
ET-ELW20 - Projector Accessories PANASONIC - Free user manual and instructions
Find the device manual for free ET-ELW20 PANASONIC in PDF.


| Product Type | Projector Lens Accessory |
| Model Number | ET-ELW20 |
| Lens Type | Zoom Lens |
| Focal Length | 20.4 - 27.6 mm |
| F Value | 1.8 - 2.3 |
| Dimensions (W x H x D) | 116 x 116 x 196 mm (4-9/16 x 4-9/16 x 7-23/32 in) |
| Net Weight | 1.20 kg (2.65 lbs) |
| Supported Projectors | PT-MZ770/MW730/MZ670/MW630/MZ570/MW530, PT-EZ770/EW730/EX800 |
| Supplied Accessories | Lens cover (front and rear), Spacers (4 pcs, colors: black, cream, clear) |
| Lens Shift Range | Adjustable within defined ranges; refer to manual for specific limits |
| Focus Correction | Using supplied spacers; correction distance depends on spacer thickness and image size |
| Safety Warnings | Do not look into lens while projector is on; turn off power before lens replacement; keep spacers away from children |
| Cleaning | Use clean, soft, dry cloth; avoid fluffy or oily cloths; do not apply excessive pressure |
| Storage | Store away from vibration or impacts after removal |
| Compliance | EU disposal regulations apply; product contains glass lens |
Frequently Asked Questions - ET-ELW20 PANASONIC
User questions about ET-ELW20 PANASONIC
0 question about this device. Answer the ones you know or ask your own.
Ask a new question about this device
Download the instructions for your Projector Accessories in PDF format for free! Find your manual ET-ELW20 - PANASONIC and take your electronic device back in hand. On this page are published all the documents necessary for the use of your device. ET-ELW20 by PANASONIC.
USER MANUAL ET-ELW20 PANASONIC
Operating Instructions
Projection Lens
Commercial Use
Model No.
ET-ELW21
ET-ELW20
ET-ELT22
ET-ELT23

ET-ELW21

ET-ELW20

ET-ELT22

ET-ELT23
ENGLISH
Read before use
This document is intended for the various projection lenses that can be attached to and used in conjunction with Panasonic projectors.
For Model No. and model names, refer to the product list (→ Page 4).
Thank you for purchasing this Panasonic product.
■ To ensure correct use of this lens, please read the operating instructions supplied with the lens and the projector carefully. Before using this product, be sure to read "Read this first!" (→Page 3). - Please save this manual for future use.

Contents
Read this first! ....3
Before Use....4
Attaching / removing the projection lens....4
Before replacing the projection lens....4
Attaching the Lens / Detaching the Lens.... 5
Making Adjustments ....5
Correcting the Focus....5
Projection relationships....7
Lens shift ranges....8
Specifications ....10
Dimensions....10
Projected image size and Projection distance.....Appendix / Annexe / 付録 1
The "Appendix" can be found after the Japanese language section (日本語).
WARNING:
Do not look at or place your skin into the light emitted from the lens while the projector is being used.
Doing so can cause burns or loss of sight.
- Strong light is emitted from the projector's lens. Do not look at or place your hands directly into this light.
● Turn off the power when moving away from the projection lens or projector.
Do not project an image with the lens cover attached.
- Doing so can cause fire.
Do not allow children to reach the spacer.
● The spacers can cause personal injury if swallowed.
- If the spacers are swallowed, seek medical advice immediately.
CAUTION:
Before replacing the projection lens, be sure to turn off the power and disconnect the power plug from the wall outlet.
● Unexpected projection of light may cause injury to eyes. ● Replacing the projection lens without removing the power plug may result in electric shock.
Do not stand in front of the lens while the projector is being used.
Doing so can cause damage and burns to clothing.
- Strong light is emitted from the projector's lens.
Do not place objects in front of the lens while the projector is being used.
Doing so can cause fire, damage to the object, or malfunction of the lens and projector.
- Strong light is emitted from the projector's lens.
Do not open the desiccant bag. Do not eat the contents.
Inadvertently ingesting desiccant could be harmful.
- If the desiccant gets into your eyes or mouth, immediately rinse with plenty of water and seek medical attention.
- Keep desiccant out of the reach of children.
Before Use
Product list
The product names and model numbers of the projection lenses covered by this manual are as follows.
| Product name Model number | |
| Fixed focus lens ET-ELW21 | |
| Zoom lens ET-ELW20 / ET-ELT22 / ET-ELT23 |
■ Supported projectors
PT-MZ770 / PT-MW730 / PT-MZ670 / PT-MW630 / PT-MZ570 / PT-MW530 / PT-EZ770 / PT-EW730 / PT-EX800
Note
● This manual omits the alphabets at the end of projector model numbers. - Models other than the above may also be supported. Refer to the operating instructions of the projector you are using.
■ Supplied Accessories
Make sure that the following has been provided.
| Part name Appearance | ||
| Lens cover |  | ● The product is delivered with a lens cap attached.● The shape and size of the lens caps are different for each product.1 each for front and rear |
| Spacer(T0SAS0001--) |    (Colors: black, cream, clear) (Colors: black, cream, clear) | 4 each |
Attaching / removing the projection lens
Before replacing the projection lens
Return the projection lens to the home position before replacing or removing it. For details on how to return the lens to the home position, refer to the operating instructions of the projector.
Attention
- Make sure that the projector power supply is switched off before attaching or detaching the projection lens. ● After removing the projection lens, store it safely away from vibration or impacts.
- Do not touch the electric contact points of the projection lens with your fingers. Dust and dirt on the contacts may cause contact malfunctions, while static electricity may damage the unit.
4-ENGLISH
Attaching / removing the projection lens (continued)
- Do not touch the surface of the lens with bare hands. Finger prints and dirt on the surface of the lens will be magnified by the lens and lower the quality of the projected image. Place the supplied lens cover on the zoom lens when the projector is not in use.
- The lens is made of glass. The lens could be damaged if brought into contact with or rubbed against hard objects. Handle the lens carefully.
- Use a clean, soft and dry cloth to wipe away dust and dirt from the projection lens. Do not use fluffy cloths containing oil, water or dust for cleaning. The lens is easily damaged, so do not apply excessive pressure when wiping it.
Attaching the Lens / Detaching the Lens
For details on attaching or removing the projection lens, refer to the operating instructions for the projector.
Making Adjustments
Correcting the Focus
When the projection lens is attached to the projector and images are being projected onto the screen, the peripheral focus may be out of focus in some localized areas. In such cases, use the supplied spacers to correct the focus of these areas, and perform adjustments so that the entire image is even.
Relationship between lens orientation and screen focus
If the projection lens is tilted with respect to the plane of the screen, uneven focus will result. For example, when the front side of the lens (screen side) is tilted downward as shown in the figure below (direction of the dotted arrow), the upper part of the screen will be tilted backward and the lower part of the screen will be tilted forward.

Procedure for correcting the focus
Attention
● Turn off the projector before removing the projection lens.
Note
- Focus correction requires some technical skill. Be sure to have a person with knowledge of projectors or a service technician to perform adjustments.
Making Adjustments (continued)
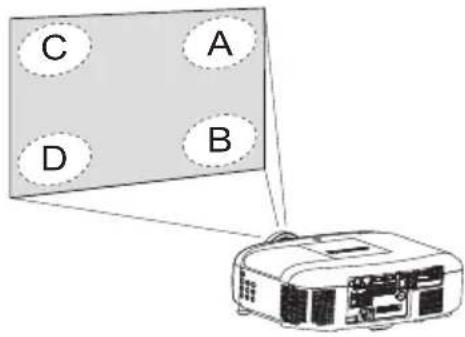
Fig. 1

Fig. 2 1) Install the projector in the installation location, and turn it on to project an image. 2) Move the lens to its home position. 3) Operate the projector to shift the focus of the entire projected image toward the front of the screen. 4) Operate the projector to shift the focus toward the screen a little bit at a time until one of the areas A to D in Fig. 1 just comes into focus on the screen, and then stop.
- In this state, the "just focus points" of the unfocused areas are positioned just in front of the screen. The distance between this position and the screen is the correction distance.
5) Insert the spacers between the body of the projector and the lens mounter, as shown in Fig. 2.
- Remove the lens mounter from the projector, and insert the spacers in the positions that correspond to the unfocused areas.
- The "just focus points" of the areas for which you inserted spacers will be corrected toward the rear of the screen.
● Make sure the adhesive surfaces of the spacers face the lens mounter when inserting them.
● The correction distance is determined by the thickness and quantity of spacers inserted. Insert spacers according to the correction distance.
(The unit for correction distances derived from the formulas in the following table is millimeters.)
| Spacer Color | Thickness | Correction distance during projected image size SD (m) | |
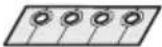 | Clear 0.1 mm | SD × SD × 51.5 | |
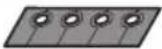 | Black | 0.2 mm SD × | SD × 103 |
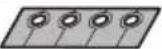 | Cream | 0.3 mm SD × | SD × 154.5 |
Correction distance guide: When the projected image size is 1.52 m (60 in.), the corrected distance when one 0.1 mm thick spacer is inserted is 120 mm.
Attention
- Installing the lens mounter, be careful not to put wiring between the lens mounter and the projector unit.
Projection relationships
The dimensional relationship between the screen and the projector is shown below.
Dimensional relationship diagram


Note
- This diagram assumes that the size and position of the projected image will be adjusted so that the image fills the entire screen. ● This illustration is not drawn to scale.
| L Projection distance | |
| LW Minimum distance | |
| LT Maximum distance | |
| L1 Lens protrusion dimension | |
| SH Image height | |
| H Distance from the lens center to the lower edge of the projected image | |
| SW Image width | |
| SD Projected image size |
● L1 dimensions (approximate values) (Unit: m)
| Projector model ET-ELW21 ET-ELW20 ET-ELT22 ET-ELT23 | ||||
| PT-MZ770 / PT-MW730 / PT-MZ670 /PT-MW630 / PT-MZ570 / PT-MW530 | 0.005 0.035 0.036 0.032 | |||
| PT-EZ770 / PT-EW730 / PT-EX800 0.050 0.080 0.081 0.080 | ||||
Note
- The illustrations of projectors in this manual are for informational purposes only and do not represent a specific projector model. Configurations may vary with the model.
Projection relationships (continued)
Attention
- To prevent blocking of the intake and exhaust vents, maintain clearances from walls and objects of at least 1 000 mm (3'3") for the exhaust vent and at least 500 mm (1'8") for the intake vent.
- Avoid setting up in places which are subject to sudden temperature changes, such as near an air conditioner or lighting equipment (studio lamps, etc.).
■ Dimensional relationship
For details on the projection distance (L), refer to “Projected image size and Projection distance” and “Projection distance formulas” in the Appendix.
Note
- For details on “Projected image size and Projection distance” for projector models other than PT-MZ770 / PT-MW730 / PT-MZ670 / PT-MW630 / PT-MZ570 / PT-MW530 / PT-EZ770 / PT-EW730 / PT-EX800, refer to “Setting up” in the operating instructions of the projector.
Lens shift ranges
Perform the lens position shift within the adjustment range.
Perform lens shift adjustment within the ranges shown in the following illustrations. Moving the lens outside of the adjustment ranges may alter the focus. The focus may change when the lens position is shifted out of the adjustment range. This is because the movement of the lens is restricted to protect the optical parts. Projection position can be adjusted with the optical axis shift based on the home position in the respective range.
| Lens model ET-ELW20 / ET-ELT22 / ET-ELT23 | |
| PT-MZ770 / PT-MW730 / PT-MZ670 / PT-MW630 / PT-MZ570 / PT-MW530 |  Standard projection position Standard projection position |
Lens shift ranges (continued)
| Lens model ET-ELW20 / ET-ELT22 / ET-ELT23 | |
| PT-EZ770 / PT-EW730 |  |
| PT-EX800 |  |
Note
- Lens shifting cannot be performed when a fixed-focus lens (model no.: ET-ELW21) is attached. The home position of the projector is a point of origin position for the lens shift (i.e., vertical and horizontal positions of the lens) based on the results of lens calibration. It is not the optical center position of the screen.
Specifications
Check the specifications of each projection lens, and use the appropriate lens for your intended use.
| Model No. ET-ELW21 ET-ELW20 ET-ELT22 ET-ELT23 | |||||
| Lens Type Short | fixed lens Short zoom lens Long zoom lens | Ultra long zoom lens | |||
| F value 2.0 1.8 to 2.3 1.8 to 2.3 1.8 to 2.3 | |||||
| Focal Length (f) 13.05 mm 20.4 to 27.6 mm 45.6 to 73.8 mm 73.9 to 117.1 mm | |||||
| Dimensions*1 | Width | 108 mm (4-1/4") | 116 mm (4-9/16") | 108 mm (4-1/4") | 108 mm (4-1/4") |
| Height | 108 mm (4-1/4") | 116 mm (4-9/16") | 108 mm (4-1/4") | 108 mm (4-1/4") | |
| Depth | 166 mm (6-17/32") | 196 mm (7-23/32") | 197 mm (7-3/4") | 196 mm (7-23/32") | |
| Net Weight | 1.08 kg (2.38 lbs) | 1.20 kg (2.65 lbs) | 1.18 kg (2.60 lbs) | 1.20 kg (2.65 lbs) | |
*1: Excluding protrusions.
Dimensions
(Unit: mm)
| Model number Dimensions | |
| ET-ELW21 |  |
Dimensions (continued)
| Model number Dimensions | |
| ET-ELW20 | 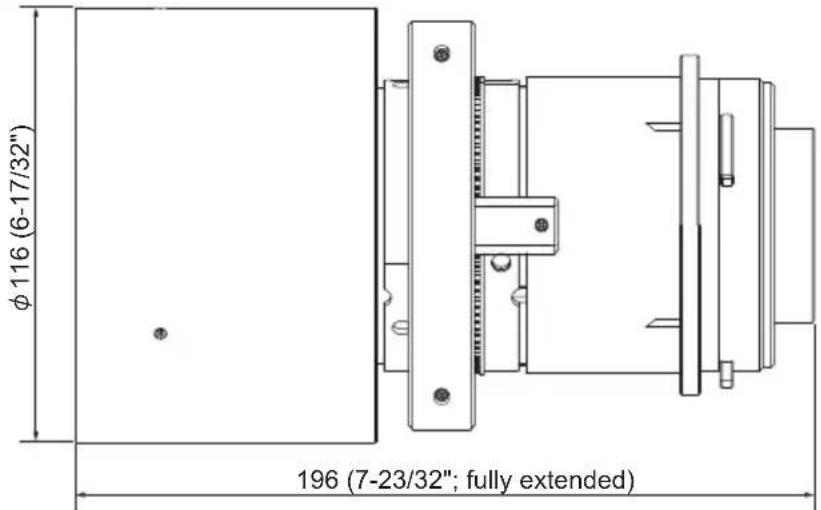 |
| ET-ELT22 | 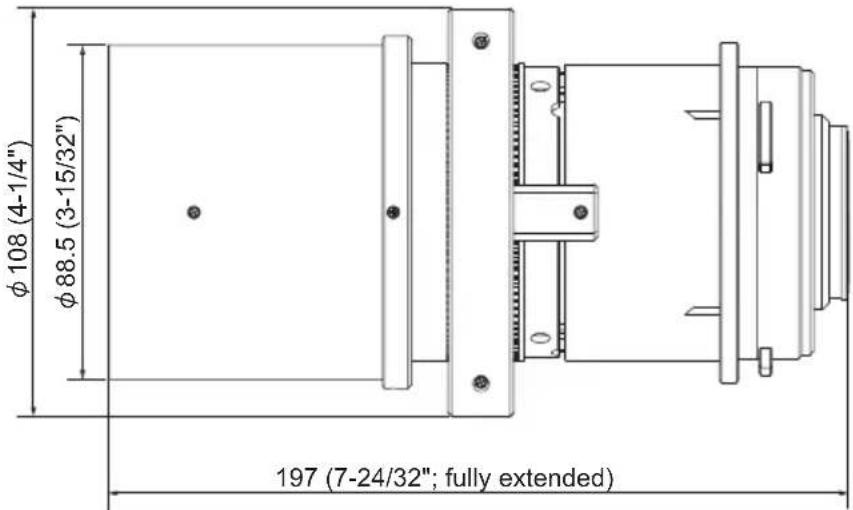 |
| ET-ELT23 |  |
Information for users in the European Union
Importer's name and address within the European Union
Panasonic Marketing Europe GmbH
Panasonic Testing Centre
Winsbergring 15, 22525 Hamburg, Germany
Disposal of Old Equipment
Only for European Union and countries with recycling systems


This symbol on the products, packaging, and/or accompanying documents means that used electrical and electronic products must not be mixed with general household waste.
For proper treatment, recovery and recycling of old products, please take them to applicable collection points in accordance with your national legislation.
By disposing of them correctly, you will help to save valuable resources and prevent any potential negative effects on human health and the environment.
For more information about collection and recycling, please contact your local municipality.
Penalties may be applicable for incorrect disposal of this waste, in accordance with national legislation.
Information on Disposal in other Countries outside the European Union
This symbol is only valid in the European Union.
If you wish to discard this product, please contact your local authorities or dealer and ask for the correct method of disposal.
Product Information (for Turkey only)


Web Site : https://panasonic.net/cns/projector/
© Panasonic Corporation 2018
Panasonic System Solutions Company of North America
Two Riverfront Plaza, Newark, NJ 07102
TEL: (877) 803 - 8492
Panasonic Canada Inc.
5770 Ambler Drive, Mississauga, Ontario L4W 2T3
TEL: (905) 624 - 5010


- OPERATING INSTRUCTIONS
- PROJECTION LENS
- COMMERCIAL USE
- READ BEFORE USE
- CONTENTS
- WARNING
- CAUTION
- BEFORE USE
- PRODUCT LIST
- SUPPORTED PROJECTORS
- NOTE
- SUPPLIED ACCESSORIES
- ATTACHING / REMOVING THE PROJECTION LENS
- BEFORE REPLACING THE PROJECTION LENS
- ATTENTION
- ENGLISH
- ATTACHING / REMOVING THE PROJECTION LENS (CONTINUED)
- ATTACHING THE LENS / DETACHING THE LENS
- MAKING ADJUSTMENTS
- CORRECTING THE FOCUS
- RELATIONSHIP BETWEEN LENS ORIENTATION AND SCREEN FOCUS
- PROCEDURE FOR CORRECTING THE FOCUS
- MAKING ADJUSTMENTS (CONTINUED)
- PROJECTION RELATIONSHIPS
- DIMENSIONAL RELATIONSHIP DIAGRAM
- PROJECTION RELATIONSHIPS (CONTINUED)
- DIMENSIONAL RELATIONSHIP
- LENS SHIFT RANGES
- LENS SHIFT RANGES (CONTINUED)
- SPECIFICATIONS
- DIMENSIONS
- DIMENSIONS (CONTINUED)
- INFORMATION FOR USERS IN THE EUROPEAN UNION
- DISPOSAL OF OLD EQUIPMENT
- ONLY FOR EUROPEAN UNION AND COUNTRIES WITH RECYCLING SYSTEMS
- INFORMATION ON DISPOSAL IN OTHER COUNTRIES OUTSIDE THE EUROPEAN UNION
- PRODUCT INFORMATION (FOR TURKEY ONLY)
- PANASONIC SYSTEM SOLUTIONS COMPANY OF NORTH AMERICA
- PANASONIC CANADA INC
Brand : PANASONIC
Model : ET-ELW20
Category : Projector Accessories