
KM 814 - Radio Krüger&Matz - Free user manual and instructions
Find the device manual for free KM 814 Krüger&Matz in PDF.


| Product Type | Radio Alarm Clock |
| Model | KM 814 (KM0814) |
| Brand | Krüger&Matz |
| Dimensions | 160 x 65 x 62 mm |
| Power Supply | AC 100-240 V, 50/60 Hz; DC 5 V, 0.5 A (adapter); Backup battery: CR2025 lithium |
| Battery | 1 x CR2025 (for clock and alarm backup) |
| Radio Type | FM |
| FM Frequency Range | 87.5 - 108 MHz |
| Output Power | 1 W RMS |
| Speaker Impedance | 8 Ω |
| Preset Stations | 20 (FM) |
| Alarm Functions | Dual Alarm (ALARM1/ALARM2), Snooze (9 min), Sleep Timer (15/30/60/90/120 min) |
| Display | LED digital display with brightness adjustment |
| Antenna | FM wire antenna (extendable) |
| Controls | P+/P-, SET, VOL+/-, TUNING+/-, ALARM1/2, BRIGHTNESS/SNOOZE, SLEEP, POWER, DATE |
| Features | Clock with date display, auto and manual tuning, auto and manual preset programming, alarm tone (buzzer or FM) |
| Cleaning | Soft, slightly damp cloth; no abrasives |
| Safety | Keep away from heat, moisture, and electromagnetic interference; unplug when not in use; keep batteries out of reach of children |
| Disposal | WEEE compliant; recycle responsibly |
Frequently Asked Questions - KM 814 Krüger&Matz
User questions about KM 814 Krüger&Matz
0 question about this device. Answer the ones you know or ask your own.
Ask a new question about this device
Download the instructions for your Radio in PDF format for free! Find your manual KM 814 - Krüger&Matz and take your electronic device back in hand. On this page are published all the documents necessary for the use of your device. KM 814 by Krüger&Matz.
USER MANUAL KM 814 Krüger&Matz
Radioalarm clock KM0814

natural_image
Abstract wavy line pattern with gradient shading, no text or symbols presentBedienungsanleitung
Owner's manual
Instrukcja obsługi
Manual de utilizare
natural_image
Line drawing of a rectangular electronic device with labeled part '14' (no text or symbols on the device itself)1. P+/P-
- Before first use, read all the instructions carefully and keep the manual for future reference.
- Do not operate the unit it does not operate correctly or if it has been damaged in any way. In such case, switch it off, withdraw the mains plug and consult authorized service point.
- Place the unit dry, flat and stable surface.
- Avoid extreme temperatures during transportation, storage or use of the product.
- Avoid exposure to direct sunlight and other sources of heat.
- Do not expose this unit to humidity, water or any direct contact with liquid.
- Do not place the unit on or near appliances which may cause electromagnetic interference. If you do, it may adversely affect the operating performance of the unit, and cause a distorted picture or sound.
- Make sure the ventilation vents are not blocked and the proper air-circulation is not obstructed in any way.
- Disconnect the unit from power supply if it is not going to be used for a longer period of time.
- Children should be supervised to ensure that they do not play with the unit.
- Keep the device as well as its batteries beyond the reach of children. Make sure the battery compartment is always securely closed.
- Do not attempt to repair this device on
Z
your own. Any repair should be carried out exclusively in an authorized service point.
PRODUCT DESCRIPTION

Z

natural_image
Line drawing of a rectangular electronic device with labeled ports and a label pointing to the bottom-left corner (no text or symbols on the device itself)1. P+/P-
- adjust date
- adjust clock time
- adjust alarm time
- select preset radio station
2. SET
- set the clock
• program radio stations
3. VOL+ ▲VOL- ▼
- increase/decrease volume
4. TUNING+/TUNING-
- tune radio station
5. ALARM1/ALARM2
- set the alarm timer
- alarm timer on/off
• view alarm settings - stop alarm
6. BRIGHTNESS/SNOOZE
- snooze function
- adjust display brightness
7. SLEEP
- set the sleep times
8. POWER BUTTON ⏻
- turn the device on/off
9. DATE
• display the day, month, year and clock time
- FM Radio antenna
- Speaker
- Battery compartment
- Power cord socket DC 5 V
- Display
BATTERY INSTALLATION
Warning: Risk of explosion! Keep battery away from heat, direct sunshine or fire. Never discard batteries in fire.
Z
For first-time use:
- Remove the protective tab to activate the unit battery.
- Loosen the screw on the battery compartment cover with a screwdriver.
- Replace a new one lithium CR2025 battery with correct polarity (+/-) as indicated.
- Close the battery compartment to the original position. and tighten the screw with a screwdriver.
Note:
- remove the battery from unit when it is not to be used for a long period.
- The unit does not operate only on battery power supply. Batteries are meant to maintain clock and alarm settings as well as preset radio stations.
AC POWER SUPPLY

Insert the AC adapter's DC plug into the unit, then insert one side of AC power cord into a wall outlet.
Caution:
Be sure to unplug the power plug from the outlet when the unit is not in use for an extended period of time.
Power On / Off
Press the power button ⏻ to turn the device on.
Standby mode
Press and hold the power button ⏻ to switch the unit to standby mode. The time (if set) appears on the display.
Set the Clock
- In standby mode, press and hold the SET button for 2 seconds, [00:00] begins to blink on the display.
- Set the hour with the P+ / P- buttons.
- Press the SET button to confirm and the minute digits begin to blink.
- Repeat above steps 2-3 to set the minute, year, month and day.
Z
Note:
If no button is pressed in 60 seconds, the unit exits clock setting mode automatically.
View the preset date
Press the DATE button repeatedly, the day, month year and clock time are displayed.
OPERATION
Adjust volume level
Press the VOL+ ▲ / VOL- ▼ buttons to increase/ decrease the volume level.
Adjust display brightness
Press the BRIGHTNESS button repeatedly to select different levels of display brightness.
RADIO
Note:
- Position the antenna as far as possible from TV, VCR or other radiation source.
- For optimal reception, fully extend and adjust the position of the antenna.
Tuning into a Station
Z
- Auto Tuning
Press and hold the TUNING+ / TUNING-button, the frequency changes down or up automatically until a station is found.
- Manual Tuning
Repeatedly press the TUNING+ / TUNING- button to change the frequency until you reach desired frequency.
Programming radio stations
You can program a maximum of 20 preset radio stations (FM).
- Automatically
- Press and hold the SET button to activate automatic program mode.
- [AUTO] is displayed.
- All available stations are programmed.
- The first programmed radio station is broadcast automatically.
- Manually
- Tune to a radio station.
- Press the SET button to activate program mode. The preset number will blink.
- Repeatedly press the P+ / P- buttons to select a number to this radio station.
- Press the SET button again to store the station.
- Repeat above steps 1 to 4 for each station you want to store in memory with a preset number.
Note: If the system is unplugged or if a power failure occurs, the preset stations will not be erased (provided the battery is inserted).
Select a preset radio station
Repeatedly press the P+ / P- buttons to select the desired preset number. Its band and frequency are displayed on the front panel.
Z
Setting the alarm timer
You can set two alarms which go off at different time.
- Ensure that you have set the clock correctly.
-
Press and hold the ALARM1 or ALARM2 button for 2 seconds or more, the 🔒 or 🔒 and alarm source („BUZZ” or “FM”) will blink on the display panel.
-
Repeatedly press the P+ / P- button to select the alarm tone (FM or BUZZ).
-
Press the ALARM1 / ALARM2 button to confirm and the hour digits begin to blink.
-
Set the hour with the P+ / P- buttons.
-
Press the ALARM1 / ALARM2 buttons to confirm and the minute digits begin to blink.
-
Repeat above steps 5-6 to set the minute.
-
Repeat above steps 5-6 to select whether to ring alarm the whole week (1-7), on weekdays (1-5), or at weekend (6-7); and alarm volume level of alarm tone.
To deactivate or re-activate an alarm timer:
Z
Press the ALARM1 or ALARM2 buttons twice in normal clock display mode to activate alarm function and again to deactivate it.
- If timer is activated, 🔒 or 🔒 is displayed.
- If timer is deactivated, the symbols are not displayed.
Snooze function
When the alarm rings, press the SNOOZE button, the alarm will ring again 9 minutes later.
Stop alarm ring
When the alarm rings, press the corresponding ALARM1 or ALARM2 buttons, the alarm stops but the alarm settings remain.
View the alarm settings
Press the corresponding ALARM1 or ALARM2 buttons.
Set the Sleep Timer
You can set the unit to turn off automatically after a certain period of time.
When the unit is turned on, press the SLEEP button repeatedly to select a set period of time (in minutes): 15, 30, 60, 90, 120.
Repeatedly press the SLEEP button until "OFF" to turn off the sleep timer function.
Z
CLEANING
Clean this device with a soft, slightly damp cloth. Do not use any type of abrasive pad or abrasive cleaning solutions as these may damage the unit.
TROUBLESHOOTING
If you are having a problem with your unit, check this list for a possible solution before calling for service. If you cannot solve the problem from the hints given here, or the unit has been physically damaged, call a qualified person, such as your dealer, for service.
No power
- Ensure that the AC adapter is connected securely.
- Ensure that there is power at the AC Mains.
No sound
- Adjust the volume.
No response from the unit
- Disconnect and reconnect the AC adapter, then turn on the unit again.
Poor radio reception
- Increase the distance between the unit and your TV or VCR.
- Fully extend and adjust the FM antenna.
Z
Timer does not work
- Set the clock correctly.
- Switch on the timer.
Clock/timer setting erased
• Power has been interrupted or the power cord has been disconnected.
- Reset the clock/timer.
SPECIFICATIONS
20 Preset Stations memory
Dual Alarm
FM Radio
FM Frequency Range: 87.5\~108 MHz
Output Power: 1 W RMS
Speaker Impedance: 8 Ω
Power supply:
Input: AC 100-240 V, 50-60 Hz
Output: 5 V, 0.5 A
Dimensions: 160 x 65 x 62 mm
Specifications are subject to change without prior notice.
English
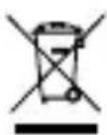
Correct Disposal of This Product (Waste
Electrical & Electronic Equipment)

(Applicable in the European Union and other European countries with separate collection systems) This marking shown on the product or Its literature, indicates that It should not be disposed with other household wastes at the end of its working life. To prevent possible harm to the environment or human health from uncontrolled waste disposal, please separate this from other types of wastes and recycle it responsibly to promote the sustainable reuse of material resources. Household users should contact either the retailer where they purchased this product, or their local government office, for details of where and how they can take this item for environmentally safe recycling. Business users should contact their supplier and check the terms and conditions of the purchase contract This product should not be mixed with other commercial wastes for disposal.
Made in China for LECHPOL Zbigniew Leszek, Miętne, 1 Garwolińska Street, 08-400 Garwolin.
KWESTIE BEZPIECZEŃSTWA
natural_image
Line drawing of a rectangular electronic device with buttons and a label pointing to the bottom-left corner (no text or symbols on the device itself)PL
1. P + / P -
PL
1. P+/P-
RO
natural_image
Completely black image with no visible content, text, or symbols.
natural_image
Abstract wavy line pattern with gradient shading, no text or symbols presentwww.krugermatz.com
Krüger&Matz is a registered trademark


- Radioalarm clock KM0814
- P+/P-
- SET
- VOL+ ▲VOL- ▼
- TUNING+/TUNING-
- ALARM1/ALARM2
- BRIGHTNESS/SNOOZE
- SLEEP
- POWER BUTTON ⏻
- DATE
- BATTERY INSTALLATION
- For first-time use:
- Note:
- AC POWER SUPPLY
- Caution:
- Power On / Off
- Standby mode
- Set the Clock
- View the preset date
- OPERATION
- Adjust volume level
- Adjust display brightness
- RADIO
- Tuning into a Station
- Z
- - Auto Tuning
- - Manual Tuning
- Programming radio stations
- - Automatically
- - Manually
- Select a preset radio station
- Setting the alarm timer
- To deactivate or re-activate an alarm timer:
- Snooze function
- Stop alarm ring
- View the alarm settings
- Set the Sleep Timer
- CLEANING
- TROUBLESHOOTING
- No power
- No sound
- No response from the unit
- Poor radio reception
- Timer does not work
- Clock/timer setting erased
- SPECIFICATIONS
- English
- Correct Disposal of This Product (Waste
- Electrical & Electronic Equipment)
- KWESTIE BEZPIECZEŃSTWA
- P + / P -
Brand : Krüger&Matz
Model : KM 814
Category : Radio