URZ4024 - Television Cabletech - Free user manual and instructions
Find the device manual for free URZ4024 Cabletech in PDF.


| Product Type | LED TV |
| Model | URZ4024 |
| Screen Size | 24 inches |
| Panel Type | LED Backlight |
| Aspect Ratio | 16:9 |
| Resolution | 1920 x 1080 (Full HD) |
| Brightness | 200 cd/m² |
| Contrast Ratio | 1000:1 |
| Viewing Angle (H/V) | 160° / 150° |
| Response Time | 5 ms |
| Color Depth | 16.7M colors |
| TV System | DVB-T/C |
| Video Standards | PAL / SECAM |
| Power Supply | 220-240V ~ 50Hz |
| Power Consumption (Typical) | 38 W |
| Standby Power | ≤0.5 W |
| Audio Output Power | 2 x 3 W |
| Inputs | RF, VGA, PC Audio, Headphone, CI, HDMI x2, USB, AV, YPbPr, Scart, Coaxial |
| USB Playback Formats | JPEG, BMP, PNG, MP3, TXT, TS (MPEG2 & H.264) |
| OSD Languages | Multilingual (English, German, French, Polish, etc.) |
| Teletext | Yes (FLOF, TOP, List mode) |
| EPG | Yes (Electronic Program Guide) |
| Parental Control | Yes (Lock System, Password, Block Program, Parental Guidance) |
| PVR Function | Yes (via USB) |
| Remote Control | Included (full function) |
| Safety Features | Auto Standby, Ventilation slots, Overvoltage protection |
Frequently Asked Questions - URZ4024 Cabletech
User questions about URZ4024 Cabletech
0 question about this device. Answer the ones you know or ask your own.
Ask a new question about this device
Download the instructions for your Television in PDF format for free! Find your manual URZ4024 - Cabletech and take your electronic device back in hand. On this page are published all the documents necessary for the use of your device. URZ4024 by Cabletech.
USER MANUAL URZ4024 Cabletech
natural_image
Abstract graphic with a large blue letter 'C' on a black background with horizontal lines (no text or symbols)CABLETECH®
URZ4024 - LED TV 24"
URZ4032 - LED TV 32"

natural_image
Abstract pattern of blue squares and white squares arranged vertically (no text or symbols)Bedienungsanleitung
DE
User's manual EN
natural_image
Abstract pattern of blue squares and white squares arranged in a grid (no text or symbols)

natural_image
Illustration of a computer monitor with lightning bolts and a hand holding a device, no text or symbols presentWarnung

natural_image
Simple line drawing of a computer monitor with a curved frame and a base, emitting steam (no text or symbols)Achtung

natural_image
Illustration of a TV with a 'X' symbol crossed out by strings, next to a hanging curtain (no text or symbols)Warnung

natural_image
Simple line drawing of a flat-screen monitor with a black X mark on its side (no text or symbols)Achtung

natural_image
Simple line drawing of a computer monitor with a crossed X symbol and a flower on top (no text or symbols)Warnung

natural_image
Cartoon illustration of a person lying on a computer monitor with a crossed-out X symbol (no text or symbols present)Achtung

natural_image
Technical line drawing of a server rack with ports, connectors, and a monitor (no text or symbols)natural_image
Technical line drawing of a computer monitor rear panel with ports, buttons, and a speaker (no text or symbols)DE
natural_image
Technical line drawing of a mechanical or electrical enclosure with no visible text, numbers, or symbols.natural_image
Technical line drawing of a mechanical device with mounting brackets and internal components (no text or symbols)DE
Frontplatte
| Picture Mode | Standard |
| Contrast 82 | |
| Brightness 50 | |
| Color 50 | |
| Sharpness 50 | |
| Tint 50 | |
| MENU | |
| Color Temperature | Medium |
| Red 40 | |
| Green 31 | |
| Blue 50 | |
| MENU | |
DE
HINWEIS:
DE
| Schedule List 04:55 28th Apr Delete | |||||
| Time | Date | Programme Title | Channel Name | ||


Aufnehmen
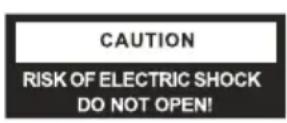
The symbol indicates that dangerous voltages constituting a risk of electric shock are present within this unit.

The symbol indicates that there are important operating and maintenance instructions in the literaturaccompanying this unit.
IMPORTANT SAFETY INSTRUCTION
1) Read these instructions.
2) Keep these instructions.
3) Heed all warnings.
4) Follow all instructions.
5) Do not use this apparatus near water.
6) Clean only with dry cloth.
7) Do not block any ventilation openings, install in accordance with the instructions.
8) Do not install near any heat sources such as radiations, heat registers, stoves, or other apparatus (including amplifiers) that produce heat.
9) Do not defeat the safety purpose of the polarized plug. If the provided plug does not fit into your outlet, consult an electrician for replacement of the obsolete outlet.
10) Protected the power cord from being walked on or pinched particularly at plugs, convenience receptacles, and the point where they exit from the apparatus.
11) Only use attachments/accessories specified by the manufacturer.
12) Unplug this apparatus during lighting storms or when unused for long periods of time.
13) Refer all servicing to qualified service personnel. Servicing is required when the apparatus has been damaged in anyway, such as power-supply cord or plug is damaged, liquid has been spilled or objects have fallen into the apparatus, the apparatus has been exposed to rain or moisture, does not operate normally, or has been dropped.
14) Mains plug is used as the disconnect device, the disconnect device shall remain readily operable.
15) The ventilation should not be impeded by covering the ventilation openings with items, such as newspapers, table-cloth, curtains, etc.
16) No naked flame sources, such as lighted candles, should be placed on the apparatus.
17) Attention should be drawn to the environmental aspects of battery disposal.
18) The use of apparatus in moderate climate.
19) The apparatus shall not be exposed to dripping or splashing and that no objects filled with liquids, such as vases, shall be placed on the apparatus.
EN
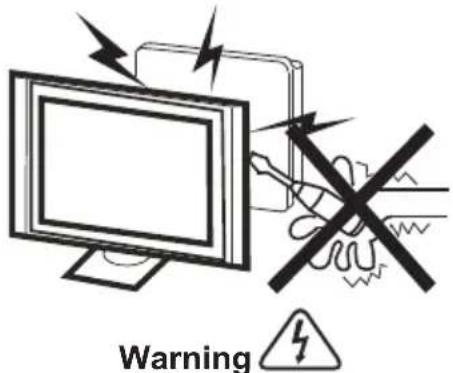
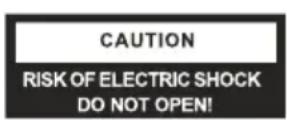
High voltages are used in the operation of this television receiver. Do not remove the cabinet back from your set. Refer servicing to qualified service personnel.
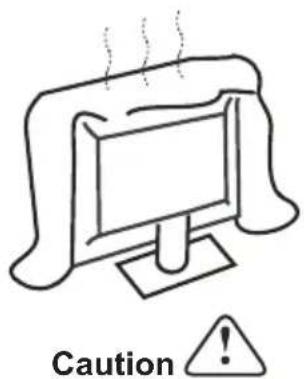
Do not block the ventilation holes in the back cover. Adequate ventilation is essential to prevent failure of electrical components.
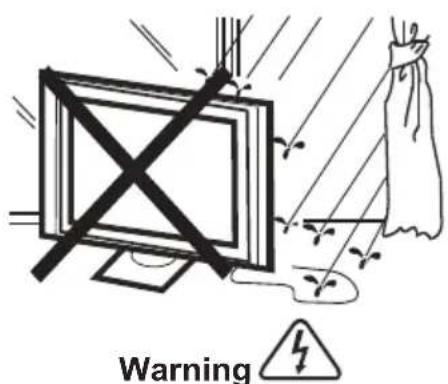
To prevent fire or electrical shock hazard, do not expose the television receiver to rain or moisture.
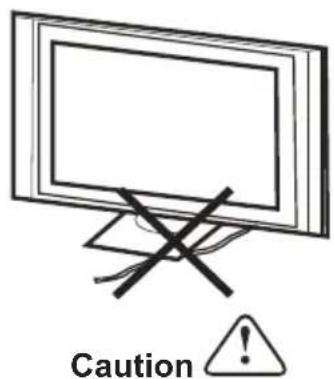
Do not trap the power supply cord under the television receiver.
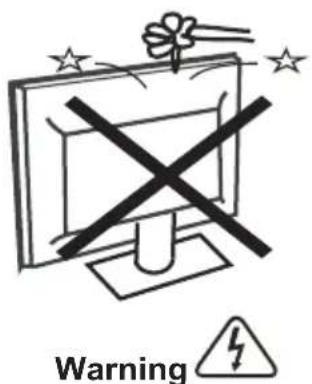
Do not drop or push objects into the television cabinet slots or openings. Never spill any kind of liquid on the television receiver.
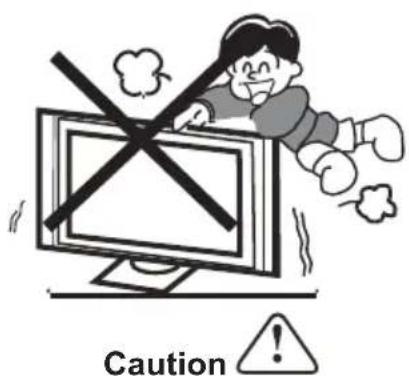
Never stand on, lean on, or suddenly push the television or its stand. You should pay special attention to children. Serious injury may result if it should fall.
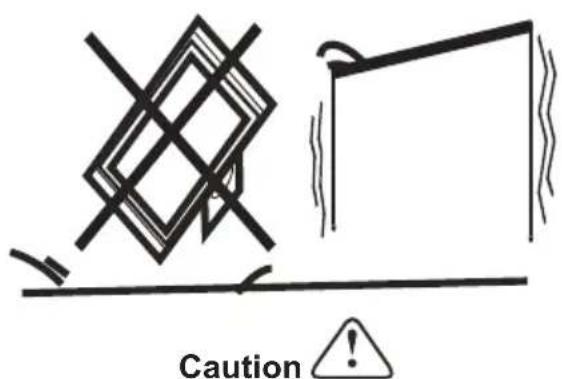
Do not place your television on an unstable cart, stand, shelf or table. Serious injury to an individual, and damage to the television, may result if it should fall.
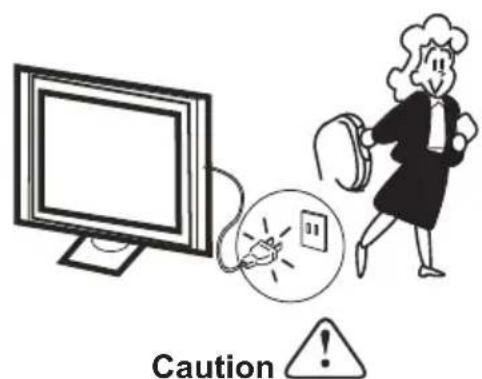
When the television receiver is not used for an extended period of time, it is advisable to disconnect the AC power cord from the AC outlet.
INSTALLATION
* Locate the TV in the room where light does not strike the screen directly.
* Total darkness or a reflection on the picture screen can cause eyestrain. Soft and indirect lighting is recommended for comfortable viewing.
* Allow enough space between the TV and the wall to permit ventilation.
* Avoid excessively warm locations to prevent possible damage to the cabinet or premature component failure.
* Do not cover the ventilation openings when using the TV.
Minimum distances
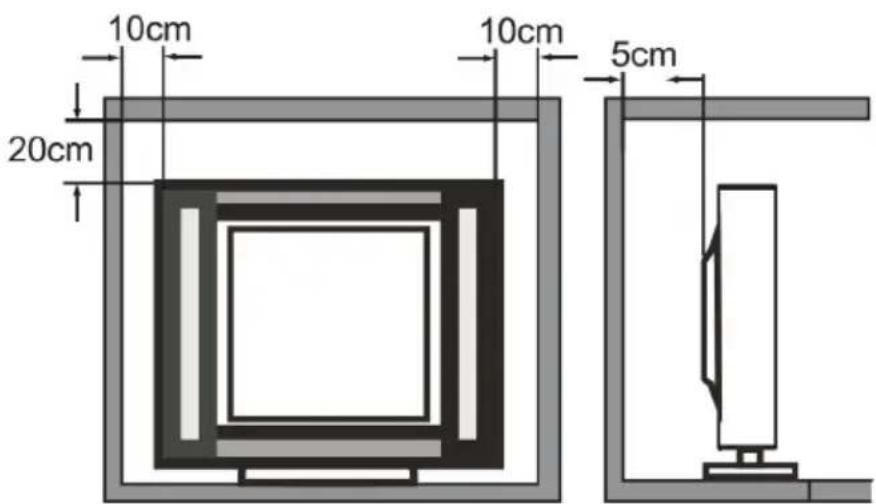
EN
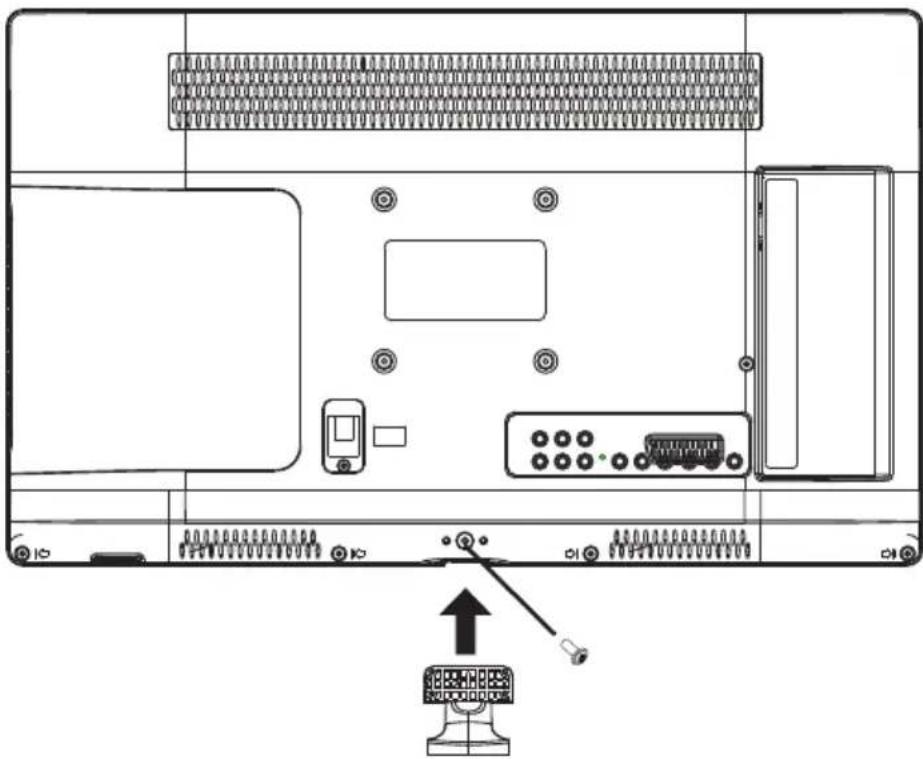
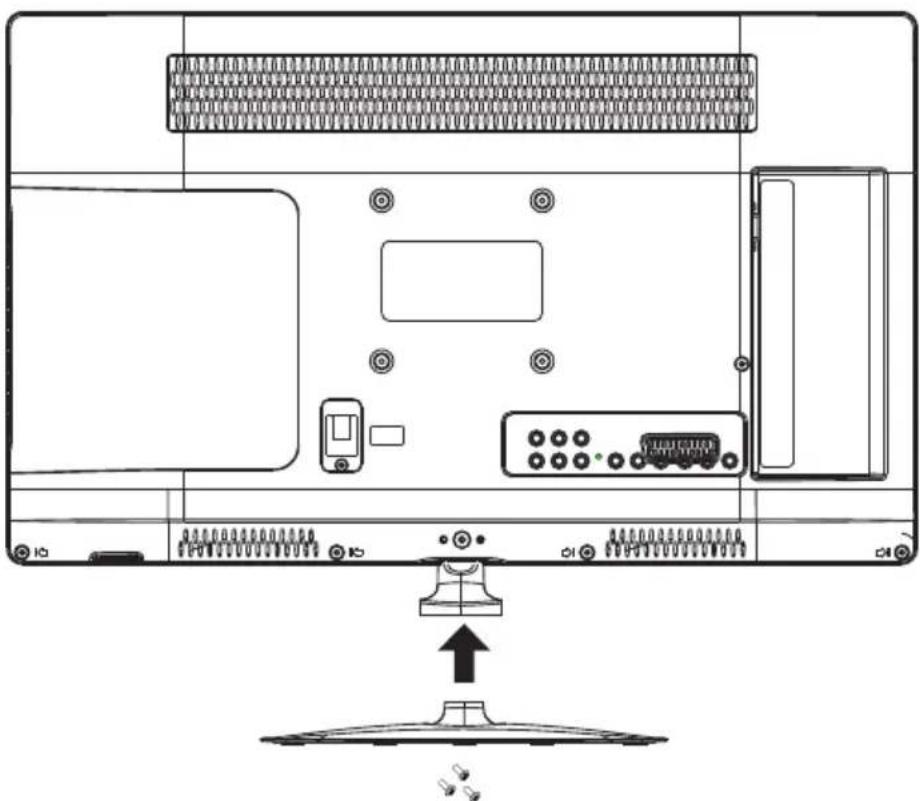
Base stand assembly instruction (URZ4024)
- Place the TV with the display side down on a flat surface. Use a cloth to protect. Locate the bottom at the stand.
natural_image
Technical line drawing of an electronic device rear panel with connectors and ports (no text or symbols)- Fix the bottom with turning the screw tightly on the stand.
natural_image
Technical line drawing of a computer monitor rear panel with ports, buttons, and a central display (no text or symbols)EN
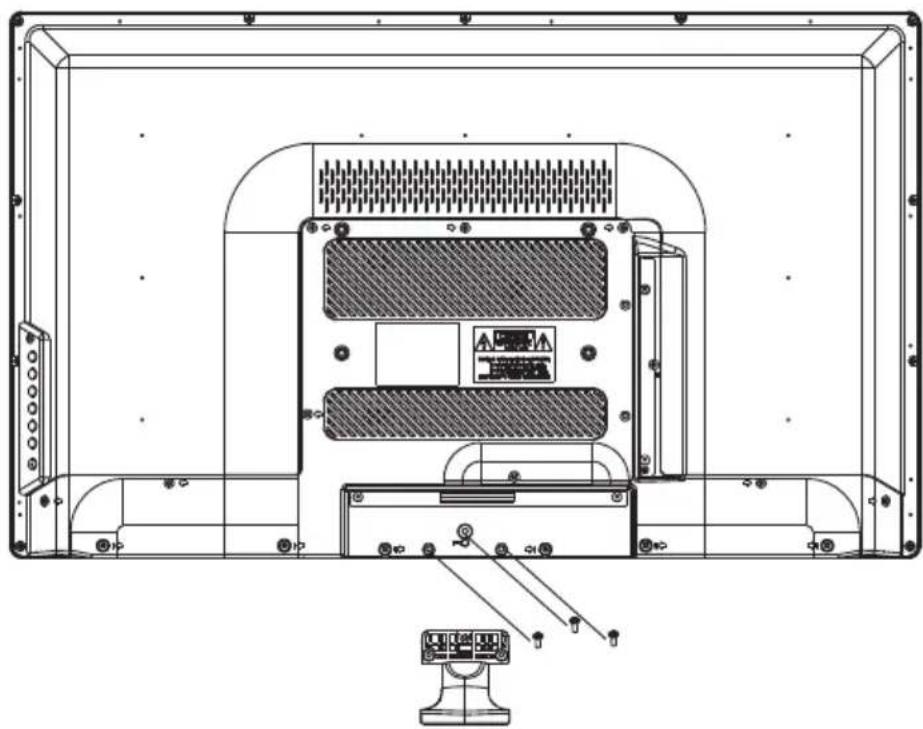
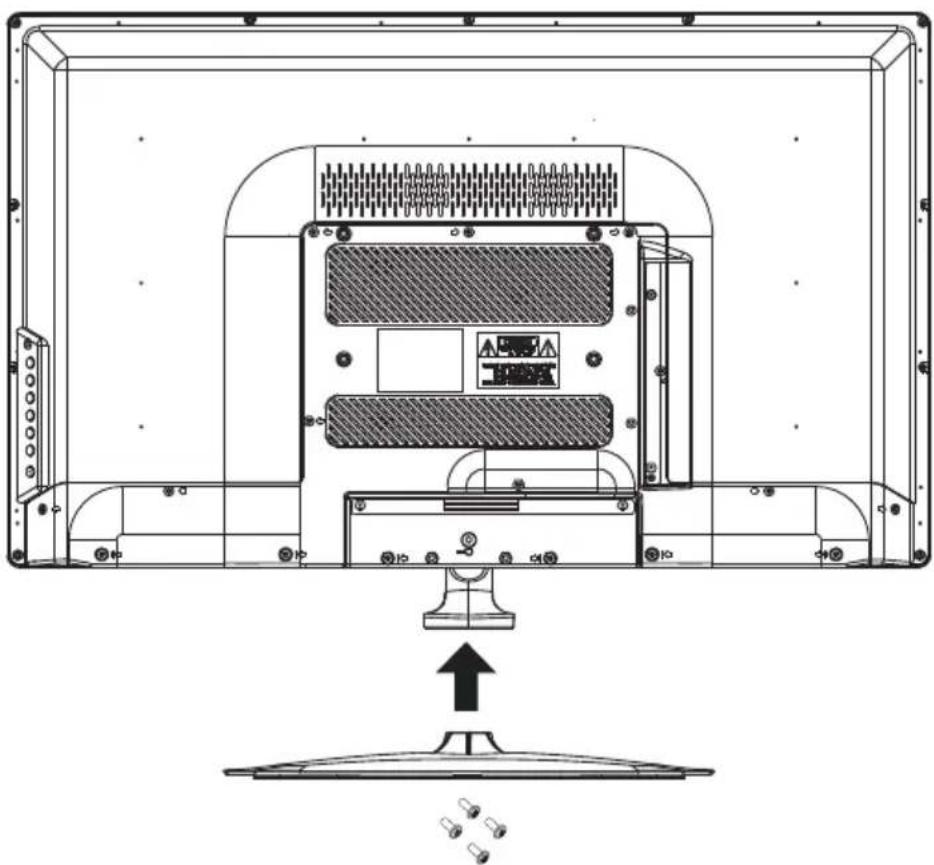
Base stand assembly instruction (URZ4032)
- Place the TV with the display side down on a flat surface. Use a cloth to protect. Locate the bottom at the stand.
natural_image
Technical line drawing of a device enclosure with ventilation grilles and control panel (no text or symbols)- Fix the bottom with turning the screw tightly on the stand.
natural_image
Technical line drawing of a computer monitor unit with ventilation grilles and control panel (no text or symbols)EN
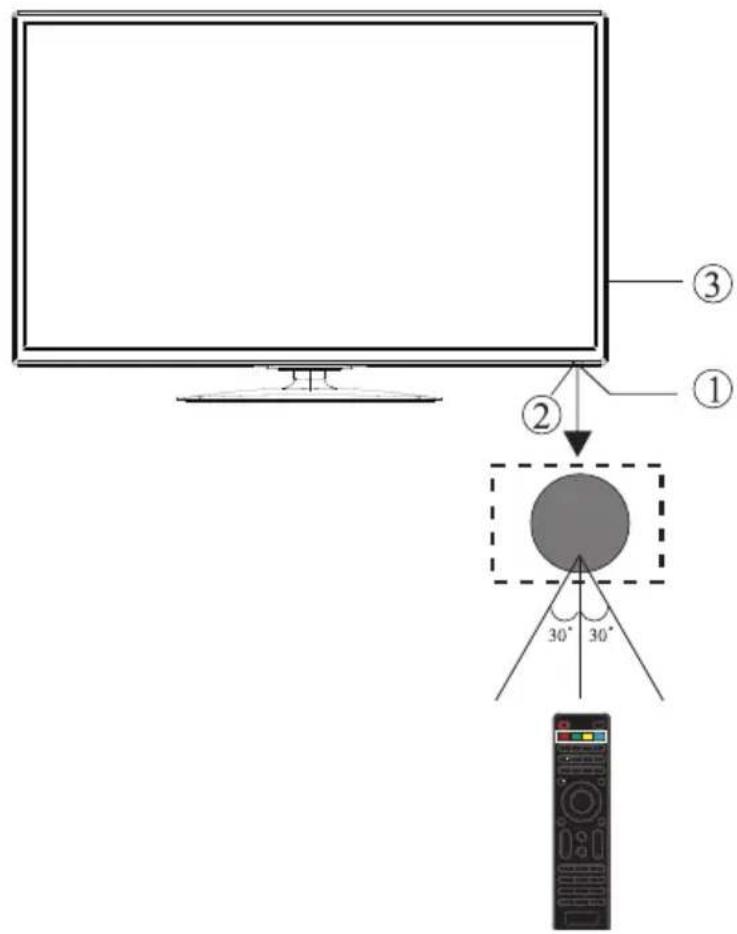
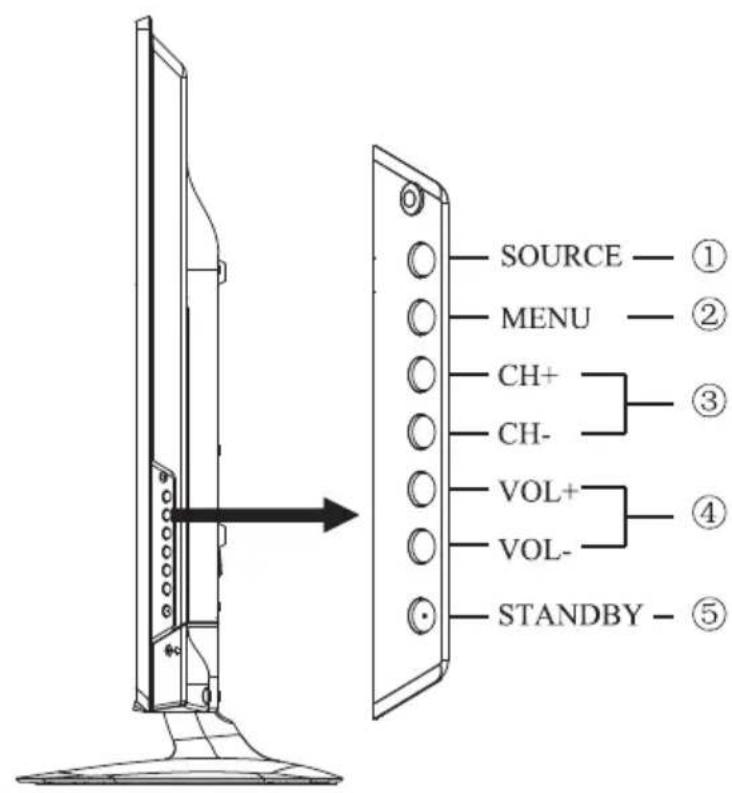
Front panel
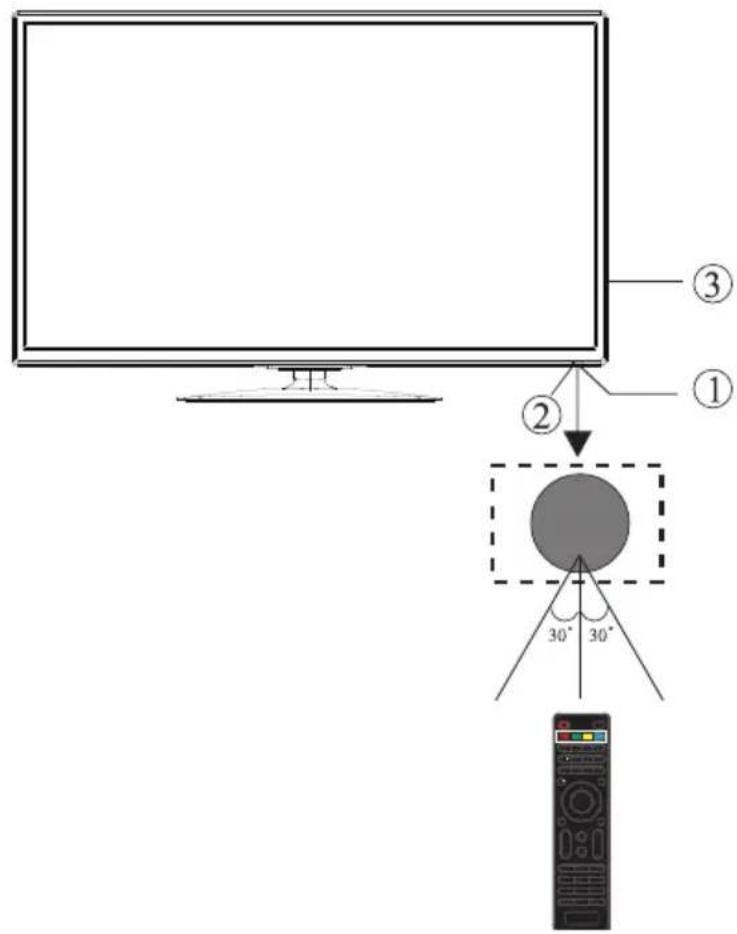
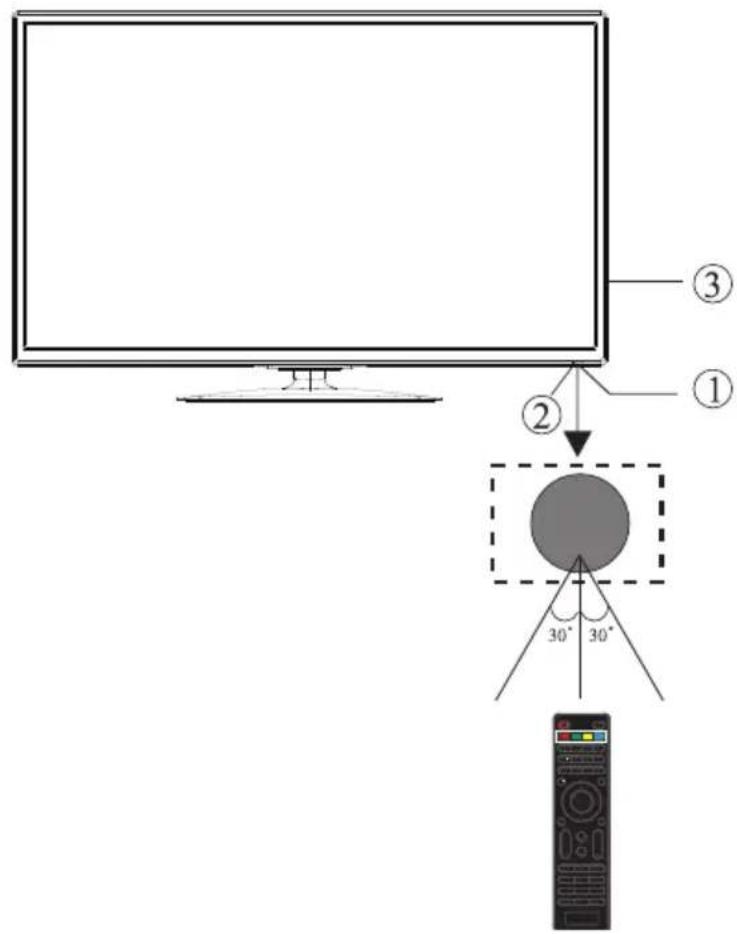
1: Remote control sensor
2: Indicator LED
- Blue - power on
- Red - standby
3: Side buttons
Keyboard
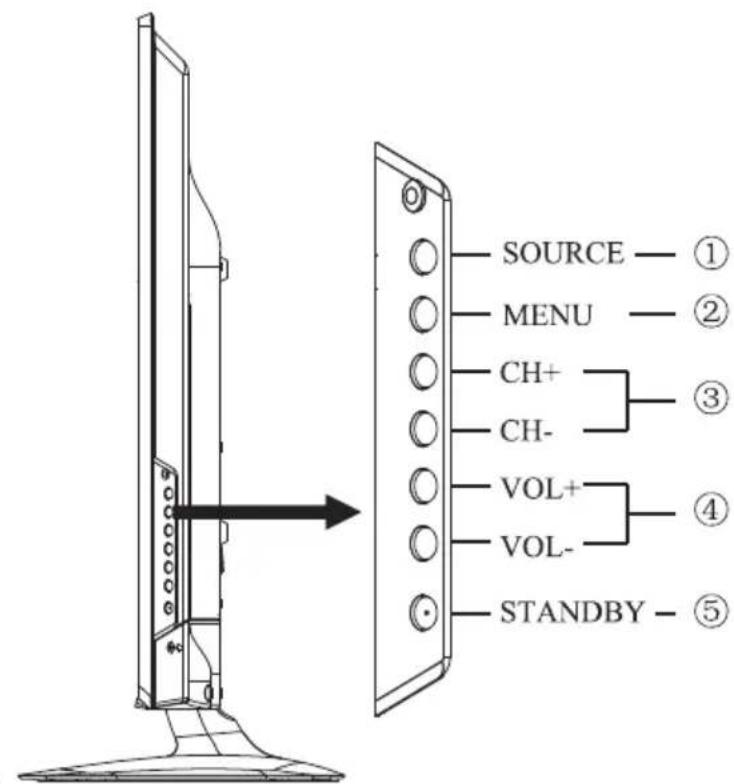
1. SOURCE
Display the input source menu. In MENU mode, press "SOURCE" to confirm the selected item.
2. MENU
Display main MENU.
3. CH+/CH-
In TV mode, press "CH-" or "CH+" to change the channel up and down. In MENU mode, press "CH-" or "CH+" to select items.
4. VOL+/VOL-
Adjust sound level.
In MENU mode, press "VOL+" or "VOL-" to adjust the item that you selected.
5. STANDBY
Press this button to turn the unit ON from STANDBY mode. Press it again to turn the set back to STANDBY.
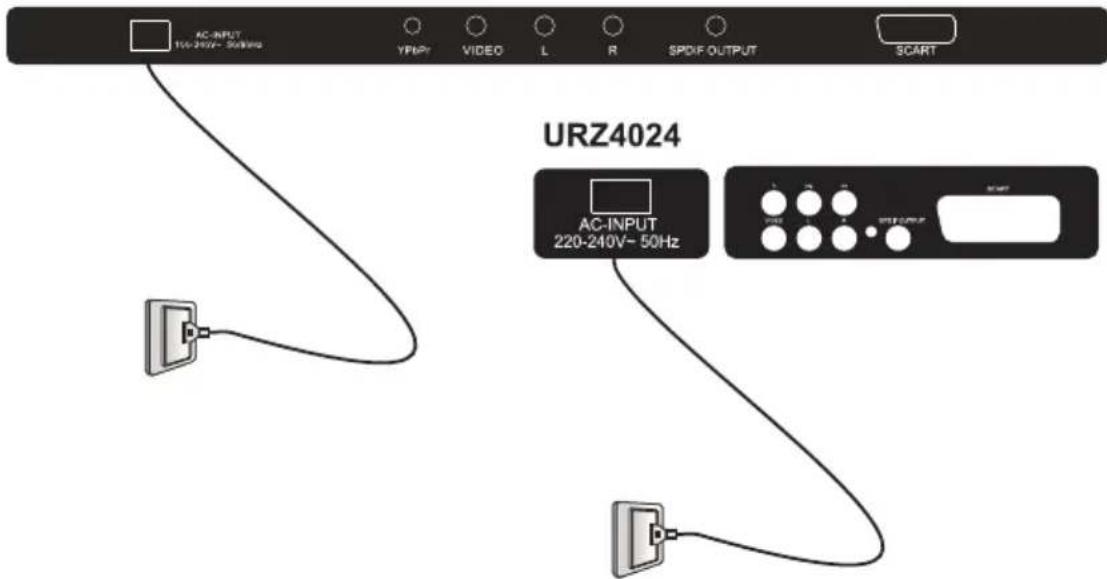
Rear AV connections (URZ4024)
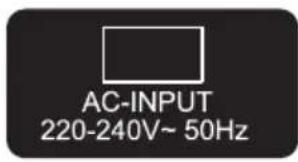
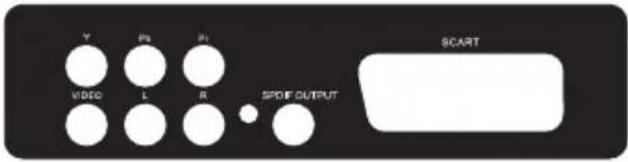
Terminals from left to right: AC power socket, YPbPr input, VIDEO, AUDIO inputs, SPDIF output, SCART.
Side AV connections (URZ4024)

Terminals from left to right: USB, HDMI2, HDMI1, headphone, CI, PC audio, VGA, RF.
Note: Insert the plug of the earphone into the earphone jack on the unit HEADPHONE. The speakers are now muted.
EN
Rear AV connections (URZ4032)

Terminals from left to right: AC power socket, YPbPr input, VIDEO, AUDIO inputs, SPDIF output, SCART.
Side AV connections (URZ4032)

Terminals from left to right: USB, HDMI2, HDMI1, headphone, CI, PC audio, VGA, RF.
Note: Insert the plug of the earphone into the earphone jack on the unit HEADPHONE. The speakers are now muted.
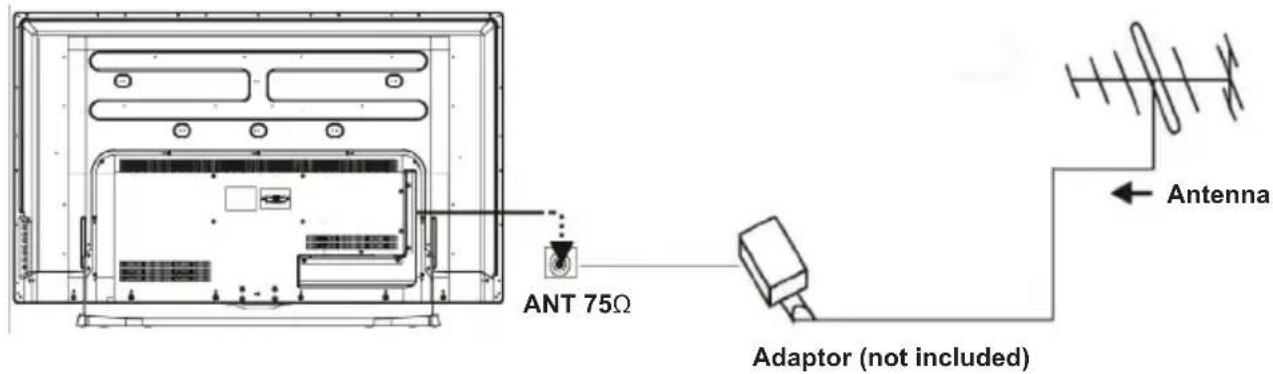
Antenna
EN
PC
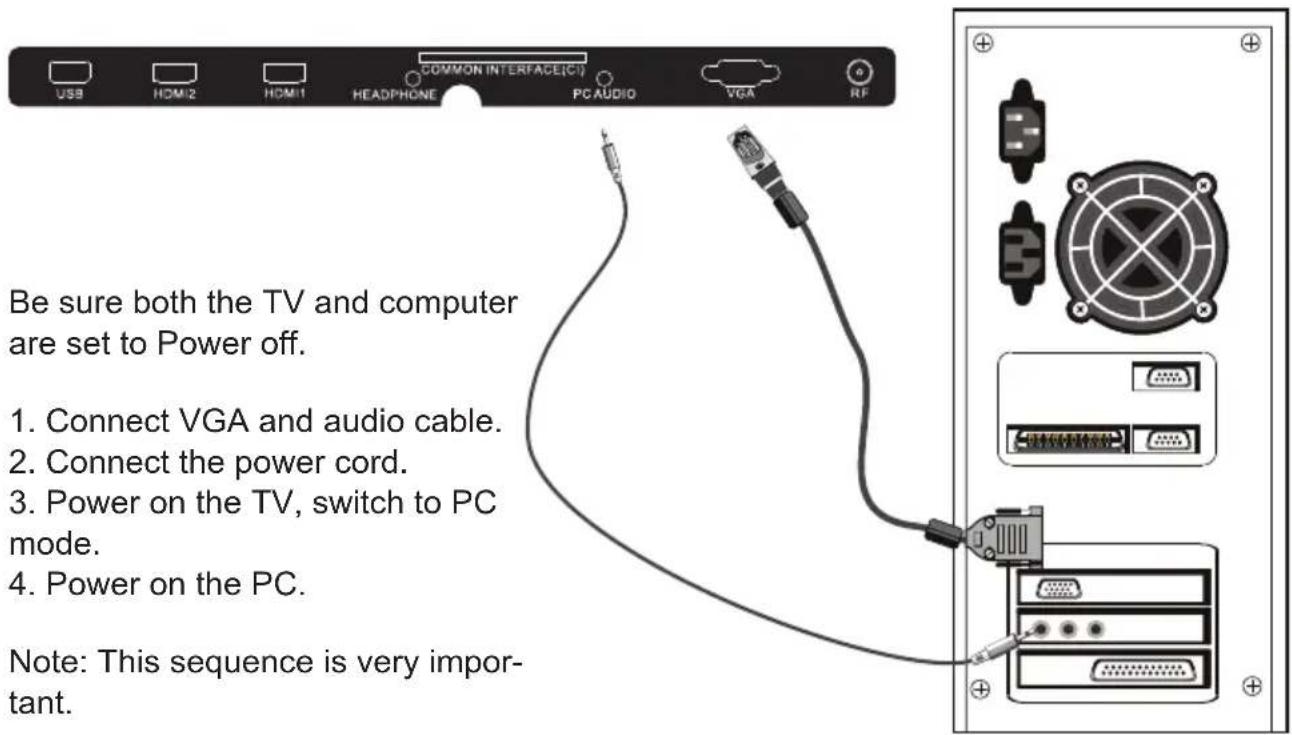
URZ4032
EN
| Resolution V.Freq. (Hz) H.Freq.(Hz) | |
| 800*600 60 37.88 | |
| 640*480 60 31.47 | |
| 1024*768 60 48.36 | |
| 1280*1024 60 63.98 | |
| 1360*768 60 47.7 | |
| 1920*1080 60 66.64 |
AV equipment (URZ4024)
This TV provides one group of AV one group of YPbPr and one SCART for convenient connection to VCR, DVD or other video equipment. Please refer to the owners manual of the equipment to be connected as well. You can use the input terminals on TV set rear as follows.
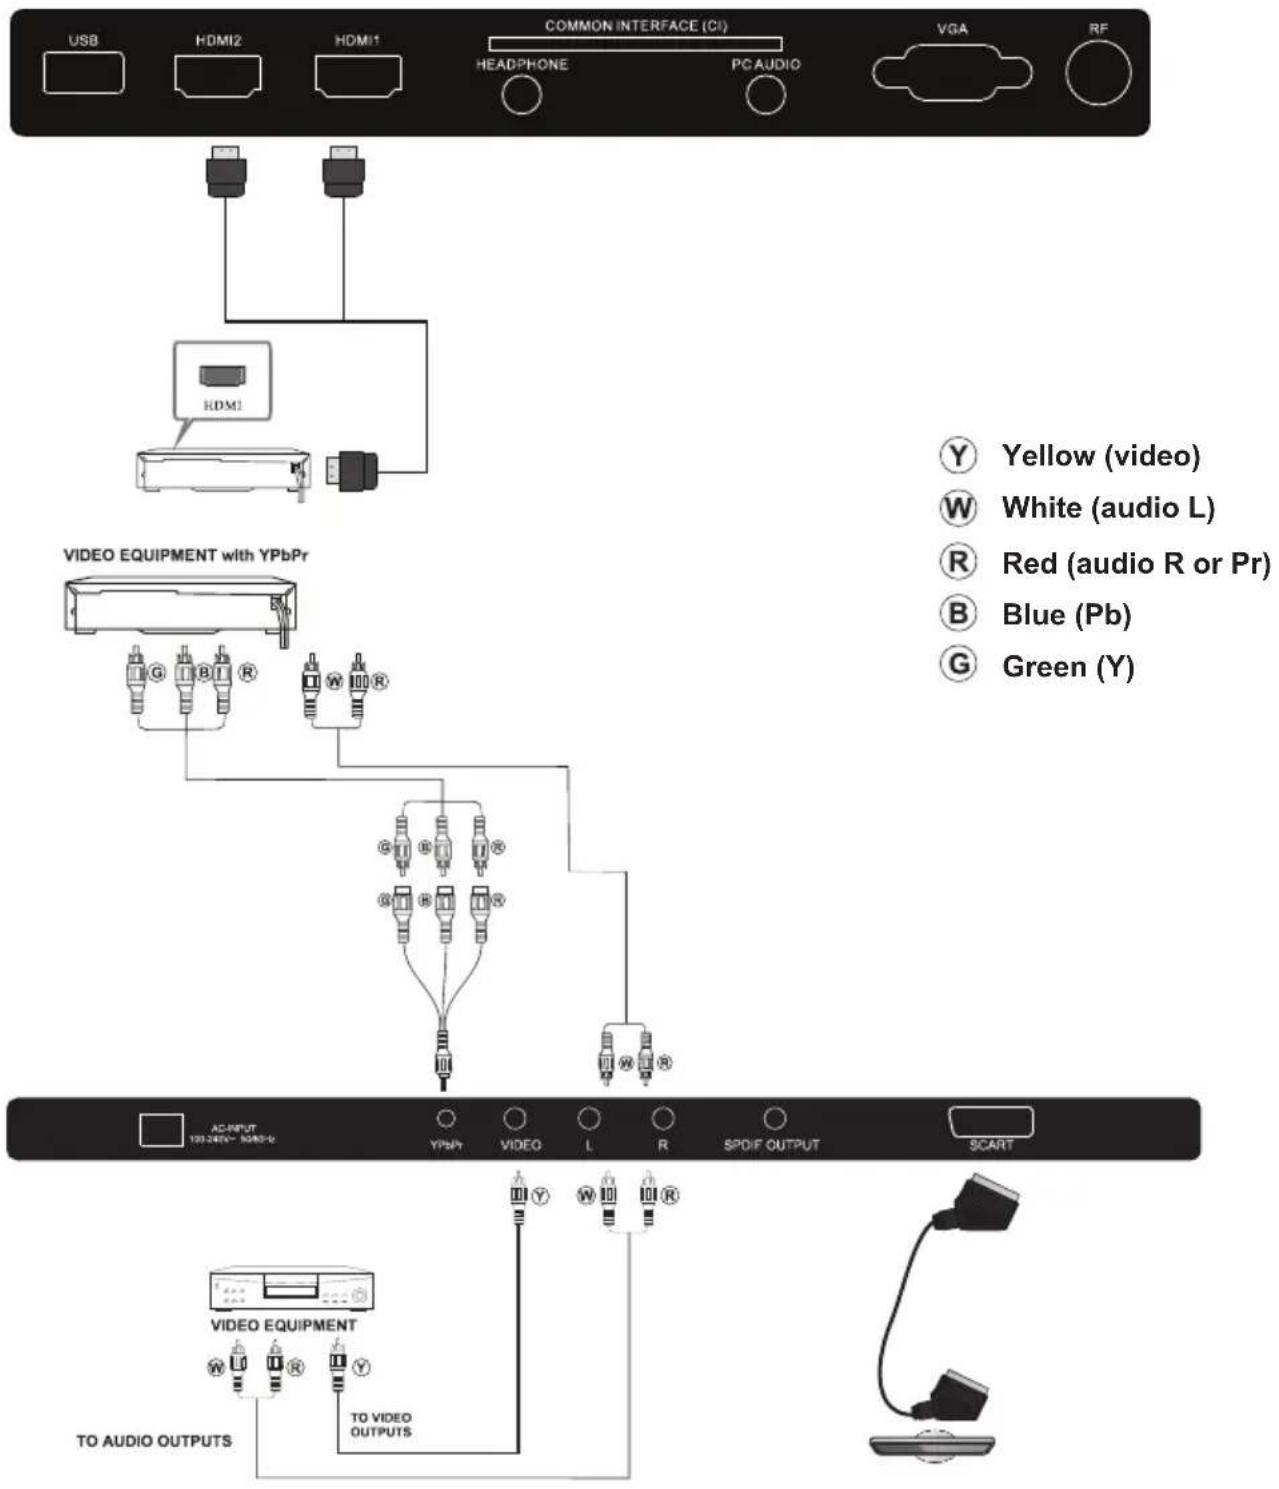
It can be connected to the following appliances: VCR, multi disc player, DVD, camcorder, video game or stereo system, etc .....
YPbPr can support these video formats: 480i, 576i, 480p, 576p, 720p, 1080i.
AV equipment (URZ4032)
This TV provides one group of AV one group of YPbPr and one SCART for convenient connection to VCR, DVD or other video equipment. Please refer to the owners manual of the equipment to be connected as well. You can use the input terminals on TV set rear as follows.
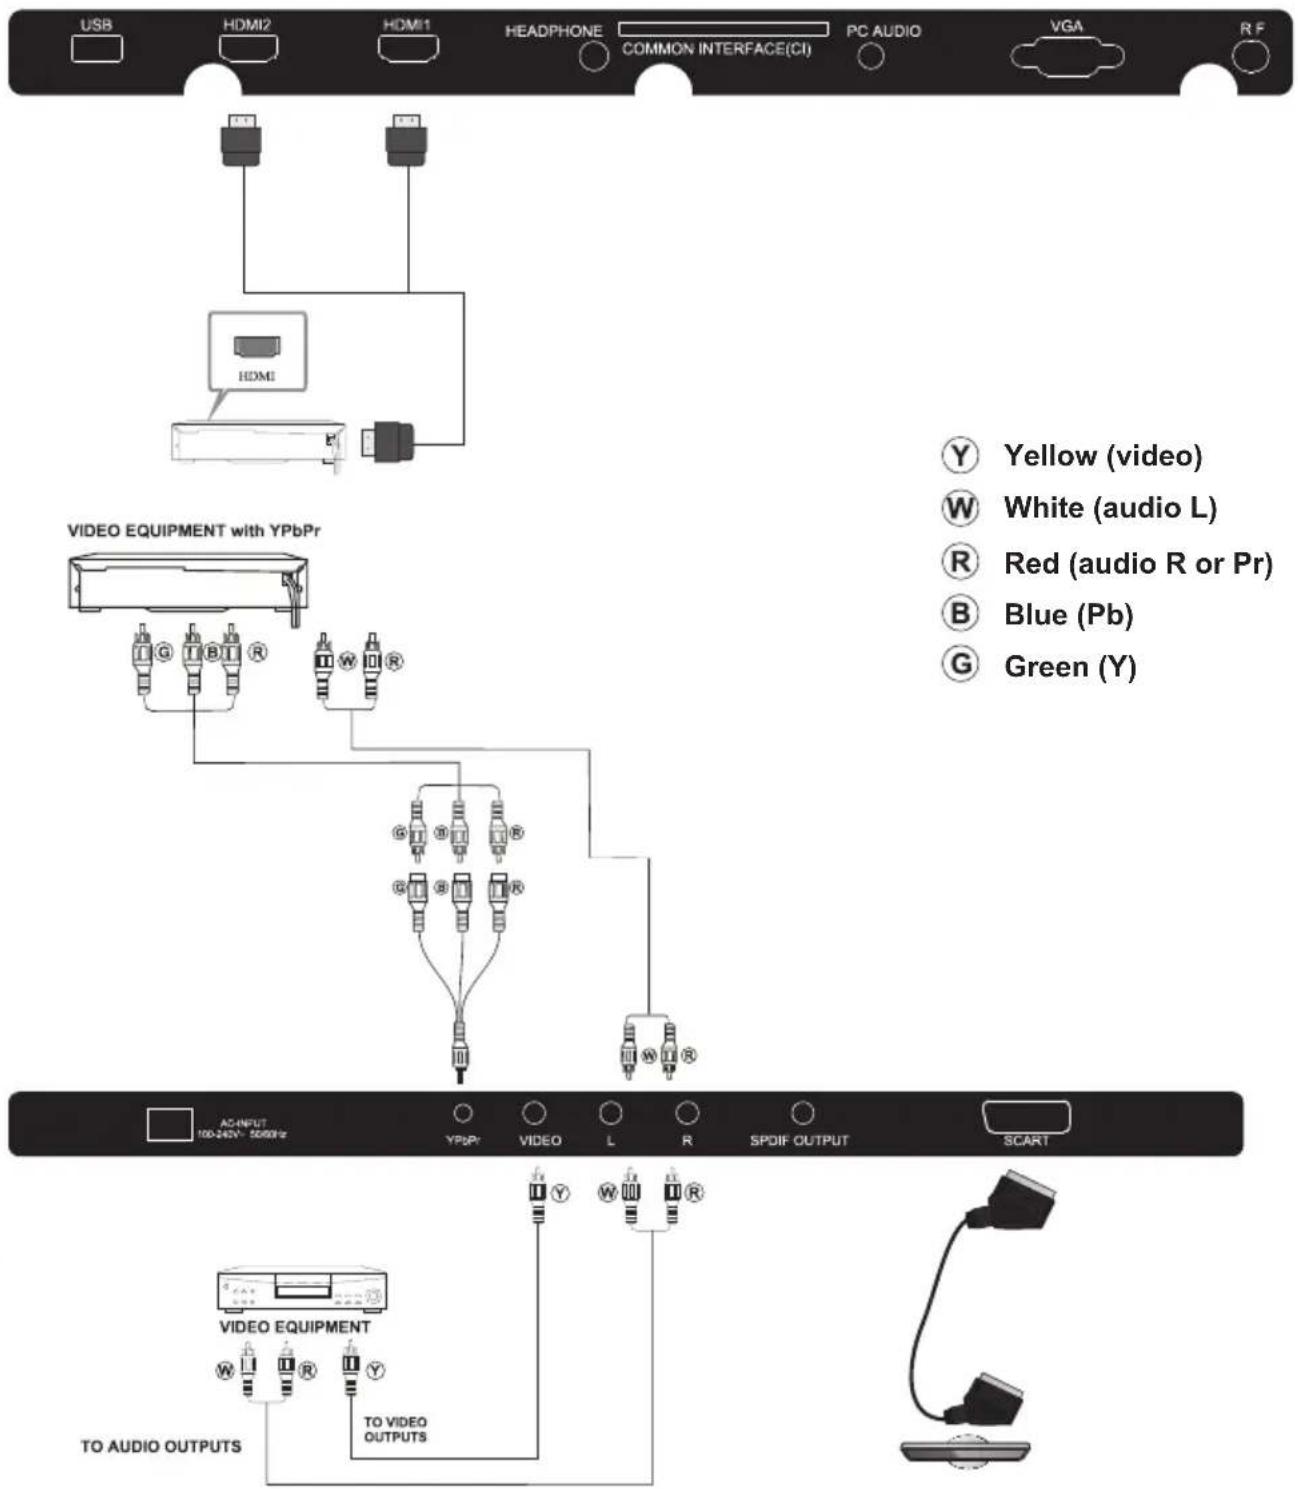
It can be connected to the following appliances: VCR, multi disc player, DVD, camcorder, video game or stereo system, etc .....
YPbPr can support these video formats: 480i, 576i, 480p, 576p, 720p, 1080i.
REMOTE CONTROL
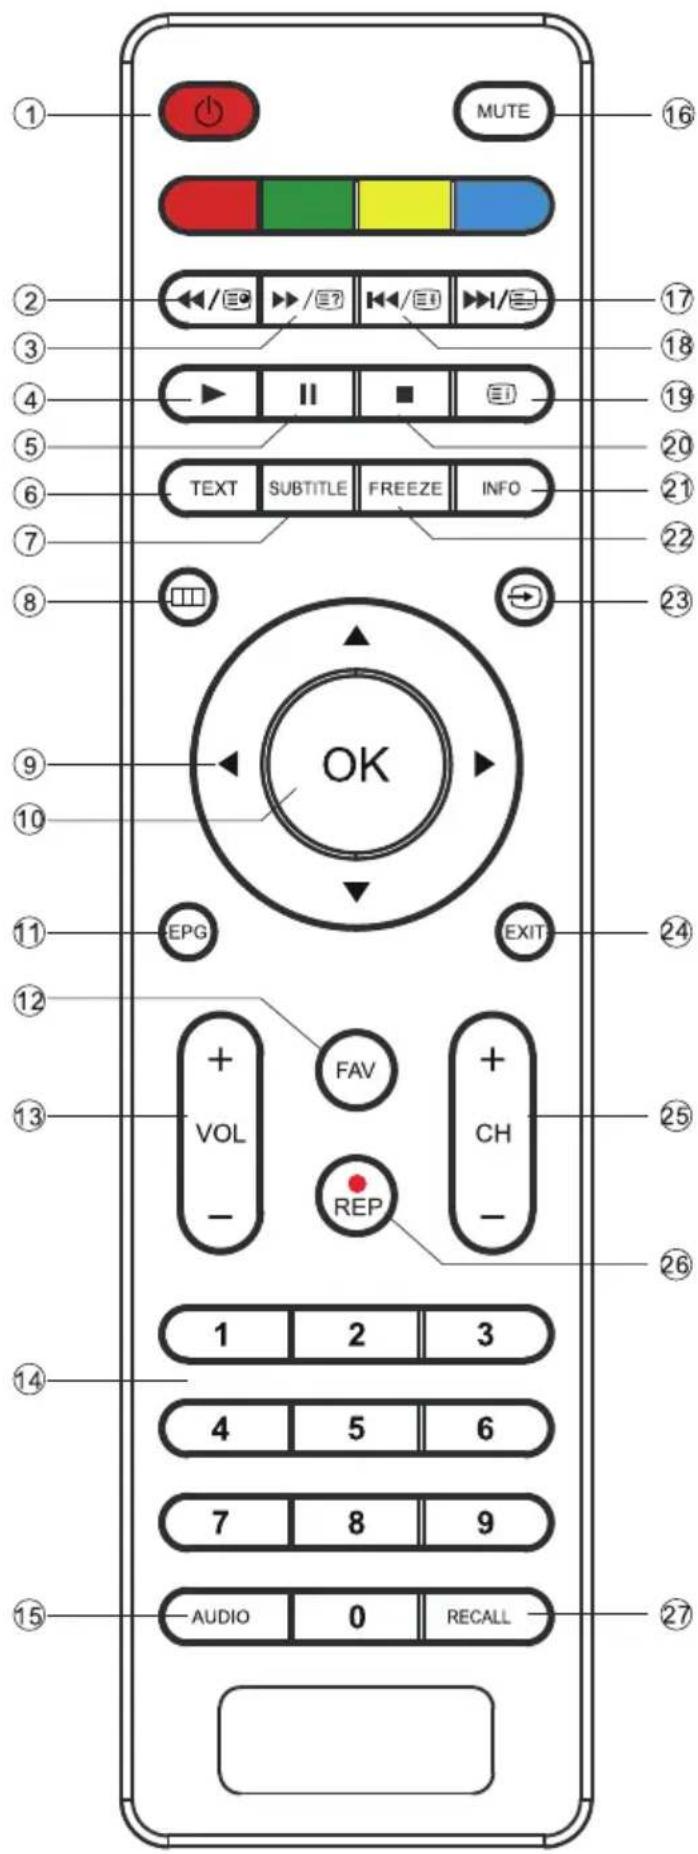
- POWER: To set the TV to standby or power on.
- ◀◀/☐: In USB mode, used as reverse key, in teletext mode used as subpage key.
- ▶▶/≡?: In USB mode, used as forward key, in teletext mode used as reveal key.
- ▶: Press in USB mode to begin or continue playback.
- II : Press in USB playback mode to pause playback.
- TEXT: To enter or exit TELETEXT.
- SUBTITLE: To turn on subtitles press the subtitle button in DTV mode.
- Displays the main on-screen menu.
- CURSOR: To move within the menu.
- OK: Conform selection.
- EPG: To display information about the program begin viewed and what's on next it DTV mode.
- FAV: To access your favorite channels list in TV or DTV mode.
- VOL+/-: To adjust sound level.
- NUMERIC KEY: For direct access to channels.
- AUDIO: To select the available audio language of TV programs.
- MUTE: To disable or enable the sound output.
- ▶▶/☐: In USB mode, used as next key, in teletext mode used as list key.
- 📄/☐: In USB mode, used as previous key, in teletext mode used as hold key.
- ☐: In teletext mode used as index.
- Press to stop play in USB mode.
- INFO: To display the program information of the show you are watching, press the info button.
- FREEZE: Press the freeze the picture you are watching.
- ➕: Press to display and select the available video sources.
- EXIT: To return to the previous menu or exit menu.
- CH+/CH-: To access the next or previous channel.
- REP: Press to record the TV program you are watching in DTV mode. In USB mode, press to select repeat mode.
- RECALL: Jumps to last channel viewed.
TELETEXT
Teletext is an information system broadcast by certain channels which can be consulted like a newspaper. It also offers access to subtitles for viewers with hearing problems or who are not familiar with the transmission language (cable networks, satellite channels, etc.)
| Press You will | obtain |
| TEXT | This is used to call or exit teletext modes. The summary appears witha list of items that can be accessed. Each item has a corresponding3 digit page number. If the channel selected does not broadcast teletext, the indication 100 will be displayed and the screen will remain blank (in this case, exit teletext and select another channel). |
SELECTING A PAGE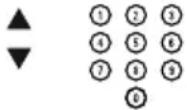 | Enter the number of the page required using the 0 to 9 up/down.Example: page 120, enter 120. The number is displayed top left, the counter turns and then the page is displayed. Repeat this operation to view another page. If the counter continues to search, this means that the page is not transmitted. Select another number. |
DIRECT ACCESS TO THE ITEM | Colored are as are displayed at the bottom of the screen. The 4 colored keys are used to access the items or corresponding pages. The colored are as flash when the item or the page is not yet available. |
| ≡i(INDEX) | This returns to the contents page (usually page 100). |
≡ E) E) | Certain pages contain sub-pages which are automatically displayed successively. This key is used to stop or resume subpage acquisition. The indication appears top left. |
| ≡(HOLD) | To freeze the page. |
≡ ) ) | To display or hide the concealed information (games solutions). |
 | The user can set four favorite pages to be directly linked to the four color keys. While list mode is activated, it is not possibility to use TOP or FLOF navigation with the color keys. The favorite page numbers should be stored and restored to/from nonvolatile memory for each channel by the system software. |
INSTALLATION GUIDE
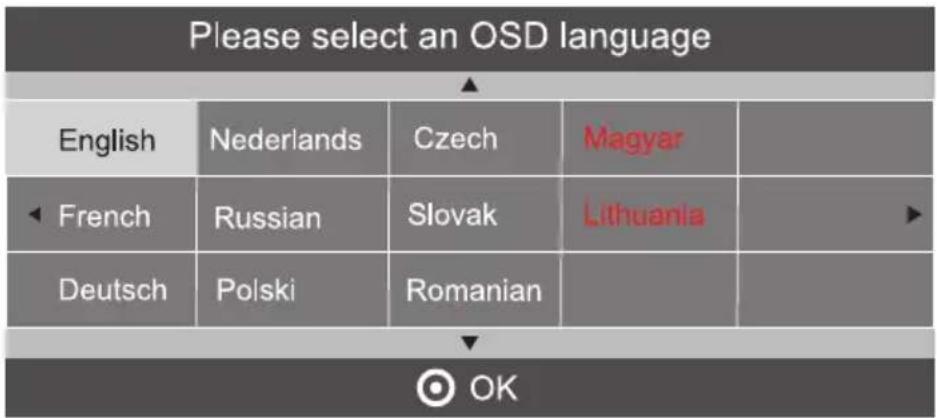
1). Press the buttons to navigate the menu and change the settings. Press the OK button to confirm.
Select your desired language to be displayed on the menu.
2). Press the buttons to select DVB-T/DVB-C and then press the OK button to confirm.
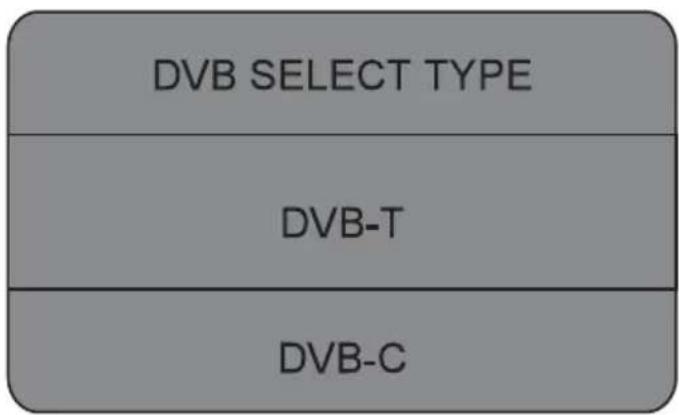
a. If you select DVB-T to next step is select the Tune and country the press the OK button to start tuning.
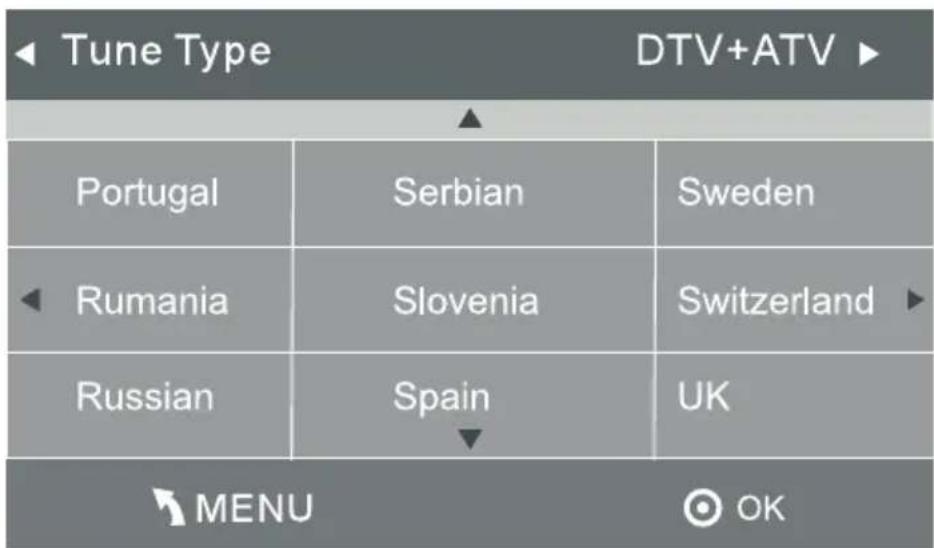
b. If you select DVB-C, the next step is to config the DVB-C system like (scan type / Frequency / Network ID / Symbol KS/S) then press OK button to into the tune type and country select menu, this step is the same as DVB-T, select the tune type (DTV/ATV). Choose the right country, press OK button to start tuning.
| DVB-C Scan Menu | |
| Scan type | Full |
| Frequency | 610000 |
| Network ID | Auto |
| Symbol(KS/S) | Auto |
| ◎ OK ↗ MENU | |
3). Channel tuning will commence. This operation may take up to 6 minutes. The display will show the progress of the tuning and the number of channels found.
4). After tuning is complete, the channels are arranged in a preset order. If you wish to skip channels, modify the preset order or rename channels, select Programme Edit under the Channel menu.
Channel Tuning
TV : 3 Programme(s)
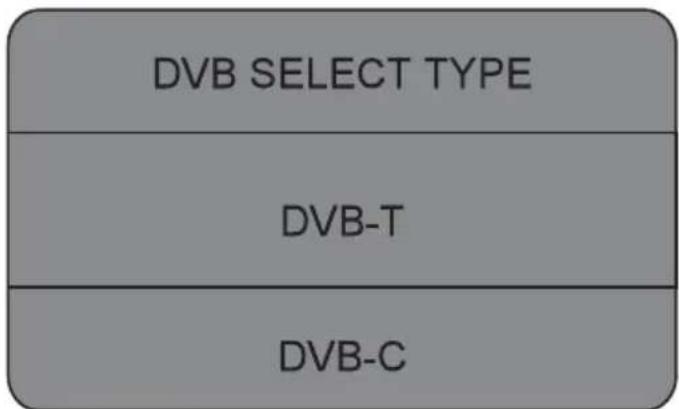
3). Press the ▼ buttons to select DVB-T/DVB-C. Press select DVB-T and then press the OK button to confirm.
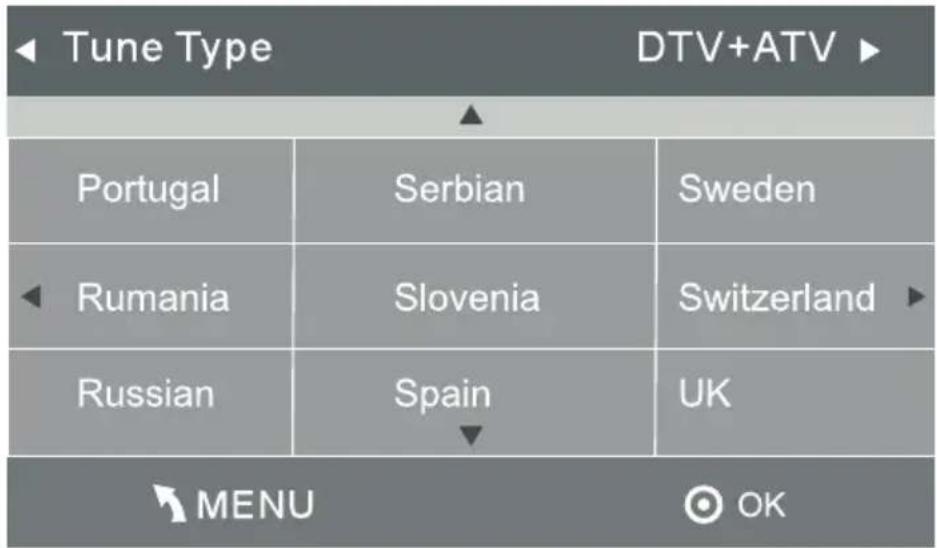
4). In the Tune Type menu, press the ◀▶ buttons to select ATV / DTV / DTV + ATV. Press the ▼ button and then press the buttons to select the country where you will operate the TV. Press the OK button to confirm.
EN
5). Channel tuning will commence. This operation may take up to 6 minutes. The display will show the progress of the tuning and the number of channels found.
6). After tuning is complete, the channels are arranged in a preset order. If you wish to skip channels, modify the preset order or rename channels, select Programme Edit under the channel menu.
Channel Tuning
TV : 3 Programme(s)
3). Press the ▼ buttons to select DVB-T/DVB-C. Press select DVB-C and then press the OK button to confirm.
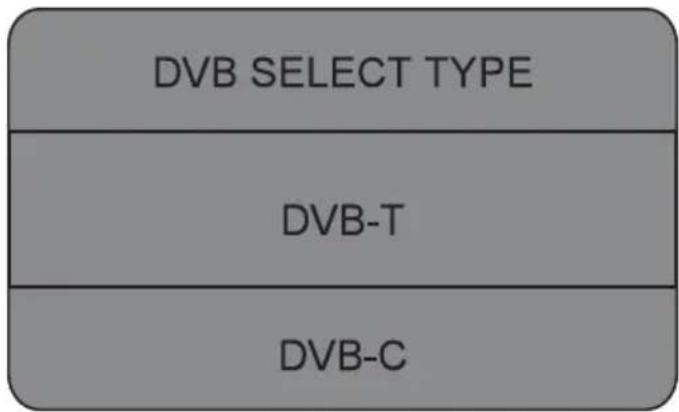
4). Press the buttons to select Scan type/Symbol(Ks/S) press the OK button to confirm.
EN
| DVB-C Scan Menu | |
| Scan type | Full |
| Frequency | 610000 |
| Network ID | Auto |
| Symbol(KS/S) | Auto |
| ◎ OK MENU | |
5). In the Tune Type menu, press the ◀buttons to select ATV / DTV / DTV + ATV. Press the ▼ button and then press the ◀buttons to select the country where you will operate the TV. Press the OK button to confirm.
| Tune Type DTV+ATV | ||
| Portugal | Serbian | Sweden |
| Rumania | Slovenia | Switzerland |
| Russian | Spain | UK |
| MENU OK | ||
EN
6). Channel tuning will commence. This operation may take up to 6 minutes. The display will show the progress of the tuning and the number of channels found.
7). After tuning is complete, the channels are arranged in a preset order. If you wish to skip channels, modify the preset order or rename channels, select Programme Edit under the channel menu.
Channel Tuning
TV : 3 Programme(s)
You can Delete ,Rename ,Move, Skip , FAV any programs.
Delete
Press teletext red button, the program in cursor will delete.
Move
Use the Arrow Buttons to select the channel you wish to move. Then press the Yellow Button to select Move function. Once active use the Arrow Buttons to move and then press OK to confirm.
Skip
Press to choose the program, press teletext blue button to skip this program, the
will show on the right side of the program.
Choose the skipped program, press blue button again, you can cancel the skip, the will disappear.
❤️ Favourite
Press ▼▲ to choose the program, press FAV button, it will show on the right side of the program. Choose the FAV program, press FAV button again, you can cancel the FAV, the will disappear.
Once your favorite group is created, you can press the FAV key to quickly access your favorite channel.
PICTURE MENU
The second item of the MENU is PICTURE MENU. You can adjust picture effect here, such as contrast, brightness, etc. Press ▼to move, press OK to adjust.
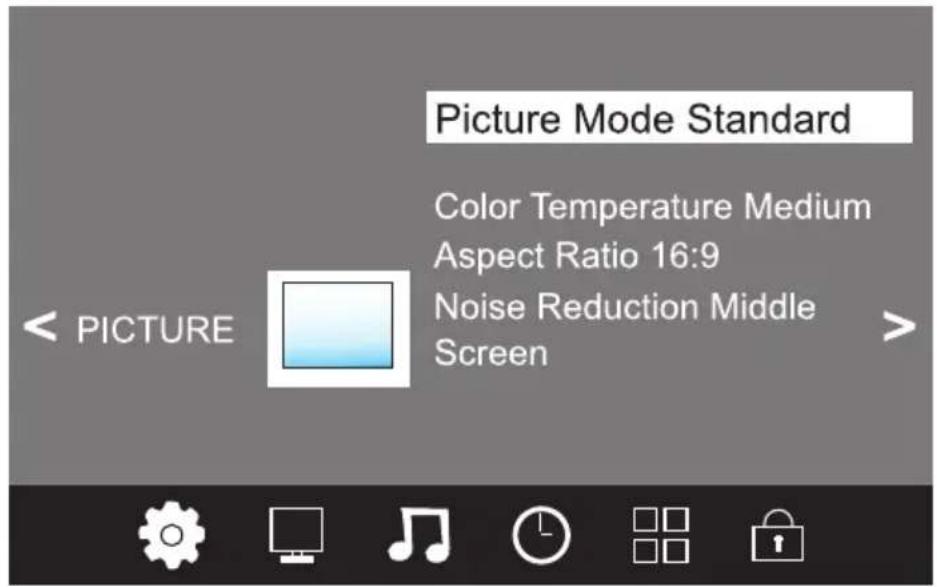
| Picture Mode | Standard |
| Contrast 82 | |
| Brightness 50 | |
| Color 50 | |
| Sharpness 50 | |
| Tint 50 | |
| MENU | |
| Color Temperature | Medium |
| Red 40 | |
| Green 31 | |
| Blue 50 | |
| MENU | |
EN
SOUND MENU
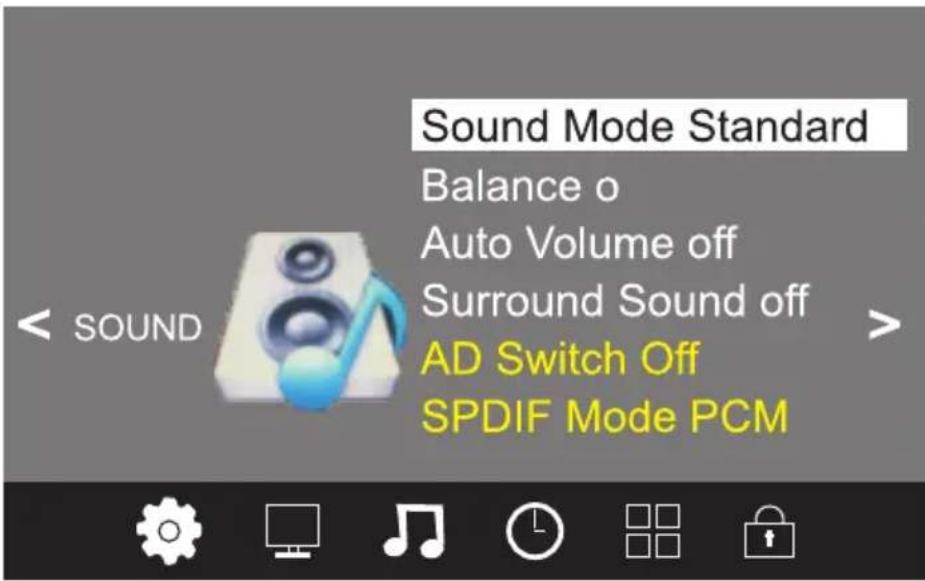
The third item of the MENU is the SOUND MENU. You can adjust the sound effect here such as treble, bass, balance etc. Press ▼to move, press OK to adjust.
TIME MENU
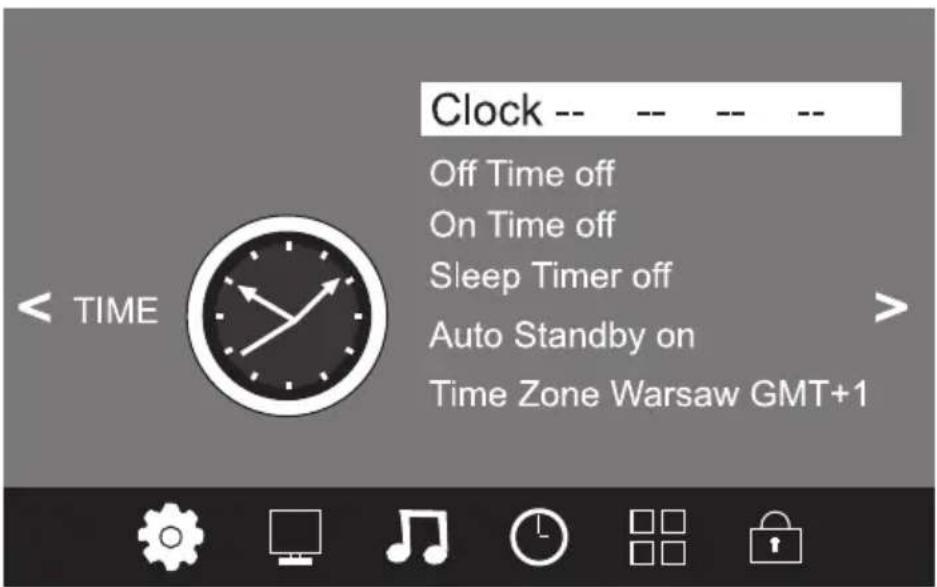
The fourth item of the menu is the TIME MENU You can adjust the clock, power on/off time, sleep time etc. Press to move, press OK to adjust.
EN
OPTION MENU
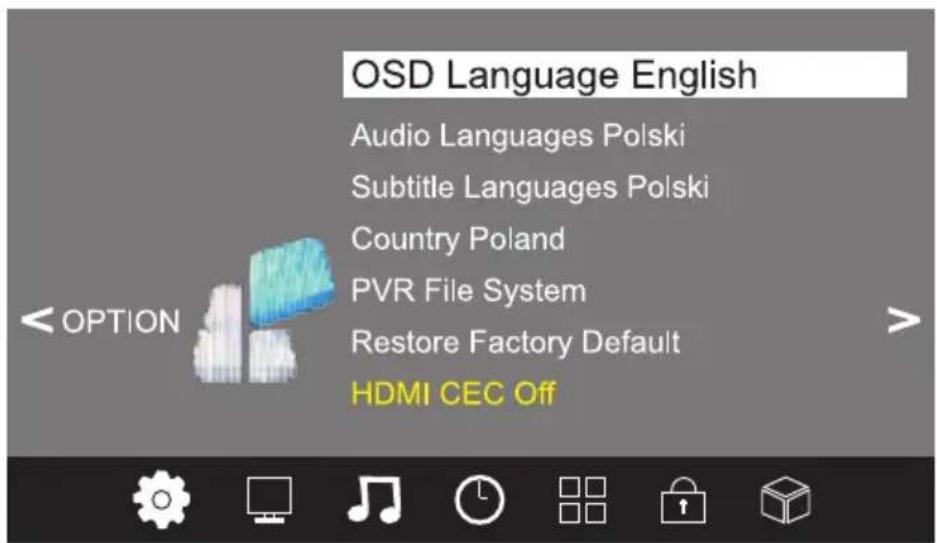
The fifth item of the MENU is the OPTION MENU. You can adjust the Menu language, Audio language, Subtitle language etc.
In PVR File system menu you can set up USB disk for PVR.
| Select Disk | C: |
| Check PVR File System Start | |
| USB Disk | |
| Format | |
| Time Shift Size | |
| Speed | |
| Free Record Limit 6 Hr. | |
| OK | MENU |
EN
NOTE:
Restore factory default will clear all the programs and password.
LOCK MENU
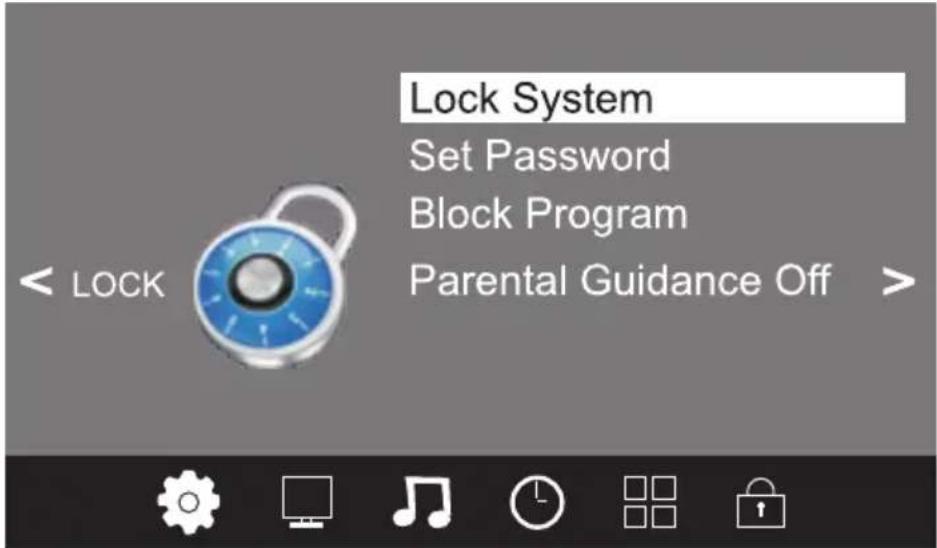
The sixth item of the menu is the LOCK MENU You can lock system, set password, block program and set parental guidance. Once you set the lock system on, you can not search the channels or change any programs.
NOTE:
The default pass word is 6666.
Block program: Press ▼to choose the program, press teletext green button to block the program. If you want unblock the program, pls enter the main menu, input the password, then press green button again. Parental guidance: Press ◀to choose rating.
USB
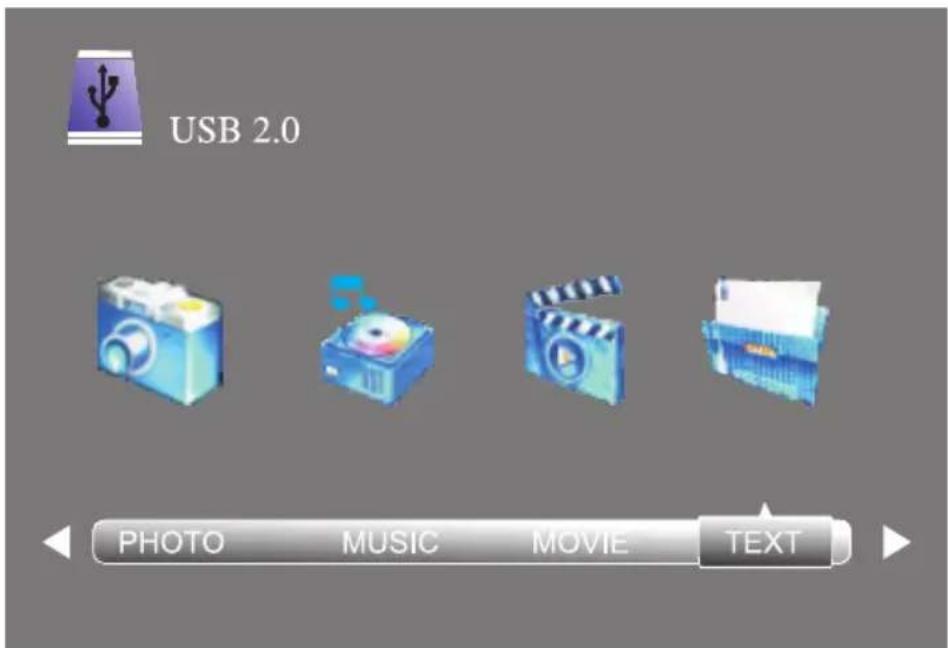
Press the button and then select USB item to enter the USB menu.
EN
Please make sure that the USB device have plugged in the slot. There are four type media item can be selected, such as photo, music, Movie, and text. Select the type media item by pressing ◀▶, press OK button to enter the disk selection menu.
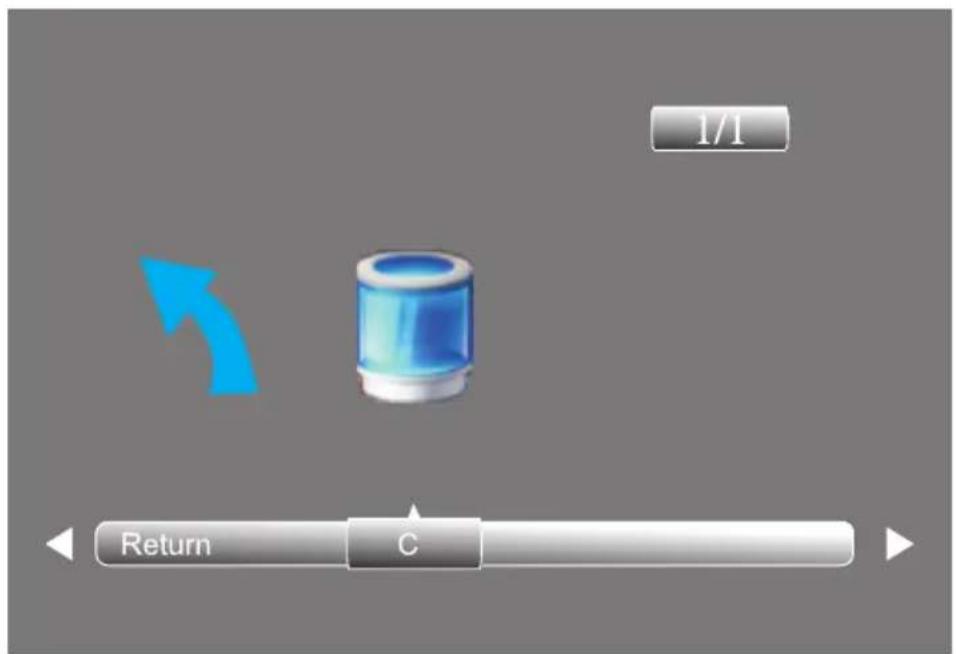
Press the ◀ to select the right disk and press OK to display media files and folder list or choose Return to back to the media type selection menu.
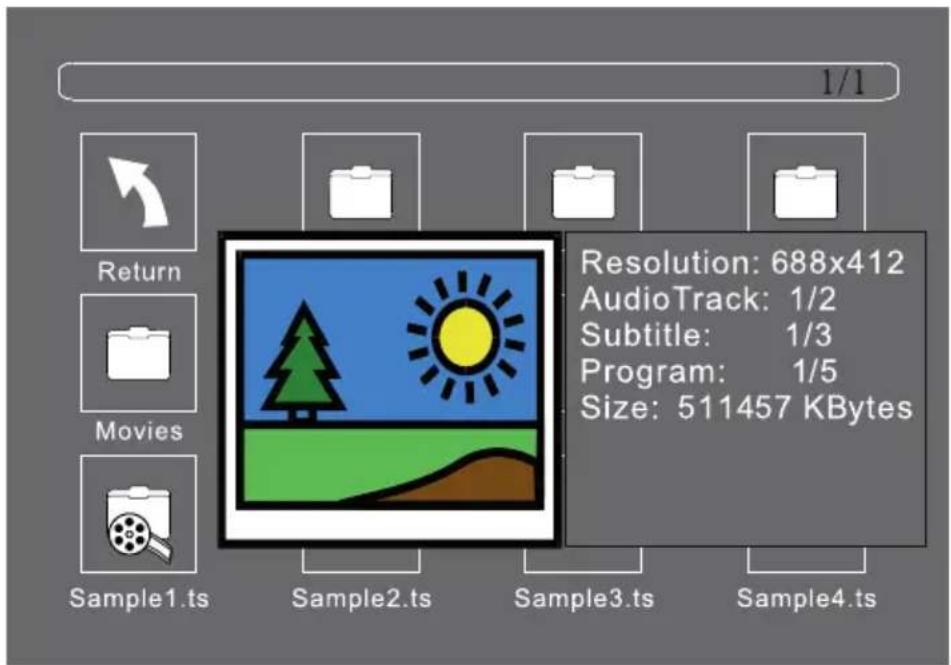
Select the media file by pressing or, then the preview frame will pop up. Press the to play the media file in full screen. When the media file (photo, music, movie, or text type) is playing, press the OK or Info button con display the control bar.
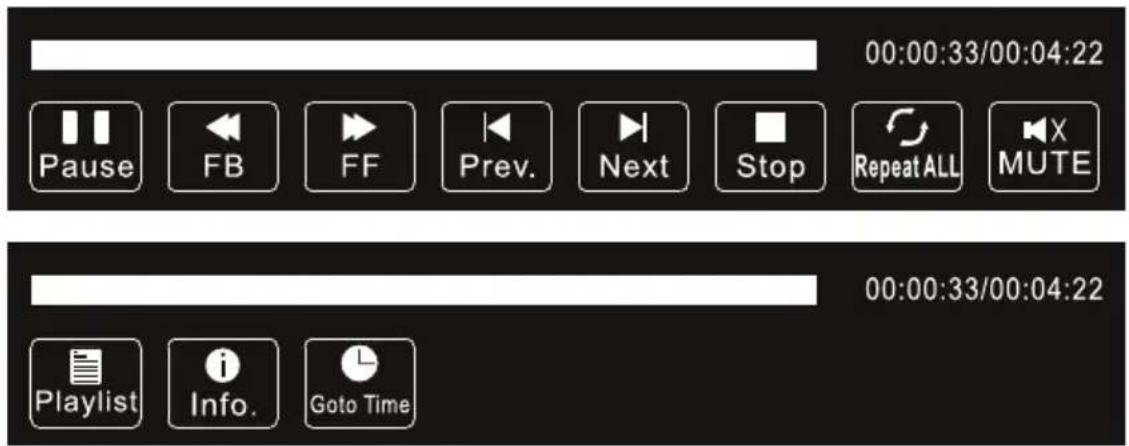
Press ◀ to select the function icon, press OK button to confirm the function.
Press or EXIT button to exit the control bar.
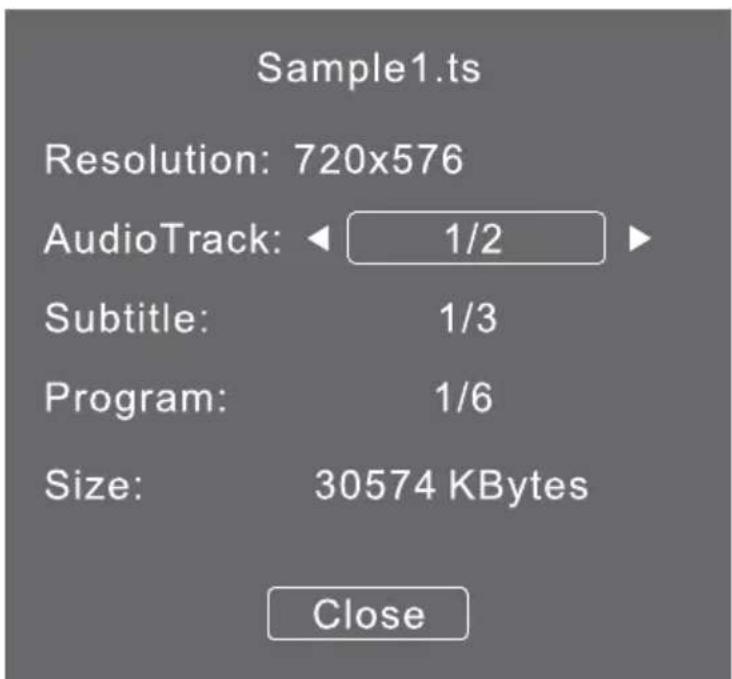
USB playback is supported for the following formats.
Photo: JPEG, BMP, PNG
Music: MP3
Text: TXT
Movie: TS (MPEG2 & H.264)
EPG Menu (Electronic Program Guide)
The EPG menu is used to look at what is being broadcasted on DTV or Radio channel in the day. To access the EPG menu, press the EPG button, the following menu will be displayed:
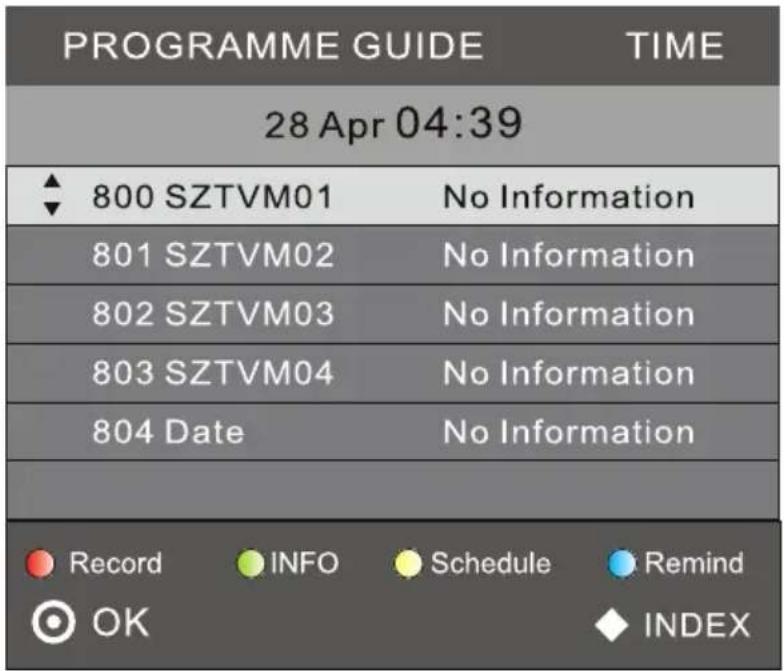

Info
Use 🔗 to choose the programs. Press INFO key, you can display the highlight program's information.

Schedule
Press the teletext yellow key. It can list all the reminder schedule, press to choose the list. Press red key DELETE to delete the schedule list. Press EPG to return to EPG menu.
EN
| Schedule List 04:55 28th Apr Delete | |||||
| Time | Date | Programme Title | Channel Name | ||

Record
Press the red key, it can set the program to be recorded.

Remind
Press the blue key to choose one program and set up one reminder time. The TV screen will skip to the chosen program in the reminder time automatically.
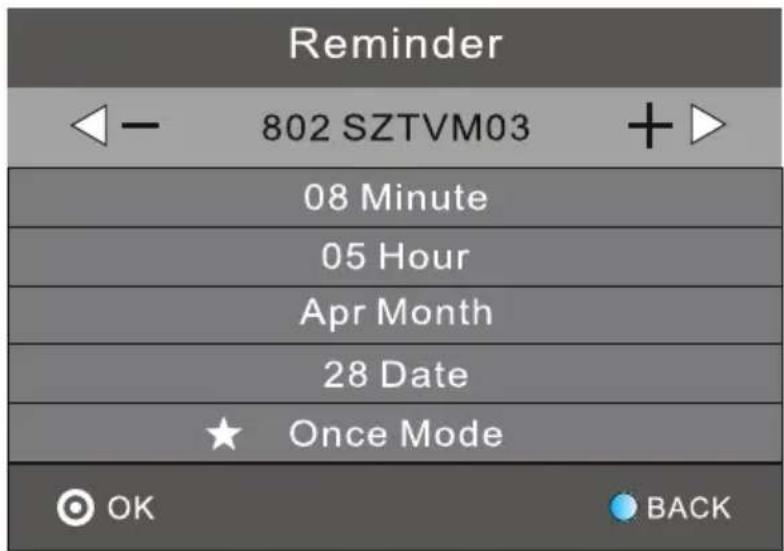
EN
TROUBLESHOOTING
| Picture Sound Inspection check | ||||
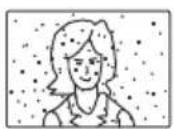 | Snow | 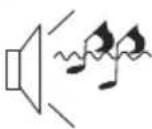 | Noise | - antenna position, direction or connection |
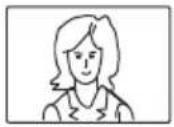 | Ghost | 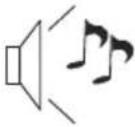 | Normal audio | - antenna position, direction or connection |
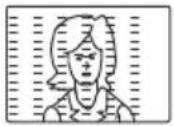 | Interference | 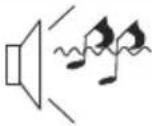 | Noise | - electronic equipment, car / motorcycle, fluorescent light |
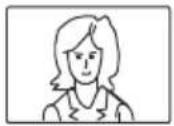 | Normal picture | 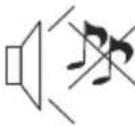 | Mute | - volume (check if mute is activated or if the audio system connections are not correct) |
 | No picture |  | Mute | - power cord is not inserted- power switch is not opened- contrast and brightness/ volume setup- press standby key on the remote control for inspecting |
 | No color |  | Normal audio | - color control |
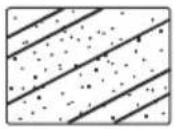 | Picture breaking up | 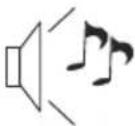 | Normal audio or weak | - retune channel |
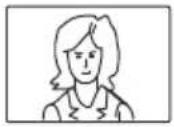 | No color | 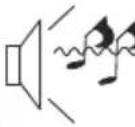 | Noise | - TV system |
EN
SPECIFICATION
| Screen size 24" 32" | ||
| Panel type LED backlight | ||
| Aspect ratio 16:9 | ||
| Pixel number 1920*1080 1366*768 | ||
| Brightness (cd/m2) 200 (±10%) 230 (±10%) | ||
| Contrast 1000:1 | ||
| Viewing angle(H/R,CR>=10) H:160°, V:150° | ||
| Response time 5ms | ||
| Display colors 16.7M | ||
| System TV DVB-T/ C | ||
| Standard video PAL / SECAM | ||
| Input power voltage | 100-240V ~ 50Hz | |
| Power consumption | 38W | 50W |
| Power consumption(Standby) | ≤0.5W | |
| Audio output power | 2x3W | 2x8W |
| RF tuner | x1 | |
| VGA | x1 | |
| PC Audio In | x1 | |
| Headphone | x1 | |
| CI | x1 | |
| HDMI | x2 | |
| USB | x1 | |
| AV | x1 | |
| Ypbpr | x1 | |
| Scart | x1 | |
| Coaxial | x1 | |
Specifications are subject to change without notice.
EN
English
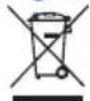
Correct Disposal of This Product (Waste Electrical & Electronic Equipment)
(Applicable in the European Union and other European countries with separate collection systems)
This marking shown on the product or Its literature, indicates that It should not be disposed with other household wastes at the end of its working life. To prevent possible harm to the environment or human health from uncontrolled waste disposal, please separate this from other types of wastes and recycle it responsibly to promote the sustainable reuse of material resources.
Household users should contact either the retailer where they purchased this product, or their local government office, for details of where and how they can take this item for environmentally safe recycling. Business users should contact their supplier and check the terms and conditions of the purchase contract. This product should not be mixed with other commercial wastes for disposal
Made in China for LECHPOL Zbigniew Leszek, Miętne, 1 Garwolińska Street, 08-400 Garwolin.



EN


UWAGA
ABY ZMNIEJSZYĆ RYZYKO PORAŻENIA PRĄDEM, NIE NALEŻY ZDEJMOWAĆ OBUDOWY URZĄDZENIA. PRACE SERWISOWE POWINNY BYĆ WYKONYWANE PRZEZ WYKWALIFIKOWANY PERSONEL.

natural_image
Technical line drawing of a computer rack with labeled ports and connectors (no text or symbols)natural_image
Technical line drawing of a computer monitor rear panel with ports, connectors, and a central control panel (no text or symbols)PL
natural_image
Technical line drawing of a device rear panel with internal components and mounting base (no text or symbols)natural_image
Technical line drawing of a device interior with ventilation grilles and a base mount (no text or symbols)PL
Panel przedni
PL
| Tune Type | DTV + ATV | |
| Germany | Italy | Netherlands |
| Greece | Ireland | Norway |
| Hungary | Luxembourg | Poland |
| MENU | ||
natural_image
Illustration of a computer monitor with lightning bolts and a hand holding a device, no text or symbols presentAvertisement
natural_image
Simple line drawing of a computer monitor with a curved frame and a base, emitting steam (no text or symbols)Atentie
natural_image
Illustration of a TV screen with a diagonal X mark and a cloth hanging from it (no text or symbols)Avertisement
natural_image
Simple line drawing of a flat-screen TV with a stand and diagonal X marks (no text or symbols)Atentie
natural_image
Illustration of a computer monitor with a crossed X symbol and a flower on top, surrounded by stars (no text or symbols)Avertisement
natural_image
Cartoon illustration of a person running away from a computer monitor with a crossed-out X symbol (no text or symbols present)Atentie
natural_image
Technical line drawing of an electronic device rear panel with connectors and a central control panel (no text or symbols)natural_image
Diagram of a computer monitor rear panel with labeled ports and an icon indicating a press or indicator (no text or symbols present)RO
Instructiunile de asamblare pentru suport de baza (URZ4032)
natural_image
Technical line drawing of a device enclosure with ventilation grilles and control panel (no text or symbols)natural_image
Technical line drawing of a mechanical device with mounting bracket and base mount (no text or symbols)RO
Panoul frontal
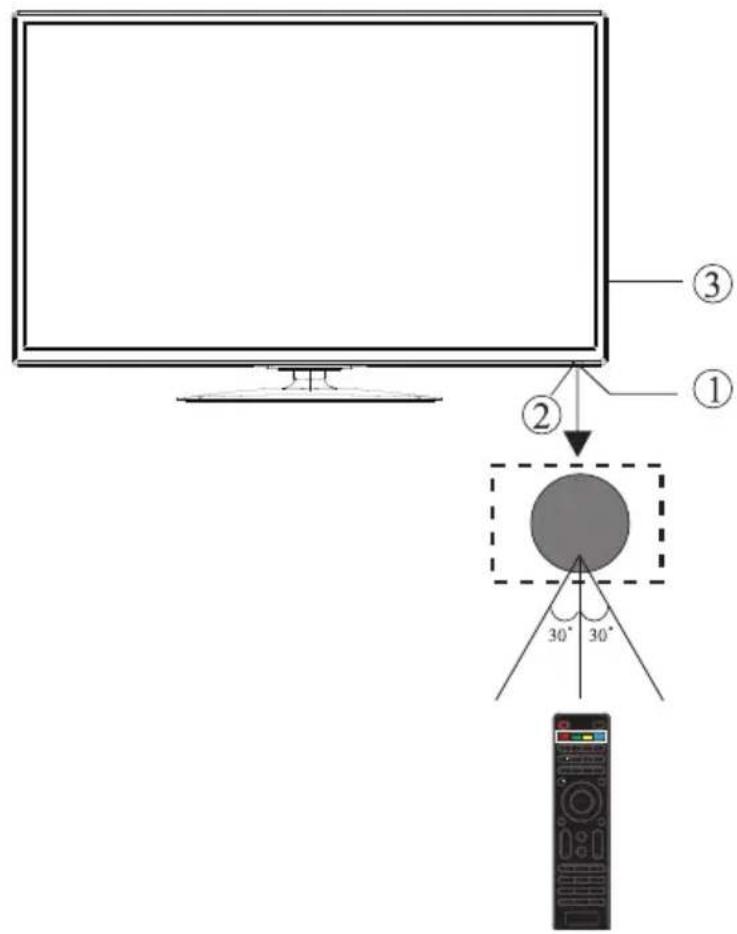
1: Senzor telecomanda
2: LED indicator
- Albastru - pornit
- Rosu - standby
3: Taste laterale
Tastatura
1. SURSA

| Tune Type DTV+ATV | ||
| Portugal | Serbian | Sweden |
| Rumania | Slovenia | Switzerland |
| Russian | Spain | UK |
| MENU OK | ||
| Picture Mode | Standard |
| Contrast 82 | |
| Brightness 50 | |
| Color 50 | |
| Sharpness 50 | |
| Tint 50 | |
| MENU | |
| Color Temperature | Medium |
| Red 40 | |
| Green 31 | |
| Blue 50 | |
| MENU | |
RO
MENIUL SUNETULUI
MENIUL SETARII OREI
NOTA:
Parola prestabilita este 6666.
Meniul EPG (Electronic Program Guide)
| Schedule List 04:55 28th Apr Delete | |||||
| Time | Date | Programme Title | Channel Name | ||
RO

Inregistrare
Apasati tasta rosie, puteti seta programul ce urmeaza a fi inregistrat.

Memento
natural_image
Abstract blue letter 'C' on black background with horizontal lines (no text or symbols)CABLETECH®
www.cabletech.pl

natural_image
Grid of blue and white squares arranged in two rows (no text or symbols)- CABLETECH®
- HINWEIS:
- DE
- Aufnehmen
- IMPORTANT SAFETY INSTRUCTION
- EN
- INSTALLATION
- Minimum distances
- Base stand assembly instruction (URZ4024)
- Base stand assembly instruction (URZ4032)
- Front panel
- Keyboard
- SOURCE
- MENU
- CH+/CH-
- VOL+/VOL-
- STANDBY
- Rear AV connections (URZ4024)
- Side AV connections (URZ4024)
- Rear AV connections (URZ4032)
- Side AV connections (URZ4032)
- Antenna
- AV equipment (URZ4024)
- AV equipment (URZ4032)
- REMOTE CONTROL
- TELETEXT
- INSTALLATION GUIDE
- Channel Tuning
- Delete
- Move
- Skip
- ❤️ Favourite
- PICTURE MENU
- SOUND MENU
- TIME MENU
- OPTION MENU
- NOTE:
- LOCK MENU
- USB
- EPG Menu (Electronic Program Guide)
- Info
- Schedule
- Record
- Remind
- English
- Correct Disposal of This Product (Waste Electrical & Electronic Equipment)
- UWAGA
- Instructiunile de asamblare pentru suport de baza (URZ4032)
- SURSA
- MENIUL SUNETULUI
- MENIUL SETARII OREI
- NOTA:
- Meniul EPG (Electronic Program Guide)
- Inregistrare
- Memento
Brand : Cabletech
Model : URZ4024
Category : Television