L15T11W-C - TV Wharfedale - Free user manual and instructions
Find the device manual for free L15T11W-C Wharfedale in PDF.


User questions about L15T11W-C Wharfedale
0 question about this device. Answer the ones you know or ask your own.
Ask a new question about this device
Download the instructions for your TV in PDF format for free! Find your manual L15T11W-C - Wharfedale and take your electronic device back in hand. On this page are published all the documents necessary for the use of your device. L15T11W-C by Wharfedale.
USER MANUAL L15T11W-C Wharfedale
HD Ready Digital LCD TV
USER'S MANUAL
Please read this manual carefully before using your television and keep this manual In a good place for future reference.
MODEL:
L15T11W-A, L15T11W-C, L19T11W-A, L19T11W-C, L20T11W-A, L20T11W-C, L19T12W-A, L19T12W-C, L20T12W-A, L20T12W-C, L22T11W-A, L22T11W-C
IMPORTANT SAFETY INSTRUCTIONS
Read all instructions before use and keep for future reference.

CAUTION
To reduce the risk of electric shock, do not remove the cover. No user serviceable parts inside. Refer to qualified service personnel for servicing.


VISIBLE AND INVISIBLE LASER RADIATION WHEN OPENED AVOID EXPOSURE TO BEAM (WARNING LOCATION: INSIDE ON LASER COVER SHIELD).

REGION MANAGEMENT INFORMATION
This DVD Player is designed and manufactured to respond to the Region Management Information that is recorded on a DVD disc. If the Region number described on the DVD disc does not correspond to the Region number of this DVD Player, this DVD player cannot play that disc.
This Region number of this DVD player is

RISK OF ELECTRIC SHOCK, DO NOT OPEN.
- Do not attempt to service this product yourself as opening or removing covers may expose you to dangerous voltage or other hazards. Refer all servicing to qualified service personnel;

WARNING
- To reduce the risk of fire or electric shock, do not expose this product to rain or moisture. Position where there is no risk of splashing or dripping of liquids. Do not place vases or any other objects filled with liquids on the unit.
- To avoid fire, no naked flame source, such as lit candles, should be placed on or around the unit.
- At least 10 cm space should be left around the apparatus for sufficient ventilation;
• The ventilation holes must be kept clear from obstructions. - In case of smoke, or unusual noises or smells coming from the unit, switch it off, unplug it from the wall socket and contact your dealer or service center.

NOTE
- For your protection, please read these instructions completely and keep this manual for future reference.
- Unplug the device from the wall socket when it is not being used for a long period of time. When there is lightning, unplug the unit from the wall socket immediately. Never touch the aerial cable during lightning.
• The device is not suitable for children to operate. - To prevent damage or electrocution - do not push objects of any kind through the openings in this device.
- Keep the device away from radiators and other heat sources.
- Unplug this device from the wall socket before cleaning. Do not use liquid cleaners or aerosol cleaners. Use a damp cloth for cleaning.
• Power supply cords should be routed safety to prevent damage to the cord. - Place the TV in such a position that the screen is not exposed to direct sunlight. It is best to have soft indirect lighting whilst watching TV. Avoid dark environments and screen reflection as these may cause eye fatigue.
- Keep the TV set away from high magnetic fields (i.e. power-amplified speakers) to avoid affecting the screen.
- When the TV has been moved from a cold place, it will need time for the moisture from inside to evaporate.
- Use an isolated power transformer during maintenance as the chassis of the device may be electrified.
• The mains plug is used for disconnecting the device, make it is easily accessible.
• Make sure the unit is connected to a mains socket which is earthed.
CONTENT
Safety Notice ....1
Front Panel Control....2
Connection 3
Remote Control 4-5
Remote Control 6
Installing Batteries....6
Connection Instructions....7
Grounding....7
External equipment connections....7
Antenna Connection....7
VGA Input....8
YPbPr Input....8
S-VIDEO Input....9
SCART Input....10
HDMI Input.... 10
Basic Operating Instructions....11
Turn on the LCD-TV....11
Audio Control....11
Mute....11
Select the TV Channel 12
Picture Mode....12
Program Swap....12
Program Scan....12
Menu Operations....13
Picture Menu Options....13
Audio Menu Options....14
Function Menu Options....16
Adjust Menu Options....18
Tuning Menu Options.... 19
DVB-T Main Menu Operations....21
Channel List....21
Favourite List....22
Now/Next EPG....22
Timers....23
Settings....23
TELE TEXT....26
Basic Playback....28
Advanced Playback....29
Special Function Playback....30
JPEG DISC PLAYBACK....30
SCREEN SAVER FUNCTION....30
DVD System SETUP....31
General Setup Process....31
General Setup Page....3.1
Preferencel Page....33
Playable Discs....35
Disc Protection and DVD Characteristics....36
Troubleshooting Guide....37
Specifications....38
Safety Notice
To prevent fire or electric shocks please read the instruction before installing, using and cleaning the television.
1 Please read all the instructions before operation;
1 Please keep the manual for future reference ;
1 Do not use any accessories that not recommended by manufacturer:
1 Before operation, make sure the operating voltage of this unit is corresponds with your house electricating supply;
1 Do not place the unit on unstable, dusty and humid places;
1 Never put the unit in direct sunlight or near heat sources;
1 Allow enough space for proper ventilation;
1 Please keep water away from the LCD-TV. If water comes in contact with the LCD-TV, disconnect the power cord from the power source, then wipe the set with a dry soft cloth;
1 Do not remove the back cover. If services were need, please refer to customer helpline.
text_image
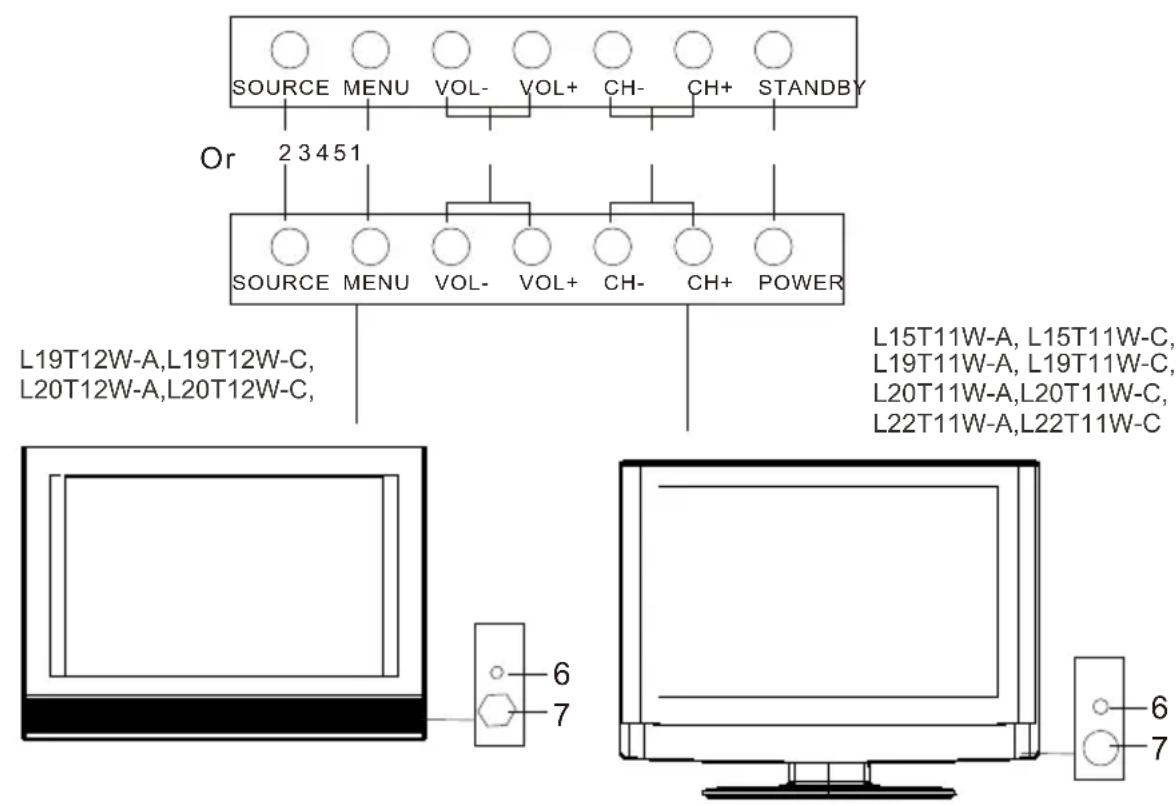
SOURCE MENU VOL- VOL+ CH- CH+ STANDBY Or 23451 SOURCE MENU VOL- VOL+ CH- CH+ POWER L19T12W-A,L19T12W-C, L20T12W-A,L20T12W-C, L15T11W-A,L15T11W-C, L19T11W-A,L19T11W-C, L20T11W-A,L20T11W-C, L22T11W-A,L22T11W-C 6 7 6 7(The description of the button may be different, just see the real.)
Control Panel Function
- Standby switch
- SOURCE Select the input signals: PC/COMPONENT/DVD/HDMI/TV/SCART/S-VIDEO
- MENU Press to select the main menu
- VOL- Volume down / Left orientation to adjust the item in the OSD VOL+ Volume up / Right orientation to adjust the item/Press to enter
- CH- TV channel down / to select the item in the menu CH+ TV channel up / to select the item in the menu
- Power indicator Illuminates red in standby mode, illuminates green when the display is turned on
- Remote Sensor
Connection Options
text_image
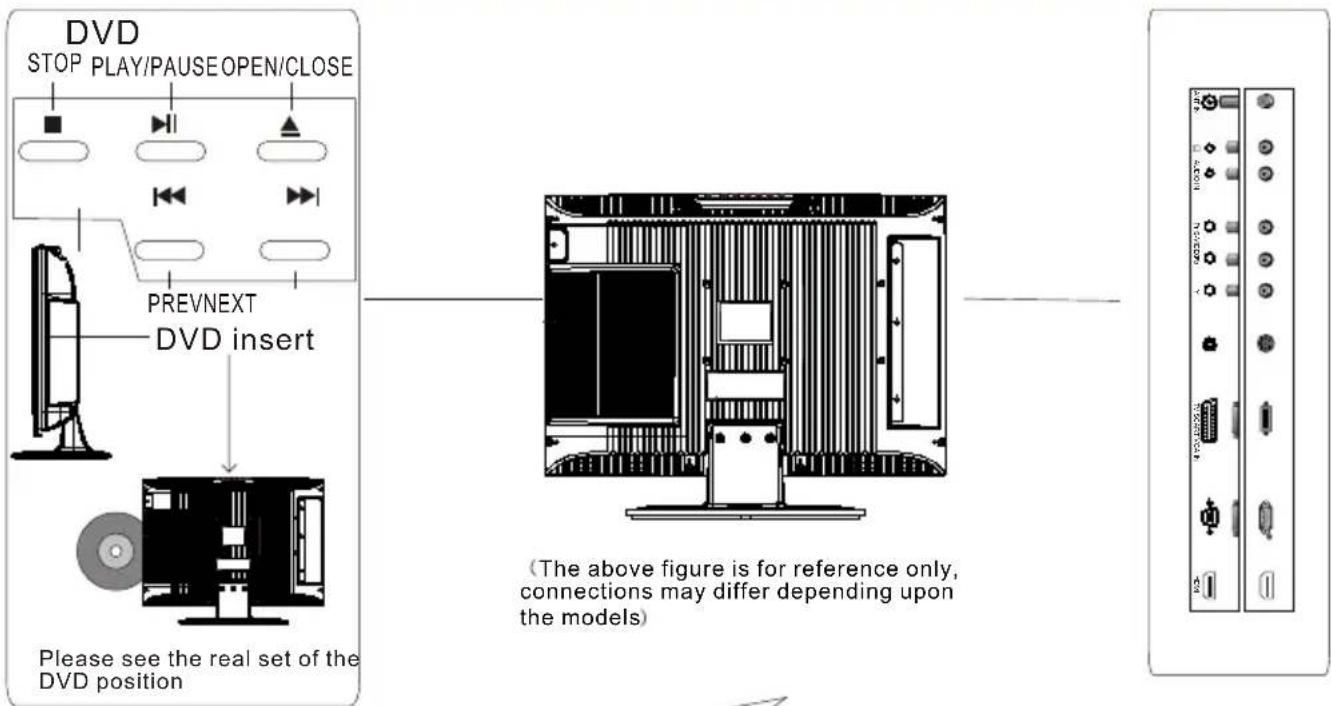
DVD STOP PLAY/PAUSE OPEN/CLOSE PREVNEXT DVD insert Please see the real set of the DVD position (The above figure is for reference only, connections may differ depending upon the models)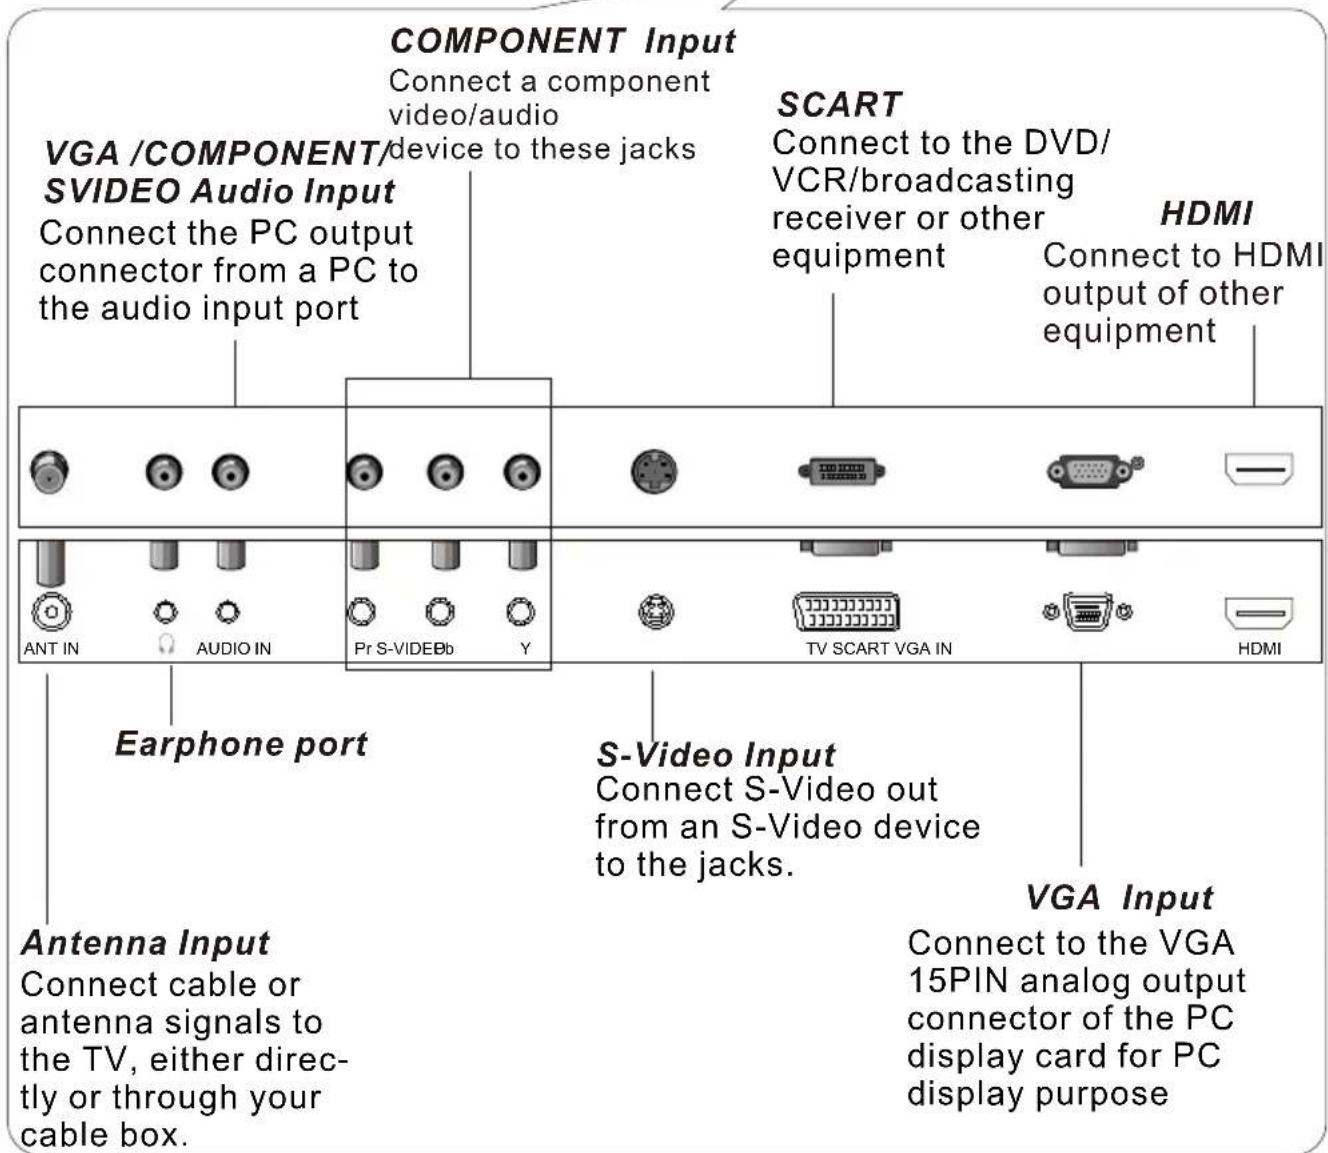
text_image
COMPONENT Input Connect a component video/audio device to these jacks VGA /COMPONENT/ SVIDEO Audio Input Connect the PC output connector from a PC to the audio input port SCART Connect to the DVD/ VCR/broadcasting receiver or other equipment HDMI Connect to HDMI output of other equipment Antenna Input Connect cable or antenna signals to the TV, either directly or through your cable box. S-Video Input Connect S-Video out from an S-Video device to the jacks. VGA Input Connect to the VGA 15PIN analog output connector of the PC display card for PC display purposeRemote Control Key Functions(for TV/DVD Combi)
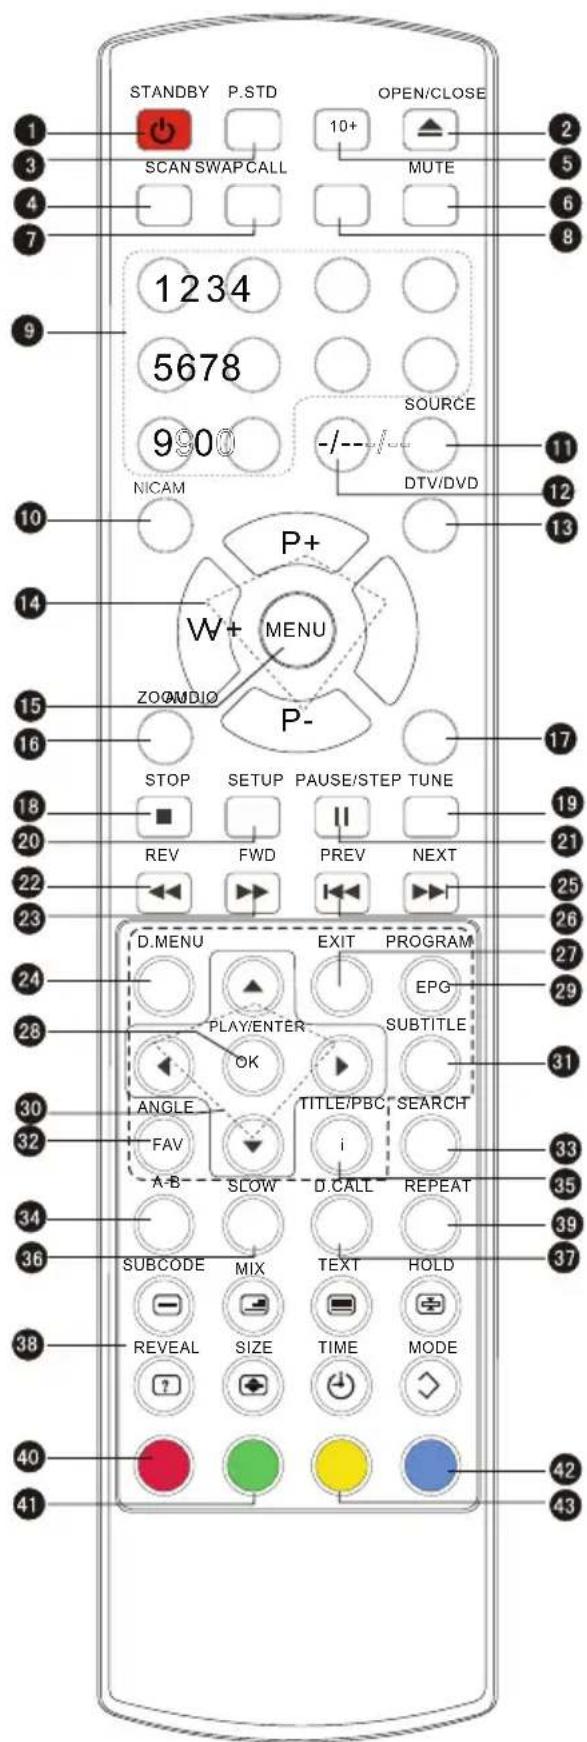
When using the remote control, aim it towards the remote sensor on the TV
text_image
STANDBY P.STD OPEN/CLOSE 10+ SCAN SWAP CALL MUTE 1234 5678 SOURCE 9900 -/- NICAM DTV/DVD P+ W+ MENU ZOOMIO P- STOP SETUP PAUSE/STEP TUNE REV FWD PREV NEXT 20 21 22 23 24 25 26 27 28 29 30 31 32 33 34 35 36 37 38 39 40 41 SUBCODE MIX TEXT HOLD REVEAL SIZE TIME MODE D.MENU EXIT PROGRAM PLAY/ENTER SUBTITLE ANGLE TITLE/PBC SEARCH FAV i A-B SCOW D.CALL REPEAT OPEN/CLOSE 10+(For TV/DVD CombiModels)
Buttons on the remote control
1 Stand By
2 DVD Open/close
3 Picture Mode
4 Scan
5 DVD 10+
6 Mute
7 Swap
8 Call Screen Display
9 Program Number
10 NICAM
11 Source Exchange
12 Digital Selector
13 DTV/DVD
14 Volume/Channel Selection
15 MENU
16 Zoom
17 DVD Audio
18 DVD STOP
19 Tune Menu Button
20 DVD SETUP
21 DVD PAUSE/STEP
22 DVD FAST REVERSE
23 DVD FAST FORWARD
24 DVD/DVB-T MENU
25 DVD NEXT
26 DVD PREVIOUS
27 Exit Screen Display
28 DVD PLAY/ENTER/DVB-T ok button
29 DVD PROGRAM/ DVB-T EPG button
30 DVD /DVB-T Cursor Move button
31 DVD /DVB-T SUBTITLE
32 DVD ANGLE/ DVB-T favourite
33 DVD SEARCH
34 DVD A-B REPEAT
35 DVD TITLE/PBC/DVB-T information button
36 DVD SLOW
37 DVD CALL
38 TELETEXT BUTTONS
39 DVD REPEAT
40 RED button
41 Green button Fast text button in analog
42 Yellow button signal
42 Yellow button Function button in DVBT
43 Blue button (just reference the OSD)
Remote Control Key Functions(for TV only)
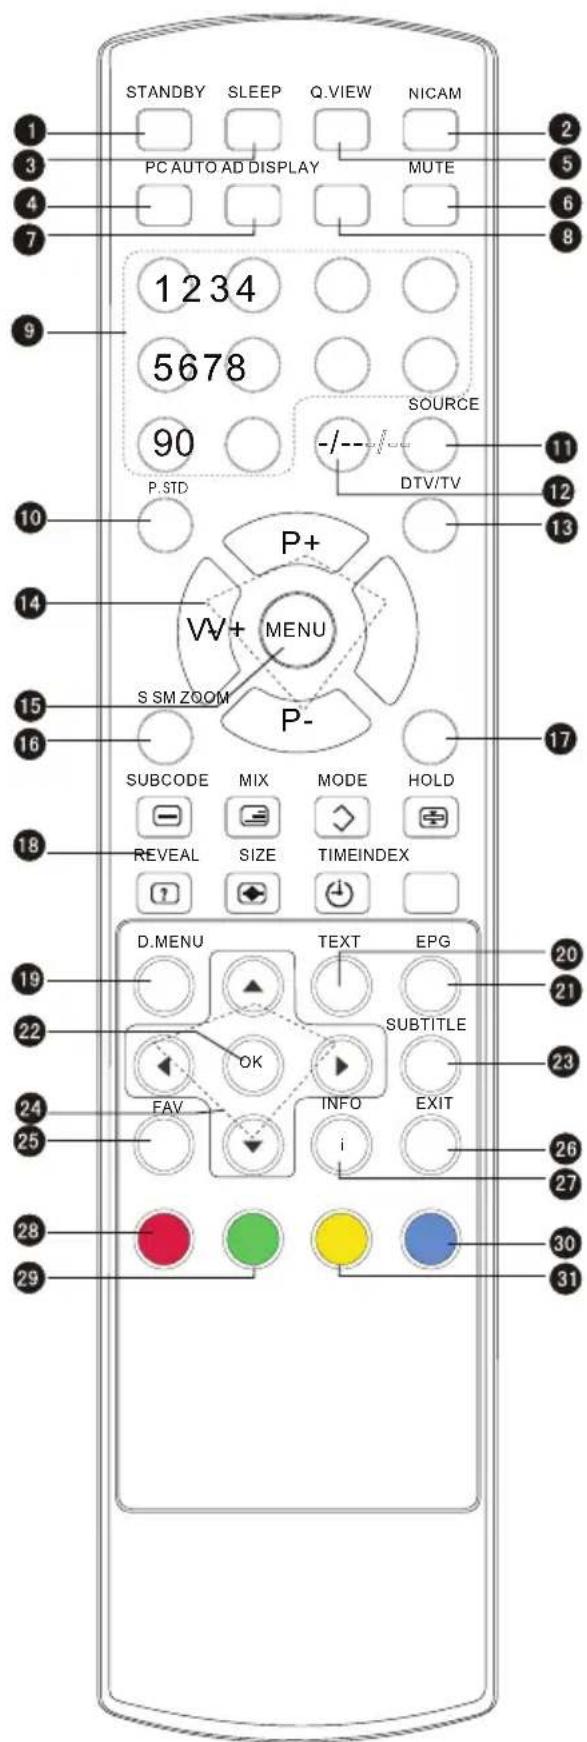
When using the remote control, aim it towards the remote sensor on the TV
text_image
STANDBY SLEEP Q.VIEW NICAM PC AUTO AD DISPLAY MUTE 1 234 5678 90 SOURCE P.STD -/- DTV/TV P+ VW+ MENU S SM ZOOM P- SUBCODE MIX MODE HOLD REVEAL SIZE TIMEINDEX D.MENU TEXT EPG OK SUBTITLE FAV INFO EXIT i 20 21 22 23 24 25 26 27 28 29 30 31(For TV Models)
Buttons on the remote control
1 Stand By
2 NICAM
3 Picture Mode
4 Switch to PC mode
5 Return the last watched program channel
6 Mute
7 Automatically adjust in PC mode
8 Call Screen Display
9 Program Number
10 Picture mode
11 Source Exchange
12 Digital Selector
13 DTV/TV
14 Volume/Channel Selection
15 MENU
16 Sound mode
17 Zoom
18 TELETEXT BUTTONS
19 DVB-T MENU
20 TEXT BUTTON
21 DVB-T EPG button
22 DVB-T ok button
23 DVB-T SUBTITLE
24 DVB-T Cursor Move button
25 DVB-T favourite
26 Exit Screen Display
27 DVB-T information button
28 RED button
29 Green button
30 Blue button
31 Yellow button
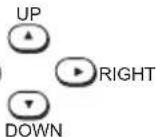
Note:
The instructions on this manual is just take remote control for TV/DVD Combi for example.
Remote Control Key Functions
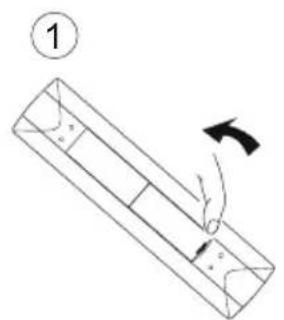
Installing Batteries
- Open the cover of the battery compartment at the back of the remote control.
- Insert two AA alkaline batteries in the compartment. (plus and minus poles to respective mark)
- Replace the cover of the battery compartment.
text_image
①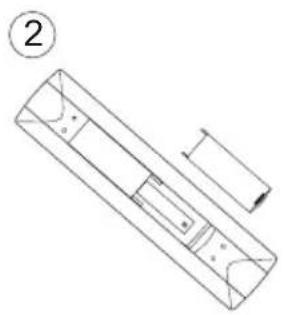
natural_image
Technical line drawing of a rectangular mechanical component with internal components and a separate part, labeled with number 2 (no text or symbols on the diagram itself)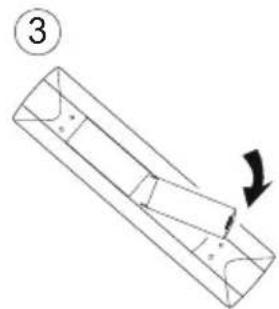
natural_image
Pure mechanical diagram showing a lever mechanism with an arrow indicating motion (no text or symbols)Precautions
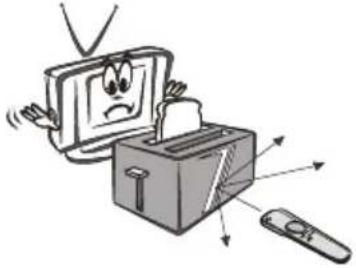
Make sure that there is no obstacle between the remote controller and television set.
natural_image
Cartoon illustration of a computer monitor with a sad face emerging from a box, emitting arrows to a remote (no text or symbols)Keep the remote controller away from heat source or humid area to ensure effective performance of the remote controller.

natural_image
Cartoon illustration of a distressed computer with a sad face and a remote, no text or symbols presentAs strong light may interfere the signals, change your position to operate the remote controller if the television cannot be turned on or off as you expect.

natural_image
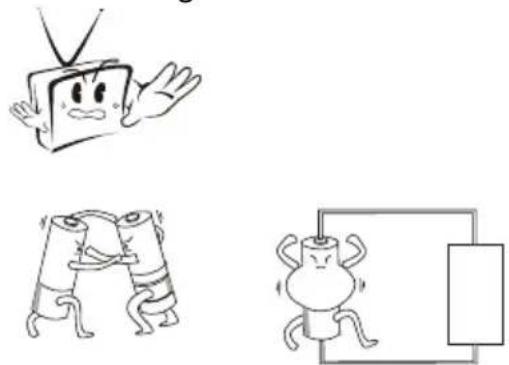
Cartoon illustration of a computer monitor with a sad face, accompanied by a lightbulb and a phone (no text or symbols)Make sure that two AA 1.5V alkaline batteries are loaded. The batteries must be of the same type. The batteries must be located properly. The batteries are not rechargeable.
natural_image
Three cartoon illustrations: a TV with angry face, a stylized figure holding a pen, and a simple electrical circuit diagram (no text or symbols)Connection Instructions
Grounding
Ensure that you connect the grounding / earth wire to prevent possible electric shock. If grounding methods are not possible, have a qualified electrician install a separate circuit breaker. Do not try to ground the unit by connecting it to telephone wires, lightening rods, or gas pipes.
External Equipment Connections
Antenna Connection
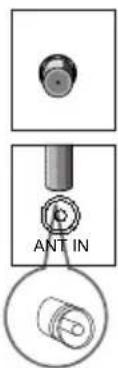
- Antenna or Cable Service with a Cable Box Connections
- For optimum picture quality, adjust antenna direction if needed.
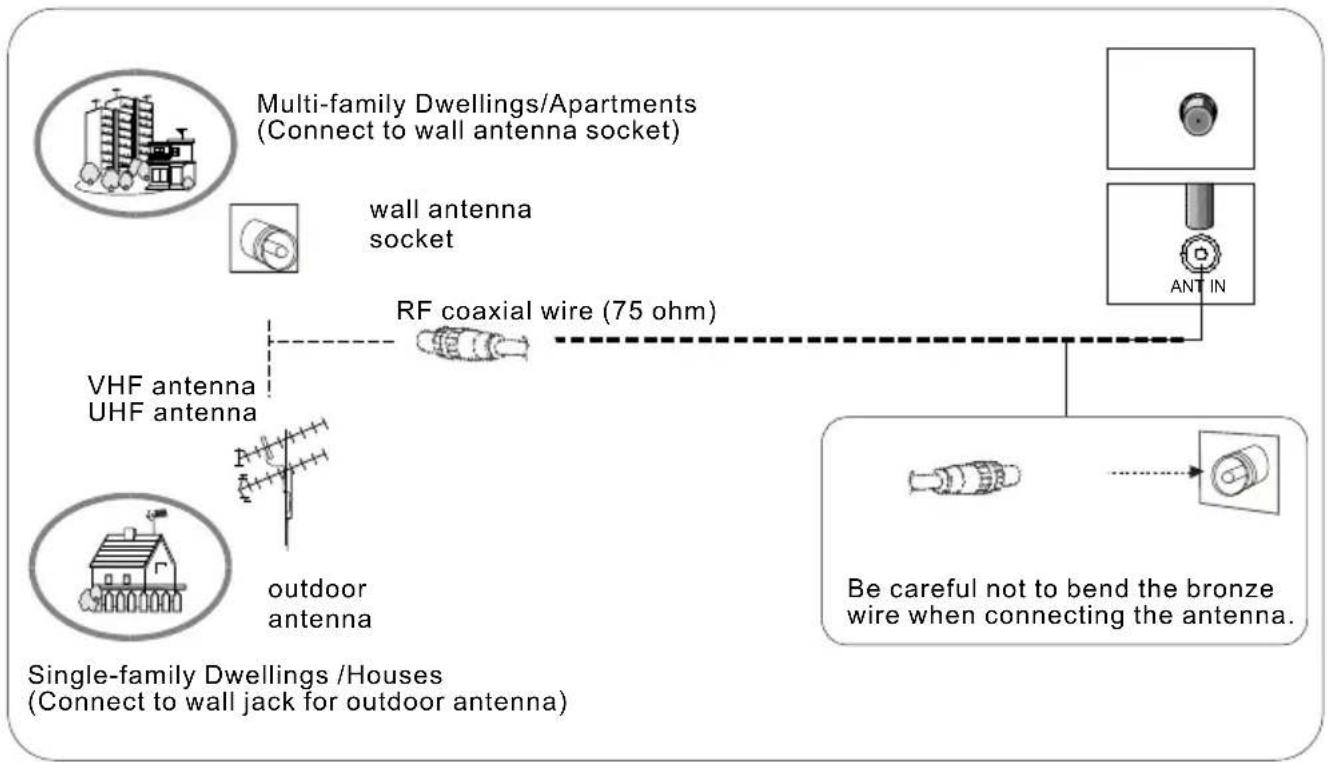
flowchart
graph TD
    A["Multi-family Dwellings/Apartments\n(Connect to wall antenna socket)"] --> B["wall antenna socket"]
    B --> C["RF coaxial wire (75 ohm)"]
    C --> D["VHF antenna UHF antenna"]
    C --> E["outdoor antenna"]
    F["Single-family Dwellings/Houses\n(Connect to wall jack for outdoor antenna)"] --> G["Outdoor antenna"]
    G --> H["Antenna with label 'Be careful not to bend the bronze wire when connecting the antenna'"]
    H --> I["Antenna with label 'ANT IN'"]
text_image
ANT IN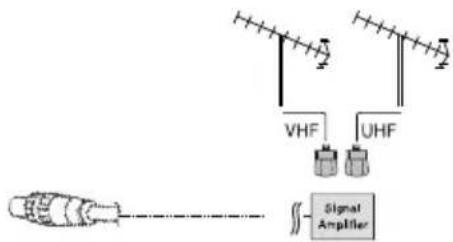
flowchart
graph TD
    A["Antenna"] --> B["VHF"]
    A --> C["UHF"]
    B --> D["Signal Amplifier"]
    C --> D
    D --> E["Output"]
● To improve picture quality in a poor signal area, purchase and install a signal amplifier.
- If the antenna needs to be split for two TV's, install a 2-Way Signal Splitter in the connections.
- If the antenna is not installed properly, contact your dealer for assistance.
Connection Instructions
VGA Input
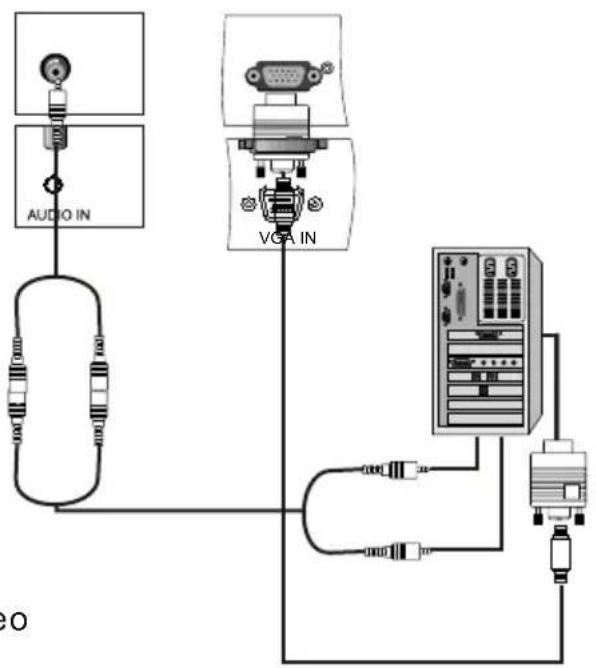
You can use your LCD-TV as a monitor for your personal computer using a VGA cable (not supplied).
Connection and use steps:
- Read the user guide supplied with your computer and ensure that it has a VGA connector;
- Make sure that the power of the LCD -TV and the PC are off;
-
Connect a D type 15-pin VGA interface cable (not supplied) to the VGA video interface connector on the PC. Then connect the other end to the PC video interface connector on the back of the LCD-TV. Tighten the screws on the VGA connectors once they are firmly connected;
-
Turn on the power of the LCD-TV first, and then turn on the power of the PC;
-
Press the SOURCE button to set the video input mode of the LCD-TV to PC-RGB;
-
Check the image on your TV. There may be noise associated with the resolution, vertical pattern, contrast or brightness in PC mode. If noise is present, change the PC mode to another resolution, change the refresh rate to another rate or adjust the brightness and contrast on the menu until the picture is clear. If the refresh rate of the PC graphic card cannot be changed, change the PC graphic card or consult the manufacturer of the PC graphic card.
Resolution
| Mode Resolution | Frame frequency (Hz) | ||
| VGA | 640*480 31.5KHz | 60Hz | |
| SVGA | 800*600 37.9KHz | 60Hz | |
| XGA | 1024*768 48.4KHz | 60Hz | |
_line frequenc
Note: All above listed are subject to VESA Criteria.
YPbPr Input
How to connect
Connect the DVD video outputs (Y, PB, PR) to the COMPONENT(Y, Pb, Pr) IN socks on the TV and connect the DVD audio outputs to the AUDIO IN jacks on the TV, as shown in the figure.
NOTE: If your DVD player does not have component video output, use S-Video.
How to use
- Turn on the DVD player, insert a DVD.
- Use the SOURCE button on the remote control to select
Customer helpline:0845 604 0105
text_image
AUDIO IN VGA IN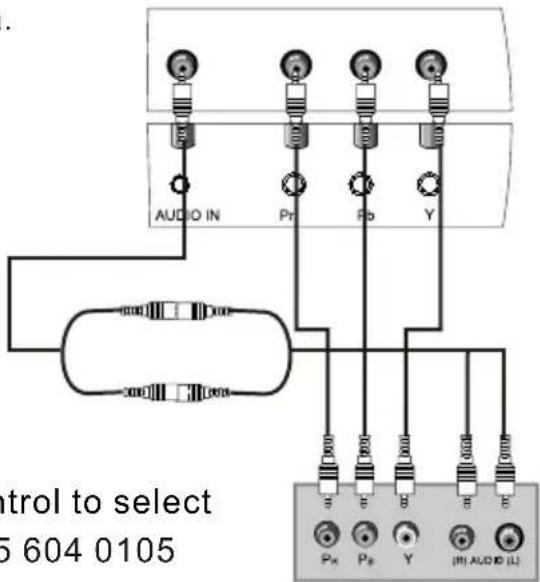
text_image
AudiO IN Pr Pb Y control to select 5 604 0105 Px Pb Y (R) AUDIO (L)Connection Instructions
COMPONENT (If connected to S-VIDEO, select the S-VIDEO external input source.)
- Refer to the DVD player's manual for operating instructions.
Component Input ports
To get better picture quality, connect a DVD player to the component input ports as shown below.
| Component ports on the TV | Y | P_B | P_R |
| Video output portson DVD player | Y | Pb | Pr |
| Y | B-Y | R-Y | |
| Y | Cb | Cr | |
| Y | PB | PR |
S-VIDEO Input
- To avoid picture noise (interference), leave an adequate distance between the VCR and TV
Connection and use steps:
- Read the user guide supplied with your AV devices and ensure that it has S-Video connectors;
- Make sure that the power of the LCD-TV and the AV device are switched off;
Connection Option 1
Set VCR output switch to 3 or 4 and then tune TV to the same channel number.
Connection Option 2
- Connect the audio and S-VIDEO cables from the VCR's output jacks to the TV input jacks, as shown in the figure.
- Insert a video tape into the VCR and press PLAY on the VCR. (Refer to the VCR owner's manual.)
- Turn on the power of the LCD-TV first; and then turn on the power of the AV device;
- Press the SOURCE button to set the vid input mode of the LCD-TV to SVIDEO mode.
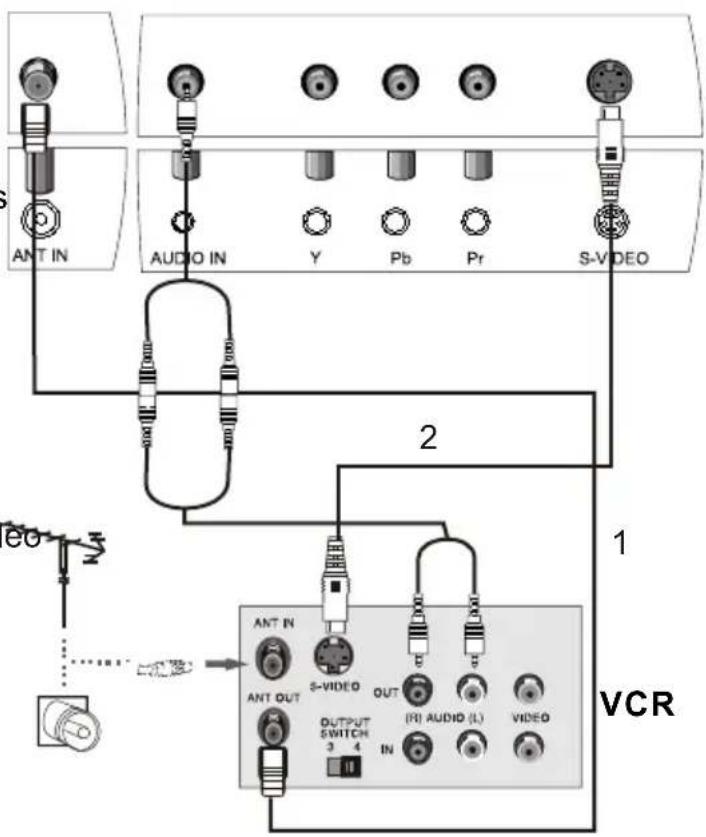
text_image
ANT IN AUDIO IN Y Pb Pr S-VIDEO 2 1 e0 VCR ANT IN ANT OUT S-VIDEO OUT (R) AUDIO (L) VIDEO OUTPUT SWITCH 3 4 INConnection Instructions
SCART Input
- Connect the scart lead from the external device(DVD players, setup boxes or game consoles, to the TV SCART socket.
- Press SOURCE to select SCART mode.
- Press Play button on external equipment and it should appear on the screen.
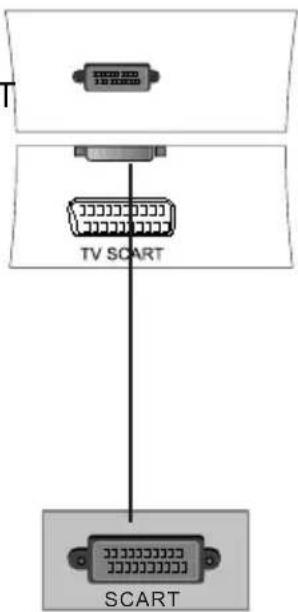
text_image
TV SCART SCARTExternal equipment
HDMI Input
HDMI Devices
Connect the cable from the HDMI devices to the TV HDMI, as shown in the figure.
How to use
- Select the iHDMI source by using the SOURCE button on the remote control.
- Operate the corresponding external equipment. Refer to external equipment operating guide.
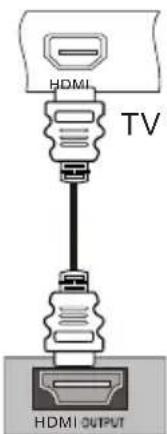
text_image
HDMI TV HDMI OUTPUTHDMI Devices
Note: The audio cable included with the TV should be used when connected with PC/COMPONENT/S-VIDEO.
Basic Operating Instructions
Turn on the LCD-TV
text_image
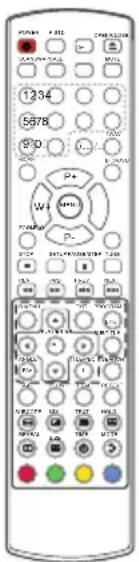
1234 5678 P+ W+ P- V V V V V V V V V V V V V V V V V V V V V V V V V V V V V V V V V V V V V V V V V V V V V V V V V V VWhen the POWER(STANDBY) button on the remote control is pressed and the LCD-TV is turned on, the indicator light on the front of the LCD-TV changes from red to green. When the LCD-TV is turned off using the POWER(STANDBY) button, the LCD-TV will go into standby mode and the indicator light turns red.
You can also turn on the TV from standby mode by pressing the digits(1-9) or P+/-.
The display will appear on the screen when the TV is turned on the first time:
AUTO SEARCH
UNITED KINGDOM
NO YES
Press V+/- to adjust the region and P+/- to select the YES and MENU to confirm. All channels will be stored after the process.
Audio Control
- Press the V+ button to increase the volume.
- Press the V-button to decrease the volume.
Mute
- Press the MUTE button to mute the sound temporarily. A mute icon appears on the screen.
- Press the MUTE button again or V+ to restore the sound.
The mute icon disappears.
Basic Operating Instructions
Select the TV Channel You Want
You can use the number keys on the remote control to directly select TV channels.
The LCD-TV can store up to 100 channels, and you can press the keys on the remote control or on the panel to make a selection.
- if you want to choose any channel from 0 to 9, please press the “-/-” button until “is indicated on the screen and then press the relevant key on the remote control. for example: if you want to choose channel 8, just press the Key number 8.)
- If you want to choose a channel bigger than 9, please press the “-/-” button until “-” is indicated on the screen. Enter the two digits of the channel number you want to watch.. for example: select channel 16)
Note: if you want to choose one digit channel in this condition, you should press 0 first and then one digit number key.
Picture Mode
Press P.STD button on the remote control for menu display. For desired mode as follows:
PERSONAL STANDARD MILD FRESH
Program Swap
1 Suppose the channel number you used channel now is 8 and the channel number you are using is 18 (as shown in the figure).
2 If you want to return to the last watched program channel 8, you can simply press the SWAP(Q.VIEW) button.
3 If you want to return to channel 18, press the button again. Through this function, you can easily change between the channel you are using and the channel you used last time.
Menu Operations
- Press MENU button to display the main menu, and V+/V-to select the main menu.
- Press P+/P- to scroll through the options
- Press V+/V- buttons to make changes to the parameters
- Press the EXIT button to exit the menu
Picture Menu Options
Picture quality can be adjusted for any input separately.
The picture quality on the screen can be adjusted as follows:
-
Press MENU button and V+/V- until the following menu appears on the screen.
-
Press P+/P- button to enter the picture menu and to group and downto select the desired option.
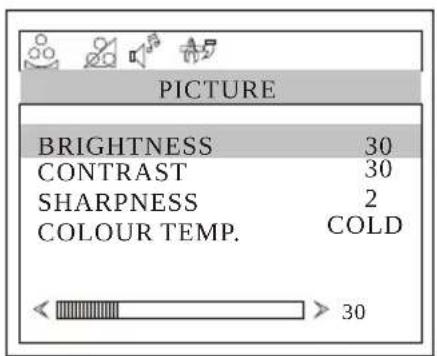
PC MENU
text_image
PICTURE BRIGHTNESS 30 CONTRAST 30 SHARPNESS 2 COLOUR TEMP. COLD 30HDMI/COMPONENT MENU
text_image
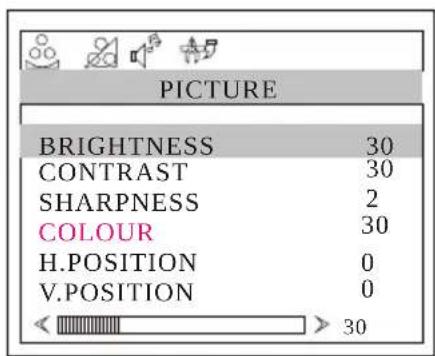
PICTURE BRIGHTNESS 30 CONTRAST 30 SHARPNESS 2 COLOUR 30 H.POSITION 0 V.POSITION 0 30TV/S-VIDEO SCART MENU/DVD/
text_image
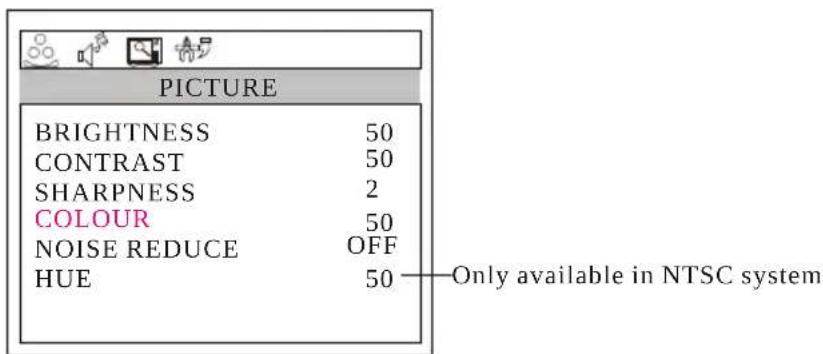
PICTURE BRIGHTNESS 50 CONTRAST 50 SHARPNESS 2 COLOUR 50 NOISE REDUCE OFF HUE 50 Only available in NTSC systemMenu Operations
Picture Menu Options continued
- Press V+/V-button to increase and decrease the level to match your preference.
- Repeat step 2 and step 3 until desired picture quality has been achieved.
Functions:
BRIGHTNESS : Adjust the brightness of the picture. By increasing the level, it will add more light to dark parts of the picture and by decreasing the level, it will add more dark to light parts of the picture.
CONTRAST : The image becomes higher as the number increase.
SHARPNESS : By increasing the level, it will show cleaner and clearer images and by decreasing the level, it will make picture smoother.
COLOUR : Press V+/V- to adjust the colour
NOISE REDUCE: Adjust the quality of the picture by selecting OFF, LOW, MID, HIGH.
HUE : Adjust the tone of the picture . Appear and be adjusted only under NTSC mode
COLOUR TEMP. : Press to select the colour temperature from WARM/NORMAL/COLD
H. POSITION : Picture horizontal adjust
V. POSITION : Picture vertical position adjust .
Audio Menu Options
Sound can be adjusted for as follows:
- Press MENU and V+/V- button until the following menu appears on the screen
| AUDIO | |
| VOLUME | 50 |
| BALANCE | 50 |
| BASS | 50 |
| TREBLE | 50 |
| AUDIO MODE | VOICE |
| AVL | OFF |
Menu Operations
Audio Menu Options continued
- Press P+/P- button to enter the audio menu and to go up and down to select the desired option.
- Press V+/V-button to increase and decrease the level to match your preference.
- Repeat step 2 and step 3 until desired sound quality has been achieved.
Functions :
VOLUME : Adjust the volume of your TV
BALANCE : Adjust the balance of the audio output from left to right . When indication value of balance increases toward 100 , sound of the left speaker becomes weaker . When indication value of balance decreases toward 0 , sound of the right speaker become weaker .
BASS : Adjust the bass of the sound . Can only be adjust under PERSONAL mode .
TREBLE : Adjust the treble of the sound . Can only be adjust under PERSONAL mode .
AUDIO MODE: Press V+/V- to select among PERSONAL, VOICE, MUSIC and THEATRE.
AVL: Automatic Volume Limit Control reduces the effect of the large volume by the same volume of all the channels.
Menu Operations
Function Menu Options
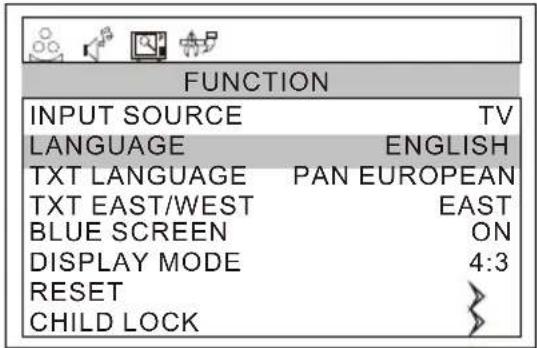
Menu Language Selection:
The menus can be shown on the screen in the selected language. First select your language.
- Press MENU and V+/V-button until the following menu appears on the screen
- Press P+/P- button to select LANGUAGE.
- Press V+/V-button to select your desired language.
From this point on, the on-screen menus will be shown in the language of your choice.
text_image
FUNCTION INPUT SOURCE TV LANGUAGE ENGLISH TXT LANGUAGE PAN EUROPEAN TXT EAST/WEST EAST BLUE SCREEN ON DISPLAY MODE 4:3 RESET CHILD LOCK- Press MENU button and V+/V- until the following menu appears on the screen.
text_image
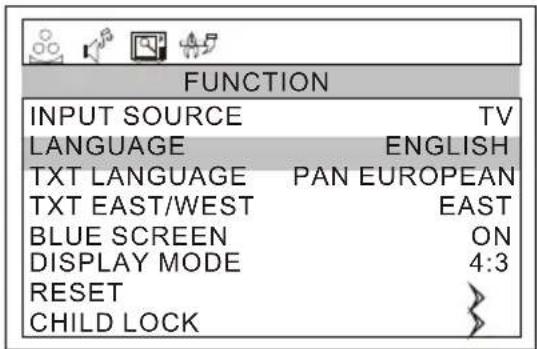
FUNCTION INPUT SOURCE TV LANGUAGE ENGLISH TXT LANGUAGE PAN EUROPEAN TXT EAST/WEST EAST BLUE SCREEN ON DISPLAY MODE 4:3 RESET CHILD LOCK- Press P+/P- button to enter the sound menu and to go up and down to select the desired option.
- Press V+/V-button to increase and decrease the level to match your preference.
- Repeat step 2 and step 3 until desired picture quality has been achieved.
Functions:
- INPUT SOURCE : PC , COMPONENT , DVD ,HDMI , DTV, TV, SCART, S-VIDEO
- TXT LANGUAGE: To switch the teletext languages.
- TXT EAST/WEST: To select EAST or WEST ..
Menu Operations
Function Menu Options Continued
4.DISPLAY MODE: To select the display mode between 4:3, 16:9 and FULL SCREEN
5. BLUE SCREEN: To set On, the screen will be in blue screen after 3 seconds if there is no signal.
6. RESET: Press V+ to reset the settings to the factory default.
7. CHILD LOCK: Press V+ to enter it and the following appears on the screen:
PASSWORD:
......
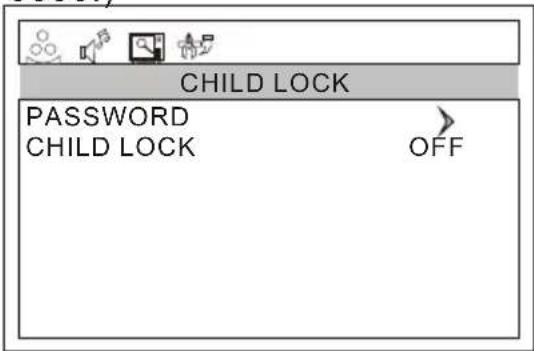
If password is correctly entered, the CHILD LOCK menu will be entered. If the password is not correctly entered, you will be required to reenter the password and the cursor will stay at the first place. CHILD LOCK menu is as follows:
(The initial password is 0000.)
text_image
CHILD LOCK PASSWORD CHILD LOCK OFFPASSWORD: The password can be changed. Press P+/- to select PASSWORD and V+ to enter. The screen will display NEW PW: ----, then enter the new password and the screen display CONFIRM PW: ----, if the same password is entered correctly twice, the old password will be changed.
CHILD LOCK: Press P+/- button to select it. Press V+/- button to set on or off mode. If lock on mode is set, child lock is inactivated automatically. In such case, buttons on the television is useless and only buttons on remote control can be used, if child lock button(button on the television) is pressed, the screen will display CHILD LOCK. The child lock mode can be resumed by entering lock set menu, set child lock on.
Menu Operations
Adjust Menu Options
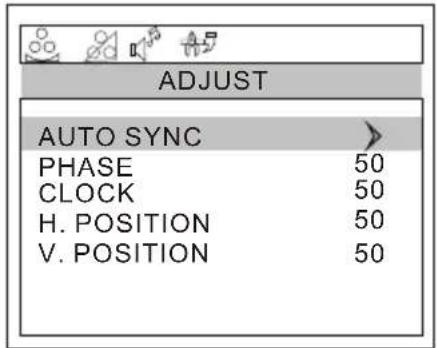
- Press MENU and V+/V-button until the following menu appears on the screen
text_image
ADJUST AUTO SYNC > PHASE 50 CLOCK 50 H. POSITION 50 V. POSITION 50Note: This menu only appears in PC mode.
- Press P+/P- button to enter the adjust menu and to go up and down to select the desired option
- Press V+/V- button to increase and decrease the level to adjust the selected option to your preference.
- Repeat step 2 and step 3 until desired quality has been achieved.
Functions:
AUTO SYNC : Is opted for adjustment of picture location frequency and phase parameters.
PHASE : Removes any horizontal distortion and clears or sharpness the displayed characters.
CLOCK : Adjust the TFT-LCD to match the PC input source
H. POSITION : Picture horizontal adjust
V. POSITION : Picture vertical position adjust .
Tuning Menu Options
- Press MENU and V+/V-button until the following menu appears on the
screen
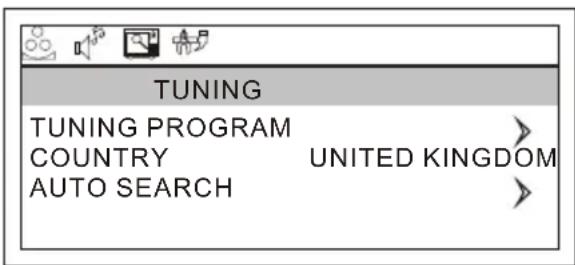
text_image
TUNING TUNING PROGRAM COUNTRY UNITED KINGDOM AUTO SEARCH >Note: This menu only appears in TV mode.
- Press P+/P- button to enter the tuning menu and to goup and down to select the desired option.
- Press V+/V- button to increase and decrease the level to adjust the selected option to your preference.
-
Repeat step 2 and step 3 until desired quality has been achieved .. Functions:
-
TUNING PROGRAM: Press V+ to enter it and the TUNING PROGRAM menu
appears:
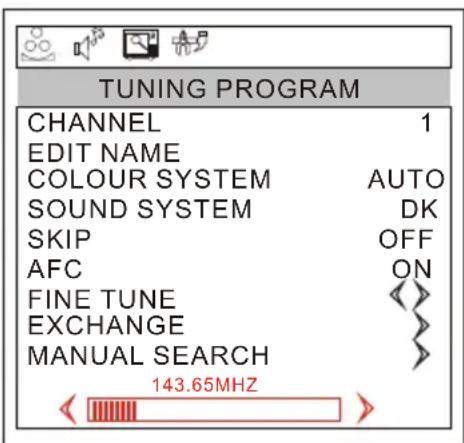
text_image
TUNING PROGRAM CHANNEL 1 EDIT NAME COLOUR SYSTEM AUTO SOUND SYSTEM DK SKIP OFF AFC ON FINE TUNE EXCHANGE MANUAL SEARCH 143.65MHZCHANNEL : Press V+/V- to change the TV channel.
EDIT NAME: Press V+ to enter it, then press V+/- to select the position you want to edit and press P+/- to input the emblem such as character and so on.(There are 8 position for you to edit totally)
COLOUR SYSTEM : Select the TV colour system from AUTO, PAL, SECAM.
SOUND SYSTEM : Select the TV standard system from DK,I,L/L',BG.
(L' may be not available in some countries)
Menu Operations
Tuning Menu Options Continued
SKIP : If you want to skip a channel , press V+/V- to select ON , and this channel will be skip next time when you press P+/P-. But you can press digits button to select the channel . If you want to restore the channel , select OFF.
AFC : Auto frequency control . Select ON to improve the image quality .
FINE TUNE :Press P+/P- to select FINE TUNE item in menu. Then, press V+/V-button to adjust and improve the image quality.
EXCHANGE : Press V+ to display the menu as follows:
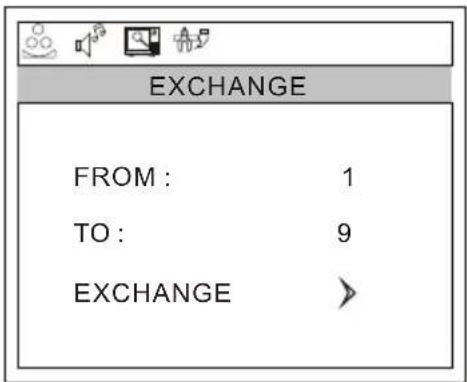
text_image
EXCHANGE FROM : 1 TO : 9 EXCHANGE >Press P+/- to select the item and then V+/- to adjust the channel and V+ to confirm. (For example: press P+/- to select FROM item, and then press V+/- to adjust the channel number to 1; then Press P+/- to select TO item, and V+/- to adjust the channel number to 9; press P+/- to select EXCHANGE item, and then V+ to confirm. The two channels will be exchanged)
MANUAL SEARCH : Press V+ to start to search the channel. The following menu will display on the screen:
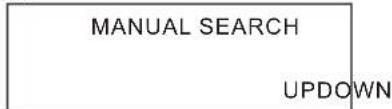
text_image
MANUAL SEARCH UPDOWNPress V+/- to select UP or DOWN, and then press MENU to confirm. (If you select DOWN, the search will search the lower frequency channel and UP will search the higher frequency channel)
- COUNTRY: Press V+/- to select the country.
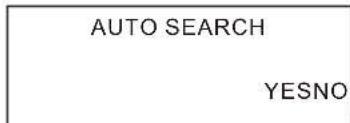
- AUTO SEARCH: Auto search and save the channel. Press the V+ button to start to search the channel and the following menu will appear on the screen:
text_image
AUTO SEARCH YESNOPress V+/- to select YES or NO, and menu to confirm.
You could press MENU to stop the search.
NOTE: If you want to search the channels in L or L' system, you need to set the sound system to L in OSD
DVB-T Main Menu Operations
Press TEXT button to display the additional information.
Press the DTV/DVD(DTV/TV) button on the remote control to enter the DVB status.
- Press D.MENU button to display the main menu
- Press▲/▼ to scroll through the options
- Press OK button to confirm enter the submenu
- Press the D.MENU or EXIT button to exit the menu
Channel List
- Press D.MENU button, the main menu will appear.

text_image
DVB-T Menu Channel List Favourites Now/Next EPG Timers Settings- Press ▲/▼ button to select Channel List and OK button to confirm enter the submenu.
text_image
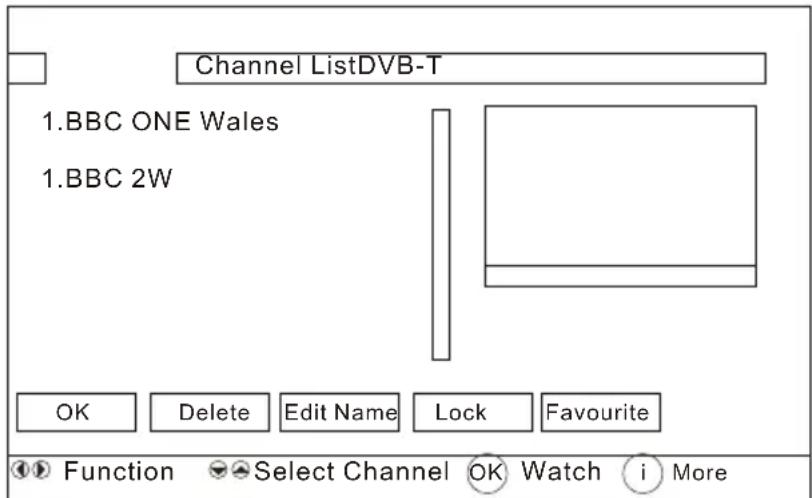
Channel ListDVB-T 1.BBC ONE Wales 1.BBC 2W OK Delete Edit Name Lock Favourite Function Select Channel OK Watch i MoreOK : Press the ▼/▲ button to select the channel, and then press the OK button to confirm.
Delete : Press the ▼/▲ button to select the channel, and then press the ◀/▶button select the Delete. Press the OK button to enter the menu, then ◀/▶button to select Yes or No and OK to confirm.
Edit Name : Press the ▼/▲ button to select the channel, and then press the ◀/▶buttons select the Edit Name. Press the OK button to enter the sub-menu. You input the name with remote control and then press OK button to memory the name.
Lock: Press the ▼/▲ button to select the channel, and then press the ◀/▶ button select the Lock. Press the OK button to enter the sub-menu. You can input the password (0000), then press the OK button to set lock or unlock.
Favourites: Press the ◀/▶ button to select the Favourites, and then press the OK button to enter the Favourite List menu. You can set the Favourite channel list. (You can call the Favourite List menu by pressing the FAV button on the remote control.)
DVB-T Main Menu Operations
Favourite List
- Press D.MENU button, the main menu will appear.
| DVB-T Menu |
| Channel List |
| Favourites |
| Now/Next EPG |
| Timers |
| Settings |
- Press ▲/▼ button to select Favourites and OK button to confirm enter the sub-menu.
- Then press ◀/▶ to select among List 1, List 2, List 3, List 4 and List 5.
- Press ▼/▲ button to select the channel and OK button to set.
After the operation, you can press FAV button to display the favourite list channel then press OK to display the current channel information, press OK button twice to display the Favourite List.
Now/Next EPG
- Press D.MENU button, the main menu will appear.
| DVB-T Menu |
| Channel List |
| Favourites |
| Now/Next EPG |
| Timers |
| Settings |
- Press ▲/▼ button to select Now/Next EPG and OK button to confirm enter the sub-menu.
▼/▲◀/▶ : select the channel Up/down/left/right.
- Zoom: Press the red or green button on the remote control to select the time period. (Press red button to enlarge the time period and press the green button to shorten the time period, just according to your preference)
- Advance Day: Press the yellow or blue button on the remote control to display the channels on the date you have selected.
① More: Press ◀/▶ to select More and OK button to display more information about operation.
DVB-T Main Menu Operations
Timers
- Press D.MENU button, the main menu will appear.
| DVB-T Menu |
| Channel List |
| Favourites |
| Now/Next EPG |
| Timers |
| Settings |
- Press ▲/▼ button to select Timers and OK button to confirm enter the sub-menu.
- Press ▼/▲ button to select Mode/Name, and then press ◀/▶ button to select the options.
- Press ▼/▲ button to select the other items, and then press the digits button to set the Start time, End time and Date.
- Press ▼/▲ button to select Password and OK to set the password.
Note: Just according the display on the menu to operate.
Settings
Configuration
- Press D.MENU button, the main menu will appear.
| DVB-T Menu |
| Channel List |
| Favourites |
| Now/Next EPG |
| Timers |
| Settings |
- Press ▲/▼ button to select Settings and OK button to confirm enter the sub-menu.
| DVB-T Menu |
| Configuration |
| Language |
| Installation |
- Press ▲/▼ button to select Configuration and OK button to confirm enter the sub-menu. And then press ◀/▶ button to select.(Receiver upgrade can not be selected)
DVB-T Main Menu Operations
Parental Setting
Press ▲/▼ button to select it and OK button to confirm, then input 0000 to enter the sub-menu.
Press ▲/▼ button to select Menu Lock, and ◀ /▶ button to select the desired item.
Press ▲/▼ button to select Set Lock Key and input digits button to set.
Settings (continued)
Language
- Press D.MENU button, the main menu will appear.
| DVB-T Menu |
| Channel List |
| Favourites |
| Now/Next EPG |
| Timers |
| Settings |
- Press ▲/▼ button to select Settings and OK button to confirm enter the sub-menu.
| DVB-T Menu |
| Configuration |
| Language |
| Installation |
- Press ▲/▼ button to select Language and OK button to confirm enter the sub-menu. Press ▲/▼ button to select Preferred or Current. Press OK button to confirm.
Then press ▼/▲ button to select desired items and press OK to enter. At last press▼/▲ button to select the language.
Installation
- Press D.MENU button, the main menu will appear.
| DVB-T Menu |
| Channel List |
| Favourites |
| Now/Next EPG |
| Timers |
| Settings |
- Press ▲/▼ button to select Settings and OK button to confirm enter the sub-menu.
| DVB-T Menu |
| Configuration |
| Language |
| Installation |
DVB-T Main Menu Operations
Settings (continued)
-
Press▲/▼ button to select Installation and OK button to confirm enter the sub-menu. Press ▲/▼ button to select Automatic Search. Press OK button to enter the sub-menu and press◀/▶ button to select Yes or No then press OK to confirm.
-
Press▲/▼ button to select Manual Search and OK button to enter. Then input the Channel Number and OK to start to search, press D.MENU to exit.
-
Press▼/▲ button to select First Time Installation and OK button to enter. Then press◄/► button to select Yes or No and OK to confirm.
TELETEXT
- Teletext is an information system, broadcast by certain channels, which can be read like a newspaper. It also provides subtitles for people with hearing difficulties or those who are unfamiliar with the language in which a particular program is being broadcast (cable networks, satellite channels, etc.).
Note: The teletext buttons could be working even if there is no teletext signal, but there is no teletext display.
Teletext

text_image
P+ V-V+MENU P-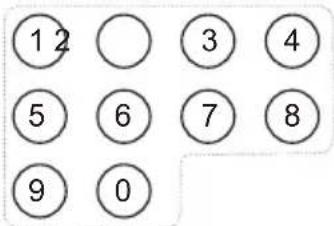
text_image
1 2 5 6 7 8 9 0
Teletext functions
To select "Teletext" press the Teletext button on the handset. To switch off Teletext, press the button again. "Note all menu functions are not available in Teletext mode". Only a few direct button control functions are available in TELETEXT mode, they are:
• Volume adjustment
- Mute function
Page up/down
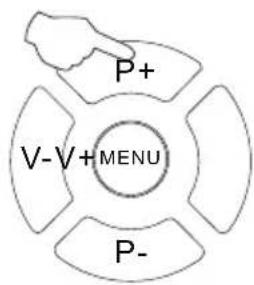
Use the P+/- buttons to browse next or previous page.
Page number entering
To select a Teletext page, enter the page number using the numeric key pad on the remote control, or use the P+ or P- buttons, or the coloured Fast text buttons.
Mix mode
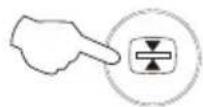
To view the TV picture while in Text mode press the button, this will superimpose the Teletext data on top of the Tv picture. Press this button again to return to Full text.
INDEX
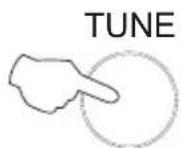
Press the tune button to go to the index page of teletext.
Teletext




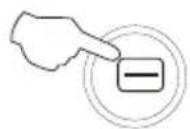
Cancel mode
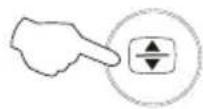
This feature allows the TV picture to be displayed while next page to be searched is entered and found. Only the top teletext line is displayed until the page is found. Press the button to hide the teletext information. Either press the button or the Text button to exit the cancel display mode.
Language change
Pressing the ➤ button will change the Teletext characters between Eastern and Western.
Hold
Pressing the ✝ button will stop the teletext page automatically updating. This feature is very useful where there are several teletext pages or data on the same page number.
Size
Pressing the ➕ button changes between full screen top half bottom half full screen. This feature is very useful as it magnifies the image making the characters easier to read.
Reveal
Pressing the 🔒 button will reveal hidden text. This feature is used to reveal information such as answers to Teletext on-line interactive puzzles.
Subcode / Time
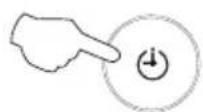
By entering its 4-digit number to enter a secondary page; While in normal TV mode only, pressing the button ⏻ will display the teletext time in the top right hand corner for a few seconds.
Fast text coloured buttons
Fast text automatically displays the four most commonly used pages that the broadcaster thinks that you may want to choose next. Press the same coloured button on the remote control as the coloured link at the bottom of the teletext page to go directly to that page.
Subtitle
Pressing the ☐ button will get the teletext decoder to automatically search for the subtitle page.
Basic Playback
Preparations
- Press the DTV/DVD button on the remote control to enter the DVD status.
Note: The unit do not allow enter DVD mode again after it have just left to avoid any damage of the DVD. Wait for 10 seconds to enter again.
Basic playback
text_image
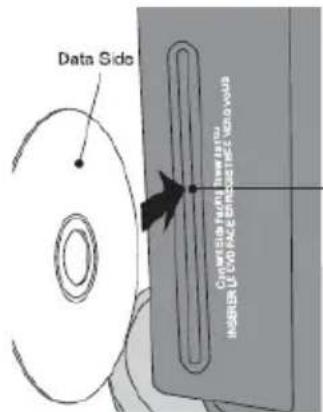
Data Side Copper Side Power, Steel Units INSIDER LUT-DO RAGE REDUCEE- Place the DVD in the disc slot as figure above. The disc will be loaded automatically after one to two seconds, then the DVD player reads the DVD and displays the opening menu. If there is no disc placed on the disc tray in DVD mode, OPEN will display on the screen all the times)
- There is only one disc size. Place the disc in the correct guide on the disc tray. If the disc is out of the guide, it may damage the disc and cause the DVD player to malfunction.
- Do not place a disc which is unplayable in this DVD player.
- Some disc may not playback automatically, you can press PLAY/ENTER button to start playback.
- Some disc may start playback with a menu, use the cursor button on the remote control to select menu options and press PLAY/ENTER to start, or press digits to select a menu options directly.
Pause playback
-
Press PAUSE/STEP to pause playback (still mode). The sound will be muted during still mode.
-
Press PLAY/ENTER to resume normal playback.
D.CALL
When pressing the D.CALL button repeatedly different OSD indicator will be displayed for different types of disc DVD, CD etc
Stop playback
-
Press STOP ■ button to go to stop mode, the TV screen will show the start-up logo. For some disc the player can recall the location where stopped, such as DVDs and audio CDs.
-
Press ENTER/PLAY to resume playback from the location where playback is stopped.
-
Press STOP twice to stop completely.
Previous and Next
During playback, press PREVI◄◄ key can go back to the beginning of this chapter, then each press of this key will skip a chapter till the start of the disc. (note: Disc function may vary depending on disc format)
Each press of NEXT ▶▶▶ key during playback will skip the current chapter and play the next one.
Fast forward and Fast reverse
-
Press FWD ▶▶ to fast forward through the disc. Each time theFWD▶▶ button is pressed, the fast forward motion speed changes. It would cycle through 2X, 4X, 8X, 16X, 32X and normal.
-
Press PLAY/ENTER to resume normal playback.
-
Press REV ◀◀ to fast reverse through the disc. Each time the REV◀◀ button is pressed, the fast reverse motion speed changes. It would cycle through 2X, 4X, 8X, 16X, 32X and normal.
-
Press PLAY/ENTER to resume normal playback.
Single step playback
-
Press the PAUSE/STEP button to pause the playback.
-
To view the next frame, press the PAUSE/STEP button. Each press of the PAUSE/STEP button advances the film by one frame.
ZOOM
Press this button can zoom enlarge or lessen the picture. Each time pressed the picture times will be change.
In zoom mode press navigation buttons to move the picture displayed on the screen
Advanced Playback
IMPORTANT NOTE:
ALL DESCRIBING FUNCTION IS FOR DVD DISCS. IF YOU PLAY OTHER FORMAT DISC, THE OPERATION AND DISPLAY ON SCREEN MAY DIFFERENT.
SUBTITLE
Press " SUBTITLE ", the screen will display "SUBTITLE 01/XX XXXXX", "01" indicates the ordinal number of this language; "XX" indicates total number of language; "XXXXXX" indicates the language of country. (the number of language depends on disc). This function can select up to 32 languages displayed on screen.
REPEAT
Press REPEAT button multiple times to reach desired play mode: DVD
Chapter repeat, Title repeat, All repeat CD
Single-play current track, Repeat One-repeat current track, Repeat Folder-repeat current folder, Folder-play current folder.
REPEAT A-B
Press A-B to mark the start-point, press again to set an end point to complete setting. The selected section A-B will be repeated immediately. Press the Repeat A-B again to cancel this function.
ANGLE
When enjoying sports, concert or theatre, press this key to watch same actions in different angles. (Valid for discs possessing this function. Using a disc recorded in multi-angle you can view the scene from different angles, for example, front, side, whole view and exterior scene.)
D.MENU
Press this key to display root menu, select item according to your preference. (This function will work with a DVD having a multi-layer menu.).
PROGRAM
When playing discs, press "PROGRAM" to enter program mode. Press the digit buttons to select the program number that you want. When finished, move the cursor to select "START". This will start the program playback. If you want to cancel this function, press "STOP", then press "PLAY/ENTER".
SEARCH
Press "SEARCH" once to display the search menu. Use the up/down navigation buttons to select the item you require. Press PLAY/ENTER to confirm (CD press the search button several times to select the item). And then press the numeric buttons or navigation buttons to input the item you require. Press PLAY/ENTER to confirm.
SLOW PLAY
Press SLOW to play a disc in slow forward. Each time the SLOW button is pressed, the slow motion speed changes.
Press PLAY /ENTER to resume normal playback.
Note: This function is invalid for CD.
AUDIO
Press this key can change the audio mode.
such as: Audio 1/2: AC 3 2 CH English
Audio 2/2: AC 3 5.1 CH English
If you play CD disc, press this button can cycle among
Mono Left, Mono Right, Mix-Mono and Stereo.
Note: When press this button continuously, you must above 3 seconds interval.
TITLE/PBC
With some DVD discs pressing this key will display the title menu. You can then use the digit buttons to select the item you prefer.
JPEG DISC PLAYBACK
Insert a picture CD or JPEG picture CD into the tray and the disc will be loaded
automatically. If the disc type can be identified, the player will start showing the pictures one by one (slide show mode). If a navigation menu will be displayed use the navigation buttons to select a file, then press the PLAY/ENTER button.
Each picture in the CD will be displayed consecutively in a slide-show fashion and will be scaled to fit in the whole TV screen. Some slide show transition modes are provided, use "PROGRAM" key to select. Customer can set transition effects for each picture.
To display an image indefinitely, press the "PAUSE" key. To view the next or previous picture, press "NEXT" or "PREV" key. To resume the slide show, press the "PLAY/ENTER" key.
Press the STOP button to preview the photos in a folder. Press navigation buttons to rotate a picture.
SCREEN SAVER FUNCTION
If this unit is idle for 3 minutes, it will go to sleep mode with screen saver on. In this mode, you can press any key on remote control or on front panel to activate the unit.
You can set SCREEN SAVER function to OFF in GENERAL SETUP PAGE of DVD SYSTEM SETUP.
DVD System Setup
text_image
PLAY/ENTER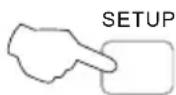
text_image
PLAY/ENTERGeneral Setup Process
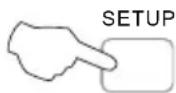
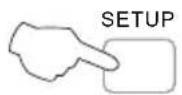
- Press the SETUP button, the General Setup Page, Preference Page will be displayed in turn.
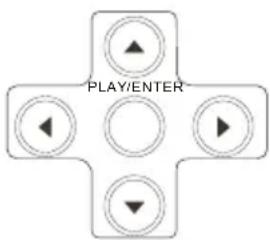
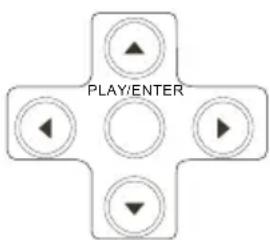
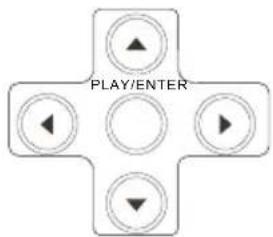
- Press ▲ or ▼ to select, the item, then press▶ to enter the submenu.
- Press ▲ or ▼ to select then press PLAY/ENTER to confirm.
- Press SETUP repeatedly to exit the set-up menus.
..General Setup Page..
Tv Display 4:3 LB 4:3/Ps
Angle Mark On 4:3/Lb
Osd Lang ENG 16:9
Caption On
Screen Saver Off
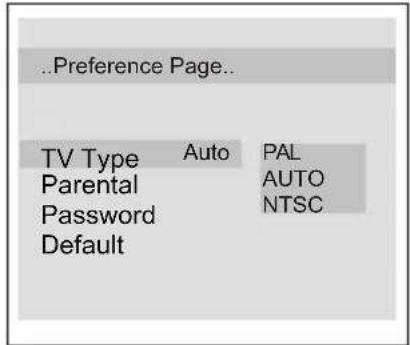
..Preference Page..
| TV Type | Auto | PAL |
| Parental | AUTO | |
| Password | NTSC | |
| Default |
General Setup Page
ASPECT RATIO DESCRIPTION
When using the DVD with the internal TV select 4:3/LB.
The following information applies only when the DVD output is connected to an external TV.
• 4:3/PS (PS = Pan and Scan)
You may select this if you have a normal aspect ratio (4:3) TV, although the NORMAL /LB (letter box) is a more common choice. In
..General Setup Page..
TV Display 4:3 LB 4:3/Ps
Angle Mark On 4:3/Lb
OSD Lang ENG 16:9
Caption On
Screen Saver Off
PS mode, widescreen material will fill the screen, but at the expense of chopping off extreme left and right edges of the original film picture. For this feature to work, the disc must be specially coded. Such discs are uncommon.
• 4:3/LB (LB = Letter Box)
You may select this if you have a normal aspect ratio (4:3) TV. Widescreen material will be shown in pure unaltered form, allowing the entire picture area of the original film to be viewed without any side cropping. Black bars will appear above and below the picture.
• 16:9
You may select this if you have a widescreen (16:9) TV. Back bars may still appear above and below the picture even if using a widescreen TV. This is because some film directors prefer to use ultra widescreen aspect ratios e.g. 2.35:1. This will normally be indicated on the DVD packaging.
DVD System Setup
General Setup Page
Angle Mark: Users can select a particular camera angle when playing a DVD which offers multiple angles.
This item allows you to set Angle Mark ON or OFF.
On Screen Display (OSD) Language: Users can select on-screen display language.
Caption: This function allows you to display or hide the caption.
Screen Saver: If the screen saver is on, then there will be an animated picture of DVD on the screen whenever the DVD player is idle for more than 3 minutes.
..General Setup Page..
Tv Display 4:3 LB
Angle Mark On
Osd Lang ENG
Caption On
Screen Saver Off
On
Off
..General Setup Page..
Tv Display 4:3 LB
Angle Mark On
OsdLang ENG
Caption On
Screen Saver Off
English
French
..General Setup Page..
Tv Display 4:3 LB
Angle Mark On
Osd Lang ENG
Caption On
Screen Saver Off
.General Setup Page..
Tv Display 4:3 LB
Angle Mark On
Osd Lang ENG
Caption On
Screen Saver Off On
Off
DVD System Setup
text_image
PLAY/ENTERPreference Page
The Preference Page is only available when there is no disc in the player. These settings are applied consistently to all discs which are inserted and played.
TV Type: This player supports different TV output, including MULTI(Auto), NTSC, and PAL systems. Usually please set to MULTI.
Parental: The parental control function works in conjunction with the different censorship classes assigned to DVDs. These classes help to control the types of DVDs that the family watches, There are up to 8 censorship classes for DVDs.
text_image
..Preference Page.. TV Type Auto PAL Parental AUTO Password NTSC Default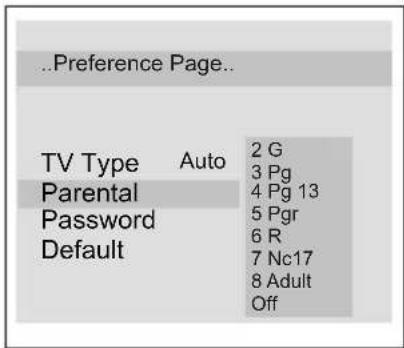
text_image
..Preference Page.. TV Type Auto Parental Password Default 2 G 3 Pg 4 Pg 13 5 Pgr 6 R 7 Nc17 8 Adult OffNote:
1 To change this setting you must enter your password. (Initial password is 0000)
2 When set to OFF, all discs may be viewed.
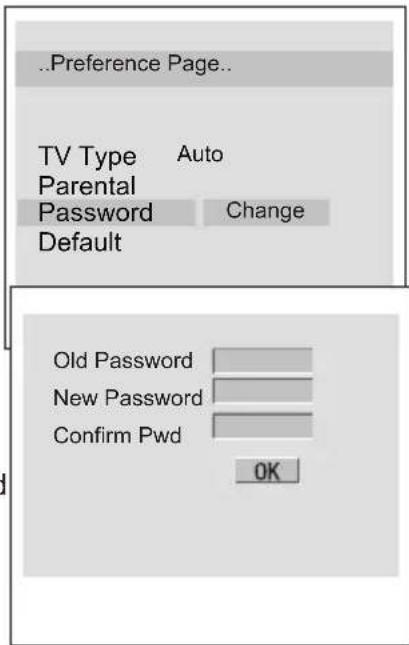
Password change:
You can change your password by entering 4 digits. Your must confirm the 4 digits before the new password can be accepted.
NOTE: If you forget your password or a password is accidentally set enter 1369 as the password. This will enable you to regain control.
text_image
..Preference Page.. TV Type Auto Parental Password Change Default Old Password New Password Confirm Pwd OKDVD System Setup
text_image
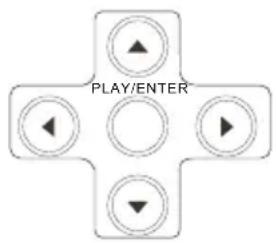
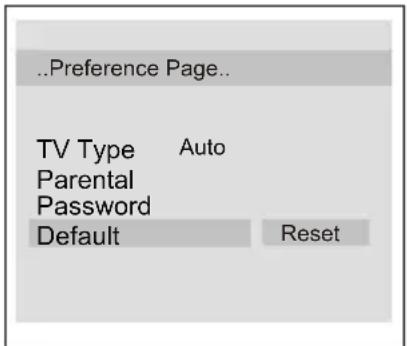
PLAY/ENTERDefault: Resets all settings (except password and parental lock status) for this DVD player back to the manufacturers original settings. Press ENTER to perform the reset.
text_image
..Preference Page.. TV Type Auto Parental Password Default ResetNote:
Some functions may not be available depending on the type of disc.
playable Discs
The following discs can be played:
| DISCS | LABEL | CONTENTS | DIMENSION |
| DVD VIDEO |  | Audio +Video (moving picture) | 12cm |
| AUDIO CD |  | Audio | 12cm |
| JPEG |  | Video(picture) | 12cm |
| KODAK CD |  | Video(picture) | 12cm |
| CD-R |  | Audio or Video (moving picture) | 12cm |
| CD-RW |  | Audio or Video (moving picture) | 12cm |
| CD+G |  | Audio(picture) | 12cm |
Support discs: DVD, CD-R, CD-RW, HDCD, JPEG, CD+G, Kodak CD, W MA.
• You cannot play discs other than those listed above.
- You cannot play non-standardized discs, even if they may be labeled as above.
- The performance of CD-R or CD-RW disc is depend on the way of disc-burning. In a few cases, their performance may not be very well or even not playable.
Dics Protection and DVD Characteristics
ON HANDLING DISCS
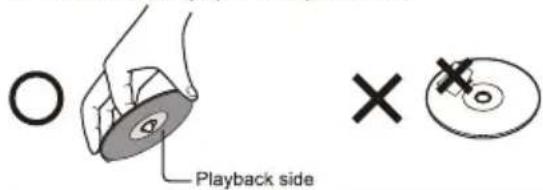
■ Do not touch the playback side of the disc.
■ Do not attach paper or tape to disc.
text_image
Playback side ×ON CLEANING DISCS
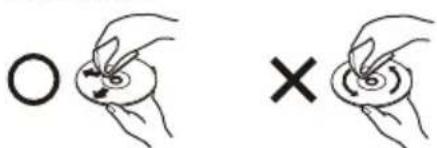
■ Fingerprints and dust on the disc cause picture and sound deterioration. Wipe the disc from the centre outwards with a soft cloth. Always keep the disc clean.
natural_image
Two hand-drawn diagrams showing a circular object with a cross mark, no text or symbols present■ If you can not wipe off the dust with a soft cloth, wipe the disc lightly with a slightly moistened soft cloth and finish with a dry cloth.
■ Do not use any type of solvent such as thinner, benzine, commercially available cleaners or anti-static spray for vinyl Lps. It may damage the disc.
ON STORING DISCS
■ Do not store discs in a place subject to direct sunlight or near heat source.
■ Do not store discs in place subject to moisture and dust such as a bathroom or near a humidifier.
■ Store discs vertically in a case. Stacking or placing object on discs outside of their case may cause warping.
STRUCTURE OF DISC CONTENTS
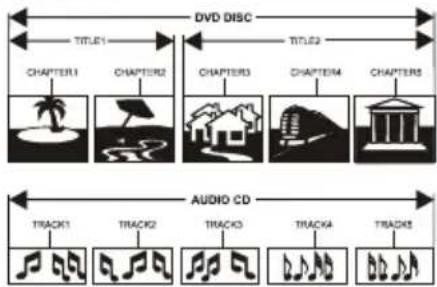
Normally, DVD discs are divided into titles, and the titles are sub-divided into chapters. Audio CD are divided into tracks.
flowchart
graph LR
    subgraph DVD_DISC
        A["CHAPTER1"] --> B["TV"]
        C["CHAPTER2"] --> D["TV"]
        E["CHAPTER3"] --> F["TV"]
        G["CHAPTER4"] --> H["TV"]
        I["CHAPTER5"] --> J["TV"]
    end
    subgraph AUDIO_CD
        K["TRACK1"] --> L["DACT"]
        M["TRACK2"] --> N["DACT"]
        O["TRACK3"] --> P["DACT"]
        Q["TRACK4"] --> R["DACT"]
        S["TRACK5"] --> T["DACT"]
    end
    A <-->|TITLE1| A
    C <-->|TITLE2| C
    E <-->|TITLE3| E
    G <-->|TITLE4| G
    I <-->|TITLE5| I
    J <-->|TITLE6| J
    K <-->|AUDIO CD| K
    L <-->|AUDIO CD| L
    N <-->|AUDIO CD| N
    P <-->|AUDIO CD| P
    Q <-->|AUDIO CD| Q
    R <-->|AUDIO CD| R
Each title, chapter, or track is assigned a number, which is called title number, chapter number or track number respectively.
There may be discs that do not have these number.
Compare DVD disc with other discs:
| DVD LD | |||||
| Encode method | Digital/MPEG II | Analog | |||
| Capacity | Single-side single-layer 4.7G | Double-side single-layer 8.5G | Single-side double-layer 9.4G | Double-side double-layer 17G |  |
| Playing Time | 133 minutes | 242 minutes | 266 minutes | 484 minutes | Single-side 60 minutes double-side 120 minutes |
| Disc diameter | 12cm | 30cm/20cm | |||
| Horizontal resolution | More than 500 line | No more than 430 line | |||
| Picture proportion | Multiple kinds | One kind | |||
| Subtitle | 32 kinds | 16 kinds at most | |||
| Sound quality | 48KHz, 96KHz/6, 20, 24bit | 44.1KHz/16bit | |||
Troubleshooting Guide
- To assist in location possible faults use help guide below.
Troubleshooting
| No picture, no sound | Verify if the television is properly plugged.Verify if the television is properly supplied power.Verify if electricity is available. |
| Blank screen | Verify if correct signals are input.Press TV/AV button to change signal input to TV input.Restart the television of power supply is interrupted. |
| No sound | Press MUTE button and verify if Mute mode is set.Switch to other channel and verify if the same problem happens.Press VOL+ button to see if the problem can be solved. |
| Poor sound | Verify if sound system is correct. Refer to some chapter for adjust. |
| No picture in some channel | Verify if correct channel is selected.Adjust the antenna.Make adjustments by FINE TUNE and MANUAL SEARCH |
| No color for some channel program (black and white) | Verify if the same problem exists in other channels.Check out of picture and sound systems.Refer to relative instructions in the Manual for color adjust. |
| Spots with some or all pictures | Verify if the antenna is correctly connected.Verify if the antenna is in good condition.Make fine adjustment of channel. |
| Television out of control | Disconnect the television from power supply and, 10 seconds later, connect the television to the power supply.If the problem still exists, contact authorized after-sales service for technical assistance. |
Note:
-
If the fault can not be repaired using the above guide consult with your local authorized service center.
-
The TV set must only be repaired by a qualified registered service person. Never attempt to remove the back cover as the TV set has dangerous voltages in side that may cause a fatally or fire.
Specifications
Specifications of the television that you have just purchased may vary from the information in this table due to technical innovations.
| Model | L15T11W-A,L15T11W-C, | L19T11W-A, L19T11W-C,L20T11W-A,L20T11W-C,L19T12W-A, L19T12W-C,L2012W-A,L20T12W-C, | L22T11W-A,L22T11W-C | |
| Picture, sound system | PAL/SECAM-B/G,I,D/K,L,L' | |||
| Audio output | ≥1.5W+1.5W | |||
| External input port | COMPONENT input PC input S-VIDEO input Audio inputHeadphone output SCART Antenna input HDMI input | |||
| Power requirements | ~150-240V 50/60Hz | |||
| Power consumption | ≤50W | ≤60W | ≤70W | |
| Temperature | Working:5°C~35°CStorage:-15°C~45°C | |||
| Humidity | Working:20%~80%Storage:5%~90% | |||
| Accessories | Remote controlBatteriesOwner's manualAudio cable | |||
Note:
All specifications are subject to change without notice.
All quality are approximate value.
Specifications
Connecting to Power
Check that the voltage marked on the product corresponds with your supply voltage. This product is fitted with a 13A plug complying with BS1363. If this plug is unsuitable or needs to be replaced, please note the following :
Plug Replacement
If you need to replace the fitted plug.

WARNING :
Never connect live or neutral wires to the earth terminal of the plug.
Only fit an approved 13 Amp BS1363/A plug and the correct rated fuse. If in doubt, consult a qualified electrician.
IMPORTANT
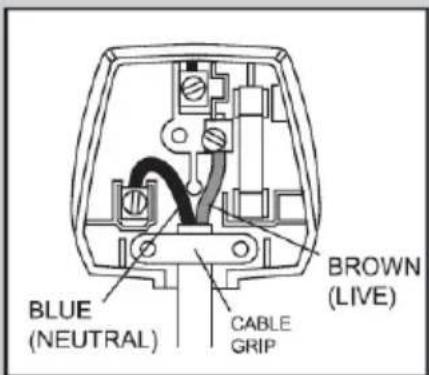
The wires in this mains lead are coloured as follows: Blue-Neutral
Brown-Live
As the colours of the wires in the mains lead of this apparatus may not correspond with the coloured markings identifying the terminals in your plug, proceed as follows:
text_image
BLUE (NEUTRAL) CABLE GRIP BROWN (LIVE)The wire which is coloured blue must be connected to the terminal, which is marked with N or coloured blue. The wire which is coloured brown must be connected to the terminal which is marked L or coloured brown. Always ensure that the plug cord grip is fastened correctly. If a 13A (BS1363) fused plug is used it must be fitted with a 5A fuse conforming to BS1362 and be ASTA approved. If in doubt contact a qualified electrician.



WASTE ELECTRICAL PRODUCTS SHOULD NOT BE DISPOSED OF WITH HOUSEHOLD WASTE. PLEASE RECYCLE WHERE FACILITIES EXIST. CHECK WITH YOUR LOCAL AUTHORITY FOR RECYCLING ADVICE.
Wharfedale