
DAB-35 MK2 - Radio DENVER - Free user manual and instructions
Find the device manual for free DAB-35 MK2 DENVER in PDF.


User questions about DAB-35 MK2 DENVER
0 question about this device. Answer the ones you know or ask your own.
Ask a new question about this device
Download the instructions for your Radio in PDF format for free! Find your manual DAB-35 MK2 - DENVER and take your electronic device back in hand. On this page are published all the documents necessary for the use of your device. DAB-35 MK2 by DENVER.
USER MANUAL DAB-35 MK2 DENVER
Please notice that DAB signal can be weaken MUCH depending on the type of building you are living in. (fx. It can be hard to catch proper signal when being in a concrete building.)
Signal can also be different in different areas of the country. Please check your local transmitter to get the best signal in your area.
natural_image
Front view of a vintage radio device with grille, speaker, and control buttons (no text or symbols)PARTS
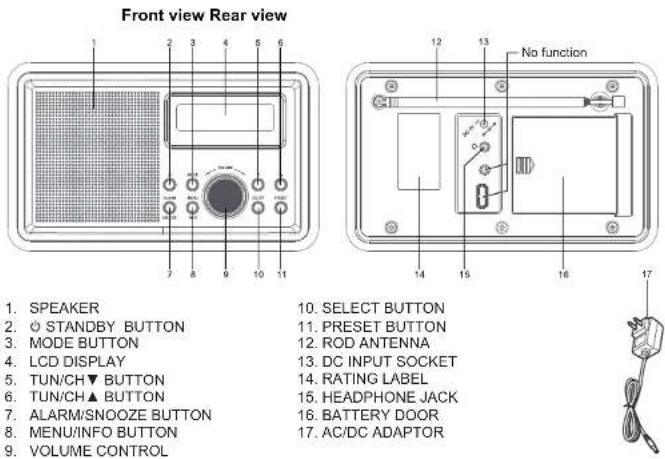
- SPEAKER
- ⏻ STANDBY BUTTON
- MODE BUTTON
- LCD DISPLAY
- TUN/CH▼ BUTTON
- TUN/CH▲ BUTTON
- ALARM/SNOOZE BUTTON
- MENU/INFO BUTTON
-
VOLUME CONTROL
-
SELECT BUTTON
- PRESET BUTTON
- ROD ANTENNA
- DC INPUT SOCKET
- RATING LABEL
- HEADPHONE JACK
- BATTERY DOOR
- AC/DC ADAPTOR
SWITCHING YOUR RADIO ON FOR THE FIRST TIME
AC Operation
- Insert the DC power jack of AC/DC adaptor to the DC input socket located at the rear of the radio.
- Plug the AC/DC Adaptor to the AC mains outlet.
- Press the Ⓧ STANDBY to turn the radio on.
Remarks: If the AC Adaptor voltage is over than 6V, it will possible make the line damage.
DC (battery) operation
- Ensure the AC/DC adaptor is disconnected from the radio and AC mains.
- Installed the batteries (4×1.5V UM3/AA battery) into the battery compartment.
- Press the Ⓧ STANDBY to turn the radio on.
Remarks: To obtain the best performance in DC operation, the use of alkaline batteries is highly recommended.
Menus:
The following controls are used to move about the menu tree to choose and select the required settings:
Press and hold MENU/INFO button to enter into the "MENU". Press the TUN/CH▲ or TUN/CH▼ button to navigate the desire option, then press SELECT button to confirm.
MENU Tree as below:
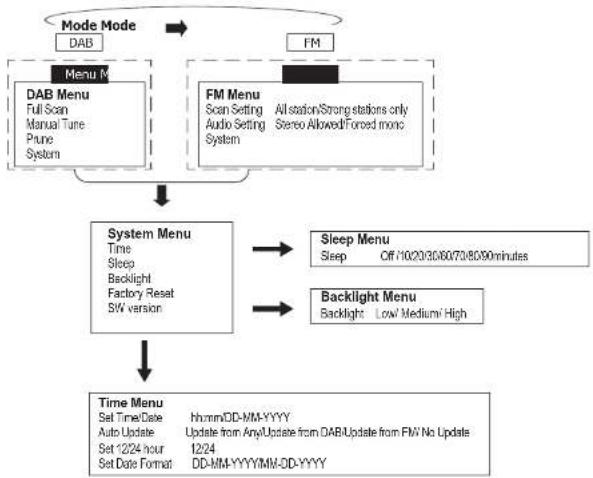
flowchart
graph TD
    A["Mode Mode"] --> B["DAB"]
    A --> C["FM"]
    B --> D["DAB Menu\nFull Scan\nManual Tune\nPrune\nSystem"]
    C --> E["FM Menu\nScan Setting\nAudio Setting\nSystem\nAll station/Strong stations only\nStereo Allowed/Forced mono"]
    D --> F["System Menu\nTime\nSleep\nBacklight\nFactory Reset\nSW version"]
    E --> G["Sleep Menu\nSleep Off 1020/3060/70/8090 minutes"]
    E --> H["Backlight Menu\nBacklight Low/Medium/ High"]
    F --> I["Time Menu\nSet Time/Date\nAuto Update\nSet 12/24 hour\nSet Date Format\nhh:mmDD-MM-YYYY\nUpdate from Any/Update from DAB/Update from FW No Update\nDD-MM-YYYY/MM-DD-YYYY"]
    G --> I
    H --> I
BASIC OPERATION - GETTING STARTED
Press the ◦ STANDY button to turn the unit on, it will automatically enter into the DAB mode and perform auto scan function. During the scan, the display show "Scanning..." together with a slide bar that indicates the progress of the scan and the amount of stations that have been found so far. (F.2) Once the scan has finished, the radio will select the first alphanumericly found station. You can now press ▼/▲ buttons to explore the found stations followed by pressing the SELECT button to select listening to the stations.
Note: If there is no stations found after auto scan, the radio will display "Full Scan", you can now press ▼/▲ buttons to select "Full scan" or "Manual tune" for stations, and press SELECT button to finally confirm.
F.1F.2

DENVER DAB-35MK2
DENVER DAB-35MK2
DAB Auto Scan
The auto scan will search for the entire DAB Band III channels. After the scan has finished, the first alphanumerically found stations will be automatically selected.
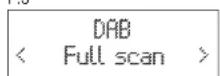
- To activate auto scan, press and hold MENU button, and press ▼/▲ buttons to enter into the Menu to select "Full scan", finally press the SELECT button to confirm. The display will show "Scanning..." and a pressing slide bar.(F.3)
- All the stations that have been found will be stored automatically, press ▼/▲ buttons to explore the stations that have been found. When you find a station that you would like to listen, press the SELECT button to confirm.
DAB Manual tune
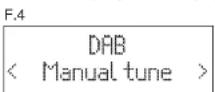
- To select manual tune, press and hold MENU/INFO button, and then press ▼/▲ buttons to select "Manual tune"(F.4). And press the SELECT button to confirm.
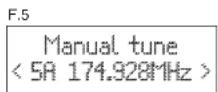
- Press ▼/▲ buttons to move through the DAB channels, the display will show "5A to 13F" and their associated frequencies. (F.5)
- When your desired frequency appears in the display, press the SELECT button to listen, the name of the station group (ensemble/multiplex) will be displayed.
F.3
FM radio
- To select FM, press the MODE button, the display will show FM and the frequency.
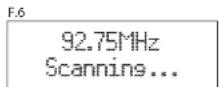
- To activate auto search, press SELECT button or press and hold ▼/▲ buttons until the radio starts to scan the frequency band, the display will show 'Scanning ...'(F6), and it will stop automatically once a station has been found.
- To search manually, press ▼/▲ buttons in the desired direction to increment the frequency by 0.05MHz. If reception is still poor adjust the position of the antenna or try moving the radio to another location.
Scan setting
In FM mode, press and hold MENU/INFO button and then press ▼/▲ buttons to select
"Scan setting". And press the SELECT button to confirm. Press ▼/▲ buttons to select
"All stations/Strong stations only", and then press the SELECT button to confirm the setting.
USING HEADPHONES (not included)
A stereo headphone jack has been provided so that the radio can be used without disturbing others. Plug in the headphones at the point marked 'Ω' and adjust the listening volume to your chosen level. Excessive sound pressure from earphones and headphones can cause hearing loss. The speakers will not operate when earphones are fitted.
RESET
- If moving the radio to another location in the country the pre-tuned and stored DAB stations may no longer be available and it will be necessary to reset the radio back to the factory settings.
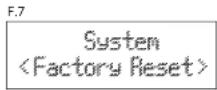
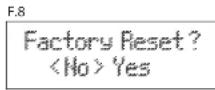
- With the unit switched on, press and hold the MENU/INFO button and press ▼/▲ buttons until the display shows 'System' and press the SELECT button and continue press ▼/▲ buttons until the display shows "Factory Reset
Yes' and press ▼/▲ buttons to " " and press the SELECT button. (F.7), (F.8) - The radio will display "Restarting...." and will then go into standby mode.
Note 1: All stored programmed stations will be lost during reset.
Note 2: Use the battery status without reset function.
TECHNICAL SPECIFICATION
Rated voltage (adaptor) AC 100 - 240V\~ 50/60Hz, 0.2A
Adaptor output DC 6V = 1A
Rated voltage (radio) DC 6V (1.5V x 4 AA)
Power consumption
Audio output 2 W RMS
Radio DAB 174-240MHz
FM 87.5-108MHz
Operating conditions Temperature: 5°C to 35°C
Humidity 5% to 90%
Unit dimension : 190 (L) × 110(W) × 115 (H) mm
Weight : 0.8kg
***SPECIFICATION SUBJECT TO CHANGE WITHOUT FURTHER NOTICE.***
ALL RIGHTS RESERVED, COPYRIGHT DENVER ELECTRONICS A/S
DENVER®
www.denver-electronics.com

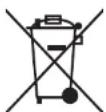

Electric and electronic equipment contains materials, components and substances that can be hazardous to your health and the environment, if the waste material (discarded electric and electronic equipment) is not handled correctly.
Electric and electronic equipment is marked with the crossed out trash can symbol, seen below. This symbol signifies that electric and electronic equipment should not be disposed of with other household waste, but should be disposed of separately.
All cities have established collection points, where electric and electronic equipment can either be submitted free of charge at recycling stations and other collection sites, or be collected from the households. Additional information is available at the technical department of your city.
Importer:
DENVER ELECTRONICS A/S
Omega 5A, Soeften
DK-8382 Hinnerup
Denmark
www.facebook.com/denverelectronics
Hereby, Inter Sales A/S declares that the radio equipment type DAB-35MK2 is in compliance with Directive 2014/53/EU. The full text of the EU declaration of conformity is available at the following internet address: http://www.denver-electronics.com/denver-dab-35mk2/
-
Operating Frequency Range: DAB 174-240MHz FM 87.5-108MHz
-
Max Output Power: 6W