Bullet 350 Twinspark (2014) - Motorcycle Royal Enfield - Free user manual and instructions
Find the device manual for free Bullet 350 Twinspark (2014) Royal Enfield in PDF.


User questions about Bullet 350 Twinspark (2014) Royal Enfield
0 question about this device. Answer the ones you know or ask your own.
Ask a new question about this device
Download the instructions for your Motorcycle in PDF format for free! Find your manual Bullet 350 Twinspark (2014) - Royal Enfield and take your electronic device back in hand. On this page are published all the documents necessary for the use of your device. Bullet 350 Twinspark (2014) by Royal Enfield.
USER MANUAL Bullet 350 Twinspark (2014) Royal Enfield
ROYAL ENFIELD OWNER'S MANUAL

text_image
BULLET · 350 ·ELECTRA TWINSPARK
RELOADED
Get ready for the adventure of a lifetime. Reengineered. Redesigned. Revitalized. The all-new Bullet Electra 350 UCE features a modern Unit Construction engine with 5 gears on the left. Easier to ride, more torque and no maintenance trouble. It's the Bullet Reloaded.
This manual is designed to give you complete control over your motorcycle. It contains important information on efficient operation and maintenance. We've also included tips on riding safely, as well as suggestions to enhance your motorcycling experience.
Your safety is of prime concern to us and we urge you to be a responsible rider. Please select your riding gear carefully in accordance with your terrain, style and weather conditions. And ensure the same for your pillion rider as well. Respect the law of the land and ride safe.
Finally, we welcome you to the Royal Enfield community. You can locate your nearest club or sign up for the next big ride at www.royalenfield.com
The legend rides on.
NOTICE
ROYAL ENFIELD
All information in this manual is based on the latest product information available at the time of publication. Due to continues improvements or other changes, there may be discrepancies between information in this manual and your vehicle. Royal Enfield reserves the right to make production changes at any time without prior notice and without incurring any obligation to make same or similar changes to vehicles previously built or sold.
All images shown are for reference to explain and need not to be exactly the same on the model you own. Technical specification are subject to change without prior notice.
© Copyright 2014 Royal Enfield (A unit of Eicher Motors Ltd.). All Rights Reserved. No part of this manual shall be copied, distributed or otherwise dealt without the express permission in writing of Royal Enfield.
Personal and vehicle information .... 4
Free service record 5
Specifications 6
Safety Definitions 9
Safe and happy riding 10
Vehicle identification numbers 11
Location of key parts 12
Operation of controls 15
Pre-Operational Checks 21
Running in Period 22
Starting 23
Gear Shifting, Riding & Stopping 25
Parking 26
Tools & First Aid kit 27
Periodical maintenance chart 28
Recommended lubricants 31
Do it yourself 32
CONTENTS
Washing procedure 46
Storage precautions 47
Long trip precautions 49
Caring for Mileage 50
Complete Wiring diagram 53
Trouble shooting 54
Warranty terms & conditions 61
Emission Warranty 63
All India Road Signs 67
Log Book 68
Free Service coupons 70
Paid Service & Maintenance Record 79
No te s....87
Annex ur es
Vehicle Installation Form
Pre-Delivery Inspection Report
Bike Installation Confirmation By Customer
Form 22
PERSONAL & VEHICLE
INFORMATION
ROYAL
ENFIELD
| Name | ||||||||||||||||||||||||||||||
| Door No./Street | ||||||||||||||||||||||||||||||
| Locality | ||||||||||||||||||||||||||||||
| City State | Pin | |||||||||||||||||||||||||||||
| Contact Nos. | Res: | Off: Mobile : | Email : | |||||||||||||||||||||||||||
| Engine No. | Battery No. | |||||||||||||||||||||||||||||
| Frame No. | Battery make | |||||||||||||||||||||||||||||
| Reg. No. | Licence No. | |||||||||||||||||||||||||||||
| Date of Sale | Valid till dt. | |||||||||||||||||||||||||||||
| Model | Key No. : | |||||||||||||||||||||||||||||
| Tyre make | Colour | |||||||||||||||||||||||||||||
| Sold by | Dealer Code | |||||||||||||||||||||||||||||
| Vehicle Installation Form (VIF) No. |
ROYAL ENFIELD
FREE SERVICE RECORD
It is our endeavour to provide excellent service to your Bullet Electra 350 UCE at all times. Towards this we provide four free services at specific intervals.
Please avail these services at the specified time, in any of the Royal Enfield Authorised Dealer / Service Point nearest to you and as a token of satisfactory services, kindly return the free service coupon duly filled in and signed, to the service outlet.
Availing the free services in the specified time is a prerequisite for warranty consideration.
The cost of fuel, oil, oil filter element, grease etc. used for all free services are chargeable to the customer.
| 1^st Service 4 | ^nd Service 3 | ^rd Service | ^th Service2 | |||||||||||||||||||||
| Date of Service | ||||||||||||||||||||||||
| Kms Covered | ||||||||||||||||||||||||
| Servicing Dealer's Name Address | Dealer / ASP Rubber Stamp | Dealer / ASP Rubber Stamp | Dealer / ASP Rubber Stamp | Dealer / ASP Rubber Stamp | ||||||||||||||||||||
Note : Please ensure that the free service details are recorded in this sheet immediately after the service is carried out.
SPECIFICATIONS
ROYAL ENFIELD
ENGINE AND ENGINE SYSTEMS
Engine Type .... Single Cylinder .... 4 Stroke, OHV, .... Dual Spark Ignition .... air cooled
Bore 70mm
Stroke 90mm
Swept volume 346cc
Compression ratio ..... 8.5:1
Max. Power BHP @ RPM 19.8@5250
Max. Torque in NM@ RPM 28@4000
Idle RPM 1050+ _200
Starting ...... Kick Start/E-Start
Air filter element ...... Paper element
Lubrication .... Wet sump, Forced .... lubrication
Engine oil capacity ..... 2.75 Litres
Carburetor ...... UCAL, BS29
Engine oil grade .... Royal Enfield .... 15 W 50 API SL .... Engine Oil (JASOMA)
Cooling ...... Natural air flow
TRANSM ISSION
Clutch ...... Wet multiplate
Primary drive .... Duplex chain drive
Primary ratio 2.15:1
Gear box .... Constant Mesh .... 5 Speed
Gear Ratio 1 ^4 3.06:1
2 nd 2.01:1
3 rd 1.52:1
4 1.21:1
5 1:1
ROYAL ENFIELD
Final drive 15 Teeth (Sprocket)
Final Ratio 2.533:1
CH ASSIS
Frame .... Tubular
Suspension : Front ..... Telescopic, hydraulic ..... damping, ..... Stroke 130 mm
Rear .... Sw in g arm with h .... gas shock absorbers .... stroke 80mm
Fr. Fork oil capacity ..... 195 ml per leg
Front fork oil .... 1F (Endurance fork oil)
Front Brake : Disc Brake . H y d ra u lic 280 mm ventilated disc.
Rear .... Foot operated 153 mm ..... single lead, internal ..... expanding
SPECIFICATIONS
Brake oil Capacity ..... 60 ml
Brake oil grade .... DOT 3 or DOT 4
Tyre size : Front ..... 3.25×19 4/6 PR
Rear ..... 3.25×19 4/6 PR
TYRE PRESSURE
Steering lock ....In built
Fuel tank capacity ..... 13.5 Litres ***
Reserve 2 Litres approx.
ELECTRICALS
Generation ...... Alternator
System: E-Start .... 12V-DC (III Phase) Kick Start .... 12V-AC/DC (I Phase)
SPECIFICATIONS
ROYAL ENFIELD
Ignition ...... Digital Dual Spark ...... Ignition, TCI System
Battery : E-Start .... 12V-14 AH MF (III Phase) Kick Start .... 12V-5 AH (I Phase)
Head lamp MFR 12V, 35/35W
Tail lamp 12V, 5W
Brake lamp 12V, 21W
Parking lamp 12V, 2W (2 Nos.)
Speedometer lamp ..... 12V, 3.4W
Hi beam indicator ..... 12V, 2W
Turn Signal Tell Tale .... 12V, 2W
Turn signal 12V, 10W
Horn 12V, 2.5 Amp(Max.)
Starter Motor (for E-Start) 12V, 0.7KW
***Fuel tank is not a measuring instrument. The capacity of tank may vary slightly from specified value.
WEIGHTS
Kerb weight (90% fuel & Oil)
E-Start ..... 187 Kgs
Kick Start .... 183 Kgs
Max pay load 163 Kgs.
DIMENSIONS
Length 2140 mm
Width 810 mm
Height 1120 mm
Wheel base 1370 mm
Ground clearance 140 mm
Saddle height 800mm

WARNING
Using bulbs / other electrical gadgets other than specified rating may lead to over loading / erratic behaviour / premature failure of electrical system.
Modifications on the bike which are not approved by Royal Enfield may not only disqualify for warranty, but also affects performance of the bike.
- Values / Dimensions given above are for your guidance only.
- In view of continuous improvements being done on our products, the specifications are likely to change without prior notice.
ROYAL ENFIELD
SAFETY DEFINITIONS
The information given under the titles: Warning, Caution and Note are for your safety and for the care and safety to your motorcycle and others. Please read these carefully and if disregarded may result in injury to yourself or others and damages to the motorcycle.
WARNING
Indicates a potentially hazardous situation. Disregarding this message may result in injury to rider or other persons.
CAUTION :
This message if disregarded may result in damage to the vehicle.
NOTE :
Indicates important and useful messages for clearer understanding.
All Images shown are for reference to explain and need not to be exactly the same on the model you own. Technical specification are subject to change without prior notice.
NOTE: BS III This vehicle meets Emission Norms - Bharat (Trem) Stage - III
SAFE AND HAPPY RIDING
ROYAL ENFIELD
RIDING DRESS
○ A proper riding apparel
NOTE :
● A light coloured shirt enables greater visibility to other road users specially during nights.
CAUTION :
- Loose clothing may get caught on moving parts of your motor-cycle.
O A pair of riding boots or shoes. - Soft leather gloves.
○ Goggles or spectacles to safe guard eyes.
○ An ISI certified helmet. Affix light reflecting strips of stickers at the front and rear.
SITTING POSTURE
Correct sitting posture is a pre-requisite for stable and safe riding :
○ Sit Straight with your shoulders completely relaxed.
- Keep your elbows close to your body.
Keep your toes in straight ahead direction.
○ Slightly press the petrol tank with the knees.
○ Hold the handle grip close to its inner end.
○ Look extensively, including rear view mirror, without turning the head.
BRAKING
○ Use both, front and rear brakes together for maximum braking efficiency.
WARNING
Applying any one of the brakes suddenly may cause the vehicle to skid.
○ While riding on wet or bad road conditions use brakes cautiously.
ROYAL ENFIELD
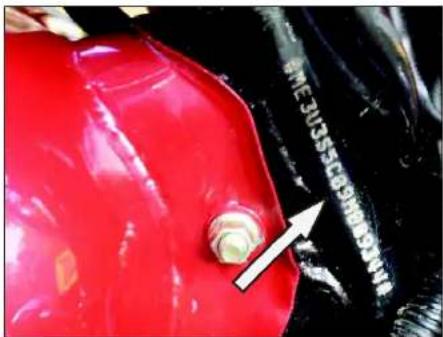
VEHICLE IDENTIFICATION NUMBERS
FRAME NUMBER
Punched on steering head tube RH side.
ENGINE NUMBER
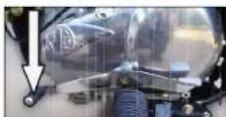
Punched on top of the engine LH side.
natural_image
Close-up of a red automotive component with a white arrow pointing to a bolt, next to a black plastic cover (no visible text or symbols)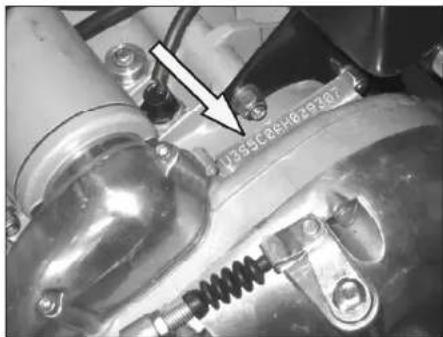
natural_image
Close-up of mechanical components with a spring and screw base, no visible text or symbolsLOCATION OF
KEY PARTS
ROYAL
ENFIELD
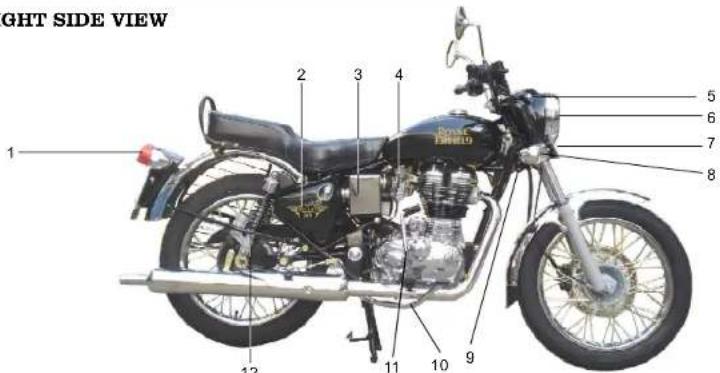
RIGHT SIDE VIEW
text_image
LIGHT SIDE VIEW 1 2 3 4 5 6 7 8 9 10 11 12| 1. Rear Trafficator RH | 6. Head Light | 11. Kick Start Lever |
| 2. Tool box | 7. Front Number Plate | 12. Shock Absorber (Gas filled) |
| 3. Air filter box | 8. Front Trafficator RH | |
| 4. Carburetor | 9. Steering lock | |
| 5. Pilot Lamp RH | 10. Brake Pedal |
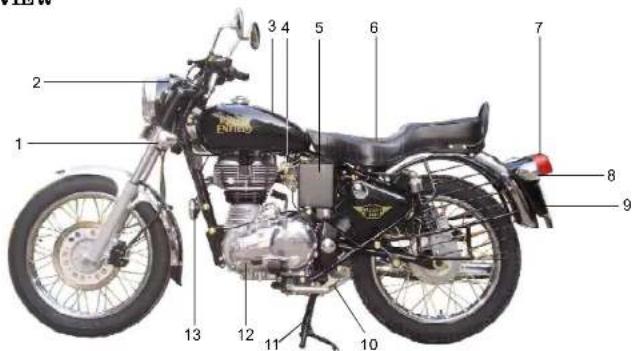
LEFT SIDE VIEW
text_image
1 2 3 4 5 6 7 8 9 10 11 12 13| 1. Front Trafficator LH | 6. Seat | 11. Center Stand |
| 2. Pilot Lamp LH | 7. Tail Lamp | 12. Gear Shift Lever |
| 3. Fuel Tank | 8. Rear Trafficator LH | 13. Horn |
| 4. Fuel Tap | 9. Number Plate Rear | |
| 5. Battery Box Cover | 10. Side Stand |
LOCATION OF
KEY PARTS
ROYAL
ENFIELD
TOP VIEW
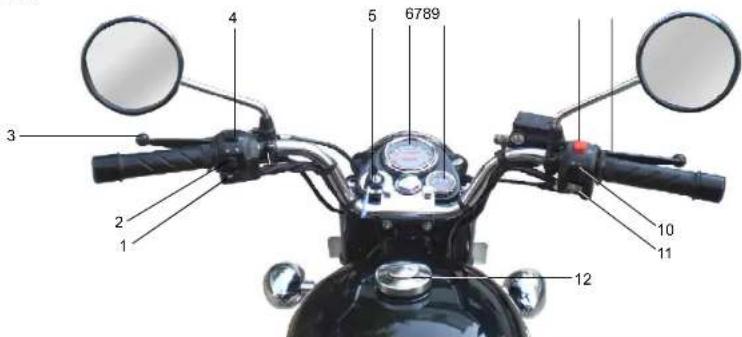
text_image
3 2 1 4 5 6789 10 11 12| 1. Horn Button | 5. Ignition Switch | 9. Brake Lever RH |
| 2. Turn Signal Switch | 6. Speedo Meter | 10. Pilot & Head Lamp Switch |
| 3. Cluth Lever LH | 7. Ammeter | 11. E-Start Switch |
| 4. Head Lamp Dip Switch | 8. Engine Kill Switch | 12. Petrol Tank Cap |
ROYAL ENFIELD
natural_image
Close-up of a mechanical knob or dial with a circular arrow symbol (no readable text or labels)FUEL TANK CAP
● Turn Key Clockwise to open
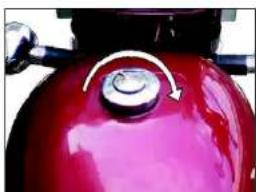
natural_image
Close-up of a red car body with a circular button and arrow indicating rotation (no text or symbols)ON
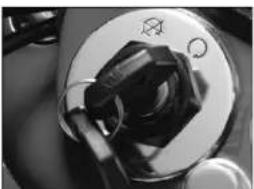
natural_image
Close-up of a mechanical knob or dial with no visible text or symbols● Turn Key Anti Clock wise to close.
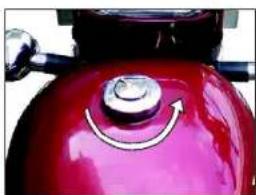
natural_image
Close-up of a red motorcycle's front wheel with a metallic knob and arrow indicating direction (no text or symbols)15
Turn anti clockwise to open
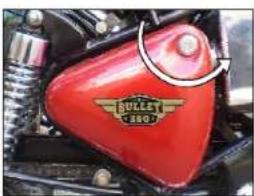
natural_image
Close-up of a red bullet-shaped motorcycle body with a white arrow pointing to the side (no visible text or symbols)STEERING LOCK
Turn Clockwise to lock
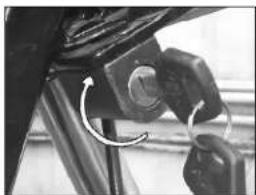
natural_image
Close-up of a mechanical component with a curved arrow indicating rotation (no visible text or symbols)BATTERY BOX
Turn anti clockwise to open
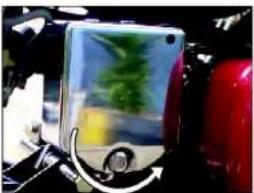
natural_image
Close-up of a transparent display panel with green leaf graphics, mounted on a red vehicle (no visible text or symbols)Turn Anticlockwise to Unlock
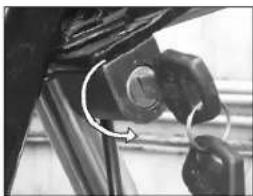
natural_image
Close-up of a mechanical component with a curved arrow indicating rotation (no visible text or symbols)NOTE :
● Key is common for ignition, petrol tank cap, steering lock, and tool boxes.
● Key for fuel tan k and tool boxes can be removed from the lock only in locked position.
NOTE :
● Turn handle bar to extreme left, before attempting to lock steering.
ROYAL ENFIELD
natural_image
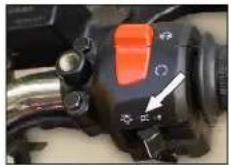
Close-up of a camera lens control panel with adjustment knobs and an arrow indicator (no readable text or symbols)HEAD LIGHT SWITCH
OFF

Pilot ON P

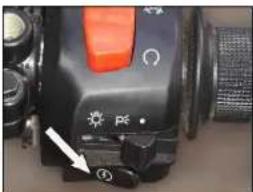
ELECTRIC START SWITCH

E-START BUTTON
Press fully to start
NOTE :
● Press E-Start Button fully till engine develops cranking speed.
● Not to make half hearted attempt.
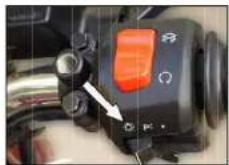
natural_image
Close-up of a camera lens with adjustment knob and control buttons (no readable text or symbols)Head lamp ON

natural_image
Close-up of a black industrial machine control knob with red and white buttons, showing a circular dial indicator (no text or symbols visible)DIMMER SWITCH
High beam

Low beam

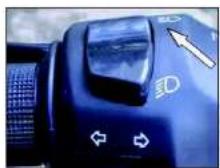
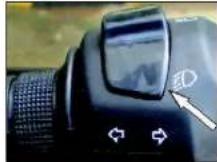
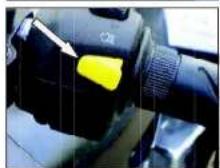

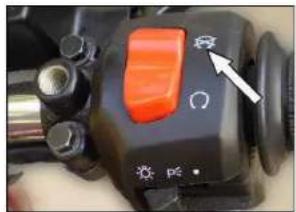
natural_image
Close-up of a black industrial control switch with orange and white buttons, no visible text or symbolsDay flash
ROYAL ENFIELD
Right turn signal ON

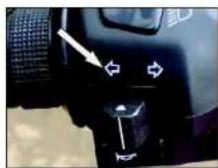
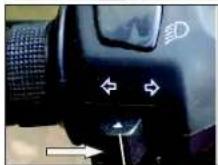
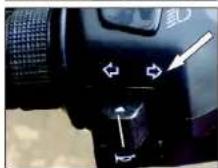
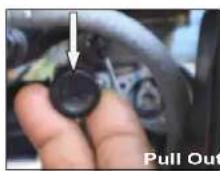
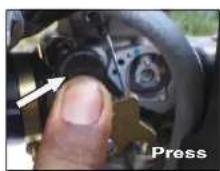
CHOKE
ON
OFF
CAUTION :
- Choke should be used only to start a cold engine. Riding the motorcycle with the choke 'ON' will increase pollution and result in high fuel consumption and loss of power.
natural_image
Close-up of mechanical components in three sequential views, showing piston and crankshaft assembly (no visible text or symbols)CHECK FOR :
- Petrol level in the tank and leakage if any.
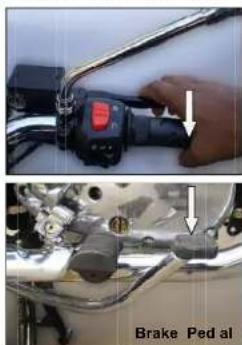
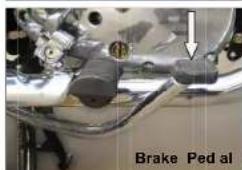
- Ope rate and free play of front and rear brakes.
Front Brake
natural_image
Close-up of a brake pedal mechanism with hand operating a grip and valve, showing mechanical components (no text or symbols visible)Rear Brake
text_image
Brake Ped al- Free play and smoothness of all operating cables.
- Free movement of steering
ROYAL ENFIELD
- Battery electrolyte level.
- Any cuts, cracks in the tyre and correct tyre pressure.
- Operation of all electrical parts.
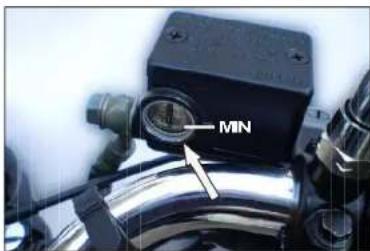
- Brake fluid is above the 'min' level in the master cylinder.
text_image
MINPRE OPERATIONAL CHECKS
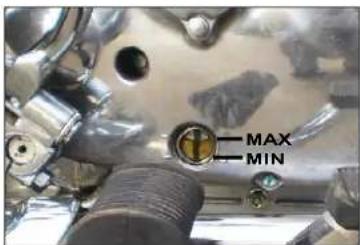
- Lub oil level should be in between "MAX" & "MIN" Level. Top up if necessary. Do not overfill above maximum level.
text_image
MAX MINNOTE :
Start engine, run for 2 minutes before checking oil level
RUNNING IN PERIOD
ROYAL ENFIELD
The Bullet Electra 350 UCE, as you would be experiencing, is capable of consistent high speeds. However as with any new motorcycle, a "running-in" is essential during the first 2000 kms to achieve optimum performance subsequently.
The following tips will help in proper bedding of a new motorcycle.
-
During the first 2000 Kms of run, do not exceed the following speed limits.
-
Do not exceed maximum pay load as specified.
- Warm up the engine for a few minutes to allow oil for all engine parts before riding the bike.
- Do not ride in constant throttle for long distances. Vary the speed by 10%.
- Avoid sudden revving and racing starts.
| Gear\Vehicle Speed | First 500 kms 501 - 2000 kms |
| 1 15 KMPH | 20 KMPH |
| 2 25 KMPH | 30 KMPH |
| 3 30 KMPH | 40 KMPH |
| 4 45 KMPH | 55 KMPH |
| 5 60 KMPH | 70 KMPH |
ROYAL ENFIELD
STARTING
USING KICK START
- Turn fuel tap to 'ON'
- Use choke if required (E.g.. When starting a cold engine in winter season).
- Switch on ignition.
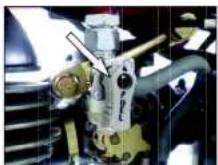
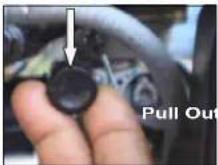
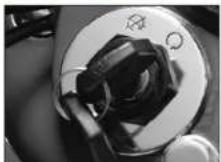
- Ensure gear is in neutral position.
NOTE :
● Neutral position is indicated by neutral light on the cockpit.
● To shift into neutral, move the motorcycle back and forth gently, while shifting the gear.
CAUTION :
- Attempting to shift gears without moving the motorcycle back and forth, may damage gears.
-
Slightly crank engine further till compression cases over.
-
Start the motor-cycle with a powerful swinging kick.
● Release the choke, if applied. - Start the motor-cycle with a powerful swinging kick.
● Release the choke, if applied.
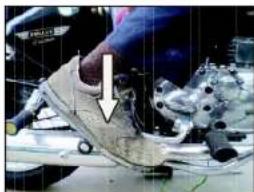
natural_image
Close-up of a hand pressing down on a mechanical component with a white arrow pointing to the part (no visible text or symbols)STARTING
ROYAL ENFIELD
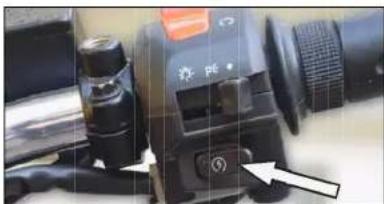
USING ELECTRIC START
Press the clutch lever and press starter button and release once the engine starts.
natural_image
Close-up of a camera lens control panel with adjustment knobs and a switch (no visible text or symbols)NOTE :
If the engine does not start, wait for 30 seconds before pressing the starter button again.
CAUTION :
Please ensure that the gears are in neutral before starting the motorcycle.
Press Starter button and release starter switch once the engine starts.
A Clutch switch is provided in the system for the safety of the rider. When the vehicle is in gear, the vehicle cannot be started - To start in gear operate the clutch lever, press Starter button and release starter switch once the engine starts.
GEAR SHIFTING, RIDING & STOPPING
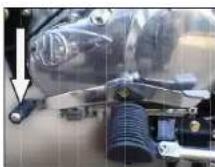
○ Warm up engine for 2 minutes - till idling is consistent.
○ Operate clutch lever.
Press gear pedal with toe to engage 1 ^st gear.
Gently open throttle and release clutch simultaneously. If clutch is released suddenly, the engine may stall and cause the motor cycle to move with a jerk.
ROYAL ENFIELD
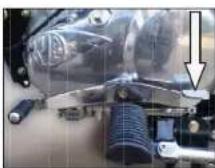
To shift to 2^nd and higher gears, close throttle, operate the clutch lever and press the gear pedal with heel.
NOTE :
Gear shift pedal is on the left side of the motorcycle.
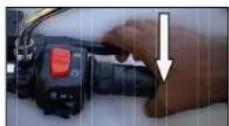
To stop the vehicle, close throttle, apply front brake with right hand and rear brakes with right leg simultaneously. Shift gears into neutral before the motorcycle just comes to a complete stop.
GEAR SHIFTING, RIDING & STOPPING
Turn the ignition switch to 'OFF' position.
Turn fuel tap 'OFF'

natural_image
Close-up of a mechanical knob or dial with no visible text or symbols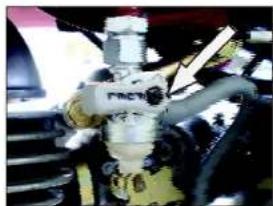
natural_image
Close-up of a mechanical assembly with no visible text or symbolsPARKING
ROYAL ENFIELD
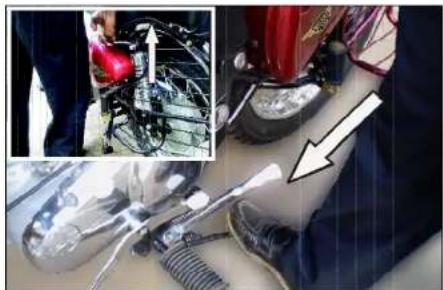
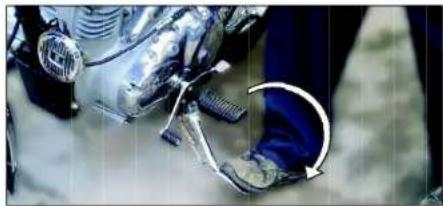
PARKING VEHICLE ON CENTER STAND PARKING VEHICLE ON SIDE STAND
- Select a firm, flat surface.
● Hold handle bar straight.
● Lower center stand, such that, both the legs of the stand are resting on firm ground. - Apply pressure on the fulcrum lever on the center stand and pull vehicle backward.
natural_image
Close-up of a motorcycle's engine components and a person's foot, with no visible text or symbols.- Select a firm, flat surface.
- Extend side stand. Tilt the motorcycle to the left, till it is supported firmly.
natural_image
Close-up of a motorcycle's foot and pedal mechanism with a curved arrow indicating motion (no text or symbols visible)
Ensure both the stands are retracted fully before riding the motorcycle.
Please exercise extreme care while parking and ensure it is parked firmly to avoid the motorcycle from falling over and causing injury to you or to others and damage to the motorcycle parts.
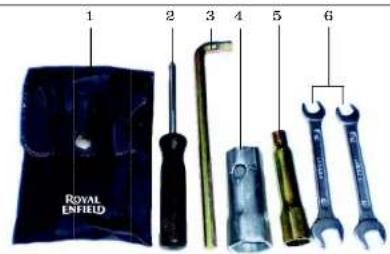
text_image
1 2 3 4 5 6 ROYAL ENFIELD| S.No. | Description | Qty. |
| 1. | Tool bag 1 | |
| 2. | Screw driver O6 X 160 1 | |
| 3. | Tommy bar 1 | |
| 4. | Tubular spanner 1 | |
| 5. | Tool- Spark plug 1 | |
| 6. | Double end spanner 10 X 12 2 |
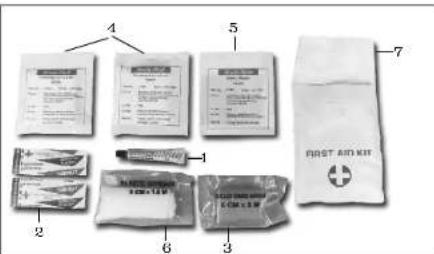
text_image
Diagram showing seven labeled items of medical or emergency supplies, including medical bags, boxes, and a first aid kit with a cross symbol.| S.No. | Description | Qty. |
| 1. | Antiseptic cream 5 gms 1 | |
| 2. | Wash proof plaster 1.9 cm x 7.2 cm 2 | |
| 3. | Gauze bandage 5 cm x 2 cm 1 | |
| 4. | Sterilized Gauze Swab 5 cm x 5 cm | 2 |
| 5. | Sterilized elastic plaster 7 cm x 6 cm | 1 |
| 6. | Elastic Gauze bandage 8 cm x 1 mtr. | 1 |
| 7. | First aid kit pouch | 1 |
PERIODICAL MAINTENANCE
ROYAL ENFIELD
The maintenance schedule detailed here will help you maintain your Bullet Electra 350 UCE meticulously and to get a long trouble free service. The schedule provided herein is based upon average riding conditions and indicates the Kms at which regular inspections, adjustments, replacements and lubrications are to be carried out. The frequency of the maintenance must be shortened depending upon the severity of the driving condition or if the motorcycle is used in a very dusty environment. Contact the nearest Royal Enfield Authorised Dealer / Service Point for expert advice and to carry out the required maintenance.
| S.No. | DESCRIPTION | FREE SERVICEwhichever is earlier | PAID SERVICE | ||||||||||
| Kms (x 1000) | 0.5 | 3 | 6 | 9 | 12 | 18 | 2 | 1 | 2 | 4 | 27 | 30 | |
| Months 1 | 5 | 3 | 6 | 9 | |||||||||
| 1 Engine Oil | R | I | R | I | R | I | R | I | R | I | R | ||
| Check level at every 1000 Kms or earlier as required | |||||||||||||
| 2 | Engine oil filter element | R | C | R | R | R | R | R | |||||
| 3 | Engine sump filter (oil strainer) | C | C | C | C | C | C | C | |||||
| 4 | Magnetic drain plug under gear box and secondary drain plug under crankshaft in crankcase RH | C | C | C | C | C | C | C | |||||
| 5 | Spark plug - 2nos. | A | A | A | A | A | R | A | A | A | A | R | |
| 6 | HT leads for crack | I | I | I | I | I | I | I | I | I | I | I | |
| 7 | Air filter paper clement | C | C | C | C | R | C | C | C | R | C | C | |
| 8 Carburetor (C.V. Type) | *Clean, Inspect and Tune | ||||||||||||
ROYAL ENFIELD
PERIODICAL MAINTENANCE
| S.No. | DESCRIPTION | FREE SERVICEwhichever is earlier | PAID SERVICE | |||||||||
| Kms (x 1000) | 0.53 | 691 | 215 | 182 | 124 | 2730 | ||||||
| Months 1 | 5369 | |||||||||||
| 9 | Fuel Tap Filter | C | C | C | C | C | C | C | C | C | C | C |
| 10 | Fuel tank | C | C | C | C | |||||||
| 11 | Fuel hose / Pipe | I | I | I | R | I | I | I | R | I | I | |
| 12 | Accelerator and carburetor cable play Adjustment | A | A | A | A | A | A | A | A | A | A | A |
| 13 | Rubber hose, Air filter to Carburetor | I | I | I | I | R | I | I | I | R | I | I |
| 14 | Rubber hose, Inlet manifold | I | I | I | I | R | I | I | I | R | I | I |
| 15 | Inlet / Exhaust valve seating | I | I | |||||||||
| 16 | Cylinder head (Combustion chamber) | D | ||||||||||
| 17 | Exhaust system | D | ||||||||||
| 18 | Clutch lever free play | Adjust every 1000 Kms or earlier as required | ||||||||||
| 19 | Rear brake pedal pivot | L | L | L | L | L | L | L | L | L | L | L |
| 20 | Battery terminals (apply petroleum jolly) | C | C | C | C | C | C | C | C | C | C | C |
| 21 | Battery Electrolyte level | I | I | I | I | I | I | I | I | I | I | I |
| 22 | Earth wire cyclet (behind battery carrier) | I | I | |||||||||
| 23 | Rear Chain | Lubricate &Adjust every 1000 Kms or earlier as required | R | |||||||||
| Clean, Adjust & Lubricate every 3000 Kms or earlier as required | ||||||||||||
PERIODICAL MAINTENANCE
ROYAL ENFIELD
| S.No. | DESCRIPTION | FREE SERVICEwhichever is earlier | PAID SERVICE | |||||||||
| Kms (x 1000) | 0.5 | 3 | 6 | 9 | 12 | 18 | 2 | 1 | 24 | 27 | 30 | |
| Months 1 | 5 | 3 | 6 | 9 | ||||||||
| 24 | Front Fork oil / leak | I | R | I | ||||||||
| Check level at every 3000 Kms or earlier as required | ||||||||||||
| 25 | Hand levers & kick starter pivot | Lubricate every 1000 Kms or earlier as required | ||||||||||
| 26 | Rear brake play | Adjust every 1000 Kms or earlier as required | ||||||||||
| 27 | Rear brake cam | L | L | L | ||||||||
| 28 | Steering ball races / Play Adjustment | A | L | A | R | A | L | A | R | A | ||
| 29 | Spokes tightness & Wheel rim run out front / rear | I | I | I | I | I | I | |||||
| 30 | Rear wheel cush rubbers | I&R | I&R | |||||||||
| 31 | Swing Arm spacer & pivot bush | L | L | L | R | |||||||
| 32 | Tyre wear Front & Rear | I | I | I | I | I | I | I | I | |||
| 33 | Brake Oil level check / Replacement | I | I | I | I | I | I | I | I | I | I | |
| 34 | Pivot-Side stand, Center stand, Pillion foot rest | L | L | L | L | L | L | L | L | L | L | |
For Maintenance after 30,000 Kms, Please repeat the same frequency specified above, in consultation with a Royal Enfield Authorised Dealer / Service Point.
* Refer Service Manual.
ROYAL ENFIELD
RECOMMENDED LUBRICANTS
| Engine Oil | |
Grade Royal Enfield 15 W 50 API SLEngine Oil(JASO MA) | |
| Capacity | 2.75 Ltrs. (with oil filter)2.50 Ltrs. (during oil & filter element replacement) |
| Front Fork Oil | |
| Grade Royal EnfieldFront Fork Oil(or 1F GradeEndurance) | |
| Capacity | 195 ml/leg |
| Brake Fluid | |
| Grade DOT 3 or DOT 4 | |
| Capacity | 60ml |
CAUTION :
Use of Wrong grade oil can reduce the life of the moving parts and seriously affect performance
NOTE :
Recommendation subject to change without notice.
* Common oil for Engine, Gear box & Clutch.
DO NOT Mix DOT 3 & DOT 4 brake fluid together.
| ISO 14001 - EMSOperation Control Process |
| 1. All customers are advised timely replacement of Engine Oil, Fork Oil & Brake Oil at the dealership /ASP. In case done privately, it is advise to reach old/used Oil to our authorised vendor through RE Dealer/ASP |
| 2. Similarly we advise for disposal of old/used Battery, Tube & Tyres as mentioned in above point No.1. |
DO IT YOURSELF
ROYAL ENFIELD
The following simple maintenance activities will help in maintaining your motorcycle. However for an elaborate maintenance, we recommend you to get in touch with an Authorised Dealer / Service Point.
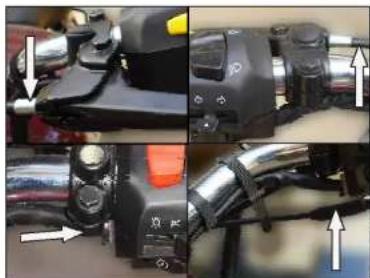
CONTROL CABLES
Lubricate after using the motorcycle in rain, after waterwash or if used in dusty conditions.
natural_image
Close-up of a motorcycle's camera and steering wheel assembly, showing adjustment knobs and mode indicators (no text or symbols visible)HAND LEVER & KICK STARTER PIVOTS
Wipe the area free of dirt / grease.
Apply a few drops of oil on the pivots.
natural_image
Close-up of mechanical components with no visible text or symbolsCENTER / SIDE STAND PIVOTS
Apply a few drops of oil on the pivots after cleaning the area of dirt.
ROYAL ENFIELD
DO IT YOURSELF
DRIVE CHAIN
Clean the drive chain carefully of dirt. Apply few drops of 90 grade oil while simultaneously rotating the rear wheel. Wipe off the excess oil.
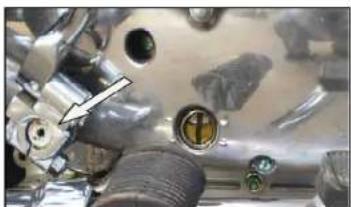
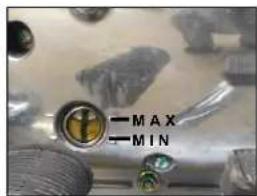
OIL LEVEL INSPECTION
- Place motorcycle on its center stand on a firm surface.
● Warm up engine for a few minutes & switch off before checking oil level.
● The level is correct if the oil level is in the middle of the oil level window.
● Top up with recommended oil if required.
CAUTION :
Use of wrong grade or spurious oil can seriously affect motorcycle performance & damage to moving parts
text_image
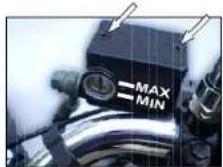
MAX MINBRAKE FLUID
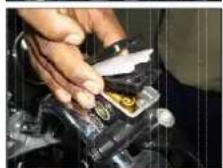
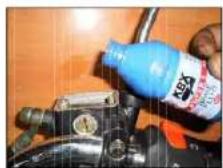
Check if oil is below 'MIN' level. To top up,
Remove cover and diaphragm.
Top up with DOT 3 or DOT 4 as specified.
CAUTION :
Don't mix DOT 3 & DOT 4 fluid.
DO IT YOURSELF
ROYAL ENFIELD
ENGINE - OIL CHANGE
(Refer Periodical Maintenance Chart for frequency)
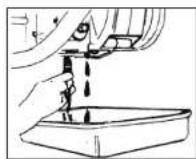
● Place motorcycle on its center stand on a firm flat surface.
- Start engine and warm up for 2 minutes.
- Keep a clean tray below the engine
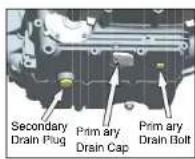
- Remove primary drain cap, to drain oil & clean suction filter, magnet.
- Then remove secondary drain plug to drain oil & clean the magnet.
● Finally remove primary drain bolt to drain the complete oil.
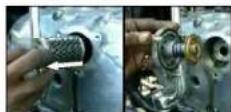
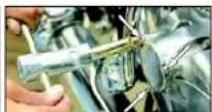
- Remove the oil filter element on the Crankcase Cover RH.
- Allow the oil to drain by tilting the motorcycle to both sides.
- Wash the drain plug and the suction filter thoroughly and refit on the crankcase after all the oil is drained out.
- Soak a new oil filter element in the oil and refit on the Crankcase Cover RH.
● Assembly 3 bolts and tighten them. Ensure 'O' Ring and gaskets are taken seat properly.
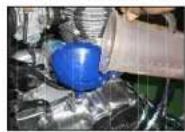
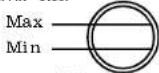
- Fill recommended oil to engine till the oil level is upto "MAX" level mark in the oil window in Crankcase Cover RH.
NOTE :
Replace oil filter element when never oil is being replaced.
CAUTION
Filling up oil over "MAX" mark may cause smoke and / or loss of power. Do NOT allow oil level to fall below "MIN" mark. Doing so may result in engine internal damage or malfunction.
ROYAL ENFIELD
DO IT YOURSELF
SPARK PLUG
Cleaning and adjusting Plug gap
● Two spark plugs are provided in your vehicle
- Remove spark plug using the plug spanner and tommy bar.
● Clean the insulator tip and electrodes of the plug carefully using a pointed scraper or spark plug cleaner.
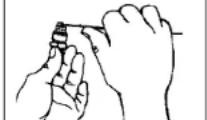
- Set the gap between 0.70 to 0.80 mm.
● Refit the spark plug on the cylinder head.
- Repeat the above procedure for the secondary sparkplug.
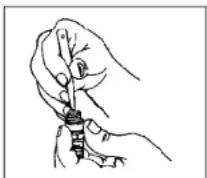
Gap 0.70 to 0.80 mm.
INSPECTION OF TYRES AND WHEELS
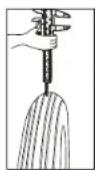
○ Inspect the tyres periodically for tread wear, cracks and cuts.
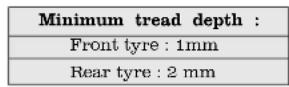
○ Check and remove stone, splinters, nails or other particles embedded in the tyre treads.
○ Bald spots / swelling may be caused by internal damage. Replace the tyres, if defective.
○ Replace tyres when the tread depth has reached the minimum as specified.
○ Periodically inspect wheels for spokes breakage and wheel rim run out.
☐ Check proper seating of the tyre beading on the rim whenever the tyre is reassembled.
- Whenever a new tyre is installed, ensure rim and spokes do not get damaged on account of using wrong levers.
○ Use only standard tyres & tubes inflated to correct pressure.
DO IT YOURSELF
ROYAL ENFIELD
Tyre Pressure
| Front Rear | ||
| Solo 1.41 kg/cm ^2 (20 PSI)With Pillion 1.55 kg/cm ^3 (23 PSI) | 2.11 kg/cm ^2 (30 PSI)2.20kg/cm ^3 (32 PSI) | |
FRONT WHEEL REMOVAL
- Place the vehicle on center stand
- Place a wooden block the front end of engine to support the vehicle.
- Disconnect speedo cable.
- Loosen the pinch bolt on the RH fork guide.
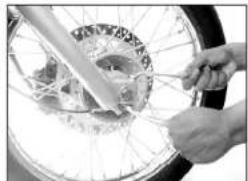
natural_image
Close-up of hands using a bicycle wheel to adjust the wheel rim (no visible text or symbols)- Remove the axle nut along with washer.
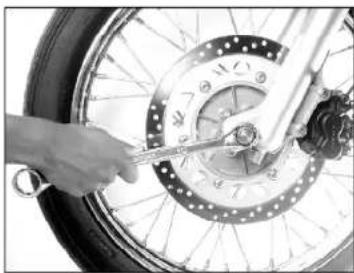
natural_image
Close-up of a hand using a wrench to adjust the wheel rim and disc (no text or symbols visible)● Tap and remove the front wheel spindle
- Tilt the vehicle to RH Side and take out the wheel along with speedo drive and RH side spacer.
● Take out Speedo drive and bush on the RH side.
ROYAL ENFIELD
DO IT YOURSELF
- Place a 4 mm thick wooden piece or cardboard sheet between the brake pads to avoid brake pads getting locked.
CAUTION :
Do not press the front brake lever when wheel is removed as this will result in brake pads getting locked.
FRONT WHEEL REASSEMBLY
- Remove the wooden piece / card board sheet placed between the brake pads.
- Place the speedo drive bush in position and place speedo drive over it.
- Insert the wheel along with speedo drive and RH s pacer between the front fork ends ensuring that the brake disc is located between the brake pads.
- Insert and tap the front wheel axle gently inside.
● Refit the washer and tighten the nut firmly.
NOTE :
Ensure that the speedo drive is correctly located such that the cable can be connected without difficulty.
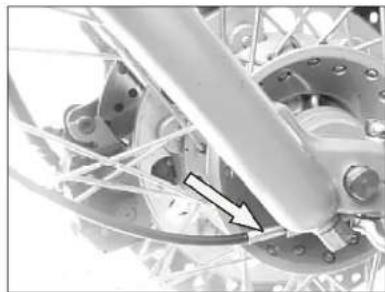
natural_image
Close-up of a mechanical assembly with a metallic frame and mounting flange (no visible text or symbols)DO IT YOURSELF
ROYAL ENFIELD
● Tighten the pinch bolt on the RH fork guide.
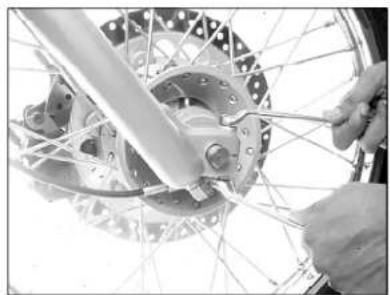
natural_image
Close-up of hands using a tool to adjust the bicycle wheel rim (no visible text or symbols)- Rotate the wheel and check for smooth rotation.
- Connect the speedo cable to speedo drive and check for proper working of speedo meter.
REAR WHEEL REMOVAL
- Place vehicle on center stand on a firm and flat surface.
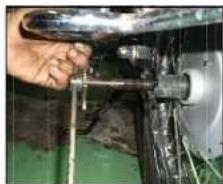
Note and mark the position of the chain adjuster butting with the stopper on the right side. - Remove split pin and castle nut on the RH side.
○ Remove wheel spindle from LH side along with h chain in adjuster, taking care not to drop the wheel collar and spacer from the RH side of the wheel.
○ Tilt vehicle to LH side and slide out rear wheel.
natural_image
Close-up of a hand using a tool to adjust or install a mechanical component (no visible text or symbols)ROYAL ENFIELD
DO IT YOURSELF
REAR WHEEL REASSEMBLY
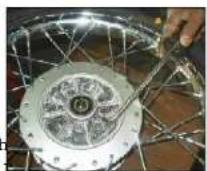
O Ensure the four cush rubbers are in position inside the rear wheel hub.
○ Tilt vehicle to right and insert wheel assembly between the swing arms.
○ Position the rear wheel with cush rubber on the rear chain sprocket.
○ Hold wheel collar and spacer in position.
Insert the wheel spindle along with chain adjuster from the LH side of vehicle and gently tap it through the wheel.
○ Ensure that the mark on the chain adjuster notch butts with the stopper.
○ Tighten the castle nut firmly and ensure that the hole on axle shaft and the slot on castle nut are aligned to enable split pin fitment.
Fit the split pin.
CAUTION :
- Do not force the spindle into the wheel as the threads may get damaged. Tap it through the wheel gently.
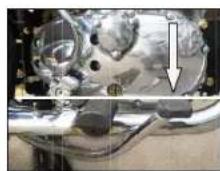
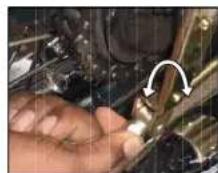
- Loosen the lock nut
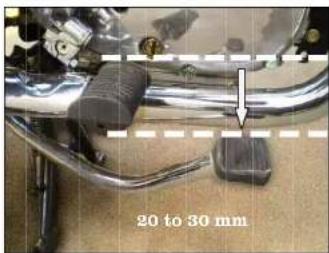
● Turn in or out the pedal stop pin till the brake pedal and front foot rest are in the same height as shown in fig.
● Tighten the lock nut - Check for free rotation of rear wheel.
DO IT YOURSELF
ROYAL ENFIELD
REAR BRAKE
- Turn in or out the adjuster nut at the brake rod end. The recommended brake pedal travel is 20 - 30 mm.
- Check that the brake is not binding and the rear wheel rotates freely.
text_image
20 to 30 mmDRIVE CHAIN TENSION (Play 25-30mm)
○ Remove rear wheel split pin.
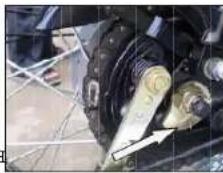
○ Loosen ca stle nut, sp in dl e nut, a n ch o r nut and brake rod nut.

natural_image
Close-up of mechanical components with a white arrow pointing to a specific part (no visible text or symbols)Turn the adjuster cams on both sides, till 25 to 30 mm slackness is achieved.
☐ Check and ensure that the number of notches from the punch mark on the cam to the notch resting on the pin are equal on both sides.
○ Apply brake and tighten all nuts.
ROYAL ENFIELD
DO IT YOURSELF
WHEEL ALIGNMENT
○ Hold the vehicle upright off the stand on a level ground.
○ Stretch a string about 100 mm above the ground along the wheels.
○ If the string touches two points on the rear wheel and two points on the front wheel (4 point contact) then the wheels are aligned.
○ If the string touches only three points on the two wheels, the alignment is incorrect.
○ Adjust the rear wheel, using the chain adjuster cams till the string touches four points.
ADJUSTMENT OF REAR GAS SHOCK ABSORBER
The rear gas shock absorber is of adjustable type i.e., the spring tension can be increased or reduced.
○ Increase the spring tension for high speed, high load operation.
○ Reduce the spring tension for low speed, low load operation.
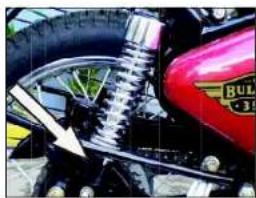
The adjuster provided on the bottom of the spring has five notches.
To carry out the adjustment proceed as follows :
natural_image
Close-up of a motorcycle's wheel and tire assembly with a red Buhl logo, no visible text or symbolsDO IT YOURSELF
ROYAL ENFIELD
☐ Insert 'C' type spring adjuster tool in the shocker shot and rotate in require direction.
Turn the adjuster such that the adjuster moves up to increase the spring tension and vice versa to reduce the spring tension.
☐ Adjust both left hand and right hand shock absorbers so that the same notch rests on the pin in both.
WARNING
Riding the motorcycle with the notches adjusted in different positions can cause loss of control and may lead to an accident.
REMOVAL OF BATTERY FROM THE VEHICLE
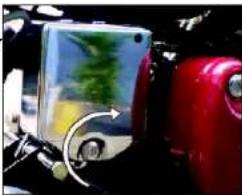
Insert the key into the battery cover lock, LH Side turn anticlock wise and hold it there.
○ Re move the battery y cover out w ar ds bring in g down off from the lock peg on top.
○ Disconne ct both the term in a l wir e s. (p ositive and negative)
○ Remove the bolts on either side and open cover. Then take out the Battery
natural_image
Close-up of a red car front view showing a mounted device with a green screen and a white panel, no visible text or symbols.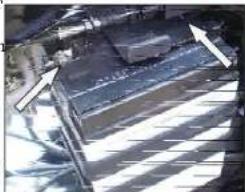
natural_image
Exterior view of a modern office building (no signage)ROYAL ENFIELD
BATTERY & MAINTENANCE
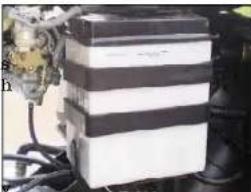
O The vehicle is provided with 12V - 14 AH (for E - Start) and 12V - 5 AH (for Kick Start)
○ Periodically check the Battery for
- Cleanliness and corrosion free terminals. - Electrolyte level in each cell.
☐ If electrolyte level is low, top up with distilled water.
CAUTION :
Electrolyte shall be filled only between minimum & maximum levels indicated in battery as "min" & "max" respectively. Usage of battery with electrolyte below the minimum level will damage battery internals and electrolyte above the maximum level will result in spillage of acid.
Use only distilled water meant for use in batteries to avoid damage to battery.
natural_image
Stacked rectangular blocks with striped patterns, possibly battery or cheese, mounted on a mechanical device (no visible text or symbols)DO IT YOURSELF
REASSEMBLY OF BATTERY ON VEHICLE
○ Connect the positive terminal (Both Red wire).
○ Connect the negative terminal (Green & Black wire).
○ Smear the terminals with petroleum jelly.
○ Close the battery cover and tighten the bolt
○ Position the battery cover over the battery such that it engages with the lock peg on top.
○ Push the lock assembly inside the locator. Turn the key clock wise to lock the battery cover. Then release the key.
CAUTION :
- Do not use battery with low electrolyte level as the battery internals will get damaged.
Do not overfill the battery electrolyte as it will spill ot through the over flow pipe and cause corrosion to vehicle parts.
DO IT YOURSELF
ROYAL ENFIELD
- Use only distilled water meant for use in batteries to avoid damage to battery.
○ Clean the wire terminals free of corrosion and keep the terminals coated with petroleum jelly.
CHANGING ELECTRICAL COMPONENTS HEAD LAMP BULB
CAUTION :
Never touch the bulb with your finger. Finger prints will etch the glass and decrease bulb life. Hence, it is recommended to grab the bulb with paper or clean dry cloth during handling.
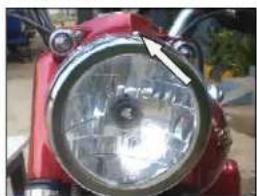
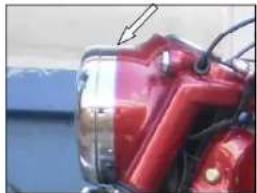
REMOVING THE HEADLAMP
○ Loosen the rim holding screw on top and take out the headlight reflector.
○ Unscrew and remove the bulb holder.
O Pull out the bulb.
natural_image
Close-up of a red motorcycle's front wheel with a metallic headlight (no visible text or symbols)○ Replace bulb and assemble in the reverse order.
natural_image
Close-up of a red motorcycle's front wheel and side-mounted sensors (no visible text or symbols)ROYAL ENFIELD
DO IT YOURSELF
TAIL LAMP BULB
○ Remove the tail lamp cover screws.
○ Unscrew and pull out the bulb.
○ Replace bulb and assemble in the reverse order.
TRAFFICATOR BULB
- Remove the screws & take out trafficator glass cover.
○ Press bulb gently & Tur n an ti-clockwise to take out the bulb.
○ Position the new bulb inside holder, ensuring that the holder, ensuring that the pins in the bulb, match with the slots in the holder.
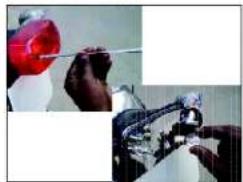
natural_image
Close-up of hands using a tool to adjust or install a mechanical component (no visible text or symbols)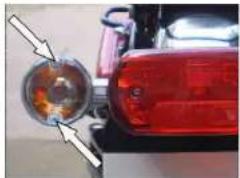
natural_image
Close-up of a red-lit car headlight with a circular lens and arrow pointing to the lens (no visible text or symbols)Press the bulb and turn clockwise to lock the bulb in the holder.
O Refit the trafficator cover and screws.
FUSE
Open the LH tool box
○ Open the fuse carrier
○ Replace fuse and close the Tool box
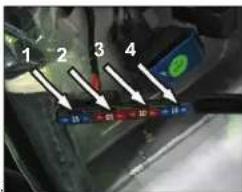
text_image
1 2 3 4 5 6 7 8 9 10 11 12 13 14 15BLADE FUSE USAGE LIST
| Fuse No. | Color Remarks |
| 1 Blue | Main Fuse (15A) |
| 2 Red | Ignition Fuse (10A) |
| 3 Red | Spare Fuse (10A) |
| 4 Blue | Spare Fuse (15A) |
WASHING PROCEDURE
ROYAL ENFIELD
PRECAUTIONS
○ Wash vehicle when the engine is cold.
Cover the silencer, tail pipe, carburetor, horn and control switches with suitable plastic bags and tie it firmly to prevent water entry.
○ Remove ignition key and seal key hole using adhesive tape.
○ Brush engine area with kerosene / diesel to remove dirt or grease.
○ Use low pressure jet of water to clean the vehicle or engine.
Never spray water with great force on head lamp, speedometer, flasher lights, front and rear wheel hubs, electrical connections and wires, control cables, carburetor, sparkplug, battery etc.
Do not apply kerosene or diesel on painted parts or rubber parts.
○ Use luke warm water and mild detergent on the painted components to remove dirt, etc.
○ Rinse vehicle thoroughly with plain water to remove the detergent and wipe vehicle dry.
○ If possible, use compressed air and blow off water particles from the obscure areas of the vehicle, electrical connections etc.
AFTER WASHING
- Ensure, the vehicle is thoroughly dry by wiping with a clean soft absorbent cloth or chamois leather.
○ Remove all plastic bags and adhesive tapes.
○ Lubricate control cables, pivot and rear chain with lube oil - Polish the painted and plated surfaces using polishing wax.
○ Start engine and allow to run at idling speed for a few minutes to warm up engine. - Drive the motorcycle slowly, applying both brakes intermittently to dry up the brake shoes.
○ Test brakes for its efficiency.
ROYAL ENFIELD
STORAGE PRECAUTIONS
Incase your Motorcycle is not going to be used for a month or more, we advice the following precautions to the taken.
○ Carryout required repair / adjustments on the motorcycle.
○ Wash the motor cycle through ly and lubricate as per the maintenance chart.
○ Drain fuel tank, fuel line and carburetor.
Keep the fuel tap in closed position and spray motor oil inside the fuel tank to prevent rusting.
○ Remove spark plug. Pour in about 25ml of clean engine oil through spark plug hole. Close the hole and crank engine several times and refit sparkplug.
○ Clean rear chain thoroughly and apply a thin film of lub oil.
○ Remove battery from the bike. Clean the terminals free of corrosion.
- Maintain electrolyte level between max or min mark, by adding distilled water and wipe the battery dry.
○ Store the battery in a cool, dry and well ventilated place.
Do not place the battery in direct sun light, near open flame or where temperature is above 40 °C or below 0 °C
○ Cover the silencer with plastic bags to prevent moisture entry. Set the motorcycle on its center stand.
○ Apply a thin film of oil on the engine barrel fins, cylinder head fins and other painted parts.
○ Apply anti rust solutions on all plated parts. Take care not to apply this solution on rubber or painted parts.
Store motorcycle in a clean covered area free - of moisture and keep it covered to prevent dust settling on it.
STORAGE PRECAUTIONS
ROYAL ENFIELD
PREPARING THE MOTORCYCLE FOR REUSE
○ Remove the anti rust solution from all plated parts and clean the motorcycle well.
○ Inflate the tyres to the correct tyre pressure.
○ Ensure battery is fully charged and proper electrolyte level is maintained.
○ Connect the battery.
○ Lubricate all control cables and pivots.
○ Check proper level of oil in engine.
○ Clean and remove the motor oil from tank and fill tank with fresh petrol.
○ Clean carburetor and air filter.
○ Remove plastic covering from the silencer.
○ Remove spark plug on cylinder head and pour in a few drops of engine oil. Crank engine a few times to lubricate cylinder walls and piston. Clean spark plug and refit.
○ Switch on ignition switch.
○ Start vehicle and warm up engine for a few minutes before riding the vehicle.
NOTE :
- Do not raise the engine rpm the moment it is started, allow the engine to run at idling speed.
ROYAL ENFIELD
LONG TRIP PRECAUTIONS
Checks prior to the commencement of long journey
○ Service the motorcycle thoroughly a Royal Enfield Authorised Service Point as per periodical maintenance chart.
- Sufficient quantity of petrol in the fuel tank for the journey planned.
○ Correct tyre pressure.
Checks after every 1500 kms of run
○ Tightness of all fasteners.
○ Tyre tread condition and wear of tyres.
○ Battery condition and electrolyte level.
○ Working of all lights and horn.
○ Correct oil level in engine.
○ Proper chain tension.
Items to be carried
O Tool kit
○ First aid kit.
○ Bulbs for Headlight, Trafficator light, Rear Tail Lamp and Fuse.
○ Accelerator, Clutch and Speedo Cable.
○ Rear chain link master lock assembly.
☐ Spare tube, tyre puncture repair kit - cold vulcanising type.
○ Foot operated air pump.
○ Insulation tape.
○ Spark plug, spark plug cap, fuel hose.
CARING FOR MILEAGE
ROYAL ENFIELD
STOP THE DROP THAT LEAKS
Petrol leak at a rate of one drop per minute accumulates to 5,25,600 drops a YEAR! That is, 35 ltrs of Petrol.
- Petrol leaks cause raw petrol smell. Get the leaks arrested immediately.
USE RECOMMENDED FUELS AND OILS ONLY
○ Wrong grade or adulterated petrol does not burn fully and results in heavy smoke, high rate of carbon deposition in cylinder and exhaust system and low mileage.
○ Wrong grade and inferior quality oils do not lubricate well. The moving parts wear prematurely.
○ Always use recommended (unleaded > 87 octane petrol) and oils only.
RIDE AT COST EFFECTIVE SPEED
○ Cost effective speed (in top gear) is 45 to 50 Km per hour.
Both lower and higher road speeds cause low kilometers per litre of petrol.
PERFORM PREVENTIVE MAINTENANCE AS PER RECOMMENDATIONS
REGULAR PREVENTIVE MAINTENANCE ENSURES :
○ Correctly inflated tyres.
- Fasteners tightened to correct torques.
○ Freely moving engine & transmission components.
ROYAL ENFIELD
CARING FOR MILEAGE
○ Properly tuned and adjusted engine.
CUT OFF NEEDLESS LOW IDLING
Ten minutes of low idling wastes 70 ml. of petrol. So cut off the engine when you know you have to wait for one minute or more.
STOP
○ Revving : Ten revvings wastes 20 ml. of petrol
○ Racing starts : Ten racing starts wastes 150 ml. of petrol.
○ Sudden ac cele ration : Ten sudden accelerations wastes 100 ml. of petrol.
STOP BRAKE RIDING
○ Brake riding pushes the brake shoes / pads to come in contact with revolving drum / disc. To overcome the resulting frictional load, engine burns additional petrol.
Result : Low mileage, loss of power, faster wear of brake shoes / pads and drum / disc.
NEVER CLUTCH RIDE
Clutch riding slips the clutch & engine drive does not get totally transferred to the rear wheel. Besides low mileage, clutch riding ends up with burnt friction plates of clutch, loss of power and engine overheating.
CARING FOR MILEAGE
ROYAL ENFIELD
AVOID FREQUENT BRAKING
Braking arrests the road speed. Motorcycle momentum is reduced. Additional fuel is burnt for subsequent acceleration.
For better mileage, use front and rear brakes only when absolutely needed. Control vehicle speed with throttle and gear like smart riders always do.
AVOID OVER LOADING
- Over loading tires the engine, wears the parts faster and reduces mileage.
PARK YOUR VEHICLE IN SHADE WHEN NOT IN USE
Petrol is highly volatile. It evaporates under normal atmosphere temperature. The evaporation increases with temperature. Prevent this loss by always parking your vehicle under shade.
☐ Too few Kms. running per day allows more time for evaporation affecting the mileage.
Vehicle Starting Procedure
Basic Guidelines to be followed "FOR ALL ELECTRIC START VEHICLES"
-
In cold condition of the engine or for initial start, it is advised to use electric start (ES) only.
-
Apply choke in cold start condition. (ambient temperature <25^ C)
-
DO NOT ATTEMPT - "HALF START" BY CASUALLY PRESSING ELECTRIC START BUTTON.
-
PLEASE PRESS AND HOLD ELECTRIC START BUTTON FOR ATLEAST 3 SECONDS CONTINUOUSLY FOR THE CRANKING OR UNTIL THE ENGINE FIRES AND SUSTAINS, WHICHEVER IS EARLIER.
-
If engine doesn't start in the first attempt, release the ES button and repeat the above Procedure.
-
It is advised not to apply excessive throttle during starting.
text_image
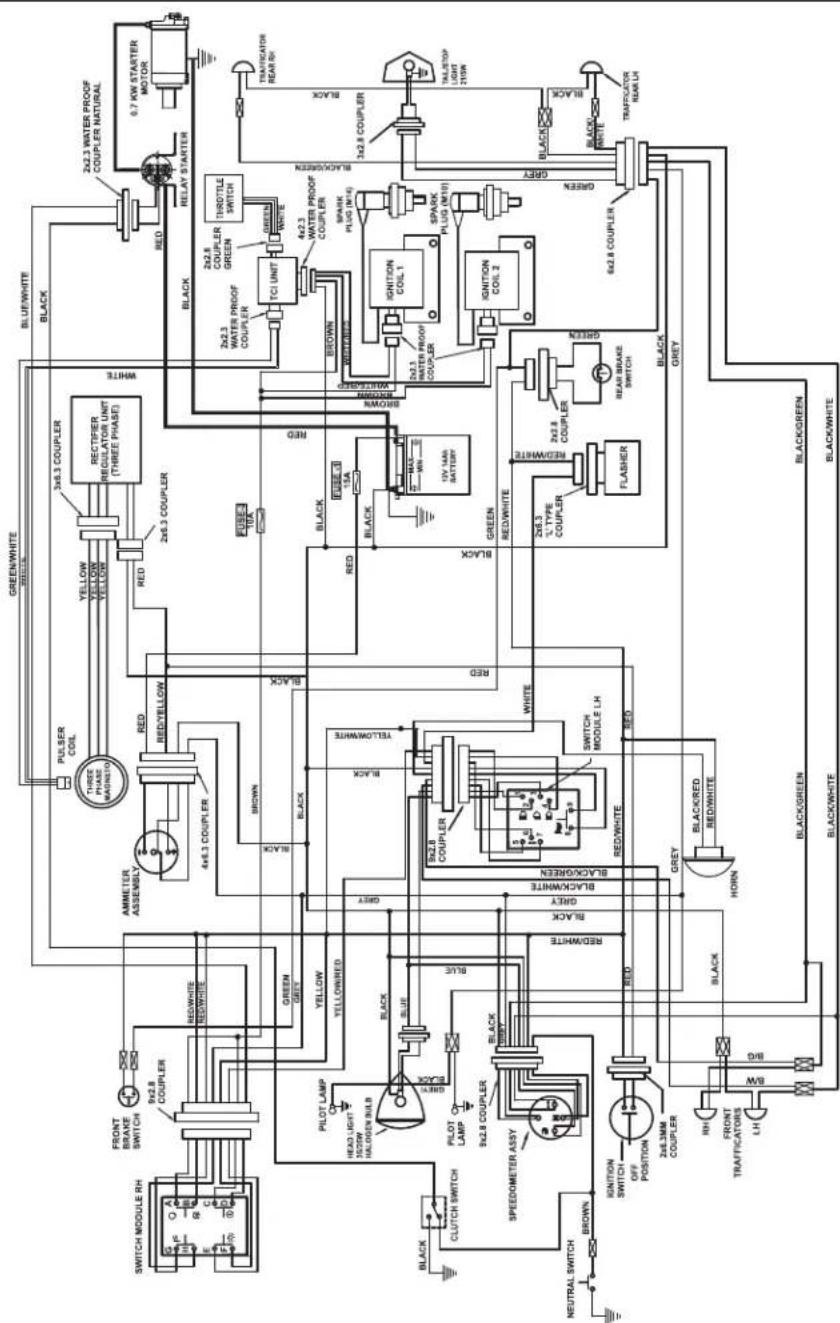
GREEN/WHITE PULSER COIL AMMETER ASSEMBLY 3x6.3 COUPLER RECTIFIER REGULATOR UNIT (THREE PHASE) 4x6.3 COUPLER RED/YELLOW RED/YELLOW RED/YELLOW GREEN/WHITE BLUE/WHITE BLACK 2x2.3 WATER PROOF COUPLER NATURAL SWITCH MODULE RH FRONT BRAKE SWITCH 9x2.8 COUPLER RED/WHITE RED/WHITE AMMETER ASSEMBLY GREEN GRAY YELLOW YELLOW/RED YELLOW/RED AMMETER ASSEMBLY RED/YELLOW RED/YELLOW RED/YELLOW GREEN/WHITE BLUE/WHITE AMMETER ASSEMBLY RED/YELLOW RED/YELLOW RED/YELLOW GREEN/WHITE BLUE/WHITE AMMETER ASSEMBLY RED/YELLOW RED/YELLOW RED/YELLOW GREEN/WHITE BLUE/WHITE AMMETER ASSEMBLY RED/YELLOW RED/YELLOW RED/YELLOW GREEN/WHITE BLUE/WHITE AMMETER ASSEMBLY RED/YELLOW RED/YELLOW RED/Y Kam GREEN/WHITE BLUE/WHITE AMMETER ASSEMBLY RED/YELLOW RED/YELLOW RED/Y KLOW GREEN/WHITE BLUE/WHITE AMMETER ASSEMBLY RED/YELLOW RED/YELLOW RED/Y KLOW GREEN/WHITE BLUE/WHITE AMMETER ASSEMBLY RED/YELLOW RED/YELLOW RED/Y KLOW GREEN/WHITE BLUE/WHITE AMMETER ASSEMBLY RED/YELLOW RED/YELLOW RED/Y KLOW GREEN/WHITE BLUE/WHITE AMMETER ASSEMBLYTROUBLE SHOOTING
ROYAL ENFIELD
CAUSES
REMEDIES
I. ENGINE FAILS TO START
1) Ignition switch in 'OFF' Position .... Switch on ignition.
2) Stop switch in 'OFF' Position.... Push stop switch to 'ON' position.
3) Clogged fuel line / tap .... Clean the fuel line / tap.
4) Vent hole clogged in fuel tank cap .... Clean vent hole.
5) Carburetor passage & jets blocked ....° Dismantle carburetor & clean jets ....../ passages
6) Carburetor float stuck in closed position .... Ensure correct movement of float
7) Spark plug cap / lead not connected ...... Fix cap / lead firmly
8) Loose HT connections ...... Fix connections firmly
9) HT Lead Damaged ....* Replace HT Lead
10) Spark plug electrode dirty / fouled .... Clean spark plug & Reset gap.
11) Spark plug insulation cracked .... Replace spark plug
12) Poor compression :
- Auto Decompressor not working ....* Ensure free motion of flyweight in exhaust cam gear assembly
* Contact Authorised Dealer / Service Point
ROYAL ENFIELD
TROUBLE SHOOTING
CAUSES REMEDIES
- Loose spark plug ....* Tighten spark plug.
13) Clutch slipping ....* Adjust clutch cable free play
II. ENGINE MISFIRING
1) Water in petrol tank/carburetor .... ^9 Clean carburetor / petrol tank. Fill tank ....... with fresh petrol.
2) Leak through intake hose .... Tighten rubber hose suitably. Replace if necessary
3) Loose spark plug cap ...... Fix cap / lead firmly
4) Spark plug fouled/insulation broken .... Clean / reset gap or, replace.
5) Poor Compression....* Auto decompressor sticky or .... not working
III. ENGINE STARTS, BUT RUNS IRREGULARLY & STOPS
1) Faulty fuel supply .... Clean the fuel line / tap / vent hole
2) Very low idling speed .... Increase idling speed
* Contact Authorised Dealer / Service Point
TROUBLE SHOOTING
ROYAL ENFIELD
CAUSES REMEDIES
IV. POOR PICKUP
1) Accelerator cable free play excessive .... Adjust cable free play
2) Faulty fuel supply .... Clean the fuel line / tap / vent hole
3) Choked air filter Clean / Replace air filter
4) Loose carburetor mounting .... Tighten clamps firmly
5) Brakes adjusted too tight ....* Re-adjust properly
6) Rear chain adjusted too tight ....* Re-adjust properly
7) Clutch Slipping ....* Adjust clutch cable free play
8) Under inflated tyres ....* Inflate to correct pressure
9) TPS setting ....* Retard / Wrong setting
V. WHITE/BLUE SMOKE
1) Oil level in RH Crankcase cover window ..... above "MAX" line .... "Check and drain excess oil
* Contact Authorised Dealer / Service Point
ROYAL ENFIELD
TROUBLE SHOOTING
CAUSES REMEDIES
VI. ENGINE OVERHEATING
1) Cylinder fins not clean .... Clean the cylinder fins at .... regular intervals
2) Clutch slipping ....* Check and correct
3) Suction leakage ....* Check and correct
4) Incorrect carburetor adjustments ....° Check and correct
5) TPS setting ....* Advance / wrong setting
VII. EXCESSIVE FUEL CONSUMPTION
1) Fuel leakage ....* Check and rectify
2) Worn out carburetor jets ....* Change the defective jets
3) Incorrect carburetor adjustments ....° Check and adjust correctly
4) Choked air filter .... Clean / Replace
5) Poor compression ....* Auto decompressor sticky or .... not working properly
6) Under inflated tyres .... Inflate to correct pressure
7) TPS setting ....* Over advance / wrong setting
* Contact Authorised Dealer / Service Point
TROUBLE SHOOTING
ROYAL ENFIELD
CAUSES REMEDIES
VIII. IGNITION KNOCK
1) Carburetor adjusted too lean ....* Check and readjust
2) Suction leakage ....* Check and correct
IX. BRAKES POOR
1) Not adjusted properly ....* Adjust properly
2) Oil / grease on lining or drum or disc ....* Clean and refit
3) Linings worn / uneven worn ....* Replace lining / pad
4) Drum scored / uneven wear ....° Rectify or replace drum
X. VEHICLE WOBBLES
1) Wheel rim runout ....* Rectify
2) Loose / Broken spokes ....* Tighten / Replace spokes
3) Tyres not fitted correctly ....* Refit tyres correctly
4) Wheels misaligned....* Ensure proper alignment
5) Under inflated tyres .... Inflate to correct pressure
* Contact Authorised Dealer / Service Point
ROYAL ENFIELD
TROUBLE SHOOTING
CAUSES
REMEDIES
XI. Electricals
Bulbs do not light
1) Loose / improper connection ....* Check and correct
2) Bulb fused ....* Replace bulb
3) Fuse blown ....* Replace fuse
4) Switch defective ....* Replace switch
Horn not working
1) Loose connections ....* Check and correct
2) Requires tuning ....* Tune horn
3) Switch Defective ....* Replace
4) Fuse blown ...... Replace fuse
Trafficators not working
1) Loose / improper connections .... Check and correct
2) Bulb fused / fuse blown .... Replace
3) Switch defective ....* Replace
4) I.C. Flasher defective ....* Replace
Brake light remains on
(1) Switch not adjusted properly ....* Adjust switch properly
(2) Switch sticky .... " Replace switch
* Contact Authorised Dealer / Service Point
TROUBLE SHOOTING
ROYAL ENFIELD
CAUSES REMEDIES
XII. ELECTRIC START
Vehicle not starting
(1) Neutral indicator not glowing .... Bring the vehicle in neutral
(2) If vehicle is without neutral indicator .... Press the clutch lever & start switch together
(3) Loose Connection....* Check & Correct
(4) Starter relay not working ....* Check & Replace
(5) Malfunctioning of clutch switch ....* Check & Replace
(6) Malfunctioning of Starter switch ....* Check & Replace
(7) Battery discharge....* Check & Recharge
(8) Motor not working ....* Check & Replace
(9) Battery not fully charged ....* Check & charge
(10)Failure of sprag clutch ....* Check & replace
ROYAL ENFIELD
WARRANTY TERMS & CONDITIONS
Royal Enfield Motor Cycles are manufactured by following best Quality practices in respect of the material and workmanship.
Royal Enfield (RE) warrants Bullet Electra 350 UCE motor cycle to be free from manufacturing and material defect under normal use subject to following conditions.
-
RE will replace or repair defective part / parts at their Authorised Dealer / Service Point, free of charge within a period of 12 months from the date of sale (date of Installation) or 10,000 kms whichever occurs earlier.
-
The warranty is applicable only to first registered owner.
-
The warranty shall be applicable only if all the free services are availed at the respective period / kilometer range as per the schedule given in the owner's manual from RE Authorised Dealer / Service Point.
-
During the warranty period, RE's obligations shall be limited to repairing / replacing free of charge such part or parts of the vehicle, which on examination to have manufacturing defect. Such defective part / parts which have been replaced become property of RE.
-
Cost of oil, oil filter, fuel and other consumables are chargeable to the customer.
-
Claims on proprietary items like tyres, tubes, spark plug, battery etc. should be taken up with respective manufacturer or their authorised agents in the area directly by customer. RE shall not be liable in any manner to replace them though their Dealers will provide assistance in preferring such claims on their manufacturer.
-
Warranty shall not apply to:
(a) Normal ageing, deterioration or rusting of plated parts paints coat, rubber parts, soft items, glass items, plastic parts etc.
WARRANTY TERMS & CONDITIONS
ROYAL ENFIELD
(b) Components like fuel filter, oil filter paper element, control cables, brake shoes / brake pads, clutch plates, drive chain & sprocket kit, which are subjected to normal wear and tear.
(c) Damages due to use of lubricant / oil / grease etc. other than specified by RE.
(d) Damages due to use of non-genuine parts.
(e) Damages due to lack of proper maintenance of the vehicle.
(f) Damages due to incorrect driving or riding habits.
(g) Parts damaged due to accidents, collision, abuse etc.
(h) Irregularities not recognized as affecting the quality or function of the vehicle such as slight vibration, oil leakage, discoloration of exhaust bent pipe / silencer / soft, hard shock absorber etc.
(i) Defects arising from fitment of unauthorised / additional Electrical loads.
(j) Vehicle serviced / repaired at unauthorised service points.
(k) Vehicle used for competition / racing.
(1) Electrical component likes bulbs, fuses etc.
(m) Normal maintenance operations like adjustment of brakes, cleaning fuel system, engine tune up and other such adjustments
-
RE reserves the right to finally decide on all warranty claims
-
RE reserves the right to make changes in Design of the vehicle without any obligation to install these changes on previously supplied vehicles.
ROYAL ENFIELD
EMISSION WARRANTY
In compliance with the provisions of Rule 115(2) of the Central Motor Vehicle Rules, 1989, Royal Enfield certifies that the following warranty is applicable to those components liable to affect the emission of the gaseous pollutants in its range of motorcycles, in normal use to which it may be subjected to.
This emission warranty comes into force from 01st July 2001 and is valid for a period of 30,000 Kms. or 36 months, whichever occurs earlier, from the date of sale to the first customer and is in addition to and parallel to the warranty policy, conditions and obligations laid down in the Owner's Manual.
Royal Enfield further warranty that if on examination by its Authorised Dealer / Service Point, the motorcycle fail to meet the specified emission standards, then the Authorised Dealer / Service Point shall take necessary corrective measures and shall at its sole discretion, repair or replace free of charge such components of the emission control system to meet the required emission standards.
The method/s of examination to determine the warranty conditions of the emission warranty related components will be at the sole discretion of Royal Enfield and / or our Authorised Dealer / Service Point and results of such examination will be final and binding. If on examination the warranty conditions of the part/s is/are not established, Royal enfield will have the right to charge all, or part of the cost of such examination to the customer in addition to the cost of the components.
In case of acceptance of the component/s under Emission warranty, Royal Enfield will replace free of charge, the component/s as required. However, the consumables like fuel, lubricants, solvents, etc shall be chargeable to the customer as per actuals.
In case any of the components covered under emission warranty or the associated parts, are not independently replaceable. Royal Enfield will have the sole discretion to replace either the entire assembly or parts of the assembly, through suitable repairs.
Royal Enfield reserves the right to carry out necessary consequential repairs to the motorcycle or
EMISSION WARRANTY
ROYAL ENFIELD
replace any part, in addition to the repair or replacement of the components covered under emission warranty, to establish compliance to in-use emission standards. Such repairs / replacements will be chargeable to the customer.
All parts removed for replacement under warranty will become the property of Royal Enfield.
Royal Enfield will not be responsible for the cost of transportation of the motorcycle to the nearest Authorised Dealer / Service Point OR for any loss due to non availability of the motorcycle during the period of examination and repairs by Royal Enfield and/or their Authorised Dealer / Service Point.
Royal Enfield will not be responsible for any penalties that may be charged by statutory authorities on account of failure to comply with the in-use emission standards.
That cost/s incurred to check emission of the motorcycle will have to be borne by the customer.
Emission warranty will be applicable irrespective of the change of ownership of the vehicle provided all the conditions as laid down in this document are met from the date of original sale of the motorcycle.
The warranty shall apply if the customer :
- Observes all the important instructions and any other precautions listed in the owner's manual.
● Under all circumstances uses lubricants and fuel as recommended by Royal Enfield. - Regularly obtains and carries out maintenance in accordance with Royal Enfield guidelines and enters the details in the Log book.
- Immediately approaches the nearest Authorised Dealer / Service Point upon discovery of failure to comply with the IN-USE emission standard inspite of having maintained and used the vehicle in accordance with the instructions in the owner's manual and having carried out such repairs and adjustments as may be required with a view to establish such compliance.
- Produces the 'Pollution Under Control' certificate valid for the period immediately preceding the
ROYAL ENFIELD
EMISSION WARRANTY
test during which the failure is discovered, the test having been carried out either for obtaining a new certificate or pursuant upon being directed by an officer as referred to in sub rule (2) of rule 116 of the Central Motor Vehicles Rules (CMVR).
- Produces the owner's manual and Log book for verification details.
- Produces receipts covering maintenance of the motorcycle is specified in the owner's manual from the date of original purchase of the vehicle.
● Produces valid certificate of Insurance and R. T. O. Registration Certificate (R.C. Book).
The Emission warranty shall not apply IF :
- A valid "Pollution under control" certificate is not produced.
- The motorcycle is not serviced by Authorised Dealer / Service Point as per the service schedule described in the maintenance chart.
- The motorcycle has been subjected to abnormal use, abuse, neglect and improper maintenance or has met with an accident.
● Replacement parts not specified and approved by Royal Enfield have been used. - The motorcycle, or parts thereof, has been altered, tampered with or modified or replaced in an unauthorised manner.
- The odometer is not functioning or the odometer and / or its reading has been changed / tampered with, so that the actual distance covered cannot be readily determined.
- The motorcycle has been used for competitions, races, and rallies or for the purpose of establishing records.
● On examination by Royal Enfield or its Authorised Dealer / Service Point, if the motorcycle shows
EMISSION WARRANTY
ROYAL ENFIELD
that any of the conditions stipulated in the Owner's manual with regard to use and maintenance have been violated.
- The motorcycle has been run on adulterated / leaded fuel or lubricant other than those specified by Royal Enfield in the Owner's manual or any other document given to the customer at the time of sale of the motorcycle.
● The emission related components are tampered with. - All service and parts related bills and vouchers incurred during the tenure of the emission warranty is not produced.
- All maintenance activities carried out on the vehicle during the tenure of the emission warranty is not entered in the log book.
Tips to be on the right side of Law
● Always get your vehicle checked to meet the emission regulations through and authorised emission checking centre.
- Always carry a valid 'Pollution Under Control' certificate with you at all times during the validity of the emission warranty (30,000 Kms / 3 years from the date of first sale)
Tips to reduce pollution
- Ensure that the periodical maintenance is carried out as stipulated in the owner's manual through a Royal Enfield Authorised Dealer / Service Point.
- Use only Unleaded petrol (> 87 Octane) from reputed fuel pumps.
- Ensure the fuel used is not adulterated.
- Use correct spark plug as recommended in the owner's manual.
- Use lubricants as per recommendations given on grade / brand in the owner's manual.
Mandatory Signs


Use of sound signals prohibited
Speed Limit
Overtaking prohibited
Drive dead slow main road ahead
Information Signs

End of speed limit

Parking place

No-Parking zone
Cautionary Signs

Road ahead zigzags towards right

Road ahead zigzags towards left

Cross-roods ahead

Sharp bend ahead towards right

Sharp bend ahead towards left

Dead-end shad

Side road ahead to right

Side road ahead to left

Hair-pin bend ahead towards right

Hair-pin bend ahead towards left

Narrow bridge ahead

Steep hill ahead

Rough road ahead

Guarded level-crossing ahead

Unguarded
veel-crossing
ahead

Ferry crossing ahead

school ahead
LOG BOOK
ROYAL ENFIELD
| Sl. No. | Date Kms. Details | Idling Co% | Authorised Dealer/Service Point | |||
| Job Card No. | Stamp & Signature | |||||
ROYAL ENFIELD
LOG BOOK
| Sl. No. | Date Kms. Details | Idling Co% | Authorised Dealer/Service Point | |||
| Job Card No. | Stamp & Signature | |||||
FREE SERVICE COUPONS
ROYAL ENFIELD
It is our endeavour to provide excellent service to your Royal Enfield Motor Cycle at all times. Towards this we provide four free services at specific Intervals.
Please avail these services at the specified time, in any of the Royal Enfield Authorised Dealer / Service Point nearest to you and as a token of satisfactory service, kindly return the free service coupon duly filled in and signed, to the service outlet.
Availing the free services in the specified time is a prerequisite to warranty consideration.
The cost of fuel, oil, oil filter element, grease etc. used for free service is chargeable to the customer.
1st
Free
Service
500 Kms
Or
45±8 days
whichever is
earlier from the
date of sale
Enter the Details in
Free Service
Record
(Cost of oil,
oil filter element
and other
consumables
used are
chargeable to
the customer)
500 KMS or 45+8 DAYS WHICHEVER IS EARLIER FROM THE DATE OF SALE
Vehicle Installation Form No.
ODO Reading :
Sold by (Dealer's Name & Address)
Regn. No:
Sale Date:
Serviced Date:
Serviced by (Dealer's/ASP Name & Address)
Received the above vehicle after the service having been done to my entire satisfaction.
Customer's Signature:....
Date

Contact Phone / Mobile No.:
1st FREE SERVICE ACTIVITIES
ROYAL ENFIELD
-
Water wash the vehicle and dry it with a clean cloth
-
Electrolyte..... Check level & top-up
-
Battery terminals.... Clean and apply petroleum jelly
-
Drive chain free play.... Check, clean, lubricate & adjust
-
Rear brake pedal pivot..... Lubricate
-
Front & Rear brakes.... Check & Adjust
-
Wheel rims front & rear..... Check spokes tightness
-
Front fork oil leak..... Check for leakage
-
Air filter element .... Clean
-
Spark plugs (2 Nos).... Check, clean & adjust gap
-
H.T. Leads.... Inspect for cracks
-
Carburetor.... Clean & tune
-
Fuel filter.... Clean
-
Fuel pipe.... Inspect for cracks
-
Rubber hose, Air filter to carburetor..... Inspect for cracks
-
Rubber hose, inlet manifold.... Inspect for cracks
-
Accelerator / TPS cable..... Check & adjust play
-
Clutch cable.... Adjust play
-
Engine oil sump strainer.... Clean
-
Engine oil..... Replace
-
Engine oil filter paper element..... Replace
-
Hand levers & kick starter pivot...... Lubricate
Customer Copy
Job Card No:
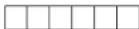
Date

Odo Reading
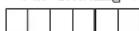
Name of Dealer
ASP with Code:
[EMPTY]
[Non-Text]
ASP / Dealer's
Stamp & Signatur
2nd
Free
Service
3000 Kms
Or
90±15 days
whichever is
earlier from the
date of sale
Enter the Details in
Free Service
Record
(Cost of oil,
oil filter element
and other
consumables
used are
chargeable to
the customer)
3000 KMS or 90+15 DAYS WHICHEVER IS EARLIER FROM THE DATE OF SALE
Vehicle Installation Form No.
ODO Reading :
Sold by (Dealer's Name & Address)
Regn. No:
Sale Date:
Serviced Date:
Serviced by (Dealer's/ASP Name &
Address)
Received the above vehicle after the service having been done to my entire satisfaction.
Customer's Signature:
Contact Phone / Mobile No.:

2nd FREE SERVICE ACTIVITIES
ROYAL ENFIELD
-
Water wash the vehicle and dry it with a clean cloth
-
Electrolyte .... Check level & top-up
-
Battery terminals.... Clean and apply petroleum jelly
-
Drive chain free play .... Check, clean, lubricate & adjust
-
Rear brake pedal pivot..... Lubricate
-
Front & Rear brakes.... Check & Adjust
-
Wheel rims front & rear..... Check spokes tightness
-
Front fork oil leak..... Check for leakage
-
Air filter element .... Clean
-
Spark plugs (2 Nos).... Check, clean & adjust gap
-
H.T. Leads .... Inspect for cracks
-
Carburetor .... Clean & tune
-
Fuel filter Clean
-
Fuel pipe....Inspect for cracks
-
Rubber hose, Air filter to carburetor .... Inspect for cracks
-
Rubber hose, inlet manifold.... Inspect for cracks
-
Accelerator / TPS cable .... Check & adjust play
-
Clutch cable .... Adjust play
-
Steering free play.... Check & Adjust
-
Engine oil..... Check level & top-up
-
Hand levers & kick starter pivot..... Lubricate
-
Oil filter element, oil strainer & magnetic drain.pklpan
Customer Copy
Job Card No:
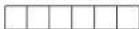
Date
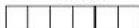
Odo Reading
Name of Dealer
ASP with Code:
[EMPTY]
[EMPTY]
ASP / Dealer's
Stamp & Signature
3rd
Free
Service
6000 Kms
Or
180±15 days
whichever is
earner from the date of sale
(2022) 1-37 - 16-20
Enter the Details in
Free Service
Record
(Cost of oil,
oil filter element
and other
consumables
used are
chargeable to
the customer)
6000 KMS or 180+15 DAYS WHICHEVER IS EARLIER FROM THE DATE OF SALE
Vehicle Installation Form No.
ODO Reading :
Sold by (Dealer's Name & Address)
Regn. No:
Sale Date:
Serviced Date:
Serviced by (Dealer's/ASP Name &
Address)
Received the above vehicle after the service having been done to my entire satisfaction.
Customer's Signature:....
Contact Phone / Mobile No.:

3rd FREE SERVICE
ACTIVITIES
ROYAL
ENFIELD
Water wash the vehicle and dry it with a clean cloth
-
Electrolyte .... Check level & top-up
-
Battery terminals .... Clean and apply petroleum jelly
-
Drive chain free play .... Check, clean, lubricate & adjust
-
Rear brake pedal pivot...... Lubricate
-
Rear brake cam...... Cam clean, lubricate & Adjust play
-
Wheel rims front & rear...... Check spokes tightness
-
Front brake .... Check & Adjust
-
Tyres front & rear...... Check wear and tread depth
-
Air filter element Clean
-
Spark plugs (2 Nos) .... Check, clean & adjust gap
-
H.T. Leads.... Inspect for cracks
-
Carburetor.... Clean & tune
-
Fuel filter.... Clean
-
Fuel pipe.... Inspect for cracks
-
Rubber hose, Air filter to carburetor..... Inspect for cracks
-
Rubber hose, inlet manifold.... Inspect for cracks
-
Accelerator / TPS cable..... Check & adjust play
-
Clutch cable.... Adjust play
-
Engine oil sump strainer.... Clean
-
Engine oil Replace
-
Engine oil filter element.... Replace
-
Hand levers & kick starter pivot..... Lubricate
-
Front Fork oil.... Inspect
-
Swing arm spacer & pivot...... Lubricate
-
Steering System .... Check, Lub. Steering balls & Adj. play
Customer Copy
Job Card No:
Date

Odo Reading
Name of Dealer
ASP with Code:
广力云智慧零售收银系统
[Non-Text]
earner from the date of sale
(2022.1.23 - 15.2 - 15.2.2.2)
Enter the Details in
Free Service
Record
(Cost of oil,
oil filter element
and other
consumables
used are
chargeable to
the customer)
9000 KMS or 270+15 DAYS WHICHEVER IS EARLIER FROM THE DATE OF SALE
Vehicle Installation Form No.
ODO Reading :
Sold by (Dealer's Name & Address)
Regn. No:
Sale Date:
Serviced Date:
Serviced by (Dealer's/ASP Name &
Address)
Received the above vehicle after the service having been done to my entire satisfaction.
Customer's Signature:....
Contact Phone / Mobile No.:

4th FREE SERVICE ACTIVITIES
ROYAL ENFIELD
-
Water wash the vehicle and dry it with a clean cloth
-
Electrolyte .... Check level & top-up
-
Battery terminals .... Clean and apply petroleum jelly
-
Drive chain free play..... Check, clean, lubricate & adjust.
-
Rear brake pedal pivot..... Lubricate
-
Front & Rear brakes.... Check & Adjust
-
Wheel rims front & rear..... Check spokes tightness
-
Front fork oil .... Check level & top-up / replace
-
Air filter element .... Clean
-
Spark plugs (2 Nos) .... Check, clean & adjust gap
-
H.T. Leads....Inspect for cracks
-
Carburetor Clean & tune
-
Fuel filter Clean
-
Fuel pipe ...... Replace
-
Rubber hose, Air filter to carburetor ..... Inspect for cracks
-
Rubber hose, inlet manifold.... Inspect for cracks
-
Accelerator / TPS cable..... Check & adjust play
-
Clutch cable .... Adjust play
-
Engine oil strainer..... Clean
-
Engine oil..... Check level & top-up
-
Hand levers & kick starter pivot..... Lubricate
-
Steering free play.... Check & Adjust
-
Tyres..... Check wear and tread depth
Customer Copy
Job Card No:
Date

Odo Reading
Name of Dealer
ASP with Code:
Dealer's Stamp & Signature
Dealer / ASP Copy
12.000 ± 250 Kms. Service
Job Card No :...... Date :......
Odo Reading : ....Dealer Code : ....
Brief Work Done : Reg. No.:
Dealer's Stamp & Signature
Customer Copy
15.000 ± 250 Kms. Service
Job Card No :...... Date :......
Odo Reading : ....Dealer Code : ....
Brief Work Done :
Dealer's Stamp & Signature
Dealer / ASP Copy
15.000 ± 250 Kms. Service
Job Card No :...... Date :......
Odo Reading : ....Dealer Code : ....
Brief Work Done : Reg. No.:
Dealer's Stamp & Signature
PAID SERVICE /
MAINTENANCE RECORD
ROYAL ENFIELD
Dealer / ASP Copy
12.000 ± 250 Kms. Service
Brief Work Done :
Dealer's Stamp & Signature
Customer Copy
12.000 ± 250 Kms. Service
Brief Work Done :
Dealer's Stamp & Signature
Dealer / ASP Copy
15.000 ± 250 Kms. Service
Brief Work Done :
Dealer's Stamp & Signature
Customer Copy
15,000 ± 250 Kms. Service
Brief Work Done :
Dealer's Stamp & Signature
ROYAL ENFIELD
PAID SERVICE / MAINTENANCE RECORD
Customer Copy
18.000 ± 250 Kms. Service
Job Card No :...... Date :......
Odo Reading : ....Dealer Code : ....
Brief Work Done :
Dealer's Stamp & Signature
Dealer / ASP Copy
18.000 ± 250 Kms. Service
Job Card No :...... Date :......
Odo Reading : ....Dealer Code : ....
Brief Work Done : Reg. No.:
Dealer's Stamp & Signature
Customer Copy
21.000 ± 250 Kms. Service
Job Card No :...... Date :......
Odo Reading : ....Dealer Code : ....
Brief Work Done :
Dealer's Stamp & Signature
Dealer / ASP Copy
21.000 ± 250 Kms. Service
Job Card No :...... Date :......
Odo Reading : ....Dealer Code : ....
Brief Work Done : Reg. No.:
Dealer's Stamp & Signature
PAID SERVICE /
MAINTENANCE RECORD
ROYAL ENFIELD
Dealer / ASP Copy
18.000 ± 250 Kms. Service
Brief Work Done :
Dealer's Stamp & Signature
Customer Copy
18.000 ± 250 Kms. Service
Brief Work Done :
Dealer's Stamp & Signature
Dealer / ASP Copy
21.000 ± 250 Kms. Service
Brief Work Done :
Dealer's Stamp & Signature
Customer Copy
21,000 ± 250 Kms. Service
Brief Work Done :
Dealer's Stamp & Signature
ROYAL ENFIELD
PAID SERVICE / MAINTENANCE RECORD
Customer Copy
24.000 ± 250 Kms. Service
Job Card No :...... Date :......
Odo Reading : ....Dealer Code : ....
Brief Work Done :
Dealer's Stamp & Signature
Dealer / ASP Copy
24.000 ± 250 Kms. Service
Job Card No :...... Date :......
Odo Reading : ....Dealer Code : ....
Brief Work Done : Reg. No.:
Dealer's Stamp & Signature
Customer Copy
27.000 ± 250 Kms. Service
Job Card No :...... Date :......
Odo Reading : ....Dealer Code : ....
Brief Work Done :
Dealer's Stamp & Signature
Dealer / ASP Copy
27.000 ± 250 Kms. Service
Job Card No :...... Date :......
Odo Reading : ....Dealer Code : ....
Brief Work Done : Reg. No.:
Dealer's Stamp & Signature
PAID SERVICE /
MAINTENANCE RECORD
ROYAL ENFIELD
Dealer / ASP Copy
24.000 ± 250 Kms. Service
Brief Work Done :
Dealer's Stamp & Signature
Customer Copy
24.000 ± 250 Kms. Service
Brief Work Done :
Dealer's Stamp & Signature
Dealer / ASP Copy
27.000 ± 250 Kms. Service
Brief Work Done :
Dealer's Stamp & Signature
Customer Copy
27,000 ± 250 Kms. Service
Brief Work Done :
Dealer's Stamp & Signature
ROYAL ENFIELD
PAID SERVICE / MAINTENANCE RECORD
Customer Copy
30.000 ± 250 Kms. Service
Job Card No :...... Date :......
Odo Reading : ....Dealer Code : ....
Brief Work Done :
Dealer's Stamp & Signature
Dealer / ASP Copy
30.000 ± 250 Kms. Service
Job Card No :...... Date :......
Odo Reading : ....Dealer Code : ....
Brief Work Done : Reg. No.:
Dealer's Stamp & Signature
Customer Copy
33,000 ± 250 Kms. Service
Job Card No :...... Date :......
Odo Reading : ....Dealer Code : ....
Brief Work Done :
Dealer's Stamp & Signature
Dealer / ASP Copy
33,000 ± 250 Kms. Service
Job Card No : .... Date : ....
Odo Reading : ....Dealer Code : ....
Brief Work Done : Reg. No.:
Dealer's Stamp & Signature
PAID SERVICE /
MAINTENANCE RECORD
ROYAL ENFIELD
Dealer / ASP Copy
30.000 ± 250 Kms. Service
Brief Work Done :
Dealer's Stamp & Signature
Customer Copy
30,000 ± 250 Kms. Service
Brief Work Done :
Dealer's Stamp & Signature
Dealer / ASP Copy
33,000 ± 250 Kms. Service
Brief Work Done :
Dealer's Stamp & Signature
Customer Copy
33,000 ± 250 Kms. Service
Brief Work Done :
Dealer's Stamp & Signature
ROYAL ENFIELD
NOTES
NOTES
ROYAL ENFIELD
ROYAL ENFIELD
VEHICLE INSTALLATION FORM
| Dealer's Name | Date |
| Place of Dealership | Dealer Code |
| Engine No. | Coupon No. |
| Chassis No. | Installation Date. |
| Customer's Name | Taluk |
| Door No. & Street | State |
| Village / Town | STD Code |
| District | Telephone Residence |
| Pin Code | Bike Regn. No. |
| Telephone Office | Invoice No. |
| E-mail address : if any | Delivery Note / Advice No. |
| Age in Years | |||||
| 18-20 Yrs | AG 01 | 36-40 Yrs | AG 05 | ||
| 21-25 Yrs | AG 02 | 41-45 Yrs | AG 06 | ||
| 26-30 Yrs | AG 03 | Above 45 Yrs | AG 07 | ||
| 31-35 Yrs | AG 04 | ||||
| Monthly Household Income | ||
| Below Rs. 10,000 | ME 01 | |
| Rs. 10,000-20,000 | ME 02 | |
| Rs. 20,000-50,000 | ME 03 | |
| Above Rs. 50,000 | ME 04 | |
| Expected Average KMs Per Day | ||
| Lesser than 10 KMs | KM01 | |
| 11 - 30 KMs | KM02 | |
| 13 - 15 KMs | KM03 | |
| Above 50 KMs | KM04 | |
| Mode of Purchase | ||
| Cash | MP 01 | |
| Bank Finance | MP 02 | |
| Organised Company Finance | MP 03 | |
| Local Finance | MP 04 | |
| Loan from friends | MP 05 | |
| Educational Qualification | |||||
| 10th - 12th | CQ 01 | BE | CQ 05 | ||
| Diploma | CQ 02 | MBB5 | CQ 06 | ||
| Graduate | CQ 03 | CA | CQ 07 | ||
| Post - Graduate | CQ 04 | MBA | CQ 08 | ||
| Purpose of use | |||||
| Family Vehicle | P 26 | To Commute Res-College | P 31 | ||
| Personal Vehicle | P 27 | To carry load business | P 32 | ||
| To move around / as part of work / Business | P 28 | To go around with friends | P 33 | ||
| No Specific Purpose / Received as Gift | P 34 | ||||
| Commute Between Residence and Office | P 29 | For long distance/ leisure rides only | P 35 | ||
| To run Family Errands | P 30 | Any other | P 36 | ||
| Usage Road Type | ||
| Hilly Road | RT 01 | |
| Plain Road | RT 02 | |
| Kutcha Road | RT 03 | |
| Highways Road | RT 04 | |
| City Road Congested | RT 05 | |
| City Road Non - Congested | RT 06 | |
| Mixed type of Road | RT 07 | |
| Profession | ||
| Private Company Employee | CP 01 | |
| Government Employee | CP 02 | |
| Sales Representative | CP 03 | |
| Bank / Insurance Employee | CP 04 | |
| Software Engineer or IT / ITeS Emps | CP 05 | |
| Public Sector Employee | CP 06 | |
| Farmer / Agriculturist | CP 07 | |
| Student | CP 08 | |
| Contractor | CP 09 | |
| Small Trader / Shopkeeper | CP 10 | |
| Businessman | CP 11 | |
| Doctor | CP 12 | |
| Lawyer | CP 13 | |
| Engineer | CP 14 | |
| Chartered Accountant | CP 15 | |
| Others (Please mention) : | CP 16 | |
What was the major reason in deciding to purchase Royal Enfield's bike?
| Riding Comfort | SP 01 | |
| Stability | SP 02 | |
| Safety | SP 03 |
| Loading carrying Capacity | SP 04 | |
| Image / Status | SP 05 | |
| Fuel Consumption | SP 06 |
Have you visited Royal Enfield website? Yes □ No □
For Office use-only
| Suggested by Friends | SP 07 | |
| Suggested by Local Mechanics | SP 08 | |
| To Cover Long Distance | SP 09 |
Vehicle Installation Form (VIF) No.
What Vehicle do you own now?
Motor Cycle
| First Time Two - Wheeler Buyer | FB 01 | HERO HONDA / HERO | Yamaha SS 125 | EY 13 | Bajaj Pulsar 200 / 220 | BA 15 | |||||
| ROYAL ENFIELD | HH CD 100 / CD 100 SS | HH 01 | Yamaha SZX | EY 14 | Ninja 250R | BA 16 | |||||
| Royal Enfield Bullet 350 (CI) | RE 01 | HH Sleek | HH 02 | Yamaha SZR | EY 15 | Ninja 650R | BA 17 | ||||
| Royal Enfield Bullet DLX | RE 02 | HH Splendor | HH 03 | Yamaha FZ16 | EY 16 | KTM Duke | BA 18 | ||||
| Royal Enfield Bullet Campus | RE 03 | HH Street / DLX | HH 04 | Yamaha FZS | EY 17 | TVS - SUZUKI / TVS | |||||
| Royal Enfield Machismo | RE 04 | HH CBZ Drum / Disc / ES | HH 05 | Yamaha Fazer | EY 18 | TVS - Suzuki Max 100 | TS 01 | ||||
| Royal Enfield Machismo A350 | RE 05 | HH Passion | HH 06 | Yamaha YZF - R15 | EY 19 | TVS - Suzuki Max 100 R | TS 02 | ||||
| Royal Enfield Lightning | RE 06 | HH Ambition 125 /135 | HH 07 | Yamaha Enticer | EY 20 | TVS - Suzuki Samurai | TS 03 | ||||
| Royal Enfield Lightning 535 | RE 07 | HH Super splendor | HH 08 | Yamaha Above 500 cc | EY 21 | TVS - Suzuki Shogun | TS 04 | ||||
| Royal Enfield Electra 4S | RE 08 | HH Splendor Plus / NXG | HH 09 | KINETIC | TVS - Suzuki Shaolin | TS 05 | |||||
| Royal Enfield Electra 5S | RE 09 | HH Hunk / Extreme | HH 10 | Kinetic KA 80 | KE 01 | TVS - Suzuki Fiero / ES | TS 06 | ||||
| Royal Enfield Thunderbird (LB) | RE 10 | Hero Ignitor | HH 11 | Kinetic K4 100 | KE 02 | TVS Sport | TS 07 | ||||
| Royal Enfield Bullet 350 UCE | RE 11 | Hero Impulse | HH 12 | Kinetic Challenger | KE 03 | TVS Star City / DLX | TS 08 | ||||
| Royal Enfield Electra UCE | RE 12 | Hero CD Dawn / DLX | HH 13 | Kinetic GF Laser / 125 / 150 | KE 04 | TVS Max 4R | TS 09 | ||||
| RE Thunderbird Twin Spark | RE 13 | Hero Splendor Pro | HH 14 | Kinetic Aquila | KE 05 | TVS Jive | TS 10 | ||||
| Royal Enfield Classis 350 | RE 14 | Hero Passion Pro | HH 15 | Kinetic Stryker | KE 06 | TVS Flame SR / DS | TS 11 | ||||
| Royal Enfield Classis 500 | RE 15 | Hero Glamour | HH 16 | Kinetic Boss | KE 07 | TVS Apache / RTR | TS 12 | ||||
| SUZUKI MOTORCYCLE | Hero Achiever | HH 17 | Kinetic Velocity | KE 08 | TVS Victor / GLX /GS | TS 13 | |||||
| Suzuki GW 250 | SM 01 | Hero CBZ Xtreme | HH 18 | Kinetic Comet | KE 09 | LML | |||||
| Suzuki Slingshot | SM 02 | Hero Karizma / ZMR | HH 19 | BAJAJ | LML Energy / FX | LM 01 | |||||
| Suzuki GS 150R | SM 03 | Bajaj M80 / Major | BA 01 | LML Adreno / FX | LM 02 | ||||||
| Suzuki Heat | SM 04 | ESCORT YAMAHA / YM | Bajaj KB 100 / RTZ | BA 02 | LML Freedom DX / Prima / Topper | LM 03 | |||||
| Suzuki Zeus | SM 05 | Escort Rajdoot | EY 01 | Bajaj 4S Champion | BA 03 | LML Graptor / Beamer | LM 04 | ||||
| Suzuki Above 500 cc | SM 06 | Escort Ace | EY 02 | Bajaj KB 125 | BA 04 | ||||||
| HONDA MOTORCYCLE | Escort Yamaha RX 100 | EY 03 | Bajaj Boxer AT & CT | BA 05 | MAHINDRA | ||||||
| Honda Dream Yuga | HM 01 | Escort Yamaha RX 135 | EY 04 | Bajaj Caliber / SM | BA 06 | Mahindra Stallio | MA 01 | ||||
| Honda CB Twister | HM 02 | Escort Yamaha RXZ | EY 05 | Bajaj Acer 100 | BA 07 | Mahindra Macho | MA 02 | ||||
| Honda CB Shine | HM 03 | Yamaha RX135(SS) | EY 06 | Bajaj Pulsar 150 / 180 | BA 08 | ||||||
| Honda CBF Stunner | HM 04 | Yamaha YBX | EY 07 | Bajaj Eliminator | BA 09 | ||||||
| Honda CB Unicorn | HM 05 | Yamaha YD 125 | EY 08 | Bajaj Cageva CRX 3 | BA 10 | ||||||
| Honda CB Unicorn Dazzler | HM 06 | Yamaha Crux | EY 09 | Bajaj Avenger | BA 11 | ||||||
| Honda CBR 150R | HM 07 | Yamaha Libero | EY 10 | Bajaj Platina 110/ 125 | BA 12 | ||||||
| Honda CBR 250R | HM 08 | Yamaha Gladiator | EY 11 | Bajaj Discover 100 / 125 / 150 | BA 13 | ||||||
| Honda Above 500 cc | HM 09 | Yamaha YBR 110 / 125 | EY 12 | Bajaj Pulsar 135 | BA 14 |
| Scooters | |||||||||||||
| LML | SC 01 | Bajaj | SC 02 | Kinetic | SC 03 | Piaggio | SC 04 | Hero | SC 05 | ||||
| TVS | SC 06 | Suzuki | SC 07 | Honda | SC 08 | Yamaha | SC 09 | ||||||
| Mopeds | ||||||||||||
| Bajaj | MD 01 | TVS | MD 02 | Escorts | MD 03 | Hero Puch | MD 04 | |||||
| Kinetic | MD 05 | Hero Majestic | MD 06 | Avanti | MD 07 | |||||||
| Car (Below 1000 cc) | CR01 | Car (1000 to 2000 cc) | CR02 | Car (Above 2000cc) | CR03 | Others | OT 01 |
The reason I have booked and willing to wait for a Royal Enfield is
| TICK THE OPTIONMOST SUITABLE | DefinitelyAgree | Agree | Maybe | Disagree | DefinitelyDisagree |
| Because it is my dream bikesince childhood. | |||||
| There is no other 350cc bike. | |||||
| This kind of styling is notavailable on any other bike. | |||||
| Because this is a Royal Enfieldam willing to wait. | |||||
| Other Reasons. |
I would rate my experience in this counter as-
| TICK THE OPTION MOST SUITABLE | Excellent | Good | Could be better | Not good | Extremely Bad |
| Attitude and Capability of people. | |||||
| Test ride. | |||||
| Communication during waiting period. | |||||
| Ease of booking and other formalities. | |||||
| Bike delivery and information given. |
Format No. F/14A/CS/03, Sep 2012 DLR/CS Copy
| Model: Engine No: | ||||||||
| Dealer's Name: Location: | ||||||||
| Colour: Key Number: | ||||||||
| Battery Number: Tyre Number: Front: Rear: Battery Make: | ||||||||
| Aggregate | Area | Defect Code | Measure | Defect #1 | Defect #2 | Defect #3 | Remarks | |
| CHASSIS / ENGINE NUMBER | 1 | Engine / Vehicle Number Details DF Same | ||||||
| CONNECT BATTERY / CHECK VOLTAGE | 2 | Battery Charging | D / NC / Weak Cell | Battery Voltage 12V-whereas 13.5 V (Max. online voltage) | ||||
| ENGINE OIL | 3 | Replace oil & oil filter / Check Oil level (3 Drain Bolts system Hex 19mm, 8mm X 2nos and Hex 12mm head bolts) | EO - (Drained Oil Level) | Fill 2.5 Litres (Capacity is 2.75 Litres) - Remove 3 Drain Bolts to Drain the complete Oil | ||||
| 4 | Clean Primary Oil Strainer screen - Clean | |||||||
| LOCK OPERATION | 5 | Ignition / Side Air Filter Box / Tool Box Lock / Fuel Tank Lock | H / LF / NW Same | |||||
| PETROL | 6 | Fill Petrol - 5 Litres | ||||||
| FRONT WHEEL | 7 | Brake Lever Free Play EP / T 2-3 mm / (STD) | ||||||
| 8 | Caliper Mounting Bolts LF 2.7 to 3.0 Kgm | |||||||
| 9 | Front Wheel Rotation | W / T / LF / N | Free (Check Spokes Looseness & Runout | |||||
| 10 | Front Mudguard Alignment / Cover Tube Rubbing | M / RB | Straight | |||||
| 11 | Front Wheel Nut | LF | 7.0 to 7.7 Kgm | |||||
| 12 | Front Tyre Condition (Check Tyre Line Seating) | WF | Good | |||||
| 13 | Front Tyre Pressure | LESS | 22 PSI | |||||
| CLUTCH | 14 | Clutch Operation | H / N | Smooth | ||||
| 15 | Clutch Lever Free Play | EP / V / T | 2 - 3 mm | |||||
| HANDLE BAR CONTROLS & ELECTRICAL SWITCH OPERATIONS | 16 | Accelerator Operation | T / SY Smooth | |||||
| 17 | Lever Brackets Tightness | LF | Tight | |||||
| 18 | Switch Modules Tightness | LF | Tight | |||||
| 19 | Steering Movement | T | Free | |||||
| 20 | Handle Bar Positioning | WF | W.r.to Dot Punch | |||||
| 21 | Lock Nut T- Stem | LF | 4.5 to 5.5 Kgm | |||||
| 22 | Electrical Switch Operation | NW / F | No Defects | |||||
| 23 | Neutral Lamp | NW / F | No Defects | |||||
| FUEL SYSTEM | 24 | Fuel Tap Operation | H / NW | Smooth / Main / Reserve | ||||
| 25 | Fuel Leak | L | No Leak (Tank, Tap, Carburetor) | |||||
| 26 | Fuel Tank Alignment | M | Straight | |||||
| REAR WHEEL | 27 | Rear Brake Pedal Free Play | T / EP 20 - 30 mm | |||||
| 28 | Pedal Position w.r.t foot rest | DF Same Level | ||||||
| 29 | Chain Tension | T / EP 20 - 25 mm | ||||||
| 30 | Rear Wheel Rotation | W / T / LF / N | Free (Check Spokes Looseness & Runout) | |||||
| 31 | Anchor Pin Nut | LF | 4.5 Kgm | |||||
| 32 | Rear Mudguard Alignment M Straight | |||||||
| 33 | Rear Tyre Pressure | LESS | 32 PSI | |||||
| 34 | Rear Tyre Condition (Check Tyre Line Seating) | WF | Good | |||||
| 35 | RR Shock Absorber Operation / Adjustment | H / N / AD | Smooth | |||||
| AESTHETICS | 36 | Mudguards - Paint / Plating Related | SC / PD / R / DN | No Defects (Mudguards / Fuel Tank / Tool Box | ||||
| 37 | Fuel Tank - Paint Related | SC / PD / R / DN | No Defects | |||||
| 38 | Tool Box LH, Air Filter Box, Battery Cover - Paint / Plating Related | SC / PD / R / DN | No Defects | |||||
| 39 | Head Lamp Casing - Paint Related SC / PD / R | No Defects | ||||||
| 40 | Powder Coated Parts (Scratch / Rust / Chipped OFF) | SC / PD / R No Defects | ||||||
| 41 | Plated Parts (Scratch / Rusty) SC / R / PO | No Defects (Mudguards / Fuel Tank / Wheel Rim / Indicator | ||||||
| 42 | Buffed components poor Buffing & Scratches SC / DU No Defects | |||||||
| 43 | Seat Alignment M No Defects | |||||||
| 44 | Indicators Alignment (MFR / Amber) M No Defect / Colour Lens | Colour Check | ||||||
| 45 | Stickers / Knee Pads M / LF / SC No Defects | |||||||
| OTHERS | 46 | Nuts, Bolts, Fasteners (Torque) | LF | Tight (RH, LH Cover / Engine Foundation / Accessories / Wheel Nut) | ||||
| 47 | Owner's Manual & Tool Kit Content - | Availability | ||||||
| 48 | Spare Fuse in Fuse Carrier | NA Tubular / Blade Fuse | ||||||
| TEST RIDE | 49 | Starting (Kick Start / Self Start) | ST / N | Easy Start | ||||
| 50 | Front / Rear Brakes Effectiveness / Feel | AD / SG Sharp | ||||||
| 51 | Pulling | P | Straight | |||||
| 52 | Vibration | V | Smooth | |||||
| 53 | Wobbling | W No Defects | ||||||
| 54 | Front Fork / Drive Chain Noise | N | No Defects | |||||
| 55 | Engine Performance / Gear Shifting / TPS Setting | N / ST / J / H | Smooth | |||||
| 56 | Any Rattling / Squeaking Noise | N | Nil (Silencer / Accessories / Body Parts / Suspension) | |||||
| STATIC CHECK (AFTER TEST RIDE) | 57 | Easy Start (Hot Condition) | ST / NW | Smooth | ||||
| 58 | Leak | L | No Leak (Oil / Fuel / Hydraulic / Acid Leakage) | |||||
| 59 | Smoke / Oil Droplets in Silencer | SK / EO | No Smoke | |||||
| 60 | Cam Noise / Top End Noise | N | Smooth | |||||
| ANY OTHER | ||||||||
| Note ** | Any Abnormal Noise or Engine Open cases during PDI Inform to Plant / Factory | |||||||
| INSTRUCTIONS | |
| 1. Check the vehicle thoroughly for any transit damages or shortage of parts.2. Carry out all jobs listed under Pre-delivery Inspection Schedule.3. Thoroughly road - test the vehicle for performance. | 4. Please ensure delivery of the vehicle in brand new condition.5. Claim transit loss and damage through 'TRANSIT' insurance only.6. Claim Parts replaced for Manufacturing defects only under warranty. |
| Misalignment | Noise | Vibration | Leak | Starting Trouble/Missing | Less | Wobbling | Loose Fitment | Discharging | Tight | Fused | Scratch | Pulling | Dent | Wrong Fitment | Hard | Jerking |
| M | N | V | L | ST | LESS | W | LF | D | T | F | SC | P | DN | WF | H | J |
| Excess Play | Different | Spongy | Sticky | Not Available | Smoke | Adjustment | Not Working | Paint Defect | Rust | Peel Off | Dull | Excessive Oil | Rubbing | Not Charging |
| EP | DF | SG | SY | NA | SK | AD | NW | PD | R | PO | DU | EO | RB | NC |
ROYAL ENFIELD
| BIKE INSTALLATION CONFIRMATION BY CUSTOMER | |||
| We congratulate you on becoming a proud owner of Royal Enfield bike. We request you to give this feedback after completion of the delivery process. | |||
| YES | NO | ||
| 1 | Bike Documents explained (Invoice, Insurance, RC / Road Tax Receipt) | ||
| 2 | Owner's Manual received | ||
| 3 | Recommended Lubricants explained | ||
| 4 | Maintenance Schedule sheet in Owner's Manual shown and explained | ||
| 5 | Next Free Service due explained | ||
| 6 | All Free / Paid Services explained | ||
| 7 | Warranty Guidelines explained | ||
| 8 | ‘Running in period” details shown in the manual explained | ||
| 9 | Service Station Address given and Location explained | ||
| 10 | Service Incharge Name & Mobile No given | ||
| 11 | Bike delivered in neat and clean condition | ||
| 12 | Tool Kit & First Aid Kit received and explained | ||
| YES | NO | ||
| 13 | Control Switches & Disc Brake System usage explained | ||
| 14 | Fuse Box location shown and explained | ||
| 15 | Recommended Tyre Pressure explained | ||
| 16 | Bike starting & Gear shifting procedure explained | ||
| 17 | Quantity of Fuel in Fuel Tank informed | ||
| 18 | Bike orientation & short distance drive provided | ||
| 19 | Date and Time of Installation | ||
| 20 | Name of Person who did Installation | ||
| Suggestions If Any:CUSTOMERSIGNATURE | |||
| Model: Registration No.: | |||
| Chassis No.: | |||
| We thank you and request you to return this filled up form to the person who did the bike installation for youKEEP RIDING | |||
FORM 22
[See Rules 47(g), 115, 124 (2), 126A and 127 (1), 127 (2)]
INITIAL CERTIFICATE OF COMPLIANCE WITH POLLUTION STANDARDS, SAFETY STANDARDS OF COMPONENTS AND ROAD WORTHINESS
Certified that the following vehicle complies with the provisions of the Motor Vehicles Act, 1988, and the rules made there under, including the following mass emission norms:
Brand name of the vehicle :-
Bullet Electra 350 UCE /
Bullet Electra 350 UCE - ES
Chassis number :-
Engine number/motor number :-
(in case of battery operated vehicles)
Sub-rule No. of rule :-
115(2)(i), 115(14)(F)
Emission norms :- Bharat Stage III
[Bharat Stage-I/II/III/Bharat (Trem) Stage-III etc.]
Date :
For ROYAL ENFIELD
Quality Assurance

ROYAL ENFIELD
ROYALENFIELD.COM