Continental GT (2014) - Motorcycle Royal Enfield - Free user manual and instructions
Find the device manual for free Continental GT (2014) Royal Enfield in PDF.


| Product Type | Motorcycle - Cafe Racer |
| Engine | 535cc, 4-stroke, air-cooled, single cylinder, OHV, SI |
| Bore x Stroke | 87 mm x 90 mm |
| Compression Ratio | 8.5:1 |
| Max Power | 29.1 BHP (21.4 kW) @ 5100 rpm |
| Max Torque | 44 Nm @ 4000 rpm |
| Fuel System | Electronic Fuel Injection (PGM-EFI) |
| Ignition | Electronic Ignition |
| Transmission | 5-speed constant mesh, wet multi-plate clutch (7 plates) |
| Final Drive | Chain drive (100 links), 18T front sprocket, ratio 2.00:1 |
| Frame | Tubular steel double cradle (Harris Performance) |
| Front Suspension | Telescopic fork, 110mm stroke |
| Rear Suspension | Gas-charged shock absorbers (Paoli), 80mm stroke |
| Front Brake | 300mm floating disc, twin piston floating caliper (Brembo) |
| Rear Brake | 240mm disc, single piston floating caliper |
| Front Tyre | 100/90-18 M/C 56H (Pirelli Sports Demon) |
| Rear Tyre | 130/70-18 M/C 63H (Pirelli Sports Demon) |
| Fuel Tank Capacity | 13.5 litres (approx.) |
| Kerb Weight | 185 kg (with 90% fuel) |
| Dimensions (L x W x H) | 2060 mm x 760 mm x 1070 mm |
| Wheelbase | 1360 mm |
| Saddle Height | 800 mm |
| Ground Clearance | 140 mm |
| Electrical System | 12V DC, alternator, battery 12V - 14 AH |
| Headlamp | 12V H4 60/55W halogen bulb |
| Fuel Level Warning | Low fuel warning at 3.00 litres (last bar blinks) |
| Safety Features | Roll over sensor, MIL for EFI, clutch start switch |
| Tool Kit | Includes basic tools and first aid kit |
| Emission Compliance | Bharat Stage III (Trem) |
Frequently Asked Questions - Continental GT (2014) Royal Enfield
User questions about Continental GT (2014) Royal Enfield
0 question about this device. Answer the ones you know or ask your own.
Ask a new question about this device
Download the instructions for your Motorcycle in PDF format for free! Find your manual Continental GT (2014) - Royal Enfield and take your electronic device back in hand. On this page are published all the documents necessary for the use of your device. Continental GT (2014) by Royal Enfield.
USER MANUAL Continental GT (2014) Royal Enfield
ROYAL ENFIELD OWNER'S MANUAL
Continental

natural_image
Red background with a white laurel wreath containing the letters 'GT' (no additional text or symbols)Foreword
The Royal Enfield Continental GT is our lightest, fastest, and most powerful motorcycle in production. It's a machine with a story, a nod to motorcycling's finest hour, the best expression yet of a cultural phenomenon that has simply refused to fade away - the cafe racer.
And now you have one of your own. Congratulations!
Your meticulously re-engineered Continental GT debuts a twin downtube cradle frame chassis developed by the renowned Harris Performance from UK. A new engine displaces 535cc and dollops of torque, when you need it. With gas-charged rear shock absorbers from Paoli and Brembo disc brakes, you stay in charge. With an aerodynamic seating position, Pirelli Sports Demon tyres and a remapped ECU, the new Continental GT is part homage, part engineering tour-de-force.
This manual will help you to operate your motorcycle and guide you to wholly maintain it. We have also provided tips on safe riding and on minor adjustments for the care of your motorcycle. Please avail the four free services at the nearest Authorised Service Point at the appropriate time to maintain your motorcycle in top riding condition. We request you to carefully read the terms and conditions of warranty and other useful information given in this manual before starting to use your Continental GT. Log on to the exciting world of Royal Enfield on www.royalenfield.com to get to know more about the company, its products and news from time to time.
Welcome to the world of the Rockers, and enjoy your burn-ups atop this spectacular machine.
Notice
All information in this manual is based on the latest product information available at the time of publication. Due to continuous improvements or other changes, there may be discrepancies between information in this manual and your vehicle. Royal Enfield reserves the right to make production changes at any time without prior notice and without incurring any obligation to make same or similar changes to vehicles previously built or sold.
All images shown are for reference to explain and need not to be exactly the same on the model you own. Technical specifications are subject to change without prior notice.
© Copyright 2014 Royal Enfield (A unit of Eicher Motors Ltd.). All Rights Reserved. No part of this manual shall be copied, distributed or otherwise dealt without the express permission in writing from Royal Enfield.
Disclaimer
- This model fitted with "tubeless tyre" is provided with an inner tube.
- Failure to use an inner tube in a spoked wheel will cause deflation of the tyre resulting in loss of motorcycle control.
- The approved tyres marked with "TUBELESS" are suitable for use with inner tube.
- Engine 9
- Ignition System 10
- Transmission 10
Electricals 11 - Chassis 12
- Dimensions .... 13
- Weights 13
SAFE RIDING TIPS/GUIDELINES .... 14
SAFE & HAPPY RIDING 18
RULES OF THE ROAD 19
VEHICLE IDENTI. NUMBER-DETAILS ..... 21
KEY PARTS LOCATION 22
- Right Side View 22
• Left Side View.... 23
- Top View 24
OPERATION OF CONTROLS 25
- Ignition Switch 25
• Steering Lock 26
• Steering Unlock 26
- Fuel Tank Cap.... 27
- Side Panel LH / Battery Cover 27
• Utility Box 27
- Side PANEL RH 27
- Alpha-Numeric display unit.... 28
Head Lamp Switch.... 30
Head Lamp Day Flash.... 30
• Dip Switch 30
• Engine Start Switch 31
• Engine Stop Switch 31
• Turn Signal Switch 31
• Horn 32
Contents
- Manual Bi Starter (choke) 32
PRE OPERATIONAL CHECKS 33
RUNNING IN PERIOD.... 34
ELECTRONIC FUEL INJECTION (EFI) ..... 35
• EFI 35
• The Advantages of EFI 35
- Malfunction Indicator Lamp (MIL) ..... 35
ROLL OVER SENSOR 36
STARTING 37
GEAR SHIFTING 40
PARKING 41
• Center Stand 41
- Side Stand 41
TOOLS & FIRST AID KIT....42
RECOMMENDED LUBRICANTS 43
PERIODICAL MAINTENANCE 44
MINOR MAINTENANCE TIPS 48
● Control Cables, Hand lever, Center / Side Stand Pivots .... 48
• Oil Level Inspection 48
• Engine oil change 49
- Spark Plug 50
- Brake fluid (Front & Rear) 51
• Inspection of tyres and wheels ..... 51
- Tyre pressure....52
- Front Wheel removal 52
- Front Wheel reassembly 53
• Rear wheel removal 54
- Rear wheel reassembly .... 55
- Adjustments-Clutch lever free play .... 57
• Rear brake light switch adjustment..... 57
- Drive Chain free play 58
- Chain lock fitment .... 59
- Adj. of gas filled shockabsorber .... 60
- Removal of Battery from the Vehicle..... 61
Contents
- Battery Maintenance.... 61
• Reassembly of Battery on Vehicle ..... 62
CHANGING ELECTRICAL COMPONENTS .... 64
• Head Lamp Bulb Replacement ..... 64
• Tail Lamp bulb Replacement ..... 65
- Trafficator bulb Replacement .... 65
- Fuse 66
- Blade fuse usage list 66
• Air Filter Paper element....67
WASHING PROCEDURE....68
• Precautions 68
• After washing....68
STORAGE PRECAUTION 70
• Preparing the motorcycle for re-use ... 71
LONG TRIP PRECAUTIONS 72
COMPLETE WIRING DIAGRAM (Domestic) . 73
TROUBLE SHOOTING 74
• Engine fails to start 74
• Engine misfiring 75
• Poor pickup 75
- White / Blue smoke 76
• Engine overheating 76
• Excessive fuel consumption.... 76
- Brakes Poor 77
- Vehicle wobbles.... 77
• Electricals 77
• Electronic Fuel Injection (EFI) 78
WARRANTY 79
EMISSION WARRANTY.... 81
FREE SERVICE COUPONS 86
PAID SERVICE/MAINTENANCE RECORD ..... 95
ALL INDIA ROAD SIGNS 103
LOG BOOK 104
NOTES 108
Personal & Vehicle Information
| Name | ||||||||||||||||||||||||||
| Door No./St. | ||||||||||||||||||||||||||
| Locality | ||||||||||||||||||||||||||
| City State | Pin | |||||||||||||||||||||||||
| Contact Nos. | Res: Off: Mobile: | Email: | ||||||||||||||||||||||||
| Engine No. Battery No. | ||||||||||||||||||||||||||
| Frame No. Battery make | ||||||||||||||||||||||||||
| Reg. No. Licence No. | ||||||||||||||||||||||||||
| Date of Sale Valid till dt. | ||||||||||||||||||||||||||
| Model Key No. | ||||||||||||||||||||||||||
| Tyre make Colour | ||||||||||||||||||||||||||
| Sold by Dealer Code | ||||||||||||||||||||||||||
| Vehicle Installation Form (VIF) No. |
Free Service Record
It is our endeavour to provide excellent service to your CONTINENTAL GT at all times. Towards this we provide 4 free services at specific Intervals.
Please avail these services at the specified time, in any of the Royal Enfield Authorised Dealer / Service Point nearest to you and as a token of satisfactory services, kindly return the free service coupon duly filled in and signed, to the service outlet.
Availing the free services in the specified time is a prerequisite for warranty consideration. The cost of fuel, oil, grease etc. used for all free services are chargeable to the customer.
| 1^st Service 4 | ^nd Service | 3^rd Service | ^th Service2 | |||||||||||||||||||||
| Date of Service | ||||||||||||||||||||||||
| Kms Covered | ||||||||||||||||||||||||
| Servicing ASP / Dealer's Name Address | Dealer / ASP Rubber Stamp | Dealer / ASP Rubber Stamp | Dealer / ASP Rubber Stamp | Dealer / ASP Rubber Stamp | ||||||||||||||||||||
NOTE : Please ensure that the free service details are recorded in this sheet immediately after the service is carried out.
Safety Definitions
8
The information given under the titles: Warning, Caution and Note are for your safety and for the care and safety to your motorcycle and others. Please read these carefully and if disregarded it may result in injury to yourself or others and damages to the motorcycle
Statement in this manual preceded by the following words are with special significance.

Warning
Indicates a potentially hazardous situation, which if not avoided, could result in serious injury or damage.
CAUTION :
Indicates a potentially hazardous situation, if not avoided, may result in minor or moderate injury or damage.
NOTE :
Indicates important and useful messages for clear understanding.
Technical Specification
9
ENGINE
Engine 4 Stroke, air cooled, single cylinder, OHV, SI Engine
Capacity 535 cc
Bore 87 mm
Stroke 90 mm
Compression ratio 8.5:1
Max. Power @ RPM 29.1 BHP (21.4 kw) @ 5100 rpm
Max. Torque @ RPM 44 Nm @ 4000 rpm
Air Filter Element ...... Paper Element Filter
Engine Oil Capacity (dry fill) 2.75 Litres.
Lubrication .... Forced Lubrication, Wet Sump
Engine Oil Grade .... Royal Enfield 15 W 50 API SL Grade Engine Oil (JASO MA)
Fuel System ...... Electronic Fuel Injection Programmed (PGM-EFI)
Technical Specification
IGNITION SYSTEM
Ignition system ...... Electronic Ignition
Spark plug Electrode gap 0.80 - 0.90 mm
Spark plug WQR8DC (Bosch Super)
TRANSMISSION
Clutch W et Multiplate (7 Plates)
Primary drive .... Duplex Chain
Primary Drive Ratio 2.15:1
Gear box .... Constant Mesh 5 Speed
Gear shift pattern 1 - N - 2 - 3 - 4 - 5
Gear Ratios 1st-3.063:1, 2nd-2.013:1, 3rd-1.522:1, 4th-1.212:1, 5th-1.000:1
Secondary Drive (F.D. Sprocket) 18 Teeth
Final Drive Ratio 2.00:1
Drive Chain Links 100 Links
Technical Specification
ELECTRICALS
Generation.... Alternator
System 12V DC
Battery 12V - 14 AH
Head lamp 12V, H4 - 60/55 W,
Halogen Bulb
Brake / Tail lamp 21/5 W
Turn signal.... 12V, 10W - 4 nos.
Instrument Cluster ...... Digital instrument Cluster with LCD
High beam indicator 12V, 0.2W (L.E.D.)
Neutral Telltale Bulb 12V, 1.12W
Horn (Dual) 12V, 2.5A (dual tone - LT, HT)
Starter Motor 12V, 0.9 KW

WARNING
Using bulb s / other electrical gadgets other than specified rating may lead to over loading / erratic behaviour / premature failure of electrical system.
Modifications on the bike which are not approved by Royal Enfield may not only disqualify for warranty, but also affects performance of the bike.
Technical Specification
CHASSIS
Frame .... Tubular steel double cradle
Tyre size ...... Front: 100/90-18 M/C 56H
Rear: 130/70-18 M/C 63H
Tyre pressure.... Front-Solo: 1.41 Kg/cm2 (20 PSI)
Pillion: 1.55 Kg/cm2 (22 PSI)
Rear- Solo: 2.11 Kg/cm2 (30 PSI)
Pillion: 2.25 Kg/cm2 (32 PSI)
Fuel tank capacity 13.5 Litres***
Low fuel warning 3.00 Litres***
Suspension ...... Front: Telescopic, Stroke 110mm
Rear: Gas Charged, Stroke 80 mm
Front fork oil capacity 430 ml per leg
Front fork oil Gabriel Fork Oil 2W 35
Hydraulic Brakes ...... Front: 300 mm dia floating disc, twin piston floating caliper
Rear: 240 mm dia disc, single piston floating caliper
Brake oil grade DOT 3 or DOT 4
Brake oil capacity ...... Front: 50 ml
Rear: 100 ml
Note:
***Fuel tank capacity given
here is approximate. It can
v ary marg in ally from this
specified value
Technical Specification
13
DIMENSIONS
Length 2060 mm
Width 760 mm
Height 1070 mm
Wheel base 1360 mm
Saddle height 800 mm
Ground clearance 140 mm
WEIGHTS
Kerb Weight (with 90% Fuel) 185 Kg
Gross vehicle weight 365 Kg
NOTE: BS III
This vehicle meets Emission Norms -
Bharat (Trem) Stage - III
NOTE :
- Values / Dimensions given above are for your guidance only.
- In view of continuous improvements being done on our products, the specifications are subject to change without notice.
Safe Riding Tips / Guidelines
- Before operating your new motorcycle, we request you to carefully read and follow the operating and maintenance instructions detailed in this manual for the safety of your own, your motorcycle, and also that of others.
- Know and respect the rules of the road. Please be a safe rider for your own safety and for others in road.
- Before starting the motorcycle, check for proper operation of brakes, clutch, gear shifter, handle bar controls, tyre pressures, fuel and oil levels.
- Use only genuine Royal Enfield spare parts and approved access or ies. Use of other manufacturer's performance parts may affect the performance of your motorcycle and render the motorcycle void of warranty. See your Royal Enfield dealer for details.
- Whenever refuelling your motorcycle, please exercise utmost caution and carefully observe the following rules.
* DO NOT smoke and please ensure that there are no open flames or sparks near the motorcycle, when refuelling OR servicing the fuel system.
* Switch OFF mobile phones and other hand held electronic devices. Open the fuel filler cap slowly.
* Refuel in a well ventilated area with the engine turned off.
* DO NOT fill the tank to its brim. Please fill fuel only till the bottom of the filler neck insert, so as to leave air space in the fuel tank to allow for fuel expansion.

Warning
Royal Enfield cautions you against the use of certain nonstandard parts such as aftermarket and custom made extended front forks or suspensions, which may adversely affect performance and handling. Removing or alt ering original part s may ad vers ely aff ect performance and could result in to an accident.
Safe Riding Tips / Guidelines
- A new motorcycle must be operated according to the special running-in-procedure. See running-in-procedure mentioned in Page No. 34.
- Operate motorcycle only at moderate speeds and out of traffic until you have become thoroughly familiar with its operation and handling characteristics under all conditions.
- DO NOT exceed the legal speed limit or drive too fast for existing conditions. Always reduce speed when poor driving conditions exist. High speed increases the influence of any other condition affecting stability and increases the possibility of loss of control.
NOTE :
If you are an inexperienced rider we recommend that you obtain formal training on correct motorcycle riding techniques and become thoroughly familiar with the operation of your particular motorcycle. New riders should gain experience under various conditions while driving at moderate speeds.
Pay strict attention to road surfaces and wind conditions. Any two wheeled vehicle may be subject to the following upsetting forces:
* Wind blasts from passing trucks.
* Rough uneven road surfaces.
* Slippery road surfaces.
These forces may affect the handling characteristics of your motorcycle. If this happens, reduce speed and guide the motorcycle relaxed to a controlled condition. Do not brake abruptly.
- Operate your motor cycle defensively. Remember that, a motorcycle does not afford the same protection as an automobile in an accident. One of the most common accident situations occurs when the driver of the other vehicle fails to see or recognize a motorcycle and turns into the oncoming motorcyclist.
Safe Riding Tips / Guidelines
- Wear an approved helmet, clothing, and foot gear suited for riding a motorcycle. Bright OR light colours are best for greater visibility in traffic, specially at night. Avoid loose, flowing garments and scarves.
- When carrying a pill on rider, it is your responsibility to instruct them on proper riding procedures.
- DO NOT allow other individuals, under any circumstances, to operate your motorcycle unless you know they are experienced, licensed riders and are thoroughly familiar with the operating conditions of your motorcycle.
Warning
Regularly inspect shock absorbers and front forks and look for leaks. Replace worn out parts. Worn out parts can adversely affect stability and handling.
Warning
For your personal welfare, all the listed service and maintain enance recom mendations should be performed. Lack of regular maintenance at the suggested intervals may affect the safe operation of your motorcycle.
Warning
Avoid any contact with the exhaust system. Wear clothing that will completely cover the legs while riding. The exhaust system gets very hot when the engine is running and remains too hot, even after the engine is turned off. Failure to wear proper or protective clothing could result in serious injury.
Warning
Exh au st gases c contains p oisonous c ar bon monoxide and chemicals, known to cause Cancer, Birth defects or other reproductive defects.
Safe Riding Tips / Guidelines
17

Warning
Motorcycle batteries contain lead and lead components, acids and chemicals known to cause cancer, birth defects or other reproductive harm. Exercise extreme caution while handling a battery. Wash hands thoroughly whenever a battery is handled.

Warning
DO NOT tow a disabled motorcycle. The steering and handling of the disabled motorcycle will be impaired due to the force of the towline. If a disabled motorcycle must be transported, use a truck or a trailer. Towing a motorcycle may cause loss of control of the motorcycle in the front, leading to an accident.

Warning
Consult your Royal Enfield Dealer regarding any questions or problems that occur in the operation of your motorcycle. Failure to do so may aggravate an initial problem, cause costly repairs & jeopardize your personal safety.

Warning
DO NOT pull a trailer behind a motorcycle. Towing a trailer may cause reduced braking efficiency, tyre overloading and unstable handling. Towing a trailer may cause loss of control of the motorcycle in the front, leading to an accident.
Safe & Happy Riding
RIDING DRESS
- Please wear proper riding apparel.
● A pair of riding boots or shoes. - Soft leather gloves.
● Goggles or spectacles to safe guard eyes.
● An approved helmet. Affixed with light reflecting strips of radium stickers at the front and rear.
NOTE :
A light coloured shirt enables greater visibility to other road users specially during nights.
CAUTION :
Loose clothing may get caught on moving parts of your mot orcycle.
SITTING POSTURE
Correct sitting posture is a pre-requisite for stable and safe riding
- Sit in lean forwarded position.
- Keep your elbows close to your body
● Hold the handle bar grips, close to its inner end - Look extensively ahead, including rear view mirrors, without turning the head.
BRAKING
- Apply front and rear brakes gently and simultaneously for maximum braking efficiency.

WARNING
Applying any one of the brakes suddenly may cause the vehicle to skid. The hydraulic disc brakes fitted on your motorcycle require very less effort. High effort or sudden application may lock the wheel. Please use utmost caution while applying the brakes.
● While riding on wet or bad road conditions use brakes cautiously.
Rules of the Road
- Be sure your number plate is installed in the position specified by law and it is clearly visible at all times.
- Ride at a safe speed that is consistent with the type of road surface you are on. Pay strict attention to whether the surface is :
* Dry
* Oily
* lcy
* Wet
- Watch for loose debris, such as leaves, slippery substances or loose gravel that can hamper the stability of your vehicle.
-
DO NOT exceed the legal speed limit or drive too fast for existing conditions. Always reduce speed when poor driving conditions exist. High speed increases the influence of any other condition affecting stability and increases the possibility of loss of control.
-
Keep to the correct side of the road center line when meeting oncoming vehicle.
- Actuate your turn signals and exercise caution when passing other vehicles going in the same direction. Never try to pass another vehicle going in the same direction at street intersections, on curves, or when going up/or down a hill.
- At street intersection give the right-of-way to the vehicle on your left or right. DO NOT presume you have the right-of-way.
● Always signal when preparing to stop, turn or pass.
● While turning either right or left, watch for pedestrians, animals, as well as vehicles. - All traffic signs, including manual controls at intersections, should be obeyed promptly. SLOW DOWN at traffic signs near schools and CAUTION signs at railroad crossings.
Rules of the Road
- When intending to turn, signal at least 100 feet (30.5 meters) before reaching the turning. Be close to the center line (unless local rules require otherwise), slow down and then turn carefully.
- Never jump a traffic light. When a change is imminent from GO to STOP (or vice versa) at intersections, slow down and wait for the light to change to green. Never run through a yellow or red traffic light.
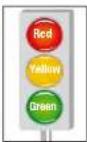
- DO NOT leave the curb or parking area without signalling. Be sure your way is clear to enter moving traffic. A moving line of traffic always has the right-of -way.
- When parking the motorcycle, park on a firm and flat surface to prevent it from falling over.
- Protect your motorcycle against theft. After parking your motorcycle, ensure that steering head is locked and then remove the Ignition key.
SIDE VIEW MIRRORS
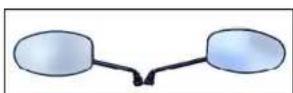
Your motorcycles is equipped with convex mirrors and have a curved surface. This type of mirror is designed to give a much wider view of the rear than a normal flat mirror. However, cars and other objects seen in this type of mirror will look smaller and farther away than when seen in a flat mirror.
Use care when judging the size or distance of objects seen in these mirrors.
NOTE :
To help you to establish the relative distance of vehicles behind your motorcycle, adjust each mirror in such a way, that a small portion of your shoulder is visible and a large portion behind your motorcycle is seen clearly.
Vehicle Identification Number - Details
21
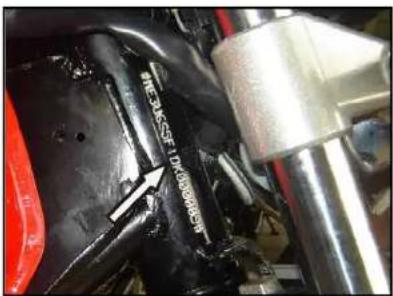
CHASSIS NUMBER
Punched on the steering head tube RH side
text_image
WE316-2F LDX00000000ENGINE NUMBER
Punched on top of the Engine LH side.
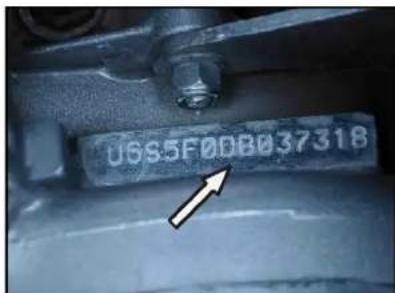
text_image
USS5F0DB037318Key Parts Location
22
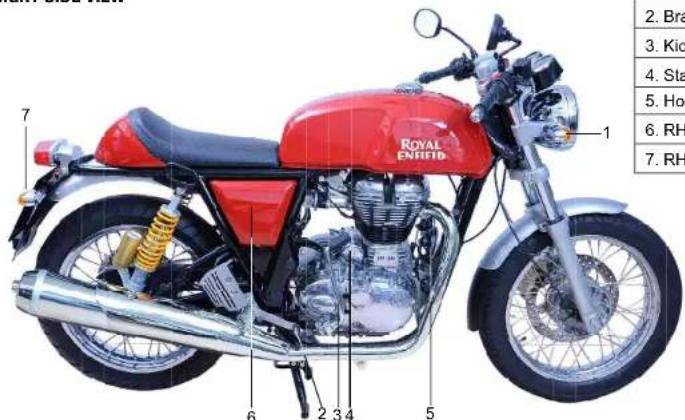
RIGHT SIDE VIEW
text_image
2. Bra 3. Kio 4. Sta 5. Ho 6. RH 7. RH| 1. RH Trafficator front |
| 2. Brake Pedal |
| 3. Kick Start Lever |
| 4. Starter Motor |
| 5. Horn |
| 6. RH Side Panel |
| 7. RH Trafficator Rear |
Key Parts Location
23
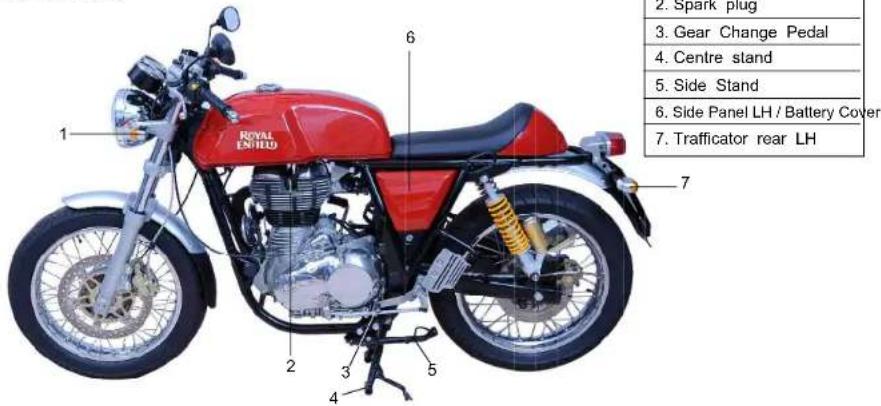
LEFT SIDE VIEW
text_image
2. Spark plug 3. Gear Change Pedal 4. Centre stand 5. Side Stand 6. Side Panel LH / Battery Cover 7. Trafficator rear LH- Trafficator front LH
- Spark plug
- Gear Change Pedal
- Centre stand
- Side Stand
- Side Panel LH / Battery Cov
- Trafficator rear LH
Key Parts Location
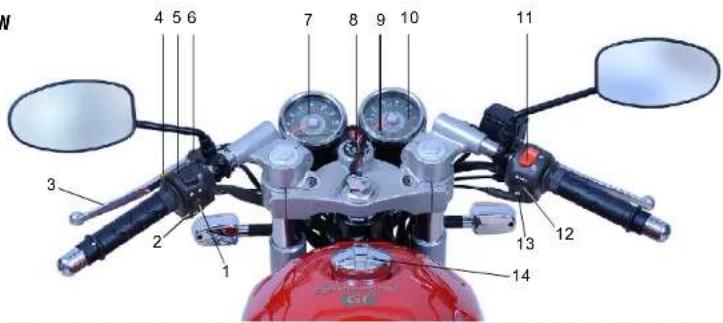
TOP VIEW
text_image
4 5 6 7 8 9 10 11 3 2 1 13 12 14| 1. Turn signal switch | 6. Manual Bistarter / Choke | 11. Engine Kill switch |
| 2. Horn button | 7. Speedometer | 12. Park / head light switch |
| 3. Clutch lever | 8. Ignition switch | 13. Electric Start Switch |
| 4. Day flash switch | 9. Malfunction Indicator Lamp | 14. Fuel tank cap |
| 5. Head lamp dip switch | 10. Tacho Meter |
Operation of Controls
25
IGNITION SWITCH

natural_image
Close-up of a car's wheel hub with a circular dial labeled 'Ferrim' and an arrow indicating rotational motion (no text or symbols beyond the dial)- Insert ignition key and turn clockwise direction to "ON". Once you turn on the ignition key all the indicating lights in instrument cluster starts glowing on for few seconds and the engine will get ready to start. The key cannot be removed from "ON" position.
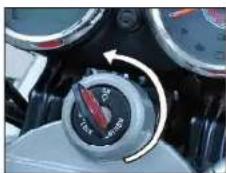
OFFON
- Turn the ignition key in anticlockwise direction to "OFF". Once you turn off, all the electrical systems goes off. Now the key can be removed.
Operation of Controls
26
STEERING LOCK
natural_image
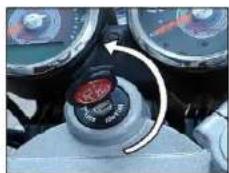
Close-up of a car's dashboard with a rotary knob and circular gauges (no visible text or symbols)- Turn the handle bar to extreme left or right position.
- Push the key inside in "OFF" position, press and further turn to anticlockwise direction to lock the steering system.
- The key can be removed from the lock in this position.
CAUTION :
Protect your motorcycle against theft. After parking your Motorcycle and lock the steering, then remove the key from combination switch.
STEERING UNLOCK
natural_image
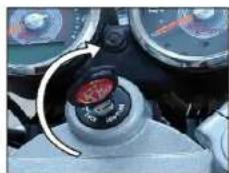
Close-up of a car dashboard with a rotary dial and speedometer (no visible text or symbols)- Push the key in steering lock Position, and turn clockwise direction to unlock the steering.
- The key can be removed from the lock in this position.
CAUTION :
Do not lubricate barrel locks with petroleum based lubricants or graphite. Inoperative locks may result in damage to your vehicle.
Operation of Controls
27
FUEL TANK CAP
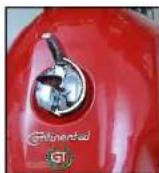
- Turn key clockwise to open. Press the cap to lock with key in position.
NOTE :
● Key can be removed only in locked position.
SIDE PANEL LH / BATTERY COVER
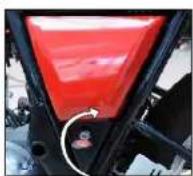
- Turn key clockwise to unlock the side panel.
- Pull the side panel outside for opening the same.
● Key cannot be removed in this position.
UTILITY BOX
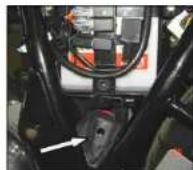
- Utility box is provided at the bot tom area of battery carrier.
- It is covered with side panel LH
SIDE PANEL RH
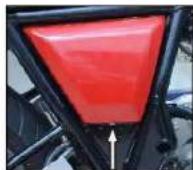
- Unscrew the indicated screw and then pull the side panel for opening the same.
Operation of Controls
28
ALPHA-NUMERIC DISPLAY UNIT
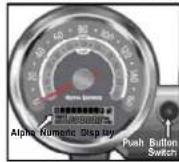
This unit in the speedometer consists of
- Odometer
- Trip A
- Trip B
- Fuel level indicator
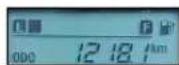
ODOMETER MODE
Odometer mode is the initial display mode of this unit. It displays odometer reading by default.
NOTE :
Once you turn "ON" the ignition key, whatever was the last selection mode will get displayed.
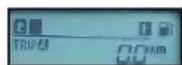
TRIP METER MODE
A light push for less than one second on the "PUSH" button switch will change the display from odometer to Trip meter (TRIP A)
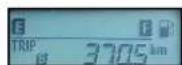
Again another press on the "PUSH" button switch will change the display from "TRIP A to "TRIP B".
NOTE :
For resetting the Trip Meter
- Set the display as TRIP A or B as a current mode.
- Press the "PUSH" button for more than 3 Seconds.
- Automatically the display will become zero.

Warning
Do not attempt to change any setting while riding the motorcycle. It may cause loss of control leading to an accident.
Operation of Controls
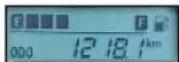
FUEL LEVEL INDICATOR
The fuel level indicator indicates the level of fuel in the fuel tank.
The display bars of the fuel meter disappears towards the Empty (E) when the fuel level decreases.
when last bar start blinking (less than 3 litres), refuel the bike at the earliest.
NOTE :
If the last bar of the fuel meter is blinking continuously after fueling, visit a Royal Enfield authorised dealer and check the same.
BATTERY LOW VOLTAGE INDICATOR
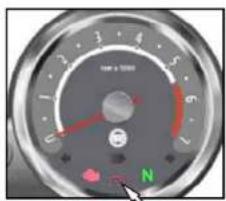
text_image
0 1 2 3 4 5 6 7 8 9 NBattery low voltage indicator
If the battery voltage is less than 12 volts, the low voltage indicator will start glowing continuously.
While the ignition is "ON", low voltage indicator symbol will glow until engine reaches 700 RPM.
In running condition if the battery voltage is below 12 Volts for more than 3 seconds continuously, the low voltage indicator will start glowing.
Operation of Controls
30
HEAD LAMP SWITCH
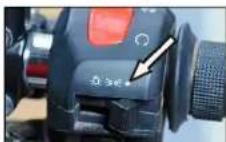
● HEAD LAMP OFF
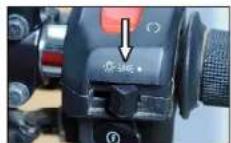
EDDE POSITION LAMP
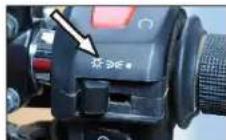
HEAD LAMP ON
DIP SWITCHHEAD LAMP DAY FLASH
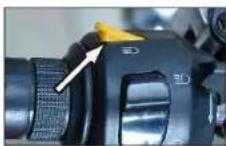
PRESS FOR HEAD LIGHT FLASH
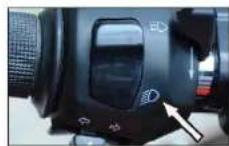
D LOW BEAM

HIGH BEAM
Operation of Controls
31
ENGINE START SWITCH
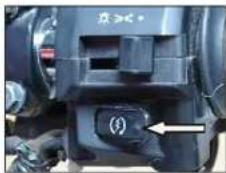
text_image
京34C (✓)PRESS
ENGINE STOP SWITCH
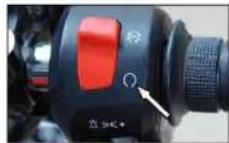

ENGINE ON
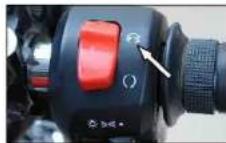

ENGINE OFF
TURN SIGNAL SWITCH
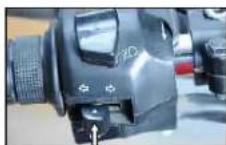
OFF (PUSH TO OFF)
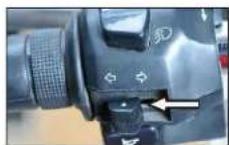

LEFT
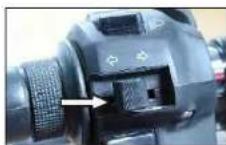

RIGHT
Operation of Controls
32
HORN
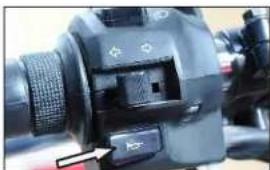
natural_image
Close-up of a camera control panel with a black connector and an arrow pointing to the button (no visible text or symbols)PRESS
MANUAL BI STARTER (CHOKE)
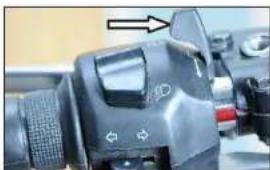
natural_image
Close-up of a camera control panel with adjustment knobs and a scroll wheel (no visible text or symbols)Apply choke in cold start condition while starting the Bike
Pre Operational Checks
33
A careful check of the following must be carried out every time before riding and specially after long periods of storage to determine if any additional maintenance is necessary.
- Adequate fuel in the tank.
- Tyres for correct pressure, abrasions or cuts.
- Rear chain for proper tension and sufficient lubrication.
- Brakes, steering and throttle for proper responsiveness.
-
Cable for fraying or crimping and free operation.
-
Engine oil level.
- Wheel spokes for proper tightness and no breakage.
- Headlamp, tail lamp, brake lamp and indicator lamps for proper functioning.

Warning
For your personal welfare and safety, all the points mentioned above should be performed periodically. Failure to do so may affect safe operation, damage your motor cycle and could result in an accident causing serious injury.
Running In Period
Proper running-In is very important for obtaining maximum life and performance of a new motorcycle. The following guidelines explain proper running-in procedures.
Since the engine is brand new, it should not be loaded excessively for the first 2,000 kilometers. During the first few hundred kilometers, the mating parts in the engine will wear and polish themselves to the correct operating clearances. Driving with prolonged full throttle operation, or in any high speed conditions might result in excessive heating of the engine and cause abnormal wear of the moving parts and hence the same must be avoided.
- 0-500 Kms
The recommended speeds for the first 500 Kilometers is below 50 to 60 Kmph. During this period avoid operating the motorcycle with full throttle opening. Stop the motorcycle for about 5 to 10 minutes to let it cool down, after every hour of running. Vary the speed of the motorcycle regularly during running but avoid using the motorcycle above 1/2 throttle opening position.
- 501-2000 Kms
The recommended speed is below 80 - 90 kmph. Avoid driving the motor cycle with full throttle
opening. Vary the speed of the motorcycle regularly but avoid using the motorcycle above 3/4 ^th throttle opening position.
- 2001 Kms and above
Avoid prol onged full-th rottle operation. Vary speed occasionally.
CAUTION :
After covering the first 500 kilometers, Please replace the engine oil and oil filter element.
Royal Enfield engines are air-cooled and consequently require forced air cooling over the cylinder and head to maintain proper operating temperature. Extended periods of idling may over heat the engine, resulting in serious engine damage.
DO NOT run the engine at extremely high RPM with clutch disengaged or transmission in neutral as it can cause serious engine damage.
An engine running for long distances at high speed must be given close attention to avoid overheating and possible engine damage
Electronic Fuel Injection (EFI)
ELECTRONIC FUEL INJECTION (EFI)
An electronic control unit (ECU) monitors engine performance and provides exact requirement of Air / Fuel mixture to the engine, through the fuel injector by taking inputs from various sensors provided in the motorcycle.
THE ADVANTAGES OF EFI ARE
- Faster response of the engine to suit road/load conditions.
- Better power output
- Lower emission
- Better reliability
• Excellent cold Startability
• Engine Diagnostic capabilities - Maintenance free
MALFUNCTION INDICATOR LAMP (MIL)
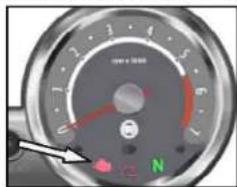
text_image
1 2 3 4 5 6 7 8 9 10 11 12 13 14 15 16 17 18 19 20 21 22 23 24 25 NA Malfunctioning Indicator Lamp (MIL) is provided in the RPM meter which is located on the right side of the Cluster unit.
- EFI Mal Function Indicator; When both the Ignition & Engine kill switch is "ON", the MIL will glow for few seconds and will go "OFF". This indicates that all the functions of Electronic Control Unit (ECU) and other sensors are working perfectly and the motorcycle can be used.
In case of any malfunctioning of the ECU or other sensors etc., the MIL will glow continuously. In the event of any such phenomenon, it is recommended to take the vehicle to a nearest Royal Enfield authorised service point for inspection and further necessary action.
Rollover Sensor
ROLLOVER SENSOR
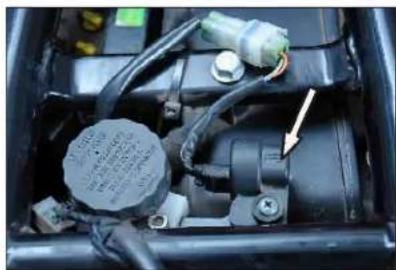
natural_image
Close-up of a car engine component with visible wiring and a black housing (no text or symbols)Your motorcycle is fitted with a unique "Roll Over Sensor" under the seat. This is a safety feature.
In the event of an accident OR if the motorcycle falls over on any side with the engine running condition, The "Roll Over Sensor" will switch off ignition and cut off fuel supply to prevent the motorcycle from moving suddenly, while it is in gear.
To re-activate the system after the motorcycle has been made upright, please switch off both the Ignition & Engine kill switch, wait for a few seconds and switch "ON" again.
This will help to RESET the "Roll Over Sensor" and the engine can be started/run.
Starting
37

Warning
Before starting engine, always shift gears into neutral.
CAUTION :
Do not force the gear lever while attempting to shift to neu tral. Move the motor cycle back & forth and simultaneously press gear lever to come to neutral. Ensure neutral Indicator light glows in the Speedometer.
NOTE :
- If the engine does not start on the first attempt in cold climate, release the starter button, wait for 30 seconds before pressing the starter button again.
- Press starter button and release starter switch once the engine starts.
- A clutch switch is provided in the system for the safety of the rider. This is to prevent the vehicle from starting when the vehicle is in gear. To start the engine when it is in gear, pull clutch lever, press the starter button and release slowly after the engine starts.
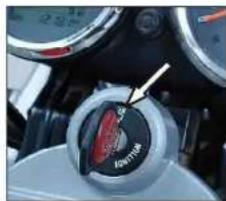
natural_image
Close-up of a mechanical component with a red and black knob labeled 'Potionbox' and an arrow pointing to it (no readable text beyond label)- Turn ignition switch 'ON'
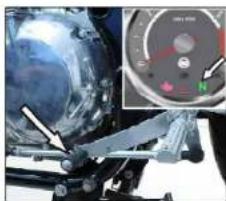
natural_image
Close-up of a mechanical component with an inset showing a circular gauge or dial indicator (no readable text or symbols)- Ensure the side and main stands are in released position
- Ensure that gears are in neutral and neutral lamp is glowing
Starting
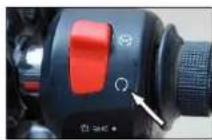
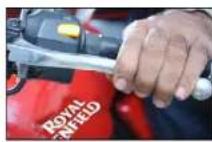
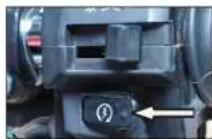
- Ensure Engine stop switch is in "RUN" position
- Press Clutch Lever.
- Press Starter Button and release as soon as engine starts
CAUTION :
Never accelerate the engine immediately after a cold start. The engine should be allowed to run slowly for 15-30 seconds. This will allow the engine to warm up and let oil reach all surfaces needing lubrication. Failure to adhere may result in damage to the Engine.
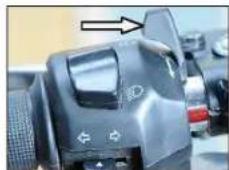
natural_image
Close-up of a camera control panel with an arrow pointing to the left side (no visible text or symbols)• Manual bi Starter (choke)
NOTE :
It may be necessary to operate and hold the manual bi starter, when starting the engine for the first time in cold mornings, temperatures below 10^ C or at high altitudes, to prevent the stalling and to keep the idling RPM steady.
Starting
As soon as the engine attains the operating temperature, the RPM will raise, at which time the manual Bi Starter should be released.
- Warm up engine for 2 minutes - till idling is consistent.
Prior to starting, check to see the fuel level from the fuel gauge.
If the last bar is blinking refuel immediately.
CAUTION :
Please ensure the motorcycle is not used with the low fuel indicator bar blinking continuously. It may not only result in the motorcycle running out of fuel. But will also cause serious damage to the fuel pump. Please ensure fuel is filled up as soon as the low fuel, last bar start blinking.
CAUTION :
Air cooled engine requires air movement over the cylinder head and exhaust pipe to maintain proper operating temperature.
Never accelerate the engine abnormally in stand still condition of the motorcycle. Failure to adhere this may result in damage to exhaust pipe / silencer of the engine due to over heating.
Gear Shifting

natural_image
Close-up of mechanical components with a white arrow pointing to a component (no visible text or symbols)- Warm up engine for 2 minutes - till id ling is consistent/stable
GEAR SHIFT PATTERN
1—N—2—3—4—5
- Press clutch lever towards the hand grip.
- Press gear pedal with toe towards down to engage 1st gear.
- Gently open 1 hr ot tle and r elease clutch simultaneously. If clutch is released suddenly, the engine may stall and cause a jerky start.
CAUTION :
The clutch must be fully disengaged before attempting a gear shift. Failure to fully disengage the clutch may cause a jerky start OR stalling the engine besides causing damage to transmission parts.

natural_image
Close-up of mechanical components including a transparent glass and metal bracket, with no visible text or symbols.- Press the gear pedal upwards with toe to eng age 2nd and gear.
- Follow the same procedure for 3rd, 4th and 5th gear.
NOTE :
Always start motorcycle with gear in neutral position.
Always move the motorcycle in first gear position only.
When engine speed decreases or while climbing a gradient or running at a reduced speed, shift to the appropriate lower gear to prevent the engine from stalling or straining to pull.
Parking
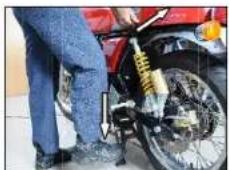
PARKING VEHICLE ON CENTER STAND
natural_image
Person using a blue tool to adjust or install a motorcycle tire (no visible text or symbols)- Select a firm, flat surface
- Hold handle bar straight
● Lower center stand, and ensure that both the legs of the stand are resting evenly on firm ground. - Apply pressure on the fulcrum lever on the center stand and pull vehicle upwards, gently.
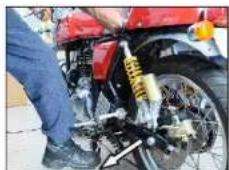
PARKING VEHICLE ON SIDE STAND
natural_image
Person working on a red motorcycle with visible mechanical components and tools (no text or symbols)- Select a firm, flat surface
● Lower Side Stand and gently tilt motorcycle to the left till it rests firmly on the side stand.

Warning
Always park the motor cycle on a firm and flat surface. Parking in a soft ground may cause stand to sink and the motorcycle to fall, causing injury to you or to others and damage to the motorcycle parts.
Tools & First Aid Kit
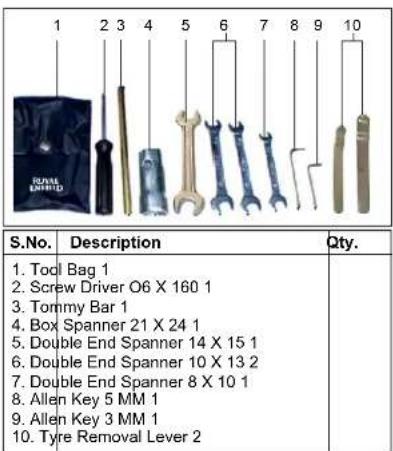
text_image
1 2 3 4 5 6 7 8 9 10 S.No. Description Qty. 1. Tool Bag 1 2. Screw Driver O6 X 160 1 3. Tommy Bar 1 4. Box Spanner 21 X 24 1 5. Double End Spanner 14 X 15 1 6. Double End Spanner 10 X 13 2 7. Double End Spanner 8 X 10 1 8. Allen Key 5 MM 1 9. Allen Key 3 MM 1 10. Tyre Removal Lever 2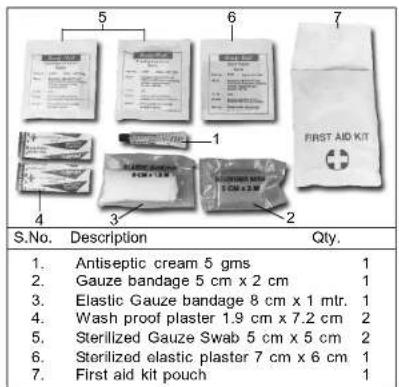
text_image
5 6 7 FIRST AID KIT 1 4 3 2 S.No. Description Qty. 1. Antiseptic cream 5 gms 1 2. Gauze bandage 5 cm x 2 cm 1 3. Elastic Gauze bandage 8 cm x 1 mlr. 1 4. Wash proof plaster 1.9 cm x 7.2 cm 2 5. Sterilized Gauze Swab 5 cm x 5 cm 2 6. Sterilized elastic plaster 7 cm x 6 cm 1 7. First aid kit pouch 1NOTE :
This Tool Kit is kept in Utility box. Refer Page No. 27.
Recommended Lubricants
43
| Engine Oil | |
Grade Royal Enfield 15 W 50 API SL Grade Engine Oil (JASO MA)  | |
| Capacity 2 | 75 Ltrs. (for dry fill)2.50 Ltrs. (during oil & filter element replacement) |
| Front Fork Oil | |
| Grade Royal EnfieldFront Fork Oil(or Gabriel ForkOil 2W 35) | |
| Capacity 430 ml / leg |
| Brake Fluid | |
| Grade DOT | 3 or DOT 4 |
| Capacity | Front : 50 mlRear : 100 ml |
| ISO 14001 – EMSOperation Control Process |
| 1. All customers are advised timely replacement of Engine Oil, Fork Oil & Brake Oil at the dealership /ASP. In case done privately, it is advise to reach old/used Oil to our authorised vendor through RE Dealer/ASP |
| 2. Similarly we advise for disposal of old/used Battery, Tube & Tyres as mentioned in above point No.1. |

Warning
DO NOT switch oil brands indiscriminately because some oil interact chemically when mixed. Use of inferior oils or non-detergent oils can damage the engine.
DO NOT Mix DOT 3 & DOT 4 brake fluid together.
Periodical Maintenance
The maintenance schedule detailed here will help you to maintain your Continental GT meticulously and to get a long trouble free service. The schedule provided herein is based upon average riding conditions and indicates the mileage at which regular inspections, adjustments, replacements and lubrications must be carried out.
The frequency of the maintenance must be shortened depending upon the severity of the Riding condition OR if the motorcycle is used in a very dusty environment, severe climatic cold and hot conditions, bad roads, stagnant water etc., Contact a nearest Royal Enfield Authorised Dealer / Service Point for expert advice and to carry out the periodical maintenance.

Warning
For your personal welfare, all the listed service and maintenance recommendations should be performed. Lack of regular maintenance at the suggested intervals may affect the safe operation of your motorcycle causing the motorcycle to malfunction and stall abruptly resulting in an accident and cause serious injury.
A : Adjust
C : Clean
D : De-carbonise
I:Inspect
L : Lubricate
R : Replace
NOTE :
For maintenance after 30,000 Kms, please repeat the same frequency levels specified above, in consultation with a Royal Enfield Authorised Dealer / Service Point.
Do not mix DOT 3 and DOT 4 brake fluid together.
*Carbo cleaner / Carbclik or Fuel Line Cleaner Spray. (Make - Wurth or ITW Chemin)
Periodical Maintenance
| S.No. | DESCRIPTION | FREE SERVICE | PAID SERVICE | |||||||||
| whichever is earlier | ||||||||||||
| Kms (x 1000) 0.5 3 6 | 9 12 | 15 18 | 21 24 | 27 30 | ||||||||
| Months 1.5 3 | 6 9 | |||||||||||
| 1 | Engine Oil | R R | R R | R | R | |||||||
| Check level at every 1000 Kms or earlier as required | ||||||||||||
| 2 | Engine oil filter element | R | C | R | R | R | R | R | ||||
| 3 | Engine sump filter (oil strainer) | C | C | C | C | C | C | C | ||||
| 4 | Magnetic drain plug under gear box and secondary drain plug under cranksharft in crankcase RH | C C | C | C | C C | C | ||||||
| 5 | Spark plug | C&A | C&A | C&A | C&A | C&A | R | C&A | C&A | C&A | C&A | R |
| 6 | HT lead for crack | I | I | I | I | I | I | I | I | I | I | I |
| 7 | Fuel hose & clip / Injector 'O' Ring / Seal Ring | I | I | I | I | R | I | I | I | R | I | I |
| 8 | Fuel Pump | Check for screw tightness in all services | ||||||||||
| 9 | Accelerator & Throttle pully cable free play | A | A | A | A | A | A | A | A | A | A | A |
| 10 | Rubber hose, Air filter to Throttle body | I | I | I | I | R | I | I | I | R | I | I |
| 11 | Rubber hose, Inlet manifold | I | I | I | I | R | I | I | I | R | I | I |
Periodical Maintenance
| S.No. | DESCRIPTION | FREE SERVICE | PAID SERVICE | |||||||||
| whichever is earlier | ||||||||||||
| Kms (x 1000) 0.5 3 6 | 9 12 | 15 18 | 21 24 | 27 30 | ||||||||
| Months 1.5 3 6 9 | ||||||||||||
| 12 | Air filter paper element C C C C R C C C R C | C | ||||||||||
| 13 | Inlet / Exhaust valve seating | I | I | |||||||||
| 14 | Cylinder head (Combustion chamber) | D | ||||||||||
| 15 | Exhaust pipe | D | ||||||||||
| 16 | Clutch lever free play | Adjust every 1000 Kms or earlier as required | ||||||||||
| 17 | Rear brake pedal pivot | L | L | L | L | L | L | L | L | L | L | L |
| 18 | Battery terminals (apply petroleum jelly) | C | C | C | C | C | C | C | C | C | C | C |
| 19 | Battery Electrolyte level | I | I | I | I | I | I | I | I | I | I | I |
| 20 | Earth wire eyelet contact (below ECU Mounting) | I | I | |||||||||
| 21 | Rear Wheel Drive Chain | Adjust every 1000 Kms or earlier as required | ||||||||||
| Lubricate every 3000 Kms or earlier as required | ||||||||||||
| 22 | Front Fork oil / leak | I | I | I | R | I | I | I | R | I | I | I |
| 23 | Steering ball races / play adjustment | A | L | A | R | A | L | A | R | A | L | |
Periodical Maintenance
| S. No. | DESCRIPTION | FREE SERVICE | PAID SERVICE | |||||||||
| whichever is earlier | ||||||||||||
| Kms (x 1000) 0.5 3 6 | 9 12 | 15 18 | 21 24 | 27 30 | ||||||||
| Months 1.5 3 6 9 | ||||||||||||
| 24 | Spokes tightness / Wheel rim run out front & rear | I | I | I | I | I | I | |||||
| 25 | Rear wheel cush rubbers | I & R | I & R | |||||||||
| 26 | Tyre wear front & rear | I | I | I | I | I | I | I | I | I | ||
| 27 | Hand levers & Kick starter pivot | Lubricate every 1000 Kms or earlier as required | ||||||||||
| 28 | Brake Oil level check / Replacement | I | I | I | I | I | I | I | I | R | I | I |
| 29 | Pivot-Side Stand/ Center Stand pivot | L | L | L | L | L | L | L | L | L | L | L |
| 30 | Rider & Pillion Foot rest pivot | L | L | L | L | L | L | L | L | L | L | L |
| 31 | Swing arm needle bearings and spindle | L | L | |||||||||
| 32 | Vent Pipe under air filter box | I & C | I & C | I & C | I & C | I & C | I & C | I & C | I & C | I & C | I & C | |
| 33 | Throttle body - cleaning spray* | C | C | C | C | C | ||||||
| 34 | PAV pipes & hose clip | I | I | I | I | I | I | I | I | R | I | I |
| 35 | Front & Rear brake hose and Banjo Bolt | I | I | I | I | I | I | I | I | I | I | R |
Minor Maintenance Tips
The following minor maintenance can be carried out easily with simple tools. However, In case, if it is felt that the adjustments are best done by an expert, we recommend that the motorcycle be taken to a nearest Royal Enfield Authorised Dealer / Service Point.
CONTROL CABLES, HANDLE BAR LEVER, PIVOTS, CENTER / SIDE STAND PIVOTS
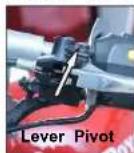
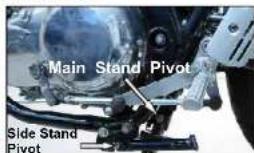
text_image
Main Stand Pivot Side Stand Pivot- Lubricate after using the motorcycle in rain, after waterwash or if used in dusty conditions.
- Wipe the area free of dirt / grease.
- Apply a few drops of oil on the pivots.
OIL LEVEL INSPECTION
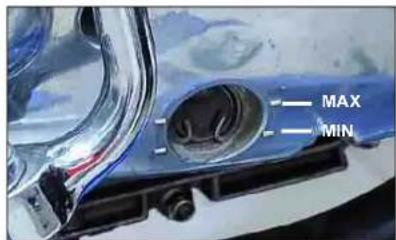
text_image
MAX MIN- Place motorcycle on its center stand on a firm surface.
● Warm up engine for a few minutes & switch off.
● The level is correct if the oil level is in the middle of the oil level window.
• Top up with recommended oil if required.
Minor Maintenance Tips
ENGINE - OIL CHANGE
- Place motorcycle on its centre stand on a firm flat surface.
- Start engine and warm up for 2 minutes.
- Keep a clean tray below the engine
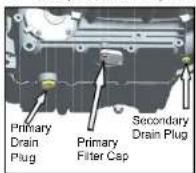
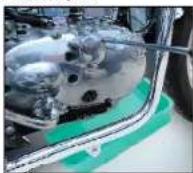
(Refer Periodical Maintenance Chart for frequency)
- Remove primary drain cap, to drain oil & clean suction filter, magnet.
- Then remove secondary drain plug to drain oil & clean the magnet.
- Finally remove primary drain bolt to drain the complete oil.
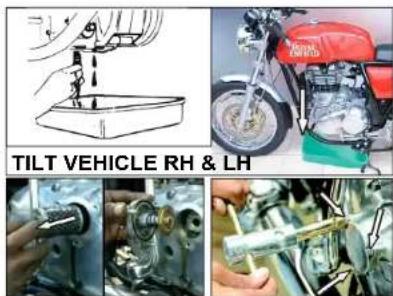
text_image
TILT VEHICLE RH & LH- Remove the oil filter paper element on the Crankcase Cover RH.
- Allow the oil to drain by tilting the motorcycle to both sides.
- Wash the primary and secondary drain plugs along with suction filter thoroughly and refit on the crankcase after all the oil is drained out.
Minor Maintenance Tips
50
- Soak a new oil filter paper element in the oil and refit on the Crankcase Cover RH.
- Assembly 3 bolts and tighten them. Ensure 'O' Ring and gaskets are taken seat properly.
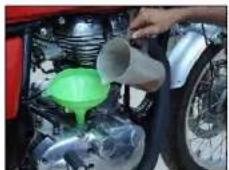
Fill recommended oil to engine till the oil level is upto "MAX" level mark in the oil window in Crankcase Cover RH.
NOTE :
Replace oil filter paper element whenever oil is being replaced.
CAUTION :
Do not fill oil over "MAX" mark. It may cause the engine to smoke and result in loss of power. Do NOT use the motorcycle if the oil is below the "MIN" mark. Doing so will cause serious damage to the moving parts inside the engine and result in an engine lock up.
SPARK PLUG
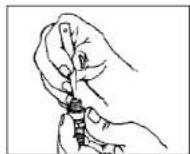

Cleaning and adjusting gap (Refer Periodical Maintenance Chart for frequency)
- Remove HT Lead and the spark plug from the cylinder head using the plug spanner and Tommy bar.
- Clean the insulator tip and electrodes of the plug carefully using a pointed scraper or spark plug cleaner.
- Set the gap between 0.80 to 0.90 mm.
- Refit the spark plug on the cylinder head and connect H.T. Lead.
Minor Maintenance Tips
BRAKE FLUID
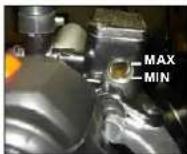
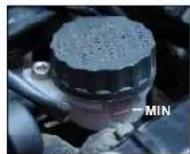
Check if oil is below 'MIN' level. To top Up, remove cover and diaphragm, then top up with DOT 3 or DOT 4 as specified.
CAUTION :
Brake fluid is highly corrosive and can cause damage to painted parts. Please ensure that brake fluid does not spill on any part of the motorcycle. In the event of a spill, please clean the area immediately with a soft cloth (preferably a wet cloth) to avoid damage.
Don't mix DOT 3 & DOT 4 Brake fluid together.
INSPECTION OF TYRES AND WHEELS
- Inspect the tyre periodically for tread wear, cracks and cuts.
Minimum tread depth
Front tyre : 1.00 mm
Rear tyre : 2.00 mm
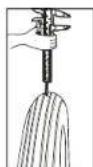
- Check and remove stone, splinters, nails or other particles embedded in the tyre treads.
- Bald spots / swelling may be caused by internal damage. Replace the tyres, if defective.
- Replace tyres when the tread depth has reached the minimum as specified.
- Periodically inspect wheels for spokes breakage and wheel rim run out.
- Check proper seating of the tyre beading on the rim whenever the tyre is reassembled.
- Whenever a new tyre is installed, ensure rim and spokes do not get damaged on account of wrong handling.
Minor Maintenance Tips
- Use only standard tyres & tubes inflated to correct pressure.
TYRE PRESSURE
| Front Rear | ||
| Solo 1.41 kg/cm2 | 2.11 kg/cm2(20 PSI) (30 PSI) | |
| With Pillion 1 | 55 kg/cm2 2.25(22 PSI) (32 PSI) | kg/cm2 |

Warning
Tyres, rims and air valves must be correctly matched to wheel rims. See your Royal Enfield Dealer. Mismatching tyre, tubes, rims and air valves may result in damage to the tyre bead during mounting, allow tyre slippage on the rim and cause tyre failure.
FRONT WHEEL REMOVAL
- Place the vehicle on center stand
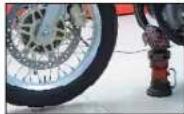
- Place a wooden block the front end of engine to support the vehicle.
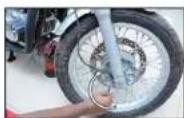
- Loosen the pinch bolt on the RH fork guide by 6 mm allen key.
- Hold the axle head by double end spanner while loosening the axle nut.
- Remove the axle nut along with washer.
Minor Maintenance Tips
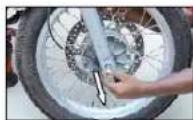
- Tap and remove the front wheel spindle.
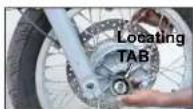
- Tilt the vehicle to RH Side and take out the wheel along with wheel speed sensor and LH side spacer.
CAUTION :
Do not press the front brake lever when wheel is removed as this will result in the brake pads coming too far out of the brake caliper.
- Place a 4 mm thick wooden piece or cardboard sheet between the brake pads to avoid pads activation in the event the front brake lever is accidentally pressed.
FRONT WHEEL REASSEMBLY
- Remove the wooden piece / card board sheet placed between the brake pads
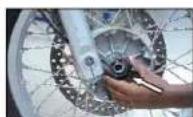
- Place the wheel speed sensor in position.
- Ensure slot on hub and speedo sensor is matched correctly.
- Insert the wheel along with wheel speed sensor and LH spacer between the front fork ends ensuring the brake disc is located between the brake pads.
- Insert and tap the front wheel axle gently inside.
- Refit the washer and tighten the nut firmly.
Minor Maintenance Tips
natural_image
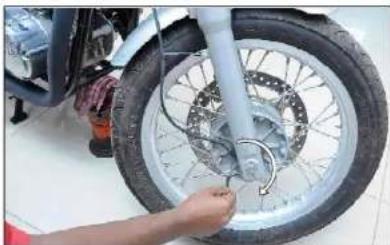
Close-up of a person adjusting the wheel rim of a motorcycle (no visible text or symbols)● Tighten the pinch bolt on the RH fork guide.
- Rotate the wheel and check for smooth rotation.
- Ensure wheel speed sensor wire coupler is being connected to cluster unit and then check for proper working of speedo meter.
- Press brake lever 2 or 3 times to check front brake efficiency.
REAR WHEEL REMOVAL
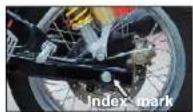
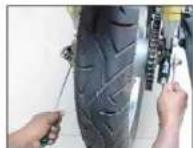
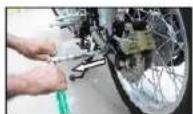
- Place the vehicle on center stand on a firm and flat surface.
- Observe and mark the alignment index marks in the both sides of swing arm.
- Remove axle nut on the RH side.
- Remove wheel spindle from LH side along with wheel collar and LH side spacer.
Minor Maintenance Tips
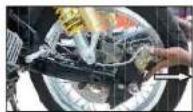
- Remove the caliper assembly by pulling out from the swing arm slot.
- Remove the distance collar.
- Tilt the motorcycle towards RH side and take out the rear wheel assembly conveniently.
CAUTION :
Do not press the rear brake pedal when wheel is removed as this will result in the brake pads coming too far out of the brake caliper.
- Place a 4 mm thick wooden piece or cardboard sheet between the brake pads to avoid pads activation in the event the rear brake pedal is accidentally pressed.
REAR WHEEL REASSEMBLY
- Ensure the four Cush rubbers are in position inside the rear wheel hub.
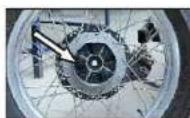
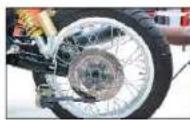
- Tilt vehicle to right and insert wheel assembly between the swing arms.
- Position the rear wheel with cush rubber on the rear driven flange / adaptor.
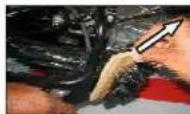
● Fix the LH side spacer in rear wheel hub. - Remove the wooden piece / card board sheet placed between the brake pads.
Minor Maintenance Tips
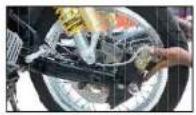
- In sert the call per assembly by pushing in the projection given inside the swing arm. Ensure the brake disc is located in between the brake pads.
- Align the caliper bracket, wheel and swing arm holes in-line and ensure distance collar is placed in hub dust seal.
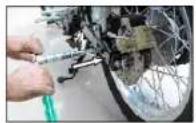
- Insert and tap the rear wheel axle gently.
CAUTION :
Do not force the spindle into the wheel as the threads may get damaged. Tap it through the wheel gently.
- Ensure the index marks alignments on both sides of the swing arm are in same position for proper wheel alignment.
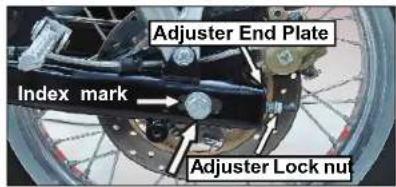
text_image
Adjuster End Plate Index mark Adjuster Lock nut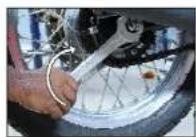
● Tighten the axle nut firmly.
- Ensure that swing arm end plate is seated properly and the chain adjuster nuts are correctly tightened and Locked.

Warning
Ensure the vehicle do not come out of center stand while dismantling and as sembling the wheel assembly.
Minor Maintenance Tips
ADJUSTMENTS - CLUTCH LEVER FREE PLAY
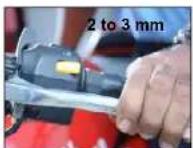
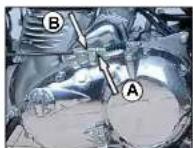
Clutch Lever (free play 2 - 3 mm)
- Loosen the cable outer lock nut (A).
- Turn the Nut (B) Clockwise to reduce the play or Anticlockwise to increase the free play.
- Check free play 2 to 3 mm at Clutch lever pivot on handle bar end.
● Tighten lock nut (A) after adjustment is done.
REAR BRAKE LIGHT SWITCH ADJUSTMENT
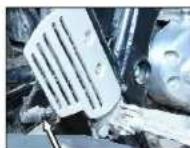
The brake light glows once you press the brake pedal. If brake light is not glowing, check the brake light switch wire for proper connection and the brake light Switch spring for any bend, breakage or disconnection.
If above are alright, then do the adjustment as mentioned below:
- Tum the brake light switch adjustment nut while holding the rear brake light switch body in position
- If the brake light do not glows after pressing the pedal for approximately 25mm, turn the adjusting nut in clockwise direction by 2 to 3 threads and check for brake light function.
- If the brake light continuously glows, turn the adjusting nut in anti clockwise direction by 2 to 3 threads so as to get the positions in which the light goes off.
Minor Maintenance Tips
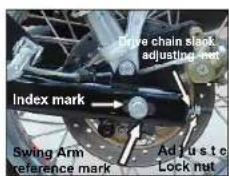
DRIVE CHAIN FREE PLAY (PLAY 20 - 25 MM)
text_image
Drive chain slack adjusting nut Index mark Swing Arm reference mark Adjust c Lock nut- Place motor-cycle on its center stand on a firm & flat surface.
- Shift the gear into the neutral position
- Meas ur e the drive chain free play as shown. The drive chain free play is 20 to 25 mm
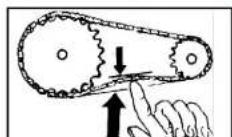
- If the drive chain free play is incorrect adjust as follows:
a. Loosen the axle nut of the rear wheel axle.
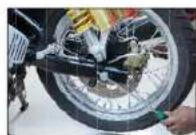
b. Loosen the QD sprocket spindle nut.
c. Loosen the locknut at both end of the swing arm.
d. To reduce the free play, turn the drive chain slack adjusting nut in cloc kwis e direction.
e. To increase the free play, turn the drive chain slack adjusting nut in anticlockwise direction and push the rear wheel forward.
Minor Maintenance Tips
59
f. Later adjust the nut on LH side by matching the index mark with respect to RH side index.
g. Ensure that both the sides are in same index marks.
h. Finally torque the spindle and axle nuts to 7 kgm.
i. Tighten the adjuster locknut by 13mm spanner against chain slack adjusting nut.

Warning
Chain slackness beyond 30mm will lead to chain slippage.
Maintain drive chain slackness within the specified limits at every 1000 kms interval.
Please Check the front and rear wheels are correctly aligned, after the chain adjustment.
CHAIN LOCK FITMENT
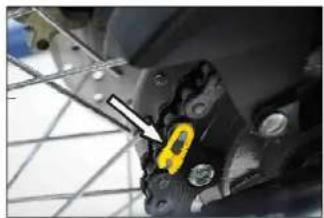
natural_image
Close-up of mechanical components with a yellow tool inserted, no visible text or symbolsThe open end of the chain master link lock should face opposite to normal direction of chain rotation.

Warning
The fitment of lock in wrong direction other than shown above can lead to its falling off, and thus can cause the sudden disconnection of the chain during the drive.
Minor Maintenance Tips
60
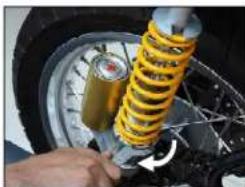
ADJUSTMENT OF GAS FILLED SHOCKABSORBER
natural_image
Close-up of a car tire with a yellow and black spring attached to the wheel, being handled by a hand (no visible text or symbols)- The rear gas filled shock absorber is an adjustable type. The spring tension can be increased or decreased.
- Reduce the spring tension for low load operation by turning the adjuster nut in the direction as shown above by using a suitable C - spanner.
-
Increase the spring tension for high load operation by turning the adjuster nut in opposite direction.
-
Adjust both the rear shock absorbers to the same thread positions.
- Recommended = 10 mm height adjustment only from factory setting.

Warning
Riding the motorcycle with the shock absorber's adjusted in different positions can cause loss of control.
Regularly inspect shock absorbers and front forks for any leaks.
NOTE :
Ensure accessories, fitted if any, do not foul with rear shock absorbers. Check for sufficient gap between the shock absorbers and the attachments in a condition that the rear end of the Motorcycle is fully loaded and the shock absorbers are maximum compressed.
Minor Maintenance Tips
REMOVAL OF BATTERY FROM THE VEHICLE
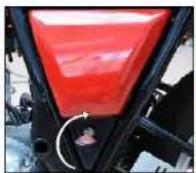
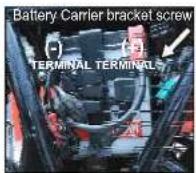
- Unlock (turn the key clockwise) and remove the Left side panel.
- Disconnect both the terminal wires (negative first and positive next respectively)
- Remove the battery carrier bracket by loosening the two screws
• Take out the battery.
BATTERY MAINTENANCE
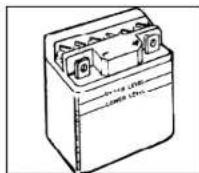
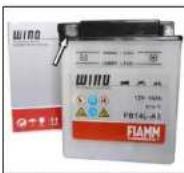
● The Motorcycle is provided with 12V - 14 AH battery.
● The battery must be periodically checked for
□ Cleanliness and corrosion free terminals.
□ Electrolyte level.
☐ If electrolyte level is low, top up with distilled water only.
NOTE :
The poor contact or loose fitment of Battery terminals may cause ECU failure.
Minor Maintenance Tips
62

Warning
Always disconnect the negative (-) battery cable first and then the Red positive (+) cable while removing the battery connections.
NOTE :
For checking the battery voltage and electrolyte specific gravity, contact authorised Royal Enfield Dealer / service point or battery service centre.
CAUTION :
- Do not use battery with low electrolyte level as the battery internal cells will get damaged.
- Do not overfill the battery electrolyte level as it will spill out through the overflow pipe and cause corrosion to vehicle parts.
- Use only distilled water meant for use in batteries to avoid damage to battery.
REASSEMBLY OF BATTERY ON MOTORCYCLE
- Position the battery in the battery carrier such that negative terminal of the battery is towards the fuel pump side.
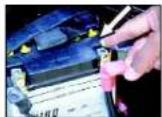
- Ensure ignition switch is in "OFF" condition.
- Connect the positive terminal (Red wire) first
-
Connect the negative terminal (Black wire) next.
-
Smear the terminals with petroleum jelly. (Do not use grease in the battery terminals).
- Place the terminal boot / cap properly.
- Refit the carrier bracket.
• Refit LH side panel & lock it.
NOTE :
Clean the wire terminals free of corrosion and keep the terminals coated with petroleum jelly.
CAUTION :
Keep the +ve and -ve cables firmly conneted to the respective battery terminals. Failure to do so may result in damage to the motorcycle electrical system.
Minor Maintenance Tips
CHANGING ELECTRICAL COMPONENTS HEADLAMP BULB REPLACEMENT
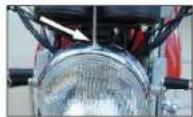
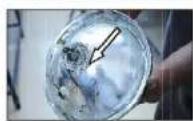
- Loos en the rim holding screw on top and take out the head lamp dome.
- Disconnect electrical connections.
- Thumb push and remove the bulb hold in g clamp gently.
- Remove the bulb.
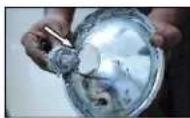
- Position new bulb inside the reflect or such that the three projections on the bulb align with the slot on the reflector.
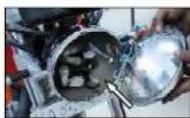
- Refix the bulb holding clamp.
- Connect the Electrical connections.
- Position head lamp doom onto the head lamp shell and tighten the mounting screw on top.
NOTE :
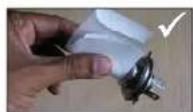
Never touch the bulb with your fingers. Finger prints will etch the glass and decrease bulb life.
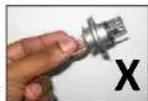
Always hold the bulb with paper or clean dry cloth during handling as shown in fig.
Minor Maintenance Tips
TAIL LAMP BULB REPLACEMENT
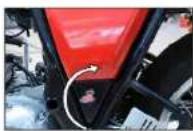
- Unlock the battery cover
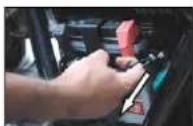
- Remove the seat assembly by pulling seat lock cable.
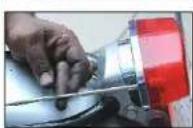
- Remove the tail light glass by uns crewing it's mounting screw
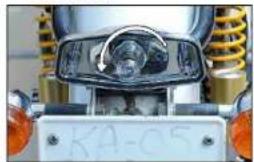
- Hold the bulb, pres s inside and rot at e anticlockwise to remove the tail light bulb from its holder.
natural_image
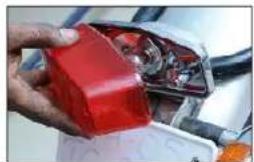
Close-up of a mechanical component with visible gears and a central lens (no text or symbols)- Replace the bulb 12V 21 / 5W.
natural_image
Close-up of a red and white object being handled by hands, no visible text or symbols- Assemble back the tail light in the reverse order of dismantling process.
Minor Maintenance Tips
65
TRAFFICATOR BULB REPLACEMENT
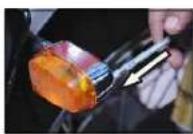
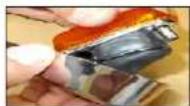
- Remove the screw from the trafficator housing back side.
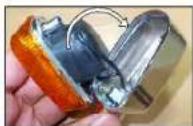
- Open the Indicator housing.
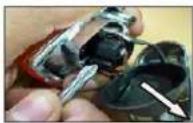
● Take out the bulb holder with help of is screw driver.
- Take out the bulb and replace the same.
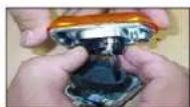
- Ref it the h older fitting its lock in proper position.
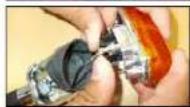
● Fix the rubber gasket cover.
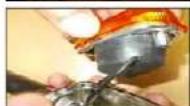
- Assemble back the indic at or housing cover.
Minor Maintenance Tips
66
FUSE
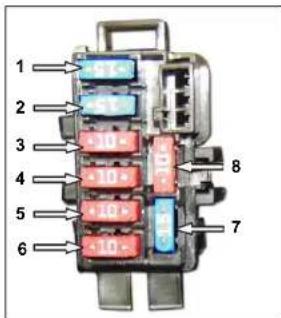
text_image
1 2 3 4 5 6 7 8
Warning
Electronic Control Unit (ECU) may fail due to loose electrical connections, loose battery terminals etc. Hence, it is very important to keep all the Electrical connections intact.
BLADE FUSE USAGE LIST
| Fuse No. | Color | Amps | Application |
| 1 Blue 15A RR Fuse | |||
| 2 Blue 15A MAIN Fuse | |||
| 3 Red 10A EQU Fuse | |||
| 4 Red 10A | General illumination / Tail / Trafficator | ||
| 5 Red 10A Head Lamp Fuse | |||
| 6 Red 10A Instrument Cluster / Horn | |||
| 7 Blue 15A Spare Fuse | |||
| 8 Red 10A Spare Fuse | |||

Warning
Please get the electrical system of your Motorcycle checked thoroughly and get the faults corrected immediately after experiencing any fuse failure. Not doing this can result in to repeated fuse failures. Usage of fuses other than specified rating will damage the complete electrical system.

Warning
While doing Arc welding any where in motorcycle, the battery terminals and the Electronic Control Unit (ECU) coupler are to be completely disconnected. Failure to do so many cause damage to the Electrical system of the Motorcycle.
Minor Maintenance Tips
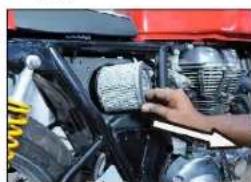
AIR FILTER PAPER ELEMENT CLEAN AND REFIX : EVERY 3000 KMS
- Remove the screw from the side cover bottom side and then take out RH side cover.
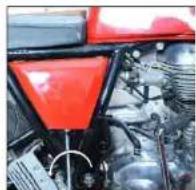
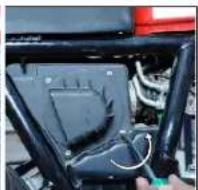
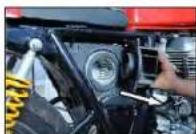
- Remove the air filter cover screws and then takeout air filter box cover.
- Takeout air filter paper element and check for dirt. Gently tap it as shown in fig and fix it back.
natural_image
Close-up of a hand inspecting the engine compartment of a red motorcycle, showing mechanical parts and no visible text or symbols.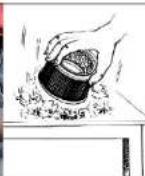
NOTE : It is adviceable to replace air filter paper element once in 10,000 KMS. In case of vehicle running in dusty / mud road condition it may be replaced as earlier as required.
Usage of high pressure compressed air is not recommended to clean air filter paper element.
Fitment of air filter paper element is reverse order of removal process.
Washing Procedure
68
PRECAUTIONS
- Wash vehicle when the engine is cold.
- Cover the silencer tail end and control switches with suitable plastic bags and tie it firmly to prevent water entry into them.
- Remove ignition key and seal key hole using adhesive tape.
- Do not remove RH side cover (panel) while washing to avoid water entry into air filter box assembly.
natural_image
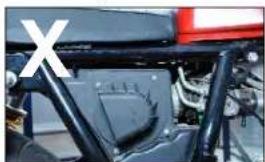
Close-up of a motorcycle's front wheel and side-mounted engine components (no visible text or symbols)- Use a suitable engine degreaser, available with your local parts store, to remove dirt or grease from the engine external parts if required. Follow the directions in the label carefully before using the degreaser.
- Use low pressure jet of water to clean the entire vehicle.
- Never spray water with great force on head lamp, Meter/cluster unit, trafficor lights, front and rear wheel hubs, electrical connections and wires, control cables, EFI components, sparkplug, battery, air filter cover etc.
- Use Luke warm water and mild detergent on the painted components to remove dirt, etc.
- Rinse vehicle thoroughly with plain water to remove the detergent and wipe vehicle dry.
- If possible, use compressed air and blow off water particles from the obscure areas of the vehicle, electrical connect ions, EFI components etc.
Washing Procedure
AFTER WASHING
- Ensure the vehicle is thoroughly dry by wiping with a clean soft water absorbent cloth or chamois leather.
- Remove all plastic bags and adhesive tapes.
- Lubricate control cables, pivots for footrest, side stand, centre stand, brake and gear shifter linkages, rear chain etc. with lube oil.
- Polish the painted and plated surfaces using polishing wax.
- Start the bike and allow engine to idle & warm up.
● Drive the motorcycle slowly, applying both brakes intermittently to dry up the brake pads.
● Test brakes for full efficiency.

Warning
Observe warnings and cautions given on labels of cleaning compounds before it is used.
When washing your motorcycle, be careful not to get the brakes, engine, mufflers or air cleaner etc., too wet. Wet brake pad and / or disc can affect braking efficiency. Engine can be started after was hing. Ensure brakes and engine are working properly before riding in the traffic and / or in highways at high speeds.
Storage Precautions
Incase your Motorcycle is not going to be used for a month or more, we advise the following precautions to be taken
- Carryout required repair/adjustments on the motorcycle.
- Wash the motorcycle thoroughly and lubricate as per the maintenance chart.
- Start the engine, warm up for a few minutes and switch off.
- Drain out the fuel completely from the fuel tank and fuel lines.
- Remove the spark plug. Pour in about 20ml of clean engine oil through spark plug hole. Close the hole and crank engine few times and refit the sparkplug.
- Clean the rear chain thoroughly and apply lubrication oil on it.
- Remove battery from the bike. Clean its
terminals and apply petroleum jelly on the terminals to avoid corrosion.
- Maintain electrolyte level between max and min marks, by adding distilled water and wipe the battery dry.
- Store the battery in a cool, dry and well ventilated place.
- Do not place the battery in direct sun light, near open flame or where temperature is above 40°C or below 0°C
- Cover the silencer with plastic bags to prevent moisture entry. Set the motorcycle on its center stand.
- Apply anti rust solution on all chrome plated parts. Take care not to apply this solution on rubber or painted parts.
- Store motorcycle in a clean covered area free of moisture and keep it covered to prevent dust settling on it.
Storage Precautions
PREPARING THE MOTORCYCLE FOR REUSE
- Remove anti rust solution from all chrome plated parts and clean the motorcycle.
● Inflate the tyres to the correct tyre pressure. - Ensure battery is fully charged and electrolyte level is properly maintained.
- Connect the battery.
● Lubricate all control cables and pivots. - Check level of oil in engine and top up if necessary.
- Fill fuel tank with fresh petrol.
- Check fuel line for any cracks or cuts.
- Clean the air filter.
-
Remove plastic covering from the silencer.
-
Remove spark plug on cylinder head and pour in a few drops of engine oil. Crank engine a few times to lubricate cylinder walls and piston. Clean spark plug and refit.
- Switch "ON" the ignition switch.
- Start vehicle and warm up engine for a few minutes before riding the vehicle.
NOTE :
Do not raise the engine rpm the moment it is started, but allow the engine to run at Idling speed.
CAUTION :
Proper long-term storage is important for the safe, trouble-free operation of your Royal Enfield motorcycle.
Long Trip Precautions
CHECKS PRIOR TO THE COMMENCEMENT OF LONG JOURNEY
- Service the motorcycle thoroughly at Royal Enfield Authorised Dealer / Service Point as per periodical maintenance chart. (Ref. Page No. 45 to 47)
- Sufficient quantity of petrol in the fuel tank for the planned journey.
- Check and correct tyre pressure if necessary.
- Correct the oil levels in Engine, brake master cylinders.
- Check for good battery condition and proper electro lyte level.
● Proper drive chain tension and correctly adjusted rear brakes. - Check for proper functioning of all lights & horn etc.,
CHECKS AFTER EVERY 1500 KMS OF RUN
● Tightness of all fasteners.
- Tyre treads condition and wear pattern of tyres.
● Battery condition and electrolyte level.
- Correct oil level in engine.
● Working of all lights and horn.
• Proper drive chain tension.
ITEMS TO BE CARRIED
- Tool kit.
- First aid kit.
- Bulbs for Headlight, Trafficator light and mini Blade Fuses (15 & 10 Amps).
- Accelerator and Clutch cable.
- Rear chain master link lock assembly.
- Spare tubes.
- Foot operated Air Pump.
• Insulation tape. - Spark plug (M14).
Complete Wiring Diagram
NOTE :
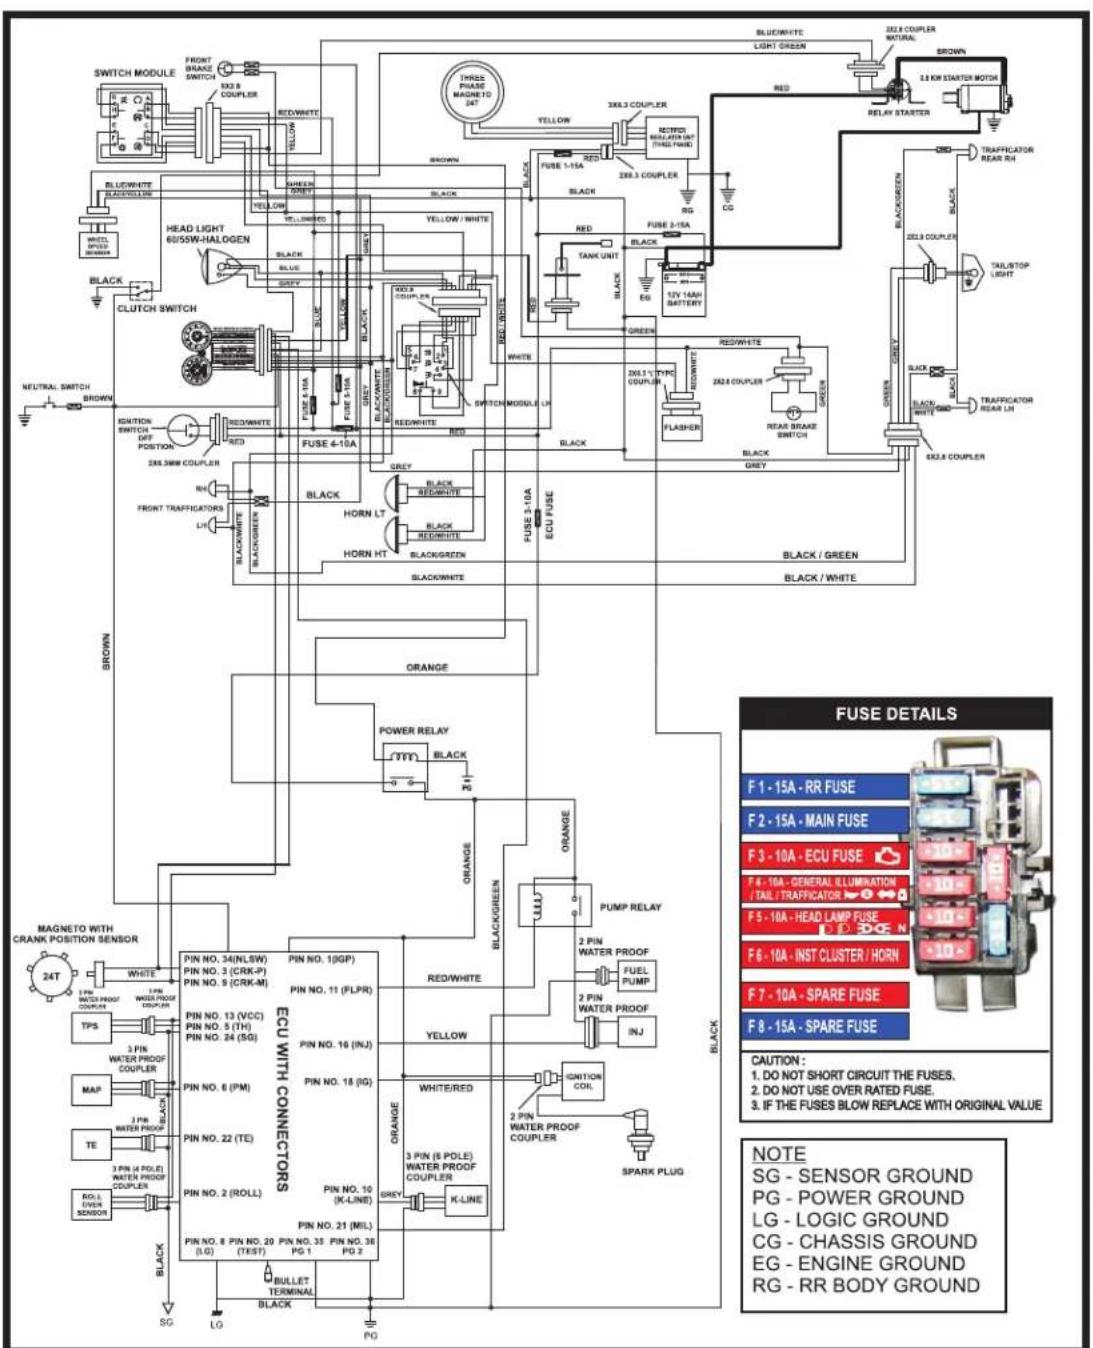
Complete Wiring Diagram is attached on this page.
Complete Wiring Diagram - Continental GT
text_image
SWITCH MODULE FRONT BRUCE SWITCH 632.5 COUPLER RED/WHITE YELLOW THREE PHASE MAGNETID 24T BLUE/WHITE BLACK/WHITE GREEN/WHITE BLUE BLACK BLUE GREEN/WHITE RED/WHITE FUSE 1-15A RED FUSE 2-15A RED/WHITE EQU FUSE FLASHER BLACK BLACK/WHITE Black BLACK/GREEN Black/WHITE BLACK/WHITE FUSE 4-10A RED/WHITE GREEN/WHITE FUSE 3-10A RICH/WHITE HORN LT HORN HT BLACK/WHITE BLACK/GREEN BLACK/GREEN FUSE 2-10A RICH/WHITE BLACK/WHITE FUSE 3-10A RICH/WHITE FUSE 4-10A RICH/WHITE FUSE 5-10A RICH/WHITE FUSE 6-10A RICH/WHITE FUSE 7-10A RICH/WHITE FUSE 8-10A RICH/WHITE FUSE 9-10A RICH/WHITE FUSE 10-10A RICH/WHITE FUSE 11-10A RICH/WHITE FUSE 12-10A RICH/WHITE FUSE 13-10A RICH/WHITE FUSE 14-10A RICH/WHITE FUSE 15-10A RICH/WHITE FUSE 16-10A RICH/WHITE FUSE 17-10A RICH/WHITE FUSE 18-10A RICH/WHITE FUSE 19-10A RICH/WHITE FUSE 20-10A RICH/WHITE FUSE 21-10A RICH/WHITE FUSE 22-10A RICH/WHITE FUSE 23-10A RICH/WHITE FUSE 24-10A RICH/WHITE FUSE 25-10A RICH/WHITE FUSE 26-10A RICH/WHITE FUSE 27-10A RICH/WHITE FUSE 28-10A RICH/WHITE FUSE 29-10A RICH/WHITE FUSE 30-10A RICH/WHITE FUSE 31-10A RICH/WHITE FUSE 32-10A RICH/WHITE FUSE 33-10A RICH/WHITE FUSE 34-10A RICH/WHITE FUSE 35-10A RICH/WHITE FUSE 36-10A RICH/WHITE FUSE 37-10A RICH/WHITE FUSE 38-10A RICH/WHITE FUSE 39-10A RICH/WHITE FUSE 40-10A RICH/WHITE FUSE 41-10A RICH/WHITE FUSE 42-10A RICH/WHITE FUSE 43-10A RICH/WHITE FUSE 44-10A RICH/WHITETrouble Shooting
Warning
The trouble shooting section of this Owner's Manual is intended solely as a guide for diagnosing problems. Carefully read the appropriate sections of this manual before performing any work. Repair and maintenance operations not listed in this Owner's Manual should be performed by your Royal Enfield Dealer only. Improper repair / maintenance could result in the motorcycle not functioning properly or injury seriously.
Warning
Please get the electrical system of your Motorcycle checked thoroughly and get the faults corrected immediately after experiencing any fuse failure. Not doing this can result in to repeated fuse failures.
Usage of fuses other than specified rating will damage the complete electrical system.
CAUSES REMEDIES
I. ENGINE FAILS TO START
1) Stop switch in 'OFF' Position .... Push stop switch to 'ON' position.
2) Vent hole clogged in fuel tank cap .... Clean vent hole.
3) Spark plug cap / lead not connected. Fix cap / lead firmly
4) Spark plug electrode dirty / fouled .... Clean spark plug
5) Spark plug insulation cracked .... Replace spark plug
6) Clutch slipping ....*Adjust clutch cable free play
7) Main or EFI Fuse failed.... Replace with new fuse
* Contact Authorised Dealer / Service Point
Trouble Shooting
CAUSES
REMEDIES
II. ENGINE MISFIRING
1) Loose spark plug cap ...... Fix cap / lead firmly
2) Spark plug fouled .... Clean spark plug or non specified heat range plug.
3) Any sensor loose connections ....* Check MAP or EOT or TPS sensor wiring / coupler loose connections
4) Water in petrol tank ....* Clean petrol tank. Fill tank with fresh petrol.
III. POOR PICKUP
1) Brake pedal adjusted too tight ....*Re-adjust properly
2) Choked air filter .... Clean / Replace air filter
3) Rear chain adjusted too tight ....*Re-adjust properly
4) Under inflated tyres ....*Inflate to correct pressure
5) Accelerator cable free play excessive Adjust cable free play
6) Clutch Slipping ....*Adjust clutch cable free play
7) Faulty fuel supply ....*Remove fuel pump & clean.
Fuel pump, filter / injector blocked
* Contact Authorised Dealer / Service Point
Trouble Shooting
CAUSES REMEDIES
IV. WHITE/BLUE SMOKE
1) Oil level in sump above the Top line. * Check and drain excess oil in the oil level window ....
V. ENGINE OVERHEATING
1) Low engine oil level .... Check and top-up if necessary
2) Clutch slipping ....* Check and correct
3) Cylinder fins not clean .... Clean the cylinder fins at regular intervals
VI. EXCESSIVE FUEL CONSUMPTION
1) Under inflated tyres .... Inflate to correct pressure
2) Choked air filter .... Clean / Replace
3) Fuel leakage....*Check and rectify, tank float unit, drain pipe, breather pipe, fuel line / pump.
* Contact Authorised Dealer / Service Point
Trouble Shooting
CAUSES REMEDIES
VII. BRAKES POOR
1) Brake pad worn / Uneven wear ..... *Replace Brake pads
2) Oil/grease on disc. ....*Clean and refit
3) spongy brake....*fill brake fluid & remove air from the system.
VIII. VEHICLE WOBBLES
1) Under inflated tyres .... Inflate to correct pressure
2) Loose / Broken spokes ....* Tighten / Replace spokes
3) Wheels misaligned ....* Ensure proper alignment
4) Wheel rim runout ....* Rectify
5) Tyres not fitted correctly ....* Refit tyres correctly
IX. ELECTRICALS
Bulbs do not glow
1) Bulb fused ....* Replace bulb
* Contact Authorised Dealer / Service Point
Trouble Shooting
CAUSES REMEDIES
2) Fuse blown ....* Check and Replace fuse.
3) Loose / improper connection....* Check and correct
Horn not working
1) Fuse blown .... Check and correct
2) Loose connections .... Check and correct
Trafficators not working
1) Loose / improper connections ...... Check and correct
2) Bulb fused .... Replace
Brake light remains on
(1) Switch not adjusted properly ....* Adjust connecting links properly
(2) Switch sticky ....* Replace switch
X. ELECTRONIC FUEL INJECTION (EFI)
Malfunctioning Indicator Lamp (MIL) glowing continuously
(1) Sensor Coupler Loose Connection. * Check for any EFI sensor coupler loose connection and correct them
(2) Any EFI Sensor Failure ....* Check & replace the same
* Contact Authorised Dealer / Service Point

Warning
Please get the electrical system of your Motorcycle checked thoroughly and get the faults corrected immediately after experiencing any fuse failure. Not doing this can result in to repeated fuse failures. Usage of fuses other than specified rating will damage the complete electrical system.
Warranty
Royal Enfield Motor Cycles are manufactured by following best Quality practices in respect of the material and workmanship.
Royal Enfield (RE) warrants CONTINENTAL GT EFI Motor Cycle to be free from manufacturing and material defect under normal use subject to following conditions.
- RE will replace or repair defective part / parts at their Authorised Dealer / Service Point, free of charge within a period of 12 months from the date of sale (date of Installation) or 10,000 kms whichever occurs earlier.
- The warranty is applicable only to first registered owner.
- The warranty shall be applicable only if all the free services are availed at the respective period / kilometer range as per the schedule given in the owner's manual from RE Authorised Dealer / Service Point.
- During the warranty period, RE's obligations shall be limited to repairing / replacing free of charge such part or parts of the vehicle, which on examination to have manufacturing defect. Such defective part / parts which have been replaced becomes property of RE.
- Cost of oil, oil filter, fuel and other consumables are chargeable to the customer.
- Claims on proprietary items like tyres, tubes, spark plug, battery etc. should be taken up with respective manufacturer or their authorised agents in the area directly by customer. RE shall not be liable in any manner to replace them though their Dealers will provide assistance in preferring such claims on their manufacturer.
- Warranty shall not apply to:
(a) Normal ageing, deterioration or rusting of plated parts paints coat, rubber parts, soft items, glass items, plastic parts etc.
Warranty
(b) Components like fuel filter, oil filter paper element, control cables, brake shoes / brake pads, clutch plates, drive chain & sprocket kit, which are subjected to normal wear and tear.
(c) Damages due to use of lubricant / oil / grease etc., other than specified by RE.
(d) Damages due to use of non-genuine parts.
(e) Damages due to lack of proper maintenance of the vehicle.
(f) Damages due to incorrect driving or riding habits.
(g) Parts damaged due to accidents, collision, abuse etc.
(h) Irregularities not recognized as affecting the quality or function of the vehicle such as slight vibration, oil leakage, discoloration of exhaust bent pipe / silencer / soft or hard shock absorber etc.
(i) Defects arising from fitment of unauthorised / additional Electrical loads.
(j) Vehicle serviced / repaired at unauthorised service points.
(k) Vehicle used for competition / racing.
(I) Electrical component like bulbs, fuses etc. & Electronic components failure due to repairs by arc welding.
(m) Normal maintenance operations like adjustment of brakes, cleaning fuel system, engine tune up and other such adjustments
-
RE reserves the right to finally decide on all warranty claims
-
RE reserves the right to make changes in Design of the vehicle without any obligation to install these changes on previously supplied vehicles.
Emission Warranty
In compliance with the provisions of Rule 115(2) of the Central Motor Vehicle Rules, 1989, Royal Enfield certifies that the following warranty is applicable to those components liable to affect the emission of the gaseous pollutants in its range of motorcycles, in normal use to which it may be subjected to.
This emission warranty comes into force from 01st July 2001 and is valid for a period of 30,000 Kms. or 36 months, whichever occurs earlier, from the date of sale to the first customer and is in addition to and parallel to the warranty policy, conditions and obligations laid down in the Owner's Manual.
Royal Enfield further warranty that if on examination by its Authorised Dealer / Service Point, the motorcycle fail to meet the specified emission standards, then the Authorised Dealer / Service Point shall take necessary corrective measures and shall at its sole discretion, repair or replace free of charge such components of the emission control system to meet the required emission standards.
The method/s of examination to determine the warranty conditions of the emission warranty related components will be at the sole discretion of Royal Enfield and / or our Authorised Dealer / Service Point and results of such examination will be final and binding. If on examination the warranty conditions of the part/s is/are not established, Royal enfield will have the right to charge all, or part of the cost of such examination to the customer in addition to the cost of the components.
In case of acceptance of the component/s under Emission warranty, Royal Enfield will replace free of charge, the component/s as required. However, the consumables like fuel, lubricants, solvents, etc shall be chargeable to the customer as per actual.
Emission Warranty
In case any of the components covered under emission warranty or the associated parts, are not independently replaceable. Royal Enfield will have the sole discretion to replace either the entire assembly or parts of the assembly, through suitable repairs.
Royal Enfield reserves the right to carry out necessary consequential repairs to the motorcycle or replace any part, in addition to the repair or replacement of the components covered under emission warranty, to establish compliance to in-use emission standards. Such repairs / replacements will be chargeable to the customer.
All parts removed for replacement under warranty will become the property of Royal Enfield.
Royal Enfield will not be responsible for the cost of transportation of the motorcycle to the nearest Authorised Dealer / Service Point OR for any loss due to non availability of the motorcycle during the period of examination and repairs by Royal Enfield and / or their Authorised Dealer / Service Point.
Royal Enfield will not be responsible for any penalties that may be charged by statutory authorities on account of failure to comply with the in-use emission standards.
That cost/s incurred to check emission of the motorcycle will have to be borne by the customer.
Emission warranty will be applicable irrespective of the change of ownership of the vehicle provided all the conditions as laid down in this document are met from the date of original sale of the motorcycle.
THE WARRANTY SHALL APPLY IF THE CUSTOMER
- Observes all the important instructions and any other precautions listed in the owner's manual.
Emission Warranty
● Under all circumstances uses lubricants and fuel as recommended by Royal Enfield.
- Regularly obtains and carries out maintenance in accordance with Royal Enfield guidelines and enters the details in the Log book.
- Immediately approaches the nearest Authorised Dealer / Service Point upon discovery of failure to comply with the IN-USE emission standard inspite of having maintained and used the vehicle in accordance with the instructions in the owner's manual and having carried out such repairs and adjustments as may be required with a view to establish such compliance.
- Produce the 'Pollution Under Control' certificate valid for the period immediately preceding the test during which the failure is discovered, the test having been carried out either for obtaining a new certificate or pursuant upon being directed by an officer as referred to in sub rule (2) of rule 116 of the Central Motor Vehicles Rules (CMVR).
- Produce the Owner's Manual and Log book for verification details.
- Produce receipts covering maintenance of the motorcycle is specified in the owner's manual from the date of original purchase of the vehicle.
● Produce valid certificate of Insurance and R.T.O. Registration Certificate (RC Book).
THE EMISSION WARRANTY SHALL NOT APPLY IF
- A valid "Pollution under control" certificate is not produced.
- The motorcycle is not serviced by Authorised Dealer / Service Point as per the service schedule described in the maintenance chart.
Emission Warranty
- The motorcycle has been subjected to abnormal use, abuse, neglect and improper maintenance or has met with an accident.
● Replacement parts not specified and approved by Royal Enfield have been used. - The motorcycle, or parts thereof, has been altered, tampered with or modified or replaced in an unauthorised manner.
- The odometer is not functioning or the odometer and / or its reading has been changed / tampered with, so that the actual distance covered cannot be readily determined.
The motorcycle has been used for competitions, races, and rallies or for the purpose of establishing records. - On examination by Royal Enfield or its Authorised Dealer / Service Point, if the motorcycle shows that any of the conditions stipulated in the Owner's manual with regard to use and maintenance have been violated.
- The motorcycle has been run on adulterated / leaded fuel or lubricant other than those specified by Royal Enfield in the Owner's manual or any other document given to the customer at the time of sale of the motorcycle.
● The emission related components are tampered with.
● All service and parts related bills and vouchers incurred during the tenure of the emission warranty is not produced. - All maintenance activities carried out on the vehicle during the tenure of the emission warranty is not entered in the log book.
● Always get your vehicle checked to meet the emission regulations through and authorised emission checking centre.
Emission Warranty
● Always carry a valid 'Pollution Under Control' certificate with you at all times during the validity of the emission warranty (30,000 Kms / 3 years from the date of first sale)
TIPS TO REDUCE POLLUTION
- Ensure that the periodical maintenance is carried out as stipulated in the owner's manual through a Royal Enfield Authorised Dealer / Service Point.
- Use only Unleaded petrol (> 91 octane) from reputed fuel pumps.
- Ensure the fuel used is not adulterated.
- Use correct spark plug as recommended in the owner's manual.
- Use lubricants as per recommendations given on grade / brand in the owner's manual.
Free Service Coupons
It is our endeavour to provide excellent service to your Royal Enfield Motor Cycle at all times. Towards this we provide four free services at specific Intervals.
Please avail these services at the specified time, in any of the Royal Enfield Authorised Dealer / Service Point nearest to you and as a token of satisfactory service, kindly return the free service coupon duly filled in and signed, to the service outlet.
Availing the free services in the specified time is a prerequisite to warranty consideration.
The cost of fuel, oil, oil filter element, grease etc. used for free service is chargeable to the customer.
1st Free Service
87
1ST
FREE
SERVICE
500 Kms
or
45±8 days
whichever is
earlier from the
date of sale
Enter the Details in Free Service Record
(Cost of oil, oil filter element and other consumables used are chargeable to the customer)
500 KMS OR 45+8 DAYS WHICHEVER IS EARLIER FROM DATE OF SALE
Vehicle Installation Form No.
ODO Reading :
Sold by (Dealer's Name & Address)

Regn. No:
Sale Date:
Serviced Date:
Serviced by
(Dealer's/ASP Name & Address)
Received the above vehicle after the service having been done to my entire satisfaction.
Customer's Signature : ....
Contact Phone / Mobile No.:

1st Free Service Activities
88
- Water wash the vehicle and dry it with a clean cloth
- Electrolyte .... Check level & top-up
- Battery terminals .... Clean and apply petroleum Jelly
- Drive chain free play..... Check, clean, lubricate & adjust
- Rear brake pedal pivot Lubricate
- Front & Rear disc brakes .... Check & top up brake fluid level
- Wheel rim Front & Rear .... Check spokes tightness
- Front fork oil .... Inspect for leakage
- Air filter element .... Clean
- Spark plug (M14) .... Check, clean & adjust gap
- H.T. Lead .... Inspect for cracks
- Fuel pump .... Check mounting screws
- Fuel hose .... Inspect for cracks
- Rubber hose, Air filter to throttle body..... Inspect for cracks
- Accelerator cable .... Adjust play
- Clutch cable .... Adjust play
- Engine oil sump strainer .... Clean
- Engine oil Replace
- Engine oil filter paper element ...... Replace
- Hand levers & kick starter pivot..... Lubricate
CUSTOMER COPY
Job Card No:
Date
Odo Reading
Name of Dealer/
ASP with Code:
......
......
ASP / Dealer's
Stamp & Signature
2nd Free Service
89
2ND
FREE
SERVICE
3000 Kms
or
90±15 days
whichever is
earlier from the
date of sale
Enter the Details in Free Service
Record
(Cost of oil, oil filter element and other consumables used are chargeabl chargeable to the customer)
3000 KMS OR 90+15 DAYS WHICHEVER IS EARLIER FROM DATE OF SALE
Vehicle Installation Form No.
ODO Reading :
Sold by (Dealer's Name & Address)

Regn. No:
Sale Date:
Serviced Date:
Serviced by
(Dealer's/ASP Name & Address)
Received the above vehicle after the service having been done to my entire satisfaction.
Customer's Signature : ....
Contact Phone / Mobile No.:

2nd Free Service Activities
90
- Water wash the vehicle and dry it with a clean cloth
- Electrolyte .... Check level & top-up
- Battery terminals .... Clean and apply petroleum jelly
- Drive chain free play..... Check, clean, lubricate & adjust
- Rear brake pedal pivot .... Lubricate
- Front & Rear disc brakes .... Check & top up brake fluid level
- Wheel rim Front & Rear .... Check spokes tightness
- Front fork oil .... Inspect for leakage
- Air filter element .... Clean
- Spark plug (M14) .... Check, clean & adjust gap
- H.T. Lead .... Inspect for cracks
- Fuel pump .... Check mounting screws
- Fuel hose ....Inspect for cracks
- Rubber hose, Air filter to throttle body..... Inspect for cracks
- Accelerator cable ....Adjust play
- Clutch cable ....Adjust play
- Engine oil .... Check level & top up
- Hand levers & kick starter pivot...... Lubricate
- Steering free play .... Check & Adjust
- Oil filter element, oil strainer & magnetic drain plugs.. Clean
CUSTOMER COPY
Job Card No:
Date
Odo Reading

Name of Dealer/
ASP with Code:
......
......
ASP / Dealer's
Stamp & Signature
3rd Free Service
91
3RD
FREE
SERVICE
6000 Kms
or
180±15 days
whichever is
earlier from the
date of sale
Enter the Details in Free Service
Record
(Cost of oil, oil filter element and other consumables used are chargeabl chargeable to the customer)
6000 KMS OR 180+15 DAYS WHICHEVER IS EARLIER FROM DATE OF SALE
Vehicle Installation Form No.
ODO Reading :
Sold by (Dealer's Name & Address)

Regn. No:
Sale Date:
Serviced Date:
Serviced by
(Dealer's/ASP Name & Address)
Received the above vehicle after the service having been done to my entire satisfaction.
Customer's Signature : ....
Contact Phone / Mobile No.:

3rd Free Service Activities
92
- Water wash the vehicle and dry it with a clean cloth
- Electrolyte .... Check level & top-up
- Battery terminals .... Clean and apply petroleum jelly
- Drive chain free play .... Check, clean, lubricate & adjust
- Rear brake pedal pivot Lubricate
- Front & Rear disc brakes .... Check & top up brake fluid level
- Wheel rims front & rear..... Check spokes tightness
- Tyre front & rear .... Check wear and tread depth
- Air filter element .... Clean
- Spark plug (M14) .... Check, clean & adjust gap
- H.T. Lead .... Inspect for cracks
- Fuel pump .... Check
- Fuel hose....Inspect for cracks
- Rubber hose, Air filter to throttle body ..... Inspect for cracks
- Accelerator cable .... Check & adjust play
- Clutch cable ....Adjust play
- Engine oil sump strainer Clean
- Engine oil Replace
- Engine oil filter paper element ...... Replace
- Hand levers & kick starter pivot Lubricate
- PAV System .... Check & Clean
- Steering system .... Check, Lub. steering balls & Adj. play
CUSTOMER COPY
Job Card No:

Date

Odo Reading

Name of Dealer/
ASP with Code:
......
ASP / Dealer's
Stamp & Signature
4th Free Service
93
4^TH
FREE
SERVICE
9000 Kms
or
270±15 days
whichever is
earlier from the
date of sale
Enter the Details in Free Service
Record
(Cost of oil, oil filter element and other consumables used are chargeabl chargeable to the customer)
9000 KMS OR 270+15 DAYS WHICHEVER IS EARLIER FROM DATE OF SALE
Vehicle Installation Form No.
ODO Reading :
Sold by (Dealer's Name & Address)

Regn. No:
Sale Date:
Serviced Date:
Serviced by
(Dealer's/ASP Name & Address)
Received the above vehicle after the service having been done to my entire satisfaction.
Customer's Signature : ....
Contact Phone / Mobile No.:

4th Free Service Activities
94
- Water wash the vehicle and dry it with a clean cloth
- Electrolyte .... Check level & top-up
- Battery terminals .... Clean and apply petroleum jelly
- Drive chain free play .... Check, clean, lubricate & adjust
- Rear brake pedal pivot Lubricate
- Front & Rear disc brakes .... Check & top up brake fluid level
- Wheel rims front & rear..... Check spokes tightness
- Front fork oil Replace oil
- Air filter element .... Clean
- Spark plug (M14) .... Check, clean & adjust gap
- H.T. Lead ....Inspect for cracks
- Fuel pump .... Check
- Fuel hose .... Inspect for cracks
- Rubber hose, Air filter to throttle body.....Inspect for cracks
- Accelerator cable .... Check & adjust play
- Clutch cable ....Adjust play
- Engine oil Check & top-up
- Hand levers & kick starter pivot .... Lubricate
- Steering free play .... Check & Adjust
- Tyres .... Check wear and tread depth
CUSTOMER COPY
Job Card No:
Date
Odo Reading

Name of Dealer/
ASP with Code:
......
ASP / Dealer's
Stamp & Signature
Paid Service / Maintenance Record
95
CUSTOMER COPY
| 12,000 ± 250 Kms. Service |
| Job Card No:...... Date:...... |
| Odo Reading:...... Dealer Code:...... |
| Brief Work Done: |
| Dealer's Stamp & Signature |
CUSTOMER COPY
| 15,000 ± 250 Kms. Service |
| Job Card No:...... Date:...... |
| Odo Reading:...... Dealer Code:...... |
| Brief Work Done: |
| Dealer's Stamp & Signature |
DEALER / ASP COPY
| 12,000 ± 250 Kms. Service |
| Job Card No:...... Date:...... |
| Odo Reading:...... Dealer Code:...... |
| Brief Work Done: |
| Dealer's Stamp & Signature |
DEALER / ASP COPY
| 15,000 ± 250 Kms. Service |
| Job Card No:...... Date:...... |
| Odo Reading:...... Dealer Code:...... |
| Brief Work Done: |
| Dealer's Stamp & Signature |
Paid Service / Maintenance Record
96
DEALER / ASP COPY
12,000 ± 250 Kms. Service Brief Work Done :
Dealer's Stamp & Signature
CUSTOMER COPY
12,000 ± 250 Kms. Service
Brief Work Done :
Dealer's Stamp & Signature
DEALER / ASP COPY
15.000 ± 250 Kms. Service Brief Work Done :
Dealer's Stamp & Signature
CUSTOMER COPY
15,000 ± 250 Kms. Service
Brief Work Done :
Dealer's Stamp & Signature
Paid Service / Maintenance Record
97
CUSTOMER COPY
18,000 ± 250 Kms. Service Job Card No:...... Date : ....
Odo Reading : ....Dealer Code : ....
Brief Work Done :
Dealer's Stamp & Signature
DEALER / ASP COPY
18,000 ± 250 Kms. Service
Job Card No:...... Date:......
Odo Reading : ....Dealer Code : ....
Brief Work Done :
Dealer's Stamp & Signature
CUSTOMER COPY
21,000 ± 250 Kms. Service
Job Card No: Date:
Odo Reading : ....Dealer Code : ....
Brief Work Done :
Dealer's Stamp & Signature
DEALER / ASP COPY
21,000 ± 250 Kms. Service
Job Card No: Date:
Odo Reading : ....Dealer Code : ....
Brief Work Done :
Dealer's Stamp & Signature
Paid Service / Maintenance Record
98
DEALER / ASP COPY
18,000 ± 250 Kms. Service Brief Work Done :
Dealer's Stamp & Signature
CUSTOMER COPY
18,000 ± 250 Kms. Service
Brief Work Done :
Dealer's Stamp & Signature
DEALER / ASP COPY
21.000 ± 250 Kms. Service Brief Work Done :
Dealer's Stamp & Signature
CUSTOMER COPY
21,000 ± 250 Kms. Service
Brief Work Done :
Dealer's Stamp & Signature
Paid Service / Maintenance Record
99
CUSTOMER COPY
24,000 ± 250 Kms. Service
Job Card No :...... Date :......
Odo Reading : ....Dealer Code : ....
Brief Work Done :
Dealer's Stamp & Signature
CUSTOMER COPY
27,000 ± 250 Kms. Service
Job Card No: Date:
Odo Reading : ....Dealer Code : ....
Brief Work Done :
Dealer's Stamp & Signature
DEALER / ASP COPY
24,000 ± 250 Kms. Service
Job Card No: Date:
Odo Reading : ....Dealer Code : ....
Brief Work Done :
Dealer's Stamp & Signature
DEALER / ASP COPY
27,000 ± 250 Kms. Service
Job Card No: Date:
Odo Reading : ....Dealer Code : ....
Brief Work Done :
Dealer's Stamp & Signature
Paid Service / Maintenance Record
100
DEALER / ASP COPY
24,000 ± 250 Kms. Service Brief Work Done :
Dealer's Stamp & Signature
CUSTOMER COPY
24,000 ± 250 Kms. Service
Brief Work Done :
Dealer's Stamp & Signature
DEALER / ASP COPY
27,000 ± 250 Kms. Service Brief Work Done :
Dealer's Stamp & Signature
CUSTOMER COPY
27,000 ± 250 Kms. Service
Brief Work Done :
Dealer's Stamp & Signature
Paid Service / Maintenance Record
101
CUSTOMER COPY
30,000 ± 250 Kms. Service
Job Card No :...... Date :......
Odo Reading : ....Dealer Code : ....
Brief Work Done :
Dealer's Stamp & Signature
DEALER / ASP COPY
30,000 ± 250 Kms. Service
Job Card No: Date:
Odo Reading : ....Dealer Code : ....
Brief Work Done :
Dealer's Stamp & Signature
CUSTOMER COPY
33,000 ± 250 Kms. Service
Job Card No: Date:
Odo Reading : ....Dealer Code : ....
Brief Work Done :
Dealer's Stamp & Signature
DEALER / ASP COPY
33,000 ± 250 Kms. Service
Job Card No: Date:
Odo Reading : ....Dealer Code : ....
Brief Work Done :
Dealer's Stamp & Signature
Paid Service / Maintenance Record
102
DEALER / ASP COPY
30,000 ± 250 Kms. Service Brief Work Done :
Dealer's Stamp & Signature
CUSTOMER COPY
30,000 ± 250 Kms. Service
Brief Work Done :
Dealer's Stamp & Signature
DEALER / ASP COPY
33,000 ± 250 Kms. Service Brief Work Done :
Dealer's Stamp & Signature
CUSTOMER COPY
33,000 ± 250 Kms. Service
Brief Work Done :
Dealer's Stamp & Signature
All India Road Signs
MANDATORY SIGNS


Use of sound signals prohibited
Speed Lmit
Overtaking prohibited
Drive dead slow main road ahead
INFORMATION SIGNS

End of speed limit

Parking place

No-Parking zone
CAUTIONARY SIGNS

towards right

Bowiec left

(1) 本次股东大会的决议的有效期

towardaright

towards left

| Sl. No. | Date Kms. Details | Idling CO% | Authorised Dealer / Service Poin | ||
| Job Card No. | Stamp & Signature | ||||
Log Book
| Sl. No. | Date Km.s. Details | Idling CO% | Authorised Dealer / Service Poin | ||
| Job Card No. | Stamp & Signature | ||||
Log Book
| Sl. No. | Date Kms. Details | Idling CO% | Authorised Dealer / Service Poin | ||
| Job Card No. | Stamp & Signature | ||||
Log Book
| Sl. No. | Date Kms. Details | Idling CO% | Authorised Dealer / Service Point | ||
| Job Card No. | Stamp & Signature | ||||
Notes
Notes
Notes
Notes
Notes
ROYAL ENFIELD
VEHICLE INSTALLATION FORM
| Dealer's Name | Date | ||||||||||
| Place of Dealership | Dealer Code | ||||||||||
| Engine No. | Coupon No. | ||||||||||
| Chassis No. | Installation Date. | ||||||||||
| Customer's Name | Taluk | ||||||||||
| Door No. & Street | State | ||||||||||
| Village / Town | STD Code | ||||||||||
| District | Telephone Residence | ||||||||||
| Pin Code | Bike Regn. No. | ||||||||||
| Telephone Office | Invoice No. | ||||||||||
| E-mail address : if any | Delivery Note / Advice No. | ||||||||||
| Age in Years | |||||
| 18-20 Yrs | AG 01 | 36-40 Yrs | AG 05 | ||
| 21-25 Yrs | AG 02 | 41-45 Yrs | AG 06 | ||
| 26-30 Yrs | AG 03 | Above 45 Yrs | AG 07 | ||
| 31-35 Yrs | AG 04 | ||||
| Monthly Household Income | ||
| Below Rs. 10,000 | ME 01 | |
| Rs. 10,000-20,000 | ME 02 | |
| Rs. 20,000-50,000 | ME 03 | |
| Above Rs. 50,000 | ME 04 | |
| Expected Average KMs Per Day | ||
| Lesser than 10 KMs | KM01 | |
| 11 - 30 KMs | KM02 | |
| 13 - 15 KMs | KM03 | |
| Above 50 KMs | KM04 | |
| Mode of Purchase | ||
| Cash | MP 01 | |
| Bank Finance | MP 02 | |
| Organised Company Finance | MP 03 | |
| Local Finance | MP 04 | |
| Loan from friends | MP 05 | |
| Educational Qualification | |||||
| 10th - 12th | CQ 01 | BE | CQ 05 | ||
| Diploma | CQ 02 | MBBS | CQ 06 | ||
| Graduate | CQ 03 | CA | CQ 07 | ||
| Post - Graduate | CQ 04 | MBA | CQ 08 | ||
| Purpose of use | |||||
| Family Vehicle | P 26 | To Commute Res-College | P 31 | ||
| Personal Vehicle | P 27 | To carry load business | P 32 | ||
| To move around / as part of work / Business | P 28 | To go around with friends | P 33 | ||
| No Specific Purpose / Received as Gift | P 34 | ||||
| Commute Between Residence and Office | P 29 | For long distance/ leisure rides only | P 35 | ||
| To run Family Errands | P 30 | Any other | P 36 | ||
| Usage Road Type | ||
| Hilly Road | RT 01 | |
| Plain Road | RT 02 | |
| Kutcha Road | RT 03 | |
| Highways Road | RT 04 | |
| City Road Congested | RT 05 | |
| City Road Non - Congested | RT 06 | |
| Mixed type of Road | RT 07 | |
| Profession | ||
| Private Company Employee | CP 01 | |
| Government Employee | CP 02 | |
| Sales Representative | CP 03 | |
| Bank / Insurance Employee | CP 04 | |
| Software Engineer or IT / ITeS Emps | CP 05 | |
| Public Sector Employee | CP 06 | |
| Farmer / Agriculturist | CP 07 | |
| Student | CP 08 | |
| Contractor | CP 09 | |
| Small Trader / Shopkeeper | CP 10 | |
| Businessman | CP 11 | |
| Doctor | CP 12 | |
| Lawyer | CP 13 | |
| Engineer | CP 14 | |
| Chartered Accountant | CP 15 | |
| Others (Please mention) : | CP 16 | |
What was the major reason in deciding to purchase Royal Enfield's bike?
| Riding Comfort | SP 01 | |
| Stability | SP 02 | |
| Safety | SP 03 |
| Loading carrying Capacity | SP 04 | |
| Image / Status | SP 05 | |
| Fuel Consumption | SP 06 |
| Suggested by Friends | SP 07 | |
| Suggested by Local Mechanics | SP 08 | |
| To Cover Long Distance | SP 09 |
Have you visited Royal Enfield website? Yes □ No □
For Office use-only
Vehicle Installation Form (VIF) No.
What Vehicle do you own now?
Motor Cycle
| First Time Two - Wheeler Buyer | FB 01 | HERO HONDA / HERO | Yamaha SS 125 | EY 13 | Bajaj Pulsar 200 / 220 | BA 15 | |||||
| ROYAL ENFIELD | HH CD 100 / CD 100 SS | HH 01 | Yamaha SZX | EY 14 | Ninja 250R | BA 16 | |||||
| Royal Enfield Bullet 350 (CI) | RE 01 | HH Sleek | HH 02 | Yamaha SZR | EY 15 | Ninja 650R | BA 17 | ||||
| Royal Enfield Bullet DLX | RE 02 | HH Splendor | HH 03 | Yamaha FZ16 | EY 16 | KTM Duke | BA 18 | ||||
| Royal Enfield Bullet Campus | RE 03 | HH Street / DLX | HH 04 | Yamaha FZS | EY 17 | TVS - SUZUKI / TVS | |||||
| Royal Enfield Machismo | RE 04 | HH CBZ Drum / Disc / ES | HH 05 | Yamaha Fazer | EY 18 | TVS - Suzuki Max 100 | TS 01 | ||||
| Royal Enfield Machismo A350 | RE 05 | HH Passion | HH 06 | Yamaha YZF - R15 | EY 19 | TVS - Suzuki Max 100 R | TS 02 | ||||
| Royal Enfield Lightning | RE 06 | HH Ambition 125 /135 | HH 07 | Yamaha Enticer | EY 20 | TVS - Suzuki Samurai | TS 03 | ||||
| Royal Enfield Lightning 535 | RE 07 | HH Super splendor | HH 08 | Yamaha Above 500 cc | EY 21 | TVS - Suzuki Shogun | TS 04 | ||||
| Royal Enfield Electra 4S | RE 08 | HH Splendor Plus / NXG | HH 09 | KINETIC | TVS - Suzuki Shaolin | TS 05 | |||||
| Royal Enfield Electra 5S | RE 09 | HH Hunk / Extreme | HH 10 | Kinetic KA 80 | KE 01 | TVS - Suzuki Fiero / ES | TS 06 | ||||
| Royal Enfield Thunderbird (LB) | RE 10 | Hero Ignitor | HH 11 | Kinetic K4 100 | KE 02 | TVS Sport | TS 07 | ||||
| Royal Enfield Bullet 350 UCE | RE 11 | Hero Impulse | HH 12 | Kinetic Challenger | KE 03 | TVS Star City / DLX | TS 08 | ||||
| Royal Enfield Electra UCE | RE 12 | Hero CD Dawn / DLX | HH 13 | Kinetic GF Laser / 125 / 150 | KE 04 | TVS Max 4R | TS 09 | ||||
| RE Thunderbird Twin Spark | RE 13 | Hero Splendor Pro | HH 14 | Kinetic Aquila | KE 05 | TVS Jive | TS 10 | ||||
| Royal Enfield Classis 350 | RE 14 | Hero Passion Pro | HH 15 | Kinetic Stryker | KE 06 | TVS Flame SR / DS | TS 11 | ||||
| Royal Enfield Classis 500 | RE 15 | Hero Glamour | HH 16 | Kinetic Boss | KE 07 | TVS Apache / RTR | TS 12 | ||||
| SUZUKI MOTORCYCLE | Hero Achiever | HH 17 | Kinetic Velocity | KE 08 | TVS Victor / GLX /GS | TS 13 | |||||
| Suzuki GW 250 | SM 01 | Hero CBZ Xtreme | HH 18 | Kinetic Comet | KE 09 | LML | |||||
| Suzuki Slingshot | SM 02 | Hero Karizma / ZMR | HH 19 | BAJAJ | LML Energy / FX | LM 01 | |||||
| Suzuki GS 150R | SM 03 | Bajaj M80 / Major | BA 01 | LML Adreno / FX | LM 02 | ||||||
| Suzuki Heat | SM 04 | ESCORT YAMAHA / YM | Bajaj KB 100 / RTZ | BA 02 | LML Freedom DX / Prima / Topper | LM 03 | |||||
| Suzuki Zeus | SM 05 | Escort Rajdoot | EY 01 | Bajaj 4S Champion | BA 03 | LML Graptor / Beamer | LM 04 | ||||
| Suzuki Above 500 cc | SM 06 | Escort Ace | EY 02 | Bajaj KB 125 | BA 04 | ||||||
| HONDA MOTORCYCLE | Escort Yamaha RX 100 | EY 03 | Bajaj Boxer AT & CT | BA 05 | MAHINDRA | ||||||
| Honda Dream Yuga | HM 01 | Escort Yamaha RX 135 | EY 04 | Bajaj Caliber / SM | BA 06 | Mahindra Stallio | MA 01 | ||||
| Honda CB Twister | HM 02 | Escort Yamaha RXZ | EY 05 | Bajaj Acer 100 | BA 07 | Mahindra Macho | MA 02 | ||||
| Honda CB Shine | HM 03 | Yamaha RX135(SS) | EY 06 | Bajaj Pulsar 150 / 180 | BA 08 | ||||||
| Honda CBF Stunner | HM 04 | Yamaha YBX | EY 07 | Bajaj Eliminator | BA 09 | ||||||
| Honda CB Unicorn | HM 05 | Yamaha YD 125 | EY 08 | Bajaj Cageva CRX 3 | BA 10 | ||||||
| Honda CB Unicorn Dazzler | HM 06 | Yamaha Crux | EY 09 | Bajaj Avenger | BA 11 | ||||||
| Honda CBR 150R | HM 07 | Yamaha Libero | EY 10 | Bajaj Platina 110/ 125 | BA 12 | ||||||
| Honda CBR 250R | HM 08 | Yamaha Gladiator | EY 11 | Bajaj Discover 100 / 125 / 150 | BA 13 | ||||||
| Honda Above 500 cc | HM 09 | Yamaha YBR 110 / 125 | EY 12 | Bajaj Pulsar 135 | BA 14 |
| Scooters | |||||||||||||
| LML | SC 01 | Bajaj | SC 02 | Kinetic | SC 03 | Piaggio | SC 04 | Hero | SC 05 | ||||
| TVS | SC 06 | Suzuki | SC 07 | Honda | SC 08 | Yamaha | SC 09 | ||||||
| Mopeds | ||||||||||||
| Bajaj | MD 01 | TVS | MD 02 | Escorts | MD 03 | Hero Puch | MD 04 | |||||
| Kinetic | MD 05 | Hero Majestic | MD 06 | Avanti | MD 07 | |||||||
| Car (Below 1000 cc) | CR01 | Car (1000 to 2000 cc) | CR02 | Car (Above 2000cc) | CR03 | Others | OT 01 |
The reason I have booked and willing to wait for a Royal Enfield is
| TICK THE OPTIONMOST SUITABLE | DefinitelyAgree | Agree | Maybe | Disagree | DefinitelyDisagree |
| Because it is my dream bikesince childhood. | |||||
| There is no other 350cc bike. | |||||
| This kind of styling is notavailable on any other bike. | |||||
| Because this is a Royal Enfieldam willing to wait. | |||||
| Other Reasons. |
I would rate my experience in this counter as-
| TICK THE OPTION MOST SUITABLE | Excellent | Good | Could be better | Not good | Extremely Bad |
| Attitude and Capability of people. | |||||
| Test ride. | |||||
| Communication during waiting period. | |||||
| Ease of booking and other formalities. | |||||
| Bike delivery and information given. |
Format No. F/14A/CS/03, Sep 2012 DLR/CS Copy
ROYAL ENFIELD
PRE DELIVERY INSPECTION LIST - CONTINENTAL GT
| Model: Engine No: | ||||||||
| Dealer's Name: Location: | ||||||||
| Colour: Key Number: Battery Number Tyre | Number Front Rear: Battery Make: | Lock Number: | ||||||
| Aggregate Area Defect | Code Measure | Defect #1 | Defect #2 | Defect #3 | Remarks | |||
| CHASSIS / ENGINE NUMBER | 1 | Engine / Vehicle Number Details DF Same | ||||||
| CONNECT BATTERY / Check Voltage | 2 | Battery Charging & Vent pipe connection D / NC / Weak Cell 12.6 V BATTERY | ||||||
| ENGINE OIL | 3 | Replace oil & oil filter / Check Oil level (Loose three Drain Bolts) | EO - (Drained Oil Level) | 2.5 Litres (Capacity is 2.75 Litres) -Loose three Drain Bolts to Drain Oil | ||||
| 4 | Clean Oil Strainer | - | Clean | |||||
| LOCK OPERATION | 5 | Ignition Cum steering/ Side cover Lock / Cap Fuel Tank Lock | H / LF / NW | Same | ||||
| PETROL | 6 | Fill Petrol | - | 3 Litres | ||||
| FUEL TANK | 7 | Fuel Leak | L | No Leak (Tank, Pump, hose) | ||||
| 8 | Fuel Tank Alignment | M | Straight | |||||
| 9 | Tank Monogram LHS & RHS alignment check up | M | ||||||
| FRONT WHEEL | 10 | Caliper Mtg BOLT | LF | 2.7 to 3 Kgm | ||||
| 11 | Fr.Wheel Rotation | W / T / LF / N | Free (Check Spokes Looseness & Runout | |||||
| 12 | Front Mudguard Alignment | M / RB | Straight | |||||
| 13 | Front Wheel Nut | LF | 7.0 to 7.7 Kgm | |||||
| 14 | Front Tyre Condition (Check Tyre Line Seating) | WF | Good | |||||
| 15 | Front Tyre Pressure | LESS | 22PSI | |||||
| 16 | Front Brake Light | NW / F | ||||||
| 17 | Spseudo sensor cable coupler connection & function | WF / NW | ||||||
| CLUTCH | 18 | Clutch Operation | H / N Smooth | |||||
| 19 | Clutch Lever Free Play | EP / V / T | 2 - 3 mm | |||||
| HANDLE BAR CONTROLS & ELECTRICAL SWITCH OPERATIONS | 20 | Accelerator Operation | T / SY | Smooth | ||||
| 21 | Lever Brackets Tightness | LF | Tight | |||||
| 22 | Switch Modules Tightness | LF | Tight | |||||
| 23 | Steering Movement | T | Free | |||||
| 24 | Clip on Handle Bar fasteners | LF | ||||||
| 25 | DOME Lock Nut T-Stem | LF | 4.5 to 5.5 Kgm | |||||
| ELECTRICALS | 26 | Brake / Tail Light | NW /F | No Defects | ||||
| 27 | Electrical Switch Operation | NW / F | No Defects | |||||
| 28 | Head lamp Low & High beam light | NW / F | No Defects | |||||
| 29 | Parking light | NW / F | No Defects | |||||
| 30 | Front / Rear brakes switch operation | NW / F | No Defects | |||||
| INSTRUMENT CLUSTER | 31 | Initial (ZPD) operation | NW / F | No Defects | ||||
| 32 | Neutral Lamp | NW / F | No Defects | |||||
| 33 | Speedo / odo working | NW / F | No Defects | |||||
| 34 | Battery indication | NW / F | No Defects | |||||
| 35 | Trip A Check up | NW / F | No Defects | |||||
| 36 | Trip B Check up | NW / F | No Defects | |||||
| 37 | Cluster Illumination check | NW / F | No Defects | |||||
| 38 | High beam tell tale | NW / F | No Defects | |||||
| 39 | Trafficator tell tale | NW / F | No Defects | |||||
| 40 | Fuel level Indication | NW / F | No Defects | |||||
| SEAT ASSY | 41 | Seat Alignment | M | |||||
| 42 | Seat Lock Cable | H / NW / LF | ||||||
| 43 | Seat Catcher Mounting Bolt | LF | ||||||
| 44 | Seat Cover | Fit and finish | ||||||
| REAR WHEEL | 45 | Rr. Brake Pedal Free Play | T / EP | 10-15mm | ||||
| 46 | Brake Fluid maximum level check up in the rear Master Cylinder | Low | ||||||
| 47 | Routings of brake hose, twist or routing of hose. | WF | ||||||
| 48 | Drive Chain Tension / slackness | T / EP | 20 -25 mm | |||||
| 49 | Rear Wheel Rotation | W / T / LF / N | Free (Check Spokes Looseness & Runout | |||||
| 50 | Rear Sprocket Mounting Screws | LF | ||||||
| 51 | Chain Guard Position | M /WF | ||||||
| 52 | Rear Mudguard Alignment | M | Straight | |||||
| 53 | Rear Tyre Pressure | LESS | 32PSI | |||||
| 54 | Rear Tyre Condition (Check Tyre Line Seating) | WF | Good | |||||
| SWING ARM / FOOT REST | 55 | RR Shock Absorber Operation / Adjustment | H / N / AD | Smooth | ||||
| 56 | Swing Arm Bolts Fitment | LF | ||||||
| 57 | Rider Foot Rest Foldable Function LH / RH H / NW | |||||||
| 58 | Presence of Foot Rest Peg / circlip | Missing | ||||||
| AESTHETICS | 59 | Mudguards - Paint Related | SC / PD / R / DN | No Defects | ||||
| 60 | Fuel Tank - Paint Related | SC / PD / R / DN | No Defects | |||||
| 61 | side panel - Paint Related | SC / PD / R / DN | No Defects | |||||
| 62 | Powder Coated Paris (Scratch/ Rust / Chipped OFF) | SC / PD / R | No Defects | |||||
| 63 | Plated Parts (Scratch/ Rusty) | SC / R / PO No Defects | ||||||
| 64 | Indicators Alignment | M | No Defect | |||||
| OTHERS | 65 | Nuts, bolts.fasteners (Torque) | LF | Tight (RH,LH Cover / Engine Foundation / Accessories/ Wheel Nut) | ||||
| 66 | Owner's Manual & Tool Kit Content | |||||||
| 67 | Spare fuse in fuse carrier | NA | ||||||
| TEST RIDE | 68 | Starting (Kick Start / Self Start) | ST / N | Easy Start | ||||
| 69 | Front / Rear Brakes Effectiveness/ Feel | AD / SG | Sharp | |||||
| 70 | One side pulling | P | Straight | |||||
| 71 | ExcessiveVibration | V | ||||||
| 72 | Wobbling | W | No Defects | |||||
| 73 | Fork / Chain Noise | N | No Defects | |||||
| 74 | Engine Performance / Gear Shifting | N / ST / J / H | Smooth | |||||
| 75 | Silencer Heat shield / Exhaust pipe guard | LF / V / SC / DN / R / PO | No Defects | |||||
| 76 | Any Rattling / Squeaking Noise | N | NII (Silencer / Accessories / Body Parts / Suspension) | |||||
| STATIC CHECK (AFTER TEST RIDE) | 77 | Easy Start (Hot condition) | ST / NW | |||||
| 78 | Leak | L | No Leak (Oil/ Fuel/ Hydraulic/ Acid leakage) | |||||
| 79 | Smoke | SK / EO | No Smoke | |||||
| 80 | Cam Noise / Top End Noise | N | ||||||
| Any OTHER | ||||||||
| Note ** | Please inform plant in case of any engine dismantling during the PDI stage | |||||||
| INSTRUCTIONS | |
| 1. Check the vehicle thoroughly for any transit damages or shortage of parts.2. Carry out all jobs listed under Pre-delivery Inspection Schedule.3. Thoroughly road - test the vehicle for performance. | 4. Please ensure delivery of the vehicle in brand new condition.5. Claim transit loss and damage through ‘TRANSIT’ insurance only.6. Claim Parts replaced for Manufacturing defects only under warranty. |
| Misalignment | Noise | Vibration | Leak | Starting Trouble/Missing | Less | Wobbling | Loose Filment | Discharging Tight | Fused Scratch | Pulling | Dent | Wrong Filment | Hard | Jerking | |
| M | N | V | L ST | LESS | W | LF D T | P SC P | DN | WF | H | J |
| Excess Play | Different | Spongy | Sticky | Not Available | Smoke | Adjustment | Not Working | Paint Defect | Rust | Peel Off | Dull | Excessive Oil | Rubbing | Not Charging |
| EP DF SG SY NA SK AD NW PD R PO DU | EO RB NC | |||||||||||||
ROYAL ENFIELD
| BIKE INSTALLATION CONFIRMATION BY CUSTOMER | |||
| We congratulate you on becoming a proud owner of Royal Enfield bike. We request you to give this feedback after completion of the delivery process. | |||
| YES | NO | ||
| 1 | Bike Documents explained (Invoice, Insurance, RC / Road Tax Receipt) | ||
| 2 | Owner's Manual received | ||
| 3 | Recommended Lubricants explained | ||
| 4 | Maintenance Schedule sheet in Owner's Manual shown and explained | ||
| 5 | Next Free Service due explained | ||
| 6 | All Free / Paid Services explained | ||
| 7 | Warranty Guidelines explained | ||
| 8 | ‘Running in period” details shown in the manual explained | ||
| 9 | Service Station Address given and Location explained | ||
| 10 | Service Incharge Name & Mobile No given | ||
| 11 | Bike delivered in neat and clean condition | ||
| 12 | Tool Kit & First Aid Kit received and explained | ||
| YES | NO | ||
| 13 | Control Switches & Disc Brake System usage explained | ||
| 14 | Fuse Box location shown and explained | ||
| 15 | Recommended Tyre Pressure explained | ||
| 16 | Bike starting & Gear shifting procedure explained | ||
| 17 | Quantity of Fuel in Fuel Tank informed | ||
| 18 | Bike orientation & short distance drive provided | ||
| 19 | Date and Time of Installation | ||
| 20 | Name of Person who did Installation | ||
| Suggestions If Any:CUSTOMERSIGNATURE | |||
| Model: Registration No.: | |||
| Chassis No.: | |||
| We thank you and request you to return this filled up form to the person who did the bike installation for youKEEP RIDING | |||
FORM 22
[See Rules 47(g), 115, 124 (2), 126A and 127 (1), 127 (2)]
INITIAL CERTIFICATE OF COMPLIANCE WITH POLLUTION STANDARDS, SAFETY STANDARDS OF COMPONENTS AND ROAD WORTHINESS
Certified that the following vehicle complies with the provisions of the Motor Vehicles Act, 1988, and the rules made there under, including the following mass emission norms:
Brand name of the vehicle :-
Continental GT
Chassis number :-
Engine number/motor number :-(in case of battery operated vehicles)
Sub-rule No. of rule :-
115(2)(i), 115(14)(F)
Emission norms :- Bharat Stage III [Bharat Stage-I/II/III/Bharat (Trem) Stage-III etc.]
Date :

ROYAL ENFIELD
ROYALENFIELD.COM