
UFX 100 - Server KATHREIN - Free user manual and instructions
Find the device manual for free UFX 100 KATHREIN in PDF.


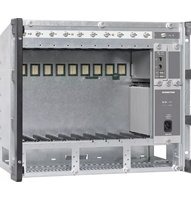
| Product Type | HDMI Encoder / Server for headends |
| Brand | Kathrein |
| Model | UFX 100 |
| Dimensions (H x W x D) | 183 x 110 x 45 mm |
| Weight | 1 kg |
| Power Supply | External 12 V DC, max. 2 A; input 100–240 V AC, 50 Hz |
| Video Inputs | HDMI, YPbPr, S-Video, CVBS (via VGA adapter cable) |
| Video Encoding | MPEG-4 AVC/H.264, up to 1080p, bitrate 1–19.5 Mbps |
| Audio Encoding | MPEG1 Layer II, MPEG2-AAC, MPEG4-AAC, 48 kHz sampling |
| RF Output | DVB-C, DVB-T, or ISDB-T modulated; frequency 30–1000 MHz |
| USB Port | Type A, USB 2.0/3.0, FAT32 formatted, max file size 2 GB |
| Network Interface | Ethernet RJ45, 100 Mbit/s; default IP 192.168.0.136 |
| Display | LCD with backlight; 5–120 s timeout adjustable |
| Control | Front buttons or web browser (via PC) |
| Recording & Playback | .ts files; loop, single, or segment modes; automatic on USB connect |
| Mounting | Wall mount, vertical orientation, 10 cm clearance all sides |
| Ambient Temperature | 0 °C to +40 °C |
| Safety | Use indoors only; disconnect before cleaning; do not open device |
| Disposal | Electronic waste – do not dispose with household waste |
Frequently Asked Questions - UFX 100 KATHREIN
User questions about UFX 100 KATHREIN
0 question about this device. Answer the ones you know or ask your own.
Ask a new question about this device
Download the instructions for your Server in PDF format for free! Find your manual UFX 100 - KATHREIN and take your electronic device back in hand. On this page are published all the documents necessary for the use of your device. UFX 100 by KATHREIN.
USER MANUAL UFX 100 KATHREIN
11.9 LCD | Keyboard 32
Audioformate: MP3, WAV
Videoformate: WMV, MPG, MP4, TS, AVI
Abb. 25: Password
Abb. 26: LCD | Keyboard
Abb. 29: Firmware
Instructions for use UFX 100
English

Table of Contents
1 About These Instructions 3
2 Symbol Explanation and Safety Instructions 3
1.1 Symbol Explanation and Signal Words 3
3 Intended Use 4
4 Safety Instructions 5
5 Device description 6
1.2 Front view 6
1.1 Plan view 7
6 Mounting the Device 8
6.1 Safety Instructions 8
6.2 Mounting the Device on the Wall 8
7 Connecting the Device 9
7.1 Simple Connection (Stand-alone) 9
7.2 Cascade Connection 10
8 Recording and Playing Transport Streams 11
9 Generating TS Videos 12
10 Operating the Device Using Buttons 13
10.1 General Information on Operating the UFX 100 13
10.2 Operating the UFX 100 Menu 14
12.1 Operating the USB Device sub-menu 21
12.1.1 Record TS 21
13.1.1 Play TS 22
14.1.1 USB Update 23
15.1.1 Disk Usage 23
16.1.1 Remove Device 23
11 Operating the Device on the PC via the Web Browser 24
11.1 Connecting the UFX 100 and Logging on 24
18.1 Overview of the user interface on the PC 25
19.1 Input 1 26
20.1 TS Config 27
21.1 Modulator 28
22.1 USB Media 29
23.1 Network 30
24.1 Password 31
11.2 LCD | Keyboard 32
1 About These Instructions
These instructions for use describe how to connect and commission the HDMI encoder. These instructions also describe the controls and connections and their functions, as well as how to operate the menu both on the device and on your PC via the web browser.
You will find more information on our website at www.kathrein.com.
▶ SAT ▶ Product Overview ▶ Signal processing/conversion ▶ UFOcompact plus ▶ UFX 100
→ The instructions are available for download on the UFX 100 product page.
2 Symbol Explanation and Safety Instructions
1.1 Symbol Explanation and Signal Words
Symbols
 | General warning symbol |
| Risk of damage to property |
Signal Words
| Warning This signal word indicates a hazard with a medium level of risk which can lead to death or severe injuries. | |
| Caution This signal word indicates a hazard with a low level of risk which can lead to minor or moderate injuries. | |
| Attention This signal word indicates a hazard which can lead to damage to property or a malfunction. | |
| Tip | This signal word indicates useful tips and recommendations. |
Other Symbols
| Symbol Meaning | |
| ▶ | Operating instructions |
| 1, 2, 3...n Operating instructions in a fixed order | |
| ⇒ | Result of an operating instruction |
| ✓ | Condition for the execution of an operating instruction |
| • | List / list entry |
| OK Buttons/connections on the device or elements in the menu | |
| LOGIN Push buttons on the PC / in the UFX 100 user interface on the PC | |
3 Intended Use
The UFX 100 HDMI encoder is an expansion for headends to feed in an additional signal from a DVD player, Blu-ray player or a set-top box. Camera signals can also be integrated into the DVB-C/T network without any problems by means of the various interfaces at the input (HDMI/YPbPr/S-video/AV). It is also easy to record or play your own transport streams (videos).
4 Safety Instructions

WARNING
Risk of death due to electric shock and risk of fires resulting from electric current!
Tampering with the device can jeopardise its electrical safety. The manufacturer accepts no liability for accidents caused by the user opening the device. Opening the device and attempting to repair it yourself will void any warranty claims.
▶ Only have device repairs carried out by qualified personnel.
▶ Only operate the device on a mains power supply with a voltage of 100 – 240 V\~/50 Hz.
▶ Ensure that the power cable is not damaged.
▶ Disconnect devices with a damaged power cable from the mains (remove the power plug).
▶ Have devices with a damaged power cable repaired by a specialist before recommissioning it.
▶ Ensure that children, for example, do not push any objects into the ventilation slots.
▶ Set up the device near an easily accessible mains power socket so that the device can be disconnected from the mains at any time.
Risk of death when operated under incorrect environmental conditions or as a result of incorrect cleaning!
Moisture in the device can cause an electric shock or result in a risk of fires due to sparking.
▶ Only use the device and the power supply unit indoors.
▶ Protect the device from moisture, dripping water and splashing.
▶ Do not operate the device in wet rooms.
▶ Only use the device in a moderate climate, not in tropical conditions.
▶ Do not place any vessels containing liquid on the unit, e.g. vases.
▶ Disconnect the mains plug before cleaning the unit.
▶ Only clean the surface.
▶ Use a dry cloth to clean.
▶ Ensure that the ambient temperature does not exceed +40°C.


CAUTION
Tripping hazard as a result of exposed cables!
▶ Lay all cables such that nobody can tread on them or trip over them.
ATTENTION
Risk of damage to the device due to:
Impermissible mains voltage!
▶ Only operate the device with the permissible mains voltage. This is specified on the rear of the device or on the power supply unit.
Overheating!
▶ Never install the device in a cupboard or on a shelf with inadequate ventilation.
▶ Only mount the device vertically on a wall, for example.
▶ Do not place any items on top of the device.
▶ Do not expose the device to direct sunlight.
▶ Do not set up the device near heat sources such as a heating system.
▶ Only mount the device on a fire-proof base.
Incorrectly earthed antenna system!
▶ Earth the device in antenna system as specified or equipotentially bond it.
▶ Comply with EN 60728/11 and any national regulations.
5 Device description
1.2 Front view

Fig. 1: Front View
| No. | Name Function | |
| 1 | LCD display display | |
| 2 | POWER lights up green when device is connected to supply voltage | |
| 3 | ALARM error indicationlights up red if there is an error, e.g. there is no signal | |
| 4 | USB displays whether a USB storage medium is connectedlights up green if a valid transport stream is being played via a USB storage mediumdoes not light up if no transport stream is being played | |
| 5 | Left button | change screens on the displaymove elements on the displaychange settings |
| 6 | Up button | |
| 7 | Down button | |
| 8 | Right button | |
| 9 | ENTER opens sub-menus | saves changed settingschanges the values of certain settings along with button5-8; see General Information on Operating the UFX 100, p. 13activates hidden options and changes settings along with buttons5-8; see General Information on Operating the UFX 100, p. 13 |
| 10 | MENU goes back a step | |
| 11 | LOCK | locks and unlocks the LCD displayopens the main menu after starting up the device |
1.1 Plan view

Fig. 2: Plan View
| No. | Name Function | |
| 1 | Protective earth earth | conductor connection |
| 2 | DC 12 V external power supply connection (power supply unit) | |
| 3 | HDMI HDMI connection | |
| 4 | YPbPr+S-Video+AV | YPbPr, S-video and AV signal input via VGA cable |
| 5 | RF IN RF input (optional) | |
| 6 | RF OUT RF output for modulated signals (DVB-C, DVB-T, ISDB-T) | |
| 7 | USB connection for external USB storage media for video recordings, play-back or software updates | |
| 8 | Ethernet | management interface (Internet) |
6 Mounting the Device
6.1 Safety Instructions

DANGER
Risk of death due to electric shock in the event of contact with electrical cables!
▶ When mounting the device to a wall, before drilling the holes, ensure that there are no electrical cables in the wall.
▶ Before beginning mounting work, disconnect the device from the mains.

ATTENTION
Risk of damage to property or malfunction due to overheating!
▶ Never install the device in a cupboard or on a shelf with inadequate ventilation.
▶ Only mount the device vertically on a wall, for example.
▶ Ensure a minimum distance of 10 cm on all sides.
▶ Do not set up the device near heat sources, such as a heating system.
6.2 Mounting the Device on the Wall
- Drill holes in the wall.
- Fix the device to the wall using screws. When doing so, ensure that the device is mounted vertically with the connections on the top; see figure on the right.

7 Connecting the Device
7.1 Simple Connection (Stand-alone)
- Connect the input signal to the HDMI or YPbPr+S-Video+AV socket.
- Connect the output cable from the RF OUT socket to the TV set.
- Connect the earth conductor.
- Connect the power supply unit to the DC 12 V socket.
- Connect the power supply unit to the outlet.
![graph TD A["Computer"] -->|RF OUT| B["Headend UFOmini or UFOcompact plus**"] B -->|RF IN (optional)*| C["Camera, DVD, set-top box etc."] C -->|YPbPr+S-Video+AV| D["HDMI"] D -->|Power supply| E["Power supply with antenna"] B -->|IP OUT| F["KATHREIN"] B -->|RF OUT| G["Ground"] B --> H["Ground"] B -->…](/content/2026/05/788550/images/a3a0cb78f609f654af0cefc82df2d338ed1da114ebed6b0e3d808dc5630fd922.jpg)
Fig. 3: Simple Connection (Stand-alone)
7.2 Cascade Connection
To increase capacity, it is possible to cascade multiple UFX 100 devices. To do so:
▶ Connect the RF OUT socket of the first device to the RF IN socket of the following UFX 100 device; see Fig. 4.
![graph TD A["Camera, DVD, set-top box etc."] -->|RF IN| B["KATHREIN"] C["Camera, DVD, set-top box etc."] -->|HDMI| D["Power supply"] D -->|RF OUT→RF IN| E["Earth conductor connection"] F["YPbPr+S-Video+AV"] -->|Power supply| G["Computer"] G -->|RF OUT| H["Headend UFOmini or UFOcompact plus**"] I["IP…](/content/2026/05/788550/images/f12860b5204b406f580673a596c2c938bcec4b87ea9f14a078ad3160e4d86e66.jpg)
Fig. 4: Cascade Connection
8 Recording and Playing Transport Streams
Transport streams can be recorded and played using the UFX 100. The UFX 100 converts the original video file into a *.ts file and saves it to the USB storage medium.
To record a video:
- Connect the signal source to the UFX 100.
- Start encoding.
- Start recording.
- Save the generated TS file to the USB storage medium.
To play the file (TS playback):
- Connect the USB storage medium 1) with the *.ts videos 2) to the UFX 100.
- Play the content.
![graph TD A["Video"] --> B["KATHREI"] B --> C["Recording"] C --> D["Play transport streams"] D --> E["HF output"] E --> F["Computer monitor"]](/content/2026/05/788550/images/32eabaa12f6cdb66067125f489b196ef4f52ce8a0d6e67545ebd517c48183f22.jpg)
Fig. 5: Recording and Playing Transport Streams
1) USB storage medium requirements: 2.0/3.0, FAT32-formatted
2) A video file must be no larger than 2 GB. Multiple video files can be played in a loop.
9 Generating TS Videos
*.ts videos with images, music or videos can be generated using the TS Creator software 1) on the computer. These videos can be stored on the USB storage medium and played on the UFX 100.
To generate *.ts videos:
- Copy the files into the TS Creator application.
Tip
Supported formats:
Picture formats: JPG, PNG, BMP, GIF
Audio formats: MP3, WAV
Video formats: WMV, MPG, MP4, TS, AVI
- Start the conversion to generate the *.ts videos.
- Save the generated *.ts video on a USB storage medium.
- Connect the USB storage medium to the UFX 100.
- Play the content.
![graph TD A["Video Bild Musik"] --> B["TS Creator"] B --> C["*ts.-Videos ausspielen"] C --> D["HF-Ausgang"] D --> E["Computer"]](/content/2026/05/788550/images/1727a99053a80533d8cb69bd21b4ff584ae0df65425e130b7bf553c131b0b6db.jpg)
Fig. 6: Generating TS Videos
1) You will find the TS Creator software and the instructions for operating the software at www.kathrein.com.
▶ SAT ▶ Product Overview ▶ Signal processing/conversion ▶ UFOcompact plus ▶ UFX 100
⇒ The instructions are available for download on the UFX 100 product page.
10 Operating the Device Using Buttons
10.1 General Information on Operating the UFX 100
The UFX 100 can be operated using buttons ⑤ – ⑪ on the front of the device; see section Front view, p. 6.
The following section uses examples to explain how to change the values of certain settings and activate hidden options using the ENTER button along with buttons ⑤ – ⑧.
Changing values using the ENTER button:
1. Press ENTER.
→ A number is underlined; see Fig. 7.
- Press the up or down button to change the value.
⇒ The value is changed.
-
Press the left or right button to move to a different number.
-
Press the up or down button to change the value.
⇒ The value is changed.
![graph LR A["Hue 1"] -->|ENTER| B["Hue +001"] B --> C["Hue +001"] C --> D["Hue +002"]](/content/2026/05/788550/images/edbd36bd3dd6974ae137b3737c24ca31c68ed16425d0102a03ffa6e88efb972f.jpg)
Fig. 7: Changing Values Using the ENTER Button
Opening options using the ENTER button and changing values:
- Press ENTER to display hidden options.
→ Brackets are placed around a value; see Fig. 8.
- Press the left or right button to change the value.
→ The value is changed.
- Press ENTER to save the new value.
⇒ The value is saved.
![graph LR A["Constellation 64 QAM"] -->|ENTER| B["Constellation [64 QAM"]] B -->|◀▶| C["Constellation [128 QAM"]] C -->|ENTER| D["Constellation 128 QAM"]](/content/2026/05/788550/images/44501505b089cdbbe7f97bbd8e7026ea46f74f0cb7eb26cd6c13954ec3645afc.jpg)
Fig. 8: Opening Hidden Options Using the ENTER Button
10.2 Operating the UFX 100 Menu
The LCD display starts to initialise the program as soon as the power supply is connected to the device.

First, go to the sub-menu to adjust the modulation to the transmission standard (DVB-C, DVB-T or ISDB-T) of your TV set that is being used to receive the RF signal.
Reboot the device when you have changed the modulation. Sub-menus ⑩ – ⑱ vary depending on the transmission standard selected in ⑲.
In these operating instructions, the menu is explained using the DVB-T transmission standard as an example.
The following symbols are used for the buttons:
| Button Symbol | |
| Up button | ↑ |
| Down button | ↓ |
| LOCK | ↓ |
| ENTER | → |
| MENU | ← |
![graph TD A["Initializing"] --> B["DVT-T803.100Mhz ...1080I8.55Mbps..."] B --> C["MainMenu Status"] C --> D["Status Alarm"] C --> E["Status Uptime"] D <--> E style A fill:#f9f,stroke:#333 style B fill:#ccf,stroke:#333 style C fill:#cfc,stroke:#333 style D fill:#fcc,stroke:#333 style E fill:#cff,strok…](/content/2026/05/788550/images/2fde13846b3596b0069512a15b8a8771d03278f7bec70e495fafc00d447f8de0.jpg)
Fig. 9: Current Settings and Status Sub-menu
| 1 DVB-T803.100 MHz1080i8.55 Mbps | current transmission standardcurrent output frequencycurrent signal source resolutioncurrent encoding bit rate |
| Status | |
| 2 Status Alarm error indication | For example, if the signal cable is not connected, the message Video 1 Not Lock appears in the sub-menu. |
| 3 Status Uptime duration of the device operating time | The time calculation starts as soon as the device is switched on. |
![graph TD A["MainMenu Encoder"] --> B["Encoder Video"] B --> C["Video Interface"] B --> D["Audio Audio"] D --> E["Audio AudioBitrate"] D --> F["AudioFormat HDMI I audioInpu"] A --> G["Encoder Audio"] G --> H["Encoder ProgramInfo"] H --> I["ProgramInfo ProgramOutput ProgramName ServiceName PMTPID PCRP…](/content/2026/05/788550/images/91f05ca9eaf7fc2a851c0900edce32faffa00115441b3ccc6e37e8a0c0326b54.jpg)
Fig. 10: Encoder and TS Config Sub-menus
| Encoder | ||
| 4 Video | Interface | edits the video parameters belowselects an interface type from the specified optionsThe UFX 100 automatically detects a valid video format and begins the encoding. |
| Resolution | resolution of the signal source (display only) | |
| Video Bit rate | 1 - 19.5 Mbps | |
| Rate Mode | CBR or VBR | |
| H.264 Profile | high or main | |
| H.264 Level | 3.0, 3.1, 3.2, 4.0, 4.1 or 4.2 | |
| Brightness | 0 - 128 | |
| Contrast | 0 - 255 | |
| Saturation | 0 - 128 | |
| Hue | -128 to +127 | |
| 5 Audio | Audio Bitrate | edits the audio parameters belowselects an audio bit rate from the specified optionsEvery audio format has its own bit rate range. |
| Audio Format | MPEG1 Layer II, MPEG2-AAC or MPEG4-AAC | |
| HDMI audio input | switches HDMI on or off | |
| 6 Program Info | Program output | edits the programme information belowdecides whether or not the program is outputted |
| Program Name | programme name | |
| Service Name | service name | |
| PMT PID | PID number of the PMT (Program Map Table) | |
| PCR PID | Reference time (PCR, Program Clock Reference) of the transport stream | |
| Video PID | PID number of the video signal | |
| Audio PID | PID number of the audio signal | |
| LCN | programme number | |
| TS Config | ||
| 7 TS ID transport stream ID | ► Press ENTER to change the new value. | |
| 8 Ori Net ID original network ID | ► Press ENTER to change the new value. | |
| 9 NIT | NIT Insert | displays, changes or selects NIT values from specified options |
| Private data | switches NIT Insert on and off | |
| Network ID | defines the 8-bit field | |
| Network name | network ID | |
| Version Mode | network name | |
| Version number | automatic or manual | |
| LCN Mode | version number (display only) | |
| European, NorDig or NorDig V2 | ||
![graph TD A["MainMenu Modulator"] --> B["Modulator Bandwidth"] B --> C["Bandwidth [6M"]] C --> D["Constellation [64QAM"]] D --> E["FFT [2K"]] E --> F["GuardInterval [1/32"]] F --> G["Coderate [1/2"]] G --> H["RFFrequency 0650.000MHz"] H --> I["RFLevel -10.0dBm"] I --> J["RFOn Off* On"] J --> K["Bitra…](/content/2026/05/788550/images/7fea8f6ceb2c97e74da7a4fd700d7fbceaf922403e5b4dbec972fb65c8b2b584.jpg)
Sub-menus ⑩ – ⑱ are explained using DVB-T as an example.
![graph TD A["MainMenu NetworkConfig"] --> B["NetworkConfig NMSIP"] B --> C["NMSIP xxx.xxx.xxx.xxx"] C --> D["NetworkConfig SubnetMask"] D --> E["SubnetMask xxx.xxx.xxx.xxx"] E --> F["NetworkConfig Gateway"] F --> G["Gateway xxx.xxx.xxx.xxx"] G --> H["NetworkConfig WebPort"] H --> I["WebPort xxxx"] I…](/content/2026/05/788550/images/17ca9e2bbdb88795c23b7ac4be65efa595d3b5272fd7fdd29493a494866d576d.jpg)
Fig. 11: Modulator, Network Config and USB Device Sub-menus
| Modulator changes the following parameters depending on the transmission standard (DVB-T in this example) | ||
| 10 Bandwidth 6M, 7M or 8M | ||
| 11 Constellation QPSK, 16 QAM or 64 QAM | ||
| 12 FFT 2k, 4K or 8K | ||
| 13 Guard interval 1/32, 1/16, 1/8 or 1/4 | ||
| 14 FEC 1/2, 2/3, 3/4, 5/6 or 7/8 | ||
| Tip Different bandwidth, constellation, guard interval and code rate (FEC) combinations produce different output data rates. | ||
| 15 RF Frequency 30 – 1000 MHz | ||
| 16 RF Level 70 – 90 dBμV | ||
| 17 RF On switches RF on or off | ||
| 18 Bit rate | current modulation rate and maximum bitrate (display only) | |
| 19 Change Modulation | adapts the modulation to the transmission standard (DVB-C, DVB-T or ISDB-T) of the TV set that is being used to receive the RF signalThe device must be rebooted once the transmission standard has been changed. | |
| Network Configuration displays or changes the following parameters: | ||
| 20 NMS IP IP address used to | connect the device to the PC | |
| 21 Subnet Mask subnet mask | ||
| 22 Gateway gateway | ||
| 23 Web Port | ||
| 24 MAC Address MAC address | ||
| USB Device | ||
| 25 Record TS | Sub-menus 25 – 29 are described in a separate section; see Operating the USB Device sub-menu, p. 21. | |
| 26 Play TS | ||
| 27 USB Update | ||
| 28 Disk Usage | ||
| 29 Remove device | ||
![graph TD A["MainMenu System"] --> B["System SaveConfig"] B --> C["System LoadSavedCFG"] C --> D["System FactoryReset"] D --> E["System LCDTime-out"] E --> F["System KeyPassword"] F --> G["System LockKeyboard"] G --> H["System ProductID"] H --> I["System Version"] B --> J["SaveConfig? Yes ▶ No"] C --…](/content/2026/05/788550/images/dbbeb5f93d1970633b79c0c04b2049573d17ac66b81de8df746acdc1e47a26a6.jpg)
Fig. 12: System Sub-menu
| System | ||
| 30 Save Config Yes | No | saves changes cancels changes |
| 31 Load Saved CFG Yes | No | loads the saved configuration does not load the saved configuration |
| 32 Reset all sets Yes | No | resets the device to the default configuration no reset |
| 33 LCD Time-out time after which the LCD display switches off 5, 10, 45, 60, 90 or 120 seconds | ||
| 34 Set Password | enters a six-digit password for unlocking the keyboard | |
| 35 Lock Keyboard Yes | Locks the keyboard. The keyboard is locked and cannot be used. The password must be entered to unlock it. This operation only needs to be performed once. ▶ Enter the default password 0000 if you have forgotten the password. No unlocks the keyboard | |
| 36 Product ID | serial number of the device (display only) | |
| 37 Version | version information of the device (display only) | |
12.1 Operating the USB Device sub-menu
Tip
The UFX 100 can be used to generate *.ts videos.
You will find the TS Creator software and the instructions for operating the software at www.kathrein.com.
▶ SAT ▶ Product Overview ▶ Signal processing/conversion ▶ UFOcompact plus ▶ UFX 100
⇒ The TS Creator software and instructions are available for download on the UFX 100 product page.
12.1.1 Record TS
![graph TD A["MainMenu\nUSBDevice"] <--> B["USBDevice\nRecordTS"] B <--> C["RecordTS\nStartRecord"] C <--> D["StartRecord\nYesNo"] C <--> E["RecordTS\nAdvancedConfig"] E <--> F["AdvancedConfig\nFileSize\nFilterNullIPKT\nFileSaveMode\nFilename\nAutomaticrecord"] F --> G](/content/2026/05/788550/images/97f0264b32a0c3a611f8d088bc56e6a4a14f29d381b0cd198b92b6d7bf2914fa.jpg)
Fig. 13: Record TS Sub-menu
| USB Device | |||
| 25 Record TS | |||
| Start | Yes | starts the recording | |
| Record | No | no recording | |
| Advanced Config | File Size size of the *.ts file, max. 2 GB | ||
| Filter Null filters or does not filter null packet | |||
| PKT | |||
| File Save Mode | Single file If the size of the *.ts file exceeds the specified file size, the recording is automatically ended. If the user limits the file size to 1 GB, for example, and the file reaches this size during recording, the UFX 100 automatically ends the recording. | ||
| Segment file If the size of the *.ts file exceeds the specified file size, the file is saved and the TS recording continues in a new file until there is no more storage space on the USB storage medium. | |||
| Loop record The UFX 100 automatically saves the files, continues the TS recording and saves this in the new file. If the USB storage medium is full, the first file recorded is replaced. | |||
| File Name | file name for the *.ts files | ||
| If, for example, the name Record has been entered, the UFX 1000 saves the files under the names Record-001.ts, Record-002.ts and so on. | |||
| Automatic record | Yes The UFX 100 starts a recording as soon as a USB storage medium is connected. | ||
| No ▶ Press Start record to start the recording. | |||
13.1.1 Play TS
![graph TD A["MainMenu\nUSBDevice"] <--> B["USBDevice\nPlayTS"] B <--> C["PlayTS\nPlayStop"] C <--> D["PlayStop\nYesNo"] C --> E["PlayTS\nFilebrowse"] E <--> F["PlayTS\nPlayMode"] F <--> G["PlayMode\nLoopAll\nSinglefile\nSingleLoop\nPlayAll"] F --> H["PlayTS\nAutomaticPlay"] H <--> I["AutomaticPlay\nY…](/content/2026/05/788550/images/3c0524f9f4fe854435c675bac6f91526c7e6bfa465fc949a4f01a3c555adc5f0.jpg)
Fig. 14: Play TS Sub-menu
| USB Device | ||
| 26 Play TS | ||
| Play Stop Yes | ends the playback | |
| No | starts the playback | |
| File browse | browses through *.ts files on the USB storage medium | |
| Play Mode selects a playback mode for *ts. files | ||
| Loop all | All files on the storage medium are automatically played in a loop function from the first to the last file. | |
| The file is only played back once. | ||
| Single file | ► Press ENTER to start the playback. | |
| The file is always played again in a loop function. | ||
| Single Loop | ► Press ENTER to start the playback. | |
| Play all | Files are automatically played back from the first to the last file. Play-back ends automatically as soon as the last file has been played. | |
| Automatic Play | Yes The UFX 100 starts a playback as soon as a USB storage medium is connected. | |
| No ► Press Start Play to start the playback. | ||
14.1.1 USB Update
![graph LR A["MainMenu\nUSBDevice"] <--> B["USBDevice\nUSBUpdate"] B <--> C["Update\nPFGA"]](/content/2026/05/788550/images/1f358f81a2b75835f94b96eb9ff685b94cafc3a53794c386e1a37af362db2e00.jpg)
Fig. 15: USB Update Sub-menu
| USB Device | |
| 27 USBUpdate | 1. Select the element to be updated.2. Press ENTER to confirm the selection and start the update.3. Save the update file to the USB storage medium as an Encoder Modulator-CPU/FPGA.tar.gz. |
| 15.1.1 Disk Usage |
 |
Fig. 16: Disk Usage Sub-menu
| USB Device | ||
| 28 | Disk Usage | shows the remaining storage capacity on the USB storage medium |
| 2017 | 2016 | |
| Cost of sales | 3.4 | 3.5 |
| Gross margin | 8.9% | 8.8% |
![graph LR A["MainMenu\nUSBDevice"] <--> B["USBDevice\nRemovedevice"]](/content/2026/05/788550/images/e213d19f43ab82c11480b21e19fcb08149a7e597f826089d1a2226b4ee53980d.jpg)
Fig. 17: Remove device Sub-menu
| USB Device | |
| 29 Remove Device | ▶ Press ENTER to safely remove the USB storage medium.The UFX 100 continues encoding the input signals automatically. |
11 Operating the Device on the PC via the Web Browser
In addition to operating the UFX 100 using the buttons on the device, it can also be operated easily and conveniently on the PC via the browser.
11.1 Connecting the UFX 100 and Logging on
Tip
The standard IP address for the UFX 100 is 192.168.0.136. It can be changed using the buttons on the device to adjust it to the IP address of the computer.
For example, if the IP address of your computer is 192.168.99.252, the IP address of the UFX 100 must be changed to 192.168.99.xxx. When changing the IP address, xxx can take a value between 1 and 254. Sole exception: 252 (avoid IP address conflict).
- Connect the UFX 100 and the PC with an Ethernet cable.
- If necessary, the ping command can be used to check whether the PC and the UFX 100 are in the same network segment.
- Adapt the IP address of the UFX 100 to the IP address of the computer as required; see Tip, p. 24.
- Open a web browser.
- Enter the IP address of the UFX 100 into the browser address bar to connect the device to the PC.
- Press ENTER.
⇒ The login mask with the user name and password appears (see Fig. 18).

-
Enter the standard user name admin and the standard password admin.
-
Press LOGIN.
→ The UFX 100 welcome mask appears (see Fig. 19).
18.1 Overview of the user interface on the PC

Fig. 19: Welcome Mask
| 1 | ▶ Select a menu tab on the left to check or change settings. |
| 2 | system information |
| 3 | information about the input, the bit rate and the status of the encoding |
| 4 | information about the output mode, the bit rate and the status of the TS |
| 5 | statusLights up green if there are no errorsLights up red in the event of an error, e.g. if no source is connected |
19.1 Input 1

Fig. 20: Input 1
| 1 | ▶ Select the Input 1 tab in the menu on the left to edit the settings for the Encoder sub-menu.⇒ The settings for the Video, Audio and Program sub-menus are displayed; cf. Operating the UFX 100 Menu, sub-menus 4 – 6, p. 17 |
| 2 | selects the input signal |
| 3 | The settings Brightness, Contrast, Saturation and Hue are only available for CVBS/S-video. |
| 4 | information about errors, current resolution and bit rate of the encoding; cf. 1 and 3, p. 15 |
20.1 TS Config

Fig. 21: TS Config
| 1 | ▶ Select the TS Config tab in the menu on the left to edit the Stream, NIT and VCT sub-menus.⇒ The settings for the Stream, NIT and VCT sub-menus are displayed; cf. Operating the UFX 100 Menu, sub-menus 7 - 9, p. 17 |
| 2 | VCT (Virtual Channel Table), only ATSC |
21.1 Modulator
Tip
Please note that the settings in the Modulator sub-menu vary depending on the transmission standard selected. Fig. 22 shows the settings for the DVB-C transmission standard.
▶ Select the Device tab in the menu on the left to change the transmission standard.

Fig. 22: Modulator
| 1 | ▶ Select theModulatortab in the menu on the left to edit the settings for the RF output signal.→ The settings for theModulatorsub-menu are displayed; cf.Operating the UFX 100 Menu, sub-menus 10 – 18, p. 19. |
| 2 | ▶ Select theDevicetab in the menu on the left to change the transmission standard. |
22.1 USB Media

A USB storage medium and an input signal must be connected to the UFX 100 and the encoding must be started to operate the Record TS sub-menu.
A USB storage medium must be connected to the UFX 100 to operate the Play TS sub-menu.

Fig. 23: USB Media
| 1 | ▶ Select the USB Media tab in the menu on the left to edit the settings for recording and playback.⇒ The settings for the Record TS, Play TS and Status sub-menus are displayed; cf. Operating the UFX 100 Menu, sub-menus 25 – 26, p. 19. |
| 2 | ▶ Press Start Record to start recording after all changes have been made in the Record TS settings. |
| 3 | ▶ Press Start Play to start playback after all changes have been made in the Play TS settings. |
| 4 | information about the total storage capacity / remaining storage capacity of the USB storage medium and about automatic playback and recording |
23.1 Network
![Encoder Modulator welcome to use Web I 2016-01-22 13:19:28 [Exit] Summary ► Status Parameters ► Input 1 ► TS Config ► Modulator ► USB Media System 1► Network ► Password ► LCD | Keyboard ► Save | Restore ► Backup | Load ► Firmware ► Device NETWORK NMS IP Address: 192.168.0.136 Subnet Mask: 255.255.25…](/content/2026/05/788550/images/3b92353e7085bb7a86a2669e020a761be0c9d000df388dd73b42a7572a06196b.jpg)
Fig. 24: Network
▶ Select the Network tab in the menu on the left to edit the settings for the Network sub-menu.
→ The settings for the Network sub-menu are displayed; cf. Operating the UFX 100 Menu, sub-menus 20 - 24, p. 19.

24.1 Password
![Encoder Modulator welcome tc 2016-01-22 13:20:32 [Exit] Summary ► Status Parameters ► Input 1 ► TS Config ► Modulator ► USB Media System ► Network ► Password ► LCD | Keyboard ► Save | Restore ► Backup | Load ► Firmware ► Device PASSWORD Modify the login name and password to make the device safely. I…](/content/2026/05/788550/images/4c6f02d1577b7409ce85d31ee4d94b153705561de0ef28dbe23e1b31888cff72.jpg)
Fig. 25: Password
| 1 | ▶ Select the Password tab in the menu on the left to edit the settings for logging in via the web browser.⇒ The settings for the Password sub-menu are displayed. |
| 2 | current user name |
| 3 | current password |
| 4 | new user name |
| 5 | new password |
| 6 | confirms new password |
11.2 LCD | Keyboard
![Encoder Modulator 2016-01-22 13:21:06 [Exit] Summary ► Status Parameters ► Input 1 ► TS Config ► Modulator ► USB Media System ► Network ► Password ► LCD | Keyboard ► Save | Restore ► Backup | Load ► Firmware ► Device LCD | KEYBOARD ② LCD Time-out: 30s ③ Keyboard Password: 000000 Lock Keyboard: ④ App…](/content/2026/05/788550/images/b315a08bfca216c27d0420a6db0614608c21f3ea4cb83d5efa407106e84fe0bf.jpg)
Fig. 26: LCD | Keyboard
| 1 | ▶ Select the LCD | Keyboard tab in the menu on the left to edit the settings in the LCD | Keyboard sub-menu.⇒ The settings for the LCD | Keyboard sub-menu are displayed; cf. Operating the UFX 100 Menu, sub-menus 33 and 35, p. 20. |
| 2 | time after which the LCD display switches off |
| 3 | sets the password for unlocking the keyboard |
| 4 | locks the keyboard |
11.3 Save | Restore
![Encoder Modulator welcome 2016-01-22 13:21:49 [Exit] Summary ► Status Parameters ► Input 1 ► TS Config ► Modulator ► USB Media System ► Network ► Password ► LCD | Keyboard ► Save | Restore ► Backup | Load ► Firmware ► Device ① SAVE CONFIGURATION When you change the parameter,you should save configur…](/content/2026/05/788550/images/96c0d1e3a85472e5eb3d0701cd31961497697a339f4e0f39b6816f8cf829ddc0.jpg)
Fig. 27: Save | Restore
| 1 | ▶ Select the Save | Restore tab in the menu on the left to save and restore configuration settings or to reset them to the default configuration.⇒ The settings for the Save | Restore sub-menu are displayed; cf. Operating the UFX 100 Menu, sub-menus 31 and 32, p. 20. |
| 2 | saves the configuration with the set parameters▶ Save a new configuration before switching off the device, otherwise all changes will be lost after a reboot. |
| 3 | loads the last saved configuration▶ Press Save config after pressing the Restore button, otherwise the Restore option will be lost after a reboot. |
| 4 | resets the device to the default configuration |
11.4 Backup | Load
![Encoder Modulator Welcome to use Web Manage 2016-01-22 13:22:30 [Exit] Summary ► Status Parameters ► Input 1 ► TS Config ► Modulator ► USB Media System ► Network ► Password ► LCD | Keyboard ► Save | Restore ► Backup | Load ► Firmware ► Device ① ② BACKUP CONFIGURATION Backup current configuration to…](/content/2026/05/788550/images/56ac48df6b9322cdac31221e461885df1bba53be39ebd5a4a8bdbeed011c9ad2.jpg)
Fig. 28: Backup | Load
| 1 | ▶ Select the Backup | Load tab in the menu on the left to create or load a backup. |
| 2 | creates a backup of the current configuration on a USB storage medium before a firmware update, for example▶ Press Backup config to create a backup of the current configuration on a USB storage medium. |
| 3 | loads the saved configuration backupRisk of device malfunction![OKTZ]The loaded configuration replaces the current device configuration.▶ Save the current configuration before loading the backup configuration.▶ Do not switch off the UFX 100 whilst loading the configuration. |
| 4 | selects the file with the saved backup on the PC |
| 5 | ▶ Press Load config to load the saved configuration backup on the UFX 100. |
11.5 Firmware
![Encoder Modulator KATHREIN 2016-01-22 13:23:12 [Exit] Summary ► Status Parameters ► Input 1 ► TS Config ► Modulator ► USB Media System ► Network ► Password ► LCD | Keyboard ► Save | Restore ► Backup | Load ► Firmware ► Device FIRMWARE Warning: 1. Upgrade firmware(software and hardware) to get new fu…](/content/2026/05/788550/images/37b8f0d5ec3b573f930dccad5622a31409ad434b46e2a166b71dc8c5c5c059e9.jpg)
Fig. 29: Firmware
① ▶ Select the Firmware tab in the menu on the left to update the software on the device.

Risk of device malfunction!
An unsuitable firmware version or switching off the device during the update process may cause the device to malfunction.
▶ Check the firmware version before updating the firmware.
▶ Do not switch off the UFX 100 whilst updating the configuration.
▶ Manually reboot the UFX 100 after updating the firmware.
② selects the file with the firmware update
▶ Click Browse to select the file.
③ updates the firmware
▶ Click Upgrade to start the firmware update.
11.6 Device
![Encoder Modulator welcome to use Web N 2016-01-22 13:23:47 [Exit] Summary ► Status Parameters ► Input 1 ► TS Config ► Modulator ► USB Media System ► Network ► Password ► LCD | Keyboard ► Save | Restore ► Backup | Load ► Firmware ► Device DEVICE Warning: New device will work after device reboot. ② Cu…](/content/2026/05/788550/images/905f7f44543ae9792639632f0aeb51642cae7769e52663426b39aa9194289d36.jpg)
Fig. 30: Backup | Load
| 1 | ▶ Select theDevicetab in the menu on the left to change the transmission standard.→ The settings for theDevicesub-menu are displayed; cf.Operating the UFX 100 Menu, sub-menus 19 and 20, p. 19 |
| 2 | ▶ Select a transmission standard (DVB-C, DVB-T or ISDB-T) from theCurrent Modulationdrop-down menu according to the required RF signal at the output.The device must be rebooted once the transmission standard has been changed. |
12 Technical Data
| HDMI input | ||
| Video | ||
| Encoding MPEG-4 AVC/H.264 | ||
| H.264 Profile high profile, main profile | ||
| H.264 Level Level 3.0 / 3.1 / 3.2 / 4.0 / 4.1 / 4.2 | ||
| Resolution | 1920 x 1080/60p/50p/60i/50i 1280 x 720/60p/50p | |
| Bit rate Mbps 1 - 19.5 | ||
| Audio | ||
| Encoding MPEG1 Layer II, MPEG2-AAC, MPEG4-AAC | ||
| Sampling frequency kHz 48 | ||
| Bit rate kbps | MPEG1 Layer II: 64, 96, 128, 192, 256, 320, 384MPEG-2 AAC: 128, 192, 256, 320, 384MPEG4-AAC: 64, 96, 128, 192, 256 | |
| YPbPr, CVBS, S-video input | ||
| Video | ||
| Encoding MPEG-4 AVC/H.264 | ||
| Resolution | CVBS: 720 x 576/50i (PAL), 720 x 480/60i (NTSC)YPbPr: 1920 x 1080/60i/50i, 1280 x 720/60p/50p | |
| Bit rate Mbps 1 - 19.5 | ||
| Audio | ||
| Encoding MPEG1 Layer II, MPEG2-AAC, MPEG4-AAC | ||
| Sampling frequency kHz 48 | ||
| Bit rate kbps | MPEG1 Layer II: 64, 96, 128,192, 256, 320, 384MPEG2-AAC: 128, 192, 256, 320, 384MPEG4-AAC: 64, 96, 128, 192, 256 | |
| Modulator | ||
| Frequency range MHz 30 - 1000 | ||
| DVB-C output level dBμV Typ. 73 - 93 | ||
| DVB-T, ISDBT output level | dBμV | Typ. 70 - 90 |
| DVB-C | ||
| Standard | EN 300429/ITU J.83 Annex A/B/C | |
| Bandwidth | MHz | J.83A: 8; J.83B: 6; J.83C: 6 |
| Constellation | QAM | J.83A: 16/32/64/128/256; J.83B: 64/256; J.83C: 64/256 |
| Symbol rate | MS/s | 5 - 9 |
| MER | dB | ≥ 40 |
| DVB-T (COFDM) | ||
| Standard | EN 300744 | |
| Guard interval | 1/4, 1/8, 1/16, 1/32 | |
| FEC | 1/2, 2/3, 3/4, 5/6, 7/8 | |
| FFT mode | 2k / 8k | |
| Bandwidth | MHz | 6, 7, 8 |
| Constellation QPSK, 16/64 QAM | ||
| MER dB ≥ 40 | ||
| ISDB-T | ||
| Standard ARIB STD-B31 | ||
| Guard interval 1/4, 1/8, 1/16, 1/32 | ||
| FFT mode 2k, 4k, 8k | ||
| Bandwidth MHz 6 | ||
| Constellation DQPSK, QPSK, 16 QAM, 64 QAM | ||
| MER dB ≥ 42 | ||
| Connections | ||
| RF input/output F connector | ||
| LAN Ethernet RJ45, 100 Mbit/s | ||
| USB TYPE A, USB 2.0/3.0 (FAT32) | ||
| VGA | adapter cable connection for: YPbPr, S-video, AV | |
| RF IN / RF OUT through loss dB | 10 | |
| External power supply unit | ||
| Input voltage range | V | 100 - 240 |
| Output voltage | V | 12 |
| Output current | A | max. 2 |
| System data | ||
| Temperature range | °C | 0 ... +40 |
| Power consumption | W | max. 11.5 |
| Dimensions (H x W x D) | mm | 183 x 110 x 45 |
| Weight | kg | 1 |
13 Disposal

Electronic equipment is not classed as domestic waste and must be disposed of properly in accordance with Directive 2002/96/EC OF THE EUROPEAN PARLIAMENT AND OF THE COUNCIL of 27 January 2003 on used electrical and electronic appliances. At the end of its service life, take this device for disposal at a designated public collection point.

- INSTRUCTIONS FOR USE UFX 100
- TABLE OF CONTENTS
- 1 ABOUT THESE INSTRUCTIONS
- 2 SYMBOL EXPLANATION AND SAFETY INSTRUCTIONS
- 1.1 SYMBOL EXPLANATION AND SIGNAL WORDS
- 3 INTENDED USE
- 4 SAFETY INSTRUCTIONS
- WARNING
- RISK OF DEATH DUE TO ELECTRIC SHOCK AND RISK OF FIRES RESULTING FROM ELECTRIC CURRENT
- RISK OF DEATH WHEN OPERATED UNDER INCORRECT ENVIRONMENTAL CONDITIONS OR AS A RESULT OF INCORRECT CLEANING
- CAUTION
- TRIPPING HAZARD AS A RESULT OF EXPOSED CABLES
- ATTENTION
- RISK OF DAMAGE TO THE DEVICE DUE TO
- IMPERMISSIBLE MAINS VOLTAGE
- OVERHEATING
- INCORRECTLY EARTHED ANTENNA SYSTEM
- 5 DEVICE DESCRIPTION
- 1.2 FRONT VIEW
- 1.1 PLAN VIEW
- 6 MOUNTING THE DEVICE
- 6.1 SAFETY INSTRUCTIONS
- DANGER
- 6.2 MOUNTING THE DEVICE ON THE WALL
- 7 CONNECTING THE DEVICE
- 7.1 SIMPLE CONNECTION (STAND-ALONE)
- 7.2 CASCADE CONNECTION
- 8 RECORDING AND PLAYING TRANSPORT STREAMS
- TO RECORD A VIDEO
- TO PLAY THE FILE (TS PLAYBACK)
- 9 GENERATING TS VIDEOS
- TO GENERATE *.TS VIDEOS
- TIP
- SUPPORTED FORMATS
- 10 OPERATING THE DEVICE USING BUTTONS
- 10.1 GENERAL INFORMATION ON OPERATING THE UFX 100
- CHANGING VALUES USING THE ENTER BUTTON
- PRESS ENTER
- OPENING OPTIONS USING THE ENTER BUTTON AND CHANGING VALUES
- 10.2 OPERATING THE UFX 100 MENU
- 12.1 OPERATING THE USB DEVICE SUB-MENU
- 12.1.1 RECORD TS
- 13.1.1 PLAY TS
- 14.1.1 USB UPDATE
- 11 OPERATING THE DEVICE ON THE PC VIA THE WEB BROWSER
- 11.1 CONNECTING THE UFX 100 AND LOGGING ON
- 18.1 OVERVIEW OF THE USER INTERFACE ON THE PC
- 19.1 INPUT 1
- 20.1 TS CONFIG
- 21.1 MODULATOR
- 22.1 USB MEDIA
- 23.1 NETWORK
- 24.1 PASSWORD
- 11.2 LCD | KEYBOARD
- 11.3 SAVE | RESTORE
- 11.4 BACKUP | LOAD
- 11.5 FIRMWARE
- RISK OF DEVICE MALFUNCTION
- 11.6 DEVICE
- 13 DISPOSAL
Brand : KATHREIN
Model : UFX 100
Category : Server