T10 - Phone AGFEO - Free user manual and instructions
Find the device manual for free T10 AGFEO in PDF.


User questions about T10 AGFEO
0 question about this device. Answer the ones you know or ask your own.
Ask a new question about this device
Download the instructions for your Phone in PDF format for free! Find your manual T10 - AGFEO and take your electronic device back in hand. On this page are published all the documents necessary for the use of your device. T10 by AGFEO.
USER MANUAL T10 AGFEO
natural_image
Black-and-white photo of a vintage telephone handset and cord with a keypad, against a dark background (no text or symbols visible)Table of Contents ...... D - 3
Accessories and Content E - 2
The AGFEO T 10 E - 2
AGFEO T 10 Buttons E - 3
Making a call E-4
One Touch Memory E-4
Two Touch Memory E-4
Ringer Level and Melody E - 5
Wall Mounting E-6
Wall Mounting with Bracket E-7
Verpackungsinhalt
text_image
Technical diagram of a telephone handset with numbered parts and labeled connectionsflowchart
graph TD
    A["Start Phone"] --> B["Insert Phone"]
    B --> C{Call Button 1}
    C -->|Yes| D["Add Phone to Phone 1"]
    C -->|No| E["Add Phone to Phone 2"]
    D --> F["Close-up of Phone 3"]
    E --> G["Close-up of Phone 4"]
    F --> H["Final Call"]
    G --> H
Accessories and Content
Following items are included in the package of the AGFEO T 10
- Phone base unit
- Handset with coil cord
- Line cord
- Wall mounting kit
- This manual
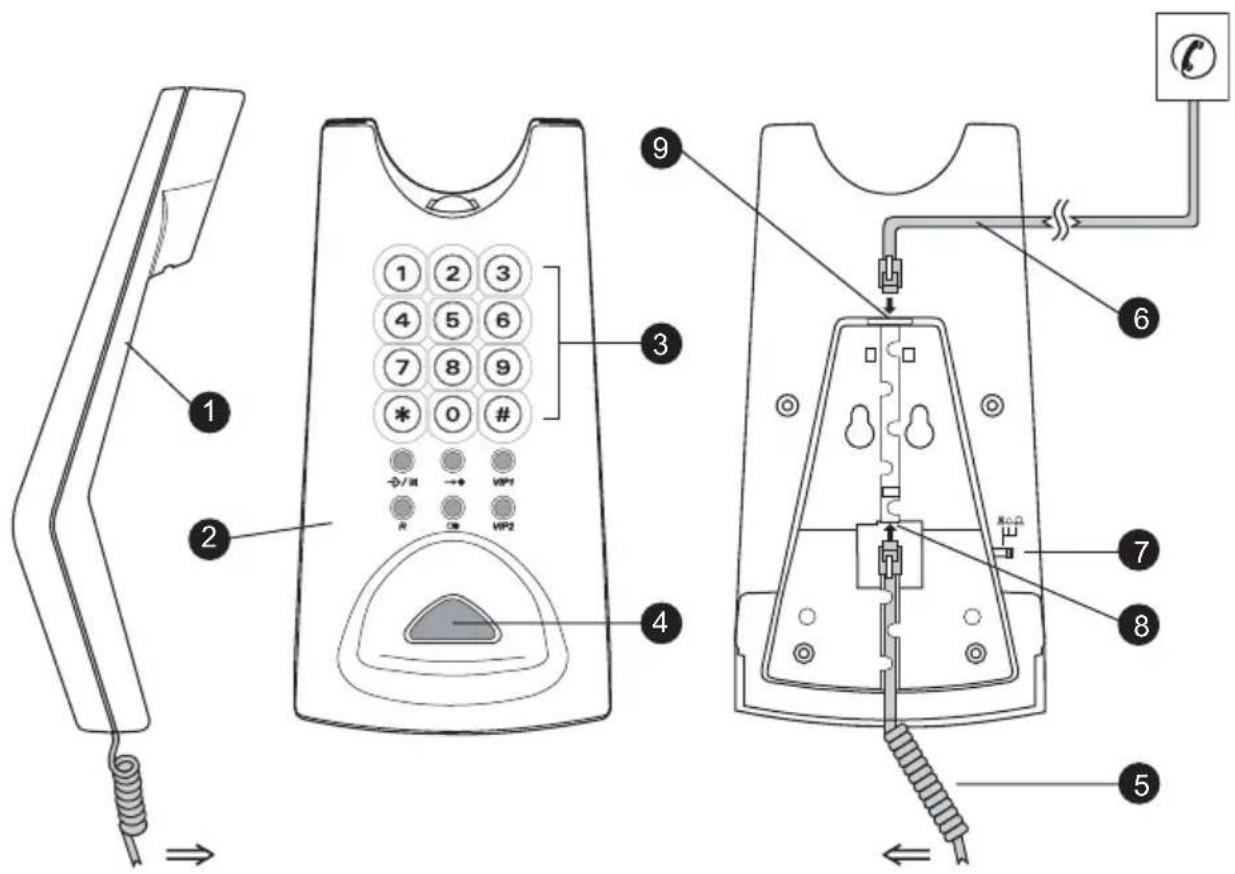
The AGFE0 T 10
text_image
Technical diagram of a telephone receiver with numbered parts and labeled connections- Handset
- Base unit
- Key top
- Hook switch
-
Coil cord
-
Line cord
- Ringer switch
- Jack for coil cord
- Jack for line cord
Ringer high:

Ringer low:

Ringer off:

Function buttons Description
| 0 - 9 | To enter the digits 0-9 |
| * | To enter * |
| # | To enter # |
| -/※ | This button functions as "MUTE" during conversation. Press this button once and your voice will not pass through the microphone. To resume, press this button again.This button functions as "STORE" when programming a telephone number into a memory bank. Please refer to "ONE/TWO Touch MEmory" section for details. |
| →● | Two touch memory (21 digits maximum). Push MEMORY button followed by 0-9 to make a call with sored telephone numbers. Please refer to section "Two Touch Memory" |
| VIP1/VIP2 | One touch memory (21 digits maximum). A single push on one of these buttons to make a call with sored telephone numbers. Please refer to section "One Touch Memory". |
| R | Flash or Recall. To switch between 2 lines. |
| ○● | This button functions as last number redial, when making a call (31 digits maximum).This button functions as "pause" when programming a telephone number into a memory bank. |
Making a call
To make a call, simply pick up the handset and wait for the dialling tone. Then dial the desired telephone number with the numeric keys. To end a call, replace the handset on the cradle of the base unit or push the hook switch.
Refer to the "T 10 Buttons" section and find out detailed functions which each individual button
One Touch Memory
One Touch Memory provides you with the easiest way to call a frequently used number. Follow the instructions listed below to store a number (21 digits maximum) into the One Touch Memory bank:
- Pick up Handset.
- Press and release STORE button ( )
- Press following the desired phone number. You may enter or buttons into the dialling sequence just like the way you usually make calls to the desired phone number after you have picked up the handset. If your Phone is connected to a PABX switching system, you may enter the PAUSE button ( ) into the dialling sequence to insert a timed delay when necessary.
Make a call with One Touch Memory
To make a call with One Touch Memory, simply pick up the nadset and wait for the dialling tone. Then Press VIP/VIP2 phone number will be dialled.
Two Touch Memory
Besides the One Touch Memory, the AGFEO T 10 is also equipped with 10 two touch memory banks. Follow the instructions below to store a number (21 digits maximum) into the Two Touch Memory Bank:
- Pick up handset
- Press and release the STORE button ( ) →/
-
Press the MEMORY button ( ) followed by a numbered button from 0 to 9 to select the memory bank position.
-
Enter the the desired phone number. You may enter or* buttons # into the dialling sequence just like the way you usually make calls to the desired phone number after you have picked up the handset. If your Phone is connected to a PABX switching system, you may enter the PAUSE button ( ) into the dialling sequence to insert a timed delay when necessary.
Make a call with Two Touch Memory
To make a call with the Two Touch Memory, simply pick up the handset and wait for the dialling tone. Press the MEMORY button ( ) followed by a corresponding numbered button. The stored phone number will be dialled
Ringer Level and Melody
The AGFEO T 10 has three preset ringer melodies and ludness levels. To change the melodies and loudness level, follow the instructions listed below:
- Pick up handset
- Press and release the STORE button ( )
3 Press and release # - Use the numbered button to make your selection of ringer melodies and loudness level combination.
Numbered Button Ringer Melody Loudness Level
| 1 | A | Low |
| 2 | A | Normal |
| 3 | A | High |
| 4 | B | Low |
| 5 | B | Normal |
| 6 | B | High |
| 7 | C | Low |
| 8 | C | Normal |
| 9 | C | High |
| 0 | OFF | OFF |
- Press and release the STORE button( ) →/
Notes
When the ringer is in OFF position, no ringing tone will be heard. The ringer resumes to previous setting automatically once the handset is picked up.
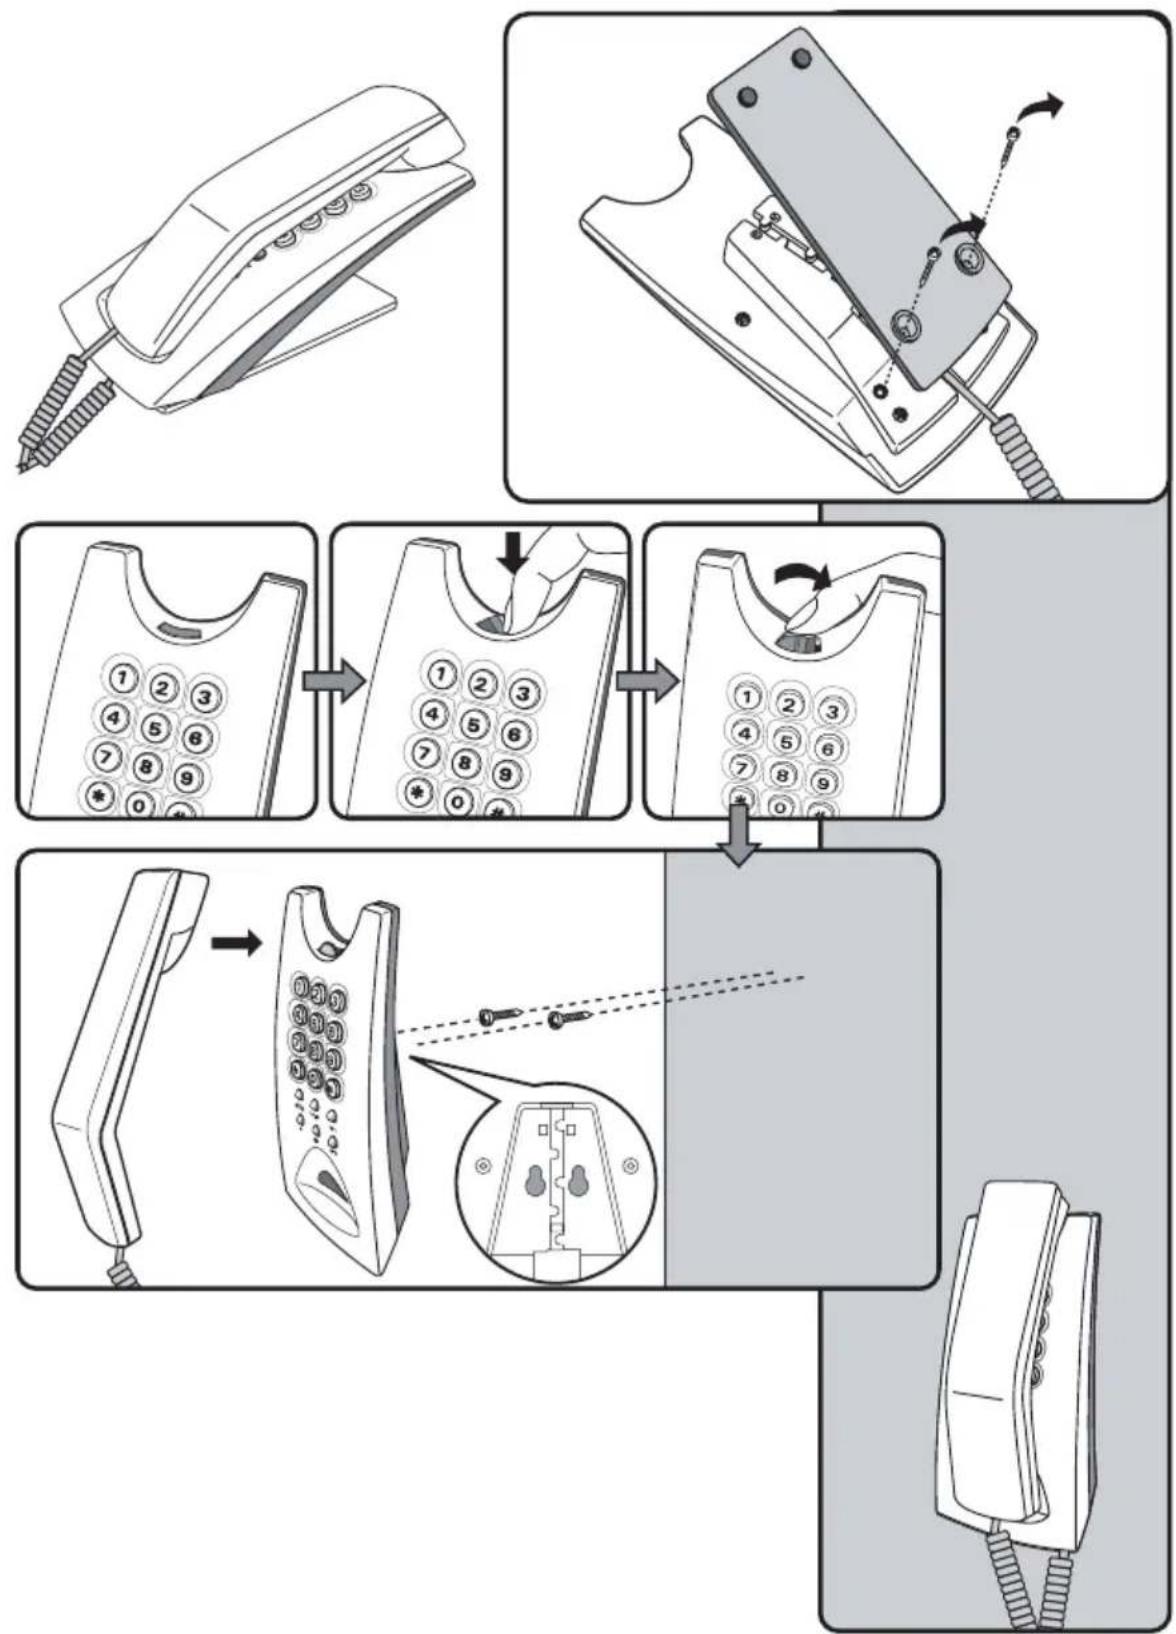
Wall Mounting
flowchart
graph TD
    A["Step 1: Insert a digit on the phone"] --> B["Step 2: Insert a keyboard via cable"]
    B --> C["Step 3: Insert a keypad with numbers 1-9 and 0-10 arranged in rows"]
    C --> D["Step 4: Insert a keypad with numbers 1-9 and 0-10 arranged in rows"]
    D --> E["Step 5: Insert a keypad with numbers 1-9 and 0-10 arranged in rows"]
    E --> F["Step 6: Insert a keypad with numbers 1-9 and 0-10 arranged in rows"]
    F --> G["Step 7: Insert a keypad with numbers 1-9 and 0-10 arranged in rows"]
    G --> H["Step 8: Insert a keypad with numbers 1-9 and 0-10 arranged in rows"]
    H --> I["Step 9: Insert a keypad with numbers 1-9 and 0-10 arranged in rows"]
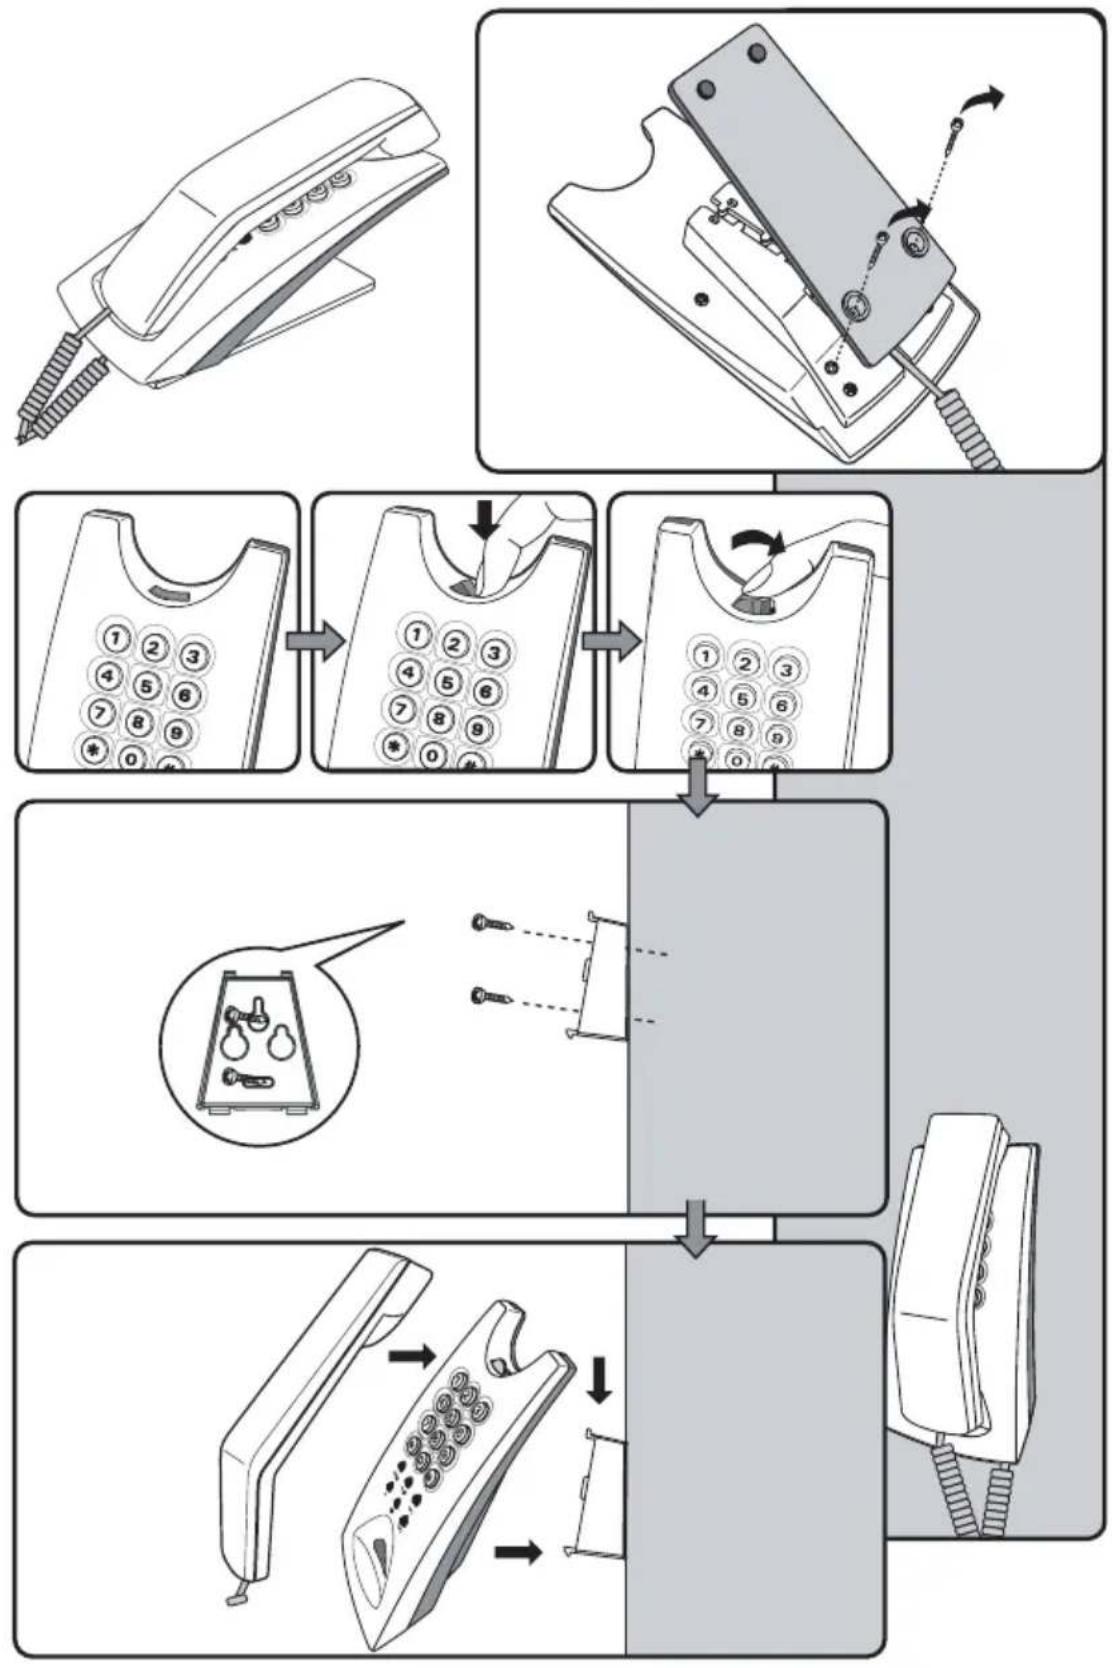
Wall Mounting with Bracket
natural_image
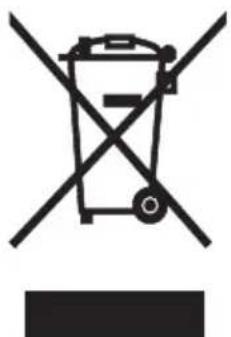
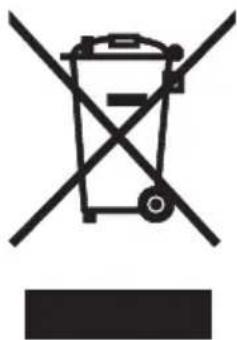
Symbol of a trash bin crossed with two crossed lines, no text or numbers presentThe crossed out wheeled bin on the product means that this belongs to the group of Electro- and electronic apparatus.
In this context you are directed by the European regulation to dispose of used apparatus
- at the point of buying an item of equal proportion / value
- at the local available collection point for disposal
With this you will participate in the reuse of material and valorisation of disused electric- and electronic apparatus, which otherwise could be a health hazard and be negative to the environment.