
HRS 9190 LAN - Receiver XORO - Free user manual and instructions
Find the device manual for free HRS 9190 LAN XORO in PDF.


| Product Type | Satellite Receiver (DVB-S/DVB-S2) |
| Model | HRS 9190 LAN |
| Brand | XORO |
| Tuner | Dual (Twin) Tuner |
| Input Voltage | AC 189-245V~ 50/60Hz |
| Power Consumption | Max 30W |
| Video Output | HDMI (up to 1080p), SCART |
| Audio Output | S/PDIF coaxial, HDMI |
| USB Ports | 2x USB 2.0 |
| Network | Ethernet LAN (RJ45) |
| Satellite Input | 2x LNB IN (13/18V 300mA max) |
| DiSEqC Support | DiSEqC 1.0, 1.1, 1.2, USALS |
| Unicable Support | Yes |
| Channel Memory | 100 satellites, 4000 transponders, 6000 channels |
| Favorite Groups | 8 |
| Parental Control | Yes |
| PVR Recording | Yes (requires USB storage) |
| Timeshift | Yes |
| EPG | Yes (Electronic Program Guide) |
| Teletext | Yes |
| Games | 8 built-in games |
| Dimensions (approx) | 260 x 160 x 45 mm |
| Weight (approx) | 1.5 kg |
| Cleaning | Soft cloth with mild detergent, unplug first |
| Safety | Keep ventilation slots uncovered, avoid liquids, do not remove cover |
| Spare Parts & Reparability | Contact qualified service personnel; no user-serviceable parts |
Frequently Asked Questions - HRS 9190 LAN XORO
User questions about HRS 9190 LAN XORO
0 question about this device. Answer the ones you know or ask your own.
Ask a new question about this device
Download the instructions for your Receiver in PDF format for free! Find your manual HRS 9190 LAN - XORO and take your electronic device back in hand. On this page are published all the documents necessary for the use of your device. HRS 9190 LAN by XORO.
USER MANUAL HRS 9190 LAN XORO
FREE TO CHOOSE INNOVATIONS
XORO®
HR 5 9190 LAN
FREE TO CHOOSE INNOVATIONS
XORO®
HR§ 9190 LAN

Quick Start Guide
Safety Precaution
This Set Top Box has been designed and manufactured to satisfy the international safety standards. Please read the following safety precautions carefully before operating this receiver.
Main Supply:
Before operating, please check the units operating voltage. The correct voltage is printed to the rear cover of the Set Top Box.
Overload:
Do not overload a wall outlet, extension cord or adapter, neither use damaged power cord or touch it with wet hand as this may result in electric shock.
Liquid:
The receiver shall not be exposed to dripping or splashing water, and that no objects filled with liquids, such as base, shall be placed on the apparatus.
Ventilation:
Keep the slots on top of the receiver uncover to allow sufficient airflow to the unit. Do not put the receiver on soft furnishings or carpets. Do not expose the receiver to direct light or do not place it near a heater or in humid conditions. Do not stack other electronic equipments on top of the receiver.
Cleaning:
Plug out the receiver from the wall outlet before cleaning. Clean the receiver by a soft cloth or mild solution of washing-up liquid (no solvents).
Connection:
Disconnect the receiver from the mains when you connect it to satellite LNB or disconnect it from LNB. Failure would possibly cause damage your equipment.
Location:
Put the receiver indoor in order to avoid lightening, raining or sunlight.
Uncover:
Do not remove the cover, to reduce the risk of electric shock. Contact qualified and licensed service personnel to repair the receiver, or contact your dealer.
1. Reference
1.1 General Features
• DVB-S/DVB-S2 Satellite Compliant (MPEG-II/ MPEG-IV/ H.264)
• SCPC & MCPC receivable from Ku and C band satellites
• Universal, Single, Single S & C Band Wideband LNB
- DiSEqC
- Supports Unicable
• Channel Memory: 100 satellite, 4000 transponders and 6000 channels
- 8 favorite group and parental lock supported
- Multi-language OSD supported
- Multi-language audio supported
- Multi-language DVB Subtitle output
• Electronic Program Guide (EPG)
- Teletext
- 2x USB 2.0 Port
1.2 Accessories
• German Users manual, English Quick Start Guide
- Remote Control Unit
2. Product Overview
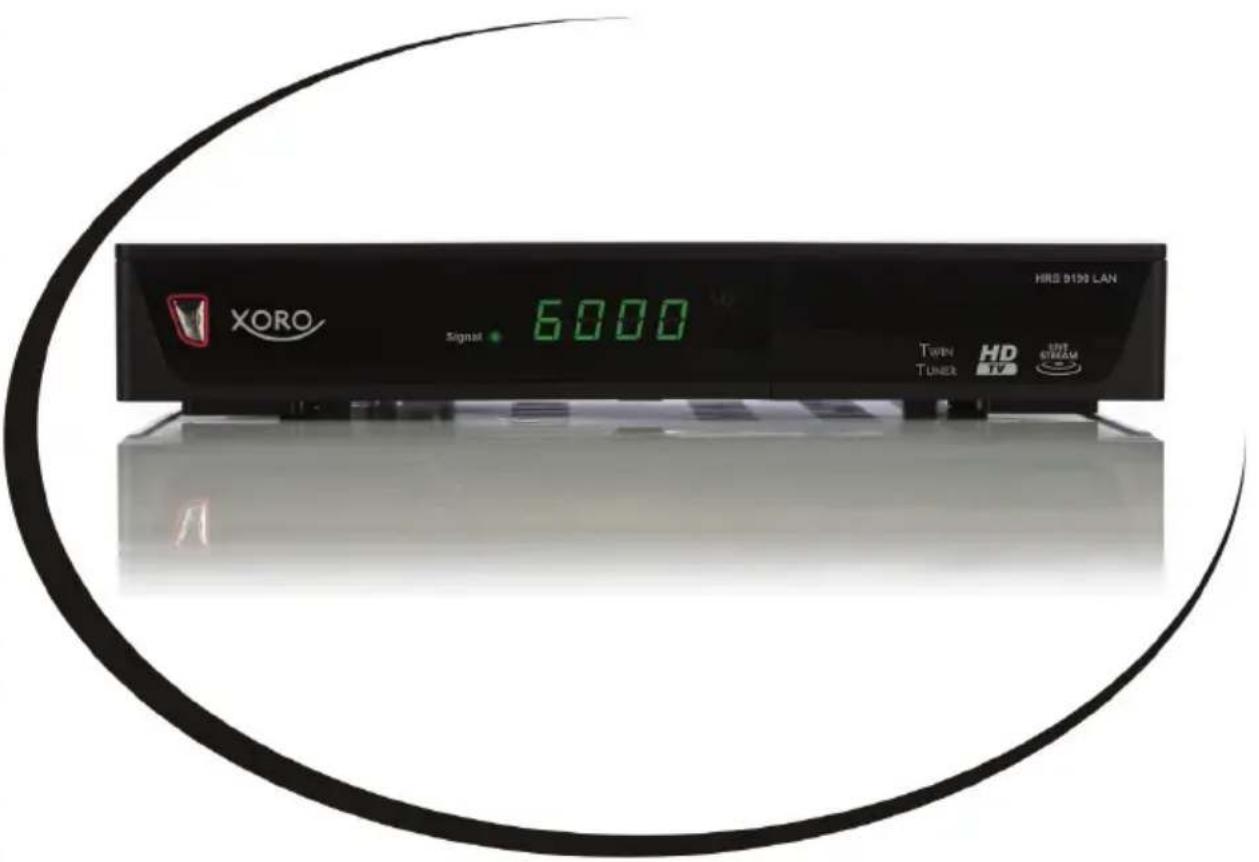
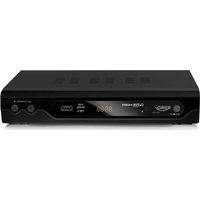
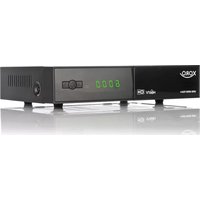
2.1 Front Panel

1. Power button
Switch between operation and standby modes. And it's also a Power indicator.
2. Display
It displays channel information. In standby mode it displays local time.
3. Signal LED
The LED lights if the Set Top Box Receives a valid Signal from the Satellite
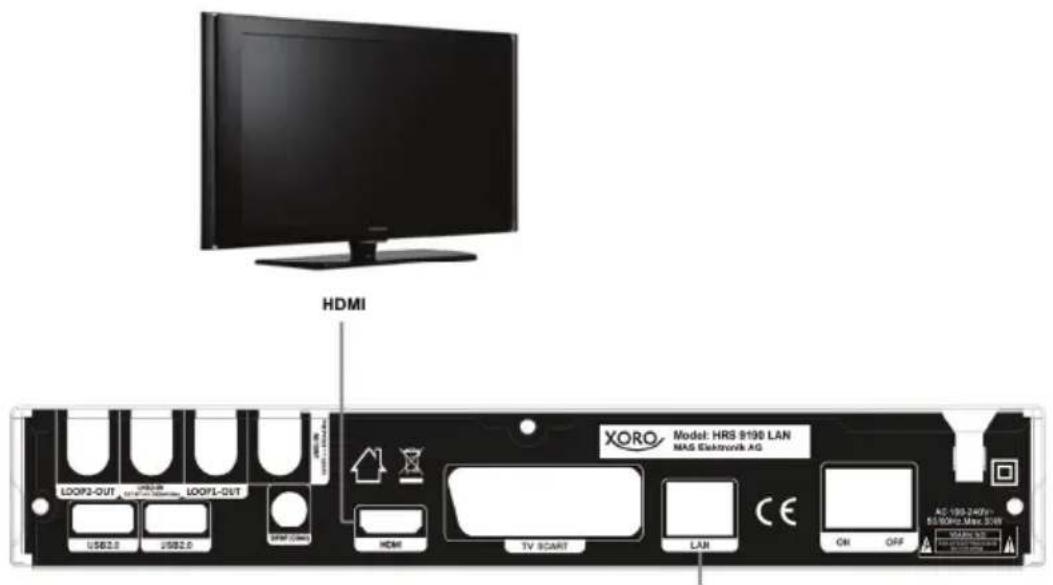
2 Rear Panel

- LNB1 IN/LNB2 IN (LNB IN 13/18V 300mA max.)
Connect the satellite antenna cable.
2. LOOP1 OUT/LOOP2 OUT
Connect another receiver.
3. 2x USB 2.0
Connect USB Mass Storage Devices or XORO HWL 155N WLAN Stick.
4. S/PDIF (COAX)
Digital Audio output (coaxial).

5. HDMI
Connect to the TV using an HDMI cable.
6. TV SCART
Connect to the TV using a Scart cable.
7. LAN
Connect Ethernet cable to you Internet Router.
8. ON/OFF
Mains Power Switch
2.3 Remote Control Unit (RCU)
1. POWER: ⏻
Switch between operation and standby modes
-
MUTE: Mute audio.
-
SLEEP: Set the sleep time.
-
HDMI: Set the HDMI Resolution.
-
ASPECT: Set the display format
-
◀◀: Fast rewind.
-
▶▶: Fast forward
-
I ◀◀: Previous.
-
▶▶▶I: Next.
-
▶: Play.
-
II: Pause/Time shift
12.■: Stop.
13.●: Record.
-
AUDIO: Display the audio list.
-
ZOOM: Picture zooming function.
-
INFO: Display the program information.
-
FIND: Search channel list by Name
-
MENU: Display main menu.
-
EXIT: Exit current menu step by step
-
USB: Open USB Media Player (allows to access PVR-Setting too)
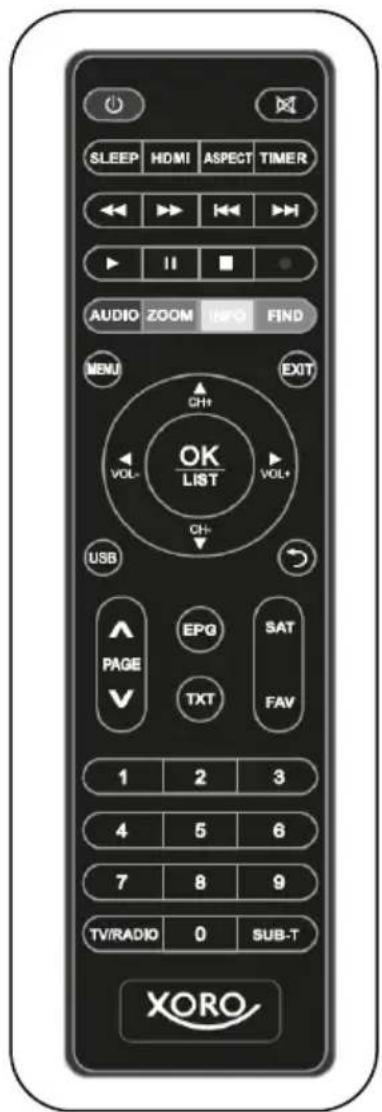

- RECALL: Move to the previous viewed channel.
- PAGE+/-: Moves up / down a page in the list.
- EPG (Electronic Program Guide): Display the program guide.
- TXT: Display the teletext.
- SAT: Display the Satellite list. This button also opens the PVR-List while the Set Top Box is recording.
- FAV: Display favorite channel.
- NUMERIC KEY (0\~9): Enter a TV/radio channel
- TV/Radio: Switch between TV- and Radio-List.
- SUB-T: Display the subtitle language list.
3. Connection with Other Device
The following diagram shows you the connections among receiver, TV, LNB and other equipment, please read this first if you are not sure about the connection, and it will guide you to the correct connection.
3.1 Connecting to TV
The Set Top Box supports one HDMI and one SCART Output. Connect your TV by either one of them. HDMI is recommended, because it supports high quality HD-Signal Output.
3.2 Connecting the Antenna
3.2 Connecting to Satellite Dish
This Set Top Box is equipped with two independent Tuners. If you want to use both Tuners, you have to connect LNB1-IN and LNB2-IN with separate cables to:
- At least an TWIN-LNB with two available Outputs
• A Multi-Switch with two available Outputs
• Two LNB (installed on the same of different Dishes) with available Outputs
4. Installation
You should install the receiver when powering on your product for the first time after purchase.
The default password is 0000. If you have forgotten your password, please contact your local product distributor.
4.1 Powering On
- Connect the power cord of the product to a wall outlet.
- Ensure the ON/OFF switch at the rear of the product is switched to ON.
- Power on by pressing the STANDBY button on the remote control or the STANDBY button at the front of the product.
4.2 Antenna Settings
Antenna Settings allows you to configure the antenna setting parameters. Menu->INTALLATION->Antenna Settings
- Satellite: Highlight the satellite you want to search.
- Transponder (TP for short): Press the VOL+/VOL- button to change the TP.
-
Tuner: Press the VOL+/VOL- button to change the tuner.
-
LNB Type: Press the
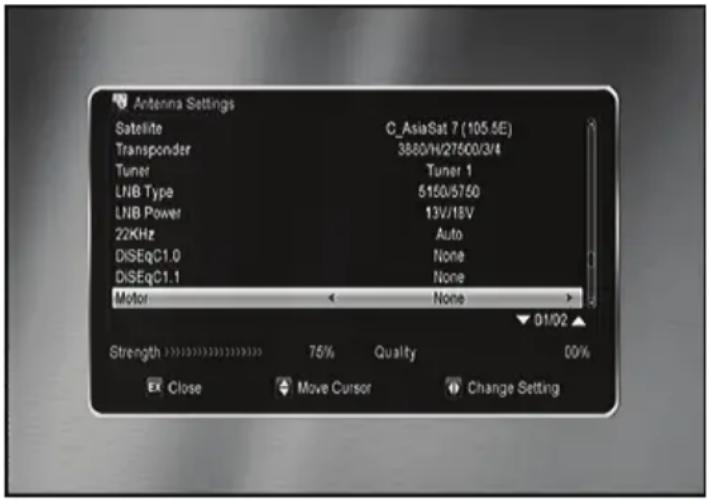
VOL+/VOL- button to change the LNB frequency.
- LNB Power: Press the VOL+/VOL- button to select the required LNB power.

- 22 kHz: Press the VOL+/VOL- button to select ON, OFF or Auto.
- DiSEqC 1.0: Press the VOL+/VOL- button to select the required DiSEqC1.0 input.
- DiSEqC 1.1: Press the VOL+/VOL- button to select the required DiSEqC1.1 input.
- Motor: Press the VOL+/VOL- button to select DiSEqC1.2 or USALS.
- Scan Mode: Press the VOL+/VOL- button to select ALL Channels & FTA Channels & HD Channels & SD Channels TV Channels & Radio Channels & FTA TV Channels & FTA Radio Channels which you want to scan.
- Start search: Press the VOL+/VOL- button to select Satellite & Multi-Sat & Blind scan & Transponder & Multi-Transponder which you want to start search.
4.3 Antenna Connection
Menu->INSTALLION -> Antenna Connection
- Connection Type: set the antenna connection type on Dual(Tuner1/2) or Single(Tuner1).
4.3 Factory Default
Menu->INSTALLION -> Factory Default
Warning: Please note that once you perform Factory Default all, all data and settings will be deleted.
5. Channel Manager
Tip: You can press the Sat button to choose different satellite, press OK to confirm, then all the channels of this sat will be display.
5.1 Edit Channel
Menu->EDIT
CHANNEL->TV/Radio Channels Edit Channels enables you to move, delete, rename, lock/unlock the channels in the channel list conveniently.

Tip: Radio Channels operation similar to the TV Channels.
1. Move Channels
1) Press YELLOW button to enter move mode.
2) Highlight the channel you want to move and press OK to select the channel.
3) Press the CH+/CH- button or press the NUMERIC (0-9) buttons to the destination in the channel list and press the OK button.
5.2 Sort Channels
You can automatically sort the channels list.
Menu-> EDIT CHANNEL ->Sort Channels
Highlight the option you want and press the OK button to sort the channel list.
5.3 User Channel List
User Channel List allows you to save/load a backup off all settings and channel lists to the build-in Memory of the Set Top Box.
- Menu->EDIT CHANNEL -> User Channel List->Save User Data
- Menu->EDIT CHANNEL -> User Channel List->Load User Data
6. Settings
6.1 System Settings
Menu->SETTINGS->System Settings
Tip: You can set all the settings here by pressing VOL+/VOL- button.
- Menu Language: Set the OSD language.
- Audio1: Set the first preferred audio language.
-
Audio2: Set the second preferred audio language.
-
Subtitle Language: Set the subtitle language.
-
Subtitle Control: Set the subtitle off or on.
-
EPG Language: Set the EPG language.
-
TXT Language: Set the Teletext language.
-
Auto Channel Selection: If

you set ON, in the channel list will play automatically when you highlight the channel. If you set OFF, in the channel list when you highlight the channel, you should press the OK button to play it.
- Auto Exit CH List: If you set ON, the channel list will disappear when you press OK on a Highlighted channel. If you set OFF, the channel list will disappear when
you press OK on a playing channel.
- Multi Pic Loop: Set the loop of multi pictures off or on.
- Recall List: You can turn Recall List on or off. If you set ON, when you press Recall button of RCU you can get the recall list. If you set OFF, when you press recall button you can go back to the last program you have viewed.
- Eco-Standby: Set this Setting to ON to reduce the power consumption in Standby Mode.
- Front Panel Light: Set the brightness of the LED-Display.
6.2 Audio/Video & OSD
Menu->SETTINGS->Audio/Video & OSD Setup
- Digital Audio: If you set PCM, all supported Audio Formats are decoded by the Set Top Box and output as PCM Stereo. If you select RAW, the Set Top Box will output Dolby Digital Audio as a Bitstream - an external Dolby Decodes is required in this case.
- Menu Transparency: Set the transparency of all menus.
- TXT Transparency: Set the transparency of teletext.
- Display Mode: Set the HD format between 1080p, 1080i, 720p, 576i or 576p.
- TV Type: Set the TV Type on PAL/NTSC state.
- Screen Mode: Set the display format according to the screen ratio. Select TV screen mode either 4:3 or 16:9 according to the TV type, or press the MODE button of RCU directly.
- OSD Timeout: Set the display time of the program information.
- Scart Output: While the HDMI Mode is set to 576i or 480i mode, you can change the scart output mode between CVBS and RGB mode.
6.3 Parental control
Menu-> SETTINGS ->Parental Control

Parental Control allows you to set limits for each program or change your previous password. You can also lock the changes you have made using Installation Lock, Edit Channel Lock and System Lock. And you can change Age Rating.
6.4 Color Settings
Color Settings can set the Brightness, Contrast and Saturation.
Menu-> SETTINGS ->Color Settings
7. Date & Time
7.1 Time Settings
Time Settings will set the time mode, time zone and daylight saving time. Menu->TIMES->Time Settings
7.2 Event Timer
Event Timer You can set timer events. The Set Top Box will record or play the program automatically according to the timer event list that you set.
Menu->TIMES-> Event Timer.
7.3 Sleep Timer
SLEEP Timer can set the automatic turn off time.
Menu->TIMES-> Sleep Timer.
7.4 Standby Time
Standby Time can set the time display on front panel when standby.
Menu->TIMES-> Standby Time
7.5 Auto-Standby
Standby the Set Top Box will switch to Standby after the set time if no user activity is detected.
Menu->TIMES-> Standby Time
8. Network & Game
8.1 Games
Menu->Network & Game->Games
Games offer 8 Games.
8.2 USB
Menu-> Network & Game -> USB or press the USB button directly
8.2.1 Basic Operations
1. Tool
In USB menu, you can press the RED button to select Rename/Delete/Move To/Copy To/Sort the folders and files.
And also can create the new folders and format the disk.
![0001: VIX - N TM-LL.mp3 0002 *Vio,↑ — fu - s'W.1.mp3 0003 CE — - Ts.mp3 [OK] Open 50% File Name: VIX - N TM-LL.mp3 Bitrate: 320 Kbps Sampling: 44100 Hz 00:00:04 / 00:03:45 Track Play Mode Upload Pull Setting [MENU] Details](/content/2026/05/785881/images/f29b9800de3301d394b1b89fb3cb71a01993ce8a1ae01a3040784a6a7e196b92.jpg)
2. Upload
You can press the YELLOW button to upload data/channel/all to USB.
8.2.2 Setting
- Play Mode: Press the GREEN button to set the play mode.
- PVR Setting: Press the BLUE button to enter the PVR Setting menu.
8.2.3 Play Files
1. Music/Photo/Movie/PVR
1) Press the VOL+/VOL- to highlight the Music/Photo/Movie/PVR.
2) Press the CH+/CH- to change the folder or file and press the OK button to open the folder or play the file.
8.3. Network
8.3.1 IP Setting
MENU -> Network & Game -> IP Setting
First you must connect the Ethernet cable to the LAN port. Then, you can get IP address manually or automatically. If the Ethernet cable is connected fine, it will display "Connect".
8.3.2 Connecting to the Wi-Fi
Menu-> Network & Game -> WIFI
Plug in the wireless USB dongle (XORO HWL 155N) to the USB port. Then in this menu select the network name of your Wi-Fi access point from the list and input the right password.
9. Hard & Software info
Menu->Hard &Software info
Hard & Software info shows information about the Set Top Box, such as product name, software & hardware version and UUID and so on. When you need service from the dealer you need to submit this information in order go get the correct and fast after sales service.
10. Basic Operation
Audio: You can press the AUDIO button to select the language you prefer.
Satellite List: You can press the SAT button to select or hide the satellite that you want.
EPG: You can press the EPG button view the EPG information. Press the GREEN button to switch between the two available views.
Subtitle: You can press the SUB-T to select the language for the subtitle if the program provides subtitle information.
Teletext: You can press the TXT button to view the teletext information of the selected channel.
FIND: You can find the channels you want quickly just by pressing the FIND button directly
INFO: You can view the program information by pressing the INFO button while watching a program. And press the INFO button twice to view detailed EPG information.
11. Channel List
This chapter will help you to work with the channel list.
Tip: You can press the SAT button to choose different satellite when you are operating on a channel list, press OK to confirm, then all the channels of this sat will be display.
11.1 OK List
1) Press the OK button to enter the channel list while watching a program.
2) Press the RED button to sort the channels (different options are available)
3) Press the GREEN to display all channel that are transmitted on a specific Transponder.
4) Press the YELLOW to filter the channel list by Alphabet.
11.2 Favorite List
1) If you have set several favorite lists, press the FAV button can enter the favorite list.
Note: If you selected a favorite list, press the CH+/CH- button can only change the channels in this favorite list and press the OK button can only display the channels in this favorite list.
12. USB Control
12.1 Recording and Timeshift
12.1.1 Recording
Depending on your Antenna Settings and if you connect both Tuner to your Satellite Dish, the Set Top Box can record up to two different channels. Please note, that the PVR-Function needs a fast USB-Storage device. Especially HD Broadcasts need a lot of free Space.
12.1.2 Timeshift
Timeshift allows you to pause a live broadcast and return to it later and continue where you left off.
12.2 PVR List
You can enter the PVR list directly by press the PLAY button and then press BULE button to play the PVR file. In the PVR list you can press the YELLOW button delete the PVR files.
Limited Warranty
In case the products delivered are not free from defects in material or workmanship, MAS Elektronik AG has the right to either repair or replace the defective product at its choice. MAS Elektronik AG manufactures and repairs goods using components which are new or equivalent to new in accordance with industry standards and practice. The warranty for wearing parts (e.g. rechargeable batteries) is limited to 6 months.

In case the device is equipped with internal data storage (e.g. hard disc drive, Flash drive), the customer is responsible to backup his data before sending the device. MAS Elektronik AG is not liable for any data loss on returned devices. MAS Elektronik AG reserves the right to reset returned devices to factory defaults. Please note your personal settings for this reason.
MAS Elektronik AG is not liable for any accessories not belonging to original package content such as DVDs, hard disc drives, Flash storage devices, batteries, etc.
This limited warranty covers the warranty requirements set by authorities in your country.
This limited warranty only is valid in the country the product was purchased. This limited warranty does not cover finishes, accessories or batteries, nor does it cover damage resulting from accident, misuse, abuse, dirt, water, battery leakage, tampering, servicing performed or attempted by unauthorized service agencies. This limited warranty does not cover damages resulting from firmware upgrades. Only in case of firmware upgrades needed to add functions promised at time of purchase, such damages are covered by this limited warranty. For a correct and frictionless completion of warranty or repairs you need a RMA No. You may obtain a RMA on the internet at www.mas.de/FAQ or by telephone.
Please send the device in its original packing material, all standard accessories and a copy of the invoice, a description of defect and the RMA No. to following address. Please note the RMA number clear and in large numbers on the outer package.
MAS Elektronik AG
Weidegrund 3
21614 Buxtehude
Germany
Support
e-mail: support@ersservice.de
Hotline: +49 (0) 4161 800 24 24
FREE TO CHOOSE INNOVATIONS

XORO by MAS Elektronik AG
Weidegrund 3
21614 Buxtehude
Deutschland
Telefon: 04161 800 24 24
Receiver-App-Download

Android

Apple iOS
HRS 9190 LAN
DE: V1
ENG: V1 OEM
FS: 12607




- XORO®
- SAFETY PRECAUTION
- MAIN SUPPLY
- OVERLOAD
- LIQUID
- VENTILATION
- CLEANING
- CONNECTION
- LOCATION
- UNCOVER
- REFERENCE
- 1.1 GENERAL FEATURES
- 1.2 ACCESSORIES
- PRODUCT OVERVIEW
- 2.1 FRONT PANEL
- POWER BUTTON
- DISPLAY
- SIGNAL LED
- 2 REAR PANEL
- LOOP1 OUT/LOOP2 OUT
- 2X USB 2.0
- S/PDIF (COAX)
- HDMI
- TV SCART
- LAN
- ON/OFF
- 2.3 REMOTE CONTROL UNIT (RCU)
- POWER: ⏻
- CONNECTION WITH OTHER DEVICE
- 3.1 CONNECTING TO TV
- 3.2 CONNECTING THE ANTENNA
- 3.2 CONNECTING TO SATELLITE DISH
- INSTALLATION
- 4.1 POWERING ON
- 4.2 ANTENNA SETTINGS
- 4.3 ANTENNA CONNECTION
- 4.3 FACTORY DEFAULT
- CHANNEL MANAGER
- 5.1 EDIT CHANNEL
- MOVE CHANNELS
- 5.2 SORT CHANNELS
- 5.3 USER CHANNEL LIST
- SETTINGS
- 6.1 SYSTEM SETTINGS
- 6.2 AUDIO/VIDEO & OSD
- MENU->SETTINGS->AUDIO/VIDEO & OSD SETUP
- 6.3 PARENTAL CONTROL
- 6.4 COLOR SETTINGS
- DATE & TIME
- 7.1 TIME SETTINGS
- 7.2 EVENT TIMER
- 7.3 SLEEP TIMER
- 7.4 STANDBY TIME
- 7.5 AUTO-STANDBY
- NETWORK & GAME
- 8.1 GAMES
- 8.2 USB
- 8.2.1 BASIC OPERATIONS
- TOOL
- UPLOAD
- 8.2.2 SETTING
- 8.2.3 PLAY FILES
- MUSIC/PHOTO/MOVIE/PVR
- NETWORK
- 8.3.1 IP SETTING
- 8.3.2 CONNECTING TO THE WI-FI
- HARD & SOFTWARE INFO
- BASIC OPERATION
- CHANNEL LIST
- 11.1 OK LIST
- 11.2 FAVORITE LIST
- USB CONTROL
- 12.1 RECORDING AND TIMESHIFT
- 12.1.1 RECORDING
- 12.1.2 TIMESHIFT
- 12.2 PVR LIST
- LIMITED WARRANTY
- XORO BY MAS ELEKTRONIK AG
- RECEIVER-APP-DOWNLOAD
Brand : XORO
Model : HRS 9190 LAN
Category : Receiver