MD 41133 - Car stereo Pro2 - Free user manual and instructions
Find the device manual for free MD 41133 Pro2 in PDF.


User questions about MD 41133 Pro2
0 question about this device. Answer the ones you know or ask your own.
Ask a new question about this device
Download the instructions for your Car stereo in PDF format for free! Find your manual MD 41133 - Pro2 and take your electronic device back in hand. On this page are published all the documents necessary for the use of your device. MD 41133 by Pro2.
USER MANUAL MD 41133 Pro2
Location and function of controls ....15
Buttons:
1) V-SEL, MENU, ENTER (SEL), V-UP/DN, MENU-UP/DN (V.UP/V.DN) .....15
2) OPEN....15
3) LCD (liquid crystal display)....15
4) UP and DN....16
5) AP (auto-storage/preset memory scan) 16
6) BAND 16
7) TA Traffic announcement....16
8) PTY Program type....17
9) PWR Power....17
10) AF Alternative frequencies ....17 Regional mode
11) MUTE....18
12) PRESET STATION TOP/CDP (CD playback), RDM (random)....18
13) MODE ....18
14) EJECT....18
15) CLOCK....18
Installation....19
Speaker connection 20
Precautions & maintenances ....21
Trouble shouting 22
Specification 23
* Digital Signal Processor
text_image
R-Schlüssel L-Schlüssel Blende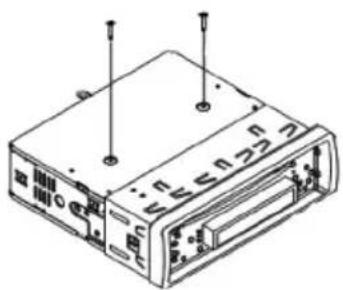
natural_image
Isometric line drawing of a computer internal unit with ports and connectors (no text or symbols)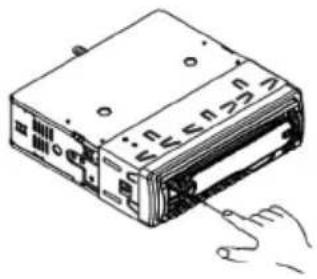
natural_image
Line drawing of a computer drive with a hand pointing to the button (no text or symbols)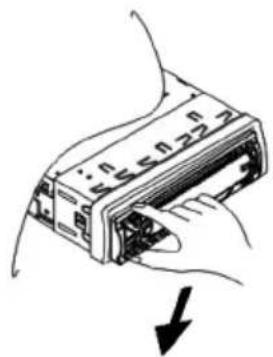
natural_image
Illustration of a hand inserting a card into a device (no text or symbols visible)
flowchart
graph TD
    A["Antennen Verbindung"] --> B["AUTORADIO RÜCKSEITE"]
    B --> C["ISO Anschluss"]
    C --> D["Sicherung 7A"]
    D --> E["Spicher Back-up (B+)"]
    D --> F["schwarz"]
    D --> G["sicherung 0.5A"]
    G --> H["rot"]
    G --> I["yellow"]
    C --> J["RCA Kabel grau"]
    J --> K["rechts rot"]
    J --> L["links weiss"]
    C --> M["vorne links Lautsprecher"]
    M --> N["grün"]
    M --> O["grün/schwarz"]
    C --> P["vorne rechts Lautsprecher"]
    P --> Q["grau"]
    P --> R["weiß"]
    C --> S["hinten rechts Lautsprecher"]
    S --> T["blau"]
    S --> U["blau/schwarz"]
Anmerkung:
natural_image
Hand inserting a card into a rectangular box (no text or symbols visible)natural_image
Illustration of a hand holding a circular object with directional arrows indicating motion (no text or symbols)
natural_image
Simple line drawing of a hand pressing down on a circular object (no text or symbols)IF Frequenz 10.7 MHz
MW
System ....compact Disk Audio System
Selecting fine audio equipment such as the unit you have just purchased is only the-start of your musical enjoyment. Now it is time to consider how you can maximize the fun and excitement your equipment offers.
We want you to get the most out of your equipment by playing it at a safe
level. One that lets the sound come through loud and clear without annoying blaring or distortion - and, most importantly, without affecting your sensitive hearing.
Sound can be deceiving. Over time your hearing "comfort level" adapts to higher volumes of sound. So what sounds "normal" can actually be loud and harmful to your hearing. Guard against this by setting your equipment at a safe level BEFORE your hearing adapts.
To establish a safe level:
- Start your volume control at a
- Slowly increase the sound until
distortion we want you listening for a lifetime.
Once you have established a comfortable sound level:
- Set the dial and leave it there
Taking a minute to do this now will help to prevent hearing damage or loss in the future.
After all, we want you listening for a lifetime.
ABOUT THIS MANUAL
This product features a number of sophisticated functions ensuring superior reception and operation. All are designed for the easiest possible use, but many are not self-explanatory.
This operation manual is intended to help you benefit fully from their potential and to maximize your listening enjoyment.
We recommend that you familiarize yourself with the functions and their operation by reading through the manual before you begin using this product. It is especially important that you read and observe the "precaution" on the next page and in other sections.
In this operation manual, the Basic Operation for each sound source is outlined at the beginning of its explanation, covering simple operation for that source, such as merely playing music.
text_image
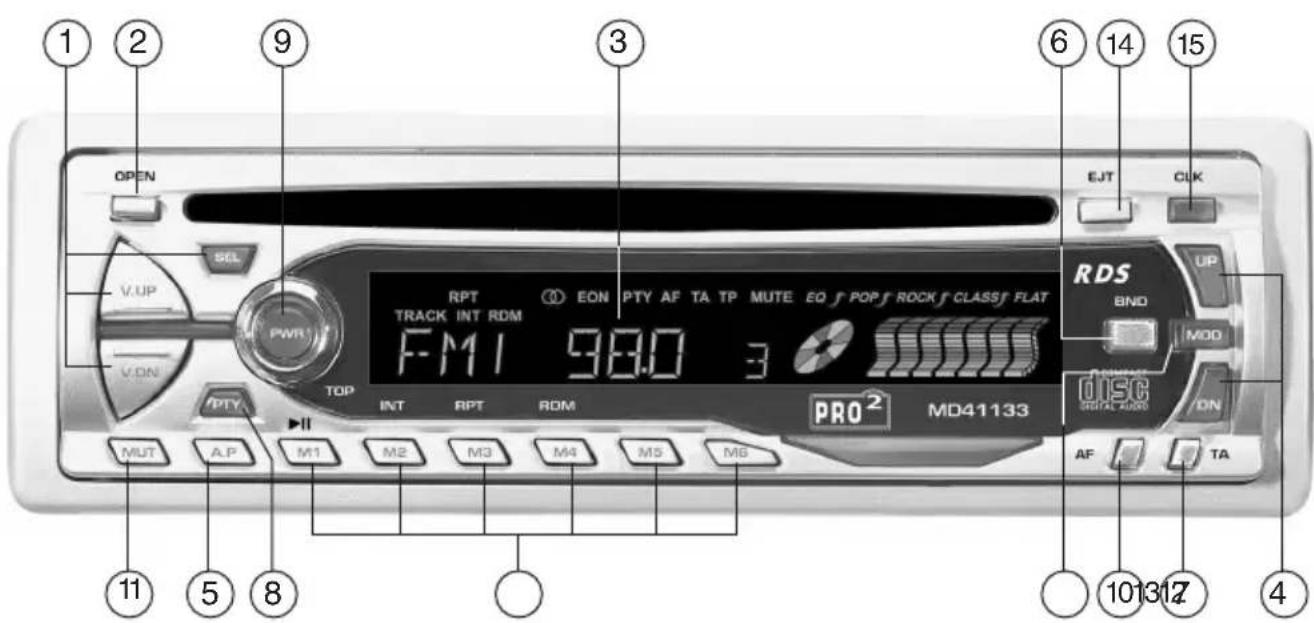
OPEN V.UP V.DN RPT TRACK INT RDM FMI 98.0 3 INT RPT ROM PRO² MD41133 MUT A.P M1 M2 M3 M4 M5 M6 II 11 5 8 6 14 15 EJT CLK UP BND MOD DISC ON AF TA 101317 41. V-SEL/MENU/ENTER(SEL) AND V-UP/DN, MENU-UP/DN(V.UP/V.DN) BUTTONS
a) Press SEL button shortly and repeatedly to select sound mode VOLUME, BASS (without preset DSP), TREBLE (without preset DSP), BALANCE and FADER, then press V.UP or V.DN button to adjust level of the selected sound mode.
b) Press SEL button hold for more than 1 second to turn on MENU mode, and the LCD will display TA SEEK/TA ALARM, then press SEL button shortly and repeatedly to select MASK DPI/MASK ALL, DSP OFF/POP M/ROCK M/CLASS M/FLAT M, LOUD ON /LOUD OFF, BEEP ON/BEEP OFF, SEEK1/SEEK2, STEREO/MONO, LOCAL/DX, VOL LAST/VOL ADJ (When it is in VOL ADJUST mode, the next mode will be A-VOL after VOL ADJUST mode, then you can adjust the volume level) in the sequence and circulation.
After select the desired MENU mode, press V.UP or V.DN button to select the mode of the selected MENU.
2. OPEN BUTTON
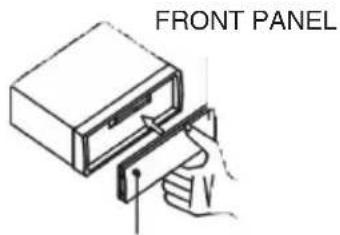
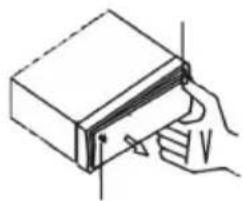
Press it to detach the front panel from the head unit and then you can take the front panel away from the head unit.
3. LCD (LIQUID CRYSTAL DISPLAY)
4. UP AND DN BUTTONS
a) In RADIO mode, press UP or DN button shortly and repeatedly to manually tune up or down for the desired radio station with step by step. Press UP or DN button hold for more than 0.5 seconds to auto-matically tune up or down for the radio station of strong signal.
b) In CD mode, press UP button to play next track. Press DN button once to play the current track from the beginning of the current track, press DN button twice continuously to play the last track.
Press UP or DN button hold to skip forward or backward.
5. AP AUTO-STORAGE/PRESET MEMORY SCAN BUTTON
In radio mode, press it to perform all stations memory for 5 seconds each time, while memory digital and frequency will flash on LCD. If the button is pressed for more than 2 seconds, it will seek station on current band, then write to the preset memories. When the auto-storage operation is completed, it will automatically perform for 5 seconds each time. During the memory station performing, press 1-6 digital buttons to select and stop scanning function.
6. BAND BUTTON
Press it repeatedly to select your desired radio band during RADIO mode.
7. TA [TRAFFIC ANNOUNCEMENT] BUTTON
When press the button, it is activated as TA mode on or off.
When TA mode is on(TA is displayed on LCD), it will begin to seek TA station and TA SEEK will be displayed on LCD for a while.
When traffic announcement is transmitted:
a) If the unit is in CD mode, it will switch to radio mode temporarily.
b) Temporarily switch over to an EON linked station when EON detects a traffic announcement on that other program, and TP will be displayed on LCD
c) If volume level is below 20, volume level is raised to 20, and returns to its previous mode and volume level when the traffic announcement is over. If volume is adjusted during traffic announcement, only the previous volume is valid.
* TA interruption function:
The current traffic announcement is canceled by pressing this key.
But the TA mode will not be off.
When TA is on, SEEK, (SCAN), AUTO MEMORY function can be received or saved only when traffic program identification code has been received.
When TA is ON, traffic program identification code is not received during specified time.
8. PTY (PROGRAM TYPE) BUTTON
Press it shortly and repeatedly to select one of the following mode:
While selecting PTY TYPE, its selection is implemented by preset buttons as described in preset key.(press one of the 6 preset buttons shortly and repeatedly to select the PTY TYPE in the preset button)
When PTY MUSIC or PTY SPEECH is on, the previous PTY program and PTY word is displayed on LCD. If there are no keys entered for 2 seconds, previously selected PTY is searched. During 1 loop, if desired PTY is not found, NO PTY is flashed, then return to previous normal radio and PTY word disappear.
9. POWER BUTTON
Press any button except the EJECT and OPEN button to turn on the unit, press PWR button hold for more than 0.5 seconds to turn off the unit. (After switching on the ACC POWER first time for 3 seconds, can only turn on the unit)
10. AF [ALTERNATIVE FREQUENCIES] BUTTON
When pressed short, AF switching mode is selected and the state of AF switching mode is displayed by AF segment in display.
Segment off: AF switching mode off.
Segment on: AF switching mode on, and has RDS information.
Segment flashing: AF switching mode on, but RDS information is not received yet.
When AF switching mode is selected, the radio checks the signal strength of AF all the time. The interval of checking time of each AFs depends on the signal strength of current station, from a few minute for strong station to a few seconds for weak station. Every time that new AF is stronger than current station, it switches over to that frequency for very short time, and NEW FREQUENCY is displayed for 1-2 second. Because the mute time of AF switching Or checking time is very short, it is almost inaudible in case of normal program.
During FM mode, when AF is on, SEEK, (SCAN), AUTO-MEMORY function can only receive and save RDS program.
When pressed long, AF mode is converted to REGION ON/OFF mode.
REGIONAL MODE ON:
AF switching or PI SEEK is implemented to the station which have all PI codes are same as current station.(PI CODE is checked when AF CHECK in progress)
REGIONAL MODE OFF:
The regional code in the format of PI code is ignored when AF switching or PI SEEK is implemented.(PI CODE and COVERAGE AREA is not checked when AF CHECK in progress)
11. MUTE BUTTON
Press the button to eliminate or resume the sound immediately.
To resume the sound immediately, can also press MODE, BAND,
V.UP, V.DN, (LOUD) and SEL button.
12. PRESET STATION [ 1-6 ] AND TOP/CDP, INT, RPT, RDM BUTTONS.
a) RADIO MODE
When pressed short, these keys select a preset station directly,
When pressed longer than one seconds, current station is stored in preset memory bank.
When PTY mode is selected, the preset memory buttons is shared as follows:
PTY music group ---- PTY speech group ---- OFF
-
POP M, ROCK M 1. NEWS, AFFAIRS, INFO
-
EASY M, LIGHT M 2. SPORT, EDUCATE, DRAMA
-
CLASSICS, OTHER M 3. CULTURE, SCIENCE, VARIED
-
JAZZ, COUNTRY 4. WEATHER, FINANCE, CHILDREN
-
NATION M, OLDIES 5. SOCIAL, RELIGION, PHONE IN
-
FOLK M 6. TRAVEL, LEISURE, DOCUMENT
b) In CDP mode, press TOP/CDP button to pause CDP playback, press it again to resume CDP playback. Press it hold for more than about 0.5 seconds to play the first track of the disc.
c) In CDP mode, press INT button to play the first 10 seconds part of each track, press it again to stop INT mode and retain playing the track currently selected.
d) In CDP mode, press RPT button to play the current track repeatedly. Press it again to cancel this mode.
e) In CDP mode, press RDM button to play the track in random order. Press it again to cancel this mode.
13. MODE BUTTON
Press it to select RADIO or CDP mode.
14. EJECT BUTTON
Press it to eject disc from the CD compartment.
15. CLOCK BUTTON
a) In RADIO mode, when RDS DATA is received: press it repeatedly to display as so: --->PA NAME--->FREQUENCY--->CLOCK--->PTY--->
When RDS DATA is not received: --->FREQUENCY --->CLOCK --->PTY --->
b) In CD mode, Press it to display time on LCD for 5 sec, then returns to its previous display state.
c) When time be displayed on LCD, press it hold until time flashes on LCD, then press V.UP or V.DN button to adjust HOUR or MINUTE.
text_image
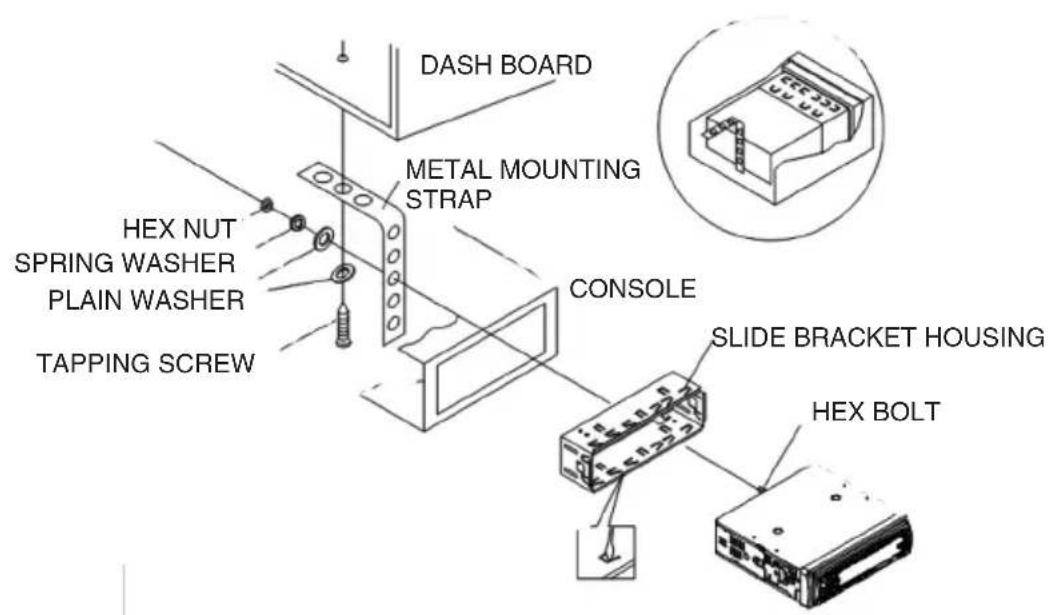
DASH BOARD METAL MOUNTING STRAP HEX NUT SPRING WASHER PLAIN WASHER TAPPING SCREW CONSOLE SLIDE BRACKET HOUSING HEX BOLT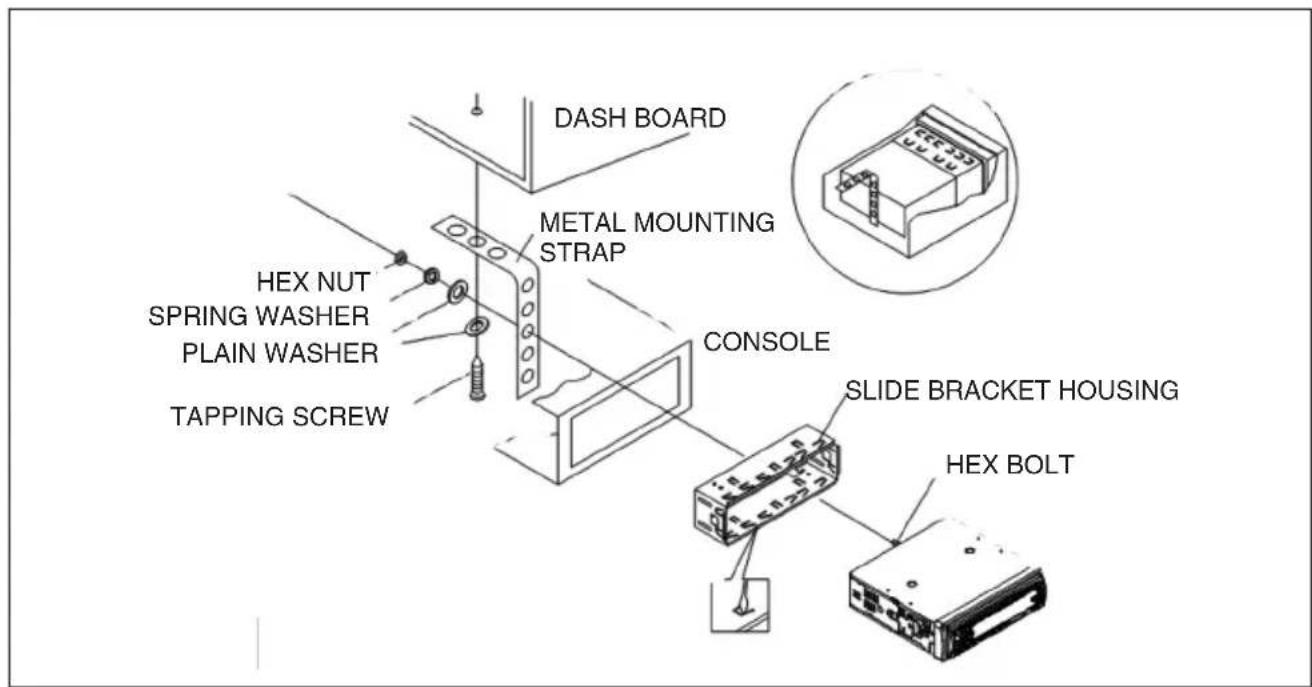
text_image
DASH BOARD METAL MOUNTING STRAP HEX NUT SPRING WASHER PLAIN WASHER TAPPING SCREW CONSOLE SLIDE BRACKET HOUSING HEX BOLT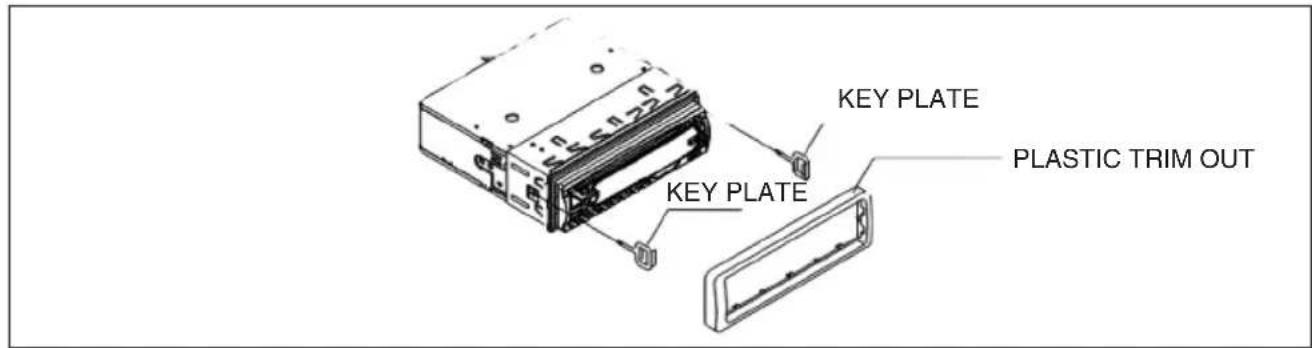
text_image
KEY PLATE KEY PLATE PLASTIC TRIM OUT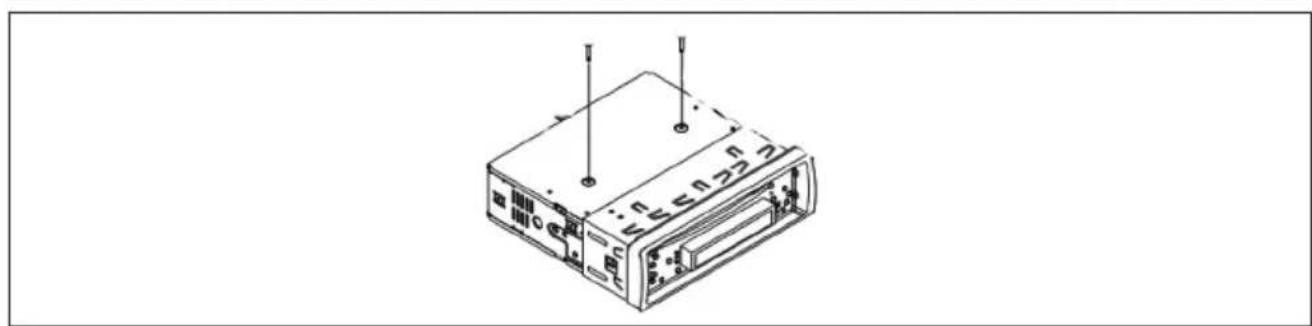
natural_image
Isometric line drawing of a computer or server unit with ports and connectors (no text or symbols)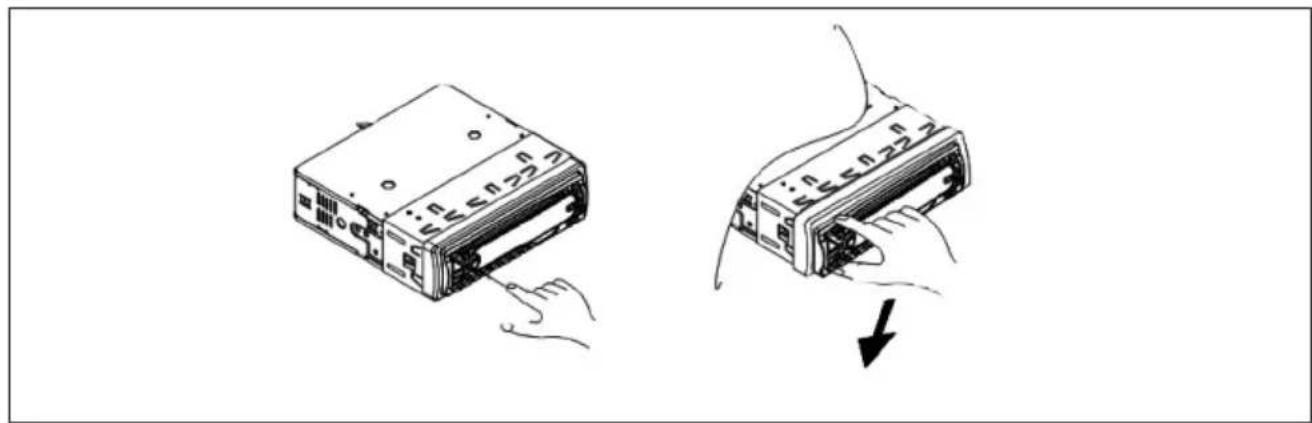
natural_image
Illustration of two hands inserting a CD into a device, showing the process (no text or symbols present)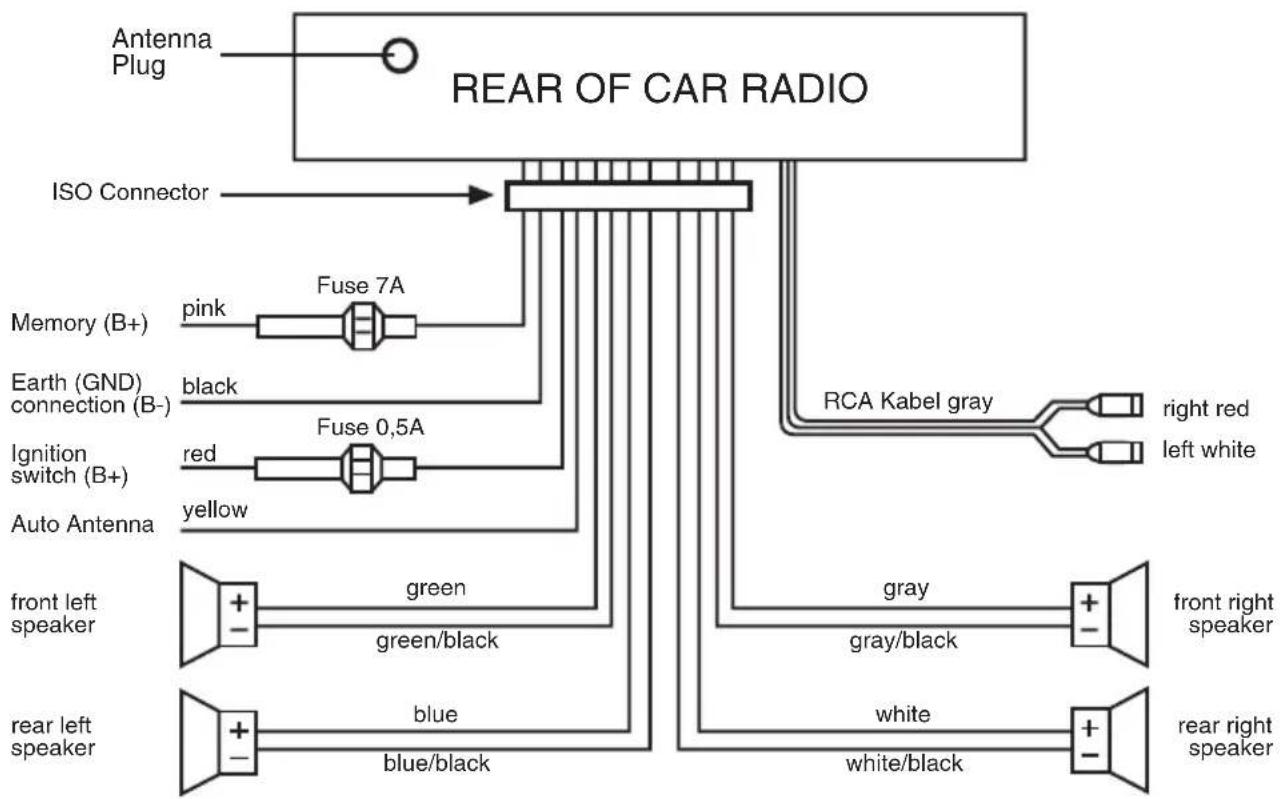
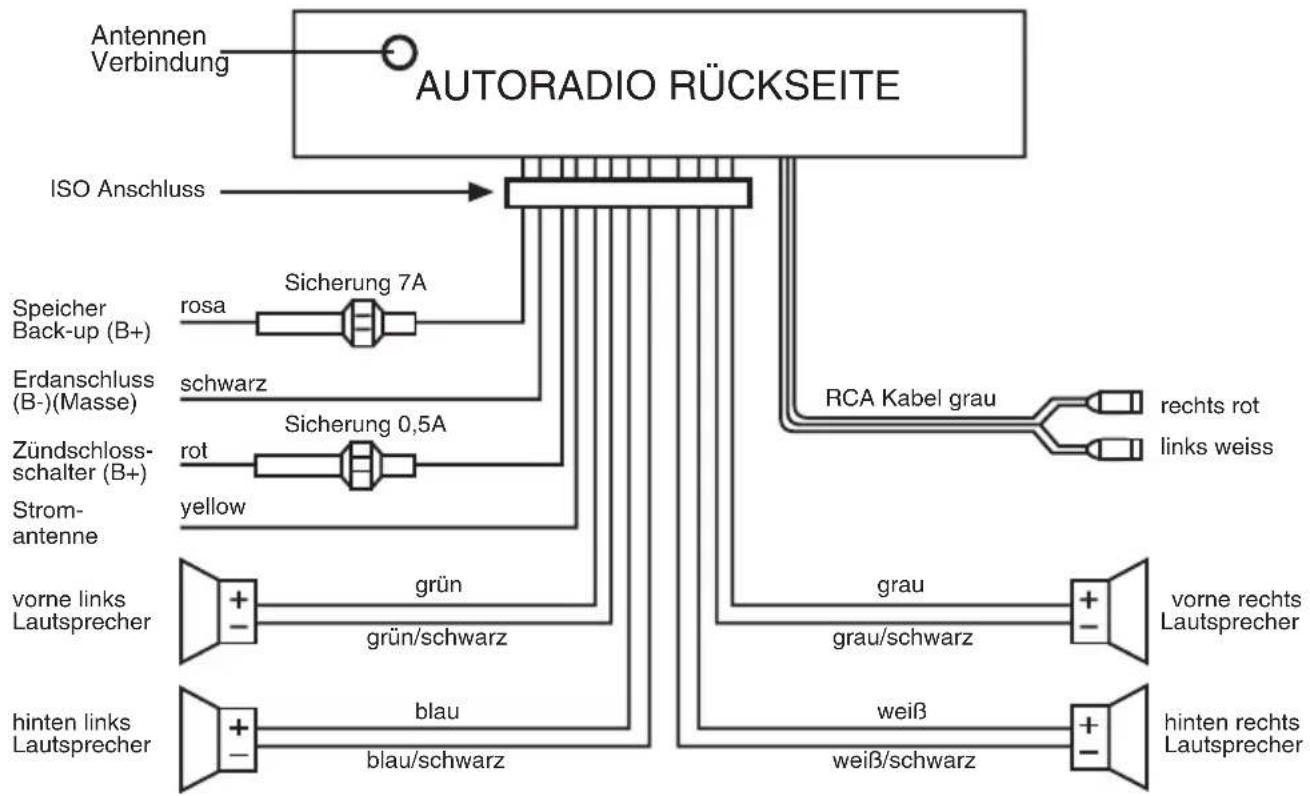
flowchart
graph TD
    A["Antenna Plug"] --> B["REAR OF CAR RADIO"]
    C["ISO Connector"] --> B
    D["Memory (B+)"] --> E["pink"]
    D --> F["Fuse 7A"]
    G["Earth (GND) connection (B-)"] --> H(black]
    I["Ignition switch (B+)"] --> J(red)
    I --> K["Fuse 0.5A"]
    L["Auto Antenna"] --> M["yellow"]
    N["front left speaker"] --> O["green"]
    N --> P["green/black"]
    Q["rear left speaker"] --> R["blue"]
    Q --> S["blue/black"]
    T["RCA Kabel gray"] --> U["right red"]
    T --> V["left white"]
    W["gray"] --> X["front right speaker"]
    Y["gray/black"] --> Z["white"]
    AA["white/black"] --> AB["rear right speaker"]
Note:
- In spite of having any kinds of speaker system, must use 4 ohms impedance of speaker to reduce the distortion during high volume level.
- Prohibit to make the conductors of auto antenna and ground touch with each other.
CAUTION: Do not install the detachable panel before connecting the wire.
Precautions and maintenances
- The unit is designed for negative terminal of the battery which is connected to the vehicle metal. Please confirm it before installation.
- During the radio or CD mode, if you drop the front panel, the unit will automatically turned off.
- If the car interior is extremely hot, as after being parked in the sun, do not use the player until the car has been driven for a while to cool off the interior.
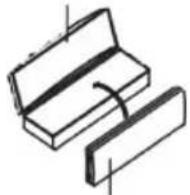
- Store the detachable in its protective case for safe keeping.
- To drop/take away/install and recover front panel, see under the illustration.
text_image
FRONT PANELPROTECTIVE CASE FRONT PANEL
natural_image
Hand holding a rectangular object with a pointed tip, no visible text or symbolsFRONT PANEL OPEN BUTTONOPEN BUTTON
CLEANING DISCS
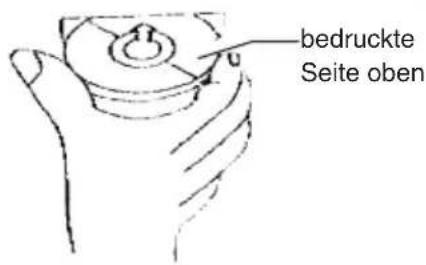
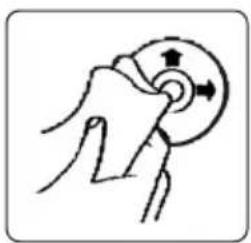
Before playing, clean the disc with a clean, lint-free cloth. Wipe the disc in the direction of the arrow.
natural_image
Illustration of a hand holding a circular object with directional arrows indicating rotation (no text or symbols)Note:
- Do not use so solvents such as benzine, thinners. Commercially available cleaners or anti static spray damage the unit.
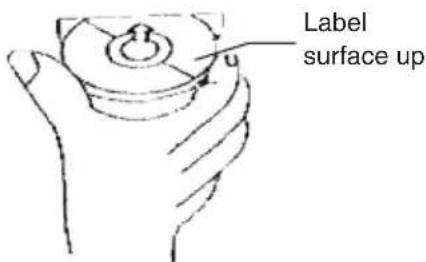
Insert a disc with the label surface down.
Doing so may damage the unit.
text_image
Label surface upNote:
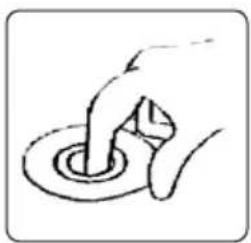
- Do not try to insert another disc when one has been already inserted.
Doing so may damage the unit. - Handle the disc by its edge. And to keep the disc clean, do not touch the surface.
natural_image
Simple line drawing of a hand pressing down on a circular object (no text or symbols)- Do not stick paper or tape on the disc.
- Do not expose the disc to direct sunlight or heat sources such as hot air ducts.
Or leave it in a car parked in direct sunlight where there can be a considerable rise in temperature.
To solve the common problem, read the trouble shooting list. If you still can not solve the problem, consult your nearest service dealer.
| Symptom | Cause | Solution |
| No power. | The car ignition is not on. | If the power supply properly connected to the car accessory switch the ignition key to ACC“. |
| The fuse is blown. | Replace the fuse. | |
| Disc cannot be loaded. | Presence of CD disc inside. | Remove the disc. |
| Disc cannot be read. | Inserting the disc in upside down. | Remove the disc in the player then put a new upward. |
| Compact disc is extremely dirty or defective. | Clean the disc or try to play a new one. | |
| Temperature inside the car is too high. | Cool off until the ambient temperature returns to normal. | |
| Volume is in minimum. | Adjust volume to a desired level | |
| No sound | Wiring is not poperly connected. | Ceck wiring connection |
| The operation keys do not work | 1. The built-in microcomputer is not operating properly due to noise.2. Front panel is not properly fix into its place. | 1. Press the RESET button2. Reinstall the front panel |
| Sound skips | The installation angle is more than 30 degrees. | Adjust the installation angle to less than 30 degrees. |
| The disc is extremely dirty or defective. | Clean the compact disc/try to play a new one. | |
| The radio does not work.The radio station automatic selection does not work | The antenna cable is not connected.The signals are too weak. | Insert the antenna cable firmly. Select a station manually. |
GENERAL
Power requirement.....DC 13.8V
Current consumption ....7A MAX
POWER OUTPUT....4 X 4 W RMS (sinus), or max. 4 x 40 W PMPO
FM SECTION
Frequency range....87.5MHz -108.0MHz
Usable sensitivity....3uV
I.F Frequency 10.7MHz
AM SECTION
Frequency range....522KHz - 1620KHz
I.F Frequency....450KHz
Usable Sensitivity 40dB
LINE - OUT [OPTION]
Output CD MAX 1200mv
CD PLAYER
System....compact disc audio system
Usable disc ....CD/CD-R/CD-RW disc
No of quantization bits 1bit
Signal format......sampling frequency 44.1KHz
Frequency characteristics....20-100Hz < 5dB
10-20KHz < 5dB
Signal to noise CD....60dB [1KHz]
Number of channels....2 STEREO
Chassis dimensions ....178[W] X 50[H] X 165[D]