K 1216 N - CD Player IdeenWelt - Free user manual and instructions
Find the device manual for free K 1216 N IdeenWelt in PDF.


User questions about K 1216 N IdeenWelt
0 question about this device. Answer the ones you know or ask your own.
Ask a new question about this device
Download the instructions for your CD Player in PDF format for free! Find your manual K 1216 N - IdeenWelt and take your electronic device back in hand. On this page are published all the documents necessary for the use of your device. K 1216 N by IdeenWelt.
USER MANUAL K 1216 N IdeenWelt
natural_image
Black and white photo of a CD or DVD player with earphones and control buttons (no visible text or symbols on device body)Gebrauchsanweisung
K 1216 N
natural_image
Hand holding a circular object with an arrow indicating direction (no text or symbols)
RICHTIG FALSCH
STÖRUNGSERKENNUNG
Kid Line CD player with two microphones
Dear customer,
Please read these operating instructions through carefully before connecting your device to the mains, in order to avoid damage due to incorrect use. Please pay particular attention to the safety information. If you pass the device on to a third party, these operating instructions must also be handed over.
CAUTION
THIS CD PLAYER IS A CLASS I LASER PRODUCT. HOWEVER, THIS CD PLAYER USES A VISIBLE/INVISIBLE LASER BEAM, WHICH COULD CAUSE HAZARDOUS RADIATION EXPOSURE. BE SURE TO OPERATE THE CD PLAYER CORRECTLY AS INSTRUCTED.
INVISIBLE LASER RADIATION WHEN COVER IS OPEN OR THE SECURITY INTERLOCK DEFEATED. DO NOT EXPOSE TO BEAM! DO NOT TOUCH THE LASER LENS.
USE OF CONTROLS OR ADJUSTMENTS OR PERFORMANCE OF PROCEDURES OTHER THAN THOSE SPECIFIED HEREIN MAY RESULT IN HAZARDOUS RADIATION EXPOSURE.
TO REDUCE THE RISK OF FIRE OR ELECTRIC SHOCK AND ANNOYING INTERFERENCE USE ONLY THE RECOMMENDED ACCESSORIES.
Setting A Safe Volume Level
• To protect your hearing please follow these hints when using headphones:
- To protect yourself, set the volume to a low level. Increase the volume slowly, until you can hear clearly and without problems.
- Do not set the volume too high. Listening to loud music for a long time may damage your hearing.
- If you continually listen to loud music, your hearing gradually adapts to it and gives you the impression that the volume is lower.
OPERATING INSTRUCTIONS
General Safety Instructions
Before use, please read these instructions carefully and keep them in a safe place for future reference.
When passing on the product to a third person, make sure to include these instructions for use.
• Manufacturer takes no responsibility for any damage caused by incorrect use.
- Incorrect or improper use can damage the product and cause injuries to the user.
- Before connecting the product to the mains supply, make sure your local voltage matches the product's technical data.
- NEVER expose the product to direct sunlight or any other sources of heat.
- Never expose the product to rain or humidity. Never operate the product near a bathtub or a pool. Danger of electrical shock. Should the product get wet, unplug it immediately. Contact an authorized service center.
- Close supervision is necessary when children use the product.
- Unplug the product, when it is not used for longer period of time.
• Always pull the plug, not the cord.
- Never attempt to make any modifications to or repair the product yourself. Have it repaired by a qualified person only.
- Allow for at least 10cm of space round the product to ensure proper ventilation.
- When the power adaptor is connected to the DC jack of the unit, it will not work on batteries. To operate the unit on batteries, check if the adaptor is detached from the DC jack of the unit at the back.
- Do not connect the product to more than one power supply.
- When using a mains adaptor (not included) only use the recommended type: 6V/600 mA.
"Sing-A-Long" CD player with two microphones
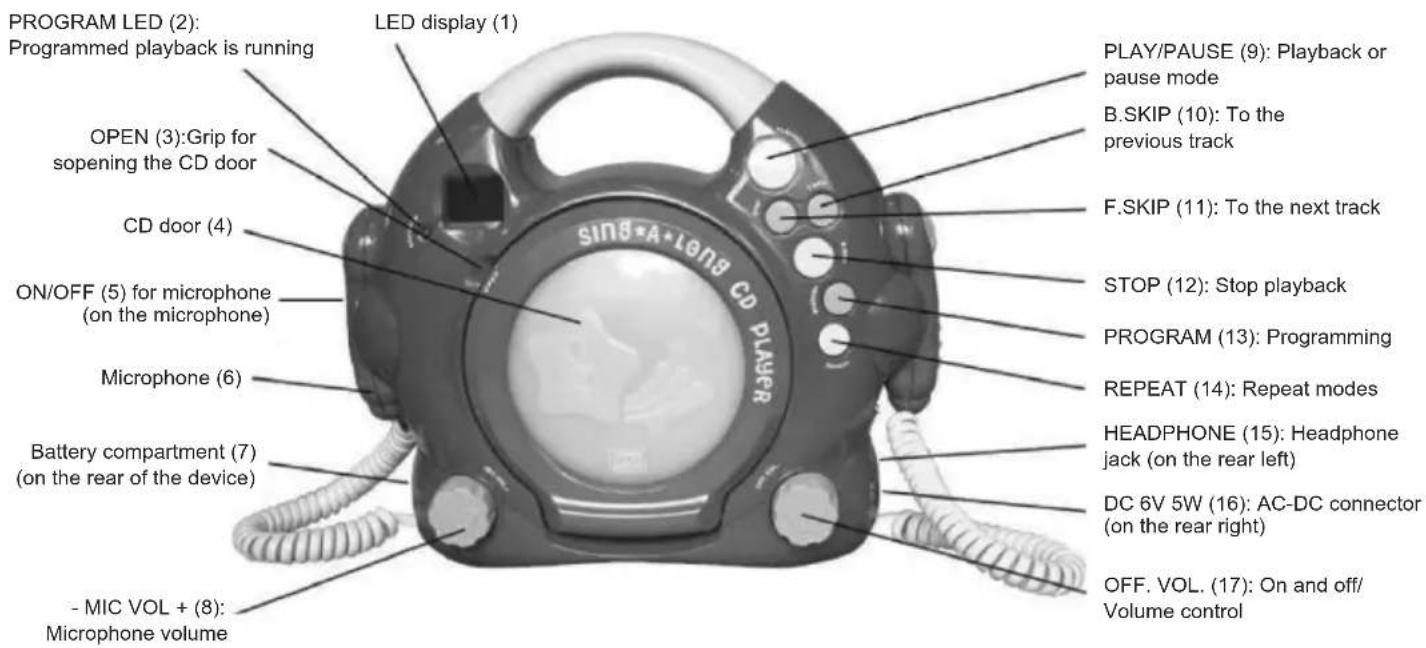
Location of Controls
text_image
PROGRAM LED (2): Programmed playback is running LED display (1) OPEN (3):Grip for sopening the CD door CD door (4) ON/OFF (5) for microphone (on the microphone) Microphone (6) Battery compartment (7) (on the rear of the device) - MIC VOL + (8): Microphone volume PLAY/PAUSE (9): Playback or pause mode B.SKIP (10): To the previous track F.SKIP (11): To the next track STOP (12): Stop playback PROGRAM (13): Programming REPEAT (14): Repeat modes HEADPHONE (15): Headphone jack (on the rear left) DC 6V 5W (16): AC-DC connector (on the rear right) OFF. VOL. (17): On and off/ Volume controlPower Supply
Battery operation
- Open the battery compartment: Loosen the screw on the cover of battery compartment with a screwdriver and remove the cover.
- Insert 4 X C/UM-2 1.5V type batteries (not included). Make sure that you follow the polarity markings inside the compartment!
- Close the battery compartment and tighten the screw.
General battery safety precautions
- Follow the battery manufacturer's safety and usage instructions.
- Keep batteries away from children and pets.
- Do not throw batteries into fire. Never expose batteries to heat or fire.
- Disposal of batteries: Dispose of exhausted batteries according to the local laws and regulations. For further information, please contact your disposal authority.
- Do not mix exhausted and new batteries and abnormal batteries with rechargeable ones.
- Do not mix different battery types, e.g. alkaline with zinc/carbon. Only use batteries of the same type.
- Use only batteries of high quality (e.g. alkaline), which do not contain mercury or cadmium.
- Wrong usage of batteries can cause a leaking of the electrolyte and corrode the battery compartment or let the batteries burst.
• Do not recharge batteries, danger of explosion! - During a long period of non-use, please remove the batteries to avoid leakage.
Operation of power adaptor (optional, not included)
Before connecting the AC/DC adaptor to a wall socket make sure that the voltage on the label corresponds to the voltage in your household.
- Only use a common 6V/600 mA power adaptor.
- Connect the power adaptor to the DC 6V jack (16).
Note: When connecting a power supply at the device, the batteries will be automatically disconnected.
Caution: The device may only be connected to a 6V, 5W AC-DC adaptor with negative pole at the inner conductor of the plug. The connection of another power supply may damage the device. Power supplies
are available in specialist shops.
Phone jack
A Phone jack (15) has been provided. To use it, plug in headphones (3.5mm connector) available at your local dealer
and adjust the OFF. VOL. (17). to a comfortable listening level.
When external headphones are connected, the main speakers of the unit will be mute.
General Operation Instructions
On / Off
Switch on the unit and adjust the volume to a comfortable listening level by turning the OFF. VOL. knob (17) clockwise. On the LED display “- -” is indicated.
To switch off, turn the knob counterclockwise until it snaps. The LED display (1) turns off.
CD playback
-
Switch on the unit by turning the OFF. VOL. knob (17) clockwise.
-
Open the CD door (4) by lifting the recess OPEN (3). Place a CD on center spindle with the cover side faced up and close the CD door (4).
Note: If no CD is inserted, the LED display (1) shows “- -”.
-
On the LED display (1) the indication “--” flashes for some seconds. Then the total number of tracks on the CD is shown.
-
Press PLAY/PAUSE (9) to start the playback. On the display the track number is indicated, e.g. "01."
-
Adjust the volume by rotating of OFF. VOL. (17) to a suitable listening level.
-
To interrupt the playback temporary (pause) press PLAY/PAUSE (9). Pressing PLAY/PAUSE (9) again cancels the pause mode and resumes the normal playback of the CD.
-
Press STOP (12) to stop the playback of the CD.
Selection of a specific track
During the playback you can skip with B.SKIP (10) or F.SKIP (11) to the previous or next track.
-
Select the track in the playback, stop or pause mode with B.SKIP (10) or F.SKIP (11) and start the playback with PLAY/PAUSE (9).
-
With a short keystroke on F.SKIP (11) skip to the next track or press repeatedly the key, until the desired track number is shown on the display.
-
With a short keystroke on B.SKIP (10) skip to the beginning of the current track.
-
To skip back one or more tracks press more than one time B.SKIP (10).
Fast forward and rewind
Press and hold F.SKIP (11) or B.SKIP (10) to move fast forward or backward within the track. At this action the sound is muted automatically.
Playback mode
- By pressing REPEAT (14) the playback mode can be toggled. The indication of the adjusted playback mode takes place with the decimal point following the first digit on the LED display.
- To cancel the playback mode press repeatedly REPEAT (14), until the decimal point following the first digit on the LED display disappears.
Repeat a single track
- Press once REPEAT (14) to repeat the current track continuously. On the display the decimal point following the first digit is flashing.
Repeat all tracks
- Press twice REPEAT (14) to repeat the complete CD continuously. On the display the decimal point following the first digit lights up permanent.
Program playback
Up to 20 tracks can be programmed to be played in a specific order.
- Press once PROGRAM (13) during the playback or stop mode. On the display "00" and also the PROGRAM LED (2) are flashing.
- Select with B.SKIP (10) or F.SKIP (11) the desired track number.
- Store the track with PROGRAM (13). The program number will be increased by one and shown for short time on the display.
- Repeat steps 2 and 3 to program up to 20 tracks.
- Press PLAY/PAUSE (9) to start the playback of the tracks in the programmed order.
- Stop the programmed playback with STOP (12).
- Press in the stop mode PROGRAM (13) and then PLAY/PAUSE (9) again to continue the program playback.
- After pressing PROGRAM (13) in the stop mode you can check the programmed track numbers in the program memory with B.SKIP (10) or F.SKIP (11).
- Delete the programmed sequence by opening the CD door or turning off the CD player with OFF. VOL. (17).
Karaoke function
The device is equipped with two coequal microphones.
- Place a CD on center spindle with the cover side faced up and close the CD door (4).
- Press PLAY/PAUSE (9) to start the playback.
- Slide the ON/OFF button (5) on the microphone to the ON position.
- Adjust the microphone volume by rotating the - MIC VOL + (8) knob to a suitable listening level.
- Now you can start singing into the microphone together with the music from the CD.
Note: Don't be too close with the microphones to the speakers; otherwise an acoustic feedback (whistling from the speakers) can happen.
Public announcements
No CD necessary. Just talk into the microphone and the voice will be returned amplified by the device.
- Just turn on the device with OFF. VOL. (17) without an inserted CD.
- Slide the ON/OFF button (5) on the microphone to the ON position.
- Adjust the microphone volume by rotating the - MIC VOL + (8) knob to a suitable listening level.
- Now you can start singing or talking into the microphone.
Note: Don't be too close with the microphones to the speakers; otherwise an acoustic feedback (whistling from the speakers) can happen.
MAINTENANCE AND CARE OF DISCS
Handling of CDs
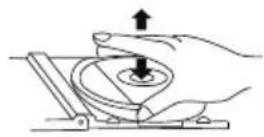
* Remove the CD from its cover.
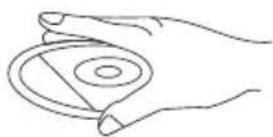
* Do not touch the surfaces.
* Do not attach stickers to CDs and do not write on them.
* Do not bend CDs.

Storage
* Always store CDs in their cover.
* Do not subject discs to direct sunlight, dirty, dusty and damp areas or car heaters.
Cleaning
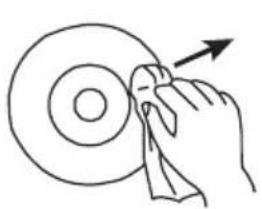
* Clean CDs with a soft cloth.
* Clean CDs from the center to the edge.
FROM THE CENTRE TO THE EDGE
natural_image
Hand cleaning a circular object with a hand holding a tool, no text or symbols visible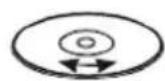
CORRECT INCORRECT
TROUBLESHOOTING
If you experience any problem with this system, review the list below before you contact the customer service.
WARNING: Never open the device. Always refer service or maintenance to authorized customer service personnel.
| PROBLEM POSSIBLE CAUSE | SOLUTION | |
| The player doesn’t work The CD | is inserted upside down.The CD is dirty or damaged.The Laser lens is dirty.The CD door (4) is not closed.The batteries are exhausted. | Reinsert disc with label side facing up.Replace or clean the CD.Clean the Laser lens.Close the CD door (4).Replace the batteries or use the AC/DC adapter. |
| No sound from the earphones. | The earphone plug is not properly inserted. | Plug in again the earphone plug. |
| No sound. The volume is set too | low. Increase the volume with OFF. | VOL. (17). |
| No sound when using the microphones. | The ON/OFF (5) switch on the microphone is set to the OFF position.The microphone volume is set too low. | Slide the ON/OFF (5) switch to the ON position.Increase the microphone volume with - MIC VOL + (8). |
SPECIFICATIONS
General
Power Supply:
AC-DC adaptor: AC 230V\~50Hz / DC 6V, 600mA
Battery operation: DC 6V (4 X C/UM-2 batteries, 1.5V)
Dimensions: approx. 265 x 100 x 225 mm
Net weight: approx. 1 kg with inserted batteries
Subject to change without prior notice
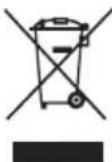
Instructions on environment protection
Do not dispose this product in the usual household garbage at the end of its life cycle; hand it over at a collection point for the recycling of electrical and electronic appliances. The symbol on the product, the instructions for use or the packing will inform about the methods for disposal.
The materials are recyclable as mentioned in its marking. By recycling, material recycling or other forms of re-utilization of old appliances, you are making an important contribution to protect our environment.
Please inquire at the community administration for the authorized disposal location.