Cubo TS522 RC - Radio Brionvega - Free user manual and instructions
Find the device manual for free Cubo TS522 RC Brionvega in PDF.


| Type of product | Portable radio with digital clock and alarm |
| Model | Cubo TS522 RC |
| Brand | Brionvega |
| Power supply | AC 220-240 V ~ 50 Hz or 6 x 1.5 V R14 batteries |
| Battery backup | 2 x AAA 1.5 V for clock retention |
| Frequency range | AM: 525-1701 kHz; FM: 87.5-108 MHz |
| Program memory | 29 total: 24 FM (red LEDs) + 5 AM (green LEDs) |
| Audio power (speaker) | 3 W music power, 1.8 W RMS |
| Headphone output | Stereo 3.5 mm, separately adjustable volume |
| Tuning methods | Manual, semi-automatic, automatic (AST) |
| Clock functions | Time, date, year, temperature, alarm with snooze, RCC synchronization |
| Display | LCD backlit with show time, date, temperature, radio info |
| Touch button | Activates backlight 10s, stops alarm (only on mains power) |
| Treble adjustment | Yes, push button for clearer treble |
| Sleep timer | 5-60 minutes auto switch-off |
| Safety class | Class 2 appliance |
| Cleaning | Dry cloth only |
| Accessories included | Telescopic aerial, mains power cable |
| Technical support | Contact authorized Technical Assistance Centre for repairs |
| Environmental disposal | WEEE compliant, do not dispose with household waste |
Frequently Asked Questions - Cubo TS522 RC Brionvega
User questions about Cubo TS522 RC Brionvega
0 question about this device. Answer the ones you know or ask your own.
Ask a new question about this device
Download the instructions for your Radio in PDF format for free! Find your manual Cubo TS522 RC - Brionvega and take your electronic device back in hand. On this page are published all the documents necessary for the use of your device. Cubo TS522 RC by Brionvega.
USER MANUAL Cubo TS522 RC Brionvega
natural_image
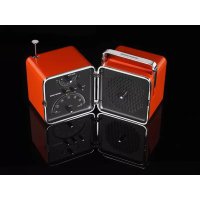
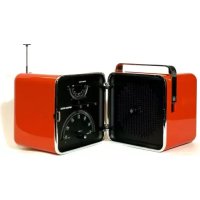
Red portable radio device with open doors showing front panel and digital display (no visible text or symbols)natural_image
Close-up of a person wearing glasses and resting chin on their head (no visible text or symbols)Richard Sapper

natural_image
Close-up grayscale portrait of a person's face and nose, showing detailed facial features (no text or symbols visible)ITALIANO
Read the precautions in the SAFETY section before using the radio.
ATTENZIONE!
CON LA RETE ELETTRICA:
220 - 240 V ca \~ 50 Hz per Europa, Australia ecc.
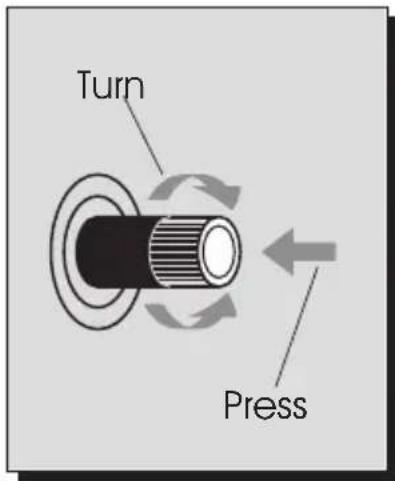
The controls [2] and [5] work both as knobs to turn and buttons to press. When an instruction refers to these controls as "knobs", you must TURN them to achieve the desired effect. When an instruction refers to them as "buttons", you must PRESS them instead.
ENGLISH
DESCRIPTION OF BUTTONS, KNOBS AND SOCKETS
[1] On/OFF and volume adjustment knob.
[2] Treble enhancement button.
[3] AST automatic tuning button.
[4] Radio band selection button (AM/FM).
[5] Radio/Alarm button.
[6] Station tuning knob.
Semi-automatic station search button.
Headphones volume adjustment button and knob.
[7] Display.
[8] Radio frequency dial.
[9] Preset programme dial.
[10] Programme selection knob. Station store button.
[11] Touch button.
[12] Battery backup compartment.
[13] Battery compartment cover clips.
[14] Battery compartment cover.
[15] Telescopic aerial.
[16] Stereo headphones socket.
[17] Socket for mains power cable [15].
[18] Mains power cable.
[19] Radio opening button.
SAFETY
Safety symbols found on the appliance:

This is a Class 2 appliance.

Dangerous voltage! Risk of electric shock.

Refer to the accompanying documentation.
Safety precautions:
Read these instructions.
Keep these instructions.
Heed all warnings.
Follow all instructions.
Do not use this apparatus near water.
Do not connect the radio to the mains supply if the power plug and/or cable [18] are damaged. Contact your local authorised Technical Assistance Centre.
Always make sure that the plugs at either end of the mains power cable [18] are correctly inserted.
Do not block any ventilation openings. Install in accordance with the manufacturer's instructions.
Do not install near any heat sources such as radiators, heat registers, stoves, or other apparatus (including amplifiers) that produce heat.
Do not defeat the safety purpose of the polarized or grounding-type plug. A polarized plug has two blades with one wider than the other. A grounding type plug has two blades and a third grounding prong. The wide blade or the third prong are provided for your safety. If the provided plug does not fit into your outlet, consult an electrician for replacement of the obsolete outlet.
Protect the power cord from being walked on or pinched particularly at plugs, convenience receptacles, and the point where they exit from the apparatus.
Do not position the radio in tight spaces. Ensure that there is an adequate space all around it (minimum 5 cm) for air to circulate. Keep the radio's air grilles free at all times to cool the internal circuitry.
Use only with the cart, stand, tripod, bracket, or table specified by the manufacturer, or sold with the apparatus. When a cart is used, use caution when moving the cart/apparatus combination to avoid injury from tip-over.
Never place candles or other objects with naked flames on the radio. If they tip over, molten wax or the naked flame itself can cause serious damage to the circuitry inside the radio.
Unplug this apparatus during lightning storms or when unused for long periods of time.
Clean only with dry cloth.
Never attempt to recharge, heat up or dispose of spent batteries in a fire. Heat can cause batteries to explode.
Do not use rechargeable batteries but only batteries of the recommended type, R 14 A.
Do not allow children to play with batteries.
Do not allow children to insert objects into the radio.
Do not allow children to play with items of packaging. Plastic bags, sheets and boxes can cause suffocation and injury.
Never remove the rear cover of the radio. High voltages inside the unit can cause electric shock.
Only use attachments/accessories specified by the manufacturer.
Refer all servicing to qualified service personnel. Servicing is required when the apparatus has been damaged in any way, such as power-supply cord or plug is damaged, liquid has been spilled or objects have fallen into the apparatus, the apparatus has been exposed to rain or moisture, does not operate normally, or has been dropped.
ECOLOGY
Recommendations for respecting the environment
PACKAGING:
The packaging materials used with this appliance comply with relevant environmental standards. If you have enough room, keep the radio's box and packaging at least for the period of the warranty. If you must dispose of the packaging, do not throw it into the environment but dispose of it responsibly.
BATTERIES:
Dispose of batteries through proper channels for the collection and disposal of environmentally dangerous waste. Never throw batteries into the environment. Whenever possible use mercury-free batteries to limit environmental impact.
RADIO POWER SOURCES
See also the specifications on the cover of the battery compartment. The radio can be powered either by batteries or by mains electrical power. If the appliance is connected to the mains, it automatically disconnects the battery circuit.
MAINS POWER:
220 - 240 V AC \~ 50 Hz for Europe, Australia etc.
- Connect the plug of the mains power cable [18] to the mains power socket [17] on the back of the radio.
- Plug the power plug of the mains power cable [18] into a mains power point.
BATTERIES:
6 x 1.5 V batteries
Always disconnect the mains power cable [18] before inserting batteries.
- Open the clips [13] and raise the cover of the battery compartment [12].
- Insert the batteries, taking care to respect the polarity shown on the diagram inside the battery compartment [12].
- Close the battery compartment cover [14].
BATTERY SUPPLY:
n° 2 pile AAA 1,5 V
Replace battery supply only when display Icd show LAW BATTERY message.

LAW BATTERY LEVEL
PRELIMINARY OPERATIONS
Extend the telescopic aerial [15] at the rear of the radio to ensure optimum signal reception. Press the button [19] to open the radio and turn the knob [1] clockwise to switch the radio on.
When you switch the radio on, the preset programme dial [10] and the radio frequency dial [8] illuminate all their LEDs in a rapid test sequence to show that the radio is functioning. At the end of the test sequence only two LEDs stay lit, one for each dial [10 and 8], indicating the programme selected and radio station tuned in when the radio was last switched OFF.
STEP TO RADIO / CLOCK FUNCTIONS
If knobs [1] is set to ON is possible:
- skip from RADIO function to CLOCK function by pressing button [5].
If knobs [1] is set to OFF:
- display LCD visualize current clock time;
- push button [5] to activate CLOCK function, in CLOCK
mode RCC symbol is active [DST] - CLOCK functions are available;
NB: RCC symbol is visible only in CLOCK mode. To be sure that RCC function is active, press for 3 seconds button [3] until lcd display visualize RCC symbol.
During CLOCK setting RCC symbol is not visible.
RCC FUNCTION
![Brionvega Cubo TS522 RC - If knobs [1] is set to OFF: - 1](/content/2026/05/780417/images/7fc2b3d328a32ae9fc5a357c5da84b64174b4161d1dd117fc4e186d2e72d6e67.jpg)

TIME Display
RCC funtions allows to synchronize RADIO/CLOCK time with local correct hour transmitter. The synchronization comes at least one time per day, in particular in Europe happens at 00.00.
If signal is insufficient to do synchronization, a new synchronization will be executed next day at same hour.
The synchronisation depends about the quality of signal received. Not in all Europe is present the RCC signal.
1. RADIO FUNCTIONS TUNING IN RADIO STATIONS
Press the button [4] to select the frequency band you want. A LED on the preset programme dial [10] lights to show what band is currently selected:
- a RED LED for FM (24 programmes)
- a GREEN LED for AM (6 programmes)
Turn the knob [6] to locate the station you want.
Turn the knob [10] to select what programme number you want to assign to the station.
Press the button [10] to store the station in programme memory.
Repeat the above operations for all the stations you want to store in programme memory.
N.B. - When listening to FM radio transmissions, rotate the aerial to obtain the best reception quality.
FM RECEPTION
There are another two ways of tuning in FM radio stations as well as that described above.
Automatic search and store:
- Press the AST button [3] to start the automatic search.
- The radio automatically searches for radio stations and stores them in programme numbers 13 to 24 (red LEDs) on the preset programme dial [9].
- The search sequence is performed in difference sweeps, with the station with the strongest signal memorised first, and weaker stations after.
N.B. - The automatic search and store sequence leaves programme numbers 1 to 12 free for stations that you want to select manually.
Semi-automatic station search:
- Press and hold the button [6] for about 2 seconds. The search sequence starts, then stops at the first station it finds.
- If this station is already in programme memory, one of the red LEDs on the preset programme dial [9] lights.
- If the station is not in memory, the LED flashes.
- To store the station, turn the knob [9] to select the programme number you want to assign on the preset programme dial [10] and then press the button [10].
Proceed to search for and store the other stations you want in the same way.
Once you have completed the tuning sequence, you can turn the knob [10] to select the numbers of your favourite radio stations whenever you want to listen to them.
ADJUSTING SOUND
Adjusting volume
Turn the knob [1] clockwise to increase volume, anticlockwise to decrease volume.
Adjusting headphones volume
Press the knob [6] and simultaneously turn it clockwise to increase volume, anticlockwise to decrease volume.
N.B. - Sound from the loudspeaker is not affected when a headphones jack is plugged into the headphones socket [17].
Adjusting treble
Press the button [2] to obtain clearer treble. Press the button once more to return to normal tone.
This treble adjustment controls the sound from the loudspeaker and the headphones.
SWITCHING THE RADIO OFF
To switch the radio OFF, turn the knob [1] anti-clockwise until it clicks.
2. CLOCK FUNCTIONS
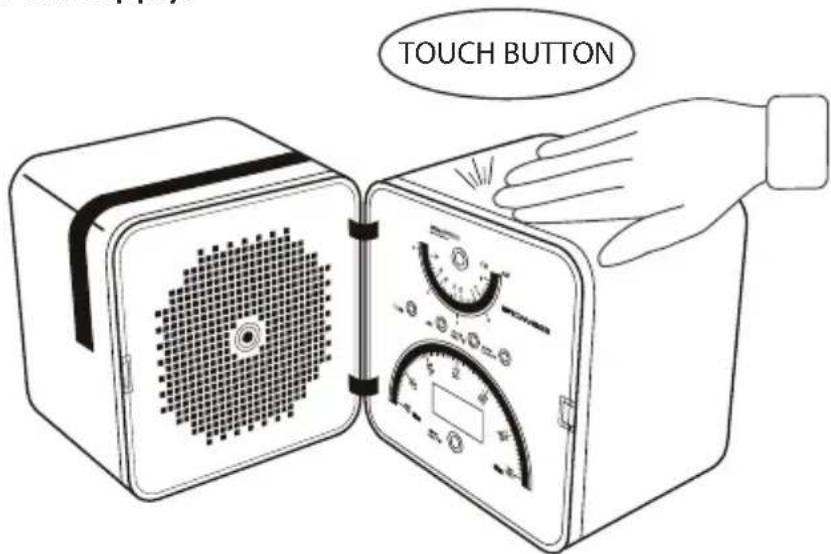
TOUCH BUTTON
Touch button is present upside of RADIO/CLOCK with this functions:
- set ON display lcd backlight for 10 seconds; - allow to stop alarm signal;
NB: to identify touch button, upside of radio is present an electrostatic adhesive. It's possible to remove it as end user wish. Touch button is not active without mains power supply.
LCD FUNCTIONS
Push button [5] to visualize the Icd functions menu: by pressing button [10] is possible to visualize the radio/alarm functions.
SETTING CLOCK:

TIME Display
- Push button [10] to visualize clock on Icd display:
- Push button [3] to set time mode (12h/24h);
- Push button [10] for 3 seconds until the screen blinking;
- Push button [10] to step value:
[HOUR] - [MINUTES] - [SECONDS] - [ZONE]
- Push buttons [3] and [4] to set the correct value;
NB: after 15 seconds the last setting lcd display blinking OFF and the setting is completed. Lcd display visualize automatically clock image.
Zone: it regards geographic area like the jet lag. It's possible to set it from -12 to +12 in relation of geographic zone.
SETTING DATE:

Month/Date/Day Display
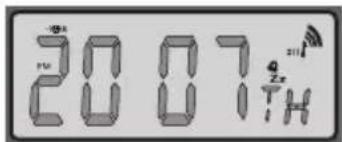
Year Display
- Push button [10] to visualize date on lcd display:
- Push button [10] for 3 seconds until the screen blinking;
- Push button [10] to step value:
[YEAR] - [MONTH/DAY] - [CALENDAR LANGUAGE]
- Push buttons [3] and [4] to set the correct value;
- After date setting is possible to set calendar language using buttons [3] and [4].
NB: after 15 seconds the last setting lcd display blinking OFF and the setting is completed. Lcd display visualize automatically clock image.
TEMPERATURE SETTING

- Push button [10] to visualize the temperature on display; - Push buttons [3] and [4] to set temperature mode (Celsius or Farenheith)
SETTING ALARM:

- Push button [10] to visualize alarm clock on lcd display; - Push button [10] for 3 seconds until the screen blinking; - Push button [10] to select value to be modify:
[HOUR] - [MINUTE]
- Push buttons [3] and [4] to set the correct value; - Push button [10] to confirm setting;
After setting alarm, with button [4] is possible to set alarm signal mode.
AVAILABLE ALARM MODE:
- Alarm ON (BUZZER mode) [ ]
- Alarm ON with SNOOZE function (ON/OFF) (*) [ 📄 Zz]
- Radio (Alarm with radio sound) (**) [RADIO]
- Alarm OFF
SNOOZE FUNCTION(\*)
By pressing Touch Button is possible to set OFF alarm. Alarm signal will be newly ON after 8 minutes. If alarm signal will not newly set OFF it will active for 30 minutes (2
minutes ON - 8 minutes OFF on circle). After 30 minutes the alarm signal automatically set OFF.
To set definitively OFF alarm signal press button [5] to set it OFF.
RADIO SOUND AS ALLARM(\*\*)
Radio/clock reproduces last frequency listened before last Power OFF.
NB: alarm signal will rings all successives days at setting alarm clock if it will not deactivates in the appropriate menu.
MAIN POWER SUPPLY DOWN
Minimal RADIO/CLOCK functions are guaranteed.
Alarm signal will songs only in BUZZER mode.
Alarm signal can be set OFF only pressing button [5].
LCD DISPLAY BRIGHTNESS
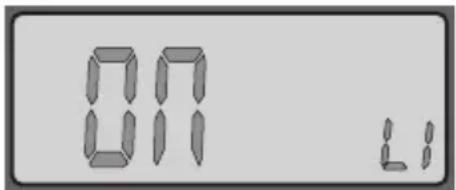
RCC ON/OFF
BRIGHTNESS DISPLAY
- Push button [10] to visualize display brightness settings.
- Push button [3] to set preferred brightness;
- Push button [4] to deactive display brightness;
NB: after 15 seconds the last setting lcd display blinking OFF and the setting is completed. Lcd display visualizes automatically clock image.
SETTING SLEEP MODE

Radio Sleep Time Display
To set delayed about auto switch OFF:
- With radio OFF push button [6] to set preferred switch OFF time: from 5 to 60 minutes.
NB: radio switch on automatically and then automatically switch OFF after sleep time set up.
TECHNICAL SPECIFICATIONS SIGNAL FREQUENCY RANGE
Standard version:
• AM:
525 - 1701 kHz
• FM:
87.5 - 108 MHz
AUDIO
• Mono: built-in loudspeaker
- Stereo: through headphones connected to socket [17] (separately adjustable volume)
AUDIO POWER
- Loudspeaker: 3 W music power 1.8 W rms
• Headphones: 2 x 0.3 W at 8 Ohm 2 x 0.3 W at 18 Ohm 2 x 0.2 W at 32 Ohm
TUNING
- AST system: automatic multiple sweep search for all radio stations, with automatic programme number assignment.
- Manual tuning: Manual search for one radio station at a time and manual programme number assignment.
- Semi-automatic tuning: automatic search for one radio station at a time, immediately above or below that currently tuned in, and manual programme number assignment.
RADIO - CLOCK FUNCTIONS
- Lcd backlight display: functions: hour, date, year, temperature; radio functions informations;
- Clock/alarm programmable:
- RCC function
PROGRAMME MEMORY
• Total number of programmes: 29
- Programmes available for FM: 24, identified by red LEDs.
- Programmes available for AM: 5, identified by green LEDs.
USER INTERFACE
- Preset programme dial [9]:
comprises 29 LEDs, including 5 green LEDs for AM stations and 24 red LEDs for FM stations.
• Radio frequency dial [8]:
comprises 59 LEDs, all red in colour.
INFORMAZIONE AMBIENTALE ENVIRONMENTAL INFORMATION


The product you have purchased contains extracted natural resources that have been used in the manufacturing process. This product may contain substances known to be hazardous to the environment or to human health. To prevent releases of harmful substances into the environment and to maximize the use of natural resources, SIM2 Multimedia provides the following information on how you can responsibly recycle or reuse most of the materials in your "end of life" product. Waste Electrical and Electronic Equipment (commonly know as WEE) should never be disposed of in the municipal waste stream (residential garbage collection). The "crossed-Out-Waste Bin" label affixed to this product is in your reminder to dispose of your "End of Life" product properly. Substances such as glass, plastic, and certain chemical compounds are highly recoverable, recyclable, and reusable. You can do your part for the environment by following these simple steps:
-
When your electrical or electronic equipment is no longer useful to you, "take it back" to your local or regional waste collection administration for recycling.
-
In some cases, your "end of life" product may be "traded in" for credit towards the purchase of new SIM2 Multimedia equipment.
Call SIM2 Multimedia to se if this program is available in your area.
- If you need further assistance in recycling, Reusing, or trading in your "end of life" product, you may contact us at the Customer Care number listed in your products user guide and we will be glad to help you withy our effort.
Finally, we suggest that your practice other environmentally friendly actions by understanding and using the energy-saving features of this products (where applicable), recycling the inner and outer packaging (including shipping containers) this product was delivered in, and by disposing of a or recycling used properly.
With your help, we can reduce the amount of natural resources needed to procedure electrical and electronic equipment, minimize the use of landfills for the disposal of "end of life" products, and generally improve our quality of life by ensuring that potentially hazardous substances are not released into the environment and are disposed of properly.
- ITALIANO
- ATTENZIONE!
- CON LA RETE ELETTRICA:
- DESCRIPTION OF BUTTONS, KNOBS AND SOCKETS
- SAFETY
- Safety precautions:
- ECOLOGY
- PACKAGING:
- BATTERIES:
- RADIO POWER SOURCES
- MAINS POWER:
- BATTERY SUPPLY:
- PRELIMINARY OPERATIONS
- STEP TO RADIO / CLOCK FUNCTIONS
- If knobs [1] is set to ON is possible:
- If knobs [1] is set to OFF:
- RADIO FUNCTIONS TUNING IN RADIO STATIONS
- N.B. - When listening to FM radio transmissions, rotate the aerial to obtain the best reception quality.
- FM RECEPTION
- Automatic search and store:
- Semi-automatic station search:
- ADJUSTING SOUND
- Adjusting volume
- Adjusting headphones volume
- Adjusting treble
- SWITCHING THE RADIO OFF
- CLOCK FUNCTIONS
- TOUCH BUTTON
- LCD FUNCTIONS
- SETTING CLOCK:
- [HOUR] - [MINUTES] - [SECONDS] - [ZONE]
- SETTING DATE:
- [YEAR] - [MONTH/DAY] - [CALENDAR LANGUAGE]
- TEMPERATURE SETTING
- SETTING ALARM:
- [HOUR] - [MINUTE]
- AVAILABLE ALARM MODE:
- SNOOZE FUNCTION(\*)
- RADIO SOUND AS ALLARM(\*\*)
- MAIN POWER SUPPLY DOWN
- LCD DISPLAY BRIGHTNESS
- SETTING SLEEP MODE
- TECHNICAL SPECIFICATIONS SIGNAL FREQUENCY RANGE
- Standard version:
- AUDIO
- AUDIO POWER
- TUNING
- RADIO - CLOCK FUNCTIONS
- PROGRAMME MEMORY
- USER INTERFACE
- INFORMAZIONE AMBIENTALE ENVIRONMENTAL INFORMATION
Brand : Brionvega
Model : Cubo TS522 RC
Category : Radio