
NE-6200 - Alarm clock radio Clas Ohlson - Free user manual and instructions
Find the device manual for free NE-6200 Clas Ohlson in PDF.


| Product Type | DAB+ Clock Radio |
| Brand | Clas Ohlson |
| Model | NE-6200 |
| Dimensions (W × H × D) | 160 × 130 × 60 mm |
| Weight | 0.53 kg |
| Power Supply | 100–240 V, 50/60 Hz |
| Frequency Range (DAB) | 174–240 MHz |
| Frequency Range (FM) | 87.5–108 MHz |
| Radio Bands | DAB+ and FM |
| Display | LCD with adjustable backlight (3 levels when on, 2 in standby) |
| Alarm | Dual alarms (Alarm 1 and Alarm 2) with selectable source: DAB preset, FM preset, or buzzer |
| Snooze Function | 5-minute snooze, repeatable up to 1 hour |
| Sleep Timer | 10, 30, 60, 70, 80, or 90 minutes |
| Station Presets | 10 presets (shared between DAB and FM) |
| Aerial | Telescopic FM/DAB antenna |
| Automatic Time Sync | Via DAB signal (no manual time setting) |
| Safety Features | Overheating protection (ventilation clearance 10 cm), non-user-serviceable internal parts, auto shutdown on prolonged inactivity |
| Cleaning | Unplug before cleaning; use lightly moistened cloth with mild detergent |
| Disposal | Follow local regulations for electronic waste |
| Accessories Included | Mains adaptor (built-in lead), user manual |
Frequently Asked Questions - NE-6200 Clas Ohlson
User questions about NE-6200 Clas Ohlson
0 question about this device. Answer the ones you know or ask your own.
Ask a new question about this device
Download the instructions for your Alarm clock radio in PDF format for free! Find your manual NE-6200 - Clas Ohlson and take your electronic device back in hand. On this page are published all the documents necessary for the use of your device. NE-6200 by Clas Ohlson.
USER MANUAL NE-6200 Clas Ohlson
natural_image
Line drawing of a modern kitchen appliance with a 'SNOOZE' label and control panel (no readable text beyond branding)Art.no
18-2914
36-5832
Model
NE-6200
NE-6200
Ver. 20140611
clas ohlson
DAB+ Clock Radio
Art.no
18-2914
Model
NE-6200
36-5832
NE-6200
Please read the entire instruction manual before using the product and then save it for future reference. We reserve the right for any errors in text or images and any necessary changes made to technical data. In the event of technical problems or other queries, please contact our Customer Services (see address details on the back).
Safety
- The clock radio should not be taken apart or modified. Never try to open the casing of the clock radio. The casing houses dangerous current-carrying non-insulated components. Contact with these can lead to fire or electric shock.
- Do not cover the clock radio. Adequate ventilation, with a distance of at least 10 cm between ventilation ports and surrounding surfaces, is necessary to prevent the clock radio from overheating.
- The clock radio must only be connected to a 100–240 V, 50/60 Hz electrical supply.
- Make sure that the wall socket to which the mains adaptor is connected is easily accessible, since this is the only way to completely disconnect the clock radio from the mains supply.
- Place the clock radio on a stable, flat surface.
- Never place any form of naked flames (wax candles, tea lights, etc.) on or close to the clock radio.
- Do not place the clock radio where there is a risk of it falling into water or other liquid. Do not place any objects which contain liquid onto the clock radio such as vases, drinks, etc.
- Do not place the clock radio in constant sunlight or near naked flames such as wood stoves, lit candles, etc.
- Place the clock radio in such a way that there is no risk of people tripping over its mains lead.
- The clock radio is designed for indoor use only.
-
Never subject the clock radio to high temperature, dust, heavy vibration, impacts, humidity or moisture.
-
Do not abuse the mains lead. Do not jerk the mains lead, grip and pull the adapter out of the socket when disconnecting the clock radio. Make sure that the mains adaptor does not come into contact with heat, sharp edges or is crushed in any way.
- Unplug the mains adaptor during thunderstorms or if the clock radio is not to be used for a long time.
- The standby switch on the clock radio does not completely disconnect it from the mains. To completely disconnect the clock radio from the mains, the mains adaptor must be unplugged from the wall socket.
- Remember always to protect your hearing. Listening on high volume for prolonged periods can lead to permanent hearing loss.
- Do not use the clock radio if it or its mains lead is damaged in any way.
- The clock radio must only be repaired by qualified service technicians.
- It is completely normal for the clock radio to become warm during use.
- The mains lead must be changed if damaged. This is to prevent the risk of electric shock or fire and should only be carried out by the manufacturer, authorised service facility or a qualified tradesman.
- Do not insert any foreign objects into the clock radio's openings. Doing so may increase the risk for electric shock.
- Do not let children play with the clock radio.
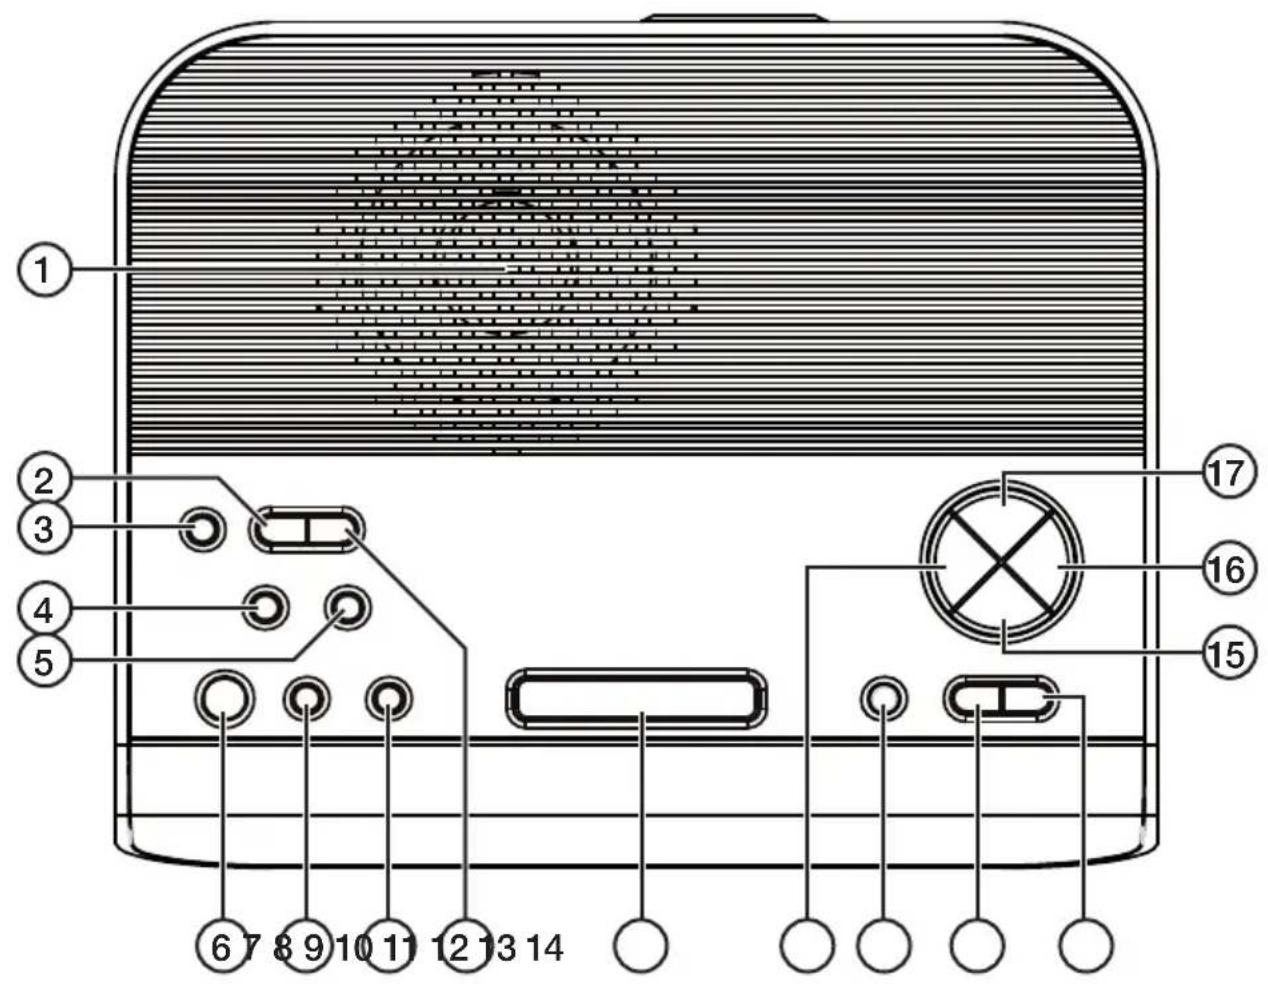
Buttons and functions
natural_image
Simple line drawing of a mechanical device with a central circular component and two hanging weights (no text or symbols)- Speaker
- [ALARM 1]
- [BACKLIGHT] Display
- [MENU] Settings
- [SLEEP] Sleep timer
- [STANDBY/ON]
- [ INFO ] Displays current settings
- [DAB/FM] DAB or FM radio selector switch
- [ALARM 2]
- [SNOOZE] Snooze alarm
- [PRESET] Save station to an available preset slot
- [MUTE] Volume off
- [VOLUME-] Volume up
- [VOLUME+] Volume down
- [SCROLL▼] Scans stations/settings
- [SELECT] Confirms selection
- [SCROLL▲] Forwards scan of stations/settings
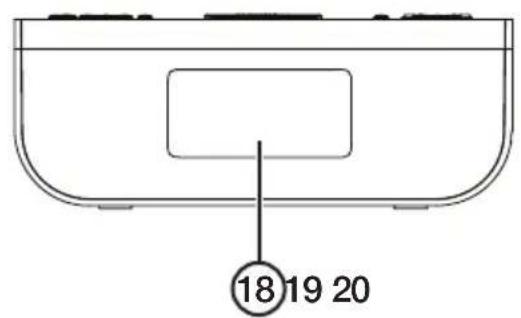
- LCD display
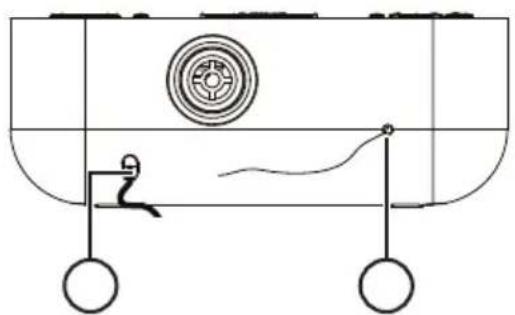
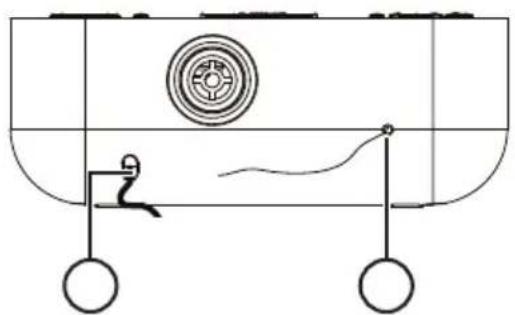
- Mains lead
- Aerial
Operating instructions
DAB Radio
Note: The time setting of the clock radio is automatically set by the DAB radio signal. Setting the time manually is not possible.
Getting the best reception
- Fully extend the FM aerial (20).
- Point the aerial in the direction where the best reception is achieved or try shifting the position of the radio itself.
- For optimal DAB reception, keep the aerial in a completely vertical position, pointing it either upwards or downwards.
On/settings
-
Plug the mains lead into a wall socket. The display will come on and begin flashing after a few seconds.
-
Press [ STANDBY/ON ]. The radio will automatically begin searching for DAB stations. The word "Scanning" will appear on the display along with a progress bar and the total number of stations found.
-
Once scanning is completed, the first detected station will begin playing.
-
Press [SCROLL▼] or [SCROLL▲] in order to toggle to the next saved station.
-
Press [SELECT] to listen.
Note: If no DAB stations are found, the radio will open the station search settings menu.
- Press [SCROLL▼] or [SCROLL▲] to select Manual tune or Autoscan.
Autoscan performs the same scan that was performed when the radio was switched on. This function can be used if you have moved the radio to another location and wish to perform the scan again.
-
Press [SELECT] to begin the selected method of scanning.
-
If Manual tune has been selected, you should press [SCROLL▼] or [SCROLL ▲] to search manually for a favourable DAB station.
-
Once a desirable station has been found, press [ SELECT ] to confirm your selection.
-
Press [ SELECT ] once more to listen to the station.
Secondary DAB services
Sometimes a “>” symbol will be displayed after the name of a station. This means that there are secondary services available for that station.
For example, a sports station may have extra information or commentary.
Press [ SELECT ] to select the secondary service.
DAB display modes
Every time [ INFO ] is pressed in DAB mode, the following information is displayed:

flowchart
graph LR
    A["Time/Date"] --> B["Frequency"]
    B --> C["Audio Bit Rate"]
    C --> D["Signal strength"]
    D --> E["DLS"]
    E --> F["Programme Type"]
    F --> G["Ensemble/Multiplex(Group name)"]
    G --> A
- Time/Date: The time and date. The time and date do not need to be set manually; they will be automatically updated by the DAB station signal. If for some reason the time and date are not updated, "
• Frequency: The frequency of the current station.
- Audio Bit Rate: The amount of data transferred per second.
- Signal Strength: The signal strength indicated by a slide bar.
- DLS: Dynamic Label Segmenting is text sent from the DAB station you are listening to. This can include information about the songs that are playing or other information.
- Programme Type: The type of programme being broadcast. If information about the type of programme is not available, the message “
- Ensemble/Multiplex (Group name): A collection of radio stations that are bundled and transmitted together on the same frequency.
Note: Press and hold in [INFO] for 2 seconds to display the present software in the radio.
FM radio
-
Press [DAB/FM] until "FM" and an FM radio frequency are displayed.
-
Press and hold in [SCROLL▼] or [SCROLL ▲] until “Searching...>” or “Searching...<” is displayed to start an auto search for FM stations. The search stops at the first station it finds. Press “Searching...>” or “Searching...<” again to resume the station search.
-
To search manually, press repeatedly on [SCROLL▼] or [SCROLL ▲].
Saving radio station presets
There are 10 station presets for saving your favourite stations in either FM or DAB mode.
- Tune into the station which you wish to save.
- Hold in [PRESET] until the display shows "Empty preset 1", and the preset number will flash.
- Press [SCROLL▼] or [SCROLL ▲] to select the desired station preset number.
- Press [ SELECT ] to confirm your selection. The display will show "Preset 1 saved" (if preset 1 was used).
Listening to preset radio stations
- Press [PRESET] once.
- Press [SCROLL▼] or [SCROLL ▲] to select the desired station preset number.
- If the preset hsa not been allocated a station, the display will show "Empty preset" and the number of the preset.
Factory reset
Note: All your preset stations will be erased during a factory reset.
If the clock radio has been moved over a long distance such as to another part of the country, your pre-tuned and stored DAB stations might no longer be available. If this is the case, you will need to reset the radio to its factory settings.
- Turn the radio on by pressing the [STANDBY/ON] button.
- Press and hold in [MENU] until "Press SELECT to confirm reset" appears on the display.
- Press [ SELECT ], the display will show "Restarting..." and once the restart is complete the radio will enter standby mode.
- Press [ STANDBY/ON ] to turn the radio back on again and start an automatic scan for DAB radio stations.
Alarm settings
- Press and hold in [ ALARM 1 ] or [ ALARM 2 ] until the display shows “Alarm Setting” and the hour digit of the alarm time flashes.
- Press [SCROLL▼] or [SCROLL ▲] to set the hour and then confirm by pressing [SELECT].
- The minutes display will then begin flashing. Press [SCROLL▼] or [SCROLL ▲] to set the minutes and then confirm by pressing [ SELECT ].
-
The display will show "DAB Preset". Press [ SELECT ] to select the type of wake-up alarm:
-
DAB radio (press [SCROLL▼] or [SCROLL ▲] to select the desired station preset).
- FM radio (press [SCROLL▼] or [SCROLL ▲] to select the desired station preset).
- Buzzer (press [SCROLL▼] or [SCROLL ▲] to select the buzzer tone).
-
Buzzer volume (press [SCROLL▼] or [SCROLL ▲] to set the volume level of the buzzer tone).
-
The settings are now ready to be activated.
Activating the alarm
- To activate the alarm, press either [ ALARM 1 ] or [ ALARM 2 ].
- The current alarm mode will be displayed in the following sequence:

flowchart
graph LR
    A["Alarm Off"] --> B["DAB Preset #"]
    B --> C["FM Preset #"]
    C --> D["Buzzer Tone #"]
- When the display shows your desired alarm mode, release the button to confirm selection and activate the alarm. The corresponding alarm symbol will appear on the display.
Deactivating the alarm
To deactivate the alarm, press [ ALARM 1 ] or [ ALARM 2 ] until "Alarm off" is displayed.
Automatic alarm repeat/snooze
Automatic repeat
When the alarm sounds, press [ STANDBY/ON ] once to shut the alarm off. The alarm will automatically repeat each day at the set time as long as the alarm symbol is displayed.
Snooze
When the alarm sounds, press [SNOOZE] to temporarily switch the alarm off for 5 minutes. The snooze function can be repeated for up to one hour, and then the alarm will be switched off automatically.
Note:
The current alarm has priority, so if a second alarm is set to go off whilst you are "snoozing", the second alarm will not function. However, if the first alarm is switched off before the second alarm is due to go off, the second alarm will sound as programmed.
Sleep timer
The sleep function allows you to programme the clock radio to switch itself off after a period of 90, 80, 70, 60, 30 or 10 minutes.
- Press the [SLEEP] button to select a duration:

flowchart
graph LR
    A["90"] --> B["80"]
    B --> C["70"]
    C --> D["60"]
    D --> E["30"]
    E --> F["10"]
    F --> G["Off"]
-
When the desired sleep duration is displayed, release the [SLEEP] button to activate the sleep function.
-
1 appears on the display, "1" represents 10 minutes.
Display backlight
- When the clock radio is switched on: press [BACKLIGHT] repeatedly to adjust the brightness of the display in the following sequence: Backlight off-Backlight 01-Backlight 02-Backlight 03.
- In standby mode there are only two modes for the backlight: Backlight off-Backlight 01.
Care and maintenance
• Always unplug the product from the wall socket before cleaning.
- Clean the product using a lightly moistened cloth. Use only mild cleaning agents, never solvents or corrosive chemicals.
- If the clock radio is not to be used for an extended period, it should be unplugged and stored in a dry and dust-free location.
Troubleshooting guide
| The clock radio does not come on. | Make sure that the mains lead and its plug are intact and undamaged.Check that the mains lead is properly plugged into an electrical socket.Check that the electrical socket is live. |
| No sound. Check the volume. Check that the MUTE function is not activated. | |
| Poor radio reception. Try adjusting the aerial or moving the radio to another location.Perform a factory reset; refer to the Factory reset section above. | |
Disposal
This product should be disposed of in accordance with local regulations. If you are unsure how to proceed, contact your local council.
Specifications
Power supply 100–240 V, 50/60 Hz
Frequency range DAB: 174–240 MHz FM: 87.5–108 MHz
Size 160 × 130 × 60 mm
Weight 0.53 kg
DAB+ klokkeradio
Art.nr. 18-2914 Modell NE-6200
36-5832 NE-6200
natural_image
Simple line drawing of a boat hull with a circular emblem and two hanging legs (no text or symbols)Postal 10 – 13 Market Place
Kingston Upon Thames
Surrey
KT1 1JZ
Deutschland
Kundenservice
- DAB+ Clock Radio
- Safety
- Operating instructions
- DAB Radio
- Getting the best reception
- On/settings
- Secondary DAB services
- DAB display modes
- FM radio
- Saving radio station presets
- Listening to preset radio stations
- Factory reset
- Alarm settings
- Activating the alarm
- Deactivating the alarm
- Automatic alarm repeat/snooze
- Automatic repeat
- Snooze
- Note:
- Sleep timer
- Display backlight
- Care and maintenance
- Disposal
- Specifications
- DAB+ klokkeradio
- Deutschland
Brand : Clas Ohlson
Model : NE-6200
Category : Alarm clock radio