IN4-9 - Cooker PKM - Free user manual and instructions
Find the device manual for free IN4-9 PKM in PDF.


User questions about IN4-9 PKM
0 question about this device. Answer the ones you know or ask your own.
Ask a new question about this device
Download the instructions for your Cooker in PDF format for free! Find your manual IN4-9 - PKM and take your electronic device back in hand. On this page are published all the documents necessary for the use of your device. IN4-9 by PKM.
USER MANUAL IN4-9 PKM
natural_image
Four white circular outlines on a dark background, arranged in a 2x2 grid (no text or symbols)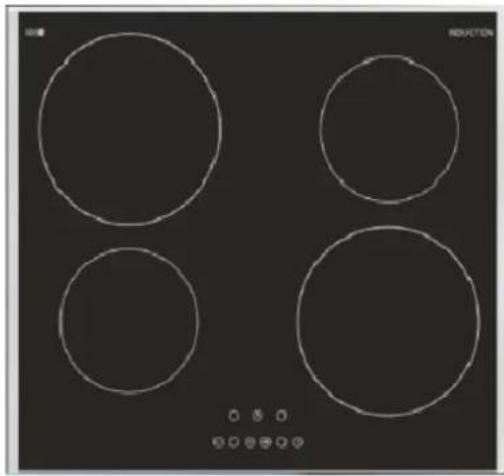
natural_image
Four white circular outlines on a black background, resembling stylized kitchen or electrical lamps (no text or symbols)English language on page 26ff.
text_image
35 50 L2 L1 N Nnatural_image
Industrial induction lighting panel with four white circles on a black background, no text or symbols present.natural_image
Pure geometric shapes including circles, squares, and rectangles without any text or symbolsnatural_image
Two identical cooking pots with a crossed-out black X mark, no text or symbols present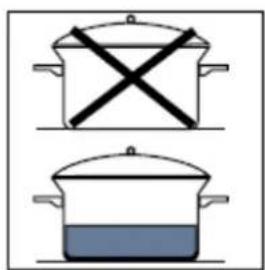
text_image
Diagram showing two cooking pots with crossed-out x-marks and liquid, likely indicating a cooking or storage method.text_image
Symbolic image showing a crossed-out X over a background with fish and leaves, indicating a prohibition or rejection concept.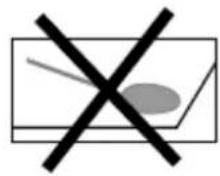
natural_image
Simple line drawing of a teach with visible vein patterns (no text or symbols)PE<= Polyethylen
PS< = Styropor
PP< = Polypropylen
| CHAPTER | SUBJECT | PAGE |
| 1. | Preface | 27 |
| 2. | Explanation of the signal words | 28 |
| 3. | Safety instructions | 28 |
| 4. | Installation | 31 |
| 5. | Control panel | 36 |
| 6. | Operating of the appliance | 38 |
| 7. | Cleaning and maintenance | 41 |
| 8. | Trouble shooting | 42 |
| 9. | Technical data | 44 |
| 10. | Waste management | 44 |
| 11. | Guarantee conditions | 46 |
Technical modifications as well as misprints shall remain reserved.
Please read this manual carefully before you use or install the appliance.
EU - Declaration of Conformity
★ The EU Conformity Declarations concerning the products, which are described in this instruction manual, are available.
★ The relevant documents can be requested from the final retailer by the competent authorities.
The figures in this instruction manual may differ in some details from the current design of your appliance.
Nevertheless follow the instructions in such a case.
1. PREFACE
Dear customer
We would like to thank you for purchasing a PKM - product from our wide range of domestic appliances.
When you are familiar with this instruction manual operating the appliance will not cause you any problems.
Before your appliance was allowed to leave manufacturer's works, it was carefully checked according to our safety and operating standards.
If your appliance is visibly damaged do not connect it to the power supply.
Contact the shop you purchased the appliance at.
- The appliance is intended for private use only.
- The appliance is intended for cooking in a private household only.
- The appliance is intended for indoor-use only.
- Only operate the appliance in accordance with its intended use.
- Do not allow anybody who is not familiar with this instruction manual to operate the appliance.
- Retain this manual in a safe place for future reference.
- If you transfer the appliance to a third party, also hand over this instruction manual.
Strictly observe the safety instructions so you will enjoy your appliance for a long period of time.
Any modifications, which do not influence the functions of the appliance. shall remain reserved by the manufacturer.
Please dispose of the packing with respect to your current local and municipal regulations.
WARNING!
While unpacking, the packaging materials (polythene bags, polystyrene pieces, etc.) should be kept away from children. CHOKING HAZARD!
Strictly observe the signal words this instruction manual contains.
⚠️ DANGER! indicates a hazardous situation which, if ignored, will result in death or serious injury.
CAUTION! indicates a hazardous situation which, if not avoided, may result in minor or moderate injury.
⚠ WARNING! indicates a hazardous situation which, if ignored, could result in death or serious injury.
NOTICE! indicates possible damage to the appliance.
Pictograms
RISK OF ELECTRIC SHOCK indicates a possible risk of electric shock when you do not observe the corresponding information and/or warning.
RISK OF FIRE indicates a possible risk of fire when you do not observe the corresponding information and/or warning.
3. SAFETY INSTRUCTIONS
TO THE ATTENTION OF CARDIAC PACEMAKER AND ACTIVE IMPLANT USERS:
The appliance complies with the current electromagnetic interference regulations. It fully complies with all legal requirements (2004/108/EG). It is designed to not interfere with the functions of other electric appliances, provided they comply with the identical regulations.
DANGER! THIS INDUCTION HOB GENERATS MAGNETIC FIELDS ROUND ITS CURRENT SETTING.
Your pacemaker must be designed in compliance to the corresponding regulations so it will not cause any interferences between the pacemaker and the appliance. Consult the manufacturer of your pacemaker to decide whether it meets the forced requirements or if any incompatibilities do exist.
Store this manual in a safe place so you can use it whenever it is needed. Strictly observe the instructions to avoid damage to persons and property.
The instructions and descriptions this manual contains are designed for various types of cookers. So the manual may contain some descriptions of functions or accessories which are not part of your current appliance.
▶ Check the technical periphery of the appliance! Do all wires and connections to the appliance work properly? Or are they time-worn and do not match the
technical requirements of the appliance? A check-up of existing and newly-made connections must be done by an authorized professional. All connections and energy-leading components (also wires inside a wall) must be checked by a qualified professional. All modifications to the electrical mains to enable the installation of the appliance must be performed by a qualified professional.
This appliance may be operated by children aged from 8 years and above as well as by persons with reduced physical, sensory and mental capabilities or lack of experience and knowledge if they are supervised or have been instructed concerning the safe use of the appliance and do comprehend the hazards involved. Children must not play with the appliance. Cleaning and user-maintenance must not be carried out by children unless they are supervised.

Energy supply

- Disconnect the appliance from the mains before you clean or maintain it.
- The appliance must always be grounded and protected corresponding to the requirements of your local energy supplier. The main current circuit must be equipped with a safety shut-down device.
- All modifications to the electrical mains to enable the installation of the appliance must be performed by a qualified professional.
- In case of an event caused by a technical malfunction, disconnect the appliance from the mains. Report the malfunction to your service centre so it can be repaired.
- Do not use the appliance if it has got a malfunction. Any malfunction must be repaired by a qualified professional.
- Do not carry out any modifications to your appliance.
- If the power cord is damaged, it must be replaced by the manufacturer or its service agent or a similar qualified person in order to avoid any kind of hazard.
- Do not repair the appliance alone. Repairs carried out by unauthorized persons can cause serious damage. Always contact the nearest service centre. Only original spare-parts should be used for repairs.

Fire protection

WARNING!
Unattended cooking with fat or oil can be dangerous and may result in fire. NEVER try to extinguish a fire with water, but switch off the appliance and then cover flame e.g. with a lid or a fire blanket.
-
The room the appliance is installed in must be dry and well-ventilated. Make also sure the room is well-ventilated to the outside air. When the appliance is installed, an easy access to all control elements is needed.
-
Cooker-hoods should be installed according to their manufacturers' instructions.
- Always supervise the appliance if you use it. Oil and fat can catch fire if they are overheated or slop out of the cookware.
- Do not install the appliance close to curtains or upholstered furniture.
- Do not store any objects on the hob. RISK OF FIRE!
- Household equipment and connection leads must not touch the hot oven or the hob as the insulation material is usually not heat-resistant.
- The adjacent furniture and all materials used for the installation must be able to withstand a temperature of at least 85^ C above the temperature of the room the appliance is installed in.
- Do not switch on the hob before you have put a cookware on it.
Child safety
- Keep children away from the appliance. Touching the appliance while it is operating can cause serious burns.
- Children must not play with the appliance.
- Always supervise children if they are near the appliance.
Final safety instructions
- Never use a steam cleaner to clean the appliance. The steam will cause serious damage to the electric components of the appliance. Risk of electrical shock!
- Metal-made items such as knives, forks, spoons and cooking tops should not be put on the appliance, because they may become hot.
- The appliance is not allowed to be operated with an external timer or a separate remote-control-system.
- If any cracks occur on the glass-ceramic, switch off the appliance and disconnect it from the mains. Risk of electrical shock!
- This appliance is designed for the use by adults only.
- The appliance is not intended for commercial purposes.
- Do not use the appliance for camping.
- Do not use the appliance in public transport.
- The appliance is designed for indoor use only.
- This appliance complies with the current European safety legislation. We do wish to emphasize that this compliance does not negate the fact that the surfaces of the appliance will become hot while operating and will retain and emit heat even if it has stopped operating.
WARNING!
Do not use a socket board or a multi socket when using 220–240 V/50 Hz alternate current (AC). All electrical connections which may be damaged must be repaired by a qualified professional. All repairs should be performed by your authorized after sales service.
Unpacking and positioning
- Unpack the appliance carefully. Dispose of the packaging as described in chapter waste management.
- Completely remove the transport-protection. Be very careful and do not use any aggressive or abrasive detergents to remove residuals of the transport-protection.
- Check that the appliance and the power cord are not damaged.
- Connect the appliance to a dedicated socket only.
- Do not install the appliance in a place where it may come in contact with water or rain; otherwise the insulation of the electrical system will be damaged.
- Connect the appliance to the mains properly.
Installation / hob
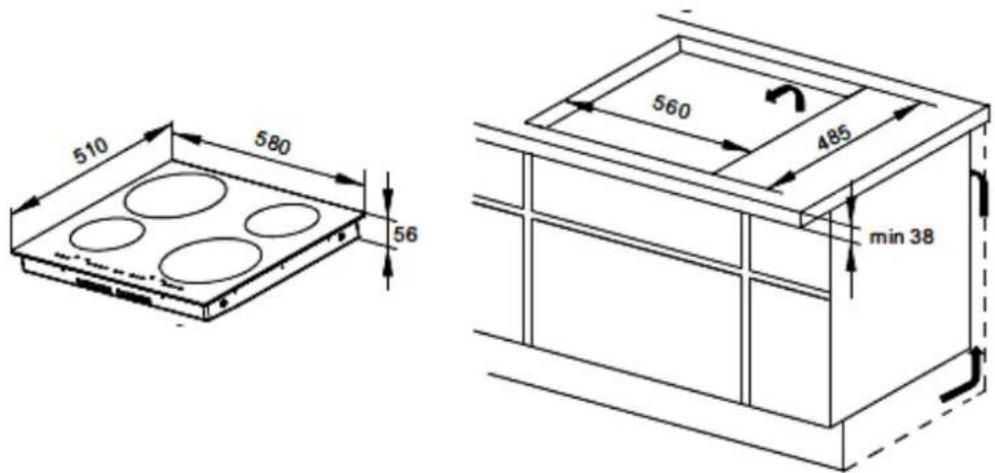
1. Cutting the cupboard
text_image
510 580 56 560 485 min 38There must be a minimum distance of 100 mm between the hole and the wall or an adjacent cupboard.
2. Above a drawer
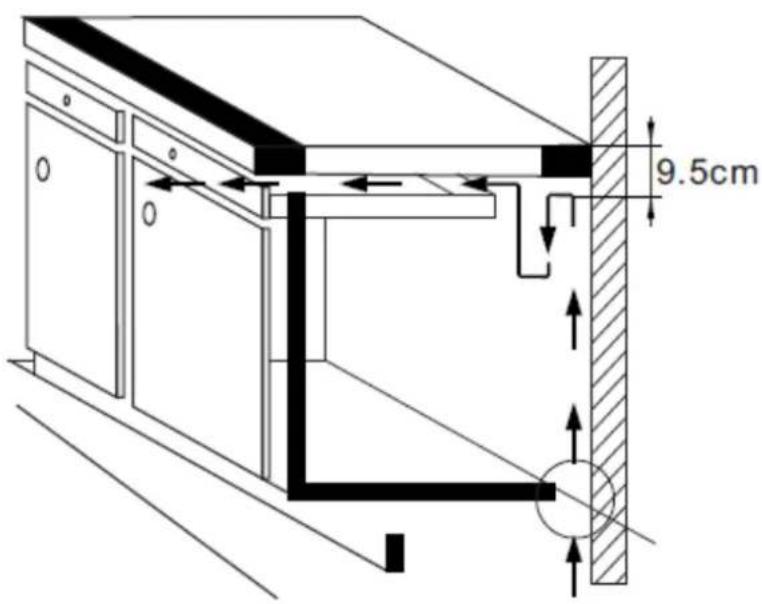
The electric circuit has to be cooled down by a permanent ventilation of fresh air as depicted below. The data of the depiction has carefully to be observed. The bigger the space between the appliance and the cupboard situated below is, the better the appliance will work.
text_image
9.5cmYour induction hob needs an air inlet at its back and an air outlet at its front.
3. Above a cupboard with door
When the air outlet is situated below the hob:
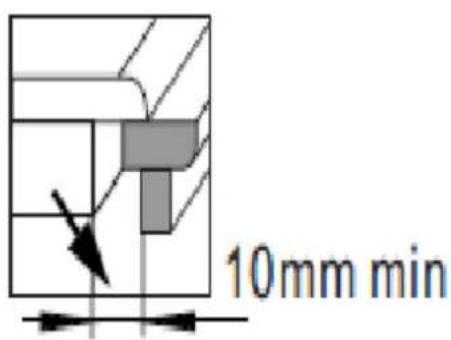
An air outlet grill should be placed between the hotplate and the door of the cupboard. It will easily be installed if the cross bar is small.
text_image
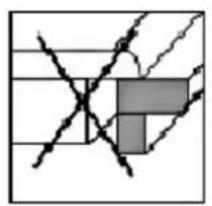
10mm minIf the cross bar is flush-mounted rectangular or the hotplate is closed off, make a bevelled cut for enabling the air outlet.
natural_image
Abstract geometric pattern with intersecting lines and a shaded rectangle (no text or symbols)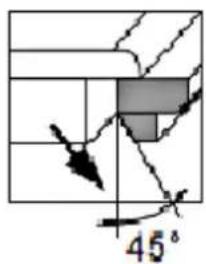
text_image
45°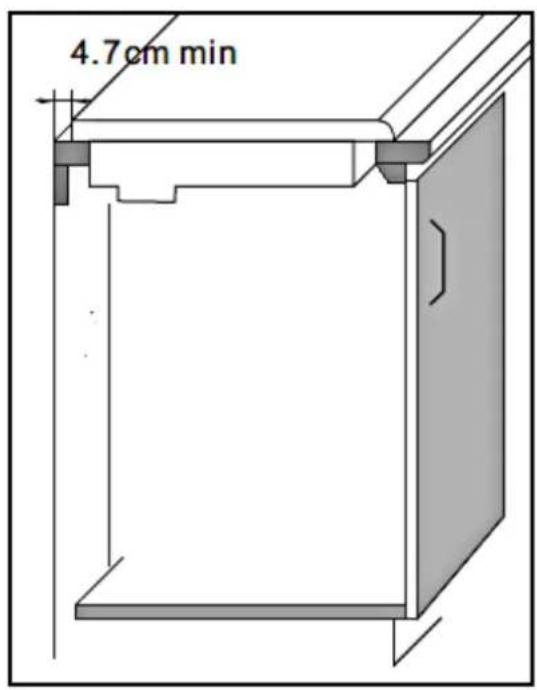
text_image
4.7cm min- Above an oven
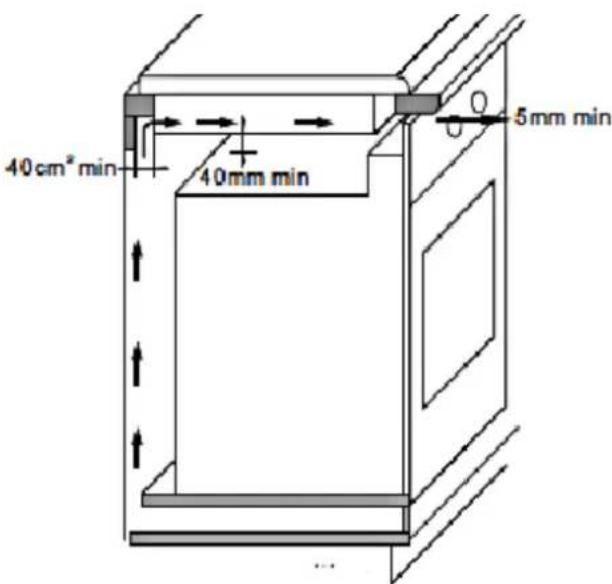
The hotplate can be built-in above an oven. The relevant oven must be equipped with an integrated cooling system. Your appliance must be properly ventilated after being built-in. Make a ventilation opening of 40cm^2 if need be.
text_image
40cm² min 40mm min 5mm minDo not install the appliance above a dish washer, a washing machine, a fridge or a freezer.
NOTICE!
For information about the distance between the hob and a cooker-hood look at the instruction manual of the manufacturer.
Preparation and fixing
-
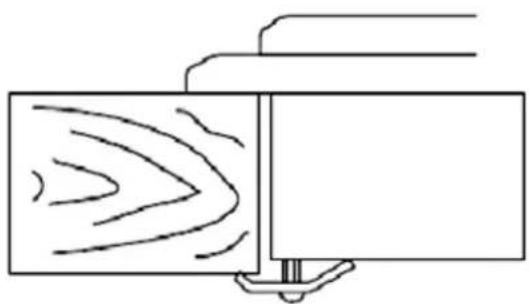
Remove the adhesive paper and stick the seal provided with the appliance all around the hob.
-
Place the hob into the hole in the cupboard pressing it firmly so that it is closed off by the seal.
natural_image
Pure diagram of fluid flow around a rectangular object with a handle, no text or symbols present-
Fix the four clips on the bottom of the hob into the holes at the corners of the cupboard.
-
Note - Some appliances do not need the clips.

Electrical connection

DANGER!
The appliance must be connected to the mains by a qualified professional, who is familiar with and adheres to the local requirements and supplementary regulations of your electricity supplier.
-
When the socket is not accessible for the user or a fixed electrical connection of the appliance is required, an all-pole disconnecting device must be incorporated during installation. Disconnecting devices are switches with a contact opening distance of at least 3 mm. These include LS-switches, fuses and protectors (EN 30335).
-
The cable must be able to withstand a temperature of 120^0 C. The appliance must be grounded properly. Switch off the current before installation.
-
Read the information on the model plate and the connection diagram.
Technical Data
| VOLTAGE | TOTAL POWER | NOMINAL POWER PER PHASE | PROTECTION |
| 400V | 7,2 KW | 31,5 A | 32 A |
The connection work must be carried out by a qualified professional only.
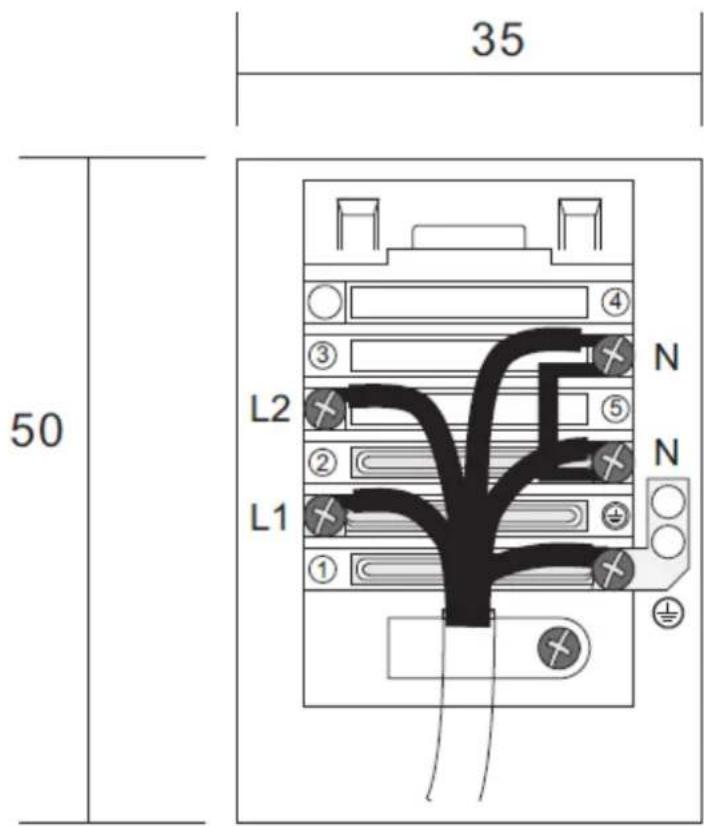
The connection diagram is also on the cover of the connection box. Remember that the connection wire should match the connection type and the power rating of the oven.
The connection cable must be secured in a strain-relief clamp.
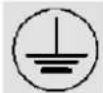
Connect the safety circuit to the connection box terminal marked with
- When you open the connector box cover, you will find the connector and the label.
text_image
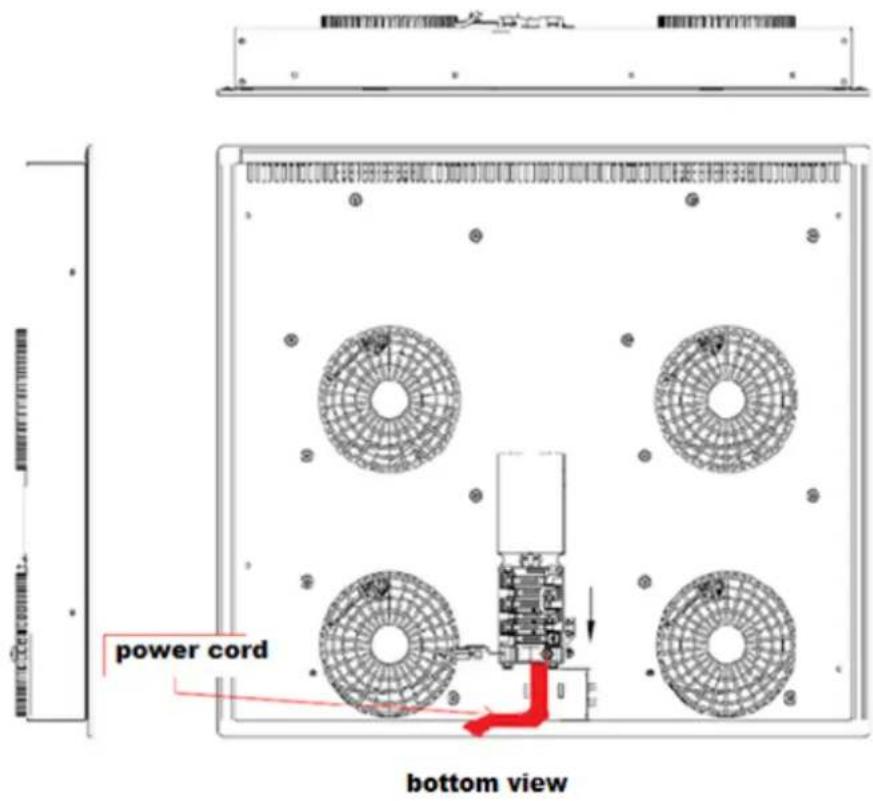
35 50 L2 L1 N N- Connect the power cord to the connector box according to the diagram.
text_image
power cord bottom view- CONTROL PANEL
natural_image
Four white circles arranged in a 2x2 grid on a black industrial stove burner, with no text or symbols present.Caption of the hotplate

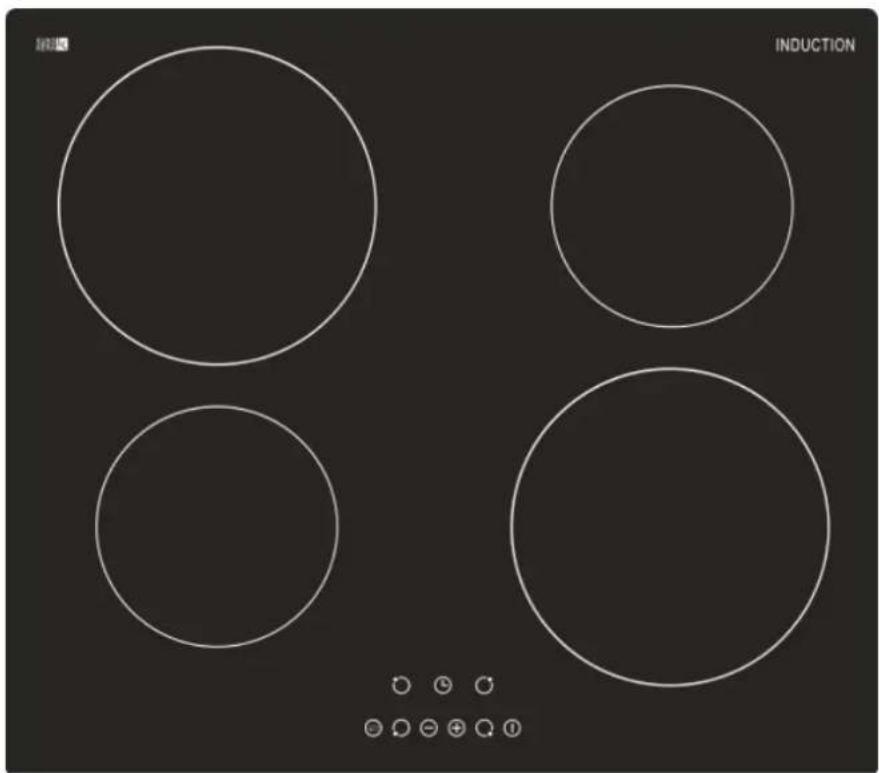
Ring indicators: show the position of each ring on the hotplate.

natural_image
Pure electrical circuit symbol symbols without any text or labelsPower displays: show the power-setting each ring is working with.

text_image
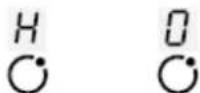
9 9 9 9 9 9 ◯◯◯◯◯◯-+Residual heat indicator: if a cooking procedure is finished, an H light and an 0 light will alternately flash. Now you can perceive if a particular ring is still hot and should not be touched. This indication may continue until the ring has cooled down.
+ and - sensors: use them for selecting the power you want the rings to work with (from 0 to 9). You can also adjust the timer with the + and - sensors.

Booster sensor: if you touch a ring indicator 2 seconds the corresponding ring will immediately be set to its maximum power, as well as at the beginning of a cooking-procedure and in the course of a cooking-procedure.
If you touch the very sensor, which controls the booster function, while the booster function is running the power of the corresponding ring is readjusted to the level it had operated before the booster function was activated.
On / Off sensor: you can directly switch on/off the appliance without using any other sensor.

Safety sensor and display: blocks all the other sensors so children are not able to play with them. You can also simultaneously perceive all the other functions, which
are currently running. None of the other sensors can be activated if the safety sensor is activated. This will be indicated on the entire control panel.
Touch the sensor for approx. 3 seconds to deactivate the safety lock.

Timer sensor: for setting a cooking time of 0 to 99 minutes on the selected ring. Touch the timer sensor first, then use the + and - sensors for increasing or decreasing the cooking time. When you have adjusted a cooking time, choose the ring you want to operate by use of the timer.

Timer displays: display the cooking time on the selected ring.
99
6. OPERATING OF THE APPLIANCE
1. Power and savings
Induction hobs heat up food much more quickly than other systems do. As the heat is produced in the cookware itself, less energy is lost and the performance of the appliance becomes better. Induction-based cooking uses only half the energy as other systems do. This lower consumption makes induction-based cooking the cheapest of all electric-based cooking systems.
2. Safety
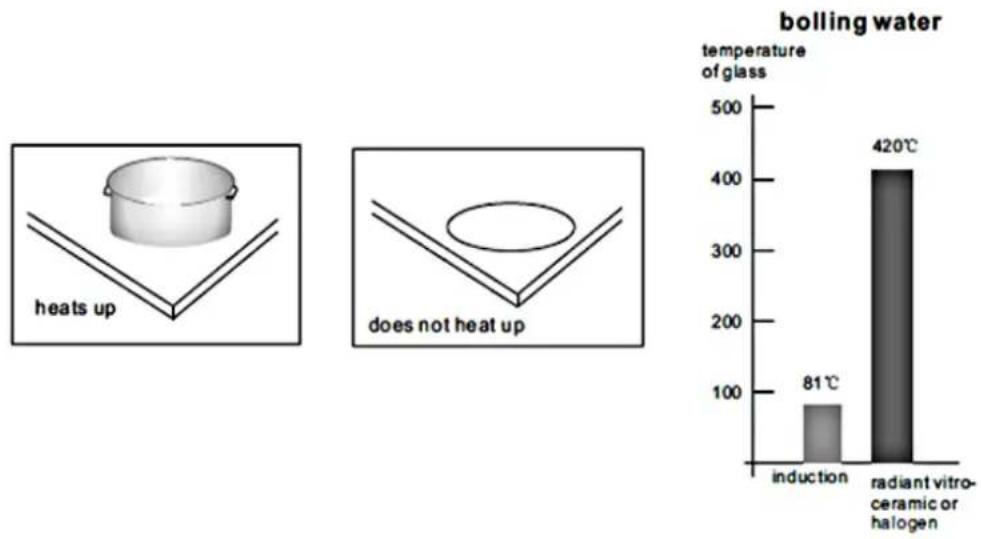
The risk for getting burnt by the hot glass-ceramic is minimal. As the heat is produced in the cookware itself, the glass hardly heats up at all. The induction rings have got a cookware detection system, i.e. the rings will not work unless there is a suitable cookware on it.
bar
bolling water | Condition | Temperature (°C) | |---|---| | induction | 81 | | radiant vitro-ceramic or halogen | 420 |- Switching on a ring
Place your fingertip on he On/Off sensor. Remember there is a safety device to prevent children from playing with the controls which is deactivated by leaving your fingertip on the control for three seconds. If the safety sensor is running or if you use the appliance for the first time, you should deactivate the safety device first.
Touch the timer sensor if you want to use it for cooking.
Touch the + and - sensors for adjusting the cooking time.
Make sure you touch the sensor corresponding to the ring you wish to use.
Adjust the power of the selected ring by touching the + and - sensors.
Important
If all the rings are turned off, the appliance will stop operating within a few seconds. An H displays, which rings are still hot.
You can activate the safety sensor whenever you wish by holding your fingertip on the sensor for three seconds.
If any items are left on the sensors the appliance will beep several times and then stop operating.
The appliance will automatically stop operating after 2 hours, even if a ring is still working but the settings were not changed in any way within these 2 hours.
4. Timer function
The timer function can merely control one ring at the same time. When the timer function is activated this is indicated at the power display of the corresponding ring by an illumination of the display. If you want to cancel the timer function, use the - sensor to decrease the setting to O.
5. Booster function
All rings can be used with the booster function, which sets the ring to its maximum power by running the ring at maximum power for 5 minutes. Afterwards the ring runs by a setting which maintains this temperature. This takes place automatically. The programming procedure is as the following:
→ Touch the sensor of the ring you want the booster function to run with for 2 seconds.
Now the corresponding display shows the status signal P and the ring is driven to its maximum temperature as long as it is needed.
When the heating period is finished you hear a short sonic signal (beep) and the power display shows the level, which is needed to maintain the temperature. The ring now is operating within its conventional parameters.
If you touch the ring indicator while the booster function is running, the booster function will be cancelled. Now you can choose the power settings 0 – 9 again. If at a ring the booster function of which was activated has been adjusted a power setting before, this power setting will be readjusted if you cancel the booster function.
Cookware
Use the supplied magnet to verify whether any cookware is suitable to be used on an induction hob.
If the magnet adheres on the bottom of the cookware, the cookware can be used on an induction hob.
The induction ring display itself also indicates whether the cookware is suitable.
If the power indicator flashes and shows the status signal E0, the cookware will not be suitable and the ring will not be neatened up.
If the cookware has got a very small base, the ring indicator will also flash and the ring will not be neatened up., even if the metal is suitable. We recommend not to use any cookware with a smaller base than described below (in mm):
| ring 280 → | 160 diameter | ring 210 → | 180 diameter |
| ring 180 → | 160 diameter | ring 150 → | 120 diameter |
Glass, ceramic, earthenware, aluminium, copper and non-magnetic stainless steel are generally unsuitable.
Enamelled stainless steel cookware with a special base suitable for induction cooking may be used. Make sure the cookware is labelled for the use on an induction hob.
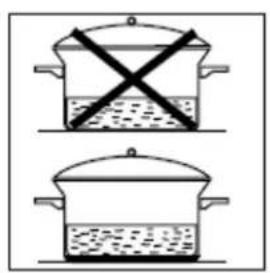
Induction-based heat is very rapidly generated in the base of the cookware itself. So never heat up an empty cookware.
Different types of cookware are suitable for the use on an induction hob, but induction cooking works best, when you use cookware with a thick base, because the energy is very efficiently used and distributed then.
text_image
Diagram showing two cooking pots with crossed-out black X marks indicating a cooking or storage procedure.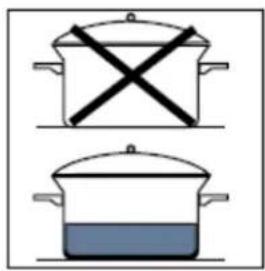
text_image
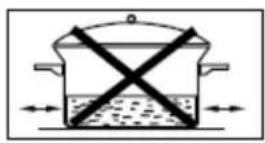
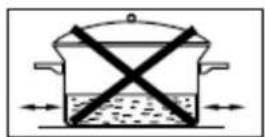
Diagram showing two cooking pots with crossed x marks, one labeled in black and the other in blue.Avoid scrapping the glass ceramic of the hob when moving the cookware.
Lift the cookware for moving it.
Do not leave any cooking utensils on the hob when it is operating. It could detect them as cookware and heat them up.
Cutlery will ordinarily not be detected as cookware, but larger utensils may be detected as cookware.
Keep an eye on pressure cookers when using the higher induction settings. Pressure cookers heat up very quickly.

text_image
Symbolic image showing a crossed-out black X over a background with faint text and symbols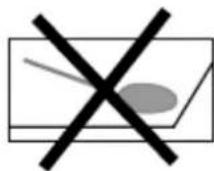
7. CLEANING AND MAINTENANCE
WARNING!
Switch off the appliance and set all rotary knobs to position 0 before you clean the appliance. The appliance must be cooled down completely.
WARNING! Do not use a steam cleaner. Risk of electric shock! The steam can damage the electric components of the appliance.
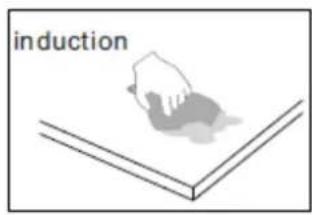
Spills and splashes will not harden and stick on the glass because it hardly heats up. Both glass-ceramic and induction rings should be cleaned of any spills and splashes as soon as possible.
Slight stains can be removed by using kitchen paper or a cloth.
More resistant strains will need a specific product for cleaning ceramic-glass. Follow the instructions of these products.
text_image
induction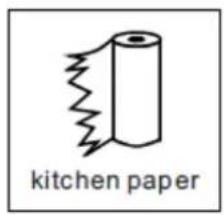
text_image
kitchen paper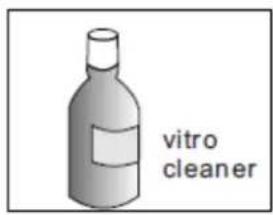
text_image
vitro cleaner
natural_image
Illustration of a cloth with visible grain texture (no text or symbols)Do not use abrasive products or any cleaning powder because the hob could be scratched.
Do not use a steam cleaner.
If any cracks appear on the surface of the glass, unplug the appliance immediately. Do not operate any part of the hob until a new ceramic-glass surface has been installed.
Do not use any abrasive detergents! Do not use any organic detergents! ^3
Do not use essential oils!
Replacing of the power cord

DANGER!
The power cord must be replaced by a qualified and authorized professional only.
8. TROUBLE SHOOTING
ERROR
CAUSES
MEASURES
The appliance does not work at all.

Break in the power supply

Check the household fuse box. If there is a blown fuse replace it with a new one
The fan keeps running for a few minutes after the appliance was switched off.

The electronic components are cooling down.

Normal operating procedure.
The appliance makes faint clicking noise when operating.

The noise is caused by the power when shared between two induction coils.

Normal operating procedure.
Cookware generates noise during cooking.

Cookware generates noise caused by vibrations due to inducted power.

Normal operating procedure.
The hob does not work at all and different messages appear.

The electronic circuit is not working correctly.

Contact the aftersales service..
Error codes
| Fehlercode | Mögl. Ursachen | Maßnahmen |
| E0 | No cookware on the relevant cooking zone.Use of improper cookware. | Put proper cookware on the cooking ring. |
| E1 | Cookware is not detected by the inspection signal. | Please contact your aftersales service for detailed technical inspection. |
| E2 | Temperature sensor open or short circuit. | Please contact your aftersales service for detailed technical inspection. |
| E3/E4/E5 | The appliance is running under dangerous operating conditions. | Disconnect the appliance from the mains.Restart the appliance after several minutes. |
| E6 | The temperature of the IGBT ^4 sensor is too high.This code is activated, when the temperature has reached 99 ^0 C. | Please contact your aftersales service for detailed technical inspection. |
| E7 | IGBT temperature sensor open or short circuit. | Please contact your aftersales service for detailed technical inspection. |
| E8 | Appliance receives invalid signals. | Please contact your aftersales service for detailed technical inspection. |

If the appliance shows a malfunction not noted on the schedule above or if you have checked all items on the above schedule but the problem still exists, please contact a service department.
DANGER!
DO NOT REPAIR THE APPLIANCE YOURSELF. If your appliance does not operate correctly, contact your aftersales service.
9. TECHNICAL DATA
| Model | IN 4-9/IN 4-9R |
| Cooking zones | 4 |
| 2*210 mm | 2000W / 2400W booster |
| 2*160 mm | 1600W / 2000W booster |
| max. power | 7200W |
| Net weight | 9,00 kg |
10. WASTE MANAGEMENT
Old appliances should not simply be disposed of with normal household waste, but should be delivered to a collection and recycling centre for electric and electronic waste.
Materials used inside the appliance are recyclable and are labelled with information concerning this. By recycling materials or other parts from used devices you make a significant contribution to the protection of our environment.
Packaging
The packaging is recyclable. The recommended modus operandi is:
→ Dispose of any paper and cardboard into the corresponding containers.
→ Dispose of any plastics into the corresponding containers.
If a suitable container is not available in your residential area, you can dispose of these materials with your domestic waste; but it would be better to take it to an appropriate facility for waste recycling.
WARNING!
While unpacking, the packaging materials (polythene bags, polystyrene pieces, etc.) should be kept away from children. CHOKING HAZARD.
Materials with this symbol on are recyclable.


PE<=Polyethylene
PS< = Styrofoam
PP< = Polypropylene
These materials can be recycled when you depose them of in a suitable collecting container of your local facilities.
Appliance
Do not dispose of the appliance with your domestic waste.
Waste separation is essential so that the single components of the appliance will be recycled according to their appropriate use.
Do not dispose of electric appliances as unsorted domestic waste. Use the local or municipal facilities for waste separation.
If electric appliances are disposed of at landfills, substances which are dangerous to one's health can get into the ground water. Such substances will become part of the food chain and cause damage to your health.
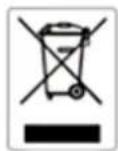
Please contact your local authorities to receive further information regarding waste separation.
Safe disposal
Please help our environment! Dispose of old appliances and their packaging in accordance to your national, local and municipal regulations concerning waste management.
Old appliances are not unusable waste. A lot of valuable resources can be gained by serious waste management.
Before you dispose of an old appliance, render it inoperative.
-
Always remove the plug from the socket. Afterwards cut off the power cord directly at the appliance. Dispose of the power cord with the plug immediately.
-
Remove the door completely so that children are not able to get into the appliance; as this endangers their lives!
The above mentioned materials are environmental-friendly and recyclable.
Receive more detailed information from your retailer or your local and municipal facilities.
11. GUARANTEE CONDITIONS
Guarantee conditions for large electric appliances PKM GmbH & Co. KG, Neuer Wall 2, 47441 Moers
This appliance was made and checked according to the most modern production methods. This appliance includes a 24-month guarantee for the consumer given by the manufacturer, dated from the day of purchase, referring to its flawless material-components and its faultless fabrication.
The consumer is accredited with both the dues of the guarantee given by the manufacturer and the vendor's guarantees. These are not restricted to the manufacturer's guarantee.
The guarantee is valid without prejudice to stringent legal liability regulations, e.g.
the product liability law, in the case of malice and of wanton negligence in view of harm of life, body or health by PKM or its agents.
The right on the guarantee is not granted, when the purchase is made in the course of a commercial activity.
The guarantee claim has to be verified by the vendee by submitting a proof of purchase including the date of purchase and/or the date of delivery. This has to be reported to us or to our after sales service in the Federal Republic of Germany.
This report has to be made immediately after the detection and within 24 months after the delivery to the first ultimate vendee.
The guarantee for our appliances is valid under the following conditions:
Defects of the appliance which are verifiably caused by material or fabrication deficiency will be rectified free of charge by our after sales. When the defect appears within 6 months we suppose that there is a material or fabrication deficiency.
Within the guarantee we will repair deficient components free of charge using components of our own choice or they will be replaced by flawless components.
Appliances, which can, due to their dimensions, be reasonably transported by an automobile, should be given over or submitted to our after sales
If the repair work is refused by us or if the repair work finally fails, the old appliance, if requested, will be replaced by an appliance of the same kind, quality and type within the period of guarantee. If the old appliance is no longer produced at the time the defect occurred, PKM will be entitled to deliver a similar appliance.
The exchange of the appliance principally takes place in the shop the first vendee bought the appliance in unless the appliance is too large to be transported by the vendee.
The guarantee does not establish any entitlement to withdraw from the purchase contract or for a price reduction.
Replaced components or exchanged appliances demise to us as our property.
The guarantee claim does not cover:
- fragile components as plastic, glass or bulbs;
- minor modifications of the PKM-products concerning their authorized condition if they do not influence the utility value of the product;
- damage caused by handling errors or false operation;
- damage caused by aggressive environmental conditions, chemicals, detergents;
- damage caused by non-professional installation and haulage;
- damage caused by non common household use;
- damages which have been caused outside the appliance by a PKM-product unless a liability is forced by legal regulations.
The validity of the guarantee will be terminated if:
-
the prescriptions of the installation and operation of the appliance are not observed.
-
the appliance is repaired by a non-professional.
-
the appliance is damaged by the vendor, the installer or a third party.
-
the installation or the start-up is performed inappropriately.
-
the maintenance is inadequately or incorrectly performed.
-
the appliance is not used for its intended purpose.
-
the appliance is damaged by force majeur or natural disasters, including, but with not being limited to fires or explosions.
The guarantee claims neither extend the guarantee period nor initiate a new guarantee period. The guarantee period for installed replacement parts ends with the guarantee.
Provided that a product-related malfunction is not covered by this guarantee the vendee has to bear the cost, when the appliance is checked, including any labour costs that may arise.
If the holder of the guarantee has requested repair work, then the holder of the guarantee must be informed about the non-intervention of the guarantee and possible costs, that may arise, and thereafter he must bear all costs for spare parts and wages.
The geographical scope of the guarantee is limited with respect to appliances, which are purchased and used in Germany, Austria, Belgium, Luxembourg and the Netherlands.

August 2012
Aftersales service information on the leaflet inside this instruction manual.