USER MANUAL VPC-MZ3EX SANYO
natural_image
Illustration of a digital camera with lens and control panel (no text or symbols)
Important note
This manual explains how to safely operate the VPC-MZ3.
Please read these instructions carefully before using the digital camera. Make sure to read and understand the section "USING YOUR DIGITAL CAMERA SAFELY AND CORRECTLY" on pages 7 to 23. Keep this manual in a safe place for later reference.
A CompactFlash is not included with Model VPC-MZ3GX.
Warning
TO PREVENT THE RISK OF FIRE OR ELECTRIC SHOCK, DO NOT EXPOSE THIS APPLIANCE TO RAIN OR MOISTURE
FOR AMERICAN USERS
- This equipment has been tested and found to comply with the limits for a Class B digital device, pursuant to Part 15 of the FCC Rules. These limits are designed to provide reasonable protection against harmful interference in a residential installation. This equipment generates, uses and can radiate radio frequency energy and, if not installed and used in accordance with the instructions, may cause harmful interference to radio communications. However, there is no guarantee that interference will not occur in a particular installation. If this equipment does cause harmful interference to radio or television reception, which can be determined by turning the equipment off and on, the user is encouraged to try to correct the interference by one or more of the following measures:
- Reorient or relocate the receiving antenna.
- Increase the separation between the equipment and receiver.
- Connect the equipment into an outlet on a circuit different from that to which the receiver is connected.
- Consult the dealer or an experienced radio/TV technician for help.
- Changes or modifications not expressly approved by the party responsible for compliance could void the user's authority to operate the equipment.

Tested to Comply with FCC Standards
FOR HOME OR OFFICE USE
Model Number : VPC-MZ3
Trade Name : SANYO
Responsible party : SANYO FISHER COMPANY
Address : 21605 Plummer Street, Chatsworth, California 91311
Telephone No. : (818) 998-7322
This device complies with Part 15 of the FCC Rules. Operation is subject to the following two conditions:
(1) this device may not cause harmful interference, and
(2) this device must accept any interference received, including interference that may cause undesired operation.
FOR CANADIAN USERS
●This Class B digital apparatus complies with Canadian ICES-003.
To help you get started enjoying using your digital camera right away, given below is an outline of the fundamental operation, from setup to shooting to playback.
SETUP
① Charge the battery pack (see pages 27 and 33).
② Install the battery pack (see page 28).
③ Install the CompactFlash ^*1 (see page 28).
④ Format the CompactFlash (see page 35). NOTE
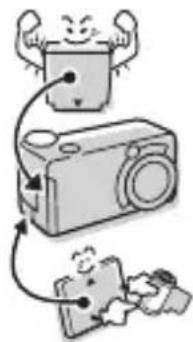
- This camera uses a CompactFlash memory card instead of photographic film to record images. Be sure to install the CompactFlash before operating the camera. A 16MB CompactFlash is supplied with this camera ^1 . A 32MB CompactFlash is also available as a separately sold accessory.
natural_image
Cartoon illustration of a smiling character interacting with a camera and a small object (no text or symbols)
SHOOTING
① Take photos in the BASIC operation mode *2.
- See "Shooting in the BASIC mode" on page 42.
- See "BASIC MODE" on page 77.
PLAYBACK
① Set the playback mode (see page 85).
② Play back the images.
- See "PLAYING BACK STILL IMAGES" on page 87.
- See "PLAYING BACK SEQUENTIAL SHOTS" on page 89.
- See "PLAYING BACK VIDEO CLIPS" on page 90.
*1: About the CompactFlash
This digital camera can use both CompactFlash and Microdrive cards for data storage. This manual is written with the premise that CompactFlash cards are used. In this manual, CompactFlash and Microdrive cards are both referred to as “card”.
A CompactFlash is not included with Model VPC-MZ3GX.
*2: Shooting in the BASIC mode
In the BASIC mode, the Scene Select function—whereby simply by selecting one from a short list of shooting conditions, the suitable settings are automatically completed—is available. Also, only the necessary shooting settings are displayed, making it easy even for the novice photographer to enjoy using this digital camera.
Symbols used in this manual
HINT Points that may prove useful when using the digital camera.
NOTE Points giving some extended instructions or special points to pay attention to.
CAUTION Points that require special attention
(see page xx) Refer to the page indicated for detailed information.
CONTENTS
USING YOUR DIGITAL CAMERA SAFELY AND CORRECTLY ..... 7
CAUTIONS CONCERNING HIGH TEMPERATURES ..... 24
CHECKING THE INCLUDED ACCESSORIES 25
QUICK START FOR CAPTURING IMAGES....27
■PREPARATION
PARTS NAMES 31
RECHARGING THE BATTERY PACK 33
FORMATTING A CARD 35
TURNING THE POWER ON/OFF....37
SETTING SCREENS AND OPTION SETTING SCREENS ..... 39
■CAPTURING IMAGES AND RECORDING SOUNDS
BEFORE TAKING PICTURES 55
SHOOTING/RECORDING MODE SETTINGS 59
CAPTURING STILL IMAGES 60
SEQUENTIAL SHOTS....61
VIDEO CLIPS 69
AUDIO RECORDINGS 70
BASIC SHOOTING FUNCTIONS 72
BASIC MODE 77
■PLAYBACK
PLAYBACK MODE SETTINGS 85
PLAYING BACK STILL IMAGES....87
WHITE BALANCE SETTING....107
ISO SENSITIVITY SETTING 109
SETTING THE EXPOSURE CONTROL....110
ADJUSTING THE COLOR TONES (REAL-COLOR EQUALIZER)....113
DIGITAL ZOOM SETTING....122
QUICK SHOT SETTING (STILL IMAGE SHOOTING MODE ONLY) 123
EXPOSURE CORRECTION 124
FLICKER-REDUCTION SETTING (VIDEO CLIP SHOOTING ONLY) 125
SHOOTING SETTING INFORMATION DISPLAY (SHOOTING INFO SCREEN).... 126
CONTENTS
■OTHER FUNCTIONS
COPYING IMAGES 128
CHANGING IMAGE SIZE 129
ADDING TEXT....131
ADDING A VOICE MEMO 135
COMBINING IMAGES (ADD PHOTO FUNCTION) ..... 137
EDITING VIDEO CLIPS. 143
PRINT SETTINGS....151
IMAGE PROTECT MODE (PREVENTING ACCIDENTAL ERASURE) 159
ERASING DATA 161
IMAGE AND AUDIO DATA STORAGE 164
USING THE CAMERA WITH A COMPUTER 166
■CAMERA SETTINGS AND DISPLAYS
SETTING THE DATE AND TIME 168
SETTING THE OPERATIONAL SOUNDS .... 172
HELP FUNCTION 175
DISPLAY LANGUAGE....176
POWER SAVE MODE....177
SETTING THE TV SYSTEM 179
ASSIGNING FILE NAMES....180
CHECKING THE REMAINING BATTERY PACK CHARGE ..... 182
CHECKING THE REMAINING CARD MEMORY .... 184
■APPENDICES
TROUBLESHOOTING....187
SPECIFICATIONS....205
USING YOUR DIGITAL CAMERA SAFELY AND CORRECTLY
CONCERNING THE DIGITAL CAMERA
WARNING
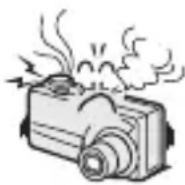
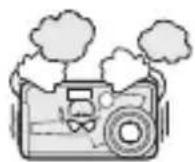
■If the digital camera makes a strange noise, emits a strange odor, or if smoke comes out from it, immediately turn off the power and remove the battery pack.
- If the digital camera is used under these conditions, it may cause a fire or electric shock. Immediately turn off the digital camera, remove the battery pack, and wait to make sure no more smoke comes from the digital camera. Then take it to the dealer for service. Do not try to repair or open the digital camera yourself.
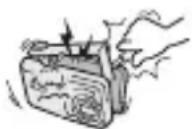
■Do not modify or open the cabinet
●High voltage circuits are inside, and there is a high risk of fire or electric shock if they are touched. Any internal check, setting, or repair should be performed by the dealer.
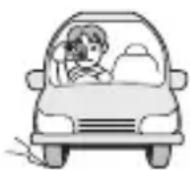
■Do not use while driving
- Do not capture images, play back images, or watch the LCD monitor while driving a vehicle. Doing so may cause an accident.
- Be careful where you put down the digital camera inside an automobile. During sudden stops or turns it may fall behind the brake pedal and prevent braking.
- When using the digital camera while walking, be very careful of your surroundings and especially the traffic to avoid accidents.
■Be aware of your surroundings when using the digital camera
●Pay close attention to your surroundings when using the digital camera. Failure to do so may lead to an accident or injury.
- Do not use the digital camera inside an airplane or elsewhere where its use may be restricted.

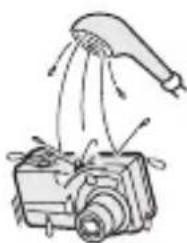
■Do not get the digital camera wet
●This digital camera is not water-resistant. Do not allow it to get wet, as doing so may cause a fire or electric shock.
●Do not use the digital camera in a bathroom
- If the digital camera gets wet, immediately turn it off and remove the battery pack. Then take it to a dealer for repair. Using the digital camera after it has been become wet may cause a fire, electric shock, or other accident.
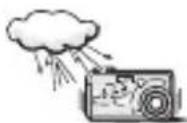
■Do not use during a storm
●To avoid the risk of being struck by lightning, do not use the digital camera during a thunderstorm. In particular, if used in an open field, you have an increased chance of being struck by lightning. Quickly seek refuge in a place that will protect you from lightning.
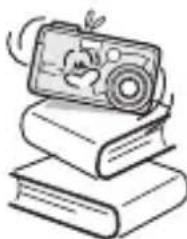
■Do not place on an unstable surface
●The digital camera may fall, resulting in damage to the digital camera or injury.
- If the digital camera has fallen and its body is damaged, turn it off, remove the battery pack, and take it to the dealer for repair. Using the digital camera after its body has been damaged may cause a fire or electric shock.
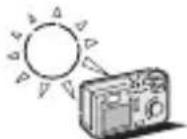
■Do not look through the digital camera into the sun
- Do not look through the digital camera at the sun or any other strong source of light. Doing so may seriously injure your eyes.
■Do not use the flash close to a person's face
- To prevent possible eye injury, do not use the flash near a person's face (especially young children or babies). If the flash is used close to a person's opened eyes, there is a risk that it may damage that person's eyesight.
natural_image
Illustration of a spray gun spraying liquid onto a camera (no text or symbols)
natural_image
Illustration of a stack of books with a smartphone hovering above them, no text or symbols present.
USING YOUR DIGITAL CAMERA SAFELY AND CORRECTLY
(CONCERNING THE DIGITAL CAMERA)
WARNING
■Do not use where there is risk of explosion
- Do not use the digital camera in a location where there is explosive gas, or any other flammable material in the air. Doing so may cause a fire or an explosion.
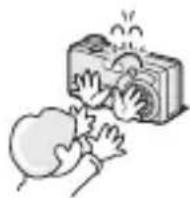
■Keep the digital camera out of the reach of children
●The following may happen if children play with the digital camera:
• They may wrap the strap around their neck and suffocate.
- They may swallow the battery pack or other small parts. In such a case, consult a physician immediately.
- They may damage their eyesight if the flash goes off too close to their eyes.
• They may get hurt by the digital camera.
CAUTION
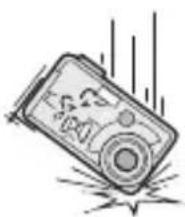
■Cautions when carrying the digital camera
- Do not walk around holding the digital camera by the handstrap. It may hit other objects and get damaged. When walking around, hold the digital camera in your hand or place it in a pocket.
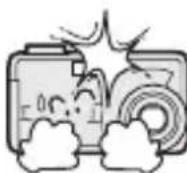
- Be careful not to drop the digital camera or subject it to strong shocks.
●Make sure direct sunlight does not hit the digital camera lens, as that may damage the internal parts. When not using the digital camera, be sure to always turn it off and retract the lens.
natural_image
Illustration of a damaged camera with visible lens and impact lines (no text or symbols)
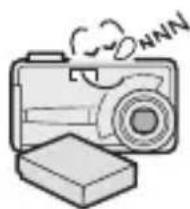
■If the digital camera is not going to be used for a long period of time
- For safety's sake, remove the battery pack from the camera. This will prevent any possible excess heat or leakage of battery fluid that may result in injuries or damage to nearby objects. (Note that when the battery pack is removed for a long period, the time and date settings will be cleared.)
natural_image
Illustration of a camera with a cloud and a base block, no text or symbols present.
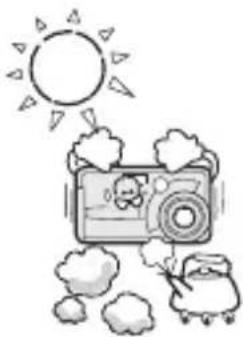
■Cautions during use and storage
●This digital camera is a precision instrument. When using or storing the digital camera, make sure to avoid the following locations to avoid damage.
- Places in direct sunlight
- Places where humidity and temperature are high
- Places that may get wet
- Places close to an air conditioner or heater
- Inside a car
- Places where there is dust and dirt
- Places where there is a fire burning
- Places where volatile products are stored
- Places subject to vibration
natural_image
Illustration of a cartoon character flying near a camera under a sun (no text or symbols)
Operating environment
- Temperature
0 to 40°C (operation)
-20 to 60°C (storage)
●Humidity 30 to
90% (operation, no condensation)
10 to 90% (storage, no condensation)
USING YOUR DIGITAL CAMERA SAFELY AND CORRECTLY
Concerning the supplied battery pack charger (Model VAR-L10)
DANGER
■Risk of electric shock. Dry location use only.
■Do not recharge battery packs that are not Lithium-ion battery packs (Model DB-L10)
- Do not use the supplied battery pack charger to recharge a battery pack other than the supplied Lithium-ion battery pack (DB-L10). Recharging a dry-cell battery or other type of rechargeable battery may cause excess heat, combustion, or leakage, and cause a fire, injuries, burns, or damage to nearby objects.
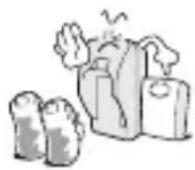
■Use a 100 to 240 V AC power supply
- If used with a power supply other than the one specified, it may cause a fire or electric shock.

■Do not disassemble or modify the battery pack charger
- It is dangerous to touch the inside of the battery pack charger. Doing so may cause a fire or electric shock.
- Do not use the battery pack charger as a direct current generator.
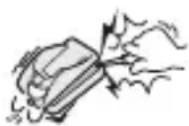
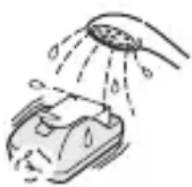
■Do not get the battery pack charger wet
●Make sure the battery pack charger does not get wet, as doing so may cause a fire or electric shock.
- Do not use the battery pack charger in a bathroom.
- If the battery pack charger gets wet, immediately unplug it from the power outlet and remove the battery pack. Then contact the place of purchase. If used while wet, it may cause a fire, electric shock, or an accident.
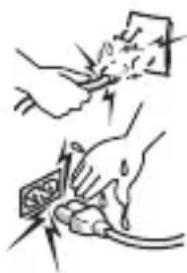
■Cautions when plugging in the battery pack charger
- Securely plug the power cord all the way into the power outlet when using the battery pack charger. If the battery pack charger is used with the power cord not fully plugged in, heat may be generated and cause a fire.
- If the power cord is damaged, or cannot be correctly plugged into the power outlet, do not use the battery pack charger. Using the battery pack charger in this condition may cause a fire or electric shock.
- Do not allow dust, etc., to build up on the power cord or power outlet. A build-up of dust may cause a short circuit or generate heat and cause a fire.
- When unplugging the power cord, be sure to hold the power plug and slowly pull it out of the power outlet. Pulling the cord portion may damage the power cord and cause a fire or electric shock.
■Do not pull on the power cord to unplug it
- Do not leave the power cord plugged into the power outlet while the other end is not plugged into the battery pack charger. The loose end can cause electrocution if touched with wet hands or if handled by children.
- Use only the power cord supplied with the battery pack charger. If a different power cord is used, it may be rated for a different current load, and that may cause a fire.
●The supplied power cord is for exclusive use with the supplied battery pack charger. Do not use it with other devices, as doing so may cause a fire or electric shock.
- Do not use a bundled power cord, as the heat generated may cause a fire.
- When using an extension cord, make sure that the total wattage of the connected devices does not exceed the rated value of the extension cord. If the power load exceeds the rated value, it may cause a fire.

natural_image
Illustration of hands using a tool to clean or store items, no text or symbols present
USING YOUR DIGITAL CAMERA SAFELY AND CORRECTLY
Concerning the supplied battery pack charger (Model VAR-L10) (continued)
DANGER
■Keep the battery pack charger out of the reach of children
●Children may place the battery pack or other small components in their mouth or perform some other such unforeseeable action. If swallowed, consult a physician immediately.

■If smoke or a strange odor is emitted, or if strange noises are heard, immediately unplug the power cord from the power outlet
- If the battery pack charger is used under these conditions, it make cause a fire or electric shock.
- If strange conditions such as these occur, immediately unplug the battery pack charger, remove the battery pack, and wait to make sure no more smoke is emitted. Then contact the place of purchase. Do not try to repair or open the battery pack charger yourself.

■Do not handle with wet hands
●Handling the battery pack charger with wet hands may cause an electric shock.
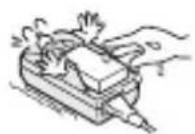
■Do not use during a storm
- Do not touch the battery pack charger or power cord while it is plugged into a power outlet during a thunderstorm. Doing so may cause an electric shock.
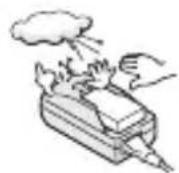
■Unplug the power cord from the power outlet when finished
- If the battery pack charger is left plugged into the power outlet for a long period of time, there is a risk of fire.
CAUTION
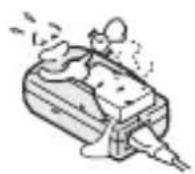
■Do not damage the power cord
- Do not place heavy objects on the power cord. Do not place the power cord near a heat source. Do not excessively bend the power cord, modify it, or secure it with staples. Doing so may damage the power cord and cause a fire or electric shock.
- If the power cord is damaged, or if it does not plug properly into the battery pack charger or wall outlet, contact the place of purchase.
■Do not place on an unstable surface
●The battery pack charger may fall, causing injury or damage.
- If the battery pack charger falls and the charger body is damaged, remove the battery pack and contact the place of purchase. If used while damaged, it may cause a fire, electric shock, or other damages.
■Operating and storage conditions
- Do not use close to a heat source (close to a stove or heater) or leave it exposed to direct sunlight.
Operating environment
- Temperature 0 to 40^ (charging) -20 to 60^ (storage)
●Humidity 10 to 85% (charging and storage)


natural_image
Illustration of a person climbing a stack of books with motion lines indicating movement (no text or symbols)

USING YOUR DIGITAL CAMERA SAFELY AND CORRECTLY
Concerning the Lithium-ion battery pack (Model DB-L10)
DANGER
This camera uses a Lithium-ion battery pack (Model DB-L10).

■If there is leaking, discoloration, change of shape, rise in temperature, damaged exterior, strange odor or any other abnormal condition, immediately discontinue use and remove the battery pack from the camera, taking care to keep it well away from fire.
- Continued use of the battery pack under any of these conditions may result in fire, injury, explosion or other serious damage.
- If battery fluid is leaking, placing the battery pack in close proximity to a fire or other heat source may ignite the battery fluid and result in fire, damage, eruption of battery fluid, or smoke fumes.
■Do not transform, take apart, or modify.
●Safety mechanisms and protective devices have been in incorporation in the battery pack for the purpose of preventing danger. Any modification, by transforming, disassembling, or directly soldering to it, etc., will defeat these safety devices and possibly cause the battery pack to catch fire, explode, or leak or spew battery fluid.
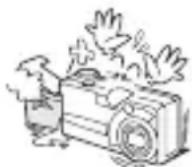
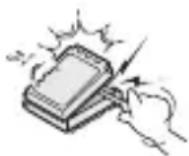
- Do not connect the (+) and (−) terminals with a wire or other metal implement. Do not carry loose or keep with necklaces, hairpins, etc.
- Doing so may result in a short circuit, high voltage flow, fire, explosion, leaking or spewing battery fluid, or heat generation. Metal such as a wire or necklace, etc. may cause heat to be generated.
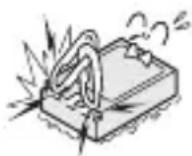
■Do not throw the battery pack in the fire or subject it to heat
- Doing so may cause the insulation to melt, damage the gas discharge valve and safety mechanisms, or ignite the battery fluid, resulting in fire or explosion.

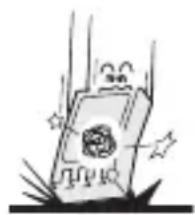
■Do not drop, hit, or submit the battery pack to strong shocks
- If the safety mechanisms and protective devices are broken, an abnormal chemical reaction may occur inside the battery pack, or cause the battery pack to catch fire, explode, leak or spew battery fluid, or generate heat.
natural_image
Cartoon illustration of a character holding a card with stars around (no text or symbols)
- If the safety mechanisms and protective devices are damaged by corrosion, an abnormal chemical reaction may occur inside the battery pack, or cause the battery pack to catch fire, explode, leak or spew battery fluid, or generate heat.
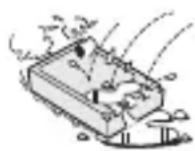
■Cautions regarding the correct environment for using and storing the battery pack
● Temperature when using or recharging: 0 to 40°C
Do not use, recharge, store or leave the battery pack near fire or inside a car exposed to the hot sun, etc. (locations in which the temperature reaches 60^ C or higher).
At high temperatures, the safety mechanisms and protective devices inside the battery pack may be damaged by corrosion, causing an abnormal chemical reaction to occur, or cause the battery pack to catch fire, explode, leak or spew battery fluid, or generate heat. If the safety mechanisms and protective devices are damaged, the battery pack will become unusable.
An environment with extremely high or low temperatures will cause the battery capacity to deteriorate and shorten the usable time, and may even shorten the battery life.
Avoid storing the battery pack with it near full charge. It is recommended to store the battery pack when it is near fully discharged.
If the battery pack is completely discharged, it may become unable to be recharged again. To avoid this, charge the battery pack for at least five minutes every six months.
- Storage temperature: -10^ to 30^
When not using the battery pack, remove it from the camera and store at -10^ to 30^ in a place with no condensation.
●Humidity: 10% to 90% (no condensation)
USING YOUR DIGITAL CAMERA SAFELY AND CORRECTLY
Concerning the Lithium-ion battery pack (Model DB-L10) (continued)
DANGER
■Use only the supplied battery pack charger (Model VAR-L10)
- If another charger is used, the battery pack may be overcharged, or recharged with an abnormal voltage, causing an abnormal chemical reaction to occur, or cause the battery pack to catch fire, explode, leak or spew battery fluid, or generate heat.
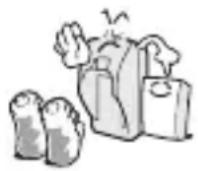
■Use the battery pack only in the specified device
- If the battery pack is used in a device other than that specified, it may cause an abnormal voltage flow, or cause the battery pack to catch fire, explode, leak or spew battery fluid, or generate heat.
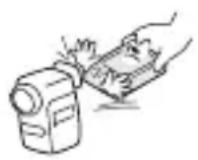
■Do not peel or damage the outer case
●Damaging the outer case, inserting nails, hitting with a hammer, stepping on the battery pack, etc. may cause a short circuit inside the battery pack or cause the battery pack to catch fire, explode, leak or spew battery fluid, or generate heat.
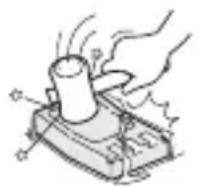
- If the electrolyte gets into your eyes, you risk losing your eyesight. Immediately rinse your eyes with clean, running water, and seek medical attention right away. Any electrolyte that comes into contact with your skin or clothing may harm your skin. Immediately rinse the area with clean, running water.

■Insert the battery pack correctly, as specified
- When installing the battery pack in the charger or camera, pay attention to the indicated polarity ((+) and (−)), and insert it correctly.
- If the battery pack is installed with the wrong orientation, it may cause an abnormal chemical reaction while in the charger, an abnormal voltage flow when it is used, or cause the battery pack to catch fire, explode, leak or spew battery fluid, or generate heat.

natural_image
Cartoon illustration of a character with a magnifying glass and plus/minus symbols (no text or symbols present)
WARNING
■Always stop the recharging after the prescribed recharge time, even if the battery pack is not fully charged.
- If you continue to recharge the battery pack, it may cause the battery pack to catch fire, explode, leak or spew battery fluid, or generate heat.
■Keep out of the reach of children.
- They may handle the battery pack in an unforeseeable manner that results in damage.

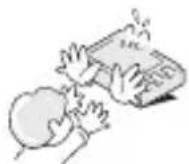
CAUTION
■Charge the battery pack before using it
●Always recharge the battery pack before using it for the first time, or when using it after it has been kept in storage for a long time. During recharging, the battery pack may be warm. This is normal and does not indicate a malfunction.

■Note concerning the battery pack after use
●The battery pack may be warm immediately after the digital camera is used. If removing the battery pack, turn off the digital camera and allow the battery pack to cool down before removing it.
■Recycling the battery pack
- To conserve the environment and for efficient use of natural resources, please discharge the used battery pack, cover the (+) and (−) terminals with tape and recycle the insulated battery pack.
- If disposing of the battery pack as unburnable trash, please follow all applicable regulations of your area.
USING YOUR DIGITAL CAMERA SAFELY AND CORRECTLY
Concerning the accessories
CAUTION
■Cautions concerning the use of the AC adapter
- Use only the separately sold AC adapter (model VAR-G6EX for the VPC-MZ3EX/VPC-MZ3GX, model VAR-G6E for the VPC-MZ3EX [for U.K.] and model VAR-G6U for the VPC-MZ3/VPC-MZ3GX) with your digital camera. Do not use an AC adapter other than the one indicted here, designed for specific use with your digital camera.
- If an AC adapter other that the specified one is used, it may damage the digital camera and cause a fire or electric shock.
- Normally when using an AC adapter, remove the battery pack. Otherwise the battery pack may cause excess heat, leakage, injury or damage to nearby objects.
- For complete information on how to use the AC adapter, refer to the instructions accompanying it.
■Cautions concerning the CompactFlash and Microdrive
- Immediately after use, the CompactFlash and Microdrive will be very hot. Before removing the CompactFlash or Microdrive, turn off the digital camera and wait for the temperature to cool down.
- Keep out of the reach of children. Young children may put the media in their mouth and choke or cause some other unexpected injury or accident.
●A CompactFlash is not included with Model VPC-MZ3GX.
FOR CORRECT USE OF YOUR CAMERA
■Cautions before capturing important images
●Before capturing important images, make sure that the digital camera is operating properly and in condition to capture the image properly.
- Sanyo Electric shall not be held responsible for any losses that result from images that could not be recorded, are erased, destroyed, or damaged in any way due to a problem with the digital camera, any of its accessories, or its software.
■Cautions concerning copyrights
●The images you capture with your digital camera are for your own private use, any other use may violate the rights of copyrights owners.
■Cautions when cleaning the digital camera
Cleaning procedure
1 Turn off the digital camera and remove the battery pack.
2 Remove the dirt with a soft cloth.
3 If the digital camera is extremely dirty, wipe with a soft cloth moistened with a mild detergent diluted with water and wrung dry.
Caution
- Do not use benzene or thinner products to clean the digital camera. Doing so may cause deformation, discoloration, or paint peeling. When using a chemically treated cloth, carefully read its instructions and warnings.
- Do not spray insecticides or volatile sprays on the digital camera. Do not let rubber or vinyl objects contact the digital camera for a long period. They may cause deformation, discoloration, or paint peeling.
■Cautions when cleaning the lens
- If the lens gets dirty, use a commercially available air blower or a cleaning cloth for photographic equipment to clean it.
USING YOUR DIGITAL CAMERA SAFELY AND CORRECTLY
FOR CORRECT USE OF YOUR CAMERA (continued)
CAUTION
■When not using the digital camera for a long period
- Remove the battery pack. However, when the battery pack is removed for a long time, the digital camera functions may begin to not work properly. Periodically reinstall the battery pack and check the digital camera functions.
- If the battery pack is left in the digital camera, a small amount of power is still used even if the digital camera is turned off. If the battery pack is left in the digital camera for a long period, it may become completely discharged and lose its ability to be recharged again.
■Cautions concerning condensation
- Using the digital camera with condensation inside it may damage the digital camera.
- Place the digital camera in a plastic bag and seal it, and then wait until the digital camera has reached the ambient temperature.
Be careful of condensation under the following conditions
- When moving the digital camera suddenly from a cold place to a warm place.
- When the ambient temperature changes drastically, such as when a heater is turned on to quickly heat the room.
- When the digital camera is placed in the path of cool air from an air conditioner.
- When the digital camera is placed in a location of high humidity.
■Cautions concerning undesired interference
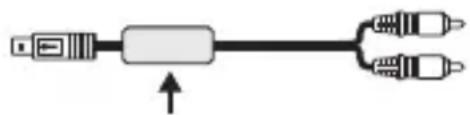
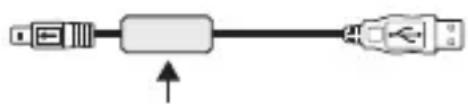
●The digital camera may create undesired interference if used close to a television or radio. To avoid this type of interference, make sure the cores on the supplied AV cable and USB interface cable are not removed.
natural_image
Pure electrical connector diagram without any text or symbols
Core Core
natural_image
Pure electrical connector diagram showing a USB cable with two ports and an internal resistor (no text or symbols)
Dedicated AV cable Dedicated USB interface cable
■ Cautions concerning magnetism
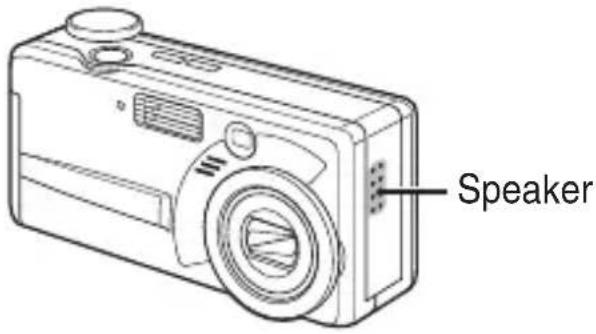
- Do not place credit cards, bank cards, floppy disks, or other items that may be damaged by magnetic fields near the speaker. Data may be lost or the magnetic strips on cards may be damaged.
text_image
Speaker
■Cautions concerning data storage
- It is recommended that any important data be copied onto a separate media (such as a hard disk, MO disk, or CD-R disk).
●Stored data may be lost (or corrupted) in cases such as those listed below. Sanyo Electric will not be held responsible for any damage or lost profits arising from the loss of data.
- If the card is used incorrectly.
- If the card is not inserted correctly into the digital camera.
- If the card is subjected to electrical or mechanical shocks or other forces.
- If the card is removed from the digital camera or if the digital camera is turned off during reading or writing operations.
- If the card has reached the end of its usable life.
USING YOUR DIGITAL CAMERA SAFELY AND CORRECTLY
FOR CORRECT USE OF YOUR CAMERA (continued)
CAUTION
■Cautions when handling the cards
●The cards are precision devices. Do not bend, drop, or subject them to strong forces or shocks. Be especially careful with the Microdrive, for it is easily damaged by vibrations.
- Avoid using or storing the cards in places with extremely high or low temperatures, subject to direct sunlight, in a completely closed vehicle, near air conditioners or heaters, or in humid or dusty locations.
- Avoid using or storing the cards in locations where strong static electrical charges or electrical noise can be easily generated.
- Do not allow the edges of the cards to become contaminated with foreign materials. Gently wipe away any contamination with a soft, dry cloth.
- When not using the cards, put them back into their protective covers to protect them from damage due to static electricity.
- Do not carry the cards in trouser pockets, as the cards may become damaged when you sit down or make other movements that may apply forces.
- Before using a new card, be sure to format it using the digital camera (see "FORMATTING A CARD" on page 35).
- When buying separately sold or commercially available products, carefully read the instructions and warnings that come with them.
CAUTIONS CONCERNING HIGH TEMPERATURES
■ icon
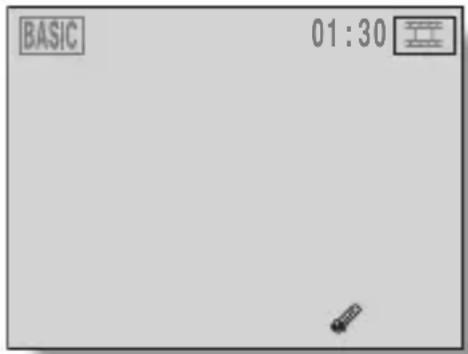
- The 🎨 icon indicates that the temperature inside the camera in use is high. If the 🔊 icon appears, it is still possible to use the camera for a short while, after which the 🔊 icon will flash and the camera will become inoperable. If this happens, discontinue using the camera as soon as possible, and wait until the internal temperature falls before using it again. Note that especially when shooting video clips, soon after the 🔊 icon lights, the remaining shooting time will appear, and when that figure becomes 00, further shooting is impossible.
text_image
BASIC
01:30
CHECKING THE INCLUDED ACCESSORIES
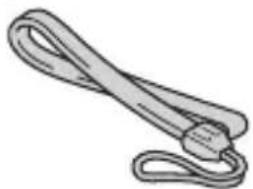
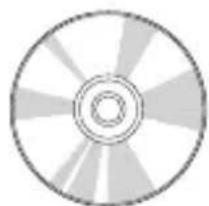
●Handstrap ●Software: 1 CD-ROM
natural_image
Simple line drawing of a coiled cable or tape (no text or symbols)
natural_image
Circular optical disc with radial gradient pattern (no text or symbols)
●CompactFlash (16MB): 1 ●Lithium-ion battery pack
with Model VPC-MZ3GX.
(battery pack): 1A CompactFlash is not ir
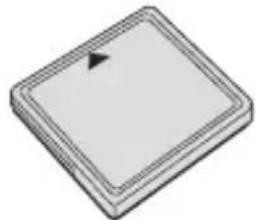
natural_image
Simple 3D diagram of a square plate with a small arrow pointing to the top surface (no text or symbols)
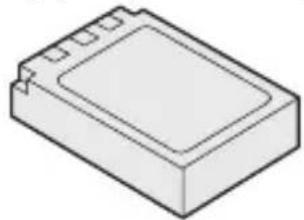
natural_image
Isometric illustration of a rectangular electronic component with a recessed top and internal structure (no text or symbols)
●Lithium-ion hydride battery pack charger and power cord
●Dedicated AV cable: 1
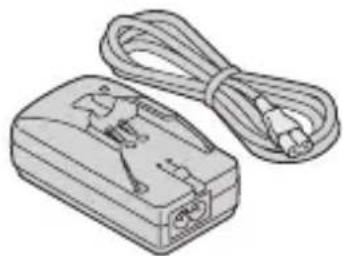
natural_image
Illustration of a portable electronic device with attached cable (no text or symbols)
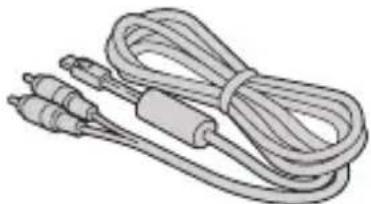
natural_image
Illustration of a coiled cable with two connectors and a central connector (no text or symbols)
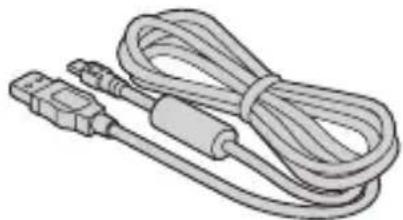
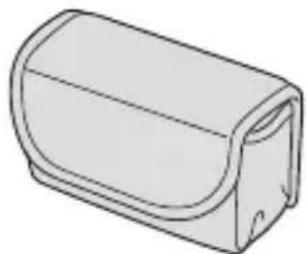
●Dedicated USB interface cable: 1 ●Soft case
natural_image
Illustration of a USB cable with connector port (no text or symbols)
natural_image
Simple line drawing of a rectangular electronic component with rounded corners and a recessed top (no text or symbols)
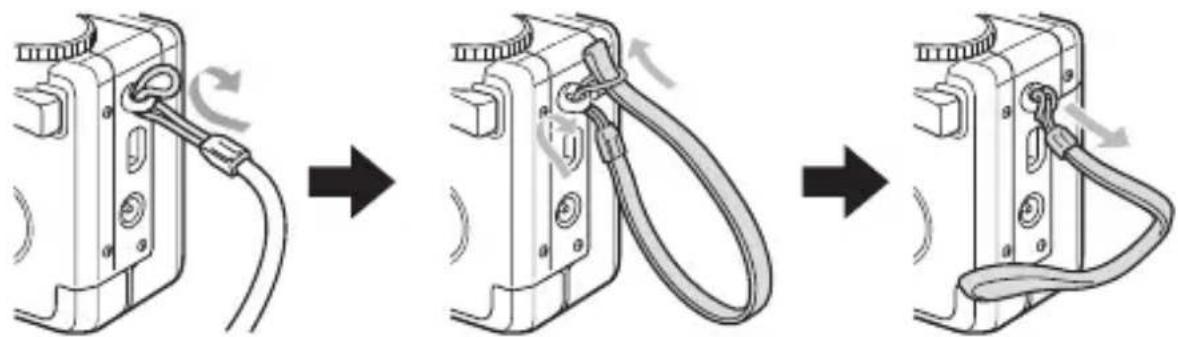
ATTACHING THE HANDSTRAP
natural_image
Diagram showing three-step cable installation process: wire connection, cable attachment, and cable cord assembly (no text or symbols)
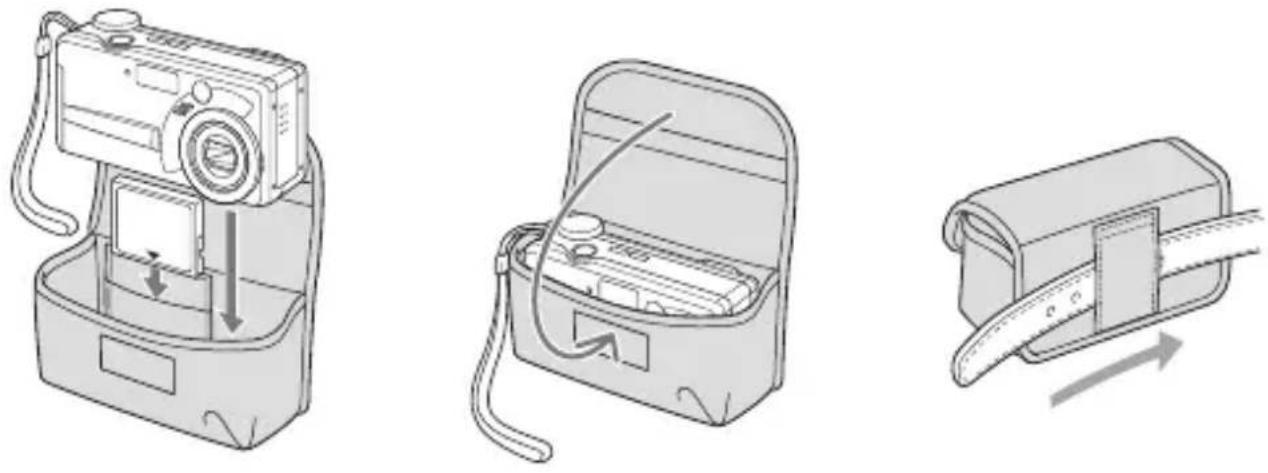
SOFT CASE
When not using the digital camera, keep it in the soft case for protection.
The types of card that can be inserted into and used with this digital camera are:
-CompactFlash
A CompactFlash is not included with Model VPC-MZ3GX.
●Microdrive
There are special precautions that must be followed when using Microdrive cards. Before using Microdrive cards, carefully read “Cautions when using the Microdrive” (see page 210).
What "card" means in this manual
- In this manual, CompactFlash and Microdrive cards that can be used in this digital camera are referred to as “card”.
●The cards in the illustrations in this manual are CompactFlash cards, but all installation, removal, and formatting procedures are the same for both the CompactFlash and Microdrive cards.
QUICK START FOR CAPTURING IMAGES
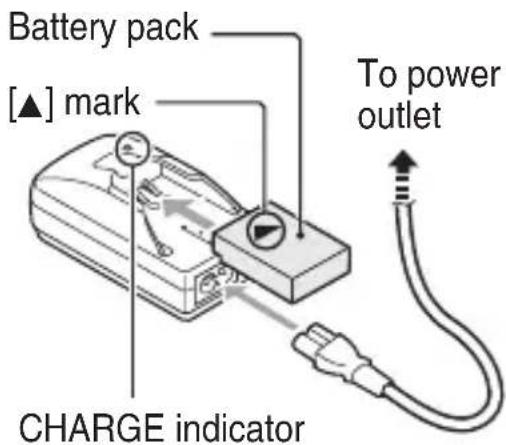
1 Charge the battery pack
●Before using the supplied battery pack in the camera, insert it into the charger.
- Insert it in the direction indicated by the [▲] mark on the battery pack.
text_image
Battery pack
[▲] mark
To power outlet
CHARGE indicator
2 Connect the supplied power cord to the battery pack charger.
- Insert the connector straight and securely.
3 Plug the power plug into a power outlet (AC 100 to 240V).
●Recharging begins.
●During recharge, the CHARGE indicator is lit red.
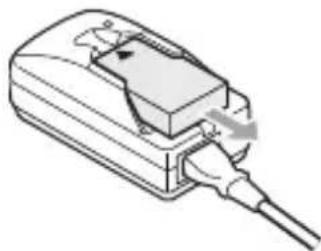
4 When the CHARGE indicator lights green, unplug the power cord from the power outlet, and remove the battery pack from the charger.
natural_image
Technical line drawing of a mechanical component with a cable inserted (no text or symbols)
HINT
- Please read the safety precautions regarding the battery pack (see page 15) and the supplied battery pack charger (VAR-L10) (see page 11).
●The recharge time is approx. 120 minutes.
Install the battery pack and card
The card can be used after it has been formatted with the camera (see FORMATTING A CARD on page 35). Be sure to turn off the power before installing or removing the card.
Use the battery pack recharged in step 1 above.
Make sure that the battery pack polarity (+) and (-)) and the card orientation are correct.
5 Insert the battery pack.
1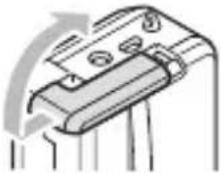 Open battery compartment cover on the digital camera side. Open battery compartment cover on the digital camera side. | 2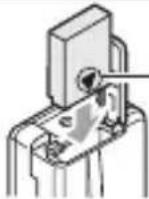 -[▲] markInsert the battery pack. -[▲] markInsert the battery pack. |
3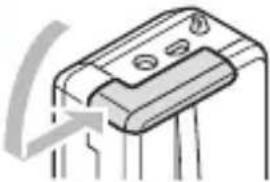 Close the battery compartment cover. Close the battery compartment cover. | ● When removing the battery pack...②Push in- )Open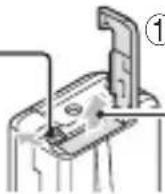 - 3Pull out - 3Pull out |
6 Insert the card
1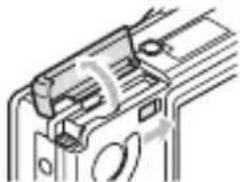 Push the card cover lever. Push the card cover lever. | 2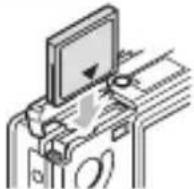 Insert the card all the way. Insert the card all the way. |
3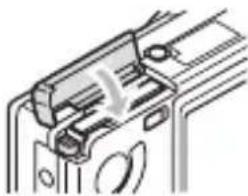 Close the card cover. Close the card cover. | ● When removing the card... ③ Pull out 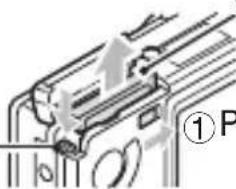 ②Push in ·ush ②Push in ·ush |
QUICK START FOR CAPTURING IMAGES
Capture an image (details on page 60)
Now that preparation is completed, your digital camera is ready to capture images. Shown here is how to capture a still image.
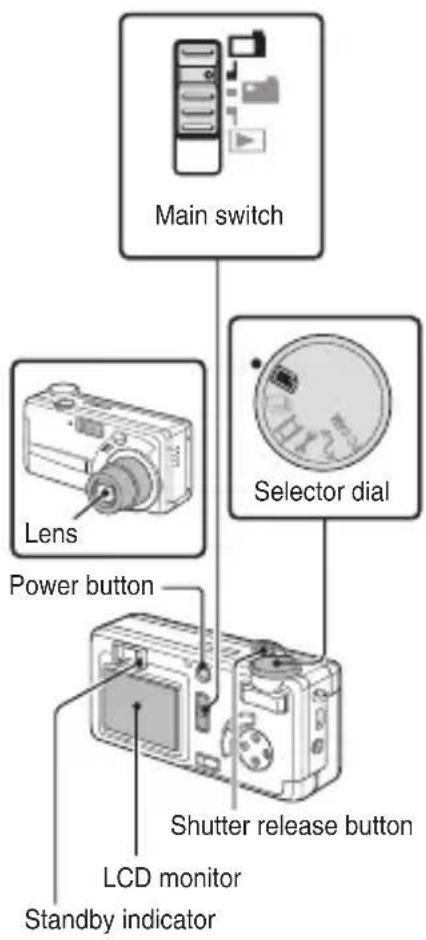
7 Set the main switch to [☐].
8 Turn the selector dial to [ ]
9 Press the power button.
●The power turns on.
●The lens extends.
- When the standby indicator lights green, the camera is ready to capture an image.
10 Point the camera lens at the subject.
●Compose the picture by viewing the LCD monitor.
text_image
Main switch
Lens
Power button
Shutter release button
LCD monitor
Standby indicator
Selector dial
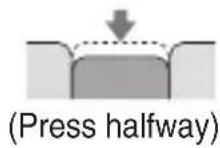
●The autofocus locks on the subject, and the image in the LCD monitor appears clearly.
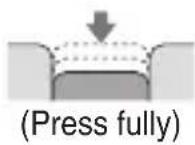
●The image is captured.
View the image (details on page 87)
Now let's take a look at the image you captured.
13 Set the main switch to [▶].
●The image you captured appears in the LCD monitor.
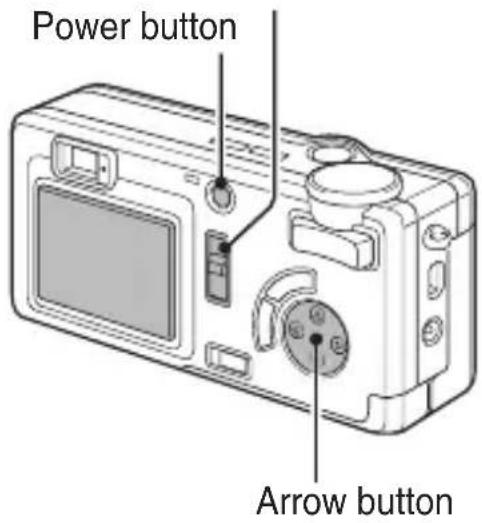
- Press [◀] or [▶] on the arrow button to display the images stored before or after the current image.
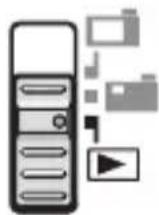
Main switch
text_image
Power button
Arrow button
HINT
●For still images, you can view the captured image on the LCD monitor by keeping the shutter release button depressed when you capture the image.
- When the standby indicator is flashing red, the next image cannot be captured. When the standby indicator lights green again, it is possible to capture the next image.
PARTS NAMES
Front
text_image
Labeled diagram of a digital camera with numbered parts for identification
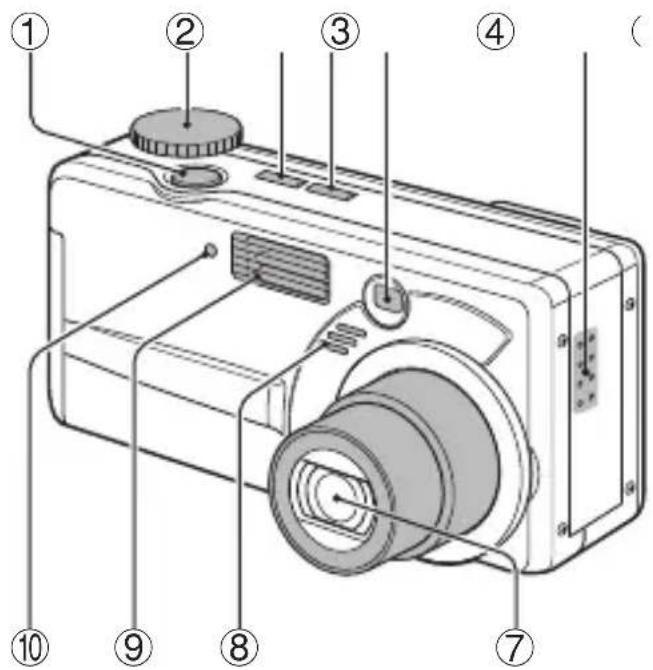
① Shutter release button
② Selector dial
③Flash button
④ Focus button
⑤ Viewfinder
⑥Speaker
⑦ Lens (closed when the lens is stowed)
⑧ Microphone
⑨Flash
⑩ Self-timer indicator
Rear
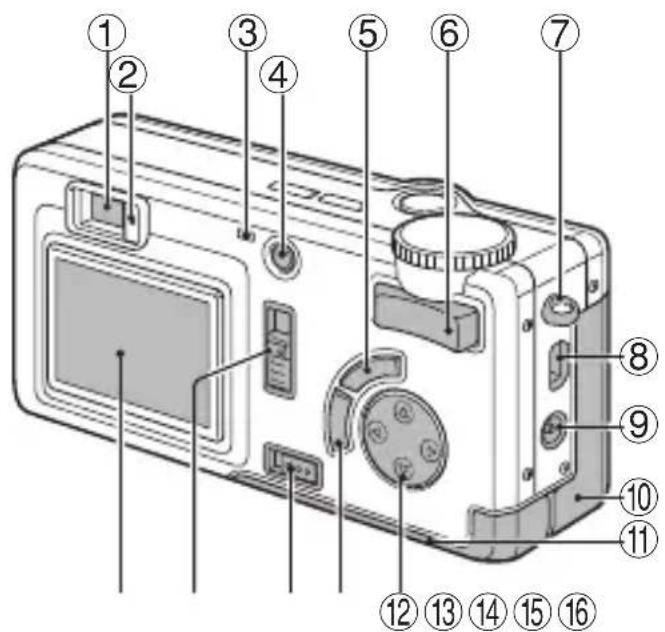
text_image
Labeled diagram of a digital camera with numbered parts for identification
① Viewfinder
② Standby indicator (red/green)
Red flashing:
- When capturing an image, recording sound, charging the flash, storing an image or sound recording, when no card is installed (indicates that image or sound cannot be recorded), or recording using the self-timer
Red steady:
- When the memory is full (indicates that image or sound cannot be recorded), or recording using the self-timer
Green flashing:
- When using the exposure correction or digital zoom functions (indicates that image and sound can be recorded)
Green steady:
●Image and sound can be recorded, or when connected to a PC
③ Accessing indicator
④ Power button
⑤ SET button
⑥Zoom switch
⑦ Handstrap holder
⑧ DIGITAL/AV terminal
●Used as both the USB connector and AV output terminal.
⑨ DC IN (external DC power input) terminal
●For connecting a separately sold AC adapter
⑩ Battery compartment cover
⑪ Card cover
⑫ Arrow button
⑬ MENU button
⑭ Card cover lever
⑮ Main switch
⑯ LCD monitor
RECHARGING THE BATTERY PACK
Be sure to fully charge the supplied or separately sold battery pack before using it in your camera. For charging the battery pack, use the supplied charger.
Charge the battery pack if it is being used for the first time, and recharge it whenever the remaining charge is low (see “CHECKING THE REMAINING BATTERY PACK CHARGE” on page 182).
●During recharging, the charger and battery pack will be warm. This is normal and does not indicate a malfunction.
If there is interference to your TV or radio during recharging...
- Move the battery pack and charger further away from the TV or radio.
Ambient temperature during recharging
- It is recommended that the ambient temperature during recharging be between about 10^ and 35^ . Due to the characteristics of the battery pack, at temperatures below 10^ , it may not be possible to sufficiently recharge it.
Recharge a battery pack in the following cases
●A battery pack which has not been used for a long time
●Newly purchased battery pack
About the CHARGE indicator
The CHARGE indicator shows the status of the battery pack and the charger. Please refer to the following table if the indicator flashes abnormally.
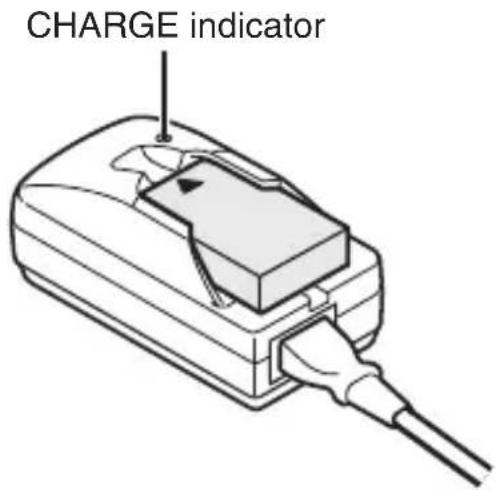
text_image
CHARGE indicator
| CHARGE indicator |
| Not lit Not connected properly | ●To recharge the battery pack, the power cord of the charger must be connected to a power outlet, and the plug at one end inserted in the charger's power socket (see page 32).●The battery pack is not installed, or it is not installed correctly (see page 27). |
| Lit red Recharging | |
| Lit green Recharging finished | |
| Red flashing Problem with the battery pack | ●Immediately remove the battery pack from the charger.●Do not use an abnormal battery pack. (The usable life of the battery pack has probably expired.) |
Before using a card, it must be formatted with this camera:
●After purchasing, when used for the first time
- If it was formatted using a personal computer or another digital camera.
For more information on handling the cards, see “Cautions when handling the cards” on page 23 and “Cautions when using the Microdrive” on page 210.
1 Display the Shooting Option Setting Screen (see page 39).
- Set the main switch to [☐], and turn the selector dial to [→].
●The Reformat Screen appears.
![SANYO VPC-MZ3EX - Press [▲] on the arrow button to select "YES". - 1](/content/2026/05/779863/images/6a3bc2872914bd3894eba0d7ab1a407fa8f286b8dfda50b4b8eceba8fab4ce6e.jpg)
text_image
AUDIO REC
COLOR ADJUSTMENT
SLIDESHOW
CLOCK SET
BEEP
LANGUAGE
TV SYSTEM
REFORMAT
![SANYO VPC-MZ3EX - Press [▲] on the arrow button to select "YES". - 2](/content/2026/05/779863/images/9213e1d04a5408e59e64157bab67baf79435ff34ccd87519901eb1f3c90249e0.jpg)
text_image
REFORMAT
YES
NO
●Reformatting begins.
- During reformatting, “REFORMATTING” and “DO NOT POWER OFF” are shown on the LCD monitor.
- When reformatting is finished, you are returned to the Shooting Option Setting Screen.
CAUTION
- Do not turn off the power to the camera or eject the card during reformatting.
- When a card is reformatted, all data recorded on the card is erased. Protected data (see page 159) is also erased, so before reformatting a card, any data you wish to keep should be copied to your personal computer's hard disk or other storage medium.
HINT
- In step 4, select "NO", and press the SET button. You are returned to the Shooting Option Setting Screen.
- Reformatting can also be executed if the main switch is set to [▶] in step 1 above to display the Playback Option Setting Screen.
NOTE
- By using the card together with a commercially available PC card adapter for CompactFlash cards, the card can be used as a PC card conforming to PC Card Standard-ATA.
Turning the power on
When capturing images
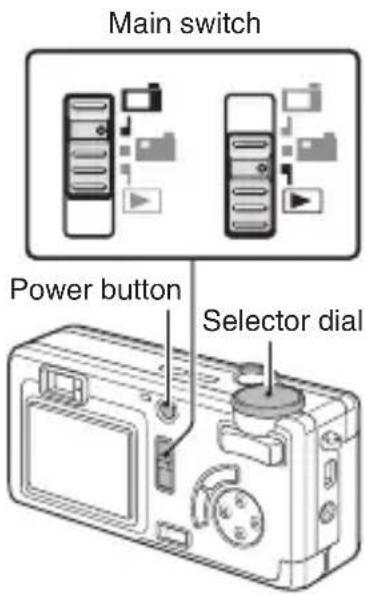
1 Set the main switch to [☐] or [☐].
[☐]: The LCD monitor is used.
[图标]: The LCD monitor is not used.
2 Turn the selector dial to [☐], [☐] or [☐].
3 Press the power button.
- The power turns on, the lens extends and the standby indicator next to the viewfinder lights.
- If the main switch is set to [☐], an image appears on the LCD monitor.
When playing back images
1 Set the main switch to [▶].
2 Press the power button.
●The power turns on, and an image appears on the LCD monitor.
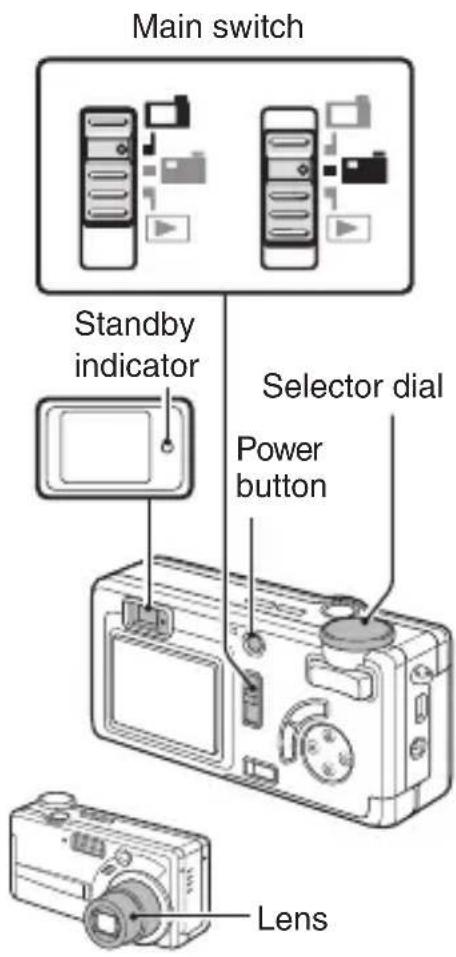
text_image
Main switch
Standby
indicator
Selector dial
Power
button
Lens
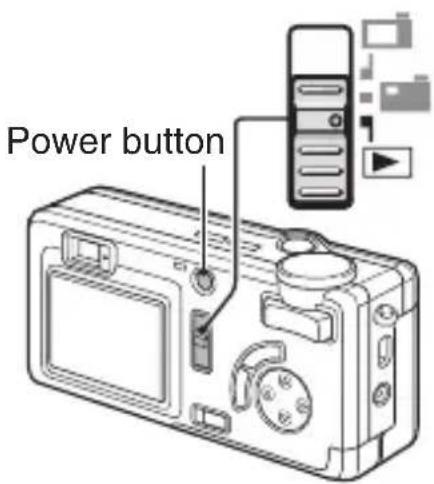
text_image
Power button
Turning the power off
●The power turns off.
●The lens automatically retracts and closes.
●The standby indicator turns off.
●The LCD monitor turns off.
●The power turns off.
●The LCD monitor turns off.
When capturing images
When playing back images
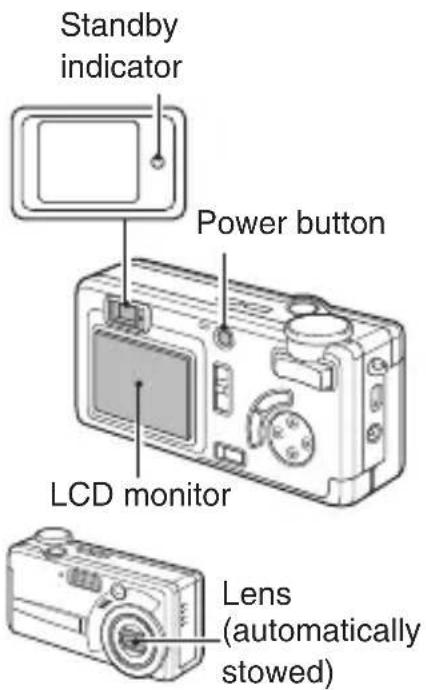
text_image
Standby
indicator
Power button
LCD monitor
Lens
(automatically
stowed)
Turning the power on when the power save function is active
In order to save the battery pack power, the power save function will automatically turn off the power after one minute of no use during shooting, or five minutes of no use during playback (factory-preset setting).
HINT
- When using the separately sold AC adapter (model VAR-G6EX for the VPC-MZ3EX/VPC-MZ3GX, model VAR-G6E for the VPC-MZ3EX [for U.K.] and model VAR-G6U for the VPC-MZ3/VPC-MZ3GX), the power save function will become active after about 30 minutes of inactivity (factory-preset setting).
●The user can specify the time elapsed before the power save function is activated (see page 177).
- In the PC connection mode and PC camera mode, while the camera is connected to a personal computer with the dedicated USB interface cable, the power save function is disabled.
SETTING SCREENS AND OPTION SETTING SCREENS
For both shooting and playback, there are Setting Screens and Option Setting Screens.
Displaying and exiting the Shooting/Playback Setting Screens and Option Setting Screens
Displaying a Setting Screen
1 Set the main switch.
[☐]: To display the Shooting Setting Screen or Shooting Option Setting Screen.
[▶]: To display the Playback Setting Screen or the Playback Option Setting Screen.
2 Turn the selector dial to the mark for the desired setting screen.
text_image
Main switch
Power button
Selector dial

| Shooting Playback |
| Still Image ShootingSetting Screen (page 45) | Still Image PlaybackSetting Screen (page 53) |
| Sequential shots ShootingSetting Screen (page 47) | Sequential shots PlaybackSetting Screen (page 53) |
| Video Clip Shooting SettingScreen (page 49) | Video Clip PlaybackSetting Screen (page 53) |
| Shooting Option SettingScreen (page 54) | Playback Option SettingScreen (page 54) |
| connection mode (page166) | PC connection mode (page166) |
| PC CAM PC | camera mode (page167) | PC camera mode (page167) |
3 Turn on the power.
- In step 2, if the selector dial is set to [→], the Shooting Option Setting Screen or Playback Option Setting Screen appears.
●The setting screen selected in step 3 appears.
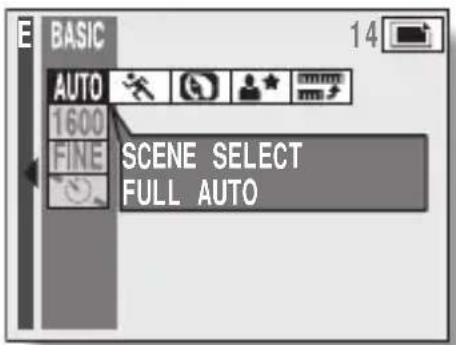
text_image
BASIC
AUTO
1600
FINE
SCENE SELECT
FULL AUTO
Example: Still Image Shooting Mode Setting Screen (BASIC mode)
Exiting the Shooting/Playback Setting Screen
●The Shooting/Playback Setting Screen is exited.
Exiting the Shooting/Playback Option Setting Screen
1 Turn the selector dial to a mark other than [2c].
●The Option Setting Screen is exited and either a Shooting Screen or Playback Screen appears.
HINT
- For more information on using the setting screens, see “Switching between the operation modes” on page 41 and “Setting screen basic operation” on page 43.
- In the PC connection mode and PC camera mode, the LCD monitor turns off.
SETTING SCREENS AND OPTION SETTING SCREENS
Switching between the operation modes (BASIC mode and EXPERT mode)
This camera allows you to choose between two operation modes: with the BASIC mode, you can enjoy taking photos while letting the camera do all the work; in the EXPERT mode, you have control of all the camera settings. Select the operation mode for the type of photography you enjoy.
1 Display the Shooting Setting Screen.
●The BASIC Mode Shooting Setting Screen or the EXPERT Mode Shooting Setting Screen appears.
●The operation mode is switched.
- To return to the initial operation mode, again press [◀] on the arrow button twice.
![SANYO VPC-MZ3EX - Press [◀] on the arrow button twice. - 1](/content/2026/05/779863/images/a8219e3be5eea000dc1e735a33e9b8fca5a0838f26a7015c5c3bb4b4f95637b9.jpg)
flowchart
graph TD
    A["〈BASIC mode〉"] --> B["〈EXPERT mode〉"]
    B --> C["Output 14"]
    D["〈BASIC mode〉"] --> E["〈EXPERT mode〉"]
    E --> F["Output 8"]
    style A fill:#f9f,stroke:#333
    style B fill:#ccf,stroke:#333
    style C fill:#cfc,stroke:#333
    style D fill:#fcc,stroke:#333
Shooting in the BASIC mode
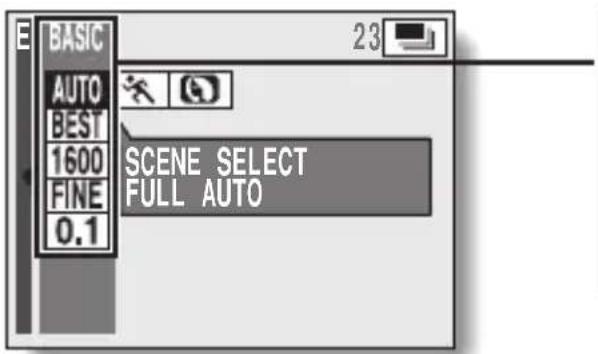
In the BASIC mode the number of settings the user has to deal with are few, making it easy for the novice digital camera operator to enjoy taking photos. It is recommended that the user who is new to digital camera operation or not familiar with the various settings take photos using the basic settings of this mode. In addition, if you change the settings and find that the resulting images are not satisfactory, try returning to the basic settings to take the photos.
BASIC mode settings
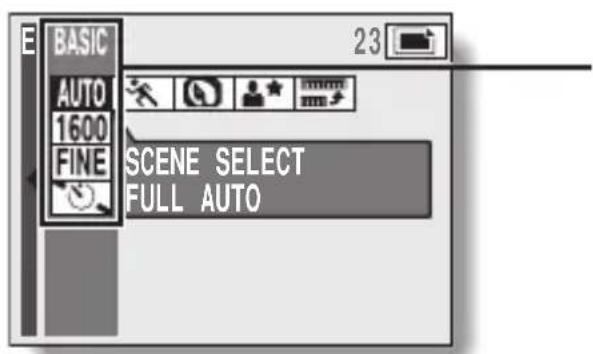
text_image
BASIC
AUTO
1600
FINE
23
SCENE SELECT
FULL AUTO
AUTO : Scene select setting
1600 : Resolution setting
FINE : Compression rate setting
: Self-timer setting
text_image
E BASIC
AUTO
BEST
1600
FINE
0.1
23
SCENE SELECT
FULL AUTO
AUTO : Scene select setting
BEST : Sequential shots mode setting
1600 : Resolution setting
FINE : Compression rate setting
0.1 : Sequential shots interval setting
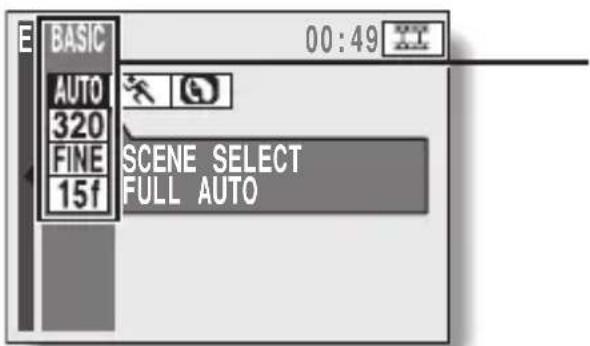
text_image
BASIC
00:49
AUTO
320
FINE
15f
SCENE SELECT
FULL AUTO
AUTO : Scene select setting
320 : Resolution setting
FINE : Compression rate setting
15f : Frame rate setting


