
VPC-E870 - Camera SANYO - Free user manual and instructions
Find the device manual for free VPC-E870 SANYO in PDF.


| Product Type | Digital Camera |
| Brand | Sanyo |
| Model | VPC-E870 |
| Megapixels | 8.0 MP |
| Optical Zoom | 3x |
| Digital Zoom | 4x |
| LCD Screen | 2.4-inch TFT |
| Sensor | 1/2.5-inch CCD |
| Storage Medium | SD/SDHC Card |
| Battery | 2x AA Alkaline or NiMH |
| Dimensions (W x H x D) | 94 x 62 x 31 mm |
| Weight (without batteries) | 130 g |
| Face Detection | Yes |
| Red-Eye Reduction | Yes |
| Scene Modes | Portrait, Landscape, Night, etc. |
| Interface | USB 2.0, AV Out |
| Shutter Speed Range | 1/1000 s to 8 s |
| ISO Sensitivity | Auto, 100, 200, 400, 800, 1600 |
| Video Recording | VGA 640x480 @ 30fps |
| File Formats | JPEG (Still), AVI (Video) |
| Focus Range (Normal) | 30 cm to infinity |
| Focus Range (Macro) | 5 cm |
Frequently Asked Questions - VPC-E870 SANYO
User questions about VPC-E870 SANYO
0 question about this device. Answer the ones you know or ask your own.
Ask a new question about this device
Download the instructions for your Camera in PDF format for free! Find your manual VPC-E870 - SANYO and take your electronic device back in hand. On this page are published all the documents necessary for the use of your device. VPC-E870 by SANYO.
USER MANUAL VPC-E870 SANYO
About this Manual ....i
Copyright ...... i
Federal Communications Commission (FCC) Compliance ...... i
Declaration of Conformity .... i
Trademark Recognition ....ii
Introduction 1
System Requirements ....1
Package Contents ....1
Main Features ....1
Camera Views 2
Front View 2
Back View 2
Top View 2
Bottom View 3
Left / Right View 3
The Mode Dial ....3
Navigation Buttons ....4
LED Indicators 6
LCD screen 7
Capture/Video Mode Display 7
Camera Setup 12
Attaching the Wrist Strap ....12
Inserting the Battery 12
Inserting an SD/MMC Memory Card ....13
Charging the Battery 13
Turning On 13
First Time Use ....14
Getting Started 15
Taking your First Photo 15
Anti-Shake Function 15
Using Quick Review 15
Using Macro Mode 15
Setting the Flash Mode 16
Using the Zoom in/out Function 16
Using the Self-timer and Burst Photography 16
Setting the Scene Mode 17
Face Detection AF/AE Function 17
Recording your First Video 18
Recording Audio Files ....18
Recording Voice Memos ....18
Capture Settings 19
The Capture Menu 19
Image Resolution 19
Image Quality 20
Focus Zone 20
EV Compensation 20
M-Burst Interval 21
White Balance 21
ISO Speed 21
AE Metering 22
Color 22
Sharpness 22
Saturation 22
Contrast 23
Setup 23
Video Capture Menu 23
Video Resolution 23
White Balance 23
Color 23
Saturation 23
Contrast 23
Setup 24
Photo, Video & Audio Playback 25
Playback Mode Display 25
Viewing Photos/Videos on the LCD Screen 27
Viewing M-Burst Photos 27
Listening to Audio Files ....28
Listening to Voice Memo 28
Viewing Photos/Videos on your TV 28
Zooming In During Playback 29
Deleting Photos/Videos/Audios 29
Using the Playback Menu 29
DPOF 30
Slideshow 31
Resize 31
Rotate 32
Protect 32
Red-Eye Compensation 33
Move 33
Transferring Photos/Videos to your PC 34
Camera Settings 35
The Setup Menu ....35
File Number 35
Digital Zoom 35
Quick View 36
Continuous AF 36
Camera Sound 36
Auto LCD Off 36
Auto Power Off 37
Video Out 37
USB Mode 37
Date Stamp 38
Date and Time 38
Language 38
Image Storage 39
Format 39
Reset 39
Voice Memo 39
PictBridge Print (PTP) 40
Image Storage 40
This Image 41
Index Print 42
DPOF Image 42
All Images 43
Specifications 44
Troubleshooting 47
English
Preface
About this Manual
This manual is designed to assist you in using your new digital camera. All information presented is as accurate as possible but is subject to change without notice.
Copyright
This manual contains proprietary information protected by copyright. All rights are reserved. No part of this manual may be reproduced by any mechanical, electronic or other means, in any form, without prior written permission of the manufacturer.
© Copyright 2008
Federal Communications Commission (FCC) Compliance
This equipment has been tested and found to comply with the limits for a Class B digital device, pursuant to Part 15 of the FCC Rules. These limits are designed to provide reasonable protection against harmful interference in a residential installation. This equipment generates, uses, and can radiate radio frequency energy and, if not installed and used in accordance with the instructions, may cause harmful interference to radio communications. However, there is no guarantee that interference will not occur in a particular installation. If this equipment does cause harmful interference to radio or television reception, which can be determined by turning the equipment off and on, the user is encouraged to try to correct the interference by one or more of the following measures:
- Reorient or relocate the receiving antenna.
- Increase the distance between the equipment and the receiver.
- Connect the equipment to an outlet on a circuit different from that to which the receiver is connected.
- Consult the dealer or an experienced radio/TV technician for help.
Warning: A shielded-type power cord is required in order to meet FCC emission limits and to prevent interference to radio and television reception. Use only shielded cable to connect I/O devices to this equipment. Any changes or modifications not expressly approved by the manufacturer may void your warranty and service agreement.
Declaration of Conformity
This device complies with Part 15 of the FCC rules. Operation is subject to the following conditions:
- This device may not cause harmful interference.
- This device must accept any interference received, including interference that may cause undersired operation.
ii Preface
Trademark Recognition
Windows 98/2000/ME/XP are registered trademarks of Microsoft Corporation in the United States and/or other countries. Windows is an abbreviated term referring to the Microsoft Windows Operation System. Adobe is a trademark of Adobe Corporation. ArcSoft is the trademark of ArcSoft System, Inc. All other companies or product names are trademarks or registered trademarks of their respective companies.
Safety and Handling Precautions
Camera Information
- Do not take apart or attempt to service the camera yourself.
- Do not expose the camera to moisture, or extreme temperatures.
- Allow the camera to warm up when moving from cold to warm temperatures.
- Do not touch the camera lens.
- Do not expose the lens to direct sunlight for extended periods.
- Do not use abrasive chemicals, cleaning solvents or strong detergents to clean the product. Wipe the product with a slightly damp soft cloth.
Battery Information
- Turn off the camera before installing or removing the battery.
- Use only the type of battery and charger that came with your camera. Using other types of battery or charger may damage the equipment and invalidate the warranty.
- When using Li-ion battery in this product, ensure that they are inserted correctly. Inserting the battery upside down can cause damage to the product and possibly start a fire.
- Download all pictures and remove the battery from the camera if you are going to store the camera for long periods.
Safety Instructions
Read and understand all Warnings and Cautions before using this product.
WARNING
If foreign objects or water have entered the camera, turn the power OFF and remove the battery and the AC power adapter.
Continued use in this state might cause fire or electric shock. Consult the store of purchase.
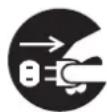
If the camera has fallen or its case has been damaged, turn the power OFF and remove the battery and the AC power adapter.
Continued use in this state might cause fire or electric shock. Consult the store of purchase.
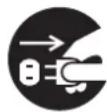
Do not disassemble, change or repair the camera.
This might cause fire or electric shock. For repair or internal inspection, ask the store of purchase.

Use the specified AC power adapter only with the indicated power supply voltage.
Use with any other power supply voltage might cause fire or electric shock.

Do not use the camera in areas near water.
This might cause fire or electric shock. Take special care during rain, snow, on the beach, or near the shore.

Do not place the camera on inclined or unstable surfaces.
This might cause the camera to fall or tilt over, causing injury.

Keep the battery out of the reach of children.
Swallowing battery might cause poisoning. If the battery is accidentally swallowed, immediately consult a physician.

Do not use the camera while you are walking, driving or riding a vehicle.
This might cause you to fall over or result in traffic accident.

iv Preface
CAUTION
Insert the battery paying careful attention to the polarity (+ or -) of the terminals.
Inserting the battery with its polarities inverted might cause fire and injury, or damage to the surrounding areas due to the battery rupturing or leaking.

Do not fire the flash close to anyone's eyes.
This might cause damage to the person's eyesight.

Do not subject the LCD monitor to impact.
This might damage the glass on the screen or cause the internal fluid to leak. If the internal fluid enters your eyes or comes into contact with your body or clothes, rinse with fresh water.
If the internal fluid has entered your eyes, consult a physician to receive treatment.

A camera is a precision instrument. Do not drop it, strike it or use excessive force when handling the camera.
This might cause damage to the camera.

Do not use the camera in humid, steamy, smoky, or dusty places.
This might cause fire or electric shock.

Do not remove the battery immediately after long period of continuous use.
The battery becomes hot during use. Touching a hot battery might cause burns.

Do not wrap the camera or place it in cloth or blankets.
This might cause heat to build up and deform the case, resulting in fire. Use the camera in a well-ventilated place.

Do not leave the camera in places where the temperature may rise significantly, such as inside a car.
This might adversely affect the case or the parts inside, resulting in fire.

Before you move the camera, disconnect cords and cables.
Failure to do this might damage cords and cables, resulting in fire and electric shock.

Warning:
TO PREVENT THE RISK OF FIRE OR ELECTRIC SHOCK, DO NOT EXPOSE THIS APPLIANCE TO RAIN OR MOISTURE
FOR AMERICAN USERS
The following advisory is included in accordance with the laws of the State of California (USA):
WARNING:
This product contains chemicals, including lead, known to the States of California to cause cancer, birth defects or other reproductive harm. Wash hands after handling.
Safety Instructions
- This equipment has been tested and found to comply with the limits for a Class B digital device, pursuant to Part 15 of the FCC Rules. These limits are designated to provide reasonable protection against harmful interference in a residential installation. This equipment generates, uses and can radiate radio frequency energy and, if not installed and used in accordance with instructions, may cause harmful interference to radio communications. However, there is no guarantee that interference will not occur in a particular installation. If this equipment does cause harmful interference to radio or television reception, which can be determined by turning the equipment off and on, the user is encouraged to try to correct the interference by one or more of the following measures:
* Reorient or relocate the receiving antenna.
* Increase the separation between the equipment and receiver.
* Connect the equipment into an outlet on a circuit different from that to which the receiver is connected.
* Consult the dealer or an experienced radio/TV technician for help.
- Changes or modifications not expressly approved by the party responsible for compliance could void the user's authority to operate the equipment.
FOR CANADIAN USERS
This Class B digital apparatus complies with Canadian ICES-003
FOR EU USERS
Note:
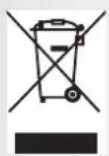
This symbol mark and recycle system apply to EU countries and do not apply to countries in other areas of the world.
Your SANYO product is designed and manufactured with high quality materials and components which can be recycled and reused.
This symbol means that electrical and electronic equipment, at their end-of-life, should be disposed of separately from your household waste.
Please dispose of the equipment at your local community waste collection/recycling centre.
In the European Union there are separate collection systems for used electrical and electronic products.
Please help up to conserve the environment we live in!
Manufacturer and Address
SANYO Electric Co., Ltd.
5-5, Keihan-hondori, 2-chome,
Moriguchi City, Osaka, Japan
Authorized Representative and Address
SANYO FISHER Sales (Europe) GmbH
Stahlgruberring 4, D-81829 Munich, Germany
vi Preface
Symbols used in this manual

Points giving some extended instructions or special points to pay attention to.
You many find the answers to questions or problems concerning camera operation in the sections "Troubleshooting".
FCC information

Tested To Comply With FCC Standards FOR HOME OR OFFICE USE
Declaration of Conformity
Model number: VPC-E870
Trade Name: SANYO
Responsible party: SANYO FISHER COMPANY
Address: 21605 Plummer Street
Chatsworth, California 91311
Telephone No.: (818) 998-7322
This device complies with Part 15 of the FCC Rules. Operation is subject to the following two conditions:
(1) this device may not cause harmful interference, and
(2) this device must accept any interference received, including interference that may cause undesired operation.
Canadian ICES-003 information
This class B digital apparatus complies with Canadian ICES-003.
TRADEMARK INFORMATION
- Micr® and Windows® are U.S. registered trademarks of Microsoft Corporation.
- Pentium ^® is a registered trademark of Intel Corporation.
- Macin® is a trademark of Apple Computer, Inc.
- SD ^TM is a trademark.
- SDHC ^TM is a trademark.
- Other names and products may be trademarks or registered trademarks of their respective owners.
READ THIS FIRST
Notice:
- Product design and specifications are subject to change without notice. This includes primary product specifications, software, software drivers, and user's manual. This User Manual is a general reference guide for the product.
- The product and accessories that come with your camera may be different from those described in this manual. This is due to the fact that different retailers often specify slightly different product inclusions and accessories to suit their market requirements, customer demographics, and geographical preferences. Products very often vary between retailers especially with accessories such as batteries, chargers, AC adapters, memory cards, cables, pouches, and language support. Occasionally a retailer will specify a unique product color, appearance, and internal memory capacity. Contact your dealer for precise product definition and included accessories.
- The illustrations in this manual are for the purpose of explanation and may differ from the actual design of your camera.
- The manufacturer assumes no liability for any errors or discrepancies in this user manual.
viii Preface
Introduction
Congratulations on the purchase of your new digital camera. This manual provides step-by-step instructions on how to use your camera, and is intended for your reference only.
System Requirements
In order to get the most out of your camera, your computer must meet the following system requirements:
- OS: Windows 2000/XP/VISTA
• Memory: 128MB or above
• HDD space: 40 MB or above
• USB port
Package Contents
Check the contents of your camera package. It should contain:
• Digital camera
- USB/AV 3-in-1 cable
- Wrist strap
- One Li-ion battery
- Battery charger and power cord
- Camera pouch
- Quick start guide for all regions
- Bundled AP-CD (Application Software, Driver and User's Manual for all regions)
Main Features
- 8 mega pixels resolution
- 15x zoom (Up to 3x optical zoom and 5x digital zoom)
• 1/2.5 inch CCD image sensor
• 2.5 inch LTPS TFT LCD monitor - 32 MB internal flash memory; support SD memory card from 32MB to 8GB
- Sleek and slim design
- Easy-to-use button interface
- PictBridge compatibility
- Slideshow feature to review your pictures and movies
• A/V output to view your pictures and movies on your TV - USB port to transfer photos and movies to your PC
2 Introduction
Camera Views
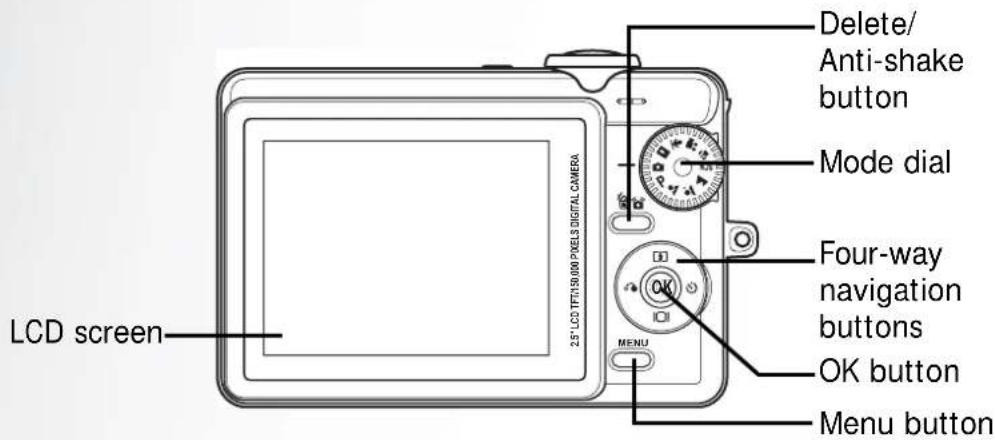
Front View
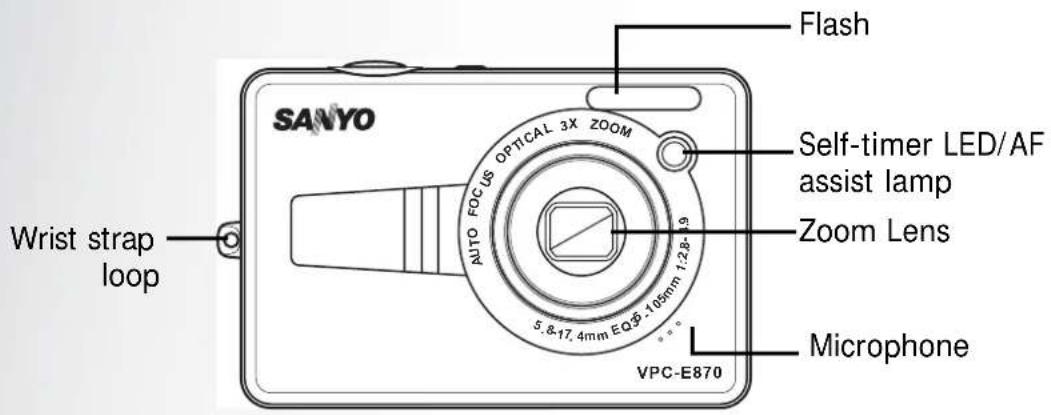
Back View
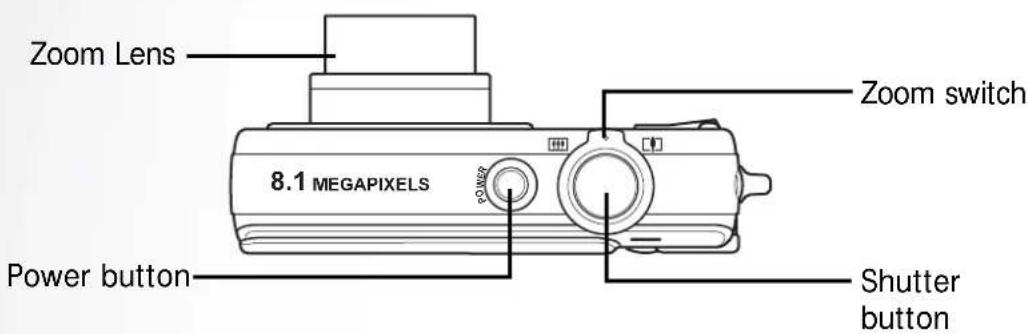
Top View
Camera Views
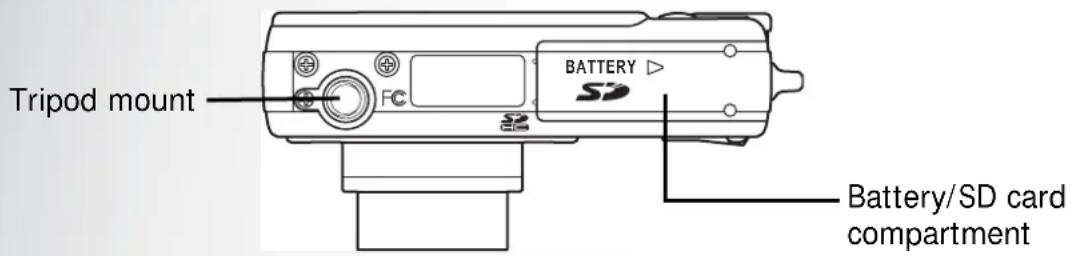
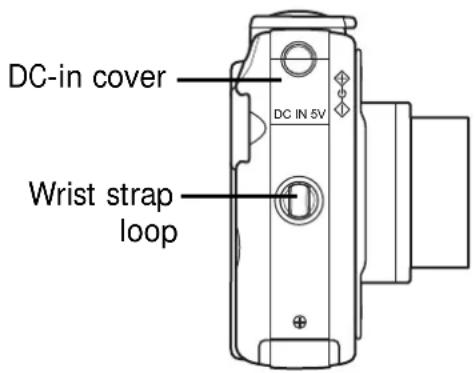
Bottom View
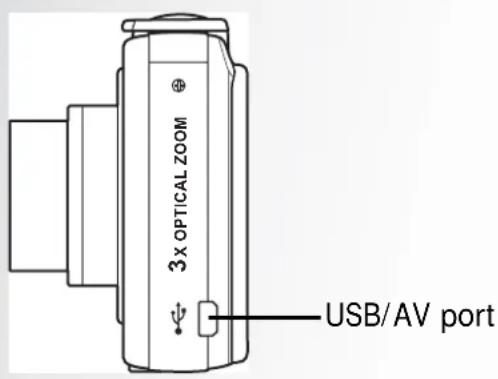
Left / Right View
The Mode Dial
The camera is equipped with a convenient Mode Dial that allows you to switch between different modes with ease. The function of each mode is as follows:
Mode Type Icon Function
| Auto Switch to select Automode. | ||
| P-Mode(Program Mode) | Switch to select Program mode. | |
| Portrait Switch to select Portrait mode. | ||
| Night Portrait Switch to select Night Portrait mode. | ||
| Landscape Switch to select Landscape mode. | ||
| Scene | SCN | Switch to select Scene mode. Here you can set a pre-programmed Scene mode. |
| Macro Switch to enable Macro mode. | ||
4 Introduction
Video Switch to select Video mode.
Audio Switch to enable Audio Recording mode.
Playback

Switch to select Playback mode to review photos/videos/audio clips saved in the internal memory or on the memory card.
Navigation Buttons
The four-way navigation buttons and the OK button allow you to access the various options available from the On Screen Display (OSD) menu. You can configure a wide range of settings to ensure maximum results from your photos and videos. Further functions of these buttons are as follows:
Icon Button Function
| OK OK | 1. Confirms a selection when using the OSD menus.2. In Capture mode:Press to enable AF area selection when Selected Area is selected in Focus Zone submenu3. In Playback mode:Press to start and pause the audio/video playbackPress to stop the voice memo playback4. In USB mode:MSDC: N/APTP: Press to confirm the selection | |
| [+] | Up/Flash | 1. Moves up in the OSD menus.2. In Capture mode:Press to pan up in AF area selectionScroll through the flash mode options (Auto, Off, Fill, and Anti Red-eye)3. In Playback mode:Press to pan up in magnify/crop modePress to move up in the thumbnail display4. In USB mode:MSDC: N/APTP: Press to scroll up through a menu |
Icon Button Function
| Right/Self-timer/Burst mode | 1. Moves right in the OSD menus.2. In Capture mode:Press to pan right in AF area selectionPress to scroll through the Self-timer/Burst/Multi-Burst mode3. In Video mode:Press to scroll through the Self-timer options4. In Playback mode:Press to pan right in magnify/crop modePress to move right in the thumbnail displayPress to navigate to next image in single upPress to fast forward video/audio playback5. In USB mode:MSDC: N/APTP: Press to select the next image in This Image submenu | |
| IOI | Down/Screen | 1. Moves down in the OSD menus.2. In Capture mode:Press to pan down in AF area selectionPress to turn off extra icons on the LCD screen, press again to turn all icons back on the LCD screen3. In Video mode:Press to turn off extra icons on the LCD screen, press again to turn all icons back on the LCD screen4. In Playback mode:Press to pan down in magnify/crop modePress to move down in the thumbnail displayPress to show the file information5. In USB mode:MSDC: N/APTP: Press to scroll down through a menu |
6 Introduction
Icon Button Function
| Left/Quick Review | 1. Moves left in the OSD menus.2. Goes up to the previous level in the OSD menus.3. In Capture mode:Press to pan left in AF area selectionPress to display the previously captured photo4. In Video mode:Press to display the first frame of the last video recorded5. In Playback mode:Press to pan left in magnify/crop modePress to move left in the thumbnail displayPress to navigate to previous image in single upPress to fast rewind video/audio playback6. In USB mode:MSDC: N/APTP: Press to select the previous image in This Image submenu |
LED Indicators
LED LED Status Camera Status
| Power/Flash LED | Off Power Off. | |
| Blue (steady) Ready to take pictures. | ||
| Blue (blinking) Camera busy. | ||
| Self-timer LED/AF assist lamp | Off Self-timer off. | |
| Orange (blinking) (1Hz) | Self-timer count down, flashes during 10 seconds. | |
| Orange (blinking) (4Hz) | Self-timer count down, flashes during last 2 seconds. | |
LCD screen
The high resolution 2.5" TFT LCD screen shows all important information regarding camera settings as well as the visual image for your photo or video.
Use the Mode Dial to switch between screen modes. Press the Screen 101 button to switch between a Full display (all icons are displayed), or a Simple display (only mode icon and focus area are shown while other icons are hidden).
Capture/Video Mode Display
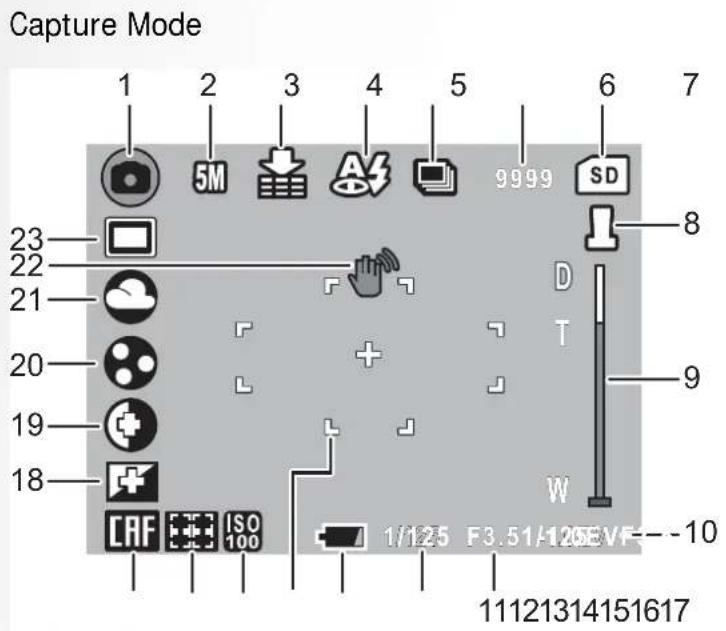
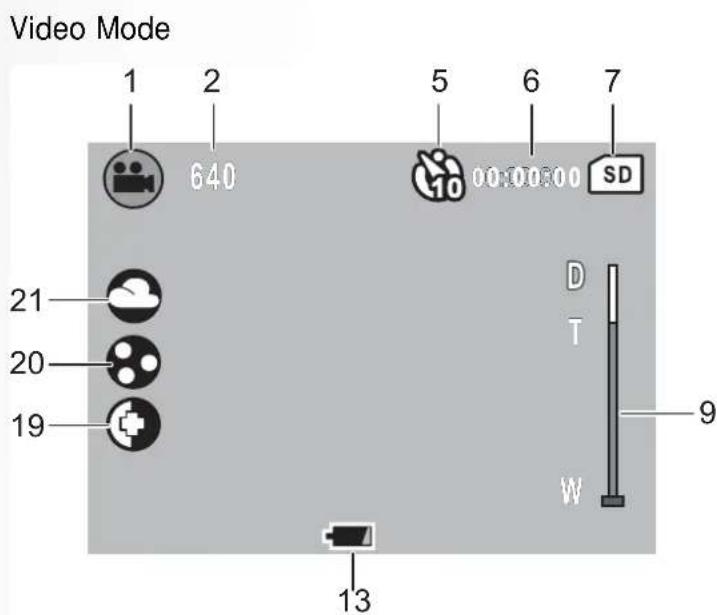
8 Introduction
No. Name Mode Icon
| 1 Mode indicator | Auto |  | ||
| P-Mode |  | |||
| Portrait |  | |||
| Night Portrait |  | |||
| Landscape |  | |||
| Scene | Sport |  | ||
| Night Landscape |  | |||
| Backlight |  | |||
| Museum |  | |||
| Snow |  | |||
| Sunset |  | |||
| Fireworks |  | |||
| Party |  | |||
| Beach |  | |||
| Copy |  | |||
| Macro |  | |||
| Video |  | |||
| Audio |  | |||
| Playback |  | |||
| 2 Image Resolution | 8M | 8M | ||
| 5M | 5M | |||
| 3M | 3M | |||
| 2M | 2M | |||
| VGA | VGA | |||
| 3 Image Quality | Best | |||
| Better | ||||
| Good | ||||
| 4 | F I a | Auto Flash | A3 | |
| Flash Off | ||||
| Fill Flash | ||||
| Anti Red-eye | ||||
| 5 Self-timer/Burst mode | M-Burst | |||
| Burst Mode | ||||
| Self Timer | 2 Seconds | |||
| 10 Seconds | ||||
| 6 Image Counter Capture | Mode Quantity 9999 | |||
| Video Mode Timer 00:00:00 | ||||
| 7 Memory Interface | SD Card | |||
| Internal Memory | ||||
| 8 Date Stamp - | ||||
| 9 Zoom Bar | - | |||
10 Introduction
| 10 | EVCompensation | - -1.0EV | ||
| 11 Aperture Value - F3.5 | ||||
| 12 Shutter Speed - 1/125 | ||||
| 13 Battery Indicator | Battery Low | |||
| Battery Insufficient | ||||
| 14 AF Frame -- | ||||
| 15 ISO Speed | Auto | ISO Auto | ||
| ISO 80 | ISO 80 | |||
| ISO 100 | ISO 100 | |||
| ISO 200 | ISO 200 | |||
| ISO 400 | ISO 400 | |||
| ISO 800 | ISO 800 | |||
| ISO 1000 | ISO 1000 | |||
| 16 Focus Zone | Multi-Zone | |||
| Center | ||||
| Selected Area | ||||
| 17 Continues AF - | ||||
| 18 Sharpness | High | |||
| Normal | ||||
| Low | ||||
| 19 Contrast | High | |||
| Normal | ||||
| Low | ||||
| 20 Saturation | High |  | ||
| Normal |  | |||
| Low |  | |||
| 21 White Balance | Auto |  | ||
| Sunny |  | |||
| Tungsten |  | |||
| Fluorescent |  | |||
| Cloudy |  | |||
| 22 | Camera Steady Warning | - |  | |
| 23 AE | Metering | Average |  | |
| Matrix |  | |||
| Spot |  | |||
12 Camera Setup
Camera Setup
Attaching the Wrist Strap
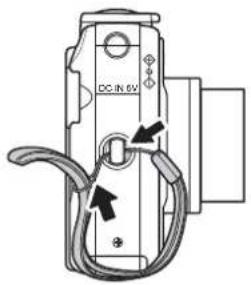
Follow these instructions to attach the wrist strap to your camera to facilitate easy carrying:
- Insert the short loop of the strap in the strap eyelet.
- String the larger loop of the strap though the short loop and pull tight to attach the strap to the camera.
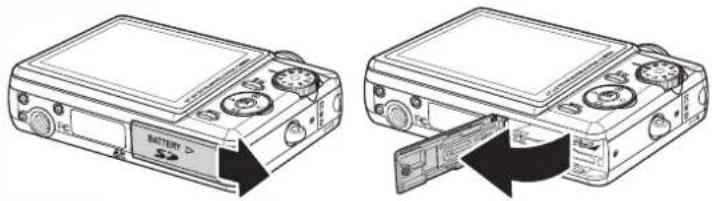
Inserting the Battery
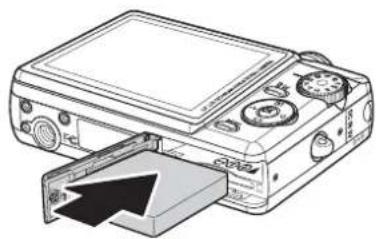
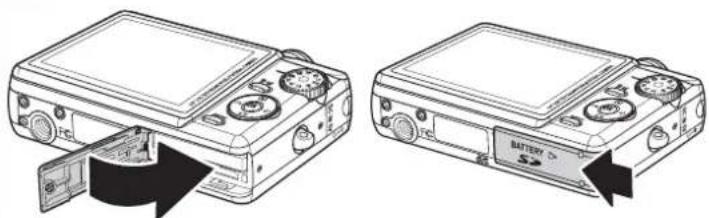
Follow these instructions to insert the Li-ion battery into the battery compartment.
- Open the battery compartment at the bottom of the camera.
natural_image
Two technical line drawings of a battery pack device, showing front and side views with no text or symbols.- Insert the battery into the compartment observing the correct polarity.
natural_image
Diagram of a digital camera with an open drive and control panel (no text or symbols)- Close the battery compartment.
natural_image
Two line drawings of a portable electronic device with labeled ports and an arrow indicating a download or transfer process (no text or symbols present)Note: The Li-ion battery should be fully charged before using for the first time.
Inserting an SD/MMC Memory Card
The camera features 32 MB internal flash memory but you may also use an optional SD/MMC memory card for additional storage.
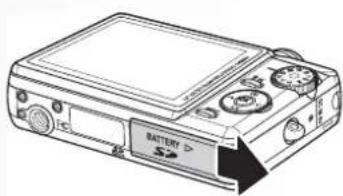
Follow these instructions to insert the SD/MMC card.
- Open the battery compartment at the bottom of the camera.
natural_image
Line drawing of a portable electronic device with buttons and a battery label (no text or symbols beyond basic labels)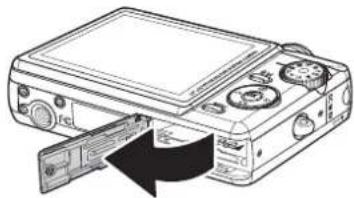
natural_image
Diagram of a computer monitor with an open drive and cable ports, showing internal components (no text or labels)- Insert the SD/MMC card into the memory card slot as shown.
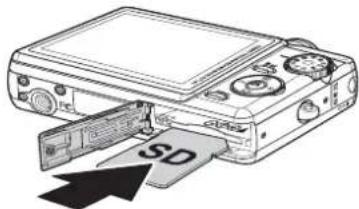
- Close the battery compartment.
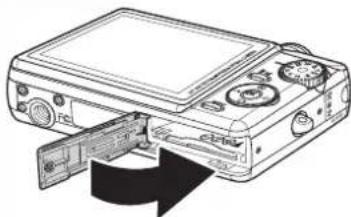
natural_image
Diagram of a computer monitor with an open drive and scroll wheel (no text or symbols)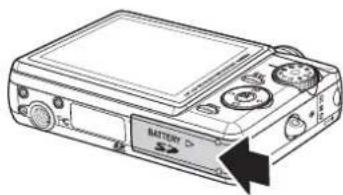
natural_image
Line drawing of a portable electronic device with buttons and a battery label (no text or symbols beyond branding)To remove the SD/MMC card, gently push the card until it pops out. Pull out the card carefully.
Charging the Battery
Insert the battery into the battery charger as shown. Connect the power supply to the charging unit and the mains supply.
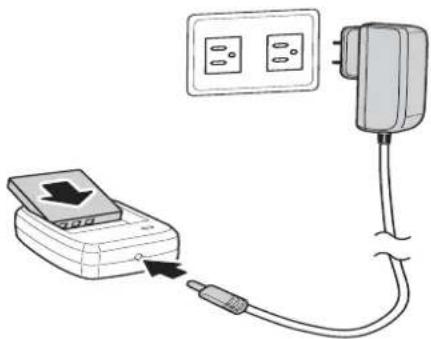
Turning On
Press and hold the Power button to turn on the camera. To turn off the camera, press the Power button again.
14 Camera Setup
First Time Use
Press the Power button as described in "Turning On" on page 13, a welcome screen displays momentarily on the LCD screen.

If the camera is turned on for the first time, the Language menu pops up automatically after powering on the camera.
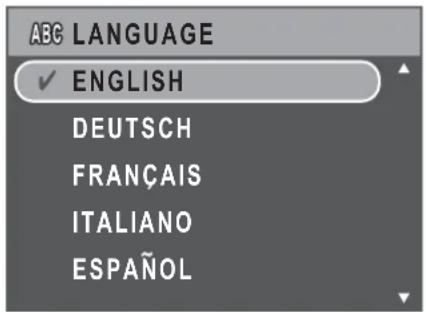
After the desired language is selected, the Date and Time menu pops up. Use the Navigation Buttons to toggle each field and adjust the value. Press the OK button to confirm.
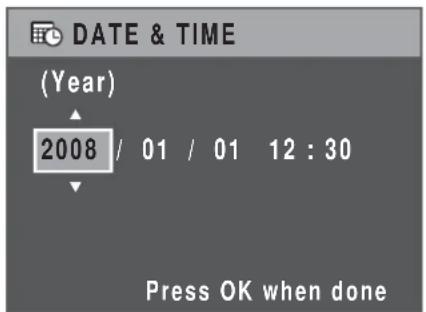
Note: If the Date and Time is reset (when running out the battery and not in use for a long period), the Date and Time setup screen displays automatically.
Getting Started
Now that you are familiar with the layout of your camera, you are ready to start taking photos and movies.
Taking your First Photo
Taking a photo with the camera is very simple.
- Turn the camera on and turn the Mode Dial to Auto mode.
- Frame the shot on the LCD screen and press the Shutter button halfway. The camera automatically adjusts the focus and exposure. The focus bracket turns green when ready.
- Press fully and hold the Shutter button to capture the image.
When a camera steady warning icon appears, hold the camera as still as post-an 1/30 second) is required.

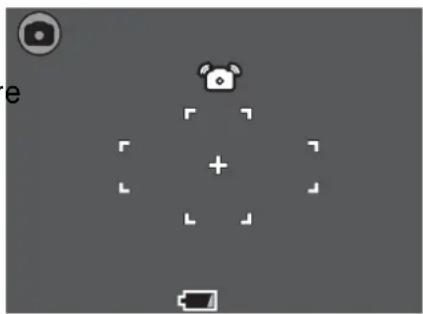
Anti-Shake Function
This function is only available in Auto

capture
mode. Press the button to enable the Anti-Shake function, and press again to disable it. An
Anti-Shake icon displays on the LCD screen when the function is activated.
natural_image
Simple grayscale game interface with a robot icon, plus signs, and battery symbol (no readable text or labels)Using Quick Review
To delete a photo when using Quick Review:
- Press the Left/ Quick Review 📋 navigation button.
- Press the button, a confirmation screen is displayed. Select This Image to delete the photo or Cancel to keep it.
- Press OK to confirm your selection.
You can also delete photos from the Playback menu. See “Deleting Photos/Videos/Audios” on page 29 for more detailed information.
Using Macro Mode
Macro mode is designed for close-up photography and can capture all detail even when your subject is very close to the camera. Turn the Mode Dial to Macro mode. The Macro icon displays on the LCD screen.
16 Getting Started
Setting the Flash Mode
You can choose from four flash modes to suit various lighting conditions.
Press the Up/Flash [⚡] navigation button to scroll through the four modes on the LCD screen. The flash setting remains the same for subsequent photos until you change it as described above.

Auto flash: The flash fires automatically when needed.

Flash off: The flash is turned off.

Fill flash: The flash always fires.

Anti Red-eye: The flash fires twice so as to reduce the red-eye effect.
Using the Zoom in/out Function
The camera comes equipped with 3x optical zoom and 5x digital zoom that allows you to zoom in on your subject.
To use the zoom:
- Slide the Zoom switch to the right [+] to zoom in on your subject.
- Slide the Zoom switch to the left 📁 to zoom out from your subject.
Using the Self-timer and Burst Photography
The camera comes equipped with a self-timer which allows you to take photos after a pre-defined delay. The burst photography feature allows you to take multiple consecutive photos by pressing and holding the Shutter button. The multi-burst photography feature allows you to take multiple (16) consecutive VGA photos by pressing the Shutter button once.
To set the self-timer/burst mode:
-
Press the Right/ Self-timer 🎨 navigation button to cycle through the self-timer( or ) and burst photography options ( or ) 📁 the 📂D screen.
-
Once you have selected an option, frame and take your shot. In self-timer mode, the icon will flash until the time expires and the photo is taken.
-
After taking a photo, the Self-timer automatically exit. If you want to use these functions for the next photo, press the Right/ Self-timer ⏻ navigation button again to activate the function.
Note:

Burst Mode
Up to 3 photos continuously during pressing the Shutter button.

: Multi-Burst Mode
16 photos continuously by 1 press of the Shutter button.
Setting the Scene Mode
The camera supports various preset modes for shooting in different environments and conditions. Each setting is configured automatically by the camera.
To select scene modes:
- Turn the Mode Dial to Scene SCN mode to display the Scene menu options.
- Use the Up/Down navigation buttons to scroll through the modes:
• Sport
- Night Landscape
- Backlight
- Museum
- Snow
- Sunset
- Fireworks
- P a
- Beach
- Copy




- Press OK to confirm your selection.
Face Detection AF/AE Function
This function is only available in Portrait
and
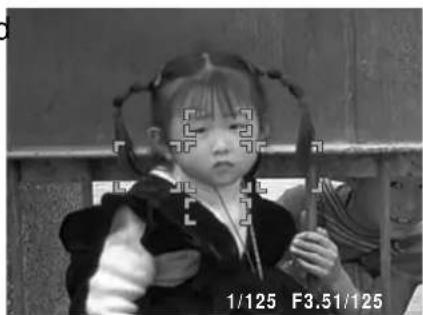
Night Portrait 🖱️ capture modes. When the shutter button is pressed halfway, the face detection function is activated. When the subject's face is detected, the green focus frames appear on the LCD screen. Then the camera automatically adjusts the focus point and exposure to the optimized value.
natural_image
Black-and-white photo of a young girl giving a thumbs-up, with another child partially visible in the background (no text or symbols)However, when the camera fails to detect your subject's face, the camera will set the focus to Multi-Zone with a green or red focus frame.
18 Getting Started
Recording your First Video
You can also record video clips with the camera.
To record a video clip:
- Turn the camera on and turn the Mode Dial to Video mode.
- Frame your subject using the LCD screen and press the Shutter button to start recording. The self-timer LED is steady on to indicate recording is in progress.
- Press the Shutter button again to stop recording. If not, recording will continue until all free memory space is used.
- In playback mode, press the OK button to playback the recording. Press the / button to delete the recording if needed.
Recording Audio Files
You can also record audio files with the camera.
To record an audio file:
- Turn the Mode Dial to Audio ↓ mode.
- Press the Shutter button to start recording. A counting up timer will be displayed during audio recording.
- Press the Shutter button again to stop recording. If not, recording will continue until all free memory space is used.
- Start recording screen is displayed after recording is stopped.
- In playback mode, press the OK button to playback the recording. Press the 🔊/ 🔒 button to delete the recording if needed.
Recording Voice Memos
You can add a 1-minute voice memo to an image right after it's taken.
To record a voice memo:
- Hold the Shutter button to start recording and release the Shutter button to stop recording.
- While recording, the selected image is shown on the LCD screen.
- The elapsed time screen shows the length of a voice memo.
Note:
A Voice Memo can also be added in Playback mode.
Capture Settings
This section describes the various settings you can modify to get better results when taking photos and video clips.
The Capture Menu
To access the Capture menu:
- Turn the Mode Dial to select Auto 📄 or P-Mode P.
- Press the MENU button to display menu options.
- Press Up/ Down navigation buttons to highlight an option and press OK button to confirm.
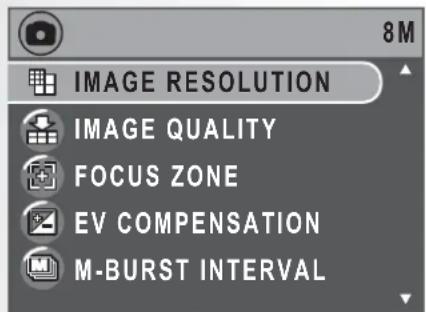
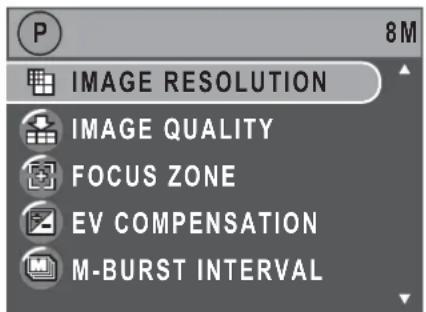
Refer to the following sections for more detailed information about each setting.
Image Resolution
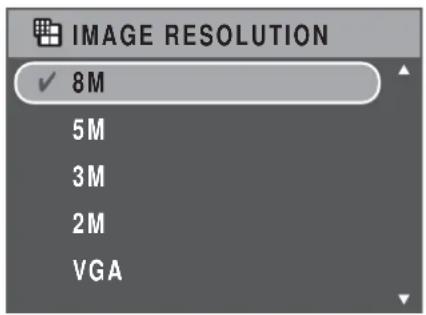
The Image Resolution setting refers to the size of the image in pixels. Use the Up/Down navigation buttons to select from the options. Six settings for image resolution are available:
- 8M (3264 x 2448)
- 5M (2576 x 1932)
• 3M (2048 x 1536) - 2M (1600 x 1200)
• VGA (640 x 480)
20 Capture Settings
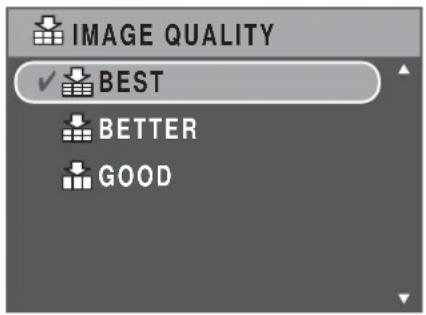
Image Quality
The Image Quality setting refers to the compression ratio of the JPG. The higher the image quality, the less the image compression ratio but more memory space is required. Use the Up/Down navigation buttons to select from the options. Three settings for image quality are available:
- Best (default)
- Better
• Good
Focus Zone
The Focus Zone setting allows you to select the number of zones the camera will focus on when taking a photo. Use the Up/Down navigation buttons to select from the options. Three settings for focus zone are available:
- Multi-Zone (default)
- Center
- Selected Area: The new setting is applied to the Live View image each time Up/ Down naviga-
tion buttons are pressed. Press the OK button to return to the Capture menu and save the current setting, which will take effect until it is changed again.
![FOCUS ZONE ✓ MULTI-ZONE [ ] CENTER SELECTED AREA](/content/2026/05/1008373/images/496c24909b1f077c7687ca3f454a776cb12c9ac83ad6e909418936213d22ef00.jpg)
EV Compensation
The EV Compensation menu allows you to adjust the exposure or amount of light that enters the lens while capturing photos or videos. Use this feature to lighten or darken the image when the brightness between the subject and background is not balanced or when the subject occupies only a small part of the photograph. Use a positive (+) EV compensation for spotlit subjects, especially against dark backgrounds or scenes with low reflectivity, such as green or dark foliage.
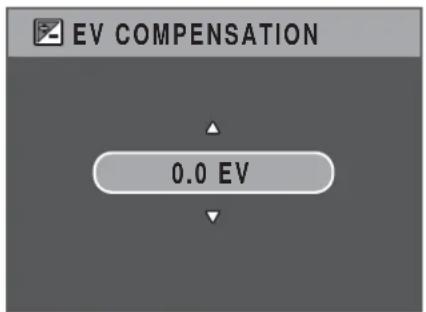
Use the Up/Down navigation buttons to modify the value. This setting can be modified from -2.0 to +2.0 in a 0.3 increment/decrement.
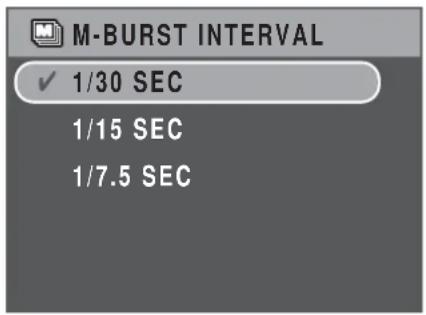
M-Burst Interval
The M-Burst Interval setting allows you to adjust the burst interval when the multi-burst function is enabled. Use the Up/Down navigation buttons to select from the options.
• 1/30 Sec (default)
• 1/15 Sec
• 1/7.5 Sec
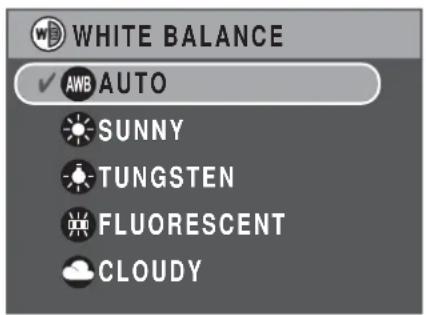
White Balance
The White Balance setting allows you to adjust the camera setting according to the ambient white light when shooting. White balance represents the degree of coolness of the light. If the light has a yellowish or reddish tinge, it is said to be warm; if it has a bluish tinge, it is said to be cool. You can select the setting and preview it on screen before confirming your choice. Use the Up/Down navigation buttons to select from the options. Five white balance settings are available:
- Auto (default)
- Sunny
• Tungsten - Fluorescent
- Cloudy
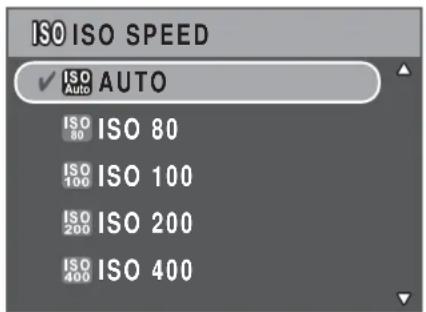
ISO Speed
The ISO Speed setting allows you to adjust the CCD light-sensitivity. Use the Up/Down navigation buttons to select from the options. Seven ISO settings are available:
- Auto (default)
• ISO 80
• ISO 100: For outdoor photography in bright sunlight.
• ISO 200: For outdoor or indoor photography in bright light. - ISO 400: For indoor photography or low light environments.
- ISO 800: For moving object photography or low light environments without using flash.
- ISO 1000: For moving object photography or low light environments without using flash
22 Capture Settings
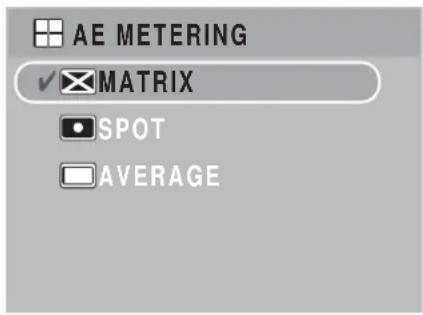
AE Metering
AE Metering allows you to select the area of the subject or frame by which the camera measures light. Use the Up/Down navigation buttons to select from the options. Three AE metering settings are available:
- Matrix (default): Camera metering is set for evaluating 16 zones of objects with intelligent weighting in the frame.
- Spot: Camera metering is set for the brightness of a single object in the center of the frame.
- Average: Camera metering is set for the average brightness of objects in the frame.
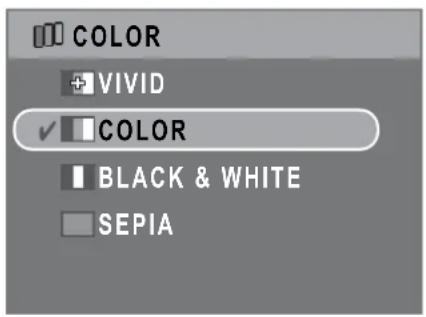
Color
The Color setting allows you to take photos and apply different colors or color tones for an artistic effect. Use the Up/Down navigation buttons to select from the options. Four color settings are available:
• Vivid
- Color (default)
- Black & White
- Sepia
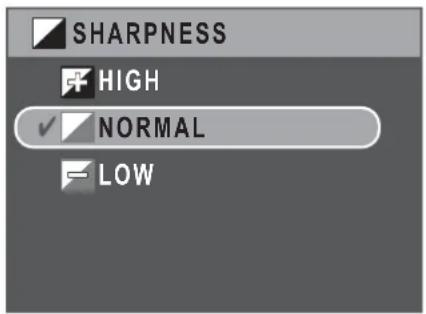
Sharpness
The Sharpness setting allows you to enhance the finer details of your photos. Use a higher setting for very sharp photos and a lower setting for a soft-toned photo. Use the Up/Down navigation buttons to select from the options. Three sharpness settings are available:
• High
- Normal (default)
- Low
Saturation
The Saturation setting allows you to adjust the saturation of the colors in your photos. Use a high saturation setting for rich colors and a lower saturation setting for more natural tones. Use the Up/Down navigation buttons to select from the options. Three saturation settings are available:
• High
- Normal (default)
- Low
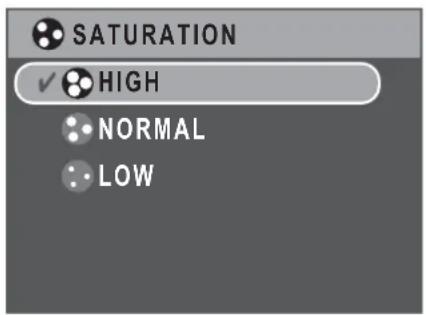
The Capture Menu
Contrast
The Contrast setting allows you to adjust the contrast of your photos. Use the Up/ Down navigation buttons to select from the options. Three contrast settings are available:
- High
- Normal (default)
- Low
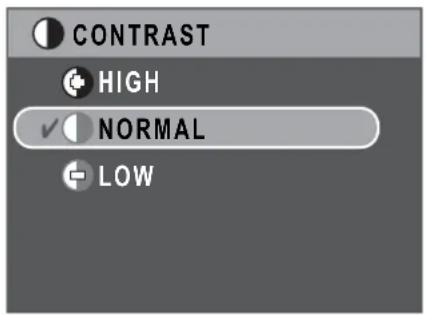
Setup
See "The Setup Menu" on page 35 for more details on the setup menu options.
Video Capture Menu
To access the video menu:
- Turn the Mode Dial to Video 🎯 mode.
- Press the MENU button to display the menu options.
- Use the Up/Down navigation buttons to highlight an option and press the OK button to confirm. Refer to the following sections for more detailed information about each setting.
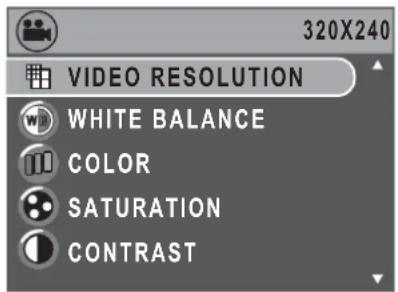
Video Resolution
The Video Resolution setting allows you to adjust the resolution at which your videos are recorded. Two video size settings are available:
- 640X480
- 320X240
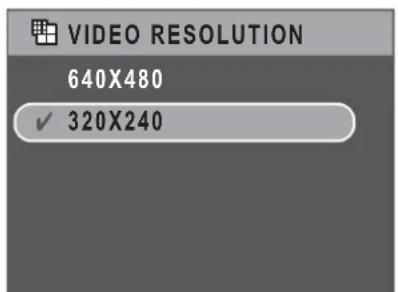
White Balance
See "White Balance" on page 21 for more details on the setup menu options.
Color
See "Color" on page 22 for more details on the setup menu options.
Saturation
See “Saturation” on page 22 for more details on the setup menu options.
Contrast
See "Contrast" on page 23 for more details on the setup menu options.
24 Capture Settings
Setup
See "The Setup Menu" on page 35 for more details on the setup menu options.
Photo, Video & Audio Playback
Playback Mode Display
Photo Playback
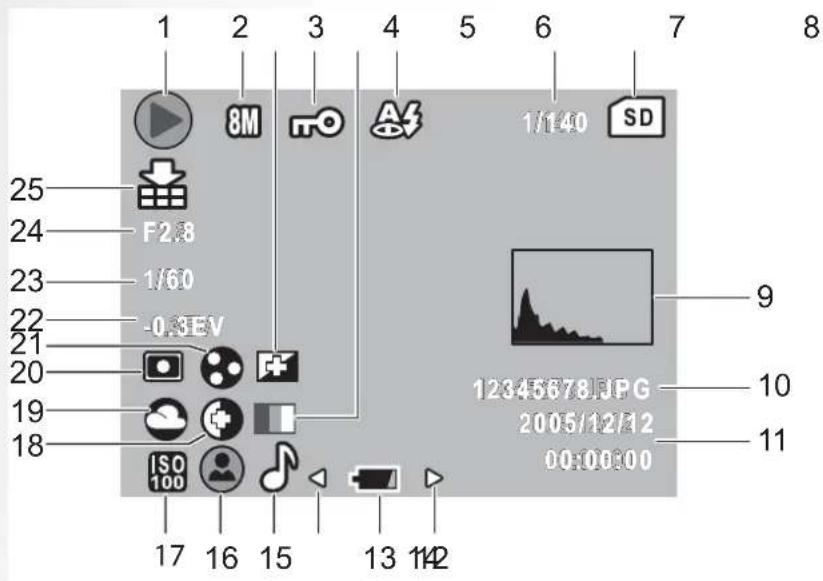
Video Playback
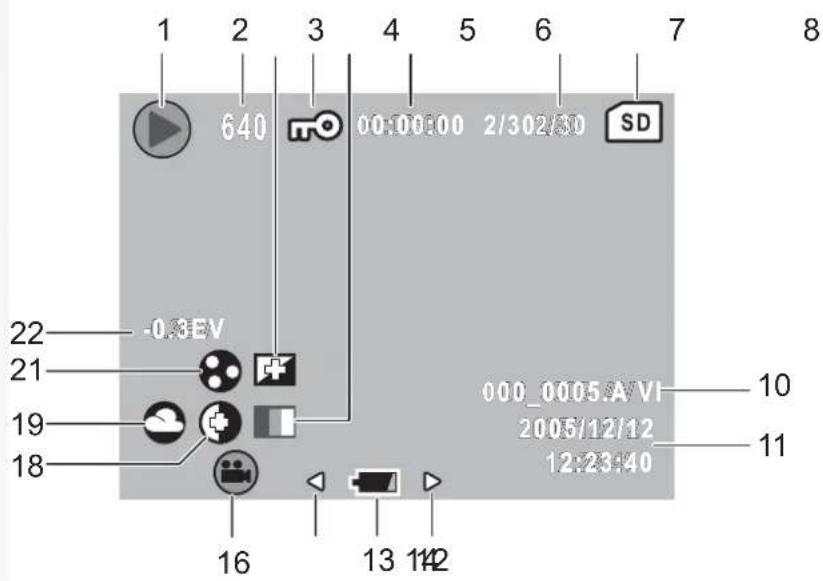
26 Photo, Video & Audio Playback
No. Name Icon
| 1 Playback mode |  |
| 2 Image resolution | Photo mode: 8M 5M 3M 2M VGAVideo mode:640 (640x480), 320 (320x240) |
| 3 Sharpness |  [IMAGE] [IMAGE] |
| 4 P r o t e c | |
| 5 Color mode | [WTB3][IMAGE] |
| 6 Flash mode |  to mode:AS [IMAGE]Video mode: 00:00:00(Length of the video clip.) to mode:AS [IMAGE]Video mode: 00:00:00(Length of the video clip.) |
| 7 Quantity 1/140, 2/30 | |
| 8 SD card / Internal memory |  [IMAGE] [IMAGE] |
| 9 Histogram |  [IMAGE] [IMAGE] |
| 10 File Name Photo mode: 12345678.JPG |  30 mode: 000_0005.AVI 30 mode: 000_0005.AVI |
| 11 Date and Time 2008/01/01 | 00:00:00 |
| 12 Next | Move to next item. |
| 13 Battery status |  [IMAGE] [IMAGE] |
| 14 Previous | Move to previous item. |
| 15 Voice memo |  |
| 16 Mode icons | Please see “Capture/Video Mode Display” on page 7 for detailed information. |
| 17 ISO Speed |  [IMAGE] [IMAGE] |
| 18 Contrast |  [IMAGE] [IMAGE] |
| 19 White balance |  [53BG] [53BG]   [IMAGE] [IMAGE] |


20 AE Metering
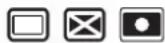
21 Saturation

22 EV Compensation -0.3EV
23 Shutter speed 1/60
24 Aperture value F2.8
25 Image quality

Viewing Photos/Videos on the LCD Screen
To view your photos and video files on the LCD screen:
- Turn the Mode Dial to Playback ▶ mode. The most recent photo or video clip is displayed.
- Use the Right/ Left navigation buttons to scroll through photos and video clips.
- Press the OK button to begin playback of a video clip.
- Press the Left/ Right navigation buttons at any time during playback to skip to the previous/next photo or video.
- Press the OK button and press the Left/Right navigation buttons to fast-rewind/fast-forward during video playback.
- Press the OK button at any time during playback to pause the video.
- After the video clip finishes playing, the LCD screen displays the first frame of the clip.
Viewing M-Burst Photos
To view your multi-burst photos on the LCD screen:
- Turn the Mode Dial to Playback ▶ mode. The most recent photo or video clip is displayed.
- Use the Right/ Left navigation buttons to scroll through photos.
- When reviewing a multi-burst image, it will be displayed from the 1^st frame to the 16^th frame at 2 frames/per second like a slideshow.
- To stop the M-Burst slideshow, press Left/Right navigation buttons and skip to the previous/next image.
28 Photo, Video & Audio Playback
Listening to Audio Files
To listen to audio files:
- Turn the Mode Dial to Playback ▶ mode. The most recent photo or video clip is displayed.
- Use the Left/Right navigation buttons to scroll through the files.
- Press the OK button to begin playback of an audio file.
- Press the Left/Right navigation buttons at any time during playback to skip to the previous/next audio file.
- Press the OK button and press the Left/Right navigation buttons to fast-rewind/fast-forward during audio playback.
- Press the OK button at any time during playback to pause.
Listening to Voice Memo
A voice memo displays simultaneously when playback an image with voice memo.
To stop a voice memo while reviewing an image, press OK button.
To skip to previous/next image, press Left/Right navigation buttons.
Viewing Photos/Videos on your TV
To view images stored on the camera on your TV, you must connect via the A/V port on the side of the camera. To connect your camera to a TV:
- Turn on the camera and make sure that the camera's video out format is set to the same as that of the TV. See "Video Out" on page 37 for more information.
- Connect the USB/AV 3-in-1 cable to the USB port on the camera.
- Connect the other end of the cable to the TV's AV input port.
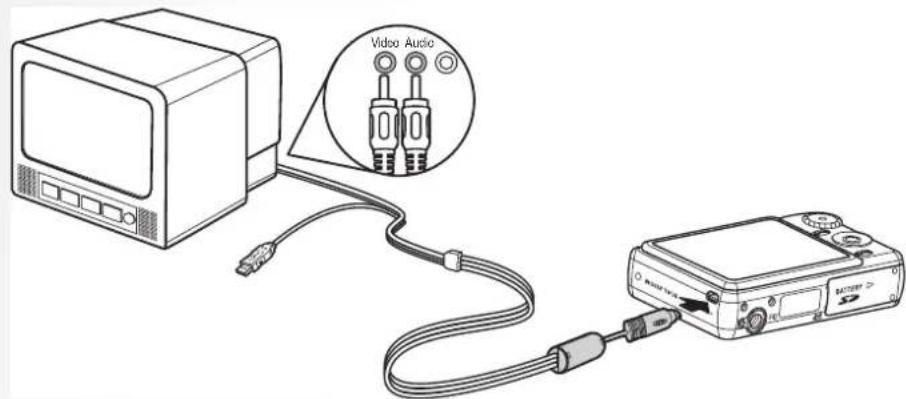
- The LCD screen turns blank and all images and video clips are displayed on the TV screen. Follow the same steps described in "Viewing Photos/Videos on the LCD Screen" on page 27.
Zooming In During Playback
The camera's zoom feature can also be used during Playback. This allows you to view photos in greater detail.
To zoom in on saved photos:
- Slide the Zoom In [icon] and Zoom Out [icon] switches to zoom in and out of the photo/video.
- Use the navigation buttons to pan across the image.
- When zoomed in on a photo, press the OK button to crop the image. When zoomed out to the maximum, the LCD screen will display all photos and videos as a series of thumbnails.
Deleting Photos/Videos/Audios
The Delete function allows you to remove unwanted files stored on internal memory or a memory card.
To delete a photo/video/audio:
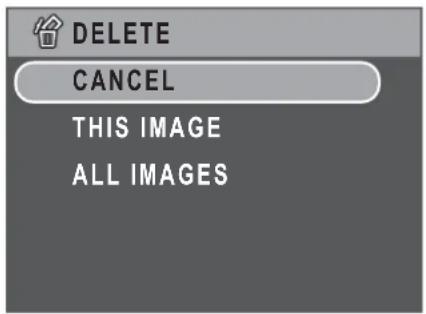
-
Press the 📋 button to display the Delete menu.
-
Press the Up/Down navigation buttons and the OK button to select from the three available options:
-
Cancel: Select to cancel the action and exit to the main menu.
- This Image: Select to delete the current image.
• A | I Images: Select to delete all images.
Using the Playback Menu
Access the Playback menu to view further information, configure printing settings, view a slideshow, or delete photos or movies.
To access the Playback menu:
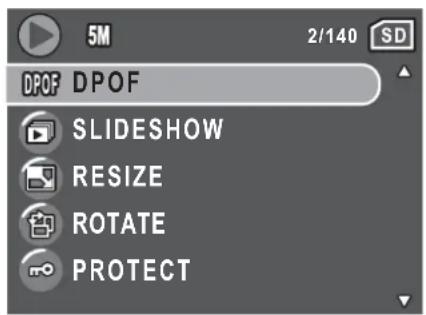
-
Turn the Mode Dial to select Playback Mode.
-
Press the MENU button to display the menu options.
-
Use the Up/Down navigation buttons to highlight an option and press the OK button to confirm.
30 Photo, Video & Audio Playback
DPOF
DPOF (Digital Print Order Format) allows you to specify the number of copies of a certain image that you want to print at a later date.
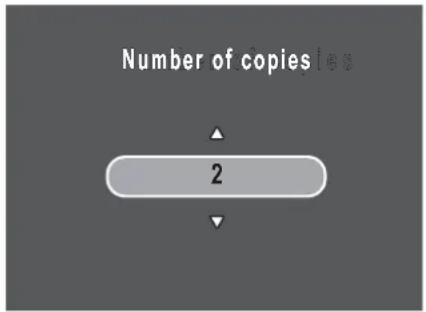
Use this function to tag pictures stored in your memory card with print information. You can tag all pictures to be printed or just the current picture. You can also select how many copies print and whether to include the date and time.
When all images to be printed are tagged, remove the memory card and take it to a photographic shop for printing, or use it with a DPOF compatible printer.
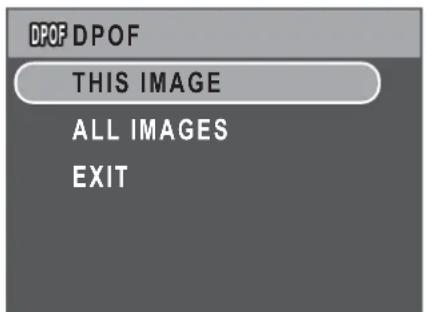
To set DPOF:
- Press the MENU button to select DPOF from the menu.
-
Press the Up/Down navigation buttons and the OK button to select from the available options:
-
This Image: Select to print the current image.
- All Images: Select to print all images.
-
Exit: Select to exit to the main menu.
-
Use the Up/Down navigation buttons to set the number of copies you wish to print.
Slideshow
The Slideshow function allows you to view all stored photos in a continuous sequence.
To view a slideshow:
- Press the MENU button to select Slideshow from the menu.
- Press the Up/Down navigation buttons and the OK button to select from the available options:
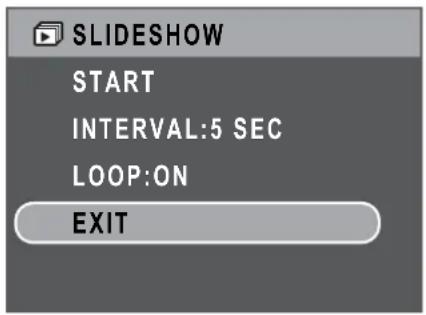
- Start: Select to start the slideshow.
- Interval: Select to set the interval time between each photo during the slide-show. Use the Up/Down navigation buttons to set a value in seconds.
- Loop: Select to enable/disable a continuous loop of the slideshow. Select On or Off (default) from the submenu.
- Exit: Select to exit to the main menu.
Resize
The Resize function allows you to change the image resolution.
To resize a photo:
-
Press the MENU button to select Resize from the menu.
-
Press the Up/Down navigation buttons and the OK button to select the resize ratio you require: 6M, 4M, 2M, 1M, and VGA.
-
Select Exit to return to the main menu.
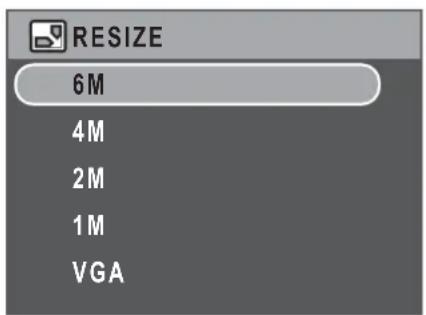
Note: It is only possible to scale-down image resolutions. If the current image resolution is VGA, this menu item is disabled in the Resize submenu. The ratio of the image (4:3 or 3:2) remains unchanged after resizing.
• This function only supports native pictures
- Cropped images cannot be resized
- If there is not sufficient storage space, images cannot be resized
- If the SD/MMC card is locked, images cannot be resized
• VGA images cannot be resized
32 Photo, Video & Audio Playback
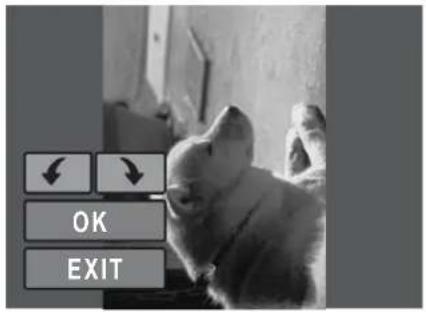
Rotate
The Rotate function allows you to change the orientation of a saved photo.
To rotate an image:
-
Press the MENU button to select Rotate from the menu.
-
Press the Left/Right navigation buttons and the OK button to rotate the select image.
-
OK: Select to rotate the image.
- Exit: Select to exit to the main menu.
natural_image
Black-and-white photo of a young dog resting on the floor, no visible text or symbolsProtect
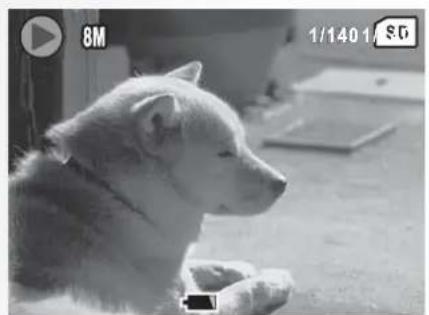
You can lock a photo or video to protect it from being accidentally erased.
To lock a photo or video:
- Press the MENU button to select Protect from the menu.
- Press the OK button to confirm.
- A key icon displays at the top of the screen to indicate the photo/video is now locked.
natural_image
Black-and-white photo of a young dog resting on the floor, no visible text or symbols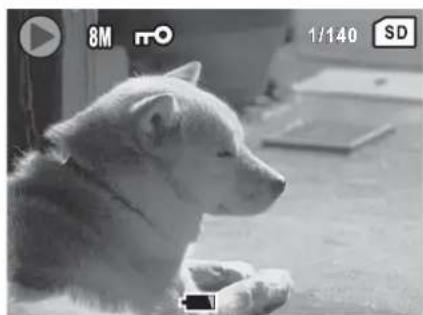
natural_image
Black-and-white photo of a wolf sitting on the floor, looking upward (no visible text or symbols)Red-Eye Compensation
The Red-Eye Compensation function allows you to perform red-eye reduction on a saved photo.
To remove red-eye from a photo:
- Press the MENU button to select Red-Eye Compensation from the menu.
- The camera starts processing. Press the Up/Down navigation buttons and the OK button to select from the three available options:
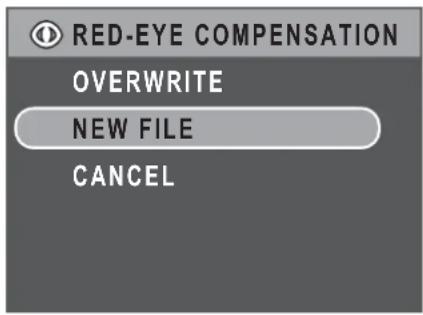
• Overwrite: Select to overwrite the original image.
- New file: Select to save the fixed image to a new file.
- Cancel: Select to discard the changes to the image and return to the main menu.
Note:
- If the image is protected, the fixed image will be saved as a new file directly without asking.
- If a failure occurs, the message "Cannot Processing Correctly" appears on the screen.
Move
The Move function allows you to move images stored in internal memory to a memory card.
To move an image:
- Press the MENU button to select Move from the menu.
- Press the Up/Down navigation buttons and the OK button to select from the three available options:
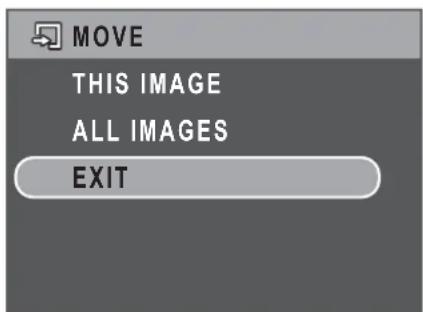
- This Image: Select to move the current image to a memory card.
- All Images: Select to move all images to a memory card.
- Exit: Select to exit to the main menu.
Note: The Move function is only available when you choose internal memory as the storage media and an SD card has been inserted into the camera.
34 Photo, Video & Audio Playback
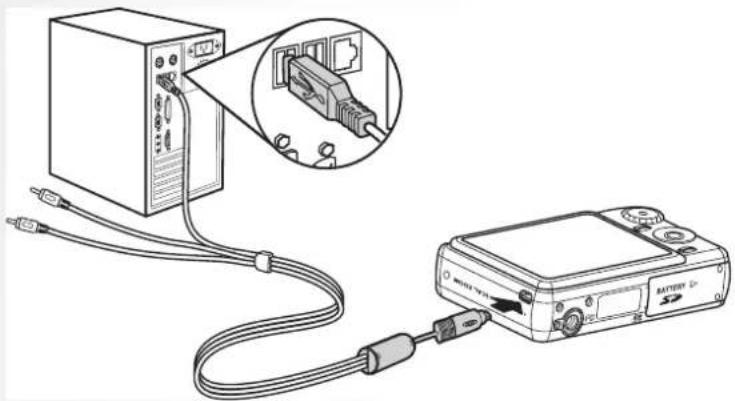
Transferring Photos/Videos to your PC
To transfer photos and videos to your PC:
Use the software CD to install the camera driver. Follow the on-screen instructions to complete the installation.
Connect the camera's USB port to a free USB port on your PC using the USB cable.
natural_image
Diagram showing connections between a server unit and a battery via cable, with an inset close-up of the device (no text or symbols present)The camera's internal memory and/or SD/MMC card appear as removable drives in the file manager. Copy the files from the drives to the directory on your PC.
Use ArcSoft PhotoImpression and ArcSoft VideoImpression (provided on the software CD) to view or edit the photos and videos respectively.
Camera Settings
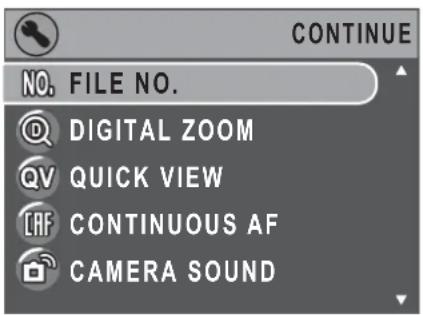
The Setup Menu
The setup menu, available in capture and playback modes, allows you to configure the camera's general settings and according to your preferences.
To access the setup menu:
- Press the MENU button when in Playback or any of the capture modes.
- Select Setup from the menu. The submenu appears.
- Use the Up/Down navigation buttons to scroll through the options and press the OK button to enter further submenus and to confirm your selection. Refer to the following sections for more detailed information about each setting.
File Number
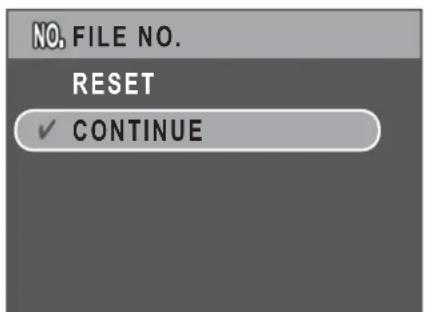
The File No. setting allows you to reset all file numbers assigned to each of the files on your camera. Select Reset to reset or Continue to set the file numbers in continuous order.
Digital Zoom
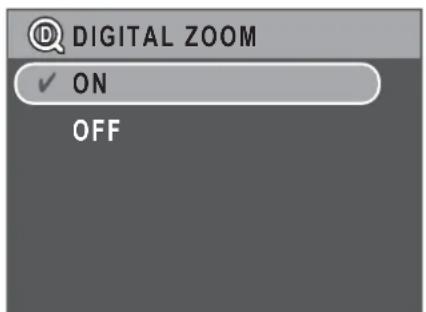
The Digital Zoom setting allows you to turn the digital zoom function on or off. Select On to enable the function or Off (default) to disable it.
36 Camera Settings
Quick View
The Quick View setting allows you to view the photo that you have just taken. Once you have taken your photo, it displays on the LCD screen. If you are not satisfied with the result, you can press the button to delete the photo immediately. Select On (default) to enable the function or Off to disable it.
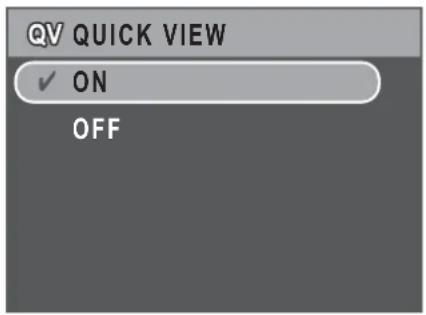
Note: The Quick View function is not available in Burst and M-Burst modes.
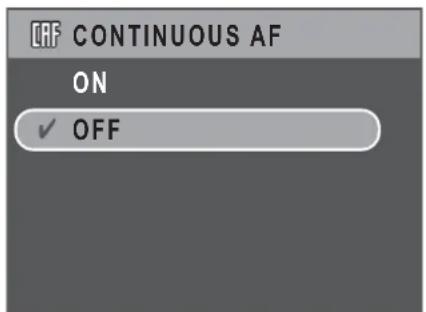
Continuous AF
The Continuous AF setting allows you to turn the continuous auto focus function On or Off. Select On to enable the function or Off (default) to disable it.
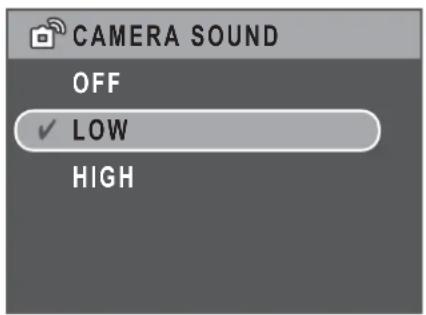
Camera Sound
The Camera Sound setting allows you to adjust the camera sound level. Three options are available:
- Off
- Low (default)
- High
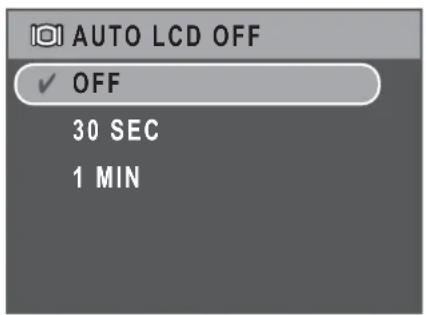
Auto LCD Off
The Auto LCD Off setting allows you to adjust the length of time that the LCD screen will remain lit before turning off to save battery power. Three options are available:
- Off (default)
• 30 sec
• 1 min
The Setup Menu
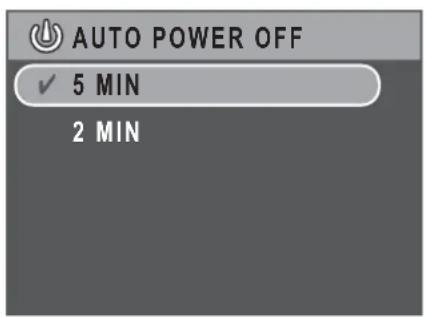
Auto Power Off
The Auto Power Off setting allows you to adjust the length of time after which the camera will power down when inactive. Use Up/Down navigation buttons to select from the menu options. Two options are available:
- 5 min (default)
- 2 min
Video Out
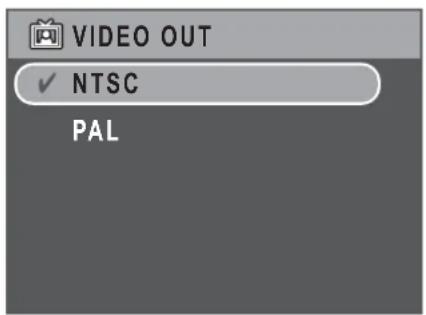
The Video Out setting allows you to adjust the video output, depending on the type of your TV. Use Up/Down navigation buttons to select from the menu options. Two options are available:
- NTSC (default)
• PAL
USB Mode
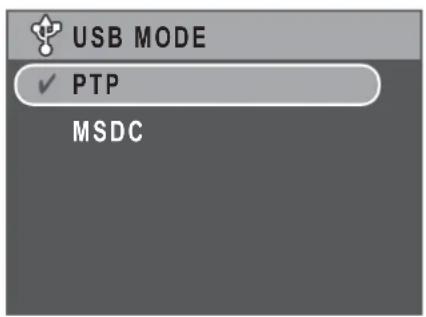
The USB Mode setting allows you to select the transfer method between your camera and your PC. Two options are available:
- PTP (PictBridge Print): When the camera is connected to a printer by a USB cable which supports Pictbridge, it can directly print images stored on the media. For details on PTP function, please See “PictBridge Print (PTP)” on page 40.
- MSDC (default): The camera is set up to act as a mass storage device, allowing for only transfer of files between your camera and PC.
38 Camera Settings
Date Stamp
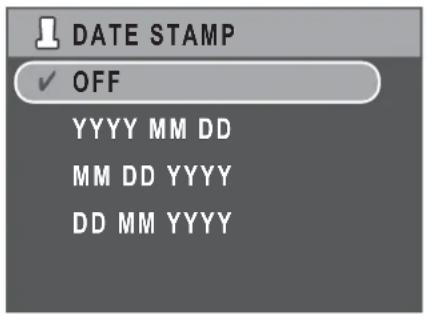
The Date Stamp setting allows you to adjust the format in which the date will appear on each photo or video. You can also deactivate this function if you wish. Setting a date stamp allows for easy sorting and the date will appear on the photo when printed. Use Up/Down navigation buttons to select from the menu options. Four options are available:
- Off (default)
• YYYY MM DD: year-month-date format - MM DD YYYY: month-date-year format
• DD MM YYYY: date-month-year format
Date and Time
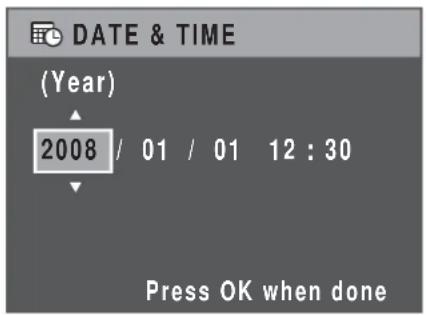
The Date and Time setting allows you to set or adjust the date and time on your camera. To set or adjust the date and time:
- Press the Left/ Right navigation buttons to select the Year field.
- Press the Up/Down navigation buttons to adjust the Year value.
- In the same way, select the Month, Date, Hour and Minute fields and adjust them accordingly.
Language
The Language setting allows you to choose which language the OSD menu uses. Scroll down the list and select your language. Use Up/Down navigation buttons to select from the menu options.
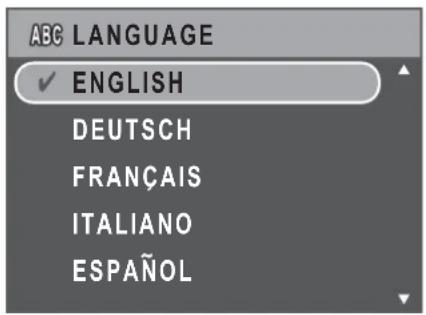
Image Storage
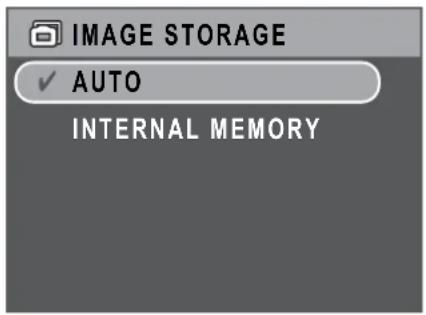
The Image Storage setting allows you to specify where photos and video clips will be stored. The camera features 32 MB internal memory but you can also insert an SD/MMC card (See "Inserting an SD/MMC Memory Card" on page 13 for more details). Two options are available:
- Auto (default): When selected, the camera chooses the storage medium automatically. If an SD/MMC card is inserted in the camera, all
photos and videos are stored on the card. If an external card is not detected, all photos and videos are stored in the internal memory. - Internal Memory: All photos and videos are stored in the internal memory.
Format
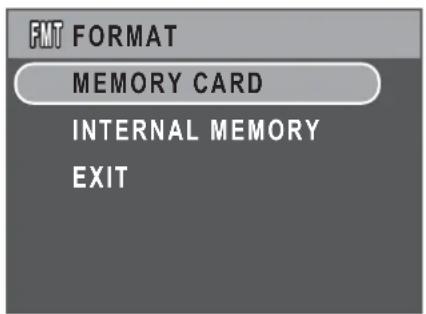
The Format setting allows you to erase all data in the internal memory or on the SD/MMC card. Use Up/Down navigation buttons to select from the menu options. Three options are available:
- Memory Card (default): All data on the SD/MMC will be formatted.
- Internal Memory: All data in the internal memory will be formatted.
- Exit: Cancel format action.
Reset
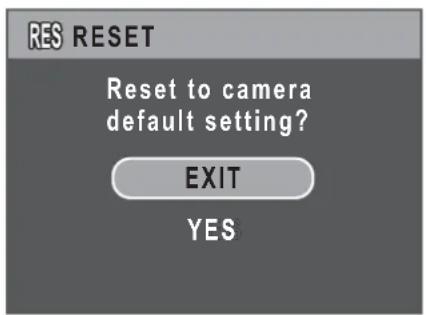
The Reset setting allows you to reset the camera to the original factory default settings. This means all modifications you have made to the camera settings will be cleared.
Once selected, the Reset screen displays a confirmation message. Select Yes to proceed with the reset or Exit (default) to cancel.
Voice Memo
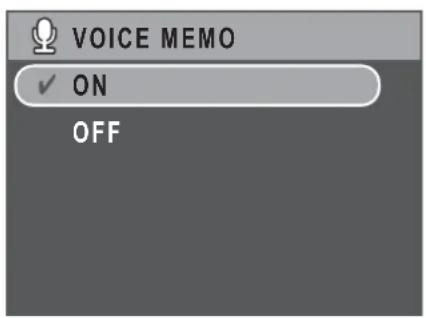
The Voice Memo setting allows you to record a voice memo when a photo is taken. Select On to enable the Voice Memo function or Off (default) to disable it.
40 Camera Settings
PictBridge Print (PTP)
The PTP function allows you to print images captured by the camera directly without connecting the camera to a PC.
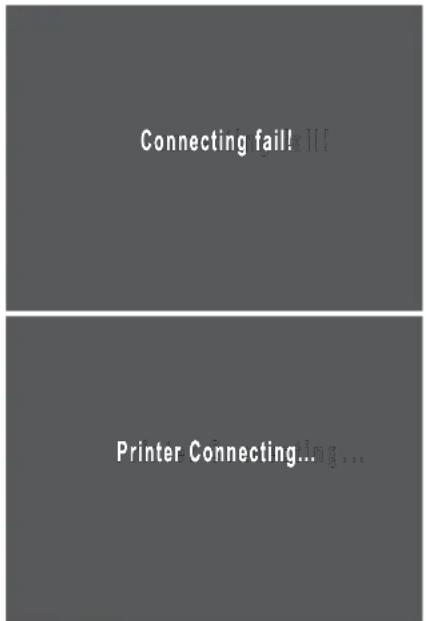
If the camera is not connected to a PTP compliant printer, an error message displays on the LCD screen. To enable PTP function, see "USB Mode" on page 37 for detailed information. If the USB mode is not set at PTP, an error message displays on the LCD screen.
When a PTP compliant printer is connected to the camera, the Printer Connecting screen displays on the LCD screen. The Print menu pops up automatically.
Use the Up/Down navigation buttons to select an option and press the OK button to confirm.
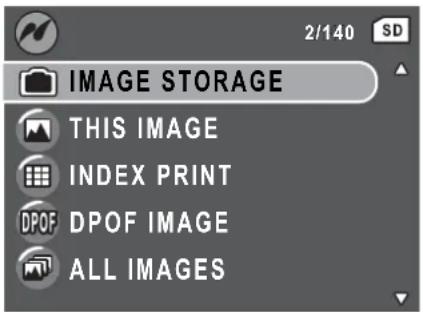
Image Storage
See "Image Storage" on page 39 for detailed information.
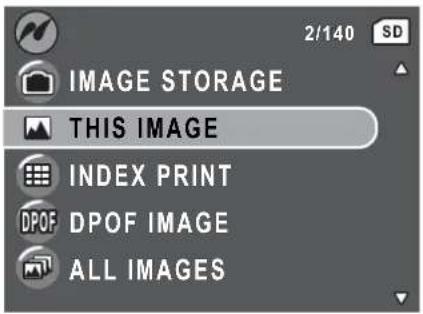
This Image
Print the selected image with the current setting.
- Use the Up/Down navigation buttons to select This Image from the options and press the OK button to confirm. Use the Left/Right navigation buttons to select previous/next file.
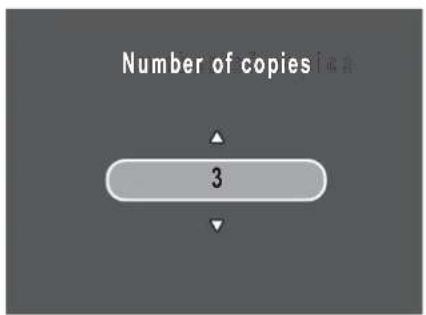
- Press Up/ Down navigation buttons to set the number of copies.
-
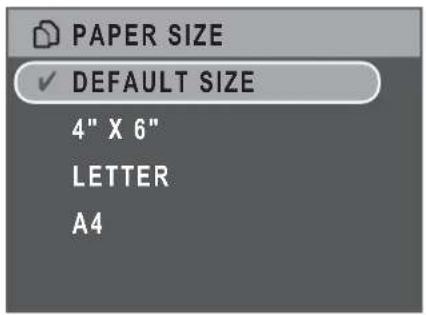
Press Up/ Down navigation buttons again to select the paper size.
-
Default Size
• 4 " x 6 " - Letter
• A4
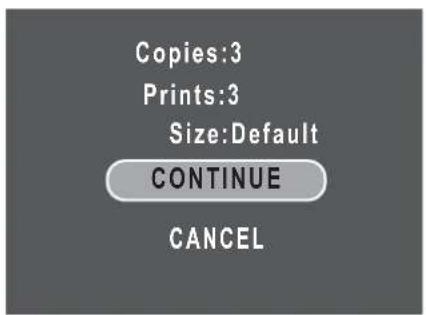
- Press Up/ Down navigation buttons to Continue or Cancel the action.
42 Camera Settings
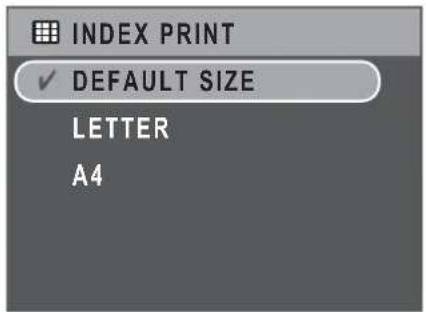
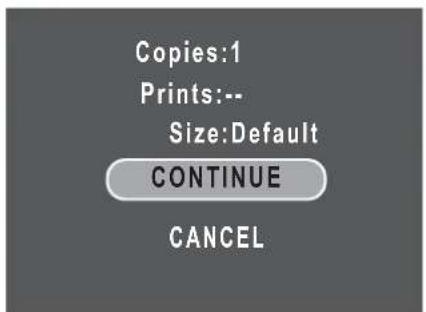
Index Print
Use this function to print all images in index format.
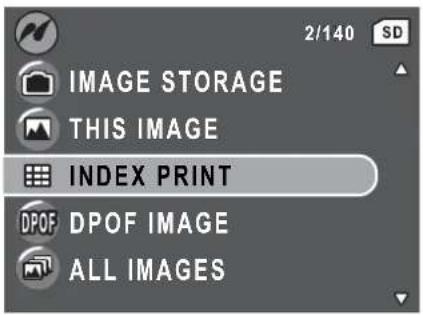
-
Press Up/ Down navigation buttons to select the Paper size.
-
Default Size
- Letter
• A4
- Press Up/ Down navigation buttons to set the number of copies. After the number of copies is set, press Up/ Down navigation buttons again to continue or cancel the action.
DPOF Image
See "DPOF" on page 30 for detailed information.
All Images
Print all images saved in memory.
- Use Up/ Down navigation buttons to select All Images from the options and press the OK button to confirm.
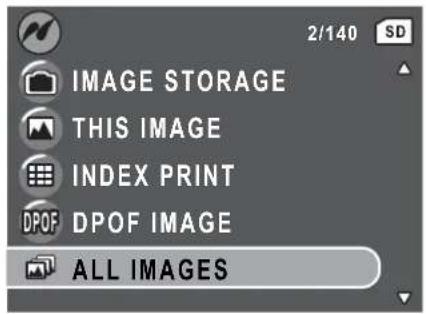
- Press Up/ Down navigation buttons to set the number of copies.
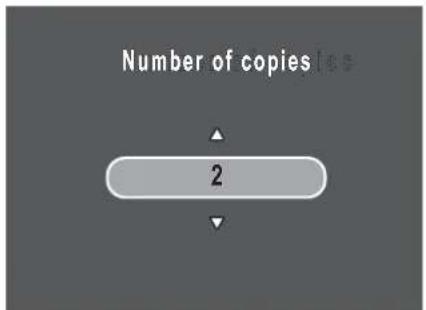
-
Press Up/ Down navigation buttons to select the Paper size.
-
Default Size
• 4 " x 6 " - Letter
• A4
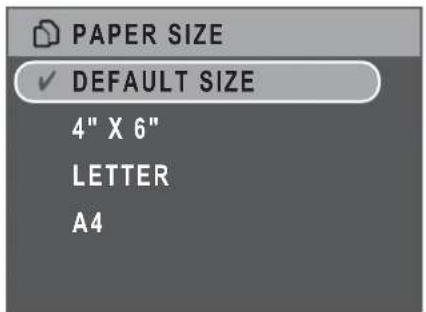
- Press Up/ Down navigation buttons to select Continue or Cancel this action.
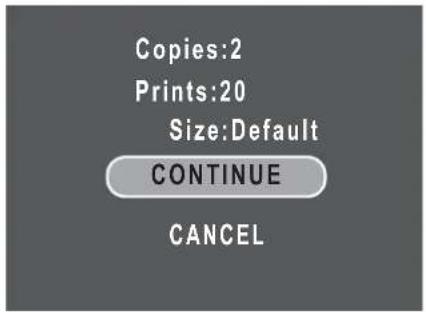
44 Specifications
Specifications
| General Resolution / Image Type 8M Pixels / 1/2.5" CCD | ||
| LCD 2.5"TFT, 150,000 Pixels | ||
| Dimensions 90(W)x59(H)x22(D)mm | ||
| Exterior Casing Front Metal Housing/ Rear Plastic Housing | ||
| Weight Approx. 128g | ||
| Optics Aperture Wide: F2.8 Tele: F4.9 | ||
| Optical Zoom Up to 3x | ||
| Digital Zoom Up to 5x | ||
| Focal Length Wide(W): 35mm, Tele(T): 105mm | ||
| Focus Mode Normal: 50cm to infinity Macro: 10cm ~ 50cm | ||
| Shutter Speed 8 ~ 1/1500 Sec. | ||
| Viewfinder None | ||
| Field of View 99% by LCD | ||
| Camera Features | Auto Power Off / Time Out Yes | |
| ISO Equivalent Auto, ISO80/100/200/400/800/1000 | ||
| Internal Memory 32MB internal memory Support SD memory card from 32MB to 8GB | ||
| Flash Modes Auto, Off, Fill, Anti Red-eye | ||
| Shooting Mode Auto, P-Mode, Portrait, Night Portrait, Landscape, Preset Scenes, Macro, Movie | ||
| Tripod Mount 1/4" Standard | ||
| Preset Scene Sport, Night Landscape, Backlight, Museum, Snow, Sunset, Fireworks, Party, Beach, Copy | ||
| Resolution Image | Image File Formats Still Image: JPEG (Exif2.2) | |
| Image Quality Mode Still Image:3264x2448, 2576x1932,2048x1536, 1600x1200,640x480Movie Mode:640x480@30fps,320x240@30fps | ||
| Quality Levels Best, Better, Good | ||
| Capture Features DPOF Version 1.1 | ||
| Erase Protection Yes | ||
| Exposure Compensation Selectable +/-2.0EV with0.3 EV steps | ||
| Sharpness High, Normal, Low | ||
| Color B&W, Sepia, Vivid, Color | ||
| Metering Average, Matrix, Spot | ||
| Focus Multi-ZoneSingle-Zone: Center, Selected area | ||
| Flash Range 2.5m@wide | ||
| Lens Thread None | ||
| Anti-Shake | Yes, High ISO | |
| Aperture Priority | No | |
| Shutter Priority | No | |
| Drive Mode | Single Mode, Burst Mode, Multi-Burst (VGA@16 shots) | |
| Quick Delete | Yes | |
| Quick View | Yes | |
| Quick Review | Yes | |
| Self Timer | 2 or 10 seconds | |
| Playback Magnify | Up to 6X (10 steps) | |
| White Balance | Auto, Sunny, Tungsten,Fluorescent, Cloudy | |
46 Specifications
| Audio/ Video Audio/Video Out PAL, NTSC | ||
| Stream to SD/MMC Yes | ||
| Speaker Yes, Mono | ||
| Movie File Format AVI | ||
| Movie Length Unlimited as long as space is available on the SD/MMC card | ||
| Microphone Yes, Mono | ||
| Audio Recording Yes, Wave format | ||
| Power Battery NP40 | ||
| Capability Camera Interface USB 2.0 full speed | ||
| Host Platform | Win 2000 , XP ,VISTA | |
| Standards | Operating Temperature | 0°C ~ 40°C |
| Language | English, German, French, Italian, Spanish, Russian, Portuguese, Simplified Chinese, Traditional Chinese, Turkish, Korea, Thai, Dutch | |
Troubleshooting
| Problem Action | |
| Camera does not turn on | ·The batteries may be exhausted. Charge or replace the batteries.·The batteries are installed incorrectly. Re-insert the batteries observing the correct polarity. |
| Camera turns off automatically | Press any button to turn on the camera. |
| LCD turns off automatically Press any button to turn on the LCD. | |
| Empty battery icon is displayed on the LCD after which camera turns off | Batteries are exhausted. Replace the batteries. |
| LCD screen displays ‘Card Requires Formatting’ | Memory card format not recognized. Re-format the memory card. |
| LCD screen displays ‘Card is Full’ | Memory card is full. Replace the memory card with a new one or delete unnecessary images from the existing card. |
| LCD screen displays ‘Card is locked’ | The card is protected by a protect switch mechanism. Move the switch to the unlock position. |
| Insufficient memory space to complete request | Insufficient space in memory to rotate an image. Delete unnecessary images. |
| No image displays on the TV screen | Incorrect TV-out type was selected. Set correct TV-out type to match your TV system. |
| Insufficient space on the card | Delete unnecessary images. |
- About this Manual ....i
- Introduction 1
- System Requirements ....1
- Package Contents ....1
- Main Features ....1
- Camera Views 2
- The Mode Dial ....3
- Navigation Buttons ....4
- LED Indicators 6
- LCD screen 7
- Camera Setup 12
- Attaching the Wrist Strap ....12
- Inserting the Battery 12
- Inserting an SD/MMC Memory Card ....13
- Charging the Battery 13
- Turning On 13
- First Time Use ....14
- Getting Started 15
- Taking your First Photo 15
- Recording your First Video 18
- Recording Audio Files ....18
- Capture Settings 19
- The Capture Menu 19
- Video Capture Menu 23
- Photo, Video & Audio Playback 25
- Viewing Photos/Videos on the LCD Screen 27
- Listening to Audio Files ....28
- Viewing Photos/Videos on your TV 28
- Zooming In During Playback 29
- Deleting Photos/Videos/Audios 29
- Using the Playback Menu 29
- Transferring Photos/Videos to your PC 34
- Camera Settings 35
- The Setup Menu ....35
- PictBridge Print (PTP) 40
- Specifications 44
- Troubleshooting 47
- Preface
- About this Manual
- Copyright
- Federal Communications Commission (FCC) Compliance
- Declaration of Conformity
- ii Preface
- Trademark Recognition
- Safety and Handling Precautions
- Camera Information
- Battery Information
- Safety Instructions
- WARNING
- iv Preface
- CAUTION
- Warning:
- FOR AMERICAN USERS
- FOR CANADIAN USERS
- FOR EU USERS
- Note:
- vi Preface
- Symbols used in this manual
- FCC information
- Canadian ICES-003 information
- TRADEMARK INFORMATION
- READ THIS FIRST
- Notice:
- Introduction
- System Requirements
- Package Contents
- Main Features
- Introduction
- Camera Views
- The Mode Dial
- Introduction
- Navigation Buttons
- Introduction
- LED Indicators
- LCD screen
- Capture/Video Mode Display
- Introduction
- Camera Setup
- Camera Setup
- Attaching the Wrist Strap
- Inserting the Battery
- Inserting an SD/MMC Memory Card
- Charging the Battery
- Turning On
- Camera Setup
- First Time Use
- Getting Started
- Taking your First Photo
- Anti-Shake Function
- Using Quick Review
- Using Macro Mode
- Getting Started
- Setting the Flash Mode
- Using the Zoom in/out Function
- Using the Self-timer and Burst Photography
- Setting the Scene Mode
- Face Detection AF/AE Function
- Getting Started
- Recording your First Video
- Recording Audio Files
- Recording Voice Memos
- Capture Settings
- The Capture Menu
- Image Resolution
- Capture Settings
- Image Quality
- Focus Zone
- EV Compensation
- M-Burst Interval
- White Balance
- ISO Speed
- Capture Settings
- AE Metering
- Color
- Sharpness
- Saturation
- Contrast
- Setup
- Video Capture Menu
- Video Resolution
- Capture Settings
- Photo, Video & Audio Playback
- Playback Mode Display
- Photo, Video & Audio Playback
- Viewing Photos/Videos on the LCD Screen
- Viewing M-Burst Photos
- Photo, Video & Audio Playback
- Listening to Audio Files
- Listening to Voice Memo
- Viewing Photos/Videos on your TV
- Zooming In During Playback
- Deleting Photos/Videos/Audios
- Using the Playback Menu
- Photo, Video & Audio Playback
- DPOF
- To set DPOF:
- Slideshow
- Resize
- Photo, Video & Audio Playback
- Rotate
- Protect
- Red-Eye Compensation
- Move
- Photo, Video & Audio Playback
- Transferring Photos/Videos to your PC
- Camera Settings
- The Setup Menu
- File Number
- Digital Zoom
- Camera Settings
- Quick View
- Continuous AF
- Camera Sound
- Auto LCD Off
- Auto Power Off
- Video Out
- USB Mode
- Camera Settings
- Date Stamp
- Date and Time
- Language
- Image Storage
- Format
- Reset
- Voice Memo
- Camera Settings
- PictBridge Print (PTP)
- This Image
- Camera Settings
- Index Print
- DPOF Image
- All Images
- Specifications
- Specifications
Brand : SANYO
Model : VPC-E870
Category : Camera