RFF312NFWHA - Fridge NORDMENDE - Free user manual and instructions
Find the device manual for free RFF312NFWHA NORDMENDE in PDF.


User questions about RFF312NFWHA NORDMENDE
0 question about this device. Answer the ones you know or ask your own.
Ask a new question about this device
Download the instructions for your Fridge in PDF format for free! Find your manual RFF312NFWHA - NORDMENDE and take your electronic device back in hand. On this page are published all the documents necessary for the use of your device. RFF312NFWHA by NORDMENDE.
USER MANUAL RFF312NFWHA NORDMENDE
BEFORE USING THE APPLIANCE ....2
Information on the Frost Free Technology 2
Safety Instructions 3
Recommendations 4
Installation and Switching On The Appliance 5
Before Switching On.... 5
USING INFORMATION 6
Temperature Settings 6
Warnings for Temperature Settings 7
FOOD PLACEMENT 8
Cooling Compartment 8
The Deep Freeze Compartment 9
CLEANING AND MAINTENANCE .... 13
Defrosting 13
Replacing the Refrigerator Light Bulb 14
TRANSPORTATION AND CHANGING OF INSTALLATION POSITION .... 14
Changing of Door Opening Direction 14
BEFORE CALLING YOUR AFTER SALES SERVICE .... 15
THE PARTS OF THE APPLIANCE AND THE COMPARTMENTS....16
PART 1. BEFORE USING THE APPLIANCE
Information on the Frost Free Technology
The Frost Free refrigerators are different from the other static refrigerators in terms of their operational system.
In normal refrigerators, in the freezing section, the humidity from the humid food entering the refrigerator during door swings causes frosting inside the freezing section. For melting the snow and frost that have been formed, it is necessary to carry out processes such as powering off the refrigerator, taking out the food that needs to be kept cold during this process, removing the accumulated frost.
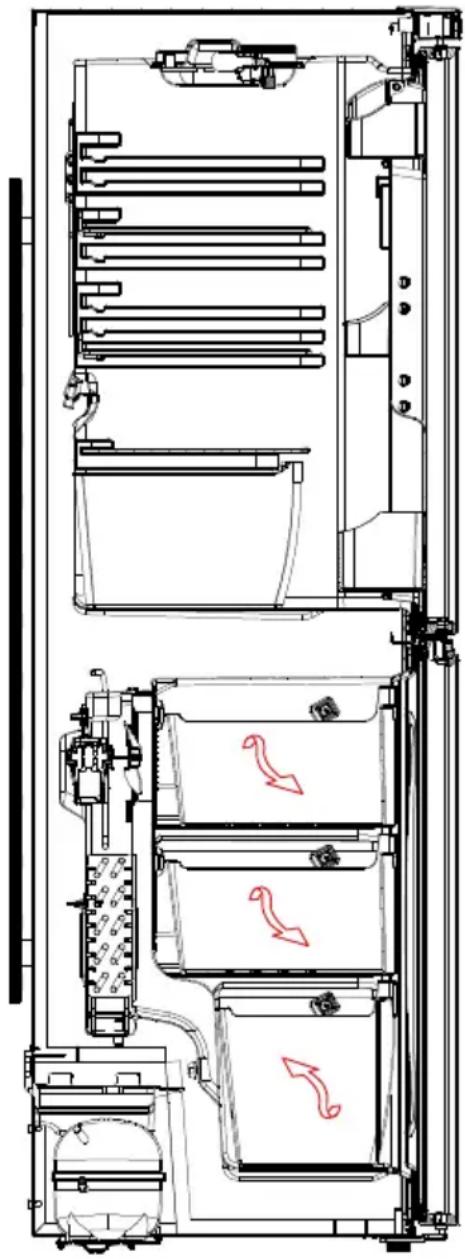
As for the case in frost free refrigerators, it is entirely different in freezer compartment. The dry and cold room is blown homogeneously at many points to the cooling and freezing sections by means of the fan. The cold air that is distributed homogeneously even in the interspaces among shelves not only makes sure that all your food is cooled equally and properly, but it also does not allow for humidification and frosting. Cooling compartment is cooled statically.
Therefore, your Frost Free refrigerator that you have provides you with great convenience in use in addition to its large volume and aesthetical look.
natural_image
Technical line drawing of a multi-level industrial or mechanical assembly with no visible text, numbers, or symbols.Safety Instructions
- If the model contains R600a-see name plate under refrigerant (the coolant isobutene), naturals gas that, is very environmentally friendly but also combustible. When transporting and installing the unit care must be taken to ensure that none of the refrigeration circuit components become damaged. In the event of damage avoid naked flames or ignition sources and ventilate the room in which the unit is placed for a few minutes.
Warning: Keep ventilation openings in appliance enclosure or in structure for building in, clear of obstruction.
- Do not use mechanical devices or other artificial means to accelerate the defrosting process.
- Do not use electrical appliances in the refrigerator or freezer compartment of the appliance.
- If this appliance is to replace an old refrigerator with a lock; break or remove the lock as a safety measure before storing it, to protect children while playing might lock themselves inside.
- Old refrigerators and freezers contain insulation gases and refrigerant, which must be disposed of properly. Entrust the disposal of a scrap unit categorically to competence of your local waste disposal service and contact your local authority or your dealer if you have any questions. Please ensure that the pipe of work of your refrigerating unit does not get damaged prior to being picked-up by the relevant waste disposal service.
IMPORTANT NOTE:
Please read this booklet before installing and switching on this appliance. The manufacturer assumes no responsibility for incorrect installation and usage as described in this booklet.
Conformity Information
- Tropical Class is defined for the environment temperatures between 16^ and 43^ in accordance with the TS EN ISO 15502 Standards.
- The appliance is designed in compliance with the EN15502, IEC60335-1 / IEC60335-2-24, 2004/108/EC standards.
natural_image
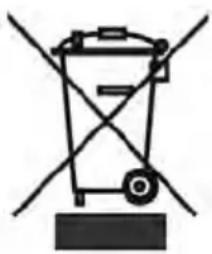
Symbol of a trash bin crossed out by diagonal lines, representing waste sorting or disposal (no text or labels)Please ask your municipal authority about the disposal of the WEEE for the reuse, recycle and recovery purposes.
Recommendations
Warning: Do not use mechanical devices or other means to accelerate the defrosting process, other than those recommended by the manufacturer. Do not use electrical appliances inside the food storage compartments of the appliance, unless they are of the type recommended by the manufacturer. Keep ventilation openings, in the appliance enclosure or in the built-in structure, clear of obstruction. Do not damage the refrigerant circuit.
- Do not use adapters or shunts which could cause overheating or burning.
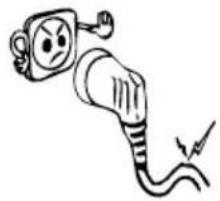
- Do not plug old, warped power supply cables.
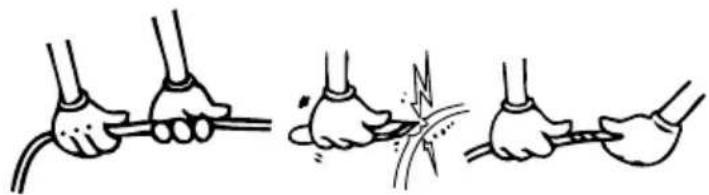
- Do not twist and bend the cables.
natural_image
Illustration of three hands performing a cable or wire manipulation technique (no text or symbols present)- Do not allow children to play with the appliance. Children must NEVER sit on drawers/shelves or hang from the door.
- Do not use sharp metal objects for removing ice on the freezer compartment; they could puncture the refrigerator circuit and cause unrepairable damage to the unit. Use the plastic scraper provided.
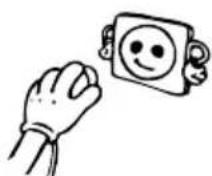
- Do not plug the power supply with wet hands.
- Do not place containers (glass bottles or tin containers) of liquids into the freezer especially gassy liquids as they could cause the container to burst during freezing.
- Bottles that contain a high percentage of alcohol must be sealed well and placed vertically in the refrigerator.
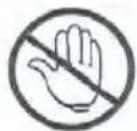
- Do not touch the cooling surfaces, especially with wet hands as you could be burnt or hurt.
- Do not eat ice, which have just been removed from the freezer.
- If the supply cord is damaged it must be replaced by the manufacturer or service agent or appointed qualified person.
- The appliance is not intended for use by people (including children) with reduced physical, sensory or mental capabilities, or lack of experience and knowledge, unless they have been given supervision or instruction concerning use of the appliance by a person responsible for their safety. Children should be supervised to ensure that they don't play with the appliance.
- If the supply cord is damaged it must be replaced by the manufacturer or service agent or similarly qualified people in order to avoid a hazard.
natural_image
Cartoon illustration of an electric plug with a sad face and plug, showing electrical shock (no text or symbols)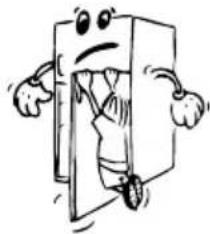
natural_image
Cartoon illustration of a smiling computer with arms and legs, showing a closed door (no text or symbols)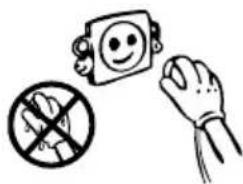
natural_image
Illustration of a hand holding a prohibition symbol, a smiling face icon, and a crossed-out hand (no text or symbols present)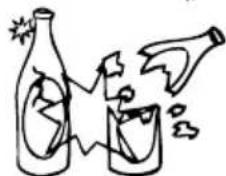
natural_image
Simple line drawing of a bottle and glass with abstract shapes (no text or symbols)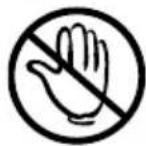
Installation and Switching On The Appliance
- This appliance is connecting to 220-240V or 200-230V and 50 Hz. Please check nameplate of appliance and be sure voltage range suitable to your mains voltage.
- You can offer help from the service to install and switching on the appliance.
- Before making the connection to the power supply, ensure that the voltage on the name plate corresponds to the voltage of electrical system in your home.
- If the socket does not match the refrigerator plug, replace the plug with a suitable one (at least 16 A)
- Insert the plug into a socket with an efficient ground connection. If the socket has no ground contact or the plug does not match, we suggest you to call an authorised electrician for assistance.
- The plug should be accessible after the appliance is positioned.
- Manufacturer is not responsible for failure to complete the ground connection as described in this booklet.
- Do not place the appliance in direct sunlight.
- Do not use in open air and shall not be exposed to the rain.
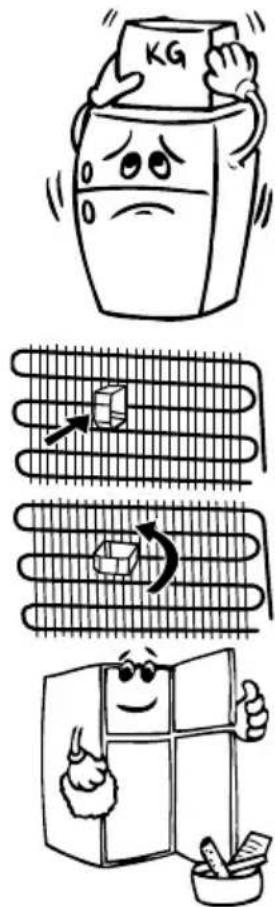
- To prevent the condenser (which is at the back, the black component with fins) from touching the wall, fit the plastic distance guide and rotate it 90^ to lock in place.
- Place the refrigerator far from heat sources and in a well-ventilated position. The refrigerator should be at least 50 cm from radiators, gas or coal stoves and 5 cm far from electrical stoves.
- Keep the top free for at least 15 cm.
- Fit the plastic wall spacers to the condenser at the back of the refrigerator in order to prevent leaning to the wall for good performance.
- Do not place heavy and lots of things on the appliance.
- If the appliance is installed next to another refrigerator or freezer, observe a minimum distance of 2 ~cm to prevent condensation.
- The appliance must be stand firmly and level on the floor Use the two front levelling-feet to compensate for an even floor.
- The outside of the appliance and the accessories inside should be cleaned with a solution of water and liquid soap; the inside of the appliance with sodium bicarbonate dissolved in lukewarm water. After drying replace all the accessories.
natural_image
Cartoon illustration showing a refrigerator with a 'KG' on top, and its cooling effect with arrows indicating heat transfer (no text or symbols)Before Switching On
- Wait after 3 hours before plugging the appliance in to the main power to ensure proper performance.
- There can be an odour when you first switch on the appliance. It will disappear after the appliance starts to cool.
PART 2. USING INFORMATION
Temperature Settings
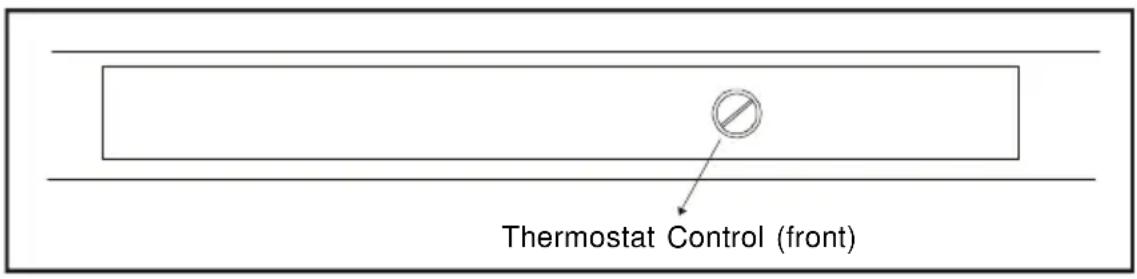
Cooler and Freezer Thermostat Knob
A) Thermostat Knob(front);
text_image
Thermostat Control (front)B) Thermostat Knob(bottom);
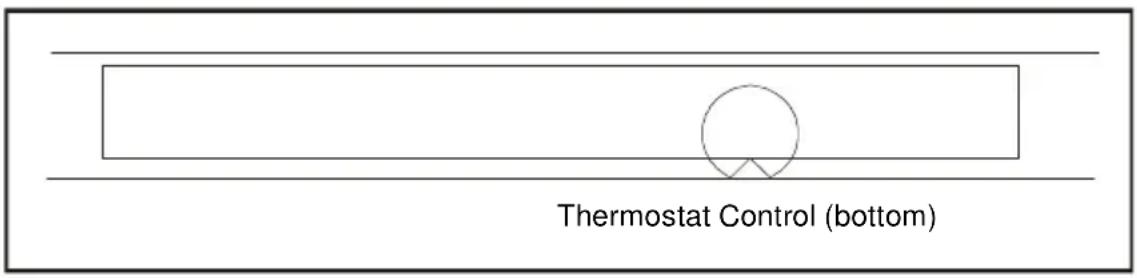
text_image
Thermostat Control (bottom)Cooling compartment
It ensures that the temperature settings in the cooling and freezing compartments of your refrigerator be performed automatically. It may be set to any value ranging from the values 1 to 5. As you turn the thermostat setting knob from 1 to 5, the cooling degree rises. For saving energy in winter months, you may operate your refrigerator at a lower position.
Cooling compartment thermostat knob;
4 - 5 : For further cooling.
2 - 4 : For normal utilization.
1 - 2 : For less cooling.
Notes: For all thermostat positions; if the user opens fridge door, lamp is ON. In thermostat 0(zero) position, other electrical component don't work even door is opened or closed.
Warnings for Temperature Settings
- The thermostat setting should be done by taking into consideration how often the cooler and freezer door is opened and closed, how much food is stored in it and the environment in which the refrigerator is found.
- In order for the refrigerator to be completely cooled after its first connection to the socket, it has to operate incessantly up to 24 hours depending on the environmental temperature.
- Throughout this period of time, do not frequently open and close the doors of your refrigerator and do not fill it exceedingly.
- When you would like to re-operate your refrigerator after disconnecting its plug from the socket, wait for at least 5 minutes to insert the plug again so that no damage is incurred by the compressor.
If your fridge is not cooling enough;
Your fridge is designed to operate in the ambient temperature intervals stated in the standards, according to the climate class stated in the information label. We do not recommend operating your fridge out of stated temperatures value limits in terms of cooling effectiveness.
| Climate Class | Ambient Temperature (°C) |
| T | Between 16 and 43 (°C) |
| ST | Between 16 and 38 (°C) |
| N | Between 16 and 32 (°C) |
| SN | Between 10 and 32 (°C) |
PART 3. FOOD PLACEMENT
Cooling Compartment
- To prevent humidification and odour formation, the food should be placed in the refrigerator in enclosed cups or with their top being covered.
- The hot food and drinks should also be cooled in the room temperature before being placed in the refrigerator.
- Please do not prop the packaged food and cups against the lamp and cover of the cooling compartment.
- The fruits and vegetables may be placed directly in the vegetable holder without being wrapped separately.
Some recommendations have been specified below for the placement and storage of your food in the cooling compartment.
| Food | Storage Duration | Location where it will be placed in the cooling compartment |
| Fruits and Vegetables | 1 Week | In the vegetable holder (without being wrapped in anything) |
| Fish and meat | 2-3 days | Wrapped in plastic folio or bag or within a meat box (on the glass shelf) |
| Fresh cheese | 3-4 days | In the special door shelf |
| Butter, margarine | 1 Week | In the special door shelf |
| Bottled products, Milk and yoghurt | The period recommended by the manufacturer | In the special door shelf |
| Egg 1 month | In the egg-holder shelf | |
| Cooked food | In every shelf | |
NOT: The potatoes, onions and garlic should not be stored in the refrigerator. The meat should never ever be frozen after it is thawed if it had not been cooked.
The Deep Freeze Compartment
- Please use the deep freeze compartment of your refrigerator for storing the frozen food for a long time and producing ice.
- Please place the food you would like to freeze initially in the upper basket of the deep freeze in such a way that it shall not exceed the declared freezing capacity of your refrigerator. Please do not place the food you shall newly freeze nearby the already frozen food.. You may place your food next to the other frozen food after they are frozen (for at least 24 hours).
- You should freeze the food you shall freeze (meat, minced meat, fish, etc.) by dividing them into portions in such a way that they can be consumed once.
- Please do not refreeze the frozen food once they are thawed. It may pose a danger for your health since it might cause problems like food poisoning.
- Do not place the hot meals in your deep freeze before they are cold. You would cause the other food frozen beforehand in the deep freeze to become putrefied.
- As you buy frozen food, makes sure they were frozen under appropriate conditions and that the package is not torn.
- While storing the frozen food, the storage conditions on the package should certainly be observed. If there are no instructions, the food has to be consumed in the shortest possible period of time.
- The frozen food has to be transported before it perishes and it should be placed in the fast freezing shelf as soon as possible. Please do not use the door shelves for freezing purposes.
- If the frozen food package has been humidified and it has a foul smell, the food might have previously been stored under suitable conditions and gone rotten. Please do not buy such food!
- The storage durations of frozen food change depending on the environment temperature, the frequent opening and closing of the doors, thermostat settings, food type and the length of period that elapsed from the time the food was bought to the time it entered the freezer. Always abide by the instructions on the package and never exceed the storage duration.
- During long lasting power cuts, please do not open the door of the deep freeze compartment. Your refrigerator shall preserve your frozen food in the environment condition of 25°C for about 12 hours. This value falls in high environmental temperatures. During longer lasting power cuts, do not refreeze your food and consume it as soon as possible.
Some recommendations have been specified on pages 10, 11 and 12 for the placement and storage of your food in the deep freeze compartment.
| Fish and Meat | Preparation | Storage Duration (months) | Thawing period at room temperature (hours) |
| Beef Steak | Wrapped in a folio | 6-10 | 1-2 |
| Lamb Meat | Wrapped in a folio | 6-8 | 1-2 |
| Calf Roast | Wrapped in a folio | 6-10 | 1-2 |
| Calf Cubes | In small pieces | 6-10 | 1-2 |
| Sheep Cubes | In pieces | 4-8 | 2-3 |
| Minced meat | In the form of oblate packages without being spiced | 1-3 2-3 | |
| Offal (piece) | In pieces | 1-3 | 1-2 |
| Sausage/Salami | Must be packed even if it is film-coated | 1-2 | Until thawed |
| Chicken and turkey | Wrapped in a folio | 7-8 | 10-12 |
| Goose / Duck | Wrapped in a folio | 4-8 | 10 |
| Deer - Rabbit - Boar | Portions of 2.5 kg and with no bones | 9-12 | 10-12 |
| Freshwater fish (Trout, Carp, Northern Pike, Cat Fish) | It should be washed and dried after it is well cleaned inside and scaled, the tail and head parts should be cut off where necessary. | 2 | Until it is well thawed |
| Lean fish (Sea Bass, Turbot, Sole) | 4-8 | ||
| Fatty fish (Bonito, Mackerel, Blue Fish, Anchovy) | 2-4 | ||
| Crustaceans | Cleansed and put into bags | 4-6 | Until it is well thawed |
| Caviar | In its package, inside an aluminium or plastic cup | 2-3 | Until it is well thawed |
| Snail | In salty water, inside an aluminium or plastic cup | 3 | Until it is well thawed |
Note: Frozen foods, when thawed, should be cooked just like fresh foods. If they are not cooked after being thawed they must NEVER be re-frozen.
| Vegetables and Fruits | Preparation | Storage Duration (months) | Thawing period at room temperature (hours) | ||
| Cauliflower | Remove the leaves, divide the core into parts and keep it waiting in water containing a little amount of lemon | 10-12 | It may be used in frozen form | ||
| Green Beans, French Beans | Wash them and cut into small pieces. | 10-13 | It may be used in frozen form | ||
| Peas | Shell and wash them | 12 | It may be used in frozen form | ||
| Mushrooms and Asparagus | Wash them and cut into small pieces | 6-9 | It may be used in frozen form | ||
| Cabbage | In a cleaned fashion | 6-8 | 2 | ||
| Eggplant | Cut it into pieces of 2cm after washing it | 10-12 | Separate plates from each other | ||
| Corn | Clean it and pack it with its cob or in grains | 12 | It may be used in frozen form | ||
| Carrot | Clean them and cut into slices | 12 | It may be used in frozen form | ||
| Pepper | Remove the stem, divide it into two and separate the seeds | 8-10 | It may be used in frozen form | ||
| Spinach | Washed | 6-9 | 2 | ||
| Apple and Pear | Slice it by peeling its rind | 8-10 | (In refrigerator) 5 | ||
| Apricot and Peach | Divide it into half and remove the seeds | 4-6 | (In refrigerator) 4 | ||
| Strawberry and Raspberry | Wash and clean them | 8-12 | 2 | ||
| Cooked fruits | Inside a cup with addition of 10% of sugar | 12 | 4 | ||
| Plums, Cherries, Sour Cherries | Wash them and remove the stems | 8-12 5-7 | |||
| Dairy Products and Pastries | Preparation | Storage Duration (months) | Storage Conditions | ||
| Packaged (Homogenized) Milk | In its own package | 2-3 | Only homogeneous ones | ||
| Cheese (except white cheese) | In the form of slices | 6-8 | They may be left in their original packages for short time storage. They should also be wrapped in plastic folio for long term storage. | ||
| Butter, Margarine | In its own package | 6 | |||
| Egg^* | Egg White | 10-12 | 30 gr of it Equals to one egg | ||
| Egg mixture (White-Yolk) | It is mixed very well, a pinch of salt or sugar is added to prevent it from getting too thick. | 10 | 50 gr of it Equals to one egg yolk. | In a closed cup | |
| Egg Yolk | It is mixed very well, a pinch of salt or sugar is added to prevent it from getting too thick. | 8-10 | 2 gr of it Equals to one egg yolk. | ||
* It should not be frozen with its shells. The white and yolk of the egg should be frozen separately or as having been well mixed.
| Storage Duration (months) | Thawing period at room temperature (hours) | Thawing duration in the oven (minutes) | |
| Bread 4-6 | 2-3 | 4-5 (220-225 °C) | |
| Biscuits | 3-6 | 1-1,5 | 5-8 (190-200 °C) |
| Pie 1-3 2-3 | 5-10 (200-225 °C) | ||
| Tart | 1-1,5 | 3-4 | 5-8 (190-200 °C) |
| Phillo Pastry | 2-3 | 1-1,5 | 5-8 (190-200 °C) |
| Pizza | 2-3 | 2-4 | 15-20 (200 °C) |
The taste of some spices found in cooked dishes (anise, basilica, watercress, vinegar, assorted spices, ginger, garlic, onion, mustard, thyme, marjoram, black pepper, etc.) changes and they assume a strong taste when they are stored for a long period. Therefore, the frozen food should be added little amount of spices or the desired spice should be added after the food has been thawed.
The storage period of food is dependent on the oil used. The suitable oils are margarine, calf fat, olive oil and butter and the unsuitable oils are peanut oil and pig fat.
The food in liquid form should be frozen in plastic cups and the other food should be frozen in plastic folios or bags.
PART 4. CLEANING AND MAINTENANCE
- Disconnect unit from the power supply before cleaning.
- Do not clean the appliance by pouring water.
- The refrigerator and freezer compartment should be cleaned periodically using a solution of bicarbonate of soda and lukewarm water
- Clean the accessories separately with soap and water. Do not clean them in the washing machine.
- Do not use abrasive products, detergents or soaps. After washing, rinse with clean water and dry carefully. When the cleaning operations have been completed reconnect the plug of the unit with dry hands.
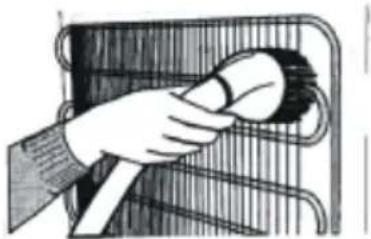
- The condenser (the black finned part at the back) must be cleaned with a vacuum cleaner or a brush at least once a year. This will allow your freezer to operate more efficiently and help you to save energy.
THE POWER SUPPLY MUST BE DISCONNECTED.
natural_image
Simple line drawing of a hand holding a smiling emoji-shaped object (no text or symbols)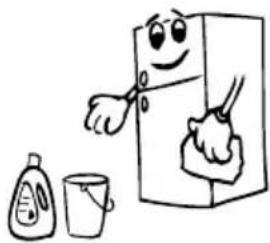
natural_image
Cartoon illustration of a smiling refrigerator with hands cleaning it, accompanied by a small bottle and cup (no text or symbols)
natural_image
Cartoon illustration of a smiling refrigerator with arms and a sad face, accompanied by two penguin-shaped objects nearby (no text or symbols)
natural_image
Illustration of a hand using a tool to clean or adjust a grid-like structure (no text or symbols visible)Defrosting
You refrigerator has fully automatic defrosting. The water formed as a result of defrosting passes through the water collection spout, flows into the vaporisation container below the condenser and evaporates there.
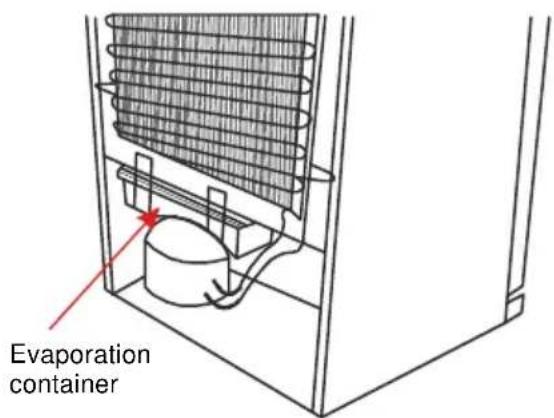
text_image
Evaporation containerReplacing the Refrigerator Light Bulb
- Unplug the unit from the power supply,
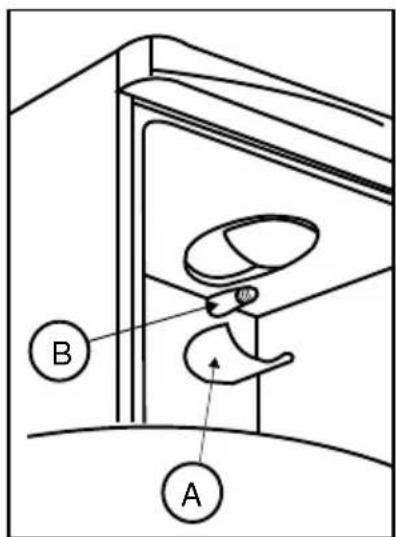
- Remove the refrigerator light cover (A) by pressing the hooks placed both sides of the cover.
- Change the present light bulb (B) with a new one (not more than 15 W).
- Place the light cover in its place and plug the unit.
text_image
Diagram of a mechanical or electrical component with labeled parts A and B, showing internal structure and directional arrows.PART 5. TRANSPORTATION AND CHANGING OF INSTALLATION POSITION
Transportation and Changing of Installation Position
- The original packages and foamed polystyrene (PS) can be concealed if required.
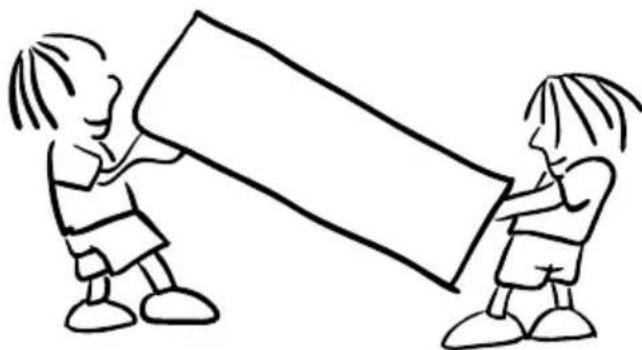
- In transportation the appliance should be tied with a wide stripe or a strong rope. The rules written on the corrugated box must be applied while transporting.
- Before transporting or changing old installation position, all the moving objects (i.e., shelves, crisper...) should be taken out or fixed with bands in order to prevent the shake.
natural_image
Simple line drawing of two children holding a large rectangular object (no text or symbols)Changing of Door Opening Direction (Only some models)
In case you need to change door-opening direction, please consult the domestic after sales service.
PART 6. BEFORE CALLING YOUR AFTER SALES SERVICE
If your refrigerator is not working properly, it may be a minor problem, therefore check the following, before calling an electrician to save time and money.
What to do if your appliance does not operate;
Check that;
- There is no power,
- The general switch in your home is disconnected,
- The thermostat setting is on « 0 »position ,
- The socket is not sufficient. To check this, plug in another appliance that you know which is working into the same socket.
What to do if your appliance performs poorly;
Check that;
- You have overloaded the appliance,
- The thermostat setting is "1" position (if so set the thermostat dial suitable value)
• The doors are closed perfectly, - There is no dust on the condenser,
- There is enough place at the rear and side walls.
If there is noise;
The cooling gas which circulates in the refrigerator circuit may make a slight noise (bubbling sound) even when the compressor is not running. Do not worry this is quite normal. If these sounds are different check that;
• The appliance is well levelled
- Nothing is touching the rear.
- The stuffs on the appliance are vibrating.
If there is water in the lower part of the refrigerator,
Check that;
- The drain hole for defrost water is not clogged (Use defrost drain plug to clean the drain hole)
Recommendations
- If the appliance is not used for long time (for example during the summer holidays) unplug and clean the appliance and leave the door open to prevent the formation of mildew and smell.
- To stop the appliance completely, unplug from main socket (for cleaning and when the doors are left open)
- If there is still a problem with your refrigerator although you have followed the instructions in this book, please consult your nearest authorized service center.
- The life cycle of this product as determined and proclaimed by the Ministry of Industry (the period for making spare parts available for the product to be able to fulfill its functions) is 10 years.
THE PARTS OF THE APPLIANCE AND THE COMPARTMENTS
text_image
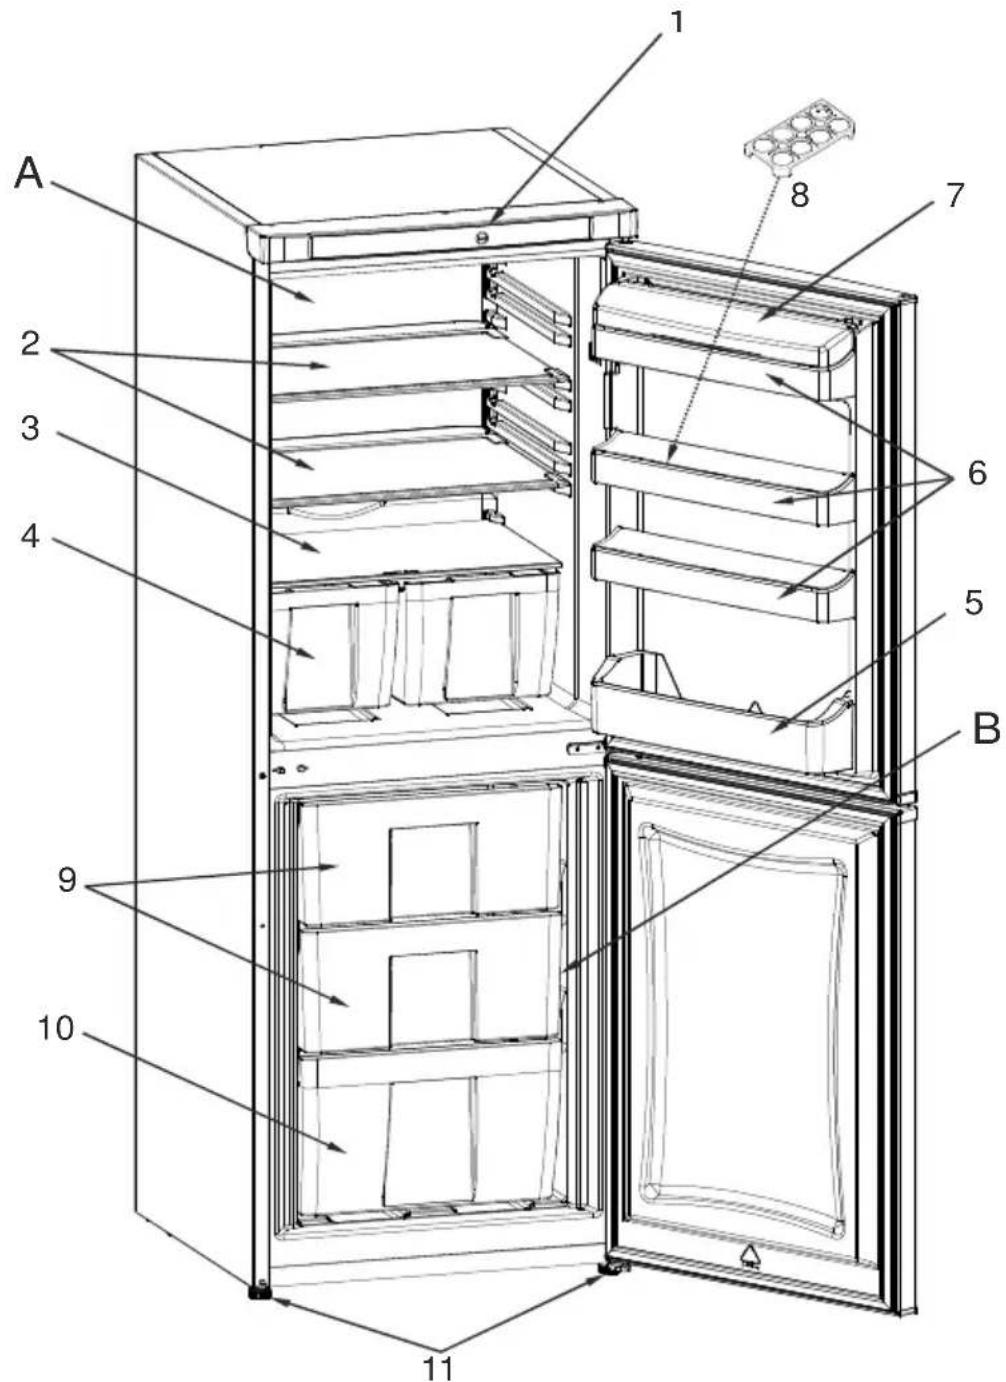
A 1 2 3 4 9 10 11 7 6 5 BThis presentation is only for information about the parts of the appliance. Parts may vary according to the appliance model.
A) Cooling compartment
B) Freezing compartment
1) Head panel with thermostat control
2) Cooling wire or glass shelf
3) Glass above the vegetable holder
4) Vegetable holder
5) Bottle shelf
6) Cheese - butter shelf
7) Cheese - butter shelf cover
8) Egg holder
9) Middle basket
10) Lower basket
11) Levelling feet
ELECTRICAL CONNECTION (FOR UK TYPE PLUG)
For your safety please read the following information
Warning: This appliance must be earthed.
This appliance operates from 220-240 volts and should be protected by a 13 amp fuse in the plug.
The appliance is supplied with a standard 13 amp 3-pin mains plug fitted with a 13-amp fuse. Should the fuse require replacement, it must be replaced with a fuse rated at 13 amp and approved to BS1362.
If the mains plug which is fitted is unsuitable for the socket outlet in your home or is removed for any other reason, please follow the instructions below on how to wire a 13 amp 3 pin plug..
How to wire a 13 amp plug.
Important
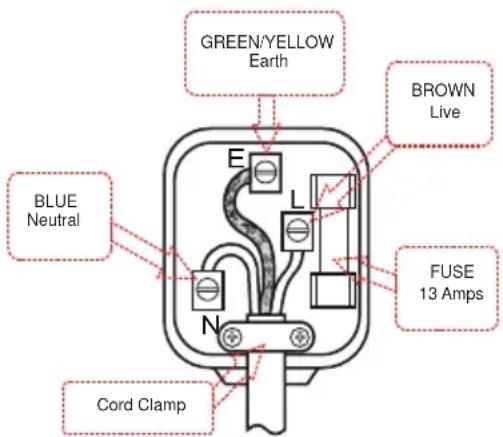
The wires in the mains lead on this appliance are coloured in accordance with the following code:
Green and Yellow - Earth
Blue – Neutral
Brown – Live
text_image
GREEN/YELLOW Earth BROWN Live BLUE Neutral FUSE 13 Amps Cord ClampAs the colours may not correspond with the markings identifying the terminals in your plug proceed as follows.
The green and yellow wire must be connected to the terminal in the plug which is marked with the letter E or with the earth symbol 1= or coloured green and yellow.
The blue wire must be connected to the terminal marked N.
The brown wire must be connected to the terminal marked L.
You must make sure the lead is firmly secured under the cord clamp.
Inhalt
BEVOR SIE DAS GERÄT BENUTZEN 19
Information zur Frost-Free Technologie 19
natural_image
Technical line drawing of a multi-level industrial or mechanical assembly with no visible text, numbers, or symbols.Sicherheitshinweise
natural_image
Illustration of three hands performing a rope knotting technique (no text or symbols present)natural_image
Cartoon illustration of a person peeking out of a door, with arms and legs raised (no text or symbols)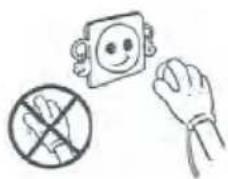
natural_image
Simple line drawing of a hand holding a prohibition symbol, a smiling face with a square, and a waving hand (no text or labels)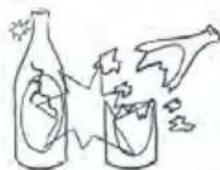
natural_image
Illustration of three cartoon kitchen-related scenes: a refrigerator with steam, a cracked bed with a mouse, and a smiling refrigerator with a bowl (no text or symbols)TEIL-2. DIE BEDIENUNGSELEMENTE
Einstellen des Thermostats
natural_image
Cartoon illustration of a character using a device to interact with a box (no text or symbols present)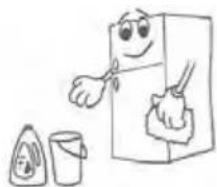
natural_image
Cartoon illustration of a smiling refrigerator with cleaning tools and a cup (no text or symbols)
natural_image
Cartoon illustration of a smiling refrigerator character giving thumbs up, with a pencil and bowl nearby (no text or symbols)