Omnisat Dome MXL002 - Satellite receiver Maxview - Free user manual and instructions
Find the device manual for free Omnisat Dome MXL002 Maxview in PDF.


| Product Type | Satellite Receiver System for Vehicles |
| Brand | Maxview |
| Model | Omnisat Dome MXL002 |
| Antenna Dimensions (W x L x H) | 69 cm x 69 cm x 34 cm |
| Receiver Dimensions (W x L x H) | 185 mm x 202 mm x 60 mm |
| Receiver Weight | 1400 g |
| Power Consumption (Receiver) | 30 W |
| Operating Voltage (System) | 11 V - 25 V DC |
| Tracking Type | Two-axis (azimuth and elevation) |
| Azimuth Range | 0° - 360° unlimited |
| Elevation Range | 20° - 70° |
| Tuner Standard | DVB-S |
| Frequency Range | 950 - 2150 MHz |
| Demodulation | QPSK |
| Video Resolution | 720 x 576 (PAL) |
| Audio System | MPEG Layer 1-2 |
| Number of Channels | Up to 8000 |
| Remote Control | Infrared with 2 x AAA batteries |
| Warranty | 2 years against defective parts or workmanship |
| Cleaning Instructions | Gently clean antenna cover with a soft cloth; do not use abrasive or solvent-based cleaners |
| Safety Warning | No user-serviceable parts inside; do not open cover; use only with Maxview Omnisat Dome antenna |
Frequently Asked Questions - Omnisat Dome MXL002 Maxview
User questions about Omnisat Dome MXL002 Maxview
0 question about this device. Answer the ones you know or ask your own.
Ask a new question about this device
Download the instructions for your Satellite receiver in PDF format for free! Find your manual Omnisat Dome MXL002 - Maxview and take your electronic device back in hand. On this page are published all the documents necessary for the use of your device. Omnisat Dome MXL002 by Maxview.
USER MANUAL Omnisat Dome MXL002 Maxview
INSTALLATION, OPERATION & USER MANUAL
MAXVIEW
Common Lane, Setchey, King's Lynn, Norfolk, PE33 0AT. England
Helpline: +49 (0) 1553 811000 Tel: +49 (0) 1553 813300
Email: cust_serv@maxview.co.uk Web: www.maxview.co.uk
9111325Iss 2
MAXVIEW
We thank you for buying the Maxview Omnisat Dome Satellite System.
The Omnisat Dome has been designed for permanent attachment to the roof of your vehicle.
It will receive satellite reception almost anywhere in Europe.
The Maxview Omnisat Dome is designed to be used to receive and watch satellite broadcasts in road vehicles e.g. caravans, minibuses, RVs and lorries while these vehicles are parked.
The Omnisat Dome is easy to use, but please read through this manual thoroughly prior to starting the installation.
If you should require any technical assistance please contact 01553 811000
Maxview reserves the right to change specifications without prior notice

CONTENTS Page/s
SECTION 1 - INSTALLATION 4
Important Safety Instructions 5
Before starting installations 5
| Tool | List | 5 |
| Vehicle | Installation | 6/7 |
| Electrical | Installation | 8/9 |
SECTION 2 - OPERATING 10
Operating The System 11
Precautions 11
Receiver Buttons and Functions 11
Connection Diagram MXL003 variant 12
Connection Diagram MXL003/twin variant 13
First Installation and TV Settings 14
Channel Selection 14
Infobar 14
Teletext 14
Channel List - Selection of the List Type 15/16
Channel list - Operatin Manual 17-20
Radio 21
Favourite Channel List 21
Satellite Selection 21
Main Menu 22
Installation 22
Transponder List 23
Changing Program Settings 24/25
Automatic Search 26
System 27
OSD Settings 27
TV Settings 28
Time and Date 28
Parental Settings 29
Other Settings 30
Service Menu 30
Timers 31
Extras 32
Games 33
Electronic Program Guide - EPG 33
Common Interface (optional) 33
Menu Map 34
Troubleshooting 35
System Specifications 36/37
SECTION 3 - USER MANUAL 38
Usage 39
Guarantee and Exemptions 40
SECTION I INSTALLATION
GUARANTEE
The Maxview Omnisat Dome is guaranteed against defective parts or workmanship for 2 years from time of purchase. This excludes any malfunction caused by improper use, accidental or malicious damage or removal of outer cover. This does not affect your statutory rights.
EXEMPTIONS
Maxview is not liable for:
- Damage caused by fires, natural disasters (such as thunder, earthquake, etc.), a third party, accidents, misuse or any other improper use.
- Damage caused by incorrectly following the instructions described in the operating or installation manual.
- Malfunction through simultaneous use of this product and other non-recommended equipment.
IMPORTANT SAFETY INSTRUCTIONS
Do not open the cover of the unit. No user-serviceable parts inside. To open the cover cancels the guarantee of the unit. Refer to an authorised dealer.
Make sure that the ventilation holes of the receiver are not blocked, this prevents overheating.
To protect your unit from permanent damage do not connect non-recommended equipment.
The receiver supplied with this system is not a standard satellite receiver. It cannot be used with a normal antenna dish. It can only be used with the Maxview Omnisat Dome. If you connect an LNB to the output of this unit it may cause damage to the LNB or receiver.
The antenna part of the system installed on the vehicle adds extra height. It is very important to be aware of this extra height when the vehicle is on the move.
On installation personal safety should be considered when using power/hand tools and working at height.
The user is legally responsible for the antenna mounted on top of the vehicle.
BEFORE STARTING THE INSTALLATION - PLEASE READ
Always follow manufacturer's instructions
Decide where you wish to mount your Omnisat Dome, taking into account any obstacles that might interfere with the tracking of the satellite. It is recommended that you do a dry run to find the best position.
The installation surface should be smooth, flat and rigid.
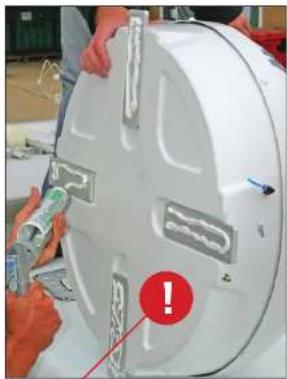
Important: All 4 Fixing Plates must be level to avoid distortion of the system (see the next page).
Before starting the installation of the antenna, make sure that the surface on which the antenna is to be mounted is dry and clean.
Please make sure that all connections have been made to the system before the power is connected, failure to do so may result in damage to the system and may void the guarantee.
RECOMMENDED PARTS/TOOL LIST
Drill and drill bits
Screwdriver
Adhesive, such as Sikaflex®-512 and/or cleaner and activator ^8
Multimeter
Side cutters and pliers
* always follow manufacturers instructions.
Remove the Omnisat Dome from the packaging and check it visually.
PACK CONTENTS
Satellite system
Satellite Receiver
2 x 'F' connectors
1 x Boot
8m Coaxial cable
'F' to 'F' coaxial lead
Infra Red extender
Receiver brackets
Receiver and power cable
Remote control handset x 2 AAA batteries
Screw and washer pack (x 8 of each)
Cable entry cover
INSTALLATION ON THE VEHICLE
- Position the Omnisat Dome on top of the vehicle carefully, in your chosen location.
The 'F' connector and blue pressure balancing pipe should be directed to the rear of the vehicle.
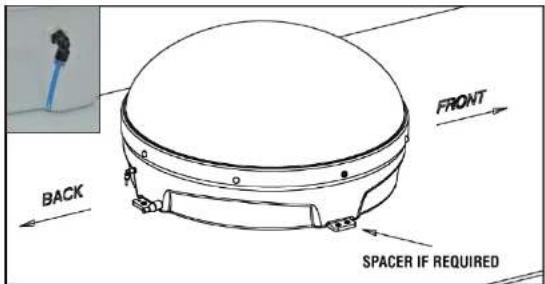
text_image
FRONT BACK SPACER IF REQUIREDCaution: Installation which is made without using spacers on irregular surfaces may cause distortion of the system. This may effect the operation of the equipment and cause permanent damage.
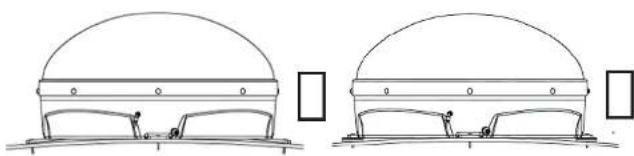
natural_image
Technical line drawings of two dome-shaped structural components with mounting brackets (no text or symbols)If the surface of the vehicle slopes, the left and right sided plates of the antenna will not lie flat on the surface. In such cases, use spacers (not included) to fill the gaps.
USAGE
Press the “” button on the front panel of the receiver or the “STANDBY” button on the remote control handset to operate the system. The LED on the front panel will come on and the system will start to operate.
When the system is operating, the antenna starts to search for the selected satellite. The search is completed in about 20 seconds. After the satellite is found, the system defines the most suitable antenna position by fine-tuning and then stops. After the satellite has been found the receiver channels can be watched.
While the system is operating a faint motor sound can be heard, this is normal.
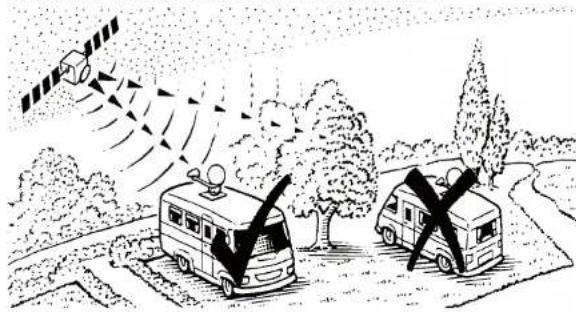
natural_image
Illustration of two buses with satellite dishes emitting signal waves, surrounded by trees and a road (no text or symbols)Satellite reception is only possible when the dome is positioned so that it has direct line of sight in the direction of the desired satellite and there are no obstructions blocking the view, e.g. trees, buildings.
The signal receiving performance of the system may decrease with heavy rainfall or snowfall. The same result may occur if the antenna is covered with snow. In such a case, gently remove the snow from the antenna cover.
Dirt on the dome may decrease the signal receiving performance over a period of time. To prevent decrease of performance gently clean the antenna cover periodically.
Do not use abrasive cleaners as they may damage the product's surfaces.
Do not use solvent based cleaning agents on plastic parts.
To turn off the system press power button on the front panel of the receiver or "STANDBY" button on the remote control handset. The LED on the front panel will go out and the system switches off.
SECTION 3 USER GUIDE
- Follow the adhesive manufacturer's guidelines for surface preparation.
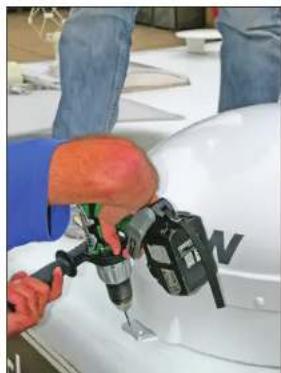
- Apply the adhesive to the underside of each fixing area (as shown). Drill and fix screws provided, ensuring the system is level and there is no distortion to the base of the system. We always recommend using screws and adhesive for fixing.
- We recommend you follow the adhesive manufacturer's guidelines for curing time before driving your vehicle.
natural_image
Close-up of hands installing or adjusting a white mechanical component with a red warning symbol (no text or symbols present)Important Note:
natural_image
Person using a power tool to apply material to a white car hood (no visible text or symbols)Your system maybe fitted with a "anti rotation tag" to prevent antenna rotation during transit. If this is the case this MUST BE REMOVED before installation.
This can be simply removed by cutting with side cutters.
ELECTRICAL INSTALLATION
The antenna cable is taken from the top of the vehicle to the inside. The antenna cable should not be longer than 15 meters. Fit the cable entry cover onto the cable going through the cable gland. Now attach the 'F' connector to the external end of the cable.
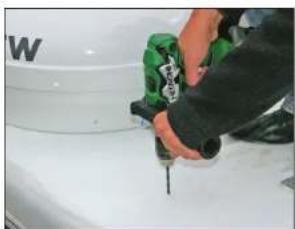
Decide on location for cable entry cover into vehicle (above an overhead locker or wardrobe etc.). Check for cables within roof space before drilling. Drill a hole through the roof and push cable into vehicle.
Ensure roof surface is clean and dry and apply sealant/adhesive to the back of the flange on the cable entry cover. Now apply cover firmly to roof. Clip cable to vehicle roof using clips supplied.
natural_image
Close-up of a person using a power tool on a white car hood (no visible text or symbols)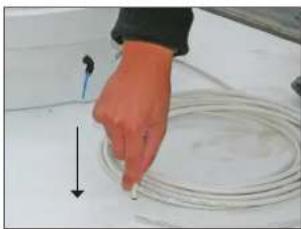
natural_image
Hand pointing at a white surface with coiled wires and a vertical arrow indicating direction (no text or symbols)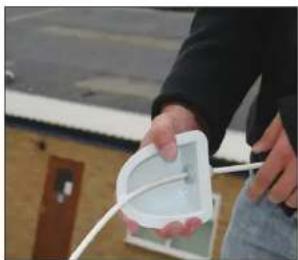
natural_image
Person holding a white plastic container outdoors, no visible text or symbols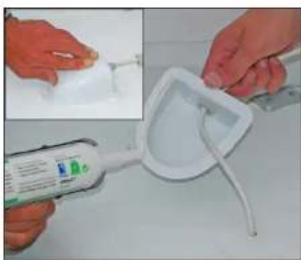
natural_image
Person applying a toothpaste to a white plastic container with a tube, no visible text or symbolsTECHNICAL SPECIFICATIONS
SATELLITE SYSTEM
Dish motion: Two axis; azimuth and elevation
Satellite tracking: At stationary position
Connection: Via coaxial cable
Horizontal (azimuth) moving range: 0° - 360° unlimited
Horizontal (azimuth) moving speed: 60°/second
Vertical (elevation) moving range: 20° \~ 70°
Vertical (elevation) moving speed: 38°/second
Operating voltage range: 11V - 25V DC
Operating power consumption: 40W
Dimensions: 69cm x 69cm x 34cm (width x length x height)
Wrapped Dimensions: 81cm x 81xm x 48cm (width x length x height)
Weight:
Storage temperature: -30°C \~ 70°C
Operating temperature: -15°C \~ 50°C
Operating relative humidity range: 0 \~ 90 %
SATELLITE RECIVER
TUNER
Standard: DVB-S
Input signal level: -65...-25 dBm
Frequency range: 950-2150 MHz
Demodulation: QPSK
Symbol rate: 1-45 Msps
Code rates: 1/2, 2/3, 3/4, 5/6 and 7/8
Reed Solomon: 204, 188, 8
System: SCPC, MCPC
Channel lock: PLL Output: Loop-through output
Input and output impedances: 75ohmes
Connectors: F type, Female
AUDIO / VIDEO
Audio system: MPEG Layer 1-2
Sampling: 32, 44.1, 48kHz
Audio output mode: Mono, Dual mono, Stereo
Video system: MPEG2 ISO/IEC 13818-
Resolution: 720*576
Video mode: PAL
A/V CONNECTIONS
RCA: Video (CVBS), Audio (Stereo) output

GENERAL SPECIFICATIONS
- Animated OSD
• 8000 Channels
• Smart channel scan - Very fast channel switch
• Mosaic channels (15 still picture, 1 live picture)
• Picture in Graphics (PIG) - Various Games
- Various Utilities
• Custom OSD-Radio backgrounds
• Channel list backup
• 16 favorite channel groups
• Advanced channel editing (Multiple deletion, multiple move, hide, skip)
• DVB and Teletext Subtitle
• VBI and OSD Teletext
• Electronic Program Guide (EPG)
• Multilingual audio support - Multilingual OSD
• Parental, setup and device lock
• 8 VCR timers (once, daily and weekly modes)
• Firmware and channel list update from PC or other box
• SCPC-MCPC compliant
• 200 MHz main CPU
• 16 MB Flash
• CI (Common Interface) slot (optional)
TECHNICAL SPECIFICATIONS
SYSTEM SOURCES
CPU (Central Processing Unit): 200 MHz RISC
RAM: 128 Mb RAM
Flash memory: 16 Mb
DATA
Standard: RS232, 115200, 8, n, 1
Connector: 9 pin, D-type, male
POWER SUPPLY
| Type: | Switch | Mode |
| Power consumption: 30W | ||
| Operating voltage: 12V....24V DC |
GENERAL
Dimensions: 185 x 202 x 60 mm
| Weight: | 1400 | gr |
Operating temperature: 5\~40 °C
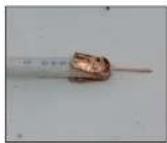
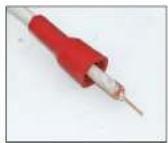
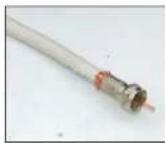
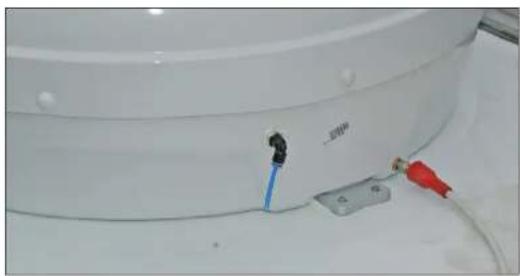
Note: The 'F' connector on the Omnisat Dome side of the cable is connected to the female 'F' connector socket on the antenna. The plastic 'F' connector boot on the antenna cable is pushed onto the 'F' connector.
natural_image
Close-up of a white cylindrical device with blue cable and red connectors, no visible text or symbolsInside vehicle route cable to satellite receiver and fit 'F' connector.
The 12-24V DC supply voltage should be taken from the correct point of the vehicle to supply voltage to the Control Box. The 12-24V DC supply voltage is supplied via a 2 x 0.75mm2 power cord to connect to the Control Box.
The antenna cable coming from the Omnisat Dome is connected to the input of the Control Box via an 'F' connector.
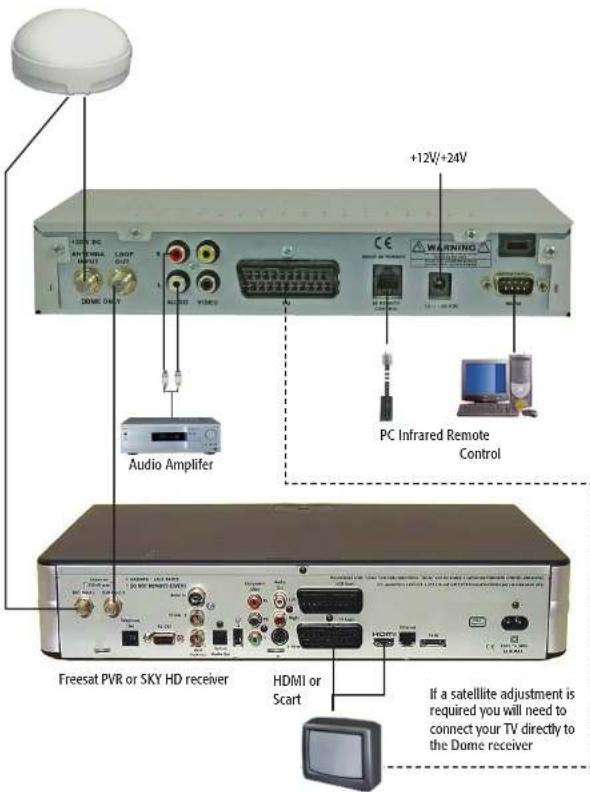
If a Set-Top-Box is used, connection between the Control Box and Set-Top-Box can be made with the provided Loop through cable.
Once the electrical connections to the Control Box and Set-Top-Box (optional) are completed, the Control Box and Set-Top-Box (optional) should be securely fastened to prevent vibration.
SEE PAGE 12 FOR RECEIVER CONNECTION DIAGRAM
SECTION 2 OPERATION
TROUBLESHOOTING
If you have a problem with your unit, before contacting the technical service, check the following:
| PROBLEM | REASON |
| The unit does not operate at all (The LED on the front panel does not come on). | Make sure the power connection is correct. The input power fuse may have blown. |
| The unit menus appear on the TV but there is no sound or picture. | Make sure that the unit is connected to the Omnisat antenna correctly. Also make sure that the program settings of the unit are set to one of the programs included in the satellite that you want to watch. |
| During digital programs, audio interruptions and video skew occurs. | Signal emitted by the antenna is not strong enough. Make sure that there is no problem with the cable. |
| A digital program that was previously watched is not available any more. | The frequency, polarity, symbol rate or PID values of that program might have changed. |
| Remote control is not working. | Check batteries and replace if required. Ensure that the sensor on the unit is not obscured. |
| Picture is available, but weak or no sound. | Make sure that the volume of your TV and satellite receiver is at an adequate level. |
flowchart
graph TD
    A["MENU MAP"] --> B["Menu Map"]
    B --> C["Actions"]
    C --> D["Settings"]
    D --> E["Controls"]
    E --> F["Colorbar"]
    F --> G["Transporter Settings"]
    G --> H["Personal Settings"]
    H --> I["Service"]

    subgraph Details
        J["Actions"]
        K["Settings"]
        L["Controls"]
    end

    style A fill:#f9f,stroke:#333
    style B fill:#ccf,stroke:#333
    style C fill:#cfc,stroke:#333
    style D fill:#fcc,stroke:#333
    style E fill:#cff,stroke:#333
    style F fill:#ffc,stroke:#333
    style G fill:#fcc,stroke:#333
    style H fill:#ffc,stroke:#333
    style I fill:#fcc,stroke:#333
    style J fill:#cfc,stroke:#333
    style K fill:#cfc,stroke:#333
    style L fill:#cfc,stroke:#333
    style_M["Services"] --> N["Settings"]
    N --> O["Controls"]
    O --> P["Colorbar"]

    style A fill:#fff,stroke:#000
    style B fill:#fff,stroke:#000
    style C fill:#fff,stroke:#000
    style D fill:#fff,stroke:#000
    style E fill:#fff,stroke:#000
    style F fill:#fff,stroke:#000
    style G fill:#fff,stroke:#000
    style H fill:#fff,stroke:#000
    style I fill:#fff,stroke:#000
    style J fill:#fff,stroke:#000
    style K fill:#fff,stroke:#000
    style L fill:#fff,stroke:#000
    style M fill:#fff,stroke:#000
Please make sure that all connections have been made to the system before the power is connected, failure to do so may result in damage to the system and may void the guarantee.
- Switch on the Control Box. Check the system is operating by listening to the sound of the antenna.
- The power voltage of the Control Box should be measured using a multimeter to ensure that the supply voltage is not less than 12V DC under operating conditions.
- Switch on the Set-Top-Box, if used. Check different channels to see if the video and audio is being received correctly.
PRECAUTIONS
No user-serviceable parts inside.
Use a dry cloth to clean the unit. Do not allow electrical equipment to be exposed to rain or moisture.
If there is a problem DO NOT remove the cover. Contact an authorised dealer.
Your receiver is designed for use in a bus, boat, caravan or similar vehicles.
Do not connect any unsuitable equipment to the unit as this could cause permanent damage or danger.
Remove the batteries from the remote control handset if it is not to be used for long periods. Non-removal could result in damage to the handset caused by leaking batteries.
Dispose of batteries correctly in order to protect the environment.
This receiver is a non standard satellite receiver and is only to be used with the Maxview Omnisat Dome Auto Satellite System. If you connect an LNB to the output of this unit, it may cause damage to the LNB and/or receiver
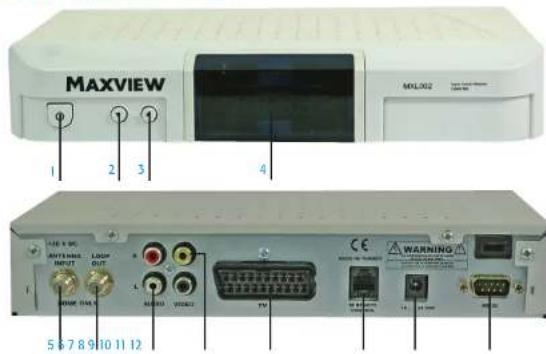
RECEIVER FUNCTIONS & CONNECTIONS
text_image
MAXVIEW MXL002 1 2 3 4 5 6 7 8 9 10 11 12 POWER INTU Laser OUT AC/DC VCC/CC TV CE WARNING- Stand-by (On/off)
- Programme Down
- Programme Bo
- Programme Up
-
LED Display
-
LNB Input
- Loop Out
- RCA Audio Outputs (Left, Right)
-
RCA Video Outputs
-
Scart Connection
- Power Input
- Serial Port
- Infrared Remote Control
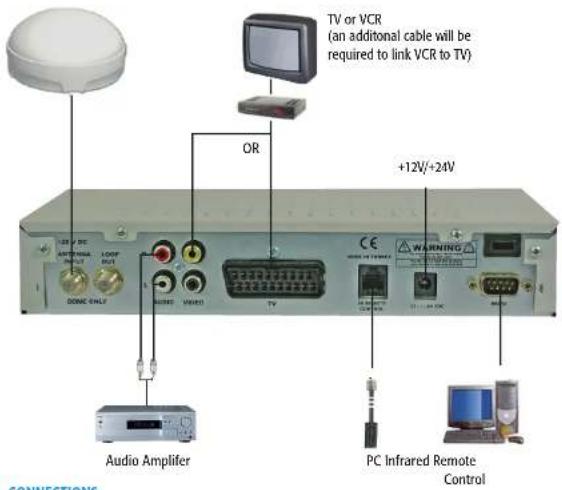
CONNECTION DIAGRAM - FOR SINGLE LNB VARIANT - MXL003
text_image
TV or VCR (an additional cable will be required to link VCR to TV) OR +12V/+24V Audio Amplifier PC Infrared Remote ControlCONNECTIONS
Before making any connections to the unit ensure that the mains input has been disconnected. Connect to the mains once all connections have been completed correctly. Incorrect connections may cause permanent damage to the unit. If you are unsure on how to connect the unit contact your installer or Customer Service.
VCR (Video Cassette Recorder) Connection
A VCR connection can be made by connecting it to the VIDEO output of the satellite receiver. The VCR OSD (On Screen Display) menus are displayed on the TV screen. The VCR is set to on, even when the receiver is switched off. When the receiver is off the volume of the TV is controlled by the TV, however, when the receiver is on, the volume can be controlled using the receiver.
TV Connection
Video RCA output should be connected to TV Video RCA inputs. Audio RCA outputs can be connected to TV Audio RCA inputs.
Audio Amplifier Connection
Connection through RCA Outputs
You may connect your unit to an audio amplifier through RCA outputs. For this purpose, use AUDIO-L and AUDIO-R stereo outputs of your unit.
GAMES
When in the "Main Menu", go to "Games" by using "☐"/"☐" and "☐"/"☐" buttons and press the "OK" button. The "Games" sub-menu is entered.
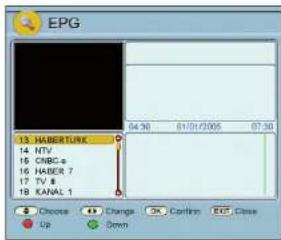
ELECTRONIC PROGRAM GUIDE - EPG
Broadcasted timetables will be available with some programs. You may use the "EPG" feature of the unit to get this information.
Press the "EPG" button on the remote control when no menu is displayed. The "EPG" menu appears on the screen.
You will see in the "EPG" menu a list of the channels, timetable, start and finish times, name and summary of the channel.
You may use "☐"/"☐" buttons to move between channels and to display data on the screen. Every time you change the channel, you will see a live picture of the new channel on the upper left hand side.
You will see the start and finish times and the day that the timetable covers. A red line shows the current time.
You may use the "EPG" menu as a reminder menu. If you select a channel other than the current channel at a later time and press the "OK" button, its box will become red. When it is time for the selected channel your receiver will automatically go to that channel. To cancel this feature, press the "OK" button again, on the same box.
COMMON INTERFACE (OPTIONAL)
Some Troya II Digital Satellite receiver models have a CI (Common Interface) module. CI modules are used with a smart card.
With a correct CI module and correct smart card existing and future scrambled channels can be watched.
Insert the smart card into the slot in the CI module and then select the scrambled channel. The scrambled channel will be available in a few seconds.
text_image
EPG 13 HABERTUNK 14 NTV 15 CNBC 8 16 HABER 7 17 TV 8 18 KANAL 1 54.30 01/01/2005 07:30 Choose Change Confirm EXP Close Up Down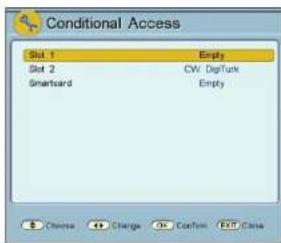
text_image
Conditional Access Slot 1 Empty Slot 2 CW: DigitTurk Smartcard Empty Choose Change Confirm End CloseEXTRAS
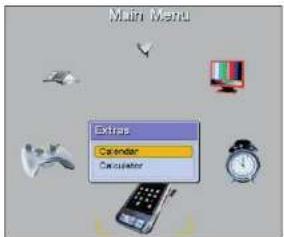
When in the "Main Menu", go to "Extras" by using "☐"/"☐" and "[/"] buttons and press the "OK" button. "Extras" sub-menu is accessed. You can access some useful programs in this menu.
While in the "Extras" menu, go to the "Calendar" by using "☐"/"☐" buttons and press the "OK" button. A calendar appears on the screen. The calendar covers the dates from 1980 to 2099. "Year" is selected by "☐"/"☐" buttons and "Month" is selected by "☐"/"☐" buttons. Press "EXIT" or "MENU" buttons to exit the calendar.
While in the "Extras" menu, go to "Calculator" by using "[]/["] " buttons and press the "OK" button. A calculator appears on the screen. Simple arithmetic calculations can be made by using number, "[]/["", "□"/"□" and "OK" buttons in this menu. Press "EXIT" or "MENU" buttons to exit the calculator.
text_image
Main Menu Extra Calendar Calendar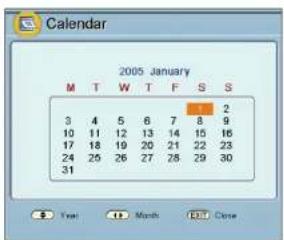
text_image
Calendar 2005 January M T W T F S S 3 4 5 6 7 8 9 10 11 12 13 14 15 16 17 18 19 20 21 22 23 24 25 26 27 28 29 30 31 Tyr! Month Close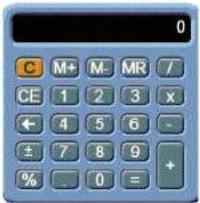
text_image
C M+ M- MR / CE 1 2 3 x ← 4 5 6 - ± 7 8 9 + % 0 = +CONNECTION DIAGRAM - TWIN LNB VARIANT - MXL003/TWIN
text_image
+12V/+24V WARNING Audio Amplifier PC Infrared Remote Control Freesat PVR or SKY HD receiver HDMI or Scart If a satellite adjustment is required you will need to connect your TV directly to the Dome receiverFIRST INSTALLATION AND TV SETTINGS
When you have completed the required connections to your satellite receiver, plug in the mains lead and switch on (Please refer to "Connections" (page 12) to verify their correctness). Turn on the TV and satellite receiver and press the "MENU" button on the satellite receiver remote control handset. If you are using a scart connection to the TV, no TV settings are required. Whenever you turn on your TV and receiver, the TV will automatically display the receiver screen. (Some TVs may not have automatic scart switching. In this case, you need to enter the AV mode using the TV remote control handset).
CHANNEL SELECTION
You may use several methods for channel selection.
You may select a channel by pressing "☐"/"☐" buttons while any program is being displayed. The number and name of the channel that you have selected will be displayed under the screen.
You may select a channel, using the number buttons. The number of the channel you have selected will be displayed under the screen. You may apply this method in three ways:
1. Press the channel number as four digits. For example, to select the channel 1875, press 1, 8, 7, 5, and to select the channel 27, press 0, 0, 2, 7.
2. Press the channel number only and then wait a few seconds. For example, to select channel 168, press 1, 6 and 8 and wait. To select channel 56, press 5 and 6, and then wait.
3. For fast access to the channels, while entering the channel number, keep pressing the last number. For example, to access channel 3, press and hold button 3. To access channel 14, press 1 and then press and hold button 4.
You may call the "Channel List" by pressing the "OK" button, if the "Channel List" menu is not displayed. (Please see "Channel List").
INFOBAR
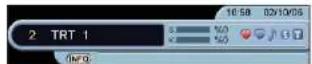
INFOBAR is displayed at the lower side of the screen with each channel change. This bar will show channel number, channel name, signal level and some information relating to the channel being displayed. Various symbols will show if the channel, is on the favourite list, has alternative languages for that channel, is a radio channel, if the channel is scrambled and if teletext is available.
TELETEXT
If your TV does not have Teletext function you may use your receiver's Teletext function.
The teletext data is available on some channels only.
Select the teletext channel you would like to view and press the "TXT" button.
You may use the "☐"/"☐" buttons to alter the page number.
For direct access to requested programs you may use the number buttons.
Pressing the "TXT" button while Teletext is active makes the Teletext page transparent.
To exit the Teletext press "MENU" button.
TIMERS
Timers are used to turn the unit on/off at programmed times. Your receiver contains 8 timers. For timer settings:
Enter the "Main Menu" and then go to the "Timers" sub menu.
Select the timer that you want to change by using "☐"/"☐" buttons, and then press the "OK" button. The "Timer Details" menu is displayed.
In the "Timer Details" menu select the channel that you want to set using the "☐/” ☐ buttons. Enter the date of the program in "Date". Enter the "Start time" and "End time" by using the number buttons on the handset. (If the start time of the program is later than the end time it is assumed to be the next day.)
"Mode" can be selected as "Once", "Daily" or "Weekly" by using "☐/” ☐ buttons.
- If you choose "Once": It turns on the receiver only on the date that you entered in "Date". "Weekday" option becomes unavailable.
- If you choose "Daily", "Weekday" and "Date" become unavailable. The program selected will turn on/off at that time, every day.
- If you choose "Weekly", "Date" becomes unavailable but you can change the day in "Weekday". If you entered a day in the "Date", every week it will turn on/off on the day that you have chosen.
"Active" should be set to "Yes" to activate the timer.
Save the changes by pressing the "BLUE" button.
After completing the changes, press "MENU" or "EXIT" button to exit from the "Timers" menu.
Notes:
If the power fails for any reason, all timer settings will be deleted and all timers turned off.
Before adjusting the timers, time and date should be entered in "Time & Date" sub-menu.
The settings should not conflict with one another.
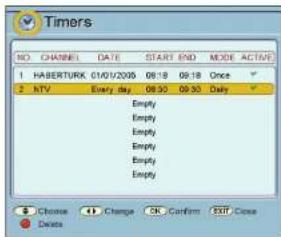
text_image
Timers NO CHANNEL DATE START END MODE ACTIVE 1 HABERTURK 01/01/2005 08:18 09:18 Once 2 hTV Every day 08:30 09:30 Daily Empty Empty Empty Empty Empty Empty Empty Empty Choose Change OK Confirm EXIT Close Delete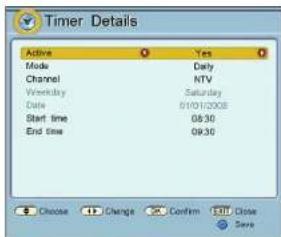
text_image
Timer Details Active Yes Mode Daily Channel NTV Weekday Saturday Date 01/01/2008 Start time 08:30 End time 09:30 Choose Change Confirm Exit Close SaveOTHER SETTINGS
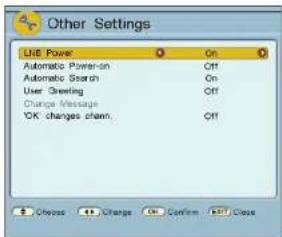
Enter the "Main Menu" and then the "Other Settings" sub-menu from the "System" menu.
If you are using a dedicated LNB, the LNB power of your satellite receiver must be switched on. A common LNB is used for satellite distribution systems. Since the common LNB is powered by the distribution centre, the LNB supply of your equipment must be switched off. Set the "LNB Power" option to "On" or "Off" using "☐/”☐' buttons.
If "Automatic Power-on" is set to "Off" when the main power fails, your satellite receiver will be set to stand-by when the power is restored. Set to "Automatic Power-on" option "On" or "Off" by using "☐"/"☐" buttons.
SERVICE MENU
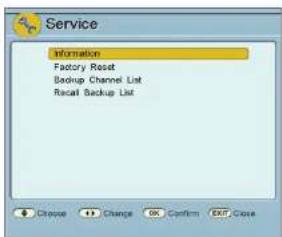
Enter the "Main Menu" and then the "Service" sub-menu from the "System" menu.
While in "Information", press the "OK" button. The "Information" menu is displayed. In this menu some hardware and software information is displayed.
"Factory Reset" option is used to return to the last channel information which was loaded to your receiver via data connection. The PIN is required to enter this menu. After the PIN has been entered, a message, "Factory settings will be restored. Are you sure?" will appear. If you press the "OK" button, the factory settings are restored.
"Backup Channel List": The PIN is required to enter this menu. After the PIN has been entered a message, "Are you sure that you want to backup channel list?" will appear. If you press the "OK" button, the channel list is backed up.
"Recall Backup List": The PIN is required to enter this menu. After the PIN has been entered, a message, "Are you sure that you want to recall database backup?" will appear. If you press the "OK" button, the spare channel list is reloaded.
text_image
Other Settings LHE Power On Automatic Power-on Off Automatic Search On User Viewing Off Change Messages OK changes chain. OffIf "Automatic Search" is set to "On", the receiver will periodically search for new channels while in stand-by mode.
Press "MENU" or "EXIT" button to exit from the "Other Settings" menu. A message, "Do you want to store?" will be displayed if you have made any changes. Press the "OK" button to store. Press "MENU" or "EXIT" button to exit without storing the changes.
text_image
Service Information Factory Reset Backup Channel List Recal Backup List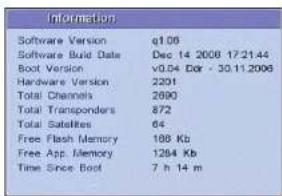
text_image
Information Software Version q1.06 Software Build Date Dec 14 2008 17:21:44 Boot Version v0.04 Ddr - 30.11.2006 Hardware Version 2201 Total Channels 2690 Total Transponders 872 Total Satellites 64 Free Flash Memory 108 Kb Free App. Memory 1284 Kb Time Since Boot 7 h 14 mCHANNEL LIST - LIST TYPE SELECTION
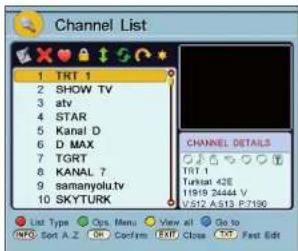
If you press the "OK" button when no menu is displayed, the "Channel List" will be displayed on the screen.
The channels may be listed as different types in the "Channel List" menu. Press the "RED" button to select the list type. After pressing the "RED" button, you can select a different list type by using "☐"/"☐" buttons. Once you have selected the list type you want, press the "OK" button.
Press the "GREEN" button to access the "Ops Menu" to enable changes to be made.
Press the "YELLOW" button to list channels.
Press the "INFO" button to list the channels in alphabetical order.SELECT SAT: The first listing type is to list the channels according to the satellite selected. After pressing the "RED" button in the "Channel List", press the "OK" button when "Select Sat" is highlighted in the pop up menu. A "Satellite List" menu comes up. All the channels are listed in this menu. Move to the desired satellite by pressing "[]/"[] buttons and press the "OK" button. If you select "All", all the satellite channels are listed. Only the channels belonging to the selected satellite will be shown.
TV/RAD: The second listing type is listing the channels depending on whether the channel is a TV or Radio channel. After pressing the "RED" button in the "Channel List", highlight "TV/Rad" by using "["/"]' buttons and press the "OK" button. The options are: "All", "TV" and "Radio" in this menu. Highlight the desired option by using "["/"]' buttons and press the "OK" button. If you select "All", all the TV and Radio channels will be listed. If you select "Radio", only radio channels will be listed and if you select "TV", only TV channels will be listed.
The programs prefixed with a ♪(note) symbol radio programs.
text_image
Channel List 1 TRT 1 2 SHOW TV 3 atv 4 STAR 5 Kanal D 6 D MAX 7 TGRT 8 KANAL 7 9 samanyolu.tv 10 SKYTURK CHANNEL DETAILS TRT 1 Turkish 42E 11919 24444 V V512 A513 P7190 List Type Ops Menu View all Go to INFO Sort A-Z ON Confirm EXP Close Fast Edit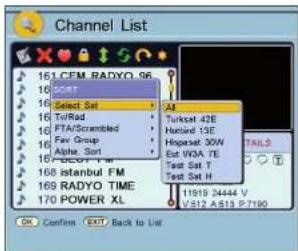
text_image
Channel List 161 CEM RADYO 96 162 SOUT 163 TV/Rad 164 FTA/Scrambled 165 Fav Group 166 Alpha, Sort 167 IBDI, FM 168 istanbul FM 169 RADYO TIME 170 POWER XL Select Set Al Turkset 42E Hotbird 13E Higpascal 30W Eat WOA 7E Text Set T Text Set H 11919 24444 V V-512 A-513 P-7190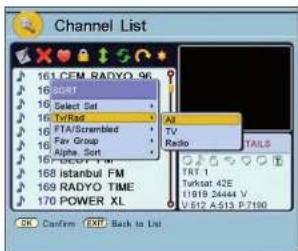
text_image
Channel List 161.CEM.RADYO 96 161.SORT 161.Select Set 161.TvrRad 161.TFA/Scrambled 161.Fav. Group 161 Alpha. Sort 161.BSDP FM 168.Istanbul FM 169.RADYO TIME 170.POWER XL AI TV Radio TAILS TRT I Turkcat 42E I1910 24444 V V-B12 A-513 P-7190 OK Confirm EXIT Back to ListFTA/SCRAMBLED: The third listing type is listing the channels depending on whether they are FTA (Free to air) or Scrambled (coded) channels. After pressing the "RED" button in the "Channel List" highlight "FTA/Scrambled" by using "☐"/☐" buttons and press the "OK" button. The options are "All", "FTA Only" and "the scrambled channel names" in this menu. Highlight the desired option by using "☐"/☐" buttons and press the "OK" button. If you select "All", all the channels are listed. If you select "FTA Only", only FTA channels will be listed and if you select "one of the Scrambled channels", the coded channels that belong to that scrambled channel will be listed.
The programs prefixed with a " 🔍 symbol are scrambled channels in the "Channel List".
FAV GROUP: The fourth listing type is listing the channels according to favourite groups. After pressing the "RED" button in the "Channel List", highlight "Fav Group" by using "[/]/[ ]" buttons and press the "OK" button. The options are "All", "Only Favs" and "the other favourite channel groups"(that you've created in this menu). Select the desired option by using "[/]/[ ]" buttons and press the "OK" button. If you select "All", all the channels are listed. If you select "Only Favs", only favorite channels will be listed and if you select one of the favourite channels that you've created, the favourite channels that belong to that group will be listed.
ALPHA SORT: The final listing type is listing the channels depending on alphabetical order. After pressing the "RED" button in the "Channel List", highlight "Alpha, Sort" by using "☐/"/"☐" buttons and press the "OK" button. The options are "Normal", "A.Z" and "Z.A" in this menu. Select the desired option by using "[]/"/"☐" buttons and press the "OK" button. If you select "Normal", the channels are listed according to the order recorded. If you select "A.Z", the channels are listed according to alphabetical order. If you select "Z.A", the channels are listed in reverse alphabetical order.
Press "MENU" or "EXIT" button to exit the "Channel List" menu.
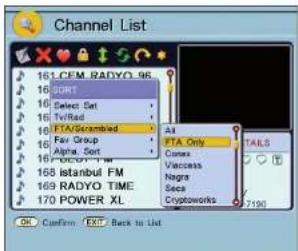
text_image
Channel List 161 CEM RADYO 96 162 SORT 163 Select Set 164 Tvl/Red 165 ETA/Scrambled 166 Fan Group 167 Alpha, Sort 168 OCDY, FM 169 Istanbul FM 170 RADYO TIME 171 POWER XL A1 FTA Only TAALS Vaccass Negra Secs Cryptoworks 7190 OK Confirm Export Back to List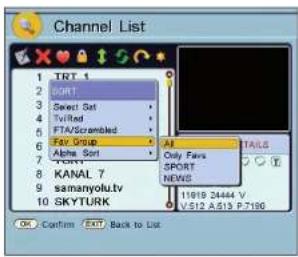
text_image
Channel List 1 TNT 1 2 SPORT 3 Select Sat 4 Tufted 5 FTA/Scrambled 6 Fair Group 7 Alpha Sort 8 TALT 9 KANAL 7 10 samanyolu.tv 111818 24444 V 12 SKYTURK V.512 A.513 P.7190 OK Confirm EXIT Back to List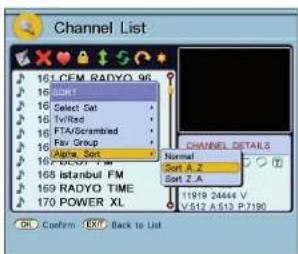
text_image
Channel List 161 CEM RADYO 96 162 SOLT 163 Select Sat 164 TV/Rsc 165 FTA/Greenbriad 166 Fax Group 167 Alpha Sort 168 BEOY FM 169 Istanbul FM 170 RADYO TIME CHANNEL DETAILS Normal Sort A.Z. Sort Z.A. 11919 24444 V V.512 A.513 P.7190 OK Confirm Cancel Back to ListPARENTAL SETTINGS
Enter the "Main Menu" and then the "Parental Settings" sub-menu from the "System" menu.
"Enter Pin" message will be displayed. Enter the 4 digit password by using the number buttons. (Factory setting of your receiver is 0000.)
The "Parental Settings" menu is displayed once the PIN has been correctly entered.
If "Receiver Lock" is "On", the PIN is asked for every time the receiver is switched on.
If you don't want your receiver settings changed by somebody else, you can use "Setup Lock" option. If "Setup Lock" is "On", the PIN is required to enter the menus where the channel information and settings are changed.
To change the PIN, highlight "Change PIN" and press the "OK" button. "Enter New PIN" becomes active. Enter the new PIN by using the number buttons. After you have entered the new PIN, "Confirm New PIN" becomes active. Enter the new PIN again. After you have pressed the last number a "Pin changed" message is displayed. Press the "OK" button to confirm.
Press "MENU" or "EXIT" button to exit from the "Parental Settings" menu. A message, "Do you want to store?" will be displayed if you have made any changes. Press the "OK" button to store. Press "MENU" or "EXIT" button to exit without storing the changes.
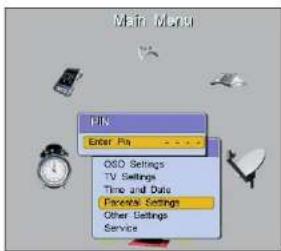
text_image
Main Mio PIN Enter Pin OSD Settings TV Settings Time and Date Foreset Settings Other Settings Service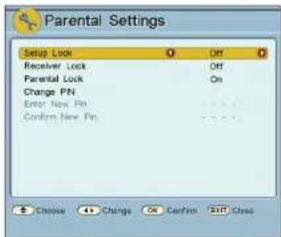
text_image
Parental Settings Setup Lock Off Receiver Lock Off Parental Lock On Change PN Enter New Pin Confirm New Pin Choose + Changes OK Confirm Exit Close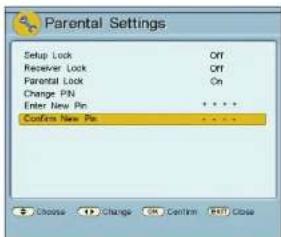
text_image
Parental Settings Setup Lock Off Receiver Lock Off Parental Lock Cn Change PIN Enter New Pin **** Confers New Pin **** Choose Change Cancel Help CloseTV SETTINGS
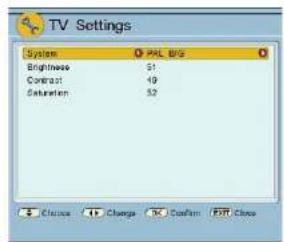
When in the "Main Menu", select "System" by using "☐"/"☐" and "☐"/"☐" buttons and press the "OK" button. Highlight "TV Settings" and press the "OK" button again. The "TV Settings" sub-menu is accessed.
In "TV Settings" you can select the TV system as "NTSC", PAL B/G" or "PAL I" in the "System" option using "/" buttons.
You can set the Brightness, Contrast and Saturation value between 0-100 by using "☐/”☐/ buttons.
Press "MENU" or "EXIT" button to exit from the "TV Settings" sub-menu. A message, "Do you want to store?" will be displayed if you have made any changes. Press the "OK" button to store. Press "MENU" or "EXIT" button to exit without storing the changes.
TIME AND DATE
Enter the "Main Menu" and then the "Time & Date" sub-menu from the "System" menu.
"Mode" can be selected as "Auto", "Manual" or "Selected tp". In "Manual" mode the time is set by the user. In "Auto" mode the time is fixed by channel. In "Selected tp" mode the time is fixed by the selected transponder.
You can highlight "Date" and "Time" by using "☐"/"☐" buttons and change them by using the number buttons.
Press "MENU" or "EXIT" button to exit from the menu. A message "Do you want to store?" will be displayed if you have made any changes. Press the "OK" button to store. Press "MENU" or "EXIT" button to exit without storing the changes.
Note: If the equipment power fails for any reason, the time and date will be lost if they were entered using the manual mode. "Time Zone" should be entered to ensure automatic time storage. It is mandatory to set the time and date before adjusting the timers.
text_image
TV Settings System PRL B/S Brightness 51 Contrast 49 Saturation 52 Choose Change Confirm Print Close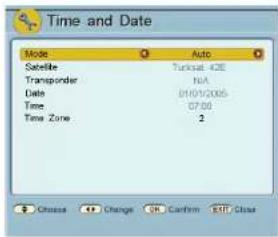
text_image
Time and Date Mode Auto Satellite Turksat 4CE Transponder N/A Date 01/03/2005 Time 07:08 Time Zone 2 Choose Change OK Confirm FTP CloseDifferent operations are also possible in the "Channel List" menu. Press the "GREEN" button to select operation type. After pressing the "GREEN" button in the "Channel List", highlight "Operation" by using "☐/☐" buttons. There are 8 symbols in the "Channel List" representing these operations.
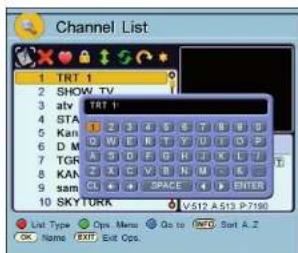
NAME: The first symbol at the top left of the column in "Channel List" is used for changing the channel name. Select ☑ by using [://,□] " buttons and press the "OK" button to access the "Name" operation. You can select the channel that you want to rename by using [I//,□] " buttons. When you press the "OK" button again, a keyboard appears on the screen. Press [□//,□], □/, □ and the "OK" buttons on the remote control to enter the desired letters on the keyboard. The channel name may have up to 32 characters. You can use uppercase or lowercase, numbers, ., & and space in the channel name.
DELETE: You can delete channels you don't want in the "Channel List" by using the "Delete" operation. Press the "GREEN" button to enter "Operation" menu. Select ☑ by using "☐/☐" buttons and press the "OK" button to activate "Delete" operation. When you press the "OK" button, the current channel is selected. You can highlight the channel you want to delete by "☐/☐" buttons. If you press the "OK" button again the highlighted channel is deleted immediately. All channels belonging to that list will be deleted if the "YELLOW" button is pressed.
FAV GROUP: Press the "GREEN" button to enter "Operation" menu. Select by using "☐/☐" buttons, "Fav Group" is activated and by pressing the "OK" button the "Fav Ops." menu appears. The options in this menu are, adding/removing a new channel to/from the favourite channel group, creating a new favourite channel group, renaming and deleting an existing group, locking and unlocking a group. To add a new group, press the "OK" button while "Add/Rem. Channel" is selected. A keyboard appears on the screen. You can now create a new favourite group using the keyboard.
text_image
Channel List 1 TRT 1 2 SHOW TV 3 atv TRT 1 4 STA 5 Kan 6 D M 7 TGR 8 KAN 9 sam 10 SKY TORK V512 A.513 P.7190 List Type Ops Menu Go to WWD Sort A. Z OK Name EXIT Exit Ops.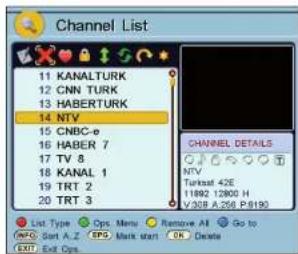
text_image
Channel List 11 KANALTURK 12 CNN TURK 13 HABERTURK 14 NTV 15 CNBC-e 16 HABER 7 17 TV 8 18 KANAL 1 19 TRT 2 20 TRT 3 CHANNEL DETAILS NTV Turkast 42E 11892 12800 H V32B A.256 P.8190 List Type Ops Menu Remove All Go to INFO Sort A.Z EPS Mark start OK Delete EXIT Exit Ops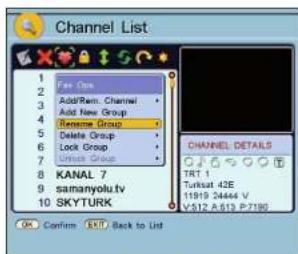
text_image
Channel List 1 2 3 4 5 6 7 8 9 10 Fiat One Add New Channel Add New Group Rename Group Delete Group Lock Group Lock Group KANAL 7 samanyolu.tv SKYTURK CHANNEL DETAILS TRT 1 Turksat 42E 11919 24464 V V-512 A-613 P-7190 OK Confirm OK Back to ListAfter you have created a new "Favourite Group" you can change the name of the group. To do this the "Rename Group" option is used. To add a channel to the created group, highlight "Add/Rem. Channel" and press the "OK" button. The menu on the right appears on the screen. The "Channel List" appears as the left column and the favourite group list appears as the right column. Select a channel from the "Channel List" and press the "OK" button. That channel will now be added to the "Favourite Channel" list.
LOCK: Press the "GREEN" button to enter the "Operation" menu in the "Channel List". Select by using "□/□" buttons. "Lock" operation is activated and by pressing the "OK" button the "PIN" menu appears. Enter the 4 digit password by using the number buttons on the remote control. (Factory setting of your receiver is 0000). The "Lock" menu is accessed. By using "[□/□]" buttons go to the channel to be locked and press the "OK" button. That channel will be locked and prefixed by the "☐" in the "Channel List".
The "Parental lock" operation can also be used on channels by using this option. The "PIN" menu appears when you want to access these channels and the correct PIN must be used to gain access.

text_image
Channel List Channel List 1 TRT 1 2 SHOW TV 3 atv 4 STAR 5 Kanal D 6 D MAX 7 TGRT 8 KANAL 7 9 samanyoklvtv 10 SKYTKUR SPORT 1 GS TV 2 BJK TV 3 FB TV 4 Superport 5 LKG TV CHANNEL DETAILS TRT 1 Turksat 42E 11819 24444 V V512 A-513 P-7190 Few List EMD Mark start OK Add EXIT Exit Ops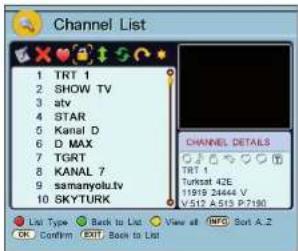
text_image
Channel List 1 TRT 1 2 SHOW TV 3 atv 4 STAR 5 Kanal D 6 D MAX 7 TGRT 8 KANAL 7 9 samanyolu.tv 10 SKYTKURK CHANNEL DETAILS TRT 1 Turkstat 42E 11919 24444 V V512 A513 P7190 List Type Back to List View all INFO Sort A.2 OK Confirm EXIT Book to List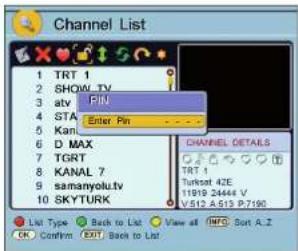
text_image
Channel List 1 TRT 1 2 SHOW_TV 3 atv FIV 4 STA Enter Pin 5 Kan 6 D MAX 7 TGRT 8 KANAL 7 9 samanyolu.tv 10 SKYTKUR CHANNEL DETAILS TRT 1 Turkset 42E 11919 24444 V V512 A.613 P.7190 List Type Back to List View all INFO Sort A.2 OK Confirm EXIT Back to ListSYSTEM
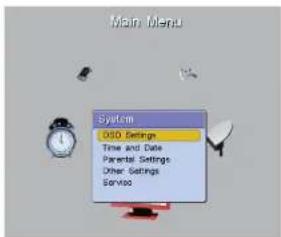
The second sub-menu in "Main Menu" is "System" menu. When in the "Main Menu", highlight "System" using "☐"/"☐" and "☐"/"☐" buttons and press the "OK" button. "System" sub-menu is displayed.
There are "OSD Settings", "Time and Date", "Parental Settings", "Other Settings" and "Service" options in this menu.
OSD SETTINGS
When in the "Main Menu", highlight "System" by using "/☐" and "/☐"/"buttons and press the "OK" button. Select "OSD Settings" and press the "OK" button again. "OSD Settings" sub-menu is accessed.
Highlight "OSD Language" and select a language using "☐"/"☐" buttons.
"Prim. Audio Lang", "Sec. Audio Lang": Primary and Secondary audio languages. Some channels broadcast in multiple languages. The languages that are selected using these options will be the chosen language for the channel.
"Subtitle Language": Some channels broadcast in multiple subtitle languages. If the channel that you are watching has subtitle languages, it is displayed automatically.
If you highlight "Transparency" the transparency can be adjusted to "0%", "20%", "40%" or "60%".
"Channel Switching" is, freezing the picture, blanking the screen or fast. Select "Fast", "Freeze" or "Blank" by using "☐/""☐" buttons.
"Infobar Duration" can be set from 1 second to 5 seconds.
text_image
Main Menu System OSO Settings Time and Date Parental Settings Other Settings Service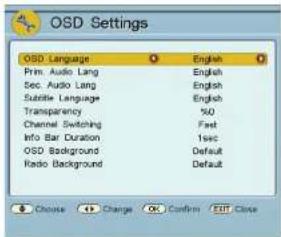
text_image
OSD Settings OSD Language English Prim. Audio Lang English Sec. Audio Lang English Subtile Language English Transparency 50 Channel Switching Fast Info Bar Duration 1sec OSD Background Default Radio Background Default Choose Change OK Confirm Edit Close"OSD Background" and "Radio Background": There is one standard OSD and radio background ("Default") in your receiver. You can load different pictures from your PC to the receiver. They appear in this option and you can select the picture that you want.
Press "MENU" or "EXIT" button to exit from "OSD Settings" sub-menu. A message "Do you want to store?" will be displayed if you have made any
changes. Press the "OK" button to store. Press "MENU" or "EXIT" button to exit without storing the changes.
AUTOMATIC SEARCH
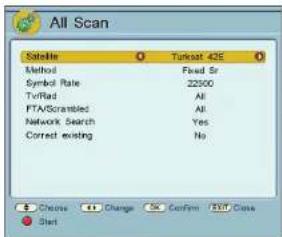
When in the "Main Menu", go to "Installation" by using "☐"/"☐" and "☐"/"☐" buttons and press the "OK" button. Press the "OK" button again to enter the "Automatic Search" option. Select the "All Scan" sub-menu.
A satellite can be selected by highlighting "Satellite" and using the "☐"/"☐" buttons.
If "Method" is highlighted "Fixed Sr" or "Transponder" can be selected. If you select "Transponder" as "Method", all relevant transponders will be searched. If you want to search by symbol rate, select "Fixed Sr" in "Method" and then enter the "Symbol Rate" by using "☐/” or number buttons.
Select "Only TV", "Only Radio" or "All" scan type in "TV/Rad" by using "☐/""☐" buttons.
If you want to scan for Free-to-Air channels, highlight "FTA/Scrambled" and select "FTA Only". If you want to scan for both Free-to-Air and other channels, select "All".
"Network Search": A network information table is sent by some programs and it shows the location of other programs. If "Network Search" option is "Yes", the receiver tries to find the new programs according to the network information table.
text_image
All Scan Satellite Method Symbol Rate Tv/Rad FTA/Scrambled Network Search Correct existing Turkast 425 Fixed Sr 22500 All All Yes No Choose Change S Confirm ST/O Close Shot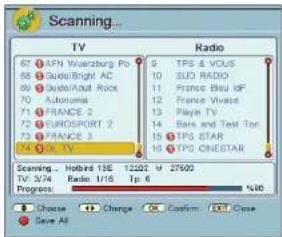
text_image
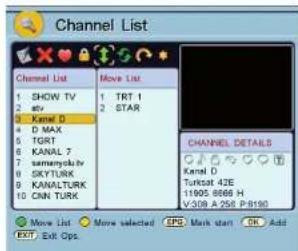
Scanning... TV 67 1AFN Würzburg Po 68 2GebuBright AC 69 3GebuBright Rock 70 Autonomia 71 FRANCE 2 72 EUROSPORT 2 73 FRANCE 3 74 OJK TV Teaching... Swindt 13E 12:02 M 27502 TV 3/16 Radio 1/16 Tp. 6 Progress: % 50% Choose Change Confirm ST Close Save AllMOVE: Press the "GREEN" button to enter "Operation" menu in the "Channel List". Select "Buy using "☐f/☐" buttons. "Move" operation is activated. When you press the "OK" button the menu on the right appears. The "Channel List" appears as the left column and the channels to be moved as the right column. Select the channel you want to move and press the "OK" button. That channel goes to the right column. In this menu press the "GREEN" button to go to the list on the right. If you select a channel and press the "OK" button again that channel goes back to the left column, it can be removed from the channel list to be moved. All the channels to be moved are in the right column.
Press the "YELLOW" button to move the selected channels to their desired position. In the left column, by using "["]/[""] buttons go to the place the channels are to be moved to and press the "OK" button. All the channels that are moved will go to the top of that selected channel position.
SWAP: Press the "GREEN" button to enter "Operation" menu in the "Channel List". Select by using "☐"/"☐" buttons, "Swap" operation is activated. Highlight the first channel that you want to swap and press "OK" button. Then highlight the second channel that you want to swap, press the "OK" button again. The two channels have now replaced each other.
text_image
Channel List Channel List Move List 1 SHOW TV 1 TRT 1 2 atv 2 STAR 3 Kanal D 4 D MAX 5 TGRT 6 KANAL 7 7 samayokuiv 8 SKYTLRK 9 KANALTURK 10 CNN TURK CHANNEL DETAILS Kanal D Turksat 43E 11905 8666 H V-309 A-258 P-8190 Move List Move selected EPS Mark start On Add EXIT Exit Ops.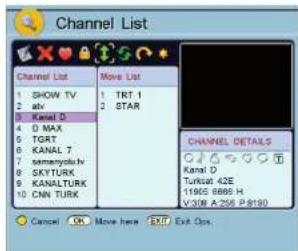
text_image
Channel List 1 SHOW TV 2 atv 3 Kanal D 4 D MAX 5 TGRT 6 KANAL 7 7 samanyoulu 8 SKY TURK 9 KANALTURK 10 CNN TURK Move List 1 TRT 1 2 STAR CHANNEL DETAILS Kanal D Turkcat 42E 11905 6866 H V-308 A-258 P-8190 Cancel OK Move here EXIT Opt.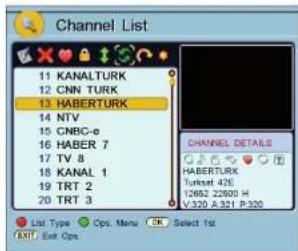
text_image
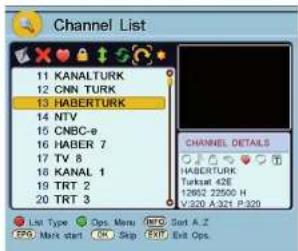
Channel List 11 KANALTURK 12 CNN TURK 13 HABERTURK 14 NTV 15 CNBC-e 16 HABER 7 17 TV 8 18 KANAL 1 19 TRT 2 20 TRT 3 CHANNEL DETAILS HABERTURK Turkcat 426 12652 Z2600 H V.320 A.321 P.320 List Type Ops Menu Select Id EXIT Exit OpsSKIP: Press the "GREEN" button to enter "Operation" menu in the "Channel List". Select by using "☐/☐" buttons, "Skip" operation is activated. If there is a channel that you want to skip while changing channels in the "Channel List", highlight that channel by using "☐/☐" buttons and press the "OK" button. The channel name will be prefixed by the "→" sign. This channel will be skipped from now on when using the remote control handset. However, you may still access that channel by entering its number using the remote control.
HIDE: Press the "GREEN" button to enter "Operation" menu in the "Channel List". Select by using "☐"/"☐" buttons. If you select "Hide Channels" option, "Hide" operation is activated. Each channel you select via the "OK" button will be hidden. If you select the "Show hidden chs." option you can see the hidden channels again. If you press the "OK" button while on a hidden channel, that channel becomes visible. If you select "Don't show hiddens" in the menu below the selected channels become invisible again.
Press "MENU" or "EXIT" button to exit the "Channel List" menu. If you've made a change to the "Channel List", a message, "Do you want to save changes" will appear on the screen. Press the "OK" button to store the changes or press "MENU" or "EXIT" button to exit without storing.
text_image
Channel List 11 KANALTURK 12 CNN TURK 13 HABERTURK 14 NTV 15 CNBC-e 16 HABER 7 17 TV 8 18 KANAL 1 19 TRT 2 20 TRT 3 CHANNEL DETAILS HABERTURK Turkcat 42E 12652 22500 H V:320 A:321 P:320 List Type Ops. Menu Info Sort A.Z EPS Mark start OK Skip Export Ops.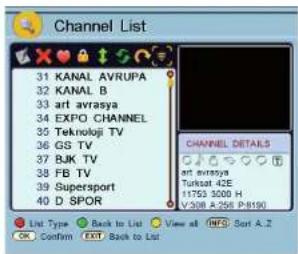
text_image
Channel List 31 KANAL AVRUPA 32 KANAL B 33 art avrasya 34 EXPO CHANNEL 35 Teknoloji TV 36 GS TV 37 BJK TV 38 FB TV 39 Supersport 40 D SPOR CHANNEL DETAILS art avrasya Turksat 4CE 11753 3000 H V308 A-258 P8190 List Type Back to List View all INFO Sort A.2 OK Confirm EXIT Back to List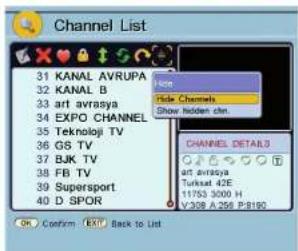
text_image
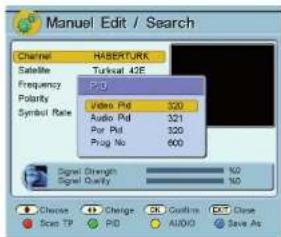
Channel List 31 KANAL AVRUPA 32 KANAL B 33 art avrayya 34 EXPO CHANNEL 35 Teknologi TV 36 GS TV 37 BJK TV 38 FB TV 39 Supersport 40 D SPOR Show: Hide Channels Show hidden chn. CHANNEL DETAILS art avrayya Turkcat 42E 11753 3000 H V:308 A:259 P:8180 OK Confirm Back to ListPID Setting: When you press the "GREEN" button, "PID" menu comes up. The values in this menu are set automatically while searching, so it is not necessary to change these values.
AUDIO Setting: When you press the "YELLOW" button, "Audio" menu comes up.
"Mode" is "Stereo" unless any changes are made. "Mode" can also be set to "Left", "Right" or "Mono" using "☐"/"☐" buttons.
The volume of some programs may be higher or lower than the others. This can cause the volume to increase or decrease abruptly. In order to compensate for such volume differences, the "Volume offset" option in the "Audio" menu can be used.
When you increase the volume offset, the volume of the program will increase, and when you decrease the volume offset (with - values), the volume of the program will decrease accordingly. When in "Volume Offset", adjust the volume difference between +10 and -10 by using "☐"/"☐" buttons.
Access to Audio Tracks: Some programs can be broadcast in several languages. Press the "OK" button when you have highlighted "Audio Tracks". Select the language you want.
Press "MENU" or "EXIT" button to exit from the "Audio" sub-menu. A message, "Do you want to store?" will be displayed if you have made any changes. Press the "OK" button to store. Press "MENU" or "EXIT" button to exit without storing the changes.
text_image
Manuel Edit / Search Channel HASEKTURK Satellite Turkuat 42E Frequency P0 Polarity Video Pd 320 Symbol Rate Audio Pd 321 Prog No 320 Prog No 600 Signal Strength N0 Signal Quality N0 Choice Change Ctrl Add Close Scan TP PID AUDIO Save As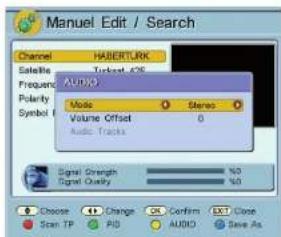
text_image
Manuel Edit / Search Channel HABERTURK Satellite Frequency Polarity Symbol Turbout 426 AUDIO Mode Stereo Volume Offset 0 Audio Tracks Signal Strength 50 Signal Quality 50 Choose Change Confirm Exit Close Scan TP PID AUDIO Save AsSelect "Search" in "Transponder" menu to begin the scanning process for your selected transponder. All the TV and Radio channels for that transponder will be found and displayed on the screen.
When the Scanning is completed, a message "... channel(s) are found. Do you want to save them?" will appear on the screen. If you press the "OK" button, all the channels that have been found will be stored. If a channel already exists in the memory it will not be saved. If you press "MENU" or "EXIT" button, no channels will be stored.
CHANGING PROGRAM SETTINGS
Display the program to which you want to change the settings.
Enter the "Installation" menu from the "Main Menu" and then "Manual Edit / Search" sub-menu.
By using "c=1" c=2 buttons you can change "Satellite", "Frequency", "Polarity" and "Symbol Rate" information. When you enter correct information, the Signal Quality and the Signal Strength levels will appear in the bars at the bottom of the menu. By pressing the "RED" button in this menu you can scan a transponder at a particular frequency. If you press the "BLUE" button, that channel will be added to the end of the list as another channel.
Scan TP: When you press the "RED" button, the frequency that you have chosen will be scanned.
text_image
Transponder List Satellite 44 11882 45 11887 46 11892 - V - 2000 47 11892 - V - 2960 48 11912 - H - 6666 49 11912 - H - 3333 50 11916 - H - 2000 51 11919 - V - 24444 Radio-3 Radio-GAP Radio-4 (TAT) Radio-5 (TURG RAG) 12 VGT Foreign 13 TSR TURKE 14 METALOGRA 15 TSR 2-VOT 2 16 VGT 2 17 Audio Test T Signal Strength Signal Quality 50 50 Choose Change Confirm EXIT, Close Add Transponder Pro List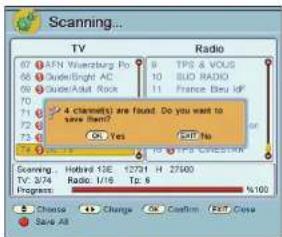
text_image
Scanning... TV Radio 67 AFN Wuerzburg Po 68 Oudelbright AC 69 QuakerAdult Rock 70 71 72 73 74 75 76 77 78 79 80 81 82 83 84 85 86 87 88 89 90 91 92 93 94 95 96 97 98 99 100 9 TPS & VOUS 10 SUD RADIO 11 France Beu Id? 4 channels are found. Do you want to save them? On: Yes EAT No. Scanning: TV 3/36 Progress: Hobind 13E 12731 H 27500 Radio: 1/16 Tp. 6 %100 Choose Change Confirm FY* Close Save All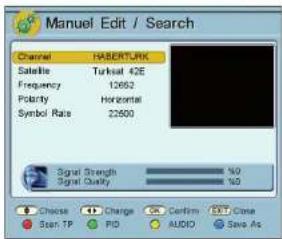
text_image
Manuel Edit / Search Channel HABERTURK Satellite Turkuat 42E Frequency 12652 Polarity Horizontal Symbol Rate 22600 Signal Strength %0 Signal Quality %0 Choose Change Confirm Exit Close Scan TP PID AUDIO Save AsRADIO
Pressing the "RADIO" button activates the "Only Radio" mode. By using "☐"/"☐" and number buttons you can select a radio channel. You can deselect the radio mode by pressing the "RADIO" button again. If you press the "RADIO" button again, "All" mode is selected, and if you press the "RADIO" button again "Only TV" mode is selected.
FAVOURITE CHANNEL LIST
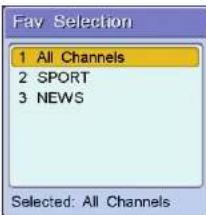
Press the "FAV" button, while there is no menu on the screen. The "Favourite Selection" menu appears on the screen. You can select your favourite group in this menu and only select the channels that appear in the selected group. If you want to see all the channels, select the "All Channels" option.
Press "MENU" or "EXIT" button to exit without selecting any option.
SATELLITE SELECTION
If you want to watch the programs of a particular satellite, you can select that satellite from a list.
Press the "SAT" button when there is no menu on the screen. The "Satellite Selection" menu appears. Highlight the satellite that you want by using "☐"/"☐" buttons and pressing the "OK" button.
You will see only the programs for the satellite that you have chosen from the program list. If the option "All Sats" is selected, you will be able to watch the programs included for all the satellites.
Press "MENU" or "EXIT" button to exit from the satellite list.
text_image
Fav Selection 1 All Channels 2 SPORT 3 NEWS Selected: All Channels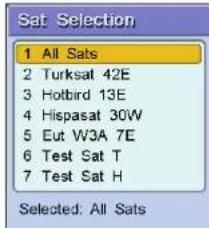
text_image
Sat Selection 1 All Sats 2 Turksat 42E 3 Hotbird 13E 4 Hispasat 30W 5 Eut W3A 7E 6 Test Sat T 7 Test Sat H Selected: All SatsMAIN MENU
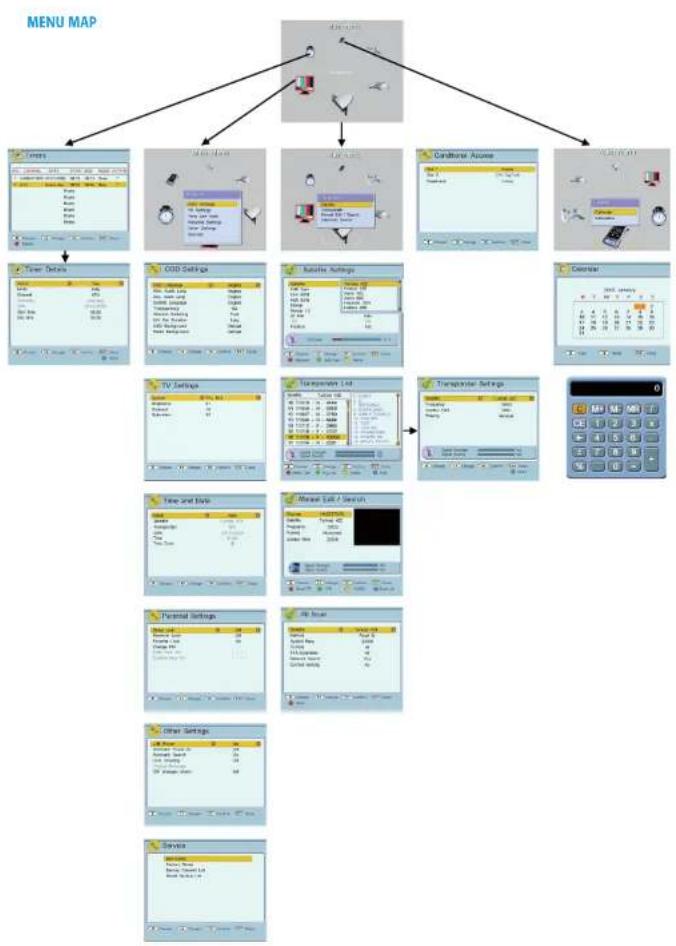
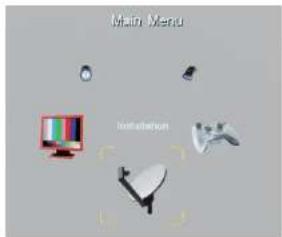
Pressing the "MENU" button when there is no menu shown on the screen will access the "Main Menu". By using the "☐"/"☐" and "☐"/"☐" buttons you can move the cursor right, left, up and down. You can move onto the symbol you want and enter the sub-menu belonging to that symbol by pressing the "OK" button.
There are "Installation", "System", "Timers", "Extras" and "Games" sub-menus in the "Main Menu".
You can move the cursor up and down in the sub-menus by using the "☐"/"☐" buttons.
Exit from the "Main Menu" and sub-menus by pressing "MENU" or "EXIT" button.
INSTALLATION
When in the "Main Menu" go to "Installation" by using "☐"/"☐" and "☐"/"☐" buttons and press the "OK" button. The "Installation" sub-menu is displayed.
There are "Satellite", "Transponder", "Manual Edit / Search" and "Automatic Search" options in this menu.
text_image
Main Menu Installation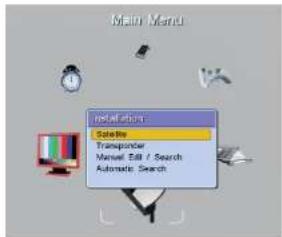
text_image
Main Menu Installation Salesforce Transpencer Manual Edit / Search Automatic SearchTRANSPONDER LIST
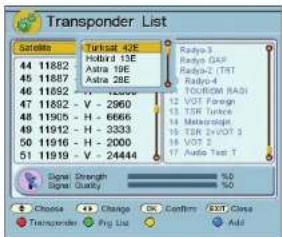
While in the "Main Menu", go to "Installation" by using "☐/""☐" and "☐/""☐" buttons and press the "OK" button. Press the "OK" button again on "Transponder" option. The "Transponder List" sub-menu is entered.
There is a transponder list of a particular satellite in the left column and the program list belonging to that transponder in the right column shown in the "Transponder List" menu. Press the "RED" button to select a satellite. When the "GREEN" button is pressed, the cursor moves to the "Program List" column. You can add a new transponder by pressing the "BLUE" button or you can delete a transponder by pressing the YELLOW" button.While in the "Transponder List" menu, go to any transponder and press the "OK" button. "Transponder" menu appears. There are "Ops. Menu" and "Search" options in this menu.
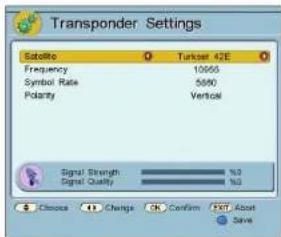
Press the "OK" button when "Ops. Menu" is selected. "Transponder Settings" menu is accessed. Select the satellite you want to make changes to by using "☐"/"☐" buttons.
By using "☐"/"☐" buttons, you can highlight "Frequency", "Symbol Rate" and "Polarity". By using "☐"/"☐" or number buttons on the remote control their values may be changed. By viewing the Signal Strength and Signal Quality at the bottom of the menu it can be seen if the correct information has been entered. If it has, press the "BLUE" button to store the information.

text_image
Transponder List Satellite Turboat 42E 10 11519 - H - 4444 11 11554 - H - 2916 12 11607 - H - 3750 13 11694 - H - 4444 14 11712 - V - 2963 15 11716 - V - 2222 16 11729 - V - 15555 17 11734 - H - 3291 S E L M X S T R E M A R S D O W N G A D S S H U M X - D O W N L O S I C A W S W S T E S T S C A W S W S F O N E R T E R K S P O W R F M S M A S L R A Y D D Signal Strength Signal Quality Change Change Confirm SAT - Close Select Set Fig. List Delete Add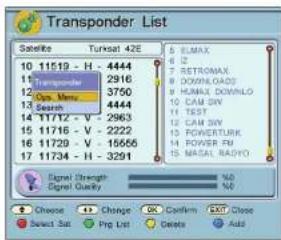
text_image
Transponder List Satellite Turkuat 42E 10 11519 - H - 4444 11 Transponder 12 Op. Menu 13 Search 14 11712 - V - 2963 15 11716 - V - 2222 16 11729 - V - 15655 17 11734 - H - 3291 Signal Strength Signal Quality 6 ELMAX 7 RETRONAX 8 DOWNLOADS 9 HUMAX, DOWNLOAD 10 CAM DIV 11 TEST 12 CAM DIV 13 POWERTRUK 14 POWER FM 15 NASAL RADVO 9 NO 9 NO Choose Change OK Confirm EXIT Close Select Sat Pro List Delete Add