CCR 500 - Satellite receiver CityCom - Free user manual and instructions
Find the device manual for free CCR 500 CityCom in PDF.


User questions about CCR 500 CityCom
0 question about this device. Answer the ones you know or ask your own.
Ask a new question about this device
Download the instructions for your Satellite receiver in PDF format for free! Find your manual CCR 500 - CityCom and take your electronic device back in hand. On this page are published all the documents necessary for the use of your device. CCR 500 by CityCom.
USER MANUAL CCR 500 CityCom
natural_image
Diagram of a network device with satellite dish, computer monitor, and multiple CD/DVD units connected via cables (no text or labels)nur Ferseher
natural_image
Illustration of a satellite dish connected to a computer and a monitor, showing wiring and components (no text or symbols)text_image
Suzhou: 100% online job search Live Web at 7. 2023 https://www.zuzhou.com.cn investment via account was a funded Business, Media, Advertising, Internet Business and communication.Informationbox (Info-Box)
natural_image
Black and white photo of a jet aircraft on a runway with trees in the background (no visible text or symbols)
text_image
Terror 200 页
text_image
OK Cancel Action Action Action
text_image
Scanned document snippet showing a flight photo with a context menu open, likely from an aircraft or flight analysis tool.
text_image
Office File Lockings B100 B100 B100-Internal A Roll B 100 Box OKVideotext
natural_image
Exterior view of a multi-story building with windows and balconies (no visible text or signage)Hauptmenü
text_image
Add Existing Settings Add Existing Settings Delete Settings Info: this Accoupled 3Hauptmenü
text_image
Organisme die Programme Organisme Leibungsprogramme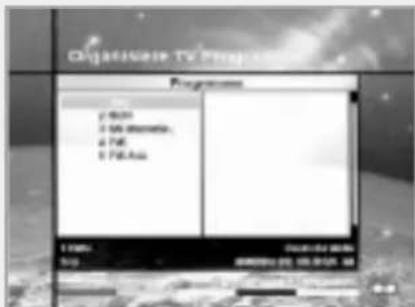
text_image
DigitalWare TV Program Programme 2 KB 1 GB (minutes) 4 KB 5 KB (ms)text_image
Alternative Actions Frequency Polarization Symmetrical FPG Video PCI Audio PSD PCB PSD 1.0000 51/58 bottomed 27/60 3/s 40 Software Mastercardtext_image
Alternative Info Alternative Info: 1 Automation Champion Start/Start Top Subs Subs June 2006 0 0 0 0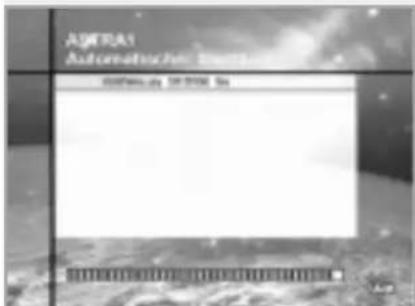
text_image
SigmaNet 11/08/2020 00:00:27:00 56 SigmaNet SigmaNet SigmaNet SigmaNet Bereinigstenatural_image
Black-and-white photo of a historic building with a superimposed line graph overlay, no visible text or symbols.This STB has been manufactured to satisfy the international safety standards.
Please read the following safety precautions carefully.
MAINS SUPPLY : 190 - 250 V AC 50/60 Hz
OVERLOADING : Do not overload a wall outlet, extension cord or adapter as this may result in fire electric shock.
LIQUIDS : Do not expose the STB to rain or moisture.
CLEANING : Disconnect the STB from the wall outlet before cleaning.
Use a light damp cloth(no solvents) to dust the STB.
VENTILATION : The slots on top of the STB must be left uncovered to allow proper airflow to the unit. Do not stand the STB on soft furnishings or carpets.
Do not expose the STB to direct sunlight or do not place it near
a heater. Do not stack electronic equipments on top of the STB.
ATTACHMENTS : Do not use any unrecommended attachments as these may cause hazard or damage the STB.
CONNECTION TO THE SATELLITE DISH LNB
: Disconnect the STB from the mains before connecting or disconnecting the cable from the satellite dish.
FAILURE TO DO SO CAN DAMAGE THE LNB.
CONNECTION TO THE TV
: Disconnect the STB from the mains before connecting or disconnecting the cable from the satellite dish.
FAILURE TO DO SO CAN DAMAGE THE TV.
EARTHING : The LNB cable MUST BE EARTHED.
The earthing system must comply with SABS 061.
LOCATION : Place the STB indoor in order not to expose to lightening, rain or sunlight.

TO REDUCE THE RISK OF ELECTRIC SHOCK, DO NOT REMOVE COVER (OR BACK). NO USER SERVICEABLE PARTS INSIDE. REFER SERVICING TO QUALIFIED SERVICE PERSONNEL.

This symbol indicates "dangerous voltage" inside the product that presents a risk of electric shock or personal injury.

This symbol indicates important instructions accompanying the product.
Warning!
Please do not insert metal or alien substance into the slots for the Modules and Smart Cards.
In doing so can cause damage to the STB and reduce its life span.
Glossary
Glossary
- Antenna
A device that collects and radiates electromagnetic waves. Includes a satellite dish and abroadband antenna.
- Forward Error Correction (FEC)
A system of error control for data transmission.
- Frequency
The number of cycles or events per one second, which is expressed in the unit of Hertz(Hz).
• Intermediate Frequency (IF)
A frequency to which a carrier frequency is shifted as an intermediate step in transmission or reception.
- Low Noise Block (LNB) Downconverter
A low noise microwave amplifier and converter which downconverts a range of frequencies to IF range.
- Packet Identifier (PID)
A set of numbers that identifies transport stream packets containing data from a single data stream.
- Polarisation
Characteristic of an electromagnetic wave determined by the orientation of the electricfield vector.
• Quaternary Phase Shift Keying (QPSK)
Phase-shift keying in which four different phase angles are used.
- Service
A channel to which a decoder or TV is tuned.
- Transponder
An automatic device that receives, amplifies and retransmits a signal on a different frequency.
Reference
1. Connect DiSEqC 1.0
All our receivers are designed to be DiSEqC 1.0 compatible. This allows multiple antennas to be connected to the STB simultaneously.
If you have two or more fixed antennas or LNBs, you can use a DiSEqC 1.0 switch.
- Connect the coaxial cable from the first LNB to the LNB 1 or LNB A input connector of the DiSEqC switch.
- Connect the coaxial cable from the second LNB to the LNB 2 or LNB B input connector of the DiSEqC switch.
- Do the same for other LNBs.
- Connect one end of a Coaxial cable to the RF output connector of the DiSEqC switch and the other end to the LNB IN socket on the STB.
2. Connect DiSEqC 1.2
Please refer to page 31.
3. Connect a Satellite antenna
To the digital receiver, you can connect either a single satellite antenna directly or through converter box several antennas or LNB of multi-feed equipment.
You can connect a further Sat-receiver (for example analog), with the receiver of common antenna equipment that has satellite signals.
STB Connection
FRONT PANEL
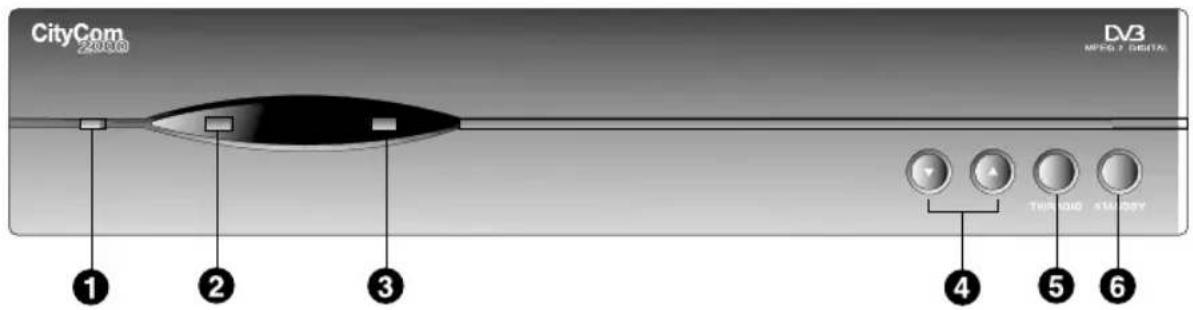
text_image
CityCom 24000 DV3 MPG / DIGITAL ① ② ③ ④ ⑤ ⑥ TUR RUD STU DRY1 STANDBY LED (RED)
Indicates that the STB is under standby.
② OPERATING LED (GREEN)
Indicates that the STB is operating
③ ERROR LED (AMBER)
Indicates that the STB has an error.
4 - +
Press to change services down and up.
5 TV / RADIO
Press to switch between TV and Radio modes.
6 STANDBY
Press to switch between Operation and Standby modes.
REAR PANEL
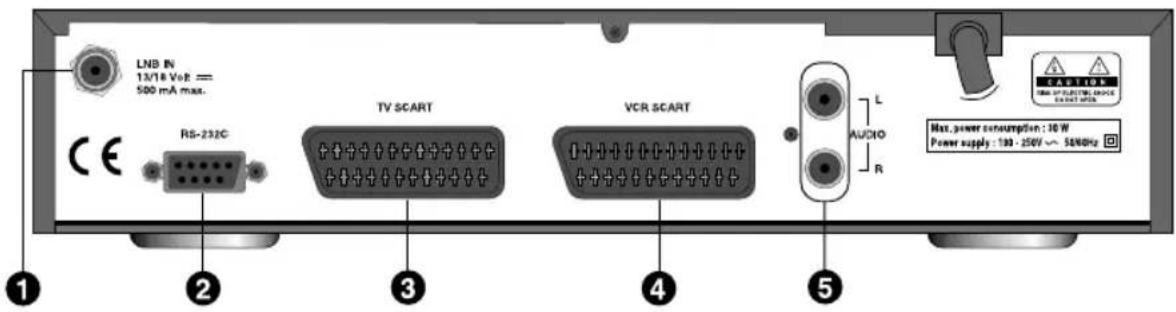
text_image
LNB IN 13/18 VoR == 500 mA max. CE RS-232C TV SCART VCR SCART L AUDIO R CAPTION MAX. power consumption: 30 W Power supply: 130 - 250V ~ 56kHz ① ② ③ ④ ⑤1 LNB IN
Use to connect an antenna.
② RS-232C
Use it when connecting to your PC.
③ TV SCART
For the audio/video input of the TV.
4 VCR SCART
For the VCR.
5 AUDIO OUTPUT
Audio signal from your STB to Hi-Fi System.
STB Connection
There are several ways of connecting the STB to your existing Audio/TV system. We recommend using one of the following set-up for best results:
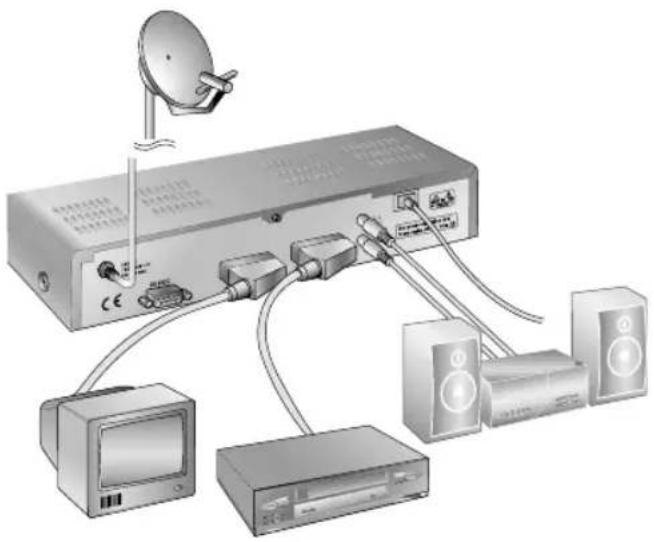
natural_image
Diagram of a network device with satellite dish, cable, and connected devices (no text or labels visible)TV only
- Connect one end of a 21-pin SCART cable to the TV SCART connector on the STB and the other end to a SCART socket on your TV.
- Connect the coaxial cable from the LNB to the LNB IN socket on the STB.
TV with VCR
- Connect one end of a 21-pin SCART cable to the TV SCART connector on the STB and the other end to a SCART socket on your TV.
- Connect one end of a 21-pin SCART cable to the VCR SCART connector on the STB and the other end to a SCART socket on your VCR.
- Connect the coaxial cable from the LNB to the LNB IN socket on the STB.
With Hi-Fi System
- Connect an RCA/Cinch stereo cable from the AUDIO L,R sockets on the back of the STB to the LINE, AUX, SPARE OR EXTRA input sockets on your Hi-Fi system.
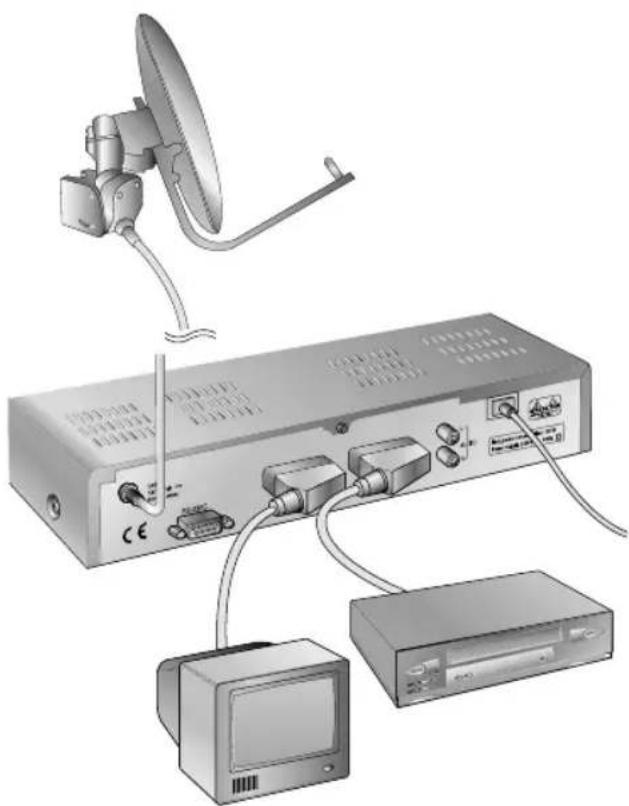
natural_image
Illustration of a satellite dish connected to a computer monitor and a CD, with no visible text or symbols.TV with VCR and Motorised System (DiSEqC 1.2)
- Connect one end of a 21-pin SCART cable to the TV SCART connector on the STB and the other end to a SCART socket on your TV.
- Connect one end of a 21-pin SCART cable to the VCR SCART connector on the STB and the other end to a SCART socket on your VCR.
- Connect the coaxial cable from the LNB of your motorised system(DiSEqC 1.2 Motor) to the LNB IN socket on the STB.
Remote Control Unit
text_image
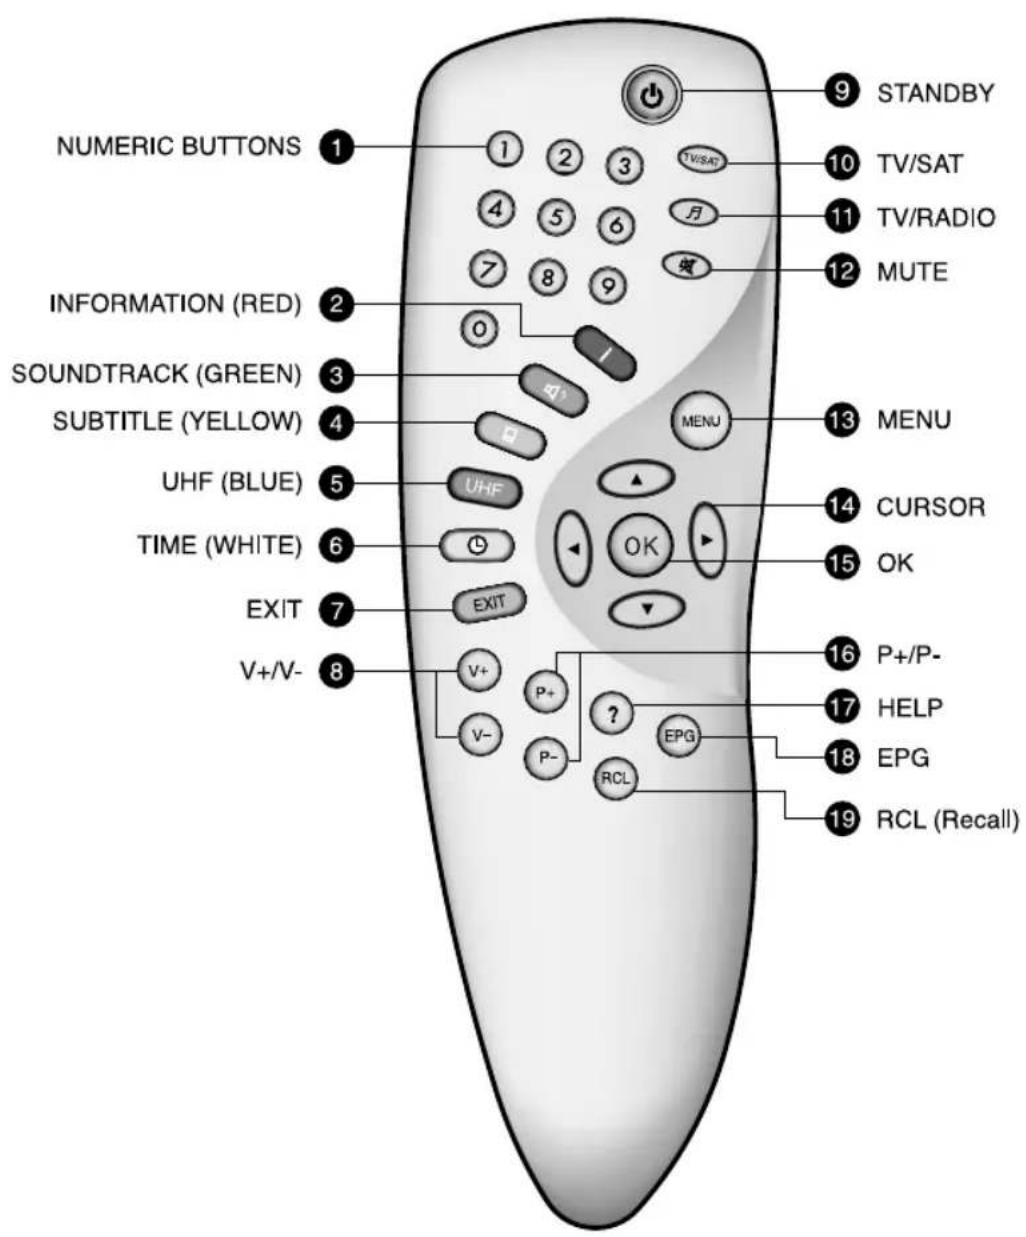
NUMERIC BUTTONS 1 2 3 4 5 6 7 8 9 10 TV/SAT 11 TV/RADIO 12 MUTE INFORMATION (RED) 2 3 0 I SOUNDTRACK (GREEN) 4 5 TITLE (YELLOW) UHF (BLUE) 6 TIME (WHITE) EXIT 7 V+/V- 8 V+ P+ P- ? EPG RCL MENU 13 MENU 14 CURSOR 15 OK 16 P+/P- 17 HELP 18 EPG 19 RCL (Recall)1 NUMERIC BUTTONS
Press to select a service, enter your PIN Code or Numerics on the menu.
② INFORMATION (RED)
Press to display the programme information box on the screen. This button functions same as the RED button on the menus.
③ SOUNDTRACK (GREEN)
Press to display the soundtrack list for the current service. And this button functions same as the GREEN button on the menus.
4 SUBTITLE (YELLOW)
Press to display the subtitle language list for the current service. And this button functions same as the YELLOW button on the menus.
⑤ UHF (BLUE)
Option button.
6 TIME (WHITE)
Press to display the current time on the screen. Press to reserve services on the Information box or EPG. And this button functions same as the WHITE button on the menus.
⑦ EXIT
Press to return to the previous menu and screen.
⑧ V+/V-
Volume up/down buttons. Press to increase or decrease the volume.
9 STANDBY
Press to switch between Operation and Standby modes.
10 TV/SAT
Press to select the TV/SAT mode.
11 TV/RADIO
Press to switch between TV and RADIO modes.
12 MUTE
Press to temporarily cut off the sound.
13 MENU
Press to display the Main Menu on the screen or return to the screen from a sub menu screen.
14 CURSOR
Press to move the highlight bar for selecting options on the menus. And this button is used to change services (up/down) and increase or decrease the audio volume.
15 OK
Press to display the service list. This button is used to select the item on the menus.
16 P+/P-
Programme up/down buttons. Press to tune to the next or previous service. Press to move up or down pages on the menus.
17 HELP
Press to display the help box on the screen.
18 EPG
Electronic Programme Guide button displays the TV/RADIO programme guide.
19 RCL (Recall)
Press to select the service that was previously viewed.
• Rescience: The design of Remote Control Unit may be changed without notice in advance.
Guide of Function
text_image
HALT 2019 Hidematek 3 5 OEN Dikcukia hizsakifrika 2020-02.10 Penter explorator en sda...Information Box (I-Plate)
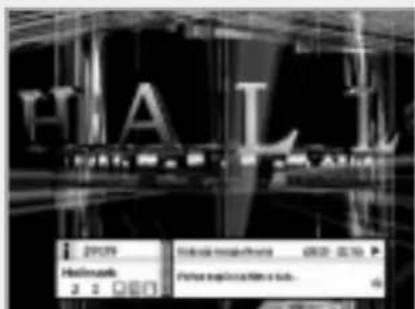
The details of service part and event part are automatically displayed on the I-Plate when pressing the i button(☐) or changing services.
I-Plate is divided into service part and event part.
SERVICE-PART (Left side of the box)
SERVICE PART consists of the following items:
- I-Plate icon, Current time
• Service name, Service number, ◆ icons - Subtitle, Teletext, Scrambling service symbol (These are automatically displayed when the broadcasting station provides appropriate information.)
• Signal quality bar
EVENT-PART (Right side of the box)
EVENT PART consists of the following items:
• Event name, Event duration time
• Description text of event, State of reserved event
Event part shows the current and next event information.
▶ button : Use to move from the current event information to the next event information.
◀ button : Use to move from the next event information to the current event information.
text_image
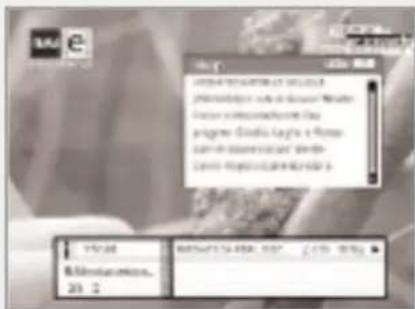
Scanned screenshot of a software interface with Chinese text and input fields, likely from an older application or tutorial.When the Help( ? )button is pressed under I-Plate display and there are no detailed event informations in the I-Plate, the Help window will appear on the screen.
The Help window shows the current Network information, including: Satellite Name, Frequency, Polarisation, Symbol Rate, FEC... The detailed information for the event can be displayed by pressing the Help( ? )button in the I-Plate with event data displaying mode. You can reserve the programme in the event data display mode by using the White( @ )button.
You can reset timer programme Once, Daily or Weekly mode. When you release the timer programme mode, then you will be asked to confirm the action.
Changing Services
To change services, do in the following sequence:
- Press the Numeric buttons (0\~9) on the remote control unit.
- Press the Ⓟ/P- buttons or buttons.
Or press the Recall( RCL ), Service-list( OK ), EPG( EPG )mode button. To switch between TV and Radio services, press the TV/Radio ( B )button. To select the previous viewed service, press the Recall( RCL )button.
Volume Control
To adjust the volume level, use the Ⓥ/∨- buttons or ◀/▶ buttons.
To temporarily stop the volume, press the Mute( )button.
To cancel mute, press the Mute( )button again or press the
v-/v- buttons or buttons.
Soundtrack
When you want to change the audio language of current service, press the Green(☐)button firstly.
The on-screen menu is displayed on the top to left side of the screen.
To change the audio language:
- ◀/▶ buttons : Use to select the audio on the left, right or both.
- ▲/▼ buttons : Use to select the audio language you want.
- OK, EXIT button : When this button is pressed, the Soundtrack OSD will disappear keeping the selected Soundtrack language constant.
When the current service is switched, the audio language returns to the audio language that was selected in previous service. If the returned audio language is invalid, the audio language that you selected from the audio language menu has the priority of playback.
Subtitle
When the current broadcasting programme provides subtitle, press the Subtitle(☐)button to see the current subtitle language list.
To change the subtitle language:
Use the buttons to select a Subtitle language you want.
Press the Ⓞ button and the selected language is highlighted and then the Subtitle language you want is displayed on the screen.
Press the EXIT button to cancel the Subtitle mode.
natural_image
Exterior view of a modern multi-story building with glass facade and surrounding street lighting (no visible signage or text)
natural_image
Satellite view of Earth showing cloud formations and atmospheric layers (no text or symbols visible)
text_image
-Ved sa du? -Att jag skulle tanka nu støben... fill er t'sinut...Guide of Function
Teletext
Use your TV remote control unit to control the Teletext service. The teletext button doesn't exist on the STB remote control unit. When the service supports Teletext, the Teletext icon(☐) is displayed on the i-plate.
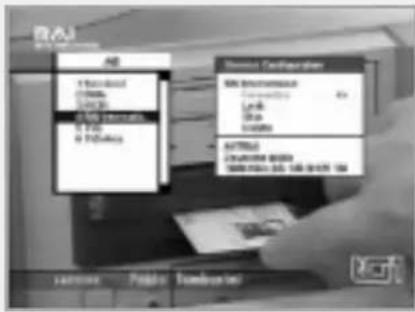
Service List
The Service List consists of Service All and Service Favourite. On the service list, you can change the attributes of a service though the Service Configuration.
▲/▼ button : Use to move to the previous or next service ◀/▶ button : Use to move to the forward or backward service (maximum 10 services.)
Red button (☐) : Service All Green button(☐) : Service Favourite
text_image
New Asset Financial Asset Management Financials Asset Management Financials Asset Management Financials Asset Management Financials Asset Management Financials Asset Management Financials Asset Management Financials Asset Management Financials Asset Management Financials Asset Management Financials Asset Management Financials Asset Management Financials Asset Management Financials Asset Management Financials Asset Management Financials Asset Management Financials Asset Management Financials Asset Management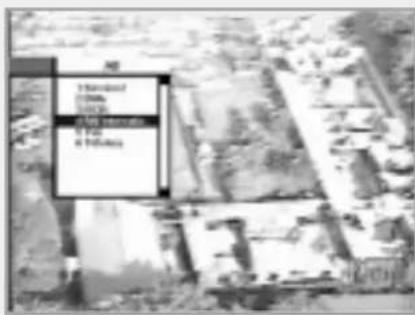
text_image
Add Add to Remove Add to Remove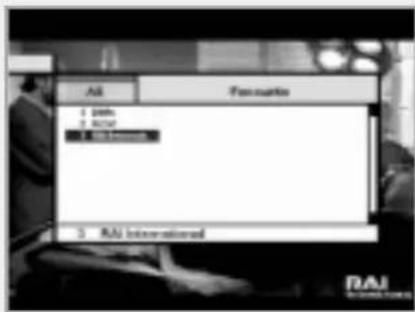
text_image
AI Fanuciate 1. AI 2. RACI 3. RACI InternationalService Configuration
To change the attributes of a service
- Use the ▲/▼/◄/► buttons to move a service you want to change in the service list.
- Press the Menu( Ⓞ )button.
- Use the ▲/▼ buttons to move to an item (such as Favourite, Lock, Skip, Delete) you want on the Service Configuration screen.
- Use the ◀/▶ buttons to select. Press the Ⓞ button to complete.
Service All
- To display the service list, press the OK button. Use Red(☐)button to select the Service All list.
- Select the desired service by using the ▲/▼/◄/► buttons.
- Press the OK button to view the selected service. The right side scroll-bar of the screen displays the location of the selected service in relation to All services.
Service Favourite
- To add the services to the Service Favourite, use the Service Configuration at Service All or Service Organising menu.
- When you press the Green (◀) button in the service list, the favourite service list will be displayed on the screen.
- When you want to see the services added to the favourite group, use the ▲/▼/◄/► buttons.
Guide of Main Menu
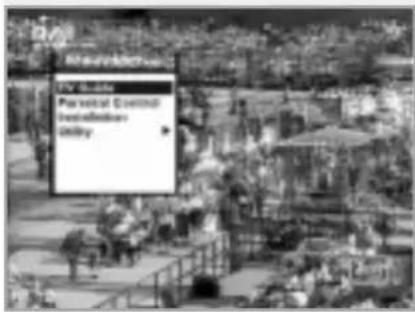
1. TV Guide
Your STB has an Electronic Programme Guide(EPG) to help you navigate through all the possible viewing options.
The TV Guide supplies information such as programme listings and start and end times for all available services.
In addition, detailed information about the programme listings and start and end times for all available services.
In addition, detailed information about the programme is often available in the EPG(the availability and amount of these programme details will vary, depending on the particular broadcaster).
2. Parental Control
Access to services and programmes is controlled by a PIN Code (i.e., a 4-digit secret code that is defined by the user).
The very first time you attempt to lock all services(or lock programmes by ratings), the on-screen menu will instruct you to assign a PIN Code (Later on, if necessary, you can change it).
3. Installation
The Installation mode allows you to have the information of setting services and newly set services (language, time, organise, search,...) Furthermore, you can recognise the states of hardware and software versions and signals from your STB.
4. Utility
This menu provides Calendar and Biorhythm.
text_image
Parviral Control Installation DelayGuide of Main Menu
1. TV Guide
You can watch a programme being shown and reserve it in the TV Guide mode.
To enter the TV Guide mode
Press the EPG(EPG)button on the remote control unit or select the TV Guide on the Main Menu.
To select the TV/Radio Guide
Press the ⏻ button on the remote control unit and TV Guide will be switched to the Radio Guide.
TV Guide mode includes four different modes.
To select each mode, use the following buttons:
- Red (☐)button : Use to display the current or next programme list.
- Green(播放)button : Use to display the programme list for one-week.
- Yellow(☐)button : Use to display the reserved programme list.
- Blue (UHF) button : Use to display the simple TV Guide list. (Quick mode)
text_image
TV Guide - NOW 100 TVE 107 TVS-Asia 108 MELLA 1 - 6000 - 2190 The hoststore 109 Hallmark - 2010 - 2190 Grenza hemisphere 110 TOB Culture - 2010 - 2190 Borino Beauty NEW YORK Korea hemisphere 45. Future climate for next. NEXT • Already • Reserved • QuickNOW / NEXT mode
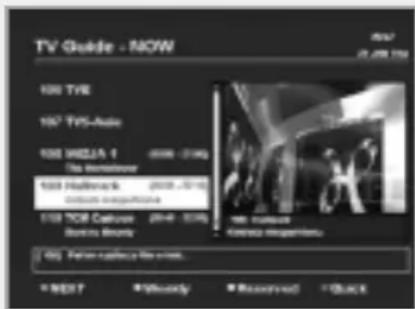
Show the informations of the programmes that are played now or will be played next time.
This mode consists of the service name, event name, event duration time, current time and on-screen-display window.
To watch a programme you want through the display window :
- Use the P+ / P- buttons to select a programme you want.
The selected service will appear on the right display window. - Use the ▲/▼ buttons to select a programme you want.
And then press the Ⓞ button on the remote control unit. The selected service will appear on the right display window. The selected OSD will be highlighted every time the cursor moves.
To reserve a programme you want:
- Select a programme you want by using the Ⓟ+/P- buttons or ▲/▼ buttons. And then press the White(◎)button.
Press the ◀/▶ buttons to watch the programme of previous page or the programme of next page.
Press the Yellow(☐)button to watch the reserved programme list.
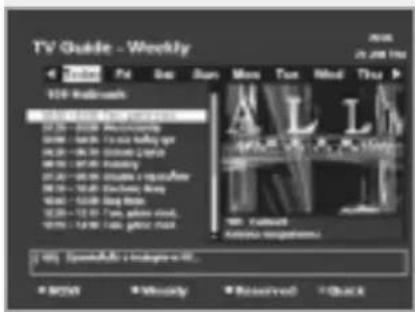
Weekly mode
Shows the information of programmes that will be played for a week. Select a day you want using the ◀/▶ buttons.
To watch and reserve a programme you want, do the same steps with the NOW/NEXT mode.
Reserved mode
Shows the programme lists that you have already reserved on the TV Guide or Information Box.
Maximum twenty programmes can be reserved.
This programme list includes service name, date, duration time, reservation mode and event name.
To cancel the Reserved service, select a programme you want to cancel using the ▲/▼ buttons and then press the White(◎)button.
Quick mode
Shows a simple TV Guide like an Information box. This mode shows in the A/V playback mode.
- Blue vertical line : Indicates the current time.
- Black/white bar : Shows the proceeding state of programme.
- Time range of bar : This consists of three blocks by 30 minutes per block.
text_image
TV Guide - Weekly 2016 Jr. 2016 No. 109-4488 VISA ALL www.visa.com 17:30 - 20:00 17:30 - 20:00 17:30 - 20:00 17:30 - 20:00 17:30 - 20:00 17:30 - 20:00 17:30 - 20:00 17:30 - 20:00 17:30 - 12:30 17:30 - 12:30 17:30 - 12:30 17:30 - 12:30 17:30 - 12:30 17:30 - 12:30 17:30 - 12:30 17:30 - 12:30 17:30 -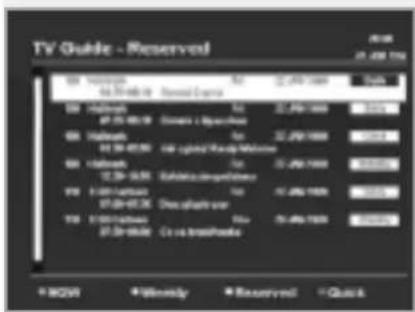
text_image
TV Guide - Reserved SN 100000 42.39-48.00 ServiceType SN 100000 42.39-48.00 Service Type SN 100000 42.39-48.00 Service Type SN 100000 42.39-48.00 Service Type SN 100000 42.39-48.00 Service Type SN 100000 42.39-48.00 Service Type SN 5-49-1666 Service Type SN 5-49-1666 Service Type SN 5-49-1666 Service Type SN 5-49-1666 Service Type SN 5-49-1666 Service Type SN 5-49-1666 Service Type SN 5-49-1666 Service Type SN 5-48-1666 Service Type SN 5-48-1666 Service Type SN 5-48-1666 Service Type SN 5-48-1666 Service Type SN 5-48-1666 Service Type SN 5-48-1666 Service Type SN 5-48-1666 Service Type SOW Mimnely Reserved Quick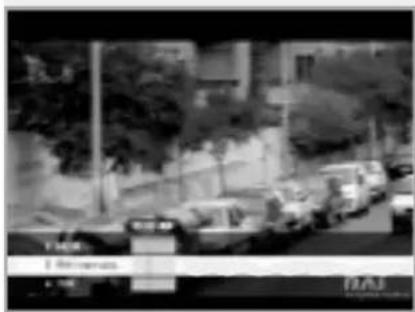
text_image
Street photo with visible store signboards and vehicle license plateGuide of Main Menu
text_image
Parental Creative Add to PCB Code no Block Add to PCB Code Add PCB Code New PCB Code Modify Changed PCB Code 0.42. Parental Control
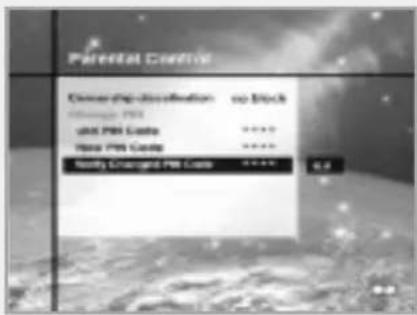
You can set a parental guidance rating to each programme in this mode.
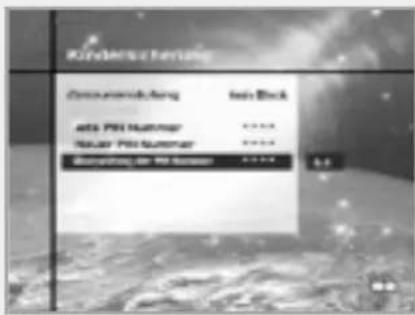
- When the Ⓞ button is pressed after selecting the highlighted parental control on the initial menu screen, a display window for entering the PIN Code will appear on the centre of screen.
** The default PIN Code is 0000.
- Enter the PIN Code on the display window.
(If any problem occurs when entering a PIN Code, you cannot switch to the next mode.)
- Set the parental guidance rating of highlighted censorship classification. The parental level is given as age-based numbers: no block, 6, 10, 14, 18 and total block.
Enter the PIN Code to unlock or lock programmes.
- To change your PIN Code:
- Select the highlighted Old Pin Code using the ▲/▼ buttons and then enter your Old PIN Code.
- Enter a New PIN Code in the highlighted New PIN Code using the ▲/▼ buttons.
- To verify the New PIN Code, re-enter a New PIN Code in the highlighted Verify Changed PIN Code.
- When the entered PIN Code is correct, then all settings are completed.
(If the PIN Code is wrong, the message "PIN Code mismatch" will be displayed on the display window. When the Ⓞ button is pressed at this time, the Old PIN Code is valid and the cursor is located in the first position of this menu.)
text_image
System Setting Language Setting Time Setting Any Output Setting Other Setting3. Installation
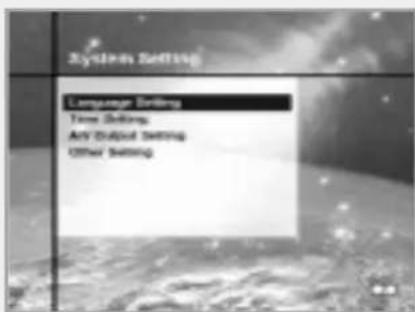
This mode allows you to customise, add a new service and displays the state of the STB. Enter the submenus after selecting the Installation mode in the Main Menu.
3-1. System Setting
The System Setting mode supports the STB internal settings according to the connection of the receiver and external units.
This mode includes Language Setting, Time Setting,
A/V Output Setting and Other Setting.
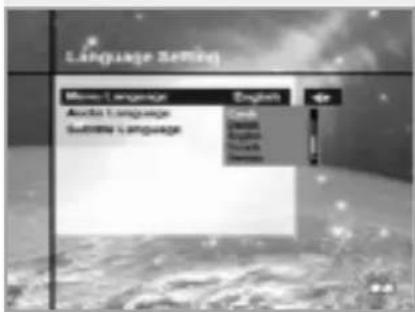
Language Setting
Select the language for menu, audio or subtitle.
- Select the highlighted language setting using the ▲/▼ buttons in the system setting mode and then press the Ⓞ button.
- Select the highlighted Menu(or Audio, Subtitle) Language and press the ◀/▶ buttons and the language list will be displayed.
- Use the ▲/▼ buttons to move to a language you want and then press the Ⓞ button to finish setting.
Menu Language
Select a language for the menu or banner OSD in this mode. You can choose the language from a selection of Czech, Danish, English, French, German, Hungarian, Italian, Portuguese, Russian, Spanish, Swedish, Turkish and more. When a broadcasting information (event) is transmitted, the selected Menu Language will be applied.
Audio Language
Select the default language for audio when changing services. If you change the current service, your STB will initially select the previously memorised Audio Language. If the Audio Language of current service is not provided, at this time, you should reselect a language on the Audio Language menu.
Languages provided: Czech, Danish, Dutch, English, Finnish, French, German, Hungarian, Italian, Norwegian, Portuguese, Rumanian, Russian Spanish, Swedish, Turkish and more.
If no language is provided, then the default language of current service will be automatically selected.
Subtitle Language
Select the default language for subtitle when changing services. Language provided: Danish, English, Finnish, French, German, Hungarian, Italian, Norwegian, Portuguese, Spanish, Swedish and more.
text_image
Language Setting Menu Language English Audio Language Cash Switch Language English Switch Language English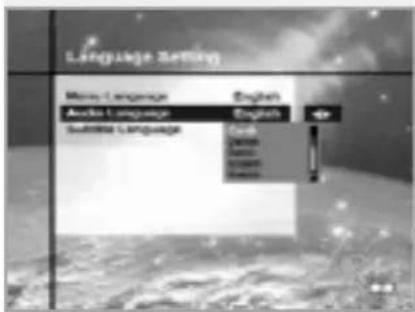
text_image
Language Setting Menu Language Audio Language Summary Language English English Form Audio Audio Audio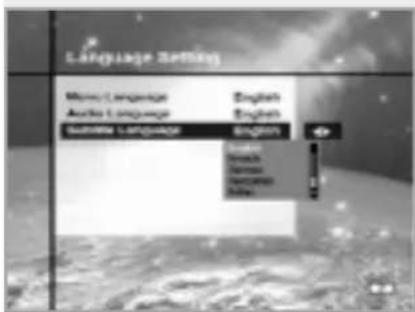
text_image
Language Settings Audio Language Audio Language Boutille Language English English English English English English EnglishGuide of Main Menu
text_image
Time Setting Options Time 07:35 New Office - 2007 A-06:00 Makeup Time 04:08 Makeup Service No. TV 2 Service Status - 00:00 Sleep Time 23:58Time Setting
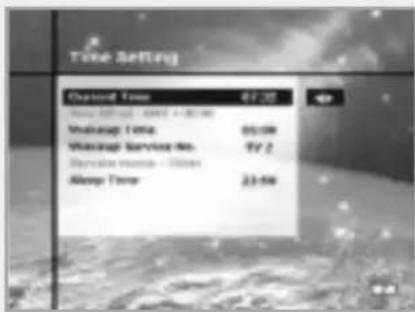
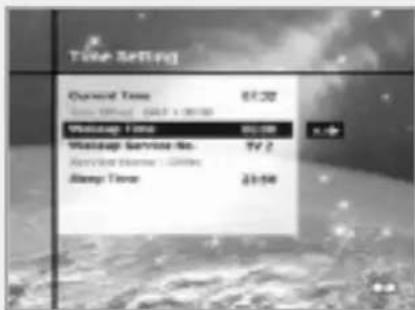
You can set the Current Time and Wakeup Time in this mode. Furthermore, the Service Number in the Wakeup Time mode and Sleep Time (standby mode) can be set. When a VCR is connected, recording can be automatically done according to Wakeup/Sleep Time Setting.
Current Time
To set the Current Time, enter the Offset value using the standardised information of current service area. The time setting will be used as the standardised time for the I-Plate, TV Guide, Wakeup and Sleep Timer.
Time Offset
Current Time is based on TDT (Time and Data Table) at the stream of the current service.
text_image
Time Setting Owned Time 67:30 Current Office: 04:57 x 00:00 Updated Time 25:08 Mallage Service No. TV 2 Service Time 1:00pm Sleep Time 23:58Wakeup Time
Select the time when STB is turned on. Use the Numeric buttons(0\~9) on the remote control unit to enter your Wakeup Time.
Wakeup Service No.
Use the ◀/▶ buttons to set the service number provided for the set Wakeup Time. Use the TV/Radio( )button on the remote control unit to toggle TV/Radio service.
text_image
Time Setting Current Time 67:20 Sleep Time 50:08 Maison Service No.TV 2 Service Status 100ms Sleep Time 23:58 8:45Service Name
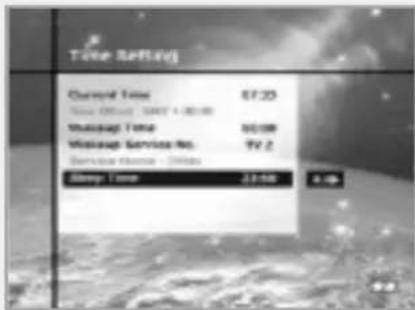
The Service Name that has been determined by the Wakeup Service No. will be shown.
Sleep Time
Depending on Time Setting, select the time when STB is turned off.
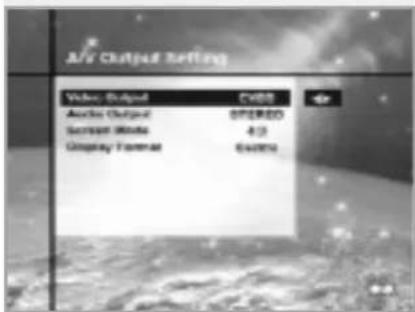
A/V Output Setting
Video Output (CVBS/S-Video/RGB)
Set the video mode for the TV SCART output.
Audio Output
Set the audio mode which is output from the TV SCART and RCA/Cinch Jack. (Stereo/Mono)
Screen Mode
Select the aspect ratio of TV which is connected to STB (4:3 or 16:9).
Display Format
Select the format which the video is to be displayed on screen. When your TV set is 4:3 and video source is 16:9, STB will display in Letter-box or Centre mode as selected. When your TV set is 16:9 and video source is 4:3, STB will display in the Pillar-box or Full mode as selected.
Other Setting
Select the OSD Transparency and Information Box Display Time.
OSD Transparency
Select the OSD Transparent type. It affects Information box, Soundtrack, Subtitle, Service list, Time and Quick mode of TV Guide. Use the ◀/▶ buttons to toggle transparent and opaque.
Info.Box Display Time
Set the display duration of information box displayed on the screen after changing services. The time ranges from 0 to 20 seconds.
text_image
A/s Output Setting Video Output CVSS Audio Output 97800 Screen Media 413 Display Format 6400%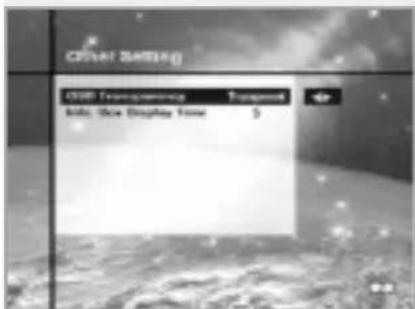
text_image
Other Setting COSO Transforming Transport Info: White Display Time 5Guide of Main Menu
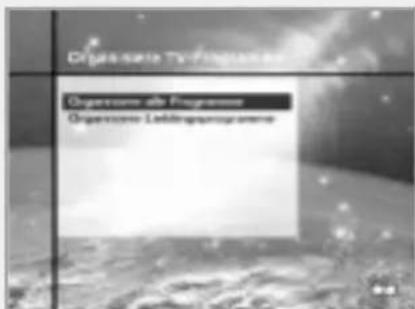
3-2. Service Organising
This menu gives users access to options that allow them to organise their Networks, TV Services and Radio Services.
** The default PIN Code is 0000.
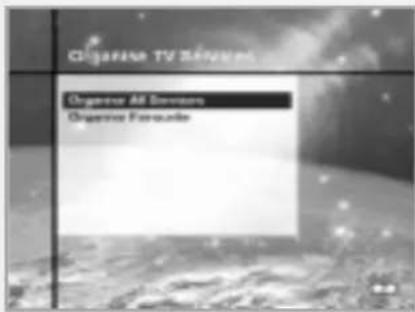
Organise TV Services
Organise All Services
This mode allows users to Delete, Move, Lock, Skip and Rename TV Services.
- Delete
- Press the Red( ⓘ )button to delete unwanted services.
- Highlight the services that you want to delete in grey.
- Press the OK button to confirm.
- Press the EXIT button to cancel the deletion.
- Move
- Press the Green(☐?)button to move the service to where you want to locate.
Then, the icon(♦) will be displayed in front of the service number.
- Use the ▲/▼/◄/► buttons to select a new location.
- Press the OK button to fix the location.
- Press the EXIT button to return to the original location.
- Lock
- Press the Yellow(☐)button to lock services.
Then, the symbol “☐” will be displayed at the right side of the service name.
- Enter the PIN Code to view the locked services.
- Skip
- Press the Blue(UHF)button to skip services.
Then, the symbol “ ↗ ” will be displayed at the right side of the service name.
- Use Numeric buttons, service list or (EPG) button to view the skipped services when selecting channels.
You can't view the skipped services by using Ⓞ/按钮.
text_image
Observe TV Remates Observe All Devons Observe Favourite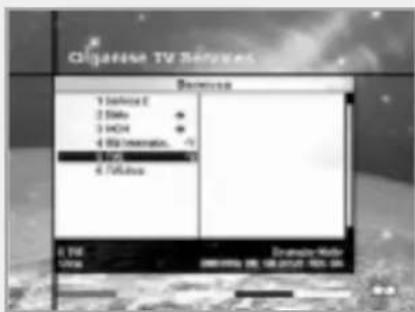
text_image
C:\Program\TV\Retarget Dowers 1 Series E 2 Series 3 DVD 4 Format/Video 5 Series 6 Videos 4 PS Units 800.000 GB 100.000 GB 100.000 GB- Rename
- Press the White(◎)button to change the service name. Then, the keyboard image will be displayed on the screen.
- Key in the new service name.
You can use the four direction keys to move or select the services.
◀ : to move the previous service
▶ : to move the next service
▲ : to move back by 16 services
▼ : to move forwards by 16 services
NNote: The box between service list and the description of the colour buttons offers the brief information of a service where the cursor is located.
Organise Favourite Services
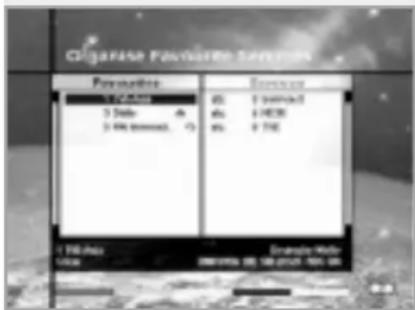
This mode service to add and delete services to and from the favourite group. To add services into Favourites, locate the cursor to the desired service and press the OK button. The function of the colour button is the same as Organise All Services, except for the following differences. When you delete a service in the Favourites window, the service is excluded from the favourite group and the service is still stored in services window. You can move the service only within Favourites window.
• To group the services into Favourites;
- Use the ▶ button to move the cursor to "Services"-plate(right).
- Select the service you want to group into Favourites.
- Press the OK button.
- Use the ◀ button to move the cursor to "Favourites"-plate(left).
- Press the OK button to save the selected group.
Note: 1. Use the◀/▶ buttons to move the cursor.
- Use the Ⓓ+/P- buttons to select the previous or next page.
text_image
Cigarette Favorite Services Purposes 10000 3 Style 3 PK brand Exercise 85: 1 Segment 45: 1 REIT 45: 1 TIN 1 PK brand Elastic Motor 200000. (2) 160 gm/100 gmGuide of Main Menu
text_image
Cigarette Radial Rotation Description 1 5647 2 5647 3 5649 4 115 5 6893 6 6833 7 6871-3675A, 8 6872-46888, 9 6873A682 16 5649 17 1649(1649, 1649, 1649, 1649, 1649, 1649, 1649, 1649, 1649, 1649, 1649, 1649, 1649, 1649, 1649, 1649, 1649, 164Organise Radio Services
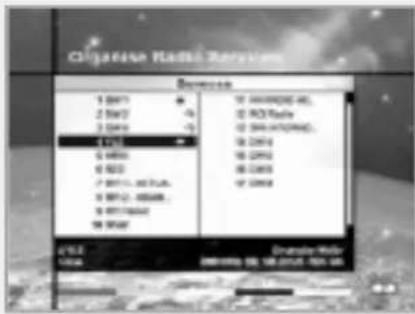
The Organise Radio Services functions same as TV Services except that it uses Radio Services. You can delete or move Radio Services and change the attributes of them.
Organise All Services
The Organise All Services lets the user Delete, Move, Look, Skip or Rename Radio Services on the All Radio Services list.
Organise Favourite Services
The Organise Favourite Radio Services lets the user Delete, Move, Lock, Skip or Rename Radio Services from the Favourite Radio Services and group into a new Favourite Radio Services. The Radio Services are grouped into a Favourite in the same way as the TV Services(refer to page 22).
text_image
Cigarette Network Networks Networks AT&T Cyber Alstwood Coast Bandsworth 4 4 41. BLUB 104. 42. PREPARCEL 54. PCC 77. 60. Forderer 60. RUBERT 60. TBI 60. OHP 60. Huaq Ind. 60. NEEF 62. MCMWLL.Organise Networks
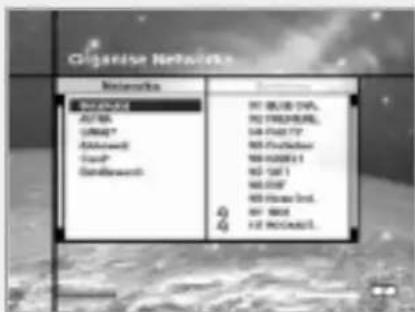
You can edit services using the network unit.
- The provider names are displayed on the left side of screen and the TV/Radio Services included in the highlighted Network are displayed on the right side of screen.
Only the Delete, Rename function can be used in this mode. - When TV/Radio Services are too many to be displayed, use the ▶ button to move the cursor to the right window and use the ▲/▼ and Ⓞ+/P- buttons to move the cursor to the next list.
When the number of services is under 10, the scroll bar is not displayed. In Radio Service icon(♪) is marked in front of service number.
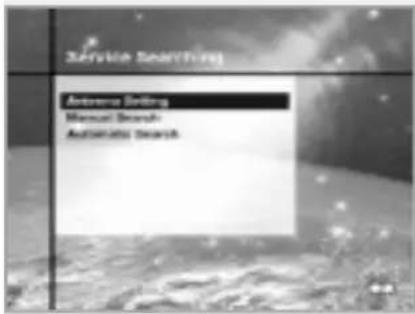
3-3. Service Searching
Enter the PIN Code to access the Service Searching menu as you access the Parental Control or Service Organising menu.
Press the Ⓞ button to start Service Search after setting the parameters.
** The default PIN Code is 0000.
Antenna Setting
Selects the antenna and LNB settings for service search.
As you can change the settings for 22 kHz Tone and DiSEqC switch, there are 16 possible Antenna Setting for use.
The values that are set in this menu will be available for selection in other service searching menus.
Antenna Alternative
There are 16 antenna alternatives, each one can have different combinations of settings for 22 KHz Tone and DiSEqC switch.
Satellite Name
Selects the Satellite Name that corresponds to the value of the Antenna Alternative.
- Press the ◀/▶ buttons to display the satellite list box.
- Select the wanted Satellite Name.
- If the desired Satellite Name is not listed then select User Defined.
- The keyboard will appear and you can type the Satellite Name directly.
The selected Satellite Name can help you select the Antenna Alternative in the searching menu, but it is possible to change or select the Satellite Name only in the Antenna Setting menu.
- Satellite Name is listed in alphabetical order and the order can be changed according to Menu Language.
- When inputting the Satellite Name, there is a 14 character limit.
LNB Frequency
- Select the L.O. Frequency that is set to antenna.
- Use the ◀/▶ buttons to select the LNB frequency (Universal, 5150, 9750, 10600, 10750, 11475MHz or 0, 1, ......, 9).
- If the required LNB Frequency is not available, then select "0" and enter the frequency manually using the Numeric buttons (0\~9).
- When you select Universal, both 9750 and 10600MHz are supported at the same time.
The 22KHz Tone setting is unnecessary. (Disabled)
text_image
Service Searching Automatic Search Manual Search Automatic Search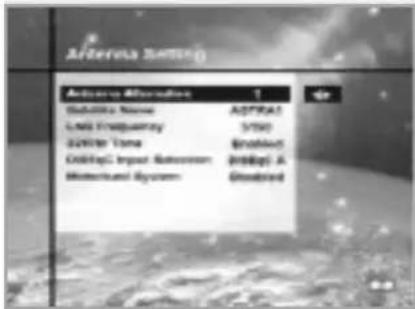
text_image
Active Data Settings Satellite Name ADTRAS Link Frequency 3700 Satellite Type Broached Cable/C Input Saturation Broached A Horizontal System Broached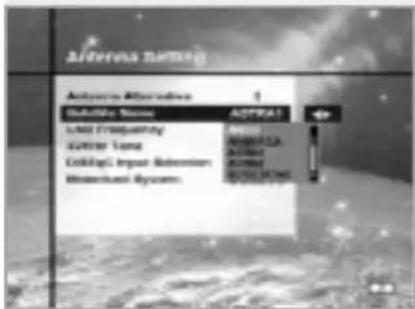
text_image
Altiva Settings Autobox Alternative 1 Default Name: ADTRAS LAD Efficacy Autobox Name EditInput: Input Subsidien Watercraft System.Guide of Main Menu
22KHz Tone
When you use a dual LNB or two antennas connected to a 22KHz Tone switch box, make 22KHz Tone switch Enable or Disable to select LNB or antenna.
DiSEqC Input
According to the option and position of DiSEqC switch, select Disabled, Tone Burst A to B and DiSEqC A to D.
After setting the above mentioned value, press the ⓄK button to move to the Manual Search menu.
Motorised System
The Motorised System is used to set the DiSEqC 1.2 motor by Eutelsat specification.
If you wish to use this system, please refer to page 30.
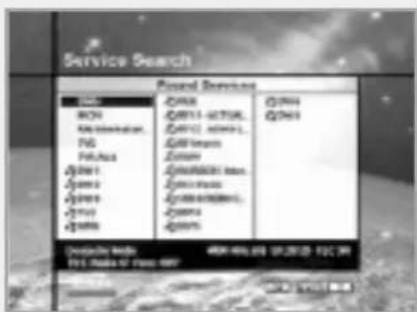
- If you press the EXIT button during the search, then Service Search stops and the searching menu will appear again.
- When you find all the services, the following picture appears.
- Before saving it, you can select the services you want to delete.
• Found services OSD
- The picture above shows services that are found after Manual Search.
- Use the Red(☐)button to mark the services that you want to delete. To unmark a service, select the service and press the Red(☐)button again.
- Press the Ⓞ button to save or press the Ⓑ button to exit without saving.
- Then Service Search menu appears again. When you exit from all menus, the first service of the found service list is played.
In the bottom of found service picture, network, the information of transponder and the number of found service that the services belong to are displayed. The deleted service by the Red(☐) button is excepted from counting of the number of services.
The deleted service is not included in this number.
"Free" applies to the empty space of the memory. It will be used to store future services.
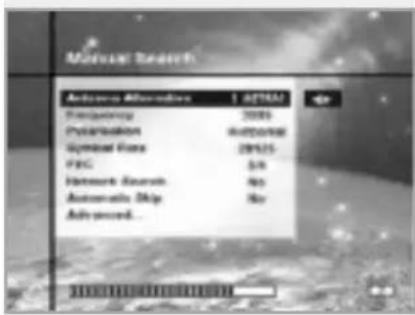
Manual Search
Set the search parameters (Frequency, Symbol Rate, etc.) to manually find the services that you have selected in the transponder.
The bar on bottom of the submenu shows the signal quality(BER) of the entered parameters.
Antenna Alternative
Select the target antenna for Manual Search.
The Satellite Name helps you select antenna alternatives.
This is only for reference and cannot be changed on this menu.
Antenna Alternative 16 is for SMATV.
Frequency
Use the Numeric buttons(0\~9) on the remote control unit.
Polarisation
Use the ◀/▶ buttons to select the Polarisation of the transponder. (Auto, Horizontal, Vertical)
• Horizontal : 18 V are output through LNB line
• Vertical : 13.5 V are output through LNB line
Symbol Rate
Inputs the Symbol Rate of the transponder you want to find.
Use the ◀/▶ buttons or Numeric buttons on the remote control unit.
FEC (Forward Error Correction)
Use the ◀/▶ buttons to select the Forward Error Correction of the transponder. You can select the value of Auto, 1/2, 2/3, 3/4, 5/6 and 7/8.
text_image
Automatic Search Automatic Accession 1 (ATM) Performance 2005 Partition Response Symbol Force 28%25 FRC 54 Hardware Source No Automatic Disk No Advanced...Guide of Main Menu
Network Search
- You can select Yes or No. When you select "Yes", you can find more transponders using the home network.
- As it refers to NIT during searching, if there is the frequency information of other transponder, it searches the other transponders besides the transponder that the user inputs.
Automatic Skip
- You can select Yes or No. When you select "Yes", the search will skip all scrambled services.
- When the found services are scrambled during searching, they are not listed up.
Refer to descriptor of PMT whether it is scrambled or not.
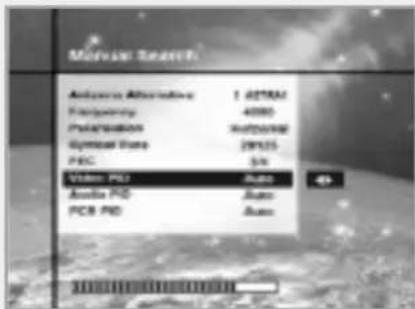
Advanced...
Performs a manual search with the ability to enter PID(Video/Audio/PCR) values. This mode is necessary when you search for the signal that has abnormal service Information tables.
The setting of the sub items is the same as Manual Search.
• Video PID/Audio PID/PCR PID
You can set PID to search for services.
- Use the ◀/▶ buttons to select PID input mode.
- Use the Numeric buttons(0\~9) on the remote control unit to enter a decimal PID value.
- In the hexadecimal input mode, press one of (0\~9) buttons to display a hexadecimal keyboard.
- Enter a hexadecimal PID value.
Notes: If no PID is input (Auto is displayed), the Advanced Search functions same as Manual Search.
- After the above mentioned value is set, press the Ⓞ button to start Service Search.
Notes: The picture and the found service list during Advanced Search are identical with the ones during Manual Search.
text_image
Audio Player Audio Player: 1.0274M Frequency: 4000 Polarization: 945698 Optical Rate: 29135 PEG: 5% Video PSU: Auto Audio PSU: Auto PCB PSU: AutoAutomatic Search
When you enter the Satellite Name that is set in Antenna Setting menu, search all of the selected satellite without inputting the extra frequency.
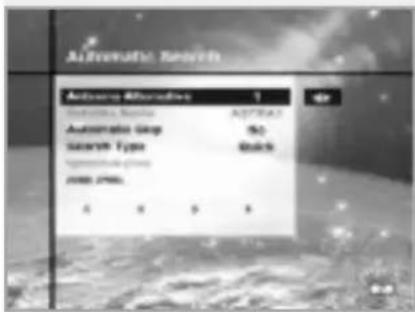
Antenna Alternative
Select the target antenna for Automatic Service Search. The attribute of this antenna alternative number is already set in Antenna Setting menu and the Satellite Name is helpful in the selection of the antenna, but in this menu you cannot change the Satellite Name.
Automatic Skip
Option to search only Free-To-Air services. The picture on the right tries to search with varying Frequency, Symbol Rate and FEC etc.
Search Type
- You can select one of two modes (Quick or Detail).
- When you select Quick mode, it searches the service by search parameters that is preset.
- When you select Detail mode, it searches the service through all field of tuner(950 - 2150MHz).
Detail Mode
The pre-fixed symbol rate list is changed according to Antenna Alternative and Satellite Name. If you want to add or change it, press the Red(1)button.
** The value of Pre-fixed symbol rates can not be editable. (22000, 27500)
The picture of the Symbol Rate Add/Change mode is as follows:
-
When you press the Red(☐)button after entered to detail mode from search type, yellow box will be trimmed with red edges meaning edit is possible.
-
You can easily put optional value with using Numeric buttons(0\~9).
text_image
Automatic Search AutoSearch Options 1 AutoSearch Type: AutoMAX AutoSearch Type: 50 Search Type: Quick AutoSearch Options: 2000.2PMI. X $ X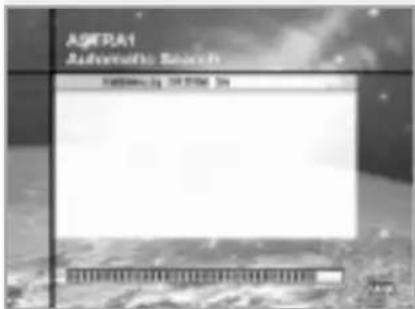
text_image
ASPRA1 Automatic Search Status: 00:00:00Guide of Main Menu
- Press the Red(1)button for confirmation, and you will successfully exit from input mode.
If press the Ⓞ button at symbol rate value input mode, the value will be confirmed, and if you moves left or right column use the ◀/▶ buttons, you can differ values of symbol rate to input. Then press the Ⓑ and the Red(☐)button to exit from input mode.
To delete a Symbol Rate in the above list, press the
0 (Numeric button) in the selected position and then the symbol rate disappears. The range of Symbol Rate that is input additionally is 16-30Ms/s.

The user should select the Satellite name in Antenna Setting menu. When the user types the Satellite Name separately, the search type is fixed to the Detail mode.
Press the Ⓞ button anywhere to start Automatic Search. The picture during searching is as follows.
The picture searches with varying frequency, Symbol Rate and FEC etc. Satellite Name is the name that the user selects to correspond with Antenna Alternative of Antenna Setting.
The progress bar(%) appears on bottom of the picture.
During the search, services that are found are displayed as follows:
-
Press the EXIT button during Automatic Search to stop search.
-
After the search is finished, the appearite message appears.
-
Press the Ⓞ button to return Service Search menu.
3-4. Status
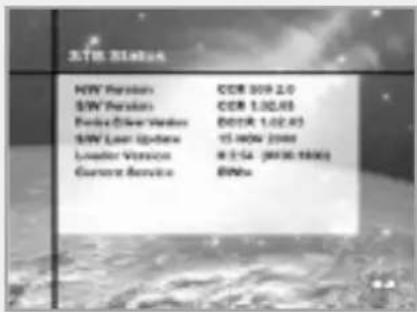
STB Status
Displays the information of H/W Version, S/W Version, Loader Version and so on.
Signal Detection
Shows the Signal Level(AGC level) and Signal Quality(BER) of the current service and is help to the initial antenna setting.
text_image
308 Status HW Provider CCR 309.2.0 S/W Provider CCR 1.02.45 DOS/DOS Provider DOS 1.02.45 S/W User Update 15:00W (200) Loader Version 8:14 (800.1800) Service Service SNPs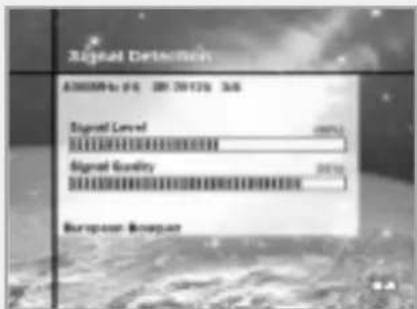
text_image
Signal Detection A00000u SE 28 29135 34 Signal Level 00000 Signal Quality 2016 European RegionSTB Upgrade
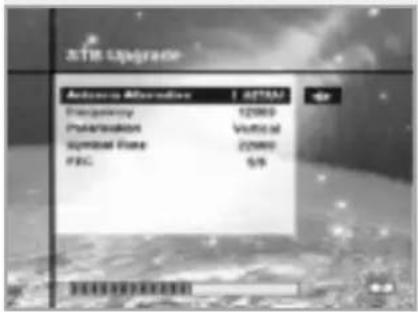
You can download and upgrade the software of this STB via ASTRA1 satellite when the software of new version is released. Do not turn off the STB during downloading. When the power is switched OFF, turn on the STB and the process will be continued.
3-5. Default setting
When you press the Ⓞ button at the screen, the data of system setting will be changed into the default values and some Free-To-Air services of Astra 1 will be stored in replacement of all services found. If you press the Ⓑ exit button, the function will be cancelled and return the Installation menu.
4. Utility
STB supports additional functions such as Calendar and Biorythm. At the Biorhythm use the ▲/▼/◄/► buttons to adjust your birth year and date to see your current biorhythm status.
text_image
ASTM Upgrade Antenna Altitude | 32750 Frequency 12960 Polarization Vccual Symbol Rate 22800 FSC 5/9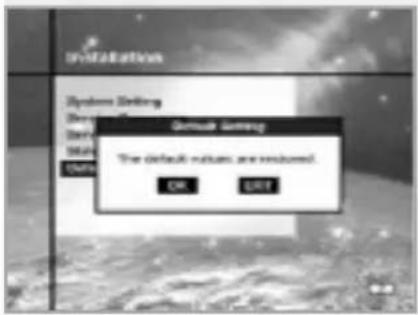
text_image
Infiltrative System Setting Design Data Share Data Default Setting The default values are returned. OK EXIT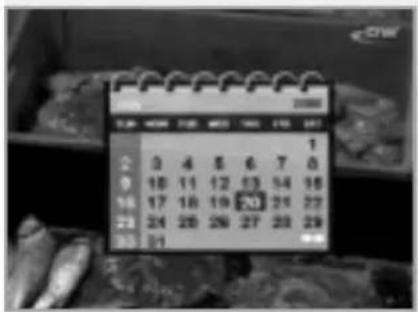
text_image
2008 1 2 0 4 5 6 7 8 9 10 11 12 13 14 15 16 17 18 19 20 21 22 23 24 25 26 27 28 29 30 31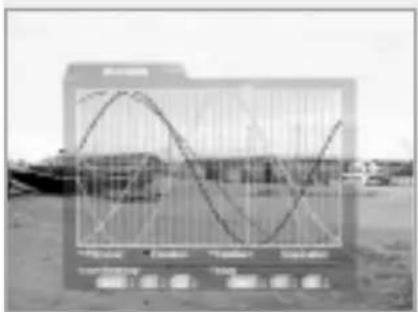
text_image
Scanned image showing a financial chart overlay with labeled axes and data visualizations, likely from a financial or statistical report.Motorised System
DiSEqC 1.2 User Instructions
If you have a DiSEqC 1.2 motorised system, then you can use the DiSEqC 1.2 functions available. The following instruction describes how to use the DiSEqC 1.2 functions to store the positions of the satellites and to search for the services(STAB Rotor Sat motor recommended).
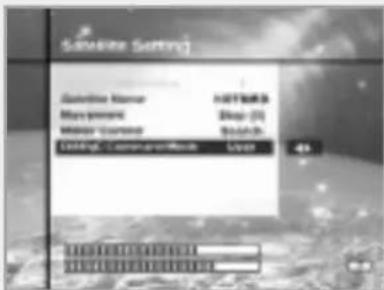
1. Satellite Setting Menu Options
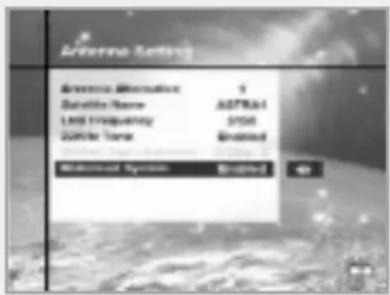
When DiSEqC Motorised System is Enabled in the Antenna Setting, a new menu is available for configuring the motor. This menu is called Satellite Setting and is accessed by pressing the button while the option Antenna Alternative is highlighted in the Manual Search menu.
The following options are available on the Satellite Setting menu.
Satellite Name
A selection of satellite names that can be used to identify a motor position. If the satellite name you require is not available, please use other. In installer mode the Satellite Name Reference refers to the 0 position of the motor.
Movement
In user mode this is used to fine-tune the position of the motor for better reception. In Installer mode this is used to search for the position of a satellite manually.
Motor Control
- Search : Searches for services on the chosen transponder.
- Goto : Moves the motor to the stored position of the selected satellite name.
- Store : Stores the current position of the motor for the selected satellite name.
- Reset : Resets all stored positions of the motor relative to the 0 position.(Installer mode only)
DiSEqC Command Mode
Changes the current mode between Installer and User.
2. Setting your Receiver for DiSEqC 1.2
You must set your receiver up so that it is ready to use DiSEqC 1.2. To do so, do as follows
text_image
Ethernet Setting Aerospace Information 1 Satellite Name ADTRbit LAD Frequency 0500 Satellite Type Embedded Satellite System Embedded- Press the Menu( MENU )button, to display the Main Menu.
- Select Service Searching option and press Ⓞ button, to display the Service Searching menu.
- Select Antenna Setting option and press Ⓞ button, to display the Antenna Setting menu.
- You must set up a separate antenna alternative for each satellite position required.
- Select the name of the satellite you wish to use.
- Select the correct LNB frequency for the LNB you are using.
-
Set the Motorised System to Enable using the ▲/▼/◄/buttons.
-
The option DiSEqC Input Selection should now be disabled. This option is used for DiSEqC 1.0 and cannot be used in conjunction with DiSEqC 1.2. Your receiver is now ready to use DiSEqC 1.2. To return to the Main Menu, use the EXIT button until you are at the Main menu.
3. Initial Satellite Position Search
This is required when you first set your receiver up to use DiSEqC 1.2 and sets the positions of all pre-programmed satellites.
text_image
Settings Settings Calendar Name ACCESS Management Shop-01 Monitor Command Stretch- Display, Commerechute Layer 45- Make sure your motor is installed correctly with the calibrations adjusted for the region you are situated. (Please consult the user manual for your motor.)
- Make sure your receiver is set up to use DiSEqC 1.2. (see section 2 above).
- On the Main Menu, select Service Searching option and press the Ⓞ button, you should now see the Service Searching menu.
-
Highlight the option Antenna Alternative and press the button to display the Satellite Setting menu.
-
Highlight the DiSEqC Command Mode option and use the ◀/▶ buttons to change the value to Installer and press the ⏻ button.
- Highlight the Motor Control option and use the ◀/▶ buttons to change the value to reset and press the OK button.
- You will now see a warning message, press the OK button to continue. All motor positions of the pre-programmed satellites should now be correct. If you have any other make or model of DiSEqC 1.2 motor then you may need to store the satellite positions in yourself (Please refer to the user manual for your motor).
- Highlight the DiSEqC Command Mode option and use the buttons to change the value to User and press the OK button.
- You should now be ready to start storing services for the various satellites (see 5 onwards).
4. Manual Satellite Search
The purpose of this is to set the motor position for each satellite manually.
This is useful if the satellite you require is not available from the pre-programmed list (see 3 above).
To do this, you must access the Satellite Settings menu. Do as follows ;
- Select Service Searching from the main menu and press the OK button, to display the Service Searching menu.
- Select the Manual Search option and press the OK button, to display the Manual Search menu. Select the relevant Antenna Alternative that you are using for this satellite.
- Enter the Frequency, Polarisation, Symbol Rate and FEC of a transponder on the satellite you wish to find. This transponder information should be unique to this satellite.
- Select the Antenna Alternative option and press the OK button, to display the Satellite Settings menu.
- Highlight the option DiSEqC Command Mode and using the ◀/▶ buttons change this to Installer.
- Highlight the option Satellite name and use the ◀/▶ buttons to select the satellite you want to find, use others if the name of the satellite you want does not appear.
- When you have selected the satellite you wish to find, go down to the Movement option and again using the ◀/▶ buttons to start the motor moving.
Motorised System
- You should move the motor as far west as possible and the move it east so that you cover the complete movement range of the motor.
- During the move from west to east the Signal Quality bar should register a signal once. This is the position of the satellite. If there are two or more different positions which registers a signal, then you must choose another frequency that is unique to the satellite you want.
- Use the Signal level and Strength Quality bar at the bottom of the screen to judge the best position of the dish.
- Use the ◀/▶ buttons to stop the motor when required.
- When you have the best position of the dish go to the Motor Control option and using the </► buttons select store and press the ⏻ button. The position of the satellite should now be stored.
- If you do not store this position, it will be lost when you exit the menu.
- Repeat the process for each satellite if required, remembering to use a different antenna alternative for each satellite.
5. Moving to a pre-set satellite
Once you have stored the positions of the satellites you want (see left below) you can now search for the services transmitted from them. Before you can do this, you must move the motor to the position of the satellite you wish to search. To do this, you must access the Satellite Settings menu. Do as follows;
- Select Service Searching from the Main Menu and press the OK button, to display the Service Searching menu.
- Select the Manual Search option and press the OK button, to display the Manual Search menu.
- Select the Antenna Alternative option and press the OK button, to display the Satellite Settings menu.
- In the Satellite Settings menu ensure that you have DiSEqC Command Mode option set to User.
- Highlight the option Satellite Name and use the ▲/▼/◄/► buttons to select the satellite you want to view.
- When you have selected the satellite you wish to view, go down to the Motor Control option and again using the ◀/▶ buttons select go to and press the OK button.
- The motor will now move to the position of the selected satellite.
- The Movement option is used to fine-tune the position of the motor.
- When using the Movement option for fine-tuning, you must remember to store the changes you have made or else these will be lost.
6. Searching for services on your selected Satellite
Once you have moved the motor into position, you can search for the channels transmitted from the relevant satellite. To search for services on your new selected satellite, Do as follows;

text_image
Schedule Settings Customer Name Net Tools Management Mood Management 30 MHz Deling: Command/Rese 240 MHz Deling: Command/Rese 240 MHz- Move the motor to the position of the satellite you wish to search. (see section 5 above)
- Select the service searching from the Main Menu and press the OK button. To display the Service Searching menu.
- Select the manual search option and press the OK button to display the Manual Search menu.
-
Now enter the Frequency and Symbol Rate using the (0\~9) buttons. Next enter the Polarisation and FEC values using the ◀/▶ buttons.
-
When you have entered all these details in, press the OK button and the search will begin.
- When the search has finished, press the OK button to view.
- Repeat the process for all the transponders you want from this satellite.
7. Automatic Search
It is possible to use automatic search using the DiSEqC 1.2 motorised system.
- Ensure that the positions for the satellite you want to search is correct. (see Section 3 and 4 above)
- In the Main Menu, select the option channel searching and press the OK button.
- In the Service Searching menu, select the Antenna Alternative that you have set for this satellite.
- When you search new services, please refer to Automatic Search of page 28.
- When the search has finished, press the Ⓞ button to store and view the services.
Now that you have stored all the positions of the satellites and searched for all the services you want, you can now use your receiver as normal. When you change to a service that is being transmitted from a different satellite, you will have to wait a few seconds to allow the motor to move into position to receive the new service.
Troubleshooting Guide
| Problem | Solution |
| About STB | |
| Does not display any LED on the front panel or STB has no power. | Check the main power cable and check that it is plugged into a suitable power outlet.Check whether STB is in Standby mode. |
| No Picture • Ensure that the | STB is switched on (see above).Check the video output port (SCART) is firmly connected to the TV or VCR.Check that you have selected the correct channel or Video Output on your TV.Check the brightness level of the TV. |
| Poor picture quality • See “No Picture” above. | Check the signal level, if this is low then try adjusting the alignment of your dish. |
| No Sound • See “No Picture” above. | Check the volume level of the TV and STB.Check the Mute status of the TV and STB. |
| Remote Control does not operate | Point remote control directly towards the STB.Check and replace batteries. |
| On-Screen Error Messages | |
| No or Bad Signal • Check the LNB - replace LNB if necessary.Check the cable from the LNB.Check the position of the dish - realign dish if necessary.If you are using a DiSEqC 1.0 switch, check that you have connected the LNBs to the correct connections on the switch.Check the “Signal Level” and the “Signal Quality” in the Signal Status menu. | |
| Service Search | |
| “No Signal” in manual search | Check the “Signal Level” and the “Signal Quality” in the Signal Status menu.Check the LNB - replace LNB if necessary.Check the cable from the LNB.Check the position of the dish - realign dish if necessary.DiSEqC 1.0Check that you have connected the LNBs to the correct connections on the switch.Check that you have set the connected setting in the Antenna Setting menu.DiSEqC 1.2Check that you have selected this in the Antenna Setting menu.Check that the dish is aimed at the correct satellite. |
| LED Error Message | |
| Amber only:Invalid system ID | • Check whether the system ID is different for Software and STB. |
| Amber & Red:Incorrect data block CRC error | • You need to contact your retail shop. |
| Amber & Red & Green:Incorrect application CRC error | • You need to contact your retail shop. |
Menu Map
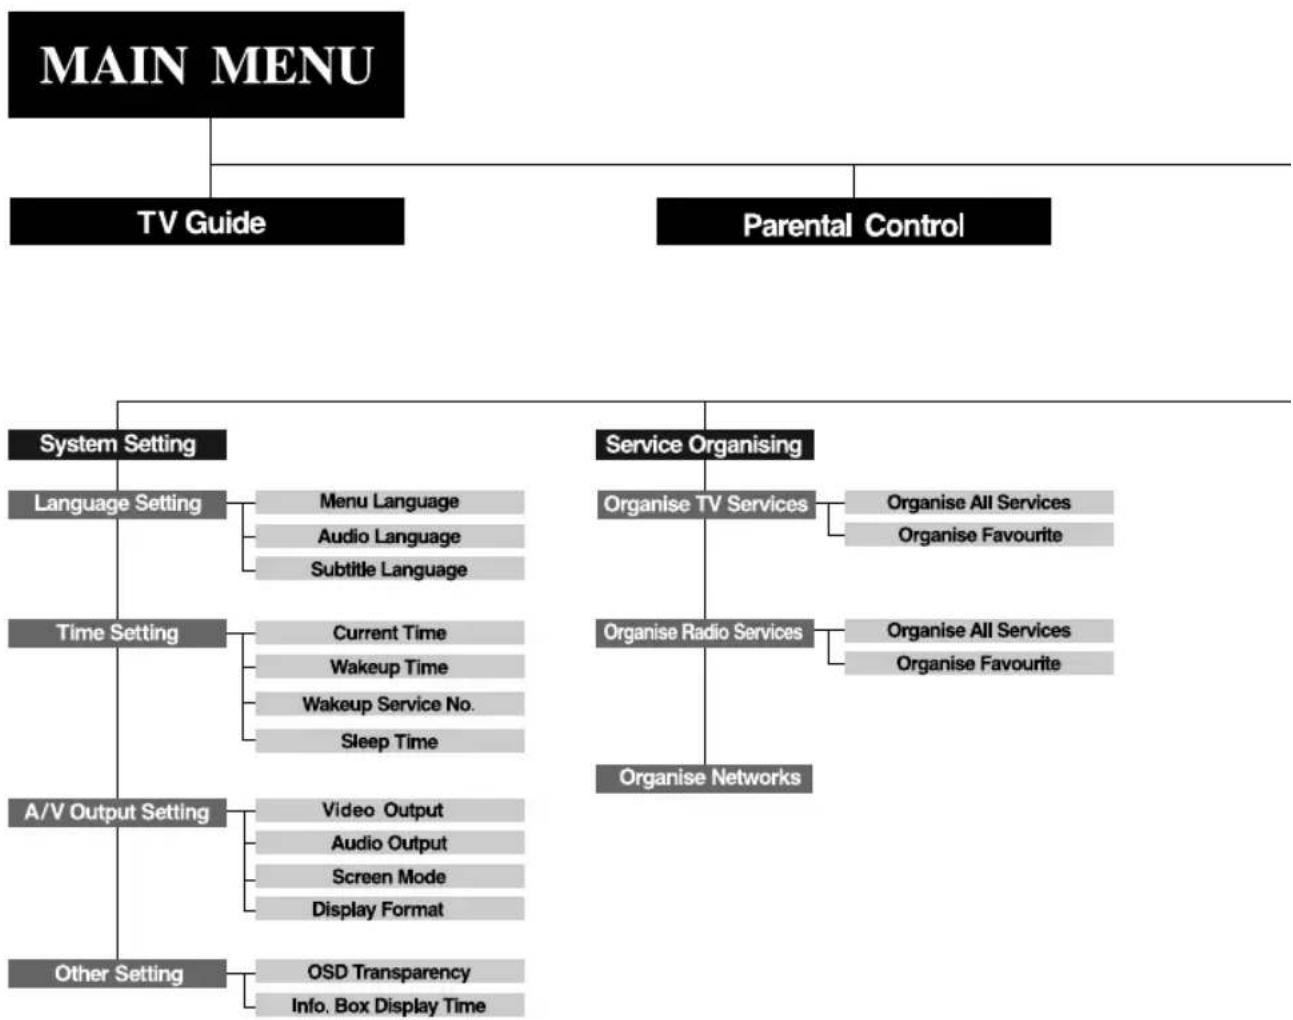
flowchart
graph TD
    A["MAIN MENU"] --> B["TV Guide"]
    A --> C["Parental Control"]
    B --> D["System Setting"]
    B --> E["Service Organising"]
    D --> F["Language Setting"]
    F --> G["Menu Language"]
    F --> H["Audio Language"]
    F --> I["Subtitle Language"]
    D --> J["Time Setting"]
    J --> K["Current Time"]
    J --> L["Wakeup Time"]
    J --> M["Wakeup Service No."]
    J --> N["Sleep Time"]
    D --> O["A/V Output Setting"]
    O --> P["Video Output"]
    O --> Q["Audio Output"]
    O --> R["Screen Mode"]
    O --> S["Display Format"]
    D --> T["Other Setting"]
    T --> U["OSD Transparency"]
    T --> V["Info. Box Display Time"]
    E --> W["Organise TV Services"]
    E --> X["Organise Radio Services"]
    E --> Y["Organise Networks"]
    W --> Z["Organise All Services"]
    W --> AA["Organise Favourite"]
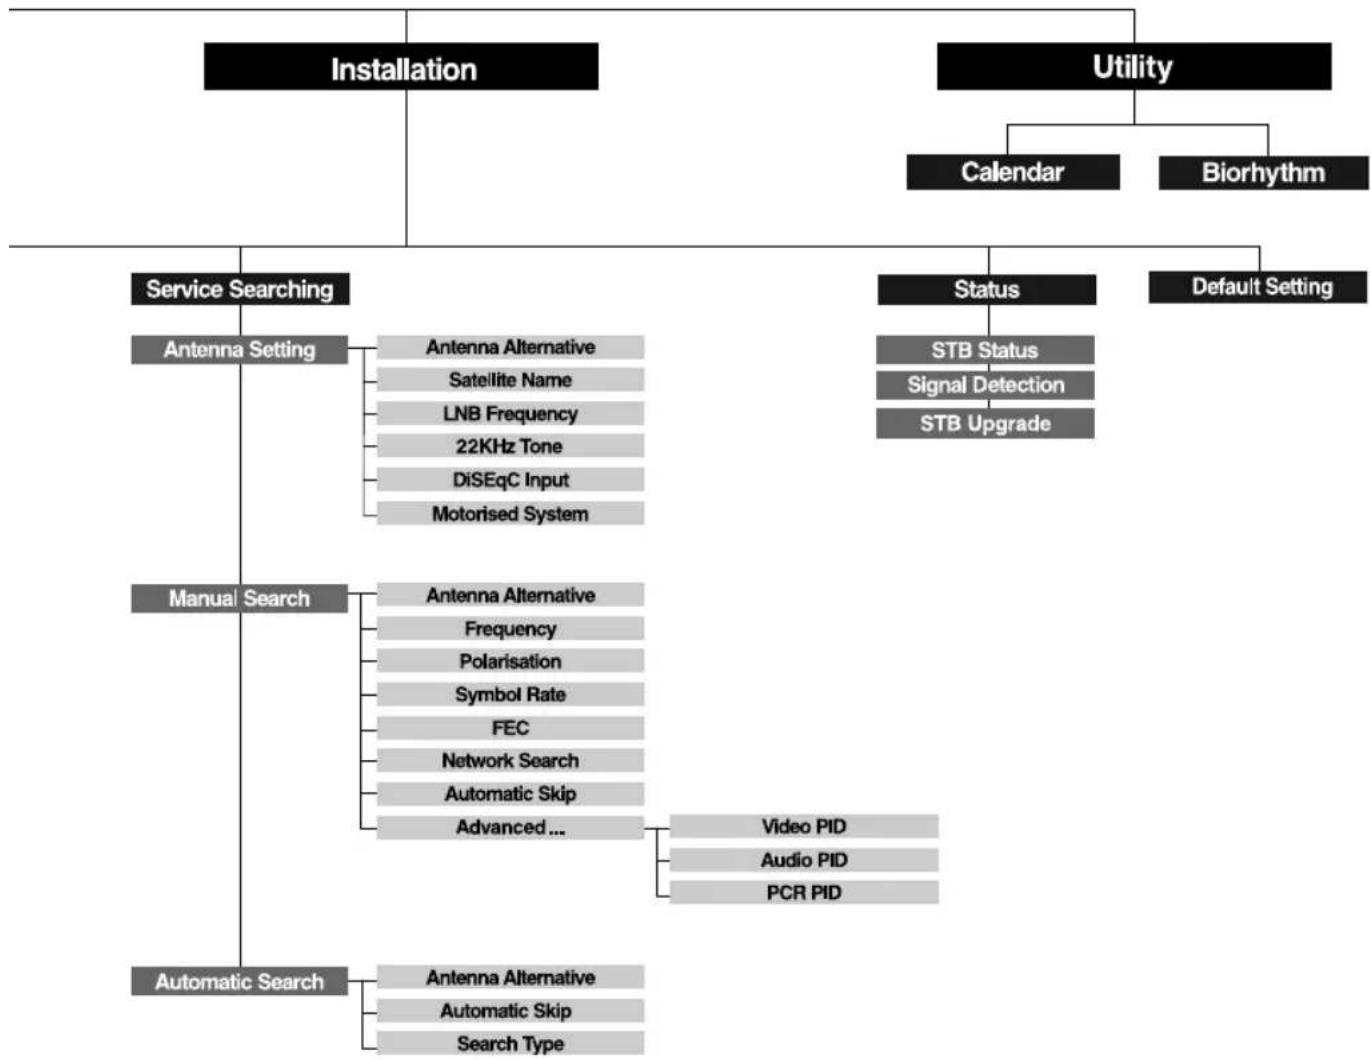
flowchart
graph TD
    A["Installation"] --> B["Service Searching"]
    A --> C["Manual Search"]
    A --> D["Utility"]
    B --> E["Antenna Setting"]
    B --> F["Antenna Alternative"]
    B --> G["Satellite Name"]
    B --> H["LNB Frequency"]
    B --> I["22KHz Tone"]
    B --> J["DiSEqC Input"]
    B --> K["Motorised System"]
    C --> L["Manual Search"]
    C --> M["Automatic Search"]
    D --> N["Calendar"]
    D --> O["Biorhythm"]
    D --> P["Default Setting"]
    P --> Q["Status"]
    Q --> R["STB Status"]
    Q --> S["Signal Detection"]
    Q --> T["STB Upgrade"]
    C --> U["Antenna Alternative"]
    C --> V["Frequency"]
    C --> W["Polarisation"]
    C --> X["Symbol Rate"]
    C --> Y["FEC"]
    C --> Z["Network Search"]
    C --> AA["Automatic Skip"]
    C --> AB["Advanced ..."]
    AB --> AC["Video PID"]
    AB --> AD["Audio PID"]
    AB --> AE["PCR PID"]
    C --> AF["Antenna Alternative"]
    C --> AG["Automatic Skip"]
    C --> AH["Search Type"]
Specification
Tuner & Channel
| Input Connector | F-type, IEC 169-24, Female |
| Frequency Range | 950 MHz to 2150 MHz |
| Input Impedance | 75 Ω unbalanced |
| Signal Level | -25 to -65 dBm |
| IF | 480 MHz |
| IF Band width | 36 MHz |
| LNB Power & Polarisation | Vertical : +13.5VHorizontal : +18VCurrent : 500 mA Max. Overload Protection |
| 22 KHz Tone | Frequency : 22 ± 4 kHz Amplitude : 0.6 ±0.2 V |
| DiSEqC Control | Version 1.0/1.2 Compatible |
| Demodulation | QPSK |
| Input Symbol Rate | 2-31 Ms/s |
| FEC Decorder | Convolutional Code Rate 1/2, 2/3, 3/4, 5/6 and 7/8 with Constraint Length K=7 |
MPEG Transport Stream A/V Decoding
| Transport Stream | MPEG-2 ISO/IEC 13818Transport stream specification |
| Profile Level | MPEG-2 MP@ML |
| Input Rate | 60 Mbit/s Max |
| Aspect Ratio | 4:3, 16:9 |
| Video Resolution | 720 x 576 |
| Audio Decoding | MPEG/MusiCam Layer I & II |
| Audio Mode | Single channel / Dual channel Joint stereo / Stereo |
| Sampling | 32, 44.1 and 48 kHz |
Memory
| Main Processor | TMIPS R3930(81MHz) |
| Flash Memory | 2 Mbyte |
| Graphic(MPEG) & System DRAM | 4 Mbyte |
- Please note: The specification of the STB may be changed without notice in advance.
A/V & Data In/Out
| TV SCART | Video Output(CVBS, S-Video, RGB)Audio Output(Resolution : 20 bits DAC, Max. 2 Vrms) |
| VCR SCART | Video Output(CVBS)Video Input(CVBS, S-Video, RGB)Audio Output(Resolution : 20 bits DAC, Max. 1 Vrms) |
| AUDIO R/L | RCA/Cinch Volume and Mute Control(Resolution : 20 bits DAC, Max. 2 Vrms) |
| RS-232C | Transfer rate 115,200 bps, 9pin D-sub Type |
Power Supply
| Input Voltage | 190 - 250V AC, 50/60 Hz |
| Type | SMPS |
| Power Consumption | Max. 30W |
| Standby Power | ≤ 8W |
| Protection | Separate internal fuse. The input shall have lightening Protection |
Physical Specification
| Size (W x H x D) | 260 x 50 x 180 mm |
| Weight (Net) | Around 1.3 kg |
| Operating Temp | 0°C to + 45°C |
| Storage Temp | -10°C to + 70°C |
| Storage Humidity | 5% ~ 95% RH (Non-Condensing) |
- You can use a special antenna switch with DiSEqC commands.
When changing ASTRA1 to EUTELSAT for example, a DiSEqC command is sent with the 22KHz tone through the antenna cable. The antenna switch will change ASTRA1 to EUTELSAT. The concept of DiSEqC is a protective trademark of EUTELSAT. - Data rate decides the picture quality of digital TV programmes.
Data rate of about 5-6 Mbit/s coincides with the picture quality of a analog TV programme.