
TKG SI 11 - Iron KALORIK - Free user manual and instructions
Find the device manual for free TKG SI 11 KALORIK in PDF.


| Product type | Iron |
| Brand | KALORIK |
| Model | TKG SI 11 |
| Main functions | Spray, Steam burst, Dry ironing, Vertical steaming |
| Temperature adjustment | Adjustable thermostat with settings for synthetic, silk, wool, cotton, linen |
| Steam flow adjustment | From 0 to maximum, with self-cleaning position |
| Tank filling | Through opening with cover, maximum level indicated |
| Recommended water type | Distilled water or tap water |
| Self-cleaning function | Yes, by prolonged action of the steam button in self-cleaning position |
| Soleplate cleaning | Use a special cleaner, do not use abrasive pad |
| Safety | Unplug before filling/cleaning, do not immerse, hot surfaces |
| Included accessories | Measuring cup |
| Environmental protection | Directive 2002/96/EC, do not dispose of with household waste |
Frequently Asked Questions - TKG SI 11 KALORIK
User questions about TKG SI 11 KALORIK
0 question about this device. Answer the ones you know or ask your own.
Ask a new question about this device
Download the instructions for your Iron in PDF format for free! Find your manual TKG SI 11 - KALORIK and take your electronic device back in hand. On this page are published all the documents necessary for the use of your device. TKG SI 11 by KALORIK.
USER MANUAL TKG SI 11 KALORIK
D
- Spray nozzle
- Lid of the filling opening
- Variable steam/dry dial
- Steam jet button
- Spray button
- Temperature dial
- Water tank
- Temperature control light
- Soleplate
- Temperature selector sign
- Maximum filling level
- Measuring cup
FR
Please read these instructions carefully before using the appliance, and always follow the safety and operating instructions.
Important: People (including children) who are not able to use the appliance in a safe way, due to their physical, sensorial or mental capacity or their lack of experience or knowledge, must never use the appliance except if they are supervised by a person responsible for their safety or if they previously received instructions concerning the safe use of the appliance. Close supervision is necessary to prevent children from using the appliance as a toy.
☐ Check that your mains voltage corresponds to that stated on the appliance.
☐ Never leave the appliance unsupervised when in use.
From time to time check the cord for damages. Never use the appliance if cord or appliance shows any signs of damage. Should the cord be damaged, it must be replaced by a competent qualified electrician ^(1) . All repairs should be made by a competent qualified electrician ^(2) .
☐ Only use the appliance for domestic purposes and in the way indicated in these instructions.
☐ Never immerse the appliance in water or any other liquid for any reason whatsoever. Never place it into the dishwasher.
☐ Never use the appliance near hot surfaces.
Before cleaning, always unplug the appliance from the power supply.
☐ Never use the appliance outside and always place it in a dry environment.
☐ Never use accessories that are not recommended by the producer. They could constitute a danger to the user and risk to damage the appliance.
☐ Never move the appliance by pulling the cord. Make sure the cord cannot get caught in any way. Do not wind the cord around the appliance and do not bend it.
☐ The temperature of the accessible surfaces may be very high when the appliance is in use. Never touch these surfaces, always use the handle.
☐ Make sure the cord does not come into contact with the hot parts of the appliance.
Before using the appliance for the first time, remove all labels and remainders from the sole plate and carefully wipe it dry.
□ Always let the appliance cool down before cleaning, storing or filling it (model with spray and/or steam).
☐ To fill the tank it is absolutely necessary to unplug the cord (model with spray and/or steam).
☐ Never put your appliance in horizontal position, but preferably in vertical position.
☐ Make sure its soleplate does not touch inflammable materials (e.g. plastic, textile) during use.
☐ If you have a special heat-resistant base, make sure you put the steam dial in 0 position.
□ Always unplug the iron when not in use.
☐ The iron shall be used and placed on a stable level surface.
☐ Do not use the iron if it has fallen, if it shows any visible signs of damage or if it leaks.
(1) Competent qualified electrician: after-sales department of the producer or importer or any person who is qualified, approved and competent to perform this kind of repairs in order to avoid all danger. In case of need you should return the appliance to this electrician.
! BEFORE USING THE IRON, remove any labels from the soleplate and wipe any manufacturing residue from the soleplate using a soft cloth.
8 TKG SI 11-091012
FILLING THE WATER TANK
Use preferably demineralised water. If you want to use the steam dial, fill the water tank as follows:
1) Unplug the iron from the outlet to let it cool down and set it horizontally on a stable level surface.
2) Turn the temperature dial to "MIN" and variable steam dial to the 0 setting.
3) To fill the water tank, open the lid of the filling opening downwards and pour water through the fill opening using a measuring cup. Never exceed the MAX mark indicated on the appliance.
4) When ironing, unplug the appliance before refilling. Fill the water tank by holding the appliance in horizontal position without putting down the hot soleplate, unless you have a heat-resistant base.
TEMPERATURE SETTINGS
• You can choose the temperature setting in function with the cloth to iron.
- In order to turn the iron on, please turn the temperature knob clockwise into the required position (see table below). If you are in doubt, take a look at the garment label.
DRY PRESSING
• Turn the variable steam dial on position 0.
- Plug in the iron.
- Set temperature dial for the desired fabric. Always check the label of the garment before choosing the temperature setting.
- Set iron on heel rest and wait until the temperature indicator light goes out.
STEAM PRESSING
| Kind of textile | Temperature dial | Steam ironing |
| Synthetic (e.g. acetate, acrylic, viscose, Polyamide, polyester, ....) | [XWWS] | [6504] |
| | | ||
| | | ||
| Silk Wool | [701] | 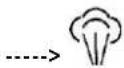 |
| | | ||
| Cotton Linen | [2476] |  |
| | | ||
| [2490] | ||
| Care and cleaning | [2486] |  |
| | |
- Fill the water tank (variable steam dial on 0 position).
- Put the plug of the appliance into the power socket.
- Turn the temperature dial clockwise into the required position.
- Turn variable steam dial between 0 and √ for minimum steam or to the √ position for a larger amount of steam.
- Set the iron on its heel and wait until the temperature indicator goes out.


9 TKG SI 11-091012
Caution: Set the temperature dial within the steam range ('●●' or '●●'). If the temperature setting is too low, water may drip from the soleplate.
Check the garment label before ironing because some cloths may be damaged when exposed to steam or water.
SPRAY
• Produces a mist for removing stubborn creases.
- Spray 🚗 can be used at any temperature setting and during either dry or steam pressing. Press down the spray button to spray.
BURST OF STEAM
The burst of steam feature provides additional steam for removing stubborn creases. This button also allows you to iron delicate articles of clothing vertically. This feature is called "vertical burst of steam". To do so, hang your article of clothing on a hanger, keep the steam button pressed and pass the iron to and fro in front of the article of clothing, making sure that the soleplate does not come into contact with the article of clothing. The distance between the soleplate and the article of clothing depends on the kind of textile and the creases.
CARE AND CLEANING
• Clean the iron regularly according to the hardness of the water and the frequency of use.
- Fill the water tank and put the thermostat in MAX position.
- Plug in the appliance. The pilot light will come on. Make sure the steam dial is in "0" position. Put the iron in vertical position.
- Never use vinegar or other liquids to descale or clean the iron.
- As soon as the pilot light goes off, hold the iron over a sink and turn the steam dial to the self-cleaning position keep the dial in this position. Steam and dust particles will come out of the soleplate.
- When the water tank is empty, release the steam dial.
• To clean the plastic parts of the iron, use a humid cloth.
- To clean the soleplate, make sure you use a product made especially for this purpose. Never use abrasive products.
WHEN YOU HAVE FINISHED IRONING
- Turn the temperature dial to "MIN" and unplug the iron from the electrical outlet.
• With soleplate facing away from you, turn the iron upside down to empty water. - Then store the hot iron on its heel rest so that any remaining moisture will evaporate.
PROTECTION OF THE ENVIRONMENT - DIRECTIVE 2002/96/EC
In order to preserve our environment and protect human health, the waste electrical and electronic equipment should be disposed of in accordance with specific rules with the
implication of both suppliers and users. For this reason, as indicated by the symbol — the rating label or on the packaging, your appliance should not be disposed of as unsorted municipal waste. The user has the right to bring it to a municipal collection point performing waste recovery by means of reuse, recycling or use for other applications in accordance with the directive.
10 TKG SI 11-091012
FR MODE D'EMPLOI
POUR VOTRE SECURITE
REPASSAGE AVEC VAPEUR
PENTRU CALCARE USCATA
natural_image
Abstract black-and-white geometric design with a circle and arrow shape (no text or symbols)KALORIK
Brand : KALORIK
Model : TKG SI 11
Category : Iron