MM-1950H - Rear Camera Camos - Free user manual and instructions
Find the device manual for free MM-1950H Camos in PDF.


| Product Type | Rear View Camera Monitor |
| Brand | Camos |
| Model | MM-1950H |
| Screen Size | 18.95 inches (481.33 mm) |
| Active Area | 408.24 (H) x 255.15 (V) mm |
| Resolution | 1440 x 900 pixels |
| Pixel Pitch | 0.2835 x 0.2835 mm |
| Brightness | 300 cd/m² |
| Contrast Ratio | 1000:1 |
| Viewing Angle | 80°/80°/75°/85° (L/R/U/D) |
| Input Voltage | DC 12V |
| Video Inputs | 2 x Composite (NTSC/PAL), 1 x HDMI (720p supported) |
| Audio Output | Built-in stereo speakers, 3W x 2 |
| OSD Languages | 7 languages (English, French, German, Spanish, Italian, Japanese, Korean) |
| Remote Control | Includes remote with CR2025 battery |
| VESA Mounting | 75 x 75 mm and 100 x 100 mm |
| Dimensions (W x H x D) | 464 x 330 x 48.5 mm |
| Weight | 4.33 kg |
| Operating Temperature | 0°C to 50°C |
| Storage Temperature | -20°C to 60°C |
| Safety | Install with power off; keep away from airbag deployment zones; clean with dry cloth; do not disassemble. |
Frequently Asked Questions - MM-1950H Camos
User questions about MM-1950H Camos
0 question about this device. Answer the ones you know or ask your own.
Ask a new question about this device
Download the instructions for your Rear Camera in PDF format for free! Find your manual MM-1950H - Camos and take your electronic device back in hand. On this page are published all the documents necessary for the use of your device. MM-1950H by Camos.
USER MANUAL MM-1950H Camos
Thank you for purchasing this product. For proper usages and application, Please read this instruction manual thoroughly.
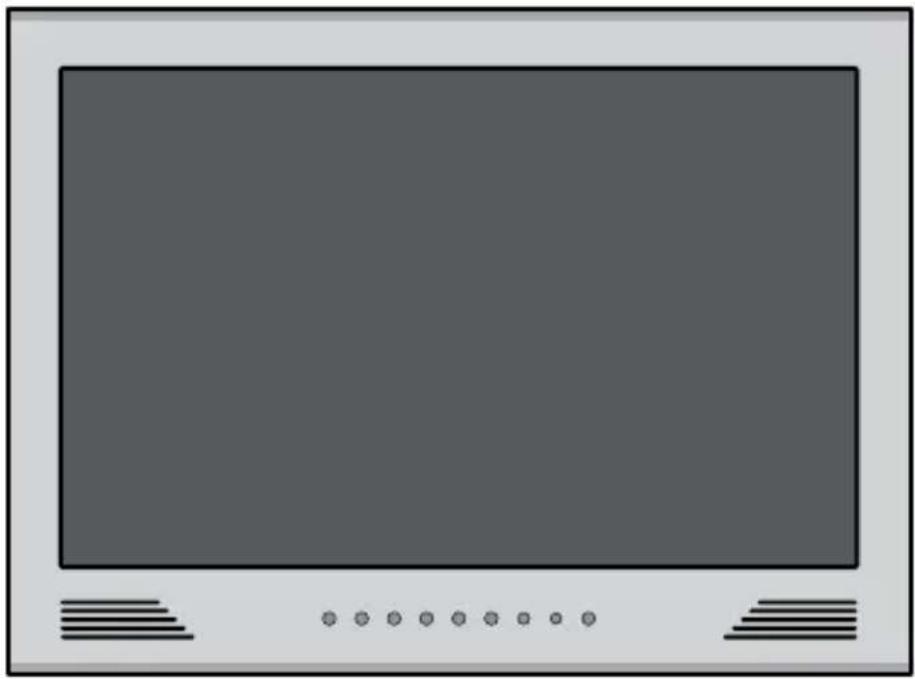
natural_image
Front view of a flat-screen monitor with no visible text, numbers, or symbols on the screen or side.
TABLE OF CONTENTS
SAFEGUARD INSTRUCTIONS.... 3
FEATURE 5
BOX CONTENTS...... 5
FUNCTION OF EACH PART....6
OPERATION......8
- SCREEN ON/OFF......8
- VOLUME CONTROL......8
- MODE 8
- MENU 9
- FUNCTION OF REMOTE CONTROL.... 13
- OSD MESSAGE....14
- SUPPORTED DISPLAY MODE.... 14
CONNECTION 15
CHANGING REMOTE CONTROL BATTERY.... 16
SPECIFICATIONS.... 17

SAFEGUARD INSTRUCTIONS
Please read the "Safety Rules" carefully before using this product. Following the safety rules prevents users from damages related with the misuse of the product. It is very important to follow these safety rules. We state "Caution" and "Warning" to clarify any potential risk for a damage associated with the misuse of the product.

This information is for preventing damage or shorten the life time of the products.

This information is for preventing bodily harm or even death and use should follow this safety rules.

CAUTION

Should install while power off. (After install products, connect DC jack)
- It may cause to electronic shock or malfunction.

While stop driving (parking), set the car in motion.
- It may cause battery discharge.

Do not use multi socket or extended adaptor.
- It may cause unexpected heating, fire and malfunction.

Unplug product when do not use for a long time.
- It may case fire by short circuit due to heating.

Do not place near magnet.
- It may cause malfunction and trouble.

Do not push a LCD panel.
- It may cause LCD broken.

In case of inserting battery, attend to polarity and insert according to direction.
- When wrong inserting, it may cause fire, damage by explosion.

Before install the body, take enough place at least more than 15cm from the wall to emit heat.

The battery for remote controller is not rechargeable and should replace same or similar model. Used battery may cause environmental pollution, so trash it carefully.
- This may cause a malfunction and problem.

WARNING

Do not put the product in place where sudden temperature increasing and should use on optimum voltage, temperature and humidity.
- It may cause to electronic shock or malfunction.

Do not get product wet and operate with wet hands.
- It may cause to electronic shock or malfunction.

Do not place near of air bag effective range.
- It may cause malfunction of air bag or accident, injury due to hitting monitor by air bag.

Keep clean dust on power socket.
- It may cause electronic shock and fire by bad connection.

Do not pull cord with a jerk, should catch a plug and pull. Do not use damaged cord.
- It may cause cord malfunction, electronic shock and fire.

When clean exterior, power off and wipe with dry cloth.
- Wet cloth may cause a electronic shock.

Do not clean exterior with volatility or oily solvent.
Neither keep touching rubber and plastic for long time.
- It may cause change of surface, fall of paint, malfunction and fire.

Do not place where vibration and shock.
- It may cause throw down and then malfunction and accident.

Do not put metals as like pin and needle into hole and chink of grill, speaker.
- In case of inserting them, stop to operate, it may cause electronic shock, fire and malfunction.

Do not use in problem condition as like smoking, smell something burn.
- It may cause fire. Stop to use and make inquiries to agency.

Do not disassemble, repair and remodeling.
- It may cause malfunction and injury, can not get warranty.
- Make inquiries to agent for repair and checkup.
1 FEATURE
• Digital TFT Wide LCD with high resolution and low reflection
• All electronic control functions
- All functions are displayed on screen (OSD function)
• Auto recognition function of Video Signal system (PAL / NTSC / AUTO)
• 7 languages on OSD menu (ENG-FRA-DEU-ESP-ITA-JPN-KOR)
• Mode selection (HDMI - AV1 - AV2)
• Built-in speaker (3Watt x 2)
- Low power consumption
2 BOX CONTENTS
* BASIC CONTENTS
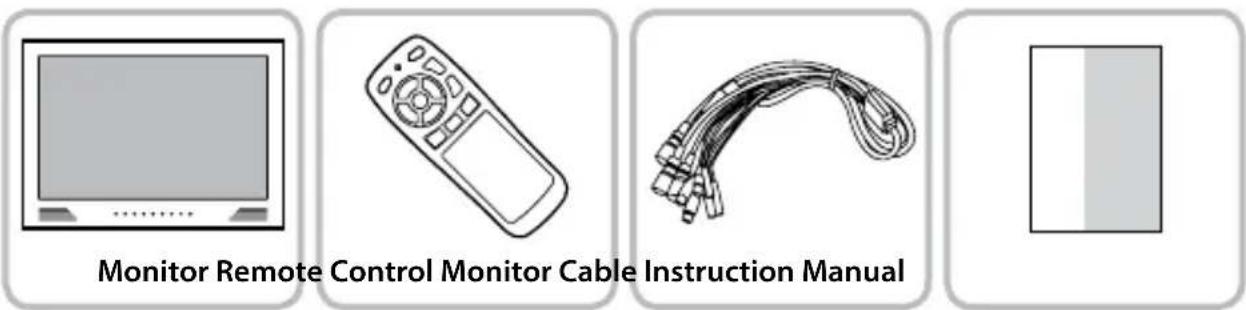
* OPTION
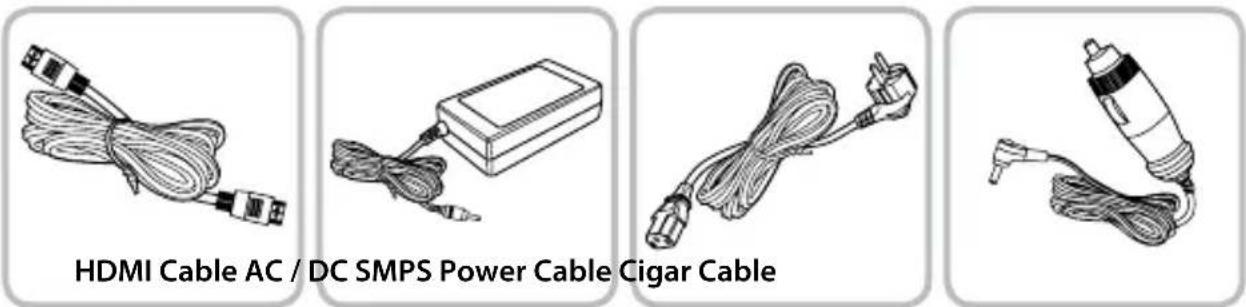
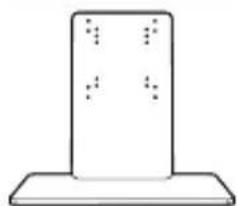
natural_image
Simple line drawing of a vertical stack with four dots on top (no text or symbols)Stand
3 FUNCTION OF EACH PART
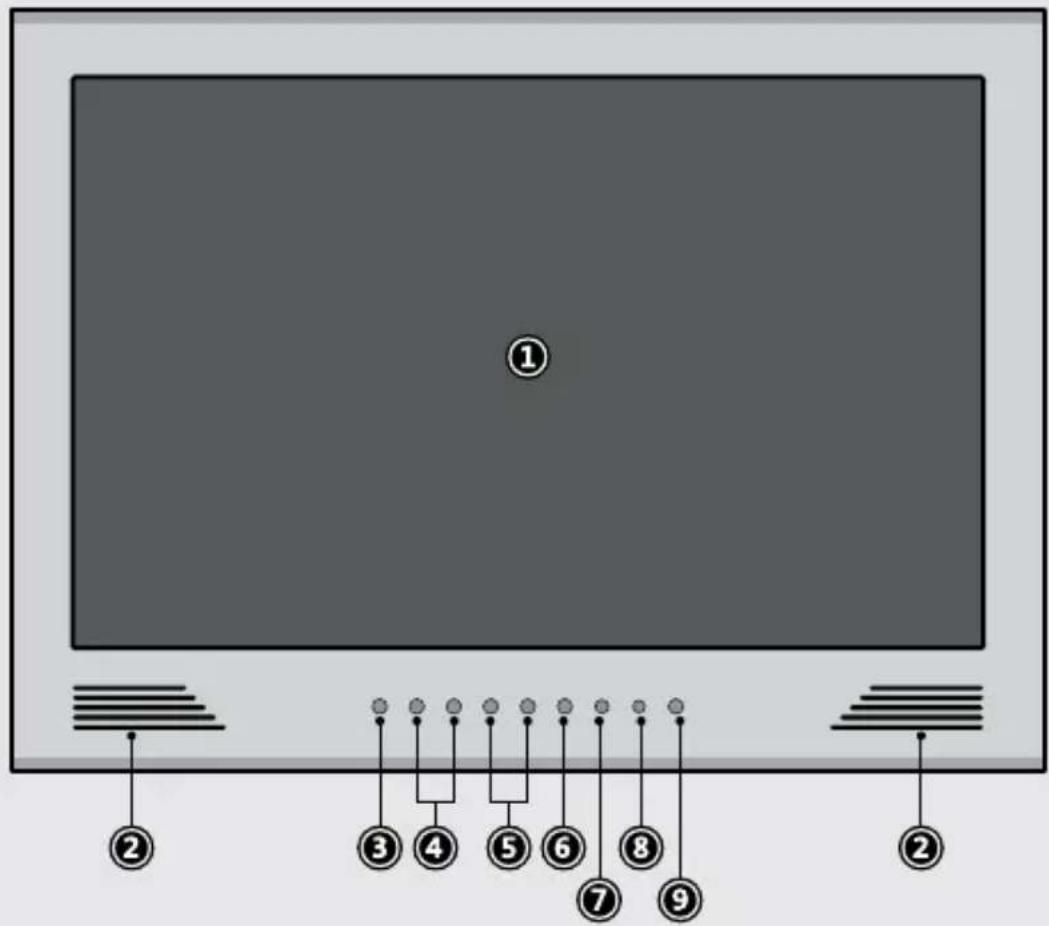
MONITOR
text_image
① ② ③ ④ ⑤ ⑥ ⑦ ⑧ ⑨| 1. LCD SCREEN | LCD SCREEN |
| 2. SPEAKER | STEREO SPEAKER (3W x 2) |
| 3. MENU | Selecting menu and changing function |
| 4. SELECT | Button to select menu and mode |
| 5. ADJUST | Adjusting menu level or volume |
| 6. MODE | Change mode (HDMI / AV1 / AV2) |
| 7. REMOTE SENSOR | Sensor for receiving signal from the remote control |
| 8. STAND-BY LED | Displays stand-by and ON/OFF |
| 9. POWER | Power ON/OFF |
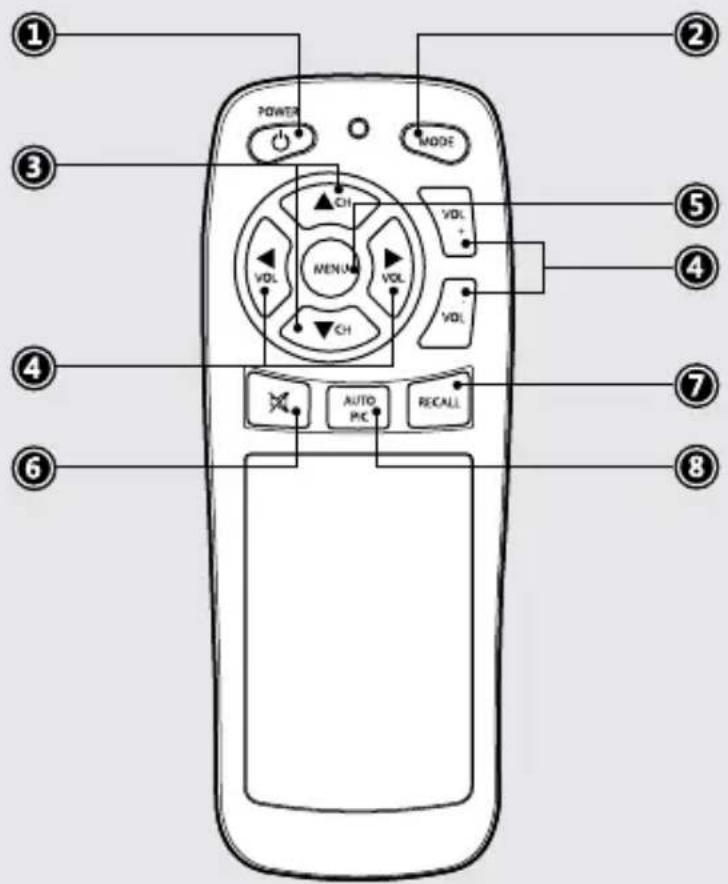
REMOTE CONTROLLER
text_image
POWER MODE CH VOL MENU VOL CH VOL AUTO PIC RECALL| 1. POWER | Power ON/OFF button |
| 2. MODE | Change mode (HDMI - AV1 - AV2) |
| 3. UP/DOWN | Moving up/down on menu |
| 4. ADJUST/VOLUME | Adjusting menu level or volume |
| 5. MENU | Selecting menu and changing function |
| 6. MUTE | Mute ON/OFF |
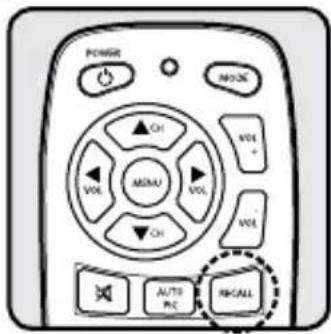
| 7. RECALL | Displaying the current mode and volume level |
| 8. AUTO PIC | Auto screen setting (USER-DYNAMIC-NORMAL-MILD) |
4 OPERATION
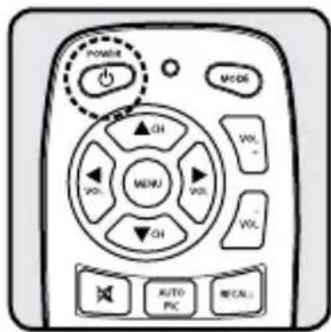
1. SCREEN ON/OFF
text_image
POWER MODE CH VOL VOL MENU VOL CH AUTO PIC RECALL
text_image
MENU SELECT ADJUST MODE S/BY POWER- Press the POWER button on the monitor front or remote controller, the screen turns on. Press the POWER button again, the screen turns off.
- If the power is connected, the S/BY LED is on. (to show power status) When the screen is on, the S/BY LED is off.
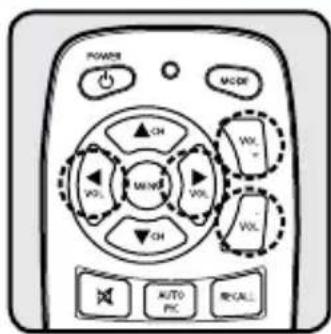
2. VOLUME CONTROL
text_image
POWER MODE CH VOL VOL MENS VOL VOL CH AUTO PIC RECALL
text_image
MENU SELECT ADJUST MODE S/BY POWER- To control volume, press the adjust buttons(◀▶) on the monitor front or volume button on the remote controller. (0\~100)
- This function is not working on "NO SIGNAL" status.
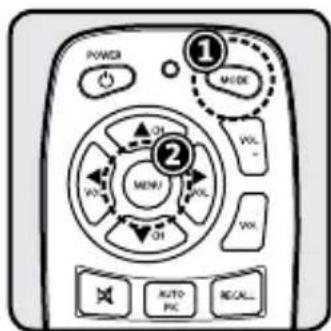
3. MODE
* A function to change external video signals to HDMI, AV1, AV2.
text_image
POWER MODE VOL - 2 MENU VOL VOL VOL AUTO PIC RECALL
text_image
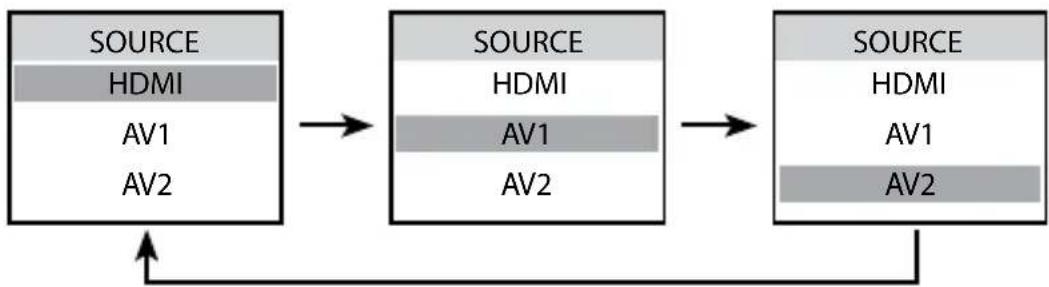
MENU SELECT ADJUST MODE S/BY POWER- Press the MODE button on the monitor front or remote control, the mode changes. (HDMI - AV1 - AV2)
- Select input mode and press the MENU button on the monitor front or remote controller then mode is changed.
flowchart
graph LR
    A["SOURCE\nHDMI\nAV1\nAV2"] --> B["SOURCE\nHDMI\nAV1\nAV2"]
    B --> C["SOURCE\nHDMI\nAV1\nAV2"]
    C --> A
4. MENU
text_image
POWER MOS ②① MENU ③ VOL + VOL - VOL CH CH AUTO PC RECALL
text_image
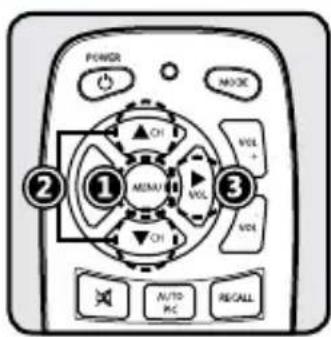
① MENU ② SELECT ADJUST MODE S/BY POWER- Press the MENU button on the monitor front or remote control, the menu list is displayed. Press the MENU button again, it is disappeared.
-
Select a menu item by ▲▼ button on the monitor front or remote controller, then press ▶ button.
-
Adjust the value by pressing ◀▶ button, then press MENU button to fix it.
* Menu item is variable depending on current output mode.
• HDMI mode
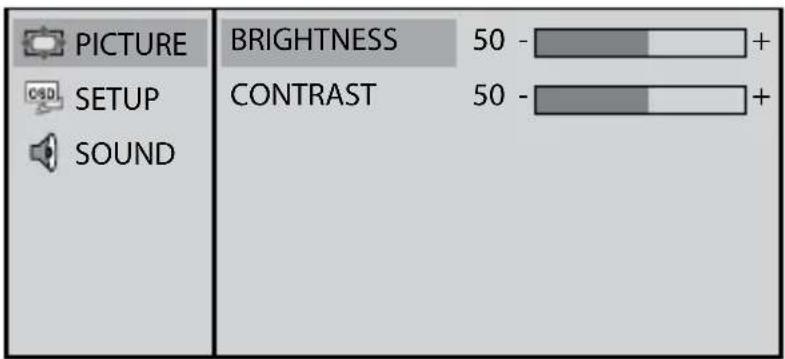
1. PICTURE
text_image
PICTURE SETUP SOUND BRIGHTNESS 50 - CONTRAST 50 - + + +1) BRIGHTNESS
Adjust the brightness of the screen.
2) CONTRAST
Adjust the contrast of the screen.
2. SETUP
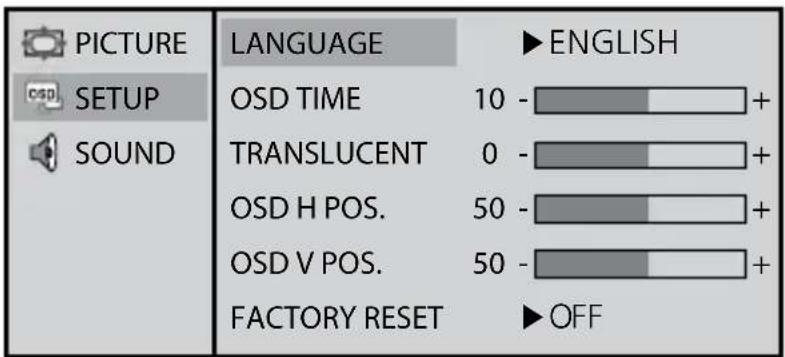
text_image
PICTURE SETUP SOUND LANGUAGE ▶ ENGLISH OSD TIME 10 - + TRANSLUCENT 0 - + OSD H POS. 50 - + OSD V POS. 50 - + FACTORY RESET ▶ OFF1) LANGUAGE Change the OSD language. (ENG-FRA-DEU-ESP-ITA-JPN-KOR)
2) OSD TIME The number of seconds that the OSD will remain visible before disappearing. (1\~60sec.)
3) TRANSLUCENT Change the opaqueness of the background of the OSD. (0\~100%)
4) OSD H POS. Move the OSD window to the horizontal direction.
5) OSD V POS. Move the OSD window to the vertical direction.
6) FACTORY RESET A factory default reset will clear all of OSD information.
3. SOUND
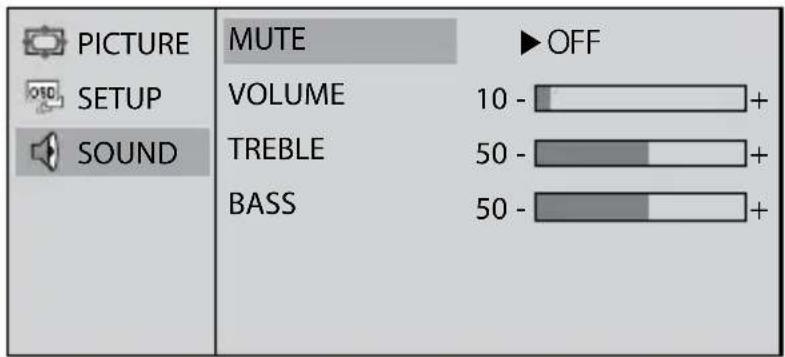
text_image
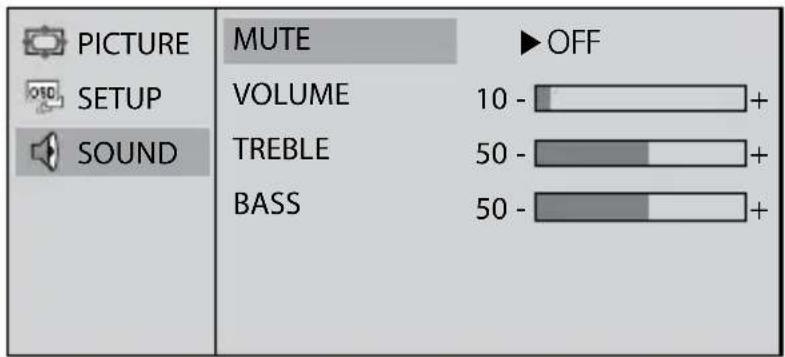
PICTURE SETUP SOUND MUTE VOLUME TREBLE BASS OFF 10 - 50 - 50 -1) MUTE Mute the sound temporarily. Mute is released when you adjust volume.
2) VOLUME Adjust the sound volume.
3) TREBLE Emphasize high frequency audio.
4) BASS Emphasize low frequency audio.
- AV mode
1. PICTURE
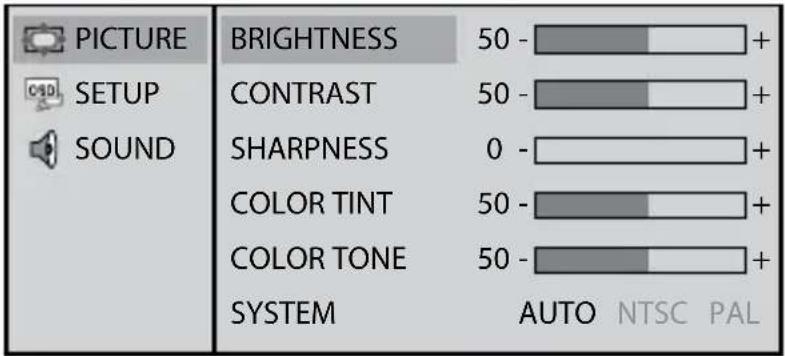
text_image
PICTURE SETUP SOUND BRIGHTNESS 50 - CONTRAST 50 - SHARPNESS 0 - COLOR TINT 50 - COLOR TONE 50 - SYSTEM AUTO NTSC PAL1) BRIGHTNESS Adjust the brightness of the screen.
2) CONTRAST Adjust the contrast of the screen.
3) SHARPNESS Adjust the sharpness of the video image.
4) COLOR TINT Change the richness of color.
5) COLOR TONE Change the tone of color.
6) SYSTEM Change video signal system NTSC, PAL, AUTO.
2. SETUP
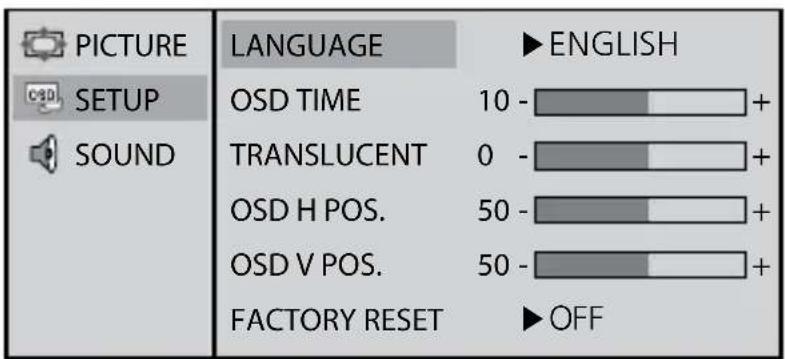
text_image
PICTURE SETUP SOUND LANGUAGE ▶ ENGLISH OSD TIME 10 - TRANSLUCENT 0 - OSD H POS. 50 - OSD V POS. 50 - FACTORY RESET ▶ OFF1) LANGUAGE Change the OSD language. (ENG-FRA-DEU-ESP-ITA-JPN-KOR)
2) OSD TIME The number of seconds that the OSD will remain visible before disappearing. (1\~60sec.)
3) TRANSLUCENT Change the opaqueness of the background of the OSD. (0\~100%)
4) OSD H POS. Move the OSD window to the horizontal direction.
5) OSD V POS. Move the OSD window to the vertical direction.
6) FACTORY RESET A factory default reset will clear all of OSD information.
3. SOUND
text_image
PICTURE SETUP SOUND MUTE VOLUME TREBLE BASS OFF 10 - 50 - 50 -1) MUTE Mute the sound temporarily. Mute is released when you adjust volume.
2) VOLUME Adjust the sound volume.
3) TREBLE Emphasize high frequency audio.
4) BASS Emphasize low frequency audio.
5. FUNCTION OF REMOTE CONTROL
* This product has a function worked by only remote controller.
• MUTE
text_image
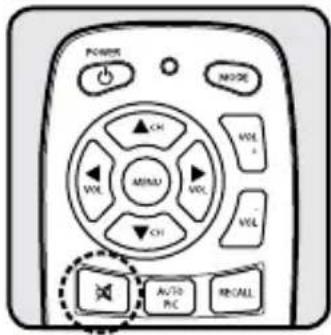
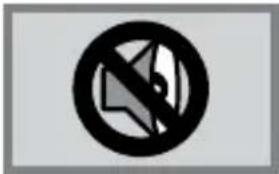
POWER MODE VOL MINI VOL VOL VOL AUTO PIC RECALLIf press MUTE button on the remote controller, it turns mute mode and there is an icon on right top side of screen.
To clear mute mode, press mute button one more or press volume button.
text_image
Prohibition sign with a circle and diagonal line symbol, indicating no sound or sound.• AUTO PIC
text_image
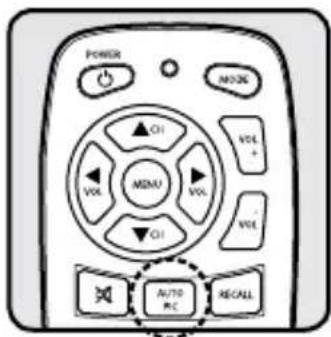
POWER MODE VOLT VOLT VOLT VOLT MENU CI AUTO REC RECALLIf press AUTO PIC button on the remote controller, the screen is changed as saved on memory.
The screen is changed [USER-DYNAMIC-NORMAL-MILD] by pressing button.
* This function is not working on HDMI mode.
- RECALL
text_image
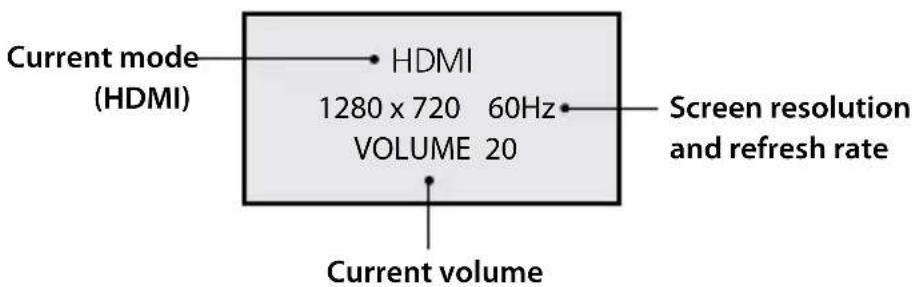
POWER MOCK VOL VOL VOL VOL AUTO PCC MRCALLDisplay the current mode and volume level.
text_image
Current mode (HDMI) HDMI 1280 x 720 60Hz VOLUME 20 Screen resolution and refresh rate Current volume6. OSD MESSAGE
OUT OF RANGE
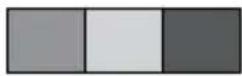
There is an error message as same as left one, when the setting value of external device is not comparable with this monitor.
EX) Resolution, Refresh rate, etc.
NO SIGNAL

There is a message as same as left one, when the external device is not connected or power off status of external device.
After connecting this monitor and external device, power on the external device.
7. Supported display mode
* MM-1750H / MM-1950H
| Mode | Resolution | Horizontal Frequency(KHz) | Vertical Frequency(KHz) |
| VGA | 640 x 480 | 31.469 | 59.940 |
| 640 x 480 | 37.500 | 75.000 | |
| WVGA | 720 x 400 | 31.469 | 70.087 |
| 720 x 480 | 31.469 | 59.940 | |
| SVGA | 800 x 600 | 37.880 | 60.300 |
| 800 x 600 | 46.875 | 75.000 | |
| XGA | 1024 x 768 | 48.363 | 60.004 |
| 1024 x 768 | 60.023 | 75.029 | |
| WXGA | 1280 x 720 | 45.000 | 60.000 |
| 1280 x 720 | 56.383 | 75.029 | |
| WSXGA+ | 1440 x 900 | 55.919 | 60.000 |
* MM-2250H
| Mode | Resolution | Horizontal Frequency(KHz) | Vertical Frequency(KHz) |
| VGA | 640 x 480 | 31.469 | 59.940 |
| 480i | 640 x 480 | 37.500 | 75.000 |
| WVGA | 720 x 400 | 31.469 | 70.087 |
| 480p | 720 x 480 | 31.469 | 59.940 |
| SVGA | 800 x 600 | 37.880 | 60.300 |
| 800 x 600 | 46.875 | 75.000 | |
| XGA | 1024 x 768 | 48.363 | 60.004 |
| 1024 x 768 | 60.023 | 75.029 | |
| WXGA | 1280 x 720 | 45.000 | 60.000 |
| 720p | 1280 x 720 | 56.383 | 75.029 |
| SXGA | 1280 x 1024 | 64.000 | 60.000 |
| 1280 x 1024 | 74.600 | 70.000 | |
| 1280 x 1024 | 80.000 | 75.000 | |
| WSXGA+ | 1440 x 900 | 55.919 | 60.000 |
| 1080i | 1920 x 540 | 33.750 | 60.000 |
| 1080p | 1920 x 1080 | 67.500 | 60.000 |
5 CONNECTION
text_image
100 15 54 34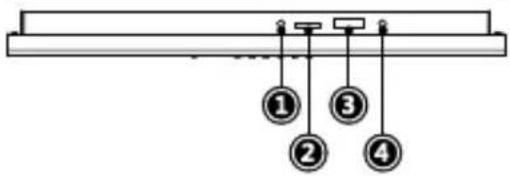
text_image
Diagram showing four numbered components suspended from a horizontal beam, likely representing a mechanical or electrical setup.1) REMOTE OUT
EXTERNAL REMOTE SENSOR OUT
2) HDMI INPUT
HDMI CONNECTOR
3) MULTI CONNECTOR
DC 12V, AV1, AV2
4) DC IN 12V ⊖-●-⊕
DC 12V input
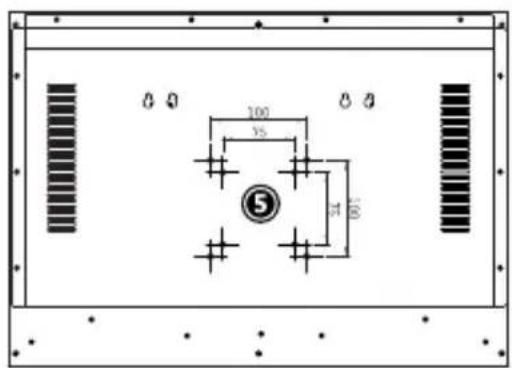
5) VESA HOLE
VESA HOLE (75 x 75mm / 100 x 100mm)
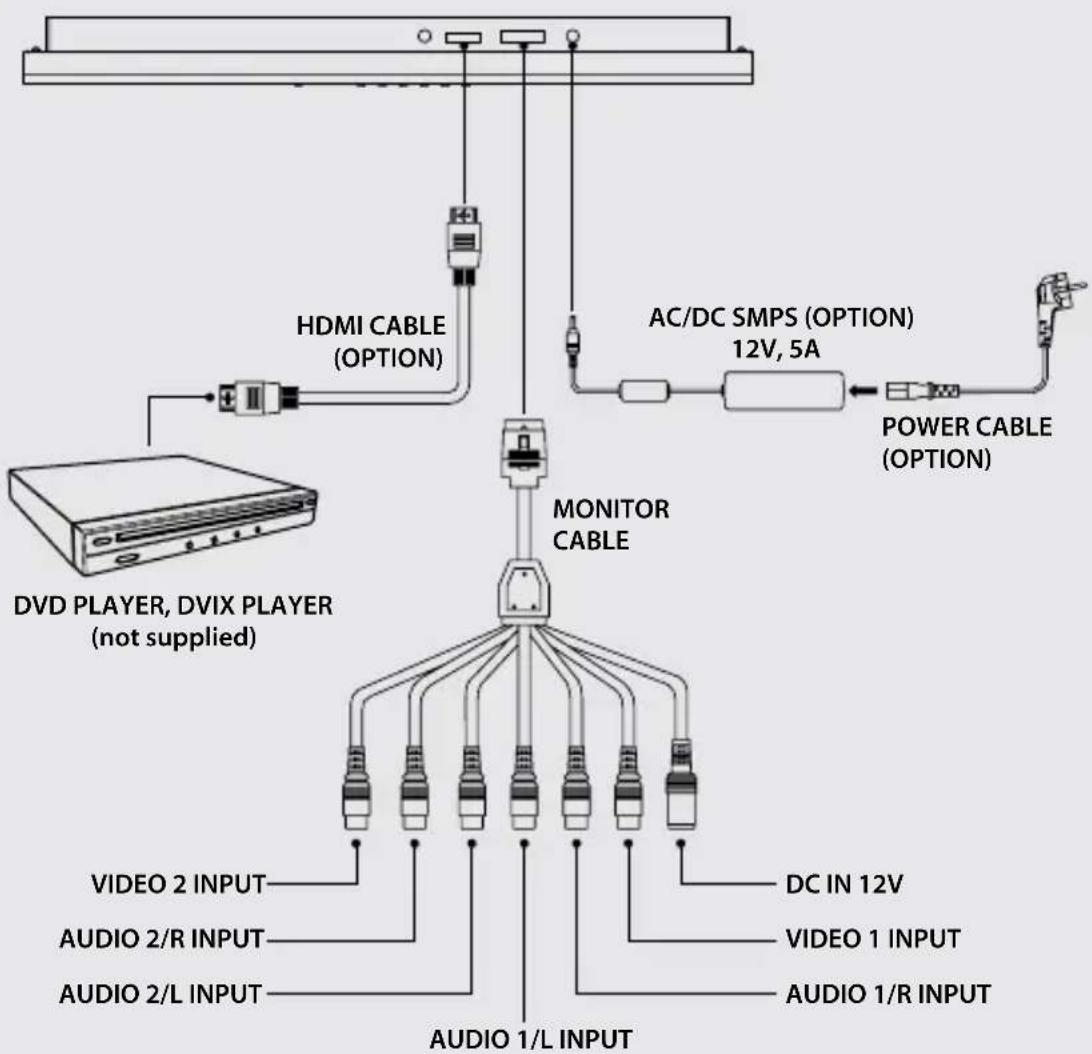
text_image
HDMI CABLE (OPTION) AC/DC SMPS (OPTION) 12V, 5A POWER CABLE (OPTION) MONITOR CABLE DVD PLAYER, DVIX PLAYER (not supplied) VIDEO 2 INPUT AUDIO 2/R INPUT AUDIO 2/L INPUT AUDIO 1/L INPUT DC IN 12V VIDEO 1 INPUT AUDIO 1/R INPUT6 CHANGING REMOTE CONTROL BATTERY
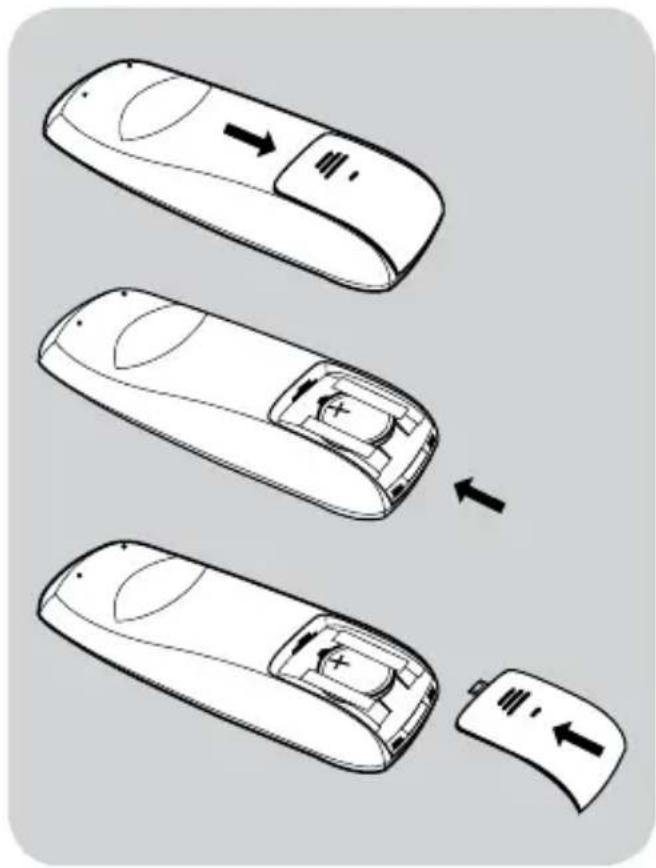
natural_image
Diagram showing three steps of a remote control device with arrows indicating movement, no text or symbols present.-
Slide and open the battery cover.
-
Insert new battery and ensure that the polarities are correct when inserting. (No. CR2025)
-
Slide and close the battery cover.
7 SPECIFICATIONS
MM-1750H
| Screen size | 433.019 mm (17.1") |
| Active area | 367.2(H) x 229.5(V) |
| Resolution | 1440 x 900 |
| Pixel Pitch | 0.255 x 0.255 |
| Brightness | 250cd/m2 |
| Contrast ratio | 800:1 |
| View angle | 80/80/75/85 (L/R/U/D) |
| Input voltage | DC 12V |
| Input video system | 2 composite (NTSC / PAL), HDMI (720p) |
| OSD language | 7 languages |
| Sound signal output | Max. 3W x 2 |
| User controls | MENU / DOWN / UP / LEFT / RIGHT / MODE / POWER |
| Operating temperature | 0°C ~ 50°C |
| Storage temperature | -20°C ~ 60°C |
| Dimension | 418(W)x305(H)x48.5(D) mm |
| Weight | 3.54 kg |
MM-1950H
| Screen size | 481.33 mm (18.95") |
| Active area | 408.24(H) x 255.15(V) |
| Resolution | 1440 x 900 |
| Pixel Pitch | 0.2835 x 0.2835 |
| Brightness | 300cd/m2 |
| Contrast ratio | 1000:1 |
| View angle | 80/80/75/85 (L/R/U/D) |
| Input voltage | DC 12V |
| Input video system | 2 composite (NTSC / PAL), HDMI (720p) |
| OSD language | 7 languages |
| Sound signal output | Max. 3W x 2 |
| User controls | MENU / DOWN / UP / LEFT / RIGHT / MODE / POWER |
| Operating temperature | 0°C ~ 50°C |
| Storage temperature | -20°C ~ 60°C |
| Dimension | 464(W)x330(H)x48.5(D) mm |
| Weight | 4.33 kg |
MM-2250H
| Screen size | 546.86 mm (21.53") |
| Active area | 476.64(H) x 268.11(V) |
| Resolution | 1920 x 1080 |
| Pixel Pitch | 0.24825 x 0.24825 |
| Brightness | 300cd/m2 |
| Contrast ratio | 1000:1 |
| View angle | 85/85/80/80 (L/R/U/D) |
| Input voltage | DC 12V |
| Input video system | 2 composite (NTSC / PAL), HDMI (1080p) |
| OSD language | 7 languages |
| Sound signal output | Max. 3W x 2 |
| User controls | MENU / DOWN / UP / LEFT / RIGHT / MODE / POWER |
| Operating temperature | 0°C ~ 50°C |
| Storage temperature | -20°C ~ 60°C |
| Dimension | 520(W)x370(H)x48.5(D) mm |
| Weight | 5.12 kg |