NEW C-3 - Organ Hammond - Free user manual and instructions
Find the device manual for free NEW C-3 Hammond in PDF.


User questions about NEW C-3 Hammond
0 question about this device. Answer the ones you know or ask your own.
Ask a new question about this device
Download the instructions for your Organ in PDF format for free! Find your manual NEW C-3 - Hammond and take your electronic device back in hand. On this page are published all the documents necessary for the use of your device. NEW C-3 by Hammond.
USER MANUAL NEW C-3 Hammond
natural_image
Two vintage piano machines displayed side by side within black diamond-shaped frames (no text or symbols visible)FOR THE New B-3 / New C-3 CONSOLE MODEL ORGAN
IMPORTANT SAFETY INSTRUCTIONS
Read these instructions.
Keep these instructions.
Heed all warnings.
Follow all instructions.
Do not use this apparatus near water.
Clean only with dry cloth.
Do not block any ventilation openings. Install in accordance with the manufacturer's instructions.
Do not install near any heat sources such as radiators, heat registers, stoves or other apparatus (including amplifiers) that produce heat.
Do not defeat the safety purpose of the polarized or grounding-type plug. A polarized plug has two blades with one wider than the other. A grounding type plug has two blades and a third grounding prong. The wider blade or third prong is provided for your safety. If the provided plug does not fit into your outlet, consult an electrician for replacement of the obsolete outlet.
Protect the power cord from being walked on or pinched, particularly at plugs, convenience receptacles, and the point where they exit from the apparatus.
Only use attachments/accessories specified by the manufacturer.
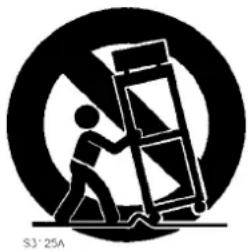
Use only with the cart, stand ,tripod, bracket, or table specified by the manufacturer, or sold
with the apparatus. When cart is used: use caution when moving the cart/apparatus combination to avoid injury from tip-over.
natural_image
Silhouette of a person climbing a ladder inside a circular frame (no text or symbols)Unplug this apparatus during lightning storms, or when unused for long periods of time.
Refer all servicing to qualified service personnel. Servicing is required when the apparatus has been damaged in any way, such as power-supply cord or plug is damaged, liquid has been spilled or objects have fallen into the apparatus, the apparatus has been exposed to rain or moisture, does not operate normally, or has been dropped.
Apparatus shall not be exposed to dripping and splashing and no objects filled with liquids, such as vases, shall be placed on the apparatus.
WARNING: To reduce the risk of fire or electric shock, do not expose this apparatus to rain or moisture.

CAUTION
RISK OF ELECTRIC SHOCK DO NOT OPEN

CAUTION: TO REDUCE THE RISK OF ELECTRIC SHOCK, DO NOT REMOVE COVER. NO USER SERVICABLE PARTS INSIDE. REFER SERVICING TO QUALIFIED SERVICE PERSONNEL.

The lightning flash with arrowhead symbol within an equilateral triangle, indicates that dangerous voltage constituting a risk of electric shock is present within this unit.

The exclamation point within an equilateral triangle, indicates that there are important operating and maintenance instructions in the literature accompanying this unit.
FOR UNITED KINGDOM:
FOR YOUR SAFETY, PLEASE READ THE FOLLOWING TEXT CAREFULLY
This appliance is supplied with a molded 3-pin mains plug for your safety and convenience.
A 5 amp fuse is fitted in this plug.
Should the fuse need to be replaced, please ensure that the replacement fuse has a rating of 5 amps and that it is approved by ASTA or BSI to BSI1362.
Check for the ASTA mark for the BSI mark on the body of the fuse.
If the plug contains a removable fuse cover, you must ensure that it is refitted when the fuse is replaced.
If the fuse is lost, the plug must not be used until a replacement cover is obtained.
A replacement fuse cover can be obtained from your local Hammond Dealer.
IF THE FITTED MOULDED PLUG IS UNSUITABLE FOR THE SOCKET OUTLET IN YOUR HOME, THEN THE FUSE SHOULD BE REMOVED AND THE PLUG CUT OFF AND DISPOSED OF SAFELY.
THERE IS A DANGER OF SEVERE ELECTRICAL SHOCK IF THE CUT-OFF PLUG IS INSERTED INTO ANY 13 AMP SOCKET.
If a new plug is to be fitted please observe the wiring code as shown below.
If in any doubt, please consult a qualified electrician.
IMPORTANT - The wires in this mains lead are coloured in accordance with the following code:
Blue: Neutral
Brown: Live
As the colours of the wires in the mains lead of this unit may not correspond with the coloured marking identifying the terminals in your plug, proceed as follows.
The wire which is coloured BLUE must be connected to the terminal in the plug which is marked with the letter N or coloured BLACK.
The wire which is coloured BROWN must be connected to the terminal in the plug which is marked with the letter L or coloured RED.
Under no circumstances should either of these wires be connected to the earth terminal of the three-pin plug, marked with the letter E or the Earth Symbol ⬆.
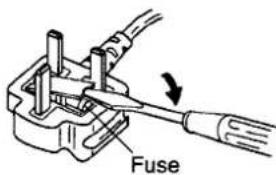
How to replace the fuse. Open the fuse compartment with a screwdriver and replace the fuse and fuse cover.
text_image
FuseIMPORTANT - PLEASE READ
Your Hammond Organ is designed to give you the true and authentic sound of Hammond Harmonic Drawbars, as well as provide you a large variety of other sounds and features to allow great flexibility in how you want to play. This Guide is designed to explain the operating features of your Hammond Organ as simply and graphically as possible.
The Information Center section of this Guide requires special explanation. It is not necessary to use the Information Center Display to get the full musical benefit from your New B-3. However, should you want to change some aspect of the sound or performance of your Hammond Organ, the Information Center Display is provided for that purpose. Each feature is treated as an explanation unto itself, and does not require you to already have prior working knowledge of some other feature. The explanations are presented such that, if you follow the steps outlined, the message you see in the Information Center Display screen will be identical to that shown in the manual at that stage of the explanation.
Do not be daunted by the number of steps required to perform each operation. Each step is simple. Simply bear these things in mind:
- Read each step carefully.
- Don't skip any of the steps.
- Don't perform the steps out of sequence.
With these guidelines, you are well on your way to mastering all of the many sounds and features of your Hammond Organ.
You've Selected The World's Most Popular Organ!
Welcome to the exclusive circle of Hammond Organ owners. We're proud you recognize the distinctive quality that has made it the overwhelming choice of beginners, "buffs," and professionals since Hammond first introduced the electric organ in 1935.
Hammond ingenuity has developed a unique digital sound voicing system combined with the traditional Hammond sound and quality. You own one of the world's great sounding instruments. Play it. Discover the exciting effects you can get. You'll achieve new levels of musical enjoyment with your Hammond.
We thank you for selecting this fine new instrument from Hammond, over the vast number of other instruments that are on the market today.
*** THIS PAGE INTENTIONALLY LEFT BLANK TO PRESERVE PAGE FORMATTING ***
TABLE OF CONTENTS
FEATURE CALLOUT 2
INTRODUCTION 6
Basic Hook-Up 6
AC/Leslie Panel....6
Connecting the organ to A.C. Power ....
Connecting the organ to a single Leslie ^® Speaker 6
Leslie Speed Switch 7
Connecting the organ to multiple Leslie ^® Speakers....7
Leslie MAIN/ECHO Switch....7
Connecting the Leslie MAIN/ECHO Switch to the organ
Connecting the Pedal Keyboard to the organ....
ADDITIONAL NOTE: Connecting MIDI devices to the organ
Turning The Organ "ON" 9
The Preset Keys 9
The Harmonic Drawbars.... 10
The Pedal Keyboard 12
Expression Pedal Foot Switch 12
The Volume and Vibrato Controls 1
Normal/Soft Volume 13
VIBRATO SWELL....13
VIBRATO GREAT 13
Amount of Vibrato and Chorus.... 14
Vibrato....14
V-1 (Small Vibrato) 14
V-2 (Wide Vibrato).... 14
Percussion "ON-OFF" 16
Percussion Volume....16
Percussion Decay 16
Percussion Harmonic Selector 16
HARMONIC DRAWBARS 18
Sound Groups....19
Color Groups 20
White Drawbars 20
Black Drawbars 20
Brown Drawbars 21
Tone Families By Shape 22
Flute family (2 step pattern) 23
Reed family (triangle pattern) 24
Diapason family (check mark pattern) 25
String family (bow pattern) 26
Pedal Drawbars 27
PRESETS 30
The Preset Keys 30
Preset Chart - Liturgical.... 31
Preset Chart - Jazz 32
Preset Chart - Theatre 33
ROTARY CONTROL PANEL .... 36
Rotary Controls 36
MASTER VOLUME....36
BASS 36
TREBLE 36
REVERB 36
OVERDRIVE 36
Jacks 37
MAIN/ECHO 37
HEADPHONE 37
LESLIESWITCH 37
EFFECTS....40
Vibrato and Chorus 40
ON/OFF 40
V-1 - (Small Vibrato) 40
C-3-(Full Chorus) 40
Leslie 41
Pedal Sustain....41
Reverb 41
REVERB Rotary Control....41
Overdrive 41
OVERDRIVE Rotary Control.... 41
INFORMATION CENTER 44
Touch Buttons 44
Top Group 45
Bottom Group 45
MENU/EXIT 45
RECORD 45
PLAY 45
PAGE 45
PLAY Mode 46
Graphic Display with parameters.
Numeric Display with parameters 4
MENU Mode 49
Menu A 49
Menu B 50
Menu C....51
Menu D....52
Advanced Features - DRAWBARS 53
Tone Wheel Select-SWL & GRT 54
Tone Wheel Select - PEDAL 55
Drawbar Fold Back.... 56
Advanced Features - PERCUSSION 5
Percussion Volume Level 59
Percussion Decay 61
Percussion 1' Cancel....63
Drawbar Level with Percussion....6
Advanced Feature - VIBRATO 67
Advanced Feature - PEDALSUSTAIN
Advanced Feature - PEDAL SUSTAIN LENGTH II ......
Advanced Feature - REVERB 72
Advanced Feature - PRESETS 74
SPECIAL PERFORMANCE FEATURES
Motor Control Switch 78
Motor Control UP 78
Motor Control DOWN 79
Advanced Features - TUNE 79
Master Tune 80
Transpose(Key Select) 81
Advanced Features - CONTROL 83
Foot Switch Function 83
Expression Minimum Level 84
Expression Curve 86
Preset Load - EX.ZONE 87
USING CompactFlash™ CARDS ....
What Is a "CompactFlash ^ Card?" 90
CompactFlash® Card Slot 90
Advanced Features - Using a Card to store Setups ....
Saving Setups to a Card 92
Loading Setups from a Card 94
Deleting a Preset Bank from a Card 9
Naming a Setup 97
MIDI 100
MIDI OUT Jack....100
Using the MIDI Jack 100
What Is A "Part"? 101
Advanced Features - MIDI 101
Advanced Features - EX.ZONE 102
EX.ZONE ON/OFF 103
EX.ZONE Bank & Program Select 104
EX.ZONE Volume 105
EX.ZONE Pan 107
EX.ZONE Octave 108
EX.ZONE Reverb Level 110
EX.ZONE Chorus....11
EX.ZONE Velocity Curve 113
EX.ZONE Zone 114
Advanced Feature - EX.DAMP 116
Advanced Feature - MIDICH.... 117
SPECIAL UTILITY FEATURES ....1
DISPLAYLOCK 120
Advanced Features - SYSTEM 121
PEDAL KEY MODE 122
LESLIE TYPE....123
SOFTWARE VERSION 125
Advanced Feature - DEFAULT 127
REFERENCE 130
INPUT 130
LINE IN L & R (Left & Right) 130
OUTPUT 130
LINE OUT L & R (Left & Right).... 130
MIDI Jack 130
Appendix A - Global Parameter List 131
Appendix B - Preset Parameter List 1
Appendix C - System Parameter List 1:
Appendix D - Real-time Parameter List 133
Appendix E - MIDI Implementation Chart 134
Specifications 135
Instrument Care 136
AC Power 136
Cabinet And Bench 136
Keys And Buttons.... 136
Moving Your Instrument.... 136
Troubleshooting 136
Important Note - Battery 137
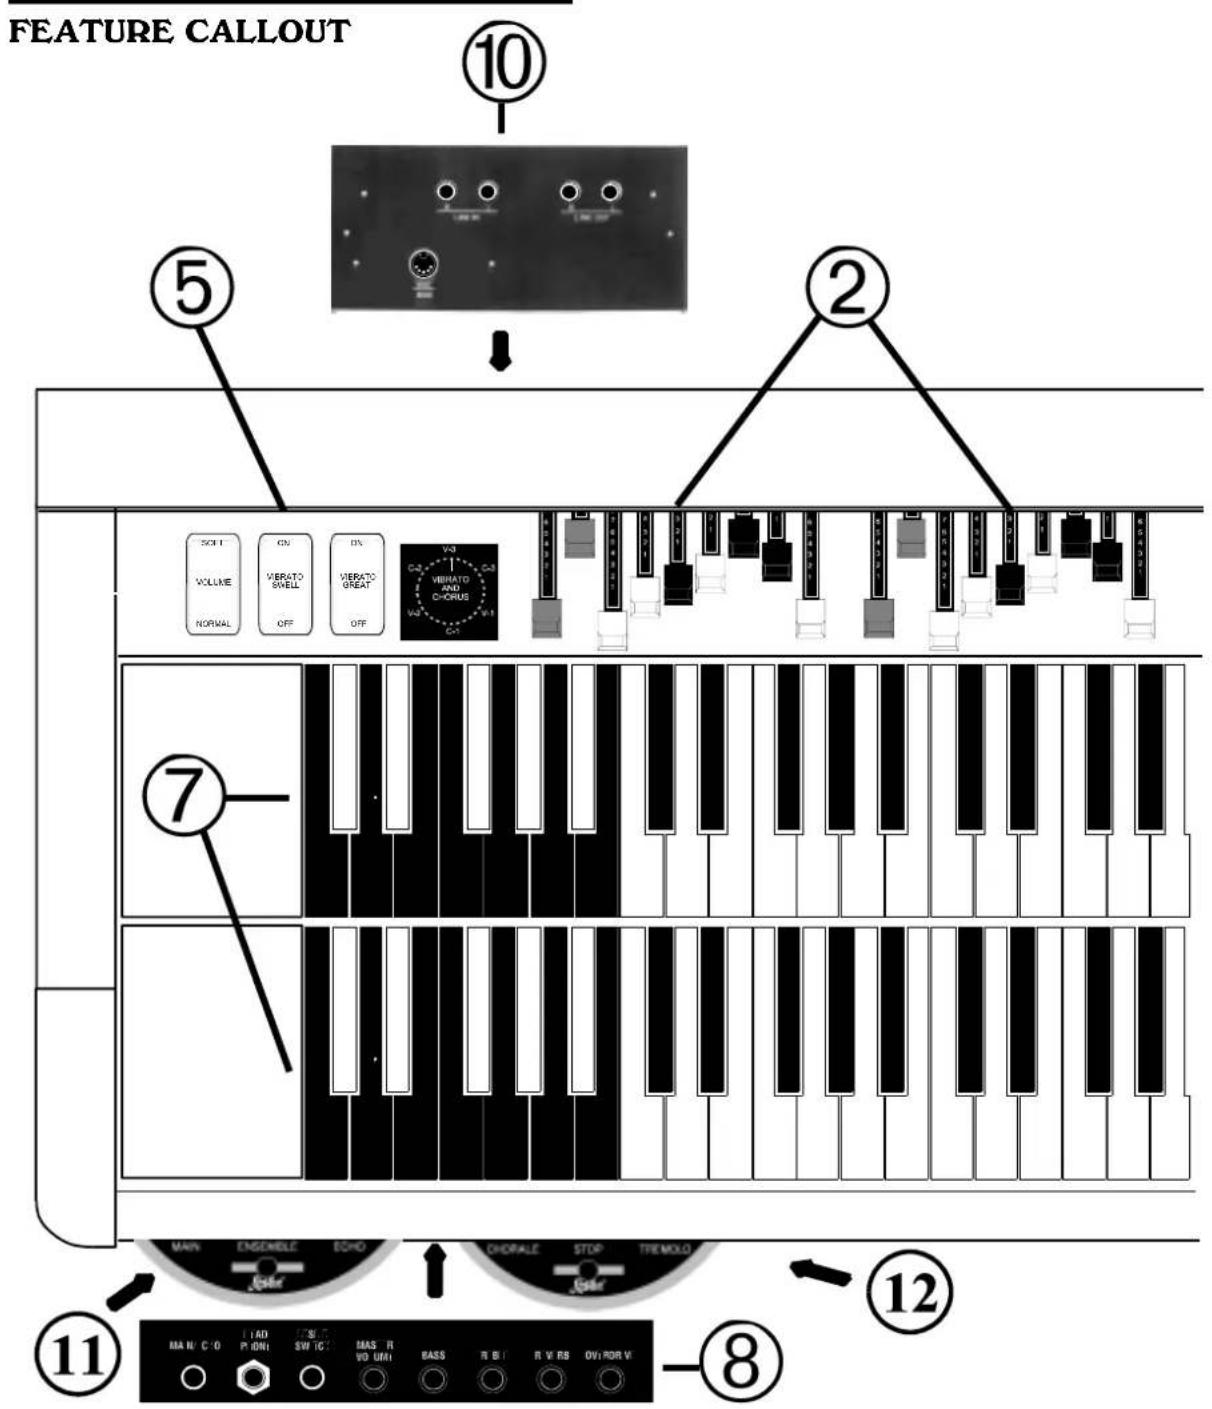
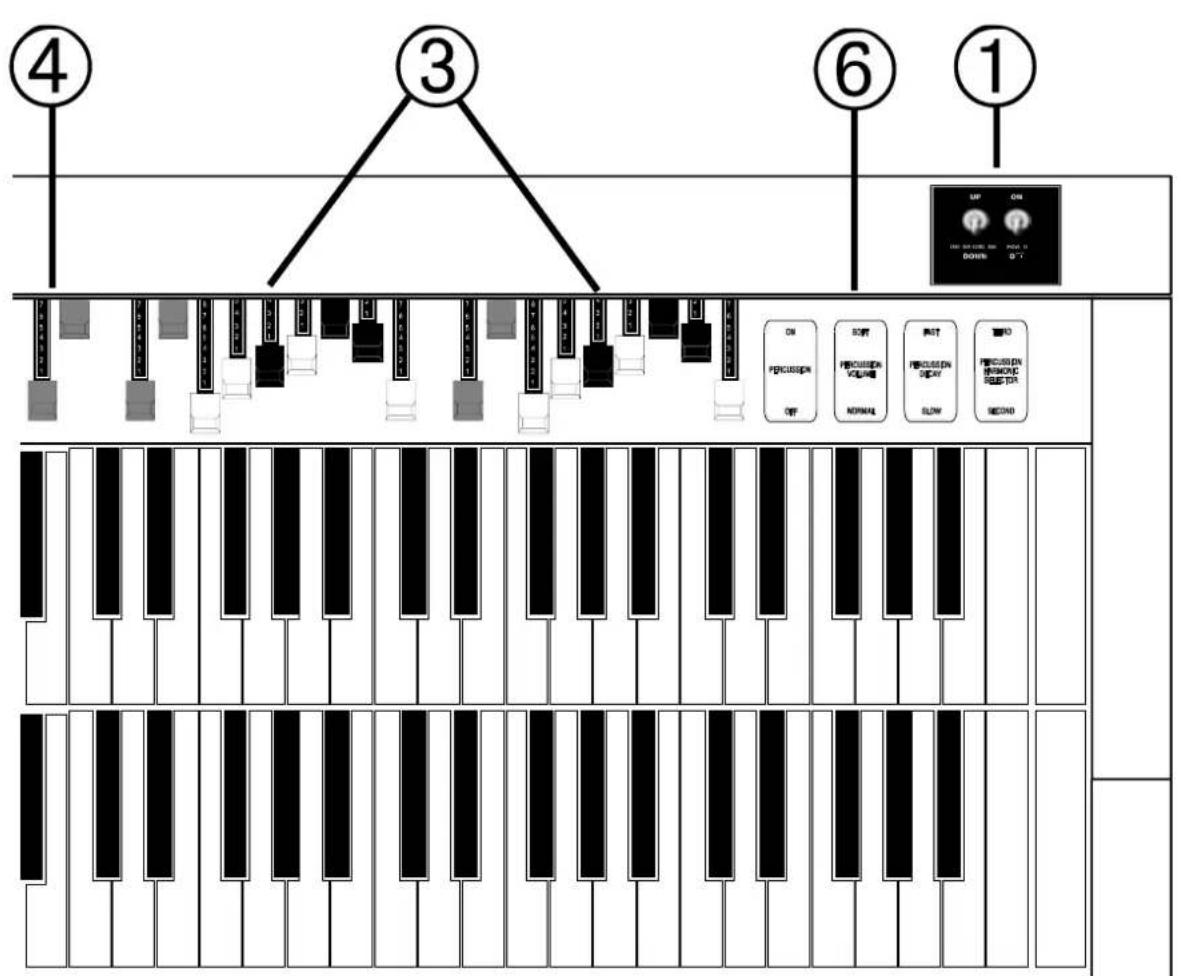
FEATURE CALLOUT
text_image
FEATURE CALLOUT ⑩ ⑤ ② ⑦ ⑪ ⑪ ⑫ ⑧ MAIN ENGINEER ECHO CHORALE STOP TREMOLD MA N C O P I ON SW T G MAS R BASS R B1 R V RS OV ROR V I A D O P O N O S W T G O D U M I B A S S R B I R V R S VOLINE ON VERSATO ON VERSATO VERSATO VERSATO VERSATO VERSATO VERSATO VERSATO VERSATO VERSATO VERSATO VERSATO VERSATO VERSATO VERSATO VERSATO VERSATO VERSATO VERSATO VERSATO VERSATO VERSATO VERSATO VERSATO VERSATO VERSATO VERSATO VERSATO VERSATO VERSATO VERSATO VERSATO VERSATO VERSATO VERSATO VOLINE NORMAL OFF OFF V3 C 2 V4 C 3 V5 C 4 V6 C 5 V7 C 6 V8 C 7 V9 C 8 V10 C 9 V11 C 10 V12- ON / OFF Power Switch & "Motor Control" Switch
- Swell Manual Drawbars
- Great Manual Drawbars
- Pedal Drawbars
- Volume & Vibrato Controls
- Touch-Response Percussion Controls
text_image
④ ③ ⑥ ① UP ON ON FOR COLD ON PON 10 DOWN DOWN ON PENGUSION OFF OFF PENGUSION VOLUME NORMAL PART PENGUSION DEAVY SLAW RECO PENGUSION RESOLED FOR SECOND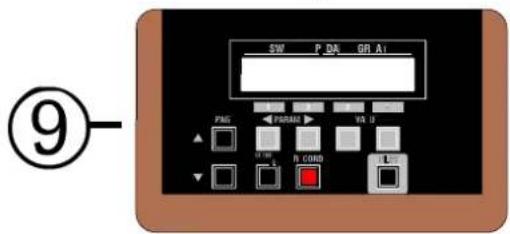
text_image
SW P DA GR AI PNG PRISM VOL 0 R COND L ⑨-- Preset Keys
- Rotary Control Panel
- Information Center
- Accessory Panel
- Leslie MAIN/ECHO Switch
- Leslie Speed Switch
*** THIS PAGE INTENTIONALLY LEFT BLANK TO PRESERVE PAGE FORMATTING ***
INTRODUCTION
INTRODUCTION
Ë Basic Hook-Up
In order to use your new Hammond Organ to its fullest, you will need to do the following:
- Connect the organ to A.C. power.
- Connect the organ to one or more Leslie Speakers.
- Connect the Pedal Keyboard to the organ.
Ë AC/Leslie Panel
The AC/Leslie panel is located at the bottom rear of the organ console, and looks like this:
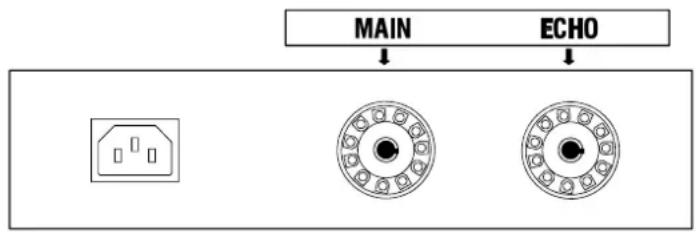
text_image
MAIN ECHOConnecting the organ to A.C. Power
Your Hammond Organ is shipped from the factory set for local A.C. power. Locate the A.C. Power Cord and plug the female end into the A.C. Power receptacle of your organ, and the male end into your A.C. power outlet.
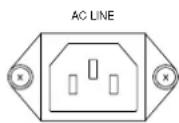
NOTE: When connecting the New C-3, feed the A.C. Power Cord (female end) through one of the round cable holes, and plug the female end into the receptacle of your organ, and the male end into your A.C. power outlet
Connecting the organ to a single Leslie ^® Speaker
A Leslie ^™ Speaker will usually be included with your organ. Before turning the organ power "ON", the Leslie Speaker should be connected to the organ. To do this:
- Locate the Leslie Connector Cable.
- Plug the female end of the Connector Cable into the receptacle on the back lower left corner of the Leslie Speaker.
- Plug the male end of the Connector Cable into the 11-pin Leslie socket marked MAIN.
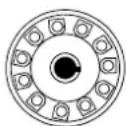
NOTE: When connecting the New C-3, feed the female end of the Leslie Cable through one of the round cable holes on the organ cabinet, and plug the male end of the Connector Cable into the 11-pin Leslie socket marked MAIN.
NOTE: Both the Leslie connections are "keyed", that is, each connection contains a notch which insures that the pins properly match up.
IMPORTANT NOTE: Connecting the organ to certain Leslie Speakers may require a special adapter kit and/or Connector Cable. Contact your Hammond Organ Dealer for more information regarding which adapter kit and/or cable you may need.
Leslie Speed Switch

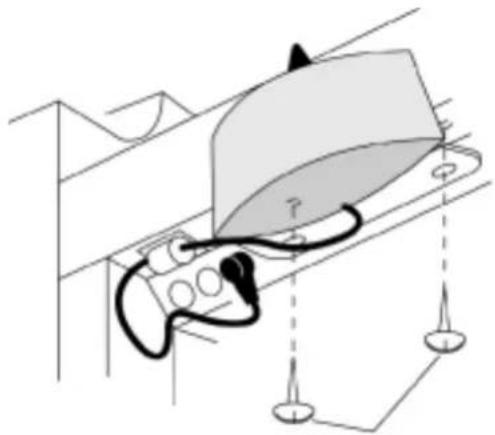
A Leslie Speed Switch is provided with your New B-3 or New C-3 Hammond Organ to allow control of the Leslie Speaker rotors from the organ console. If you wish to move the location of the Leslie Speed Switch:
-
Loosen and remove the two screws holding the Leslie Speed Switch to the underside of the organ.
-
Mount the Leslie Speed Switch in the new location as shown in the diagram below. Secure the cable using the clamps provided underneath the organ.
natural_image
Diagram of a mechanical or electrical component with wires and supports, no visible text or symbolsConnecting the organ to multiple Leslie® Speakers
Your New B-3 or New C-3 Hammond Organ has two 11-pin Leslie connectors, one marked MAIN and the other marked ECHO, making it easy to connect multiple Leslie Speakers to your organ. To do this:
-
Follow steps 1 through 3 under Connecting ____ the organ to a Leslie Speaker to connect the first Leslie Speaker.
-
Plug the female end of the Connector Cable into the receptacle on the back lower left corner of the second Leslie Speaker.
-
Plug the male end of the Connector Cable into the 11-pin Leslie socket marked ECHO.
NOTE: When connecting the New C-3, feed the female end of the other Leslie Cable through one of the round cable holes on the organ cabinet, and plug the male end of the Connector Cable into the 11-pin Leslie socket marked ECHO.
NOTE: Both the left and right sides of the organ cabinet are outfitted with cable holes in order to allow for different placements of Leslie Speakers relative to the location of the organ console.
Leslie MAIN/ECHO Switch

When two Leslie Speakers are connected to the organ, the optional MAIN/ECHO switch will allow the sound to come from only the MAIN cabinet, only the ECHO cabinet, or both cabinets simultaneously.
Connecting the Leslie MAIN/ECHO Switch to the organ
- Locate the MAIN/ECHO jack found on the Rotary Control Panel underneath the manuals on the left side.
- Plug the connector from the Leslie MAIN/ECHO Switch into the MAIN/ECHO jack.
- Mount the Leslie MAIN/ECHO Switch on the organ as shown in the diagram under Connecting the Leslie Speed Switch.
You can connect up to four Leslie Speaker cabinets to one organ using "Y" cables and the MAIN and ECHO connectors on the organ. To connect more than four cabinets, an external Power Relay should be used to avoid damage to the Power Switch of the organ. This accessory is available from your I Hammond Dealer.
Connecting the Pedal Keyboard to the organ
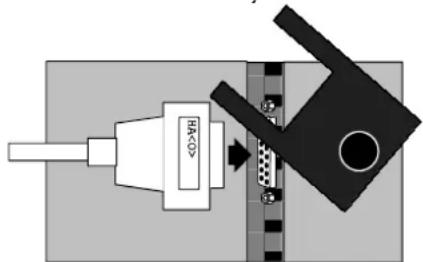
Your Hammond Organ is supplied with a 25-note Pedal Keyboard which should be connected to the organ. To set up the Pedal Keyboard:
- Lay the Pedal Keyboard on the floor in front of the organ.
- Locate the Pedal Keyboard connector cable, and plug it into the Socket found on the Pedal Keyboard.
natural_image
Pure mechanical assembly diagram without any text, numbers, or symbols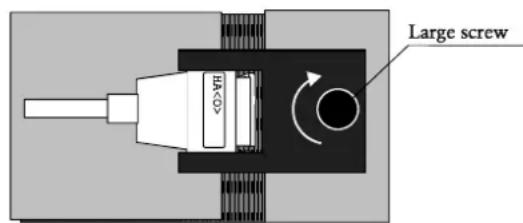
text_image
Large screw-
Secure the Pedal Keyboard connection by tightening the large screw opposite the cable plug. This can be tightened by hand.
-
Carefully slide the Pedal Keyboard underneath the organ, and push it back all the way as far as it will go.
When you have made all of the Basic I Hook-Up connections described above, your I Hammond Organ will be ready to play.
ADDITIONAL NOTE: Connecting MIDI devices to the organ
Before turning the power to the organ "ON", any MIDI devices that you wish to use should be connected. See the MIDI Section of this Guide for information on how to connect MIDI devices to your organ.
The remainder of this Owner's Playing Guide will describe in detail the playing features of your Hammond Organ.
This section will introduce you to the basic sections of the instrument in order to help you get started making music right away.
Ë Turning The Organ "ON"
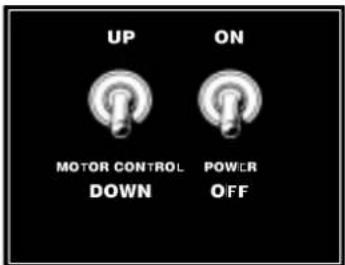
At the right of the music rack slot, you will find two switches. The first is a "toggle" switch to control the pitch of the organ, and will be explained later in this Guide.
text_image
UP ON MOTOR CONTROL DOWN POWER OFFThe second "toggle" switch is the ON/OFF Power Switch. To turn the organ "ON", simply push this switch forward so that it is in the "ON" position. After about 5 seconds, the organ will be ready to play. I However, if you are using a Leslie Speaker cabinet with a tube amplifier, wait about 20 seconds until the tubes warm up.
To shut off the organ, simply pull the ON/OFF Power Switch to its "OFF" position.
È The Preset Keys
text_image
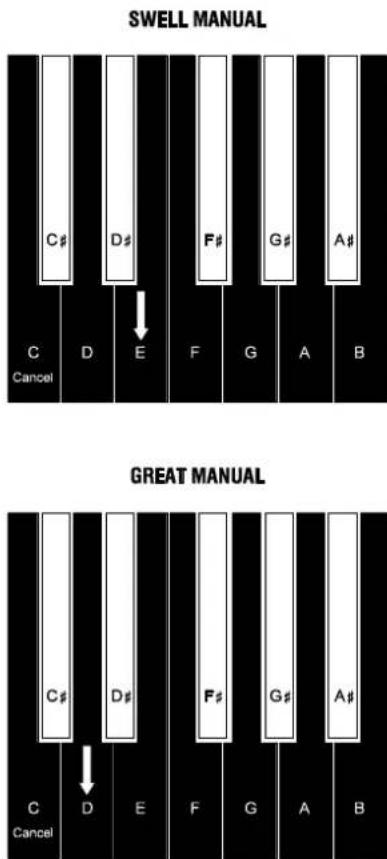
SWELL MANUAL C# D# F# G# A# Cancel D E F G A B GREAT MANUAL C# D# F# G# A# Cancel D E F G A BLocated to the left of the Swell and Great Manuals are the reverse-color keys called the Preset Keys. For the moment, depress the keys (as shown) "E" on the Swell Manual and "D" on the Great Manual. Now both manuals will play. (Depress only one Preset Key on each manual. If two keys are locked down by mistake, release them by pressing the "C" key, at the far left.) The Presets section of this Owner's Playing Guide contains a complete explanation of the principle behind the Preset Keys and how they work.
text_image
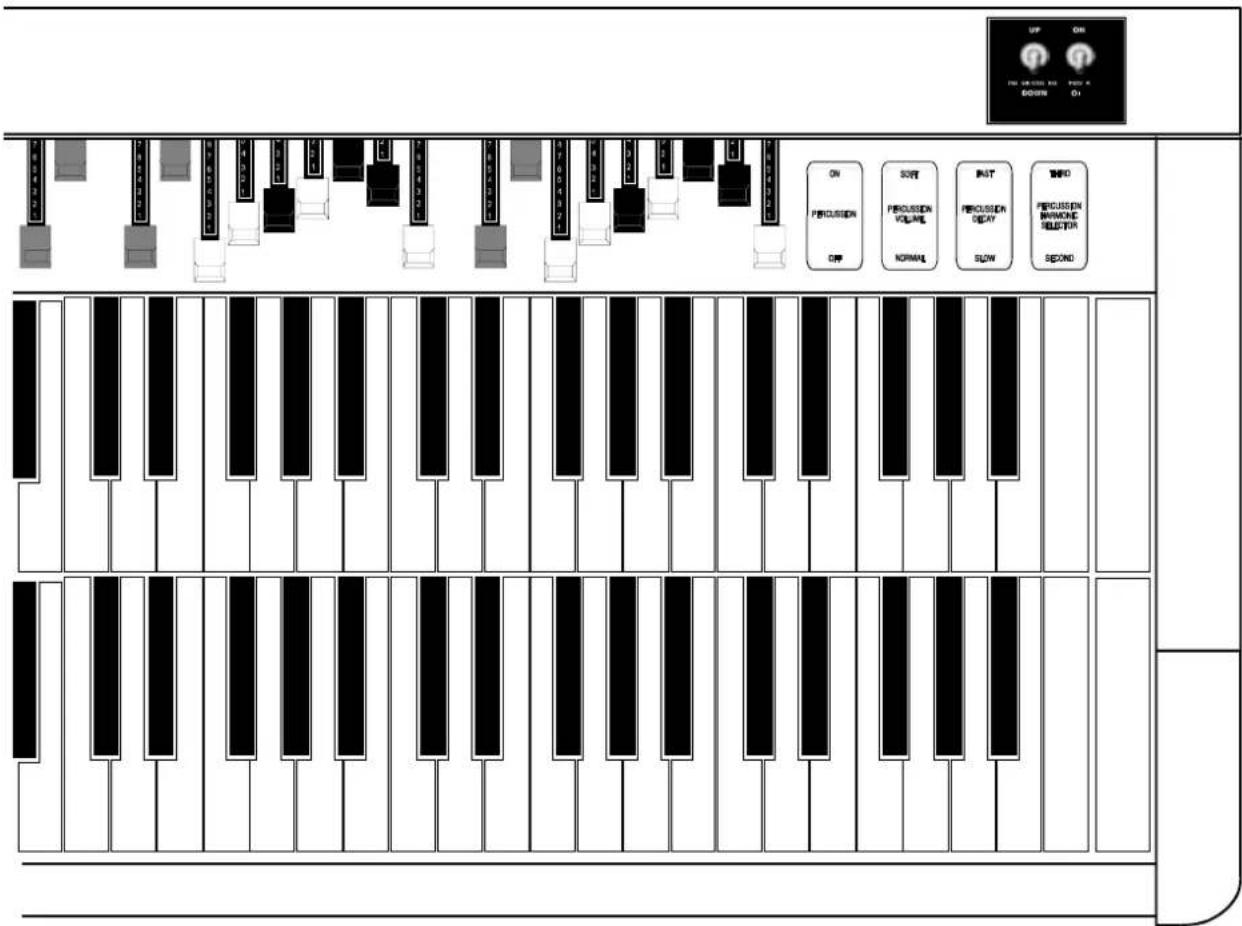
SOFT VOLUME ON VBRATO SWELL ON VBRATO GRIHT C-3 VBRATO AND CHORUS V-2 C-1In the illustration above you will notice that there are four groupings of Harmonic Drawbars on your Hammond Organ, located above the Swell Manual. The first two groups control the Swell Manual. Next are two brown Drawbars (set slightly apart from the other Drawbars) which control the volume of the Pedal tones. Finally, there are two more groups of Harmonic Drawbars that control the Great Manual. The tones for each manual are created by making arrangements of these Harmonic Drawbars. The principle behind the Harmonic Drawbars of the Hammond Organ is simplicity itself, yet it results in providing you with incredible versatility. See the Harmonic Drawbars section starting on page 18 for a complete explanation of the principle behind them and how they work. With two groups of Drawbars for each manual, it becomes necessary to be able to select which group you want. The first group of Drawbars for each manual is therefore controlled by the "A<" Preset Key on that manual and can be played only when that Preset Key is depressed, while the second group for each manual comes in when you depress the "B" Preset Key for that manual. If no Preset Keys are depressed, the manual will not sound when played.
text_image
UP ON FOR UP DOWN ALL DOWN DOWN ON PENGUSSION OFF SOUT PENGUSSION VOLUME NORMAL PART PENGUSSION DEAVY SLOW BAND PENGUSSION BANONE SELECTOR SECONDThe Harmonic Drawbar is a device for controlling the intensity of the harmonics. By varying the positions of these Drawbars, an unbelievable number of different tones can be created. Thus, the player of a Hammond Organ can "create" his own tones. Each harmonic is available in eight stages of intensity (volume) plus "OFF", the eight numbers being marked on the Drawbars. These numbers are used to record a tone quality so that the organist can duplicate, exactly, any tone which he desires to remember. The reason for providing two groups instead of one for each manual is so that you can have several of your favorite combinations ready and waiting for use.
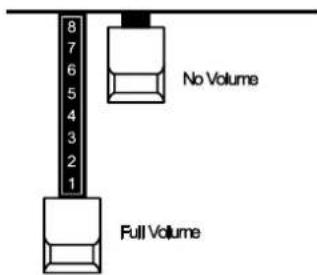
Pulling a Drawbar out (toward you) will increase the volume in incremental steps from 0 (no volume) to 8 (full volume). Pushing the Drawbar back in (away from you) decreases the volume of that Drawbar.
text_image
8 7 6 5 4 3 2 1 No Volume Full Volumenatural_image
Pure diagram of a piano keyboard with vertical lines and base, no text or symbols presentThe large keyboard on the floor is known by two names - the pedal keyboard or the pedal clavier. The Pedal Keyboard is really nothing more then a keyboard large enough to play using your feet. On the pedal keys you play the low bass notes. When the foot plays the bass notes, the left hand is then free to play the harmony, and the pedal note will blend in smoothly since the foot can sustain the bass note as long as desired.
Ë The Expression Pedal
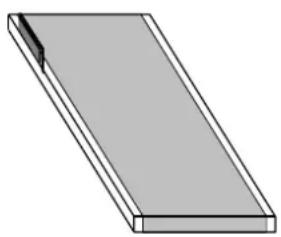
To the center and just above the Pedal Keyboard is the Expression or Volume Pedal, which you operate with your right foot, and with which you vary the volume of the organ to create "expression." Press forward with the front of your foot to increase the volume and back with your heel to decrease the volume. Practice using the Expression Pedal with a very slow and gradual pressure to secure a beautifully smooth flow of music, and to avoid sudden unmusical changes in volume. To begin, leave the Expression Pedal set halfway open.
natural_image
Simple 3D illustration of a rectangular block with a small protrusion on the left side (no text or symbols)Ë Expression Pedal Foot Switch
Located on the left side of the Expression Pedal is a Foot Switch which can be programmed to activate one of several different functions.
natural_image
3D diagram of a rectangular block with a small protrusion and a small arrow pointing to its edge (no text or symbols)Your Hammond Organ has three Control Tablets and a six-position switch controlling the degrees of Vibrato and Vibrato Chorus.
Normal / Soft Volume
This Control Tablet allows you to play either at “normal volume” or “soft volume” in a small room or for practice. While, of course, you can also play the organ softly by keeping the Expression Pedal partly closed, the “soft” volume position reduces volume while giving you the entire range of the Expression Pedal.

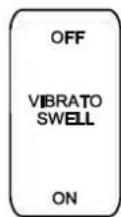
VIBRATO SWELL
This Control Tablet turns the "Vibrato" or "Vibrato Chorus" (depending upon the position of the six-position switch) "ON" or "OFF" on the Swell or Upper Manual.
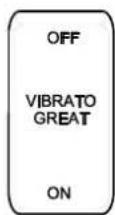
VIBRATO GREAT
This Control Tablet turns the "Vibrato" or "Vibrato Chorus" "ON" or "OFF" on the Great or Lower Manual.
Amount of Vibrato and Chorus
The Vibrato and Chorus switch is controlled by a knob which operates in six positions, providing three degrees of Vibrato and three degrees of Vibrato Chorus. Each degree of the Hammond Vibrato is noticeably different and serves a different purpose, adding greatly to the musical resources of the organ. To select the amount of Vibrato or Chorus, simply turn the knob to the desired position.

text_image
VIBRATO AND CHORUSVibrato
V-1 (Small Vibrato)
This is the lightest depth and produces the vibrato equivalent of most orchestral solo instruments.
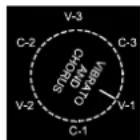
V-2 (Wide Vibrato)
This is the standard depth vibrato used with the Drawbars to produce the effect of a theater organ.
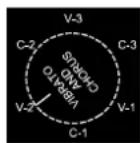
V-3 (Full Vibrato)
This is the fullest amount and adds much warmth and enhances your music.
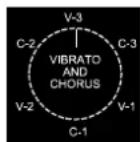
Remember, either one or both of the VIBRATO SWELL or VIBRATO GREAT Control Tablets must be in the "ON" position to allow you to hear the selected Vibrato effect for each Manual.
Chorus
When the CHORUS effect is used, half of the tone is heard without Vibrato, and half of the tone is heard with Vibrato.
C-1 (Small Chorus)
This is the lightest depth, and produces the light chorus effect.
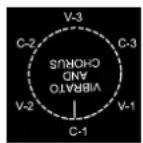
C-2 (Wide Chorus)
This is the standard depth of the chorus effect.
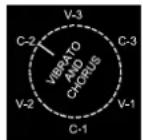
C-3 (Full Chorus)
This is the fullest amount.
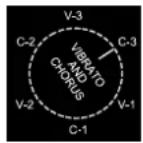
Remember, either one or both of the VIBRATO SWELL or VIBRATO GREAT Control Tablets must be in the "ON" position to allow you to hear the selected Chorus effect for each Manual.
È Percussion
text_image
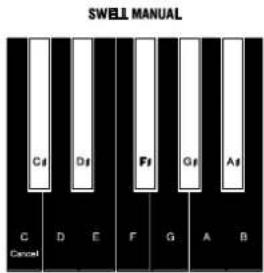
SWELL MANUAL C# D# F# G# As Cancel C D E F G A BThe Percussion tones are available only with the second group of Swell Manual Drawbars. Thus the "B" Preset Key must be active to obtain Percussion.
Organ tones are normally “sustained” in that they are steady in their loudness as long as a playing key is held down. The word “Percussion” refers to a tone that is not steady and fades away, such as a piano or chimes. Your Hammond Organ has Percussion tones which enhance the sounds produced by the Drawbars.
The four Control Tablets controlling the Percussion tones are located to the right of the Drawbars above the Swell Manual.
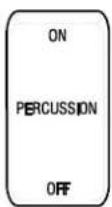
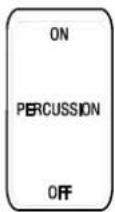
Percussion "ON-OFF"
This Control Tablet, when in its "ON" position, renders the Percussion effect effective on the Swell Manual.
NOTE: In the "ON" position, all of the second group upper manual Swell Manual Drawbars will be effective except the 8th Harmonic Drawbar. This latter is employed for operating the percussion system. In the "OFF" position, the 8th Harmonic Drawbar is effective as usual.
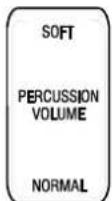
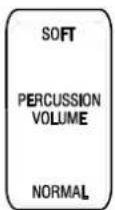
Percussion Volume
This Control Tablet regulates the volume of the Percussion tone. When it is set to its "NORMAL" position, the Percussion effect will be very prominent for the tones produced by the Swell Manual Drawbars. It will also be noticed that the tones from the Swell Manual Drawbars are reduced in volume to compensate for the addition of the percussion tones. This volume compensating feature enables the organist to quickly make registration changes by merely manipulating the "ON-OFF" percussion control.
When the Percussion Volume Control is set to its "SOFT" position, the percussion effect is much less prominent. The volume of the Swell Manual Drawbar tones therefore remains unaffected by the addition of the soft percussion effect.
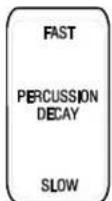
Percussion Decay
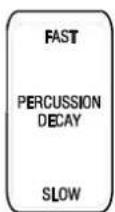
When this Control Tablet is set to its "SLOW" position (push tablet down at front), the Percussion tone will decay (die away) slowly like a chime. In its "FAST" position, the Percussion effect will decay rapidly like a xylophone or marimba.
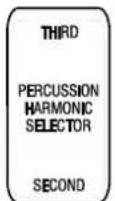
Percussion Harmonic Selector
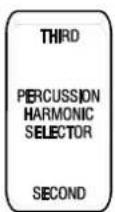
The position of this Control Tablet determines the pitch at which the percussion tone sounds. When set at "SECOND," the pitch is up one octave with respect to the Fundamental Drawbar; when set at "THIRD," the percussion pitch is up an octave and a fifth with respect to the Fundamental Drawbar.
HARMONIC DRAWBARS
HARMONIC DRAWBARS
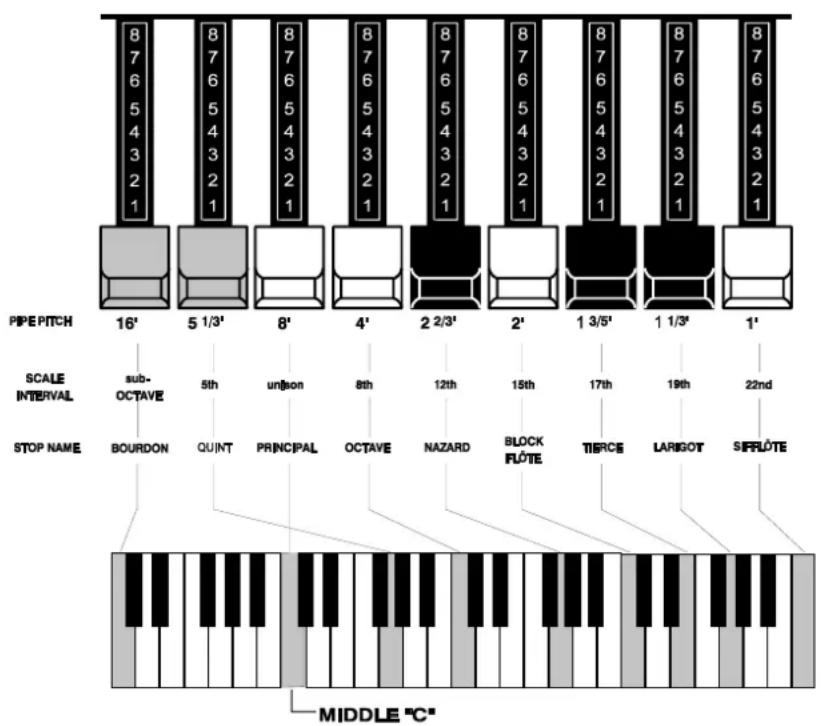
Your Hammond Organ has 4 sets of nine Drawbars, two for each manual. Drawbars, often called Tonebars, are the heart and the basis of the renowned Hammond Sound and have been used since the first Hammond Organ Model A introduced in 1935.
There are approximately 253,000,000 possible sound combinations that can be produced by these Drawbars. Each Drawbar consists of sine waves of different pitches (which means tone depth). The illustration below shows how each Drawbar relates to the manual when middle "C" is pressed.
text_image
8 7 6 5 4 3 2 1 8 7 6 5 4 3 2 1 8 7 6 5 4 3 2 1 8 7 6 5 4 3 2 1 8 7 6 5 4 3 2 1 8 7 6 5 4 3 2 1 8 7 6 5 4 3 2 1 8 7 1/3' 8' 4' 2 2/3' 2' 1 3/5' 1 1/3' 1' SCALE INTERVAL STOP NAME BOURDON QUINT PRINCIPAL OCTAVE NAZARD BLOCK FLÔTE TIERCE LARIGOT SIFLÔTE MIDDLE "C"Each Drawbar is marked with a number followed by a footage mark. For example, the first white Drawbar is marked "8." This is pipe organ terminology indicating that the pipe used to produce the lowest note on the keyboard on a pipe organ is actually eight feet long. The numbers from "1" to "8" on each Drawbar represent degrees of loudness - number 1 being the softest, and number 8 being the loudest.
Drawbars are divided into 3 groups of sound as well as 3 groups of color. We will first look at the 3 sound groups.
Ë Sound Groups
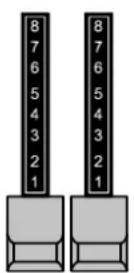
You may think of these sound groups in terms of the three levels - The Sub being the deep pitches, the Foundation being the mid range of pitches and the Brilliance being the high pitches.
- SUB -- FOUNDATION -- BRILLIANCE -
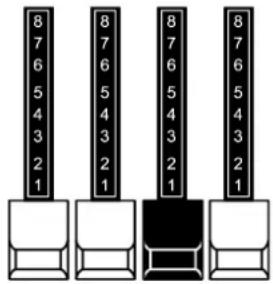
text_image
8 7 6 5 4 3 2 1 8 7 6 5 4 3 2 1 8 7 6 5 4 3 2 1 8 7 6 5 4 3 2 1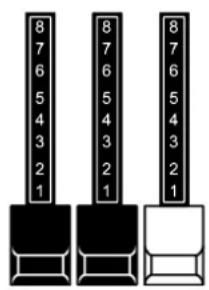
text_image
8 7 6 5 4 3 2 1 8 7 6 5 4 3 2 1 8 7 6 5 4 3 2 1TRY THIS:
- Make sure all Drawbars are "IN" (off).
- Press the "B" Preset Key on the Swell (upper) Manual.
- Hold down a "C" chord, starting with "E" above middle "C", ("E", "G" & "C" notes) with your right hand on the Swell Manual.
- Starting with the first white Drawbar in the second group of Drawbars for the Swell Manual, pull out and push in each of the Swell Manual Foundation Drawbars one group at a time until you have a sound that you like.
- While still holding the "C" chord down, pull each of the Swell Manual brown Sub Drawbars out until you like the sound.
- Now do the same with the Swell Manual Brilliance Drawbars.
It's that easy to create your own custom Drawbar settings.
Ë Color Groups
White Drawbars
The first white Drawbar represents the "fundamental" or "8' base" tone. All of the other white Drawbars are octave intervals or harmonics of the fundamental tone. The tonal brilliance is greatly increased by adding white Drawbars, but the harmonics added are always in "consonance" or harmony.
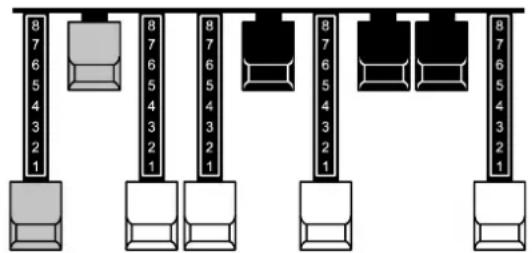
text_image
8 7 6 5 4 3 2 1 8 7 6 5 4 3 2 1 8 7 6 5 4 3 2 1 8 7 6 5 4 3 2 1- CONSONANT HARMONICS -
TRY THIS:
- Make sure all Drawbars are pushed "In" (off).
- Press the "B" Preset Key on the Swell Manual.
- Hold down middle "C" on the Swell Manual.
- Pull the first white Drawbar in the second group for the Swell Manual, marked 8', all the way out.
- Now, one by one, pull the other Swell white Drawbars out in sequence.
As you add each Drawbar, you will hear the addition of the same note an octave higher in each case.
Black Drawbars
The Black Drawbars on the Hammond Organ represent the dissonant (discordant) harmonics which are also necessary in building rich tone colors. The mellowness of a horn, the pungency of strings, and the brilliance of reed voices owe much of their character to the presence of these harmonics in different degrees.
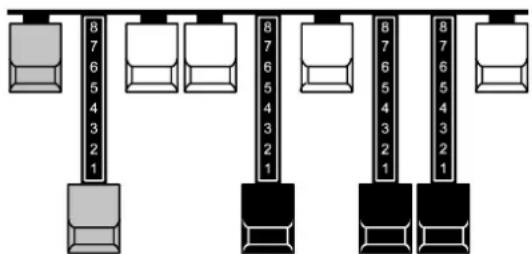
text_image
8 7 6 5 4 3 2 1 8 7 6 5 4 3 2 1 8 7 6 5 4 3 2 1 8 7 6 5 4 3 2 1- DISSONANT HARMONICS -
TRY THIS:
- Make sure all Drawbars are pushed "in."
- Press the "B" Preset Key on the Swell Manual.
- Hold down middle "C" on the Swell Manual.
- Pull the first white Drawbar in the second group of Drawbars for the Swell Manual, marked 8', all the way out.
- Now pull the 3 Black Drawbars in the second group of Drawbars for the Swell Manual all the way out.
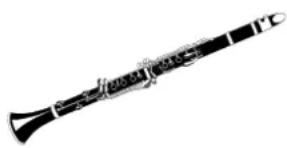
The sound produced by the Drawbars is that of a clarinet.
natural_image
Black and white illustration of a standard oboe (no text or symbols)Brown Drawbars
In addition to the white and black Drawbars, there are two brown Drawbars in the group. These two Drawbars produce "sub-octave" effects. The first brown Drawbar is the sub-octave of the fundamental 8' Drawbar. It is "one octave" lower in sound.
TRY THIS:
- Make sure all Drawbars are pushed "in."
- Press the "B" Preset Key on the Swell Manual.
- Hold down middle "C" on the Swell Manual.
- Pull the first white Drawbar in the second group of Drawbars for the Swell Manual, marked 8', all the way out.
- While continuing to hold middle "C" down, pull the first brown Drawbar in the second group of Drawbars for the Swell Manual, marked 16', all the way out.
You will now hear the sound of "C" one octave lower being added.
The second brown Drawbar is the "sub-octave" of the third harmonic. Both of these Drawbars are used to add depth and richness to many combinations. They also increase the range of the manual by one octave since a solo registration of the "8 foot," or normal pitch, can be set up using the first brown Drawbar as the fundamental and played one octave higher.
TRY THIS:
- Make sure all Drawbars are pushed "in."
- Press the "B" Preset Key on the Swell Manual.
- Hold down middle "C" on the Swell Manual.
- Pull the first white Drawbar in the second group of Drawbars for the Swell Manual, marked 8', all the way out.
- While continuing to hold middle "C" down, pull the first brown Drawbar in the second group of Drawbars for the Swell Manual, marked 16', all the way out. You will now hear the sound of "C" one octave lower being added.
- Now pull the second brown Drawbar in the same group out, and you will hear it add a richness to the sound of the "C" note that you are holding down.
Ë Tone Families By Shape
Regardless of the size of a pipe organ or its number of stops, all of its voices are related to four basic families of tone. The four basic families - Flute, Reed, String and Diapason - can be quickly set up on the Drawbars by relating a pattern or shape to each family.
These are the generalities which apply to the tonal resources of the organ, and in themselves produce pleasant and usable effects. However, real beauty of tone is secured in two ways. The first way is to use registrations which have been devised by organists. The second way, and eventually the one that best expresses your own feeling for the music, is to create your own tonal effects, experimenting with and perfecting tones which you use to play your favorite selections.
The Hammond Organ Drawbars allow you not only to set up any tonal effect you want, but also to make many fine variations of the tone. Only with the Hammond Drawbars can you play exactly the shade of tone you want for every selection and, perhaps even more important, for every size and type of room in which you play.
With the Hammond Organ Drawbars, a touch of a finger is all that is needed to make the tone quality softer or more brilliant, richer in one harmonic or another.
Typical Drawbar Registration Patterns For The Four Families Of Organ Sound
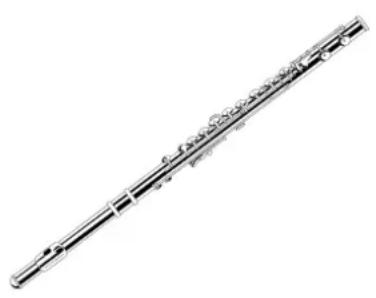
Flute family (2 step pattern)
natural_image
Illustration of a Flute 4-5 instrument with no visible text or symbols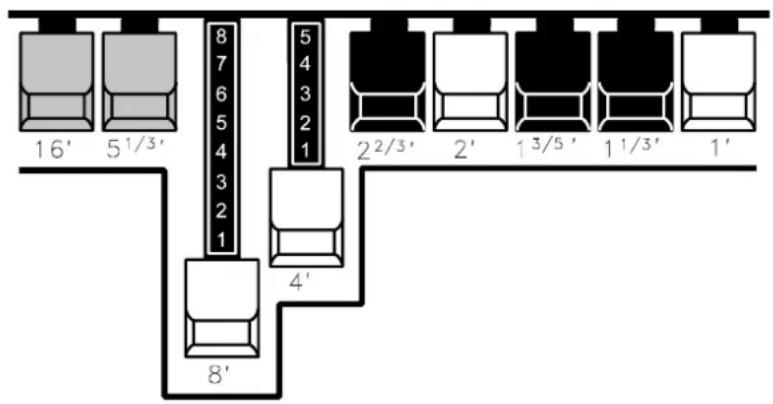
text_image
16' 5\( ^{1/3} \)' 8 7 6 5 4 3 2 1 5 4 3 2 1 2\( ^{2/3} \)' 2' 1\( ^{3/5} \)' 1\( ^{1/3} \)' 1' 4' 8'A Basic Flute Tone
There are literally hundreds of flute tones available on the Hammond Organ, in contrast to other types of organs on which you can play only one or perhaps two or three tones which are set up at the factory. By simply changing the relative positions of the 8' and 4' Drawbars to 00 3700 000, you can create a light concert type of flute. Or by closing the 4' Drawbar altogether and adding a little of the 2^2/_3' Drawbar plus a heavier fundamental, you can get a solo tibia - 00 8020 000.
Any combination of white Drawbars provides various flute tones; the first brown Drawbar adds depth.
Flute Tones
| Accompaniment Flute 8' | 00 8460 000 |
| 00 3220 000 | |
| 00 8600 000 | |
| Blokflöte 8' | 00 5310 000 |
| Blokflöte 4' | 00 0503 010 |
| Chorus of Flutes 16' | 80 8605 002 |
| Concert Flute 8' | 00 6300 000 |
| Flute 8' | 00 6201 000 |
| Flute 4' | 00 0602 001 |
| Flute 2' | 00 0106 004 |
| Flute (Organ type) 16' | 50 3000 000 |
| Flute (Organ type) 8' | 00 5300 000 |
| Flute (Organ type) 4' | 00 0503 000 |
| Flute (Organ type) 2' | 00 0005 000 |
| Nazard 2 2/3 | 00 0030 000 |
| Open Flute 8' | 00 7510 000 |
| Orchestral Flute 8' | 00 3831 000 |
| Piccolo 2' | 00 0006 003 |
| Principal Flute 8' | 00 8530 000 |
| Stopped Flute 8' | 00 5020 000 |
| Tibia 8' | 00 7030 000 |
| Tibia 4' | 00 0700 030 |
| Tibia (Solo) 8' | 00 8020 000 |
| Tibia (Theater) 16' | 80 8605 004 |
| Wooden Open Flute 8' | 00 8840 000 |
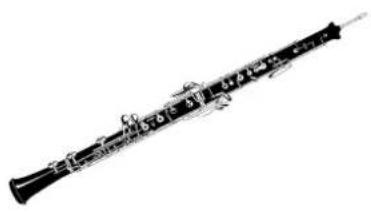
E Reed family (triangle pattern)
natural_image
Black and white illustration of a traditional oboe (no text or symbols visible)
text_image
16' 51/3' 4 3 2 1 6 5 4 3 2 1 7 6 5 4 3 2 1 6 5 4 3 2 1 5 4 3 2 1 4 3 2 1 3 2 1 8' 4' 22/3' 13/5' 11/3' 1'A Basic Reed Tone
The reeds are more brilliant and numerous than any other tone group. Many are used as solo stops because of their strong personalities.
Reed tones include the brasses and woodwinds. The tones of the woodwinds are created by vibrating reeds. The oboe, a typical reed tone, is obtained by emphasizing the Drawbars in the middle of the group, with nearly as much of the first black Drawbar as the fundamental itself. Use of the first black Drawbar is typical of many reed registrations. It creates a "triangle" pattern that is easy to remember. The triangle pattern of a less powerful registration, 00 2333 200, is a useful accompaniment tone.
Reed Tones
| Bassoon 16' | 44 7000 000 |
| Bassoon 8' | 08 7500 000 |
| Bombarde 16' | 86 8400 000 |
| Chorus Reed 8' | 00 7777 750 |
| Clarinet 8' | 00 6070 540 |
| Clarinet 8' | 00 6060 300 |
| English Horn 8' | 00 3682 210 |
| Flugel Horn 8' | 00 5777 530 |
| French Horn | 00 7654 321 |
| Kinura 8' | 00 0172 786 |
| Oboe (Orchestral) 8' | 00 4764 210 |
| Oboe (Organ type) 8' | 00 4571 320 |
| Oboe Horn 8' | 00 4675 210 |
| Post Horn 8' | 00 6677 530 |
| Reed Chorus | 63 8888 863 |
| Saxophone 16' | 86 7100 000 |
| Saxophone 8' | 01 8762 431 |
| Trombone 8' | 01 8777 530 |
| Trumpet (Orchestral) 8' | 00 6788 650 |
| Trumpet (Organ type) 8' | 00 7677 320 |
| Tuba (Organ type) 16' | 88 8864 000 |
| Tuba (Organ type) | 03 6888 760 |
| Tuba Sonora 8' | 02 7788 640 |
| Vox Humana 16' | 33 6045 000 |
| Vox Humana 8' | 00 4720 123 |
Diapason family (check mark pattern)
natural_image
Symmetrical abstract diagram with vertical bars and a horizontal baseline (no text or symbols)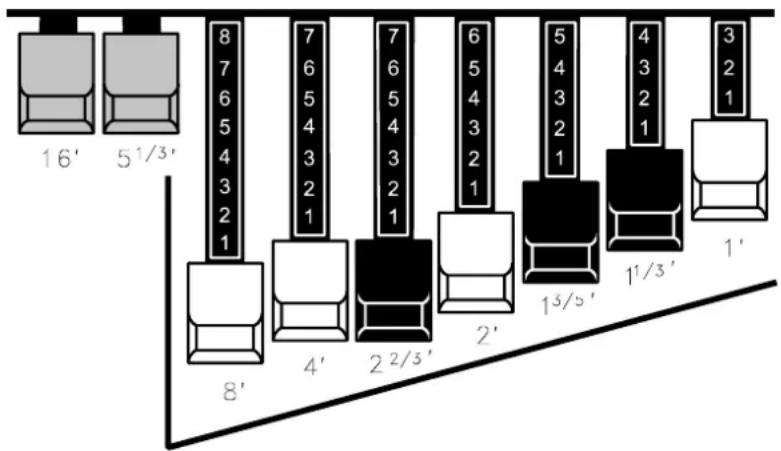
text_image
16' 5¹/³' 8 7 6 5 4 3 2 1 7 6 5 4 3 2 1 7 6 5 4 3 2 1 6 5 4 3 2 1 5 4 3 2 1 4 3 2 1 13/5' 1¹/³' 1' 3 2 1A Basic Diapason Tone
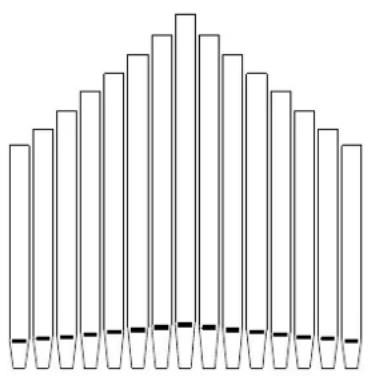
All diapason tones are characterized by a strong fundamental and second harmonic with relatively weak upper harmonics. Diapason tones are more affected by good or bad acoustics than are the tones of more pronounced character. Registration that is good in one location may not be satisfactory in another. The "phonon" type of diapason was developed on pipe organs by designers who wanted to produce a soft foundation tone.
In discussing tone as a structure, diapason tones lie between the flute tones, which are almost devoid of upper harmonics, and the string tones, which are characterized by strong upper harmonic development.
Diapason Tones
| Accomp. Diapason 8' | 00 8874 210 |
| Chorus Diapason 16' | 84 8421 000 |
| Chorus Diapason 8' | 00 8686 310 |
| Chorus Diapason 4' | 00 0806 085 |
| Diapason 8' | 00 7785 321 |
| 00 7783 210 | |
| Diapason Chorus 8' | 61 8855 424 |
| Echo Diapason 16' | 43 4421 000 |
| Echo Diapason 8' | 00 4434 210 |
| Harmonic Diapason 16' | 85 8524 100 |
| Harmonic Diapason 8' | 00 8877 760 |
| Harmonic Diapason | 00 8678 453 |
| Harmonic Diapason | 00 6546 532 |
| Harmonic Diapason 4' | 00 0606 045 |
| Horn Diapason 16' | 77 7621 000 |
| Horn Diapason 8' | 00 8887 480 |
| Open Diapason 8' | 01 8866 430 |
| Open Diapason | 00 8745 423 |
| Open Diapason | 01 6655 320 |
| Solo Diapason 16' | 85 8544 000 |
| Solo Diapason 8' | 01 8855 331 |
| Solo Diapason 4' | 00 0818 055 |
| Wood Diapason 16' | 82 7311 000 |
| Wood Diapason 8' | 00 7754 321 |
String family (bow pattern)
text_image
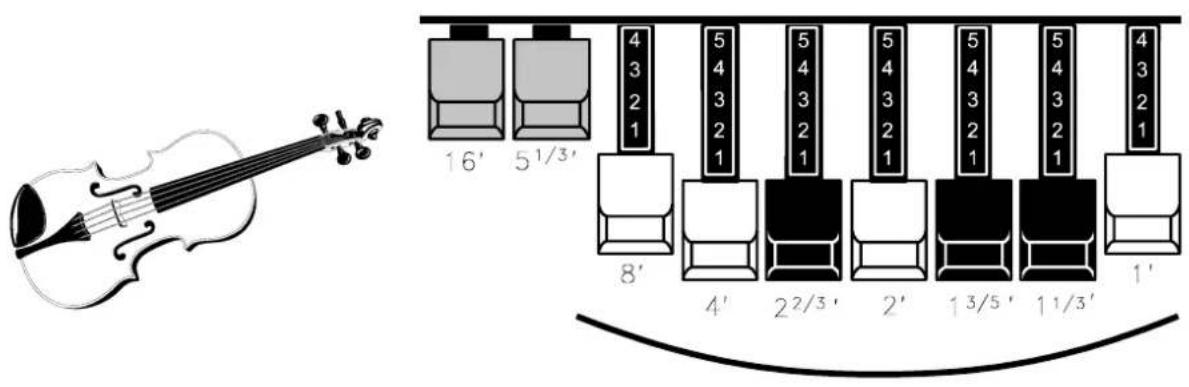
16' 5¹/³' 4 3 2 1 5 4 3 2 1 5 4 3 2 1 5 4 3 2 1 5 4 3 2 1 5 4 3 2 1 4 3 2 1 8' 4' 2²/³' 2' 1³/⁵' 1¹/³' 1'A Basic String Tone
The fourth and last of the organ "family" groups is the string family, both organ and orchestral. String tone qualities are characterized by especially strong upper harmonic development. The fundamental and second harmonic structure is the opposite of flutes.
There are many hundreds of possible string tone registrations. Every string tone can be made either "dull" or "bright" by varying the amount of the upper harmonics. In fact, the string family, considered the most versatile of the four tone families, can be soft or loud, single strings or groups and used as solos or accompaniments.
String Tones
| Cello 8' | 00 3564 534 |
| Cello 8' | 00 3564 211 |
| Dulciana 8' | 00 7770 000 |
| Gamba 8' | 00 3484 443 |
| Gamba 8' | 00 3474 121 |
| Gemshorn 8' | 00 4741 321 |
| Gross Gamba 8' | 00 4786 543 |
| Harmonica (Organ type) 8' | 00 1233 321 |
| Keen Strings 8' | 00 1687 664 |
| Muted String 8' | 00 2452 010 |
| Orchestral String 8' | 00 1464 321 |
| Salicional 16' | 25 4321 000 |
| Salicional 8' | 00 2453 321 |
| Salicional 4' | 00 0204 052 |
| Soft String 16' | 13 3210 000 |
| Soft String 8' | 00 1332 320 |
| Solo Cello 8' | 00 3485 543 |
| Solo Viola 8' | 00 2474 341 |
| Solo Violin 8' | 00 3654 324 |
| String Organ | 22 5787 765 |
| String Organ | 22 4767 765 |
| Viola da Gamba 8' | 00 2465 432 |
| Violin 8' | 00 2334 434 |
| Violin 8' | 00 2382 233 |
| Violin 8' | 00 2476 264 |
| Violina 4' | 00 0103 064 |
| Violine 16' | 26 3431 000 |
Ë Pedal Drawbars
text_image
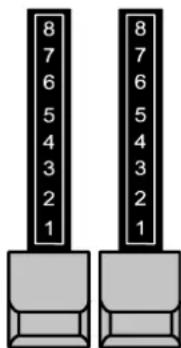
8 7 6 5 4 3 2 1 8 7 6 5 4 3 2 1The two brown Drawbars located between the Drawbars for the Swell and Great Manuals control the sounds produced by the Pedal Keyboard. The first Pedal Drawbar produces a tone at 16' pitch for a deep foundation bass, while the second Pedal Drawbar produces a tone at 8' pitch, or one octave higher.
NOTE: You can change the characteristics of the Drawbar sounds of the organ. To see how to do this, please consult page 53 of this Guide.
*** THIS PAGE INTENTIONALLY LEFT BLANK TO PRESERVE PAGE FORMATTING ***

text_image
PRESETSPRESETS
Ë The Preset Keys
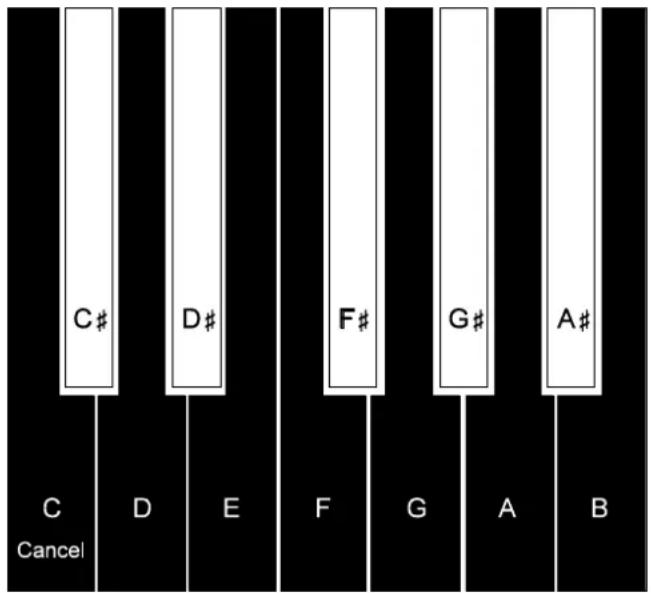
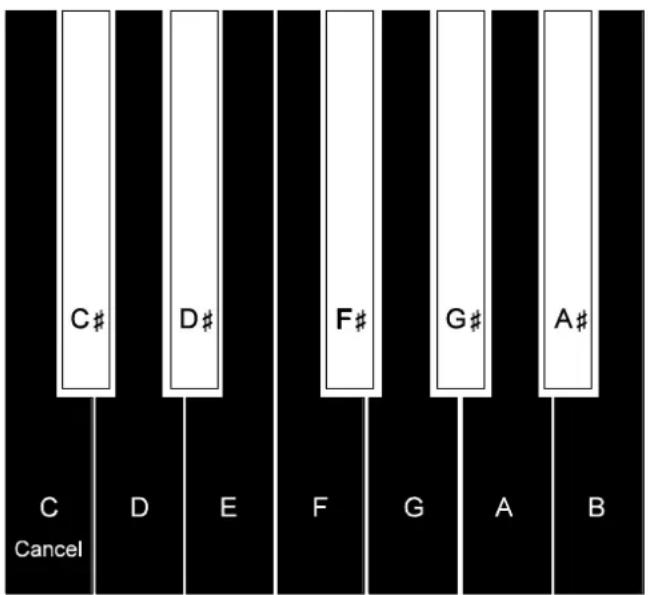
To the left of each manual are the twelve Preset Keys. The first key on each manual is a Cancel key. The next nine keys, "C<" through "A", are preset to the tones most often used by organists. These tones can be changed if you wish, to suit the acoustics of the room or to incorporate tone colors that you particularly like. The last two keys on each manual, "A<" and "B", (sometimes called "Adjust" Keys) are actually "on-off" switches to control the tones created and set up on the four groups of Drawbars.
SWELL MANUAL
text_image
C# D# F# G# A# Cancel C D E F G A BGREAT MANUAL
The organ has three built-in Preset Banks - Liturgical, Jazz and Theatre. For the Liturgical and Theatre Preset Banks, the white keys are the solo and single-tone qualities, while the black ones are the ensemble qualities. The softer tones are to the left, gradually growing louder to the right. In all Preset Banks, the Presets are used one at a time, and cannot be used in combination. Pressing one key cancels any other key.
NOTE: You can access the three Preset Banks using the Information Center. Please see page 47 for information on how to do this.
text_image
C# D# F# G# A# Cancel C D E F G A BË Preset Chart - Liturgical Bank
Swell Manual
| PRESET KEY DRAWBAR SETTING TONE QUALITY LOUDNESS VALUE | |||
| C | C | ||
| C< 00 5320 000 Stopped Flute pp | |||
| D 00 4432 000 Dulciana ppp | |||
| D< 00 8740 000 French Horn mf | |||
| E 00 4544 222 Salicional pp | |||
| F 00 5403 000 | Flutes 8' & 4' p | ||
| F< | 00 4675 300 | Oboe Horn | mf |
| G 00 5644 320 | Swell Diapason | mf | |
| G< | 00 6876 540 | Trumpet | f |
| A 32 7645 222 Full Swell | ff | ||
| A< | Adjust harmonic Drawbars in 1st group, Swell Manual | ||
| B | Adjust harmonic Drawbars in 2nd group, Swell Manual | ||
Great Manual
| PRESET KEY DRAWBAR SETTING TONE QUALITY LOUDNESS VALUE | |||
| C | C | ||
| C< | 00 4545 440 | Cello | mp |
| D 00 4423 220 Flute & String mp | |||
| D< | 00 7373 430 | Clarinet | mf |
| E 00 4544 220 | Diapason, Gamba and Flute | mf | |
| F 00 6644 322 | Great, no reeds f | ||
| F< | 00 5642 200 | Open Diapason | f |
| G 00 6845 433 Full Great ff | |||
| G< 00 8030 000 Tibia Clausa | f | ||
| A 42 7866 244 | Full Great with 16' | fff | |
| A< | Adjust harmonic Drawbars in 1st group, Great Manual | ||
| B | Adjust harmonic Drawbars in 2nd group, Great Manual | ||
SPECIAL NOTE: You can change the registrations on the Preset Keys using the Information Center. To see an explanation of how to do this, please turn to page 74.
Ë Preset Chart - Jazz Bank
Swell Manual
PRESET KEY DRAWBAR SETTING TONE QUALITY
| C | C |
| C< 88 8000 000 Jimmy1 | |
| D 88 8800 000 Power | |
| D< 88 8800 008 Jimmy2 | |
| E 80 0008 888 Squabble | |
| F 80 0800 000 Walter | |
| F< 88 8000 008 Groove | |
| G 88 8880 000 Pop | |
| G< 88 0888 080 Jackie | |
| A 88 8888 888 All Nine | |
| A< | Adjust harmonic Drawbars in 1st group, Swell Manual |
| B Adjust harmonic Drawbars in 2nd group, Swell Manual | |
Great Manual
PRESET KEY DRAWBAR SETTING TONE QUALITY
| C | C | |
| C< 83 8000 000 | Jimmy 1 Bass | |
| D 00 8800 000 | Accomp. | |
| D< 84 8000 000 | Jimmy2 Bass | |
| E 82 8000 000 | Squabble Bass | |
| F 80 8000 000 | Smooth Bass | |
| F< 85 8000 000 | Groove Bass | |
| G 00 8840 000 | Pop Accomp. | |
| G< 84 8010 000 | Fat Bass | |
| A 00 8886 540 | Full Accomp. | |
| A< Adjust harmonic Drawbars in 1st group, Great Manual | ||
| B Adjust harmonic Drawbars in 2nd group, Great Manual | ||
SPECIAL NOTE: You can change the registrations on the Preset Keys using the Information Center. To see an explanation of how to do this, please turn to page 74.
Ë Preset Chart - Theatre Bank
Swell Manual
| PRESET KEY DRAWBAR SETTING TONE QUALITY | ||
| C | C | |
| C< 00 8740 000 French Horn 8' | ||
| D 00 8408 004 Tibias 8' & 2' | ||
| D# 00 8080 840 Clarinet 8' | ||
| E 08 8800 880 Novel Solo 8' | ||
| F 60 8088 000 Theatre Solo 16' | ||
| F< 00 4685 300 Oboe Horn 8' | ||
| G 60 8807 006 Full Tibias 16' | ||
| G< 00 6888 654 | Trumpet 8' | |
| A 76 8878 667 Full Theatre Brass 16' | ||
| A< | Adjust harmonic Drawbars in 1st group, Swell Manual | |
| B Adjust harmonic Drawbars in 2nd group, Swell Manual | ||
Great Manual
| PRESET KEY DRAWBAR SETTING TONE QUALITY | ||
| C | C | |
| C< 00 4545 442 | Cello 8' | |
| D 00 4432 000 | Dulciana 8' | |
| D< 00 4800 000 | Vibraharp 8' | |
| E 00 2500 234 Vox 8' & Tibia 4' | ||
| F 00 6554 322 | String Accomp. 8' | |
| F< | 00 5642 200 | Open Diapason 8' |
| G 00 7656 311 Full Accomp. 8' | ||
| G< 00 8030 000 | Tibia 8' | |
| A 84 7767 666 | Bombarde 16' | |
| A< | Adjust harmonic Drawbars in 1st group, Great Manual | |
| B Adjust harmonic Drawbars in 2nd group, Great Manual | ||
SPECIAL NOTE: You can change the registrations on the Preset Keys using the Information Center. To see an explanation of how to do this, please turn to page 74.
*** THIS PAGE INTENTIONALLY LEFT BLANK TO PRESERVE PAGE FORMATTING ***
ROTARY CONTROL PANEL
ROTARY CONTROL PANEL
Your New B-3 has a Rotary Control Panel, which is located underneath the manuals on the extreme left side and looks like this:

text_image
MAIN/ECHO HEAD PHONE LESLIE SWITCH MASTER VOLUME BASS TREBLE REVERB OVERDRIVEË Rotary Controls
You can use these controls to adjust the sound of your Hammond Organ.
MASTER VOLUME
The MASTER VOLUME Rotary Control allows you to control the total or maximum volume of the entire organ. Turning this control clockwise will increase the total volume, while turning it counter-clockwise will decrease the total volume. The Expression Pedal will express up to the total volume amount determined by the setting of the Total Volume control.
BASS
This control allows you to adjust the Bass response of the organ. Turn the control to the left (counter-clockwise) for the Minimum amount of Bass. Turn the control to the right (clockwise) for the Maximum amount of Bass.
TREBLE
This control allows you to adjust the Treble response of the organ. Turn the control to the left (counter-clockwise) for the Minimum amount of Treble or high frequencies. Turn the control to the right (clockwise) for the Maximum amount of Treble.
NOTE: For normal operation, the BASS and TREBLE controls should normally be set in the center (12:o'clock) position.
REVERB
This Rotary Control allows you to control the total or maximum amount of Digital Reverb. Turn the control to the left (counter-clockwise) to decrease the amount of Reverb down to zero (no Reverb.) Turn the control to the right (clockwise) to increase the amount of Reverb.
OVERDRIVE
This Rotary Control allows you to control the total or maximum amount of "overdrive", the fuzzy, raspy sound produced by a tube amplifier when it is pushed to its sound limit. Turning this control clockwise will increase the amount of overdrive, while turning it counter-clockwise will decrease the amount.
NOTE: For normal operation, the OVERDRIVE control should normally be turned all the way to the left.
Ë Jacks
The Rotary Control Panel also contains three jacks. The following paragraphs explain their function.
MAIN/ECHO
Use this jack to connect a MAIN/ECHO switch so that you can switch among two or more Leslie Speaker cabinets.
HEADPHONE
Use this jack to connect a set of stereo headphones so that you may play or practice in privacy.
NOTE: If a Leslie Speaker is connected to the organ, it will be silenced whenever the Headphone Jack is in use.
LESLIE SWITCH
Use this jack to connect a Leslie Speed Switch, allowing you to control the rotor speed of one or more connected Leslie Speakers.
*** THIS PAGE INTENTIONALLY LEFT BLANK TO PRESERVE PAGE FORMATTING ***

text_image
EFFECTSEFFECTS
You can add Vibrato/Chorus, Leslie, Pedal Sustain, Reverb and Overdrive to the sounds of your Hammond Organ. In the following section, each effect is explained in detail.
Ë Vibrato and Chorus
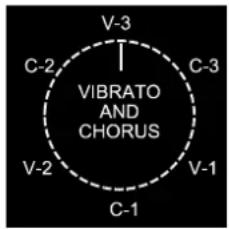
text_image
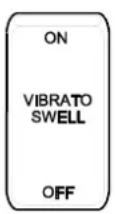
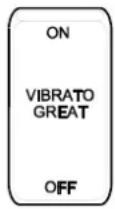
VIBRATO AND CHORUSYour Hammond Organ has two Control Tablets and one Rotary Knob which turn Vibrato "ON" and "OFF" for each Manual, and which also control the degrees of Vibrato and Chorus.
Vibrato / Chorus ON / OFF
To turn the Vibrato or Chorus effect "ON," turn the appropriate Control Tablet "ON."
V-1 - (Small Vibrato) - This produces the vibrato equivalent of most orchestral solo instruments.
V-2 - (Wide Vibrato) - This is the standard depth vibrato to produce the effect of a theater organ.
V-3 - (Full Vibrato) - This gives the fullest amount of vibrato, adding much warmth and enhancing your music.
Chorus
When the CI IORUS effect is used, half of the tone is heard without Vibrato, and half contains the vibrato amount indicated by the number "1" "2" or "3."
C-1 - (Small Chorus) - This produces the light chorus effect.
C-2 - (Wide Chorus) - This is the standard depth of the chorus effect.
C-3 - (Full Chorus) - This is the fullest amount of Chorus, adding warmth that enhances your Drawbar settings.
Ë Leslie®
Your Hammond Organ is designed to directly interface with a Leslie Speaker Cabinet. A Leslie Speaker cabinet, in addition to amplifying the basic sound of the organ, also uses mechanical rotors which turn at different speeds to add different animation effects. The data chart below shows the options available.
| LESLIE ROTOR SPEED OPTIONSDescription Function | |
| SLOW (Chorale) Rotors will turn slowly, producing an effect suitable for use with hymns, classical style music and some slower songs. | |
| OFF Rotors do not turn. Animation can be provided by using Vibrato and Chorus. | |
| FAST (Tremolo) Rotors will speed up and rotate fast to produce a rich full sound. |
NOTE: The above table shows the options which can be selected for either a single- or multi-channel Leslie Speaker cabinet using an 11-pin interface.
Ë Pedal Sustain
The PEDAL SUSTAIN effect will produce a lingering tone when pedals are released. Normally, this feature is “OFF,” but when it is active, the Pedal tones will sound when a pedal is pressed, and then fade away gradually when the pedal is released.
NOTE: You can change the length of the Pedal Sustain using the Information Center. To see how to do this, turn to page 70 of this Guide.
Ë Reverb
Using REVERB adds the beautiful concert hall effect to all voices when you are playing and counteracts the "deadening" effect of carpets, drapes or furniture.
REVERB Rotary Control
This Rotary Control allows you to control the total or maximum amount of Reverb. Turning this control clockwise will increase the amount of Reverb, while turning it counter-clockwise will decrease the amount.
REVERB

NOTE: There are eight different Reverb programs available. To see how to select the one you want, please consult the Information Center section of this Guide.
Ë Overdrive
Overdrive adds the fuzzy, raspy, "dirty" sound created by the vacuum tubes of a tube-style Leslie Speaker when its volume is pushed past its sound limit.
OVERDRIVE Rotary Control
This Rotary Control allows you to control the total or maximum amount of “Overdrive” (the fuzzy, raspy sound produced by a tube amplifier when it is pushed to its sound limit). Turning this control clockwise will increase the amount of Overdrive, while turning it counter-clockwise will decrease the amount.
OVERDRIVE

*** THIS PAGE INTENTIONALLY LEFT BLANK TO PRESERVE PAGE FORMATTING ***
INFORMATION CENTER
INFORMATION CENTER
The Drawbars, Control Tablets and Rotary Controls control the operations necessary for performance on the organ. Advanced Features such as Drawbar Voice Mode, Pedal Sustain Length, etc., are accessed using the Information Center. This allows you to see and make changes.
The Information Center Display and Touch Buttons are located on a drawer underneath the manuals on the extreme right side. Carefully slide this drawer out all the way to reveal the controls.
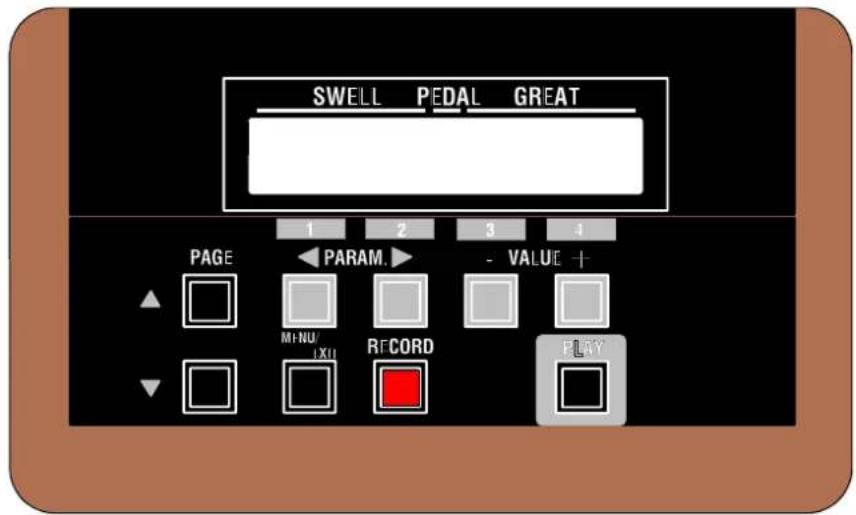
text_image
SWELL PEDAL GREAT 1 2 3 4 PAGE PARAM - VALUE + MENU/RCORD PLAYË Information Center Display
When you slide the drawer out, you will notice the Information Center Display. This is an LCD screen which looks like this:
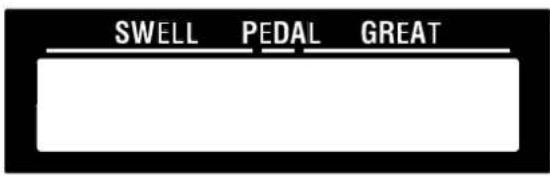
text_image
SWELL PEDAL GREATË Touch Buttons
Below the Information Center Display are the Touch Buttons.
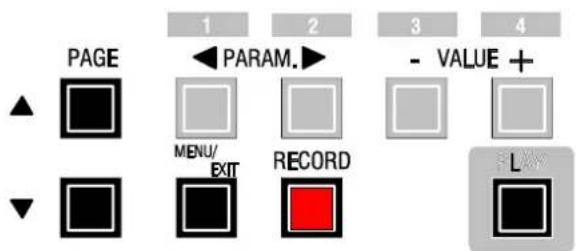
text_image
PAGE PARAM. MENU/ EXIT RECORD VALUE + LThese buttons have functions that change automatically as different modes and menus are used. These basic functions are:
- Turning something ON or OFF.
- Modification of parameters - increasing or decreasing.
- Selecting among multiple functions.
- Confirmation - YES, NO or OK.
Ë Touch Buttons - Top Group
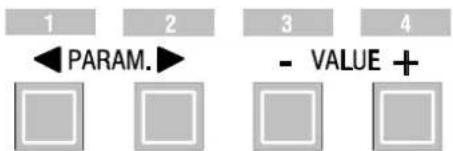
text_image
1 2 PARAM. 3 - VALUE + 4The Information Center Display has two basic modes of operation - PLAY Mode and MENU Mode. When using MENU Mode, these 4 Touch Buttons, marked 1 through 4, allow you to choose from among the various Menu choices in each screen. Menu Mode is explained starting on page 37.
Ë Touch Buttons - Bottom Group
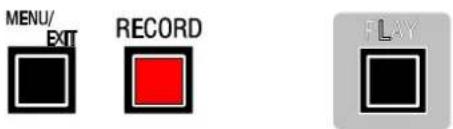
text_image
MENU/ EXIT RECORD FLXYThese three Touch Buttons allow you to choose from among the various options for using the Information Center Display. The following is a very brief explanation of each of these Touch Buttons.
MENU / EXIT - This Touch Button allows you to access the MENU Mode from any other display mode, and to exit out of a specific Menu back into MENU Mode.
RECORD - This Touch Button will allow you to record your own Preset registrations.
PLAY - This Touch Button allows you to instantly access PLAY Mode from any other display mode.
Ë Touch Buttons - PAGE
These two Touch Buttons allow you to page through a list of Advanced Features when you are in MENU Mode. Use the “•” Touch Button to move to the next Page and the “-” Touch Button to move to the previous Page.
As stated on the previous page, there are two basic modes of the Information Center Display - PLAY Mode and MENU Mode. The following is only the basic levels and NOT a complete explanation of all the functions. Detailed information for every function of the menus is given in each chapter of this Owner's Playing Guide as needed.
IMPORTANT: It is assumed at this point that you have just turned the organ "ON" and have not touched either the PLAY or MENU Touch Buttons. If you have, please turn the organ "OFF", wait 5 seconds and turn it back "ON." Also the Drawbars should be "OFF" (pushed "in") so no numbers are showing.
Ë PLAY Mode
There are two (2) screen displays to the PLAY Mode - Graphic with parameters and Numeric with parameters.
PLAY Mode - Graphic Display with parameters.
Turn the instrument "ON." The LCD screen should look like this when it is first turned on. This information is only displayed for a short time.

text_image
SWELL PEDAL GREAT HAMMOND B-3 Music'sGloriousVoiceOnce the opening message has disappeared, the display screen of your instrument should now look similar to this:
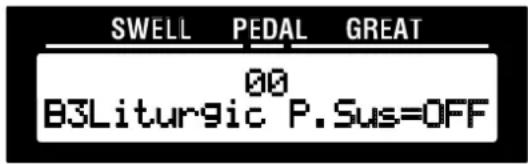
text_image
SWELL PEDAL GREAT 00 B3Liturgic P.Sus=OFFThe upper half of the display shows the following information from left to right:
- Swell Manual graphic Drawbar settings.
- Pedal Numeric settings.
- Great Manual graphic Drawbar settings.
The bottom half of the display shows the following information from left to right:
- Currently active Preset Bank.
- Pedal Sustain setting - "ON" or "OFF."
PLAY Mode - Numeric Display with parameters.
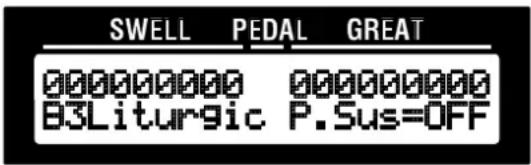
Now, touch the black PLAY Select Touch Button. The Information Center Display should now show the following:
text_image
SWELL PEDAL GREAT 000000000 000000000 B3Liturgic P.Sus=OFFNow you are in the Numeric Display of the Play Mode.
The upper half of the display shows the following information from left to right:
- Swell Manual Numeric Drawbar settings.
- Pedal Graphic settings.
- Great Manual Numeric Drawbar settings.
NOTE: If the Pedal Drawbars are both pushed all the way in, this area of the screen will be blank.
The bottom half of the display shows the following information from left to right:
- Currently active Preset Bank.
- Pedal Sustain setting - "ON" or "OFF."
Touching the black PLAY Select Touch Button again will return to the initial Graphic Display.
Normally when playing the organ, the Information Center Display should be set for one of the PLAY display modes.
Selecting Preset Banks
As noted above, the currently active Preset Bank will display on the lower line of the Information Center Display. In the Presets section of this Guide, it was explained that there are three Preset Banks - Liturgical, Jazz and Theatre. You can select these other Preset Banks using the Information Center. To do this:
- Touch the black PLAY Select Touch Button so that the Information Center Display shows one of the two PLAY Mode screens:
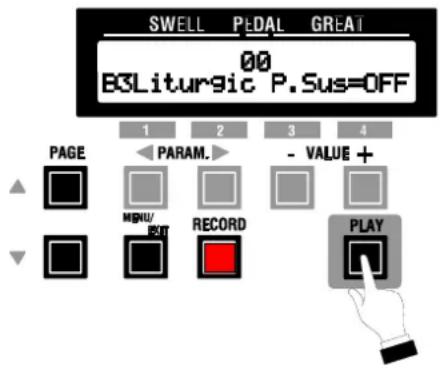
text_image
SWELL PEDAL GREAT 00 B3Liturgic P.Sus=OFF PAGE 1 2 3 4 PARAM. - VALUE + MENU/ RECORD PLAY RECORD- Touch the PARAM “▶” Select Touch Button once. The Information Center Display should now look similar to this:
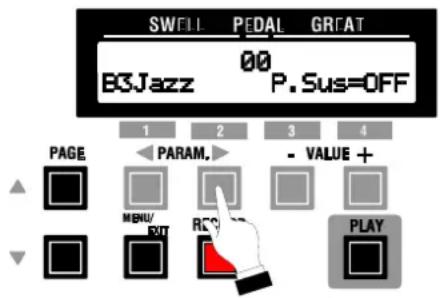
text_image
SWILL PEDAL GRAT 00 B3Jazz P. Sus=OFF 1 2 3 4 PAGE PARAM. - VALUE + MBW/ RCP PLAYNotice that the lower line now reads, "B3Jazz."
- Now try some of the settings on the Preset Keys. You will notice that they are now different. This Preset Bank is particularly well suited for Jazz and Blues playing. Most of the Great Manual Presets are “Keyboard Bass” settings of the type used by jazz and blues organists.
- From the above screen, touch the PARAM “▶” Select Touch Button once. The Information Center Display should now look similar to this:
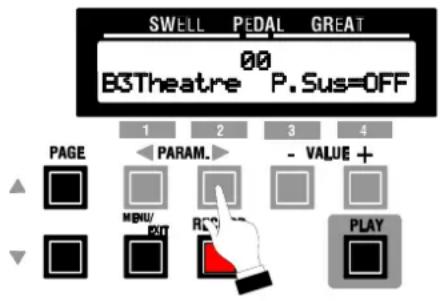
text_image
SWELL PEDAL GREAT 00 B3Theatre P.Sus=OFF 1 2 3 4 PAGE PARAM. - VALUE + MENU/ RCS PLAY EXITNotice that the lower line now reads, "B3Theatre."
- Now try some of the settings on the Preset Keys. This Preset Bank contains settings suitable for playing “pop organ” style.
Touching the PARAM “◀” Select Touch Button two times will return you to the first Preset Bank (“B3Liturgic”).
Starting on page 74 of this Guide, we will explain how to program your own Presets. You can program all three Preset Banks with your own settings and store them as a Setup on a CompactFlash ^® Card.
Ë MENU Mode
There are 4 Levels or screens to the MENU Mode. Each of these levels or screens has Advanced Features. These Advanced Features allow you to change parameters, save or load data to and from CompactFlash ^® Cards, turn something “OFF” or “ON,” etc. These functions are explained in detail in later sections of this Owner's Playing Guide.
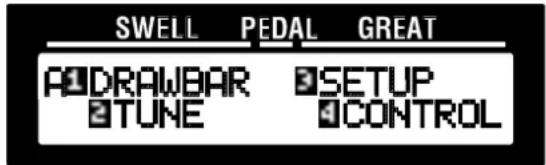
Menu A
If you touch the black MENU / EXIT Select Touch Button once from any of the Play Mode screens, the Information Center Display should look like this for the A Screen of the MENU Mode:
text_image
SWELL PEDAL GREAT DRAWBAR SETUP TUNE CONTROLFour (4) choices from 1 through 4 should now appear in the display window with the letter in the upper left hand corner.
Touching a numbered gray Select Touch Button will enter the Information Center Display into an Advanced Feature selection.
This is a brief explanation of these 4 Advanced Feature functions:
A-1 DRAWBAR - Allows you to modify the characteristics of the Drawbars.
A-2 TUNE - Allows you to fine-tune the overall pitch of the entire organ up or down, transpose the entire organ into other musical keys and select the tuning temperament for the entire organ.
A-3 SETUP- Allows you to Load, Save, Name or Delete Setups, or groups of additional Preset Banks, using a CompactFlash ^® Card.
NOTE: CompactFlash ^® Cards are discussed later in this Guide.
A-4 CONTROL - Allows you to determine the characteristics of various features of the organ such as the Foot Switch, etc.
Menu B
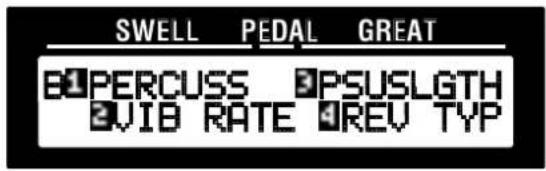
From the A screen of the MENU Mode, touch the black PAGE “•” Select Touch Button once. The Information Center Display should look like this for the B Screen of the MENU Mode:
text_image
SWELL PEDAL GREAT B1PERCUSS PSUSLGTH 2VIB RATE REV TYPFour (4) choices from 1 through 4 should now appear in the display window with the letter in the upper left hand corner.
Touching a numbered gray Select Touch Button will enter the Information Center Display into an Advanced Feature selection.
This is a brief explanation of these 4 Advanced Feature functions:
B-1 PERCUSS - Allows you to change the characteristics of the Percussion.
B-2 VIB RATE - Allows you to set the Vibrato Rate for Swell and Great Manuals.
B-3 PSUSLGTH - Allows you to set the Sustain Length for the Pedal tones.
B-4 REV TYP - Allows you to select from among different Reverb programs.
Menu C
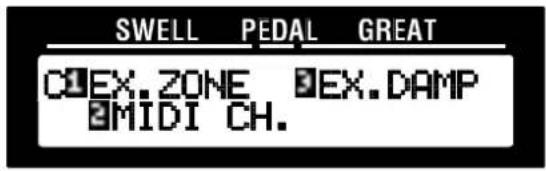
From the B screen of the MENU Mode, touch the black PAGE “•” Select Touch Button once. The Information Center Display should look like this for the C Screen of the MENU Mode:
text_image
SWELL PEDAL GREAT C:\EX.ZONE EX.DAMP \MIDI CH.Three (3) choices from 1 through 4 should now appear in the display window with the letter in the upper left hand corner.
Touching a numbered gray Select Touch Button will enter the Information Center Display into an Advanced Feature selection.
This is a brief explanation of these 3 Advanced Feature functions:
C-1 EX..ZONE - Allows you to select the upper and lower limits for each External MIDI Zone.
C-2 MIDI CH. - Allows you to set MIDI Channel information for the instrument.
C-3 EX..DAMP - Allows you to select which External Zones will have the Damper effect.
NOTE: Please see the MIDI section of this Guide starting on page 99 for more information about the MIDI features of your organ.
Menu D
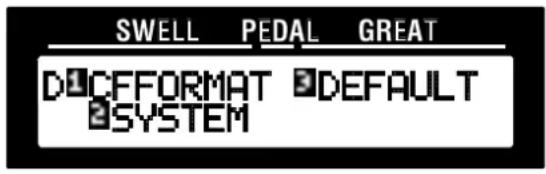
From the C screen of the MENU Mode, touch the black PAGE “•” Select Touch Button once. The Information Center Display should look like this for the D Screen of the MENU Mode:
text_image
SWELL PEDAL GREAT D CFFORMAT DEFAULT SYSTEMThree (3) choices should now appear in the display window with the letter D in the upper left hand corner.
Touching a numbered gray Select Touch Button will enter the Information Center Display into an Advanced Feature selection.
This is a brief explanation of these 3 Advanced Feature functions:
D-1 CFFORMAT - Allows you to format a CompactFlash ^ Card for use with the organ.
D-2 DEFAULT - Allows you to restore the instrument to its default settings.
D-3 SYSTEM - Allows you to select Pedal Mode and display Software Versions.
These are the four screens of the MENU Mode. The Advanced Features they control will be explained on the following pages.
A Advanced Features - DRAWBARS
There are three Drawbar Advanced Features which allow you to make the following changes to the organ:
- Tone Wheel Select SWL & GRT - Allows you to select different Drawbar Voicings for the Swell and Great Manual tones.
- Tone Wheel Select PEDAL - Allows you to select different Drawbar Voicings for the Pedal tones.
- Drawbar Fold Back - Allows you to set the Drawbar Fold Back points for both the 16' & 8th harmonic (1') Drawbars of the Upper and Great Manuals. The default settings are the same as the older Hammond Models B-3, C-3, RT-3, D-100 and A-100: Sub-Fundamental (16') Drawbar at "C2" and the 8th harmonic (1') Drawbar at "4G." By using this you can lower the playing range of the 16' Drawbar and raise the playing range of the 1' Drawbar.
The following pages give a more detailed explanation of how these Advanced Features work.
Tone Wheel Select - SWL & GRT
This Advanced Feature allows you to change the overall sound of the Drawbar tones of the Swell and Great Manuals. You can select either "B-TYPE" which reproduces the sound of the B-3 tone-wheel generator, or "MELLOW" which produces a very pure sine-wave tone quality. These voicing types are subtle changes. I However, they allow you the ability to create the differences in the sound of Hammond Drawbars over the years.
TRY THIS:
- From either of the PLAY Mode Displays, touch the black MENU / EXIT Select Touch Button to display the A Menu of the MENU Mode:
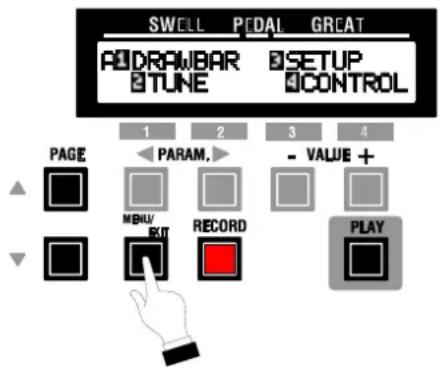
text_image
SWELL PEDAL GREAT A1 DRAWBAR TUNE B2 SETUP CONTROL PAGE 1 2 3 4 PARAM. - VALUE + MENU- RECORD PLAY- Touch the Number 1 Select Touch Button once ____ to select the DRAWBAR Menu:
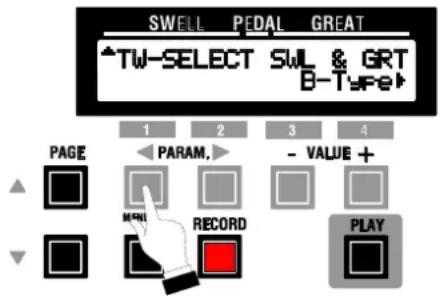
text_image
SWELL PEDAL GREAT TW-SELECT SWL & GRT B-Type PAGE PARAM. - VALUE + MAN RECORD PLAYNotice that the legend B-Type is flashing "on" and "off."
- Now select the setting you want by doing the following:
Use the VALUE “-” Select Touch Button to select B-Type.
Use the VALUE “+” Select Touch Button to select Mellow.
NOTE: You can exit by touching the MENU / EXIT Select Touch Button.
Tone Wheel Select - PEDAL
This Advanced Feature allows you to change the overall sound of the Pedal Drawbar tones. You can select either "NORMAL" which reproduces the rich sound of the B-3 pedal tones, or "MUTED" which is a very pure tone quality suitable for "string-bass" effects.
TRY THIS:
- From either of the PLAY Mode Displays, touch the black MENU / EXIT Select Touch Button to display the A Menu of the MENU Mode:
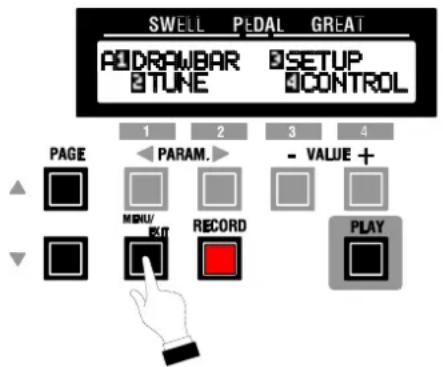
text_image
SWELL PEDAL GREAT DRAWBAR TUNE SETUP CONTROL PAGE 1 2 3 4 PARAM. - VALUE + MENU/RECORD PLAY- Touch the Number 1 Select Touch Button once ____ to select the DRAWBAR Menu:
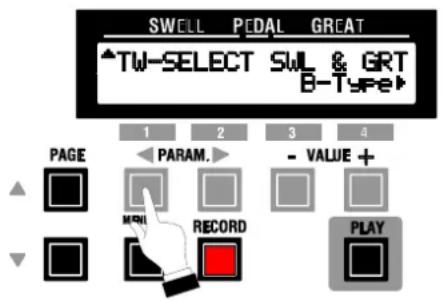
text_image
SWELL PEDAL GREAT TW-SELECT SWL & GRT B-Type 1 2 3 4 PAGE PARAM. - VALUE + NEW RECORD PLAY- Touch the PAGE “•” Select Touch Button once. The Information Center Display should now look like this:
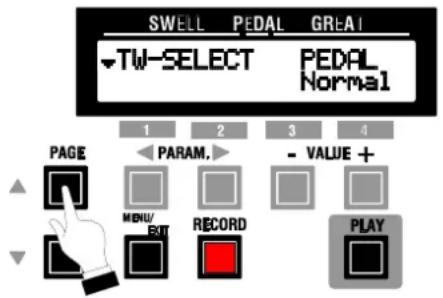
text_image
SWELL PEDAL GREAT TW-SELECT PEDAL Normal 1 2 3 4 PAGE PARAM. - VALUE + MENU/ RECORD PLAYNotice that the word Normal is flashing “on” and “off.”
- Now select the setting you want by doing the following:
Use the VALUE “-” Select Touch Button to select Normal.
Use the VALUE “+” Select Touch Button to select Muted.
NOTE: You can exit by touching the MENU / EXIT Select Touch Button.
Drawbar Fold Back
There are two function selections to the Drawbar Fold Back Advanced Feature Menu of the organ: (1) Select how low the 16' Drawbar will play on each manual. (2) Set the upper frequency limit for each manual.
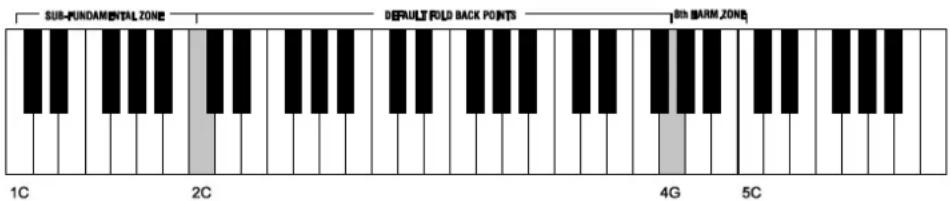
On the earliest model Hammond Organs, such as the original models A, B and C, the 16' Drawbar would continue to play all the way down to the lowest C (1C). Newer models such as the Hammond Models X-66, X-77, Concorde, and SX and CX Series do the same, however, the 1' Drawbar continues to play up the manual to the next to the highest C (5C) on the manual. The other higher-pitched Drawbars perform similarly. The default settings for both the 16' and 1' foot Drawbars will replicate the original B-3, C-3, RT-3 or A-100.
text_image
SUB-FUNDAMENTAL ZONE DEFAULT FOLD BACK POINTS BTH BARM ZONE 1C 2C 4G 5COn a B-3, the lowest note produced by the 16' Drawbar is the 2nd C (2C) from the left end of the manual. The lowest octave on the manual, from the 1st B (1B) down to the lowest C (1C) repeats the same octave as the one above it, or "Folds Back." The highest note that can be played by the 1' Drawbar is the 4th F< from the left end of the manual. The higher keys on the manual also "Fold Back", in that they repeat the pitches played by lower notes.
TRY THIS:
- From either of the PLAY Mode Displays, touch the black MENU / EXIT Select Touch Button to display the A Menu of the MENU Mode:
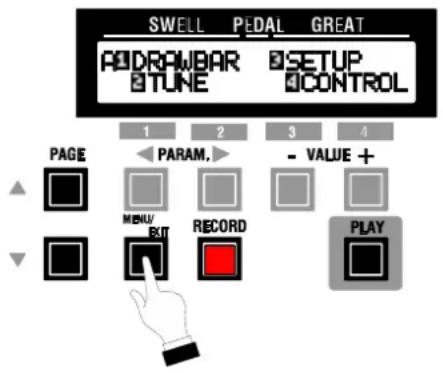
text_image
SWELL PEDAL GREAT ADDRAWBAR TUNE SETUP CONTROL 1 2 3 4 PAGE PARAM. - VALUE + MENU RECORD PLAY EXIT- Touch the Number 1 Select Touch Button once ____ to select the DRAWBAR Menu:
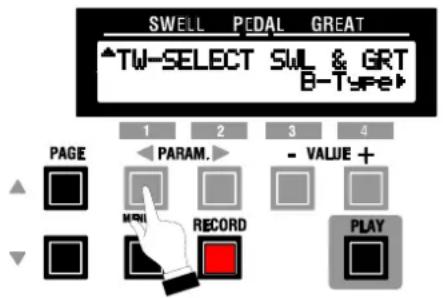
text_image
SWELL PEDAL GREAT TW-SELECT SWL & GRT B-Type PAGE PARAM. - VALUE + RECORD PLAY- Touch the PARAM “▶” Select Touch Button once. The Information Center Display should now look similar to this:
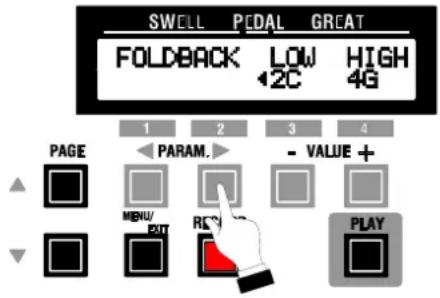
text_image
SWELL FOLDBACK LOW 12C HIGH 4G PAGE PARAM. - VALUE + MENU/ EXIT RESET PLAYNotice that the legend underneath the word LOW is flashing “on” and “off.”
- Now select the Fold Back settings you want by doing the following:
Use the PARAM Select Touch Buttons to move between "LOW" and "HIGH1."
The “LOW” parameter represents the range of the Drawbar marked “16’,” and can be set from “1C” through “2C,” while the “HIGH” parameter represents the range of the Drawbar marked “1’,” and can be set from “4G” through “5C.”
Use the VALUE “-” Select Touch Button to decrease the numbers.
Use the VALUE “+” Select Touch Button to increase the numbers.
The data chart below shows the options that you may select. The default settings are the same as the Hammond Models B-3, C-3, RT-3, and A-100: 16' Drawbar at "C2" and the 1' Drawbar at "4G."
| MANUAL 16' RANGE | ||
| SWELL 1C-2C | 4G-5C | |
| GREAT 1C-2C | 4G-5C | |
NOTE: You can exit by touching the MENU / EXIT Select Touch Button.
A Advanced Features - PERCUSSION
There are four PERCUSSION Advanced Features which allow you to make the following changes to the organ:
- Percussion Level - Allows you to select the overall level of the Percussion.
- Percussion Decay - Allows you to set the rate of decay for the Percussion tones.
- Percussion Drawbar Cancel - This Advanced Feature allows you to select whether or not the 1' Drawbar will cancel when using Percussion.
- Drawbar Level With Percussion - This Advanced Feature allows you to select whether or not the volume of the Drawbars will decrease when Percussion is used at Normal volume.
The following pages give a more detailed explanation of how these Advanced Features work.
Percussion Volume Level
This Advanced Feature allows you to set the overall volume level of the Percussion tones. This will allow you to balance the amount of "normal" and "soft" Percussion sound (the choices provided by the PERCUSS. SOFT Control Tablet) with the sound produced by the Drawbars.
NOTE: This Advanced Feature works independently of the PERCUSS. SOFT Control Tablet.
TRY THIS:
- From either of the PLAY Mode Displays, touch the black MENU / EXIT Select Touch Button to display the A Menu of the MENU Mode:
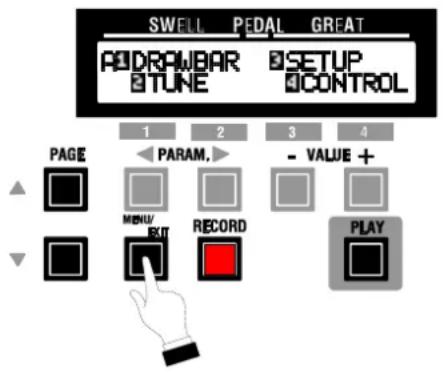
text_image
SWELL PEDAL GREAT ADDRAWBAR TUNE SETUP CONTROL PAGE 1 2 3 4 PARAM. - VALUE + MENU/RECORD PLAY NEXT EXT RECORD- Touch the PAGE “•” Select Touch Button once to display the B Menu:
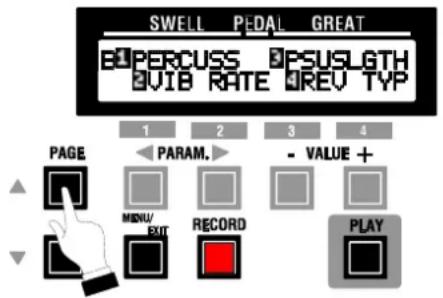
text_image
SWELL PEDAL GREAT PERCUSS PSUSLGTH VIB RATE REV TYP 1 2 3 4 PAGE PARAM. - VALUE + MENU/RECORD PLAY EXIT- Touch the Number 1 Select Touch Button to select the PERCUSSION ____ Menu:
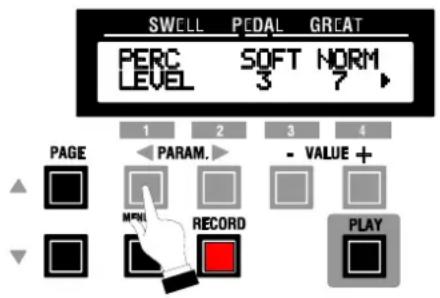
text_image
SWELL PEDAL GREAT PERC SOFT NORM LEVEL 3 7 1 2 3 4 PAGE PARAM. - VALUE + MPNL RECORD PLAYNotice that the number underneath the word SOFT is flashing “on” and “off.”
- Now select the Percussion Volume you wish by doing the following:
Use the PARAM Select Touch Buttons to select “SOFT” (the Percussion Volume when the PERCUSSION VOLUME Control Tablet is set to SOFT) or “NORM” (the Percussion Volume when the PERCUSSION VOLUME Control Tablet is set to NORMAL).
Use the VALUE “-” Select Touch Button to decrease the Percussion Volume.
Use the VALUE “+” Select Touch Button to increase the Percussion Volume.
The data chart below shows the options that you may select.
| PERCUSSION VOLUME |
| 1 - 8 |
NOTE: You can exit by touching the MENU / EXIT Select Touch Button.
Percussion Decay
This Advanced Feature allows you to set the rate of decay for the Percussion tones. You can select from "1" (the shortest decay) to "16" (a continuous tone).
NOTE: The numerical setting represents the decay rate for both "FAST" and "SLOW"
NOTE: When "SLOW" is selected, setting the Percussion Decay number to "16" (maximum setting) will cause the Percussion tone to sound continuously without decaying. The effect will be similar to that produced by the SECOND VOICE Tab on certain older Hammond Organs, such as the H-series.
TRY THIS:
- From either of the PLAY Mode Displays, touch the black MENU / EXIT Select Touch Button to display the A Menu of the MENU Mode:

text_image
SWELL PEDAL GREAT DRAWBAR TUNE SETUP CONTROL PAGE 1 2 3 4 PARAM. MENU/RECORD PLAY- Touch the PAGE “•” Select Touch Button once to display the B Menu:
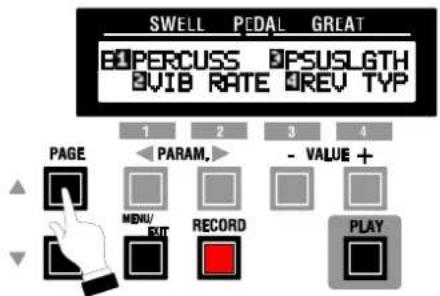
text_image
SWELL PEDAL GREAT PERCUSS VIB RATE PSUSL GTH REV TYP 1 2 3 4 PAGE PARAM. - VALUE + MENU/RECORD PLAY- Touch the Number 1 Select Touch Button to select the PERCUSSION ____ Menu:
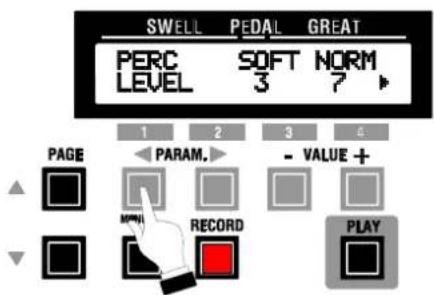
text_image
SWELL PEDAL GREAT PERC SOFT NORM LEVEL 3 ? 1 2 3 4 PAGE PARAM. - VALUE + RECORD PLAYNotice that the number underneath the word SOFT is flashing "on" and "off."
- Touch the PARAM “▶” Select Touch Button two times. The Information Center Display should now look like this:
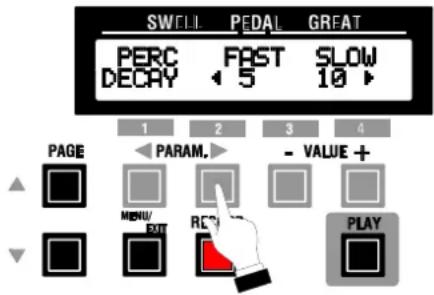
text_image
SWELL PEDAL GREAT PERC FAST SLOW DECAY 5 10 PAGE PARAM. - VALUE + MENU RECY PLAYNotice that the number underneath the word FAST is flashing “on” and “off.”
- Now select the option you wish by doing the following:
Use the PARAM Select Touch Buttons to select “SLOW” (the Percussion Decay when the PERCUSSION DECAY Control Tablet is set to SLOW) or “FAST” (the Percussion Decay when the PERCUSSION DECAY Control Tablet is set to FAST).
Use the VALUE “-” Select Touch Button to decrease the Percussion Decay.
Use the VALUE “+” Select Touch Button to increase the Percussion Decay.
The data chart below shows the options that you may select.
| PERCUSSION DECAY |
| 1 - 16 |
NOTE: You can exit by touching the MENU / EXIT Select Touch Button.
Percussion 1' Cancel
On the original Hammond Organs with Touch-Response Percussion, such as the B-3, C-3 and RT-3, when the Swell Manual "B" Preset Key is engaged, and Percussion is "ON", the sound produced by the 8^th harmonic (1') Drawbar is canceled. However, some pros would re-wire the organ so that the 1' Drawbar would continue to play while Percussion is "ON."
The Percussion 1' Cancel Advanced Feature allows you to select whether the 1' Drawbar will continue to sound when Percussion is turned "ON." The default setting is "OFF."
TRY THIS:
- From either of the PLAY Mode Displays, touch the black MENU / EXIT Select Touch Button to display the A Menu of the MENU Mode:
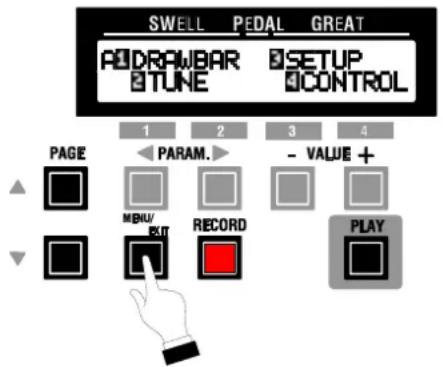
text_image
SWELL PEDAL GREAT DRAWBAR TUNE SETUP CONTROL PAGE 1 2 3 4 PARAM. - VALUE + MENU/RECORD PLAY- Touch the PAGE “•” Select Touch Button once to display the B Menu:
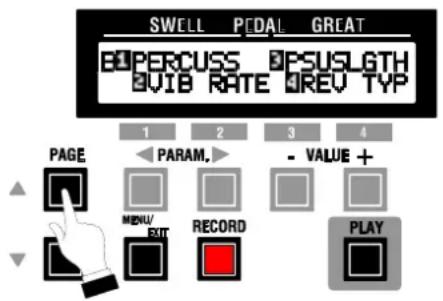
text_image
SWELL PEDAL GREAT PERCUSS PSUSLGTH VIB RATE REV TYP 1 2 3 4 PAGE PARAM. - VALUE + MENU/RECORD PLAY MENU/EXIT RECORD- Touch the Number 1 Select Touch Button to select the PERCUSSION ____ Menu:
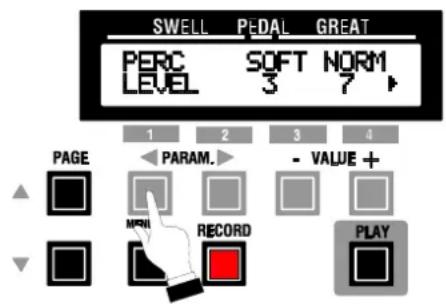
text_image
SWELL PEDAL GREAT PERC SOFT NORM LEVEL 3 7 1 2 3 4 PAGE PARAM. - VALUE + MEN RECORD PLAYNotice that the number underneath the word SOFT is flashing “on” and “off.”
- Touch the PARAM "▶" Select Touch Button four times. The Information Center Display should now look similar to this:
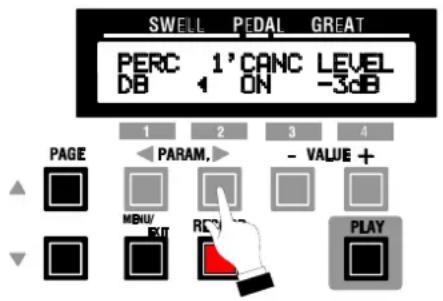
text_image
SWELL PEDAL GREAT PERC 1' CANC LEVEL DB ON -3dB 1 2 3 4 PAGE PARAM. - VALUE + MENU/RECY PLAY OKNotice that the word just under the legend 1' CANC is flashing "on" and "off."
- Now select the option you wish by doing the following:
Use the VALUE “-” Select Touch Button to turn 1' Cancel OFF.
Use the VALUE "+" Select Touch Button to turn 1' Cancel ON.
The data chart below shows the options you may select.
| PERCUSSION 1' CANCEL OPTIONSOption Function | |
| ON The 8th harmonic Drawbar will be canceled when Percussion is "ON". | |
| OFF The 8th harmonic Drawbar will sound while Percussion is "ON". |
NOTE: You can exit by touching the MENU / EXIT Select Touch Button.
Drawbar Level with Percussion
On the original Hammond Organs with Touch-Response Percussion, such as the B-3, C-3, RT-3 and A-100, when the Swell Manual "B" Preset Key is engaged, Percussion is "ON" at normal volume and a Drawbar setting is used, the volume of the Swell Manual Drawbars is reduced slightly in order to preserve the musical balance between Swell and Great Manuals. I however, some pros would perform a modification so that the "B" Preset Drawbar settings would remain at full volume even if Percussion were "ON" at normal volume.
This Advanced Feature allows you to select either “-3db.” (Percussion volume is reduced) or “0db” option.
TRY THIS:
- From either of the PLAY Mode Displays, touch the black MENU / EXIT Select Touch Button to display the A Menu of the MENU Mode:
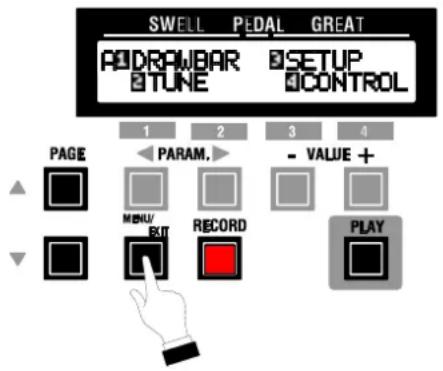
text_image
SWELL PEDAL GREAT ADDRAWBAR TUNE SETUP CONTROL 1 2 3 4 PAGE PARAM. - VALUE + MENU EXIT RECORD PLAY- Touch the PAGE “•” Select Touch Button once to display the B Menu:
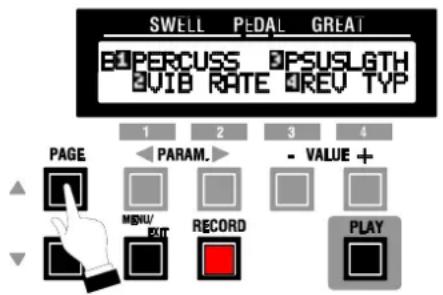
text_image
SWELL PEDAL GREAT BOPERCUSS PSUSLGTH QUIB RATE REV TYP 1 2 3 4 PAGE PARAM. - VALUE + MENU/RECORD PLAY → ↓ ↓ ↓- Touch the Number 1 Select Touch Button to select the PERCUSSION ____ Menu:
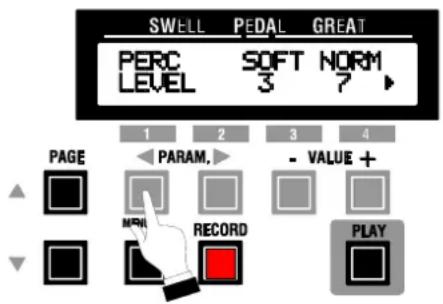
text_image
SWELL PEDAL GREAT PERC SOFT NORM LEVEL 3 7 1 2 3 4 PAGE PARAM. - VALUE + MRI RECORD PLAYNotice that the number underneath the word SOFT is flashing “on” and “off.”
- Touch the PARAM “▶” Select Touch Button five times. The Information Center Display should now look similar to this:
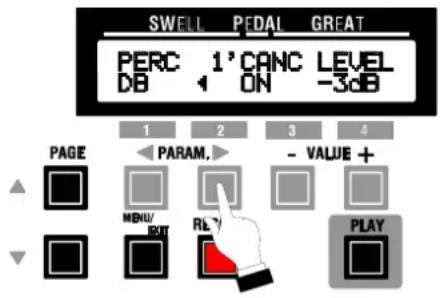
text_image
SWELL PEDAL GREAT PERC 1' CANC LEVEL DB ON -3dB 1 2 3 4 PAGE PARAM. - VALUE + MENU/RLY PLAY RENTNotice that the legend just under the word LEVEL is flashing “on” and “off.”
- Now select the option you wish by doing the following:
Use the VALUE “-” Select Touch Button to select 0dB.
Use the VALUE “+” Select Touch Button to select -3dB.
The data chart below shows the options that you may select.
| DRAWBAR LEVEL WITH PERCUSSION | |
| *-3dB The volume | level of the Drawbars will be reduced by 3 decibels*, or a small amount, when Percussion is “ON” at normal volume |
| 0dB The volume | of the Drawbars will stay at the same level, or “0db”, when Percussion is "ON" at normal volume. |
*default setting
NOTE: You can exit by touching the MENU / EXIT Select Touch Button.
A Advanced Feature - VIBRATO RATE
This Advanced Feature Menu Page allows you to select the Vibrato/Chorus Rate that you prefer. You may select "SLOW," "MID," "NORMAL," "MIDFST," and "FAST." The default setting is "NORMAL."
TRY THIS:
- From either of the PLAY Mode Displays, touch the black MENU / EXIT Select Touch Button to display the A Screen of the MENU Mode.
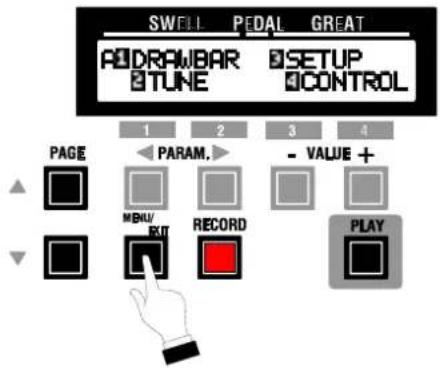
text_image
SWELL PEDAL GREAT DRAWBAR TUNE SETUP CONTROL PAGE 1 2 3 4 PARAM. - VALUE + MENU RECORD PLAY RECU- Touch the PAGE “•” Select Touch Button once to display the B Menu:
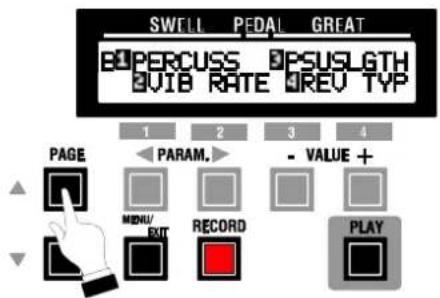
text_image
SWELL PEDAL GREAT PERCUSS PSUSLGTH QUIB RATE REV TYP 1 2 3 4 PAGE PARAM. - VALUE + MENU/RECORD PLAY MENU EXIT RECORD- Touch the Number 2 Select Touch Button to select the VIB ____ RATE Menu:
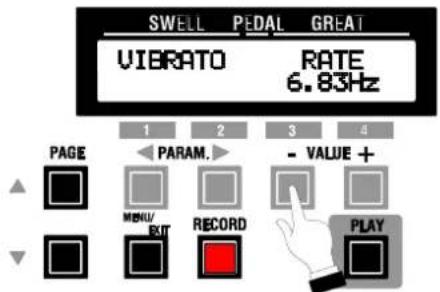
text_image
SWELL PEDAL GREAT VIBRATO RATE 6.83Hz 1 2 3 4 PAGE PARAM. - VALUE + MENU BIT RECORD PLAYNotice that the numbers on the lower line are flashing "on" and "off."
- Now select the option you wish by doing the following:
Use the VALUE “-” Select Touch Button to scroll down through the selections.
Use the VALUE “+” Select Touch Button to scroll up through the selections.
The data chart below shows the options that you may select.
| VIBRATO RATEMessage Description | |
| 6.10Hz Slow | |
| 6.50Hz Medium | |
| 6.83Hz Normal | |
| 7.00Hz Medium Fast | |
| 7.25Hz Fast | |
NOTE: You can exit by touching the MENU / EXIT Select Touch Button.
A Advanced Feature - PEDAL SUSTAIN
You can add Sustain (a lingering effect) to the Pedal tones.
TRY THIS:
- Make sure the Information Center is in PLAY Mode. If it is not, touch the PLAY Select Touch Button.

text_image
SWELL PEDAL GREAT 00 B3Liturgic P.Sus=OFF PAGE PARAM. - VALUE + MENU/ RECORD PLAY- Touch the Number 4 Select Touch Button. The Information Center Display should now look like this:
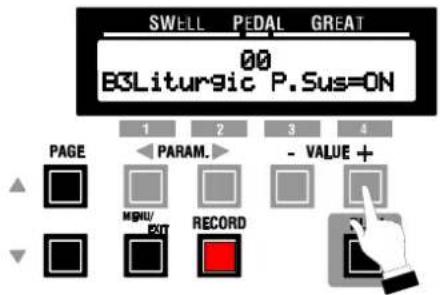
text_image
SWELL PEDAL GREAT 00 B3Liturgic P.Sus=ON PAGE PARAM. - VALUE + MENU/RECORD-
Now play a series of Pedal notes. You will hear a Pedal note gradually fade away after the Pedal is released.
-
To turn Pedal Sustain "OFF," touch the Number 3 Select Touch Button as shown below.
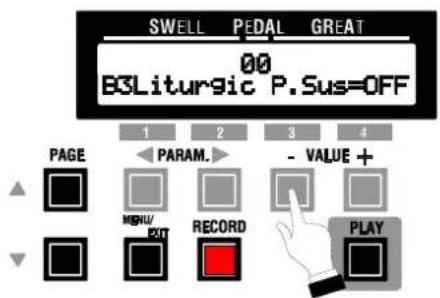
text_image
SWELL PEDAL GREAT 00 B3Liturgic P.Sus=OFF 1 2 3 4 PAGE PARAM. - VALUE + MENU/ RECORD PLAY EXIT70
INFORMATION CENTER.
A Advanced Feature - PEDAL SUSTAIN LENGTH
This Advanced Feature allows you to select the length of the Pedal Sustain You can select Sustain degrees from "1" (short) through "5" (long). The default setting is "3" (medium amount).
TRY THIS:
- From either of the PLAY Mode Displays, touch the black MENU / EXIT Select Touch Button to display the A Menu of the MENU Mode:
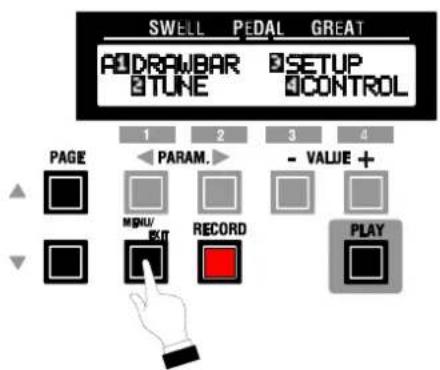
text_image
SWELL PEDAL GREAT ADDRAWBAR TUNE SETUP CONTROL PAGE 1 2 3 4 PARAM. - VALUE + MENU RECORD PLAY- Touch the PAGE “•” Select Touch Button once to display the B Menu:
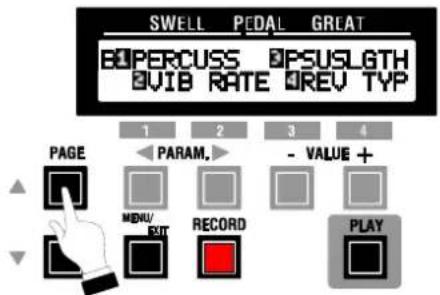
text_image
SWELL PEDAL GREAT EOPERCUSS EPSUSLGTH VIB RATE REV TYP 1 2 3 4 PAGE PARAM. - VALUE + MENU/RECORD PLAY- Touch the Number 3 Select Touch Button to select the PSUSLGTH ____ (Pedal Sustain Length) Menu:
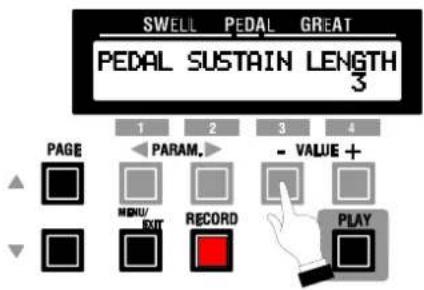
text_image
SWELL PEDAL GREAT PEDAL SUSTAIN LENGTH 3 1 2 3 4 PAGE PARAM. - VALUE + MENU/ RECORD PLAY MENU/ EXIT RECORD PLAYNotice that the number just underneath the word LENGTH is flashing "on" and "off."
- Now select the option you wish by doing the following:
Use the VALUE “-” Select Touch Button to decrease the Sustain Length.
Use the VALUE “+” Select Touch Button to increase the Sustain Length.
The data chart below shows the options that you may select.
| PEDAL SUSTAIN LENGTH |
| 1 ~ 5 |
default setting is 3.
NOTE: You can exit by touching the MENU / EXIT Select Touch Button.
72
INFORMATION CENTER.
A Advanced Feature - REVERB
This Advanced Feature Menu allows you to select the Reverb Type for the entire organ.
Reverb Type
This Advanced Feature allows you to select the type of Reverb that you prefer.
TRY THIS:
- From either of the PLAY Mode Displays, touch the black MENU / EXIT Select Touch Button to display the A Menu of the MENU Mode:
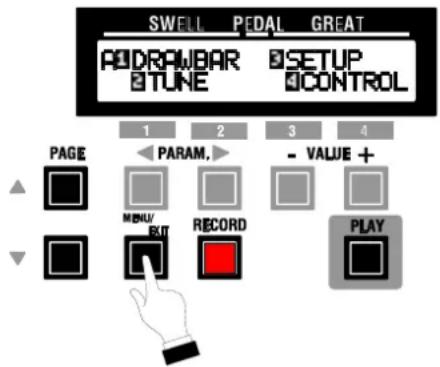
text_image
SWELL PEDAL GREAT ADDRAWBAR TUNE BSETUP CONTROL PAGE 1 2 3 4 PARAM. - VALUE + MENU- RECORD PLAY- Touch the PAGE “•” Select Touch Button once to display the B Menu:
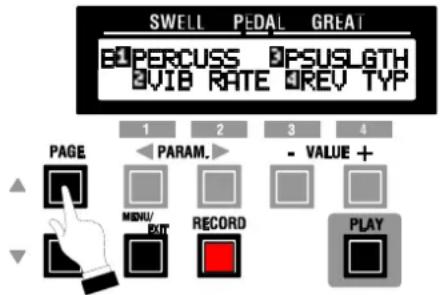
text_image
SWELL PEDAL GREAT EOPERCUSS EPSUSLGTH VIB RATE QREV TYP 1 2 3 4 PAGE PARAM. - VALUE + MENU/RECORD PLAY MENU/RECORD PLAY- Touch the Number 4 Select Touch Button to select the REV ____ TYP Menu:
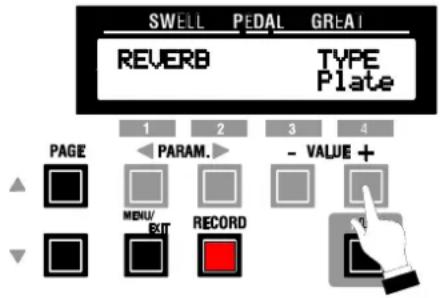
text_image
SWELL PEDAL GREAT REVERB TYPE Plate PAGE 1 2 3 4 PARAM. - VALUE + MENU EXIT RECORD- Now select the option you wish by doing the following:
Use the VALUE “-” Select Touch Button to scroll down through the selections.
Use the VALUE “+” Select Touch Button to scroll up through the selections.
The data chart below explains the options you may select. The Reverb Programs increase in length from approximately 1 second (ROOM 1) to approximately 6 seconds (CATHEDRAL).
| REVERB OPTIONS |
| ROOM 1 |
| ROOM 2 |
| ROOM 3 |
| *HALL 1 |
| HALL 2 |
| PLATE |
| CHURCH |
| CATHEDRAL |
*default setting
NOTE: You can exit by touching the MENU / EXIT Select Touch Button.
A Advanced Feature - PRESETS
This Advanced Feature allows you to program your own Presets using the Information Center and the Preset Keys.
"Preset Banks" and "Setups"
As was explained on page 47, your Hammond Organ has three built-in Preset Banks - B3Liturgic, B3Jazz and B3Theatre. A group of three Preset Banks is called a Setup. This terminology is important to know when you want to store Preset Banks to a CompactFlash ^® Card, because the Card can store several Setups, or collections of three Preset Banks.
TRY THIS:
- Make sure the Information Center is in PLAY Mode. If it is not, touch the PLAY Select Touch Button.
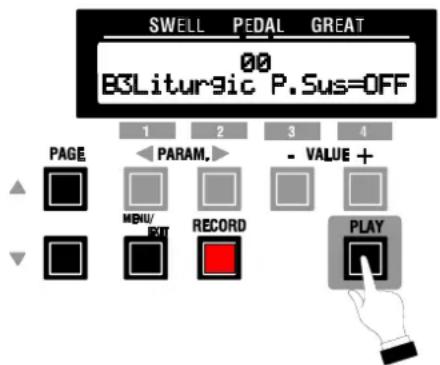
text_image
SWELL PEDAL GREAT 00 B3Litur9ic P.Sus=OFF PAGE 1 2 3 4 PARAM. - VALUE + MENU/ RECORD PLAY- Select the Preset Bank you want to change. From the PLAY Mode screens, use the PARAM Select Touch Buttons to select Preset Banks.
- Set up a registration you want to save on the organ.
- Touch and Hold the red RECORD Select Touch Button. After approximately 1 second, the Information Center Display should show the following:
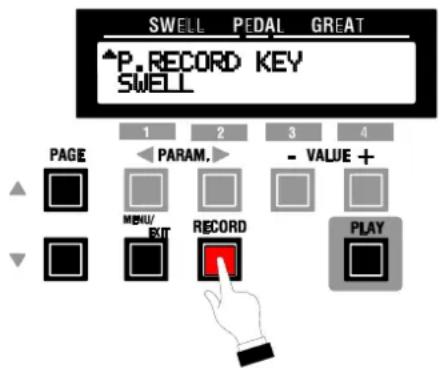
text_image
SWELL PEDAL GREAT ▲P. RECORD KEY SWELL PAGE 1 2 3 4 PARAM. - VALUE + MENU/RECORD PLAY BUT-
Use the PAGE Select Touch Buttons to make your Manual selection. You can select either "SWELL" or "GREAT."
-
After you have made your Manual selection, depress the Preset Key to which you want to save your new registration. The Preset Key will latch, and your selection will appear in the Information Center Display. For example, if you select the Swell Manual Preset Key “G,” the Information Center Display will show:
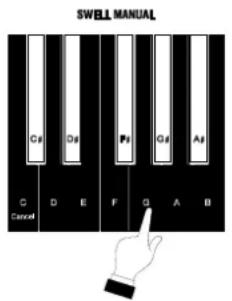
text_image
SWELL MANUAL C# D# F# G# A# C D E F G A B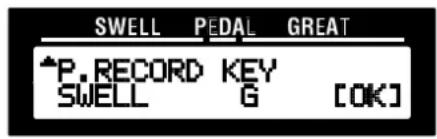
text_image
SWELL PEDAL GREAT ▲P.RECORD KEY SWELL G [OK]- Touch the Number 4 [OK] Select Touch Button. The Information Center Display will flash the following for approximately 1 second:
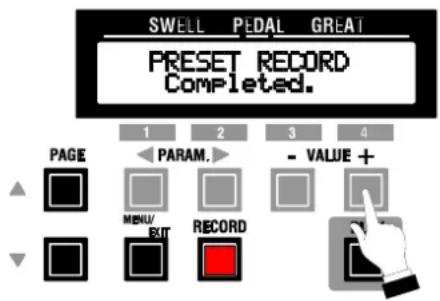
text_image
SWELL PEDAL GREAT PRESET RECORD Completed. 1 2 3 4 PAGE PARAM. - VALUE + MENU RECORD EXITWhen the PLAY Mode screen returns, your registration has been saved to the selected Preset.
You can save up to 9 Presets ("C<" through "A") on both the Swell and Great Manuals.
NOTE: Percussion and Vibrato settings may not be saved to a Preset.
- Now you can use the PARAM Select Touch Buttons to select the other Preset Banks. These may also be reprogrammed with your own settings. If you wish to program one or both of the other two Preset Banks, follow steps 1 through 6 above for each Bank. However, it is not necessary to program all three Preset Banks in order to save a Setup, or bundle of three Banks, to a CompactFlash ^® Card. You may reprogram only one Bank if desired.
Please turn to page 92 to see how to save Setups.
*** THIS PAGE INTENTIONALLY LEFT BLANK TO PRESERVE PAGE FORMATTING ***
SPECIAL PERFORMANCE FEATURES
SPECIAL PERFORMANCE FEATURES
On the original Hammond Organs with tone-wheel generators driven by non-self-starting synchronous motors (i.e., requiring START and RUN motors and therefore two switches), it was possible to “bend the pitch” in different ways by using the START and RUN switches to force the main motor to run at other than its normal speed. These pitch-bending capabilities are incorporated into the New B-3.
By now, you have noticed two “toggle” switches on the far right end of the console.
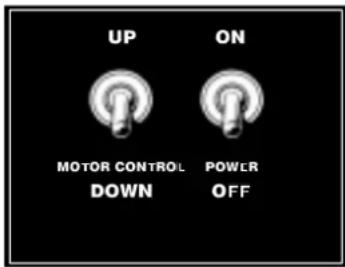
text_image
UP ON MOTOR CONTROL DOWN POWER OFFThe second of these switches is the ON/OFF Power Switch and has already been explained. This is the equivalent of the RUN switch on the original Hammond Organs.
The New B-3 does not use an electro-mechanical tone generator requiring a separate Start motor, and therefore does not require a START switch; however, the first “toggle” switch has been retained in order to provide the additional “pitch bending” features described above.
Using this first switch, you may either bend the pitch UP or DOWN in a manner similar to that possible on a tone-wheel Hammond Organ.
Motor Control UP
The UP position of the Motor Control switch allows you to slightly raise the pitch similar to the effect produced by holding the START switch in the “up” position on a tone-wheel Hammond Organ.
TRY THIS:
- With the organ "ON," set up a registration on one of the Manuals.
- Play a chord (such as C Major - "C" "E" and "G") on the registered manual.
- While continuing to hold the chord, move the Motor Control switch forward ____.
You will now hear the pitch of the entire organ rise. The pitch will continue to be raised as long as the switch is pressed forward. When you release the switch, the organ pitch will return to normal.
Motor Control DOWN
The DOWN position of the Motor Control switch allows you to recreate the “tone-wheel brake” effect. This occurs when notes are pressed and held and the RUN switch is turned “OFF” on a tone-wheel Hammond Organ.
TRY THIS:
- With the organ "ON," set up a registration on one of the Manuals.
- Play a chord (such as C Major - "C" "E" and "G") on the registered manual.
- While continuing to hold the chord, move the Motor Control switch backward
You will now hear the chord you are holding slowly decrease in pitch until two octaves down. The pitch will continue to be down as long as the switch is pressed backward. When you release the switch, the pitch will slowly rise until it is back to normal.
A Advanced Features - TUNE
There are two Advanced Features which allow you to make the following changes to the organ:
- Master Tune - Allows you to change the overall pitch of the entire instrument.
- Transpose - Allows you to shift the musical key of the entire instrument.
The following pages give a more detailed explanation of how these Advanced Features work.
Master Tune
This Advanced Feature allows you to change the overall tuning pitch of the entire instrument. You can select from “430Hz” to “450Hz.” The default setting is “440Hz.”
NOTE: The term "Hz" is an abbreviation for Hertz, and refers to the frequency of a pitch measured in cycles per second. The note reference commonly used is "A440," meaning that a note consisting of 440 Hertz will be the pitch "A." This is the international standard used to tune most musical instruments.
TRY THIS:
- From either of the PLAY Mode Displays, touch the black MENU Select Touch Button to display the A Menu of the MENU Mode:
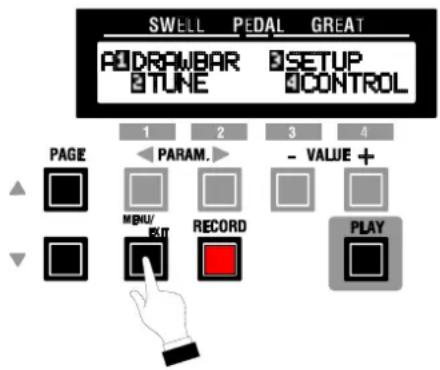
text_image
SWELL PEDAL GREAT P1 DRAWBAR TUNE SETUP CONTROL PAGE 1 2 3 4 PARAM. - VALUE + MENU/ RECORD PLAY- Touch the Number 2 Select Touch Button to select the TUNE ____ Menu:
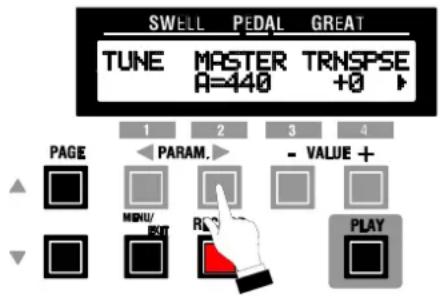
text_image
SWELL PEDAL GREAT TUNE MASTER TRNSPSE A=440 +0 1 2 3 4 PAGE PARAM. - VALUE + MENU/ RCK PLAYNotice that the legend below the word MASTER is flashing “on” and “off.”
- Now select the option you wish by doing the following
Use the VALUE "-" Select Touch Button to raise the pitch.
Use the VALUE "+" Select Touch Button to lower the pitch.
The data chart below explains the options you may select.
| MASTER TUNE OPTIONS |
| 430 ~ 450 Hz |
default setting is "440Hz."
NOTE: You can exit by touching the EDIT Select Touch Button.
Transpose (Key Select)
This Advanced Feature allows you to shift the musical key of the entire organ. This is useful if you have a piece of music written in one key but which needs to sound in another key; for example, a song written and played in C Major, could sound in G Major. Transpose will step either up or down six (6) semitones from the center position. Transpose consists of two separate switches. The VALUE “+” Touch Button is for ascending transposition and the VALUE “-” Touch Button is for descending transposition.
TRY THIS:
- From either of the PLAY Mode Displays, touch the black MENU / EXIT Select Touch Button to display the A Menu of the MENU Mode:
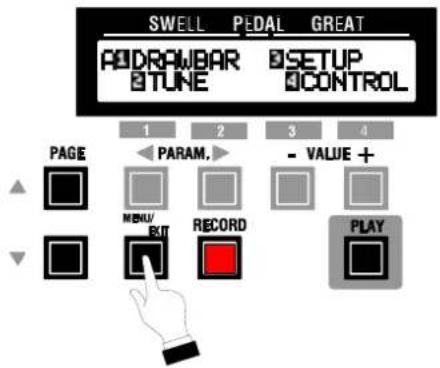
text_image
SWELL PEDAL GREAT ADDRAWBAR TUNE BSETUP CONTROL PAGE 1 2 3 4 PARAM. - VALUE + MENU/ EXIT RECORD PLAY- Touch the Number 2 Select Touch Button to select the TUNE ____ Menu:
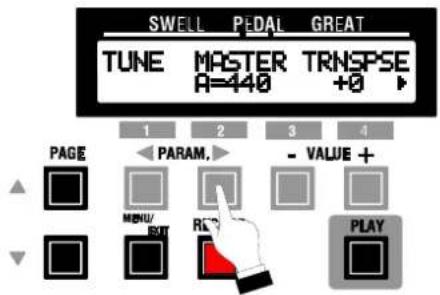
text_image
SWELL PEDAL GREAT TUNE MASTER TRNSPSE A=440 +0 ▶ 1 2 3 4 PAGE PARAM. - VALUE + MENU/ EXIT RC3 PLAY- Touch the PARAM "▶" Select Touch Button once. The Information Center Display should now look similar to this:
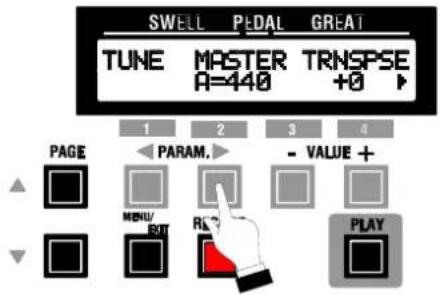
text_image
SWELL PIEDAL GREAT TUNE MASTER TRNSPSE A=440 +0 1 2 3 4 PAGE PARAM. - VALUE + MENU/ RCL PLAY EXITNotice that the legend just underneath the word TRNSPSE is flashing "on" and "off."
- Touch the VALUE “-” Touch Button once. The pitch of the entire organ will be lowered one semitone (half step). The lower right-hand corner of the Information Center Display will show, "-1".
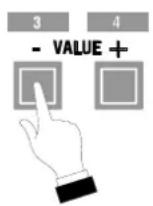
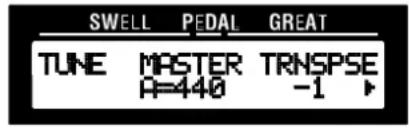
text_image
SWELL PEDAL GREAT TUNE MASTER TRNSPSE A=440 -1 ►Each time you touch the VALUE “-” Touch Button, the display will change showing each step down (“-2”, “-3,” etc.).
- Now touch the VALUE “+” Touch Button two ____ times. The pitch of the entire organ will be raised one semitone (half step). The Information Center will now show, “+1”.
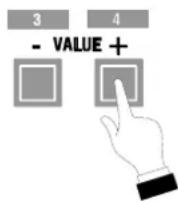
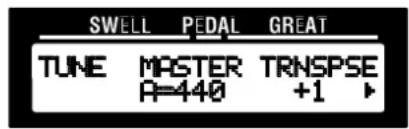
text_image
SWELL PEDAL GREAT TUNE MASTER TRNSPSE A=440 +1 ►Each time you touch the VALUE “+” Touch Button, the display will change showing each step up (“+2”, “+3,” etc.).
NOTE: In order to change the Transpose by only one half-step, it is only necessary to touch the appropriate Touch Button once. Touching and Holding either of the VALUE Touch Buttons will rapidly scroll through the half-steps.
- Now touch the VALUE “-” and “+” Touch Buttons together once.
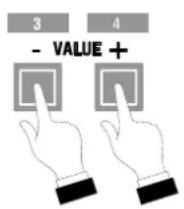
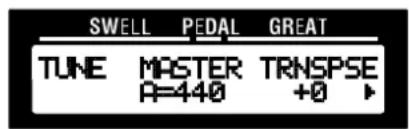
text_image
SWELL PEDAL GREAT TUNE MASTER TRNSPSE A=440 +0 ►This will return the organ to “concert pitch,” or no transposition. The Information Center Display will show, “+0” in the lower right-hand corner.
A Advanced Features - CONTROL
Foot Switch Function
As explained on page 12, located on the left side of the Expression Pedal is a Foot Switch which can be programmed to activate one of several different functions. This Advanced Feature allows you to select the functions to be controlled by the Foot Switch.
TRY THIS:
- From either of the PLAY Mode Displays, touch the black MENU / EXIT Select Touch Button to display the A Menu of the MENU Mode:
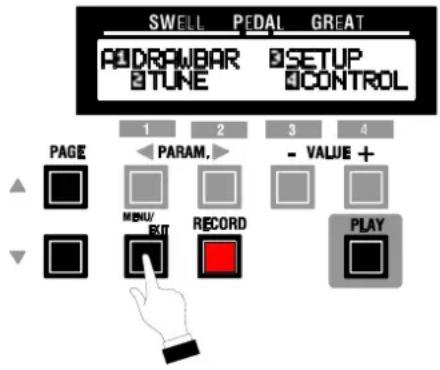
text_image
SWELL PEDAL GREAT ADDRAWBAR TUNE SETUP CONTROL PAGE PARAM. - VALUE + MENU/ EXIT RECORD PLAY- Touch the Number 4 Select Touch Button once ____ to select the CONTROL Menu:
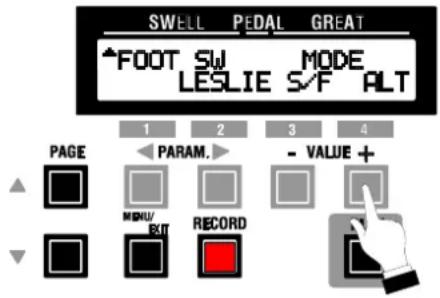
text_image
SWELL PEDAL GREAT ▲ FOOT SW MODE LESLIE S/F ALT 1 2 3 4 PAGE PARAM. - VALUE + MENU/ RECORD EXITNotice that the legend on the bottom line of the display is flashing “on” and “off.”
- Now select the option you wish by doing the following:
Use the VALUE “-” Select Touch Button to scroll backward through the choices.
Use the VALUE “+” Select Touch Button to scroll forward through the choices.
The data chart below explains the options you may select.
| FOOT SWITCH OPTIONSOption Function | |
| OFF Foot switch has no assigned function. | |
| * LESLIE S/F ALTERNATE The rotors of a Leslie Speaker can be toggled between SLOW and FAST. | |
| LESLIE S/F MOMENTARY | The rotors of a Leslie Speaker will turn FAST while the Foot Switch is held. |
| EXTERNAL DAMPER SWELL MOMENTARY Notes played on the selected Manual or Pedals will be “damped” or sustained indefinitely. | |
| EXTERNAL DAMPER GREAT MOMENTARY Notes played on the selected Manual or Pedals will be “damped” or sustained indefinitely. | |
| EXTERNAL DAMPER PEDAL MOMENTARY Notes played on the selected Manual or Pedals will be “damped” or sustained indefinitely. | |
* Default setting
NOTE: You can exit by touching the MENU / EXIT Select Touch Button.
Expression Minimum Level
This Advanced Feature allows you to control how the Expression Pedal functions at its Minimum volume setting. You can select either “Soft” (the organ plays at a minimum volume level) or “0” (no sound is heard). The default setting is “Soft.”
TRY THIS:
- From either of the PLAY Mode Displays, touch the black MENU / EXIT Select Touch Button to display the A Menu of the MENU Mode:
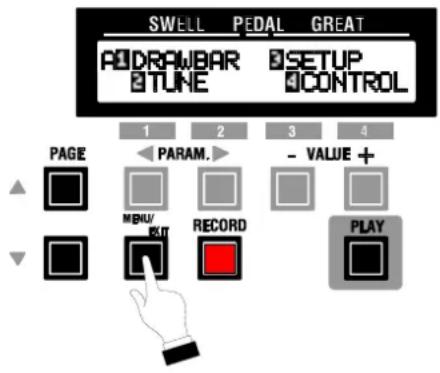
text_image
SWELL PEDAL GREAT ADDRAWBAR TUNE SETUP CONTROL PAGE 1 2 3 4 PARAM. - VALUE + MBRU/ EXIT RECORD PLAY- Touch the Number 4 Select Touch Button once to select the CONTROL Menu:
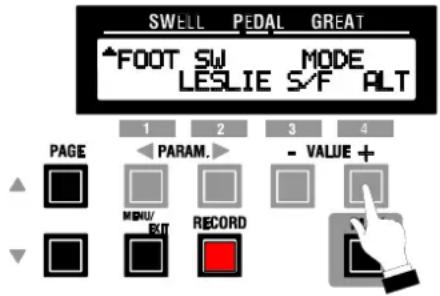
text_image
SWELL PEDAL GREAT ▲ FOOT SW MODE LESLIE S/F ALT 1 2 3 4 PAGE PARAM. - VALUE + MENU/ RECORD EXIT- Touch the PAGE “•” Touch Button once. The Information Center Display should now look like this:
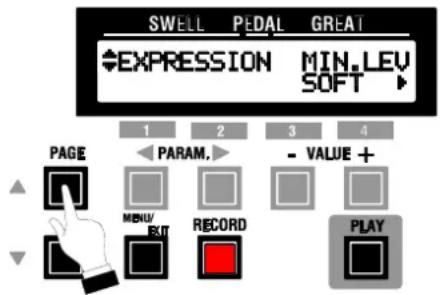
text_image
SWELL PEDAL GREAT EXPRESSION MIN.LEV SOFT 1 2 3 4 PAGE PARAM. - VALUE + MENU/RECORD PLAY EXITNotice that the legend on the bottom line of the display is flashing “on” and “off.”
- Now select the option you wish by doing the following:
Use the VALUE “-” Select Touch Button to select SOFT.
Use the VALUE “+” Select Touch Button to select ZERO.
The data chart below explains the options you may select.
| EXPRESSION MINIMUM LEVEL OPTIONSOption Function | |
| *SOFT | The volume will be at a very soft level when the Expression Pedal is “closed,” or at its Minimum volume setting. |
| ZERO The organ | will be silent when the Expression Pedal is closed. |
*default setting
NOTE: You can exit by touching the MENU / EXIT Select Touch Button.
Expression Curve
This Advanced Feature allows you to select the response curve of the Expression Pedal. You can select from among three different curves, which are explained below.
TRY THIS:
- From either of the PLAY Mode Displays, touch the black MENU / EXIT Select Touch Button to display the A Menu of the MENU Mode:
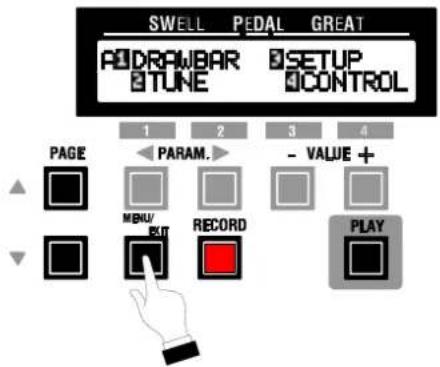
text_image
SWELL PEDAL GREAT DRAWBAR TUNE SETUP CONTROL PAGE 1 2 3 4 PARAM. MENU EXIT RECORD - VALUE + PLAY- Touch the Number 4 Select Touch Button once ____ to select the CONTROL Menu:
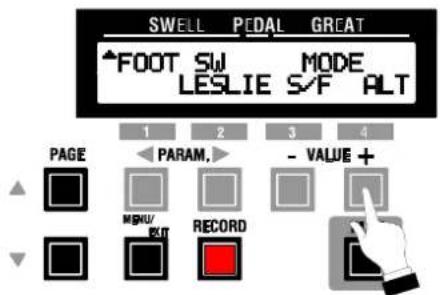
text_image
SWELL PEDAL GREAT ▲ FOOT SW MODE LESLIE S/F ALT 1 2 3 4 PAGE PARAM. - VALUE + MENU/ RECORD - ↓ ↓- Touch the PAGE “•” Touch Button once. The Information Center Display should now look like this:
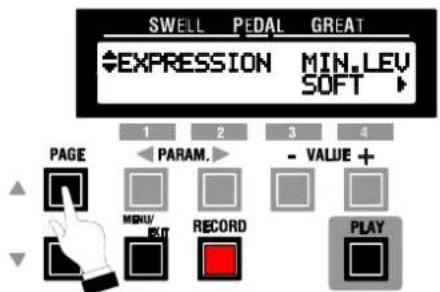
text_image
SWELL PEDAL GREAT EXPRESSION MIN.LEV SOFT PAGE 1 2 3 4 PARAM. - VALUE + MENU/RECORD PLAY MENU/EXIT RECORD PLAYNotice that the legend on the bottom line of the display is flashing "on" and "off."
- Touch the PARAM “▶” Touch Button once. The Information Center Display should now look like this:
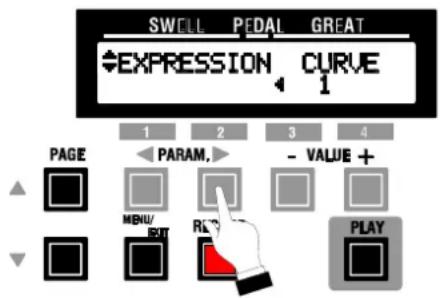
text_image
SWELL PEDAL GREAT ←EXPRESSION CURVE 1 PAGE PARAM. - VALUE + MENU/ RCL PLAYNotice that the number on the bottom line of the display is flashing “on” and “off.”
- Now select the option you wish by doing the following:
Use the VALUE “+” Select Touch Button to scroll forward through the choices.
Use the VALUE “-” Select Touch Button to scroll backward through the choices.
The data chart below explains the options you may select.
| EXPRESSION CURVE OPTIONS | |
| Option Function | |
| *1 Duplicates | the expression curve of the tone-wheel B-3. |
| 2 Similar to 1 | but with a slightly different point at which the volume “peaks.” |
| 3 Straight linear curve. | |
*default setting
NOTE: You can exit by touching the MENU / EXIT Select Touch Button.
Preset Load - €X.ZONE
This Advanced Feature allows you to select whether you want the Presets to change External MIDI Zones. You can select either “ON” or “OFF” for the Swell and Great Manual Presets individually. The default setting is “OFF” for both Swell and Great Presets.
TRY THIS:
- From either of the PLAY Mode Displays, touch the black MENU / EXIT Select Touch Button to display the A Menu of the MENU Mode:
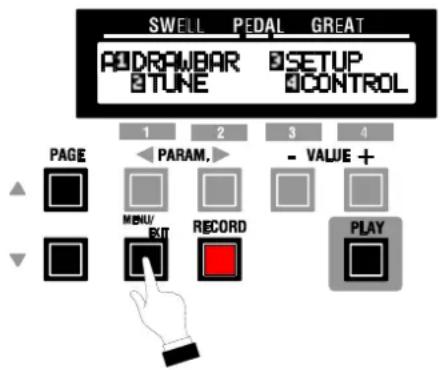
text_image
SWELL PEDAL GREAT ADDRAWBAR TUNE SETUP CONTROL PAGE 1 2 3 4 PARAM. - VALUE + MENU RECORD PLAY exit- Touch the Number 4 Select Touch Button once to select the CONTROL Menu:
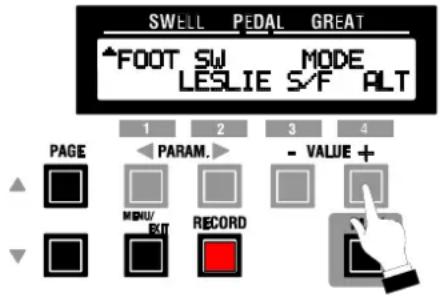
text_image
SWELL PEDAL GREAT ▲ FOOT SW MODE LESLIE S/F ALT 1 2 3 4 PAGE PARAM. - VALUE + MENU/ RECORD EXIT- Touch the PAGE “•” Touch Button three times. The Information Center Display should now look like this:
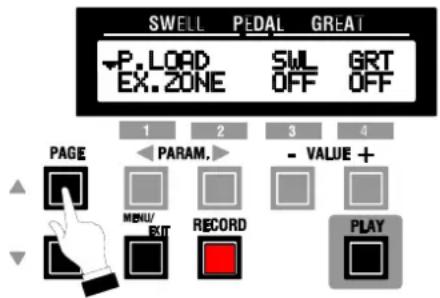
text_image
SWELL PEDAL GREAT P. LOAD SML GRT EX. ZONE OFF OFF 1 2 3 4 PAGE PARAM. - VALUE + MENU/ RECORD PLAY EXITNotice that the word underneath SWL is flashing “on” and “off.”
- Now select the option you wish by doing the following:
Use the PARAM Select Touch Buttons to select “SWL” (Swell Manual Presets) or “GRT” (Great Manual Presets).
Use the VALUE “-” Select Touch Button to select OFF.
Use the VALUE “+” Select Touch Button to select ON.
The data chart below explains the options you may select.
| PRESET LOAD EXTERNAL ZONE OPTIONS | |
| Option Function | |
| ON MIDI settings | will change when Preset Keys are selected. |
| *OFF MIDI settings | will not change when Presets are selected. |
*default setting
NOTE: You can exit by touching the MENU / EXIT Select Touch Button.
USING CompactFlash® CARDS
USING CompactFlash™ CARDS
Your Hammond Organ can store and retrieve several types of data:
- Drawbar Wave data
- Preset data
The above types of data can be stored to, and retrieved from, Compact Flash ^™ Cards.
The following pages will explain each function.
CompactFlash ^® was first introduced in 1994 as a way of storing large amounts of digital data - more data than can be stored to other types of media such as floppy disks, etc. In addition to providing mass storage, its small size (43mm (1.7") x 36mm (1.4") x 3.3mm (0.13") makes it very portable and easy to store. The CompactFlash ^® Card makes use of flash technology, which does not require a battery to retain data indefinitely.
The CompactFlash logo looks like this:

There are two types of CompactFlash ^® Cards - Type 1 and Type 2. They are electrically identical; however Type 1 cards are 3.3mm thick while Type 2 cards are 5mm thick. Your New-B-3 Hammond Organ uses Type 1 CompactFlash ^® Cards.
NOTE: "CompactFlash" and the CompactFlash logo are trademarks of the CompactFlash Association (www.compactflash.org).
NOTE: Be sure to use Hammond HCF-32 or other compatible Cards, such as SANDISK, HAGIWARA or I.O DATA.
CompactFlash ^ Card Slot
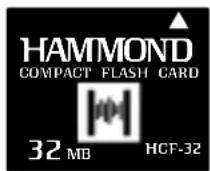
The CompactFlash ^® Card Slot is located in a receptacle on the back of the organ. In order to access the Card Slot, it will be necessary to remove the back of the organ.
Follow these steps to access the CompactFlash ^® Card Slot:
- The wooden back of the organ is held in place by two large thumbscrews. These can be removed by rotating them counter-clockwise by hand. Remove these screws.
- Carefully lift up and remove the back of the organ and set it to one side.
You should now see the CompactFlash ^® Card Slot.
To use a CompactFlash ^® Card, simply insert it into the Slot. Be sure to insert the Card with the label facing up. Use the Eject Button located to the right of the slot to eject the Card after use.
A Advanced Feature - CFFORMAT
Since a card must be formatted before it can be used, we will explain the FORMAT process first. Normally, this only has to be done once, when a card is new; however, you may find it useful to re-format a card you have previously used to make sure it is empty.
TRY THIS:
-
Insert a CompactFlash ^® Card into the Card Slot.
-
From either of the PLAY Mode Displays, touch the black MENU / EXIT Select Touch Button to display the A Menu of the MENU Mode:
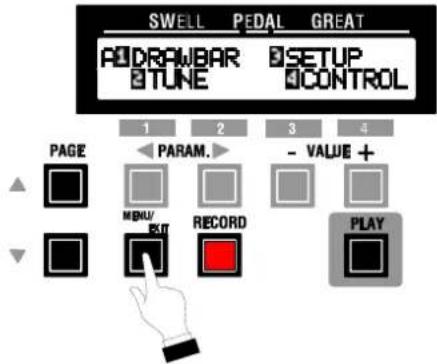
text_image
SWELL PEDAL GREAT DRAWBAR TUNE SETUP CONTROL PAGE 1 2 3 4 PARAM. - VALUE + MENU RECORD PLAY- Touch the PAGE “•” Select Touch Button three times to display the D Menu:
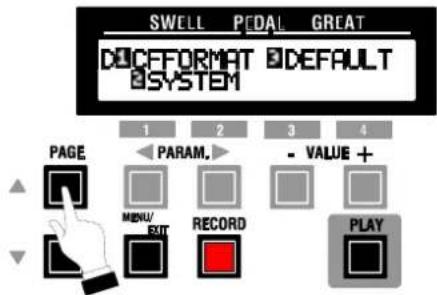
text_image
SWELL PEDAL GREAT DECFFORMAT DEFAULT SYSTEM 1 2 3 4 PAGE PARAM. - VALUE + MENU/RECORD PLAY- Touch the Number 1 Select Touch Button once ____ to select the CFFORMAT Menu:
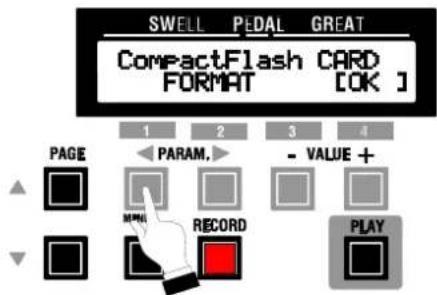
text_image
SWELL PEDAL GREAT CompactFlash CARD FORMAT [OK] PAGE PARAM. - VALUE + RECORD PLAY- Touch the Number 4 Select Touch Button once. The Information Center Display should now show the following:
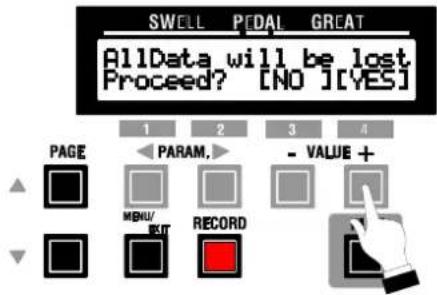
text_image
SWELL PEDAL GREAT AllData will be lost Proceed? [NO] [YES] PAGE PARAM. - VALUE + MENU/ RECORDNotice that the word Proceed? is flashing "on" and "off."
- If you DO NOT wish to format the card, touch the Number 3 (NO) Select Touch Button, and the previous MENU screen will appear. If you want to format the card, touch the Number 4 (YES) Select Touch Button. After a short time (from 1 to 5 seconds), the Information Center Display will flash the following message:
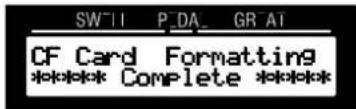
text_image
SW'TI P_DA_ GR AT CF Card Formatting ***** Complete ****The Card is now ready for use.
A Advanced Features - Using a Card to store Setups
Saving Setups to a Card
TRY THIS:
-
Use the procedure described starting on page 74 to program your own Preset Banks.
-
Insert a CompactFlash ^ Card into the Card Slot.
-
From either of the PLAY Mode Displays, touch the black MENU / EXIT Select Touch Button to display the A Menu of the MENU Mode:
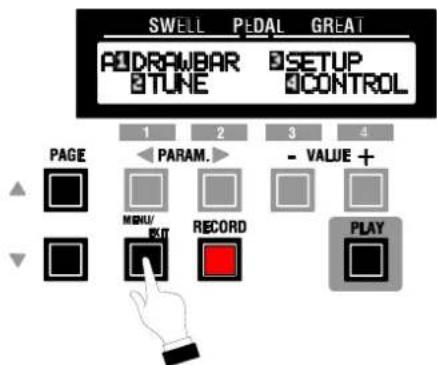
text_image
SWELL PEDAL GREAT ADDRAWBAR TUNE SETUP CONTROL PAGE 1 2 3 4 PARAM. - VALUE + MENU EXIT RECORD PLAY- Touch the Number 3 Select Touch Button once to select the SETUP Menu. If the card is blank, the Information Center Display will look similar to this:
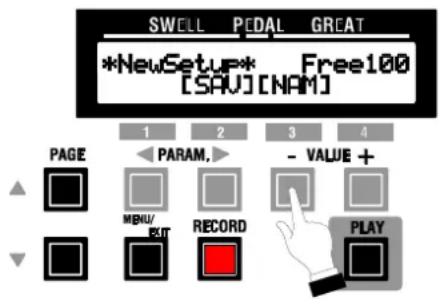
text_image
SWELL PEDAL GREAT *NewSetup* Free100 [SAU] [NAM] PAGE PARAM. - VALUE + MENU/ RECORD PLAYIf the card already has Setup Data stored on it, the Information Center Display will look similar to this:
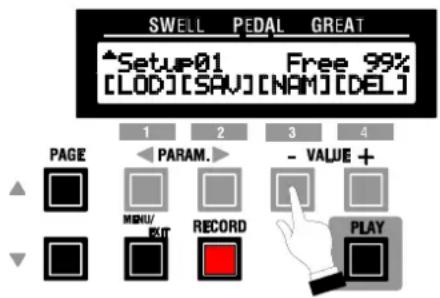
text_image
SWELL PEDAL GREAT Setup01 Free 99% [LOD][SAV][NAM][DEL] PAGE PARAM. - VALUE + MENU/ RECORD PLAYIf you see the above screen and you want to update or overwrite Setup Data on the card, proceed to step.5. If you see the above screen and you DO NOT wish to erase Setup Data that already exists, touch the PAGE “•” Select Touch Button repeatedly or until you see “★NewSetup* shown in the display.
NOTE: If there is no Card inserted in the Card Slot, the Information Center Display will show, "Not Ready.
- Touch the Number 2 Select Touch Button to select Save (SAV). The Information Center Display should now look similar to this:
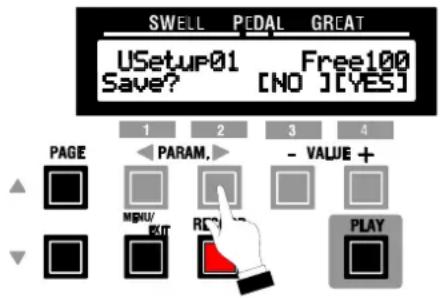
text_image
SWELL PEDAL GREAT USetuP01 Save? Free100 [NO] [YES] PAGE PARAM. - VALUE + MBUV EXIT RE PLAY- To complete the Saving procedure, Touch the black Number 4 Select Touch Button. The Information Center Display will flash the following:
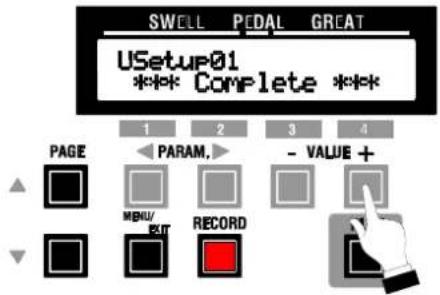
text_image
SWELL PCDAL GREAT USetup01 *** Complete *** PAGE PARAM. - VALUE + MENU/ RECORD 1 2 3 4 ▲ ▼- As soon as the above message disappears, your Preset Banks will have been Saved to the Card.
Loading Setups from a Card
TRY THIS:
-
Insert a CompactFlash ^ Card containing Setup Data into the Card Slot.
-
From either of the PLAY Mode Displays, touch the black MENU / EXIT Select Touch Button to display the A Menu of the MENU Mode:
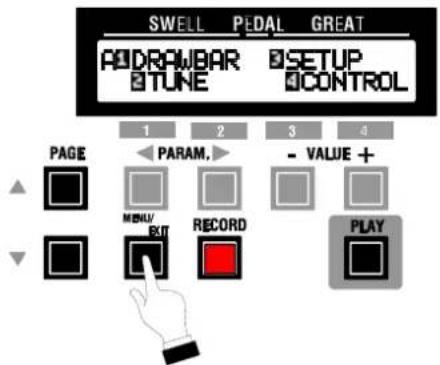
text_image
SWELL PEDAL GREAT ADDRAWBAR TUNE SETUP CONTROL PAGE 1 2 3 4 PARAM. - VALUE + MENU RECORD PLAY EXIT- Touch the Number 3 Select Touch Button once ____ to select the SETUP Menu:
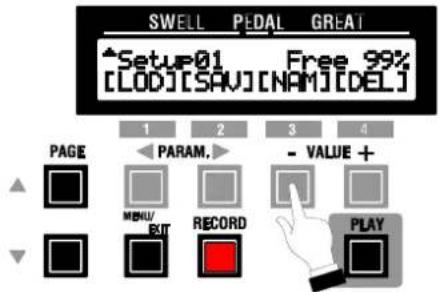
text_image
SWELL PEDAL GREAT Setup01 Free 99% [LOD][SAV][NAM][DEL] PAGE 1 2 3 4 PARAM. - VALUE + MENU/ RECORD PLAY BIT- Touch the Number 1 Select Touch Button once. The Information Center Display should now look similar to this:
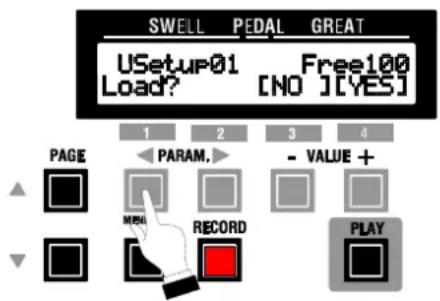
text_image
SWELL PEDAL GREAT USetuP01 Free100 Load? [NO] [YES] 1 2 3 4 PAGE PARAM. - VALUE + NEW RECORD PLAYIf the Card contains more than one Setup use the PAGE Touch Buttons to select the Setup containing the Preset Data you want.
- When you have found the Setup you want, touch the VALUE "+" Select Touch Button to Load it. The Information Center Display will flash the following:
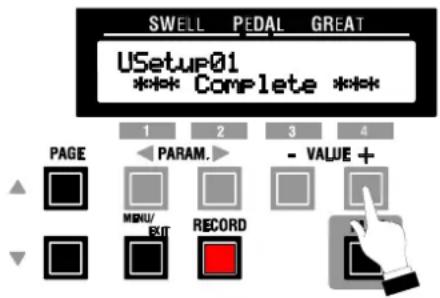
text_image
SWELL PEDAL GREAT USetup01 *** Complete **** PAGE PARAM. - VALUE + MENU/RECORD EXIT- As soon as the above message disappears, your Preset Banks will be loaded into the organ's memory.
Deleting a Preset Bank from a Card
TRY THIS:
- Insert a CompactFlash ^® Card containing Setup Data into the Card Slot.
- From either of the PLAY Mode Displays, touch the black MENU / EXIT Select Touch Button to display the A Menu of the MENU Mode:
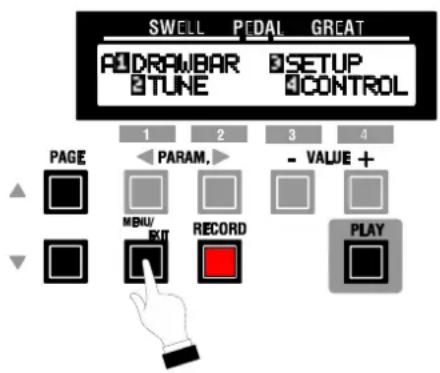
text_image
SWELL PEDAL GREAT A1 DRAWBAR TUNE B2 SETUP CONTROL PAGE 1 2 3 4 PARAM. - VALUE + MENU/RECORD PLAY- Touch the Number 3 Select Touch Button once to select the SETUP Menu:
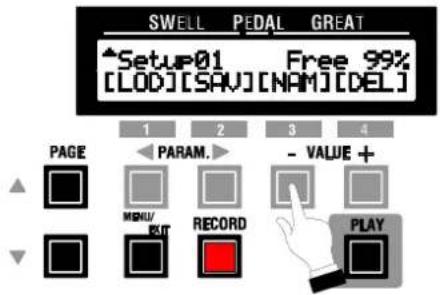
text_image
SWELL PEDAL GREAT Setup01 Free 99% [LOD][SAV][NAM][DEL] PAGE PARAM. - VALUE + MENU/ RECORD PLAY RECORD- Touch the Number 4 Select Touch Button once _. The Information Center Display should now look similar to this:
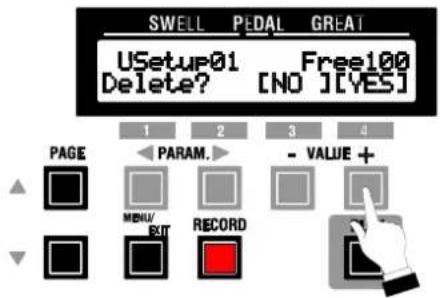
text_image
SWELL PEDAL GREAT USetup01 Free100 Delete? [NO] [YES] PAGE 1 2 3 4 PARAM. - VALUE + MENU/ RECORD EXIT- Touch the number 4 Select Touch Button to select "YES". If you DO NOT wish to delete the Setup, touch the Number 3 Select Touch Button to select "NO". If you select "YES", the Setup will then be deleted from the Card.
The Information Center Display will flash the following:
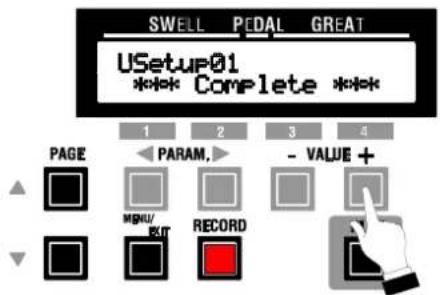
text_image
SWELL PEDAL GREAT USetup01 *** Complete **** PAGE PARAM. - VALUE + MENU/ RECORD- As soon as the above message disappears, the Setup has been deleted from the Card.
Naming a Setup
TRY THIS:
- Insert a CompactFlash ^ Card containing Preset Data into the Card Slot.
- From either of the PLAY Mode Displays, touch the black MENU / EXIT Select Touch Button to display the A Menu of the MENU Mode:
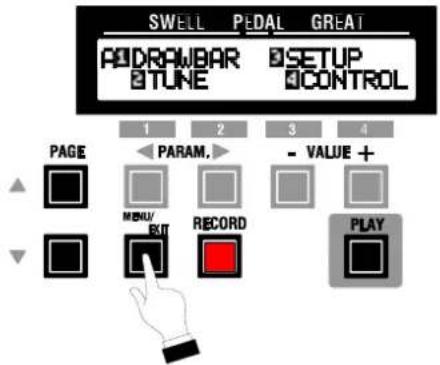
text_image
SWELL PEDAL GREAT ADDRAWBAR B TUNE B SETUP B CONTROL 1 2 3 4 PAGE PARAM. - VALUE + MENU/RECORD PLAY MENU/EXIT RECORD- Touch the Number 3 Select Touch Button once ____ to select the SETUP Menu:
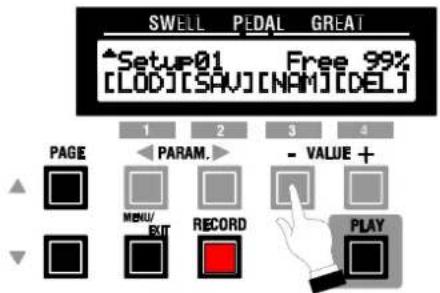
text_image
SWELL PEDAL GREAT Setup01 Free 99% [LOD][SAV][NAM][DEL] PAGE PARAM. - VALUE + MENU BIT RECORD PLAY-
Use the PAGE Select Touch Buttons to select the Setup you want to name.
-
After you have made your selection, touch the Number 3 Select Touch Button. You will now see a cursor underneath the first character of the Preset Name flash "ON" and "OFF."
-
Name the Preset Bank by doing the following:
Use the PARAM “▶” Select Touch Button to move the cursor to the right.
Use the PARAM "◀" Select Touch Button to move the cursor to the left.
Use the VALUE “-” Select Touch Button to scroll down through the character list.
Use the VALUE "+" Select Touch Button to scroll up through the character list.
Touch and Hold the RECORD Select Touch Button and use either of the VALUE Select Touch Buttons to quickly scroll through the characters.
The data chart below shows the options that you may select.
SETUP NAME ALPHANUMERIC CHARACTER LIST
space - .' & A \~ Z a \~ z 0 \~ 9
- When you having finished entering the Name (8 characters maximum), touch the PARAM "▶" Select Touch Button repeatedly until [ENT] appears in the lower right-hand corner of the Information Center Display.
- Touch the Number 4 Select Touch Button. The Information Center Display should now look similar to this:
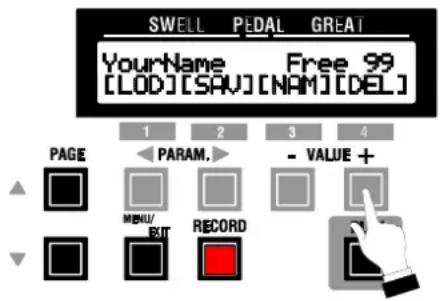
text_image
SWELL PEDAL GREAT YourName Free 99 [LOD][SAV][NAM][DEL] 1 2 3 4 PAGE PARAM. - VALUE + MENU/RECORD EXITYou will see your Setup Name displayed in the upper left-hand corner of the Information Center Display.
SPECIAL NOTE: If a CompactFlash ^® Card is not inserted in the Card Slot, you will see the message, "Card is not ready," when you access the SETUP or CFFORMAT Menus. Touch the Number 4 [OK] Select Touch Button to exit from this screen.

text_image
MIDIMIDI
The letters MIDI stand for Musical Instrument Digital Interface. MIDI is an international standard for allowing electronic musical instruments equipped with MIDI capability to exchange performance information. For example, a synthesizer can be used to communicate with a drum machine, an electronic piano can interface with a computer, and so forth. Additionally, since MIDI is an international standard recognized and implemented by all musical instrument manufacturers worldwide, instruments made by different manufacturers can communicate with each other via MIDI.
Ë MIDI OUT Jack
Your Hammond Organ has a MIDI OUT jack which is located underneath the organ on the left side.
Ë Using the MIDI Jack
To control another MIDI instrument (synthesizer, sound module, etc.) from the organ, connect the MIDI OUT from the organ to the MIDI IN of the instrument you wish to control using a MIDI cable, as shown in the diagram below.
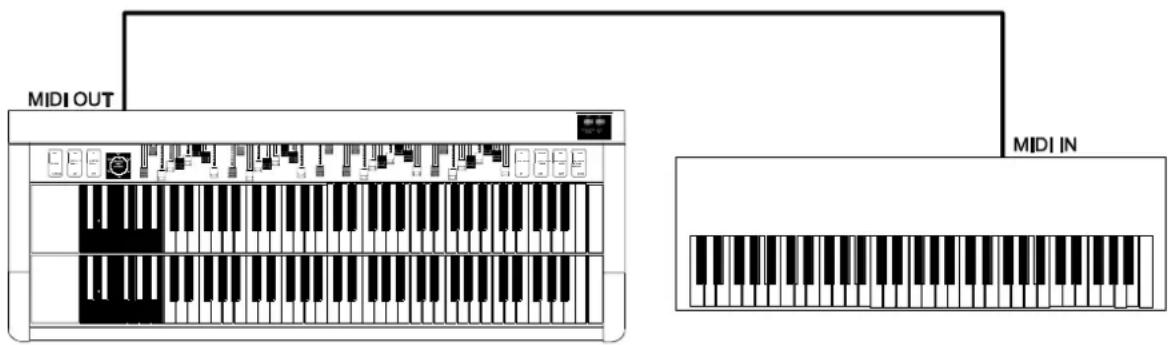
text_image
MIDI OUT MIDI INË Special Note - MIDI IN and THRU
Many MIDI devices, in addition to MIDI OUT, also have MIDI IN and MIDI THRU jacks to allow incoming MIDI data from another instrument as well as to allow MIDI data to “pass through” to another instrument in multiple MIDI hookups.
Due to the unique tone-generation system of the New B-3, it does not implement MIDI IN or MIDI THRU.
È What Is A "Part"?
The MIDI implementation of your New B-3 allows you to play up to three MIDI voices at a time from each manual and pedals. Each voice is considered as being played by a separate performance platform or “sub-manual” called a Part. Each Part can have its own settings for such things as Program Number, Bank Number, Volume, Panpot, Reverb and Chorus levels. In this way, you can play, for example, Piano and Strings together, or any combination of voices available from whatever MIDI gear you may be using, with each voice having its own Volume setting, Pan setting, etc.
The Parts are referred to by manual and by number; SWELL 1, SWELL 2, SWELL 3, GREAT 1, GREAT 2, GREAT 3, and PEDAL 1, PEDAL 2 and PEDAL 3. The first letter of the manual designation is used in the Information Center Display, so that "S1" refers to SWELL 1, "G3" means GREAT 3, etc.
A Advanced Features - MIDI
There are three main pages to the MIDI Advanced Feature Menu that allow you to do the following:
- EX.ZONE -
Allows you to select External MIDI voices and set their characteristics.
- EX.DAMP -
Allows you to use the Expression Pedal Foot Switch as a “damper” pedal to sustain notes indefinitely, such as a Piano sound from a connected MIDI device.
- MIDI CH. -
Allows you to set the MIDI Channels on which the organ will Transmit (Tx).
The following pages give a more detailed explanation of how these Advanced Features work.
Advanced Features - €X.ZONE
There are nine EX.ZONE Advanced Features which allow you to make the following changes to the organ:
-
EX.ZONE ON/OFF - Allows you to turn each External Zone Part "ON" or "OFF."
-
EX.ZONE Bank & Program Select - Allows you to send Bank and Program Changes to a connected MIDI module.
-
EX.ZONE Volume - Allows you to select the volume at which the External MIDI voice will play for each Part.
-
EX.ZONE Pan - Allows you to set the directionality of the External MIDI voice for each Part.
-
EX.ZONE Octave - Allows you to select the octave in which the External MIDI voice will sound for each Part. You can select “-2” (up to two octaves down) through “+2” (up to two octaves up).
-
EX.ZONE Reverb - Allows you to select the Reverb amount for each Part. You can select from "0" (no Reverb) through "127" (maximum Reverb).
-
EX.ZONE Chorus - Allows you to select the Chorus amount for each Part. You can select from "0" (no Chorus) through "127" (maximum Chorus).
-
EX.ZONE Velocity - Allows you to select the Velocity Curve which will be applied to the External MIDI voices.
-
EX.ZONE Zone - Allows you to set the upper and lower limits for each Part. You can select from "1C" (the lowest note) through "6C" (the highest note).
EX.ZONE ON/OFF
This Advanced Feature allows you to turn each External Zone Part "ON" or "OFF."
TRY THIS:
- From either of the PLAY Mode Displays, touch the black MENU Select Touch Button to display the A Menu of the MENU Mode:
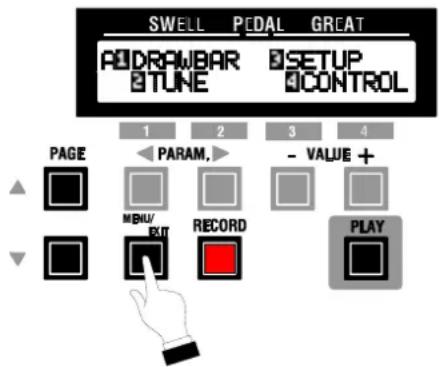
text_image
SWELL PEDAL GREAT ADRAWBAR TUNE SETUP CONTROL PAGE 1 2 3 4 PARAM. - VALUE + MENU/ RECORD PLAY- Touch the PAGE “•” Select Touch Button two times to display the C Menu:
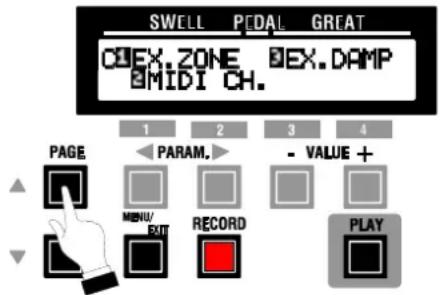
text_image
SWELL PEDAL GREAT COMEX.ZONE COMEX.DAMP MIDI CH. 1 2 3 4 PAGE PARAM. - VALUE + MENU/ EXIT RECORD PLAY- Touch the Number 1 Select Touch Button to select the EX.ZONE Menu:
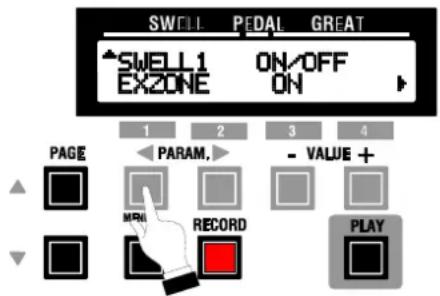
text_image
SWELL PEDAL GREAT SWELL 1 EXZONE ON/OFF ON PAGE PARAM. - VALUE + RECORD PLAYNotice that the word ON is flashing "on" and "off."
- Now select the option you wish by doing the following:
Use the PAGE Select Touch Buttons to make your Manual, Pedal and Part selections (“SWELL 1,” “SWELL 2,” “SWELL 3,” “GREAT 1,” “GREAT 2,” “GREAT 3” or “PEDAL 1,” “PEDAL 2” and “PEDAL 3”).
Use the VALUE “-” Select Touch Button to turn the selected Part OFF.
Use the VALUE “+” Select Touch Button to turn the selected Part ON.
NOTE: You can exit by touching the MENU / EXIT Select Touch Button.
EX.ZONE Bank & Program Select
This Advanced Feature allows you to send Program and Bank Numbers for each Part.
TRY THIS:
- From either of the PLAY Mode Displays, touch the black MENU Select Touch Button to display the A Menu of the MENU Mode:
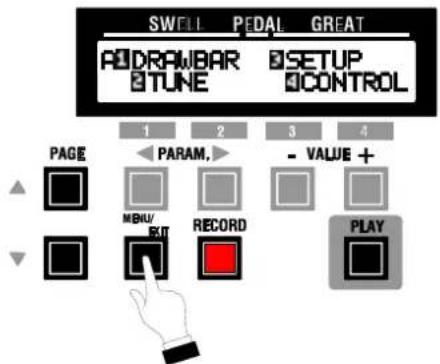
text_image
SWELL PEDAL GREAT DRAWBAR TUNE SETUP CONTROL PAGE 1 2 3 4 PARAM. - VALUE + MENU/ BIT RECORD PLAY- Touch the PAGE “•” Select Touch Button two times to display the C Menu:
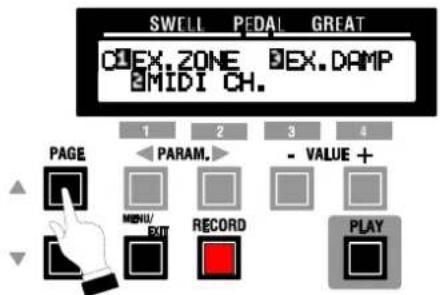
text_image
SWILL PEDAL GREAT COMEX.ZONE COMX.DAMP MIDI CH. PAGE PARAM. - VALUE + MENU/ EXIT RECORD PLAY- Touch the Number 1 Select Touch Button to select the EX.ZONE Menu:
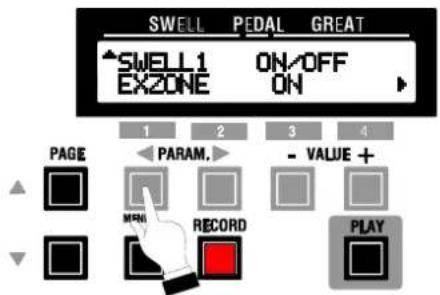
text_image
SWELL PEDAL GREAT SWELL1 ON/OFF EXZONE ON PAGE PARAM. - VALUE + RECORD PLAYNotice that the word ON is flashing "on" and "off."
- Touch the PARAM "▶" Select Touch Button once. The Information Center Display should now look similar to this:
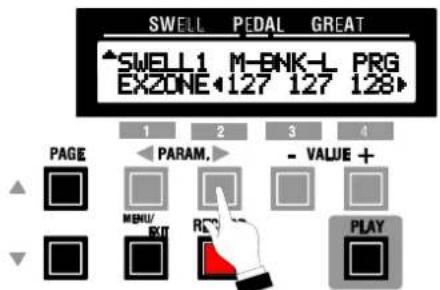
text_image
SWELL PEDAL GREAT SWELL1 M-BNK-L PRG EXZONE 127 127 128 PAGE PARAM. - VALUE + MENU/RECK PLAYNotice that the number just underneath the letter M is flashing "on" and "off."
- Now select Program and Bank Numbers by doing the following
Use the PAGE Select Touch Buttons to make your Manual, Pedal and Part selections (“SWELL 1,” “SWELL 2,” “SWELL 3,” “GREAT 1,” “GREAT 2,” “GREAT 3,” or “PEDAL 1,” “PEDAL 2” and “PEDAL 3”).
Use the PARAM Touch Buttons to select “M” (MSB or Most Significant Bit) “L” (LSB or Least Significant Bit) of the Bank Number, or “PRG” (Program Number).
Use the VALUE “-” Select Touch Button to scroll down through the numbers.
Use the VALUE “+” Select Touch Button to scroll up through the numbers.
NOTE: You can exit by touching the MENU / EXIT Select Touch Button.
EX.ZONE Volume
This Advanced Feature allows you to select the Volume of the External MIDI voice for each Part.
TRY THIS:
- From either of the PLAY Mode Displays, touch the black MENU Select Touch Button to display the A Menu of the MENU Mode:
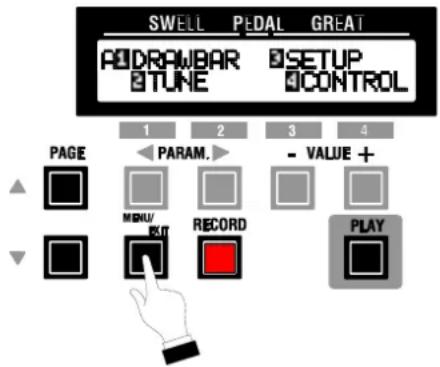
text_image
SWELL PEDAL GREAT ADDRAWBAR TUNE SETUP CONTROL PAGE 1 2 3 4 PARAM. - VALUE + MENU RECORD PLAY- Touch the PAGE “•” Select Touch Button two times to display the C Menu:
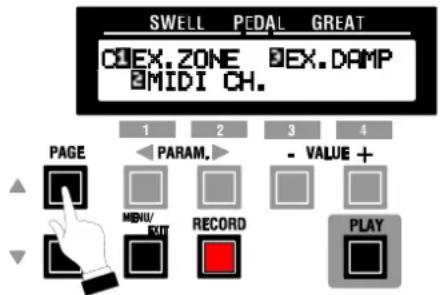
text_image
SWELL PEDAL GREAT COMEX.ZONE COMX.DAMP MIDI CH. PAGE PARAM. - VALUE + MENU/RECORD PLAY- Touch the Number 1 Select Touch Button to select the EX.ZONE Menu:
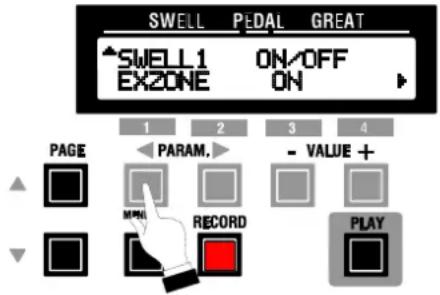
text_image
SWELL PEDAL GREAT SWELL1 ON/OFF EXZONE ON PAGE PARAM. - VALUE + RECORD PLAYNotice that the word ON is flashing “on” and “off.”
- Touch the PARAM “▶” Select Touch Button four times. The Information Center Display should now look similar to this:
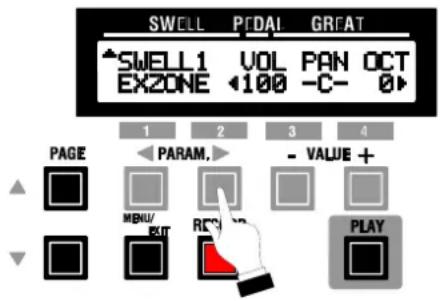
text_image
SWELL PICAL GRAT SWELL1 VOL PAN OCT EXZONE <100 -C- 0> PAGE PARAM. - VALUE + MENU/ RCS EXIT PLAYNotice that the number just underneath the word VOL is flashing “on” and “off.”
- Now select the Volume for each Part by doing the following:
Use the PAGE Select Touch Buttons to make your Manual, Pedal and Part selections (“SWELL 1,” “SWELL 2,” “SWELL 3,” “GREAT 1,” “GREAT 2,” “GREAT 3” or “PEDAL 1,” “PEDAL 2” and “PEDAL 3”).
Use the VALUE “-” Select Touch Button to lower the Volume for the selected Part.
Use the VALUE “+” Select Touch Button to raise the Volume for the selected Part.
The data chart below shows the options that you may select.
| EX.ZONE VOLUME - All Parts |
| 0 ~ 127 |
NOTE: You can exit by touching the MENU / EXIT Select Touch Button.
EX.ZONE Pan
This Advanced Feature allows you to select the directionality of the MIDI voice for each Part.
TRY THIS:
- From either of the PLAY Mode Displays, touch the black MENU Select Touch Button to display the A Menu of the MENU Mode:
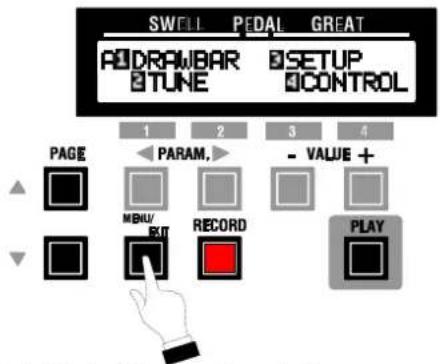
text_image
SWELL PEDAL GREAT DRAWBAR TUNE SETUP CONTROL PAGE 1 2 3 4 PARAM. - VALUE + MENU RECORD PLAY- Touch the PAGE “•” Select Touch Button two times to display the C Menu:
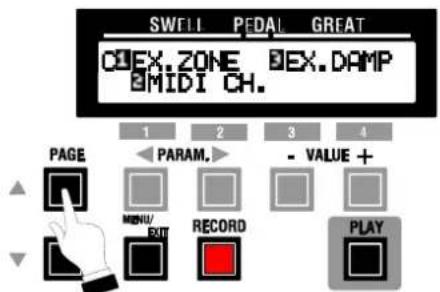
text_image
SWELL PEDAL GREAT CODEX.ZONE MIDI CH. PAGE 1 PARAM. 2 - VALUE + MENU/RECORD PLAY- Touch the Number 1 Select Touch Button to select the EX.ZONE ____ Menu:
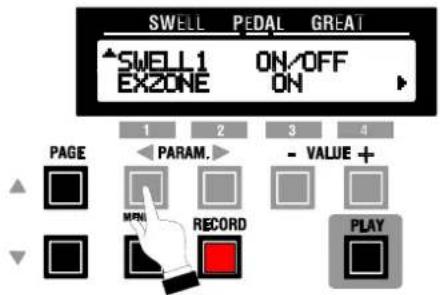
text_image
SWELL PEDAL GREAT ▲SWELL1 ON/OFF EXZONE ON PAGE PARAM. - VALUE + MPN RECORD PLAYNotice that the word ON is flashing "on" and "off."
- Touch the PARAM "▶" Select Touch Button five times. The Information Center Display should now look similar to this:
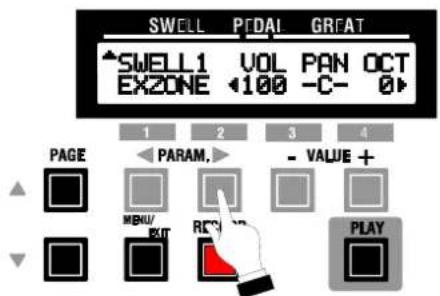
text_image
SWELL PEDAI GREAT SWELL1 VOL PAN OCT EXZONE <100 -C- 1 2 3 4 PAGE PARAM. - VALUE + MENU/ EXIT RC' PLAYNotice that the legend just underneath the word PAN is flashing "on" and "off."
- Now select the Pan setting for each Part by doing the following:
Use the PAGE Select Touch Buttons to make your Manual, Pedal and Part selections ("SWELL 1," "SWELL 2," "SWELL 3," "GREAT 1," "GREAT 2," "GREAT 3" or "PEDAL 1," "PEDAL 2" and "PEDAL 3").
Use the VALUE “-” Select Touch Button to move the sound into the left channel.
Use the VALUE “+” Select Touch Button to move the sound into the right channel.
The data chart below shows the options that you may select.
| EX.ZONE PAN - All Parts |
| L64 ~ C ~ R63 |
NOTE: You can exit by touching the MENU / EXIT Select Touch Button.
EX.ZONE Octave
This Advanced Feature allows you to select the Octave in which the External MIDI voice will play for each Part.
TRY THIS:
- From either of the PLAY Mode Displays, touch the black MENU Select Touch Button to display the A Menu of the MENU Mode:
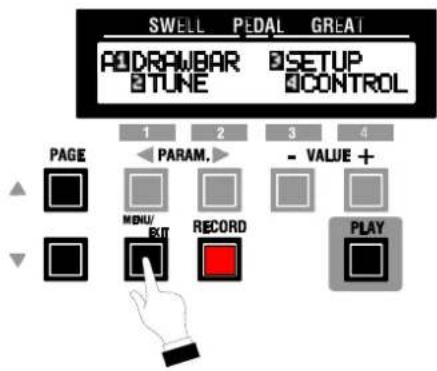
text_image
SWELL PEDAL GREAT ADDRAWBAR TUNE SETUP CONTROL PAGE 1 2 3 4 PARAM. - VALUE + MENU/RECORD PLAY- Touch the PAGE “•” Select Touch Button two times to display the C Menu:
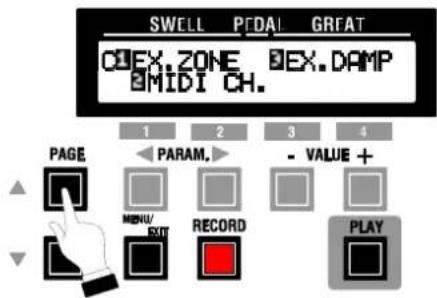
text_image
SWELL PEDAL GREAT COMEX.ZONE COMX.DAMP MIDI CH. PAGE PARAM. - VALUE + MENU/RECORD EXIT PLAY- Touch the Number 1 Select Touch Button to select the EX.ZONE Menu:
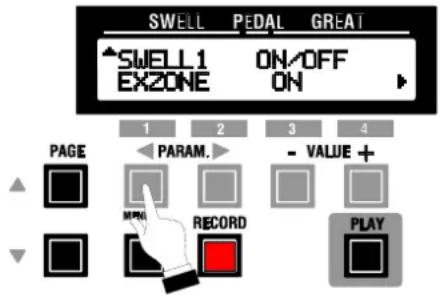
text_image
SWELL PEDAL GREAT SWELL1 ON/OFF EXZONE ON PAGE PARAM. - VALUE + RECORD PLAYNotice that the word ON is flashing "on" and "off."
- Touch the PARAM “▶” Select Touch Button six times. The Information Center Display should now look similar to this:
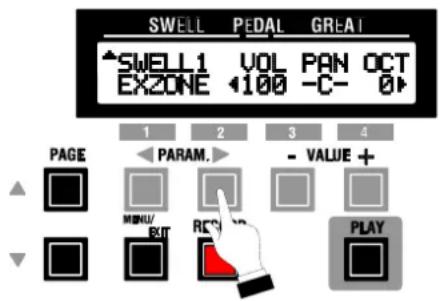
text_image
SWELL PEDAL GREAT SWELL1 VOL PAN OCT EXZONE <100 -C- 0> PAGE PARAM. - VALUE + MENU/ REC BIT PLAYNotice that the legend just underneath the word OCT is flashing “on” and “off.”
- Now select the Octave setting for each Part by doing the following:
Use the PAGE Select Touch Buttons to make your Manual, Pedal and Part selections (“SWELL 1,” “SWELL 2,” “SWELL 3,” “GREAT 1,” “GREAT 2,” “GREAT 3” or “PEDAL 1,” “PEDAL 2” and “PEDAL 3”).
Use the VALUE “-” Select Touch Button to lower the Octave setting for the selected Part.
Use the VALUE “+” Select Touch Button to raise the Octave setting for the selected Part.
The data chart below shows the options that you may select.
| EX.ZONE OCTAVE - All Parts |
| -2 (two octaves lower) ~ 0 ~ +2 (two octaves higher) |
NOTE: You can exit by touching the MENU / EXIT Select Touch Button.
EX.ZONE Reverb Level
This Advanced Feature allows you to select the Reverb amount for each Part.
TRY THIS:
- From either of the PLAY Mode Displays, touch the black MENU Select Touch Button to display the A Menu of the MENU Mode:
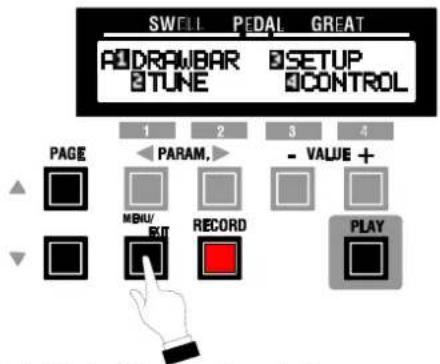
text_image
SWELL PEDAL GREAT DRAWBAR TUNE SETUP CONTROL PAGE 1 2 3 4 PARAM. - VALUE + MENU/ RECORD PLAY- Touch the PAGE “•” Select Touch Button two times to display the C Menu:
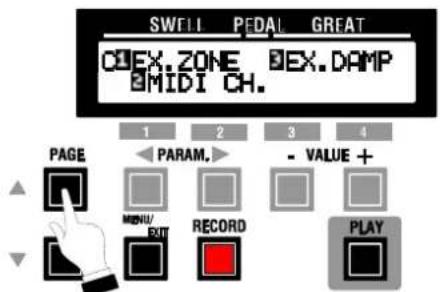
text_image
SWELL PEDAL GREAT COMEX.ZONE COMX.DAMP MIDI CH. 1 2 3 4 PAGE PARAM. - VALUE + MENU/RECORD PLAY EXIT- Touch the Number 1 Select Touch Button to select the EX.ZONE Menu:
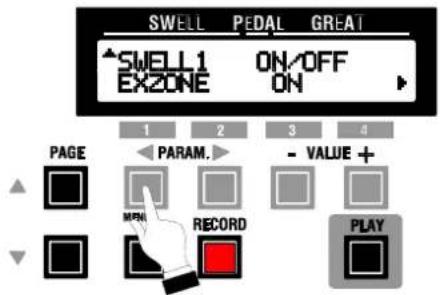
text_image
SWELL PEDAL GREAT ▲SWELL1 ON/OFF EXZONE ON PAGE PARAM. - VALUE + MPN RECORD PLAYNotice that the word ON is flashing "on" and "off."
- Touch the PARAM “▶” Select Touch Button seven times. The Information Center Display should now look similar to this:
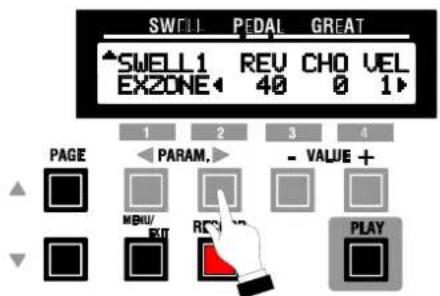
text_image
SWELL PEDAL GREAT SWELL1 REV CHO VEL EXZONE 40 0 1> 1 2 3 4 PAGE PARAM. - VALUE + MENU/ RC PLAYNotice that the number just underneath the legend REV is flashing "on" and "off."
- Now select the Reverb amount for each Part by doing the following:
Use the PAGE Select Touch Buttons to make your Manual, Pedal and Part selections ("SWELL 1," "SWELL 2," "SWELL 3," "GREAT 1," "GREAT 2," "GREAT 3" or "PEDAL 1," "PEDAL 2" and "PEDAL 3").
Use the VALUE “-” Select Touch Button to decrease the Reverb amount for the selected Part.
Use the VALUE "+" Select Touch Button to increase the Reverb amount for the selected Part.
The data chart below shows the options that you may select.
| EX.ZONE REVERB - All Parts |
| 0 ~ 127 |
NOTE: You can exit by touching the MENU / EXIT Select Touch Button.
EX.ZONE Chorus
This Advanced Feature allows you to select the amount of Chorus for each Part.
TRY THIS:
- From either of the PLAY Mode Displays, touch the black MENU Select Touch Button to display the A Menu of the MENU Mode:
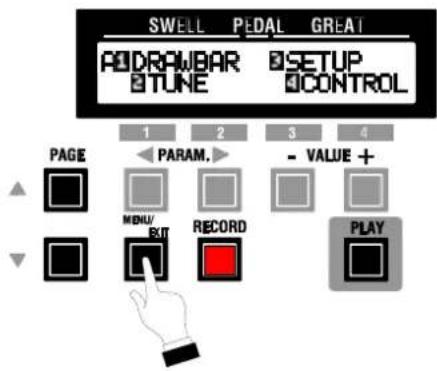
text_image
SWELL PEDAL GREAT ADRAWBAR TUNE BSETUP CONTROL PAGE 1 2 3 4 PARAM. - VALUE + MENU/ EXIT RECORD PLAY- Touch the PAGE “•” Select Touch Button two times to display the C Menu:
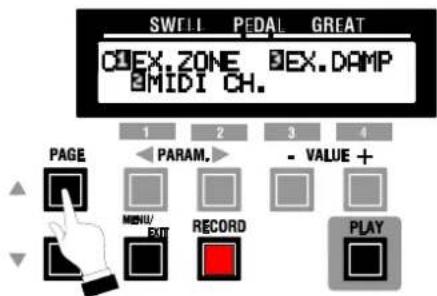
text_image
SWILL PEDAL GREAT CUX ZONE DEX DAMP #MIDI CH. 1 2 3 4 PAGE PARAM. - VALUE + MENU/RECORD PLAY- Touch the Number 1 Select Touch Button to select the EX.ZONE Menu:
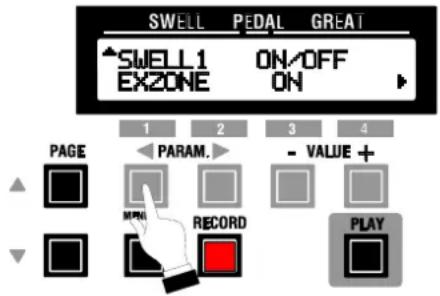
text_image
SWELL PEDAL GREAT SWELL1 ON/OFF EXZONE ON PAGE PARAM. - VALUE + RECORD PLAYNotice that the word ON is flashing "on" and "off."
- Touch the PARAM “▶” Select Touch Button eight times. The Information Center Display should now look similar to this:
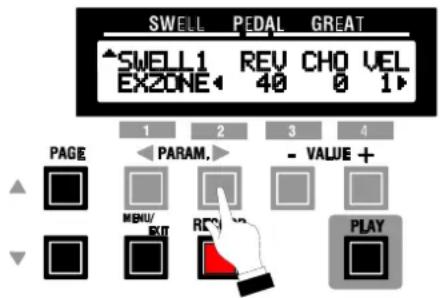
text_image
SWELL PEDAL GREAT ▲SWELL1 REV CHO VEL EXZONE 40 0 1 PAGE PARAM. - VALUE + MBUX/ RCS PLAYNotice that the number just under the word CHO is flashing “on” and “off.”
- Now select the Chorus amount for each Part by doing the following:
Use the PAGE Select Touch Buttons to make your Manual, Pedal and Part selections (“SWELL 1,” “SWELL 2,” “SWELL 3,” “GREAT 1,” “GREAT 2,” “GREAT 3” or “PEDAL 1,” “PEDAL 2” and “PEDAL 3”).
Use the VALUE “-” Select Touch Button to decrease the Chorus amount for the selected Part.
Use the VALUE “+” Select Touch Button to increase the Chorus amount for the selected Part.
The data chart below shows the options that you may select.
| EX.ZONE CHORUS - All Parts |
| 0 ~ 127 |
NOTE: You can exit by touching the MENU / EXIT Select Touch Button.
EX.ZONE Velocity Curve
This Advanced Feature allows you to select the Velocity Curve which will be applied to each Part.
TRY THIS:
- From either of the PLAY Mode Displays, touch the black MENU Select Touch Button to display the A Menu of the MENU Mode:
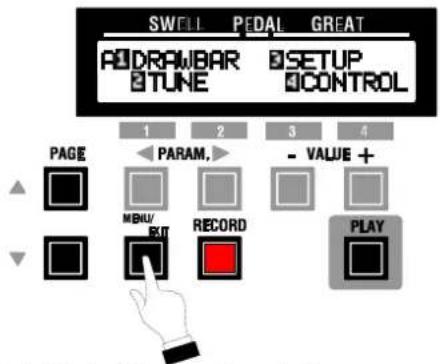
text_image
SWELL PEDAL GREAT DRAWBAR TUNE SETUP CONTROL PAGE 1 2 3 4 PARAM. - VALUE + MENU RECORD PLAY- Touch the PAGE “•” Select Touch Button two times to display the C Menu:
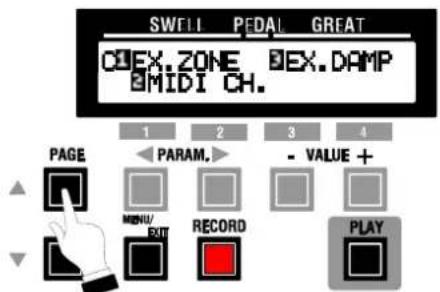
text_image
SWELL PEDAL GREAT CODEX.ZONE MIDI CH. PAGE 1 PARAM. 2 - VALUE + MENU/RECORD PLAY- Touch the Number 1 Select Touch Button to select the EX.ZONE ____ Menu:
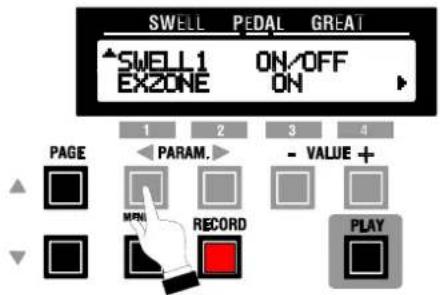
text_image
SWELL PEDAL GREAT ▲SWELL1 ON/OFF EXZONE ON PAGE PARAM. - VALUE + MPN RECORD PLAYNotice that the word ON is flashing "on" and "off."
- Touch the PARAM “▶” Select Touch Button nine times. The Information Center Display should now look similar to this:
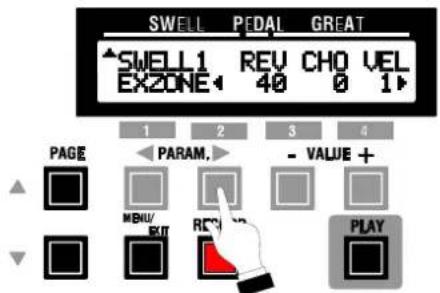
text_image
SWELL PEDAL GREAT ▲SWELL1 REV CHO VEL EXZONE 40 0 1▶ PAGE PARAM. - VALUE + MENU/EXIT RECO PLAYNotice that the legend just under the word VEL is flashing "on" and "off."
- Now select the Velocity setting for each Part by doing the following:
Use the PAGE Select Touch Buttons to make your Manual, Pedal and Part selections ("SWELL 1," "SWELL 2," "SWELL 3," "GREAT 1," "GREAT 2," "GREAT 3" or "PEDAL 1," "PEDAL 2" and "PEDAL 3").
Use the VALUE “-” Select Touch Button to scroll down through the choices.
Use the VALUE "+" Select Touch Button to scroll up through the choices.
The data chart below shows the options that you may select.
| EX.ZONE VELOCITY OPTIONS |
| OFF, 1 ~ 5 |
NOTE: The Pedal velocity setting is permanently set at "100."
NOTE: You can exit by touching the MENU / EXIT Select Touch Button.
EX.ZONE Zone
This Advanced Feature allows you to select the range of the manual or pedals in which the External MIDI voice will play for each Part.
TRY THIS:
- From either of the PLAY Mode Displays, touch the black MENU Select Touch Button to display the A Menu of the MENU Mode:
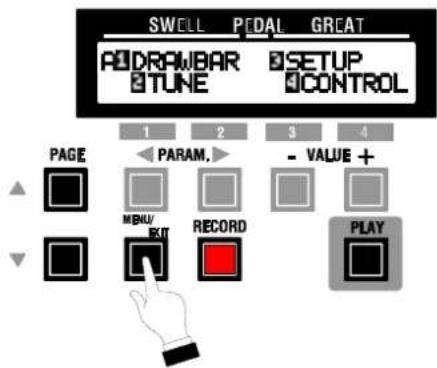
text_image
SWELL PEDAL GREAT ADRAWBAR TUNE BSETUP CONTROL PAGE 1 2 3 4 PARAM. - VALUE + MENU/ RECORD PLAY- Touch the PAGE “•” Select Touch Button two times to display the C Menu:
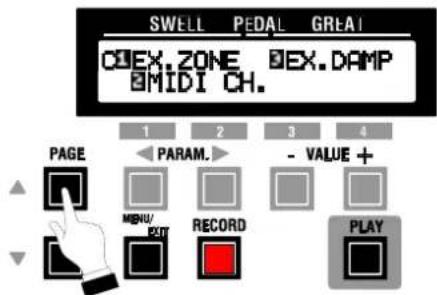
text_image
SWELL PEDAL GREAT COMEX.ZONE COMEX.DAMP MIDI CH. PAGE PARAM. - VALUE + MENU/RECORD PLAY- Touch the Number 1 Select Touch Button to select the EX.ZONE Menu:
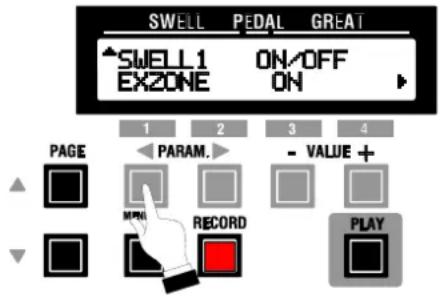
text_image
SWELL PEDAL GREAT SWELL1 ON/OFF EXZONE ON PAGE PARAM. - VALUE + RECORD PLAY- Touch the PARAM “▶” Select Touch Button ten times. The Information Center Display should now look similar to this:
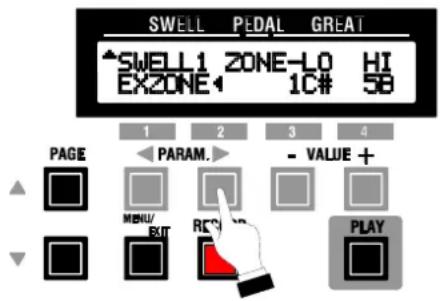
text_image
SWELL PEDAL GREAT SWELL1 ZONE-LO HI EXZONE 1C# 5B 1 2 3 4 PAGE PARAM. - VALUE + MENU/ REC BIT PLAYNotice that the legend just under the word LO is flashing “on” and “off.”
- Now select the Zone range for each Part by doing the following:
Use the PAGE Select Touch Buttons to make your Manual, Pedal and Part selections (“SWELL 1,” “SWELL 2,” “SWELL 3,” “GREAT 1,” “GREAT 2,” “GREAT 3” or “PEDAL 1,” “PEDAL 2” and “PEDAL 3”).
Use the PARAM Select Touch Buttons to move between “LO” and “HI.” “LO” represents the lowest note playable by the selected Part, while “HI” represents the highest note playable by the selected Part.
Use the VALUE “-” Select Touch Button to set the Zone range lower.
Use the VALUE “+” Select Touch Button to set the Zone range higher.
The data chart below shows the options that you may select.
| EX.ZONE - All Parts |
| 1C ~ 6C |
NOTE: You can exit by touching the MENU / EXIT Select Touch Button.
Advanced Feature - EX.DAMP
This Advanced Feature allows you to use the Expression Pedal Foot Switch as a “damper” pedal to sustain notes indefinitely, such as a Piano sound from a connected MIDI device.
TRY THIS:
- From either of the PLAY Mode Displays, touch the black MENU Select Touch Button to display the A Menu of the MENU Mode:
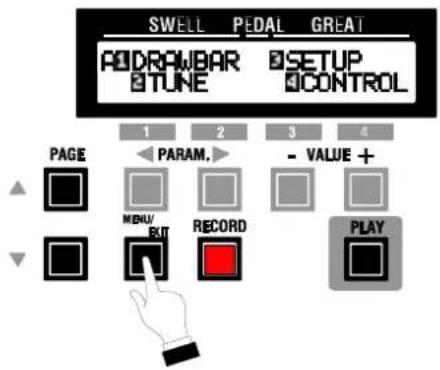
text_image
SWELL PEDAL GREAT ADDRAWBAR TUNE SETUP CONTROL PAGE 1 2 3 4 PARAM. - VALUE + MENU- RECORD PLAY BUT- Touch the PAGE “•” Select Touch Button two times to display the C Menu:
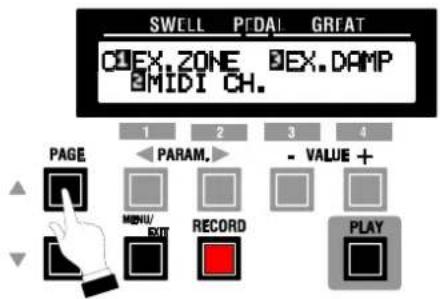
text_image
SWELL PFDAL GREAT COMEX.ZONE COMX.DAMP MIDI CH. PAGE PARAM. - VALUE + MENU/RECORD PLAY- Touch the Number 2 Select Touch Button to select the EX..DAMP Menu:
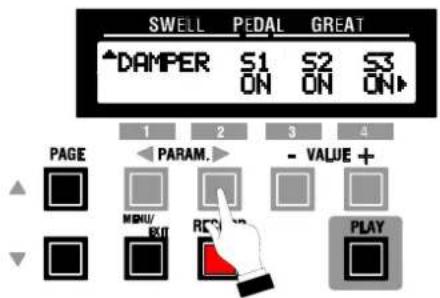
text_image
SWELL PEDAL GREAT ▲ DAMPER S1 S2 S3 ON ON ON 1 2 3 4 PAGE PARAM. - VALUE + MENU REC PLAY MAIN EXIT- Now select the options you wish by doing the following:
Use the PARAM Select Touch Buttons to make your Manual and Part selection (“S1,” “S2,” “S3,” “G1,” “G2,” “G3,” or “P1,” “P2,” and “P3”).
Use the VALUE “-” Select Touch Button to turn the Damper feature OFF for the selected Part.
Use the VALUE “+” Select Touch Button to turn the Damper feature ON for the selected Part.
NOTE: You can exit by touching the MENU / EXIT Select Touch Button.
Advanced Feature - MIDI CH.
This Advanced Feature allows you to select the MIDI Channels on which the organ will transmit. You can select the MIDI Channels for: Swell 1, 2 and 3, Great 1, 2 and 3 and Pedal 1, 2 and 3.
TRY THIS:
- From either of the PLAY Mode Displays, touch the black MENU Select Touch Button to display the A Menu of the MENU Mode:
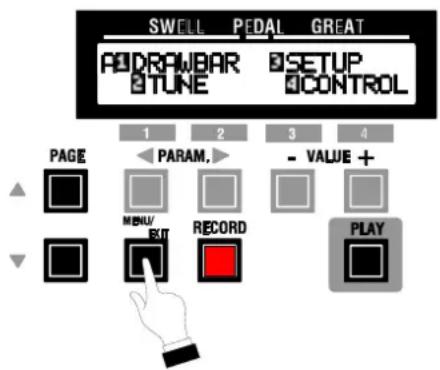
text_image
SWELL PEDAL GREAT ADDRAWBAR TUNE SETUP CONTROL PAGE 1 2 3 4 PARAM. - VALUE + MENU/RECORD PLAY MENU/EXIT RECORD- Touch the PAGE “•” Select Touch Button two times to display the C Menu:
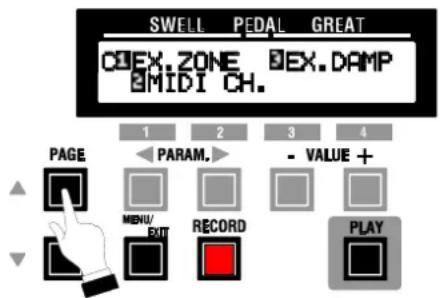
text_image
SWELL PEDAL GREAT CQEX.ZONE MIDI CH. PAGE PARAM. - VALUE + MENU/RECORD PLAY- Touch the Number 3 Select Touch Button to select the MIDI CH. Menu:

text_image
SWELL PEDAL GREAT TX CH S1 S2 S3 SWELL 1 OFF OFF▶ 1 2 3 4 PAGE PARAM. - VALUE + MENU/ RCS PLAY MENU/ EXIT- Now select the MIDI Channels by doing the following:
Use the PARAM Select Touch Buttons to make your Manual and Part selection (“S1,” “S2,” “S3,” “G1,” “G2,” “G3,” or “P1,” “P2,” and “P3”).
Use the VALUE “-” Select Touch Button to scroll down through the channel numbers.
Use the VALUE “+” Select Touch Button to scroll up through the channel numbers.
The data chart below shows the options you may select.
| MIDI CHANNEL OPTIONS - All Parts |
| 1 ~ 16, OFF |
NOTE: You can exit by touching the MENU / EXIT Select Touch Button.
SPECIAL UTILITY FEATURES
SPECIAL UTILITY FEATURES
Your Hammond Organ has a number of special features which would not normally be accessed during performance, but which enable you to make certain adjustments to the organ's playing features, as well as give you specific information about the organ. The following paragraphs explain these features in detail.
A Advanced Feature - DISPLAY LOCK
This Advanced Feature allows you to put the organ into a special playing mode whereby the Information Center Display is rendered inoperative. Touching any of the Select Touch Buttons will have no effect. This is useful if you want to use the organ exactly as if it were an old-style tone-wheel Hammond Organ.
TRY THIS:
-
If the organ is "ON," turn the power "OFF."
-
Touch and Hold the PLAY Touch Button.
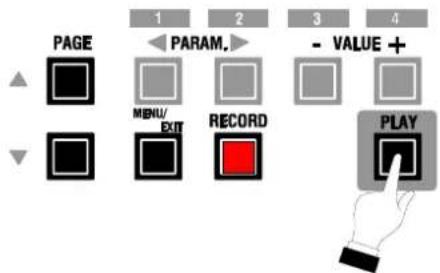
text_image
PAGE PARAM. MENU/ EXIT RECORD - VALUE + PLAY- While holding the PLAY Touch Button, turn the power to the organ "ON."
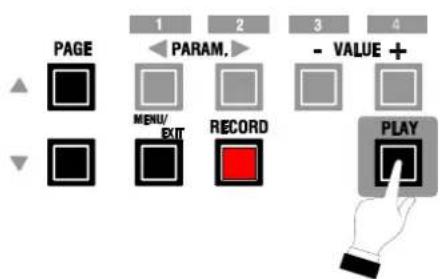
text_image
PAGE 1 PARAM. 2 3 - VALUE + MENU/RECORD PLAY
text_image
UP ON MOTOR CONTROL DOWN POWER OFF- Continue to hold the PLAY Touch Button until the opening message finishes displaying. After approximately 1 second, the Information Center Display will look like this:
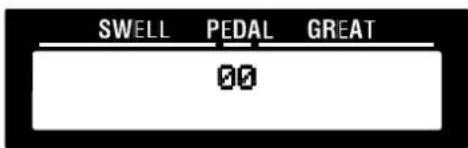
text_image
SWELL PEDAL GREAT 00Notice that the bottom line of the screen is now blank. The Information Center Display will show Drawbar settings and Preset information only. None of the Advanced Features may be accessed using the Touch Buttons.
To restore the organ to its normal playing mode, simply repeat steps 1 through 4 listed on the previous page. After doing so, you will be able to access the Advanced Features normally.
A Advanced Features - SYSTEM
There are three System Advanced Features which allow you to make the following changes to the organ:
-
Pedal Key Mode MONO / POLY - Allows you to select whether the Pedals play only one note at a time (“MONO”) or several notes at once (“POLY”).
-
Leslie Type - Allows you to select the sound character for a particular Leslie Speaker cabinet.
-
Software Version - Allows you to see the software version of your organ.
-
Default - Allows you to Reset the organ to its factory settings.
The following pages give a more detailed explanation of how these Advanced Features work.
PEDAL KEY MODE
This Advanced Feature allows you to select whether the Pedals play only one note at a time (“MONO”) or several notes at once (“POLY”).
TRY THIS:
- From either of the PLAY Mode Displays, touch the black MENU / EXIT Select Touch Button to display the A Menu of the MENU Mode:
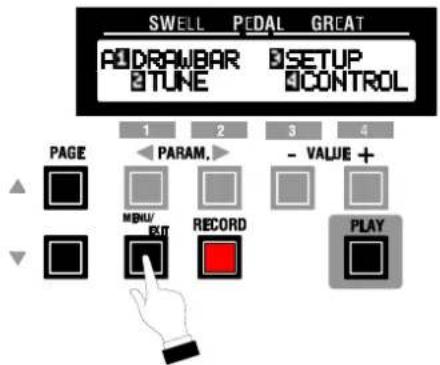
text_image
SWELL PEDAL GREAT DRAWBAR TUNE SETUP CONTROL PAGE 1 2 3 4 PARAM. - VALUE + MENU- RECORD PLAY- Touch the PAGE “•” Select Touch Button three times to display the D Menu:
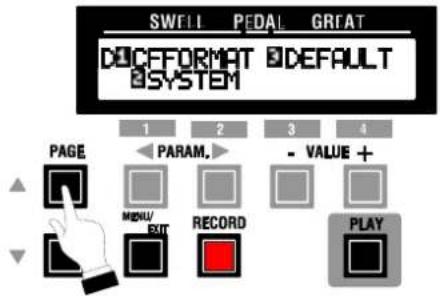
text_image
SWELL PEDAL GRAT DECFFORMAT DEFAULT SYSTEM PAGE 1 2 3 4 PARAM. - VALUE + MENU/RECORD PLAY EXIT- Touch the Number 2 Select Touch Button once ____ to select the SYSTEM Menu:
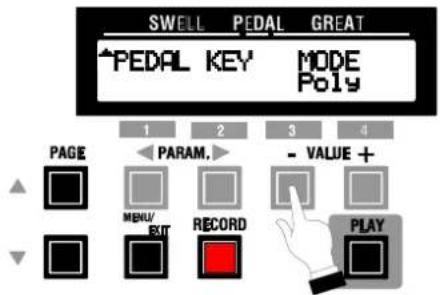
text_image
SWELL PEDAL GREAT *PEDAL KEY MODE Poly 1 2 3 4 PAGE PARAM. - VALUE + MENU/ RECORD PLAY EXITNotice that the word Poly is flashing "on" and "off."
- Now select the option you wish by doing the following:
Use the VALUE “-” Select Touch Button to select Poly.
Use the VALUE "+" Select Touch Button to select Mono.
The data chart below shows the options that you may select.
| PEDAL KEYBOARD MODE | |
| Mode Description | |
| *Poly “Polyphonic” - the Pedal Keyboard will play several notes at once. | |
| Mono “Monophonic” - the Pedal Keyboard will play only one note at a time. If two or pedals are played, the last Pedal key pressed will sound. |
*default setting
NOTE: You can exit by touching the MENU / EXIT Select Touch Button.
LESLIE TYPE
This Advanced Feature allows you to tailor the organ to the type of Leslie being used. You can select either “Tube” which is a mellow setting, or “SolidState” which emphasizes the higher frequencies. The default setting is “Tube.”
TRY THIS:
- From either of the PLAY Mode Displays, touch the black MENU / EXIT Select Touch Button to display the A Menu of the MENU Mode:
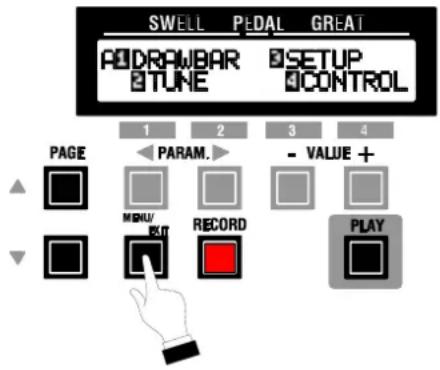
text_image
SWELL PEDAL GREAT A DRAWBAR TUNE B SETUP CONTROL PAGE PARAM. - VALUE + MENU/ RECORD PLAY- Touch the PAGE “•” Select Touch Button three times to display the D Menu:
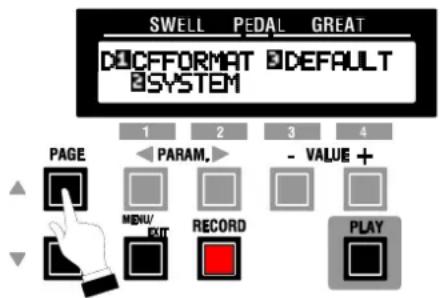
text_image
SWELL PEDAL GREAT DECFFORMAT DEFAULT SYSTEM PAGE 1 2 3 4 PARAM. - VALUE + MENU/RECORD PLAY MENU/EXIT RECORD- Touch the Number 2 Select Touch Button once to select the System Menu:
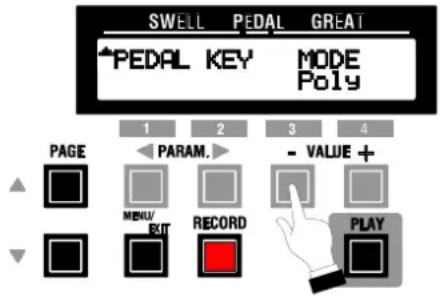
text_image
SWELL PEDAL GREAT *PEDAL KEY MODE Poly 1 2 3 4 PAGE PARAM. - VALUE + MENU/ RECORD PLAY EXIT- Touch the PAGE “•” Select Touch Button once. The Information Center Display should now look similar to this:
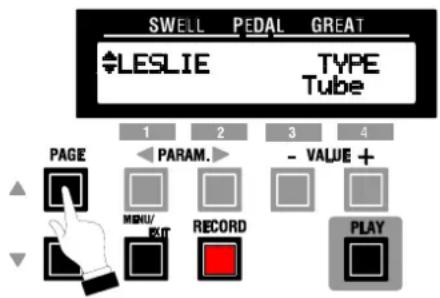
text_image
SWELL PEDAL GREAT LESLIE TYPE Tube 1 2 3 4 PAGE PARAM. - VALUE + MENU/RECORD PLAYNotice that the word Tube is flashing "on" and "off."
- Now select the option you wish by doing the following:
Use the VALUE “-” Select Touch Button to select Tube.
Use the VALUE “+” Select Touch Button to select SolidState.
The data chart below shows the options that you may select.
| LESLIE TYPE OPTIONSMode Description | |
| *Tube A setting whereby the frequency response is “flat”for use with a Leslie Speaker having a tube amplifier, such as model 122XB. | |
| SolidState A setting which “rolls off” the upper frequencies slightly, thereby adding warmth to the sound when used with older Leslie Speakers having solid-state amplifiers, such as models 760, 770, etc. |
*default setting
NOTE: You can exit by touching the MENU / EXIT Select Touch Button.
SOFTWARE VERSION
This Advanced Feature Menu Page allows you to see the software version of your organ. This page is simply an information screen.
TRY THIS:
- From either of the PLAY Mode Displays, touch the black MENU / EXIT Select Touch Button to display the A Menu of the MENU Mode:
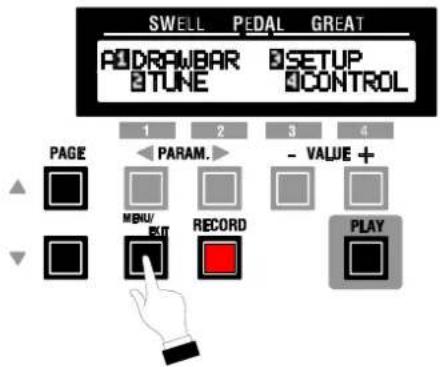
text_image
SWELL PEDAL GREAT DRAWBAR TUNE SETUP CONTROL PAGE 1 2 3 4 PARAM. - VALUE + MENU/RECORD PLAY exit- Touch the PAGE “•” Select Touch Button three times to display the D Menu:
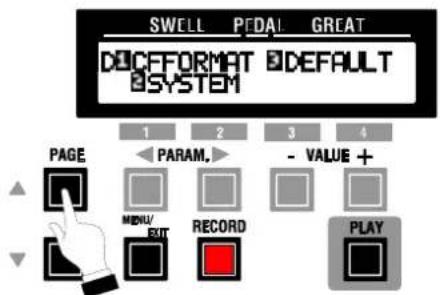
text_image
SWELL PEDAL GREAT DECFFORMAT DEFAULT SYSTEM 1 2 3 4 PAGE PARAM. - VALUE + MENU/RECORD PLAY MENU/EXIT RECORD PLAY- Touch the Number 2 Select Touch Button once ____ to select the SYSTEM Menu:
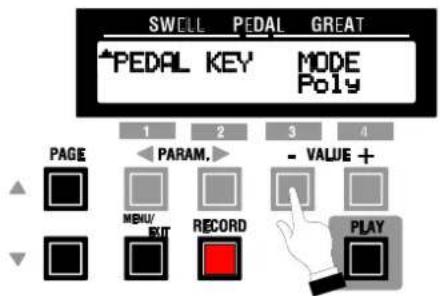
text_image
SWELL PEDAL GREAT *PEDAL KEY MODE Poly 1 2 3 4 PAGE PARAM. - VALUE + MENU/RECORD PLAY MENU/EXIT RECORD PLAY- Touch the PAGE “•” Select Touch Button two times. The Information Center Display should now look similar to this:
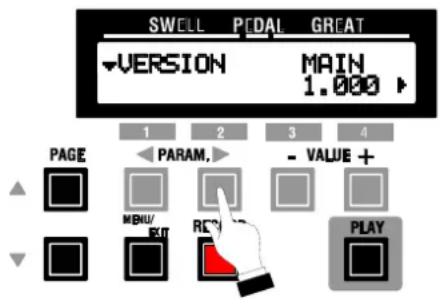
text_image
SWELL PICAL GREAT VERSION MAIN 1.000 PAGE PARAM. - VALUE + MENU/ RE PLAY- Now see the Software Version of your organ by doing the following:
Use the PARAM Select Touch Buttons to select the Software Module you wish to see.
The data chart below shows the Software Modules and a description of each one.
| SOFTWARE VERSION & DATEMessage Description | |
| MAIN Main operating system | |
| DSP EFFECTS(Vibrato, Percussion, Equalization, Reverb, Overdrive etc.) | |
| PEDAL Pedal Voice Generator |
NOTE: You can exit by touching the MENU / EXIT Select Touch Button.
A Advanced Feature - DEFAULT
This Advanced Feature allows you to Reset the organ to its factory settings.
WARNING: Doing the following will ERASE all parameters, settings and registrations you may have programmed. Make sure you are completely "backed up" before performing a Reset of the organ.
TRY THIS - to restore factory settings:
- From either of the PLAY Mode Displays, touch the black MENU / EXIT Select Touch Button to display the A Menu of the MENU Mode:
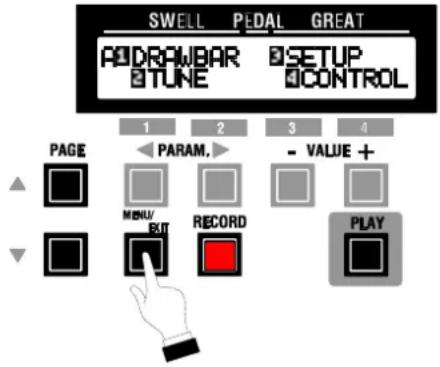
text_image
SWELL PEDAL GREAT ADDRAWBAR TUNE BSETUP CONTROL PAGE 1 2 3 4 PARAM. - VALUE + MENU/ EXIT RECORD PLAY- Touch the PAGE “•” Select Touch Button three times to display the D Menu:
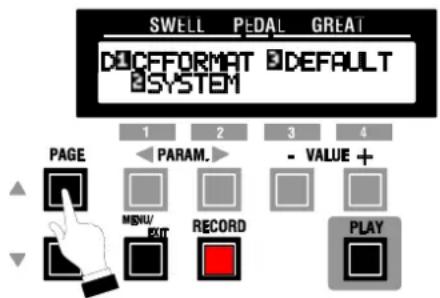
text_image
SWELL PEDAL GREAT DECFFORMAT DEFAULT SYSTEM 1 2 3 4 PAGE PARAM. - VALUE + MENU/RECORD PLAY- Touch the Number 3 Select Touch Button once to select the DEFAULT Menu:
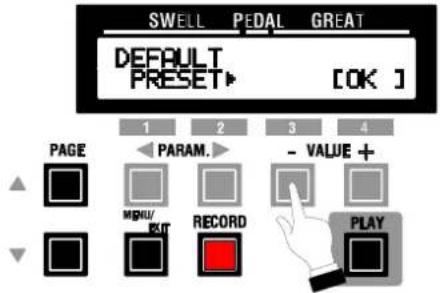
text_image
SWELL PEDAL GREAT DEFAULT PRESET ▶ [OK ] 1 2 3 4 PAGE PARAM. - VALUE + MENU/ RECORD PLAY- Now select the option you wish by doing the following:
Use the PARAM Select Touch Buttons to select which portions of the organ you want to Reset. The data chart below shows the options that you may select.
| DEFAULT SETTINGSSetting Description | |
| PRESET This will reset the Presets. | |
| GLOBAL This will reset the Global Parameters. | |
| ALL This will reset the entire organ. |
- After you have made your selection, touch the Number 4 [OK] Select Touch Button once to Reset the organ to the settings you have chosen. If you DO NOT wish to Reset, touch either the MENU / EXIT or the PLAY Select Touch Button.
TRY THIS - to Reset the organ quickly:
- If the organ is "ON," turn the power "OFF."
- Touch and Hold the RECORD Touch Button.

- While holding the RECORD Touch Button, turn the power to the organ "ON."

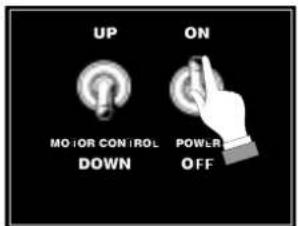
text_image
UP ON MOI OR CON I R O L DOWN POWLR OFF- Continue to hold the RECORD Touch Button until the opening message finishes displaying. The PLAY Screen will appear, and your Hammond Organ is now Reset with the factory settings.
REFERENCE
REFERENCE
The Accessory Panel is located inside the organ on the right side facing the back. To see the Accessory Panel, remove the back by rotating the two thumbscrews counter-clockwise by hand. You will see a diagram on the bottom shelf showing a mirror image of the jacks.
Ë INPUT
LINE IN L & R (Left & Right) -
Use to connect the organ to the LINE OUTs of an external sound device, such as a keyboard or a tape recorder. The volume of the external sound device can be controlled by the MASTER VOLUME Rotary Control.
Ë OUTPUT
LINE OUT L & R (Left & Right) -
Use to connect the organ to the LINE IN of an external amplifier.
Ë MIDI Jack
Use the MIDI jack to connect to outboard MIDI instruments such as synthesizers, sound modules and other devices.
Ë Appendix A - Global Parameter List
| Category | Global Parameters | ||
| Parameter Value Default | |||
| Tune | Transpose -6 - 0 - 6 0Master Tune 430 - 440 - 450 440 | ||
| Expression | Minimum Soft / Zero Soft | ||
| Curve 1, 2, 3 1(B-3Curve) | |||
| Foot Switch | Foot Sw (Exp. Pedal) | OffLeslie Fast(alternate)Leslie Fast(momentaly)Swell Vib On(momentaly)Damper Extra SwellDamper Extra GreatDamper Extra Pedal | Leslie Fast(alternate) |
| Preset Load eachSwell, Great | Extra Zone | Off / On | Off |
| Reverb | Rev. Type | Room 1 - 3,Hall 1, 2,Plate,Church,Cathedral | Hall 1 |
| Vibrato | Vibrato Rate | 6.1 - 7.25Hz | 6.83Hz |
| Swell/ Great Drawbar Voice | Voice Type | B-Type / Mellow | B-Type |
| Fold Back Low | 1C - 2C | 2C | |
| Fold Back High | 4G - 5C | 4G | |
| Pedal Drawbar Voice | Voice Type | Normal / Muted | Normal |
| Pedal Sustain | Off / On | Off | |
| Sustain Length | Off, 1 - 5 | 8 | |
| Percussion Voice | Level Normal | 1 - 8 | 7 |
| Level Soft | 1 - 8 | 3 | |
| Drawbar 1' Cancel | Off / On | On | |
| Drawbar Level | 0 / -3dB | -3dB | |
| Decay Rate Slow | 1 - 16 | 10 | |
| Decay Rate Fast | 1 - 16 | 5 | |
| Extra Zone each Pedal 1, Pedal 2, Pedal 3 | Part On | Off / On | On, Off, Off |
| Bank MSB | 0 - 127 | 0 | |
| Bank LSB 0 - 127 | 0 | ||
| Program | 1 - 128 | 1 | |
| Volume | 0 - 127 | 100 | |
| Pan Left - Center - Right | Center | ||
| Vel. Curve | Off | Off | |
| Reverb Send Level | 0 - 127 | 0 | |
| Chorus Send Level | 0 - 127 | 0 | |
| Octave Shift | 3E - 40 - 42 (-2 - 0 - +2) | 0 | |
| Key Range Low | 1C - 3C | 1C | |
| Key Range High | 1C - 3C | 3C | |
| Extra Damper | Swell 1 | Off / On | On |
| Swell 2 | Off / On | On | |
| Swell 3 | Off / On | On | |
| Great 1 Off / On | On | ||
| Great 2 Off / On | On | ||
| Great 3 Off / On | On | ||
| Pedal 1 | Off / On | On | |
| Pedal 2 | Off / On | On | |
| Pedal 3 | Off / On | On | |
Ë Appendix B - Preset Parameter List
| Category Parameter | Value | |
| Drawbar Registration(Swell & Great) | 16' 0 - 85 1/3' 0 - 88' 0 - 84' 0 - 82 2/3' 0 - 82 0 - 81 3/5' 0 - 81 1/3' 0 - 81' 0 - 8 | |
| Extra Zone(Swell 1, Swell 2, Swell 3, Great 1, Great 2, Great 3 | Part On 00, 01 (Off/On) | |
| Bank MSB 00 - 7F (0 - 127) | ||
| Bank LSB 00 - 7F (0 - 127) | ||
| Program 00 - 7F (1 - 128)Volume 00 - 7F | ||
| Pan 00 - 40 - 7F | (Left - Center - Right) | |
| Vel. Curve 00 - 05 | (Off, Normal - String) | |
| Reverb Send Level | 00 - 7F | |
| Chorus Send Level | 00 - 7F | |
| Octave Shift | 3E - 40 - 42(-2 - 0 - +2) | |
| Key Range Low | 24 - 5F | |
| Key Range High | 25 - 60 |
E Appendix C - System Parameter List
| Category Parameter | Value | Default | |
| PEDAL MODE | Poly Mono | Poly / Mono | Poly |
| LESLIE TYPE | Tube,SolidState | Tube / Solidstate | Tube |
| MIDI TRANSMIT CHANNEL | Swell 1 | 1 - 16, Off 1 | |
| Swell 2 | 1 - 16, Off 2 | ||
| Swell 3 | 1 - 16, Off 3 | ||
| Great 1 | 1 - 16, Off 4 | ||
| Great 2 | 1 - 16, Off 5 | ||
| Great 3 | 1 - 16, Off 6 | ||
| Pedal 1 | 1 - 16, Off 7 | ||
| Pedal 2 | 1 - 16, Off 8 | ||
| Pedal 3 | 1 - 16, Off 9 |
E Appendix D - Real-time Parameter List
| Category Parameter Value | ||
| Preset Key Swell C | # - A (C=OFF) + A# + B | |
| Great C# - A (C=OFF) + A# +B | ||
| Pedal DB 16' 0 - 8 | ||
| Registration 8' 0 - 8 | ||
| Volume Soft 00, 01 (Off/On) | ||
| Drawbar Effect | Vibrato On Swell 00, 01 (Off/On) | |
| Vibrato On Great | 00, 01 (Off/On) | |
| Vibrato Mode (6-position knob) | 00 - 05 (V1 - C3) | |
| Percussion Voice | Percussion On | 00, 01 (Off/On) |
| Harmonic | 00, 01 (Second/Third) | |
| Decay | 00, 01 (Fast / Slow ) | |
| Soft / Normal | 00, 01 (Soft / Normal ) | |
| Controller | Master Volume | |
| Expression Pedal | ||
| TONE Bass | ||
| TONE Treble | ||
| Reverb | ||
| Overdrive | ||
| Leslie Switch Jack (Ring) | Leslie Chorale / Stop / Tremolo | |
| Leslie Main / Echo Jack | Main / Echo | |
| Exp Foot Switch | Assignable | |
| OUT | HEAD PHONE JACK | |
| IN | Leslie 11PIN JACKLINE OUT L/R JACKMIDI OUT JACKLINE IN L/R JACK | |
New B-3
8/20/2002 Version1.0
| Function Transmitted | Recognized Remarks | ||||||
| Basic Channel | Default 1 - 16 *1 X | *1: Swell = 1, Great = 4, | |||||
| Changed ***** X | Pedal=7 | ||||||
| Mode | Default 3 X | ||||||
| Messages XX | |||||||
| Altered ***** X | |||||||
| Note Number | 36 - 97 *2 | X *2: Swell&Great = 36 - 97 | |||||
| : True Voice | ***** XPedal = 36 - 60 | ||||||
| Velocity | Note ON | 0 | X | ||||
| Note OFF | XX 9xH, vv=00h | ||||||
| After Touch | Key's | XX | |||||
| Ch's | XX | ||||||
| Pitch Bender | 0 | X | |||||
| Control Change | 32 | 0 | X Bank Select | ||||
| 7 | 0 | X | Volume | ||||
| 10 | 0 | X Pan | |||||
| 11 | 0 | X Expression | |||||
| 64 | 0 | X Damper (Off: 00H, On:7FH) | |||||
| 91 | 0 | X Reverb Send Level | |||||
| 93 | 0 | X Chorus Send Level | |||||
| 121 | 0 | X Reset All Controllers | |||||
| Program Change | 0 | 0 - 127 | X | ||||
| : True # | ***** X | ||||||
| System Exclusive | XX | ||||||
| System Common | : Song Position | XX | |||||
| : Song Select | XX | ||||||
| : Tune | XX | ||||||
| System Real Time | : Clock | X | X | ||||
| : Commands | X | X | |||||
| Aux Messages | : Local On/Off | XX | |||||
| : All Notes Off | 0 | X | |||||
| : Active Sense | 0 | X | |||||
| : Reset XX | |||||||
| Mode 1: | OMNI ON, POLY | Mode 2: | OMNI ON, MONO | 0: Yes | |||
| Mode 3: | OMNI OFF, POLY | Mode 4: | OMNI OFF, MONO | X: No | |||
È Specifications
KEYBOARDS Swell and Great 61 keys each
PEDALS 25-note, radiating, detachable
PRESET KEY 12keys Mec-3/7hanical Latch
HARMONIC DRAWBARS
SWELL(UPPER)
9 pitches 2 sets
GREAT(LOWER)
9 pitches 2 sets
2 pitches
PRESET MEMORY CompactFlash card
KEYING METHOD Direct Analog Keying
KEY CONTACT 10-Mechanical contacts + Rubber contacts w/velocity
POLYPHONY Full Polyphony
GENERATOR(Manual) 96-Digital Tone Wheels
GENERATOR(Pcdal) VASE II
PERCUSSION Harmonic Selector Second/Third, Decay Slow/Fast, Volume Soft/Normal
VIBRATO/CHORUS V1, V2, V3, C1, C2, C3, SWELL ON, GREAT ON
Expression Pedal w/Foot Switch REVERB, OVERDRIVE
TONE CONTROL
BASS, TREBLE
TERMINAL
11P LESLIE SOCKET (Main ,Echo) , HEADPHONE LINE IN , LINE OUT , MIDI OUT
EXT MEMORY SLOT
COMPACT FLASH CARD
DISPLAY
20x2 digits LCD
WEIGHT
209lbs (95kg)
DIMENSION
48"(w) x 29"(D) x 38"(H), 123(W) x 73(D) x 97(H)cm
ACCESSORY
Compact Flash Card HCF-32, Leslie Speed Switch
È Instrument Care
AC Power
Be sure to turn the instrument “OFF” after use, and do not turn the unit “ON” and “OFF” in quick succession, as this places an undue load on the electronic components.
Cabinet And Bench
As with any piece of furniture, direct sunlight can damage the finish of your instrument. Use a soft dry cloth for dusting. To remove fingerprints or dulling film, use a soft cloth slightly moisten with water and a little mild soap. Immediately wipe dry with a soft dry cloth.
Keys And Buttons
To clean keys and buttons, use a clean soft cloth moistened with water. Do not use any solvents, thinners or dryers such as alcohol, gasoline, lighter fluid, carbon tetrachloride, etc. These solutions may affect the letters and/or finish on the buttons and keys.
Moving Your Instrument
It is not necessary to bolt or fasten any parts of the instrument when moving. Careful consultation with your mover will assure you of a satisfactory moving job.
Ë Troubleshooting
If you encounter the following conditions, please check the following points before calling for service:
A Entire instrument fails to play
* Is the Power Switch "ON?"
* Is the AC plug inserted into a wall socket?
* Is the Leslie cable connected?
* Is the AC plug of the Leslie Speaker connected to a wall socket?
★ Is the MASTER VOLUME Rotary Control (underneath the manuals on the left side) turned up?
★ Is a Preset Key selected?
★ Are headphones connected?
A Sound is distorted
★ Is the OVERDRIVE Rotary Control on Rotary Control Panel (underneath the manuals on the left side) turned up? If so, please turn the control all the way to the left.
A Key Click noise when pressing or releasing a manual key
* When a key is depressed, ten (10) small switch contacts are closed - one for each of the nine Drawbars (plus an additional contact to allow MIDI transmission). Therefore, there will be a slight "click" or "pop" when keys are depressed and released. This is done on purpose to duplicate the performance of a Hammond tone-wheel organ, which used a similar keying system. Since it is an inherent characteristic of the New B-3 and New C-3, and since it is mechanical, it cannot be deleted. However, the unique "Key Click" sound is considered to be an important and indispensable part of the "B-3" tonal identity. However, it is possible that dust may settle on the key contacts, resulting in an intermittent or "scratchy" sound. If this occurs, the contact can be "self-cleaned" by pressing and releasing the keys several times (10 or 20 times).
If the problem persists, please contact your Hammond Organ dealer.
Ë Important Note - Battery
Your New B-3 / New C-3 Hammond Organ uses a battery-backed RAM to remember your changes to the Preset and Global parameters. When the battery voltage becomes low and the power is “ON,” the Information Center Display will show this message for a few seconds:
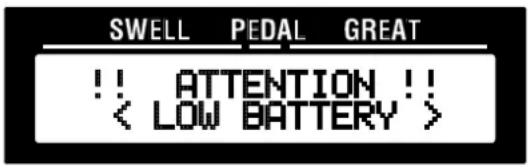
text_image
SWELL PEDAL GREAT !! ATTENTION!! < LOW BATTERY >If you see this message, you should immediately back up your parameter changes, if you have made any, and please contact your Authorized Hammond Dealer for Service assistance and ask them to exchange the battery.
If the battery is completely dead, the information Center Display will show this message:
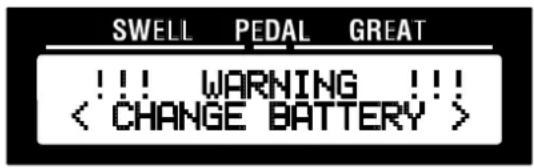
text_image
SWELL PEDAL GREAT !!! WARNING !!! < CHANGE BATTERY >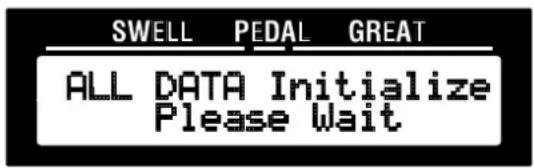
text_image
SWELL PEDAL GREAT ALL DATA Initialize Please WaitAfter the above message is displayed, the organ will re-initialize itself, and the factory default settings will be restored. Therefore, it is a good idea to periodically back up data. Please contact your Authorized Hammond Dealer for Service assistance and ask them to exchange the battery.
Manufacturer assumes no responsibility for loss of memory caused by damage to the unit after purchase, such as power surges, battery replacement, repair, etc.
I Hammond maintains a policy of continuously improving and upgrading its instruments and therefore reserves the right to change specifications without notice. Although every attempt has been made to insure the accuracy of the descriptive contents of this Guide, total accuracy cannot be guaranteed. Should the player require further assistance, inquiries should first be made to your Authorized Hammond Dealer. If you still need further assistance, contact I Hammond at the following addresses:
In the United States contact:
In Europe contact:
All other countries contact:
HAMMOND SUZUKI USA, Inc.
733 Annoreno Dr.
Addison, IL 60101
UNITED STATES
HAMMOND SUZUKI EUROPE B.V.
IR. D.S. Tuynmanweg 4A
4131 PN Vianen
THE NETHERLANDS
HAMMOND SUZUKI Ltd.
25-12, Ryoke 2 Chome
Hamamatsu 430-0852 (Shizuoka)
JAPAN
Email:hammondsuzuki@worldnet.att.net Email:info@hammondsuzuki.com
Website:www.hammondsuzuki.com
Technical materials are available and can be obtained by mailing a request to the appropriate address listed above marked ATTENTION: SERVICE DEPARTMENT.
Manufacturer:
SUZUKI MUSICAL INSTRUMENT MFG. CO., Ltd
25-12, Ryoke 2 Chome
Hamamatsu 430-0852 (Shizuoka)
JAPAN
ACKNOWLEDGMENTS
In appreciation of the many fine players who have made their contributions to Hammond over the years:
Axel Alexander
Milt Buckner
Buddy Cole
Jesse Crawford
Wild Bill Davis
Jackie Davis
"Papa" John DeFrancesco
Joey DeFrancesco
Lenny Dee
Collins Driggs
Artie Dunn
Eddie Dunstedter
Charles Earland
Richard Ellsasser
Keith Emerson
Fred Feibel
Virgil Fox
Ken Griffin
Jon Hammond
Glenn Hardman
Porter Heaps
Richard "Groove" Holmes
Milt Herth
Bob Kames
Al Kooper
Eddie Layton
Jon Lord
Captain Jack McDuff
Jimmy McGriff
Lee Micheals
Don Patterson
Big John Patton
Richard Purvis
Bob Ralston
Rosa Rio
Freddie Roach
Bryan Rodwell
Dr. Mario Salvador
Shirley Scott
Hal Shutz
Ethel Smith
Jimmy Smith
Cor Steyn
Paul Taubman
Shay Torrent
Juan Torres
Rick Wakeman
Thomas "Fats" Waller
Walter Wanderly
Lew White
Baby Face Willette
George Wright
Klaus Wunderlich
Pietro Yon
Larry Young
and many others too
numerous to list.