
GN 366 A+ - Refrigerator TECHWOOD - Free user manual and instructions
Find the device manual for free GN 366 A+ TECHWOOD in PDF.


| Product Type | Refrigerator with Freezer |
| Brand | Techwood |
| Model | GN 366 A+ |
| Cooling System | No-Frost |
| Operating Voltage | 220-240 V, 50 Hz |
| Climate Class | SN, N, ST, T (10°C to 43°C) |
| Thermostat Control | Manual knob, settings 1-6 |
| Freezer Capacity | Approx. 13 hours power-off storage at 25°C |
| Defrosting | Automatic in freezer, manual defrost for static models |
| Light Bulb | 15 watt (replaceable) |
| Door Reversible | Yes |
| Refrigerant | R600a (isobutane, flammable but environmentally friendly) |
| Minimum Clearance | 15 cm above, 5 cm from electric ovens, 50 cm from heat sources |
| Adjustable Feet | Yes, front legs adjustable for leveling |
| Compressor Delay | 5 minutes after power interruption |
| Cleaning | Unplug before cleaning; use warm soapy water; do not use flammable substances |
| Spare Parts Availability | 10 years as per manufacturer |
| Safety Features | Grounded plug, 16A fuse, child lock (if not applicable, omit) |
| Installation Requirements | Upright for 3 hours before first use; spacers for condenser |
Frequently Asked Questions - GN 366 A+ TECHWOOD
User questions about GN 366 A+ TECHWOOD
0 question about this device. Answer the ones you know or ask your own.
Ask a new question about this device
Download the instructions for your Refrigerator in PDF format for free! Find your manual GN 366 A+ - TECHWOOD and take your electronic device back in hand. On this page are published all the documents necessary for the use of your device. GN 366 A+ by TECHWOOD.
USER MANUAL GN 366 A+ TECHWOOD
natural_image
Interior view of a white refrigerator with open doors and storage compartments (no visible text or symbols)Inhalt
natural_image
Close-up of a door with a blue circle highlighting a small object, no visible text or symbolsnatural_image
Close-up of a white door with a white handle and orange carpet, no visible text or symbolsnatural_image
Person installing or adjusting a white appliance panel on a red floor, with blue arrows pointing to the component (no text or symbols visible)natural_image
Close-up of a white car door with a black plastic clip attached, showing no visible text or symbols.natural_image
Close-up of a white mechanical component with a black screwdriver inserted, against a red background (no visible text or symbols)natural_image
Close-up of a white door with two circular buttons and a yellow tool inserted, no visible text or symbolsnatural_image
Close-up of hands adjusting a white plastic component with a small circular button (no text or symbols visible)natural_image
Close-up of a white ceramic container with a tool inserted, showing a small object on top and a blue arrow indicating upward motion (no text or symbols)
natural_image
Close-up of a white plastic container with a yellow tool and a blue upward arrow pointing to a small white object (no text or symbols visible)natural_image
Close-up of a hand pressing down on a white battery casing (no visible text or symbols)natural_image
Close-up of a hand using a screwdriver to adjust or install a white cabinet panel (no visible text or symbols)
natural_image
Cartoon illustration of a distressed refrigerator with arms and legs, showing a sad face (no text or symbols)natural_image
Cartoon illustration of a smiling refrigerator with hands giving thumbs up and a bowl with chopsticks (no text or symbols)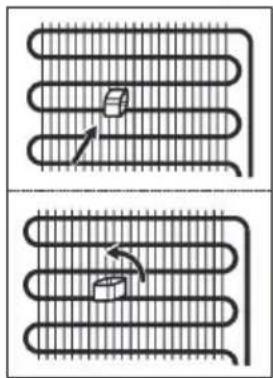
natural_image
Diagram showing two stages of a coiled heat exchanger with a moving component, no text or symbols presentVor dem Einschalten
natural_image
Technical line drawing of a mechanical or architectural component with internal compartments and decorative patterns (no text or symbols)natural_image
Line drawing of a hand holding a circular knob inside a device panel (no text or symbols)Kühlbereich
natural_image
Technical line drawing of a refrigerated industrial machine with cooling fins and internal components (no text or symbols)TRANSPORT UND STANDORTWECHSEL
natural_image
Simple line drawing of two children playing a board game (no text or symbols)natural_image
Simple line drawing of a trash bin with crossed lines indicating no waste or restriction (no text or symbols)Hinweis
natural_image
Illustration of three hands performing a rope knotting technique (no text or symbols present)DE ONDERDELEN VAN HET APPARAAT EN DE

natural_image
Cartoon illustration of a refrigerator with a smiling face and a closed door, accompanied by a bowl and utensils (no text or symbols)
natural_image
Diagram showing two identical curved pipes with internal structures and directional arrows, no text or symbols present.natural_image
Technical line drawing of a mechanical or electrical component with internal compartments and no visible text or symbolsDE DIVERSE FUNCTIES EN DE MOGELIJKHEDEN
Temperatuurinstellingen
natural_image
Line drawing of a hand holding a circular knob inside a device panel (no text or symbols)Koelgedeelte
natural_image
Simple line drawing of a smiling square character and a hand, no text or symbols present
natural_image
Cartoon illustration of a smiling refrigerator with a hand pointing at it, accompanied by a small jar and bucket (no text or symbols)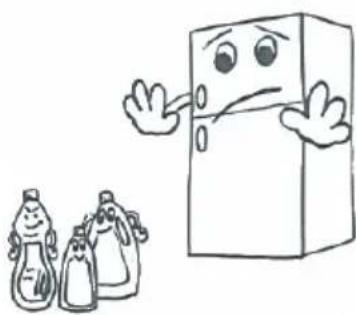
natural_image
Cartoon illustration of a refrigerator with a sad face and two smaller figures nearby (no text or symbols)
natural_image
Illustration of a hand holding a cylindrical object over a rack (no text or symbols visible)DE STEKKER MOET HIERVOOR UIT HET STOPCONTACT WORDEN VERWIJDERD.
Ontdooien

natural_image
Technical line drawing of an internal refrigeration unit with coiled heat exchanger and cooling unit (no text or symbols)VERVOEREN EN VERPLAATSEN
natural_image
Simple line drawing of two children playing a game with a long block (no text or symbols)Safety Instructions 42
Safety warnings 43
THE PARTS OF THE APPLIANCE AND THE COMPARTMENTS .....44
Reversing the Door 45
INSTALLING AND OPERATING YOUR FRIDGE....49
Before Using your Fridge 49
Information On No-Frost Technology 50
USAGE INFORMATION 51
Temperature Settings 51
Warnings for Temperature Settings 51
PLACING THE FOOD 52
Cooling Compartment 52
The Deep Freeze Compartment 53
CLEANING AND MAINTENANCE ....57
Defrosting 58
Replacing the Bulb 58
SHIPMENT AND REPOSITIONING 59
BEFORE CALLING SERVICE 59
BEFORE USING YOUR FRIDGE
Safety Instructions
- If the model contains R600a-see name plate under refrigerant (the coolant isobutane), naturals gas that, is very environmentally friendly but also combustible. When transporting and installing the unit care must be taken to ensure that none of the refrigeration circuit components become damaged. In the event of damage avoid naked flames or ignition sources and ventilate the room in which the unit is placed for a few minutes.
Warning: Keep ventilation openings in appliance enclosure or in structure for building in, clear of obstruction.
- Do not use mechanical devices or other artificial means to accelerate the defrosting process.
- Do not use electrical appliances in the refrigerator or freezer compartment of the appliance.
- If this appliance is to replace an old refrigerator with a lock; break or remove the lock as a safety measure before storing it, to protect children while playing might lock themselves inside.
- Old refrigerators and freezers contain insulation gases and refrigerant, which must be disposed of properly. Entrust the disposal of a scrap unit categorically to competence of your local waste disposal service and contact your local authority or your dealer if you have any questions. Please ensure that the pipe of work of your refrigerating unit does not get damaged prior to being picked-up by the relevant waste disposal service.
Important note:
Please read this booklet before installing and switching on this appliance. The manufacturer assumes no responsibility for incorrect installation and usage as described in this booklet.
Safety warnings
Warning: Do not use mechanical devices or other means to accelerate the defrosting process, other than those recommended by the manufacturer. Do not use electrical appliances inside the food storage compartments of the appliance, unless they are of the type recommended by the manufacturer. Keep ventilation openings, in the appliance enclosure or in the built-in structure, clear of obstruction. Do not damage the refrigerant circuit.
- Do not use multiple receptacles or extension cords.
- Do not plug in damaged, torn or old plugs.
- Do not pull, bend or damage the power cord.


natural_image
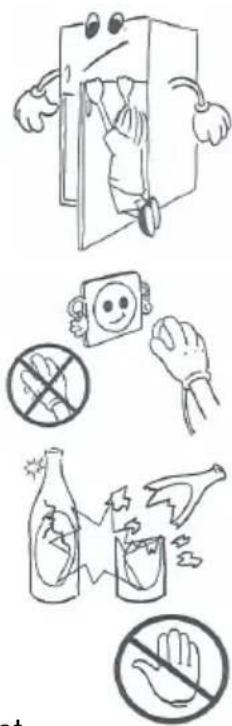
Illustration of three hands performing a rope knotting technique (no text or symbols present)- This appliance is designed for use by adults. Do not allow children to play with the appliance or let them hang on the door.
• To prevent electrocution or electrical shock, do not plug in or remove the plug from the receptacle with wet hands! - Do not place glass bottles or beverage cans in the freezer compartment. Bottles or cans may explode.
- For your safety do not place explosive or flammable material in your fridge. Place drinks with higher alcohol content vertically and close their caps tightly in the fridge compartment.
- Do not touch frozen goods with wet hands!
- Do not re-freeze frozen goods after being thawed. This may cause serious health issues on consumption like food poisoning.
- Do not cover the body or top of the fridge with lace. This affects the performance of the appliance.
- Secure the accessories in the fridge during transportation to prevent them from damage.
- The appliance is not intended for use by people (including children) with reduced physical, sensory or mental capabilities, or lack of experience and knowledge, unless they have been given supervision or instruction concerning use of the appliance by a person responsible for their safety. Children should be supervised to ensure that they don't play with the appliance.
- If the supply cord is damaged it must be replaced by the manufacturer or service agent or similar qualified people in order to avoid a hazard.
THE PARTS OF THE APPLIANCE AND THE COMPARTMENTS

This presentation is only for information about the parts of the appliance. Parts may vary according to the appliance model.
A) Cooling Compartment
B) Freezing Compartment
1) Cooling Glass Shelf
2) Thermostat
3) Glass Above the Vegetable Holder
4) Vegetable Holder
1- Unscrew the two screws which are fixing the middle hinge. (Fig-1)

natural_image
Close-up of a door with a blue circular annotation highlighting a small object, no visible text or symbols3- Remove the kick plate by pulling forward. (Fig-3)

natural_image
Person installing or adjusting a white appliance on a red floor, with blue arrows pointing to the component (no text or symbols visible)5- Unscrew the pin of hinge from Hole 1, rotate the bottom hinge 90^ and screw the pin to Hole 2. (Fig-5)
2- Dismantle the refrigerator and freezer door from cabinet by pulling towards to you together with the middle hinge. (FIG-2)

natural_image
Close-up of a white door hinge with a blue arrow pointing to a blue object on the floor (no text or symbols visible)4- Unscrew the bottom hinge fixing screws and remove it. (Fig-4)

natural_image
Close-up of a white plastic electrical connector with a black cable inserted, next to a white panel on a dark surface (no visible text or symbols)6- Then screw the hinge to bottom left side of refrigerator. (Fig-6)
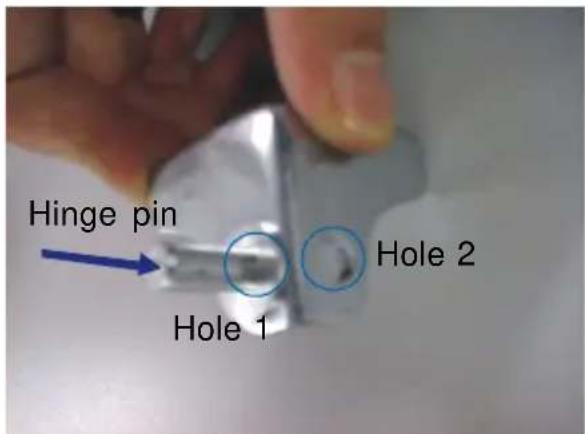
natural_image
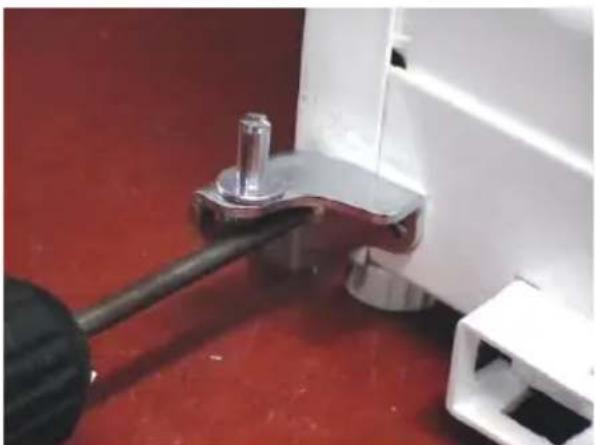
Close-up of a white mechanical component with a black tool inserted, against a red background (no visible text or symbols)7- Remove the caps on the left. (Fig-7)

natural_image
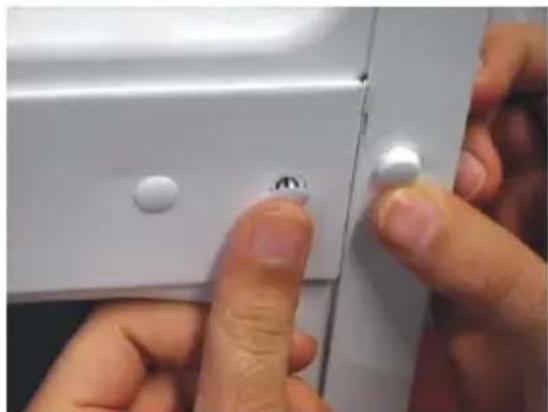
Close-up of a white door with two white circular buttons and a yellow tool inserted, no visible text or symbols.9- Unscrew the pin of the right top hinge (Fig-9)
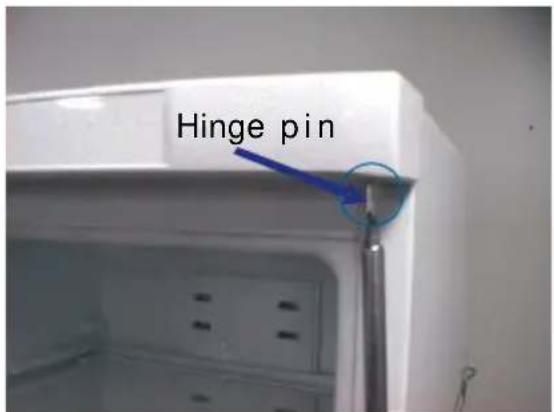
11- Screw the pin of the left top hinge. (Fig-11)
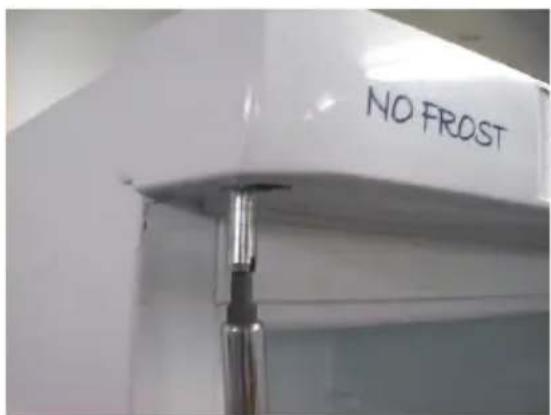
8- Insert the caps to the right side. (Fig-9) (You can find the new caps in the user manual bag)
natural_image
Close-up of hands adjusting a white electrical switch component (no text or symbols visible)10- Then by using a knife cut the left side of the head panel. (Fig-10)

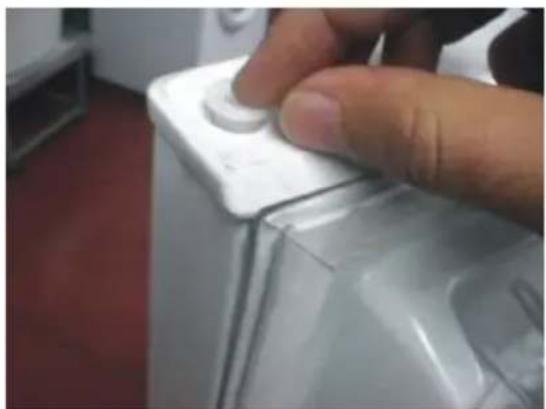
12- Replace the freezer door top bushing (Fig-12.1) and top bushing cap. (Fig-12.2) (You can find the new bushing cap in the user manual bag)

13- Remove the freezer door bottom bushing and bottom stopper and then insert them the left side. (Fig-13)
14- Remove the freezer door top bushing and insert it into left hole. (Fig-14)
15- Remove the refrigerator door bottom and top bushing and then insert them the left side. (Fig-15)
natural_image
Close-up of a hand pressing down on a white battery cover (no visible text or symbols)16- Turn the middle hinge 180°. Assemble the freezer door and refrigerator door together with middle hinge (Reverse operation of item 2) Fix the middle hinge by tightening the screws. (Fig-16)
17- Finally, by using a knife cut left side of the kick plate and assemble it. (Fig-17)

natural_image
Close-up of a hand using a power tool to clean or store items on a white cabinet (no visible text or symbols)
INSTALLING AND OPERATING YOUR FRIDGE
- Before making the connection to the power supply, ensure that the voltage on the nameplate corresponds to the voltage of the electrical system at your home.
- Operating voltage for your fridge is 220-240 V at 50Hz.
- Before starting to use your fridge, please contact the nearest authorized servicer if help is needed with the installation, operation and usage of your fridge.
- The main power cord of your fridge has a grounded plug. This plug should be used with a grounded receptacle that has a 16 amper fuse minimum. If you don't have a receptacle conforming with this, please have one installed by a qualified electrician.
- We do not take responsibility for any damages that occur due to ungrounded usage.
- Place your fridge in a place where it is not exposed to direct sunlight.
- Your appliance should be at least 50 cm away from stoves, ovens and heater cores, and should be at least 5 cm away from electrical ovens.
- This appliance should never be used outdoors or left under the rain.
- Fit the plastic wall spacers to the condenser on the back of the refrigerator in order to prevent it from touching the wall and affecting performance.
- When your fridge is placed next to a deep freezer, there should be at least 2 cm between the appliances to prevent humidity on the outer surface. Do not place anything on your fridge, and install your fridge in a suitable place where there is at least 15 cm of clearance space available on the upper side.

natural_image
Cartoon illustration of a distressed refrigerator with arms and legs (no text or symbols)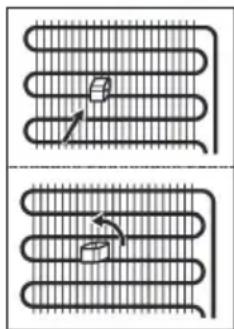
natural_image
Diagram showing two top-down views of a coiled structure with internal components and directional arrows (no text or symbols)
natural_image
Cartoon illustration of a smiling refrigerator with hands giving thumbs up, next to a mortar and pestle (no text or symbols)- If you place your fridge next to your kitchen cabinets, leave a space of 2 cm between the appliance and the cabinets.
- Install the distance adjustment plastic (the part with black vanes at the rear) by turning it 90^ to prevent the condenser from touching the wall.
- The adjustable front legs should be set at an appropriate height to allow your fridge to operate in a stable and proper way. You can adjust the legs by turning them clockwise or counter-clockwise. This should be done before placing food in the fridge.
- Before using your fridge, wipe all parts with warm water mixed with a teaspoonful of sodium bicarbonate and then rinse with clean water and dry. After cleaning, replace all parts in their proper locations in the fridge.
Before Using your Fridge
- When operated for the first time or after transportation, keep your fridge in the upright position for at least 3 hours before plugging it in to allow efficient operation. Otherwise, you may damage the compressor.

- Your fridge may have a slight odor when it is operated for the first time. The odor will fade away when your fridge starts to cool.
Information On No-Frost Technology
No-frost refrigerators differ from other static refrigerators in their operating principle.
In normal fridges, the humidity entering the fridge due to door openings and the humidity inherent in the food causes freezing in the freezer department. To defrost the frost and ice in the freezer compartment, you are periodically required to turn off the fridge, place the food that needs to be kept frozen in a separately cooled container, and remove the ice gathered in the freezer department.
The situation is completely different in no-frost fridges. Dry and cold air is blown into the fridge and freezer compartments homogeneously and evenly from several points via a blower fan. Cold air dispersed homogeneously and evenly between the shelves cools all of your food equally and uniformly, thus preventing humidity and freezing.
Therefore your no-frost fridge allows you ease of use, in addition to its huge capacity and stylish appearance.

natural_image
Technical line drawing of a mechanical assembly with internal components and no visible text or symbolsUSAGE INFORMATION
Temperature Settings
Cooler and Freezer Thermostat Knob

natural_image
Line drawing of a hand holding a circular knob inside a device panel (no text or symbols)Cooling compartment
The thermostat ensures that the temperature settings in the cooling and freezing compartments of your refrigerator are controlled automatically. It may be set to any value ranging from 1 to 6. As you turn the thermostat setting knob from 1 to 6, the amount of cooling increases.
Cooling compartment thermostat knob:
5 - 6 : For more cooling.
3 - 5 : For normal utilization.
1 - 3 : For less cooling.
Warnings for Temperature Settings
- It is not recommended that you operate your fridge in environments colder than 10^ C in terms of its efficiency.
- The thermostat setting should be done by taking into consideration how often the fresh food and freezer doors are opened and closed, how much food is stored in the refrigerator, and the environment in which the refrigerator is located.
- Your fridge should be operated up to 24 hours according to the ambient temperature without interruption after being plugged in to be completely cooled. Do not open doors of your fridge frequently and do not place much food inside it in this period.
- A 5 minute delaying function is applied to prevent damage to the compressor of your fridge, when you take the plug off and then plug it on again to operate it or when an energy breakdown occurs. Your fridge will start to operate normally after 5 minutes.
- Your fridge is designed to operate in the ambient temperature intervals stated in the standards, according to the climate class stated in the information label. It is not recommended that your fridge is operated in the environments which are out of the stated temperature intervals in terms of cooling efficiency.
| Climate Class | Ambient |
| T | 16 to 43 °C |
| ST | 16 to 38 °C |
| N | 16 to 32 °C |
| SN | 10 to 32 °C |
PLACING THE FOOD
Cooling Compartment
- To prevent humidification and odor formation, the food should be placed in the refrigerator in closed or covered containers.
- Hot foods and drinks should be cooled to room temperatures before being placed in the refrigerator.
- Please do not prop packaged food and containers against the lamp or cover of the cooling compartment.
- Fruits and vegetables may be placed directly in the vegetable holder without being wrapped separately.
- Some recommendations have been specified below for the placement and storage of your food in the cooling compartment.
| Food | Storage Duration | Location where it will be placed in the cooling compartment |
| Fruits and Vegetables | 1 Week | In the vegetable holder (without being wrapped in anything) |
| Fish and meat | 2-3 days | Wrapped in plastic folio or bag or within a meat box (on the glass shelf) |
| Fresh cheese | 3-4 days | In the special door shelf |
| Butter, margarine | 1 Week | In the special door shelf |
| Bottled products, Milk and yoghurt | The period recommended by the manufacturer | In the special door shelf |
| Egg 1 month | In the egg-holder shelf | |
| Cooked food | In every shelf | |
NOTE: Potatoes, onions and garlic should not be stored in the refrigerator. Meat should never be refrozen after it is thawed if it has not been cooked before refreezing.
The Deep Freeze Compartment
- Use the deep freeze compartment of your refrigerator for storing the frozen food for a long time and for producing ice.
- To get maximum capacity for freezer compartment, please just use glass shelves for upper and middle section. For bottom section, please use lower basket.
- Place the food you would like to freeze initially in the upper shelf of the deep freeze section in such a way that it shall not exceed the declared freezing capacity of your refrigerator. You may place your food next to the other frozen foods after they are frozen (for at least 24 hours).
- It is recommended to keep thermostat set at level 5.
- It is recommended that the food which is being newly frozen be kept separate from the already frozen food.
- Foods should be frozen in single portion sized containers.
- Do not refreeze the frozen food once it is thawed. It may pose a danger to your health as it might cause problems like food poisoning.
- Do not place hot meals in your deep freeze until they cool down. You could cause the other food frozen beforehand in the deep freeze compartment to become spoiled.
- As you buy frozen food, make sure it was frozen under appropriate conditions and that the packaging is not torn.
- While storing frozen food, the storage conditions on the package should certainly be observed. If there are no instructions, the food has to be consumed in the shortest possible period of time.
- Frozen food has to be transported before it thaws and it should be placed in the fast freezing shelf as soon as possible. Please do not use the door shelves for fast freezing purposes.
- If the frozen food package has been humidified and it has a foul odor, the food might have previously been stored under unsuitable conditions and become spoiled. Please do not buy such food!
- The storage durations of frozen food change depending on the environmental temperatures, the frequent opening and closing of the doors, thermostat settings, food types, and the period of time that elapsed from when the food was acquired to the time it entered the freezer. Always abide by the instructions on the package and never exceed the storage duration.
- During extended power outages, please do not open the door of the deep freeze compartment. Your refrigerator will preserve your frozen food in the ambient environmental temperature of 25°C for about 13 hours. This preservation time period decreases the higher the ambient environmental temperatures are. During longer lasting power cuts, you should not refreeze your food.
Some recommendations have been specified on pages 54, 55 and 56 for the placement and storage of your food in the deep freeze compartment.
| Fish and Meat | Preparation | Storage Duration (months) | Thawing period at room temperature (hours) |
| Beef Steak | Packed for freezing in convenient portions | 6-10 1-2 | |
| Lamb Meat | Packed for freezing in convenient portions | 6-8 1-2 | |
| Calf Roast | Packed for freezing in convenient portions | 6-10 1-2 | |
| Calf Cubes | In small pieces | 6-10 | 1-2 |
| Sheep Cubes In | pieces 4-8 2-3 | ||
| Minced meat | In convenient portions, packaged without being spiced | 1-3 2-3 | |
| Offal (piece) In | pieces 1-3 1-2 | ||
| Sausage/Salami | Must be packed even if it is film-coated | 1-2 Until | thawed |
| Chicken and turkey | Packed for freezing in convenient portions | 7-8 10-12 | |
| Goose / Duck | Packed for freezing in convenient portions | 4-8 10 | |
| Deer - Rabbit - Boar | Portions of 2.5 kg and with no bones | 9-12 10-12 | |
| Freshwater fish (Trout, Carp, Northern Pike, Cat Fish) | It should be washed and dried after it is well cleaned inside and scaled, the tail and head parts should be cut off where necessary. | 2 | Until it is well thawed |
| Lean fish (Sea Bass, Turbot, Sole) | 4-8 | ||
| Fatty fish (Bonito, Mackerel, Blue Fish, Anchovy) | 2-4 | ||
| Crustaceans | Cleansed and put into bags | 4-6 | Until it is well thawed |
| Caviar | In its package, inside an aluminum or plastic cup | 2-3 Until | it is well thawed |
| Snail | In salty water, inside an aluminum or plastic cup | 3 Until | it is well thawed |
Note: Frozen foods, when thawed, should be cooked just like fresh foods. If they are not cooked after being thawed they must NEVER be re-frozen.
| Vegetables and Fruits | Preparation | Storage Duration (months) | Thawing period at room temperature (hours) | ||
| Cauliflower | Remove the leaves, divide the core into parts and keep it waiting in water containing a little amount of lemon | 10-12 | It may be used in frozen form | ||
| Green Beans, French Beans | Wash them and cut into small pieces. | 10-13 | It may be used in frozen form | ||
| Peas | Shell and wash them | 12 | It may be used in frozen form | ||
| Mushrooms and Asparagus | Wash them and cut into small pieces | 6-9 | It may be used in frozen form | ||
| Cabbage In a cleaned fashion 6-8 2 | |||||
| Eggplant | Cut it into pieces of 2cm after washing it | 10-12 | Separate plates from each other | ||
| Corn | Clean it and pack it with its cob or in grains | 12 | It may be used in frozen form | ||
| Carrot | Clean them and cut into slices | 12 | It may be used in frozen form | ||
| Pepper | Remove the stem, divide it into two and separate the seeds | 8-10 | It may be used in frozen form | ||
| Spinach Washed 6-9 2 | |||||
| Apple and Pear | Slice it by peeling its rind | 8-10 | (In freezer) 5 | ||
| Apricot and Peach | Divide it into half and remove the seeds | 4-6 (In freezer) 4 | |||
| Strawberry and Raspberry | Wash and clean them | 8-12 | 2 | ||
| Cooked fruits | Inside a cup with addition of 10% of sugar | 12 | 4 | ||
| Plums, Cherries, Sour Cherries | Wash them and remove the stems | 8-12 5-7 | |||
| Dairy Products and Pastries | Preparation | Storage Duration (months) | Storage Conditions | ||
| Packaged (Homogenised) Milk | In its own package | 2-3 | Only homogeneous ones | ||
| Cheese (except white cheese) | In the form of slices 6-8 | They may be left in their original packages for short time storage. They should also be wrapped in plastic folio for long term storage. | |||
| Butter, Margarine | In its own package | 6 | |||
| Egg* | Egg White 10-12 | 30 gr of it Equals to one egg yolk. | |||
| Egg mixture (White-Yolk) | It is mixed very well, a pinch of salt or sugar is added to prevent it from getting too thick. | 10 | 50 gr of it Equals to one egg yolk. | In a closed cup | |
| Egg Yolk | It is mixed very well, a pinch of salt or sugar is added to prevent it from getting too thick. | 8-10 | 2 gr of it Equals to one egg yolk. | ||
* It should not be frozen with its shells. The white and yolk of the egg should be frozen separately or as having been well mixed.
| Storage Duration (months) | Thawing period at room temperature (hours) | Thawing duration in the oven (minutes) | |
| Bread 4-6 2-3 | 4-5 (220-225 °C) | ||
| Biscuits 3-6 1-1,5 | 5-8 (190-200 °C) | ||
| Pie 1-3 2-3 | 5-10 (200-225 °C) | ||
| Tart | 1-1,5 | 3-4 | 5-8 (190-200 °C) |
| Filo Pastry | 2-3 | 1-1,5 | 5-8 (190-200 °C) |
| Pizza 2-3 2-4 | 15-20 (200 °C) |
The taste of some spices found in cooked dishes (anise, basilica, watercress, vinegar, assorted spices, ginger, garlic, onion, mustard, thyme, marjoram, black pepper, etc.) changes and they assume a strong taste when they are stored for a long period. Therefore, the frozen food should be added little amount of spices or the desired spice should be added after the food has been thawed.
The storage period of food is dependent on the oil used. The suitable oils are margarine, calf fat, olive oil and butter and the unsuitable oils are peanut oil and pig fat.
The food in liquid form should be frozen in plastic cups and the other food should be frozen in plastic folios or bags.
CLEANING AND MAINTENANCE
- Make sure to unplug the fridge before starting to clean it.
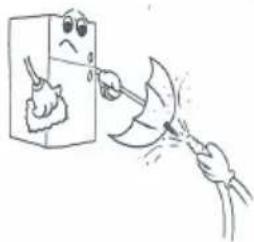
- Do not wash your fridge by pouring water.
- You can wipe the inner and outer sides with a soft cloth or a sponge using warm, soapy water.
- Remove the parts individually and clean with soapy water. Do not wash in washing machine.
- Never use flammable, explosive, or corrosive materials like paint thinner, gas, or acid for cleaning the fridge.
- Cleaning the condenser (back of the appliance) with a brush or a vacuum cleaner at least once a year will ensure maximum product efficiency and productivity.

natural_image
Cartoon illustration of a hand brushing a small fire inside a box (no text or symbols)


natural_image
Cartoon illustration of a smiling refrigerator with a sad face and two smaller figures beside it (no text or symbols)
natural_image
Illustration of a hand holding a baby near a coiled bed (no text or symbols)Make sure that your fridge is unplugged while cleaning.
Defrosting

natural_image
Technical line drawing of a refrigerated industrial machine with cooling fins and cooling unit (no text or symbols)- Your refrigerator performs fully automatic defrosting. The water formed as a result of defrosting passes through the water collection spout, flows into the vaporization container behind your refrigerator and evaporates by itself in there.
• Make sure you have disconnected the plug of your refrigerator before cleaning the vaporization container.
- Remove the vaporization container from its position by unscrewing the screws as indicated. Clean it with soapy water at specific time intervals. Thus, the odor formation will have been prevented.
Replacing the Bulb
To replace the bulb in the freezer and fridge compartments;
1- Unplug your fridge.
2- Using a screwdriver, carefully remove the light cover from the top panel.
3- Replace with a 15 watt bulb.
4- Reinstall the light cover.
5- Wait for 5 minutes before re-plugging the fridge in and restore the thermostat to its original position.

SHIPMENT AND REPOSITIONING
- Original packaging and foam may be kept for re-transportation (optional).
- You should wrap your fridge with a thick packaging and band it to the unit. Always follow the original instructions for transportation found on the packaging for re-transportation.
- Remove unsecured parts (shelves, accessories, vegetable bins etc.) or secure them into the fridge by using bands or tape during re-positioning and transportation.
• Always transport your fridge in the upright position.

natural_image
Simple line drawing of two children playing a board game (no text or symbols)BEFORE CALLING SERVICE
If your refrigerator is not working:
• Is there an electrical failure?
- Has the plug been correctly connected to the socket?
- Has there been a blow-out in the fuse or breaker of the electrical circuit to which the plug has been connected?
- Are there any faults with the socket? For this purpose, try the plug of your refrigerator by connecting it to a socket which you are sure is working.
If your refrigerator does not get cold enough:
• Is the thermostat set in the coldest position?
- Are the doors of your refrigerator opened very frequently and do they remain open for long periods of time?
- Do the doors of your refrigerator fully closed and are the door gaskets sealing correctly?
- Are any containers or dishes placed in your refrigerator contacting the back wall in such a way that they are obstructing the air circulation?
• Is your refrigerator over-filled?
• Is there enough space between your refrigerator and the back and side walls?
If the food in the Cooling/Freezing compartment is colder than necessary:
- Has a suitable temperature setting be made? (Are the thermostat knobs in the position "5"?)
- Is there too much newly placed food in the deep freeze compartment?
If there is, the compressor shall operate longer for freezing it; hence it may also possibly be cooling the food in the cooling compartment more than necessary.
If your refrigerator is operating noisily:
The compressor shall from time to time energize to ensure that the adjusted coolness level remain fixed. The noises that may be heard from the refrigerator at that time are normal as required by function.
Once the required coolness level has been achieved, the noises should automatically diminish.
If there is still noise:
- Has your refrigerator been leveled? Have the feet been adjusted and set?
• Is there anything behind your refrigerator? - Are the shelves or the plates on the shelves of your fridge vibrating? If so, then rearrange the shelves and/or plates.
- Are the goods placed in your fridge vibrating? Secure them or rearrange on the shelf.
Crackling (Ice Cracking) Noise:
- It is heard during the automatic defrosting process as the ice which has formed on the cooling coil melts and falls into the drain trough.
- Once the device has been cooled or heated (the expansions and contractions of the actual product material).
Short Cracking Noise:
- It is heard when the thermostat turns the compressor on and off.
Compressor Noise:
- It is a normal engine noise. This noise indicates that the compressor is operating normally.
- As the compressor is being energized, it might run a bit more noisily for a short period of time.
Bubbling and gurgling sound:
- This noise is emitted as the coolant fluid flows through the pipes within the system.
Water flowing sound:
- This is the normal sound of water flowing into the drain trough during the defrosting process.
Air blowing sound:
- It is the normal fan sound. This sound may be heard due to air circulation in No Frost refrigerators when the system is operating normally.
If the edges of the refrigerator cabinet contacted by the door seal are hot:
- Especially in summer months (in hot weather), there might be warming of the surfaces contacted by the seal on the refrigerator. This is normal.
If there is moisture on the inner parts of your refrigerator:
- Has the food been properly packaged and sealed? Have the containers been well dried before they were put into the refrigerator?
- Are the doors of the refrigerator opened very frequently? Once the door is opened, the humidity found in the air in the room enters the refrigerator. Especially if the humidity levels in the room are very high. The more frequently the door is opened, the faster will be the humidification.
- It is normal to have water drops formed on the back wall following the automatic defrosting process (In Static Models).
If the doors are not being properly closed:
- Are food packages preventing the doors from being closed?
- Have the door compartments, shelves and drawers properly placed?
- Are the door seals defective or torn?
- Is your refrigerator standing on level ground?
IMPORTANT NOTES:
- In case of a sudden power loss or disconnecting and reconnecting of the plug to the electrical socket, the compressor protective thermal element will be opened as the pressure of the gas in the cooling system of your refrigerator has not yet been balanced. 4 or 5 minutes later, your refrigerator will start to operate; this is normal.
- If you won't be using your refrigerator for a long time (such as on summer holidays), please disconnect the plug from the socket. Clean your refrigerator as per Part 4 of this document and leave the door open to prevent any humidification or odor formation.
If there is still a problem with your refrigerator although you have followed the instructions in this book, please consult your nearest authorized service center.
The life cycle of this product as determined and proclaimed by the Ministry of Industry (the period for making spare parts available for the product to be able to fulfill its functions) is 10 years.
Conformity Information
- Tropical Class is defined for the environment temperatures between 16^ and 43^ in accordance with the TS EN ISO 15502 Standards.
- The appliance is designed in compliance with the EN15502, IEC60335-1 / IEC60335-2-24, 2004/108/EC standards.
Inverkehrbringer:
Vestel Germany GmbH
Parkring 6
D 85748 Garching b. München
- Inhalt
- Vor dem Einschalten
- Kühlbereich
- TRANSPORT UND STANDORTWECHSEL
- Hinweis
- DE ONDERDELEN VAN HET APPARAAT EN DE
- DE DIVERSE FUNCTIES EN DE MOGELIJKHEDEN
- Temperatuurinstellingen
- Ontdooien
- VERVOEREN EN VERPLAATSEN
- THE PARTS OF THE APPLIANCE AND THE COMPARTMENTS .....44
- INSTALLING AND OPERATING YOUR FRIDGE....49
- USAGE INFORMATION 51
- PLACING THE FOOD 52
- CLEANING AND MAINTENANCE ....57
- SHIPMENT AND REPOSITIONING 59
- BEFORE CALLING SERVICE 59
- BEFORE USING YOUR FRIDGE
- Safety Instructions
- Important note:
- Safety warnings
- THE PARTS OF THE APPLIANCE AND THE COMPARTMENTS
- INSTALLING AND OPERATING YOUR FRIDGE
- Information On No-Frost Technology
- USAGE INFORMATION
- Temperature Settings
- Cooling compartment
- Cooling compartment thermostat knob:
- Warnings for Temperature Settings
- PLACING THE FOOD
- The Deep Freeze Compartment
- CLEANING AND MAINTENANCE
- Defrosting
- Replacing the Bulb
- SHIPMENT AND REPOSITIONING
- BEFORE CALLING SERVICE
- If your refrigerator is not working:
- If your refrigerator does not get cold enough:
- If the food in the Cooling/Freezing compartment is colder than necessary:
- If your refrigerator is operating noisily:
- If there is still noise:
- Crackling (Ice Cracking) Noise:
- Short Cracking Noise:
- Compressor Noise:
- Bubbling and gurgling sound:
- Water flowing sound:
- Air blowing sound:
- If the edges of the refrigerator cabinet contacted by the door seal are hot:
- If there is moisture on the inner parts of your refrigerator:
- If the doors are not being properly closed:
- IMPORTANT NOTES:
- Conformity Information
Brand : TECHWOOD
Model : GN 366 A+
Category : Refrigerator