
6727DC - TV SYLVANIA - Free user manual and instructions
Find the device manual for free 6727DC SYLVANIA in PDF.


| Product Type | Color TV/DVD/VHS Combo |
| Brand | Sylvania |
| Model | 6727DC (27 inch) |
| Screen Size | 27 inches (CRT, in-line gun, 110° deflection tube) |
| Dimensions (H x W x D) | 25-1/2" x 26-9/16" x 19-11/16" (648 mm x 675 mm x 500 mm) |
| Weight | 86 lbs (39.0 kg) |
| Power Requirements | AC 120V, 60Hz |
| Power Consumption (Max) | 125W |
| TV System | NTSC-M |
| Channel Coverage | VHF 2-13, UHF 14-69, CATV (181 channels) |
| Built-in DVD Player | Plays DVD video, Audio CD, MP3 CD |
| Built-in VCR | VHS, Hi-Fi stereo, 4-head, SP/LP/SLP playback, SP/SLP recording |
| Audio Features | Dolby Digital, DTS, SRS TruSurround, MTS stereo/SAP |
| Video Features | Closed Caption, V-Chip, Picture Control (Bright, Contrast, Color, Tint, Sharpness), Degaussing |
| Connectivity | Antenna input (75 ohm), Video/Audio L/R input (front), Audio L/R output, Coaxial digital audio output, Headphone jack |
| Accessories Included | Remote control (NE200UD), 2 AA batteries, Owner's manual |
| Special VCR Functions | One Touch Recording (OTR), Timer recording (8 events/1 year), Auto repeat, Rental play, Index search, Time search, Zero return |
| Special DVD Functions | Parental lock, Zoom, Marker, Resume, Random/Program play, Subtitle/Audio/Angle selection |
| Cleaning and Maintenance | Cabinet: soft damp cloth; Auto head cleaning; Disc: soft cloth, wipe from center to edge |
| Safety Compliance | FCC Class B, ICES-003, Laser safety (Class 1), ENERGY STAR partner |
| Warranty | 1 year parts (2 years picture tube), 90 days labor; carry-in to authorized service center |
| User Interface Languages | English, Spanish, French |
Frequently Asked Questions - 6727DC SYLVANIA
User questions about 6727DC SYLVANIA
0 question about this device. Answer the ones you know or ask your own.
Ask a new question about this device
Download the instructions for your TV in PDF format for free! Find your manual 6727DC - SYLVANIA and take your electronic device back in hand. On this page are published all the documents necessary for the use of your device. 6727DC by SYLVANIA.
USER MANUAL 6727DC SYLVANIA
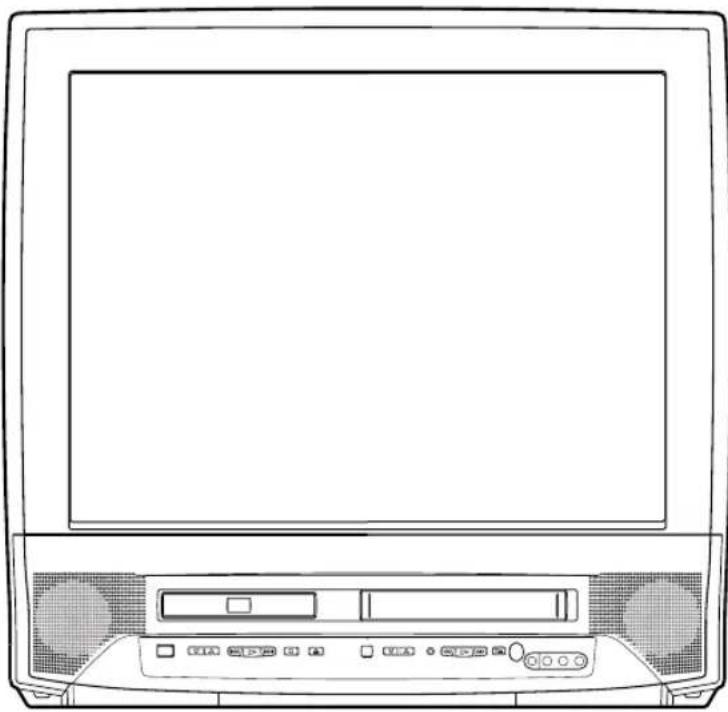
COLOR TV/DVD/VHS 6719DC (19 inch) 6727DC (27 inch)
natural_image
Line drawing of a front view of a desktop computer monitor with ports and a blank screen (no text or symbols)



TruSurround™ by SRS (●) MP3
This Owner's Manual is made of recycled paper.
SUPPLIED ACCESSORIES
| ACCESSORIES | PART NO. |
| Remote Control Unit | NE200UD |
| Batteries | 2 AA Batteries |

As an ENERGY STAR®
Partner, our company has determined that this product meets the ENERGY STAR® guidelines for energy efficiency. ENERGY STAR® is a U.S. registered mark.

If you need additional operating assistance after reading this owner's manual or to order replacement accessories, please call TOLL FREE : 1-800-968-3429.
WARNING: TO REDUCE THE RISK OF FIRE OR ELECTRIC SHOCK, DO NOT EXPOSE THIS APPLIANCE TO RAIN OR MOISTURE.

CAUTION
RISK OF ELECTRIC SHOCK DO NOT OPEN

CAUTION: TO REDUCE THE RISK OF ELECTRIC SHOCK, DO NOT REMOVE COVER (OR BACK). NO USER SERVICEABLE PARTS INSIDE. REFER SERVICING TO QUALIFIED SERVICE PERSONNEL.

THIS SYMBOL INDICATES THAT DANGEROUS VOLTAGE CONSTITUTING A RISK OF ELECTRIC SHOCK IS PRESENT WITHIN THIS UNIT.

THIS SYMBOL INDICATES THAT THERE ARE IMPORTANT OPERATING AND MAINTENANCE INSTRUCTIONS IN THE LITERATURE ACCOMPANYING THE APPLIANCE.
The caution marking is located on the rear of the cabinet.
IMPORTANT SAFEGUARDS
- Read instructions- All the safety and operating instructions should be read before the appliance is operated.
- Retain Instructions-The safety and operating instructions should be retained for future reference.
3.Heed Warnings-All warnings on the appliance and in the operating instructions should be adhered to. -
Follow Instructions-All operating and use instructions should be followed.
-
Cleaning-Unplug TV/DVD/VHS from the wall outlet before cleaning. Do not use liquid cleaners or aerosol cleaners. Use a damp cloth for cleaning.
EXCEPTION: A product that is meant for uninterrupted service and, that for some specific reason, such as the possibility of the loss of an authorization code for a CATV converter, is not intended to be unplugged by the user for cleaning or any other purpose, may exclude the reference to unplugging the appliance in the cleaning description otherwise required in item 5.
-
Attachments-Do not use attachments not recommended by the TV/DVD/VHS manufacturer as they may cause hazards.
-
Water and Moisture-Do not use this TV/DVD/VHS near water-for example, near a bath tub, wash bowl, kitchen sink, or laundry tub, in a wet basement, or near a swimming pool, and the like.
-
Accessories-Do not place this TV/DVD/VHS on an unstable cart, stand, tripod, bracket, or table. The TV/DVD/VHS may fall, causing serious injury to someone, and serious damage to the appliance. Use only with a cart, stand, tripod, bracket, or table recommended by the manufacturer, or sold with the
TV/DVD/VHS. Any mounting of the appliance should follow the manufacturer's instructions and should use a mounting accessory recommended by the manufacture. An appliance and cart combination should be moved with care. Quick stops, excessive force, and uneven surfaces may cause the appliance and cart combination to overturn.
PORTABLE CART WARNING

natural_image
Silhouette of a person pushing a cart with a large object, enclosed in a circle (no text or symbols)-
Ventilation-Slots and openings in the cabinet and the back or bottom are provided for ventilation and to ensure reliable operation of the TV/DVD/VHS and to protect it from overheating, and these openings must not be blocked or covered. The openings should never be blocked by placing the TV/DVD/VHS on a bed, sofa, rug, or other similar surface. This TV/DVD/VHS should never be placed near or over a radiator or heat register. This TV/DVD/VHS should not be placed in a built-in installation such as a bookcase or rack unless proper ventilation is provided or the manufacturer's instructions have been adhered to.
-
Power Sources-This TV/DVD/VHS should be operated only from the type of power source indicated on the marking label. If you are not sure of the type of power supply to your home, consult your appliance dealer or local power company. For TV/DVD/VHSs intended to operate from battery power, or other sources, refer to the operating instructions.
-
Grounding or Polarization-This TV/DVD/VHS is equipped with a polarized alternating-current line plug(a plug having one blade wider than the other). This plug will fit into the power outlet only one way. This is a safety feature. If you are unable to insert the plug fully into the outlet, try reversing the plug. If the plug should still fail to fit, contact your electrician to replace your obsolete outlet. Do not defeat the safety purpose of the polarized plug.
-
Power-Cord Protection-Power-supply cords should be routed so that they are not likely to be walked on or pinched by items placed upon or against them, paying particular attention to cords at plugs, convenience receptacles, and the point where they exit from the appliance.
-
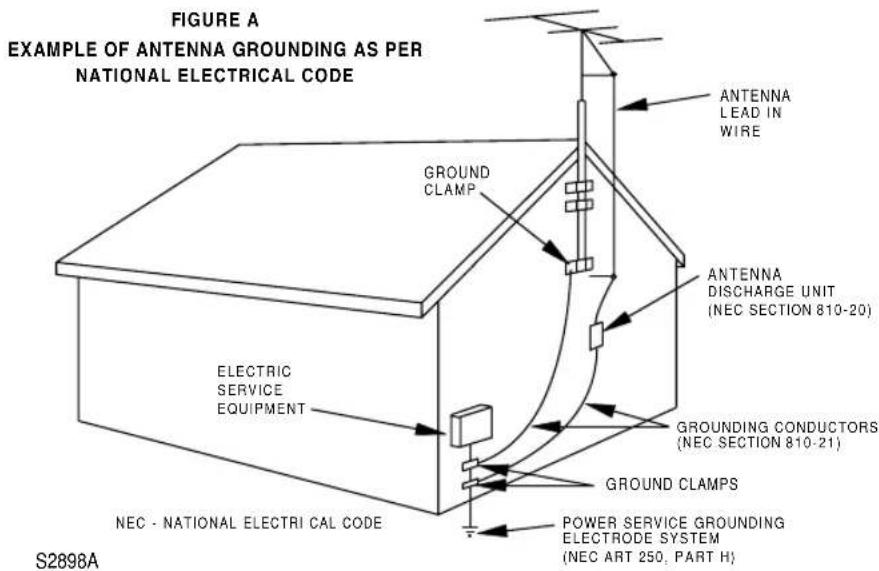
Outdoor Antenna grounding-If an outside antenna or cable system is connected to the TV/DVD/VHS, be sure the antenna or cable system is grounded so as to provide some protection against voltage surges and built-up static charges. Article 810 of the National Electrical Code, ANSI/NFPA No. 70, provides information with respect to proper grounding of the mast and supporting structure, grounding of the lead-in wire to an antenna discharge unit, size of grounding conductors, location of antenna-discharge unit, connection to grounding electrodes, and requirements for the grounding electrode. (Fig. A)
-
Lightning-For added protection for this TV/DVD/VHS receiver during a lightning storm, or when it is left unattended and unused for long periods of time, unplug it from the wall outlet and disconnect the antenna or cable system. This will prevent damage to the TV/DVD/VHS due to lightning and power-line surges.
-
Power Lines-An outside antenna system should not be located in the vicinity of overhead power lines or other electric light or power circuits, or where it can fall into such power lines or circuits. When installing an outside antenna system, extreme care should be taken to keep from touching such power lines or circuits as contact with them might be fatal.
-
Overloading-Do not overload wall outlets and extension cords as this can result in a risk of fire or electric shock.
17.Object and Liquid Entry-Never push objects of any kind into this TV/DVD/VHS through openings as they may touch dangerous voltage points or short out parts that could result in a fire or electric shock. Never spill liquid of any kind on the TV/DVD/VHS.
-
Servicing-Do not attempt to service this TV/DVD/VHS yourself as opening or removing covers may expose you to dangerous voltage or other hazards. Refer all servicing to qualified service personnel.
-
Damage Requiring Service-Unplug this TV/DVD/VHS from the wall outlet and refer servicing to qualified service personnel under the following conditions:
a. When the power-supply cord or plug is damaged or frayed.
b. If liquid has been spilled, or objects have fallen into the TV/DVD/VHS.
c. If the TV/DVD/VHS has been exposed to rain or water.
d. If the TV/DVD/VHS does not operate normally by following the operating instructions. Adjust only those controls that are covered by the operating instructions, as improper adjustment of other controls may result in damage and will often require extensive work by a qualified technician to restore the TV/DVD/VHS to its normal operation.
e. If the TV/DVD/VHS has been dropped or damaged in any way.
f. When the TV/DVD/VHS exhibits a distinct change in performance-this indicates a need for service.
-
Replacement Parts-When replacement parts are required, be sure the service technician has used replacement parts specified by the manufacturer that have the same characteristics as the original part. Unauthorized substitutions may result in fire, electric shock, injury to persons or other hazards.
-
Safety Check-Upon completion of any service or repairs to this TV/DVD/VHS, ask the service technician to perform routine safety checks to determine that the TV/DVD/VHS is in proper operating condition.
-
Heat-This TV/DVD/VHS product should be situated away from heat sources such as radiators, heat registers, stoves, or other products (including amplifiers) that produce heat.
CAUTION: TO PREVENT ELECTRIC SHOCK, MATCH WIDE BLADE OF PLUG TO WIDE SLOT, FULLY INSERT.
ATTENTION: POUR ÉVITER LES CHOC ÉLECTRIQUES, INTRODUIRE LA LAME LA PLUS LARGE DE LA FICHE DANS LA BORNE CORRESPONDANTE DE LA PRISE ET POUSSER JUSQU'AU FOND.
IMPORTANT COPYRIGHT INFORMATION
Unauthorized copying, broadcasting, public performance and lending of discs are prohibited.
FCC WARNING- This equipment may generate or use radio frequency energy. Changes or modifications to this equipment may cause harmful interference unless the modifications are expressly approved in the instruction manual. The user could lose the authority to operate this equipment if an unauthorized change or modification is made.
RADIO-TV INTERFERENCE
This equipment has been tested and found to comply with the limits for a Class B digital device, pursuant to Part 15 of the FCC Rules. These limits are designed to provide reasonable protection against harmful interference in a residential installation.
This equipment generates, uses, and can radiate radio frequency energy and, if not installed and used in accordance with the instructions, may cause harmful interference to radio communications.
However, there is no guarantee that interference will not occur in a particular installation. If this equipment does cause harmful interference to radio or television reception, which can be determined by turning the equipment off and on, the user is encouraged to try to correct the interference by one or more of the following measures:
1) Reorient or relocate the receiving antenna.
2) Increase the separation between the equipment and receiver.
3) Connect the equipment into an outlet on a circuit different from that to which the receiver is connected.
4) Consult the dealer or an experienced radio/TV technician for help.
LASER SAFETY
This unit employs a laser. Only a qualified service person should remove the cover or attempt to service this device, due to possible eye injury.
CAUTION: USE OF CONTROLS OR ADJUSTMENTS OR PERFORMANCE OF PROCEDURES OTHER THAN THOSE SPECIFIED HEREIN MAY RESULT IN HAZARDOUS RADIATION EXPOSURE.
CAUTION: VISIBLE AND INVISIBLE LASER RADIATION WHEN OPEN AND INTERLOCK DEFEATED. DO NOT STARE INTO BEAM.
LOCATION: INSIDE, NEAR THE DECK MECHANISM.
This Class B digital apparatus complies with Canadian ICES-003.
For safe operation and satisfactory performance of your TV/DVD/VHS, keep the following in mind when selecting a place for its installation:
- Shield it from direct sunlight and keep it away from sources of intense heat.
- Avoid dusty or humid places.
- Avoid places with insufficient ventilation for proper heat dissipation. Do not block the ventilation holes at the top and bottom of the unit. Do not place the unit on a carpet because this will block the ventilation holes.
• Install unit in a horizontal position. - Avoid locations subject to strong vibration.
- Do not place the TV/DVD/VHS near strong magnetic fields.
- Avoid moving TV/DVD/VHS to locations where temperature differences are extreme.
WARNING
Moisture condensation may occur inside the unit when it is moved from a cold place to a warm place, or after heating a cold room or under conditions of high humidity. If a DVD is played in a TV/DVD/VHS which has moisture, it may damage the DVD and TV/DVD/VHS. Therefore when the condensation occurs inside the unit, turn the POWER button on and allow at least 2 hours for the unit to dry out.
AVOID THE HAZARDS OF ELECTRICAL SHOCK AND FIRE
- Do not handle the power cord with wet hands.
- Do not pull on the power cord when disconnecting it from an AC wall outlet. Grasp it by the plug.
- If, by accident, water is spilled on your unit, unplug the power cord immediately and take the unit to our Authorized Service Center for servicing.
- Do not put your fingers or objects into the TV/DVD/VHS disc loading tray.
- Do not place anything directly on top of the unit.
A NOTE ABOUT RECYCLING
This product's packaging materials are recyclable and can be reused. Please dispose of any materials in accordance with your local recycling regulations.
Batteries should never be thrown away or incinerated but disposed of in accordance with your local regulations concerning chemical wastes.
The serial number of this product may be found on the back of the unit. No other TV/DVD/VHS has the same serial number as yours. You should record the number and other vital information here and retain this book as a permanent record of your purchase to aid identification in case of theft. Serial numbers are not kept on file.
| Date of Purchase | |
| Dealer Purchase from | |
| Dealer Address | |
| Dealer Phone No. | |
| Model No. | |
| Serial No. |
■IMPORTANT SAFEGUARDS ....2
■PRECAUTIONS ....4
LOCATION 5
AVOID THE HAZARDS OF ELECTRICAL SHOCK AND FIRE .5 WARNING ....5
■FEATURES ....7
■OPERATING CONTROLS AND FUNCTIONS....9
■PREPARATION FOR USE .....11
ANTENNA/CABLE CONNECTIONS ....11
CONNECTING TO EXTERNAL INPT JACKS .....12
INSTALLING THE BATTERIES ..12 EXTERNAL INPUT MODE .....12
CONNECTING TO A STEREO SYSTEM (for DVD) .....13
CONNECTING TO AN AMPLIFIER EQUIPPED WITH DIGITAL INPUT JACKS, MD DECK OR DAT DECK (for DVD) 13
CONNECTING TO A DOLBY DIGITAL DECODER OR DTS DECODER (for DVD) ...14
■SET UP FOR USE .....15
CHANNEL SET UP FOR THE FIRST TIME .....15
DELETING (OR ADDING) CHANNEL ....15
CHANNEL SET UP AGAIN .....16
SELECTING THE LANGUAGE ..16 DAYLIGHT-SAVING TIME .....16
CLOCK SET UP (AUTO / MANUAL)....17
TV/VCR SECTION
WATCHING A TV PROGRAM ...19
DEGAUSSING .....19
PICTURE CONTROL....19
CLOSED CAPTION SYSTEM . . . 20
V-CHIP SET UP .....21
■MTS(Multi-Channel Television
sound)SYSTEM .....23
CHECKING THE SELECTED MTS MODE ....23
MTS RECORDING/MONITOR MODE ....23
SELECTING THE MTS SYSTEM .24
■VIDEO CASSETTE....25
■PLAYBACK .....26
NORMAL PLAYBACK .....26
TRACKING ADJUSTMENT .....26
SLOW MOTION .....26
PICTURE SEARCH .....26
STILL PICTURE .....26
VERTICAL HOLD CONTROL ...26
OTR (One Touch Recording) .....31
COPYING A VIDEO CASSETTE (Requires a VCR or camcorder) ...31
■TIMER ....32
■ABOUT THE DISCS .....36
PLAYABLE DISCS .....36
DISC TYPES .....36
SYMBOLS USED IN THIS MANUAL ....36
■PLAYING A DISC .....37
PLAYING A DVD VIDEO OR AN AUDIO CD ....36
USING THE DVD MENUS .....36
USING THE TITLE MENU .....36
RESUMING PLAYBACK FROM THE POINT WHERE PLAYBACK STOPPED .....38
FAST FORWARD/REVERSE .....38
PAUSING PLAYBACK OR DIS- PLAYING
A STILL PICTURE .....38
STEPPING THROUGH FRAMES .38
SLOW MOTION .....39
PLAYING FROM A DESIRED TITLE OR CHAPTER .....39
STARTING FROM A DESIRED TIME COUNT ....39
STARTING FROM A DESIRED TRACK....39
REPEAT 40
A-B REPEAT ....40
MARKER 41
PROGRAM (Audio CD) .....41
RANDOM (Audio CD) .....42
ZOOM PLAYBCK .....42
PLAYING AN MP3 DISC .....42
CHANGING THE ONSCREEN DISPLAY DURING MP3 DISC PLAY ....43
PLAYING AN MP3 DISC FROM A DESIRED TRACK ....43
PLAYING AN MP3 DISC IN A PROGRAMMED WAY ....43
PLAYING AN MP3 DISC AT RANDOM....44
■SETTINGS ....44
CHANGING THE AUDIO LANGUAGE OR SOUND MODE .44 CHANGING THE SUBTITLE LANGUAGE .....45
CHANGING THE CAMERA ANGLE (Multi-Angle Pictures) . . . 45
CHANGING THE ON-SCREEN DISPLAY ....46
■CHANGING THE SETUP ITEMS .47
LANGUAGE SETTINGS .....47
DISPLAY SETTINGS....48
AUDIO SETTINGS ....49
PARENTAL LOCK ....50
■LANGUAGE CODE LIST .....51
■TROUBLESHOOTING GUIDE ...52
■MAINTENANCE....55
DISC HANDLING .....55
■SPECIFICATIONS .....56
■WARRANTY ....Back Cover
TV/VCR
- Hi-Fi system–The Hi-Fi stereo recording system offers you excellent sound quality with a dynamic range of 80dB, frequency response from 20Hz to 20kHz, and 0.005% wow and flutter.
- Rotary 4-head Record/Playback System–Four heads ensure excellent picture quality and special effects playback.
- Index Search–Fast-forwards to start of next recording.
- Slow Motion–View recorded program at slower than normal speed.
• Infrared remote control - Trilingual on screen tv/vcr setup display selectable in English or Spanish or French
- Real time counter—This shows the elapsed recording or playback time in hours, minutes, and seconds. The “—” indication will appear when the tape is rewound further than the tape counter position “0:00:00”.
- 181 channel capability PLL frequency synthesizer tuner with direct station call—(A converter may be necessary to view scrambled cable channels.)
- Auto Clock Setting—Allows you to set the clock function from a PBS broadcast station.
- Closed caption system—You may view specially labeled (cc) TV programs, movies, news, prerecorded tapes, etc. with either a dialogue caption or text display added to the program.
- Auto power on and off system—Automatically turns on the TV/DVD/VHS when you insert the cassette, turns off after auto-rewind, and ejects when the beginning of the tape is reached.
- Auto rewind when the end of a tape is reached—This function doesn't occur when using timer recording.
-
Smooth mode change—TV/VCR mode, DVD mode automatically changes without control.
-
2 Step picture search operation—You can view a video program at a high speed or super high speed in either a forward or reverse direction in LP and SLP mode. For SP mode only high speed.
- Three different playback tape speeds : SP/LP/SLP
- Two different recording tape speeds : SP/SLP
- Auto Head Cleaner—Automatically cleans video heads as you insert or remove a cassette.
- Zero Return—The tape returns to counter of 0:00:00 by rewinding or fast forwarding.
- Still—“Freeze” the picture at any time, for close viewing of a particular scene.
- Digital Auto Tracking (DTR)—Automatically adjusts the tracking for each tape you play.
- Rental play mode—Improves playback picture quality from worn tapes, such as rental tapes.
- Auto repeat—Allows you to repeat the playing of a tape indefinitely without pressing the PLAY button.
- Time search—Let you set the TV/DVD/VHS to advance the tape by entering the desired playback time you want to skip.
- OTR (One Touch Recording)—Instant timed recording from 30 to 480 minutes is possible at the push of the REC/OTR button.
- 1 Year, 8 events (including Daily and Weekly Timer Recording)—The built-in timer allows you to record up to 8 programs at different times on different channels up to 1 year in advance. The Daily timer allows recordings to be made of daily broadcasts, and the Weekly timer allows recording to be made once a week up to the end of the tape.
- Auto return–After timer recording is finished, the TV/DVD/VHS can return to the beginning of the recording.
- Sleep timer—Allows you to have the TV/DVD/VHS automatically turn on or off at a desired time.
Timer Program Extension—Allow you to shift the time schedule for automatic timer recording. - V-CHIP—Enables parents to prevent their children from watching inappropriate material on TV.
A NOTE ABOUT RECYCLING
This product's packaging materials are recyclable and can be reused. Please dispose of any materials in accordance with your local recycling regulations.
Batteries should never be thrown away or incinerated but disposed of in accordance with your local regulations concerning chemical wastes.
DVD
• Dolby Digital surround
This player can handle Dolby Digital surround sound having 5.1 channels when connected to a Dolby Digital decoder.
- Still/fast/slow/step playback
Various playback modes are available including still pictures, fast forward/reverse, slow motion and step frames.
- Random playback for audio CD and MP3
This player can shuffle the order of tracks to play them in random order.
- Program playback for audio CD and MP3
You can program the order of tracks to play them in any desired order.
• DVD menus in a desired language
You can display DVD menus in a desired language, if available on a DVD.
- Screen saver/Auto power-off functions
The screen saver program starts when there is no input from the player for five minutes in the stop mode. When the screen saver program is activated for 30 minutes, the DVD power is automatically turned off, and "DVD" appears on the screen.
- Subtitles in a desired language
You can select a desired language for the display subtitles, if that language is available on a disc.
- Selecting a camera angle
You can select the desired camera angle, if a disc contains sequences recorded from different angles.
- Choices for audio language and sound mode
You can select the desired audio language and sound mode, if different languages and modes are available on a disc.
- Parental lock
You can set the control level to limit playback of discs which may not be suitable for children.
• Automatic detection of discs
This player automatically detects if a loaded disc is DVD, audio CD or MP3 on disc.
- Playing an MP3 disc
You can enjoy MP3 files which are recorded on CD-R/RW.
- Direct Search
You can search the desired title, chapter, and track with numeric button during playback or in stop mode.
- On-screen display
Information about the current operation can be displayed on a TV screen, allowing you to confirm the currently active functions (such as program playback), on the TV screen using the remote control.
- Sleep timer
Allows you to have the TV/DVD/VHS automatically turn off at a desired time.
• DTS (Digital Theater System)
You can enjoy 5.1 channel surround system developed by the Digital Theater System co. which reproduces the original sound as truthfully as possible.
- Search
Chapter search: Search for the chapter designated by user is possible.
Title search: Search for the title designated by user is possible.
Track search: Search for the track designated by user is possible.
Time search: Search for the time designated by user is possible.
- Repeat
Chapter: Repeated playback of the chapter of the disc being played is possible.
Title: Repeated playback of the title of the disc being played is possible.
Track: Repeated playback of the track of the disc being played is possible.
Disc(audio CD): Repeated playback of the entire disc being (MP3) played is possible.
A-B: The part between A and B designated by user is possible.
Album: Repeated playback of the folder of the MP3 disc being played is possible.
- Zoom
2-time and 4-time magnified screen can be displayed.
- Marker
The part designated by user can be called back.
- Resume Play
User can resume to playback from the part at which the play was stopped.
• SRS TruSurround
You can enjoy stereophonic virtual space on your existing stereo system.
- Dimmer
Brightness of the display can be varied.
- Bit rate indication
• DRC (Dynamic range control)
This unit employs TruSurround system
TruSurround ^™ by SRS(●)* of SRS Labs, Inc. as virtual technology.
TruSurround and the (●) symbol are trademarks of SRS Labs, Inc.
TruSurround technology is incorporated under license from SRS Labs, Inc.
NOTE:
- We do not recommend the use of universal remote controls. Not all of the functions may be controlled with a universal remote control.
If you decide to use a universal remote control with this unit, please be aware that the code number given may not operate this unit. In this case, please call the manufacturer of the universal remote control.
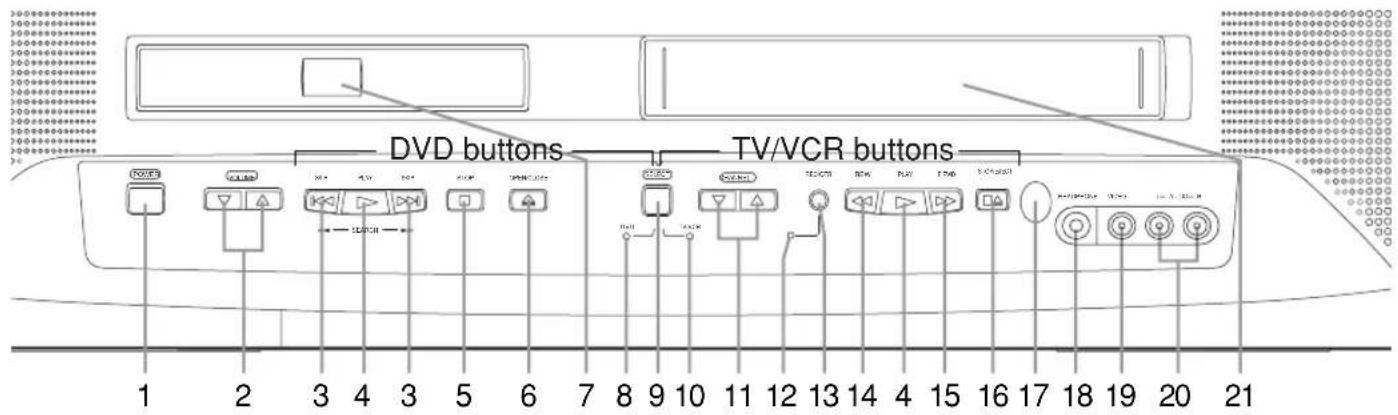
- TV/DVD/VHS FRONT PANEL - [Fig.1]
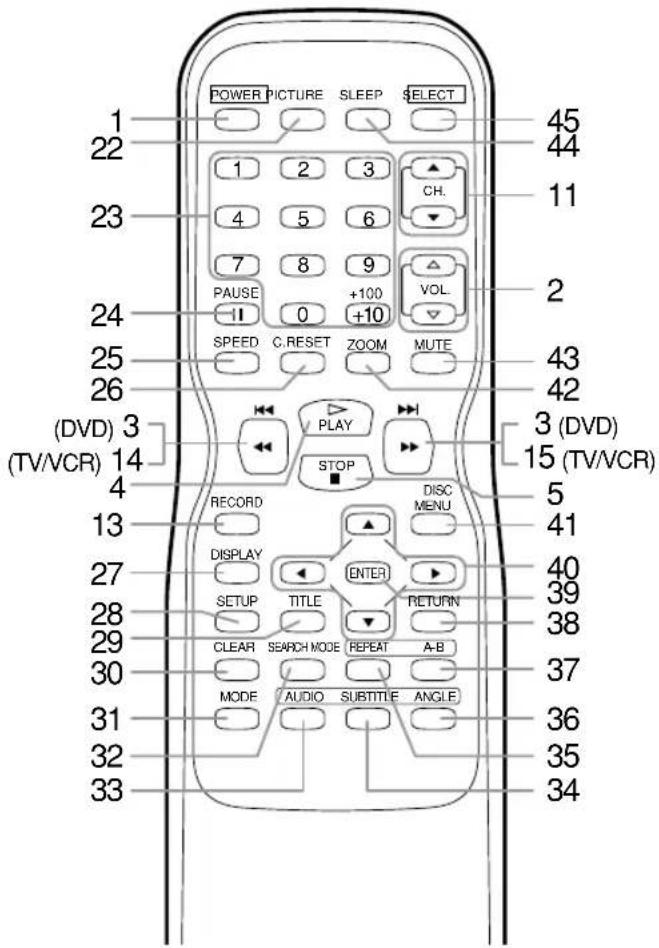
- REMOTE CONTROL - [Fig. 2]
- POWER button [TV/VCR P.15 / DVD P.37] Press to turn the power on and off.
-
VOLUME △▽ buttons Press to control the volume level for the DVD and TV.
3.SKIP buttons (for DVD)[P.37] Skip chapters or tracks to a desired point.
4.PLAY button [TV/VCR P.26 / DVD P.37] Starts playback of the disc or tape contents.
5.STOP button [P.37] Stops operation of the disc. -
OPEN/CLOSE button [DVD P.37] Press to insert discs into or remove them from the tray.
- Disc loading tray
8.DVD indicator Lights on during DVD mode. - SELECT button Press to change to TV/VCR mode or DVD mode. NOTE: For about 4 seconds just after the DVD mode has switched to the TV mode, the button does not work to switch back to the DVD mode.
- TV/VCR indicator Lights on during TV/VCR mode.
- CHANNEL ▲/▼ buttons Press to select memorized channel.
- Recording indicator Flashes during recording. Lights up in the Stand-by mode for Timer Recording.
- REC/OTR (RECORD) button [TV/VCR P.28] Press for manual recording. Activates One Touch Recording. (OTR is only during TV/VCR mode.)
- REW button (for TV/VCR)[TV/VCR P.26] Press to rewind the tape, or to view the picture rapidly in reverse during playback mode. (Rewind Search)
- FWD button (for TV/VCR) [TV/VCR P.26] Press to rapidly advance the tape, or to view the picture rapidly in forward during playback mode. (Forward Search)
- STOP/EJECT button [TV/VCR P.28] Press to stop the tape motion. Press in the Stop mode to remove tape from the unit.
- Remote sensor window
- HEADPHONE jack To connect headphone (not supplied) for personal listening.
- VIDEO input jack Connect to the video output jack of a video camera or VCR.
- TV/DVD/VHS REAR PANEL - [Fig.3]
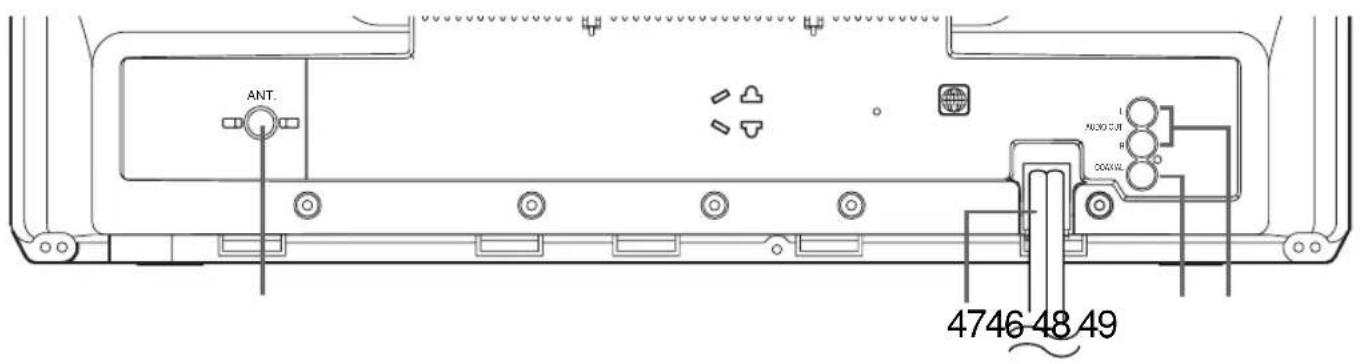
20. AUDIO L/R input jacks
Connect to the audio output jacks of a video camera or VCR.
21. Cassette compartment
22. PICTURE button
Press to adjust the picture.
23. Number buttons
TV Mode:[P.15]
Press two digits to directly access the desired channel.
Remember to press a "0" before a single digit channel.
+100 button-
Press to select cable channels which are equal or greater than number 100.
DVD Mode:
Press to enter the desired number.
+10 button-
Press to enter the desired numbers which are equal or greater than number 10.
24. PAUSE button [TV/VCR P.26 / DVD P.38]
Pauses the current disc or tape operation.
25. SPEED button [TV/VCR P.30]
Press to choose the desired recording speed: SP/SLP.
26. C.RESET button [TV/VCR P.28]
Press to reset counter to 0:00:00.
Press to cancel a setting of timer program. (See page 33.)
27. DISPLAY button
TV/VCR Mode:
Display the counter or the current channel number and current time on the TV screen.
DVD Mode:[P.43]
Displays the current status on the TV screen for checking purposes.
28. SETUP button [TV/VCR P.15]
Press to enter or exit the TV menu or DVD setup mode.
29. TITLE button [DVD P.37]
Displays the title menu.
30. CLEAR button
Resets a setting.
31. MODE button [DVD P.41]
Activates program playback or random playback mode.
32. SEARCH MODE button [DVD P.39]
Press to locate a desired point.
33. AUDIO button [DVD P.44]
Press to select a desired audio language or sound mode.
34. SUBTITLE button [DVD P.45]
Press to select a desired subtitle language.
35. REPEAT button [DVD P.40]
Repeats playback of the current disc, title, chapter or track.
36. ANGLE button (DVD mode) [DVD P.45]
Press to change the camera angle to see the sequence being played back from a different angle.
37. A-B REPEAT button [DVD P.40]
Repeats playback of a selected section.
38. RETURN button
Returns to the previous operation.
39. ENTER button
Press to accept a setting.
40. Arrow buttons
TV/VCR Mode:
Press to select a setting mode from the menu on the TV screen.
Press to select or adjust from a particular menu.
DVD Mode:
Use when making settings while watching the display on a TV screen.
41. DISC MENU button [DVD P.37]
Displays the menus in the DVD.
42. ZOOM Button [DVD P.42]
Enlarges part of a DVD-reproduced image.
43. MUTE button
Mutes the sound. Press it again to resume sound.
44. SLEEP button [TV/VCR P.34]
Sets the Sleep Timer. (See page 34.)
45. SELECT button
Press to switch TV/VCR and DVD mode. You can see the mode (TV/VCR or DVD) on the front panel indicator.
46. ANT. in jack
Connect to an antenna, cable system, or satellite system.
47. Power cord
Connect to a standard AC outlet (120V/60Hz).
NOTE: Remove the power cord from the hook to avoid breaking a wire before you connect to a standard AC outlet.
48. COAXIAL digital audio out jack
Connect to the digital input of an external amplifier or decoder.
49. AUDIO L/R output jack
Connect to the analog audio input of an external amplifier or decoder.
PREPARATION FOR USE
ANTENNA/CABLE CONNECTION
Satellite Box or Cable Box (Not supplied)
![From Cable System or Satellite Dish 75-ohm Coaxial Cable (Not supplied) from Cable System VHF Antenna (Not supplied) 75-ohm Coaxial Cable (Not supplied) or ANT. VHF/UHF Combiner (Not supplied) or Flat twin-lead cable UHF Antenna (Not supplied) [Fig. 4]](/content/2026/05/772507/images/358228b8e72b59ee8eddbe518f06ee40ebc79accccb4f30476eb9d5c7bb747d6.jpg)
VHF/UHF SEPARATE ANTENNAS
In some areas it will be necessary to use an outdoor antenna.
CABLE WITHOUT CONVERTER/ DESCRAMBLER BOX
Use this connection if your cable system connects directly to your TV/DVD/VHS without a converter box.
By using this connection you can:
1) Use the TV/DVD/VHS remote to select channels.
2) Program one or more unscrambled channels for Automatic Timer Recording.
NOTE: This unit will ONLY record and view the same channel.
CABLE WITH CONVERTER/ DESCRAMBLER BOX OR SATELLITE BOX
If your cable service supplies you with a converter box or if you use a satellite system, you can use the basic connection shown in the illustration.
By using this connection you can also record scrambled channels. However, channel selection must be made with the converter box or satellite box. This means that channels cannot be changed using the TV/DVD/VHS Remote Control. Unattended timer recording is limited to one channel at a time.
Antenna/Cable Connections Continued on the Next Page.
TO RECORD A SCRAMBLED/UNSCRAM-BLED CHANNEL
- Set the TV/DVD/VHS channel selector to the output channel of the Cable Converter Box or Satellite Box. (Ex. CH3)
- Select the channel to record from your Cable Converter Box or Satellite Box.
Note to CATV system installer:
This reminder is provided to call the CATV system installer's attention to Article 820-40 of the NEC that provides guidelines for proper grounding and, in particular, specifies that the cable ground shall be connected to the grounding system of the building as close to the point of cable entry as practical.
CONNECTING TO EXTERNAL INPUT JACKS
When you watch a program recorded on an another source (VCR or video camera), use the audio/video input jacks on the front of the TV/DVD/VHS.
Connect the audio/video output jacks of another source to the AUDIO L/R and VIDEO jacks of this TV/DVD/VHS.
Then press the CHANNEL ▲/▼ buttons until "AUX" appears on the screen.
NOTE:
- When you connect a monaural VCR (another source) to this TV/DVD/VHS, connect the Audio output jack of the monaural VCR (another source) to the AUDIO L jack of this TV/DVD/VHS. The audio will output in both L and R channel equally.
![[Another source] etc. To the video output jack To the audio output jacks Audio/Video coaxial cable (not supplied) [Front of the TV/DVD/VHS] [Fig. 5]](/content/2026/05/772507/images/346b341695a6f0ec2cc6f80437410b492973b576ac1a84d733dd64a2173b9c8e.jpg)
INSTALLING THE BATTERIES
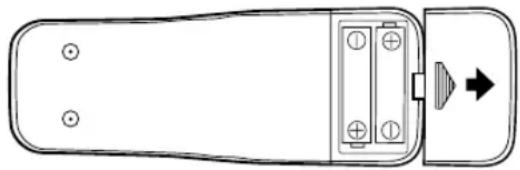
1) Open the battery compartment cover by pressing the cover on the remote unit in the direction of the arrow.
2) Insert 2 “AA” penlight batteries into the battery compartment in the direction indicated by the polarity (+/-) markings.
3) Replace the cover.
natural_image
Top-down schematic of a device with battery, switch, and directional arrow (no text or symbols)EXTERNAL INPUT MODE
When using an external input signal (another VCR or video camera), connect the player's audio/video out-
put cables to the AUDIO L/R IN/VIDEO IN jacks of your TV/DVD/VHS. Then press the CHANNEL ▲ or ▼ button until “AUX” appears on the screen.
CONNECTING TO A STEREO SYSTEM (for DVD)
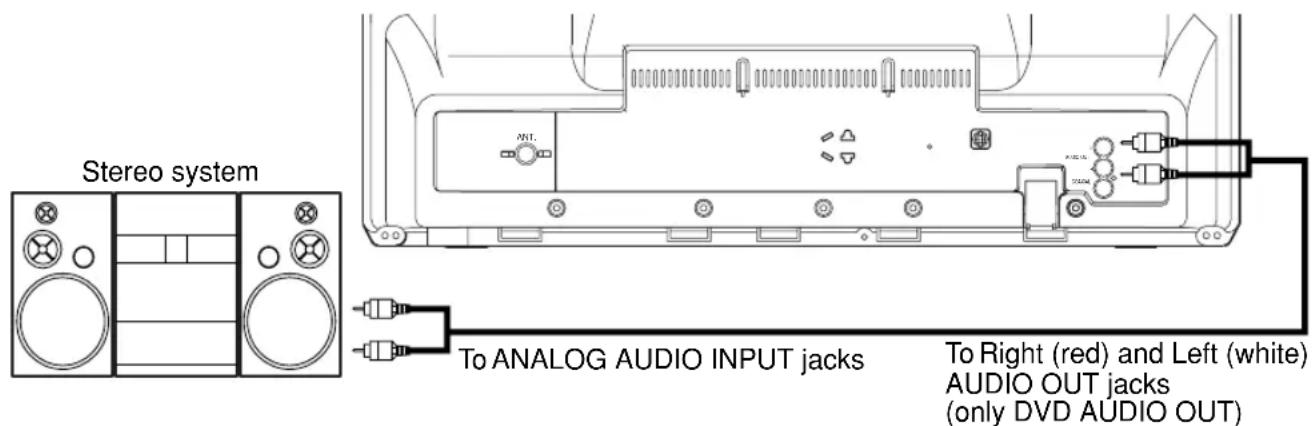
[Fig. 6]
NOTES:
- Be sure to turn off the power to all components in the system before connecting another component.
- Refer to the Owner's Manuals for your, stereo system and any other components to be connected to the TV/DVD/VHS.
CONNECTING TO AN AMPLIFIER EQUIPPED WITH DIGITAL INPUT JACKS SUCH AS MD DECK OR DAT DECK (for DVD)
Use an audio coaxial digital cables (not included) for the audio connections. Connecting to an amplifier equipped with digital input jacks such as MD Deck or Dat Deck.
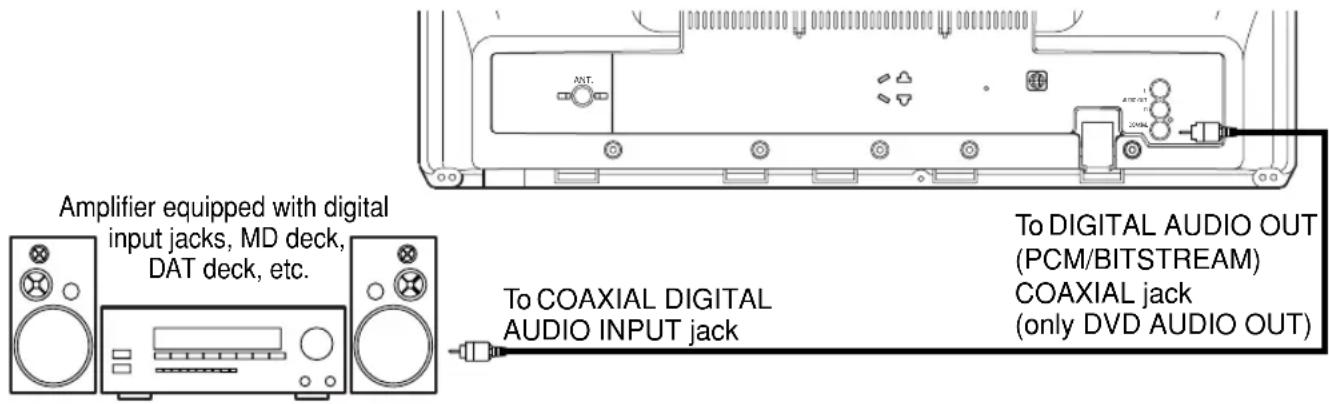
[Fig. 7]
NOTES:
- The audio source on a disc in a 5.1 channel Dolby Digital surround format cannot be recorded as digital sound by an MD or DAT deck.
- Be sure to turn off the power to all components in the system before connecting another component.
- Refer to the Owner's Manuals for the components to be connected to the TV/DVD/VHS.
- Set Dolby Digital and DTS to OFF for audio output in the setup mode. Playing a TV/DVD/VHS using incorrect settings may generate noise distortion, and may also damage the speakers.
- When Dolby Digital is set to OFF and VIRTUAL 3D to ON for audio output in the setup mode and you select the audio source in a 5.1 channel Dolby Digital surround format, the audio will be muted.
CONNECTING TO A DOLBY DIGITAL DECODER, DTS DECODER, OR MPEG DECODER (for DVD)
If using this TV/DVD/VHS to play back a TV/DVD/VHS in a 5.1 channel Dolby Digital surround, DTS surround, or MPEG surround format, the TV/DVD/VHS outputs a Dolby Digital, DTS, or MPEG data stream from its COAXIAL DIGITAL AUDIO OUT jack. By hooking the player up to a Dolby Digital or DTS decoder, you can enjoy a more convincing, realistic ambience with powerful and high-quality surround sound of a professional standard such as can be heard in movie theaters.
Use an audio coaxial digital cables (not included) for the audio connections.
![Front speaker (left) Center speaker Front speaker (right) Dolby Digital or DTS decoder Surround speaker (left) Surround speaker (right) To COAXIAL DIGITAL AUDIO INPUT jack Subwoofer Center speaker for MPEG (left) Center speaker for MPEG (right) To DIGITAL AUDIO OUT (PCM/BITSTREAM) COAXIAL jack [Fig. 8]](/content/2026/05/772507/images/6dc37bd1370f3d098857563b486a906bbad7bc3bbb5f4463261e9c4fba8f431a.jpg)
NOTES:
- Be sure to turn off the power to all components in the system before connecting another component.
- Refer to the Owner's Manuals for the components to be connected to the TV/DVD/VHS.
- If output Dolby Digital audio, connect to a Dolby Digital decoder, and set Dolby Digital to on for audio output in the setup mode.
- If output DTS audio, connect to a DTS decoder, and set DTS to ON for audio output in the setup mode.
- If played a disc indicated MPEG audio, connect to a MPEG decoder, and set MPEG to ON for audio output in the setup mode.
- Unless connected to a Dolby Digital decoder, a DTS decoder, or a MPEG decoder, set Dolby Digital, DTS, or MPEG to off for audio output in the setup mode. Playing a TV/DVD/VHS using incorrect settings may generate noise distortion, and may also damage the speakers.
- When Dolby Digital is set to OFF and VIRTUAL 3D to ON for audio output in the setup mode and you select the audio source in a 5.1 channel Dolby Digital surround format, the audio will be muted.
Manufactured under license from Dolby Laboratories. "Dolby" and the double-D symbol are trademarks of Dolby Laboratories.
“DTS” and “DTS Digital Out” are trademarks of Digital Theater Systems, Inc.
You can program the tuner to scan all the channels you receive in your area.
NOTE: Channel memory programming is NOT needed when connected to a cable box or satellite box. Just select the TV/DVD/VHS channel selector to the output channel of the cable box or satellite box (Ex CH3).
Then select the channel to be viewed on the Cable Box or Satellite Box.
CHANNEL SET UP FOR THE FIRST TIME
1 Plug in the TV/DVD/VHS power cord
Plug the TV/DVD/VHS power cord into a standard AC outlet.
NOTE:
- If some digits appear in the corner of the screen, press the POWER button without unplugging the power cord.
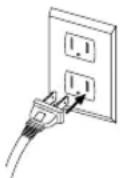
2 Turn on the TV/DVD/VHS
Press the POWER button to turn on the TV/DVD/VHS.
3 Select "ENGLISH" or "ESPAÑOL" or
"FRANÇAIS"
Select "ENGLISH" or
“ESPAÑOL”=Spanish or
“FRANÇAIS” = French using the
Arrow ▶ or ◀ button. “[ ]” indicate the selected language.
- SET UP -
▶LANGUAGE [ENGLISH] ESP FRA
AUTO PRESET
4 Begin auto preset
Press the Arrow ▲ or ▼ button to point to “AUTO PRESET”.
Then press the Arrow▶ button.
The tuner scans and memorizes all active channels in your area.
- SET UP -
LANGUAGE [ENGLISH] ESP FRA
▶ AUTO PRESET
NOTES:
- The TV/DVD/VHS distinguishes between standard TV channels and cable channels.
- If you want to play or record a video tape BEFORE presetting the tuner, you must press the SETUP button on the remote control. To preset the tuner again, see “CHANNEL SET UP AGAIN” on page 16.
- The TV/DVD/VHS may memorize TV channels as CATV channels if reception conditions is poor. If this happens, try AUTO MEMO action again when reception conditions are better.
5 After scanning
The tuner stops on the lowest memorized channel.
If you want to recall the selected channels, you can select the desired channel directly with the remote control number buttons or CHANNEL ▲ or ▼.
DELETING (OR ADDING) CHANNEL
The channels you no longer receive or seldom watch can be deleted from the memory. (Of course, you can add the deleted channel into the memory again.)
1 Select "CHANNEL SET UP"
Press the SETUP button on the remote control.
Press the Arrow ▲ or ▼ button to point to “CHANNEL SET UP”.
Then, press the Arrow▶button.
TV/VCR SETUP
TIMER PROGRAMMING
SETTING CLOCK ▶ CHANNEL SET UP
CHANNEL SET UP USER'S SET UP
V-CHIP SET UP
LANGUAGE [ENGLISH]
CAPTION [OFF]
ZERO RETURN
TIME SEARCH INDEX SEARCH
INDEX SEARCH
2 Select "ADD/DELETE CH"
Press the Arrow ▲ or ▼ button to point to “ADD/DELETE CH”.
Press the Arrow▶button.
- CHANNEL SET UP -
▶ ADD / DELETE CH (TV) AUTO PRESET
3 Enter the desired channel number
Press the Arrow ▲ or ▼ button until your desired channel number appears. (You can also use the number buttons or the CHANNEL ▲/▼ button to enter it) (Example: CH8)
08
ADD / DELETE
4 Delete (or add) it from (into) memory
Press the Arrow ▶ or ◀ button. The channel number changes to light red. The channel is deleted from memory.
- Todelete another channel, repeat steps [3] and [4].
- If you press the Arrow ▶ or ◀ button again, the channel is memorized again.
5 Exit the channel setup mode
Added channel: Light blue. Deleted channel: Light red.
Press the SETUP button on the remote control to returns to TV mode.
NOTE: To confirm that channel(s) has been deleted or added, press the CHANNEL ▲ or ▼ button.
CHANNEL SET UP AGAIN
Make sure ...
- Press the POWER button to turn on the TV/DVD/VHS.
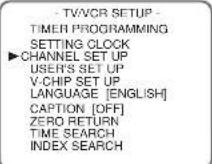
1 Select "CHANNEL SET UP"
Press the SETUP button on the remote control.
Press the Arrow ▲ or ▼ button to point to "CHANNEL SET UP".
Then, press the Arrow▶button.
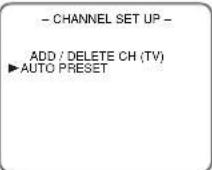
2 Begin auto preset
Press the Arrow ▲ or ▼ button to point to "AUTO PRESET".
Then, press the Arrow ▶ button. The tuner scans and memorizes all the active channels in your area.
3 After scanning
The tuner stops on the lowest memorized channel.
SELECTING THE LANGUAGE
Make sure ...
- Press the POWER button to turn on the TV/DVD/VHS.
NOTE: This function effects only the language on the screen menu and not the audio source.
1 Select "LANGUAGE"
Press the SETUP button on the remote control.
Press the Arrow ▲ or ▼ button to point to "LANGUAGE".
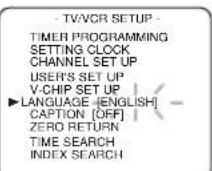
2 Select "ENGLISH" or "ESPAÑOL" or "FRANÇAIS"
Select "ENGLISH" or "ESPAÑOL" = Spanish or "FRANÇAIS" = French using the Arrow ▶ or ◀ button.
3 Exit the Language mode
Press the SETUP button on the remote control to return to TV mode.
NOTE: If Spanish or French is selected accidentally, press the SETUP button on the remote control, press the Arrow ▲ button to point to "IDIOMA [ESPAÑOL]" or "LANGUAGE" [FRANÇAIS], then press the Arrow ▶ button, then press the SETUP button on the remote control.
Select this feature and the TV/DVD/VHS's clock automatically will advance one hour in April, then reverse one hour in October.
When Daylight-Saving Time is ON, the clock will change automatically as follows:
- First Sunday of April : At 2 AM the clock immediately changes to 3 AM. Any timer programming you have set to occur between 2 AM and 3 AM will not record.
- Last Sunday of October : At 2 AM the clock immediately changes to 1 AM.
Make sure ...
- Press the POWER button to turn on the TV/DVD/VHS.
1 Select "SETTING CLOCK"
Press the SETUP button on the remote control.
Press the Arrow ▲ or ▼ button to point to "SETTING CLOCK".
Then, press the Arrow▶button.
TV/VCR SETUP -
TIMER PROGRAMMING
▶ SETTING CLOCK
CHANNEL SET UP
USER'S SET UP
V-CHIP SET UP
LANGUAGE (ENGLISH)
LANGUAGE [EN] CARTION JOSE
CAPTION [OFF] ZERO RETURN
ZERO RETURN
TIME SEARCH
INDEX SEARCH
2 Set "D.S.T." (Daylight-Saving Time) to [ON]
Press the Arrow ▲ or ▼ button to point to "D.S.T.".
Then, press the Arrow▶or◀button until [ON] appears.
- SETTING CLOCK -
AUTO CLOCK [ON]
AUTO CLOCK CH [AUTO]
MANUAL CLOCK SET
▶D.S.T.
![SYLVANIA 6727DC - Set "D.S.T." (Daylight-Saving Time) to [ON] - 1](/content/2026/05/772507/images/97d301490567bb638d73cbf3d7763951b78fb90b8be34e768f38eb5ef0e92230.jpg)
3 Exit the Daylight-Saving Time mode
Press the SETUP button on the remote control to return to TV mode.
Repeat steps [1] to [2], select [OFF] using the Arrow ▶ or ◀ button.
CLOCK SET UP (AUTO / MANUAL)
Set the clock accurately for proper automatic timer recording. If the Public Broadcasting Station (PBS) is available in your area, follow "AUTO CLOCK SETTING". If it is not, follow "MANUAL CLOCK SETTING".
AUTO CLOCK SETTING
You can have the TV/DVD/VHS set the clock automatically by using the Public Broadcasting Station (PBS) channel in your area. Once you have set the clock by using the following procedure, the TV/DVD/VHS will automatically monitor the correct time and date being broadcast by the PBS station in your area, using a new service called Extended Data Service (XDS).
Make sure ...
• TV/DVD/VHS power must be turned on.
- Confirm that the antenna connections are correct.
- The cable converter box must be turned on if your TV/DVD/VHS is connected directly to it. (See NOTES:)
- The channel is properly set in advance. (See page 16.)
NOTES:
- Auto clock setting only needs to be set once. But it can be done again if the clock's time has become incorrect for some reason.
- If the TV/DVD/VHS is connected directly to a cable converter box or satellite box, the local PBS station must be selected on the cable box itself, and the TV/DVD/VHS must be set to the output channel of the cable converter box or satellite box (usually channel 3 or 4), to be able to set up or correct the clock automatically.
If you do not know what your local PBS station is, then follow "Manual Clock Settings" on page 18.
The TV/DVD/VHS cannot control the channels of the cable converter box or satellite box.
1 Select "SETTING CLOCK"
Press the SETUP button on the remote control.
Press the Arrow ▲ or ▼ button to point to "SETTING CLOCK".
Then, press the Arrow▶button.
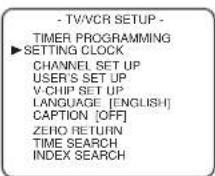
2 Set "AUTO CLOCK" to [ON]
Press the Arrow ▶ or ◀ button repeatedly until [ON] appears.
![SYLVANIA 6727DC - Set "AUTO CLOCK" to [ON] - 1](/content/2026/05/772507/images/2d11b5709345844fe1fb745f4655d02c3d96f6b0d3c187e2d77cf2181b82b7cc.jpg)
3 Enter the channel number for the PBS station
Press the Arrow ▲ or ▼ button to point to "AUTO CLOCK CH".
Then press the Arrow▶ or ◀ button until the channel number for your local PBS station appears.
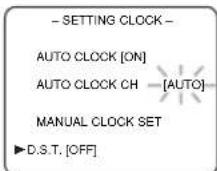
If you do not know the PBS channel number, leave it set to [AUTO] which is located before [2]. The TV/DVD/VHS will search automatically all available channels for the local PBS station, and will select that channel.
4 Exit the Auto Clock Setting
Press the SETUP button on the remote control to return to TV mode.
5 Turn off the TV/DVD/VHS
Turn the TV/DVD/VHS off. Because the Auto Clock functions automatically while the TV/DVD/VHS is off.
If you choose [AUTO],
- the TV/DVD/VHS must search until the PBS channel is found. It must scan each channel for a couple of seconds to determine if that channel is transmitting the XDS signal.
- if the time, that is automatically set by this selected PBS station is incorrect, it may not be your local PBS station, but one from a different time zone. Or there is a case that no channel is broadcasting the XDS signal in your area, as shown by no time. In these cases, you must manually enter the correct local PBS station, or set the clock manually and turn off the Auto Clock Setting feature.
MANUAL CLOCK SETTING
Make sure ...
• TV/DVD/VHS power must be turned on.
1 Select "SETTING CLOCK"
Press the SETUP button on the remote control.
Press the Arrow ▲ or ▼ button to point to “SETTING CLOCK”.
Then, press the Arrow▶button.
TV/VCR SETUP
TIMER PROGRAMMING
▶ SETTING CLOCK
CHANNEL SET UP
USER'S SET UP
V-CHIP SET UP
LANGUAGE [ENGLISH]
2 Select "MANUAL CLOCK
SET"
Press the Arrow ▲ or ▼ button to point to “MANUAL CLOCK SET”.
Then, press the Arrow▶button.
- SETTING CLOCK -
AUTO CLOCK [ON]
AUTO CLOCK CH [AUTO]
▶MANUAL CLOCK SET
D.S.T. [OFF]
3 Select the month
Press the Arrow ▲ or ▼ button until your desired month appears.
(Example: May → 05)
Then, press the Arrow▶button.
- MANUAL CLOCK SET -
MONTH DAY YEAR
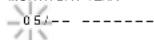
HOUR MINUTE
---:---
4 Select the day
Press the Arrow ▲ or ▼ button until your desired day appears.
(Example: 7th → 07)
Then, press the Arrow ▶ button.
- MANUAL CLOCK SET -
MONTH DAY YEAR
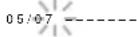
HOUR MINUTE
---:---
5 Select the year
Press the Arrow ▲ or ▼ button until your desired year appears.
(Example: 2002)
Then, press the Arrow▶button.
- MANUAL CLOCK SET -
MONTH DAY YEAR
05/07 TUE
HOUR MINUTE
---:---
In the example below, the clock is to be set to:
DATE May 7th, 2002
SETTING TIME 5:40PM
6 Select the hour
Press the Arrow ▲ or ▼ button until your desired hour appears.
(Example: 5, PM)
Then, press the Arrow▶button.
- MANUAL CLOCK SET -
MONTH DAY YEAR
05/07 TUE 2002
HOUR MINUTE
05:-- PM
7 Select the minute
Press the Arrow ▲ or ▼ button until the desired minute appears.
(Example: 40)
- MANUAL CLOCK SET -
MONTH DAY YEAR
05/07 TUE 2002
HOUR MINUTE
05:40 PM
8 Start the clock
Press the SETUP button on the remote control.
Although seconds are not displayed, they begin counting from 00 when you press the SETUP button on the remote control. Use this feature to synclock with the correct time.
5:40 PM
NOTE:
When unplugging the AC cord or if there is a power failure for more than 30 seconds, you may have to reset the clock.
TO CHANGE CLOCK SETTING
If you want to change the clock,
1) Follow steps [1] and [2].
2) Select where you want to change using the Arrow ▶ or ◀ button.
3) Enter correct numbers using the Arrow ▲ or ▼ button.
4) Press the SETUP button on the remote control to start the clock.
PLEASE NOTE:
If there is no local PBS station in your area or on your cable system, select "AUTO CLOCK" and press the Arrow▶or◀button to turn [OFF] this function. Then you can manually adjust the clock.
WATCHING A TV PROGRAM
1 Turn on the TV/DVD/VHS
Press the POWER button to turn on the TV/DVD/VHS.
2 Select the channel number
Press the CHANNEL ▲ or ▼ button to select your desired channel number or press the number buttons on the remote control.
Remember: If the TV/DVD/VHS is connected to a cable box or satellite box, the TV/DVD/VHS must be on CH3 or CH4, then the channel to be viewed must be selected on the cable box or satellite box.
3 Adjust sound
Press the VOLUME △ or ▽ button to adjust the volume.
VOLUME 20
NOTES:
- If you press the CHANNEL ▲ or ▼ in the DVD mode, you can change the TV channels.
Even if you turn off the TV/DVD/VHS in the DVD mode, when you turn it on again, it will go into the TV/VCR mode.
DEGAUSSING
Magnetism from nearby appliances might affect the color of the TV picture.
If this happens, move this unit away from the appliance. If the color is still not correct, disconnect power cord from AC outlet then reconnect it after 30 minutes.
PICTURE CONTROL
The TV/DVD/VHS's picture controls – BRIGHT, CONTRAST, COLOR, TINT and SHARPNESS – are preset to factory specifications. Although they are usually the best, you may need to make some further adjustments for a natural looking image.
NOTES:
- Procedures must be followed within 5 seconds or the Picture Control mode will be cancelled.
- When setting the Picture Control, the Game mode will be cancelled.
Make sure ...
• TV/DVD/VHS power must be turned on.
1 Select "PICTURE CONTROL"
Press the PICTURE button on the remote control.
2 Select item you want to adjust
Press the Arrow ▲ or ▼ button until desired control is displayed.
BRIGHT
CONTRAST
COLOR
TINT
SHARPNESS
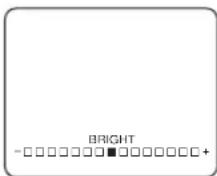
3 Adjust the picture control
Press the Arrow ▶ or ◀ button to adjust to your desired level.
| Arrow◀Arrow▶ | ||
| BRIGHT to decrease to increase brightness brightness | ||
| CONTRAST | to decrease to in contrast | crease contrast |
| COLOR | to pale | to brilliant |
| TINT | to purple | to green |
| SHARPNESS | to soft | to clear |
- If there is a power failure of any kind, the unit will retain its memory for this feature.
CLOSED CAPTION SYSTEM
You can view specially labeled (cc) TV programs, movies, news, pre-recorded tapes with either a dialogue caption or text display.
CAPTION mode: By choosing the caption mode, you can watch dramas, movies and news while captioning the dialogues and the contents of news.
TEXT mode: By choosing the text mode, you can watch half screen text information if you want.
1-2: You may get these captions or text information by selecting either "1" or "2". Caption "2" is used, usually for a second language if available.
NOTE:
Not all programs are broadcast with closed captions. Your television is designed to provide error free closed captions from high quality antenna, cable and VCR signals. Conversely, poor quality signals are likely to result in caption errors or no captions at all. Common signal conditions which may cause captions errors are listed below:
• Automobile ignition noise
• Electric motor brush noise
- Weak snowy reception on TV screen
- Multiplex signal reception displaying picture ghosts or airplane flutter.
- Playback of poorly recorded or worn VCR tapes.
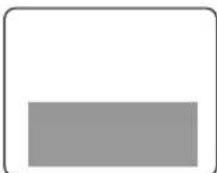
NOTE:
If the TV/DVD/VHS displays a black box on the TV screen, this means that the TV/DVD/VHS is set to the TEXT mode. To clear screen, select [CAPTION1], [CAPTION2] or [OFF].
Make sure ...
• TV/DVD/VHS power must be turned on.
1 Select "CAPTION"
Press the SETUP button on the remote control.
Press the Arrow ▲ or ▼ button to point to "CAPTION".
- TV/VCR SETUP -
TIMER PROGRAMMING
SETTING CLOCK
CHANNEL SET UP
USER'S SET UP
V-CHIP SET OF LANGUAGE
LANGUAGE (ENGLISH)
CAPTION [OFF] ZERO RETURN
TIME SEARCH
INDEX SEARCH
2 Select your desired caption menu
Press the Arrow ▶ or ◀ button until your desired caption menu appears.
([CAPTION1], [CAPTION2], [TEXT1] or [TEXT2])
- TV/VCR SETUP -
TIMER PROGRAMMING
SETTING CLOCK
CHANNEL SET UP
USER'S SET UP
V-CHIP SET UP
LANGUAGE ENGLISH
CAPTION [CAPTION]
ZERO RETURN TIME: 054501
TIME SEARCH INDEX SEARCH
3 Exit the caption setting mode
Press the SETUP button on the remote control to return to TV mode.
TO CANCEL THE CLOSED CAPTION SYSTEM
Repeat steps [1] and [2], select [OFF] using the Arrow ▶ or ◀ button. Press the SETUP button on the remote control to return to TV mode.
WHEN THE CLOSED CAPTION MODE IS ON
The On-Screen Display will disappear after 5 seconds.
- This is also true when the MUTE button is pressed, and when the PAUSE button is pressed while recording.
- If there is a power failure of any kind, the unit will retain its memory for this feature.
V-CHIP SET UP
V-CHIP enables parents to prevent their children from watching inappropriate material on TV.
V-CHIP reads the ratings for programming (except for news and sports programs, unedited movies on premium cable channels, and Emergency Broadcast System signals), then denies access to programming if the program's rating meets the limitations you select. In this case, “PROTECTED PROGRAM by ...” message appears on the TV screen. You can watch the protected program by entering access code (default 0000).
Toblock ratings, follow the steps below.
- Programming may be rated by the Motion Picture Association of America (MPAA) or according to the Television Parental Guidelines. In order to block any inappropriate programming, set your limits in both places (MPAA RATING and TV RATING).
TV RATING SET UP
Make sure ...
• TV/DVD/VHS power must be turned on.
1 Select "V-CHIP SET UP"
Press the SETUP button on the remote control.
Press the Arrow ▲ or ▼ button to point to “V-CHIP SET UP”.
Then, press the Arrow▶button.
TV/VCR SETUP -
TIMER PROGRAMMING
SETTING CLOCK
CHANNEL SET UP
USER'S SET UP VCHIP SET UP
V-CHIP SET UP LANGUAGE [ENGLISH]
LANGUAGE [EF] CAPTION JOFF
ZERO RETURN
TIME SEARCH
INDEX SEARCH
2 Input Access code
Use the number buttons to enter 4-digit access code. The default code is 0000.
ACCESS CODE

3 Select "TV RATING"
Press the Arrow ▲ or ▼ button to point to “TV RATING”.
Then, press the Arrow▶button.
- V-CHIP SET UP -
▶ TV RATING MPAA RATING CHANGE CODE
4 Select your desired item
Press the Arrow ▲ or ▼ button to point to your desired item.
Then, press the Arrow▶ button to select [BLOCK] or [VIEW].
TV-Y [VIEW] TV-Y7 ( ) [VIEW] TV-G [VIEW] TV-PG ( ) [VIEW] TV-14 ( ) [VIEW] TV-MA ( ) [VIEW]
- When you select the rating category and turn it [BLOCK], the higher rating will turn [BLOCK] automatically. Also, the lower rating will turn [VIEW] automatically.
- When you turn “TV-Y” to [VIEW], the all ratings will turn to [VIEW] automatically.
| Selection | Rating Category Explanations |
| TV-Y | Appropriate for all children |
| TV-Y7 | Appropriate for children seven and older |
| TV-G | General Audience |
| TV-PG | Parental Guidance suggested. |
| TV-14 | Unsuitable for children under 14 |
| TV-MA | Mature audience only |
When you select TV-Y7, TV-PG, TV-14, or TV-MA and you press the Arrow ▶ button, the sub-ratings will appear on the TV screen.
If you select the rating category (example: TV-PG) and turn it [BLOCK] or [VIEW], the sub-ratings (example: V for Violence) will turn [BLOCK] or [VIEW] automatically.
You can set the sub-ratings to [BLOCK] or [VIEW] individually when the rating category is set to [BLOCK].
To set the sub-ratings individually, follow the steps below.
- When you select [TV-Y7]:
Press the Arrow ▼ or ▲ button to select “FV” (Fantasy Violence). Then, press the Arrow ▶ button to select [BLOCK] or [VIEW].
- When you select [TV-PG], [TV-14] or [TV-MA]:
Press the Arrow ▼ or ▲ button to select “D”(Suggestive Dialog), “L”(Coarse Language), “S”(Sexual Situation), or “V”(Violence). Then, press the Arrow ▶ button to select [BLOCK] or [VIEW].
Note: When you select [TV-MA], "D" does not appear on the TV screen.
- The sub-ratings which set to [BLOCK] appears next to the rating category in the TV RATING menu.
![SYLVANIA 6727DC - - When you select [TV-PG], [TV-14] or [TV-MA]: - 1](/content/2026/05/772507/images/5c3f409d83b963cf610c105758398826e0cfd857b8dc6ba6833a344edde28a63.jpg)
![SYLVANIA 6727DC - - When you select [TV-PG], [TV-14] or [TV-MA]: - 2](/content/2026/05/772507/images/3b30598222c96748fdecac87649bad1f6a22b88bff31f5d7c722f951d401c300.jpg)
![SYLVANIA 6727DC - - When you select [TV-PG], [TV-14] or [TV-MA]: - 3](/content/2026/05/772507/images/e69d40f8e6ada9e9f2be980cff0aca562b4e4d93b79caa90b8a19ec30bb155c9.jpg)
5 Exit the V-Chip setting mode
Press the SETUP button on the remote control to return to original mode.
MPAA RATING SET UP
Make sure ...
• TV/DVD/VHS power must be turned on.
1 Select "V-CHIP SET UP"
Press the SETUP button on the remote control.
Press the Arrow ▲ or ▼ button to point to "V-CHIP SET UP".
Then, press the Arrow▶button.
TV/VCR SETUP -
TIMER PROGRAMMING
SETTING CLOCK
CHANNEL SET UP
USER'S SET UP
▶ V-CHIP SET UP
LANGUAGE [EN CAPTION]
CAPTION [OFF] ZERO RETURN
ZEENO NETOWN
TIME SEARCH INDEX SEARCH
INDEX SEARCH
2
Use the number buttons to enter 4-digit access code. The default code is 0000.
ACCESS CODE

3 Select "MPAA RATING"
Press the Arrow ▲ or ▼ button to point to "MPAA RATING".
Then, press the Arrow▶button.
-V-CHIP SET UP -
TV RATING
▶MPAA RATING
CHANGE CODE
| Selection Rating Category Explanations | |
| G General | Audience |
| PG Parental Guidance suggested. | |
| PG-13 Unsuitable for children under 13 | |
| R Restricted; under 17 requires accompanying parent or adult guardian | |
| NC-17 No | one under 17 admitted |
| X Mature | audience only |
4 Select your desired item
Press the Arrow ▲ or ▼ button to point to your desired item.
Then, press the Arrow▶button to select [BLOCK] or [VIEW].
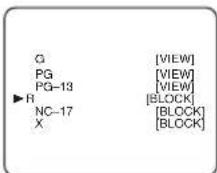
- When you select the rating category and turn it [BLOCK], the higher rating will turn [BLOCK] automatically. Also, the lower rating will turn [VIEW] automatically.
- When you turn "G" to [VIEW], the all ratings will turn to [VIEW] automatically.
5 Exit the V-Chip setting mode
Press the SETUP button on the remote control to return to original mode.
CHANGE ACCESS CODE
To change access code, follow the steps.
1
Press the SETUP button so that the TV/VCR SETUP display appears on the TV screen.
2
Press the Arrow ▲ or ▼ button to point to "V-CHIP SET UP". Then, press the Arrow ▶ button.
TV/VCR SETUP
TIMER PROGRAMMING
SETTING CLOCK
CHANNEL SET UP
USER'S SET UP
▶ V-CHIP SET UP
LANGUAGE [ENGLISH]
CAPTION [OFF]
ZERO RETURN
TIME SEARCH
3
Use the number buttons to enter 4-digit access code. The default code is 0000.
ACCESS CODE

4
Press the Arrow ▲ or ▼ button to point to "CHANGE CODE". Then, press the Arrow ▶ button.
- V-CHIP SET UP -
TV RATING
MPAA RATING
▶ CHANGE CODE
5
Use the number buttons to enter your desired access code in the NEW CODE space. Then enter the same code in the CONFIRM CODE space. V-CHIP SET UP screen appear on the screen.
NEW CODE

CONFIRM CODE

- If you enter wrong code, repeat step 5, making sure you enter the same new code exactly in the confirm code space.
NEW CODE

CONFIRM CODE

6
Press the SETUP button to exit the TV/VCR SETUP.
Note:
- If you unplug the power code or power failure occurs, the changed access code will be lost and will return to default (0000). Change your access code again as necessary.
You can record or listen to a program in MTS stereo.
CHECKING THE SELECTED MTS MODE
When you play a VHS tape, or receive a broadcast on the TV/DVD/VHS tuner channel you are watching, the status shown below will appear when you press the DISPLAY button on the remote control.
![PLAY HIFI CH 123 STEREO/SAP SP COUNT 0:00:00 1] 2] 3]](/content/2026/05/772507/images/10c68a32792d23a0aa0ba44c40fadc7eb3beeddc275544fd5ad274e6894e9cb9.jpg)
| SAP | Second Audio Program, which means your program, can also be received in a second language or sometimes a radio station. |
| HIFI | High Fidelity which produces better sound than standard stereo TV/DVD/VHSs. |
1] When a program is broadcast in stereo, STEREO appears on the TV screen.
2] When a program is broadcast in second audio, SAP appears on the TV screen.
3] When a program broadcast both in stereo and second audio, STEREO and SAP appear on the TV screen.
NOTE: Although a program may be broadcast in both stereo and second audio, you cannot record in both stereo and second audio at the same time.
4] While the TV/DVD/VHS is set in HIFI stereo mode and playback mode. HIFI appears on the TV screen. While the TV/DVD/VHS is set in monaural(MONO) mode, HIFI disappears from the TV screen.
NOTE: If you play non-HIFI tapes while the TV/DVD/VHS is set in HIFI, HIFI will disappear from the TV screen and the TV/DVD/VHS will play automatically in monaural.
MTS RECORDING/MONITOR MODE
| Type of broadcast | Display on STEREO/SAP Hi-Fi a the TV screen | AUDIO track(2-channel) Normal audio SELECTION L-channel R-channel | audio track(2-channel) Normal audio track | ||
| Regular (monaural audio) | -None- | -Invalid- | Mono | Mono | Mono |
| Stereo broadcast | STEREO | -Invalid- | L | R | L+R |
| Bilingual broadcast | SAP | STEREO* | Main audio program | Main audio program | Main audio program |
| SAP* | Sub audio program | Sub audio program | Sub audio program | ||
| Stereo & Bilingual broadcast | STEREO SAP | STEREO* | L | R | L+R |
| SAP* | sub audio program | sub audio program | sub audio program | ||
*You must select the recording mode in TV AUDIO [STEREO] or [SAP] when you record a broadcast.
SELECTING THE MTS SYSTEM
Make sure ...
• TV/DVD/VHS power must be turned on.
TO SELECT HIFI MODE
1 Select "USER'S SET UP"
Press the SETUP button on the remote control.
Press the Arrow ▲ or ▼ button to point to “USER’S SET UP”. Then, press the Arrow ▶ button.
- TV/VCR SETUP -
TIMER PROGRAMMING
SETTING CLOCK
CHANNEL SET UP
▶ USER'S SET UP
V-CHIP SET UP
LANGUAGE [ENGLISH]
CAPTION [OFF]
ZERO RETURN
TIME SEARCH INDEX SEARCH
- USER'S SET UP -
2 Select"VCR AUDIO"
Press the Arrow ▲ or ▼ button to point to "VCR AUDIO". Then, press the Arrow ▶ button.
RENTAL [OFF]
REPEAT PLAY [OFF]
AUTO RETURN [OFF]
▶VCR AUDIO [HIFI]
TV AUDIO
[STEREO]
3 Select [HIFI]
Press the Arrow ▶ or ◀ button until [HIFI] appears.
- USER'S SET UP -
RENTAL [OFF]
REPEAT PLAY OFF!
AUTO RETURN [OFF]
▶VCR AUDIO [HIFI]
TV AUDIO
[STEREO]
4 Toreturn to TV mode
Press the SETUP button on the remote control to return to TV mode.
NOTES:
- Normally, “HIFI” should be selected for playback-with HIFI sound.
- When you play non-HIFI tapes, the TV/DVD/VHS will play automatically in the monaural mode.
- The TV/DVD/VHS records automatically MTS broadcasts in HIFI stereo sound unless you select SAP mode recording before you begin recording.
TO SELECT MONO MODE
You can change the selection to “MONO” if you want to listen to HIFI tapes in normal audio playback.
1) Press the SETUP button on the remote control. Press the Arrow ▲ or ▼ button to point to "USER'S SET UP". Then, press the Arrow ▶ button.
2) Press the Arrow ▲ or ▼ button to point to "VCR AUDIO". Then, press Arrow ▶ button.
3) Press the Arrow ▶ or ◀ button until [MONO] appears.
4) Press the SETUP button on the remote control to return to TV mode.
TO SELECT STEREO, SAP, OR MONO
1 Select "USER'S SET UP"
Press the "SETUP" button on the remote control.
Press the Arrow ▲ or ▼ button to point to “USER’S SET UP”. Then, press the Arrow ▶ button.
- TV/VCR SETUP -
TIMER PROGRAMMING
SETTING CLOCK
CHANNEL SET UP
▶ USER'S SET UP
V-CHIP SET UP
LANGUAGE [ENGLISH]
CAPTION [OFF] ZERO RETURN
Press the Arrow ▲ or ▼ button to point to "TV AUDIO". Then, press the Arrow ▶ button.
- USER'S SET UP -
RENTAL [OFF]
REPEAT PLAY [OFF]
AUTO RETURN [OFF]
VCR AUDIO [HIFI]
▶ TV AUDIO

3 Select [STEREO], [SAP], or [MONO]
Press the Arrow ▶ or ◀ button until [STEREO], [SAP], or [MONO] appears.
4 To return to TV mode
Press the SETUP button on the remote control to return to TV mode.
NOTES:
- You must select the recording mode, either TV AUDIO [STEREO] or [SAP] when you record a broadcast.
Refer to "MTS RECORDING/MONITOR MODE".
- If you select second audio when second audio is not available, the TV/DVD/VHS will record normal audio.
This TV/DVD/VHS will operate with any cassette that has the VHSk. For best results, we recommend the use of high-quality tapes. Do not use poor quality or damaged tapes.
PRECAUTIONS
- Avoid moisture. Moisture condensation may occur on the tape if it is moved from a cold place to a warm place or visa versa. Before using a tape with these conditions, to avoid damage of the tape and your TV/DVD/VHS, wait until the tape has warmed to room temperature and the moisture has evaporated.
- Avoid extreme heat, high humidity and magnetic fields.
- Do not tamper with the cassette mechanism.
- Do not touch the tape with your fingers.
TWO DIFFERENT TAPE SPEEDS
Before recording, select the tape speed from : SP mode (Standard Play) or SLP mode (Super Long Play).
The table below shows the maximum recording/play-back time using T60, T120 or T160 tapes in each mode.
| Tape Speed Recording/Playback Time | ||||
| Type of tape | T60 T1 | 20 T160 | ||
| SP mode 1 hour | 2 hours 2 | 2/3 hours | ||
| SLP mode 3 hours | 6 hours | 8 hours | ||
Note: You can play back a tape recorded in LP mode (Long Play).
INSERTING A CASSETTE
Insert the cassette in the direction as shown. Push in gently, but continuously, on the center-back of the cassette until it is drawn into the TV/DVD/VHS. The TV/DVD/VHS will automatically turn on.
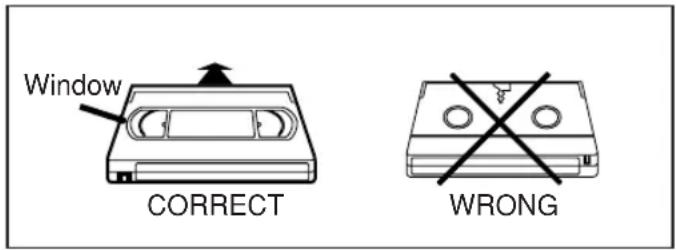
REMOVING A CASSETTE
1) In the Stop mode, press the EJECT button on the remote control or press the STOP/EJECT button on the TV/DVD/VHS. The cassette will eject.
2) Pull the cassette out of the cassette compartment.
3) Store the cassette in its case as shown.
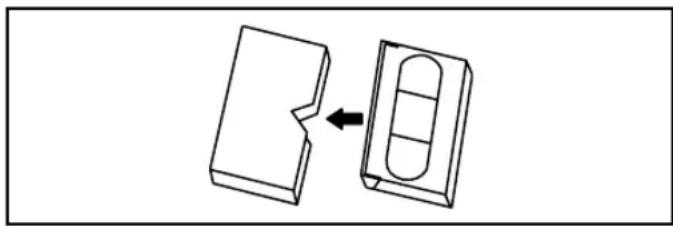
natural_image
Diagram showing a mechanical component being cut into a housing, with no visible text or symbols.ERASE PREVENTION
You can prevent accidental erasing of recording by breaking off the tab on the back edge of the cassette.
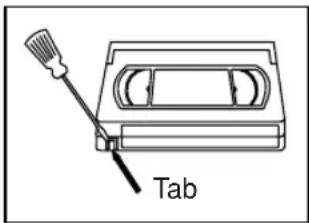
If you decide to record on the tape again, cover the hole with plastic tape.
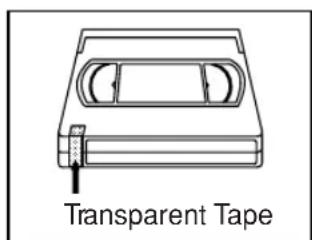
NOTE:
- In DVD mode, Whether the cassette is with tab or without tab you insert, it doesn't start playing until you press the PLAY button.
In TV/VCR mode, if th cassette without tab is inserted, playback will automatically start.
NORMAL PLAYBACK
Make sure ...
• TV/DVD/VHS power must be turned on.
1 Insert a prerecorded tape
If the erase-protection tab has been removed, the TV/DVD/VHS will start playback automatically.
2 To begin playback
Press the PLAY button.
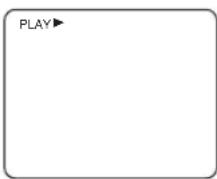
3 Tostop playback
Press the STOP button when play-back is completed.
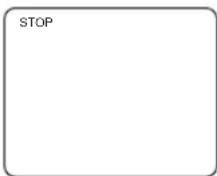
NOTES:
- If you press the TV/VCR side PLAY button in the DVD mode, you can start the VCR playback.
- If you press the SELECT button in the VCR playback, it will stop and the mode will change to the DVD mode. In addition, the same function operates with the DVD side PLAY button or OPEN/CLOSE button.
TRACKING ADJUSTMENT
- Tracking adjustment will be set automatically (Digital Tracking function) when you start playback.
- However when playing pre-recorded tapes or tapes recorded on units other than your own, noise lines (black and white streaks) may appear on the playback picture. If this occurs, you can adjust the tracking control manually by pressing the CHANNEL ▲ or ▼ button until the streaks disappear. To return to the DTR function, stop the tape once and start playback again.
- You can reduce the noise lines by pressing the CHANNEL ▲ or ▼ button in slow mode, too. Tracking adjustment in Slow mode will not be set automatically.
NOTE:
- In Still mode, press the SLOW button and press the CHANNEL ▲ or ▼ button until streaks disappear. Toreturn to Still mode, press the PAUSE button again.
SLOW MOTION
During pause, press the FWD button to reduce the playback speed. The TV/DVD/VHS mutes the sound during slow motion. Press the PLAY button to return to normal playback.
NOTE: If it is left in the Slow mode for more than five minutes, the TV/DVD/VHS will automatically go into the Stop mode.
PICTURE SEARCH
This feature is very useful in finding or skipping over a particular scene on a tape. In this mode, the sound will be muted.
1) You may view a video tape at a high speed in either a forward or reverse direction by pressing the F.FWD or REW button. (in the SP / LP / SLP modes)
NOTE:
- If you press the F.FWD or REW button on the front panel in the DVD mode, the VCR forward or reverse will start. Please press the STOP / EJECT button once to stop it, twice to eject it.
2) Press it again and the TV/DVD/VHS will now search in super high speed. (in the LP / SLP modes only)
NOTE:
- Tapes recorded in the SP or LP mode will display a noise bar on the TV screen and the picture may revert to Black and White. This is normal.
3) Press the PLAY button to return to normal speed.
STILL PICTURE
You can view a still picture on the TV screen during playback (the Still mode). Press the PAUSE button during playback. Only tapes recorded in the SLP mode will show the least amount of lines. Press the PLAY button to return to playback.
NOTES:
- You can advance the picture one frame at a time by pressing the PAUSE button during the Still mode.
- If it is left in the Pause mode for more than five minutes, the TV/DVD/VHS will automatically switch to the Stop mode.
VERTICAL HOLD CONTROL
In the Pause/Still mode only, when the picture begins to vibrate vertically, stabilize the picture by pressing the CHANNEL ▲ or ▼ button.
NOTE:
If there are video noise lines on the screen, see Tracking Adjustment section.
Make sure ...
• TV/DVD/VHS power must be turned on.
- Insert a prerecorded tape.
- Before playback, follow steps below.
RENTAL PLAYBACK
This function enables you to improve the picture quality when playing back worn cassettes such as rented tapes.
1 Select "USER'S SET UP"
Press the SETUP button on the remote control.
Press the Arrow ▲ or ▼ button to point to “USER’S SET UP”.
Then, press the Arrow▶button.
TV/VCR SETUP
TIMER PROGRAMMING
SETTING CLOCK
CHANNEL SET UP
▶ USER'S SET UP
V-CHIP SET UP LANGUAGE [ENGLISH]
LANGUAGE [EN CARTION (OFF)]
CAPTION [OFF] ZERO RETURN
ZERO RETURN TIME SEARCH
TIME SEARCH INDEX SEARCH
2 Set "RENTAL" to [ON]
Press the Arrow ▲ or ▼ button to point to “RENTAL”.
Press the Arrow▶or◀button until [ON] appears.
_USER'S SET UP
▶ RENTAL [ON]
REPEAT PLAY [OFF]
AUTO RETURN [OFF]
VCR AUDIO [HIFI]
TV AUDIO
![SYLVANIA 6727DC - Set "RENTAL" to [ON] - 1](/content/2026/05/772507/images/f27a1b08ff9f0cd081c283825ad918032099af4220b7b64d87b0e3b109bf6422.jpg)
[IFI]
[STEREO]
3 Exit the Rental setting
Press the SETUP button on the remote control to return to the TV mode.
4 Start playback
Press the PLAY button to start playback. “RENTAL PLAY ▶” appears.
- Once you select the Rental mode, it stays in effect even after you turn off the TV/DVD/VHS.
TO CANCEL THE RENTAL MODE
Repeat steps [1] and [2], select [OFF] using the Arrow▶ or ◀button on the remote control. Press the SETUP button on the remote control to return to TV mode.
If there is a power failure of any kind, the unit will retain its memory for this feature.
AUTO REPEAT PLAYBACK
The TV/DVD/VHS has the auto repeat function that allows you to repeat a tape indefinitely without touching the PLAY button.
ALL REPEAT: Repeat playback from the beginning to the end of the tape.
BLANK REPEAT: Repeat playback from the beginning to a blank part, which is blank for more than 10 seconds.
1 Select "USER'S SET UP"
Press the SETUP button on the remote control.
Press the Arrow ▲ or ▼ button to point to “USER’S SET UP”.
Then, press the Arrow▶button.
- TV/VCR SETUP -
TIMER PROGRAMMING
SETTING CLOCK
CHANNEL SET UP
▶ USER'S SET UP
V-CHIP SET UP
LANGUAGE [ENGLISH]
CAPTION [OFF]
ZERO RETURN TIME SEARCH
TIME SEARCH INDEX SEARCH
2 Select "ALL" or "BLANK"
Press the Arrow ▲ or ▼ button to point to “REPEAT PLAY”.
Press the Arrow ▶ or ◀ button repeatedly until your desired selection [ALL] or [BLANK] appears.
_USER'S SET UP
RENTAL
▶ REPEAT PLAY
AUTO RETURN
VCH AUDIO
TV AUDIO
[OFF]
[ALL]
[OFF]
[HIFI]
[STEREO]
3 Exit the Repeat Play setting
Press the SETUP button on the remote control to return to the TV mode.
4 Start playback
Press the PLAY button to start the Repeat Play. "REPEAT PLAY ▶" appears.
- Once you select the Repeat Play mode, it stays in effect even after you turn off the TV/DVD/VHS.
- If the Rental mode is set [ON], the “RENTAL PLAY▶” display has priority.
TO CANCEL THE REPEAT PLAY MODE
Repeat steps [1] and [2], select [OFF] using the Arrow▶ or ◀button on the remote control. Press the SETUP button on the remote control to return to TV mode.
If there is a power failure of any kind, the unit will retain its memory for this feature.
Make sure ...
• TV/DVD/VHS power must be turned on.
- Insert a tape.
ZERO RETURN
This function allows you to search easily a beginning point that you want to review by rewinding or fast forwarding.
NOTE:
Zero Return WILL NOT work on a blank tape or a blank portion of a tape.
1 Stop a tape at your desired point Rewind or fast forward the tape to the beginning point at which you want to review.
2 Reset the counter to 0:00:00 Press the COUNTER RESET button repeatedly.
3 Begin recording or playback Press the RECORD or PLAY button. Press the STOP button when recording or playback is completed.
4 To activate "ZERO RETURN" mode
Press the SETUP button on the remote control.
Press the Arrow ▲ or ▼ button to point to “ZERO RETURN”.
Then, press the Arrow ▶ button.
The counter will appear on the TV screen.
The tape will automatically stop when the counter returns to 0:00:00.
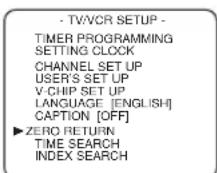
TIME SEARCH
The Time Search function makes it possible to quickly advance the tape to your desired position simply by entering the exact amount of playback time you want to skip.
NOTES:
- Time Search can be set up to a maximum of 9 hours 50 minutes (9:50) by 10 minutes at a time.
- This function will not operate in recording mode. - This function is not operative when a cassette tape is not inserted in the TV/DVD/VHS.
In the example below: To watch a program after 2 hour 50 minutes from the present position, in either direction.
1 Insert a tape.
2 Select "TIME SEARCH" mode
Press the SETUP button on the remote control.
Press the Arrow ▲ or ▼ button to point to “TIME SEARCH”.
Then, press the Arrow▶button.
TV/VCR SETUP -
TIMER PROGRAMMING
SETTING CLOCK
CHANNEL SET UP
USER'S SET UP
V-CHIP SET UP LANGUAGE [ENGLISH]
LANGUAGE [EN CARTION JOFF
CAPTION [OFF] ZERO RETURN
TIME SEARCH
INDEX SEARCH
3 Enter your desired time
Press the Arrow ▲ or ▼ button until your desired time appears.
(Example: “2:50” stands for 2 hours 50 minutes)
If you wish to cancel the Time
Search at this point, press the SETUP button on the remote control.
TIME SEARCH
2:50
/1\
4 Begin Time Search
By pressing the Arrow ◀ or ▶ button, the TV/DVD/VHS will rewind or fast forward to the specified point.
The time counts down as the searching progresses. When 0:00 is reached, the tape will start playback automatically.
TO CANCEL THE TIME SEARCH at this point
Press the STOP/EJECT button on the TV/DVD/VHS or the remote control. This will delete the selected time.
INDEX SEARCH
This feature provides a method of indexing the starting point so that it can be easily returned to in either fast forward or rewind mode.
- The index mark will be made automatically when the REC button is pressed. It will also be marked at the starting point of Timer recording and OTR.
- The index mark will not be recorded if the PAUSE button is pressed and released during recording.
- The time gap between making the index marks on the tape should be greater than 1 minute for SP recording, 2 minutes for LP recording and 3 minutes for SLP recording.
- In some cases, the index mark at the beginning of video tape cannot be detected.
Example: You are watching program number 4 and want to fast forward to program number 7. You must skip three programs.
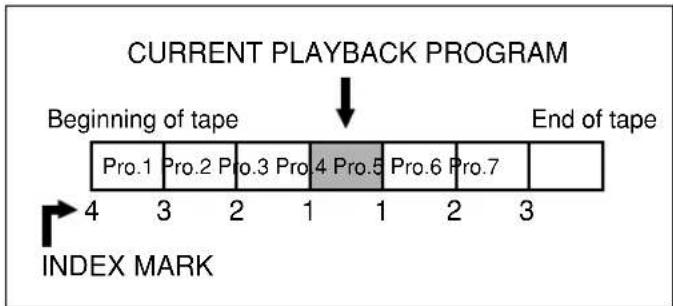
flowchart
graph TD
    A["Beginning of tape"] --> B["Pro.1"]
    B --> C["Pro.2"]
    C --> D["Pro.3"]
    D --> E["Pro.4"]
    E --> F["Pro.5"]
    F --> G["Pro.6"]
    G --> H["Pro.7"]
    H --> I["End of tape"]
    J["INDEX MARK"] --> K["4 3 2 1 1 2 3"]
1 Select "INDEX SEARCH"
Press the SETUP button on the remote control.
Press the Arrow ▲ or ▼ button to point to "INDEX SEARCH". Then, press the Arrow ▶ button
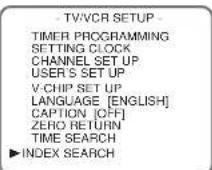
2 Enter your desired number
Press the Arrow ▲ or ▼ button until the number of programs that you want to skip appears.
(Example: "03" for 3 programs)
• The Index Search mode will be
canceled if the procedures are not activated in 30 seconds.
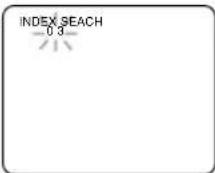
3 Begin Index Search
Press the Arrow ◀ or ▶ button. The TV/DVD/VHS begins rewinding or fast forwarding to the beginning of desired program.
NOTE: Every time an index signal is skipped, the number in the program indicator decreases by one.
4 After Index Search
When the preset program is reached, the TV/DVD/VHS will start playback automatically.
- A video cassette must be inserted in the TV/DVD/VHS for this function to work.
- The number of Index Searches can be set up to 20.
- This function will not operate in the recording mode.
- When you want to cancel the Index Search while in progress, press the STOP button.
SPECIAL FEATURES
REAL TIME TAPE COUNTER
This shows the elapsed recording or playback time in hours, minutes, and seconds. (The displayed time will not change on a blank tape or blank portions on the tape.) The “-” indication will appear when the tape has rewound further than “0:00:00” on the tape counter.
AUTO REWIND-EJECT
- When the end of a tape is reached during recording, playback, or fast-forward, the tape will automatically rewind to the beginning. After rewinding finishes, the TV/DVD/VHS will eject the tape and turn itself to off.
- This function is operative when Repeat Play is set to the [OFF] position.
- The tape will not auto-rewind during timer recording or One Touch Recording.
Make sure ...
• TV/DVD/VHS power must be turned on.
- Insert a cassette tape with its erase prevention tab in place. (If necessary, rewind or fast forward the tape to the point at which you want to begin recording.)
- This unit will ONLY record and view the same channel.
- This unit cannot record the contents from the built-in DVD.
NOTES:
NORMAL RECORDING
You can ONLY watch the same TV program that is being recorded.
1 Select the channel to be recorded
Press the number buttons on the remote control or the CHANNEL
▲ or ▼ button.
Remember: If the TV/DVD/VHS is connected to a cable box or satellite box, the TV/DVD/VHS must be on CH3 or CH4, then the channel to be recorded must be selected on the cable box or satellite box.
2 Select the tape speed
Press the SPEED button to select the desired tape speed (SP/ SLP).
3 Begin recording
Press the RECORD button.
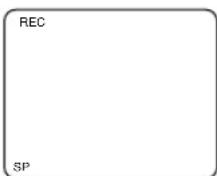
4 Stop recording
Press the STOP button when recording is completed.
SKIPPING UNWANTED SCENES DURING RECORDING
Press the PAUSE button to temporarily stop recording.
Press the PAUSE or RECORD button to resume recording.
NOTES:
• After five minutes, the
TV/DVD/VHS will automatically switch to the Recording mode to prevent tape damage.
- If “CLOSED CAPTION (ON)” is selected, the On-Screen Display will appear for 5 seconds, then disappear.
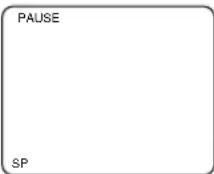
OTR (One Touch Recording)
This function enables you to set a recording length simply by pressing the REC/OTR button on the TV/DVD/VHS.
Make sure ...
• TV/DVD/VHS power must be turned on.
- Insert a cassette tape with its erase prevention tab in place. (If necessary, rewind or fast forward the tape to the point at which you want to begin recording.)
NOTES:
- This function CANNOT be done from the remote control.
- Recording starts immediately when the REC/OTR button is pressed.
- When the REC/OTR button is pressed 18 times, the TV/DVD/VHS returns to the Normal Recording mode.
- To stop the OTR operation, press the STOP button on the TV/DVD/VHS or on the remote control.
- To show the remaining time, press the DISPLAY button on the remote control so that “OTR” appears on the TV screen. (It will show up momentarily then disappear.)
- Recording stops when 0:00 is reached.
- Please note that in the SLP mode maximum recording time, assuming the tape is started at the beginning, is 8 hours using T-160 (or 6 hours using T-120).
- If the tape runs out before the end time, the TV/DVD/VHS will switch to the Stop mode immediately, ejects the tape and turns itself off.
1 Select the channel to be recorded
Press the number buttons on the remote control or the CHANNEL ▲ or ▼ button.
Remember: If the TV/DVD/VHS is connected to a cable box or satellite box, the TV/DVD/VHS must be on CH3 or CH4, then the channel to be recorded is selected on the cable box or satellite box.
2 Select the tape speed
Press the SPEED button to select the desired tape speed (SP/ SLP).
3 Begin OTR
Press the REC/OTR button on the TV/DVD/VHS as many times as needed. The recording length will be determined by the number of times you press the REC/OTR button. Each additional push will increase the recording time by 30 minutes. It is set up to 8 hours.
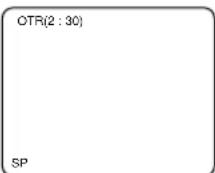
| Push(es) | Display Recording length | |
| 1 push (normal recording) | ||
| 2 pushes 0:30 30 minutes | ||
| 3 pushes 1:00 60 minutes | ||
| ↓ | ↓ | ↓ |
| 17 pushes | 8:00 | 480 minutes |
COPYING A VIDEO CASSETTE (Requires a VCR or camcorder)
You can make copies of video tapes made by friends or relatives for your enjoyment.
WARNING: Unauthorized recordings of copyrighted video tapes may be an infringement of copyright laws.
Connect your TV/DVD/VHS and a Source (Playing) VCR using the following diagram.
![[The TV/DVD/VHS] [Fig.8] Audio/Video adapter cable (not supplied) [Ex: Source (playing) VCR or camcorder] AUDIO L OUT IN R VIDEO OUT IN](/content/2026/05/772507/images/c827dea076db7764e58efdd9ce47815e1c324a641b4cf56a2517860fbbef58ee.jpg)
1) Insert a pre-recorded video cassette into the Source (Playing) VCR or camcorder.
2) Insert a blank video cassette, or one you want to record over, into the TV/DVD/VHS's cassette compartment.
3) Press the SPEED button on remote control for the TV/DVD/VHS to select the desired recording speed (SP/SLP).
4) Press the CHANNEL ▲ or ▼ button on the TV/DVD/VHS until “AUX” appears on the screen.
5) Press the RECORD button on the TV/DVD/VHS.
6) Begin playback of the tape in the source (Playing) VCR or camcorder.
NOTE: For best results during copying, use the TV/DVD/VHS's front panel controls whenever possible. The remote control might affect the source (Playing) VCR's playback operation.
You may set the TV/DVD/VHS to start and end a recording while you are away. You can set 8 programs to record on specific days, daily or weekly within a 1 year period.
In the example below, the timer is being set to record:
DATE: July 6th, 2001
SETTING TIME: from 7:30PM to 8:50PM
CHANNEL: CH61
TAPE SPEED: SP
Make sure ...
- If a cable box or satellite box is connected with the TV/DVD/VHS you will be limited to record only one channel. And the channel selector on the TV/DVD/VHS must be selected to the output channel of the boxes CH 3 or CH 4 and then the actual channel to be recorded must be selected on the boxes.
- Clock must be set to the correct time and date before setting the timer.
- TV/DVD/VHS power must be turn on to program it.
- Insert a cassette tape with its erase prevention tab in place. (If necessary, rewind or fast forward the tape to the point at which you want to begin recording.)
- The channel you want to record is properly set in advance. (See page 16.)
Avoid over lap of programs ...
There is a chance that a program will not be recorded. when programs overlap;
- The program with an earlier start has priority.
- Once the earliest program finishes, the overlapping programs will begin recording in sequence.
- The illustration below demonstrates the sequence of recordings.
Program 1 10:00AM - 11:00AM
Program 2 9:00AM - 10:00AM
Program 3 9:30AM - 12:00PM
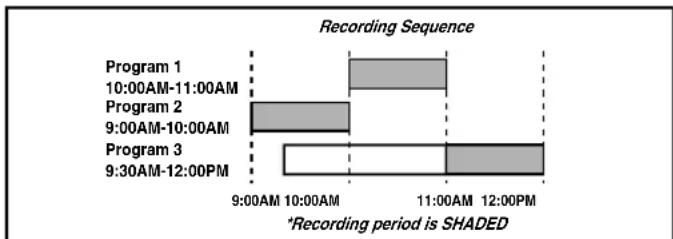
bar
Recording Sequence | Program | Time Period | Duration (s) | | :--- | :--- | :--- | | Program 1 | 9:00AM-10:00AM | 12 | | Program 2 | 9:00AM-10:00AM | 12 | | Program 3 | 9:30AM-12:00PM | 12 | *Recording period is SHADED1 Select "TIMER PROGRAMMING"
Press the SETUP button on the remote control.
Confirm "TIMER PROGRAMMING" is pointed by
pressing the Arrow ▲ button. And press the Arrow ▶ button.
- If you have not yet set the clock, "MANUAL CLOCK SET" appears. If so, follow stops [3] to [8] on page 18. Then set the timer recording.
TVVCR SETUP
▶ TIMER PROGRAMMING SETTING CLOCK CHANNEL SET UP USER'S SET UP V-CHIP SET UP LANGUAGE [ENGLISH] CAPTION [OFF] ZERO RETURN TIME SEARCH INDEX SEARCH
2 Select your desired program position (1\~8)
Press the Arrow ▲ or ▼ button to select the desired program position. Then, press the Arrow ▶ button.
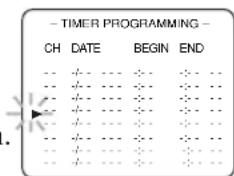
3 Set the channel number
Press the Arrow ▲ or ▼ button until the desired channel number appears.
(Example: CH61)
Then, press the Arrow▶ button.
Remember: If the TV/DVD/VHS is connected to a cable box or satellite box, the TV/DVD/VHS must be on CH3 or CH4, then the channel to be recorded is selected on the cable box or satellite box.
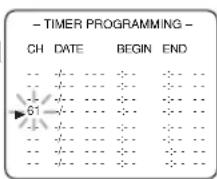
4 Select once, every day or weekly recording
For once recording :
Press the Arrow ▲ (up) button until the desired date appears.
(Example: “7/06” for July 6th). Then, press the Arrow ▶ button.
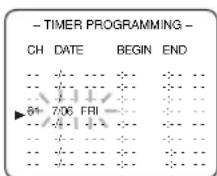
For every day recording : To record a TV program
at the same time on the same channel every day. (Example: Monday through Sunday)
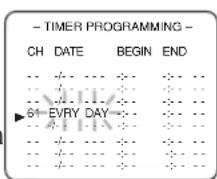
Press the Arrow ▼ (down) button until “EVRY DAY” appears.
Then, press the Arrow ▶ button.
For weekly recording : To record a TV program at the same time on the same channel every week. (Example: every Monday)
Press the Arrow ▼ (down) button until “EVRY” and your desired day of the week appear together. Arrow ▶ button.
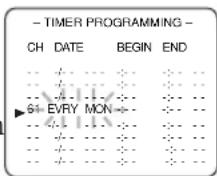
5 Set beginning hour
Press the Arrow ▲ or ▼ button until the desired hour appears.
(Example: “7, PM” for 7:30PM)
Then, press the Arrow▶button.
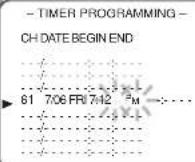
6 Set beginning minute
Press the Arrow ▲ or ▼ button until the desired minute appears.
(Example: "30" for 7:30PM)
Then, press the Arrow▶ button.
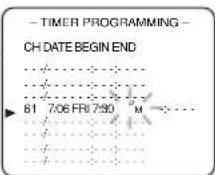
7 Set end hour
Press the Arrow ▲ or ▼ button until the desired hour appears.
(Example: "8, PM" for 8:50PM)
Then, press the Arrow▶ button.
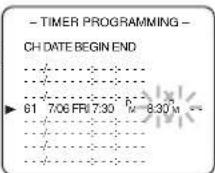
8 Set end minute
Press the Arrow ▲ or ▼ button until the desired minute appears.
(Example: "50" for 8:50PM)
Then, press the Arrow ▶ button.
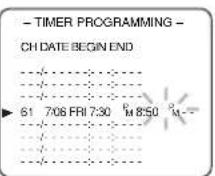
9 Set the tape speed
Press the Arrow ▲ or ▼ button until the desired tape speed appears. (Example: SP)
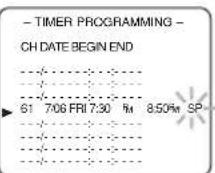
10 Finish setting the program
Press the Arrow ▶ or ◀ button. The program is now completed.
- To set another program, repeat steps [2] to [10].
- Press the SETUP button on the remote control to return to original mode.
11 Set the timer
Press the POWER button to set automatic timer recording. The TIMER REC indicator lights up.
- You must turn off the TV/DVD/VHS to activate automatic timer recording.
If power is not turned off and you continue watching TV, "TIMER REC STANDBY" starts flashing on the TV screen 2 minutes before the programmed start time.
TIMER PROGRAM EXTENSION
To shift the time schedule of an automatic timer recording.
1) Press the POWER button.
2) Repeat step [1] on page 32.
3) Press the RECORD button and select the desired program using the Arrow ▲ or ▼ button.
4) Press the RECORD button again.
Each additional push will shift forward the begin/end time for recording by 10 minutes. When the recording is already in progress, each additional push will shift forward the end time only. If you want to cancel while setting, press the PAUSE button on the remote control. The recording time returns to the original time.
NOTE: When you shift forward the time schedule during recording, the recording speed will automatically be set to the SLP mode.
5) Press the Arrow ▶ or ◀ button to exit the setting menu. Then press the SETUP button on the remote control to return to original mode.
TO CORRECT A PROGRAM
- While setting a program; press the Arrow ◀ button to go back one step and enter the correct numbers using the Arrow ▲ or ▼ button.
• After setting a program;
1) Press the POWER button.
2) Repeat steps [1] - [2] on page 32.
3) Press the Arrow ▶ button (or press the Arrow ◀ button to go back one step) until the part you want to correct begins flashing, then make the changes pressing the Arrow ▲ or ▼ button.
4) Press the POWER button to set automatic timer recording.
TO CANCEL AN AUTOMATIC TIMER RECORDING
• After setting a program;
1) Press the POWER button.
2) Repeat steps [1] \~ [2] on page 32 and select a program you want to cancel.
4) Press the SETUP button on the remote control to return to TV mode.
• While recording is in progress;
1) Press POWER button.
2) Press the STOP/EJECT button on the TV/DVD/VHS.
TO CHECK THE BEGIN/END TIME
1) Press the POWER button so that the REC indicator goes off.
2)Press the SETUP button on the remote control.
3) Confirm "TIMER PROGRAMMING" is pointed.
4) Press the Arrow ▶ button. The details of programs appear on the TV screen.
5) Press the SETUP button on the remote control to return to TV mode.
- Make sure the channel you want to record is properly set in advance.
- It is not necessary to press the RECORD button for timer recording.
- Recording begins automatically at the Start time.
- If you are recording using a Timer mode, you may not operate the unit manually.
- The erase-prevention tab on the cassette must be in place (or you must put tape over the hole).
- If the erase-prevention tab is removed, the cassette will be ejected when the POWER button is pressed to off.
- If the tape runs out before the end time, the TV/DVD/VHS will switch to the Stop mode immediately, and the tape will be ejected.
AUTO RETURN
With this feature, after timer recording is finished, the beginning of the recorded program(s) can be searched for automatically.
1 Select "USER'S SET UP"
Press the SETUP button on the remote control.
Press the Arrow ▲ or ▼ button to point to “USER’S SET UP”.
Then, press the Arrow▶button.
TV/VCR SETUP -
TIMER PROGRAMMING
SETTING CLOCK
CHANNEL SET UP
▶ USER'S SET UP
V-CHIP SET UP
LANGUAGE [ENGLISH]
CAPTION [OFF]
ZERO RETURN
TIME SEARCH
INDEX SEARCH
2 Set "AUTO RETURN" to [ON]
Press the Arrow ▲ or ▼ button to point to “AUTO RETURN”.
Press the Arrow▶ or ◀button until [ON] appears.
_ USER'S SET UP_
RENTAL [OFF]
REPEAT PLAY [OFF
▶ AUTO RETURN [ON]
VCR AUDIO [HIFI]
TV AUDIO [STEREO]
3 Auto Return will begin
When all the timer recordings are completed, the TV/DVD/VHS will rewind to the beginning of the recorded program(s).
NOTE:
- If you press the POWER button while tape is rewinding, the Auto Return will stop.
4 Watch the recorded program
Press the PLAY button.
TO CANCEL THE AUTO RETURN MODE
Repeat steps [1] and [2], select [OFF] using the Arrow ▶ or ◀button.
If there is a power failure of any kind, the unit will retain its memory for this feature.
SLEEP TIMER
The Sleep Timer function turns off the TV/DVD/VHS without using the POWER button after a desired period of time.
NOTE:
- This function does not operate during Recording mode.
1 Select "SLEEP TIMER"
Press the SLEEP button on the remote control until "SLEEP TIMER" appears.
2 Set sleep time
Press the SLEEP button until your desired sleep time appears.
Each additional push will increase the time by 30 minutes up to 120 minutes.
After 5 seconds, exit the Sleep Timer setting.
SLEEP 120 MINUTES
Press the SLEEP button on the remote control until "SLEEP TIMER" appears. Press the SLEEP button until "SLEEP 0 MINUTES" appears.
To check the Counter, Clock and Channel number on the TV screen, press the DISPLAY button on the remote control. Each time you press the DISPLAY button on the remote control, the TV screen will change as follows:
When the Closed Caption mode is OFF:
- Counter mode: After 5 seconds, only the counter remains. To clear it, press the DISPLAY button.
- Clock mode: After 5 seconds, only the clock and the channel number remain. To clear them, press the DISPLAY button.
When the Closed Caption mode is ON:
- The On Screen Display disappear after 5 seconds.
- This is true even if the MUTE button is pressed, or the PAUSE button is pressed while recording.
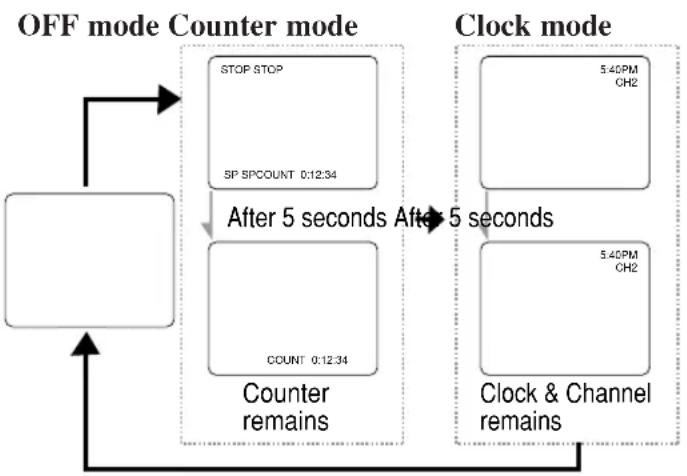
flowchart
graph TD
    A["OFF mode Counter mode"] --> B["STOP STOP"]
    B --> C["SP SPCOUNT 0:12:34"]
    C --> D["After 5 seconds After 5 seconds"]
    D --> E["Counter remains"]
    E --> F["Clock & Channel remains"]
    F --> G["5:40PM CH2"]
    G --> H["5:40PM CH2"]
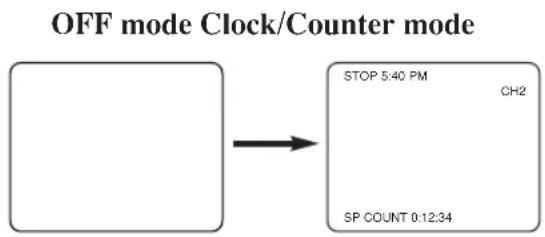
flowchart
graph LR
    A[" "] --> B["STOP 5:40 PM CH2"]
    B --> C["SP COUNT 0:12:34"]
CABLE CHANNEL DESIGNATIONS
If you subscribe to cable TV, the channels are displayed as 1-125. Cable companies often designate channels with letters or letter-number combinations. Please check with your local cable company. The following is a chart of common cable channel designations.
| CATV channel | 5A | 2 | 3 | 4 | 5 | 6 | 7 | 8 | 9 | 10 | 11 | 12 | 13 | A | B |
| TV Display | 1 | 2 | 3 | 4 | 5 | 6 | 7 | 8 | 9 | 10 | 11 | 12 | 13 | 14 | 15 |
| CATV channel | C | D | E | F | G | H | I | J | K | L | M | N | O | P | Q |
| TV Display | 16 | 17 | 18 | 19 | 20 | 21 | 22 | 23 | 24 | 25 | 26 | 27 | 28 | 29 | 30 |
| CATV channel | R | S | T | U | V | W | W+1 | W+2 | W+3 | W+4 | W+5 | W+6 | W+7 | W+8 | W+9 |
| TV Display | 31 | 32 | 33 | 34 | 35 | 36 | 37 | 38 | 39 | 40 | 41 | 42 | 43 | 44 | 45 |
| CATV channel | W+10 | W+11 | W+12 | W+13 | W+14 | W+15 | W+16 | W+17 | W+18 | W+19 | W+20 | W+21 | W+22 | W+23 | W+24 |
| TV Display | 46 | 47 | 48 | 49 | 50 | 51 | 52 | 53 | 54 | 55 | 56 | 57 | 58 | 59 | 60 |
| CATV channel | W+25 | W+26 | W+27 | W+28 | W+29 | W+30 | W+31 | W+32 | W+33 | W+34 | W+35 | W+36 | W+37 | W+38 | W+39 |
| TV Display | 61 | 62 | 63 | 64 | 65 | 66 | 67 | 68 | 69 | 70 | 71 | 72 | 73 | 74 | 75 |
| CATV channel | W+40 | W+41 | W+42 | W+43 | W+44 | W+45 | W+46 | W+47 | W+48 | W+49 | W+50 | W+51 | W+52 | W+53 | W+54 |
| TV Display | 76 | 77 | 78 | 79 | 80 | 81 | 82 | 83 | 84 | 85 | 86 | 87 | 88 | 89 | 90 |
| CATV channel | W+55 | W+56 | W+57 | W+58 | A-5 | A-4 | A-3 | A-2 | A-1 | W+59 | W+60 | W+61 | W+62 | W+63 | W+64 |
| TV Display | 91 | 92 | 93 | 94 | 95 | 96 | 97 | 98 | 99 | 100 | 101 | 102 | 103 | 104 | 105 |
| CATV channel | W+65 | W+66 | W+67 | W+68 | W+69 | W+70 | W+71 | W+72 | W+73 | W+74 | W+75 | W+76 | W+77 | W+78 | W+79 |
| TV Display | 106 | 107 | 108 | 109 | 110 | 111 | 112 | 113 | 114 | 115 | 116 | 117 | 118 | 119 | 120 |
| CATV channel | W+80 | W+81 | W+82 | W+83 | W+84 | ||||||||||
| TV Display | 121 | 122 | 123 | 124 | 25 | ||||||||||
PLAYABLE DISCS
The following discs can be played back on this DVD player.
| Logo | ContentsD | sDtypSize | Maximum Playback Time | |
| DVD Video |  | Sound and Pictures | 12 cm | Approx. 4 h (single-sided) |
| Approx. 8 h (double-sided) | ||||
 | 8 cm | Approx. 80 min (single-sided) | ||
| Approx. 160 min (double-sided) | ||||
| Audio CD |  | Sound | 12 cm | 74 min |
| 8 cm (singles) | 20 min |
This player conforms to the NTSC color system. You cannot play discs recorded in other color systems such as PAL or SECAM.
- Some discs include region codes as shown below.


- The number inside the symbol refers to a region of the world, and a disc encoded in a specific region format can only be played back on DVD players with the same region code.
The following discs cannot be played back on this DVD player.
• DVD with region codes other than 1 or ALL.
• DVD-ROM
- DVD-RAM (Never play back, otherwise malfunction may result.)
- CD-ROM
• VSD
• CDV (Only plays back the audio part.)
• CD-G (Only plays back the sound.)
- CD-R/CD-RW
(Only plays back the discs which audio CD and MP3 is recorded.)
- CD-I (Never play back, otherwise malfunction may result.)
• SACD
- Photo CD (Never play back, otherwise malfunction may result.)
Any other discs without compatibility indications
DISC TYPES
[DVD]
Data on a DVD is divided into sections called "titles", and then into subsections called "chapters", each of which is given a title or chapter number. Playback conditions are preset on some DVD video discs, and these playback conditions take priority over user operations on this player. If a function you selected do not run as desired, refer to the manual accompanying the disc.
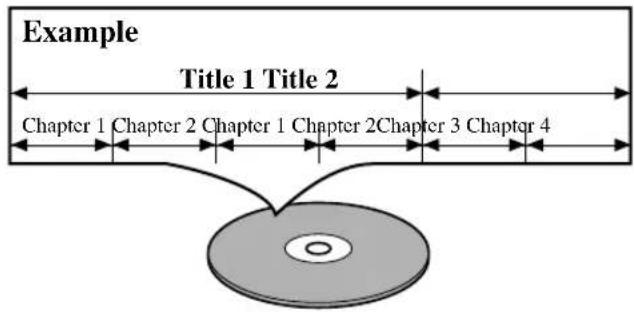
[AUDIO CD]
Data on an audio CD is divided into sections called "tracks", each of which is given a track number.
![SYLVANIA 6727DC - [AUDIO CD] - 1](/content/2026/05/772507/images/1479b2d2f90bf20a42cd65804cbfde2d5211240a1759a572e2ec02ad9f7d148c.jpg)
flowchart
graph LR
    A["Track 1"] --> B["Track 2"]
    B --> C["Track 3"]
    C --> D["Track 4"]
    D --> E["Track 5"]
    E --> F["Track 6"]
    G["Circle with center"] --> H["End"]
[MP3]
Data on a MP3 is divided into sections called "albums", and then into subsections called "tracks", each of which is given an album or track number.
![SYLVANIA 6727DC - [MP3] - 1](/content/2026/05/772507/images/3ac9a1eb7e7a1fb711f5385893f7c087e536c49cf33492df419c66c3c435ba8e.jpg)
flowchart
graph LR
    A["Example"] --> B["Album 1"]
    B --> C["Album 2"]
    C --> D["Track 1"]
    C --> E["Track 2"]
    C --> F["Track 3"]
    C --> G["Track 4"]
    C --> H["Track 1"]
    C --> I["Track 2"]
    D --> J["CD"]
    E --> J
    F --> J
    G --> J
    H --> J
    I --> J
PLAYING A DVD VIDEO OR AN AUDIO CD
CDDVD
Getting started
Turn on the power of the TV, amplifier and any other components which are connected to the DVD player. (Change the input system to suit the DVD player, and check that the sound volume is correct.)
1 Press the POWER button.
- The power will turn on.
2 Press the OPEN/CLOSE button.
- The disc loading tray will open.
3 Place a disc into the tray.
- Make sure the disc is sitting properly in the correct recess, with the label side up.
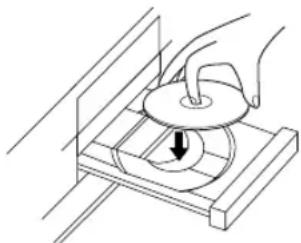
natural_image
Illustration of a hand using a circular tool to press or install a component on a wooden base (no text or symbols)4 Press the PLAY button.
- The tray will close automatically, and playback will then start from the first chapter or track of the disc. You need to press the PLAY button only when the tray has been closed by pressing the OPEN/CLOSE button.
- When you playback the DVD which a title menu is recorded, it may appear on the screen. In this case, refer to “USING THE TITLE MENU”.
5 Press the STOP button to stop play.
Notes
- If you press the OPEN/CLOSE button in the TV/VCR mode or power-off, the DVD tray will open.
- If you press the DVD side PLAY button in the TV/VCR mode or power off, you can start the DVD playback.
- A “prohibited icon” may appear at the top-right on the TV screen during operation, warning that a prohibited operation has been encountered by the DVD player or the disc.
- If a disc is dirty or has scratches, the pictures may appear distorted and the playback operation may stop. In such cases, clean the disc and unplug the power cord and then plug it again before resuming playback.
- With DVDs that use some titles for playback program signals, playback may start from the second title, or it may skip these titles.
- During the playback of two layered disc, pictures may stop for a moment. This happens when the 1st layer switches to the 2nd layer. This is not a malfunction.
USING THE DVD MENUS
DVD
Some DVDs contain their own menus, such as a guidance menu which describes the contents of the disc or a selection menu for sound, language and other customized settings.
1 Press the DISC MENU button.
• The DVD menu will appear.
2 Select the desired title.
- Press the arrow buttons ( /// ) to change the setting, and then press the ENTER button.
3 Playback will start from the selected title.
USING THE TITLE MENU
DVD
With a DVD containing a title menu, you can select desired titles from the menu.
1 Press the TITLE button.
- The title menu will appear.
2 Select the desired title.
- Press the arrow buttons ( /// ) to change the setting, and then press the ENTER button.
CALLING UP A MENU SCREEN DURING PLAYBACK
For DVDs
- Press the DISC MENU button to call up the DVD menu.
- Press the TITLE button to call up the title menu.
Note
- Contents of menus and corresponding menu operations may vary between discs. Refer to the manual accompanying the disc for details.
RESUMING PLAYBACK FROM THE POINT WHERE PLAYBACK STOPPED
PAUSING PLAYBACK OR DISPLAYING A STILL PICTURE
CDDVD
CDDVD
1 Press the STOP button during playback.
- Playback will stop, and then appear the resuming message at the center.
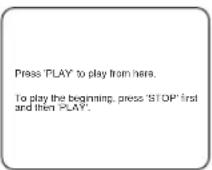
2 Press the PLAY button. Playback will start from the point where the previous playback session was stopped.
Notes
- Resuming playback is not available with some discs.
- It is possible to switch from the DVD play mode to the TV mode. Even if the power is turned off, the resume function enables to playback on from the previously interrupted point. But note that the Marker commands are not saved.
- The resume function can be reset by pressing the STOP button twice or by opening the disc loading tray.
FAST FORWARD/REVERSE
1 Press the PAUSE button during playback.
- Playback will pause, with sound muted.
2 Press the PLAY button to resume playback.
STEPPING THROUGH FRAMES
DVD
1 Press the PAUSE/ STILL button while play-back is paused.
- The next picture frame is displayed with sound muted each time the button is pressed.
CDDVD
1 Press and hold the ▶▶ or ◀◀ button for more than 1 second during playback.
- For DVDs, pressing the FWD▶▶ or REV ◀◀ button cycles the playback speed in four steps. In case of DVDs, the sound will mute.
- For audio CDs, the playback speed is × 16 fixed.
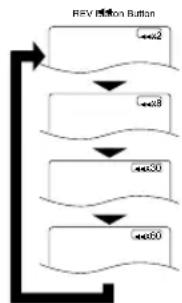
flowchart
graph TD
    A["RPV Button"] --> B["+e02"]
    B --> C["+e03"]
    C --> D["+e04"]
    D --> E["+e05"]
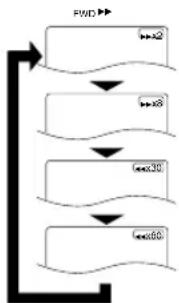
flowchart
graph TD
    A["Start"] --> B["Step 1"]
    B --> C["Step 2"]
    C --> D["Step 3"]
    D --> E["Step 4"]
2 Press the PLAY button to return to normal playback speed.
2 Press the PLAY button to resume playback.
SLOW MOTION
DVD
1 Press and hold the ▶ button for more than 1 second while playback is paused. (Sound remains muted.)
- Slow motion mode will be activated.
- Pressing and holding the ▶▶ button for more than 1 second cycles the playback speed in three steps. Select an appropriate speed while referring to the speed indication on the screen.
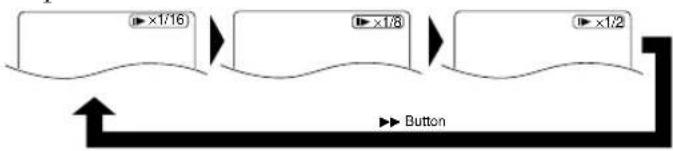
flowchart
graph LR
    A["▶ ×1/16"] --> B["▶ ×1/8"] --> C["▶ ×1/2"]
    D["Button"] --> A
2 Press the PLAY button to return to normal playback speed.
Notes
- Slow playback is not available with audio CDs.
- The reverse of slow playback is not available.
- If you press the ▶▶ button and release immediately during playback is paused or slow, it returns to normal playback.
PLAYING FROM A DESIRED TITLE OR CHAPTER
DVD
1 Press the SEARCH MODE button and then press the numeric buttons to select a title or a chapter.
- Perform the title search and the chapter search after setting them on the same screen at the same time. Changeover by ▲/▼ buttons.
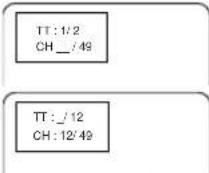
- During playback, press the numeric buttons to select a Chapter. The Chapter will be located and playback will start.
- When playback is stopped, press the numeric buttons to select a Title. The Title will be located and playback will start.
Notes
- Playback from a desired title or chapter is not available with some DVDs.
- Some discs which the chapter number isn't displayed cannot playback from a desired chapter.
TRICKS WITH THE SKIP BUTTONS (|◀◀, ▶▶)
If the SKIP button ▶▶lis pressed during playback or while playback is paused, the current chapter will be skipped and the next chapter will be played. When the SKIP button ◀◀◀ is pressed once, the top of the current chapter will be located for replaying. When the SKIP button ◀◀◀is pressed again within 2-seconds after playback begins, the previous chapter will be located.
STARTING FROM A DESIRED TIME COUNT
CDDVD
1 Press the SEARCH MODE button twice.
2 Press the numeric buttons to set the desired time count.
• Example: 1 hour, 23 minutes and 30 seconds
$$ 1 \rightarrow 2 \rightarrow 3 \rightarrow 3 \rightarrow 0 $$
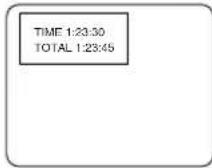
Notes
- In the case of DVD, Time Search in Title is effective. (But Time Search in Chapter is ineffective.)
- In the case of CD, Time Search in Track is effective. (But Time Search in the entire disc is ineffective.)
- Playback from a desired time count is not available with some discs or if the unit is in stop mode.
- If wrong numbers are entered, press the CLEAR button and re-enter the correct numbers.
STARTING FROM A DESIRED TRACK
CD
1 Press the numeric buttons to enter the desired track number.
- The selected track will be located, and playback will start.
You can also press the SEARCH MODE button, use the numeric buttons to enter the track number. When the track number is entered in the entry box, playback of the desired track will start automatically.
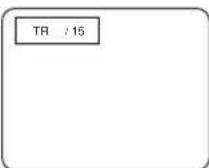
TRICKS WITH THE SKIP BUTTONS (|◀◀, ▶▶|)
If the SKIP button ▶▶is pressed during playback or while playback is paused, the current track is skipped and the next track is played. When the SKIP button ◀◀is pressed once, the top of the current track is located for replaying. When the SKIP button ◀◀is pressed again while Within 2-second playback, the previous track is located.
1 Press the REPEAT button.
For DVDs
- A single title or chapter is played back repeatedly.
- Pressing the REPEAT button cycles the display on the screen as follows.
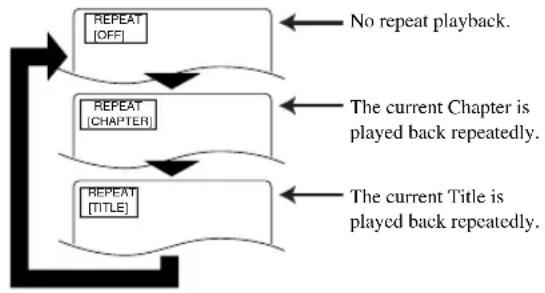
flowchart
graph TD
    A["REPEAT [OFF"]] --> B["REPEAT [CHAPTER"]]
    B --> C["REPEAT [TITLE"]]
    D["No repeat playback."] --> A
    E["The current Chapter is played back repeatedly."] --> B
    F["The current Title is played back repeatedly."] --> C
For audio CDs
- The whole disc or a single track is played back repeatedly.
- Pressing the REPEAT button cycles the display on the screen through Off, Track and All.
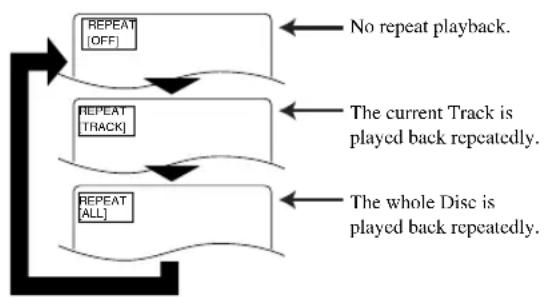
flowchart
graph TD
    A["REPEAT [OFF"]] --> B["No repeat playback."]
    C["REPEAT [TRACK"]] --> D["The current Track is played back repeatedly."]
    E["REPEAT [ALL"]] --> F["The whole Disc is played back repeatedly."]
If the REPEAT button is pressed once during program/random playback, the program/random playback is performed repeatedly.
If the REPEAT button is pressed again, the current track is played back repeatedly.
Notes
- Repeat playback is not available with some discs.
- The REPEAT setting will be cleared when moving to other title, chapter or track.
- Repeat playback is not function during A-B repeat playback.
You can define a section to be played back repeatedly.
1 Press the A-B REPEAT button during playback.
- The starting point (A) will then be selected.
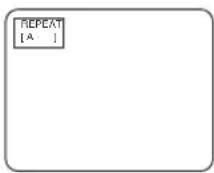
2 Press the A-B REPEAT button again at the end point (B) of the desired section.
- The selected section will be played back repeatedly.
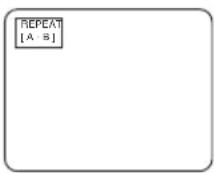
3 To exit A-B repeat playback, press the A-B REPEAT button and set it to OFF.
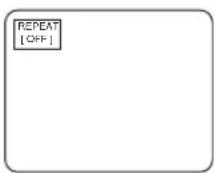
Notes
- With DVDs, the A-B repeat section can be set only within the current title.
- With audio CDs, the A-B repeat section can be set within the current track.
- A-B repeat is not available with some scenes in DVD.
- To cancel the A point which was set, press RETURN button.
- A-B repeat playback is not function during title, chapter, track or all repeat playback had set.
You can define the part to be called back.
1 Press the SEARCH MODE button three times during playback.
Set the marker
- Using the cursor (◀/▶) button, position the cursor on to the marker number shown as “NOT SET”. Press the ENTER button when the screen to be reviewed appears. The marked time will be displayed. Up to 5 points can be marked.
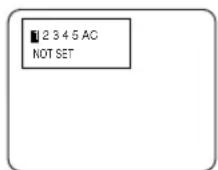
Call back the marker
- Using the cursor (◀/▶) button, position the cursor on to the marker number to be called back and press the ENTER button.
Clear the marker
- Using the cursor (◀/▶) button, position the cursor on to the marker number to be cleared and press the CLEAR button.
To clear all markers, place the cursor on "AC" (All clear markers) and press the ENTER button.
2 Press the SEARCH MODE button or the RETURN button to exit the display.
1 Press the MODE button in stop mode.
- The program screen will appear.
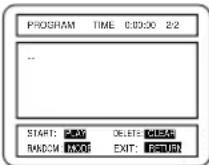
2 Press the numeric buttons to enter the desired track numbers.
- 50 programs can be displayed at once on the screen. Press “▼” to go to the next page.
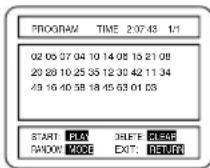
3 Press the PLAY button.
- Playback will start in the programmed order.
- While the program is being played back, the STOP button works as follows.
- Press the STOP button once and then the PLAY button again, playback will restart from the point where the STOP button was pressed. (Program continued)
- Press the STOP button twice and then the PLAY button again, playback will restart from the track in the usual way. (Program cleared)
Notes
- Adding programs is not possible during program playback. You must stop the current playback before such operations can be carried out.
- Press the CLEAR button to cancel a program. The most recently entered program will then be deleted.
- Up to 99 programs can be entered.
- Playback from a desired track and random playback are not available during program playback.
- Program settings are cleared when the power is turned off or the disc loading tray is opened.
- Press the MODE button to check the programmed setting.
RANDOM (Audio CD)
CD
1 Press the MODE button in stop mode.
- The program setting menu screen will appear.
2 Press the MODE button again.
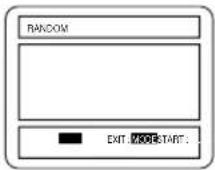
3 Press the PLAY button. Random playback will then start.
Note
- Program playback is not available during random playback.
ZOOM PLAYBACK (enlargement onscreen)
DVD
Images can be enlarged four times on the screen to your taste.
1 Press the ZOOM button during playback.
- An image will be enlarged at the center of the screen.
- Press the ZOOM button again, and the image will be back to the previous size.
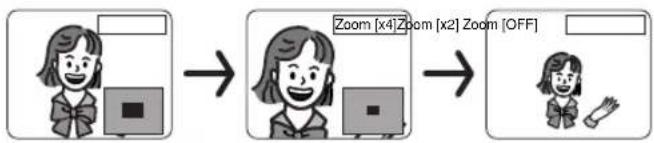
flowchart
graph LR
    A["User Image"] --> B["Zoom [x4"] Zoom["x2"] Zoom["OFF"]]
    B --> C["User Image"]
2 When the cursor (▲/▼/◄/►) button is pressed during zoom play, the part to be zoomed moves.
- The zooming frame can be moved from the center .... 4 steps to the right. 4 steps to the left. 4 steps to the top. 4 steps to the bottom when 2 time zooming. The frames will move 6 steps when 4 time zooming.
- Current position will be displayed on the right-bottom of the screen. Press the ENTER button, and the display disappears.
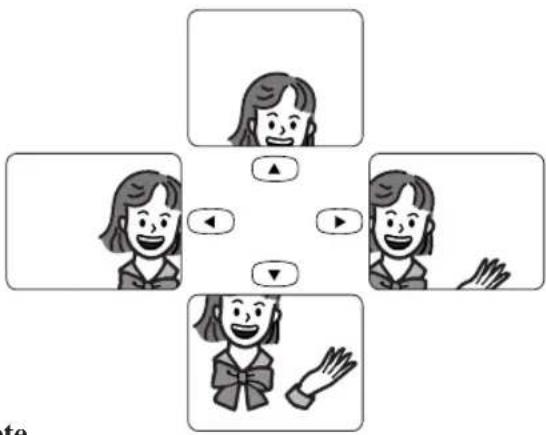
flowchart
graph TD
    A["Top: 🎯"] --> B["Left: 🏠"]
    C["Right: 🎯"] --> D["Right: 🧠"]
    E["Bottom: 🏠"] --> F["Left: 🏠"]
    G["Left: 🏠"] --> H["Right: 🧠"]
    I["Right: 🧠"] --> J["Left: 🏠"]
Note
- Zooming function does not work while disc menu is shown.
PLAYING AN MP3 DISC
MP3
1 Insert an MP3 file-recorded disc.
• The MP3 menu screen shows up.
- Folders are referred to as "ALBUMS" and files are referred to as "TRACKS".
- “+” appears at the beginning of the album name.
- If all the TRACKS cannot be displayed at once on the screen, “▼” appears to go to the next page. If there is a previous page, “▲” appears on-screen. On the left of “▼”, the current page and the total number of pages are displayed.
- The player can recognize 255 ALBUMS and TRACKS altogether.
2 Using the ▲/▼ buttons, select a ALBUM or TRACKS to be played.
[When TRACKS are selected]
The TRACKS will be played in the order of selection.
[When an ALBUM is selected]
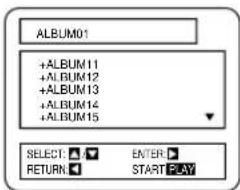
Press the ▶ button. The TRACK selection screen shows up. Using the ▲/▼ buttons, select TRACKS to be played.
- Choose "FIRST PLAY", and the ALBUMS and TRACKS will be played from the beginning of the disc.
- Press the TITLE button, and the top hierarchy will be called back.
- ALBUMS can be played up to the 8th hierarchy.
3 Press the PLAY button.
- Playback will start.
4 To stop the play, press the STOP button.
CHANGING THE ONSCREEN DISPLAY DURING MP3 DISC PLAY
MP3
The information on an MP3 disc in play can be checked.
1 Press the DISPLAY button during playback.
- The TRACK currently in play will be highlighted.
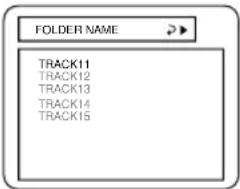
2 Press the DISPLAY button again.
- The ALBUM name being displayed will be replaced by the elapsed time of the track.
- will be displayed when the repeat play has been selected.
A: Album (folder) repeat
T: Track repeat
D : Disc repeat
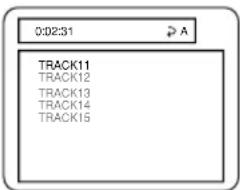
3 Press the DISPLAY button again, and the display screen disappears.
PLAYING AN MP3 DISC FROM A DESIRED TRACK
MP3
1 Press the SEARCH MODE button during play-back.
• The SERACH menu shows up.
- A track currently in play or under RESUME ON will be highlighted. In the case of RESUME OFF, the first track of the disc will be highlighted.
- Press the RETURN button, and the SEARCH menu disappears.
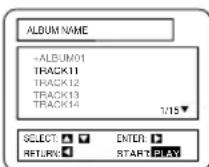
2 Using the ▲/▼ buttons, select a track to be played. Then press the PLAY button to start playing.
Notes
- During play, a desired track can be directly searched. Just type in the TRACK number with the numerical buttons.
- If the typed TRACK number is not available, the “disable” symbol appears and the direct search mode is cancelled.
- Playback cannot be started from a desired time count.
PLAYING AN MP3 DISC IN A PROGRAMMED WAY
MP3
1 Press the MODE button in STOP mode.
- The program screen shows up.
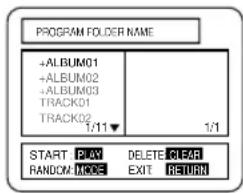
2 Using the ▲/▼ buttons, select a track. Then press the ENTER button to save it in a program.
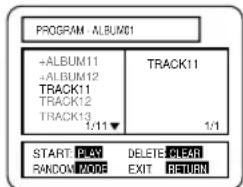
- The programmed track is displayed in the right-hand screen.
- When the ◀ button is pressed, the album stop in the current left-hand screen will be highlighted.
- If the entire program cannot be displayed at once on the screen, “▼” appears to go to the next page.
3 When the disc has been programmed, press the PLAY button.
- Programmed play starts.
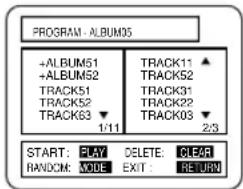
Notes
- Press the CLEAR button, and the last-programmed entry will be deleted.
- Press the RETURN button, and the STOP screen will show up with the program contents in memory.
- The program setting will be cancelled when the power is turned off or the disc tray is opened.
PLAYING AN MP3 DISC AT RANDOM
MP3
1 Press the MODE button twice in STOP mode.
- The random setting menu screen will appear.
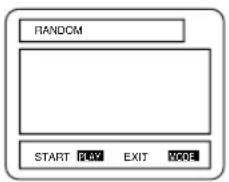
2 Press the PLAY button.
- Random play starts.
SETTINGS
CHANGING THE AUDIO LANGUAGE OR SOUND MODE
CDDVD
The DVD player has a function which allows you to select the desired audio language and sound mode.
For DVDs
Press the AUDIO button during playback, and then press the AUDIO button to select the desired audio language.
- The audio language can be changed if multiple languages are recorded on the DVD being played.
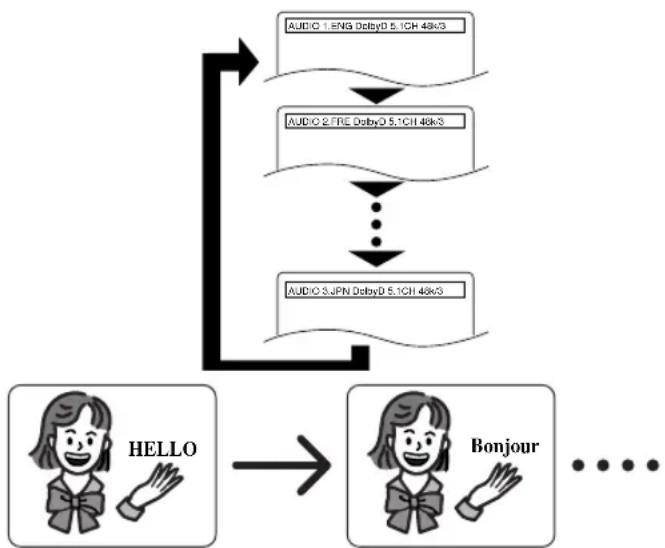
flowchart
graph TD
    A["AUDIO 1.5NG Delay0 5.1CH 48x3"] --> B["AUDIO 2.FRE Delay0 5.1CH 48x3"]
    B --> C["..."]
    C --> D["AUDIO 3.JPN Delay0 5.1CH 48x3"]
    D --> E["HELLO"]
    E --> F["Bonjour"]
For audio CDs
Press the AUDIO button during playback.
- Pressing the AUDIO button cycles the sound mode through STEREO, L-CH and R-CH.
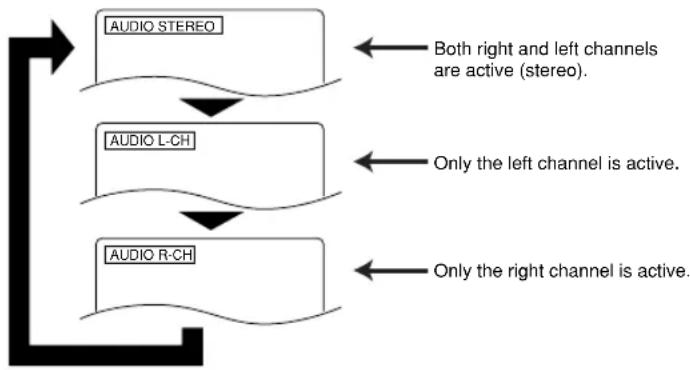
flowchart
graph TD
    A["AUDIO L-CH"] --> B["Both right and left channels are active (stereo)"]
    C["AUDIO R-CH"] --> D["Only the left channel is active."]
    E["AUDIO STEREO"] --> F["Only the right channel is active."]
Notes
- Pressing the Audio button may not work on some DVDs with multiple audio languages (e.g. DVDs which allow audio language setting on the disc menu). Operation varies between discs, so refer to the manual accompanying the disc.
- Current audio language and sound mode will be displayed when you press the AUDIO button at first.
- If a desired language is not shown after pressing the Audio button several times, the disc does not have an audio source in that language.
- The audio language resets to the one which has been selected in the setup mode, every time the power is turned on or discs are replaced. If that language is not available on a disc, a language defined by the disc is selected.
- The screen display will disappear after about 5 seconds.
- If you use DIGITAL AUDIO OUT jack, the sound mode of audio CDs can not be changed.
CHANGING THE SUBTITLE LANGUAGE
DVD
The DVD player has a function which allows you to select the desired language for subtitles.
1 Press the SUBTITLE button during playback, and then press the SUBTITLE button to select the desired subtitle language.
- The subtitle language can be changed if the subtitles are recorded in multiple languages on the DVD being played.
- The subtitle language cannot be changed if the subtitles are recorded in a single language on the DVD being played.
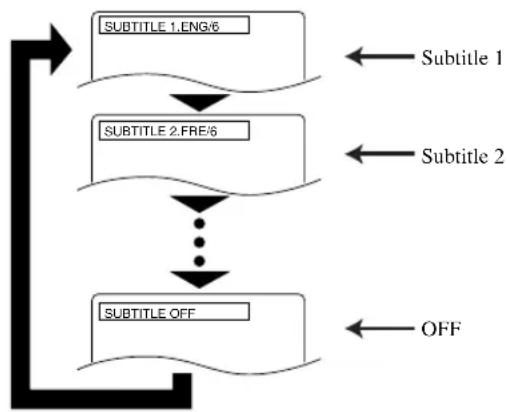
flowchart
graph TD
    A["SUBTITLE 1.ENG/6"] --> B["SUBTITLE 2.FRE/6"]
    B --> C["..."]
    C --> D["SUBTITLE OFF"]
    D --> E["OFF"]
    style A fill:#f9f,stroke:#333
    style B fill:#f9f,stroke:#333
    style C fill:#f9f,stroke:#333
    style D fill:#f9f,stroke:#333
    style E fill:#f9f,stroke:#333
- Pressing the SUBTITLE button cycles the subtitle language from SUBTITLE 1, SUBTITLE 2 and all the languages recorded.
- Current subtitle mode will be displayed when you press the SUBTITLE button at first.
- Press the SUBTITLE button, and then press the cursor (◀/▶) button to set it to on or off.
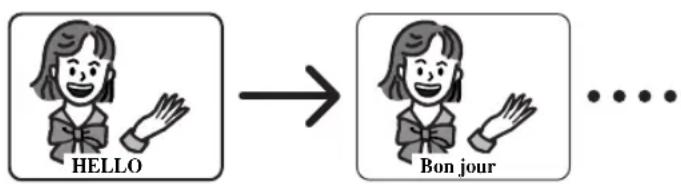
flowchart
graph LR
    A["HELLO"] --> B["Bon jour"]
    B --> C["..."]
Notes
- Some discs allow subtitle language setting on the disc menu. (Operation varies between discs, so refer to the manual accompanying the disc.)
- If the desired language is not shown after pressing the SUBTITLE button several times, the disc does not have subtitles in that language.
-
The subtitle language resets to the one which has been selected in the setup mode, every time the power is turned on or discs are replaced. If that language is not available on a disc, a language defined by the disc is selected.
-
It may take time to display the subtitles in the selected language.
- The screen display will disappear after about 5 seconds.
- When “SUBTITLE NOT AVAILABLE” appears onscreen, it means no subtitle is recorded on the scene.
CHANGING THE CAMERA ANGLE (Multi-Angle Pictures)
DVD
The DVD player has a function which allows you to select the desired camera angle.
1 Press the ANGLE button during playback.
- If the disc contains sequences recorded from different camera angles, the angle icon ( ) will appear at the top-right of the screen. You can change the camera angle when the icon appears on the screen.
- The camera angle cannot be changed if the disc does not contain sequences recorded from different camera angles.
2 Press the ANGLE button while the angle number is shown on the screen.
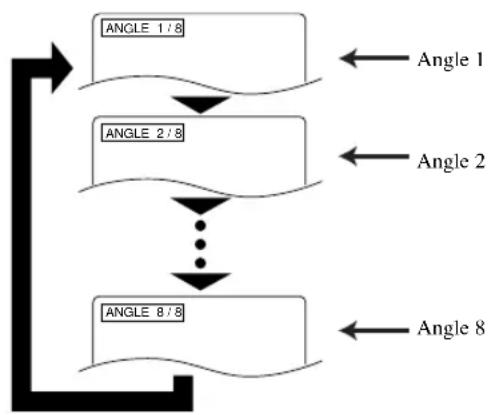
flowchart
graph TD
    A["ANGLE 1/8"] --> B["Arrow"]
    C["ANGLE 2/8"] --> D["Arrow"]
    E["..."] --> F["Arrow"]
    G["ANGLE 8/8"] --> H["Arrow"]
    I["Angle 1"] --> J["Arrow"]
    K["Angle 2"] --> L["Arrow"]
    M["Angle 8"] --> N["Arrow"]
Note
- The screen display will disappear after about 5 seconds.
- Current camera angle will be displayed when you press the ANGLE button at first.
CHANGING THE ON-SCREEN DISPLAY

You can check the information about the disc by pressing the DISPLAY button on the remote control.
For DVDs
1 Press the DISPLAY button during playback.
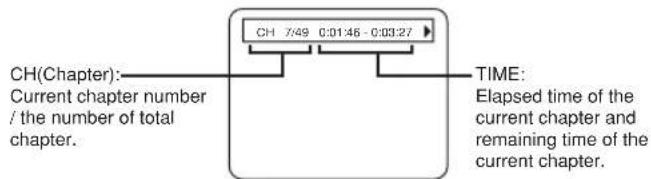
2 Press the DISPLAY button again.
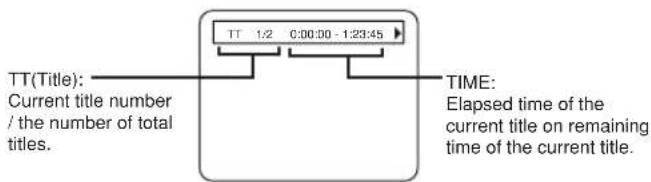
- Use the number button to start from a desired chapter.
3 Press the DISPLAY button again.
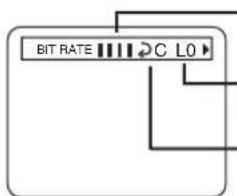
flowchart
graph TD
    A["BIT RATE"] --> B["C"]
    B --> C["L0"]
• BIT RATE indicator will appear.
• BIT RATE shows the quantity of information which is recorded in DVD.
* Layer number(*) L0: Layer 0 is playing back L1: Layer 1 is playing back
- Current Repeat setting - C: Chapter repeat - T: Title repeat
A B: A-B repeat
*) It appears when the layered disc is playing back.
4 Press the DISPLAYbutton or the RETURN button to exit the display.
For audio CDs
1 Press the DISPLAY button during playback.
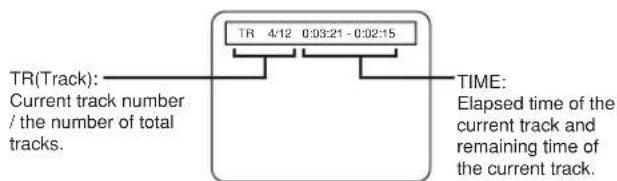
flowchart
graph LR
    A["TR Track: Current track number / the number of total tracks."] --> B["TR 4/12 0:03:21 - 0:02:15"]
    B --> C["TIME: Elapsed time of the current track and remaining time of the current track."]
2 Press the DISPLAY button again.
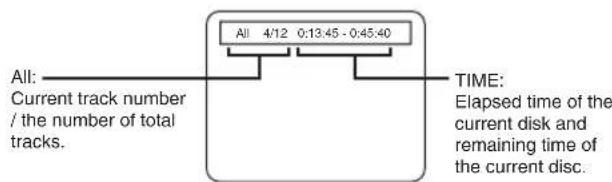
- Use the number button to start from a desired track.
3 Press the DISPLAY button or the RETURN button to exit the display.
You can set to make the black parts of the picture brighter.
1 Press the MODE button during playback.
- The setup screen will appear.
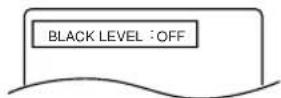
2 Press the ENTER button to set it on or off.
- ON : It makes the dark parts brighter.(Default : OFF) OFF : Original picture which is recorded on the disc will be shown.
- Press the RETURN button to exit the display.
TruSurround SETTINGS
You can enjoy stereophonic sound system when you playback Dolby Digital and PCM 48kHz sound.
1 Press the MODE button twice during playback.

2 Press the ENTER button to set it on or off.
ON : TruSurround ON.(Default : OFF) OFF : TruSurround OFF.
- Press the DISPLAY button or the RETURN button to exit the display.
LANGUAGE SETTINGS
1 Press the SETUP button in STOP mode.
- The setup screen appears.
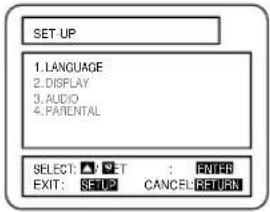
2 Press the ▲/▼ buttons to select Language, and then press the ENTER button.
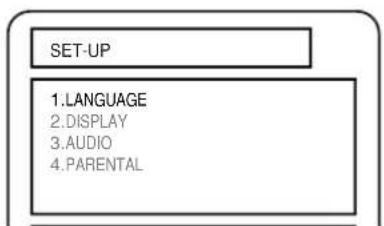
3 Press the ▲/▼ buttons to select an item, and then press the ENTER button.
AUDIO:
(Voice is played back in selected language.)
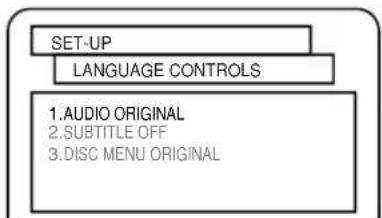
flowchart
graph TD
    A["SET-UP"] --> B["LANGUAGE CONTROLS"]
    B --> C["1. AUDIO ORIGINAL\n2. SUBTITLE OFF\n3. DISC MENU ORIGINAL"]
SUBTITLE:
(Subtitles are shown in selected language.)
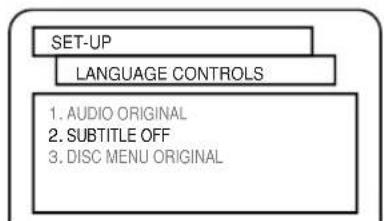
flowchart
graph TD
    A["SET-UP"] --> B["LANGUAGE CONTROLS"]
    B --> C["1. AUDIO ORIGINAL"]
    B --> D["2. SUBTITLE OFF"]
    B --> E["3. DISC MENU ORIGINAL"]
DISC MENU:
(The disc menu appears in selected language.)
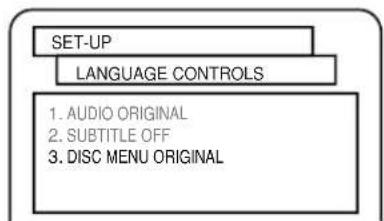
flowchart
graph TD
    A["SET-UP"] --> B["LANGUAGE CONTROLS"]
    B --> C["1. AUDIO ORIGINAL\n2. SUBTITLE OFF\n3. DISC MENU ORIGINAL"]
4 Press the ▲/▼ buttons to select a desired item, and then press the ENTER button.
- If “OTHER” is selected on the AUDIO, SUBTITLE or DISC MENU setting screen, the Language Code setting screen will appear. Press the numeric buttons to enter the desired language code while referring to the list on page 51.
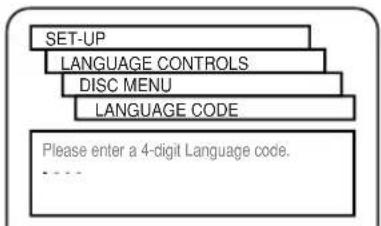
flowchart
graph TD
    A["SET-UP"] --> B["LANGUAGE CONTROLS"]
    B --> C["DISC MENU"]
    C --> D["LANGUAGE CODE"]
    D --> E["Please enter a 4-digit Language code. . . . ."]
5 Press the SETUP button.
- The setup mode will be canceled and the ordinary screen will appear.
Note
- Be sure to press the SETUP button, or the setting will not work.
- Language Setting for Audio and Subtitle is not available with some discs. Then use the Audio and Subtitle button. Details are on pages 44 and 45.
- You can also select the item by pressing the numbers which displayed with the item.
- When you change the setup items, press the STOP button if you are in playback mode.
DISPLAY SETTINGS
1 Press the SETUP button in STOP mode.
- The setup screen will appear.
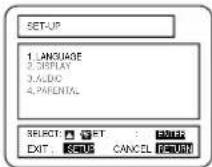
2 Press the ▲/▼ buttons to select DISPLAY and then press the ENTER button.
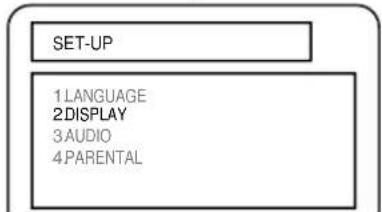
3 Press the ▲/▼ buttons to select an item, and then press the ENTER button.
TV MODE (Default : 4:3 LETTER BOX)
4:3 LETTER BOX : Wide screen with black bars on top and bottom
4:3 PAN & SCAN : Full height picture, trimmed both sides
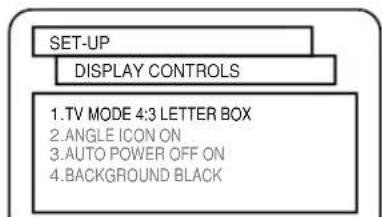
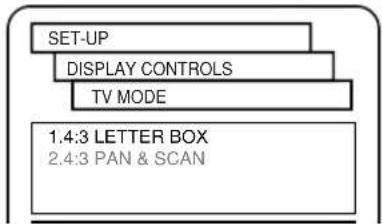
ANGLE ICON (Default : ON)
Display or not display the Angle icon on the screen.
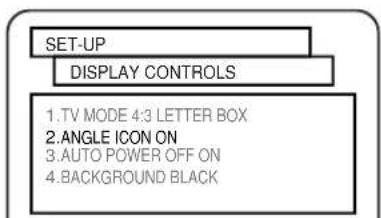
AUTO POWER OFF (Default : ON)
Set or not set to turn off after the screen saver is started and no keys are pressed for 30 minutes.
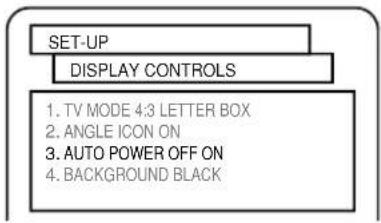
BACKGROUND COLOR (Default : BLACK)
Select blue or black.
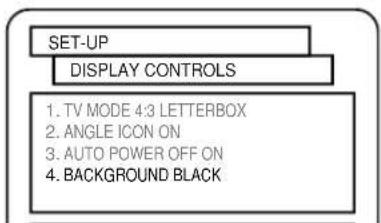
4 Press the ▲/▼ buttons to select a desired item, and then press the ENTER button.
5 Press the SETUP button.
- The setup mode will be canceled and the ordinary screen will appear.
Notes
- Be sure to press the SETUP button, or the setting will not work.
- You can also choose the item by pressing the numbers.
AUDIO SETTINGS
1 Press the SETUP button in STOP mode.
- The setup screen will appear.
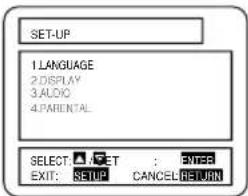
2 Press the ▲/▼ buttons to select Audio and then press the ENTER button.
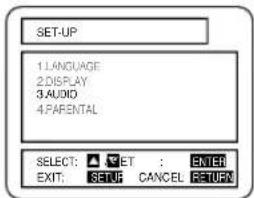
3 Press the ▲/▼ buttons to select an item, and then press the ENTER button.
DRC (Default : OFF)
On : DRC
(Dynamic Range Control)
- This function is for controlling the range of sound volume. By compressing the range of sound volume, it is possible not only to suppress the output of loud sound at night and but also to raise the volume of low sound.
- This function is effective only for the sound recorded by Dolby Digital recording.
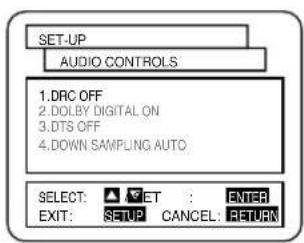
Dolby Digital (default : ON)
On : Output by Dolby Digital
Set to On when the unit is connected to Dolby Digital Decoder.
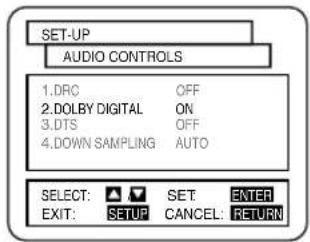
DTS (Default : OFF)
On : Output DTS sound
Set to On when the unit is connected to DTS Decoder.
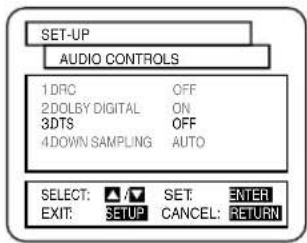
Down Sampling (Default : AUTO)
Set the output for the DVD recorded in PCM 96kHz (96kHz or 48kHz)
- Press the ▲/▼ buttons to select an item, and then press the ENTER button.
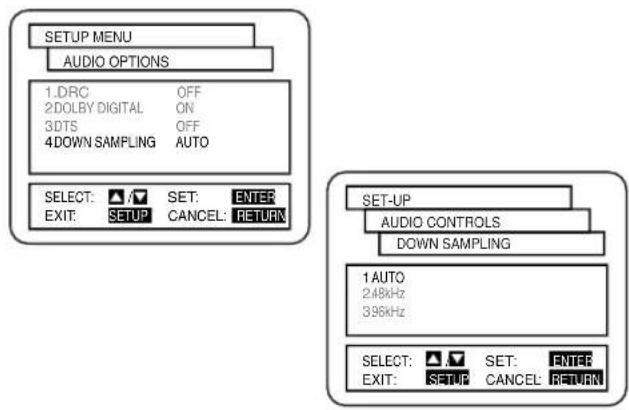
When playing a disc with copyright protection
- If you select 96KHz, copyright protection will be activated and no sound will come out. If you select AUTO, sound will be down sampled at 48KHz.
4 Press the SETUP button.
- The setup mode will be canceled and the ordinary screen will appear.
PARENTAL LOCK
1 Press the SETUP button.
- The setup screen will appear.
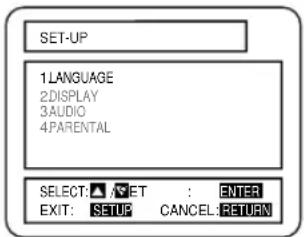
2 Press the ▲/▼ buttons to select PARENTAL, and then press the ENTER button.
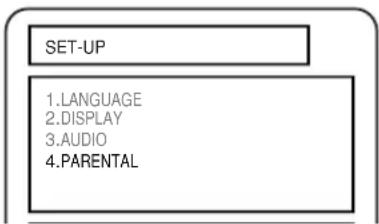
3 Press the numeric buttons to enter the 4-digit password, and then press the ENTER button.
- When doing this for the first time, enter any 4 digits. (except for 4737) That number will be used as the password from the second time onward.
- By entering the password, you can then change the control level and password settings.
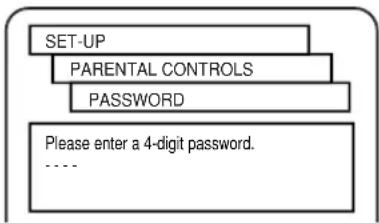
flowchart
graph TD
    A["SET-UP"] --> B["PARENTAL CONTROLS"]
    B --> C["PASSWORD"]
    C --> D["Please enter a 4-digit password."]
    D --> E["..."]
4 Press the ▲/▼ buttons to select an item, and then press the ENTER button.
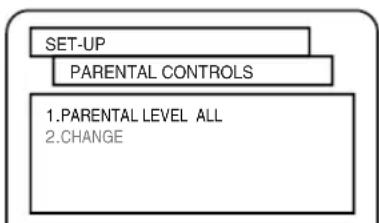
flowchart
graph TD
    A["SET-UP"] --> B["PARENTAL CONTROLS"]
    B --> C["1. PARENTAL LEVEL ALL"]
    B --> D["2. CHANGE"]
When "PARENTAL LEVEL" is selected
- Press the ▲/▼ buttons to select an item from “ALL” or 8 to 1 and then press the ENTER button.
![SET-UP PARENTAL CONTROLS PARENTAL LEVEL ALL 8 7 [NC-17] 6 [R] 5 SELECT: ▲/▼ SET: ENTER EXIT: SETUP CANCEL: RETURN](/content/2026/05/772507/images/b5355f33c451e6671057228d8ca3cc7ac483e2355906395d2c515d95c5abd79e.jpg)
When "CHANGE" is selected
- Press the numeric buttons to enter the 4 digits password. Then press the ENTER button.
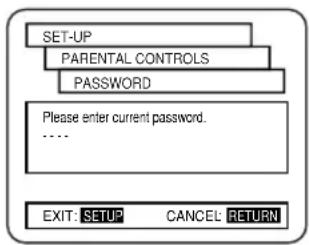
flowchart
graph TD
    A["SET-UP"] --> B["PARENTAL CONTROLS"]
    B --> C["PASSWORD"]
    C --> D["Please enter current password."]
    D --> E["EXIT: SETUP CANCEL: RETURN"]
5 Press the SETUP button.
- The setup mode will be canceled and the ordinary screen will appear.
CONTROL LEVELS
• ALL
All parental lock is cancelled.
• Level 8
DVD software of any grade (adult/general/children) can be played back.
- Levels 7 to 2
Only DVD software intended for general use and children can be played back.
- Level 1
Only DVD software intended for children can be played back, with those intended for adult and general use prohibited.
Notes
- With some DVDs, it may be difficult to find if they are compatible with parental lock. Be sure to check if the parental lock function operates in the way that you have set.
- Record the password in case you forget it.
1) Press the 4, 7, 3, 7 at step 3.
- Password will be cleared and parental level will be set to ALL.
2) Proceed the above steps 3-5 again.
| No. | Language Country code |
| 1 | Afar 4747 |
| 2 | Abkhazian 4748 |
| 3 | Afrikaans 4752 |
| 4 | Amharic 4759 |
| 5 | Arabic 4764 |
| 6 | Assamese 4765 |
| 7 | Aymara 4771 |
| 8 | Azerbaijani 4772 |
| 9 | Bashkir 4847 |
| 10 | Byelorussian 4851 |
| 11 | Bulgarian 4853 |
| 12 | Bihari 4854 |
| 13 | Bislama 4855 |
| 14 | Bengali;Bangla 4860 |
| 15 | Tibetan 4861 |
| 16 | Breton 4864 |
| 17 | Catalan 4947 |
| 18 | Corsican 4961 |
| 19 | Czech 4965 |
| 20 | Welsh 4971 |
| 21 | Danish [DAN] 5047 |
| 22 | German [GER] 5051 |
| 23 | Bhutani 5072 |
| 24 | Greek [GRE] 5158 |
| 25 | English [ENG] 5160 |
| 26 | Esperanto 5161 |
| 27 | Spanish [SPA] 5165 |
| 28 | Estonian 5166 |
| 29 | Basque 5167 |
| 30 | Persian 5247 |
| 31 | Finnish [FIN] 5255 |
| 32 | Fiji 5256 |
| 33 | Faroese 5261 |
| 34 | French [FRE] 5264 |
| 35 | Frisian 5271 |
| 36 | Irish [IRI] 5347 |
| 37 | Scots Gaelic 5350 |
| 38 | Galician 5358 |
| 39 | Guarani 5360 |
| 40 | Gujarati 5367 |
| 41 | Hausa 5447 |
| 42 | Hindi 5455 |
| 43 | Croatian 5464 |
| 44 | Hungarian [HUN] 5467 |
| 45 | Armenian 5471 |
| 46 | Interlingua 5547 |
| 47 | Interlingue 5551 |
| 48 | Inupiak 5557 |
| 49 | Indonesian 5560 |
| 50 | Icelandic [ICE] 5565 |
| 51 | Italian [ITA] 5566 |
| 52 | Hebrew 5569 |
| 53 | Japanese 5647 |
| 54 | Yiddish 5655 |
| 55 | Japanese [JPN] 5669 |
| 56 | Georgian 5747 |
| 57 | Kazakh 5757 |
| 58 | Greenlandic 5758 |
| 59 | Cambodian 5759 |
| 60 | Kannada 5760 |
| 61 | Korean [KOR] 5761 |
| 62 | Kashmiri 5765 |
| 63 | Kurdish 5767 |
| 64 | Kirghiz 5771 |
| 65 | Latin 5847 |
| 66 | Lingala 5860 |
| 67 | Laothian 5861 |
| 68 | Lithuanian 5866 |
| No. | Language Country code | |
| 69 | Latvian; Lettish | 5 8 6 8 |
| 70 | Malagasy | 5 9 5 3 |
| 71 | Maori | 5 9 5 5 |
| 72 | Macedonian | 5 9 5 7 |
| 73 | Malayalam | 5 9 5 8 |
| 74 | Mongolian | 5 9 6 0 |
| 75 | Moldavian | 5 9 6 1 |
| 76 | Marathi | 5 9 6 4 |
| 77 | Malay | 5 9 6 5 |
| 78 | Maltese | 5 9 6 6 |
| 79 | Burmese | 5 9 7 1 |
| 80 | Nauru | 6 0 4 7 |
| 81 | Nepali | 6 0 5 1 |
| 82 | Dutch [DUT] | 6 0 5 8 |
| 83 | Norwegian [NOR] | 6 0 6 1 |
| 84 | Occitan | 6 1 4 9 |
| 85 | (Afan)Oromo | 6 1 5 9 |
| 86 | Oriya | 6 1 6 4 |
| 87 | Panjabi | 6 2 4 7 |
| 88 | Polish | 6 2 5 8 |
| 89 | Pashto; Pushto | 6 2 6 5 |
| 90 | Portuguese [POR] | 6 2 6 6 |
| 91 | Quechua | 6 3 6 7 |
| 92 | Rhaeto-Romance | 6 4 5 9 |
| 93 | Kirundi | 6 4 6 0 |
| 94 | Romanian [RUM] | 6 4 6 1 |
| 95 | Russian [RUS] | 6 4 6 7 |
| 96 | Kinyarwanda | 6 4 6 9 |
| 97 | Sanskrit | 6 5 4 7 |
| 98 | Sindhi | 6 5 5 0 |
| 99 | Sangho | 6 5 5 3 |
| 100 | Serbo-Croatian | 6 5 5 4 |
| 101 | Singhalese | 6 5 5 5 |
| 102 | Slovak | 6 5 5 7 |
| 103 | Slovenian | 6 5 5 8 |
| 104 | Samoan | 6 5 5 9 |
| 105 | Shona | 6 5 6 0 |
| 106 | Somali | 6 5 6 1 |
| 107 | Albanian | 6 5 6 3 |
| 108 | Serbian | 6 5 6 4 |
| 109 | Siswat | 6 5 6 5 |
| 110 | Sesotho | 6 5 6 6 |
| 111 | Sundanese | 6 5 6 7 |
| 112 | Swedish [SWE] | 6 5 6 8 |
| 113 | Swahili | 6 5 6 9 |
| 114 | Tamil | 6 6 4 7 |
| 115 | Telugu | 6 6 5 1 |
| 116 | Tajik | 6 6 5 3 |
| 117 | Thai | 6 6 5 4 |
| 118 | Tigrinya | 6 6 5 5 |
| 119 | Turkmen | 6 6 5 7 |
| 120 | Tagalog | 6 6 5 8 |
| 121 | Setswana | 6 6 6 0 |
| 122 | Tonga | 6 6 6 1 |
| 123 | Turkish [TUR] | 6 6 6 4 |
| 124 | Tsonga | 6 6 6 5 |
| 125 | Tatar | 6 6 6 6 |
| 126 | Twi | 6 6 6 9 |
| 127 | Ukrainian | 6 7 5 7 |
| 128 | Urdu | 6 7 6 4 |
| 129 | Uzbek | 6 7 7 2 |
| 130 | Vietnamese | 6 8 5 5 |
| 131 | Volapuk | 6 8 6 1 |
| 132 | Wolof | 6 9 6 1 |
| 133 | Xhosa | 7 0 5 4 |
| 134 | Yoruba | 7 1 6 1 |
| 135 | Chinese [CHI] | 7 2 5 4 |
| 136 | Zulu | 7 2 6 7 |
If you choose a Language that has a 3 letter language code, the code will be displayed every time you change the Audio or Subtitle language setting on pages 21 and 22. If you choose any other languages, ‘---’ will be displayed instead. (3 letter language code is written in bracket.)
TV/VCR
Sometimes a performance problem can be easily solved by checking seemingly apparent but often overlooked possibilities. Before arranging for service, check these items. It could save your time and money.
| PROBLEM CORRECTIVE ACTION | |
| No power. | Make sure the AC cord is connected to an AC outlet.Make sure the power is turned on. |
| Remote Control Doesn’t Work | Is TV/DVD/VHS plugged in?Power at outlet?Check batteries in Remote Control. |
| No picture and sound. | Make sure the AC cord is connected to an AC outlet.Check antenna connection.Let the TV/DVD/VHS program its tuner memory. |
| No picture or poor picture on TV/DVD/VHS. | Adjust direction or replace antenna.Adjust picture controls. |
| No sound or poor sound. | Adjust volume control on remote control or main unit.Press the MUTE button to restore sound. |
| Bars On Screen | If outside antenna is being used, check for broken wire.Check for local interference. |
| Picture Distorted or Blurred | Try a new channel, if OK, then possible station trouble.If outside antenna is being used, check for broken wire. |
| Picture Rolls Vertically Lines or Streaks in Picture | Try a new channel, if OK, then possible station trouble.If outside antenna is being used, check for broken wire.Check for local interference. |
| No Color | Try a new channel, if OK, then possible station trouble.Is antenna connected to terminal on the back of the set?If outside antenna is being used, check for broken wire.Adjust COLOR control. |
| Poor Reception on Some Channels Ghosts in Picture | Try a new channel, if OK, then possible station trouble.Is antenna connected to terminal on the back of the set?If outside antenna is being used, check for broken wire.Check for local interference. |
| Weak Picture | Try a new channel, if OK, then possible station trouble.Is antenna connected to terminal on the back of the set?If outside antenna is being used, check for broken wire.Adjust CONTRAST & BRIGHT control. |
| Sound OK, Picture Poor | Try a new channel, if OK, then possible station trouble.Is antenna connected to terminal on the back of the set?If outside antenna is being used, check for broken wire.Check for local interference.Adjust CONTRAST & BRIGHT control. |
| Picture OK, Sound PoorTimer recording is not possible. | Try a new channel, if OK, then possible station trouble.Check for local interference.Make sure the timer recording is set correctly.Make sure the power is off.Make sure the TV/DVD/VHS clock is set correctly. |
| Cannot go into Record mode. | Make sure the tape has an erase-prevention tab. If need, cover the hole with plastic tape. |
| PROBLEM | CORRECTIVE ACTION |
| Playback picture is partially noisy. | Adjust tracking control for a better picture using the CHANNEL ▲ or▼ button on the TV/DVD/VHS. |
| No picture but the audio is OK in playback. | Head cleaning may be necessary. Refer to “AUTO HEAD CLEANING” on page 53. |
| No operation by infrared Remote Control. | Make sure the AC cord is connected to an AC outlet.Check batteries in remote control. |
| Video or color fades in and out when making a copy of a video tape. | You can not copy a copyrighted video tape. You are experiencing copy guard protection. |
| Uneven color | Unplug the AC cord for about 30 minutes, then plug it again. |
| CLOSED CAPTION PROBLEM | POSSIBLE REMEDY |
| My TV/DVD/VHS is showing • You are watching a live broadcast and spelling errors made by the captions that are misspelled. | closed captioning production company may pass through uncorrected.A prerecorded program will not show any misspelled words because of the normal time available for editing the captions. |
| My TV/DVD/VHS will not show • Captions that are delayed a few seconds behind the actual the text dialogue are common for live broadcast. Most captioning production in its entirety or there is a delay of what is being said.in companies can display a dialogue to a maximum of 220 words per minute. If a dialogue exceeds that rate, selective editing is used to insure that the captions remain up-to-date with the current TV screen dialogue. | |
| My captions are scrambled with • Interference caused by building, power lines, thunderstorms, etc. white boxes on the TV screen. | may cause scrambled or incomplete captions to appear. |
| My program guide listed a TV show as being closed captioned but none of the captions were displayed. | • Broadcasters may at times use a time compression process to speed up the actual program so that additional advertising time can be given. Since the decoder cannot read the compressed information, captions will be lost. |
| My prerecorded video tape does not show any captions. The tape box mentions it being closed captioned. | • The video tape was either an illegal copy or the tape duplicating company accidentally left out the captioning signals during the copying process. |
| My TV screen shows a black box • You are in the TEXT mode. Select CAPTION mode to CAPTION on certain channels. | You are in the TEXT mode. Select CAPTION mode to CAPTION [OFF]. |
DVD
If the TV/DVD does not perform properly when operated as instructed in this Owner's Manual, check the player, consulting the following checklist.
| Symptom Cause | Remedy | |
| No power. | Loose power plug. | Insert the power plug firmly into the wall out let |
| The player does not respond to the remote control. | The remote control is not aimed at the sensor on the TV/DVD.Obstacles present between the remote control and the sensor.The remote control is too far away from the TV/DVD.Dead batteries. | Aim the remote control directly at the sensor on the TV/DVD.Remove the obstacles from the signal path.Use the remote control within 7m of the TV/DVD.Replace the batteries. |
| No picture | Loose video connection.Wrong disc. | Connect the video cables firmly.Insert a correct video disc that plays on this TV/DVD. |
| Disc cannot be played | No disc.Dirty disc.Disc is placed upside down.Parental lock is active. | Insert a disc.Clean the disc.Place the disc correctly, with the label side up.Cancel the parental lock or change the control level. |
| No sound | Loose audio connection.The power of the connected audio component is off.Wrong audio output settings.Wrong input settings on the connected audio component. | Connect the audio cables firmly.Turn the power of the audio component on.Correct the audio output settings.Correct the input settings on the audio component. |
| Distorted picture | Copy protection is active.Immediately after playing, press fast forward or in reverse.The 1st layer is switching to the 2nd layer, when playing a two layered disc. | Connect the player directly to the TV.There are some cases where pictures may be slightly distorted, which are not a sign of a malfunction.Although Pictures may stop for a moment, this is not a malfunction. |
| Audio or subtitle language does not match the setup. | The selected language is not available for audio or subtitles on the DVD. | No malfunction. |
| The camera angle cannot be changed. | The DVD does not contain sequences recorded from different camera angles. | No malfunction. |
| Audio or subtitle language cannot be changed. | The DVD does not contain audio source or subtitles in the selected language. | No malfunction. |
| "Prohibited icon" appears on the screen, prohibiting an operation. | That operation is prohibited by the TV/DVD or disc. | No malfunction. |
| CD sound dropout No CD reproduction DVD picture dropout DVD picture freeze DVD picture in mosaic No DVD reproduction | Scratched disc | Replace the disc with unscratched one. |
NOTES:
- Some functions are not available in specific modes, but this is not a malfunction. Read the description in this Owner's Manual for details on correct operations.
- Playback from a desired track and random playback are not available during program playback.
CABINET CLEANING
- Wipe the front panel and other exterior surfaces of the TV/DVD with a soft cloth immersed in lukewarm water and wrung dry.
- Never use a solvent or alcohol. Do not spray insecticide liquid near the TV/DVD. Such chemicals may cause damage and discoloration to the exposed surfaces.
AUTO HEAD CLEANING
- Automatically cleans video heads as you insert or remove a cassette, so you can see a clear picture.
- Playback picture may become blurred of interrupted while the TV program reception is clear. Dirt accumulated on the video heads after long periods of use, or the usage of rental or worn tapes can cause this problem.
If a streaky or snowy picture appears during play-back, the video heads in your TV/DVD/VHS may need to be cleaned.
- Please visit your local Audio/Video store and purchase a good quality VHS Video Head Cleaner.
- If a Video Head Cleaner does not solve the problem, please call our help line at 1-800-968-3429, to locate an Authorized Service Center.
NOTES:
- Remember to read the instructions included with the video head cleaner before use.
- Clean video heads only when problems occur.
SERVICING
- Should your TV/DVD become inoperative, do not try to correct the problem by yourself. There are no user-serviceable parts inside. Turn off, unplug the power cord, and please call our help line at 1-800-968-3429, to locate an Authorized Service Center.
IF THE LASER OPTICAL PICKUP UNIT IS DIRTY
- If the player still does not perform properly when it is operated while referring to the relevant sections and to "TROUBLESHOOTING GUIDE" in this Owner's Manual, the laser optical pickup unit may be dirty. Consult your dealer or an Authorized Service Center for inspection and cleaning of the laser optical pickup unit.
DISC HANDLING
- Use discs which have the following logos on them. (Optical audio digital discs.)


- Handle the discs so that fingerprints and dust do not adhere to the surfaces of the discs.
• Always store the disc in its protective case when it is not used.
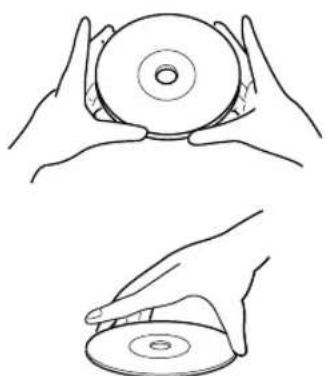
natural_image
Line drawings of hands holding a CD and a disc (no text or symbols)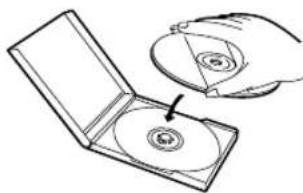
natural_image
Illustration of a CD or DVD disc being placed into an open case, with hands adding a section (no text or symbols present)- To clean-off, use a soft cloth.
- Do not use a hard cloth since this will mar the disc.
- Wipe the disc in a straight line from center to edge.
- Never wipe with a circular motion.
- Do not use detergent or abrasive cleaning agents.
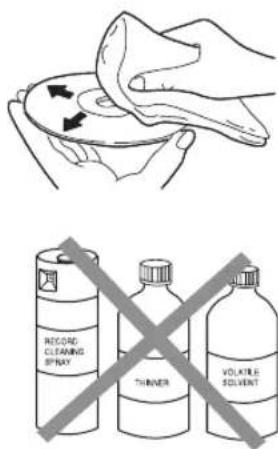
GENERAL SPECIFICATIONS
TV/VCR
CRT
[19 inch model]: 19 inch in-line gun, 90° deflection tube
[27 inch model]: 27 inch in-line gun, 110° deflection tube
Television system : NTSC-M
Closed caption system :§15.119/FCC
Video Heads : Rotary four-head
Tape width : 1/2 inch
Tape speed
SP : 33.40mm/sec.
LP : 16.67mm/sec.
SLP:11.12mm/sec.
Tuner channel
TV VHF Low : #2\~#6
TV VHF High : #7\~#13
TV UHF : #14\~#69
CATV
VHF : 5A
MID band : A5\~A1, A\~I
SUPER band : J\~W
HYPER band : W+1\~W+84
DVD
Product type: DVD Player
Discs: DVD video, Audio CD
Output signal format: NTSC color
Frequency response
(out put jack)
DVD (linear sound): 20 Hz to 22 kHz
(sample rate: 48 kHz)
20 Hz to 44 kHz
(sample rate: 96 kHz)
CD: 20 Hz to 20 kHz
Signal-to-noise ratio
(S/N ratio)(out put jack)
CD: 100 dB (EIAJ)
Dynamic range
(out put jack)
DVD (linear sound): 85 dB
CD: 84 dB (EIAJ)
Total distortion factor
CD: 0.07% (EIAJ)
Wow and flutter: Below the measurement
limitation (+/-0.001%
W PEAK) (EIAJ)
ELECTRICAL SPECIFICATIONS
Sound output: 2 speakers, 1W, 8 ohm
OTHER SPECIFICATIONS
Terminals
Antenna input: VHF/UHF/CATV 75 ohm unbalanced (F-type)
Video input: RCA connector × 1
Audio L/R input: RCA connector × 2
Headphone: 1/8" stereo (3.5 mm)
Coaxial digital
audio output: One pin jack, 500m Vpp (75 ohm)
Analog audio L/R output: RCA connector × 2
Remote control: Digital encoded infrared light system
Operating
temperature: 5°C to 40°C (41°F\~104°F)
Power requirements: AC 120V, 60Hz
[19 inch model]
Power consumption
(Maximum): 85W
Picture tube: 19"
Dimensions: H:19-21/32" (500mm) W:23-13/16" (605mm) D:18-11/16" (475mm)
Weight: 48.5 lbs (22kg)
[27 inch model]
Power consumption
(Maximum): 125W
Picture tube: 27"
Dimensions: H:25-1/2" (648mm) W:26-9/16" (675mm) D:19-11/16" (500mm)
Weight: 86 lbs (39.0kg)
Accessories: Remote Control Unit with 2"AA"batteries Owner's Manual
- Designs and specifications are subject to change without notice and without our legal obligation.
- If there is a discrepancy between languages, the default language will be English.
MEMO
INDICE
FUNAI CORP. will repair this SYLVANIA product, free of charge in the USA in the event of defect in materials or workmanship as follows:
DURATION:
PARTS: FUNAI CORP. will provide parts to replace defective parts without charge for one (1) year from the date of original retail purchase. Two (2) years for Picture Tube. Certain parts are excluded from this warranty.
LABOR: FUNAI CORP. will provide the labor without charge for a period of ninety (90) days from the date of original retail purchase.
LIMITS AND EXCLUSIONS:
This warranty is extended only to the original retail purchaser. A purchase receipt or other proof of original retail purchase will be required together with the product to obtain service under this warranty.
This warranty shall not be extended to any other person or transferee.
This warranty is void and of no effect if any serial numbers on the product are altered, replaced, defaced, missing or if service was attempted by an unauthorized service center. This SYLVANIA Limited warranty does not apply to any product not purchased and used in the United States.
This warranty only covers failures due to defects in material or workmanship which occurs during normal use. It does not cover damage which occurs in shipment, or failures which are caused by repairs, alterations or product not supplied by FUNAI CORP., or damage which results from accident, misuse, abuse, mishandling, misapplication, alteration, faulty installation, improper maintenance, commercial use such as hotel, rental or office use of this product or damage which results from fire, flood, lightning or other acts of God.
THIS WARRANTY DOES NOT COVER PACKING MATERIALS, ANY ACCESSORIES (EXCEPT REMOTE CONTROL), ANY COSMETIC PARTS, COMPLETE ASSEMBLY PARTS, DEMO OR FLOOR MODELS.
FUNAI CORP. AND ITS REPRESENTATIVES OR AGENTS SHALL IN NO EVENT BE LIABLE FOR ANY GENERAL, INDIRECT OR CONSEQUENTIAL DAMAGES ARISING OUT OF OR OCCASIONED BY THE USE OF OR THE INABILITY TO USE THIS PRODUCT. THIS WARRANTY IS MADE IN LIEU OF ALL OTHER WARRANTIES, EXPRESS OR IMPLIED, AND OF ALL OTHER LIABILITIES ON THE PART OF FUNAI, ALL OTHER WARRANTIES INCLUDING THE WARRANTY OF MERCHANTABILITY, AND FITNESS FOR A PARTICULAR PURPOSE, ARE HEREBY DISCLAIMED BY FUNAI AND ITS REPRESENTATIVES IN THE UNITED STATES.
ALL WARRANTY INSPECTIONS AND REPAIRS MUST BE PERFORMED BY A FUNAI AUTHORIZED SERVICE CENTER. THIS WARRANTY IS VALID WHEN THE UNIT IS CARRIED-IN TO FUNAI AUTHORIZED SERVICE FACILITY.
IMPORTANT:
THIS LIMITED WARRANTY GIVES YOU SPECIFIC LEGAL RIGHTS, YOU MAY HAVE OTHER RIGHTS THAT VARY FROM STATE TO STATE, IF, AT ANY TIME DURING THE WARRANTY PERIOD, YOU ARE UNABLE TO OBTAIN SATISFACTION WITH THE REPAIR OF THIS PRODUCT, PLEASE CONTACT FUNAI CORP.
ATTENTION:
FUNAI CORP. RESERVES THE RIGHT TO MODIFY ANY DESIGN OF THIS PRODUCT WITHOUT PRIOR NOTICE.
To locate your nearest SYLVANIA Authorized Service Center or for general service procedure, please call 1-800-968-3429 or write to the following:
FUNAI CORPORATION, INC.
Customer Service
100 North Street; Teterboro, NJ 07608
Tel :1-800-968-3429
PLEASE DO NOT SHIP YOUR UNIT TO THE TETERBORO ADDRESS.
- COLOR TV/DVD/VHS 6719DC (19 inch) 6727DC (27 inch)
- TruSurround™ by SRS (●) MP3
- IMPORTANT SAFEGUARDS
- IMPORTANT COPYRIGHT INFORMATION
- RADIO-TV INTERFERENCE
- LASER SAFETY
- WARNING
- AVOID THE HAZARDS OF ELECTRICAL SHOCK AND FIRE
- A NOTE ABOUT RECYCLING
- TV/VCR SECTION
- TV/VCR
- DVD
- • Dolby Digital surround
- - Still/fast/slow/step playback
- - Random playback for audio CD and MP3
- - Program playback for audio CD and MP3
- • DVD menus in a desired language
- - Screen saver/Auto power-off functions
- - Subtitles in a desired language
- - Selecting a camera angle
- - Choices for audio language and sound mode
- - Parental lock
- • Automatic detection of discs
- - Playing an MP3 disc
- - Direct Search
- - On-screen display
- - Sleep timer
- • DTS (Digital Theater System)
- - Search
- - Repeat
- - Zoom
- - Marker
- - Resume Play
- • SRS TruSurround
- - Dimmer
- - Bit rate indication
- NOTE:
- - TV/DVD/VHS REAR PANEL - [Fig.3]
- AUDIO L/R input jacks
- Cassette compartment
- PICTURE button
- Number buttons
- PAUSE button [TV/VCR P.26 / DVD P.38]
- SPEED button [TV/VCR P.30]
- C.RESET button [TV/VCR P.28]
- DISPLAY button
- SETUP button [TV/VCR P.15]
- TITLE button [DVD P.37]
- CLEAR button
- MODE button [DVD P.41]
- SEARCH MODE button [DVD P.39]
- AUDIO button [DVD P.44]
- SUBTITLE button [DVD P.45]
- REPEAT button [DVD P.40]
- ANGLE button (DVD mode) [DVD P.45]
- A-B REPEAT button [DVD P.40]
- RETURN button
- ENTER button
- Arrow buttons
- DISC MENU button [DVD P.37]
- ZOOM Button [DVD P.42]
- MUTE button
- SLEEP button [TV/VCR P.34]
- SELECT button
- ANT. in jack
- Power cord
- COAXIAL digital audio out jack
- AUDIO L/R output jack
- PREPARATION FOR USE
- ANTENNA/CABLE CONNECTION
- VHF/UHF SEPARATE ANTENNAS
- CABLE WITHOUT CONVERTER/ DESCRAMBLER BOX
- CABLE WITH CONVERTER/ DESCRAMBLER BOX OR SATELLITE BOX
- TO RECORD A SCRAMBLED/UNSCRAM-BLED CHANNEL
- Note to CATV system installer:
- CONNECTING TO EXTERNAL INPUT JACKS
- INSTALLING THE BATTERIES
- EXTERNAL INPUT MODE
- CONNECTING TO A STEREO SYSTEM (for DVD)
- NOTES:
- CONNECTING TO AN AMPLIFIER EQUIPPED WITH DIGITAL INPUT JACKS SUCH AS MD DECK OR DAT DECK (for DVD)
- CONNECTING TO A DOLBY DIGITAL DECODER, DTS DECODER, OR MPEG DECODER (for DVD)
- CHANNEL SET UP FOR THE FIRST TIME
- Plug in the TV/DVD/VHS power cord
- Turn on the TV/DVD/VHS
- Select "ENGLISH" or "ESPAÑOL" or
- "FRANÇAIS"
- Begin auto preset
- After scanning
- DELETING (OR ADDING) CHANNEL
- Select "CHANNEL SET UP"
- Select "ADD/DELETE CH"
- Enter the desired channel number
- Delete (or add) it from (into) memory
- Exit the channel setup mode
- Added channel: Light blue. Deleted channel: Light red.
- CHANNEL SET UP AGAIN
- Make sure ...
- Begin auto preset
- After scanning
- SELECTING THE LANGUAGE
- Select "LANGUAGE"
- Select "ENGLISH" or "ESPAÑOL" or "FRANÇAIS"
- Exit the Language mode
- Select "SETTING CLOCK"
- Set "D.S.T." (Daylight-Saving Time) to [ON]
- Exit the Daylight-Saving Time mode
- CLOCK SET UP (AUTO / MANUAL)
- AUTO CLOCK SETTING
- Set "AUTO CLOCK" to [ON]
- Enter the channel number for the PBS station
- Exit the Auto Clock Setting
- Turn off the TV/DVD/VHS
- If you choose [AUTO],
- MANUAL CLOCK SETTING
- Select "MANUAL CLOCK
- SET"
- Select the month
- Select the day
- Select the year
- Select the hour
- Select the minute
- Start the clock
- TO CHANGE CLOCK SETTING
- PLEASE NOTE:
- WATCHING A TV PROGRAM
- Turn on the TV/DVD/VHS
- Select the channel number
- Adjust sound
- DEGAUSSING
- PICTURE CONTROL
- Select "PICTURE CONTROL"
- Select item you want to adjust
- Adjust the picture control
- CLOSED CAPTION SYSTEM
- Select "CAPTION"
- Select your desired caption menu
- Exit the caption setting mode
- TO CANCEL THE CLOSED CAPTION SYSTEM
- WHEN THE CLOSED CAPTION MODE IS ON
- V-CHIP SET UP
- TV RATING SET UP
- Select "V-CHIP SET UP"
- Input Access code
- Select "TV RATING"
- Select your desired item
- - When you select [TV-Y7]:
- - When you select [TV-PG], [TV-14] or [TV-MA]:
- Exit the V-Chip setting mode
- MPAA RATING SET UP
- 2
- Select "MPAA RATING"
- CHANGE ACCESS CODE
- 1
- 3
- 4
- 5
- 6
- CHECKING THE SELECTED MTS MODE
- SELECTING THE MTS SYSTEM
- TO SELECT HIFI MODE
- Select "USER'S SET UP"
- Select"VCR AUDIO"
- Select [HIFI]
- Toreturn to TV mode
- TO SELECT MONO MODE
- TO SELECT STEREO, SAP, OR MONO
- Select [STEREO], [SAP], or [MONO]
- To return to TV mode
- PRECAUTIONS
- TWO DIFFERENT TAPE SPEEDS
- INSERTING A CASSETTE
- REMOVING A CASSETTE
- ERASE PREVENTION
- NORMAL PLAYBACK
- Insert a prerecorded tape
- To begin playback
- Tostop playback
- TRACKING ADJUSTMENT
- SLOW MOTION
- PICTURE SEARCH
- STILL PICTURE
- VERTICAL HOLD CONTROL
- RENTAL PLAYBACK
- Set "RENTAL" to [ON]
- Exit the Rental setting
- Start playback
- TO CANCEL THE RENTAL MODE
- AUTO REPEAT PLAYBACK
- Select "ALL" or "BLANK"
- Exit the Repeat Play setting
- TO CANCEL THE REPEAT PLAY MODE
- ZERO RETURN
- To activate "ZERO RETURN" mode
- TIME SEARCH
- Insert a tape.
- Select "TIME SEARCH" mode
- TV/VCR SETUP -
- Enter your desired time
- Begin Time Search
- TO CANCEL THE TIME SEARCH at this point
- INDEX SEARCH
- Select "INDEX SEARCH"
- Enter your desired number
- Begin Index Search
- After Index Search
- SPECIAL FEATURES
- REAL TIME TAPE COUNTER
- AUTO REWIND-EJECT
- NORMAL RECORDING
- Select the channel to be recorded
- Select the tape speed
- Begin recording
- Stop recording
- SKIPPING UNWANTED SCENES DURING RECORDING
- OTR (One Touch Recording)
- Begin OTR
- COPYING A VIDEO CASSETTE (Requires a VCR or camcorder)
- WARNING: Unauthorized recordings of copyrighted video tapes may be an infringement of copyright laws.
- Avoid over lap of programs ...
- Select "TIMER PROGRAMMING"
- Select your desired program position (1\~8)
- Set the channel number
- Select once, every day or weekly recording
- For once recording :
- Set beginning hour
- Set beginning minute
- Set end hour
- Set end minute
- Set the tape speed
- Finish setting the program
- Set the timer
- TIMER PROGRAM EXTENSION
- TO CORRECT A PROGRAM
- • After setting a program;
- TO CANCEL AN AUTOMATIC TIMER RECORDING
- • While recording is in progress;
- TO CHECK THE BEGIN/END TIME
- AUTO RETURN
- Set "AUTO RETURN" to [ON]
- Auto Return will begin
- Watch the recorded program
- TO CANCEL THE AUTO RETURN MODE
- SLEEP TIMER
- Select "SLEEP TIMER"
- Set sleep time
- When the Closed Caption mode is OFF:
- When the Closed Caption mode is ON:
- CABLE CHANNEL DESIGNATIONS
- PLAYABLE DISCS
- DISC TYPES
- [DVD]
- [AUDIO CD]
- [MP3]
- PLAYING A DVD VIDEO OR AN AUDIO CD
- Getting started
- Notes
- USING THE DVD MENUS
- USING THE TITLE MENU
- CALLING UP A MENU SCREEN DURING PLAYBACK
- For DVDs
- Note
- RESUMING PLAYBACK FROM THE POINT WHERE PLAYBACK STOPPED
- PAUSING PLAYBACK OR DISPLAYING A STILL PICTURE
- CDDVD
- Press the STOP button during playback.
- FAST FORWARD/REVERSE
- Press the PAUSE button during playback.
- STEPPING THROUGH FRAMES
- Press the PAUSE/ STILL button while play-back is paused.
- PLAYING FROM A DESIRED TITLE OR CHAPTER
- TRICKS WITH THE SKIP BUTTONS (|◀◀, ▶▶)
- STARTING FROM A DESIRED TIME COUNT
- STARTING FROM A DESIRED TRACK
- TRICKS WITH THE SKIP BUTTONS (|◀◀, ▶▶|)
- Press the REPEAT button.
- For audio CDs
- Press the SEARCH MODE button three times during playback.
- Set the marker
- Call back the marker
- Clear the marker
- Press the MODE button in stop mode.
- Press the numeric buttons to enter the desired track numbers.
- Press the PLAY button.
- RANDOM (Audio CD)
- ZOOM PLAYBACK (enlargement onscreen)
- PLAYING AN MP3 DISC
- [When TRACKS are selected]
- [When an ALBUM is selected]
- To stop the play, press the STOP button.
- CHANGING THE ONSCREEN DISPLAY DURING MP3 DISC PLAY
- Press the DISPLAY button during playback.
- Press the DISPLAY button again.
- Press the DISPLAY button again, and the display screen disappears.
- PLAYING AN MP3 DISC FROM A DESIRED TRACK
- Press the SEARCH MODE button during play-back.
- Using the ▲/▼ buttons, select a track to be played. Then press the PLAY button to start playing.
- PLAYING AN MP3 DISC IN A PROGRAMMED WAY
- Using the ▲/▼ buttons, select a track. Then press the ENTER button to save it in a program.
- When the disc has been programmed, press the PLAY button.
- PLAYING AN MP3 DISC AT RANDOM
- Press the MODE button twice in STOP mode.
- Press the PLAY button.
- SETTINGS
- CHANGING THE AUDIO LANGUAGE OR SOUND MODE
- CHANGING THE SUBTITLE LANGUAGE
- CHANGING THE CAMERA ANGLE (Multi-Angle Pictures)
- Press the ANGLE button during playback.
- Press the ANGLE button while the angle number is shown on the screen.
- CHANGING THE ON-SCREEN DISPLAY
- TruSurround SETTINGS
- LANGUAGE SETTINGS
- Press the SETUP button in STOP mode.
- Press the ▲/▼ buttons to select Language, and then press the ENTER button.
- Press the ▲/▼ buttons to select an item, and then press the ENTER button.
- Press the ▲/▼ buttons to select a desired item, and then press the ENTER button.
- Press the SETUP button.
- DISPLAY SETTINGS
- Press the ▲/▼ buttons to select DISPLAY and then press the ENTER button.
- AUDIO SETTINGS
- When playing a disc with copyright protection
- Press the SETUP button.
- PARENTAL LOCK
- Press the SETUP button.
- Press the ▲/▼ buttons to select PARENTAL, and then press the ENTER button.
- Press the numeric buttons to enter the 4-digit password, and then press the ENTER button.
- Press the ▲/▼ buttons to select an item, and then press the ENTER button.
- When "PARENTAL LEVEL" is selected
- When "CHANGE" is selected
- CONTROL LEVELS
- • ALL
- • Level 8
- - Levels 7 to 2
- - Level 1
- CABINET CLEANING
- AUTO HEAD CLEANING
- SERVICING
- IF THE LASER OPTICAL PICKUP UNIT IS DIRTY
- DISC HANDLING
- GENERAL SPECIFICATIONS
- CRT
- ELECTRICAL SPECIFICATIONS
- OTHER SPECIFICATIONS
- Terminals
- [19 inch model]
- [27 inch model]
- MEMO
- INDICE
- DURATION:
- LIMITS AND EXCLUSIONS:
- IMPORTANT:
- ATTENTION:
Brand : SYLVANIA
Model : 6727DC
Category : TV