
EBK 956 - Cooker BOMANN - Free user manual and instructions
Find the device manual for free EBK 956 BOMANN in PDF.


| Product Type | Built-in electric hob (glass-ceramic cooktop) |
| Brand | Bomann |
| Model | EBK 956 |
| Number of Cooking Zones | 4 |
| Cooking Zone 1 (front left) | 200 mm, 1800 W |
| Cooking Zone 2 (rear left) | 165 mm, 1200 W |
| Cooking Zone 3 (rear right) | 200 mm, 1800 W |
| Cooking Zone 4 (front right) | 165 mm, 1200 W |
| Power Levels | 9 (1-9) |
| Supply Voltage | 220–240 V~ / 400 V 3N~, 50/60 Hz |
| Total Power | 5500–6600 W (6000 W nominal) |
| Connection Cable | H05VV-F 5 x 1.5 mm² |
| External Dimensions (W x H x D) | 590 x 55 x 520 mm |
| Installation Dimensions (W x D) | 560 x 490 mm |
| Net Weight | 8.6 kg |
| Gross Weight | 10.1 kg |
| Control Type | Touch-sensitive buttons |
| Timer | Up to 99 minutes per zone |
| Child Lock | Yes, locks all buttons except ON/OFF |
| Residual Heat Indication | Displays "H" when zone is hot |
| Overheating Protection | Automatic shut-off if internal temperature too high |
| Automatic Switch-Off | After set time depending on power level (1-8 hours) |
| Cleaning | Use glass-ceramic cleaner; avoid abrasive sponges |
| Installation Clearance | Min. 50 mm free space below cutout |
| Safety Features | Child lock, residual heat indicator, auto shut-off |
| Scope of Delivery | Glass-ceramic hob, 4 mounting brackets, user manual (D, GB) |
Frequently Asked Questions - EBK 956 BOMANN
User questions about EBK 956 BOMANN
0 question about this device. Answer the ones you know or ask your own.
Ask a new question about this device
Download the instructions for your Cooker in PDF format for free! Find your manual EBK 956 - BOMANN and take your electronic device back in hand. On this page are published all the documents necessary for the use of your device. EBK 956 by BOMANN.
USER MANUAL EBK 956 BOMANN
natural_image
Four white circular outlines arranged in a 2x2 grid on a black background, with no text or symbols present.EINLEITUNG 3
Maßtabelle:
| A | 560 mm |
| B | 490 mm |
| X | mindestens50 mm |
| L | 590 mm |
| W | 520 mm |
| H | 55 mm |
| D | 51 mm |
natural_image
Technical diagram showing two mechanical assembly configurations with labeled parts A and B (no text or symbols beyond labels)natural_image
Four white circular outlines arranged in a 2x2 grid on a black background, with no text or symbols present.Please read the instructions and keep them in a safe place!
TABLE OF CONTENTS
INTRODUCTION 21
GENERAL ADVICE 21
Structure of the safety instructions ....21
Limitation of liability 21
Copyright 21
Intended use 22
SAFETY INSTRUCTIONS....22
Instructions for safe use of the appliance ....23
Avoiding damage to the appliance ....24
DESCRIPTION OF THE APPLIANCE 24
Hob 24
Control panel 24
Description of the functions 25
Specifications 25
INSTALLATION 26
Unpacking the appliance ....26
Requirements of the installation location 27
Installation 27
Electrical connection ......29
OPERATION 30
General instructions for operation ....30
Selection of the correct cookware ....30
Turning the appliance ON/OFF 31
Turning a cooking zone ON/OFF 31
Using the timer 32
Canceling the timer setting 32
Other timer use ....33
Turning the child lock ON 33
Turning the child lock OFF 33
CLEANING AND MAINTENANCE 34
REPAIRS 34
TROUBLESHOOTING 35
DISPOSAL 35
INTRODUCTION

Please read the operating instructions carefully before operating the appliance. They include important safety instructions for installation, operation, and maintenance of the appliance. Improper use of the appliance can be dangerous, especially for children.
Keep the operating instructions handy for later reference. Hand them over to any subsequent owner. Please contact your dealer or customer service for questions not answered in these operating instructions.
GENERAL ADVICE
Structure of the Safety Instructions
All safety instructions in these instructions are provided with a warning symbol. They indicate possible dangers in advance and provide advice on how the hazards can be prevented.

WARNING
Used for a potentially dangerous situation that could lead to severe injuries or death.
▶ To prevent the danger, follow the instructions listed here.

NOTE
A note contains additional information facilitating use of the appliance.
Limitation of Liability
We shall not be liable for damages and consequential damages in case of:
- Failure to follow the operating instructions,
• use other than intended use, - incorrect or unsuitable handling or cleaning,
• incorrectly performed repairs, - unauthorized modifications,
- use of unsuitable add-ons or accessories.
Copyright
This document is subject to copyright. Any reproduction or reprinting, even excerpts thereof, as well as reproduction of the illustrations, even if altered, is permitted only with the written consent of the manufacturer.
Intended use
This appliance is intended exclusively for non-commercial use in enclosed rooms for warming and preparation of food in domestic quantities with use of suitable cookware. The appliance must be installed in a work surface.
Any other or further use, for example for heating of rooms, shall be considered as not intended.
WARNING
If not used as intended or otherwise, this appliance can cause hazards.
▶ Only use the appliance as intended.
▶ Follow the procedures described in the operating instructions.
Claims of any kind due to damage from use other than that intended are excluded.
SAFETY INSTRUCTIONS
WARNING
Danger from electrical current!
Contact with live leads or components can be fatal! Follow the safety instructions below to prevent hazards from electrical current:
▶ The connection of the appliance must satisfy the relevant standards and regulations and may only be performed by an authorized specialist.
▶ The appliance may not be used if the glass surface has cracks or is broken.
The use of high-pressure cleaners or steam jet cleaners is prohibited. Ingress of liquids can lead to electric shock.
▶ Modifications or changes to the appliance are not permitted for safety reasons.
WARNING
Risk of Burning on hot surfaces
Touching the glass-ceramic surface and/or the cookware can lead to severe burns.
▶ Do not touch the glass-ceramic surface during operation.
▶ Touch the cookware only on heat-insulated parts or use suitable heat protection.
The hobs are still hot after turning off. Before touching the glass-ceramic surface, use the residual heat indication to check whether the hobs are still hot.

WARNING Risk of Fire!
Overheated fats and oils can ignite easily.
▶ Never walk away from fats and oil when heating them.
If fat/oil ignites, never extinguish it with water. Immediately cover with a lid or a plate. Turn off the hob and allow the cookware to cool down.
Instructions for safe use of the appliance
- This appliance is not intended for use by children under 8 years of age or persons with limited physical, sensory or mental capabilities or with insufficient experience and/or knowledge unless they are supervised by a person responsible for their safety or have received instructions on the use of the appliance from such a person.
• Children must be supervised to ensure that they do not play with the appliance. - To avoid danger, do not place the glass-ceramic hob under water.
- Do not heat pots without food on the glass-ceramic hob, as this can lead to malfunctions or hazards.
- To prevent the risk of explosion, do not heat sealed food (for example, in tins) if unopened.
- Do not place metal objects (like knives, forks, spoons, and lids) on the hob, as they can become hot.
- Do not use the appliance in the immediate vicinity of heat sources (gas or kerosene stoves).
- Do not store detergents or easily inflammable materials under the appliance.
- Turn off the appliance after use and do not rely on automatic recognition (automatic switch off).
- Do not repair the appliance yourself, but contact an authorized specialist or customer service.
- Do not use the glass-ceramic hob as a storage area.
- The electrical safety of the hob is guaranteed only when it is connected to a correctly installed earthed socket. In cases of doubt, have the domestic wiring checked by an electrician. The manufacturer shall not be liable for damages caused by missing or short-circuited earth connections (for example electric shock).
- The mains connection may only be replaced by an electrician familiar with the local regulations and the additional regulations of the local power supply company and compliance with them.
Avoiding damage to the appliance
- Do not place rough or uneven equipment onto the hob to prevent damage
- Clean the glass-ceramic hob regularly to prevent build-up of dirt or its ingress into the appliance housing.
- Always avoid dropping hard or pointed objects onto the glass plate. The ceramic glass is susceptible to mechanical stresses like impacts or blows and can be damaged by them.
- The hob may not be used as a storage or support area.
- Periodically check that the air inlet under the hob is not blocked by foreign objects (glass, paper, etc.).
DESCRIPTION OF THE APPLIANCE
Hob
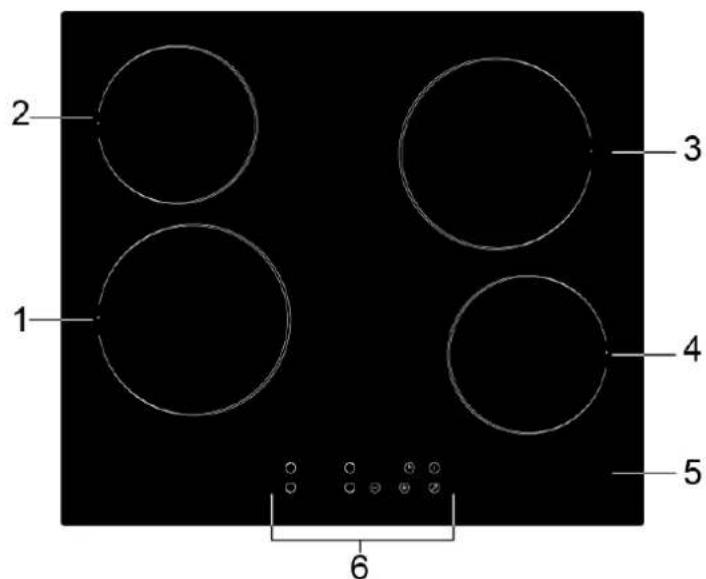
| 1 Cooking zone11800 W |
| 2 Cooking zone 21200 W |
| 3 Cooking zone 31800 W |
| 4 Cooking zone 41200 W |
| 5 Glass-ceramic plate |
| 6 Control panel |
Control panel
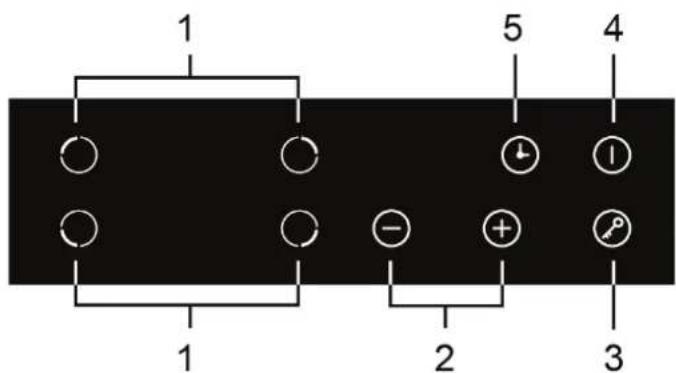
| 1 Cooking zone selection |
| 2 Power/Timer con-trol |
| 3 Child lock |
| 4 ON/OFF button |
| 5 Timer setting |
Description of the Functions
The glass-ceramic hob has four cooking zones heated by electrical heating coils under the glass-ceramic plate. The power of each cooking zone can be adjusted in nine levels. The hob is operated via touch-sensitive buttons on the control panel. The current operating status is shown on displays. The glass-ceramic hob can be kept clean easily because of the smooth surface.
Overheating Protection
A thermostat monitors the inside of the appliance. If maximum temperatures are exceeded, the appliance is turned off automatically to prevent damage.
Residual Heat Indication
After the appliance has been turned off, the display of the corresponding cooking zone shows the symbol “H” (residual heat) when the temperature of the cooking zone is still high enough to cause burns when touched. When the temperature has dropped sufficiently, the residual heat indication of the respective cooking zone goes out.
Automatic Switch off
The integrated automatic switch off automatically turns off the appliance, if you forget to turn off the hob. The switch off times of the different power levels are shown in the following table:
| Power level 1 2 3 4 5 6 7 8 9 | ||||||||
| Switch-off time (hours) 8 8 8 4 | 4 4 2 | 2 2 |
Child Lock
The appliance has a child lock to prevent children from accidentally turning the appliance on.
Specifications
| Type designation EBK 956 | |
| Supply voltage 220-240V~/400V | 3N ~ 50/60 Hz |
| Power 5500-6600W/6000W | |
| External dimensions (W x H x D) | 590x55x520 mm |
| Installation dimensions (W x D) 560 x 490 mm | |
| Weight (net/gross) 8.6 / 10.1 kg | ||
| Connection line cable type H05VV | V-F | |
| Cable cross section | 5 x 1.5 mm2 with connection to 220 to 240 V | |
| Number of cooking zones 4 | ||
| Cooking zone 1 Single cooking zone | ||
| Size 200 mm | ||
| Power 1800 W | ||
| Cooking zone 2 Single cooking zone | ||
| Size 165 mm | ||
| Power 1200 W | ||
| Cooking zone 3 Single cooking zone | ||
| Size 200 mm | ||
| Power 1800 W | ||
| Cooking zone 4 Single cooking zone | ||
| Size 165 mm | ||
| Power 1200 W | ||
| Scope of delivery Glass-ceramic | hob EBK 9564 x mounting bracket,operating instructions (D, GB) | |
Manufacturer information - We reserve the right to improve the product.
INSTALLATION
Unpacking the Appliance
The packaging must be undamaged. Check the appliance for transport damage. A damaged appliance may not be operated. In the case of damage, contact your dealer.

WARNING
Danger of suffocation!
Packaging parts (for example foils, Styrofoam) can be dangerous for children.
▶ Keep packaging materials away from children.
- Remove the protective foil from the appliance.
Requirements of the installation location
- The appliance may only be installed next to higher kitchen furniture, appliances, or walls on one side.
- The appliance should not be installed directly next to refrigerators or freezers. Their power consumption will be increased unnecessarily by the produced heat.
- A space of at least 50 mm must remain free for cooling under the entire cut-out space for the appliance. No heat-sensitive items (base cabinet, drawer, etc.) may be located in this space. Any existing side walls or drawer boxes must be removed or cut out accordingly.
- The work surface must be at least 30 mm thick and 620 mm deep, must be level, and must be sealed on the wall side against liquid overflow.
- The glass-ceramic hob must be framed on all sides by at least 50 mm of work surface.
- The work surface, back walls, veneers, plastic coatings, and glues used must be sufficiently heat-resistant (up to 100 °C).
- The cut-out space may be max. 560 x 490 mm.
- The appliance shall be installed so that sufficient air circulation is assured (refer to the following figure).
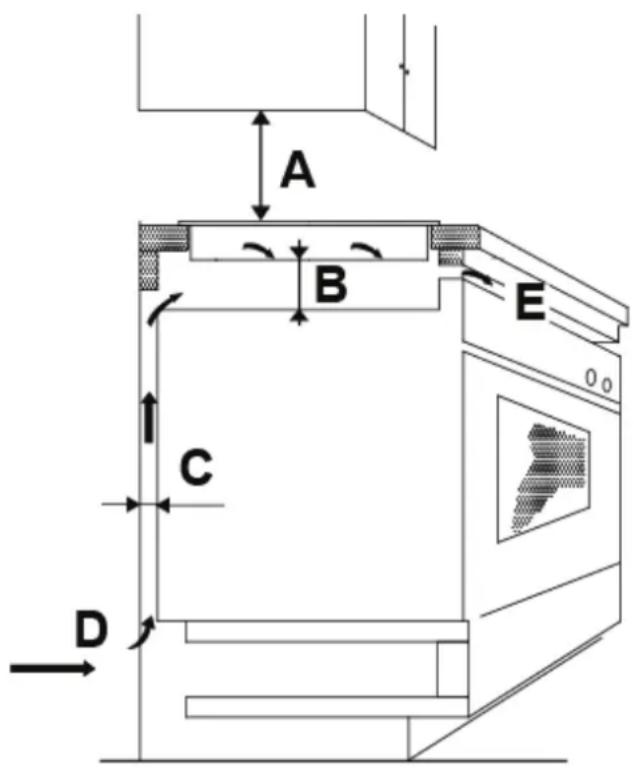
Min. dimensions for sufficient air circulation:
| A Distance to wall cabinets | 760 mm |
| B Free space under the hob | 50 mm |
| C Distance to the wall | 30 mm |
| D Air inlet 30 mm | |
| E Air outlet 10 mm |
Installation
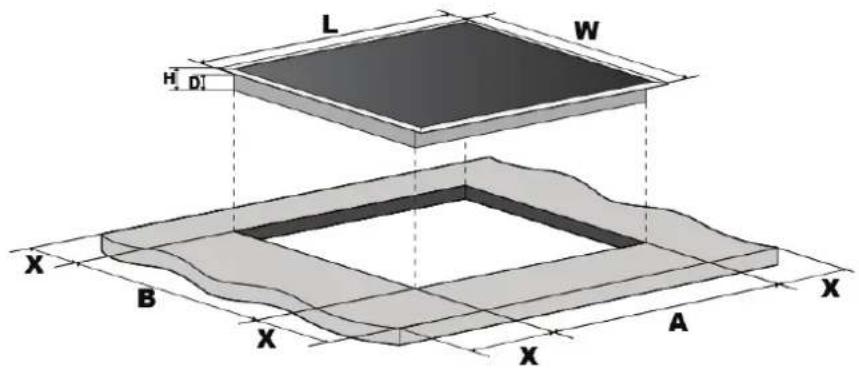
Dimensions:
| A | 560 mm |
| B | 490 mm |
| X | At least 50 mm |
| L | 590 mm |
| W | 520 mm |
| H | 55 mm |
| D | 51 mm |
- Cut the work surface according to the above drawing.

NOTE
Before sawing, cover the outer edge of the cutout with wide adhesive tape to prevent traces of the saber jig saw on the work surface.
- Seal the cut surfaces with special temperature-resistant lacquer, silicon, or cast resin to prevent swelling of the work surface from moisture.
- Place the glass-ceramic hob with the glass side facing down onto a stable base. Use a suitable base to prevent scratching of the glass-ceramic surface. The hob must not be subjected to any forces.
- Connect the connection cable to the appliance as described in the chapter Electric Connection.
- Insert the appliance with the operation panel at the front into the cutout. Make sure that the distance to the cutout is the same on all four sides.
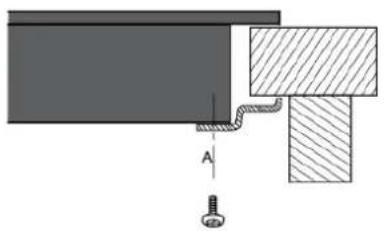
- Mount the hob with the four supplied holders onto the work surface. Depending on the thickness of the work surface, the holders can be installed in two ways (refer to the following figure).
natural_image
Pure mechanical diagram showing a bolt and a block with a curved line, no text or symbols present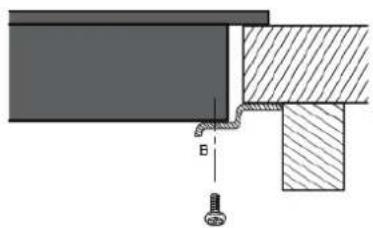
natural_image
Technical diagram showing a mechanical assembly with a bolt and hatched material (no text or symbols)Electric Connection

WARNING
Danger from electrical current!
Connection to the mains may only be performed by authorized certified electrician in compliance with the relevant VDE regulations.
▶ Have the electric connection performed only by an authorized specialist.
▶ Before the start of work, disconnect and isolate all poles of the input line.
Connection Conditions
- Before making the connection, confirm that the power supply conforms to the information on the name plate on the underside of the appliance.
- The supply line must have an isolating device for all poles with a contact gap of at least 3 mm in the house installation (fuses, circuit breaker, or contactor).
- The appliance must be grounded via an earth conductor.
- A rubber-sheathed cable H05VV-F with wire end ferrules and correspondingly rated cross section must be used as the mains connection cable (EN60335: 5 x 1.5 mm ^2 ).
- Protection against accidental contact must be guaranteed. For increased safety, an FI circuit breaker with a trip current of 30 mA should be connected between the appliance and the mains.
- Connection to a domestic socket (230 V/16 A) and the use of multiple sockets is not permitted.
- The connection cable must not be bent or clamped.
Mains Connection
The appliance is designed for two connection types (refer to the following figure):
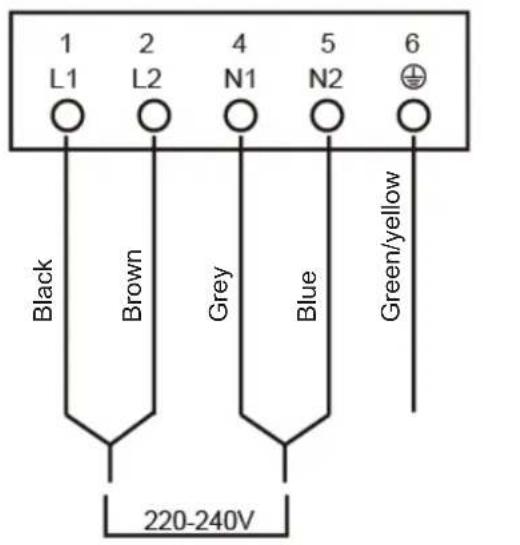
L N PE L1
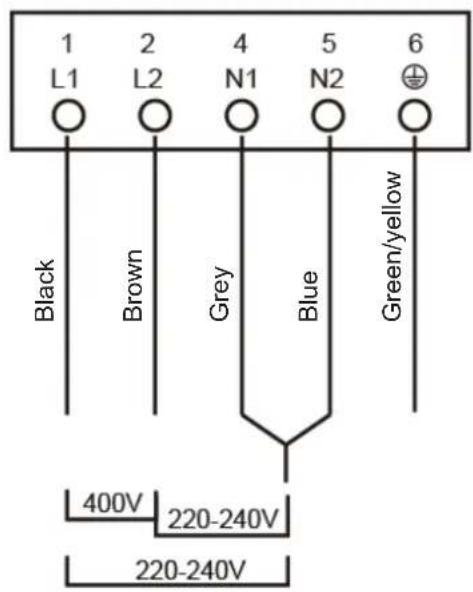
L2 N PE
OPERATION
General Instructions for Operation
- Operation of the appliance is performed via buttons on the control panel of the appliance.
- The buttons respond to a light touch. No pressure is required.
- The appliance reacts best to touching the buttons with the tip of a finger and dry hands.
• A short beep sounds when a touch is registered.
• Always make sure that the control panel is clean and dry. Objects or a thin film of fluid can make the operation difficult.
Selection of the correct cookware
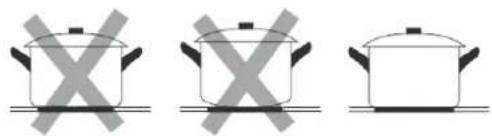 | Use only cookware with a completely flat bottom or with a slight concave surface (the bottom expands when heated). In this way, the heat is transferred optimally. |
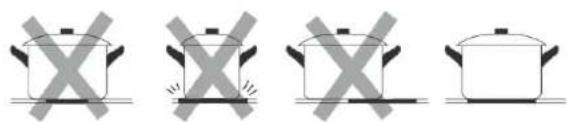 | The bottom of the cookware should be the same size as the hob and should be centered on the hob. |
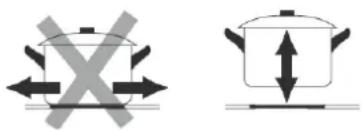
To prevent scratches, do not slide the cookware over the glass-ceramic hob, but rather lift it.
Turning the Appliance ON/OFF
natural_image
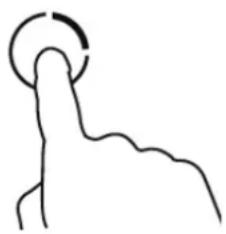
Simple line drawing of a hand with a circular symbol on the index finger (no text or labels)- Touch the ON/OFF switch on the control panel of the appliance to turn the appliance on. After turning on, a beep sounds and all indicators light up for one second. Now the appliance is in standby mode.

NOTE
▶ If you do not select another function within one minute, the appliance is turned off automatically.
▶ The hob can be turned off at any time by touching the ON/OFF switch.
Turning a Cooking Zone ON/OFF
natural_image
Simple line drawing of a finger pressing a circular button (no text or symbols)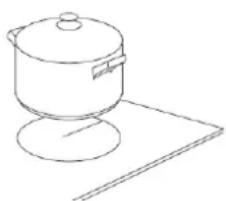
natural_image
Line drawing of a cooking pot on a stand (no text or symbols)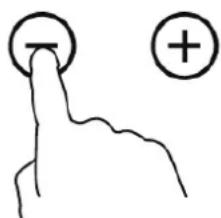
- On the control panel, select the cooking zone to be turned on.
- Place suitable cookware onto the cooking zone to be used. Make sure that the surface of the cooking zone and the bottom of the cookware are clean and dry.
- Select the desired heating level from 1 to 9 with the button ⊕ or the button 📋 you can change the setting at any time during cooking. - The setting is changed steplessly by touching the button ⊕ or ○ continuously.
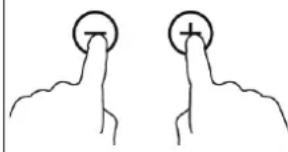 | • To turn off the cooking zone, touch the button, until the indicator “0” appears.• As an alternative, touch the buttons + and @ the same time; the power is reset to level 0 and the cooking zone is turned off. |
Using the Timer
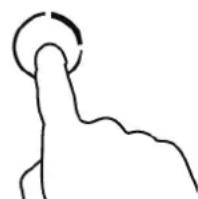 | Select the cooking zone for which the timer is to be set on the operation panel and set the desired heating level with the buttons ⊕ or ⊖. |
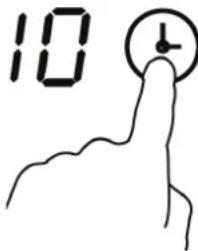 | Touch the button Timer Setting. The timer indicator shows “10” and the timer can be set.Set the timer between 1 and 99 minutes with the buttons ⊕ or ⊖Each time ⊕ or ⊕is touched, the set time is changed by one minute. By continuously touching button ⊕ or ⊖the set time is changed in steps of 10 minutes.After the timer has been set, the timer display flashes for 5 seconds. A red dot next to the cooking level indicates that a timer has been set for this cooking zone. The display shows the remaining time. |
Canceling the Timer Setting
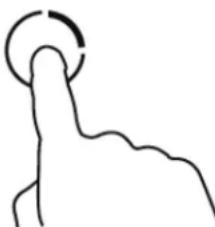 | Select the cooking zone for which the timer is to be canceled on the control panel. |
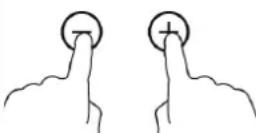 | Touch the buttons ⊕ and ⊖ ,at the same time to cancel the timer for the cooking zone. The timer display shows “--”. |

NOTE
▶ In timer mode, the power level can be changed without changing the time setting.
The timer function can also be set for several cooking zones. The display shows only the shortest remaining time.
▶ The timer function is canceled when the appliance is turned off.
▶ After the set time, the cooking zone is turned off automatically.
Other Timer Use
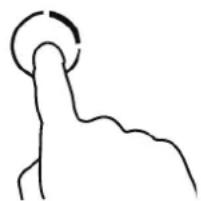
natural_image
Simple line drawing of a finger pressing a circular button (no text or symbols)- The hob must be turned on and no cooking zone may be selected.
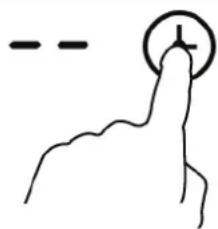
natural_image
Simple line drawing of a finger pressing a button with a plus sign (no text or symbols)- Touch the button Timer Setting. The display shows “--” and the timer can be set.
- Setting the timer for other use is done as described in Timer as Time Switch.
- After the set time has passed, a beep sounds for 30 seconds, and the display shows “--”.
Turning the Child Lock ON
The appliance has a lock function to prevent unintended operation.
Touch the button “Child Lock” 🔒, the appliance is locked and the display shows “Lo”.
Turning the Child Lock OFF
Make sure that the appliance is turned on.
Touch the button "Child Lock" ⏻ for approximately 3 seconds to cancel the lock.

NOTE
When the child lock is activated, all buttons other than the ON/OFF button are locked. The appliance can be operated again only after unlocking.
CLEANING AND MAINTENANCE

WARNING
Danger from electrical current!
In the case of incorrect cleaning, moisture can get into the inside of the appliance, and this can lead to electric shock.
▶ Never clean the appliance with high-pressure or steam cleaners.
▶ The appliance must be dry before it is operated again.
Notes for Cleaning
- Always clean the hob after cooking. This ensures that food residue will not burn in.
- Turn the appliance off and allow the hob to cool down sufficiently before you start cleaning.
- Use only detergents suitable for glass-ceramics. Follow the cleaning instructions on the package.
- Do not use aggressive cleaning agents, scouring agents, or scratching sponges.
- Use a glass scraper (not included) to remove excessive dirt. Use the glass scraper only on the glass-ceramic surface and not on the frame.
- Periodically use a glass-ceramics cleaner that seals the glass-ceramics surface and protects the hob.
REPAIRS

WARNING
Danger from incorrect repair!
A wrongly or incorrectly performed repair causes a hazard for the user and the invalidation of the warranty.
▶ Repairs on electrical appliances may only be performed by qualified specialists.
▶ A damaged mains cord may only be replaced by an electrician.
TROUBLESHOOTING
The design of the appliance assures trouble-free operation and a long life. Should problems still occur, the following table will help to find and eliminate minor problems:
| Problem Possible cause Repair | ||
| The hob cannot be turned on. | The power supply is interrupted. | Check the distribution board of the appliance. Use other appliances to check for a power failure. When you have checked everything and the problem still persists, call customer service or an electrician. |
| The buttons no longer respond. | The child lock is active. | Unlock the control panel. |
| The buttons react very poorly when touched. | The control surface is damp. | Make sure that the control panel area is dry and that you use the finger tip for operation. |
| Some pots and pans make crackling noises. | This can be caused by the design of the cookware. | This does not indicate a fault. |
If a problem still persists after following the steps above, please contact your distributor and/or a technician.
DISPOSAL
Packaging Materials
The packaging protects the appliance from transport damage. The packaging materials have been selected to be environmentally friendly and disposed of in an environmentally friendly manner and thus can be recycled. Returning the packaging to the material cycle saves raw materials and reduces waste. Dispose of no longer needed packaging materials according to the relevant local regulations. The materials used are:
- Corrugated cardboard/Cardboard (mainly from waste paper)
- Moulded parts made of PS (foamed polystyrene free of FCKW)
- Foils and bags of PE (polyethylene)
- Straps made from PP (polypropylene)
Waste Appliances
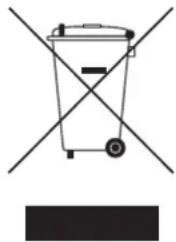
natural_image
Simple line drawing of a trash bin with crossed lines indicating no waste or restriction (no text or symbols)The symbol of the garbage bin on the product or the accompanying paperwork shows that this appliance must not be handled as household waste. Instead, it should be brought to the collection point for recycling of electrical and electronic appliances. Disposal must be according to the relevant local regulations. For further information, contact the local authorities or a waste disposal company.
Are you interested in other Bomann products?
Please visit our website: www.bomann.de
BOMANN®
www.bomann.de

- EINLEITUNG 3
- TABLE OF CONTENTS
- INTRODUCTION
- GENERAL ADVICE
- Structure of the Safety Instructions
- WARNING
- NOTE
- Limitation of Liability
- Copyright
- Intended use
- SAFETY INSTRUCTIONS
- Danger from electrical current!
- Risk of Burning on hot surfaces
- WARNING Risk of Fire!
- Instructions for safe use of the appliance
- Avoiding damage to the appliance
- DESCRIPTION OF THE APPLIANCE
- Description of the Functions
- Overheating Protection
- Residual Heat Indication
- Automatic Switch off
- Child Lock
- INSTALLATION
- Unpacking the Appliance
- Danger of suffocation!
- Requirements of the installation location
- Electric Connection
- Connection Conditions
- Mains Connection
- OPERATION
- General Instructions for Operation
- Selection of the correct cookware
- Turning the Appliance ON/OFF
- Turning a Cooking Zone ON/OFF
- Other Timer Use
- Turning the Child Lock ON
- Turning the Child Lock OFF
- CLEANING AND MAINTENANCE
- Notes for Cleaning
- REPAIRS
- Danger from incorrect repair!
- TROUBLESHOOTING
- DISPOSAL
- Packaging Materials
- Waste Appliances
- BOMANN®
Brand : BOMANN
Model : EBK 956
Category : Cooker