
NO-034 Johnny - Hi-Fi System Karcher Audio - Free user manual and instructions
Find the device manual for free NO-034 Johnny Karcher Audio in PDF.


| Product Type | Hi-Fi System |
| Brand | Karcher Audio |
| Model | NO-034 Johnny |
| Dimensions (W x H x D) | 450 x 140 x 310 mm |
| Weight | 4.2 kg |
| Power Supply | AC 100-240V, 50/60 Hz |
| Power Consumption | 40 W (standby < 0.5 W) |
| Radio Tuner | FM with RDS |
| Compact Disc Player | CD, CD-R/RW compatible |
| USB Playback | Supports MP3, WMA via USB 2.0 |
| Bluetooth | Yes, A2DP profile |
| Speaker Impedance | 4 ohms each |
| Frequency Response | 40 Hz - 20 kHz |
| Remote Control | Included (CR2025 battery) |
| Cleaning Instructions | Wipe with a soft, dry cloth. Avoid solvents. |
| Safety Precautions | Do not expose to moisture. Unplug during storms or long inactivity. |
| Spare Parts Availability | Contact Karcher Audio support for parts. |
| Repairability | Service by authorized personnel recommended. |
Frequently Asked Questions - NO-034 Johnny Karcher Audio
User questions about NO-034 Johnny Karcher Audio
0 question about this device. Answer the ones you know or ask your own.
Ask a new question about this device
Download the instructions for your Hi-Fi System in PDF format for free! Find your manual NO-034 Johnny - Karcher Audio and take your electronic device back in hand. On this page are published all the documents necessary for the use of your device. NO-034 Johnny by Karcher Audio.
USER MANUAL NO-034 Johnny Karcher Audio
natural_image
Red portable electronic ticker with open lid and digital display, no visible text or symbols on main bodyNO-034 "Johnny"
Fernbedienung
Taste Funktion
natural_image
Diagram of a battery pack with an arrow indicating direction (no text or symbols)Grundfunktionen
flowchart
graph TD
    A["Repeat 1"] --> B["Repeat All"]
    B --> C["Random"]
    C --> D["Off"]
    D --> A
natural_image
Diagram showing a device with an inserted USB into a port, no text or symbols presentHinweise:
natural_image
Illustration of a hand holding a thin bundle of wires with directional arrows indicating movement (no text or symbols)- Read Instructions - All the safety and operating instructions should be read before the appliance is operated.
- Retain Instructions - The safety and operating instructions should be retained for future reference.
- Heed Warnings - All warnings on the appliance and in the operating instructions should be adhered to.
- Water and Moisture – Do not use the apparatus near water (e.g. bath tub, sink, swimming pool) or in wet places or tropical climates. Do not place objects filled with liquids, such as vases, on top of the apparatus. Do not expose the apparatus to dripping or splashing.
- Setup – The apparatus should only be placed on a stable, flat surface. Do not let the apparatus fall down or expose it to shock.
- Wall or Ceiling Mounting - The appliance should be mounted to a wall or ceiling only as recommended by the manufacturer.
- Ventilation - The appliance should be situated so that its location or position does not interfere with its proper ventilation. For example, the appliance should not be situated on a bed, sofa, rug, or similar surface that may block the ventilation openings; or, placed in a built-in installation, such as a bookcase or cabinet that may impede the flow of air through the ventilation openings. Ensure a minimum distance of 5 cm around the apparatus for sufficient ventilation. Ensure that the ventilation is not impeded by covering the ventilation openings with items such as newspapers, table-cloths, curtains, etc.
- Heat - The appliance should be situated away from heat sources such as radiators, heat registers, stoves, or other appliances (including amplifiers) that produce heat.
- Power Sources - The appliance should be connected to a power supply only of the type described in the operating instructions or as marked on the appliance.
- Cables and Plugs – The mains plug shall remain readily operable. All cables should be routed so that they are not likely to be walked on or pinched by items placed upon or against them, paying particular attention to cords at plugs, convenience receptacles, and the point where they exit from the appliance.
- Cleaning - The appliance should be cleaned only as recommended by the manufacturer. Clean by wiping with a dry and clean cloth. Do not use chemical cleaners or detergents. Always pull the mains plug before cleaning the unit.
- Non-use Periods - The power cord of the appliance should be unplugged from the outlet when left unused for a long period of time.
- Object and Liquid Entry - Care should be taken so that objects do not fall and liquids are not spilled into the enclosure through openings.
- Damage Requiring Service - The appliance should be serviced by qualified service personnel when:
a) The power-supply cord or the plug has been damaged; or
b) Objects have fallen, or liquid has been spilled into the appliance; or
c) The appliance has been exposed to rain; or
d) The appliance does not appear to operate normally or exhibits a marked change in performance; or
e) The appliance has been dropped, or the enclosure damaged. - Servicing - The user should not attempt to service the appliance beyond that described in the operating instructions. All other servicing should be referred to qualified service personnel.
- Open Fire – Keep the apparatus away from open fires. Do not place naked flame sources, such as lighted candles on the apparatus.
- Thunderstorms – During a thunderstorm the mains plug should be unplugged.
- Safety Check – After servicing the technician should conduct a safety check in order to ensure that the apparatus is working properly and safely.
-
Batteries – Always place batteries in the correct polarization into electrical components. Danger of explosion if battery is incorrectly replaced. Replace only with the same or equivalent type. Do not mix old and new batteries. Take attention to the environmental aspects of battery disposal. Batteries shall not be exposed to excessive heat such as sunshine, fire or the like. Remove batteries before disposing of the product.
-
Volume Levels – To prevent possible hearing damage, do not listen at high volume levels for long periods.
- Headphones – Excessive sound pressure from earphones and headphones can cause hearing loss.
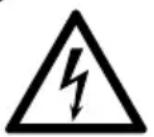
CAUTION
RISK OF ELECTRO SHOCK
DO NOT OPEN

WARNING: To reduce the risk of fire or electric shock, do not expose this appliance to dripping or splashing.
WARNING: To reduce the risk of electric shock, do not remove cover (or back). No user serviceable parts inside. Refer servicing to qualified service personnel.
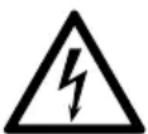
The lightning flash with arrowhead symbol within an equilateral triangle is intended to alert the user to the presence of uninsulated dangerous voltage within the product's enclosure that may be of sufficient magnitude to constitute a risk of electric shock to persons.

The exclamation point within an equilateral triangle is intended to alert the user to the presence of important operating and maintenance (servicing) instructions in the literature accompanying the appliance.
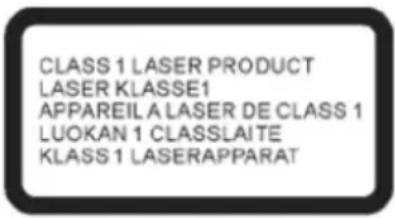
DO NOT STARE INTO BEAM – INVISIBLE LASER RADIATION
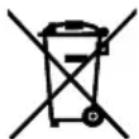
Batteries
Batteries may not be disposed of in regular house hold trash. Every consumer has the obligation to return batteries to special disposal locations.
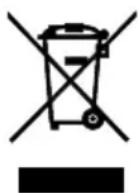
Disposal of Used Electrical & Electronic Equipment
The meaning of the symbol on the product, its accessory or packaging indicates that this product shall not be treated as household waste. Please, dispose of this equipment at your applicable collection point for the recycling of electrical & electronic equipments waste. By ensuring the correct disposal of this product, you will help prevent potential hazards to the environment and to human health, which could otherwise be caused by unsuitable waste handling of this product. The recycling of materials will help conserve natural resources. For more detailed information about recycling of this product, please contact your local city office, your household waste disposal service or the shop where you purchased the product.
- Handling discs
• Always keep the CD compartment shut to prevent dust or dirt from getting into the CD mechanism.
- Do not touch the recorded surface.
- Do not stick paper or write on either side of the CD.
- Do not bend the CD.
- Only handle a disc on its outer edges.
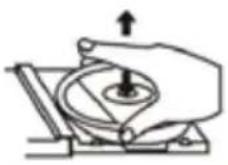
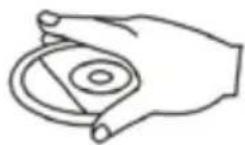
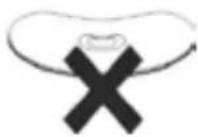
- Storing discs
• To avoid scratches/damages always put CDs back into their cases after use.
- Do not expose CDs to direct sunlight, dust, dirt, high temperatures, high humidity or water.
-
Cleaning discs
-
Use a soft cloth to wipe fingerprints and dust from the disc surface.
- Carefully move the cloth from the center of the disc to its edge:
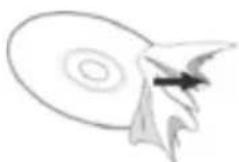
natural_image
Simple line drawing of a stylized rocket or missile with no text or symbols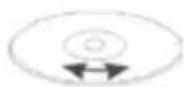
Correct False
- Never use benzene, thinners, record cleaner fluid or antistatic spray to clean CDs.
- Compatibility
- Due to the numerous compression methods, some discs may not play.
NOTES ABOUT THIS INSTRUCTION MANUAL:
-
This instruction manual is published by the manufacturer without any warranty. Corrections and changes of this instruction manual for the removal of typographic mistakes and editorial inaccuracies as well as due to (technical) improvements (changes) of the devices can be done by the manufacturer at any time without announcement. Changes of this kind are considered in future versions of this user manual. All rights reserved.
-
All figures are only for illustration and do not always show the exact representation of the product.
- This unit is not intended for use by persons (including children) with reduced physical, sensory, or mental capacities, or lack of experience and knowledge, unless they have been given supervision or instruction concerning use of the appliance by a person responsible for their safety. Children should be supervised to ensure that they do not play with the unit.
FURTHER NOTES ON THE DEVICE
Setting a safe volume level
- If you continually listen to loud music, your hearing gradually adapts to it and gives you the impression that the volume is lower.
• What seems normal to you can be already for long time too loud and unhealthy.
• To protect yourself from this, set the volume to a low level. - Increase the volume slowly.
- Damage to your hearing can be extensive and cannot be reversed.
• If you notice a hearing problem, please consult a doctor.
Condensation:
- Condensation may occur when moving the device from a cold to a warm environment. If there is moisture inside the player, it may not operate properly. Don't turn on the device and wait about one hour for the moisture to evaporate.
Saving energy
- If the unit is not used for a longer period of time it should be unplugged from the power source and the batteries taken out of the remote control.
Unpacking:
• Take out carefully the unit from the packing. Please keep the packing for further use.
- Carefully remove possible protection cardboards and slipcovers.
Power Source
- Connect the AC cord into a suitable wall power outlet.
- Ensure that the output power of the outlet matches the input power of the unit.
- To turn the unit on or off, turn the FUNCTION selector to a desired mode or to "OFF" position to turn the unit off.
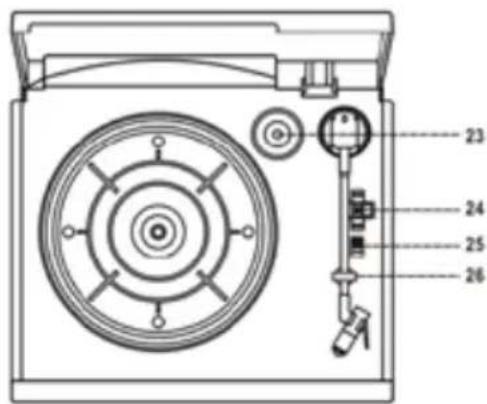
Location of Controls
-
Dust cover
-
Dial pointer
-
Left speaker
-
LCD display
-
Remote sensor
-
FM stereo indicator
-
CD door
-
USB socket
-
Volume knob
-
X-bass control button
-
Source button
-
Folder up button
-
Right speaker
-
Tuning knob
-
CD door open/close 📄 button
-
CD stop ■ button
-
FM St/Mono selector
-
Function selector
-
3.5mm stereo headphone jack
-
CD play/pause 🖼Button
-
CD Skip/Search up ▶▶| button
-
CD Skip/Search down |◀◀ button
-
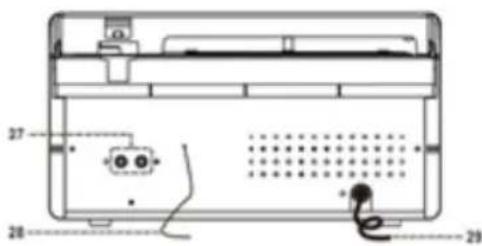
Spindle adaptor
-
Turntable speed selector
-
Auto stop switch
-
Pick-up holder
-
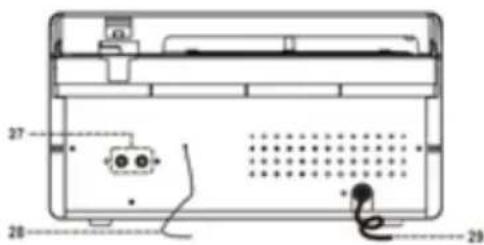
Line out socket
-
FM antenna
-
AC cord
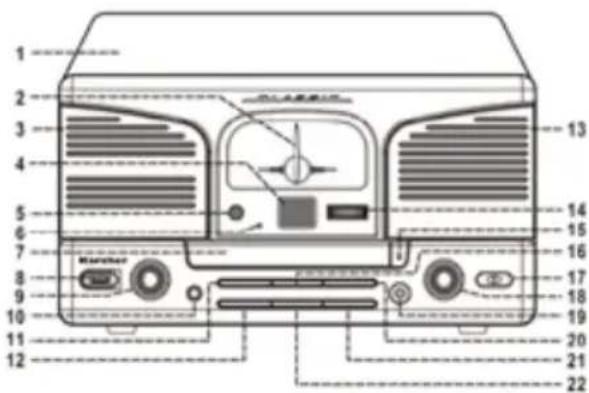
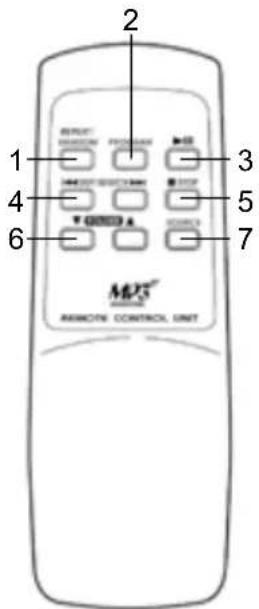
Remote Control
Button Function
- REPEAT/RANDOM In CD/USB mode, press to enable repeat/random play.
- PROGRAM In CD/USB mode, press to enter program mode.
- Play/Pause ▶Ⅱ In CD/USB mode press to start playback/pause mode.
- Skip/Search Up ▶▶| Press once to skip to the next track, press & hold to search forward.
Skip/Search Down |◀◀ Press once to skip to the previous track, press & hold to search backward.
- Stop ■ In CD/USB mode press to stop the playback.
- FOLDER ▲/▼ Press to select a folder during play MP3 file (if available).
- Source Press to change mode between CD/USB.
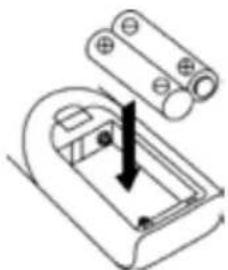
Inserting Batteries
- Open the battery compartment on the bottom of the remote control.
- Insert two size AAA batteries (not included) into the compartment following the polarity markings (+/-) inside the compartment.
- Close the battery compartment again.
natural_image
Diagram of a mechanical assembly with a central component and two cylindrical parts above it, showing a downward force arrow (no text or symbols)Basic Functions
Turning the Unit On and Off
- To turn the unit on, turn the FUNCTION selector to a desired mode, such as "PHONO", "CD/USB" or "TUNER".
- To turn the unit off, turn the FUNCTION selector to position "OFF".
Volume Setting
- To set the volume rotate the VOLUME knob on the fron of the unit. Turn the knob clockwise to increase the volume, and counter-clockwise to decrease the volume. Do not overturn the volume knob as this may lead to damage.
Radio
- Turn the unit on and select the radio mode by turning the FUNCTION selector to "TUNER".
- Select the desired radio station by turning the TUNING knob.
FM & FM Stereo Reception
- Set the FM St/Mono selector to "FM" position. Programs are received in mono mode. In particular when stereo signals are weak it is preferable to receive the program in mono.
- Set the FM St/Mono selector to "FM-ST" position for receiving stereo programs. The FM stereo LED indicator will light up to show FM stereo program is being received.
For a better reception
For best reception fully unwind the FM wire antenna at the rear of the unit.
- Turn the unit on and select the CD mode by turning the FUNCTION selector to "CD/USB".
- "CD" will be shown in the display.
- Open the CD tray by pressing the Open/Close ▲ button.
- Insert a CD with the printed side facing up.
- Close the CD tray by pressing the Open/Close ▲ button again.
- The CD is now being read and the display will then show the total no. of tracks.
- Press the PLAY/PAUSE Button to start playback.
- To temporarily stop the playback (pause), press the PLAY/PAUSE ▶ button once. Press the button again to resume playback.
- To stop playback, press the STOP ■ button.
Fast Forward / Fast Rewind & Skipping Tracks
- To jump to the beginning of the currently playing track, press the Skip/Search Down |◀◀ button once. Press it a second time to skip to the previous track.
• To skip to the next track, press the Skip/Search Up ▶▶| button once.
• To fast forward the currently playing track, press and hold the Skip/Search Up ▶▶| button. Once you reach the desired section of the track, release the button to resume normal playback.
• To fast rewind the currently playing track, press and hold the Skip/Search Down |◀◀ button. Once you reach the desired section of the track, release the button to resume normal playback. - For when MP3 discs contain several folders, you can navigate between these folders by pressing the FOLDER ▼/▲ buttons.
Repeat/Random Modes (via Remote Control)
- For Audio CDs:
Press the REPEAT/RANDOM button. Each press of the button changes the playback mode as follows:

flowchart
graph TD
    A["Repeat 1"] --> B["Repeat All"]
    B --> C["Random"]
    C --> D["Off"]
    D --> A
Mode Display Indicator Function
Repeat 1 REP. Repeats the current track
Repeat All Tracks

Repeats all tracks on the disc
Random RAN. Plays all tracks on the disc in random order
Off ----
Resumes normal playback
- For MP3 CDs:
Press the REPEAT/RANDOM button. Each press of the button changes the playback mode as follows:

flowchart
graph LR
    A["Repeat 1"] --> B["Repeat Folder"]
    B --> C["Repeat All"]
    C --> D["Random"]
    D --> E["Off"]
Mode Display Indicator Function
Repeat 1 REP. Repeats the current track
Repeat Folder

Repeats the current folder
Repeat All Tracks

Repeats all tracks on the disc
Random RAN. Plays all tracks on the disc in random order
Off ----
Resumes normal playback
Programming Track Order (via Remote Control)
You can store up to 20 tracks in a desired sequence. The programming can only be done in CD stop mode (press the STOP ■ button if a CD is playing).
- While in CD stop mode, press the PROGRAM button. "PROG" will be shown in the display together with "P01" which is flashing.
- Using the Skip/Search Down |◀◀ and Skip/Search Up ▶▶| buttons, select the track to be played first in the sequence.
In case of MP3-CD or USB playback where folders are included you need to first select the desired folder by pressing the FOLDER ▼/▲ buttons and then the Skip/Search Down |◀◀ and Skip/Search Up ▶▶| buttons to select the track.
- Press the PROGRAM button again. "P02" will be shown in the display.
- Repeat the steps 2 - 3 to select up to 20 tracks for your sequence.
- Press the PLAY/PAUSE ▶ button to start the playback of your sequence.
- To delete your sequence, press the STOP ■ button twice.
Note:
- The programming mode will automatically quit in case there is no button pressed within about one minute after pressing the PROGRAM button.
MP3 Playback from USB
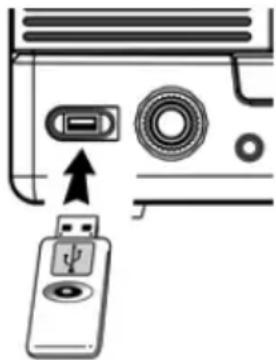
- Insert or take out a USB stick only while the unit is turned off.
- After inserting a USB stick, turn the unit on and into CD/USB mode turning the FUNCTION selector to "CD/USB".
- Select the USB mode by pressing the SOURCE button. "USB" appears in the display.
- The USB stick is now being read and the display will then show the total no. of tracks.
- Press the PLAY/PAUSE button to start playback.
- Playback functions are the same as for CD playback as described above.
- To stop playback, press the STOP ■ button.
natural_image
Diagram showing a device with an open port and a USB flash, no text or symbols presentNotes:
- A USB device must always be connected directly to the USB port of this product. The use of a USB extension cord is not supported by this product. The USB port of this product cannot communicate with a computer directly.
- The reading time for a USB drive varies depending on the speed of the memory device and the number of songs and folders.
• Always switch off the unit before removing a USB drive to prevent damage to your USB device. The manufacturer is not responsible for the loss or damage of data. - This unit does not support USB MP3 players due to their inherent lack of software compatibility. Only USB “pen drives” (flash memory USB drives) can be used for MP3 playback.
- Only MP3 files can be played. Due to numerous methods of compression it may be that some files or USB drives cannot be played.
Supported files: Bit rate 32kbps - 320kbps; sampling rate 32kHz, 44.1kHz and 48kHz decodable.
Phono
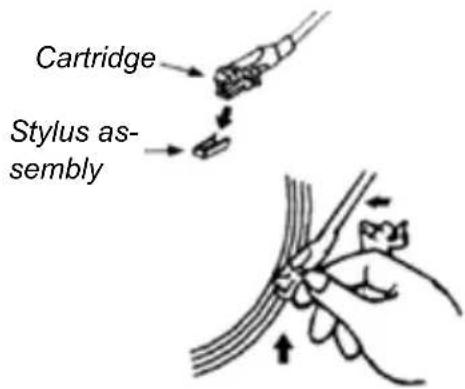
- Remove the stylus protector.
-
Be sure that the tone arm is being detached from the tone arm rest before operating and re-secured again afterwards.
-
Turn the unit on and select the turntable mode by turning the FUNCTION selector to "PHONO".
- Set the speed selector to the proper position depending on the record to be played.
- Place the record on the platter (use the spindle adaptor if required).
- Lift the tone arm from the rest and slowly move it to the record side. The platter will start to rotate.
- Place the tone arm to the desired position of the record.
- At the end of the record the platter will automatically stop rotating. Lift the tone arm from the record and return it to the rest.
- To stop manually lift the tone arm from the record and return it to the rest.
Remark:
For some records the auto-stop area may be out of the unit setting, i. e. it will stop before the last track is finished. In this case set the auto-stop switch to "Off" position. It will now play to the end of the record but will not stop automatically (turn off the unit by power button or switch back the auto-stop switch to "On" position to stop the platter rotate). Then put back the tone arm to the rest position.
Line Out
You can connect this unit to an external hi-fi system by connecting the line out socket to the related input socket of your external hi-fi system via RCA cable (not included).
Headphones
You can connect headphones to the headphone jack on the front of the unit. When headphones are connected the internal speakers of the unit are switched off.
To listen to the internal speakers of the unit unplug the headphones.
Energy Saving
For energy saving, the system will switch into standby mode automatically in case the unit has stopped operating in CD/USB mode for 15 minutes.
To turn the unit back on turn the FUNCTION selector to "OFF" and then to the desired mode.
Technical Specifications
Power Supply: AC 230V \~ 50Hz
Radio Frequency Range: FM 88 - 108 MHz
Dimensions (WxDxH) ca.: 311 x 333 x 170 mm
Technical specifications and design may change without notice.
Karcher
www.karcher-products.de
- NO-034 "Johnny"
- Fernbedienung
- Taste Funktion
- Grundfunktionen
- Hinweise:
- CAUTION
- Batteries
- Disposal of Used Electrical & Electronic Equipment
- NOTES ABOUT THIS INSTRUCTION MANUAL:
- FURTHER NOTES ON THE DEVICE
- Setting a safe volume level
- Condensation:
- Saving energy
- Unpacking:
- Power Source
- Location of Controls
- Remote Control
- Button Function
- Inserting Batteries
- Basic Functions
- Turning the Unit On and Off
- Volume Setting
- Radio
- FM & FM Stereo Reception
- For a better reception
- Fast Forward / Fast Rewind & Skipping Tracks
- Repeat/Random Modes (via Remote Control)
- Mode Display Indicator Function
- Programming Track Order (via Remote Control)
- Note:
- MP3 Playback from USB
- Notes:
- Phono
- Remark:
- Line Out
- Headphones
- Energy Saving
- Technical Specifications
- Karcher
Brand : Karcher Audio
Model : NO-034 Johnny
Category : Hi-Fi System