
PB10PRO - Hi-Fi System SAMSON - Free user manual and instructions
Find the device manual for free PB10PRO SAMSON in PDF.


| Product Type | Power Distribution Unit with Surge Protection and Rack Lighting |
| Brand | Samson |
| Model | PB10PRO |
| Rack Size | 1U (single rack space) |
| Dimensions (W x H x D) | 19 x 1.75 x 6.5 inches (approx.) |
| Weight | 5 lbs (approx.) |
| Power Input | 0-130 VAC, 10 Amp max, heavy-duty 14-gauge cord |
| Number of Outlets | 8 switched rear-panel IEC outlets + 1 unswitched front-panel convenience outlet |
| Surge Protection | 3-point: Hot to Neutral, Hot to Ground, Neutral to Ground; clamping voltage 340 VAC at 50A; response time 1 ns; max surge current 6000A |
| RF Filtering | >20 dB from 1.5 MHz to 200 MHz |
| Front Panel LEDs | Dual retractable cylinders with 5 LEDs each, dimmable |
| Meters | 3-digit LED voltmeter and ammeter |
| Rear USB Lamp | USB socket for included gooseneck LED lamp |
| Circuit Breaker | 10 Amp resettable front-panel breaker |
| Construction | Steel chassis, rugged roadworthy design |
| LED Lamp Life | 100,000 hours (typical) |
| Safety Certifications | Complies with UL and CE standards (implied) |
| Cleaning | Use a damp cloth only; avoid moisture exposure |
| Spare Parts Availability | Contact Samson Technologies for service; no user-serviceable parts inside |
Frequently Asked Questions - PB10PRO SAMSON
User questions about PB10PRO SAMSON
0 question about this device. Answer the ones you know or ask your own.
Ask a new question about this device
Download the instructions for your Hi-Fi System in PDF format for free! Find your manual PB10PRO - SAMSON and take your electronic device back in hand. On this page are published all the documents necessary for the use of your device. PB10PRO by SAMSON.
USER MANUAL PB10PRO SAMSON
Caution: To reduce the hazard of electrical shock, do not remove cover or back.
No user serviceable parts inside. Please refer all servicing to qualified personnel.
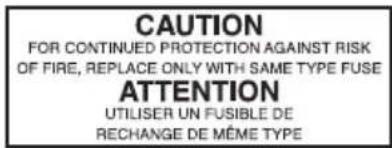


WARNING: To reduce the risk of fire or electric shock, do not expose this unit to rain or moisture.
The lightning flash with an arrowhead symbol within an equilateral triangle, is intended to alert the user to the presence of un-insulated "dangerous voltage" within the products enclosure that may be of sufficient magnitude to constitute a risk of electric shock to persons.
The exclamation point within an equilateral triangle is intended to alert the user to the presence of important operating and maintenance (servicing) instructions in the literature accompanying the product.
Important Safety Instructions
-
Please read all instructions before operating the unit.
-
Keep these instructions for future reference.
-
Please heed all safety warnings.
-
Follow manufacturers instructions.
-
Do not use this unit near water or moisture.
-
Clean only with a damp cloth.
-
Do not block any of the ventilation openings. Install in accordance with the manufacturers instructions.
-
Do not install near any heat sources such as radiators, heat registers, stoves, or other apparatus (including amplifiers) that produce heat.
-
Do not defeat the safety purpose of the polarized or grounding-type plug. A polarized plug has two blades with one wider than the other. A grounding type plug has two blades and a third grounding prong. The wide blade or third prong is provided for your safety. When the provided plug does not fit your outlet, consult an electrician for replacement of the obsolete outlet.
-
Protect the power cord from being walked on and pinched particularly at plugs, convenience recep - tacles and at the point at which they exit from the unit.
-
Unplug this unit during lightning storms or when unused for long periods of time.
-
Refer all servicing to qualified personnel. Servicing is required when the unit has been damaged in any way, such as power supply cord or plug damage, or if liquid has been spilled or objects have fallen into the unit, the unit has been exposed to rain or moisture, does not operate normally, or has been dropped.
Table of Contents
Introduction....2
PowerBrite Features....3
PS10 Guided Tour - Front Panel 4
PS10 Guided Tour - Rear Panel....5
PB10 Guided Tour - Front Panel....6
PB10 Guided Tour - Rear Panel....7
PB10PRO Guided Tour - Front Panel....8
PB10PRO Guided Tour - Rear Panel....9
Setting Up and Using Your PowerStrip or PowerBrite 10
Appendix A: LED Or Incandescent? 11
Specifications.... 12
Copyright 2007, Samson Technologies Corp.
Printed April, 2007 v1.0
Samson Technologies Corp.
45 Gilpin Avenue
Hauppauge, New York 11788-8816
Phone: 1-800-3-SAMSON (1-800-372-6766)
Fax: 631-784-2201
www.samsontech.com
Introduction
Congratulations on purchasing your Samson PowerStrip, PowerBrite, or PowerBrite Pro! This manual covers three products: the PowerStrip PS10; the PowerBrite PB10; and the PowerBrite PB10Pro. All three of these single-space rack units provide multiple outlets for reliable power distribution with 3-point surge and spike protection, plus RF (Radio Frequency) filtering. The three products differ in that the PowerBrite and PowerBrite Pro also provide dual front-panel LED lamps (in retractable cylinders), with dimmer control, which can be used to fully illuminate your entire rack of gear. In addition, the PB10 and PB10Pro also provide a rear-panel USB socket to use with the included LED gooseneck lamp so you can see the back of your gear. For advance control, the PowerBrite PB10Pro's feature front-panel voltmeter and ammeter, each with their own large LED display so you can easily monitor the condition of your power source. The steel chassis and solid build construction makes the PowerStrip and PowerBrite series reliable tools on the road or in fixed installations.
In this manual, you'll find a more detailed description of the features of your PowerStrip PS10, PowerBrite PB10, or PowerBrite PB10Pro, as well as instructions for its use and complete specifications. You'll also find a warranty card enclosed—don't forget to fill it out and mail it in! This will enable you to receive online technical support and will allow us to send you updated information about other Samson products in the future. Also, be sure to check out our website (www.samsontech.com) for complete information about our full product line.
With proper care and adequate air circulation, your PowerStrip PS10, PowerBrite PB10, or PowerBrite PB10Pro will operate trouble free for many years. We recommend you record your serial number in the space provided below for future reference.
Serial number: ____
Date of purchase: ____
SPECIAL NOTE: Should your PowerStrip PS10, PowerBrite PB10, or PowerBrite PB10Pro ever require servicing, a Return Authorization number (RA) is necessary. Without this number, the unit will not be accepted. If purchased in the United States, please call Samson at (516) 364-2244 for a Return Authorization number prior to shipping the unit. If you purchased your Samson product outside the United States, please contact your local distributor for warranty information and service. Please retain the original packing material and, if possible, return the unit in its original carton and packing materials.
WARNING: Though the PowerStrip PS10, PowerBrite PB10, and PowerBrite PB10Pro all provide both surge and spike protection, they are not designed to protect against major overload situations such as lightning strikes or connection to incorrect voltage supplies. In the event of either occurrence, unplug all connected equipment immediately and have your PowerStrip PS10, PowerBrite PB10, or PowerBrite PB10Pro evaluated by Samson Technical Support or by an authorized Samson service center before using it again.
PowerStrip & PowerBrite Features
The Samson PowerStrip PS10, PowerBrite PB10, and PowerBrite PB10Pro all utilize state-of-the-art technology in power distribution and are engineered to the finest detail. Here are some of their main features:
- Eight switched, rear panel, IEC outlets that allow you to power an entire rack's worth of gear from one source. In addition, an unswitched front panel convenience outlet is provided for temporary power needs (such as plugging in a guitar amplifier, soldering iron, etc.).
- 3-point surge protection, spike clamping protection and RF filtering enables all connected equipment to operate with maximum efficiency and minimal noise.
- Front panel, re-settable, 10 amp circuit breaker protects all connected gear.
- An independent dedicated switch with status light for powering the rear panel switched outlets.
- In the PowerBrite PB10 and PowerBrite PB10Pro, dual slide out cylinders containing LED light clusters that illuminate all gear underneath with cool, clear light. In addition, there is automatic switching for turning on the lamps.
- In the PowerBrite PB10 and PB10Pro, a rear panel USB socket to use with the included LED gooseneck lamp providing rear rack lighting.
- In the PowerBrite PB10Pro, a front panel voltmeter and ammeter that allow you to monitor changes in the current drawn from both switched and unswitched outlets.
- All units are designed to be mounted in the top slot of any standard 19" rack, taking only a single rack space.
- Rugged construction that makes the Samson PowerStrip PS10, PowerBrite PB10, and PowerBrite PB10Pro eminently roadworthy and extremely reliably in permanent installation.
• Four IEC power cables included.
PS10 Guided Tour - Front Panel

PowerStrip PS10 Front Panel
1: Circuit breaker- This circuit breaker will trip whenever the total load on the PS10 (all rear panel switched outlets plus the front panel unswitched convenience outlet) exceeds 10 amps. To reset it, unplug one or more devices so as to reduce the load and gently press the circuit breaker in until you hear it click.
Note: It may take a minute to cool before you can reset it.
- Vent - Convection cooling is accomplished by the front panel vent holes.
3: Unswitched convenience outlet- This IEC outlet is active whenever the PS10 is plugged in, regardless of the setting of the Outlets switch (see #4 below).
4: Outlets switch- Use this to turn the rear panel outlets on or off. When on, the status light inside this switch is lit red.

flowchart
graph LR
    A["AC LINE NOISE REDUCTION"] --> B["8 SWITCHED 1 UNSWITCHED OUTLETS"]
    B --> C["SURGE SUPPRESSION"]
PS10 Guided Tour - Rear Panel

PowerStrip PS10 Rear Panel
- Power cord - Heavy Duty, 14 gauge mains power cord.
2: Switched AC outlets - Connect external equipment to these standard IECoutlets, which are turned on and off from the front panel Outlets switch (see #2 on the previous page).
3: Ground Lug - Convenient thumb screw for connecting home run grounds.
PB10 Guided Tour - Front Panel

PowerBrite PB10 Front Panel
1: Circuit breaker- This circuit breaker will trip whenever the total load on the PB10 (all rear panel switched outlets plus the front panel unswitched convenience outlet) exceeds 10 amps. To reset it, unplug one or more devices so as to reduce the load and gently press the circuit breaker in until you hear it click.
Note: It may take a minute to cool before you can reset it.
2: Dimmer - Use this to adjust the level of the LED light in the slide-out Lamps.
3: Lamps- Contains the PB10's 5-LED light. Use the Dimmer control (see #2 above) to adjust the brightness of the lamps. To turn off the lamp, gently slide the lamp back in.
4: Vents- Convection cooling is accomplished by the front panel vent holes.
5: Unswitched convenience outlet- This IEC outlet is active whenever the PB10 is plugged in, regardless of the setting of the Outlets switch (see #6 below).
6: Outlets switch- Use this to turn the rear panel outlets on or off. When on, the lamp inside this switch lights red.

flowchart
graph LR
    A["2X5 LED LIGHTING"] --> B["AC LINE NOISE REDUCTION"]
    B --> C["SURGE SUPPRESSION"]
    C --> D["REAR PANEL USB LED LAMP"]
PB10 Guided Tour - Rear Panel

PowerBrite PB10 Rear Panel
1: Power Cord - Heavy Duty, 14 gauge mains power cord.
2: USB Socket - USB type socket for connecting the included USB gooseneck LED lamp.
3: Switched AC outlets - Connect external equipment to these standard 3-pin AC outlets, which are turned on and off from the front panel Outlets switch (see #6 on the previous page).
4: Ground Lug - Convenient thumb screw for connecting home run grounds.
PB10PRO Guided Tour - Front Panel

PowerBrite PB10Pro Front Panel
1: Circuit breaker- This circuit breaker will trip whenever the total load on the PB10Pro (all rear panel switched outlets plus the front-panel unswitched convenience outlet) exceeds 10 amps. To reset it, unplug one or more devices so as to reduce the load and gently press the circuit breaker in until you hear it click.
Note: It may take a minute to cool before you can reset it.
2: Dimmer - Use this to adjust the level of the LED light in the slide out Lamps.
3: Lamps- Contains the PB10Pro's 5-LED light. Use the Dimmer control (see #2 above) to turn the light on or off. To turn off the lamp, gently slide the lamp back in.
4: Voltmeter- This three digit LED meter shows the amount of voltage in the electrical signal being received by the PowerBrite PB10Pro.
WARNING: Severe voltage swings can cause damage to connected equipment. If you see the voltmeter changing drastically or rapidly, disconnect the PB10Pro until the source of the problem is identified.
5: Vents- Convection cooling is accomplished by the front panel vent holes.
6: Ammeter-This three digit LED meter shows the amount of current being drawn by equipment connected to the PB PB10Pro.
WARNING: Severe current swings can cause damage to connected equipment. If you see the ammeter changing drastically or rapidly, disconnect the PB10Pro until the source of the problem is identified and repaired.
7: Unswitched convenience outlet- This IEC outlet is active whenever the PB10Pro is plugged in, regardless of the setting of the Outlets switch (see #8 below).
8: Outlets switch- Use this to turn the rear-panel outlets on or off. When on, the status light inside this switch is lit red.

flowchart
graph LR
    A["2X5 LED LIGHTING"] --> B["AC LINE NOISE REDUCTION"]
    B --> C["SURGE SUPPRESSION"]
    C --> D["AMMETER VOLTMETER"]
    D --> E["REAR PANEL USB LED LAMP"]
PB10PRO Guided Tour - Rear Panel

PowerBrite PB10Pro Rear Panel
1: Power Cord - Heavy Duty, 14 gauge mains power cord.
2: USB Socket - USB type socket for connecting the included USB gooseneck LED lamp.
3: Switched AC outlets - Connect external equipment to these standard 3-pin AC outlets, which are turned on and off from the front panel Outlets switch (see #8 on the previous page).
4: Ground Lug - Convenient thumb screw for connecting home run grounds.
Setting Up and Using Your PowerStrip or PowerBrite
Setting up your PS10, PB10, or PB10Pro is a simple procedure which takes only a few minutes:
- Remove all packing materials (save them in case of need for future service) and install the unit in a standard 19" rack. We recommend that the PB10 and PB10Pro be placed in the top slot so that its slide-out LED lamps can be used to illuminate the entire rack of equipment below.
- Connect the PS10, PB10, or PB10Pro to any standard grounded AC outlet. If you are using a PB10Pro, the front-panel voltmeter and ammeter will show you the incoming electrical voltage and current draw of connected equipment.
- Connect the AC cables of your rack equipment to the rear-panel switched AC outlets, using the included IEC cables.
- Make sure all connected equipment is switched off, then press the front panel. Outlets switch so that its status light is lit red. This activates all rear panel switched outlets.
- Turn on all connected equipment, one at a time. If the total load exceeds 10 amps, the front-panel circuit breaker will trip. To reset it, unplug one or more devices, then press in the front panel circuit breaker.
- You can also use the unswitched front panel convenience outlet for additional temporary power needs (such as connecting a guitar amplifier, soldering iron, etc.). This outlet is fully operational whenever the PS10, PB10, or PB10Pro is plugged into an AC source, regardless of the position of the front panel Outlets switch. The front panel circuit breaker affects this outlet as well as all rear-panel switched outlets.
- (PB10 and PB10Pro only) - To illuminate the equipment in your rack, gently pull the front-panel slide-out cylinders out towards you. The lamps will switch on automatically.
- You can illuminate the back of your rack by connecting the included USB gooseneck LED light to the rear panel USB power socket.
Appendix A: LED Or Incandescent?
There are numerous advantages to using the kind of LED (light emitting diode) lighting provided by the PowerBrite PB10 and PowerBrite PB10Pro over the incandescent lighting provided by competing rack light products. Here are the main points to consider when making your purchase:
- LED lights generate almost no heat at all; incandescent bulbs can generate large amounts of heat.
- LED lights last approximately 50 times longer than incandescent ones, with a typical life of 100,000 hours (as opposed to incandescent lights, which rarely last more than about 2,000 hours).
- LED lights are brighter than incandescent ones and when properly arranged, they deliver much greater light level.
- The quality of our LED light is similar to daylight, while incandescent lights impart a yellowish, artificial glow.
- Taking your rack on the road? LED lights travel better than incandescent ones because the LED has no delicate filament or glass that can break from mechanical shock or vibration.
Specifications
Electrical:
Number of Outlets
PS10, PB10, PB10Pro 8 switched, 1 unswitched
Max. Current 10 Amp (circuit breaker protected)
Input Voltage (RMS) 0 to 130 Vac continuous
Spike Protection Mode Hot to Neutral, Hot to Ground, and Neutral to Ground
Max. Clamping Voltage (@ 50 A) 340 Vac
Response Time 1 nanosecond
Max. Surge Current 6,000 Amps (8 x 20 _s pulse)
Max. Spike Energy 70 Joules per leg
Noise Attenuation >20 dB, 1.5 MHz to 200 MHz
Power Cord Attached, 14 gauge
LED Light Life (Typical) 100,000 Hours
General:
Specifications are subject to change without notice.
Samson Technologies Corp.
45 Gilpin Avenue
Hauppauge, New York 11788-8816
Phone: 1-800-3-SAMSON (1-800-372-6766)
Fax: 631-784-2201
www.samsontech.com
- Important Safety Instructions
- Table of Contents
- Introduction
- PowerStrip & PowerBrite Features
- PS10 Guided Tour - Front Panel
- PowerStrip PS10 Front Panel
- PS10 Guided Tour - Rear Panel
- PowerStrip PS10 Rear Panel
- PB10 Guided Tour - Front Panel
- PowerBrite PB10 Front Panel
- PB10 Guided Tour - Rear Panel
- PowerBrite PB10 Rear Panel
- PB10PRO Guided Tour - Front Panel
- PowerBrite PB10Pro Front Panel
- PB10PRO Guided Tour - Rear Panel
- PowerBrite PB10Pro Rear Panel
- Setting Up and Using Your PowerStrip or PowerBrite
- Appendix A: LED Or Incandescent?
- Specifications
Brand : SAMSON
Model : PB10PRO
Category : Hi-Fi System