
UR 1320BT - Alarm Clock Karcher Audio - Free user manual and instructions
Find the device manual for free UR 1320BT Karcher Audio in PDF.


| Product Type | Alarm clock radio with Bluetooth speaker |
| Model | UR 1320BT |
| Brand | Karcher Audio |
| Dimensions (WxDxH) | Approx. 334 x 132 x 96 mm |
| Power Supply | DC 12V 1.5A (external adaptor) |
| USB Output | 5V 1A (for charging devices) |
| Radio Band | FM PLL stereo/mono |
| Bluetooth Version | Bluetooth (range approx. 10 m / 30 ft) |
| Alarm Modes | Buzzer or radio wake-up |
| Snooze Duration | 9 minutes |
| Sleep Timer | Up to 90 minutes (adjustable in 10 min steps) |
| Display Dimmer | 3 brightness levels (high, low, off) |
| Station Presets | 20 FM stations |
| AUX Input | 3.5 mm stereo (cable not included) |
| Clock Format | 12H or 24H selectable |
| Auto Standby | After 10-15 min of no input (BT/AUX) |
| Antenna | FM wire antenna |
| Safety Features | Overheat protection, condensation handling, power saving |
| Cleaning Instructions | Wipe with dry cloth; unplug before cleaning |
| Manual Languages | Available in multiple languages (including English) |
Frequently Asked Questions - UR 1320BT Karcher Audio
User questions about UR 1320BT Karcher Audio
0 question about this device. Answer the ones you know or ask your own.
Ask a new question about this device
Download the instructions for your Alarm Clock in PDF format for free! Find your manual UR 1320BT - Karcher Audio and take your electronic device back in hand. On this page are published all the documents necessary for the use of your device. UR 1320BT by Karcher Audio.
USER MANUAL UR 1320BT Karcher Audio
Bluetooth ^® Stereo Speaker with PLL Radio
GEFAHR EINES ELEKTRO-
SCHOCKS

- Read Instructions - All the safety and operating instructions should be read before the appliance is operated.
- Retain Instructions - The safety and operating instructions should be retained for future reference.
- Heed Warnings - All warnings on the appliance and in the operating instructions should be adhered to.
- Water and Moisture – Do not use the apparatus near water (e.g. bath tub, sink, swimming pool) or in wet places or tropical climates. Do not place objects filled with liquids, such as vases, on top of the apparatus. Do not expose the apparatus to dripping or splashing.
- Setup – The apparatus should only be placed on a stable, flat surface. Do not let the apparatus fall down or expose it to shock.
- Wall or Ceiling Mounting - The appliance should be mounted to a wall or ceiling only as recommended by the manufacturer.
- Ventilation - The appliance should be situated so that its location or position does not interfere with its proper ventilation. For example, the appliance should not be situated on a bed, sofa, rug, or similar surface that may block the ventilation openings; or, placed in a built-in installation, such as a bookcase or cabinet that may impede the flow of air through the ventilation openings. Ensure a minimum distance of 5 cm around the apparatus for sufficient ventilation. Ensure that the ventilation is not impeded by covering the ventilation openings with items such as newspapers, table-cloths, curtains, etc.
- Heat - The appliance should be situated away from heat sources such as radiators, heat registers, stoves, or other appliances (including amplifiers) that produce heat.
- Power Sources - The appliance should be connected to a power supply only of the type described in the operating instructions or as marked on the appliance.
- Cables and Plugs – The mains plug shall remain readily operable. All cables should be routed so that they are not likely to be walked on or pinched by items placed upon or against them, paying particular attention to cords at plugs, convenience receptacles, and the point where they exit from the appliance.
- Cleaning - The appliance should be cleaned only as recommended by the manufacturer. Clean by wiping with a dry and clean cloth. Do not use chemical cleaners or detergents. Always pull the mains plug before cleaning the unit.
- Non-use Periods - The power cord of the appliance should be unplugged from the outlet when left unused for a long period of time.
- Object and Liquid Entry - Care should be taken so that objects do not fall and liquids are not spilled into the enclosure through openings.
- Damage Requiring Service - The appliance should be serviced by qualified service personnel when:
a) The power-supply cord or the plug has been damaged; or
b) Objects have fallen, or liquid has been spilled into the appliance; or
c) The appliance has been exposed to rain; or
d) The appliance does not appear to operate normally or exhibits a marked change in performance; or
e) The appliance has been dropped, or the enclosure damaged. - Servicing - The user should not attempt to service the appliance beyond that described in the operating instructions. All other servicing should be referred to qualified service personnel.
- Open Fire – Keep the apparatus away from open fires. Do not place naked flame sources, such as lighted candles on the apparatus.
- Thunderstorms – During a thunderstorm the mains plug should be unplugged.
- Safety Check – After servicing the technician should conduct a safety check in order to ensure that the apparatus is working properly and safely.
-
Batteries (if applicable) – Always place batteries in the correct polarization into electrical components. Danger of explosion if battery is incorrectly replaced. Replace only with the same or equivalent type. Do not mix old and new batteries. Take attention to the environmental aspects of battery disposal. Batteries shall not be exposed to excessive heat such as sunshine, fire or the like. Remove batteries before disposing of the product.
-
Headphones (if applicable) – Excessive sound pressure from earphones and headphones can cause hearing loss.
EN
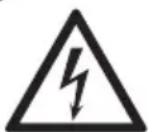
CAUTION
RISK OF ELECTRO SHOCK DO NOT OPEN

WARNING: To reduce the risk of fire or electric shock, do not expose this appliance to dripping or splashing.
WARNING: To reduce the risk of electric shock, do not remove cover (or back). No user serviceable parts inside. Refer servicing to qualified service personnel.
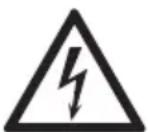
The lightning flash with arrowhead symbol within an equilateral triangle is intended to alert the user to the presence of uninsulated dangerous voltage within the product's enclosure that may be of sufficient magnitude to constitute a risk of electric shock to persons.

The exclamation point within an equilateral triangle is intended to alert the user to the presence of important operating and maintenance (servicing) instructions in the literature accompanying the appliance.
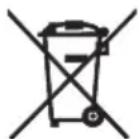
Batteries
Batteries may not be disposed of in regular house hold trash. Every consumer has the obligation to return batteries to special disposal locations.
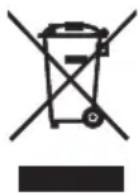
Disposal of Used Electrical & Electronic Equipment
The meaning of the symbol on the product, its accessory or packaging indicates that this product shall not be treated as household waste. Please, dispose of this equipment at your applicable collection point for the recycling of electrical & electronic equipments waste. By ensuring the correct disposal of this product, you will help prevent potential hazards to the environment and to human health, which could otherwise be caused by unsuitable waste handling of this product. The recycling of materials will help conserve natural resources. For more detailed information about recycling of this product, please contact your local city office, your household waste disposal service or the shop where you purchased the product.
NOTES ABOUT THIS INSTRUCTION MANUAL
-
This instruction manual is published by the manufacturer without any warranty. Corrections and changes of this instruction manual for the removal of typographic mistakes and editorial inaccuracies as well as due to (technical) improvements (changes) of the devices can be done by the manufacturer at any time without announcement. Changes of this kind are considered in future versions of this user manual. All rights reserved.
-
All figures are only for illustration and do not always show the exact representation of the product.
-
This unit is not intended for use by persons (including children) with reduced physical, sensory, or mental capacities, or lack of experience and knowledge, unless they have been given supervision or instruction concerning use of the appliance by a person responsible for their safety. Children should be supervised to ensure that they do not play with the unit.
FURTHER NOTES ON THE DEVICE
Setting a safe volume level
- If you continually listen to loud music, your hearing gradually adapts to it and gives you the impression that the volume is lower.
• What seems normal to you can be already for long time too loud and unhealthy.
• To protect yourself from this, set the volume to a low level.
- Increase the volume slowly.
- Damage to your hearing can be extensive and cannot be reversed.
- If you notice a hearing problem, please consult a doctor.
Condensation
- Condensation may occur when moving the device from a cold to a warm environment. If there is moisture inside the player, it may not operate properly. Don't turn on the device and wait about one hour for the moisture to evaporate.
Saving energy
• If the unit is not used for a long period of time, it should be unplugged from the power supply.
Unpacking
• Take out carefully the unit from the packing. Please keep the packing for further use.
- Carefully remove possible protection cardboards and slipcovers.
Location of Controls
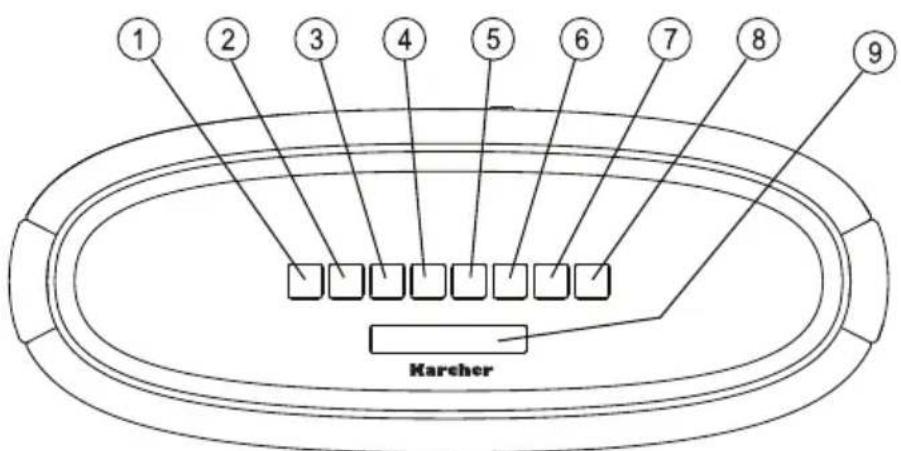
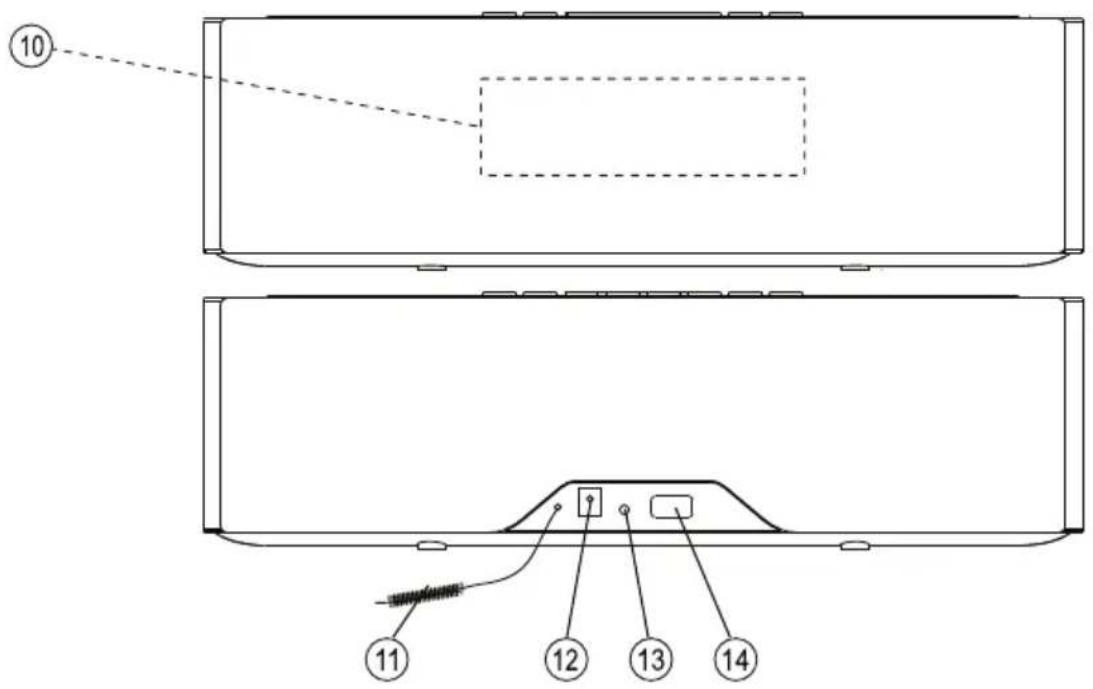
EN
- On/Standby button
- Function button
- Recall/Memory button
- Back / M- / Tune- button
- ▶ Play/Pause / Pairing button
- Next / M+ / Tune+ button
-
Volume Down / Alarm button
-
Volume Up / ⏱ Clock Set button
- Dimmer / Snooze / Sleep button
- Display
- FM wire antenna
- DC jack
- AUX In socket
- USB (charging socket only)
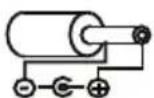
Power Supply
- Connect the supplied AC/DC adaptor to the DC In connector on the backside of the unit and plug the adaptor into a suitable wall power outlet.
• Ensure that the output power of the outlet matches the input power of the adaptor and the unit. - The unit is now in standby mode (clock display).
- To switch the unit on, press the ⏻ On/Standby button.
- Switch the unit into standby mode after use by pressing the ⏻ On/Standby button.
• To completely disconnect the unit from the power supply or when it is not used for a longer period of time, remove the AC/DC adaptor from the power outlet (clock setting will be lost).
Intelligent Power Saving System
This unit has a built-in power saving system which will automatically put the system into standby mode to reduce power consumption when it detects that the unit is not in use.
This automatic switch into standby mode will happen approximately 10-15 minutes after there is no input signal detected in BT or AUX In mode.
To reactivate the unit, press the ⏻ On/Standby button to switch it back on.
First Use & Basic Functions
Clock Setting
This unit has a built-in digital clock which is displayed at all times while the unit is being powered.
The clock can only be set while the unit is in standby mode (clock display).
- With the unit in standby mode, press and hold for 2 seconds the Clock Set button.
- "24H" or "12H" will be flashing in the display. Select your desired time format by pressing the Back or Next button.
- Confirm your selection by pressing the ⏻ Clock Set button again. Now the hours are flashing.
- Set the current hours by pressing the Back or Next button.
- Confirm your setting by pressing the ⏻ Clock Set button again. Now the minutes are flashing.
- Set the current minutes by pressing the Back or Next button.
- Confirm your setting by pressing the ⏻ Clock Set button again. The time is now set.
Note:
- When the clock is not set, the clock display will be flashing to indicate that the time needs to be set.
Alarm Setting
The alarm function can only work properly, if the clock is set correctly.
- With the unit in standby mode, press and hold for 2 seconds the Alarm button.
- The hour and "AL" will be flashing in the display.
- Set the desired hours by pressing the Back or Next button.
- Confirm your setting by pressing the Alarm button again. Now the minutes are flashing.
- Set the desired minutes by pressing the Back or Next button.
- Confirm your setting by pressing the Alarm button again. The alarm time is now set.
Activating/Deactivating the Alarm & Alarm Mode
After you have set the alarm time, you need to activate the alarm:
- With the unit still in standby mode, press the Alarm button once. The alarm time and "AL" will be shown in the display. After approximately 5 seconds the display will switch back to normal clock display, "AL" will remain in the display indicating that the alarm is active.
The buzzer will come on at the set alarm time.
- If you would like to be woken up by radio instead of buzzer, press the Alarm button again while the display is showing the clock and "AL". The display will now show the set alarm time, "AL" and a flashing "FM". After approximately 5 seconds the display will switch back to normal clock display, "AL" will remain in the display, while "FM" will disappear.
At the set alarm time, the unit will switch on to the last radio station played.
- To deactivate the alarm function, you need to press the Alarm button twice if the alarm is set to buzzer mode, or once if the alarm is set to radio mode. The set alarm time and "AL" will be shown. After approximately 5 seconds the display will switch back to the clock display and "AL" will disappear, indicating that the alarm is deactivated.
Note on the alarm volume:
- When buzzer is set for wake up mode, it will come on with a slowly increasing volume.
- When radio is set for wake up mode, it will come on at volume 15 if the previously set volume during radio mode was 15 or below. If a higher volume level than 15 was set, it will come on at this set volume.
Stopping an Active Alarm
To stop an active alarm, press the ⏻ On/Standby button. The alarm will come back on the next day at the set alarm time.
Snooze Function
The snooze function allows you to delay an active alarm for 9 minutes. To do so, press the Snooze button once while the alarm is active. The alarm will stop and come on again after 9 minutes.
The procedure can be repeated for approximately one hour.
Sleep Function
The sleep function enables you to set a countdown timer after which the unit will turn itself into standby mode automatically.
- At any time while the unit is operating, press and hold for 2 - 3 seconds the Sleep button to ac-
cess the sleep function. The "SL." symbol will be shown in the display.
- Then press the Sleep button repeatedly to select the duration of the sleep timer after which the unit should switch itself into standby. Each press of the button changes the duration as follows ("00" means that the sleep timer is deactivated):

flowchart
graph LR
    A["90 Min."] --> B["80 Min."]
    B --> C["70 Min."]
    C --> D["60 Min."]
    D --> E["50 Min."]
    E --> F["40 Min."]
    F --> G["30 Min."]
    G --> H["20 Min."]
    H --> I["10 Min."]
    I --> J["00"]
Dimmer
The brightness of the display can be set in 3 levels (High, Low, Off).
To adjust the brightness, repeatedly press the Dimmer button.
Radio
- Press the OnStandby button to switch the unit on.
- Press the Function button repeatedly to switch to radio mode. In radio mode "FM" and the frequency will be shown in the display.
- Select a desired radio station by pressing the ◀◀ Back or ▶▶ Next button repeatedly.
- To automatically search for the next available radio station, press and hold for 2 seconds the Back or Next button.
- Adjust the volume by pressing the Volume Up and Volume Down buttons.
- For the best FM reception completely unroll the FM wire antenna.
- By pressing the Pldy/Pause / Pairing button you can select between FM Mono and FM Stereo (if the selected station is broadcasting in stereo). If reception is poor it may be advisable to select mono mode to improve the clarity of the radio signal.
- To switch the radio off, press the OvStandby button.
Station Memory
This unit enables you to store up to 20 radio stations.
- Tune to a radio station which you would like to store.
- Press and hold for 2 seconds the Recall/Memory button. The display will show "C 01" with the preset number flashing.
- Select the desired preset number (01 - 20) on which you want to store the current frequency by pressing the HBack or Next button.
- Once you have reached the desired station number, confirm the setting by pressing the Recall/Memory button.
- Repeat steps 1 - 4 to store up to 20 radio stations.
Recalling a Stored Radio Station
- To recall a stored radio station, press the Recall/Memory button once while in radio mode.
- Select the desired preset number by pressing the ◀ Back or ▶ Next button.
Note:
- To clear the memory of any position, simply save a new station to the same preset number.
Bluetooth® Wireless Playback
This unit can wirelessly stream audio from any Bluetooth ^® device within 10 meters (30 feet). Obstacles such as walls may limit this range.
Simply pair the device and enjoy wireless playback and control from your compatible Bluetooth ^® device.
Preparing the Unit
- Press the On/Standby button to switch the unit on.
- Press the Function button repeatedly to switch to BT mode.
- The BT symbol will be flashing to indicate that pairing is pending. The BT symbol will be shown steadily when paired with an external device.
Note: Only one device can be paired and played at a time.
Preparing Your Phone or Other Bluetooth® Device
- Turn on the Bluetooth ^ function in your device. Please refer to your device's manual for further details.
Establishing the Connection
- Go to your device's Bluetooth ^ settings.
- Add or search for devices.
- When the model no. "UR 1320BT" appears, select the device.
- If asked for a pass code, enter "0000".
Note: This is a one-time event per device. To pair your unit to another device repeat the above preparation and connection steps.
Disabling the Connection
- To unpair a Bluetooth ^ device that is already paired, press and hold the Pairing button for a few seconds.
Volume Control
Increase and decrease the volume using the Volume Up and Volume Down buttons on the unit and using the volume controls on your device.
Note: If there is no playback, ensure that neither the unit nor your Bluetooth ^® device are set to zero volume and the right device for playback is paired.
Playback Control
Press the ▶May/Pause button to start or pause and resume playback.
To skip to the previous or next track, press the ◀◄ Back or ►► Next button.
Troubleshooting
- There is no Bluetooth ^ link between the speaker and the external device
Delete the UR 1320BT name entry from your Bluetooth ^® device paired memory list and re-pair your device with the speaker.
Ensure that both the speaker and your Bluetooth ^® device are not connected to any other devices.
- Bluetooth ^ link is established and paired between the devices but there is no music
Make sure that the volume of the speaker and the external device is not set to zero (muted, set to vibrate only or set to any other silence mode).
Additional Guidelines for Bluetooth ^® Devices
- The short wave radio signals of a Bluetooth and medical devices.
- Switch off the device where it is prohibited.
® device may impair the operation of other electronic
Compatibility Disclaimer
- Wireless performance is dependent on your device's Bluetooth ^ wireless technology. Refer to your device's user manual.
- Compatibility with all devices and media types is not guaranteed.
- The manufacturer cannot be held liable for any loss or leakage of or damage to data.
Mobile Phone Charging via USB
You can charge your phone or other devices that can be charged via USB with this product. Simply connect your device to the USB connector on the back of the unit (output: 5V --fA).
Note:
- The USB connector on the unit is only for charging external devices. The unit can neither communicate with other devices via USB nor play music files from USB drives.
AUX Input
You can connect the audio output of an external device such as an MP3 player to this unit to listen to the sound of that device through the amplifier of this music system.
- To connect the external device please use a standard stereo audio cable (3.5 mm to 3.5 mm plugs) (not included) to connect the headphone out or audio line out of the external device to the AUX input socket of this unit.
- Press the On/Standby button to switch the unit on.
- Press the Function button repeatedly to switch to AUX mode. When in AUX mode, the display will show "AUX" and the clock.
- Switch the external device (e.g. MP3 player) on.
- Start playback of the external device and adjust the volume control of the main unit to the desired level.
- Remember to switch off the unit when you are finished using the external device.
Specifications
Power Supply: DC 12V--1.5A (external adaptor)
USB Output: =5V 1A
Dimensions (WxDxH) ca.: 334 x 132 x 96 mm
Technical specifications and design may change without notice.
CE
We, Karcher AG, herewith confirm that this product is in line with the basic requirements of regulation 1999/5/EG and further relevant regulations.
A copy of the declaration of conformity can be obtained at the following address:
Or online at the following link:
The Bluetooth ^® word mark and logos are registered trademarks owned by Bluetooth SIG, Inc. and any use of such marks by Karcher is under license. Other trademarks and trade names are those of their respective owners.
Bluetooth® QDID: B020022
Karcher
www.karcher-products.de
- CAUTION
- Batteries
- Disposal of Used Electrical & Electronic Equipment
- NOTES ABOUT THIS INSTRUCTION MANUAL
- FURTHER NOTES ON THE DEVICE
- Setting a safe volume level
- Condensation
- Saving energy
- Unpacking
- Location of Controls
- Power Supply
- Intelligent Power Saving System
- First Use & Basic Functions
- Clock Setting
- Note:
- Alarm Setting
- Activating/Deactivating the Alarm & Alarm Mode
- Note on the alarm volume:
- Stopping an Active Alarm
- Snooze Function
- Sleep Function
- Dimmer
- Radio
- Station Memory
- Recalling a Stored Radio Station
- Bluetooth® Wireless Playback
- Preparing the Unit
- Preparing Your Phone or Other Bluetooth® Device
- Establishing the Connection
- Disabling the Connection
- Volume Control
- Playback Control
- Troubleshooting
- Additional Guidelines for Bluetooth ® Devices
- Compatibility Disclaimer
- Mobile Phone Charging via USB
- AUX Input
- Specifications
- CE
- Karcher
Brand : Karcher Audio
Model : UR 1320BT
Category : Alarm Clock