KULED19XXXYA - TV Kogan - Free user manual and instructions
Find the device manual for free KULED19XXXYA Kogan in PDF.


User questions about KULED19XXXYA Kogan
0 question about this device. Answer the ones you know or ask your own.
Ask a new question about this device
Download the instructions for your TV in PDF format for free! Find your manual KULED19XXXYA - Kogan and take your electronic device back in hand. On this page are published all the documents necessary for the use of your device. KULED19XXXYA by Kogan.
USER MANUAL KULED19XXXYA Kogan
natural_image
Front view of a black Kogan TV monitor with a red stand (no visible text or symbols on the screen)Contents
SAFETY AND WARNINGS....2-4
BASE STAND ....5ASSEMBLY INSTRUCTION
WALL MOUNTING INSTALLATION GUIDELINES....5
INSTALLATION....6-9
REMOTE CONTROL....10-11
OPERATION....12-17
TROUBLE SHOOTING.... 18
TECHNICAL SPECIFICATIONS....19
Important Safety Instructions
Warning: To reduce the risk of electric shock, do not remove the cover or back. There are no user-serviceable parts inside. Refer servicing to qualified personnel.
Warning: To prevent fire or electric shock hazard, do not expose the unit to rain or moisture.
Do not expose the Adaptor and product to water (dripping or splashing) and no objects filled with liquids, such as vases, should be placed on the unit.
Keep the product away from direct sunlight and heat source such as radiators or stoves.
Do not block the ventilation openings. Slots and openings on the unit are provided for ventilation. The openings should never be blocked by placing your product on a cushion, sofa or other similar surface.
Do not place the product on unstable cart, stand, tripod, bracket or table. The unit may fall, resulting in possible damage or injury.
Never place heavy or sharp objects on the panel or frame.
Only use the AC adapter included with product. Using any other adapter will void your warranty.
Unplug the power from the outlet when the unit is not in use.
Attention should be drawn to the environmental aspects of battery disposal.
WARNING: The battery (battery or batteries or battery pack) shall not be exposed to excessive heat such as sunshine, fire or the like.
WARNING: Excessive sound pressure from earphones or headphones can cause hearing loss.
WARNING: Only use attachments/accessories specified provided by the manufacturer, the product is supplied by AC adapter, the AC adapter is used as disconnect device, the disconnect device shall remain readily operable.
natural_image
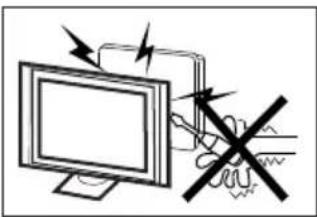
Illustration of a computer monitor with a crossed-out cable and lightning bolts, no text or symbols presentHigh voltages are used in the operation of this television receiver. Do not remove the cabinet back from your set.
Refer servicing to qualified service personnel.
natural_image
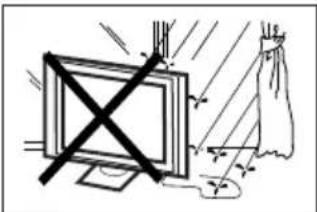
Illustration of a TV with a black X symbol crossed out, next to a curtain and falling figure (no text or symbols)To prevent fire or electrical shock hazard, do not expose the television receiver to rain or moisture.
natural_image
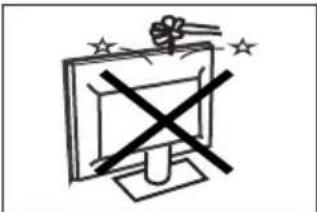
Simple line drawing of a computer monitor with a cross symbol on its screen (no text or labels)Do not drop or push objects into the television cabinet slots or openings. Never spill any kind of liquid on the television receiver.
natural_image
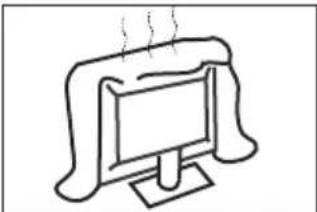
Simple line drawing of a computer monitor with a stand and roof, emitting steam (no text or symbols)Do not block the ventilation holes in the back cover.
Adequate ventilation is essential to prevent failure of electrical components.
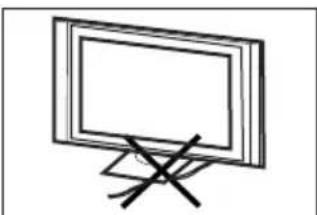
natural_image
Simple line drawing of a flat-screen monitor with a black X mark on the stand (no text or symbols)Do not trap the power supply cord under the television receiver.
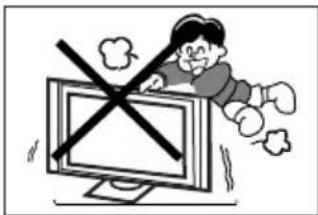
natural_image
Cartoon illustration of a person lying on a computer monitor with a crossed-out X symbol (no text or symbols present)Never stand on, lean on, or suddenly push the television or its stand. You should pay special attention to children. Serious injury may result if it falls.

natural_image
Simple line drawing of a geometric structure with intersecting lines and a rectangular frame (no text or symbols)Do not place your television on an unstable cart, stand, shelf or table. Serious injury to an individual, and damage to the television may result if it falls.
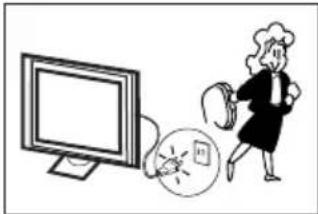
natural_image
Illustration of a person running away from a computer monitor with a bug symbol nearby (no text or symbols present)When the television receiver is not used for an extended period of time, it is advisable to disconnect the AC power cord from the AC outlet.
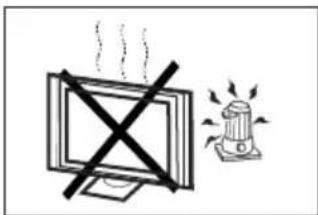
natural_image
Simple line drawing of a monitor with a cross symbol crossed out, next to a megaphone emitting sound waves (no text or symbols)Avoid exposing the television receiver to direct sunlight and other sources of heat. Do not stand the television receiver directly on other products which give off heat, e.g. video cassette players and audio amplifiers. Do not place naked flame sources, such as lighted candles on the television.
text_image
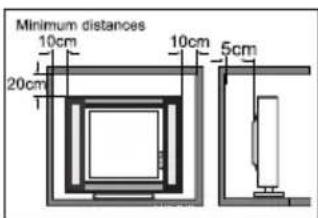
Minimum distances 10cm 10cm 5cm 20cmIf the television is to be built into a compartment or similar enclosure, the minimum distances must be maintained. Heat build-up can reduce the service life of your television, and can also be dangerous.
Base Stand Assembly Instruction
-
Place the TV with the display side down on a flat surface. Use a cloth to protect. Locate the bottom at the stand.
-
Fix the bottom with turning the screw tightly on the stand.
WALL MOUNTING INSTALLATION GUIDELINES
For wall mounting with the optional bracket, please read the following instruction and the bracket instruction. Make sure qualified service personnel perform the operation. KOGAN bears no responsibility for improper mounting that results in accident or injury.
This television can be wall mounted as follows:
- Place the LED LCD Television onto a solid surface. Please place some soft material over the front of the screen to protect it from any damage.
-
Remove the screws from the lower part of the television, where the base joins to the TV, and take away the stand (put the stand somewhere safe for future use).
-
Use the four screws provided to fix the TV onto a wall mounting bracket (not included) via the four VESA standard holes on the back of the television.
100 mm
100 mm
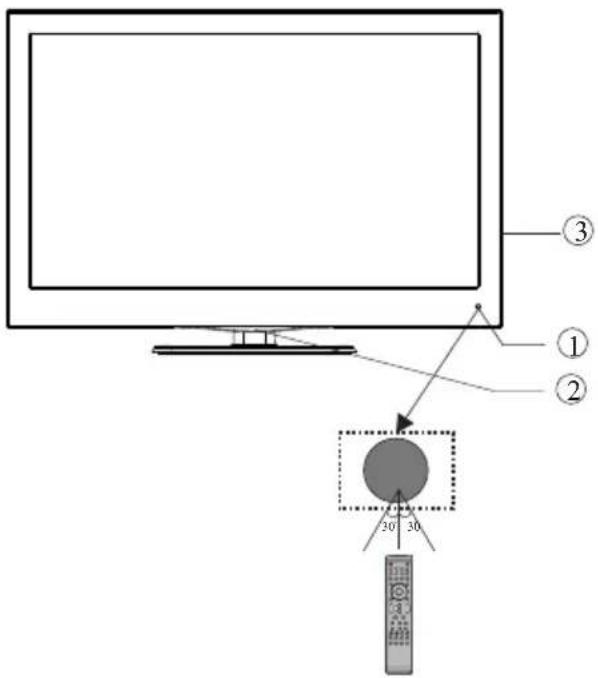
Front panel
text_image
Diagram showing a monitor setup with labeled components and a remote control, including numbered parts ①, ②, and ③.1: Remote control sensor.
2: Indicator LED: BLUE ○ = POWER ON. RED ● = Stand-by.
3: Key board (on side of TV).
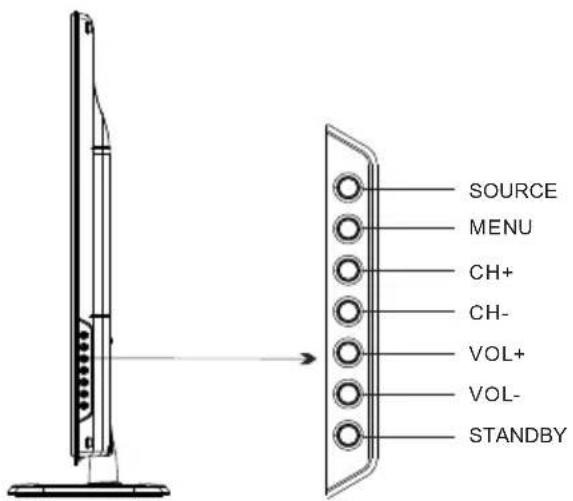
KEYBOARD
text_image
SOURCE MENU CH+ CH- VOL+ VOL- STANDBY- SOURCE:
Displays the input source Menu.
- MENU:
Displays the main MENU.
- CH+/CH-
In TV mode, press "CH+" or "CH-" to change the channel up or down. In MENU mode, press "CH+" or "CH-" to select items.
- VOL+/VOL-
Adjusts the sound level.
In MENU mode, press "VOL+" or "VOL-" to adjust the item that you have selected.
- STANDBY
Once the TV's main power switch has been activated, press this button to turn the unit ON from STANDBY mode. Press it again to return the set back to STANDBY.
REAR AV Connections

text_image
AV L R Y Pb Pr POWER HDMI2All the terminals are(from left to right):
, Audio input, Power socket, YPbPr (component video) input, AV composite
HDMI2 input.
Note: 1. AV and YPbPr share one audio channel.
- When the HDMI2 port receives a DVI signal, the audio signal is received from the YPbPr/AV Audio channel.
REAR AV Connections(SIDE)

text_image
COMMON INTERFACE (CI) HDMI1 USB PC AUDIO SCART VGA ANTAll the terminals are(from left to right):
HDMI1 input, USB, PC Audio input, VGA input, CI ,SCART, Antenna socket.
Note: When HDMI1 receives a DVI signal, the audio signal is received from the PC Audio channel.
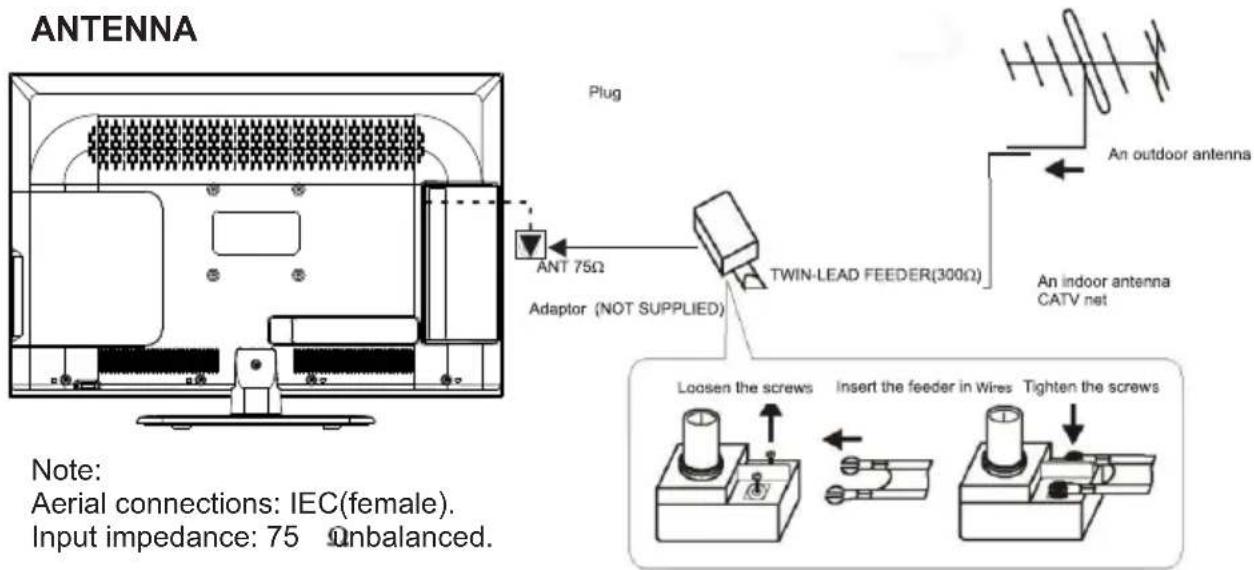
ANTENNA
text_image
ANTENNA Plug ANT 75Ω Adaptor (NOT SUPPLIED) TWIN-LEAD FEEDER(300Ω) An outdoor antenna An indoor antenna CATV net Loosen the screws Insert the feeder in Wires Tighten the screws Note: Aerial connections: IEC(female). Input impedance: 75 Unbalanced.Note:
PC
STEPS:
Be sure both the TV and computer are set to Power off.
- Connect VGA and audio cable.
- Connect the power cord.
- Power on the TV, switch to PC mode.
- Power on the PC.
This sequence is very important.
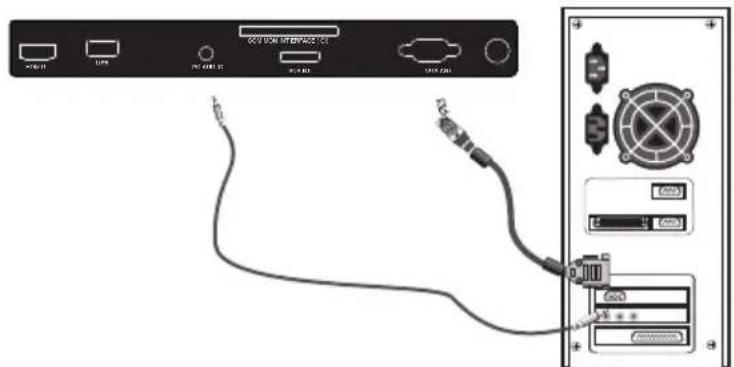
text_image
Diagram showing cable connection between a network interface with labeled ports and connectors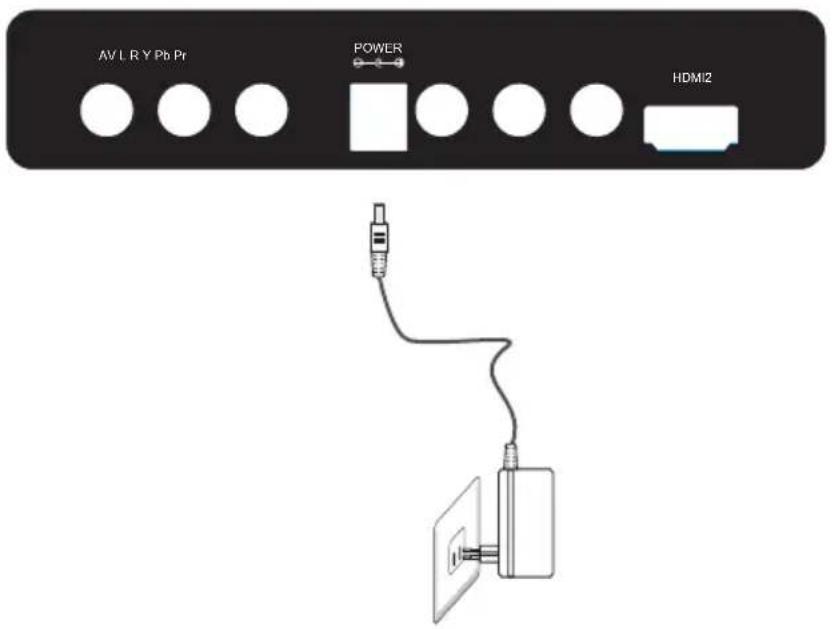
text_image
AV L R Y Pb Pr POWER HDMI2PC
PRESET MODE
| RESOLUTION | V.Freq.(Hz) H.Freq.(KHz) | ||
| 1 | 720*400 | 70 | 31.47 |
| 2 | 640*480 | 60 | 31.47 |
| 3 | 800*600 | 56 | 35.156 |
| 4 | 800*600 | 60 | 37.88 |
| 5 | 800*600 | 72 | 48.08 |
| 6 | 1024*768 | 60 | 48.36 |
| 7 | 1024*768 | 70 | 56.48 |
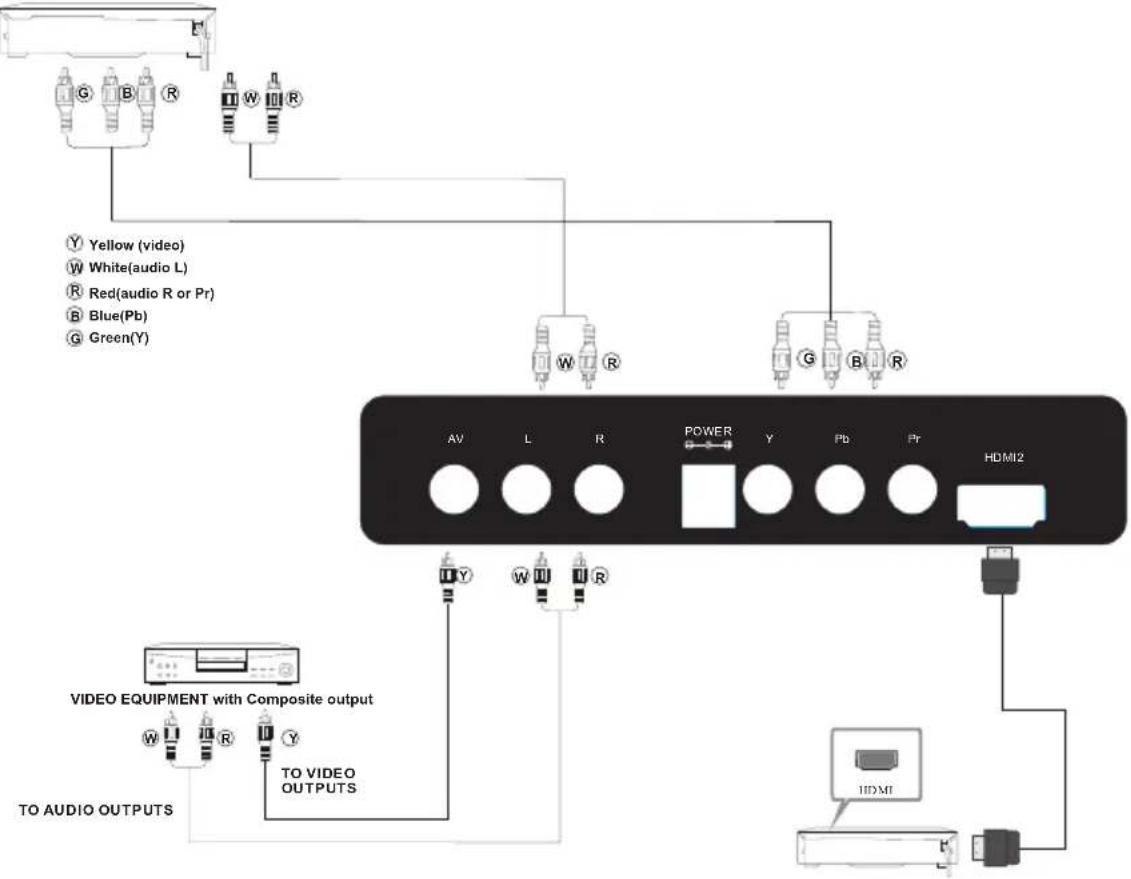
AV EQUIPMENT
You can use the input terminals on TV set rear as follows.

text_image
COMMON INTERFACE (CI) HDMI1 USB PC AUDIO SCART VGA ANT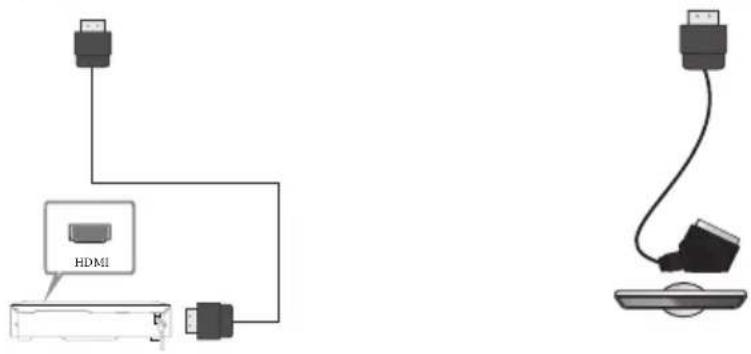
text_image
HDMIVIDEO EQUIPMENT with YPbPr (component) output
flowchart
graph TD
    A["Video Equipment with Composite output"] --> B["AV"]
    A --> C["L"]
    A --> D["R"]
    A --> E["POWER"]
    A --> F["Y"]
    A --> G["Pb"]
    A --> H["Pr"]
    A --> I["HDMI2"]
    J["TO AUDIO OUTPUTS"] --> K["VIDEO EQUIPMENT with Composite output"]
    L["Yellow (video)"] --> M["Yellow (video)"]
    N["White(audio L)"] --> O["White(audio L)"]
    P["Red(audio R or Pr)"] --> Q["Red(audio R or Pr)"]
    R["Blue(Pb)"] --> S["Blue(Pb)"]
    T["Green(Y)"] --> U["Green(Y)"]
    V["HDMI1"] --> W["HDMI1"]
It can be connected to the following appliances: VCR, multi disc player, DVD, camcorder, video game or stereo system, etc.....
YPbPr can support these video formats: 480i,576i,480p,576p,720p,1080i.(component video)
REMOTE CONTROL
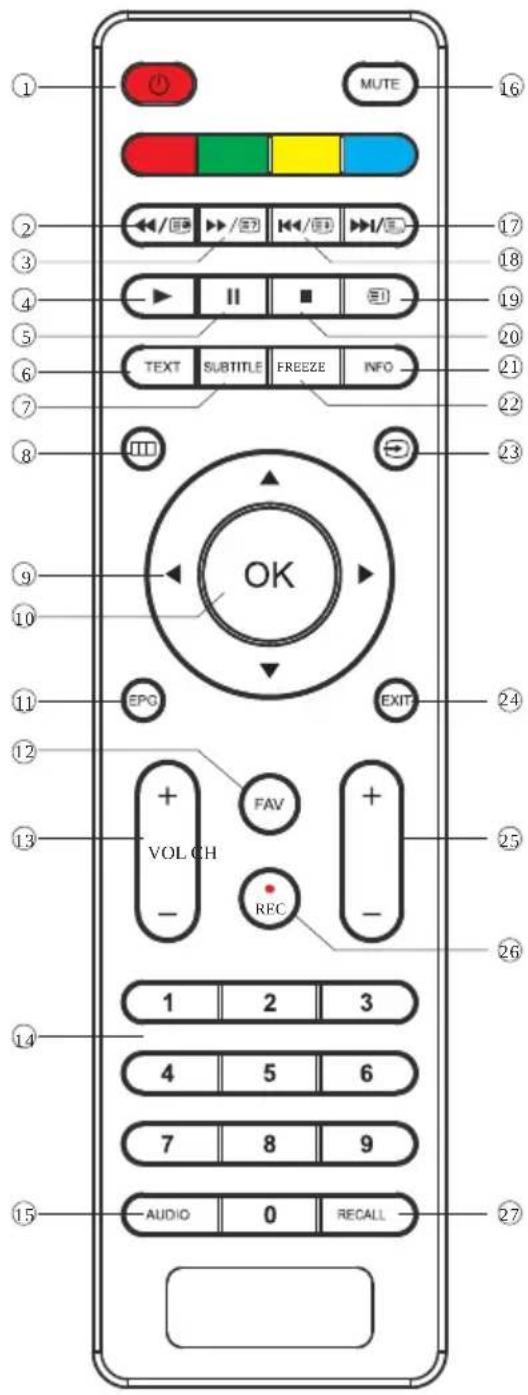
text_image
MUTE 16 2 17 3 4 19 5 20 6 TEXT SUBTITLE FREEZE INFO 21 7 8 22 23 9 10 OK EPO EXIT 24 12 13 + FAV + VOL CH REC - - 25 26 1 2 3 4 5 6 7 8 9 AUDIO 0 RECALL 15 271: POWER: To set the TV to standby or power on.
2: In USB mode, used as reverse key, in teletext mode used as subpage key.
3:▶▶/▶ In USB mode, used as forward key, in teletext mode used as reveal key.
4: ▶: Press in USB Mode to begin or continue playback.
5: II: Press in USB Playback Mode to pause playback.
6:TEXT:To enter or TELETEXT.
7: SUBTITLE: To turn on subtitles press the subtitle button in DTV mode.
8: Displays the main on-screen menu.
9 : CURSOR: To move within the menu.
10:OK: Confirms selection.
11:EPG: To display information about the program being viewed and what's on next in DTV mode.
12:FAV: To access your favourite channels list in TV or DTV mode.
13:VOL+/- : To adjust sound level.
14: NUMERIC KEY: For direct access to channels.
15:AUDIO: To select the available audio language of TV programs.
16:MUTE: To disable or enable the sound output.
17: ▶▶/□: In USB mode, used as next key, in teletext mode used as list key.
18: In USB mode, used as previous key, in teletext mode used as hold key.
19: In teletext mode used as index.
20: ■: Press to stop play in USB mode.
21:INFO: To display the program information of the show you are watching, press the info button.
22:FREEZE: Press to freeze the picture you are watching.
23: ✉ Press to display and select the available video sources.
24:EXIT: To return to the previous menu or exit menu.
25:CH+/CH-: To access the next or previous channels.
26:REC:Press to record the TV program you are watching in DTV Mode.
27:RECALL: DTV Mode: RECALL:Jumps to last channel viewed.
Picture 1:
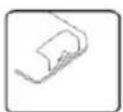
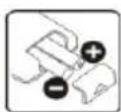
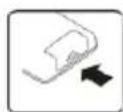
Picture 2:
TELETEXT
Teletext is an information system broadcast by certain channels which can be consulted like a newspaper. It also offers access to subtitles for viewers with hearing problems or who are not familiar with the transmission language (cable networks, satellite channels, etc.)
| Press: | You will obtain : |
| TEXT | This is used to call or exit teletext modes. The summary appears with a list of items that can be accessed. Each item has a corresponding 3 digit page number. If the channel selected does not broadcast teletext, the indication 100 will be displayed and the screen will remain blank (in this case, exit teletext and select another channel). |
SELECTING A PAGE 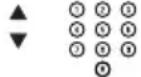 | Enter the number of the page required using the 0 to 9 up/down. Example: page 120, enter 120. The number is displayed top left, the counter turns and then the page is displayed. Repeat this operation to view another page. If the counter continues to search, this means that the page is not transmitted. Select another number. |
DIRECT ACCESS TO THE ITEMS  | Coloured buttons correspond to the colours at the bottom of the screen. The 4 coloured keys are used to access the items or corresponding pages. The coloured areas flash when the item or the page is not yet available. |
| INDEX | This returns to the contents page (usually page 100). |
| SUB PAGE | Certain pages contain sub-pages which are automatically displayed successively. This key is used to stop or resume sub-page acquisition. The indication appears top left. |
| HOLD | To freeze the page. |
| REVEAL | To display or hide the concealed information (games solutions). |
| LIST | The user can set four favourite pages to be directly linked to the four color keys. While list mode is activated, it is not possibility to use TOP or FLOF navigation with the colourkeys. The favourite page numbers should be stored and restored to/from nonvolatile memory for each channel by the system software. |
Installation Guide
text_image
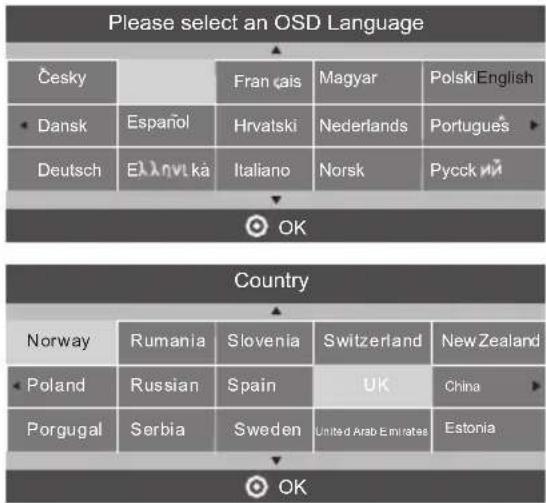
Please select an OSD Language Česky Français Magyar Polski English Dansk Espanöl Hrvatski Nederlands Portugues Deutsch Eklnvt ká Italiano Norsk Pycck nǐ OK Country Norway Rumania Slovenia Switzerland New Zealand Poland Russian Spain UK China Porgugal Serbia Sweden United Arab Emirates Estonia OKThis screen only appears when the TV is turned on for the first time, or reset to factory settings. You can choose language, country and auto tuning programs. After tuning, the screen will skip to the first DTV program.
To select the MENU mode, press the menu button on the side keyboard of the TV, or press the TV/menu button on the remote control.
1.CHANNEL MENU
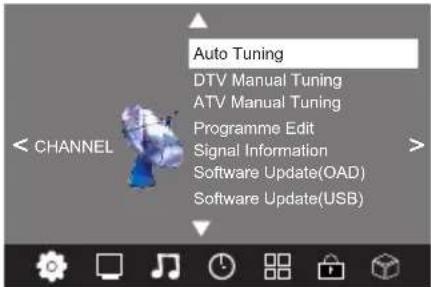
The first item of the MENU is channel menu (for ATV or DTV source only). ATV = Analogue TV, DTV = Digital TV.
text_image
Auto Tuning DTV Manual Tuning ATV Manual Tuning Programme Edit Signal Information Software Update(OAD) Software Update(USB)You can search channels and edit programs here.
1). Auto tuning:
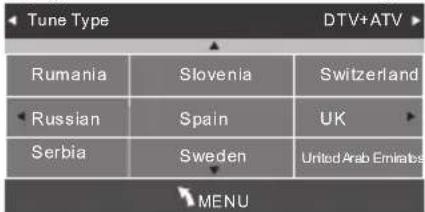
Search all the channels automatically (you can select ATV and DTV)
text_image
Tune Type DTV+ATV Rumania Slovenia Switzerland Russian Spain UK Serbia Sweden United Arab Emirates MENUPress ◀▶▼▲ to select country at first, then press the OK button to start auto tuning.
text_image
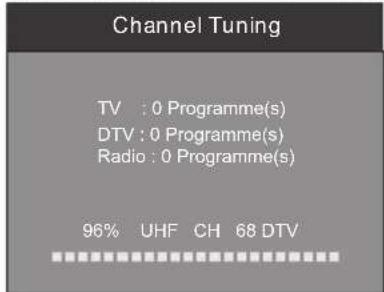
Channel Tuning TV : 0 Programme(s) DTV : 0 Programme(s) Radio : 0 Programme(s) 96% UHF CH 68 DTVNOTE:
All the channels including ATV, DTV and Radio can be tuned at once, if the Tune Type is set to DTV+ATV. Any previously stored channels will be deleted after auto tuning is carried out.
After auto tuning, the receiver will skip to the first DTV channel.
2).DTV Manual tuning:
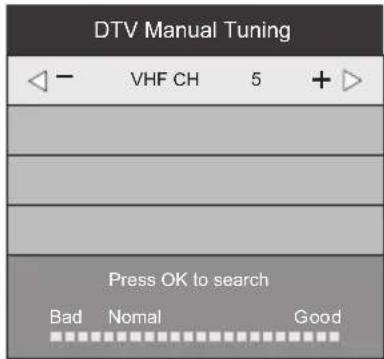
You can select a DTV channel then find the program in this channel.
Press ◀▶to select the channel, then press OK to search the programs.
NOTE:
The Bad Normal Good bar graph on this screen shows signal intensity.
text_image
DTV Manual Tuning VHF CH 5 + Press OK to search Bad Nomal Good3). ATV Manual tuning :
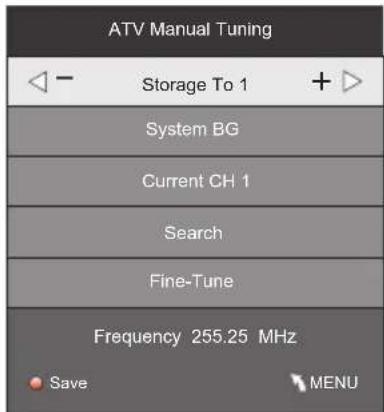
You can change the sound system, search the analog TV channels and fine tune them, then store the channels you selected.
text_image
ATV Manual Tuning Storage To 1 + System BG Current CH 1 Search Fine-Tune Frequency 255.25 MHz Save MENUNOTE:
Press the teletext red button on the remote control to store the channels after manual tuning.
4). Program edit:
You can Delete, Rename, Move, Skip, or FAV most TV programs.

Delete
Press the teletext red button, the program in the cursor will be deleted.

Rename:
You can only rename ATV programs.
Move the cursor to the program, press the teletext green button to rename the program.
Press ▼▲to choose the character. Press ◀ to move the cursor.
Press MENU button to exit edit, Press EXIT to exit the menu.
Note: ATV program names can only be 5 characters long, DTV program names can be up to 25 characters.

Move
Use the Arrow Buttons to select the channel you wish to move. Then press the Yellow Button to select Move function. Once active, enter the number button and then press OK to confirm.

Skip
Press ▼▲ to choose the program, press the teletext blue button to skip this program, the Ⓤ symbol will show on the right side of the program.
Choose the skipped program, press the blue button again, you can cancel the skip and the symbol will disappear.

Favourite
Press ▼▲ to choose the program, press the FAV button and it will show on the right side of the program. Choose the FAV program, press FAV button again, you can cancel the FAV and will disappear.
Once your favorite group is created, you can press the FAV key to quickly access your favourite channel.
2. PICTURE MENU
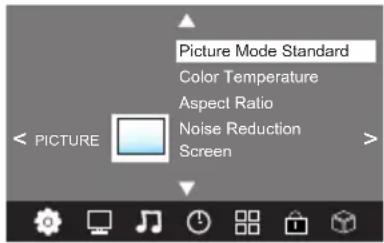
The second item of the MENU is PICTURE MENU. You can adjust picture effects here, such as contrast, brightness, etc.
Press ▼▲ to move, press OK to adjust.
text_image
Picture Mode Standard Color Temperature Aspect Ratio Noise Reduction Screen < PICTURE >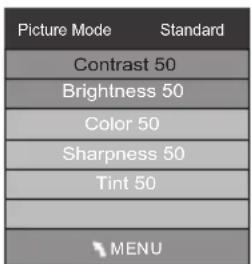
text_image
Picture Mode Standard Contrast 50 Brightness 50 Color 50 Sharpness 50 Tint 50 MENU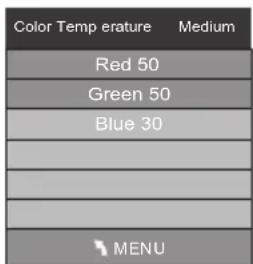
text_image
Color Temperature Medium Red 50 Green 50 Blue 30 MENUNOTE:
1). Tint is available in NTSC system only.
2). There are four color temperature modes that can be selected: medium, warm, cool, user.
3). The Screen option is only available in PC mode, which allows you to adjust Horizontal position, vertical position, size and phase.
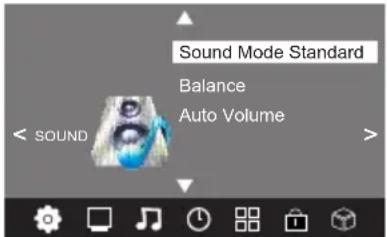
3.SOUND MENU
The third item of the MENU is the SOUND MENU.
You can adjust the sound effect here such as treble, bass, balance etc.
Press ▼▲ to move, press OK to adjust.
text_image
Sound Mode Standard Balance Auto Volume < SOUND >Note:
Auto volume: only available when the input signal volume is too large or there is distortion.
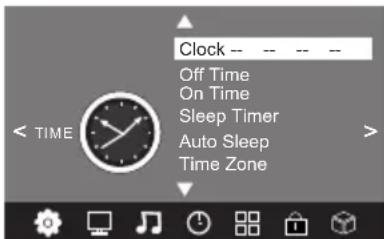
4.TIME MENU
The fourth item of the menu is the TIME MENU. You can adjust the clock, power on/off time, sleep time etc. Press ▼▲to move, press OK to adjust.
text_image
Clock -- -- -- Off Time On Time Sleep Timer Auto Sleep Time ZoneNOTE:
If within 10 minutes there is no signal, the TV will auto sleep, if Auto Sleep is set ON. The clock time can be set from the DTV system.
5. OPTION MENU
To enter the Option Menu, press MENU button and then press ◀ or ▶ buttons to select the Option Menu. Once in Option Menu, press ▼ or ▲ buttons to select the settings you wish to adjust. Press MENU button to return to the Main Menu.

text_image
OSD Language English Audio Languages Subtitle Languages Country Australia PVR File System Restore Factory DefaultNOTE:
Restore Factory Default will clear all the programs and password.
In PVR File System Menu you will be asked to format your USB Disk or Hard Disc for PVR Operation.
| Select Disk C: |
| Check PVR File System Start |
| USB Disk |
| Format |
| Time Shift Size |
| Speed |
| Free Record Limit 6 Hr. |
Select Disc
To view and select the USB file or the allocated space on your Hard Disc that you would like to record to, press OK button to enter the Select Disc Sub-Menu and then press or◀buttons on your remote control to select the particular partition/file for recording.
Press the Menu Button to return to the Main Menu.
Check PVR File System
Press the OK Button to start checking the file system of your USB storage or Hard Disk. Once Success is shown after checking, you will then be able to begin recording or or use Time Shift function. If FAIL is shown after checking, you then need to format your USB or Hard Disc and to be able to record or use Time Shift.
Format
When you format your USB or Hard Disc partition any saved data will be lost. Please ensure that you start with a blank partition on your Hard Disc to ensure you don't lose any data.
text_image
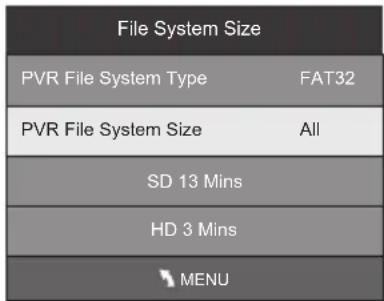
File System Size PVR File System Type FAT32 PVR File System Size All SD 13 Mins HD 3 Mins MENUPVR File System Type
There are two types of format s: FAT32 and Hi Speed Format. You can press or <buttons to choose the type of formatting. If FAT32 is selected, you will have to format whole size of your USB or the allocated partition for recording. If Hi Speed Format is selected, you will then be able to press or <buttons to select the size you wish to use (for example 1G, 10G, 20G... or All). Once a particular size is booked for recording, you will be able to use the remaining space of your USB or Hard Disc for other data storage.
Please note no matter which size is booked for recording, all the data in the allocated partition of the Hard Disc will be lost after formatting.
Speed
This will show the supported speed of recording.
Record Limit
This will show the approximate time you will be able to record on to your USB or Hard Disc.
FACTORY RESET NOTE:
If you wish to reset your TV, please select the Restore Factory Default option, this will clear all settings.
6. LOCK MENU
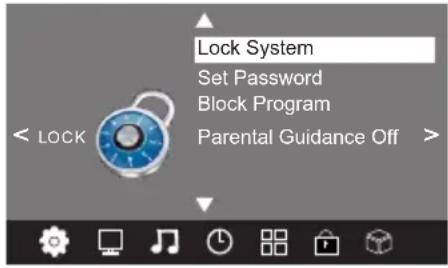
To enter the LOCK Menu, press MENU button and then press or buttons to select the LOCK Menu.
The default password is 6666.
Please set a new password so it is easy to remember. Follow the on screen steps to set.
text_image
Lock System Set Password Block Program Parental Guidance Off >Once the Parental Guidance mode is turned on, you can set viewing restrictions during DTV TV reception based on the programs classification (eg. G, PG, M, MA etc).
NB. The viewing restrictions do not apply to the DVD player.
7. USB MENU
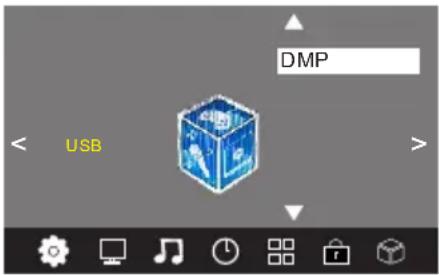
To enter the USB Menu, press MENU button and then press on buttons to select the USB Menu. This is where you will be able to view and play various low data-rate USB media files.
text_image
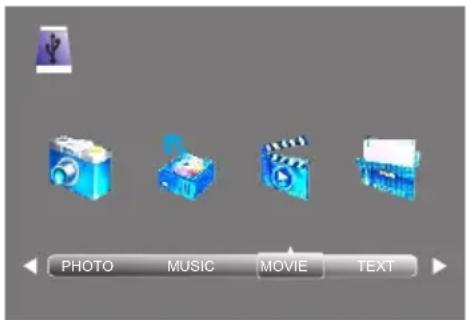
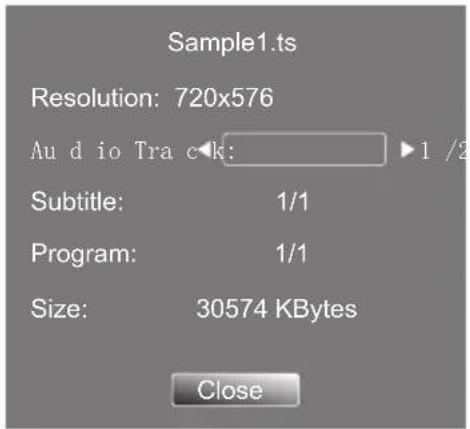
DMP USBPress the OK button to enter the basic DMP (Digital Media Player) Menu and then use the or buttons on the remote control to select the file playback type (eg. Photo, Music, Movie, Text), then press OK. You can preview a selected file by highlighting it using the cursor arrows and pressing OK. Press the play button to show it in full-screen size. Press the MENU/INFO button to bring up a controls tab at the bottom of the screen, allowing easier control of play, pause, stop and repeat modes. Press the EXIT button to progressively return back to the DMP menu.
text_image
PHOTO MUSIC MOVIE TEXTThe supported formats are as below:
Photo: JPEG (Press Play to start slideshow. For best results use 1920 x 1080 pixel images).
Music: MP3
Movie: Small AVI files (Not all .AVI formats are supported).
Text: TXT (eg. Windows Notepad).
text_image
Sample1.ts Resolution: 720x576 Audio Track: ▶ 1 /2 Subtitle: 1/1 Program: 1/1 Size: 30574 KBytes Close8.EPG Menu (Electronic Program Guide).
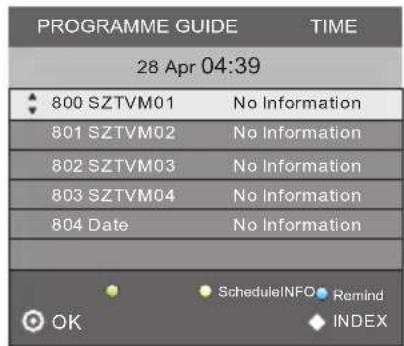
The EPG Menu is used to look at what is being broadcasted in DTV or Radio modes. Press the EPG Button to access the EPG Menu. You will receive detailed program information of the channel you are currently watching as well as programs in the near future.
text_image
PROGRAMME GUIDE TIME 28 Apr 04:39 800 SZTVM01 No Information 801 SZTVM02 No Information 802 SZTVM03 No Information 803 SZTVM04 No Information 804 Date No Information OK ScheduleINFO Remind INDEX1. INFO
Use to select a program and then press the Green Button or INFO key on the Remote to display the highlighted program's information.
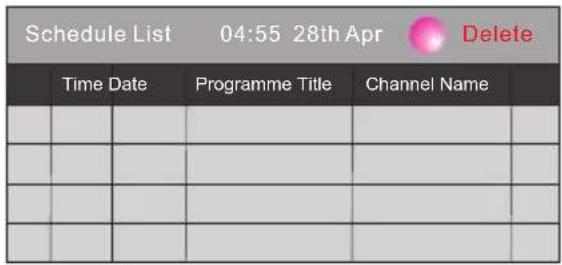
2. Schedule
Press the teletext yellow key to list all the reminder schedule, press ▼▲ to choose the list, press red key DELETE to delete the schedule list, Press EPG to return to EPG menu.
text_image
Schedule List 04:55 28th Apr Delete Time Date Programme Title Channel Name / / / / / / / /3. Remind
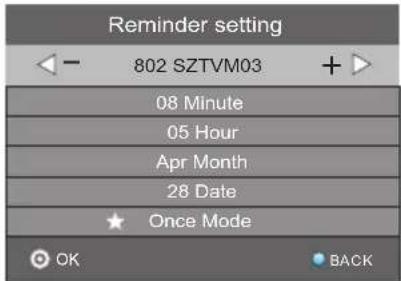
Press the Blue Button to book a program for future viewing and add to the schedule list.
text_image
Reminder setting 802 SZTVM03 08 Minute 05 Hour Apr Month 28 Date Once Mode OK BACK| Trouble phenomenon Symptom | Inspection Check | |||
| Picture Audio | ||||
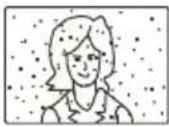 | Snow Noise | 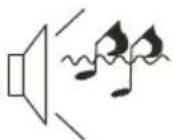 | antenna position, direction or connection | |
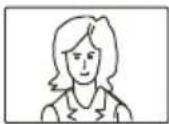 | Ghost | 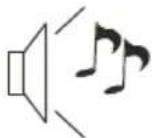 | Normal audio | antenna position, direction or connection |
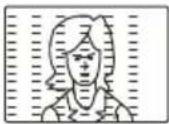 | Interference | 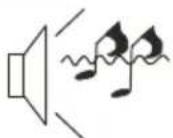 | Noise | electronic equipment, car/motorcycle, fluorescent light |
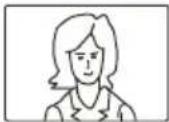 | Normal Picture | 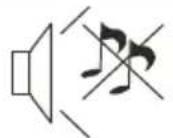 | Mute | Volume (check if mute is activated or if the audio system connections are not correct) |
 | No picture Mu | 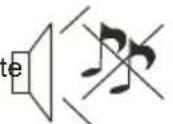 | Mains Power cord is not insertedMains Power switch is not activatedContrast and brightness/volume setupPress Power/Stand-by key on the remote control | |
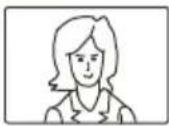 | No colour Norr |  | our control | |
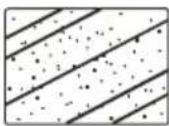 | Picture breaking up | 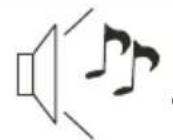 | Normal audio or weak | retune channel |
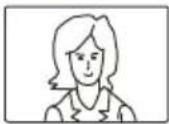 | No colour |  | Noise | TV system |
| LED : | |||
| Viewing Picture Size (diagonal) | 18.5" (47cm) | 21.5" (55cm) 23 | 6" (59.9cm) |
| Resolution | 1366x768 | 1920x1080 1920 | x1080 |
| Aspect Ratio | 16:9 | ||
| TV: | |||
| TV system | Digital TV: DVB-TAnalog TV: PAL/SECAM | ||
| DVB-T decode | Audio: MPEG2 Audio Layer I&IVideo: MPEG2 Transport MP@HL | ||
| DVB-T de-modulation | Demodulator : COFDMOFDM Mod.: 2K, 8K FFT, SFN and MFNPacked Carriers: 2K/8KGuard Interval: 1/4, 1/8, 1/16, 1/32 | ||
| Terminals: | |||
| HDMI Inputs | 2 | ||
| VGA Input | 1 | ||
| Audio (L+R) Input | 1 | ||
| PC Audio Input | 1 | ||
| Composite Video Input | 1 | ||
| Y PbPr (Component video)Input | 1 | ||
| Mini Scart | 1 | ||
| Commen Interface(CI) input | 1 | ||
| USB input | 1 | ||
| Others: | |||
| Input Power Voltage | DC 12V 3A (Power adaptor supplied) | ||
| Power consumption | 35 W | ||
| Audio Output Power (THD≤ 7%) | 2 x 3W | ||