KAMN49DFUCLA - Screen Kogan - Free user manual and instructions
Find the device manual for free KAMN49DFUCLA Kogan in PDF.


| Product Type | Screen (Monitor) |
| Brand | Kogan |
| Model | KAMN49DFUCLA |
| Screen Size | 49 inches (diagonal) |
| Resolution | 3840 x 1080 (Super Ultrawide) |
| Aspect Ratio | 32:9 |
| Refresh Rate | 144 Hz |
| Response Time | 1 ms (MPRT) |
| Panel Type | VA |
| Curvature | 1800R |
| Connectivity | 2x HDMI 2.0, 2x DisplayPort 1.4, USB-C (with 65W PD), USB 3.0 Hub |
| Built-in Speakers | Yes, 2 x 5W |
| VESA Mount | 100 x 100 mm |
| Dimensions (W x H x D) with Stand | 1198 x 529 x 282 mm |
| Weight with Stand | 14.5 kg |
| Power Consumption (Typical) | 65 W |
| Power Input | 100-240 V, 50/60 Hz |
| Adjustability | Height, Tilt, Swivel, Pivot |
| Cleaning Instructions | Wipe with soft, dry cloth; avoid liquids |
| Safety Precautions | Place on stable surface; do not block ventilation |
| Spare Parts & Repairability | Contact Kogan support; not user-serviceable |
Frequently Asked Questions - KAMN49DFUCLA Kogan
User questions about KAMN49DFUCLA Kogan
0 question about this device. Answer the ones you know or ask your own.
Ask a new question about this device
Download the instructions for your Screen in PDF format for free! Find your manual KAMN49DFUCLA - Kogan and take your electronic device back in hand. On this page are published all the documents necessary for the use of your device. KAMN49DFUCLA by Kogan.
USER MANUAL KAMN49DFUCLA Kogan
natural_image
Side view of a black horizontal computer monitor with a curved top and stand (no text or symbols visible)INFINITY ULTRAWIDE DFHD CURVED GAMING MONITOR
(3840 X 1080, 144HZ USB-C, 1800R)
KAMN49DFUCLA
Safety & Warnings 3
Components 4
Overview 5
Assembly 7
VESA Mount 8
Operation 10
Connectivity 14
Specifications 18
Notes 19
SAFETY & WARNINGS
- Read all instructions before using the appliance and retain for reference.
- This monitor is designed with ventilation holes on the back of the casing. Do not cover or block them.
- Do not insert any object or spray any liquid into the vents.
- Avoid placing the monitor near heaters, stoves, fireplaces or other sources of heat, as well as in rooms lacking adequate ventilation.
- Do not position the monitor in unsafe locations. If the monitor falls, it may be damaged and may injure nearby people.
- Unplug the monitor if it is not going to be used for an extended period.
- Do not place heavy objects on the monitor, its power cord or any connected cable.
- Do not open the back panel of the monitor, as it contains a high-voltage current even when not plugged in.
- There is a polariser layer (not a protective film) on the surface of the screen. Do not peel it off or the product may be damaged and the warranty will be invalid.

HIGH-DEFINITION MULTIMEDIA INTERFACE
The terms HDMI and HDMI High-Definition Multimedia Interface and the HDMI Logo are trademarks or registered trademarks of HDMI Licensing Administrator, Inc. in the United States and other countries.
COMPONENTS
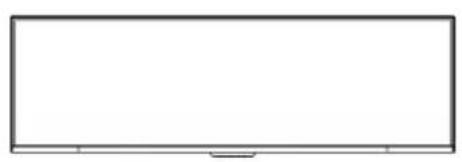
natural_image
Empty rectangular frame with no text, symbols, or markings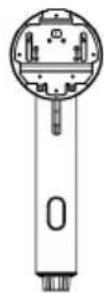
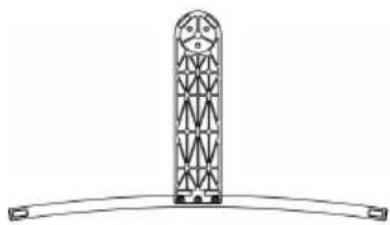
natural_image
Line drawing of a tall, symmetrical geometric structure with a curved base (no text or symbols)Monitor Stand Arm Stand Base
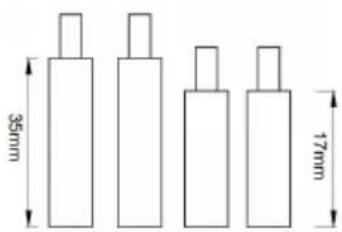
VESA Screw (x4)
natural_image
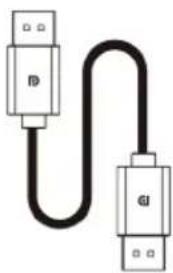
Pure electrical circuit lines without any symbolsDP Cable
natural_image
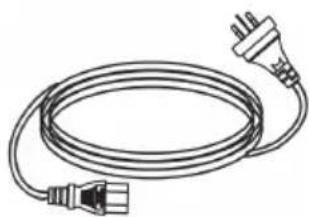
Line drawing of a coiled electrical plug with two terminal connectors (no text or symbols)Power Cable
natural_image
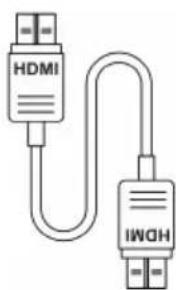
Line drawing of two connected USB devices labeled HDMI and IWGH (no text or symbols on the diagram itself)HDMI Cable
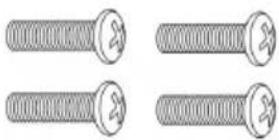
Screws (x4)
User Guide
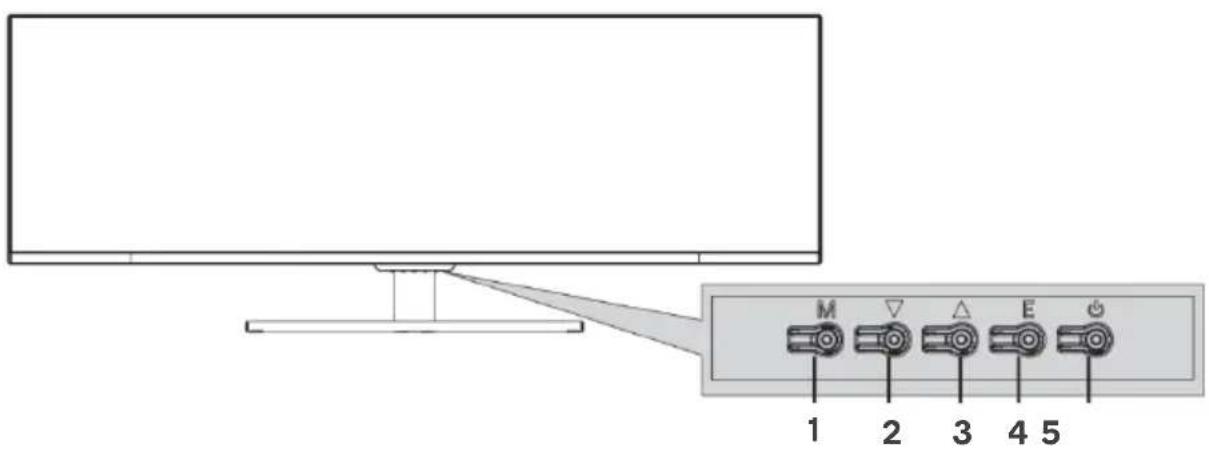
1 Menu button
Press to display OSD menu and enter sub-menus.
2 Down button
Move down in the menu/quickly adjust the game crosshairs.
3 Up button
Move up/quickly adjust contextual model.
4 Exit key
Returns to the previous menu/quickly adjust the input signal.
5 Power button
Press to turn monitor on/off.
Ports
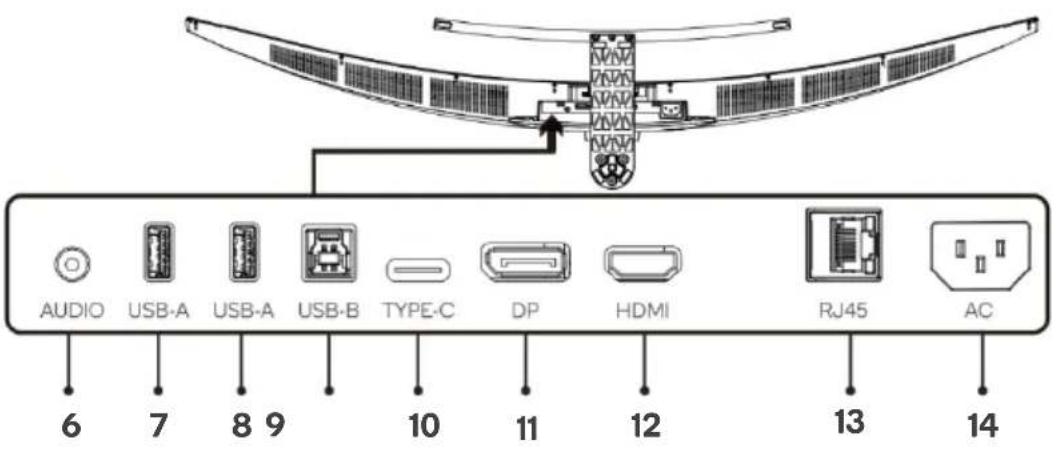
6 Audio output
7 USB-A
8 USB-A
9 USB-B
10 USB-C
11 Display port
12 HDMI port
13 Ethernet port
14 AC Input
ASSEMBLY
Before disposing of any packaging, place all items on a soft, clean and flat surface to ensure all components are accounted for.
WARNING: The panel of the monitor is the fragile. Keep the foam underneath the monitor screen while assembling the stand.
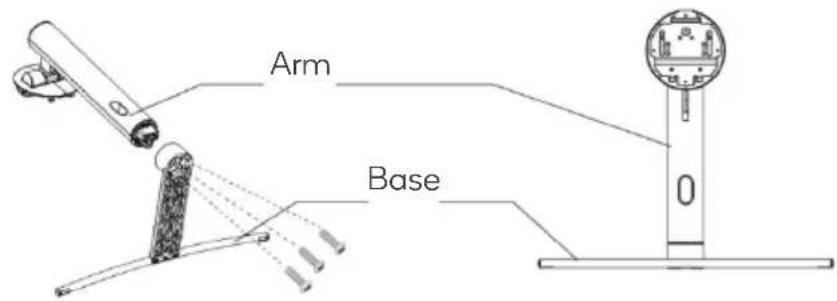
Stand base
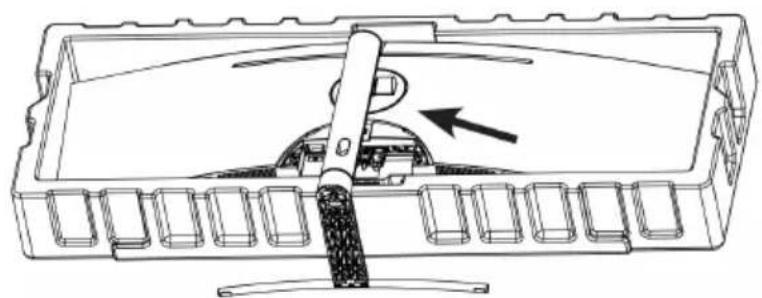
- Lay the monitor screen facing down on a table with the monitor still resting on the packing foam. Take out the stand arm and base. Then use the included screwdriver and x3 15mm screws to secure the base to the stem.
- Attach the stand assembly to the rear of the monitor and ensure it is securely in place.
natural_image
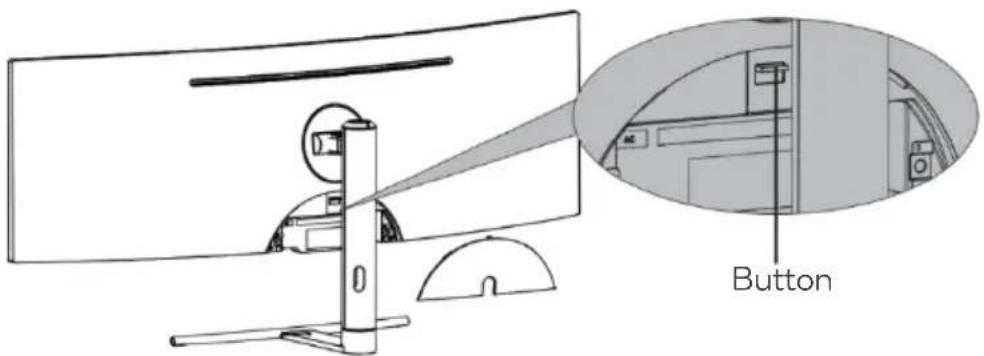
Technical line drawing of a mechanical component with a lever and arrow indicating direction (no text or symbols)- To remove the stand assembly, remove the port cover from the rear of monitor. Press the button down and separate the stand assembly from the monitor.
VESA MOUNT

VESA mounting pattern 75x75mm, screw size M4.
Note: VESA mount and mounting accessories are not included.
- Open the box, lay the monitor screen facing down on a table with the monitor still resting on the packing foam.
- Remove all components and the protective foam from the back of the monitor.
- If the monitor is already attached to the stand, remove the stand from the monitor.
- Remove the x4 original screws from the opening in the rear of the monitor. Follow the directions received with your mount, stand or accessory and install the monitor on the wall or fixture as desired.
- Use the included VESA screws when attaching anything to the rear of the monitor.
Note: Only use the included VESA screws whenever mounting this monitor. Do not discard the original screws as these may be needed for future use.
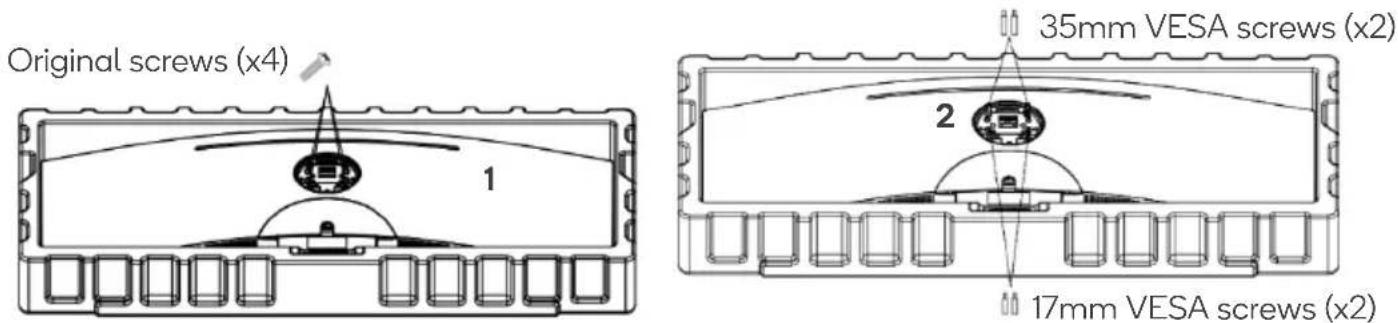
- Follow the directions received with your mount, stand or accessory and install the monitor on the wall or fixture as desired.
natural_image
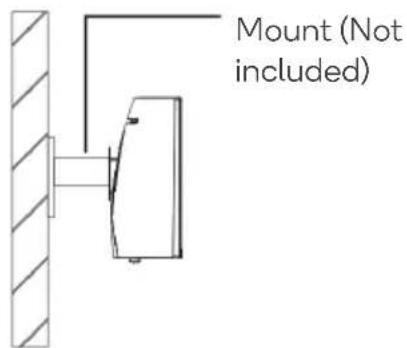
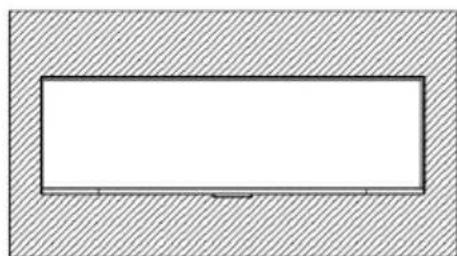
Simple diagram with a rectangular shape inside a hatched rectangular border (no text or symbols)Note: To prevent the monitor on the mount from failing, install it firmly and protect it fully. Do not place or hang any object on the mount and the using height of the mount should be less than 2 meters.
Adjustments
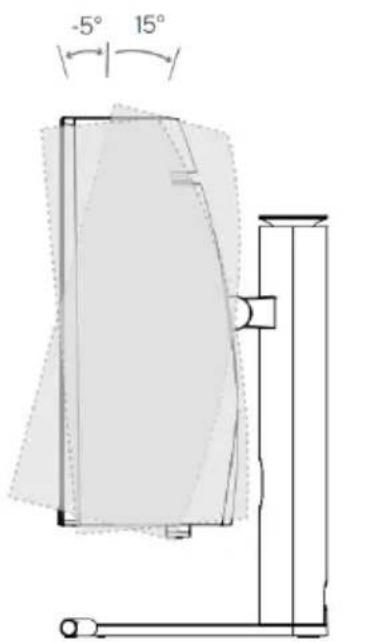
Tilting angle -5.0^ (±2.0^)-+15^ (±2.0^)
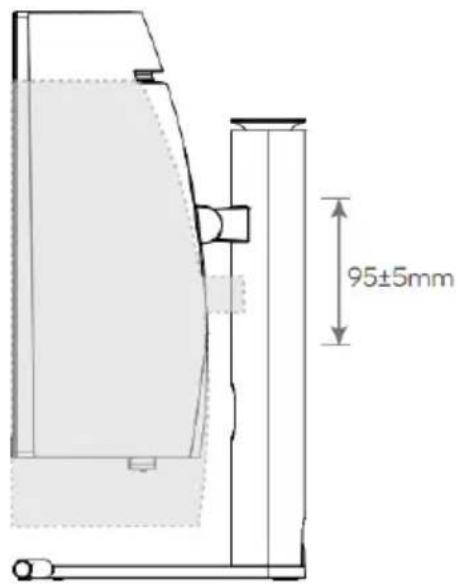
Height adjustment 95mm(±5mm)
OPERATION
The on-screen display (OSD) menu can be used to adjust settings of the monitor and is shown on the screen after the monitor is powered on and the Menu (M) button is pressed.
Note:
The images of the OSD menu shown in this user guide may differ slightly to the actual product.
- Press the Menu (M) button to activate the browser screen.
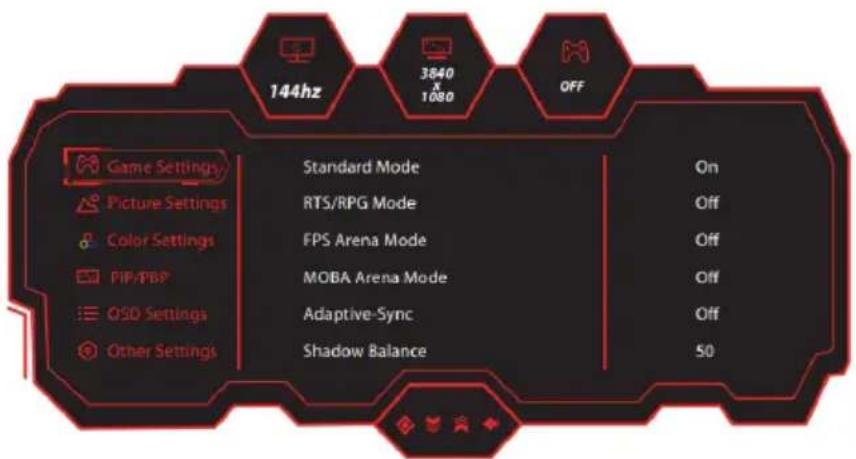
- Push the directional buttons ▲ or ▼ to scroll through the functions.
- Select the desired function and press Menu (M) to enter the sub-menu.
- Press ▲ or ▼ to scroll through sub-menus and press key Menu (M) to select and confirm the desired function.
- Press ▲ or ▼ to select one option and press Menu (M) to confirm settings and exit from the current menu.
- Press E to exit from the menu screen.
On-Screen Display (OSD) Functions
Functions of the monitor vary with different models and the functions in this user guide are for reference only.
| Main Menu Sub Menu Options | ||
| Game Settings | Standard Mode | Off/On |
| RTS/RPG Mode | Off/On | |
| FPS Arena Mode | Off/On | |
| MOBA Arena Mode | Off/On | |
| Adaptive-Sync | Off/On | |
| Shadow Balance | 0-100 | |
| Response Time | Off/Normal/Fast/Ultrafast | |
| Refresh Rate | Off/On | |
| Position: Top Right/TopLe/Bottom Right /Bottom Left | ||
| Game Crosshair | Off | |
| On: Crosshair 1/Crosshair 2/Crosshair 3/ Crosshair 4/Crosshair 5/Crosshair 6 | ||
| Game Time | Off | |
| On: 15:00/30:00/45:00/60:00/Position | ||
| Dynamic Brightness | Off/Standard/Expert/Elaboration | |
| HDR Off/HDR Standard | ||
| MPRT Off/On | ||
| Picture Settings | Brightness 0-100 | |
| Contrast 0-100 | ||
| DCR Off/On | ||
| Contextual Model | Off/On | |
| On: Movie Mode/Reading Mode/ Night Mode | ||
| Low Blue Light 0-100 | ||
| Sharpness 0-5 | ||
| Gamma 1.8/2.0/2.2/2.4/2.6/ S.curve | ||
| Aspect Ratio | Wide Screen/4:3/1:1/Auto | |
| Colour Settings | Warm Off/On | |
| Natural Off/On | ||
| Cool Off/On | ||
| User1 Off/On | ||
| User2 Off/On | ||
| User3 Off/On | ||
| Hue 0-100 | ||
| Saturation 0-100 | ||
| PIP/PBP | PIP/PBP Mode | Off/PIP Mode/PBP 2Win1:1/PBP 2Win2:1/ PBP 2Win1:2 |
| Sub-Signal Source | Type-C/DP/HDMI | |
| Audio Source | Auto/Type-C/DP/HDMI | |
| PIP Position | Top right/Top le/Bottom right/ Bottom left | |
| PIP Size Small/Medium/Large | ||
| Window swap | Off/On | |
| OSD Settings | Language | 简体中文/English/한국어//Portugues do Brasilazil/Deutsch/Nederland/Suomi/Français/Ελληνικά/Indonesia/Italiano/日本語/Malaysia/Polskie/Português/Русский/Espanol/ЩИУ/Українська/Tiéng Việt/繁體中文/Türkçe |
| OSD Time Out 5-60 | ||
| OSD H-Position 0-100 | ||
| OSD V-Position | 0-100 | |
| OSD Transparency | 0-5 | |
| Hotkey1 Setting | Brightness, Contrast, Volume, Mute, Shadow Balance, Game Crosshair, Refresh Rate, Game Time, Contextual Model, PIP/PBP Mode, Input Signal, Dynamic Brightness | |
| Hotkey2 Setting | ||
| Hotkey3 Setting | ||
| OSD Lock | Off/On | |
| Other Settings | Input Signal | Auto/Type-C/DP/HDMI |
| Volume 0-100 | ||
| Mute Off/On | ||
| Auto Power | Off/On | |
| Eye shield Remind | Off/On | |
| USB Switch Type-B/Type-C | ||
| USB Power (Sleep) | Off/On | |
| USB Upgrade No/Yes | ||
| Reset No/Yes | ||
| Information Input | Source:/Resolution:/Mode/HDR Ver | |
CONNECTIVITY
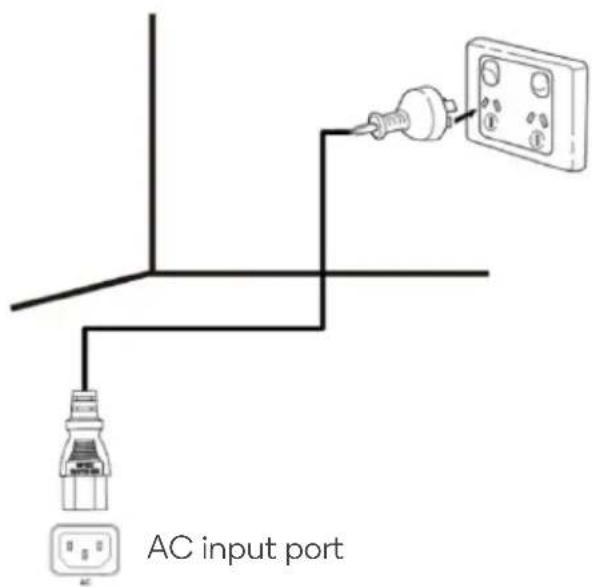
Power Cable
Connect the power cable plug to the AC input port of the monitor and then connect the power cable to an electrical outlet.
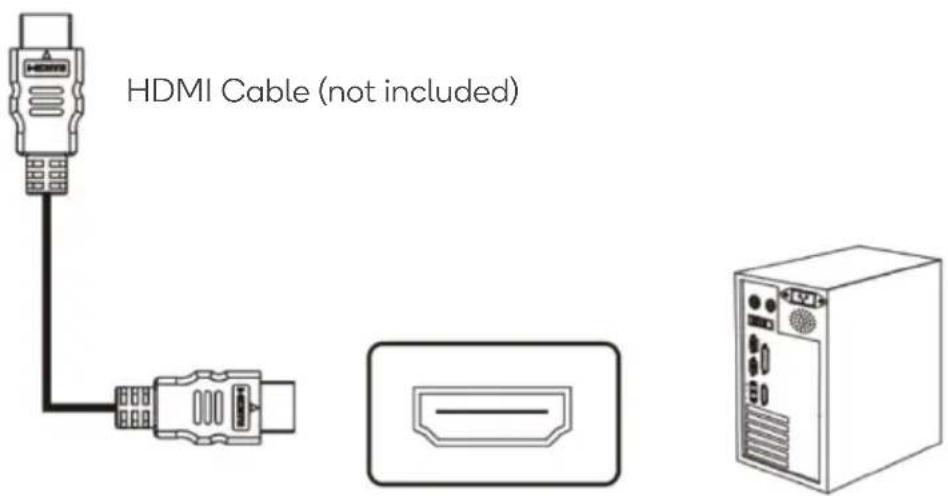
HDMI
Connect the provided HDMI cable (not supplied) from the computer's HDMI port to the monitor's HDMI port.
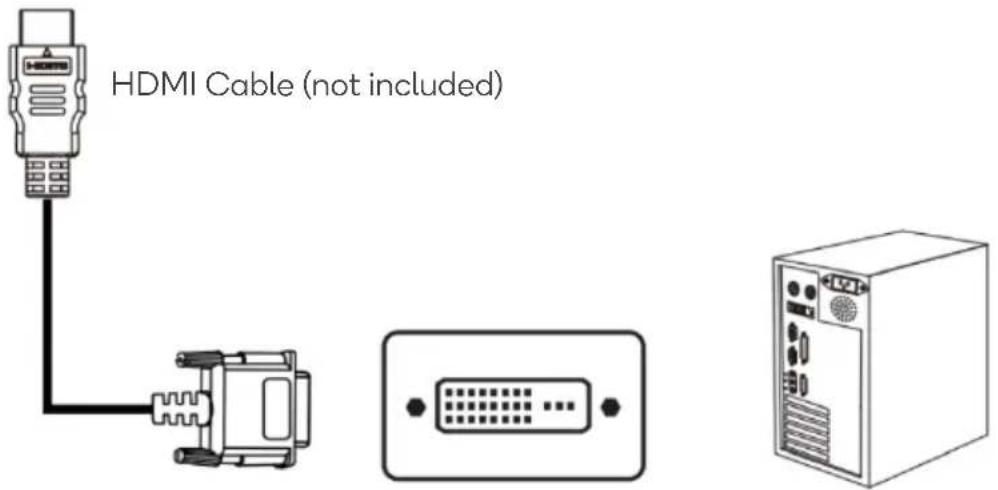
HDMI to DVI
Connect an HDMI to DVI cable (not provided) from the monitor's HDMI port to the computer's DVI port.
Note: Audio cannot always be transferred through a DVI port.
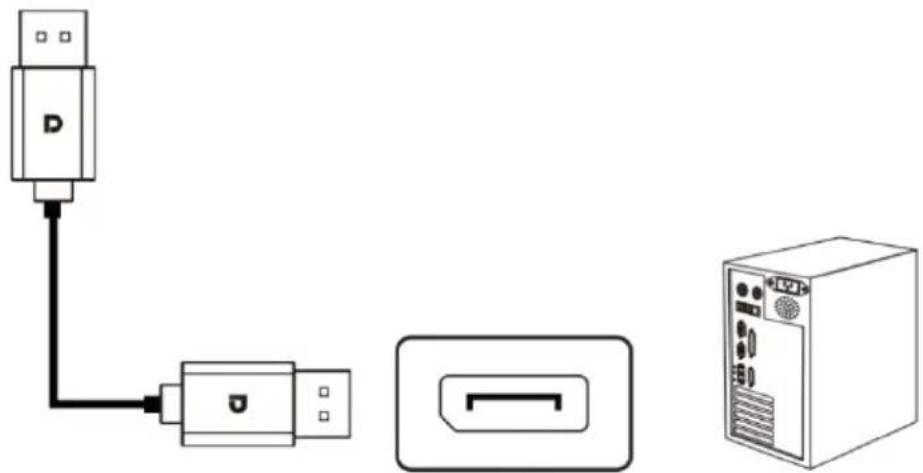
DisplayPort
Connect ta DisplayPort cable from the computer's DisplayPort to the monitor's DisplayPort.
natural_image
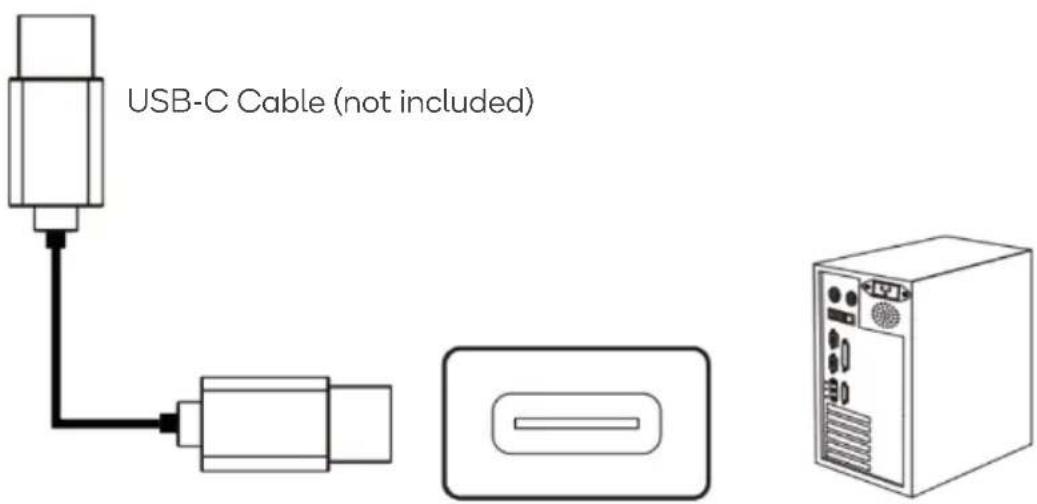
Diagram showing connection between a USB port, a USB connector, and a server tower (no text or symbols present)USB-C
Insert one end of the USB-C cable (not supplied) into the computer's USB-C output and connect the other end to the monitor's USB-C (Type-C) port.
Note:
For MacBook/Mac users that want to connect to this monitor, the minimum version requirement of the MacBook shall be MacOS 14.5.
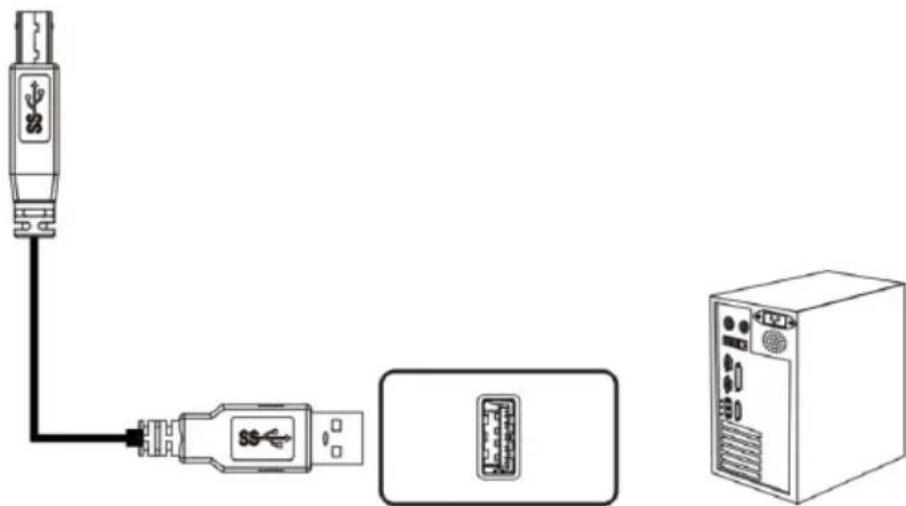
USB-A-USB-B
To enable your monitor to receive a signal from a USB device, connect the included USB cable from the USB-A port on the monitor to the USB-B port on the device.
natural_image
Diagram showing connection between a USB connector, USB cable, and server unit (no text or symbols)Audio Out
Earphones, headphones or other audio devices can be connected to the 3.5mm audio port (Audio Out) on the monitor. The monitor may need to be set as the PC's default sound output device.
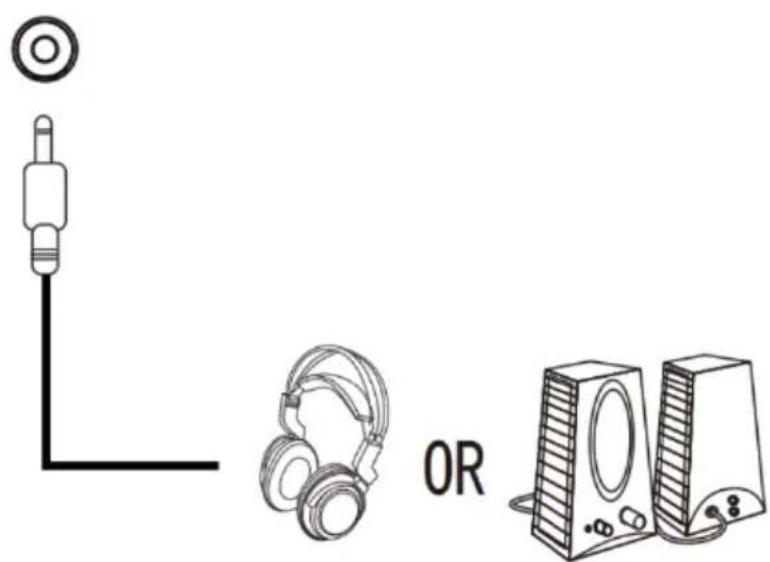
Earphones & Speakers (not included)
SPECIFICATIONS
| Screen size 49inch | ||
| Aspect ratio 32:9 | ||
| Viewing angle 178°(H)/178°(V) | ||
| Contrast ratio 3000:1(TYP) | ||
| Colour 16.7M | ||
| Resolution 3840 x 1080 | ||
| Refresh rate 144Hz | ||
| Power input 100-240V-50/60HZ,3.0A | ||
| Power input 100-240V-50/60HZ,3.0A | ||
| Product dimensions | Without stand 1198.5 x 375.6 x 160.2mm | |
| With stand | 1198.5 x 543.2 x 273.7mm | |
| Tilting angle | Forward tilting: -5° (±2.0°)Backward tilting: 15° (±2.0°) | |
| Height range 95mm±5mm | ||
| Swivel angle N/A | ||
| Environmental conditions | Action | Temperature: 0°C-35°C (32°F - 104°F)Humidity: 10%-80% RH (non-condensing) |
| Storage | Temperature: -20°~60° (-4°F - 140°F)Humidity: 5%~95% RH (non-condensing) | |
NOTES
Need more information?
We hope that this user guide has given you the assistance needed for a simple set-up.
For the most up-to-date guide for your product, as well as any additional assistance you may require, head online to help.kogan.com
kogan.com
- INFINITY ULTRAWIDE DFHD CURVED GAMING MONITOR
- SAFETY & WARNINGS
- COMPONENTS
- Menu button
- Down button
- Up button
- Exit key
- Power button
- Ports
- ASSEMBLY
- Stand base
- VESA MOUNT
- Adjustments
- OPERATION
- Note:
- On-Screen Display (OSD) Functions
- CONNECTIVITY
- Power Cable
- HDMI
- HDMI to DVI
- DisplayPort
- USB-C
- USB-A-USB-B
- Audio Out
- SPECIFICATIONS
- NOTES
- Need more information?
Brand : Kogan
Model : KAMN49DFUCLA
Category : Screen