
SIK 810 - Cooker Scandomestic - Free user manual and instructions
Find the device manual for free SIK 810 Scandomestic in PDF.


| Product Type | Induction Cooker |
| Brand | Scandomestic |
| Model | SIK 810 |
| Hob Type | Induction |
| Number of Cooking Zones | 4 |
| Power Levels (Hob) | 9 |
| Oven Capacity | 65 liters |
| Oven Energy Efficiency Class | A |
| Number of Oven Functions | 9 |
| Oven Functions | Defrost, Double Grilling, Double Grill, Energy-Saved Cooking, Radiant Grilling, Convection with Fan, Conventional Cooking, Bottom Heat, Oven Lamp |
| Oven Lamp Type | Halogen (25-40W, 230V, E-14 or G9) |
| Oven Door | Double-glazed, removable for cleaning |
| Oven Interior Coating | Wipe-clean enamel |
| Storage Compartment | Yes |
| Adjustable Feet | Yes |
| Safety Features | Overheating protection, auto shutdown, child lock (via supervision), small/non-magnetic item detection |
| Power Supply | 230V, 5G 2.5mm² cable |
| Frequency | 50/60 Hz |
| Maximum Power Consumption | Approx. 7.0 kW (based on hob zones: 1.5+2.0+1.5+2.0 kW) |
| Accessories Included | Wire shelf, universal pan, slider brackets (some models) |
| Installation Requirements | Minimum 20 cm from taller cabinets, 60 cm from hood, 50 cm from wall cabinets above |
| Warranty | Refer to seller (not specified) |
Frequently Asked Questions - SIK 810 Scandomestic
User questions about SIK 810 Scandomestic
0 question about this device. Answer the ones you know or ask your own.
Ask a new question about this device
Download the instructions for your Cooker in PDF format for free! Find your manual SIK 810 - Scandomestic and take your electronic device back in hand. On this page are published all the documents necessary for the use of your device. SIK 810 by Scandomestic.
USER MANUAL SIK 810 Scandomestic
ADVARSEL HYLDEPLACERING:
natural_image
Simple diagram showing a circle with an arrow pointing inward, surrounded by dots (no text or symbols)natural_image
Technical line drawing of a mechanical assembly with no visible text or symbols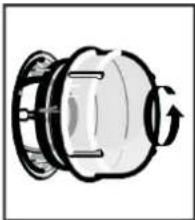
natural_image
Cross-sectional diagram of a mechanical component with no visible text or symbolsFejlfinding
Important Safety Warnings
THESE WARNINGS ARE PROVIDED IN THE INTEREST OF SAFETY, PLEASE READ THEM CAREFULLY BEFORE INSTALLING OR USING THE APPLIANCE
To maintain the EFFICIENCY and SAFETY of this appliance, we commend:
Call the Service Centers authorized by the store where you buy the cooker. Always use original Spare Parts.
- This appliance is intended for non-professional use within the home.
- Before using the appliance, read the instructions in this owner's manual carefully, since you should find all the instructions you require to ensure safe installation, use and maintenance. Always keep this owner's manual close to hand since you may need to refer to it in the future.
- After removing the packaging, check that the appliance is not damaged. If you have any doubt, do not use the appliance. Contact your nearest Service Centre of the store where you buy the appliance. Never leave the packaging components plastic bags, foamed polystyrene, nails, etc.) within the reach of children since they are a source of potential danger.
- The appliance must be installed only by a qualified person in compliance with the instructions provided. The manufacturer declines all responsibility for improper installation which may harm persons and animals and damage property.
- This appliance can be used by children aged from 8 years and above and persons with reduced physical, sensory or mental capabilities or lack of experience and knowledge if they have been given supervision or instruction concerning use of the appliance in a safe way and understand the hazards involved. Children shall not play with the appliance. Cleaning and user maintenance shall not be made by children without supervision.
- The electrical safety of this appliance can only be guaranteed if the cooker is correctly and efficiently earthed, in compliance with current regulations on electrical safety. Always ensure that the earthing is efficient if you have any doubts call in a qualified electrician to check the system. The manufacturer declines all responsibility for damage resulting from a system which has not been earthed.
- Check that the electrical capacity of the system and sockets will support the maximum power of the hob, as indicated on the rating label. If you have any doubts call in a qualified technician.
- When the cooker is first used an odor may be emitted, this will cease after a period of use. When first using the cooker ensure that the room is well ventilated e.g., open a window or use an extractor fan and that persons who may be sensitive to the odor avoid any fumes. It is suggested that any pets be removed from the room until the smell has ceased. When the oven is first switched on, it may give off an unpleasant smell. This is due to the bonding agent used for the insulating panels within the oven. This is completely normal, if it does occur, you merely have wait for the smell to clear before putting food into the oven.
- Ensure that the appliance is switched off before maintenance by switching off the main switches and turning all knobs to OFF position.
- The openings and slots used for ventilation and dispersion of heat on the rear and below the control panel must never be covered.
- The user must not replace the supply cable of this appliance. Always call an after-sales servicing Centre authorized by the seller in the case of cable damage or replacement.
- This appliance must be used for the purpose for which it was expressly designed. Any other use is considered to be improper and consequently dangerous. The manufacturer declines all responsibility for damage resulting from improper and irresponsible use.
- A number of fundamental rules must be followed when using electrical appliances. The following are of particular importance do not touch the appliance you're your hands or feet are wet do not use the appliance bare footed. Never allow the Mains Cable to be stretched, pulled or damaged if the Cooker is moved for cleaning etc. Do not use the cooker if the Mains Cable is damaged, consult a
qualified electrician. Do not allow the cooker to be used unsupervised by children or persons unfamiliar with it.
• Always switch off the electrical supply to the cooker and allow it to cool down before carrying out any cleaning operations etc.
- Danger of fire: do not store items on the cooker surfaces.
- To avoid accidental spillage do not use cookware with uneven or deformed bottoms on the burners or on the electric plates.
- Special care should be taken when using chip pans etc. in order to avoid splashing or spillage of hot oil. They should not be used unattended since over heated oil may boil over and could also ignite.
- Parts of this appliance, cooking surfaces, retain heat for considerable periods after switching off. Care should, therefore, be taken when touching these areas before they have completely cooled down.
- Never use flammable liquids such as alcohol or gasoline, etc. near the appliance when it is in use.
- When using small electrical appliances near the hob, keep the supply cord away from the hot parts.
- Make sure the knobs are in its "OFF" position when the appliance is not in use. Also make all potentially dangerous parts of the appliance, safe, above all for children who could play with the appliance.
- When the appliance is in use the heating elements and some parts of the oven door become extremely hot. Make sure you don't touch them and keep children well away.
• The power line specification is 5G 2.5mm2.
- The appliance that you have bought may be slightly different from the one illustrated in this manual. Please refer to the information related to the model you have.
- Do not use harsh abrasive cleaner or sharp metal scrapers to clean the oven door glass since they can scratch the surface, which may result in shattering of the glass.
- Any spillage should be removed from the lid before opening and the hob surface should be allowed to cool before closing the lid.
- Use only hob guards designed by the manufacture of the cooking appliance or indicated by the manufacturer of the appliance in the instructions for use as suitable or hob guards incorporated in the appliance. The use of inappropriate guards can cause accidents.
- You must grill with closed door.
- Keep the appliance and its supply cord out of reach of children aged less than 8 years.
- If the supply cord is damaged, it must be replaced by the manufacturer, its service agent or similarly qualified persons in order to avoid a hazard.
Safety when cleaning:
- For cleaning, the appliance must be switched off and allowed to cool down. Never use steam cleaners for cleaning the cooking hobs and oven cavity.
- Never use harsh, abrasive cleaners or sharp metal scrapers to clean the oven door glass since they can scratch the surface, which may result shattering of the glass.
Note: Every care is taken to ensure the safety of the customer. Glass can break. Be very careful when cleaning the glass as not to scratch it. Do not knock or hit the glass with the accessories.
Installation
The following instructions should be read by a qualified technician to ensure that the appliance is installed, regulated and technically serviced correctly in compliance with current regulations.
Important: disconnect the cooker from the electricity when making any adjustment, maintenance operation, etc.
Positioning
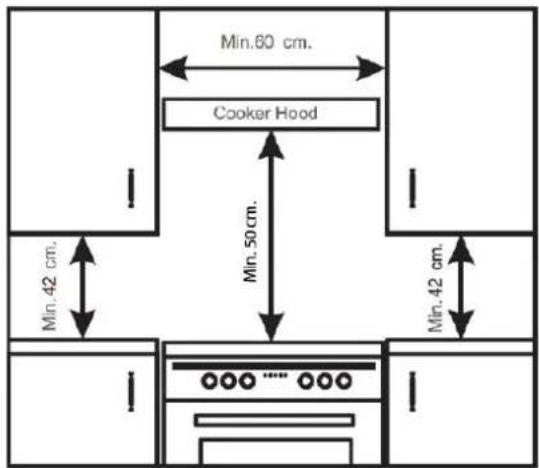
The appliance can be installed next to furniture units which are no taller than the top of the cooker hob. For proper installation of the cooker, the following precautions must be taken:
Kitchen cabinets installed next to the cooker that are taller than the top of the hob must be situated at least 20 cm from the edge of the hob.
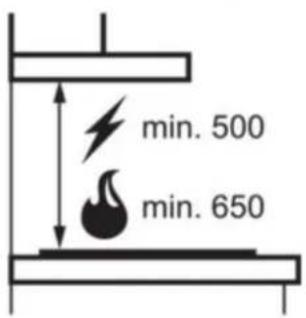
Hoods must be installed according to the requirements in the installation manual for the hoods themselves and in any case at a minimum distance of 60 cm.
Place the wall cabinets adjacent to the hood at a minimum height of 42 cm from the hob (see figure).
Should the cooker be installed beneath a wall cabinet, the latter should be situated at least 50 cm (centimeters) away from the hob, as shown in the figure.
The cut-out for the cooker cabinet should have the dimensions indicated in the figure below.
Product specifications:
• 4 zone solid hot plates:
- 2 x 1.50 kW solid hot plates (∅ 160mm)
- 2 x 2.00 kW solid hot plates (∅ 180 mm)
- Oven energy efficiency class: A
- Oven gross / net capacity: 65litres
- 9 Oven functions
• Mechanically controllable thermostat
• Double-glazed full inner door glass
- Wipe-clean enamel cavity
- Storage compartment
- Adjustable feet
Introduction of the Product
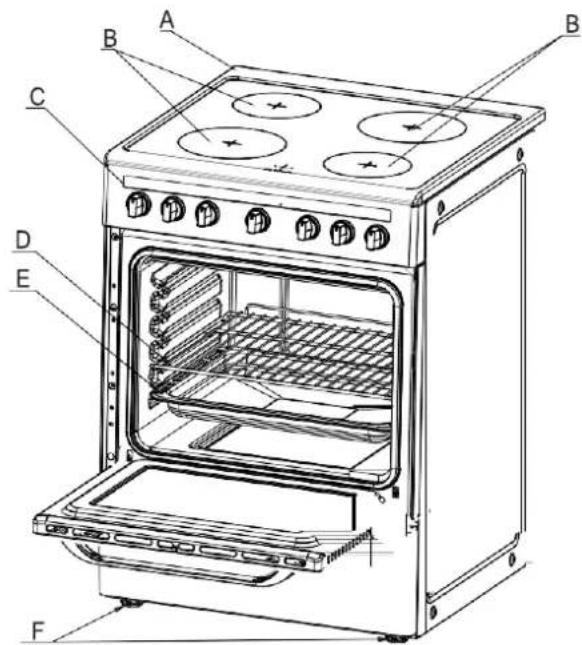
A Cooktop
B Induction Hotplates
C Control Panel
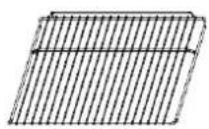
D Wire Shelf
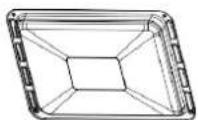
E Drip Pan or Baking Tray
F Adjustable Feet
TILBEH∅R
Wire shelf:
For grill, dishes, cake pan with items for roasting and grilling.
Slider bracket:
these shelf support rails on the right and left sides of the oven can be removed for cleaning oven walls. (only for specific models)
Universal pan:
For cooking large quantities of food such as moist cakes, pastries, frozen food etc, or for collecting fat/spillage and meat juices.
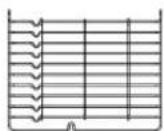
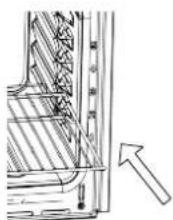
SHELF PLACEMENT WARNING:
To ensure the oven shelves operate safely, correct placement of the shelves between the side rail is imperative. Shelves and the pan only can be used between the first and fifth layers.
The shelves should be used with the right direction, it will ensure that during careful removal of the shelf or tray, hot food items should not slide out.
Controlpanel
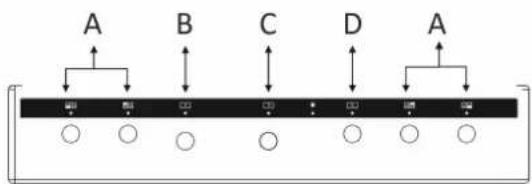
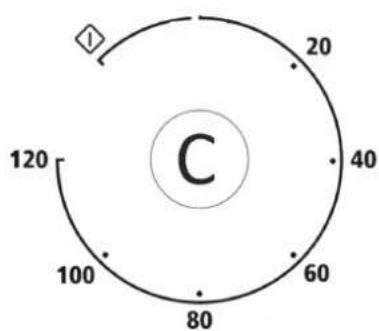
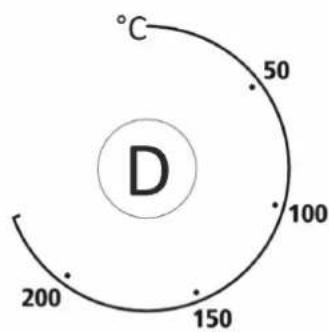
A - Hob kontrol knobs
B-Oven function knob
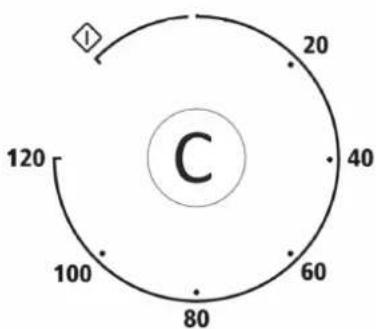
C - Timer function knob
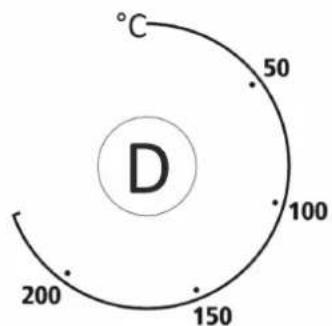
D - Temperature knob
Oven controls - the function and temperature controls
To use an oven function, first select the function with the left hand dial and then set the temperature of the function with the right hand dial. Set the timer in the middle. The indicator light will illuminate. When the temperature inside your oven reaches the temperature you set, the thermostat will cut off the heating element and the indicator light will go off. When the temperature falls below the set temperature, the heating element will again be turned on and the indicator light will illuminate again.
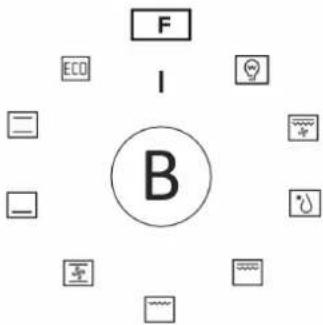
Oven Lamp:

which enables the user to observe the progress of cooking without opening the door.
Defrost:

The circulation of air at room temperature enables quicker thawing of frozen food, (without the use of any heat). It's a gentle but quick way to speed up the defrost-ing time and thawing of ready-made dishes and cream filled produce etc.
Double grilling:

The inner grill element and top element are working.
The temperature can be set within the range of 180-240OC. The default temperature is 210OC. This is optional function that can be work with rotisserie motor.
Double grill:

The radiant heating element and the top heating element are working. The temperature can be set within the range of 180-2400C..The default temperature is 2100C. This is optional function that can be work with rotisserie motor.
For energy-saved cooking:

Cooking the selected ingredients in a gentle manner, and the heat comes from the top and the bottom.
Radiant grilling:

The inner grill element switches on and off to maintain temperature.
The temperature can be set within the range of 180-240OC. The default temperature is 210OC. This is optional function that can be work with rotisserie motor.
Convention with fan:

Combination of the fan and both heating element provides more even heat penetration, saving up to 30-40% of energy. Dishes are lightly browned on the outside and
still moist on the inside. Note: This function is suitable for grilling or roasting big pieces of meat at a higher temperature. The temperature can be set within the range of 50-2500C. The default temperature is 2200C.
Conventional cooking:

The top and bottom work together to provide convectional cooking. The temperature can be set within the range of 50-250OC. The default temperature is 220OC. This is optional function that can be work with rotisserie motor.
Bottom heat:

A concealed element in the bottom of the oven provides a more concentrative heat to the base of food without browning. This is ideal for slow cooking dishes such as casseroles, stews, pastries and pizzas where a crispy base is
desired. The temperature can be set within the range of 60-120OC. The default temperature is 60OC.
Instructions for use
Using the oven
When you first use your oven, odors may come from the insulation materials and the heating elements. For this reason, before using your oven for the first time, switch on the oven while empty, at its maximum temperature for 45 minutes.
Select the oven function you require. Select the temperature you require.
Before placing food in the oven you may need to pre-heat the oven for 10 minutes.
The red temperature indicator light goes off when the chosen temperature is reached.
To switch the oven off, turn the function control dial to the off position '0'.
Note: Under no circumstances should the oven be lined with aluminium foil, do not place dishes or baking trays directly or onto the oven base as overheating and damage may occur.
Using the hob
The induction hob caters for all kind of cooking, with its electromagnetic Cooking zones, and its micro-computerised controls and multi-functions, making it the ideal choice for today's family.
Manufactured with specially imported materials, the induction hob is extremely user-friendly, durable and safe.
Your hob has four elements. Each knob has a symbol above it, which indicates which element it controls.
The hob is designed for operating at 9 different levels.
Working Principle
The induction hob comprises a coil, a hotplate made of ferromagnetic material and a control system. Electrical current generates a powerful magnetic field through the coil. This produces a large number of vortices which in turn generate heat which is then transmitted through the cooking zone to the cooking vessel.
Safety
The hob was specially designed for domestic use. Protection from overheating
A sensor monitors the temperature in the cooking zones. When the temperature exceeds a safe level, the cooking zone is automatically switched off.
Detection of small or non-magnetic items
When an unsuitable size or non-magnetic pan (e.g. aluminium), or some other small item (e.g. knife, fork, key) has been left on the hob, the hob automatically go on to standby in 1 minute. The fan will keep cooking down the induction hob for a further 1 minute.
Auto shutdown
Auto shutdown is a safety protection function for your induction hob. It shutdown automatically whenever you forget to turn off a cooking zone. The default working times for various power levels are shown in the below table:
| Steps | Automatic shutdown |
| 1-3 | 8 hours |
| 4-6 | 4 hours |
| 7-9 | 2 hours |
Warning: Anyone who has been fitted with a heart pacemaker should consult a doctor before using the induction hotplate.
Diagram of induction hob
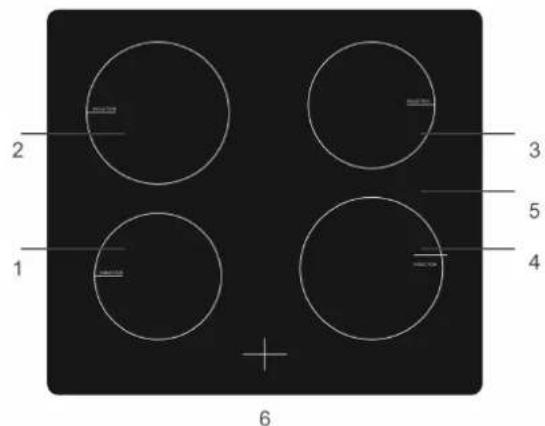
| 1 | 1500 W zone |
| 2 | 2000 W zone |
| 3 | 1500 W zone |
| 4 | 2000 W zone |
5 Glass plate
6 Display
Preparation before using:
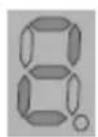
When the power is switched on the buzzer will sound once and all the indicators will come on for one second and then go out. The hob is now in standby mode.
Place the pan in the centre of the cooking zone.
Operating instructions
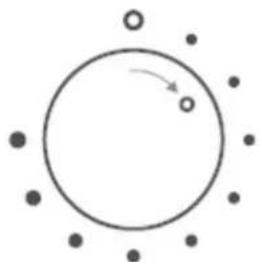
First turn the knob to the "OFF" position, then select the power level by turning the knob for the relevant induction zone.
natural_image
Simple diagram showing a circle with an arrow pointing inward, surrounded by scattered dots (no text or symbols)If you turn the knob to the "OFF" position, the power setting returns to "0". The maximum power of cooking zones is as follows:
Heating zone...... Maximum power
1 1500W
2 2000W
3 1500W
4 2000W
You may have a number of different cooking vessels
This induction hob can identify a variety of cooking vessels, which you can test by one of the following methods:
Place the vessel on the cooking zone. If the corresponding cooking zone displays a power level, then the vessel is suitable. If "U" flashes then the vessel is not suitable for use with the induction hob.
Hold a magnet to the vessel. If the magnet is attracted to the vessel, it is suitable for use with the induction hob.
NB: The base of the vessel must contain magnetic material. It must have a flat bottom with a diameter of more than 12cm.
Safety Reminding and maintenance
 | 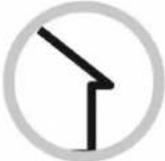 | 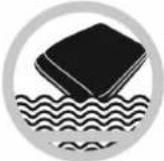 | 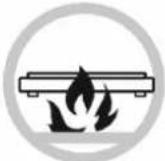 |
| A dedicated power protection air switch must be used. | For indoor use only | Never wash the induction hob directly with water. | Do not store detergents or flammable materials beneath the hob. |
 | 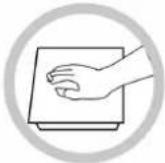 |  | 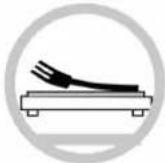 |
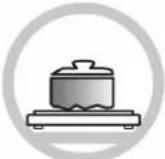
| Always open sealed containers, such as cans, before heating them, otherwise they may explode. | When a cooking zone has been on for a long time the surface remains hot for some time afterwards, so do not touch the surface | From time to time, check that nothing is obstructing the air intake beneath the induction hob. | Don't leave metallic objects, such as knives, forks, spoons and lids on the hob as they may get hot. |
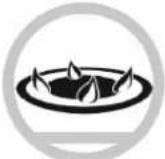 | 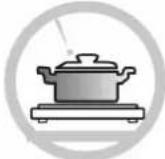 | 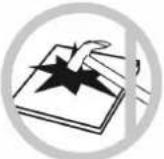 |  |
| Never use the hob near another appliance which generates a high temperature, such as a gas cooker or paraffin heater. | Never have the hotplate to work without food inside, otherwise its operational performance may be affected and danger may happen | If the surface of the hob is cracked, switch off the appliance to avoid the possibility of electric shocks. | Do not place rough or uneven vessels on the hob, as they may damage the ceramic surface. |
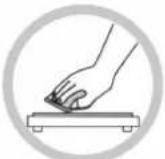 | 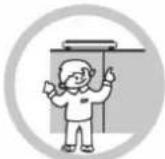 | 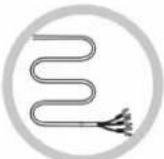 | |
| Clean the induction hob regularly to stop foreign objects from getting into the fan and preventing the appliance from working properly | Keep children of infirm persons away from the appliance. Never let them use it unsupervised. | If the power cable is damaged it should be replaced by our service agent or by another suitable qualified person. |
This appliance is not intended for use by persons (including children) with reduced physical, sensory or mental capabilities, or lack of experience and knowledge, unless they have been given supervision or instruction concerning use of the appliance by a person responsible for their safety.
Children should be supervised to ensure that they do not play with the appliance.
The surface of the induction hob may be easily cleaned in the following way:
| Type of contamination | Method of cleaning | Cleaning materials |
| Light | Immerse in hot water and wipe dry | Cleaning sponge |
| Rings and lime scale | Apply white vinegar to the area, wipe with a soft cloth or use a commercially available product | Special adhesive for ceramic glass |
| Sweetmeat, melted aluminium or plastics | Use a special scraper for ceramic glass to remove residue (a silicon product is best) | Special adhesive for ceramic glass |
NB: Disconnect the power supply before cleaning.
Failure display and inspection
If any abnormality occurs, the induction hob will automatically go into protective mode and display one of the following codes:
| Fault | Possible cause | Solutions |
| F3-F8 | Temperature sensor failure | Contact the supplier |
| F9-FE | Temperature sensor of the IGBT failure. | Contact the supplier |
| E1/E2 | Abnormal voltage in power supply | Check if power supply is normal.Power on after the power supply is normal. |
| E3/E4 | Abnormal temperature | Check the pan. |
| E5/E6 | Poor heat radiation in cooking zone | Restart when cooking zone cools down. |
The above table shows how to assess and check common faults. Do not dismantle the appliance yourself, otherwise you may damage the induction hob.
Hints and tips
Baking tips
• Always place baking tins in the centre of the wire shelf.
- Make sure you use bakeware that is oven proof.
- Do not place bakeware too close to the rear or sides of the oven walls.
- You can influence the degree of browning by changing the temperature setting.
- If a cake collapses after removing it from the oven:
- Use less liquid on your next attempt.
- Consider using a longer baking time or use a slightly lower temperature setting.
Cookware Hobs
Use heavy gauge, flat, smooth bottomed pans that are the same diameter as the element. This will provide good contact with the glass and help reduce cooking times.
Cookware with a stainless steel saucepan base will give you the best results.
Energy Saving
- During use of electrical cookers, it is required to use saucepans having flat bases.
- Choose a cookware of proper size.
• Using a lid will reduce cooking times. - Minimize the amount of liquid or fat to reduce cooking times.
- When liquid starts boiling, reduce the temperature setting.
- Oven door should not be opened often during cooking.
Cleaning tips (Disconnect the appliance from the power supply.)
- Wait until the oven has cooled before removing the wire shelves, wash them separately in warm soapy water and dry thoroughly.
- Wash the interior of the oven with hot soapy water and wipe down with a damp cloth.
- Leave the door open until the interior has dried, before replacing the wire shelves.
- Clean the oven after each use, especially after roasting or grilling, this will prevent spilt or splattered food debris burning and becoming difficult to remove.
- Do not use abrasive pads to clean the interior of the oven as this may remove the enamel, which will affect the efficiency of your oven.
- Do Notuse harsh, abrasive cleaners or sharp metal scrapers to clean the oven door glass since they can scratch the surface, which may result shattering of the glass.
Cleaning the outside of the oven (Disconnect the appliance from the power supply.)
- You should regularly wipe over the control panel, oven door and oven sides using a soft cloth and mild liquid detergent as spilt liquids may damage the enamel.
- Wash enameled or chrome plated parts of the oven with warm soapy water or with non-abrasive detergents.
- Never use abrasive pads to clean enameled, chromed or stainless steel surfaces.
- When using commercially available stainless steel cleaning products, avoid cleaning any lettering or symbols, as they can become damaged.
Removing the door for easier cleaning
We recommend you have someone to assist you during removal of the door.
- Open the door completely.
- The door hinge has a small latch. Lift the latch on both hinges.
- Lift the door slightly as if closing, and then with both hands supporting the door, pull it away from the oven.
- To replace the door, hold the door in an open position and insert the latches on both hinges back into place. Open and close the door to make sure that it has been fitted correctly.
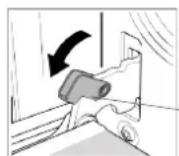
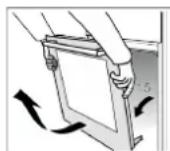
Warning: To avoid possible electric shock, disconnect the power supply before replacing the lamp. Only use 25-40W/230V type E-14, T300 C halogen lamps, or 25-40W/230 V type G9, T300 C halogen lamps.
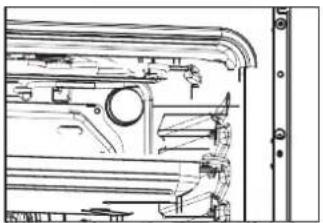
Replacing the oven light
1 Switch off and disconnect the power from the oven. Ensure that the internal parts are cool before touching internal parts.
2 Remove the lamp cover by turning it counter-clockwise (note, it may be stiff) and replace halogen lamp with a new one.
3 Re-fit the cover.
4 If in any doubt, consult a qualified electrician for help.
natural_image
Technical line drawing of a mechanical assembly with no visible text or symbols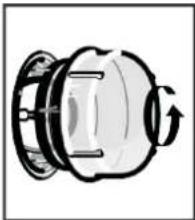
natural_image
Cross-sectional diagram of a mechanical component with no visible text or symbolsTrouble shooting
If a malfunction occurs, it often is due to a minor fault. Please read the follow instructions before calling the after-sales service:
| The oven does not work | Blown Fuse | Please check the fuse box that the fuse is in working order |
| Some hob zones are not heating | Incorrect setting | Please check all controls have been turned to the desired location |
| Installation | Please check that the appliances terminal box has been correctly installed (see installation instructions) | |
| The oven does not work | Blown Fuse | Please check the fuse box that the fuse is in working order |
Disposal
Do not dispose this product as unsorted municipal waste. Collection of such waste separately for special treatment is necessary.
We decline liability for any damage or accident derived from any use of this product which is not in conformity with the instructions contained in this booklet.
This appliance is labelled in compliance with European directive 201/19/EU for Waste Electrical and Electronic Equipment (WEEE).
Be ensuring that this appliance is disposed of correctly, you will help prevent any possible damage to the environment and to human health, which might otherwise be caused if it were disposed of in the wrong way.
The symbol on the product indicates that it may not be treated as normal household waste. It should be taken to a collection point for the recycling of electrical and electronic goods.
This appliance requires specialist waste disposal.
For further information regarding the treatment, recovery and recycling of this product please contact your local council, your household waste disposal service, or the shop where you purchased it.
Sicherheitshinweise
DIESE WARNHINWEISE WERDEN IM INTERESSE DER SICHERHEIT GEGEBEN, BITTE LESEN SIE SIE SORGFÄLTIG DURCH, BEVOR SIE DAS GERÄT INSTALLIEREN ODER BENUTZEN
Detection of small or non-magnetic items
natural_image
Simple diagram showing a circle with an arrow pointing inward, surrounded by scattered dots (no text or symbols)natural_image
Technical line drawing of a mechanical assembly with no visible text or symbols
natural_image
Pure mechanical component diagram without any text, numbers, or symbolsFehlerbehebung
A Spis
B Induktions kokplattor
C Kontrollpanel
D Ovnrist
E Dropppanna eller bakplåt
F Justerbara fötter
Tillbehör
Ovnrist:
HÅLLPLACEMENT WARNING:
Ugnslampa:

natural_image
Simple diagram showing a circle with a curved arrow and surrounding dots (no text or symbols)


- ADVARSEL HYLDEPLACERING:
- Fejlfinding
- Important Safety Warnings
- Safety when cleaning:
- Installation
- Positioning
- Product specifications:
- TILBEH∅R
- Wire shelf:
- Slider bracket:
- Universal pan:
- SHELF PLACEMENT WARNING:
- Oven controls - the function and temperature controls
- Oven Lamp:
- Defrost:
- Double grilling:
- Double grill:
- For energy-saved cooking:
- Radiant grilling:
- Convention with fan:
- Conventional cooking:
- Bottom heat:
- Instructions for use
- Using the oven
- Using the hob
- Working Principle
- Safety
- Detection of small or non-magnetic items
- Auto shutdown
- Preparation before using:
- Operating instructions
- You may have a number of different cooking vessels
- Failure display and inspection
- Hints and tips
- Baking tips
- Cookware Hobs
- Energy Saving
- Cleaning tips (Disconnect the appliance from the power supply.)
- Cleaning the outside of the oven (Disconnect the appliance from the power supply.)
- Removing the door for easier cleaning
- Replacing the oven light
- Trouble shooting
- Disposal
- Sicherheitshinweise
- DIESE WARNHINWEISE WERDEN IM INTERESSE DER SICHERHEIT GEGEBEN, BITTE LESEN SIE SIE SORGFÄLTIG DURCH, BEVOR SIE DAS GERÄT INSTALLIEREN ODER BENUTZEN
- Fehlerbehebung
- Tillbehör
- Ovnrist:
- HÅLLPLACEMENT WARNING:
- Ugnslampa:
Brand : Scandomestic
Model : SIK 810
Category : Cooker