
MTHT-1806 - Remote control Nexa - Free user manual and instructions
Find the device manual for free MTHT-1806 Nexa in PDF.


| Product Type | Wall Transmitter with Touch and Push Dimmer |
| Brand | Nexa |
| Model | MTHT-1806 |
| Battery | 1 x CR2032 (3V) |
| Radio Protocol | System Nexa (433.92 MHz) |
| Indoor Range | Up to 30 m (optimal conditions) |
| Operating Modes | On/Off, Dimming (2 options), Smart Mode (3 scenarios) |
| Switch Positions | Position 1 (On/Off/Dim), Position 2 (Smart Mode), Position 3 (Setting Smart Mode) |
| Installation | On flat surface (self-adhesive tape) or in wall box (screws) |
| Programming | Press center button once to program receiver |
| Memory Deletion | Press center button twice quickly |
| Auto-Calibration | 16 seconds after battery change or relocation |
| Safety | Do not repair; no serviceable parts |
| Waterproofing | Not waterproof; keep dry |
| Cleaning | Dry cloth only; no chemicals |
| Operating Temperature | Avoid extreme heat or cold |
| Compatibility | System Nexa ON/OFF and dimmer receivers |
| Minimum Distance Between Receivers | 50 cm |
| Life Support Equipment | Do not use for life support devices |
Frequently Asked Questions - MTHT-1806 Nexa
User questions about MTHT-1806 Nexa
0 question about this device. Answer the ones you know or ask your own.
Ask a new question about this device
Download the instructions for your Remote control in PDF format for free! Find your manual MTHT-1806 - Nexa and take your electronic device back in hand. On this page are published all the documents necessary for the use of your device. MTHT-1806 by Nexa.
USER MANUAL MTHT-1806 Nexa
natural_image
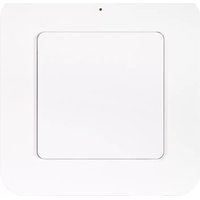
White square electronic device with a circular button and indicator light (no text or symbols visible)MTHT-1806 VÄGGSÄNDARE, TOUCH
TEKNISK DATA
Batteri 1 x CR2032
Radioprotokoll System Nexa (433,92 MHz)
The MTHT-1806 is a battery-powered System Nexa wall transmitter with touch- and push dimmer functions for dimmer receivers. It is simple to fit in a wall box or on a flat surface, using self-adhesive tape or screws. The wall transmitter can be used to contro System Nexa ON/OFF and dimmer receivers.
SAFETY
Read all the instructions carefully first. Call in a professional if necessary. Nexa cannot be held liable if the product is used for any purpose other than that for which it was designed, or if the associated instructions are not followed.
Do not attempt to repair the product. The product contains no serviceable parts.
Do not expose the product to extreme heat or cold, as this may damage the electronic circuits or shorten their service life.
INSTALLATION
- Insert the battery into the wall transmitter
- Fit the back plate to the wall (1a) or in a wall box (1b)
- Set the switch to the appropriate setting "Setting, switch"
- Press the wall transmitter firmly onto the back plate.
1A 1B


PROGRAMMING
- Set the receiver to programming mode, see the relevant manual.
- Press the centre of the transmitted one time.
CONFIRMATION OF PROGRAMMING
The receiver switches off and on two times; if a light is connected to the transmitter, it will flash twice. See the manual for the receiver.
DELETE MEMORY
- Set the receiver to programming mode, see the relevant manual.
- Press the centre of the transmitter two times in quick succession.
CONFIRMATION OF DELETION
The receiver switches off and on two times; if a light is connected to the transmitter, it will flash twice.
SETTING, SWITCH
Position 1 On/Off/Dimming
Position 2 Smart Mode
Position 3 Setting, Smart Mode
CONTROL (POSITION 1)
| ON | Press the button in the centre once to switch on. The dimmer receiver switches on at the most recently set dimmer level. |
| OFF | Press the button in the centre two times in quick succession to switch off. |
| DIM option 1 | Press the button in the centre once to switch on. Press briefly again to start the dimming cycle up/down; press briefly again to stop at the desired level |
DIM Press the button in the centre and hold it down to start the dimming cycle up or down; release it at the desired level. option 2
SMART MODE (POSITION 2)
| Scenario 1 | Press the button once to activate; the LED flashes Orange one time. |
| Scenario 2 | Press the button once to activate; the LED flashes Orange twice. |
| Scenario 3 | Press the button once to activate; the LED flashes Orange three times. |
SETTING, SMART MODE (POSITION 3)
- Start by setting the receivers to the status they are to have when the scenario is selected. For this phase, it can be practical to use a different remote control to input the settings in the receivers.
- Set the switch on the Smart button to position 3 (Setting, Smart Mode)
- Press the centre of the transmitter one time to save the settings to Scenario 1; two times to save the settings to Scenario 2; and three times to save the settings to Scenario 3. The LED ring will now flash Green three times followed by Orange one time to confirm that Scenario 1 has been saved, two times Orange to confirm that Scenario 2 has been saved, and three times Orange to confirm that Scenario 3 has been saved.
- Set the switch on the Smart button to position 2 (Smart Mode).
AUTO-CALIBRATION
Every time you replace the battery in the unit or move it to a different position or surface, the sensitivity of the touch plate will auto-calibrate for 16 seconds. This is to ensure that the transmitter is reacting correctly based on the material on which it is placed. Do not touch the transmitter during this period until the calibration has been completed.
SAFETY AND OTHER INFORMATION
Range indoors: up to 30 m (optimal conditions). The range is heavily dependent on local conditions – such as if there are any metals nearby. For example, the heavy metal coating in low-emission energy glass has a negative impact on the range of the radio signals. There may be limitations on the use of the unit outside the EU. If appropriate, check that the unit complies with the local regulations.
Max. load: Never connect lights or equipment that exceeds the maximum load of the receiver. This can result in faults, short circuit or fire.
Life-support equipment : Never use Nexa products for life support equipment or other devices where faults or disruptions can have life-threatening consequences.
Disruptions: All wireless units can be affected by disruptions that may have an impact on performance and range. The minimum distance between two receivers should therefore be at least 50~cm . Repairs: Do not attempt to repair the product. It does not contain any serviceable parts.
Waterproofing: The product is not waterproof. Make sure that it is always dry. Moisture will corrode the electronic components inside and may result in short circuit, faults and risk of electric shock. Cleaning: Clean the product with a dry cloth. Do not use chemicals, solvents or potent cleaning agents.
Environment: Do not expose the product to extreme heat or cold, as this may damage the electronic circuits or shorten their service life.
NORSK
STYRING (POSISJON 1)
SMART MODE (POSISJON 2)
natural_image
White square electronic device with circular button and dot on top (no text or symbols visible)MTHT-1806 SEINÄLÄHETIN, TOUCH
TEKNISET TIEDOT
Paristo 1 x CR2032
Radiotaajuus System Nexa (433,92 MHz)
Kantama enint. 30 m

Brand : Nexa
Model : MTHT-1806
Category : Remote control