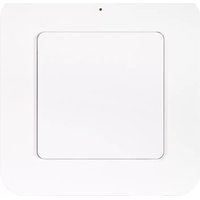
MWST-1809 - Remote control Nexa - Free user manual and instructions
Find the device manual for free MWST-1809 Nexa in PDF.


| Brand | Nexa |
| Model | MWST-1809 |
| Product Type | Wireless Remote Control |
| Frequency | 433.92 MHz |
| Range | Up to 30 meters (open space) |
| Battery Type | CR2032 (3V lithium coin cell) |
| Number of Channels | 1 |
| Dimensions | Approx. 86 x 43 x 16 mm |
| Weight | Approx. 20 g (including battery) |
| Material | ABS plastic |
| Color | White |
| Compatibility | Nexa receivers (switches, sockets, etc.) |
| Primary Functions | On/Off control of connected devices |
| Additional Buttons | None (single button) |
| LED Indicator | Red LED for signal confirmation |
| Pairing Method | Self-learning via receiver's learn button |
| Warranty | 2 years |
Frequently Asked Questions - MWST-1809 Nexa
User questions about MWST-1809 Nexa
0 question about this device. Answer the ones you know or ask your own.
Ask a new question about this device
Download the instructions for your Remote control in PDF format for free! Find your manual MWST-1809 - Nexa and take your electronic device back in hand. On this page are published all the documents necessary for the use of your device. MWST-1809 by Nexa.
USER MANUAL MWST-1809 Nexa
natural_image
Two white square electronic devices with internal compartments, no visible text or symbolsMWST-1809 / MWST-1812 VÄGGSÄNDARE
TEKNISK DATA
Batteri 1 x CR2032
Radioprotokoll System Nexa (433,92 MHz)
NEXA

natural_image
Two white square electronic devices with internal cutouts, no visible text or symbolsMWST-1809 / MWST-1812
WALL TRANSMITTER
TECHNICAL DATA
Battery 1 x CR2032
Radio protocol System Nexa (433.92 MHz)
Range up to 30 m
MWST-1809: 1 channel
MWST-1812: 2 channels
Timer interval Off, 5s, 1m, 10m, 30m, 60m
Operating temperature 0-45 °C
IP rating IP20 Indoor use
Dimensions (W x H x D) 80 x 80 x 14 mm
A declaration of conformity is available at www.nexa.se
NEXA
NEXA AB, DATAVÄGEN 37B, 436 32 ASKIM, SWEDEN
info@nexa.se | www.nexa.se
ENGLISH
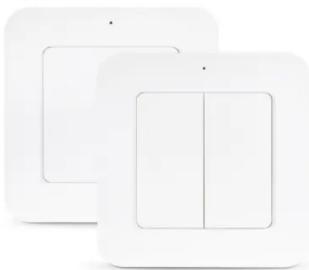
MWST 1809 and MWST 1812 are battery powered System Nexa wall transmitters with built-in switch off timer and function for pushdim with System Nexa dimmer receiver.
They are simple to install on a switch box or on a flat surface with self-adhesive tape or screw. The wall transmitter can control System Nexa ON/OFF- and dimmer receiver.
SAFETY
Read through the entire instruction first. Engage a professional if so required. Nexa cannot be held liable if the product is used for any purpose other than the one for which it is designed, or if there is failure to comply with the instruction.
Do not attempt to repair the product. The product contains no repairable parts.
Do not expose the product to intense heat or cold, because it could damage or shorten the service life of the electric circuits.
INSTALLATION
-
Place the battery in the wall transmitter
-
Fix the back piece on the wall (1a) or switch box (1b)
-
Press the wall transmitter into place on the back piece.


PAIRING
-
Set the receiver to pairing mode – see respective manual
-
Press the upper part (ON) of the selected toggle switch within 6 seconds.
PAIRING CONFIRMATION
The LED indicator on the receiver flashes rapidly. If a light is connected to the receiver, this flashes twice. See also the receiver's manual.
DELETING MEMORY
-
Set the receiver to pairing mode – see respective manual.
-
Press the lower part (OFF) of the selected toggle switch within 6 seconds.
CONFIRMATION DELETION
The LED indicator on the receiver flashes rapidly. If a light is connected to the receiver, this flashes twice. See also the receiver's
SWITCH OFF TIMER
MWST-1809/1812 has built-in switch off timer which automatically sends an "OFF" signal to trained receiver when the set time has been reached.
SETTING SWITCH OFF TIMER
-
Press and hold down the toggle switch's upper and lower part for 3 seconds, green LED starts to flash (the number of flashes represents the current timer setting, see table below).
-
Press the toggle switch's upper part to increase one step or on the toggle switch's lower part to decrease one step.
-
Press and hold down the toggle switch's upper and lower part for 3 seconds to save the setting, LED flashes green rapidly to confirm timer is set.
1 flash Timer not activated
2 flashes 5 seconds
3 flashes 1 minute
4 flashes 10 minutes
5 flashes 30 minutes
6 flashes 60 minutes
Setting mode finishes after 16 seconds if no setting is saved.
CONTROL
ON Press briefly on the toggle switch's upper part to turn on. The dimmer receiver turns on at the most recently set dimmer level
OFF Press briefly on the toggle switch's lower part to turn off.
DIMMER Max./Min. Press twice briefly on the toggle switch's upper part to turn on at the dimmer's highest level. Press twice briefly on the toggle switch's lower part to turn on at the dimmer's lowest level.
DIM model name that starts with MXXX
Dim up: Press and hold down the toggle switch's upper part, release the toggle switch at the required dimmer level. Dim down: Press and hold down the toggle switch's lower part, release the toggle switch at the required dimmer level.
DIM Press on the toggle switch's upper part to turn on. Press briefly on the toggle switch again, to start the dimming cycle. Press briefly to stop at required level.
SAFETY AND INFORMATION
Indoor range: up to 30 m (optimal conditions). The range is strongly dependent on local conditions, such as the presence of metals. For example, the thin metal coating in Low-emissivity (Low-E) glass has a negative impact on the range of radio signals. There may be restrictions on the use of this device outside the EU. If applicable, check whether this device complies with local directives.
Maximum load: Never connect lights or equipment that exceed the maximum load of the receiver, as it can result in defects, a short circuit or fire.
Life-support: Never use Nexa products for life-support systems or other applications in which equipment malfunctions can have life-threatening consequences.
Interference: All wireless devices may be subject to interference, which could affect performance. The minimum distance between 2 receivers should be at least 50 cm.
Repairing: Do not attempt to repair this product. There are no user-serviceable parts inside.
Water-resistance: This product is not water-resistant. Keep it dry. Moisture will corrode the inner electronics and can result in a short circuit, defects and shock hazard.
Cleaning: Use a dry cloth to clean this product. Do not use harsh chemicals, cleaning solvents, or strong detergents.
Environment: Do not expose the product to excessive heat or cold, as it can damage or shorten the life of electronic circuit boards.

NEXA

natural_image
Two white square electronic devices with internal cutouts, no visible text or symbolsMWST-1809/MWST-1812 VEGGSENDER
TEKNISKE SPESIFIKASJONER
Batteri 1 x CR2032
Radioprotokoll System Nexa (433,92 MHz)
NEXA
natural_image
Two white square electronic devices with internal cutouts, no visible text or symbolsMWST-1809 / MWST-1812 SEINÄLÄHETIN
TEKNISET TIEDOT
Paristo 1 x CR2032
Radioprotokolla System Nexa (433,92 MHz)
Kantama Jopa 30 m
MWST-1809: 1 kanava


Brand : Nexa
Model : MWST-1809
Category : Remote control