ToughPhone TP802 - Smartphone JCB - Free user manual and instructions
Find the device manual for free ToughPhone TP802 JCB in PDF.


User questions about ToughPhone TP802 JCB
0 question about this device. Answer the ones you know or ask your own.
Ask a new question about this device
Download the instructions for your Smartphone in PDF format for free! Find your manual ToughPhone TP802 - JCB and take your electronic device back in hand. On this page are published all the documents necessary for the use of your device. ToughPhone TP802 by JCB.
USER MANUAL ToughPhone TP802 JCB
Thank you for purchasing JCB ToughPhone TP802 mobile phone.
Contents
Introduction
1. Using the Phone
1.1 battery
1.1.1 installation of battery
1.1.2 charging the battery
1.1.3 use of battery
1.2 plug and unplug the earphone
1.3 SIM card
1.3.1 Inserting the SIM card
1.3.2 Insert the T-FLASH
1.3.3 Using the USB and T-FLASH data cable
1.3.4 unlock the SIM card
1.4 Description of the mobile phone
1.4.1 Phone status icons
1.4.2 specification
1.4.3 keypad description
1.4.4 Text editing window
2. Dial and answer the call
2.1 making a call
2.1.1 direct dial
2.1.2 making a call from the phone list
2.1.3 speed dial
2.2 answering a call
2.2.1 answering new call
2.2.2 adjust the volume
2.2.3 hands free
2.2.4 end a call
2.2.5 connecting two calls at the same time
2.2.6 conference call
2.2.7 emergency call
3. Menu Function
4. Time Manager
4.1 alarm
4.2 tasks
4.3 time and date
4.4 stopwatch
5. User Profiles
5.1 general
5.2 meeting
5.3 outdoor
5.4 indoor
5.5 headset
5.6 Bluetooth
6. Organizer
6.1 world clock
6.2 Calendar
6.3 Calculator
6.4 Bluetooth
6.5 unit converter
6.6 currency converter
7. Phonebook
7.1 view
7.2 send text message
7.3 send multimedia message
7.4 call
7.5 edit
7.6 delete
7.7 copy
7.8 move
7.9 send contact
7.10 add to blacklist
7.11 Caller groups
7.12 Phonebook settings
8. Messaging
8.1 write message
8.2 inbox
8.3 drafts
8.4 outbox
8.5 MMS
8.6 Broadcast message
8.7 Templates
8.8 SMS settings
9. Call Center
9.1 call history
9.2 call settings
9.2.1 caller ID
9.2.2 call waiting
9.2.3 call divert
9.2.4 call barring
9.2.5 line stitching
9.2.6 closed user group
9.2.7 advance settings
9.2.7.1 blacklist
9.2.7.2 auto redial
9.2.7.3 call time display
9.2.7.4 call time reminder
9.2.7.5 auto quick end
10. Settings
10.1 phone settings
10.1.1 schedule power on/off
10.1.2 language
10.1.3 pref. input methods
10.1.4 display
10.1.5 themes
10.1.6 dedicated key
10.1.7 auto update of date and time
10.1.8 flight mode
10.1.9 misc. settings
10.2 network settings
10.2.1 network selection
10.2.2 preferences
10.3 security settings
10.3.1 SIM lock
10.3.2 Phone lock
10.3.3 Auto keypad lock
10.3.4 Fixed dial
10.3.5 Barred dial
10.3.6 Change password
10.4 connectivity
10.5 restore factory settings
10.6 sound effects
10.7 file manager
11 Multimedia
11.1 video player
11.2 audio player
11.3 Sound recorder
11.4 Ebook
11.5 FM radio
12 Fun & Games
12.1 Internet service
12.2 games
Frequently Asked Questions
Maintenance guideline
Important Product Information Guide
Brief introduction
Thank you for choosing the JCB TP802GSM cellular phone. You'll find details of the great features of the phone in this manual. The TP802 is waterproof IPX4, dustproof IP5, The phone is rugged enough to withstand a drop of 1.5m onto a hard surface. It also supports FM radio, Bluetooth, MMS, MP3 playback, Video player, Sound recorder and Ebook reader.
Please ensure you read the Important Product Information Guide at the end of this user manual prior to using the product
1. Using the Phone
1.1 Battery
The battery is attached with the mobile phone. The battery is not charged when the mobile phone is purchased but can support power on. Please recharge it for use after complete use up the battery for the first three times, which makes this battery easier to achieve the best using state.
1.1.1 Installation of battery
Put the back of the mobile phone upward; press the clip cover according to the picture below.
first then take off the rear
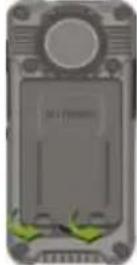
Dig out the bottom of the battery and get the battery out.
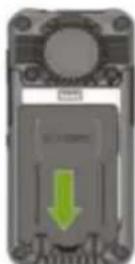
When installing the battery, insert the metal teeth at the top of the battery into corresponding slot of the mobile phone, and then press the battery down to install the battery in place. The battery must be installed before power on.
1.1.2 Charging the battery
Put the charging connector to the phone like the picture below:
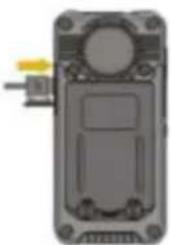
natural_image
Top-down view of a gray electronic device casing with a circular top and internal compartments, showing no visible text or symbols.Connect to the charging plug to the socket of the Power Supply After charging, take out of the charging connector.
Battery Use: When the power of the battery is lower than normal, the phone will prompt battery low. Please charge the battery, otherwise you will lose any files which are not saved. If you don't charge for a long time, the phone will be powered off automatically.
When charging, the battery icon in the right upper corner of the screen will appear in a dynamic rolling manner. During the charging period, the battery, mobile phone and charger will become hot, which is normal.
Warning:
The stated charging temperature ranges from 0°C to 40°C. Please do not use charging equipment if the temperature exceeds the range. Please only use the charger provided by the supplier.
1.1.3 Use of battery
In actual use, the standby time and talk time of the mobile phone varies with the network status, working environment and different using manners.
Warning:
You must power off the mobile phone before removing the SIM card. Inserting or removing the SIM card is absolutely prohibited when the external power supply is connected, otherwise the SIM card and mobile phone may be damaged.
1.3 SIM card
Power off the mobile phone, remove the rear cover and battery
1.3.1 Inserting the SIM card
Insert the SIM card correctly in the card slot; install battery and the rear cover of the mobile phone.
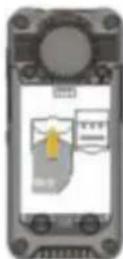
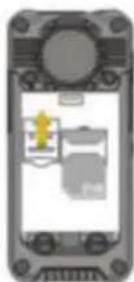
1.3.2 Insert T-FLASH card
Open the memory card holder, and insert the memory card into the slot at the bottom then close the memory card holder
1.3.3 Using the USB and T-FLASH data cable
Before the first time to use T-Flash, please format the T-Flash via a PC.
Use the USB cable attached with the phone to connect PC and the phone.
Under Power on status, the USB setting interface will automatically pop up.
Select "Mass Storage", then PC shows "removable disc". Click into the saved files, the files can be copied, moved etc.
Eg:MP3 to Music folder, MP4 or AVI files to Video file, Audio files to Audio folder, pictures to Images folder, txt files to Ebook folder.
Note: Don't pull out USB cable from PC directly, exit by clicking the USB icon from PC table first, when you see "remove hardware safely", select USB and stop it, then pull out the USB cable.
1.3.4 Unlock the SIM card
In order to prevent illegal use, SIM card adopts PIN code (personal identification code) encryption protection.
If this function is selected, the PIN code should be input correctly each time when you power on the mobile phone, thus to unlock the SIM card for normal use. Users can disarm the SIM card protection.
If the PIN code input is incorrect for 3 consecutive times, your SIM card will be locked by the network. The mobile phone will require the PUK code which will be provided by your network operator. If the PUK code input is incorrect for 10 consecutive times, the SIM card will be permanently barred.
Note:
Your network operator will set a standard PIN code (4 to 8 numbers) for you and you should change it to private password as soon as possible.
1.4.1 Phone status icons
You can find the information via the icons displayed on the screen.
 | Indicates current signal intensity |
| Indicates SIM1is connecting network currently | |
| Indicates unread short message | |
| Indicates unread multimedia message and download message | |
| Indicates divert all voice calls unconditional | |
| Indicates missed calls | |
| Current Alert type is : Vibration | |
| Current Alert type is: Vibration / Or under silent mode | |
| Current Alert type is: Vib. and ring | |
| Current Alert type is: Vib. then ring | |
| Silence mode | |
| Conversation and keeping conversation | |
| Indicates keypad is locked | |
| Indicates earphone has been inserted | |
| Indicates Bluetooth is activated | |
| Bluetooth matched earphone | |
| Indicates Alarm is set | |
| Indicates current mobile phone circuit | |
| indicating MP3 playback | |
| Stopwatch has been set | |
| Indicates current battery power |
View of mobile phone
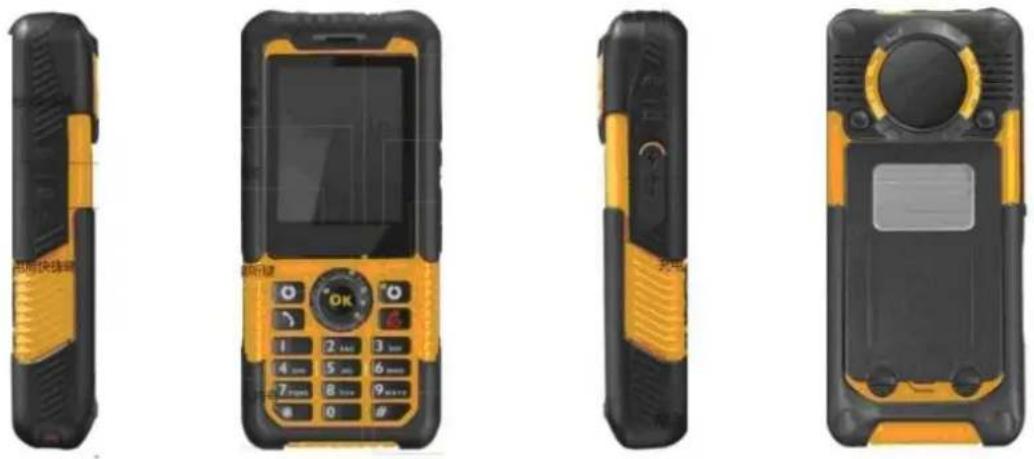
1.4.2 Specification
Frequency: GSM 900/1800/1900 MHz
Dimension: 53 mm X 115 mm X 23mm
Talk time: 4.5h (depends on the local network)
Standby time: 400h (depends on the local network)
Screen parameter: 2.0" TFT 65K COLRO, 176*220pixels
Phonebook capacity: 1000pcs
SMS capacity: 1000pcs
Battery: 1300mAh
Temperature: -20degree to 55 degree
Support language: English, French, Spanish, English, Portuguese, German
Mobile phone antenna: Inside antenna
Memory: supports up to 16G
IP54 Dustproof and water proof:
The first digit (5) indicates resistance to dust. It's not completely impervious to dust but any dust which does enter will not have any harmful effect on the equipment. The second digit (4) indicates the phone is resistant to splashing water. Splashes hitting the phone from any angle will have no harmful effect.
1.4.3 Keypad Description
Functions of the keys are described as following:
| Keys | Function description |
Left softkey  | OK; pop-up menu; short press in the standby screen to enter the main menu. |
Right softkey  | Clear; back; short press in the standby screen to enter the Phonebook. |
Sendkey  | Making a call, press Snd key for dialing out; answering a call; in the standby screen press the Snd key to enter the Call history. |
Endkey  | Hang up a call; go back to the standby screen.Short press End key to off/ on the background light; long press End to power on / off the phone |
| OK key | OK; short press to enter menu screen; short press to select and check the unread message |
| Navigationkey | Left navigation key (L): moving to the left; in the Languages press it to switch to the next module clockwise. |
| Right navigation key (R): moving to the right; in the MP3 playback; press it to switch to the module anticlockwise. | |
| UP、Down navigation key: Up: Write Massage; Down: FM radio. In User Profile, Profile options -> Customize -> Volume-> Ringtone, by short pressing the up or down direction key to adjust volume. In Games interface to speed up or back off operation | |
| keypad | Input numbers, letters, punctuation; shortpress Number key to enter corresponding menu; long press 2-9 to speed dial (need set); in the editing screen, short press # key to switch input method; short press * key to enter the symbol choosing interface; long press D key in dial screen to input +, p, w. |
| Torch | By short pressing to light up |
| *key | Short press *key to enter the symbol choosing interface; |
| #key | long press #key to active Silent mode; in the editing state, short press #key to switch input method; |
| *&#key | adjust the volume under FM screen |
1.4.4 Text editing window
Smart ABC/abc input method
When you use smart ABC/abc input method, you only need to press 2-9 to input letters, the phone will provide all possible letters for your choice, for example, press number key twice, it will list "aa" or "ab\ac" etc for your choice, and of course you can keep on inputting letters to reduce the choice able letters.
Other grammar
In editing screen, you can select and edit grammar of current language by entering input method menu.
2 Dial and answer the call
2.1 Making a call
2.1.1 Direct dial
Making domestic call
In the standby screen, input the call numbers (please add the area code for domestic long-distance calls), press Snd to make the call.
Call extension of fixed number
When calling the extension number of a fixed number, you need to dial the host number and then dial the extension number according to the corresponding voice hints. If you insert "p" between the host number and extension number, the mobile phone will automatically dial the extension number for you.
Call an international call
To make an international call, you simply need to input the symbol “+”(long press 0) key, then input the country code and complete phone number that you want to dial.
2.1.2 Making a call from phonebook list
In the Phonebook list, select corresponding contact person and phone number, press Snd key to make the call
2.1.3 Speed dial
Enter phonebook→option→phonebook setting→speed dial
On the standby screen, long press the number keys and you can automatically dial
the number that has been set up. If speed dial has not been set for the number key you long pressed, the mobile phone will hint “No speed dial number”.
2.2 Answer a call
2.2.1 Answering new call
Press

answer when there is new call
2.2.2 Adjust volume
You can adjust voice volume by using up/ down key during conversation.
2.2.3 Hand Free
Press right soft key to choose "Hand free", you can switch conversation between receiver and speaker
2.2.4 End a Call
Press

ight soft key to refuse calls
2.2.5 Connecting two calls at the same time.
Active option, and you can operate as below: Swap: switch call
Conference: making conference call (network support is required)
End single call: hang up the current call.
End all calls: hang up all the current calls.
Transfer (network support is required): transfer the current call to your designated phone number.
New call: input new phone number to dial.
Phonebook: enter the phonebook interface.
Messages: edit the message to send it.
Sound recorder: can record and save the current call.
Silence: Open Silence mode, the caller can't hear any sound at your side.
DTMF: on/off settings can be conducted. If the function is activated, when calling the telephone exchange, you can call the extension in accordance with voice clews; the aforesaid functions are unavailable if the function is off.
"Connecting and preset Bluetooth Headset": Switch on Bluetooth→search handsfree device →pairing→Preset to Bluetooth headset device; choose"connecting and preset Bluetooth headset" during calling then can realize handsfree communication. Details as per the Bluetooth menu.
Conference call
Hold conf. call: hold the current call with members of the conference, then others cannot hear your voice; and the option of Hold conf. call changed to Retrieve conf. call, select it and you can recover normal conference call.
Split: separate the selected member from the conference call.
Emergency call
If you are in the network coverage area, even without the SIM card, you are able to make an emergency call.
Input the PIN code or unlock the phone unlocking interface, press \$OS and you can make an emergency call.
Note:
The emergency call numbers in different countries or regions are different. Please refer to the local numbers for specific emergency service numbers.
- Menu Function
| Time Manage | AlarmTaskTime and dateStopwatch |
| User profiles | GeneralMeetingOutdoorIndoorHeadsetBluetooth |
| Organizer | World clockCalendarCalculatorBluetoothUnit converterCurrency converter |
| Phonebook-- Option | ViewSend text messageSend multimediaCallEditDeleteCopyMoveSend contactAdd backlistCaller groupsPhonebook setting |
| Messaging | Write messageInboxDraftsOutboxMMSBroadcast messageTemplatesSMS settings |
| Call center | Call history----Missed calls/ Dialled calls/ Received calls/Delete call logs/ Call timers/ Call cost/ Text msg. counter/GPRS counterCall settingsCaller IDCall waitingCall divertCall barringLine switchingClosed user groupAdvance settings----Blacklist/ Auto redial/ Call time display/Call time reminder/ Auto quick end |
| Settings | Phone settings----Schedule power on/ off; Language;Pref.Input methods; Display; /Themes/ Dedicated key /Autoupdate of date and time/Flight mode; Misc. settings( LCD backlight)Security settings---SIM lock/ Phonelock/ Change passwordConnectivityRestore factory settingsSound effectsFile manager |
| Multimedia | Video PlayerAudio PlayerSound RecorderEbook ReaderFM Radio |
| Fun & Games | STK serviceInternet serviceGames |
4. Time Manager
4.1 Alarm
Select an alarm, enter the settings interface of this alarm, (You can set a maximum of 5 Alarms most), you can turn on / off this alarm and set the time of the alarm, also, you can set the alarm details such as Alert type etc. (Enter through Profile options – Customized – tone setting to set the Alert ringtone)
4.2 Tasks
Enter task menu, you can choose "Add" to open a new folder.
If the tasks list has entries, you can activate "option" to operate as below:
View: View the item that you choose
ADD: You can choose corresponding catalogue to add new task.
Edit: Edit the task that you choose
Delete: Delete the task
Delete overdue: Delete overdue tasks.
Delete all: Delete all tasks
Jump to date: Switch to the date in valid time range, to view the task.
Send vCalendar: Send current task by short message/ Multimedia message/ Bluetooth
Save as file: Save current task by file form.
4.3 Time and Date
Time and date: modify the current city, time, date and the format.
4.4 Stopwatch
The stopwatch function, allows you to select the split timing or lap timing and view records that you have saved.
5. User profiles
You can change the profile setting ( such as tone settings, volume and alert type etc ) according to your own preferences. The phone provides a set of default profiles including General, Meeting, Outdoor, Indoor, Silent, Headset and Bluetooth. When you insert a headset in the mobile phone, headset mode will be activated automatically.
Press OK key, to enter the profile menu.
Press left soft key, enter customized menu, you can select parameters under each profile such as Tone(Incoming call/ Alarm/ Message/ Keypad), Volume, Alert type; Ring type, Extra tone, Answer mode.
Note: Each profiles or volumes will have a different screen icon.
6 Organizer
6.1 World Clock
This feature allows you to check time of major cities in the world;
Calendar
The current month calendar is displayed and the current date has a frame around the number with special color. Select Options, to view:
New: add a new calendar or edit, delete and send the selected calendar.
View all: you can view the entire calendar. You also can add a new calendar
Add event: you can select event type and add a new event to the calendar.
Delete event: delete current event.
Jump to date: input the date to viewed (in a valid period of time)
Weekly view : (Go to monthly view): Set the display mode of calendar as weekly view chart/monthly view chart.
6.3 Calculator
The calculator performs four basic functions: addition, subtraction, multiplication and division.
6.4 Bluetooth
In the Bluetooth menu you can select the following:
Power: turn on/off the Bluetooth function. When Bluetooth function is turned off, all Bluetooth connection are ended. You can transmit and receive data by using Bluetooth when it is switched on
Visibility: set on/off visibility of Bluetooth.
My device: you can select new device search and pair with another mobile phone, records of previously paired devices will be displayed.
Search Audio device: search the hands-free devices
Change device name: you can change the phones name.
Advanced: you can view my address, set the audio path, storage, sharing permission and remote control.
Note: The received file that transmitted by Bluetooth are stored in Received folder automatically.
How to pair a Bluetooth device and transmit files
To transmit files by Bluetooth under "my device" or other menus: search new device=>input same password as the desired device for pairing=>successfully connected=>select file and start transmitting.
To make a call with Bluetooth headset
Make sure the Bluetooth headset is fully charged r=> put the headset to pairing mode (check the manual of Bluetooth headset)=>select "search audio device" or from "my device" to search=> pairing=>successfully pairing, the Bluetooth icon will turn green and you can start to make a call. Note: All the files received by Bluetooth will be default saved to Received file.
6.5 Unit converter
The Unit Converter can convert Weight or Length
6.6 Currency converter
This function, if you input the rate and the amount of money in local, you can get the result of the equivalence money of foreign.
7 Phonebook
In the Phonebook menu, you can input the name to search for contacts; you can also add new contacts.
Check: check the contacts
Send message: send a message to current contact.
Send MMS: Send a mms to current contact.
Call: choose to call the contact.
Edit: edit details of the contact.
Delete: Delete the current contacts information
Copy: choose to copy the current contact to phone/SIM/file manager.
Move: Move the contacts to phone/SIM.
Send contact: send the current contact
Add to blacklist: add a contact to the blacklist.
Caller groups: you can add any contacts to any group of your friends/family/colleagues.
Phonebook setting: you can choose save the contacts to the phone or to the SIM, input "my number", choose Vcard version, check memory status, and delete contacts.
8 Messaging
Write message: you can press LSK to create a new message, you also can switch to MMS in message editing screen by use the menu key. In the messages screen, the following operations are available:
Inbox: you can view the received messages including SMS and MMS; you can also view, reply, call sender, forward and delete.
Drafts: store the messages before sending.
Outbox: store the massages that have been sent unsuccessfully.
MMS: this function needs to be supported by your SIM card. Please consult your network service provider for specific situations.
Write message
In the MMS option, you can perform the following functions: receiver, script, secret script, theme, topic and contents.
When you input the receiver's information, you can input the receiver's phone number directly, or press "check" from the phonebook. If you want to send one message to multiple contacts, you just press choose under the receiver option:
Add numbers: add receiver's numbers
Add receiver's email: add receiver's email address.
Edit: edit the receiver's number
Delete: move the numbers from receiver's list.
Delete All: delete all receiver's numbers from the list
The theme of the MMS can be empty, and the message will be sent as no theme.
In the MMS mode, press "option", you can "add picture, add audio or add attachment"
After completing the message, you can choose to send, save, save to drafts and save to template.
Inbox
When you receive a new MMS, you will be notified you, press read, then it will start the MMS download.
Outbox
You can check an MMS you are editing in the outbox.
Drafts
You can save a message to Drafts for editing or sending at a later date.
MMS setting
Storage status : you can check the how much memory space you have used.
Note : The MMS size is related to the operator, if the size of MMS is beyond the memory limits, the phone will be unable to receive the MMS successfully.
Broadcast message: you can select the receive mode( off or on,) choose the language and channel settings.
Templates: you can check for preinstalled message templates or edit from an existing message.
SMS setting,: you can select profile setting, check memory status, preferred storage etc.
9 Call center
9.1 Call history
The call history will display missed calls, dialled calls, received calls and call timers.
Under each record, you can have the option to view, call and send a text message.
Delete all :delete all the calls history at one time.
Call timer : see how long the last call lasted
Call cost: if supported by operator.
Text message counter: check how many message you received and sent.
GPRS counter: you can check how much data you send and receive, you also can reset this date to zero.
9.2 Call settings
9.2.1 Caller ID
You have the option to modify how your calling ID is displayed “ Set by network, Hide ID or Send ID” Set by network is the default in the phone.
9.2.2 Call waiting
If you activate call waiting a new incoming call (whilst in an existing call) will be displayed on the phone screen and you can receive that call normally.
9.2.3 Call divert
This function is used to transfer the call to your designated phone.
9.2.4 Call barring
This function needs network support. Your Network provider will provide the corresponding network password for you activate call barring service.
9.2.5 Line switching: switch the phone current line.
9.2.6 Closed user group : this function need the help from operator.
9.2.7 Advance settings
9.2.7.1 Blacklist: If you select this mode, you can input any numbers that you want to put in the blacklist.
9.2.7.2 Auto redial: you can choose this function mode on or off.
9.2.7.3 Call time display: During your call, displays how long the call lasts.
9.2.7.4 Call time reminder: You can set it remind you in single or periodic.
9.2.7.5 Auto quick end: You can set it auto end a call from 1 s to 9999 s.
10 Settings
10.1 Phone Settings
10.1.1 Time and date: modify the current city, time, date and the format.
10.1.2 Language: you can set the language of the mobile phone.
10.1.3 Pref. input methods: there are multiple text input methods to be selected. You can choose one as the default method for text editing.
10.1.4 Display settings: you can set display options such as screen saver, main menu effect, show date, show operator name and greeting text.
10.1.5 Themes: current menu style.
10.1.6 Dedicated Key: you can set the navigation key's function from the list
10.1.7 Auto update of date and time: the phone can update time Network.
10.1.8 Flight mode: you can set the phone into flight mode.
10.1.9 Other setting: you can set the LCD backlight brightness
10.2 Network settings
10.2.1 Network selection: search new network according to the network searching mode or select the network you need from the network list.
10.2.2 Preferences: select and set the preferences of network.
10.3 Security Settings
10.3.1 SIM lock: this function can prevent others from using your SIM card without your permission. After the SIM card PIN code is activated, the correct PIN code must be entered when the mobile phone is powered on; otherwise you can only make emergency call.
Note: PIN code is the operating password and relative with the SIM card. The SIM card will be locked, if the PIN code is entered incorrectly 3 consecutive times. At this time, you need the PUK code to unlock the SIM card.
10.3.2 Phone lock : This function locks the phone and prevents other people from using the mobile phone without permission (default password is 0000).
10.3.3 Auto keypad lock : If this function is activated, when the phone is in standby status the keypad will be locked automatically after the set time. The standby screen will show keypad locked icon. At the left bottom corner of the screen, the word Unlock will appear. To unlock the mobile phone, press left key and “*” key
10.3.4 Fixed dial: if activated, the mobile phone is only allowed to dial telephone numbers from the fixed dial list. To turn on the function, you need to input your PIN2 code. Please consult your network service provider for specific situations.
Note: When the Fixed dial function is active, the functions of SIM card will be restricted, such as dial call, send SMS, and send MMS.
10.3.5 Barred dial: this function needs to be supported by the SIM card. Please consult your network service provider for specifics.
10.3.6 Change password: you can change the password of SIM PIN and SIM PIN2 through the system prompts
10.4 Connectivity
GSM data: you can choose to edit the GSM account, numbers, user name, password line type, speed, primary DNS.
GPRS : you can choose to edit the GPS account name, GPRS APN, user name, pass word, Auth.type, primary DNS.
10.5 Restore Factory Settings
The mobile phone will prompt you to input a password (default password is 1122). After running the Restore factory settings, will restore the phone to the factory default settings.
10.6 Sound Effects
Select different sound effect to playback the MP3.
10.7 File Manager
The File Manager will show the phone and memory file locations. The top sections of the display shows the capacity and surplus storage available in each location. The following features are available:
Select Phone or Memory card to open, format, rename or check details of the folder; Opening one of the folders, you can Open/play, New folder, Rename, Delete, Sort by, If you Enter one of the folder you can conduct Play, send to Bluetooth, Use as ringtone or wallpaper, New folder, Rename, Delete, Sort by, Mark several, Copy, Move and Delete All,
Note: Files to be transmitted need be the same format as that supported at the destination, or, sending may fail.
11 Multimedia
11.1 Video Player
The video player has the following features
Play: Play the current video file.
Send: send the selected video file.
Rename: Rename the selected video file.
Delete: Delete the current video file.
Delete all files: Delete all video files listed.
Array: Array the video files listed.
Note: only the video files that are saved in "Videos" folder can be played.
11.2 Audio Player
The audio player has the following features
Play: play the current audio file.
Details: check the details of the file.
Add to ringtones: add the current audio file to ringtone.
Reflash list: (when the "auto list" in "setting" menu is set "on")
Settings: set the parameters of audio player
Preferred playlist: Memory card or Phone.
List auto generated: when it's set ON, all MP3 will be auto added to MP3 playback list. When it's set OFF, MP3 can be added manually.
Repeat: playback current music repeatedly.
Shuffle: Shuffle playback of all MP3 in the list.
Background play: exit MP3 playback interface, music is still playing.
Bluetooth settings: set Bluetooth stereo output on or off.
Bluetooth Stereo Headset : If paired play the MP3 to the headset
Audio effect: select different audio effect for the current music.
Note: only audio files that saved in "My audio" folder can be played.
11.3 Sound Recorder
The sound recorder has the following features
New record: start the new recording.
List: list the recorder files.
Play: play the current selected recording file.
Append: continue to add record on the previously selected recorded file.
Rename: rename of the current recording file.
Delete: delete the current selected recording file.
Delete All: Delete all the files recorded.
Use: send current selected recording to user profiles.
Send: send current selected recording file.
Settings: you can set the preferred storage location, file format, audio quality of the recording file.
11.4 Ebook reader
This function can be used to read files which are stored in the phone or memory card (confirm the memory card is inserted).
The Ebook has the following features
Open ebook: read the file current selected.
Clean up bookshelf: rearrange the files in the folder.
Global settings: set the font style, font size, scroll by, auto scroll, scroll speed, full screen, Encoding, alignment and select storage for reading of Ebook.
Book info: display the content of Ebook such as title, size, and format.
Delete: delete the selected file.
Delete all files: delete all files displayed in Ebook menu.
Sort by: arrange all files in sequence which is displayed in Ebook.
Apply global settings: renew the relative settings of Ebook.
Help: introduce shortcut key of Ebook functions.
11.5 FM radio
The FM Radio has the following features
Channel list: display all the channels existing in the list.
Manual input: manually input the channels.
Preset auto search: automatically search channels and update the current channel list.
Settings: set the parameter of FM radio.
Note: Plug in earphone, then press left soft button to the FM radio interface. Press up direction key to start auto search, or left/right direction key to start manual search. Press down direction key to stop FM playback. Press side volume button to adjust volume.
Note: The Earphone acts as the FM receiving antenna. The FM radio can only work with earphone plugged in.
12 Fun and Game
12.1 Internet service
The Internet Service has the following features :
Homepage: you can access the preset website directly.
Bookmarks: bookmark is used to save the websites you use most often.
Recent Pages: look at the recent browsed history
Offline pages: look at pages saved as offline pages.
Input address: enter the website editing interface.
Service inbox: stored the service message.
Settings: enter the Settings menu list and the following functions are available:
Edit account: you can edit and activate the selected account for the SIM card. You can surf on the internet only when you set and activate correctly according to your local network.
Browser options: set relevant parameters for the browser.
Service message settings: turn on/off receiving service message.
Clear cache: the sites that you have visited will be stored in the cache of the phone.
Select the operation to erase the temporary sites in the cache.
Clear cookies: remove the browsed website messages stored in the cache of the mobile phone.
Trusted certificates: view trusted certificates.
12.2 Games
UFO and tetris games are provided on your phone,
Frequently Asked Questions
Q. The mobile phone cannot be powered on
A. The mobile phone cannot be powered on since the battery power is too low. Please recharge the battery.
Q. Unable to make some calls
A. Call barring has been set and barred calls from the mobile phone. Please check and cancel call barring.
Q. Another person is answering my calls
A. The mobile phone has been set to divert your calls to another phone number. Please check and cancel call divert.
Q. The mobile phone cannot find a network
A. The mobile phone is outside of the network coverage area and calls cannot be made or answered. If you are in a room, try moving closer to the window.
Q. During operation the mobile phone may display the following: "Please Insert SIM"
A. You must insert the SIM card before using the mobile phone. If the SIM card has been inserted, please get it out and wipe clean with a dry cloth on the golden region, and then insert the SIM card.
Q "Emergency"
A. You are outside the network coverage area of the service provider. But another network area where you locate allows you to make emergency call according to the signal strength.
Q "Invalid SIM"
A. The SIM card of the mobile phone is locked and the inserted SIM card is unable to be accepted. Please insert the correct SIM card
Q. "Please Enter PUK"
A. The SIM card has been locked since the wrong PIN code has been tried three times. You must consult your network provider for the PUK code with eight numbers to unlock the SIM card (The PUK code may have been provided with your PIN code at the same time).
Warning: The SIM card will be permanently locked if you input the wrong PUK code for ten consecutive times and you must apply for a new SIM card from your network provider
Maintenance Guideline
If there is a problem using the mobile phone, please contact your vendor
Important Product Information Guide
This Important Product Informaon Guide contains safety and handling for JCB Toughphone.
Look for recycling, disposal, and other environmental informaon in the JCB Toughphone User Guide at: hp://www.jcbphone.co.uk/
To avoid injury, read all operang instrucons and the following safety informaon before using JCB Toughphone. For detailed operang instrucons, read the JCB Toughphone User Guide on your JCB Toughphone by vising hp://www.jcbphone.co.uk/
Important Safety and Handling Informaon
WARNING: Failure to follow these safety instrucons could result in re, electric shock, or other injury or damage to JCB Toughphone or other property.
General Useage: JCB Toughphone has been designed to be significantly more rugged than a normal mobile phone, however it is NOT indestrucible.
Carrying and Handling JCB Toughphone : JCB Toughphone contains sensitive components Do not drop, disassemble, open, crush, bend, deform, puncture, shred, microwave, incinerate, paint, or insert foreign objects into JCB Toughphone. Do not use JCB Toughphone if it has been damaged—for example, if JCB Toughphone is cracked, punctured, or damaged by water. The screens of JCB Toughphone are made of glass. This glass could break if JCB Toughphone is dropped on a hard surface or receives a substantial impact or is crushed, bent, or deformed. If the glass chips or cracks, do not touch or aempt to remove the broken glass. Stop using JCB Toughphone until the glass is replaced by a JCB Toughphone Authorized Service Provider. Glass cracked due to misuse or abuse is not covered under the warranty.
Keeping the Outside of JCB Toughphone Clean Clean JCB Toughphone immediately if it comes into contact with any contaminants that may cause stains, such as ink, dyes, makeup, dirt, food, oils, and loons. To clean JCB Toughphone, unplug all cables and turn o JCB Toughphone. Then use a so, slightly damp, lint-free cloth. Avoid geng moisture in openings. Don't use window cleaners, household cleaners, aerosol sprays, solvents, alcohol, ammonia, or abrasives to clean JCB Toughphone. The front screen surfaces have an oleophobic coang. To remove ngerprints, simply wipe these surfaces with a so, lint-free cloth. The ability of this coang to repel oil will diminish over me with normal usage, and rubbing the screen with an abrasive material will further diminish its eect and may scratch the glass.
Dust and Water The JCB Toughphone in fully tested to meet either IP54 or IP57 speciaons (depending on the model). It is very important to note that all of the Toughphone connectors, covers and baery compartment must be correctly fastened and have the correct 0-rings ed to
meet the waterproof and dust speciaons Failure to ensure all connector, covers, battery compartment and O rings are correctly ed will invalidate the warranty. In case JCB Toughphone gets wet turn o JCB Toughphone before cleaning, and allow it to dry thoroughly before turning it on again. Do not aempt to dry JCB Toughphone with an external heat source, such as a microwave oven or hair dryer.
Repairing or Modifying JCB Toughphone Never aempt to repair or modify JCB Toughphone yourself. JCB Toughphone does not contain any user-serviceable parts, except for the SIM card, Baery and Baery Compartment. Disassembling JCB Toughphone, including the removal of external screws and back cover, may cause damage that is not covered under the warranty. Service should only be provided by a JCB Authorized Service Provider. If you have quesons, a JCB Toughphone Authorized Service Provider.
Charging JCB Toughphone To charge JCB Toughphone, only use the JCB Toughphone Connector to USB Cable or a high-power USB port on another device that is compliant with the USB 2.0 or 1.1 standard, or another JCB Toughphone -branded product or accessory designed to work with JCB Toughphone, or a third-party accessory cered to use with JCB Toughphone.
Read all safety instrucons for any products and accessories before using with JCB Toughphone. JCB Toughphone is not responsible for the operaon of, or any damage caused by, third-party accessories or their compliance with safety and regulatory standards.
When you use the JCB Toughphone USB Power Adapter to charge JCB Toughphone, make sure that the power adapter is fully assembled before you plug it into a power outlet. Then insert the JCB Toughphone USB Power Adapter rmly into the power outlet. Do not connect or disconnect the JCB Toughphone USB Power Adapter with wet hands.
The JCB Toughphone USB Power Adapter may become warm during normal use. Always allow adequate venlaon around the JCB Toughphone USB Power Adapter and use care when handling. Unplug the JCB Toughphone USB Power Adapter if any of the following conditions exist:
- The power cord or plug has become frayed or damaged.
- The adapter is exposed to rain, liquid, or excessive moisture.
- The adapter case has become damaged.
- You suspect the adapter needs service or repair.
- You want to clean the adapter.
Avoiding Hearing Damage Permanent hearing loss may occur if the receiver, earbuds, headphones, speakerphone, or earpieces are used at high volume. Set the volume to a safe level. You can adapt over me to a higher volume of sound that may sound normal but can be damaging to your hearing. If you experience ringing in your ears or mued speech, stop listening and have your hearing checked. The louder the volume, the less me is required before your hearing could be aected. Hearing experts suggest that to protect your hearing:
- Limit the amount of time you use the receiver, earbuds, headphones, speakerphone, or earpieces at high volume.
- Avoid turning up the volume to block out noisy surroundings.
- Turn the volume down if you can't hear people speaking near you.
For informaon about how to set a maximum volume limit on JCB Toughphone, see the JCB Toughphone User Guide.
Emergency Calls You should not rely on wireless devices for essenal communicaons, such as medical emergencies. Use of JCB Toughphone to call emergency services may not work in all locaons or all operang condions. Emergency numbers and services vary by region, and somemes an emergency call cannot be placed due to network availability or environmental interference. Some cellular networks may not accept an emergency call from JCB Toughphone if it does not have a SIM, if the SIM is PIN-locked, or if you have not acvated your JCB Toughphone.
Driving and Riding Safely Use of JCB Toughphone alone or with headphones (even if used only in one ear) while driving a vehicle or riding a bicycle is not recommended and is illegal in some areas. Check and obey the laws and regulaons on the use of mobile devices like JCB Toughphone in the areas where you drive or ride. Be careful and aenve while driving or riding a bicycle. If you decide to use JCB Toughphone while driving, keep in mind the following guidelines:
- Give full attention to driving or riding and to the road. Using a mobile device while driving or riding may be distracting. If you find it disruptive or distracting while operating any type of vehicle, riding a bicycle, or performing any activity that requires your full attention, pull off the road and park before making or answering a call.
- Get to know JCB Toughphone and its features such as Voice Control, Favourites, Recent, and Speaker. These features help you to place your call without taking your attention off the road. See the JCB Toughphone User Guide for more information.
- Use a hands-free device. Take advantage of one of the many compatible hands-free accessories available for use with JCB Toughphone. Use of a hands-free device may be required in some areas.
- Position JCB Toughphone within easy reach. Keep your eyes on the road. If you get an incoming call at an inconvenient time, let your voicemail answer it for you.
- Try to plan calls when your car will be stationary. Assess the traffic before dialing, or place calls when you are not moving or before pulling into traffic.
- Let the person you are speaking with know you are driving. If necessary, suspend the call in heavy traffic or hazardous weather conditions. Driving in rain, sleet, snow, ice, fog, and even heavy traffic can be hazardous.
- Do not text, email, take notes, look up phone numbers, or perform any other activities that require your attention while driving. Composing or reading texts and emails, jotting down a to-do list, or flipping through your address book takes attention away from your primary responsibility, driving safely.
- Do not engage in stressful or emotional conversations that may be distracng. Make people you are talking with aware you are driving
and suspend conversaons that have the potenal to divert your aenon from the road.
Navigang Safely Do not rely on JCB Toughphone applicaons that provide maps, digital compass headings, orientaon informaon, direcons, or locaon-based navigaon to determine precise locaons, proximity, orientaon, distance, or direcon. These applicaons should only be used for basic navigaon assistance. Maps, direcons, and locaon-based applicaons depend on data services. These data services are subject to change and may not be available in all geographic areas, resulting in maps, digital compass headings, direcons or locaon-based informaon that may be unavailable, inaccurate, or incomplete
Do not use locaon-based applicaons while performing advies that require your full aenon. For important informaon about driving safety, see the “Driving and Riding Safely” secon. Always comply with posted signs and the laws and regulaons in the areas where you are using JCB Toughphone.
For Vehicles Equipped with an Air Bag An air bag inates with great force. Do not store JCB Toughphone or any of its accessories in the area over the air bag or in the air bag deployment area.
Seizures, Blackouts, and Eyestrain A small percentage of people may be susceptible to blackouts or seizures (even if they have never had one before) when exposed to ashing lights or light paerns such as when playing games or watching video. If you have experienced seizures or blackouts or have a family history of such occurrences, you should consult a physician before playing games (if available) or watching videos
on your JCB Toughphone. Disconnue use of JCB Toughphone and consult a physician if you experience headaches, blackouts, seizures, convulsion, eye or muscle twitching, loss of awareness, involuntary movement, or disorientaon. To reduce risk of headaches, blackouts, seizures, and eyestrain, avoid prolonged use, hold JCB Toughphone some distance from your eyes, use JCB Toughphone in a well-lit room, and take frequent breaks.
Choking Hazards JCB Toughphone contains small parts, which may present a choking hazard to small children. Keep JCB Toughphone and its accessories away from small children.
Repeve Moon When you perform repeve advies such as typing or playing games on JCB Toughphone, you may experience occasional discomfort in your hands, arms, shoulders, neck, or other parts of your body. Take frequent breaks and if you have discomfort during or aer such use, stop use and see a physician.
Potenally Explosive Atmospheres Turn o JCB Toughphone when in any area with a potenally explosive atmosphere. Do not charge JCB Toughphone, and obey all signs and instrucons. Sparks in such areas could cause an explosion or re, resulting in serious injury or even death. Areas with a potenally explosive atmosphere are oen, but not always, marked clearly. Potenal areas may include: fueling areas (such as gas staons); below deck on boats; fuel or chemical
transfer or storage facilities; vehicles using liqueed petroleum gas (such as propane or butane); areas where the air contains chemicals or parcels (such as grain, dust, or metal powders); and any other area where you would normally be advised to turn o your vehicle engine.
Using Connectors and Ports Never force a connector into a port. Check for obstrucons on the port. If the connector and port don't join with reasonable ease, they probably don't match. Make sure that the connector matches the port and that you have posioned the connector correctly in relaon to the port.
Accessories and Wireless Performance Turning on Airplane Mode on JCB Toughphone may eliminate audio interference between JCB Toughphone and an accessory. While Airplane mode is on, you cannot make or receive calls or use features that require wireless communicaon. Under some conditions, certain accessories may act JCB Toughphone wireless performance.
Reorienng or relocang JCB Toughphone and the connected accessory may improve wireless performance.
Keeping JCB Toughphone Within Acceptable Temperatures JCB Toughphone is designed to be operated in temperatures between 0° and 35° C (32° to 95° F) and stored in temperatures between -20° and 45° C (-4° to 113° F). Low- or high-temperature condions might temporarily shorten baery life or cause JCB Toughphone to temporarily stop working properly. Leaving JCB Toughphone in a parked vehicle or in direct sunlight can cause JCB Toughphone to exceed these storage or operang temperature ranges. Avoid dramac changes in temperature or humidity when using JCB Toughphone as condensaon may form on or within JCB Toughphone.
When you're using JCB Toughphone or charging the baery, it is normal for JCB Toughphone to get warm. The exterior of JCB Toughphone funcons as a cooling surface that transfers heat from inside the unit to the cooler air outside.
Exposure to Radio Frequency Energy JCB Toughphone contains radio transmiers and receivers. When on, JCB Toughphone receives and sends out radio frequency (RF) energy through its antennas. The JCB Toughphone cellular antenna is located at the boom edge of JCB Toughphone, to the le of the Home buon. The Wi-Fi and Bluetooth® antenna is located at the top edge of JCB Toughphone, to the right of the headset jack.
For opmal mobile device performance and to be sure that human exposure to RF energy does not exceed the FCC, IC, and European Union guidelines, always follow these instrucons and precautions: When on a call using the built-in audio receiver in JCB Toughphone, hold JCB Toughphone with the dock connector pointed down toward your shoulder to increase separaon from the antenna. When using JCB Toughphone near your body for voice calls or for wireless data transmission over a cellular network, keep JCB Toughphone at least 15 mm (5/8 inch) away from the body, and only use carrying cases, belt clips, or holders that do not have metal parts and that maintain at least 15 mm (5/8 inch) separaon between JCB Toughphone and the body.
JCB Toughphone is designed and manufactured to comply with the limits for exposure to RF energy set by the Federal Communications Commission (FCC) of the United States, Industry Canada (IC) of Canada, and regulang enes of Japan, the European Union, and other countries.
The exposure standard employs a unit of measurement known as the specific absorpon rate, or
SAR. The SAR limit applicable to JCB Toughphone set by the FCC is 1.6 was per kilogram (W/kg), 1.6 W/kg by Industry Canada, and 2.0 W/kg by the Council of the European Union. Tests for SAR are conducted using standard operang posions (i.e., at the ear and worn on the body) specified by these agencies, with JCB Toughphone transming at its highest cered power level in all tested frequency bands. Although SAR is determined at the highest cered power level in each frequency band, the actual SAR level of JCB Toughphone while in operaon can be well below the maximum value because JCB Toughphone adjusts its cellular transming power based in part on proximity to the wireless network. In general, the closer you are to a cellular base staon, the lower the cellular transming power level.
JCB Toughphone has been tested and meets the FCC, IC, and European Union RF exposure guidelines for cellular, Wi-Fi, and Bluetooth operaon
JCB Toughphone's SAR measurement may exceed the FCC exposure guidelines for body-worn operaon if posioned less than 15 mm (5/8 inch) from the body (e.g., when carrying JCB Toughphone in your pocket).
If you are sll concerned about exposure to RF energy, you can further limit your exposure by liming the amount of me using JCB Toughphone, since me is a factor in how much exposure a person receives, and by using a hands-free device and placing more distance between your body and JCB Toughphone, since exposure level drops o dramacally with distance.
Additional Informaon For more informaon from the FCC about exposure to RF energy, see: www.fcc.gov/oet/rfsafety The FCC and the U.S. Food and Drug Administraon (FDA) also maintain a consumer website at www.fda.gov/Radiaon-EmingProducts/RadiaonEmingProductsandProcedures/HomeBusinessandEntertainment/CellPhones/default.htm to address inquiries about the safety of mobile phones. Please check the website periodically for updates.
For informaon about the scienc research related to RF energy exposure, see the EMF Research Database maintained by the World Health Organizaon at: www.who.int/peh-emf/research/database
Radio Frequency Interference Radio-frequency emissions from electronic equipment can negatively affect the operaon of other electronic equipment causing them to malfuncon. Although JCB Toughphone is designed, tested, and manufactured to comply with regulaons governing radio frequency emission in countries such as the United States, Canada, the European Union, and Japan, the wireless transmiers and electrical circuits in JCB Toughphone may cause interference in other electronic equipment. Therefore, please take the following precautions:
Aircra Use of JCB Toughphone may be prohibited while traveling in aircra. For more informaon about using Airplane Mode to turn o the JCB Toughphone wireless transmiers, see the JCB Toughphone User Guide.
Vehicles Radio frequency emissions from JCB Toughphone may act electronic systems in motor
vehicles. Check with the manufacturer or its representave regarding your vehicle.
Pacemakers The Health Industry Manufacturers Associaon recommends that a minimum separaon of 15 cm (6 inches) be maintained between a handheld wireless phone and a pacemaker to avoid potenal interference with the pacemaker. Persons with pacemakers:
- Should always keep JCB Toughphone more than 15 cm (6 inches) from the pacemaker when the phone is turned on
- Should not carry JCB Toughphone in a breast pocket
- ÂÂ Should use the ear opposite the pacemaker to minimize the potential for interference
If you have any reason to suspect that interference is taking place, turn JCB Toughphone o immediately. (Press and hold the Sleep/Wake buon unl the red slider appears, then drag the slider.)
Hearing Aids JCB Toughphone may interfere with hearing aids. If it does, consult the hearing aid manufacturer or your physician for alternaves or remedies.
Other Medical Devices If you use any other personal medical device, consult the device manufacturer or your physician to determine if it is adequately shielded from radio frequency emissions from JCB Toughphone.
Health Care Facilities Hospitals and health care facilities may use equipment that is particularly sensitive to external radio frequency emissions. Turn JCB Toughphone o when sta or posted signs instruct you to do so.
Blasting Areas and Posted Facilities To avoid interfering with blasng operaons, turn o JCB Toughphone when in a “blasng area” or in areas posted “Turn off two-way radio.” Obey all signs and instrucons.