
GZ-44 - Refrigerator Guzzanti - Free user manual and instructions
Find the device manual for free GZ-44 Guzzanti in PDF.


| Product Type | Thermoelectric refrigerator |
| Model | GZ-44 |
| Net Capacity | 44 L |
| Energy Consumption | 0.444 kWh/24h |
| Voltage | 220-240 V / 120 V |
| Frequency | 50-60 Hz |
| Rated Power | 65 W |
| Dimensions (approx.) | 450 x 400 x 550 mm |
| Net Weight (approx.) | 12 kg |
| Temperature Control | Mechanical knob, positions 0 to 3 |
| Cooling Type | Thermoelectric (heat pipe) |
| Defrost | Automatic (no manual defrost needed) |
| Door Hinge | Reversible (left or right swing) |
| Interior Light | LED |
| Shelves | 2 adjustable shelves |
| Refrigerant | None (thermoelectric) |
| Climate Class | N (ambient 20-25°C recommended) |
| Noise Level | Low (no compressor) |
| Ventilation Requirement | Minimum 200 cm³; 20 mm sides, 50 mm bottom |
| Power Cord | Earthed plug, 1.5 m approx. |
| Approvals | CCC/CB/CE/EMC & LVD |
Frequently Asked Questions - GZ-44 Guzzanti
User questions about GZ-44 Guzzanti
0 question about this device. Answer the ones you know or ask your own.
Ask a new question about this device
Download the instructions for your Refrigerator in PDF format for free! Find your manual GZ-44 - Guzzanti and take your electronic device back in hand. On this page are published all the documents necessary for the use of your device. GZ-44 by Guzzanti.
USER MANUAL GZ-44 Guzzanti
natural_image
Simple line drawing of a rectangular frame with three vertical lines and no text or symbols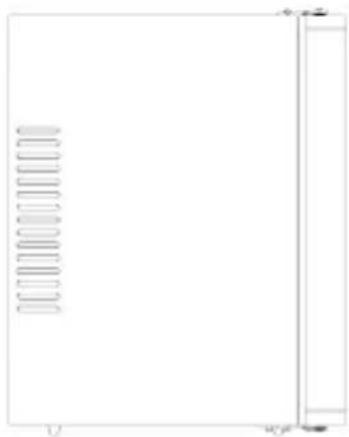
natural_image
Pure geometric diagram with vertical lines and a right-angle arrow, no text or symbols presentNávod k obsluze Návod na obsluhu Instrukcja obsługi Használati útmutató Navodila za uporabo Gebrauchsanleitung Instruction manual
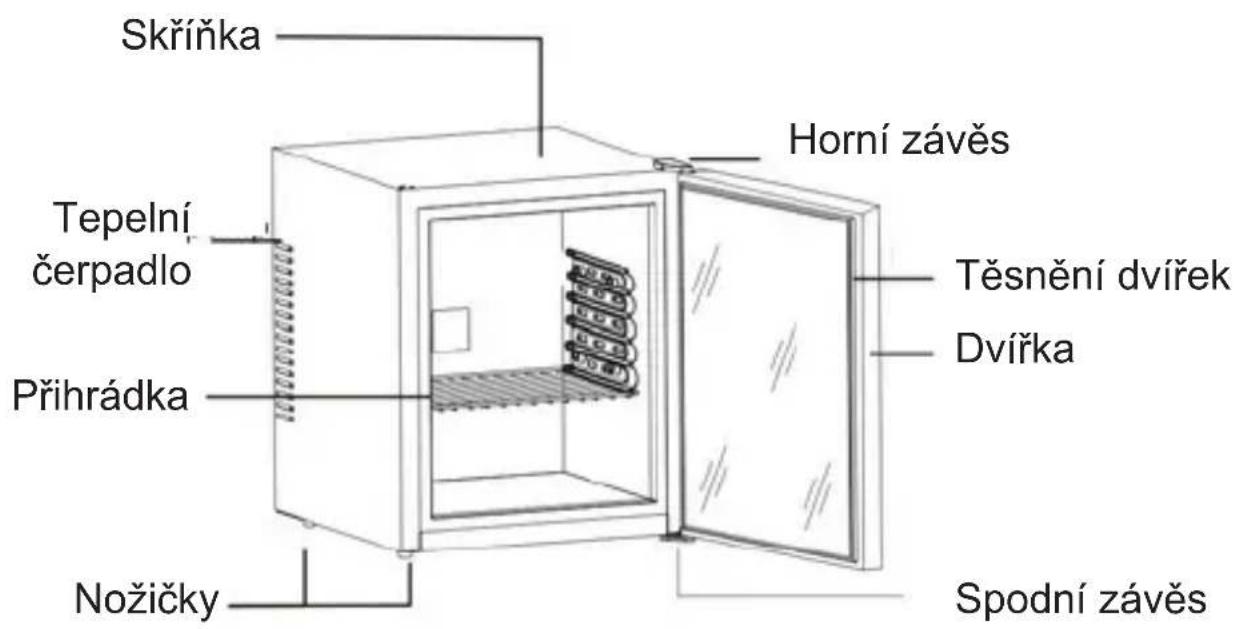
Popis částí
Minibar 28
natural_image
Symbol of a trash bin crossed with two crossed lines, no text or numbers presentnatural_image
Circular mechanical component with three curved slots labeled 0, 1, and 2, no text or symbols present.natural_image
Symbol of a trash bin crossed with two crossed lines, no text or numbers presentnatural_image
Circular mechanical component with three curved slots labeled 0, 1, and 2, no text or symbols present.natural_image
Symbol of a trash bin with crossed lines and a blank rectangular base (no text or numbers)natural_image
Circular mechanical component with three curved slots labeled 0, 1, and 2, no text or symbols present.natural_image
Symbol of a trash bin with crossed lines indicating no waste or discharge, and a solid black rectangle below (no text or labels)natural_image
Circular mechanical component with three curved slots labeled 0, 1, and 2, no text or symbols present.Uporaba regulatorja temperature
- Vaša naprava ima samo en gumb za nastavitev temperature. Regulator temperature se nahaja na vrhu notranjega prostora hladilnika.
- Za nastavitev notranje temperature prilagodite regulator glede na temperaturo okolice ali predvideno uporabo.
- Razpon nastavitve temperature je od položaja „0“ do „3“.
Navodila za uporabo
natural_image
Symbol of a trash bin crossed with two crossed lines, no text or numbers presentnatural_image
Symbol of a trash bin with crossed lines and a blank rectangular base (no text or numbers)- It is intended to be used exclusively for the cellar.
- This refrigerating appliance is not suitable for the freezing foodstuffs.
- The cellar is recommended to be designed at 12 °C.
- The shelves placed in factory mode is the most efficient use of energy for the refrigerating appliances.
- The following combination of shelves is recommended for energy to be used as efficiently as possible by the refrigeration unit.
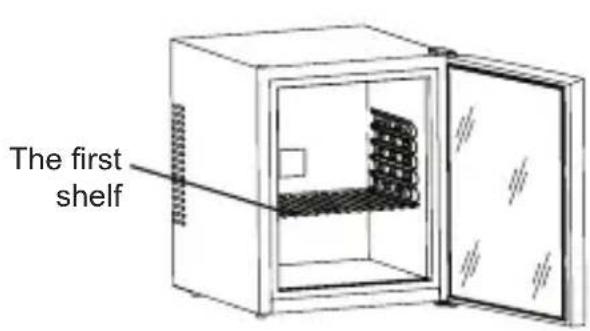
The first shelf
The second shelf

natural_image
Line drawing of an open refrigerator with shelves and doors (no text or symbols)- When the surrounding temperature is 25^ C and the cellar has no load, it will take around 3.5 hours to decrease the cellar's temperature from 25^ C to 12^ C .
- The cellar is recommended to be designed at 12^ C . The energy consumption is shown in the table below. If the setting temperature is higher than 12^ C , the energy consumption will be lower. If the setting temperature is lower than 12^ C , the energy consumption will be higher.
| Model No Energy consumption |
| GZ-28 0.356kWh/ 24h |
| GZ-44 0.444kWh/ 24h |
Operating your refrigerator
Temperature Control
natural_image
Circular mechanical component with three curved arrows labeled 0, 1, and 2, no text or symbols present.Setting the Temperature Control
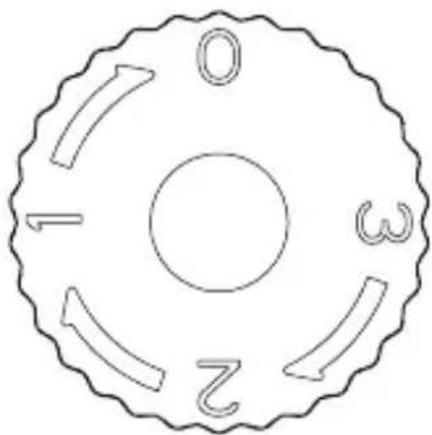
- Your refrigerator has only one control for regulating the temperature. The temperature control is located on the top of the refrigerator inside.
- To control the internal temperature, adjust the control knob according to the ambient temperature or purpose of use.
- The range of the temperature control is from position "0" to "3".
Instruction for use
- Position your refrigerator so that the plug is accessible.
- Keep your refrigerator out of direct sunlight.
- Do not place next to heat generating appliance.
- Do not place directly on the ground. Provide suitable stand.
Very important
- The refrigerator will have better performance at ambient of 20-25 degree; We suggest the refrigerator be ambient temperature is lower than 10 degree.
- After plugging the appliance, allow the unit to cool down for 2-3 hours before placing beverage into the refrigerator compartment.
- Ventilation is very important for this kind thermoelectric refrigerator; The inside PCB will be broken easily if the ventilation is bad; It will also reduce the life of the refrigerator.
- If leakage occurs (which can be easily detected due to the unpleasant smell), please
A: Switch off the refrigerator immediately
B: Ventilate the room thoroughly
C: Call for after sales service department
- The refrigerator applies automatic defrosting system, so there is no need to defrost it manually.
Power supply
- The refrigerator must be connected to a properly earthed socket in line with relevant valid country regulations before operating;
- Check the data label (which is on the side of the refrigerator) for voltage and frequency corresponds to your local one; If not, don't plug your cable into the socket;
Installation instructions
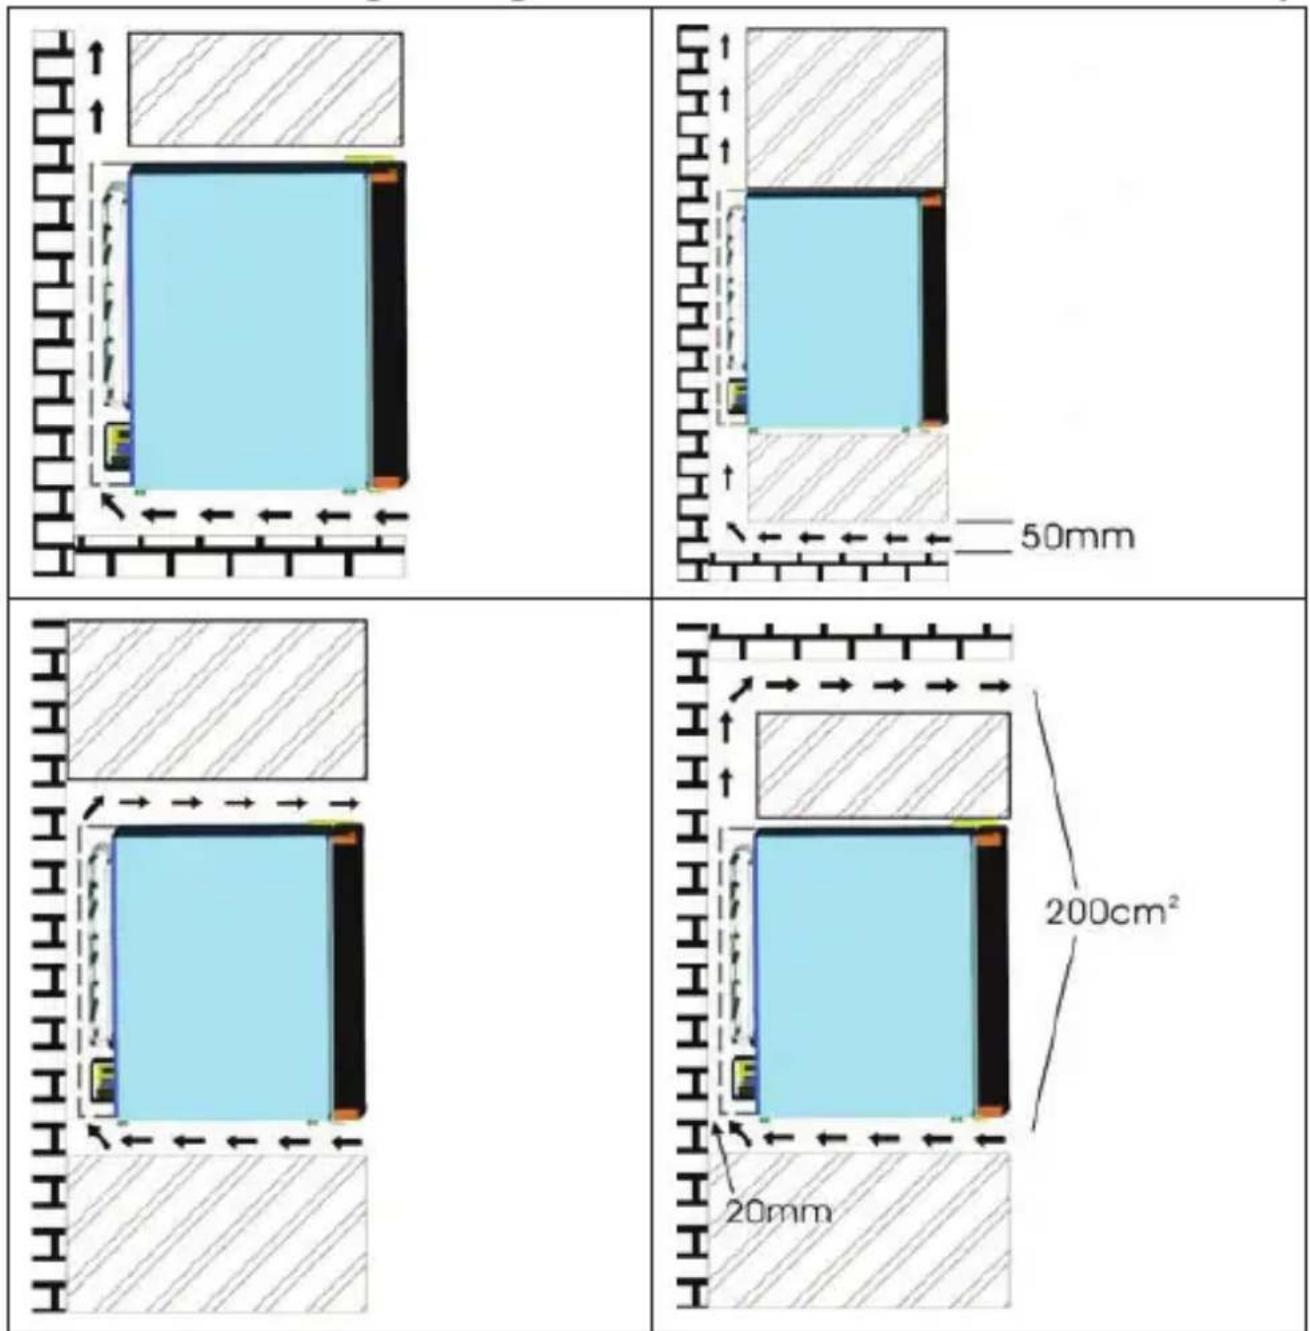
When install a Heat pipe Refrigerator, ventilation should be considered seriously, please refer to the following:
• There should be left at least 200 cm ^3 for ventilation
- The distance between wall and refrigerator side should be at least 20 mm.
- The bottom should be left at least 50 mm for air flowing air passing through must not be preheated.
- Entire cooling system should be considered in the ventilation.
• The following four pictures show four installation ways:
Changing the Swing Hinge
This refrigerator has the capability of the door opening from either the left or right side. The unit is delivered to you with the door opening from the left side. Should you desire to reverse the opening direction, please follow below instructions.
All the hinge can be used for left or right swing, except for model MINIBAR 28 and MINIBAR 40, please find an additional left upper hinge in the bag of the user manual for installation as bellow.
- Pull out the three screws from right hinge.
- Remove the hinge (upper and lower) away.
- Install the door in suitable position with hinges, use three self-screws to fix them.
Trouble Shooting Guide
| PROBLEM POSSIBLE CAUSE | |
| Refrigerator does not operate. | Not plugged in.The circuit breaker tripped or a blown fuse. |
| Refrigerator is not cold enough. | The room temperature is hotter than normal.The door is opened too often.The door is not closed completely.The temperature control is not set correctly.The door gasket does not seal properly.The refrigerator does not have the correct clearances.Abnormal voltage. |
| The light does not work. | Not plugged in. The circuit breaker tripped or a blown fuse. The LED light has burned out. |
| Vibrations. Check | to assure that the refrigerator is level. |
| The door will not close properly. | The refrigerator is not level.The door was reversed and not properly installed. The gasket is dirty.The shelves, bins, or baskets are out of position. |
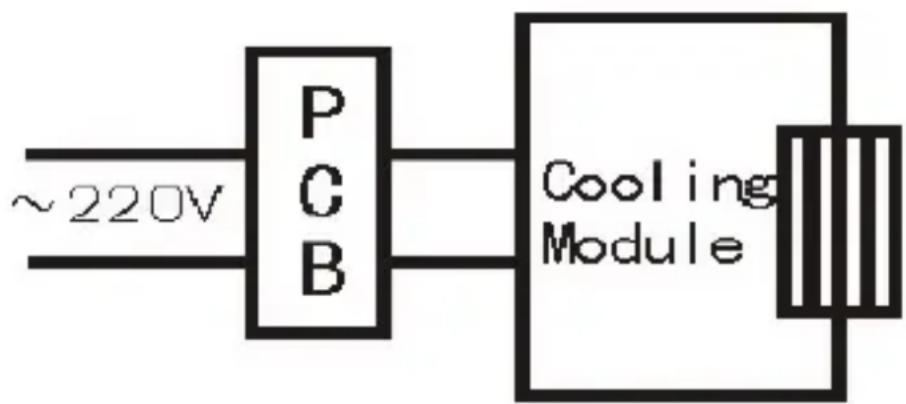
Electric Diagram
- The refrigerator should be located in the coolest area of the room, away from heat producing appliances, and out of the direct sunlight.
• Overloading the refrigerator forces the thermoelectric cooling system to run longer. - Reduce door openings and extended searches, remove as many item as needed at one time, and close the door as soon as possible.
- One characteristic of heat-pipe units is the length of time it requires to recover from having the door opened and shut frequently. It may be necessary to wait longer for the temperature to return to its former level once the door has been opened for too long. This is normal for the type of unit.
- Heat-pipe technology costs just pennies to operate. It is environmentally friendly due to the lack of CFC's.
Specification Table
| Net Capacity (liters) | MINIBAR 28 MINIBAR 40 | |
| Voltage (V) 220-240 / 120 | ||
| Frequency (Hz) 50-60 | ||
| Rated Power (W) 65 65 | ||
| Dimension (mm) 380 x 380 x 470 435 x 403 x 545 | ||
| Packing (mm) 460 x 430 x 520 495 x 455 x 590 | ||
| Net Weight (kg) 10.5 12 | ||
| Gross Weight (kg) 12.5 14 | ||
| Approval | CCC/CB/CE/EMC & LVD | |
DISPOSAL OF USED ELECTRICAL AND ELECTRONIC EQUIPMENT
natural_image
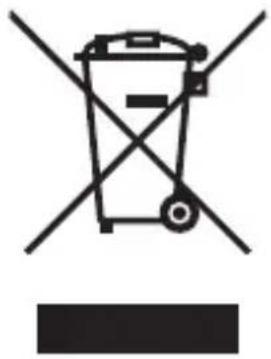
Symbol of a trash bin crossed with two crossed lines, no text or numbers presentThis symbol on products or original documents means that used electric or electronic products must not be added to ordinary municipal waste. For proper disposal, renewal and recycling hand over these appliances to determined collection points. Alternatively, in some European Union states or other European countries you may return your appliances to the local retailer when buying an equivalent new appliance. Correct disposal of this product helps save valuable natural resources and prevents potential negative effects on the environment and human health, which could result from improper waste disposal. Ask your local authorities or collection facility for more details. In accordance with national regulations penalties may be imposed for the incorrect disposal of this type of waste.
For business entities in European Union states
If you want to dispose of electric or electronic appliances, ask your retailer or supplier for the necessary information.
Disposal in other countries outside the European Union.
This symbol is valid in the European Union. If you wish to dispose of this product, request the necessary information about the correct disposal method from the local council or from your retailer.


- Popis částí
- Uporaba regulatorja temperature
- Navodila za uporabo
- Operating your refrigerator
- Temperature Control
- Setting the Temperature Control
- Instruction for use
- Very important
- Power supply
- Installation instructions
- Changing the Swing Hinge
- Electric Diagram
- Specification Table
- DISPOSAL OF USED ELECTRICAL AND ELECTRONIC EQUIPMENT
- For business entities in European Union states
- Disposal in other countries outside the European Union.
Brand : Guzzanti
Model : GZ-44
Category : Refrigerator