
DS7 Crossback (2017) - Automotive CITROEN - Free user manual and instructions
Find the device manual for free DS7 Crossback (2017) CITROEN in PDF.


| Product Type | Automobile |
| Brand | Citroën |
| Model | DS7 Crossback (2017) |
| Body Style | SUV |
| Dimensions (L x W x H) | Approx. 4570 x 1900 x 1620 mm |
| Wheelbase | 2738 mm |
| Curb Weight | From 1500 kg (depending on version) |
| Fuel Type | Petrol, Diesel, or Rechargeable Hybrid |
| Transmission | 8-speed automatic (e-EAT8 for hybrid) |
| Driving Modes | Eco, Comfort, Sport, Hybrid (hybrid only), Electric (hybrid only) |
| Key Features | DS Active Scan Suspension, DS Night Vision, DS Pixel LED Vision, Keyless Entry and Start, 12-inch touch screen, Motorised tailgate, Adaptive cruise control, Lane keeping assist |
| Safety Systems | ABS, ESC, Active Safety Brake, Blind spot monitoring, Park sensors, Reversing camera, 360 Vision |
| Seating Capacity | 5 |
| Boot Capacity (VDA) | Approx. 550 liters |
| Fuel Tank Capacity | Approx. 60 liters (Petrol/Diesel) |
| Battery (Hybrid) | Lithium-ion, 13.2 kWh (traction battery) |
| Charging (Hybrid) | Domestic socket or Wallbox, Type 2 connector |
| Maintenance Intervals | Every 12 months or 12,500 miles (20,000 km) |
| AdBlue Tank (Diesel) | Approx. 17 liters |
| Warranty | 3 years / 60,000 miles (depending on region) |
Frequently Asked Questions - DS7 Crossback (2017) CITROEN
User questions about DS7 Crossback (2017) CITROEN
0 question about this device. Answer the ones you know or ask your own.
Ask a new question about this device
Download the instructions for your Automotive in PDF format for free! Find your manual DS7 Crossback (2017) - CITROEN and take your electronic device back in hand. On this page are published all the documents necessary for the use of your device. DS7 Crossback (2017) by CITROEN.
USER MANUAL DS7 Crossback (2017) CITROEN
Install the MyDS App application (content available offline).
Also available in the Scan MyDS application.




TOUCH SCREEN (depending on availability)

In the Help touch screen application, select the User Manual tab.
Several types of searches are available to access the information sought.
For safety reasons, this application is not accessible while driving above 3 mph (5 km/h).

ONLINE
View or download the handbook at the following address:
http://service.dsautomobiles.com

Scan this QR Code for direct access.
Select:
- the language,
- the vehicle and body style,
- the issue period of the handbook corresponding to the date of 1^st registration of the vehicle.

This symbol indicates the latest information available.
WELCOME
Thank you for choosing DS 7.
This document contains the key information and recommendations you will need to be able to explore your vehicle in complete safety. We strongly recommend familiarising yourself with it, as well as the Maintenance and Warranty Guide. Your vehicle will be fitted with only some of the equipment described in this document, depending on its trim level, version and the specification for the country in which it was sold.
The descriptions and illustrations are for guidance only.
The DS AUTOMOBILES brand is marketed by Automobiles CITROËN, a public limited company with a share capital of €159,000,000 whose head office is located at 2-10 boulevard de l'Europe, 78300 POISSY, FRANCE, registered with the Trade and Company Register (RCS) of Versailles under number 642 050 199, hereafter referred to as the "Manufacturer" and who reserves the right to modify the technical specifications, equipment and accessories without having to update this document.
If ownership of your vehicle is transferred, please ensure this Handbook is passed on to the new owner.
For any work on your vehicle, contact a member of the Manufacturer's dealer network, hereinafter referred to as a 'dealer', or a qualified workshop.
Key

Safety warning

Additional information

Environmental protection feature

Left-hand drive vehicle

Right-hand drive vehicle
Location of equipment/button indicated using a black area

Overview

Eco-driving

Dashboard instruments
10 Driver information
10 Digital instrument panel
11 Warning and indicator lamps
17 Indicators
21 Manual test
21 Total distance recorder
22 Trip computer
23 Clock
23 12-inch touch screen
25 Remotely operable additional functions (Rechargeable hybrid)

Access
26 Electronic key with remote control function and built-in key
28 Keyless Entry and Start
30 Central locking
30 Back-up procedures
32 Doors
32 Boot
33 Motorised tailgate
37 Alarm
39 Electric windows
40 Panoramic sunroof

Ease of use and comfort
42 Driving position
43 Front seats
46 Steering wheel adjustment
47 Mirrors
48 Rear seats
49 Heating and Ventilation
51 Dual-zone automatic air conditioning
53 Front demisting/defrosting
54 Rear screen demisting/defrosting
54 Heated windscreen
54 Temperature pre-conditioning (Rechargeable hybrid)
55 Front fittings
59 Touch-sensitive courtesy lamps
59 Interior ambient lighting
60 Rear fittings
60 Boot fittings

Lighting and visibility
63 Exterior lighting control stalk
64 Direction indicators
65 Headlamp beam height adjustment
65 Automatic illumination of headlamps
65 Guide-me-home and welcome lighting
66 Automatic lighting systems - General recommendations
66 Automatic headlamp dipping
67 Adaptive Frontlight System
69 DS PIXEL LED VISION 3.0
70 DS NIGHT VISION
72 Wiper control stalk
74 Changing a wiper blade
74 Automatic wipers

Safety
76 General safety recommendations
76 Hazard warning lamps
77 Horn
77 Pedestrian horn (Rechargeable hybrid)
77 Emergency or assistance
79 Electronic stability control (ESC)
81 Seat belts
83 Airbags
86 Child seats
87 Deactivating the front passenger airbag
90 ISOFIX child seats
94 i-Size child seats
95 Child lock
Driving
96 Driving recommendations
97 Starting/switching off the engine
98 Starting rechargeable hybrid vehicles
99 Electric parking brake
101 Automatic gearbox
104 e-EAT8 automatic gearbox (Rechargeable hybrid)
105 DS ACTIVE SCAN SUSPENSION
106 Driving modes
108 Hill start assist
109 Gear shift indicator
109 Stop & Start
110 Tyre under-inflation detection
112 Driving and manoeuvring aids - General recommendations
113 Shortcuts for driving aids
114 Road signs recognition
117 Speed limiter
118 Cruise control - Specific recommendations
119 Programmable cruise control
120 DS DRIVE ASSIST
120 Adaptive cruise control
124 Lane positioning assist
128 Active Safety Brake with Collision Risk Alert and Intelligent emergency braking assistance
131 Distraction detection
133 Lane keeping assist
135 Blind spot monitoring

137 Parking sensors
138 Reversing camera
140 360 Vision
07 Practical information
143 Compatibility of fuels
143 Refuelling
144 Misfuel prevention (Diesel)
145 Rechargeable hybrid system
153 Charging the traction battery (Rechargeable hybrid)
155 Towing device
156 Towing device with retractable ball joint
157 Roof bars
158 Very cold climate screens
158 Snow chains
159 Energy economy mode
159 Bonnet
160 Engine compartment
161 Checking levels
163 Checks
165 AdBlue® (BlueHDi)
166 Free-wheeling
167 Advice on care and maintenance
08 In the event of a breakdown
170 Warning triangle
170 Running out of fuel (Diesel)
170 Tool kit
172 Temporary puncture repair kit
175 Spare wheel
178 Changing a bulb
180 Fuses
181 12 V battery/Accessory batteries
186 Towing the vehicle
09 Technical data
189 Engine technical data and towed loads
190 Petrol engines
191 Diesel engines
192 Rechargeable hybrid engines
193 Dimensions
193 Identification markings
10 DS IRIS SYSTEM - 12" touch screen Infotainment system
194 First steps
197 Customisation
198 Steering mounted controls
198 Applications
199 Voice commands
200 Navigation
201 Connectivity
203 Mirror Screen
204 Media
206 Phone
207 Settings
208 Help
11 Vehicle data recording and privacy
Alphabetical index
Appendix
Presentation
These illustrations and descriptions are intended as a guide. The presence and location of certain elements may vary, depending on the version or trim level.
Instruments and controls
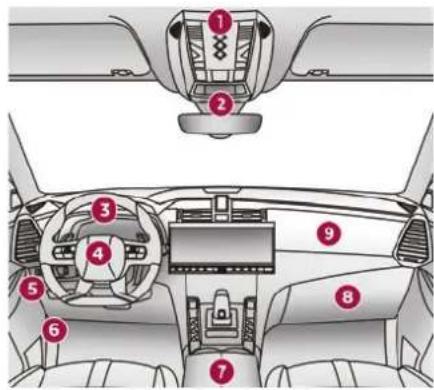
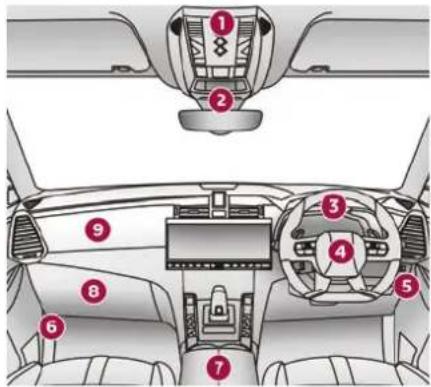
- Emergency call/Assistance call Deactivation of the alarm's interior volumetric and anti-tilt monitoring Panoramic sunroof and blind controls Courtesy lamp /Reading lamps
- Warning lamps display for seat belts and front passenger airbag Interior rear view mirror/Driving in Electric mode indicator LED
- Instrument panel
- Horn Driver front airbag
- Door mirrors Side control bar
- Bonnet release
-
Front armrest with storage USB sockets
-
Glove box Deactivation of the front passenger airbag
- Front passenger airbag
Centre console
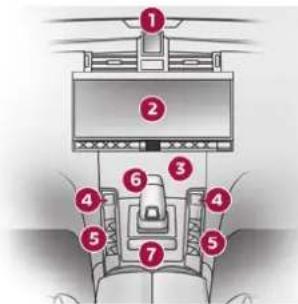
- Clock Starting/switching off the engine
- 12-inch touch screen Central control bar
- Storage 12 V socket/USB socket(s) Wireless smartphone charger
- Electric parking brake Driving mode selector
- Electric windows Electric child lock Central locking
- Gearbox
- Storage compartment Cup holder
Steering-mounted controls
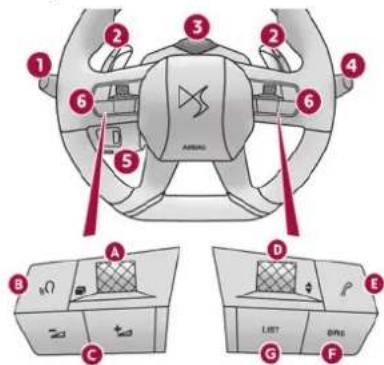
- Exterior lighting controls/Direction indicators/Service indicator
- Automatic gearbox control paddles
- Infrared camera (associated with the DS DRIVER ATTENTION MONITORING function)
- Wipers/Screenwash/Trip computer control stalk
- Controls for Cruise control/Speed limiter/Adaptive cruise control
- Audio system and instrument panel controls
A. Choice of instrument panel display mode
B. Short press: system voice commands Long press: smartphone voice commands
C. Decrease/Increase volume
D. Press: radio/media display
Up/Down: previous/next radio/media/
smartphone selection
Press: confirm a selection
E. Pick up/Hang up call
Access to the Phone application's call log
F. Select an audio source
G. Display the list of radio stations/audio tracks
Side control bar
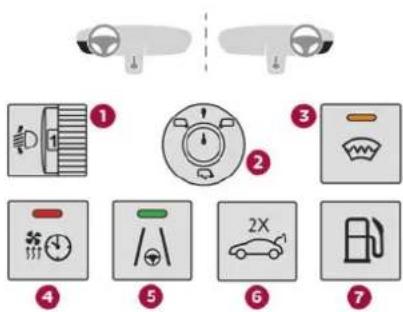
- Manual headlamp beam height adjustment
- Door mirrors adjustment
- Heated windscreen
- Temperature pre-conditioning operation indicator lamp
- Lane positioning assist
- Opening/closing the motorised tailgate
- Opening the fuel filler flap
Central control bar
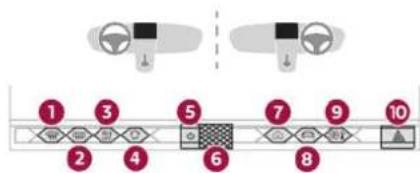
flowchart
graph LR
    A["Top Section"] --> B["Left Car"]
    C["Bottom Section"] --> D["Right Car"]
    style A fill:#f9f,stroke:#333
    style C fill:#f9f,stroke:#333
    style B fill:#ccf,stroke:#333
    style D fill:#ccf,stroke:#333
    subgraph Route 1
        1 --> 2
        2 --> 3
        3 --> 4
        4 --> 5
        5 --> 6
        6 --> 7
        7 --> 8
        8 --> 9
        9 --> 10
    end
- Front demisting/defrosting
- Rear screen demisting/defrosting
- Ventilation off
- Manual recirculation of the interior air
- Audio system on/off
- Volume adjustment
- HOME button
- Access to the Shortcuts for driving aids
- Access to the Climate application
- Hazard warning lamps
Rechargeable hybrid system
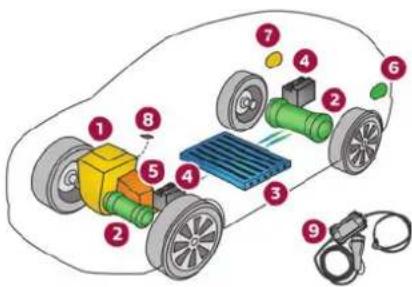
- Petrol engine
- Front and rear electric motors (depending on version)
- Traction battery
4.12 V accessories batteries - 8-speed electric automatic gearbox (e-EAT8)
- Charging flap
- Fuel filler flap
- Driving mode selector
- Domestic charging cable
The rechargeable hybrid technology combines two sources of energy: that of the petrol engine and that of one or two electric motors (depending on version).
The engine and the motor can operate alternately or simultaneously, according to the driving mode selected and the driving conditions.
The electric power alone provides the mobility of the vehicle in Electric mode, and in Hybrid mode in case of moderate demand. It assists the petrol engine during starting and acceleration phases. The electric power is supplied by a rechargeable traction battery.
Labels
"Ease of use and comfort - Front fittings - Wireless smartphone charger" section:

"Lighting and visibility - Exterior lighting control stalk" and "In the event of a breakdown - Changing a bulb" sections:

"Safety - Child seats - Deactivating the front passenger airbag" section:
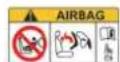

"Safety - ISOFIX mountings" section:


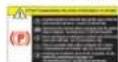
"Driving - Electric parking brake" section:
"Driving - Stop & Start" section:

"Practical information - Compatibility of fuels" section:


"Practical information - Rechargeable hybrid system" section:


"Practical information - Charging the traction battery (Rechargeable hybrid)" section:


"Practical information - Bonnet" section:


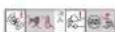
"In the event of a breakdown - Temporary puncture repair kit" section:
"In the event of a breakdown - Spare wheel" section:

"In the event of a breakdown - 12 V battery/Accessory batteries" section:


7 Overview
Eco-driving
Eco-driving refers to a range of everyday practices that allow the motorist to optimise the vehicle's energy consumption (fuel and/or electricity) and CO_2 emissions.
Optimise your use of the gearbox
With an automatic gearbox, favour automatic mode. Do not depress the accelerator pedal heavily or suddenly.
The gear shift indicator prompts you to engage the most suitable gear. Whenever this indication is displayed on the instrument panel, follow it straight away.
With an automatic gearbox, this indicator appears only in manual mode.
Drive smoothly
Maintain a safe distance between vehicles, use engine braking rather than the brake pedal and press the accelerator gradually. These practices help to save on energy consumption, reduce CO_2 emissions and decrease general traffic noise. Favour the use of the "Eco" driving mode by selecting it using the "DRIVE MODE" control. When the traffic is flowing smoothly, select the cruise control.
Control the use of electrical equipment
Before moving off, if the passenger compartment is too warm, ventilate it by opening the windows and air vents before using the air conditioning. At speeds above 31 mph (50 km/h), close the windows and leave the air vents open.
Consider using equipment that can help keep the temperature in the passenger compartment down (e.g. sunroof blind, window blinds).
Unless automatically regulated, switch off the air conditioning as soon as the desired temperature has been reached.
Switch off the demisting and defrosting functions, if they are not managed automatically. Switch off the heated seat as soon as possible.
Adapt your use of the headlamps and/or foglamps to the level of visibility, in accordance with current legislation in the country in which you are driving.
Avoid running the engine before moving off, particularly in winter (other than in severe wintry conditions: temperature below -23°C). The vehicle will warm up much faster while driving.
As a passenger, avoid connecting your multimedia devices (e.g. film, music, video game) to help reduce the consumption of energy.
Disconnect all portable devices before leaving the vehicle.
Limit the causes of excess consumption
Spread loads throughout the vehicle. Place the heaviest items in the boot as close as possible to the rear seats.
Limit the loads carried in the vehicle and minimise wind resistance (e.g. roof bars, roof rack, bicycle carrier, trailer). Preferably, use a roof box.
Remove roof bars and roof racks after use. At the end of winter, remove snow tyres and refit summer tyres.
Comply with the servicing instructions
Check tyre pressures regularly, with the tyres cold, referring to the label in the door aperture on the driver's side.
Carry out this check in particular:
- before a long journey.
- at each change of season.
- after a long period out of use.
Do not forget the spare wheel and, where applicable, the tyres on your trailer or caravan. Have your vehicle serviced regularly (e.g. engine oil, oil filter, air filter, passenger compartment filter, etc.). Observe the schedule of operations in the manufacturer's service schedule.
With a BlueHDi Diesel engine, if the SCR system has a fault, your vehicle will emit pollution. Visit a dealer or a qualified workshop as soon as possible to restore your vehicle's nitrogen oxide emissions to legal levels.
When filling the fuel tank, do not continue after the third cut-out of the nozzle, to avoid overflow. You will only see the fuel consumption of your new vehicle settle down to a consistent average after the first 1,900 miles (3,000 kilometres).
Optimising the driving range (rechargeable hybrid vehicles)
Connect the vehicle as soon as possible. Favour the ECO zone of the power indicator by driving smoothly and at a steady speed.
9 Eco-driving
Anticipate slowing down as much as possible and, if possible, favour decelerations with regenerative braking mode activated (power indicator in the CHARGE zone).
With the vehicle connected, carry out temperature pre-conditioning before setting off. To optimise consumption during a journey:
Programme a destination in the vehicle's GPS navigation system.
- Select the Hybrid driving mode.
- Make sure that the battery charge level is close to maximum.
- Do not use the e-Save function while driving.
- Use the heating/air conditioning system wisely.
Dashboard instruments
Driver information
Instrument panel
The instrument panel displays all the information the driver needs about the status of the vehicle's various systems.
This information appears in the form of warning and indicator lamps and messages.
The instrument panel is in the form of a fully digital screen.
Digital instrument panel
This digital instrument panel can be personalised. Depending on the display page selected, certain information does not appear or is displayed differently.
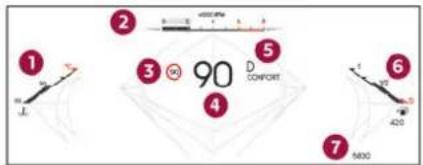
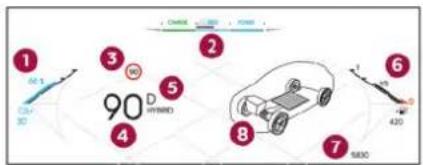
- Coolant temperature indicator ( ^ C) (Petrol or Diesel) Traction battery charge level and remaining range (miles or km) (Rechargeable hybrid)
- Rev counter (rpm) (Petrol or Diesel) Power indicator (Rechargeable hybrid)
- Display of speed limit signs Cruise control/speed limiter settings
- Speedometer (mph or km/h) READY indicator lamp (Rechargeable hybrid)
- Status of the automatic gearbox Active driving mode
- Fuel gauge and remaining range (miles or km)
- Total distance recorder (miles or km)
- Energy flows (Rechargeable hybrid)
When the vehicle is driving in all-electric mode, the speed is displayed in blue (Rechargeable hybrid).
The default pages are as follows:
- Dials.
- Minimal.
- Energy flows (Rechargeable hybrid).
- Driving aids.
- Night Vision (depending on equipment).
- Navigation (depending on equipment).
- Personal 1.
- Personal 2.
Information displayed on the instrument panel
The information displayed on the instrument panel (e.g. warning lamps, indicators) may have a fixed or variable location depending on the page or the driving aid activated.
For the functions that have indicator lamps for both operation and deactivation, there is only one dedicated location.
i Display language and units These depend on the touch screen settings.
When travelling abroad, the speed must be shown in the official units of the country you are driving in (mph, miles or km/h, km).
Choice of the displayed page
By default, pages are memorised in the instrument panel.
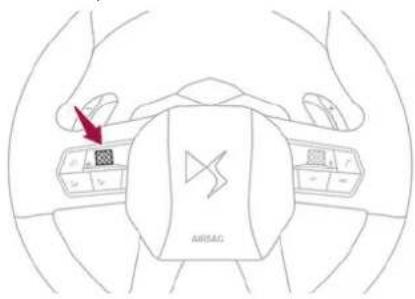
▶ Turn the thumbwheel on the left of the steering wheel to display and scroll through the various pages on the instrument panel.
▶ Press the thumbwheel to confirm the page.
The new page is applied immediately. If there is no action on the thumbwheel, the selected display page is applied automatically after a few moments.
When a message is displayed in a temporary window, pressing this thumbwheel will cause this window to disappear immediately.
Settings for displayed pages
The available settings operations are: addition, deletion and layout of pages.
It is possible to memorise up to 5 pages.
The colour can also be configured according to the selected driving mode.

The settings are changed via the Settings
Customization touch screen application.
Settings for a "Personal" display page
In the two additional personal pages, the types of information available are as follows:
- Dynamic (Torque, Boost, Power).
- G-metres.
- Engine temperatures (Petrol or Diesel).
- Rev counter (Petrol or Diesel).
- Energy flows (Rechargeable hybrid).
- Power indicator (Rechargeable hybrid).
-
Accessories consumption (Rechargeable hybrid).
-
Media.
- Trip computer.
- Vigilance level (with the DS DRIVER ATTENTION MONITORING function only).
- Driving aids.
- Navigation.
i The type of information selected in the "Personal 1" page is not available in the "Personal 2" page.

The settings are changed via the Settings > Customization touch screen application.
For further information on Personalisation - Instrument Panel, refer to the corresponding section for the Audio equipment and telematics systems.
Warning and indicator lamps
Displayed as symbols, the warning and indicator lamps inform the driver of the occurrence of a malfunction (warning lamps) or of the operating status of a system (operation or deactivation indicator lamps). Certain lamps light up in two ways (fixed or flashing) and/or in several colours.
Associated warnings
The illumination of a lamp may be accompanied by an audible signal and/or a message displayed in a screen.
Relating the type of alert to the operating status of the vehicle allows you to determine whether
the situation is normal or whether a fault has occurred: refer to the description of each lamp for further information.
When the ignition is switched on
Certain red or orange warning lamps come on for a few seconds when the ignition is switched on.
These warning lamps should go off as soon as the engine is started.
For more information on a system or a function, refer to the corresponding section.
Persistent warning lamp
If a red or orange warning lamp comes on, there may be fault which needs further investigation.
If a lamp remains lit
The references (1), (2) and (3) in the warning and indicator lamp description indicate whether you should contact a qualified professional in addition to the immediate recommended actions.
(1): You must stop the vehicle.
Stop as soon as it is safe to do so and switch off the ignition.
(2): Contact a dealer or a qualified workshop.
(3): Visit a dealer or a qualified workshop.
01
Dashboard instruments
List of warning and indicator lamps
Red warning/indicator lamps
STOP

Fixed, associated with another warning lamp, accompanied by the display of a ge and an audible signal.
A serious fault with the engine, braking system, power steering or automatic gearbox or a major electrical fault has been detected. Carry out (1) and then (2).
Maximum coolant temperature

Fixed.
The temperature of the cooling system is
too high.
Carry out (1), then wait until the engine has cooled down before topping up the level, if necessary. If the problem persists, carry out (2).
Engine oil pressure

Fixed.
There is a fault with the engine lubrication
system.
Carry out (1) and then (2).
System malfunction (Rechargeable hybrid)

Fixed.
The rechargeable hybrid system is faulty.
Carry out (1) and then (2).
Cable connected (Rechargeable hybrid)

Fixed when the ignition is switched on. The charging cable is connected to the e's connector.

Fixed when the ignition is switched on, accompanied by a message.
It is not possible to start the vehicle while the charging cable is connected to the vehicle's connector.
Disconnect the charging cable and close the flap.
12 V battery charge (depending on country of sale)

Fixed.
The battery charging circuit is faulty
(e.g. dirty terminals, loose or severed alternator belt).
Carry out (1).
If the electric parking brake stops working, immobilise the vehicle:
▶ Fit the chock against one of the wheels. Clean and tighten the terminals. If the warning lamp does not go off when the engine is started, carry out (2).
Braking

Fixed.
The brake fluid level in the braking circuit
has dropped significantly.
Carry out (1), then top up with fluid that complies with the manufacturer's recommendations. If the problem persists, carry out (2).


Fixed.
The electronic brake force
distribution (EBFD) system is faulty.
Carry out (1) and then (2).
Electric parking brake

Fixed.
The electric parking brake is applied.

Flashing.
Application/release is faulty.
Carry out (1): park on flat ground (on a level surface).
Select mode P on the automatic gearbox.
Switch off the ignition and carry out (2).
DS ACTIVE SCAN SUSPENSION

Fixed.
A malfunction of the active suspension
system is detected.
Reinitialise the system:
▶ Switch the ignition off and wait for at least 30 seconds.
▶ Switch the ignition on again and wait for at least 5 seconds before starting the engine. If the problem persists, carry out (3).
Door(s) open

Fixed, associated with a message identifying the access.
An audible signal supplements the alert if the speed is higher than 6 mph (10 km/h).
A door or the boot is not properly closed.
Seat belts not fastened/unfastened

Fixed or flashing, accompanied by an increasing audible signal.
A seat belt has not been fastened or has been unfastened.
Orange warning/indicator lamps
Service

Temporarily on, accompanied by the display of a message.
One or more minor faults, for which there is/are no specific warning lamp(s), have been detected. Identify the cause of the fault using the message displayed on the instrument panel.
You may be able to deal with some faults yourself, such as changing the battery in the remote control.
For other faults, such as with the tyre under-inflation detection system, carry out (3).

Fixed, accompanied by the display of a message.
One or more major faults, for which there is/are no specific warning lamp(s), have been detected. Identify the cause of the fault using the message displayed on the instrument panel, then carry out (3).

Fixed, accompanied by the message "Parking brake fault".
Automatic release of the electric parking brake is unavailable.
Carry out (2).


Service warning lamp fixed and service spanner flashing then fixed.
The servicing interval has been exceeded.
The vehicle must be serviced as soon as possible. Only with BlueHDi Diesel engines.
Braking

Fixed.
A minor fault with the braking system has been detected.
Drive carefully.
Carry out (3).
Malfunction (with electric parking brake)


Fixed, accompanied by the message "Parking brake fault".
The vehicle cannot be immobilised with the engine running.
If manual application and release commands are not working, the electric parking brake control is faulty.
The automatic functions must be used at all times and are automatically reactivated in the event of a fault with the control.
Carry out (2).


Fixed, accompanied by the message "Parking brake
fault"
The electric parking brake is faulty: manual and automatic functions may not be working. When stationary, to immobilise the vehicle:
▶ Pull the electric parking brake control and hold it for approximately 7 to 15 seconds, until the indicator lamp lights up on the instrument panel.
If this procedure does not work, secure the vehicle:
▶ Park on a level surface.
▶ Select P on the automatic gearbox, then place the supplied chock against one of the wheels. Then carry out (2).
Automatic functions deactivated (electric parking brake)

Fixed.
The "automatic application" (on switching engine) and "automatic release" (on ration) functions are deactivated.
If automatic application/release is no longer possible:
▶ Start the engine.
▶ Use the control to apply the electric parking brake.
▶ Take your foot fully off the brake pedal.
▶ Hold the control pressed in the release direction for between 10 and 15 seconds.
▶ Release the control.
▶ Depress and hold the brake pedal.
▶ Pull the control in the application direction for 2 seconds.
▶ Release the control and the brake pedal.
Anti-lock braking system (ABS)

The anti-lock braking system has a fault.
The vehicle retains conventional braking.
Drive carefully at moderate speed, then carry out (3).
Dashboard instruments
Engine self-diagnostic system

Flashing
The engine management system has a
fault.
There is a risk that the catalytic converter will be destroyed.
You must carry out (2).

Fixed.
The emissions control system has a fault.
The warning lamp should go off when the engine is started.
Carry out (3) without delay.
Dynamic stability control (DSC)/Anti-slip regulation (ASR)

Fixed.
The system is deactivated.
The DSC/ASR system is reactivated automatically when the vehicle is started, and at speeds above approximately 31 mph (50 km/h).
At speeds below 31 mph (50 km/h), it can be reactivated manually.

Flashing.
DSC/ASR system regulation is activated in
the event of a loss of grip or trajectory.
Fixed.
The DSC/ASR system has a fault.
Carry out (3).
Emergency brake malfunction (with electric parking brake)


Fixed, accompanied by the message "Parking brake fault".
Emergency braking does not deliver optimal performance.
If automatic release is not available, use manual release or carry out (3).
Hill start assist


Fixed, accompanied by the message "Anti roll-back system
fault".
The system has a fault.
Carry out (3).
Under-inflation

Fixed.
The pressure in one or more tyres is too
low.
Check the pressure of the tyres as soon as possible.
Reinitialise the detection system after adjusting the pressure.

Under-inflation warning lamp flashing then fixed and Service
warning lamp fixed.
The tyre pressure monitoring system is faulty. Under-inflation detection is no longer monitored. Check the tyre pressures as soon as possible and carry out (3).
Parking sensors

Fixed, accompanied by an onscreen message and an audible signal.
The system is deactivated.


Fixed, associated with the Service warning lamp, accompanied by the
display of a message and an audible signal.
The system has a fault.
Carry out (3).
Engine preheating (Diesel)

Temporarily on
(up to approximately 30 seconds in severe
weather conditions).
When switching on the ignition, if the weather conditions and the engine temperature make it necessary.
Wait until the warning lamp goes off before starting.
When the warning lamp goes off, starting will occur immediately if you press and hold the brake pedal.
If the engine does not start, make the engine starting request again, while keeping your foot on the pedal.
Airbags

Fixed, associated with the Service warning lamp and accompanied by
the display of a message
One of the airbags or seat belt pyrotechnic pretensioners is faulty.
Carry out (3).
Front passenger airbag (ON)

Fixed.
The front passenger airbag is activated.
The control is set to the "ON" position.
In this case, do not install a "rearward facing" child seat on the front passenger seat - risk of serious injury!
Front passenger airbag (OFF)

Fixed.
The front passenger airbag is deactivated.
The control is set to the "OFF" position.
A "rearward facing" child seat can be installed, unless there is a fault with the airbags (Airbags warning lamp on).
Low fuel level

Fixed, accompanied by an audible signal and a message.
When it first comes on, there remains
approximately 6 litres of fuel in the tank (reserve).
Until the fuel level is topped up, this alert will be repeated every time the ignition is switched on, with increasing frequency as the fuel level decreases and approaches zero.
Refuel without delay to avoid running out of fuel.
Never drive until completely empty, as this could damage the emissions control and injection systems.
Pedestrian horn (Rechargeable hybrid)

Fixed.
Horn fault detected.
Carry out (3).
Collision Risk Alert/Active Safety Brake

Fixed, accompanied by the display of a message.
The system has been deactivated via the touch screen.

Flashing.
The system activates and brakes the vehicle momentarily to reduce the speed of collision with the vehicle in front.
For more information, refer to the Driving section.

Fixed, accompanied by a message and an audible signal.
The system has a fault.
Carry out (3).

Fixed.
The system has a fault.
If these warning lamps come on after the engine is switched off and then restarted, carry out (3).

Fixed.
The system is deactivated
temporarily because the driver and/or front passenger (depending on version) has been detected as present but the corresponding seat belt has not been fastened.
Lane keeping assist

Fixed.
The system has been automatically rated or placed on standby.

Flashing.
You are about to cross a broken lane
marking without operating the direction indicators.
The system is activated, then corrects the trajectory if it detects a risk of unintentionally crossing a line or hard shoulder (depending on version).
For more information, refer to the Driving section.


Fixed, accompanied by the display of a message and an audible signal.
The system has a fault.
Carry out (3).
Lane positioning assist


Fixed, accompanied by the Service warning lamp.
The system has a fault.
Carry out (3).
Stop & Start

Fixed, accompanied by the display of a message.
The Stop & Start system has been deactivated manually.
The engine will not switch off at the next traffic stop.
Reactivate the system via the touch screen.

Fixed.
The Stop & Start system has been
deactivated automatically.
The engine will not switch off at the next traffic stop, if the exterior temperature is:
- below 0°C.
- above +35°C.
For more information, refer to the Driving section.
Dashboard instruments

Flashing then fixed, accompanied by a message.
The system has a fault.
Carry out (3).
AdBlue® (BlueHDi)

On for around 30 seconds when starting the vehicle, accompanied by a message
indicating the driving range.
The driving range is between 1,500 and 500 miles (2,400 and 800 km).
Top up the AdBlue ^6 .

Fixed, on switching on the ignition, accompanied by an audible signal and a
message indicating the driving range.
The driving range is between 500 and 62 miles (800 and 100 km).
Promptly top up the AdBlue ^ , or carry out (3).

Flashing, accompanied by an audible signal and a message indicating the
driving range.
The driving range is less than 62 miles (100 km).
You must top up the AdBlue® to avoid engine
starting being prevented, or carry out (3).

Flashing, accompanied by an audible signal and a message indicating that
starting is prevented.
The AdBlue ^® tank is empty: the legally required engine immobiliser system prevents the engine from starting.
To restart the engine, top up the AdBlue ^x or carry out (2).
It is essential to add at least 10 litres of AdBlue ^3 to the tank.
SCR emissions control system (BlueHDi)


Fixed when the ignition is switched on, accompanied by an audible
signal and a message.
A malfunction of the SCR emissions control system has been detected.
This alert disappears once the exhaust emissions return to normal levels.


Flashing AdBlue ^2 warning lamp on switching on the ignition, with the
Engine self-diagnostics warning lamp on fixed, accompanied by an audible signal and a message indicating the driving range.
Depending on the message displayed, it is possible to drive for up to 685 miles (1,100 km) before the engine immobiliser is triggered.
Carry out (3) without delay, to avoid starting
being prevented.


Flashing AdBlue ^3 warning lamp on switching on the ignition, with the
Engine self-diagnostics warning lamp on fixed, accompanied by an audible signal and a message indicating that starting is prevented.
The engine immobiliser prevents the engine from restarting (the permitted driving limit has been exceeded after confirmation of a malfunction of the emissions control system).
To start the engine, carry out (2).
Rear foglamps

Fixed.
The lamps are on.
Automatic headlamp dipping
AUTO Fixed, accompanied by an audible signal and a message.
A function or camera malfunction is detected.
Carry out (2).
DS PIXEL LED VISION 3.0
Fixed, accompanied by an audible signal and a message.
A malfunction of the DS PIXEL LED VISION 3.0 headlamps or of the camera has been detected. Carry out (2).
DS NIGHT VISION

Fixed.
The function has been activated, but
the vehicle is travelling too fast or the exterior temperature conditions are outside the operating range.
The display is available with "Night vision" mode but the system does not emit an alert.
For more information, refer to the Lighting and visibility section.
Green warning/indicator lamps
Stop & Start

Fixed.
When the vehicle stops, the Stop & Start puts the engine into STOP mode.

Flashing temporarily.
STOP mode is momentarily unavailable or START mode is automatically triggered.
For more information, refer to the Driving section.
Vehicle ready to drive (Rechargeable hybrid)

Fixed, accompanied by an audible signal when it comes on.
The vehicle is ready to drive.
The indicator lamp goes out upon reaching a speed of approximately 3 mph (5 km/h) and lights up again when the vehicle stops moving. The lamp will go out when you switch off the motor and exit the vehicle.
Lane positioning assist

Fixed.
The function has been activated.
All conditions have been met: the system is operating.
For more information, refer to the Driving section.
Automatic wiping

Fixed.
Automatic windscreen wiping is activated.
Direction indicators

Flashing with audible signal.
The direction indicators are on.
Sidelamps

Fixed.
The lamps are on.
Dipped beam headlamps

Fixed.
The lamps are on.
DS NIGHT VISION

Fixed.
(grey)
The function is activated, but not available.

Fixed.
The function is active
All of the conditions are met: the system is operating.
For more information, refer to the Lighting and visibility section.
DS PIXEL LED VISION 3.0

Fixed.
(grey)
The function is activated, but not available.
All the operating conditions have not been met.

Fixed.
The function is active.
All of the conditions are met: the system is operating.
For more information, refer to the Lighting and visibility section.
Automatic headlamp dipping

Fixed.
The function has been activated via
the touch screen.
The lighting control stalk ring is in the "AUTO" position.
For more information, refer to the Lighting and visibility section.
Blue warning/indicator lamps
Main beam headlamps

Fixed.
The lamps are on.
e-SAVE function (Rechargeable hybrid)

Fixed, accompanied by the reserved electric range.
The function is activated.
Black/white warning lamps
Automatic gearbox or Electric automatic gearbox (e-EAT8) (Rechargeable hybrid)

Fixed.
The automatic gearbox is locked.
You must press the Unlock button to unlock it.
Indicators
Service indicator
The servicing information is expressed in terms of distance (miles or kilometres) and time (months or days).
The alert is given at whichever of these two terms is reached first.
The servicing information is displayed in the instrument panel. Depending on the version of the vehicle:
- The distance recorder display line indicates the distance remaining before the next service is due, or the distance travelled since it was due preceded by the "-" sign.
- An alert message indicates the distance remaining, as well as the period before the next service is due or how long it is overdue.
i The value indicated is calculated according to the distance covered and the time elapsed since the last service. The alert may also be triggered close to a due date.
Service spanner

On temporarily when the ignition is switched on.
Between 620 and 1,860 miles (1,000 and 3,000 km) remain before the next service is due.

Fixed, when the ignition is switched on. The next service is due in less than 620 (1,000 km).
Have your vehicle serviced very soon.
Service spanner flashing


Flashing then fixed, when the ignition is switched on.
(With BlueHDi Diesel engines, associated with the Service warning lamp.)
The servicing interval has been exceeded. Have your vehicle serviced as soon as possible.
Resetting the service indicator
The service indicator must be reset after each service.
If you have serviced your vehicle yourself:
▶ Switch the ignition off.
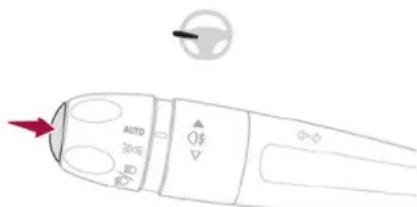
▶ Press and hold the button located on the end of the lighting control stalk.
▶ Without pressing the brake pedal, press the START/STOP button once; a temporary display window appears and a countdown begins.
When the display indicates =0, a confirmation message appears; release the lighting control stalk button and the spanner symbol disappears.
If you disconnect the battery following this operation, lock the vehicle and wait at least 5 minutes for the reset to be registered.
Reminder of the servicing information

Servicing information is accessible using the Settings > Vehicle application on the screen.
▶ Then select Safety > Diagnostics.
Engine oil level indicator
(Depending on version)
On versions fitted with an electric gauge, the engine oil level status is displayed on the instrument panel for a few seconds when the ignition is switched on, after the servicing information, in the form of messages.
i The level read will only be correct if the vehicle is on level ground and the engine has been off for more than 30 minutes.
Low oil level
This is indicated by a message prompting you to top up the level, accompanied by the lighting of the Service warning lamp and an audible signal. If a low oil level is confirmed by a check using the dipstick, the level must be topped up to avoid damage to the engine.
For more information on Checking levels, refer to the corresponding section.
Oil gauge malfunction
This is indicated by the message "Oil level measurement invalid" on the instrument panel. Contact a dealer or a qualified workshop.
In the event of a malfunction of the electric gauge, the oil level is no longer monitored.
If the system is faulty, you must check the engine oil level using the manual dipstick located in the engine compartment.
For more information on Checking levels, refer to the corresponding section.
Coolant temperature indicator
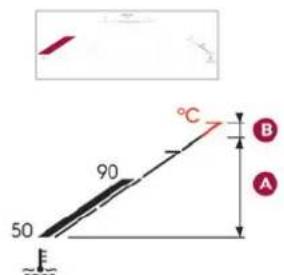
With the engine running:
- In zone A, the temperature is correct.
- In zone B, the temperature is too high. The associated warning lamp and the STOP warning lamp light up in red on the instrument panel, accompanied by the display of a message and an audible signal.
You must stop the vehicle as soon as it is safe to do so.
Wait a few minutes before switching off the engine.
! After switching off the ignition, carefully open the bonnet and check the coolant level.
i For more information on Checking levels, refer to the corresponding section.
AdBlue ^® range indicators (BlueHDi)
The Diesel BlueHDi engines are equipped with a system that associates the SCR (Selective Catalytic Reduction) emissions control system and the Diesel particle filter (DPF) for the treatment of exhaust gases. They cannot function without AdBlue® fluid.
When the level of AdBlue ^4 falls below the reserve level (between 1,500 and 0 miles (2,400 and 0 km)), a warning lamp lights up when the ignition is switched on and an estimate of the distance that can be travelled before engine starting is prevented is displayed in the instrument panel.
! The engine starting prevention system required by regulations is activated automatically once the AdBlue ^® tank is empty. It is then no longer possible to start the engine until the minimum level of AdBlue ^® has been topped up.
Manual display of driving range
While the driving range is greater than 1,500 miles (2,400 km), it is not displayed automatically.
Driving range information is accessible using the Settings > Vehicle application on the touch screen.
▶ Then select Safety > Diagnostics.
19 Dashboard instruments
Actions required related to a lack of AdBlue®
The following warning lamps light up when the quantity of AdBlue ^® is below the reserve level: driving range of 1,500 miles (2,400 km).
Together with the warning lamps, messages regularly remind you of the need to top up to avoid engine starting being prevented. Refer to the
Warning and indicator lamps section for details of the messages displayed.
For more information on AdBlue ^x (BlueHDi) and in particular on topping up, refer to the corresponding section.
| Warning/indicatorlamps on | Action Remainingrange |
| Top up. Between1,500 milesand 500miles (2,400km and 800km) | |
| Top up as soonas possible. Between500 milesand 62 miles(800 km and100 km) |
Dashboard instruments
| Warning/indicator lamps on | Action Remaining range |
 | A top-up is vital, there is a risk that the engine will be prevented from starting. |
 | To be able to restart the engine, add at least 10 litres of AdBlue® to the tank. |
i Taking into account of top-up Top-up detection may not be
instantaneous after addition. It may take a few minutes of driving before the top-up detection is effective.
Malfunction of the SCR emissions control system
Malfunction detection


If a malfunction is detected, these warning lamps come on, accompanied by an audible signal and the display of an "Emissions control fault" message.
The alert is triggered while driving when the fault is detected for the first time, and thereafter when switching on the ignition for subsequent journeys, for as long as the cause of the fault persists.
If the fault is temporary, the alert disappears during the next journey, after self-diagnostic checks of the SCR emissions control system.
Malfunction confirmed during the permitted driving phase (between 685 miles and 0 miles (1,100 km and 0 km))
If the fault indication is still displayed permanently after 31 miles (50 km) of driving, the fault in the SCR system is confirmed.
The AdBlue warning lamp flashes and a message is displayed ("Emissions control fault: starting prevented in X miles (kms)"), indicating the driving range in miles or kilometres.
While driving, the message is displayed every 30 seconds. The alert is repeated when switching on the ignition.
You can continue driving for up to 685 miles (1,100 km) before the engine starting prevention system is triggered.
Have it checked by a dealer or a qualified workshop.
Starting prevented
Every time the ignition is switched on, the message "Emissions control fault: Starting prevented" is displayed.
! To restart the engine Contact a dealer or a qualified workshop.
Power indicator (Rechargeable hybrid)
The power indicator shows in real time the power demanded from the vehicle.
There are 3 zones:

POWER High power demand, using the combined capabilities of the petrol engine and the electric motor(s) (depending on version).
The slider is located in this zone during more dynamic driving phases when high levels of performance are being demanded.
ECO Optimal use of energy (internal combustion or electric).
The slider is located in this zone when driving under electric power and when optimal use is being made of the petrol engine, both accessible by adopting a suitable driving style.
A symbol indicates the threshold at which the petrol engine will restart. The driver can therefore moderate their acceleration to remain in electric driving mode.
CHARGE Energy recovery for partly recharging the traction battery.
The slider is located in this zone during deceleration: taking your foot off the accelerator pedal or braking.
Charge level indicator (Rechargeable hybrid)
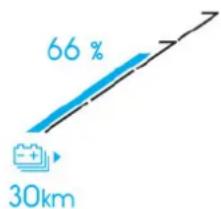
The charge level of the traction battery and the remaining range in electric driving mode are permanently displayed when the vehicle is switched on.
! The range displayed depends on the use of the vehicle (type of driving and speed), the outside temperature and the activated comfort equipment.
Manual test
This function allows you to check certain indicators and display the alerts log.

The test is launched in the Settings> Vehicle touch screen application.

Then select Safety > Diagnostics.
The following information is displayed on the instrument panel:
- Tyre pressures.
- Engine oil level (depending on engine).
- Next service due.
- Driving range associated with the AdBlue ^* and the SCR system (BlueHDi Diesel).
- Current alerts.
i This information is also displayed automatically every time the ignition is switched on.
Total distance recorder
The total distance recorder measures the total distance travelled by the vehicle since its initial registration.
With the ignition on, the total distance is displayed at all times. It remains displayed for 30 seconds after switching off the ignition. It is displayed when the driver's door is opened, and when the vehicle is locked or unlocked.
When travelling abroad, you may have to change the distance units (miles or km): the displayed speed must be in the local country's official unit (mph or km/h).
The unit is changed via the screen's configuration application, with the vehicle stationary.
Lighting dimmer
Used to manually adjust the brightness of the instruments and controls to suit the exterior light level.

It is configured in the Settings > Brightness touch screen application.
Dashboard instruments
In the "Cockpit" category, press or move the slider to the desired setting.
Trip computer
Displays information related to the current trip (range, fuel consumption, average speed, etc.).
Data displayed on the instrument panel
Trip computer data is permanently displayed when the "Personal" display mode is selected. In all other display modes, pressing the end of the wiper control stalk will cause this data to appear temporarily in a specific window. Displaying the different tabs
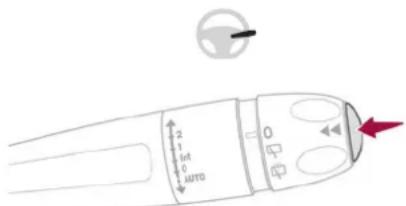
▶ Pressing the button located on the end of the wiper control stalk displays the following tabs in turn:
- Current information:
• Total driving range (Petrol or Diesel). - Current consumption (Petrol or Diesel).
• Time counter for Stop & Start (Petrol or Diesel).
• Percentage of the current journey travelled in all-electric driving mode (Rechargeable hybrid).
- Trips "1" then "2":
- Average speed.
• Average fuel consumption.
• Distance travelled.
Trip reset
+2s ▶ When the desired trip is displayed, press the button on the end of the wiper control stalk for more than 2 seconds. Trips "1" and "2" are independent and are used in the same way.
Definitions
Range
(miles or km)
Distance that can still be travelled with the fuel remaining in the tank (based on the average fuel consumption over the last few miles (kilometres) travelled).
This value may vary following a change in driving style or terrain, leading to a significant change in current fuel consumption.
When the range falls below 19 miles (30 km), dashes are displayed.
After filling with at least 5 litres of fuel, the range is recalculated and is displayed if it exceeds 62 miles (100 km).
Dashes appearing permanently in place of numbers while driving indicates a malfunction. Contact a dealer or a qualified workshop.
Current consumption
(mpg or l/100 km or km/l)

Calculated during the last few seconds.
This function is only displayed at speeds above 19 mph (30 km/h).
Average consumption
(mpg or l/100 km or km/l)

Calculated since the last trip computer reset.
Average speed
(mph or km/h)
Calculated since the last trip computer reset.
Distance travelled
(miles or km)

Calculated since the last trip computer reset.
Stop & Start time counter

(minutes/seconds or hours/minutes)
If your vehicle is fitted with the Stop & Start function, a time counter calculates the time spent in STOP mode during a journey.
The time counter is reset each time the ignition is switched on.
Clock
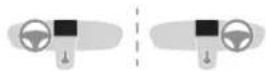
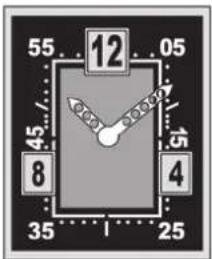
It is deployed automatically when the ignition is switched on and folds back automatically when the ignition is switched off.
The hands mechanism is synchronised with the time displayed on the touch screen.
! Do not fold the clock back manually - it may break!
12-inch touch screen
This system gives access to the following elements:
- Time and exterior temperature.
- Heating/air conditioning system controls and reminders of settings.
- Settings for driving aid functions, comfort and safety functions, audio equipment and digital instrument panel.
- Settings of functions specific to rechargeable hybrid vehicles.
- Display of visual manoeuvring aid functions.
- Interactive handbook.
- Video tutorials (e.g. screen management, driving aids, voice recognition).
- Audio equipment and telephone controls with display of associated information.
- Connected services and display of associated information.
- Navigation system controls and display of associated information (depending on equipment).
- Voice recognition (depending on equipment).
! For safety reasons, always stop the vehicle before performing operations that require sustained attention.
Some functions are not accessible while driving.
Recommendations
This screen is of the capacitive type.
- Do not use pointed objects on the touch screen.
- Do not touch the touch screen with wet hands.
- Use a soft, clean cloth to clean the touch screen.
23 Dashboard instruments
Main controls

Access to one of the home pages Return to the first home page
Direct access to the Climate application

Direct access to the Shortcuts for driving aids
▶ Swipe down from the upper edge of the touch screen to access a list of quick settings (e.g. Brightness, Diagnostics).
▶ Depending on the pages displayed on the screen, with or without the context menu, scroll the text by swiping with your finger, as with a smartphone.

Show/Hide context menu
Return to the previous page
To change the status of a function, press the description for the corresponding line (change confirmed by the slider moving to the right/left: function activated/deactivated).

Access additional information on the function
Access to function parameters

Adding/Removing shortcuts

Short press, ignition off: system on/off. Short press, ignition on: mute/restore
sound.

24
Dashboard instruments
Long press, ignition on: start standby mode (mute sound, screens and clock display off).

Volume adjustment.
Applications

Press this button to access the applications wall.
i From any page, press the touch screen with three fingers to display the applications wall.
To obtain information about the other applications not listed here, refer to the sections describing the audio and telematic systems.

ADAS
Activation/Deactivation and configuration driving aid functions.

Climate
Settings for temperature, air flow, etc.
For more information on Dual-zone automatic air conditioning, refer to the corresponding section.

Seats
Activation/Deactivation and configuration
of the seat comfort functions (heating, ventilation and massages).
For more information on the Heated and/or ventilated seats or on the Multi-point massages, refer to the corresponding section.

Settings
Main settings for the audio system, touch screen and digital instrument panel.
Activation/Deactivation and configuration of the exterior lighting, vehicle access and safety functions.

Energy
Access to the rechargeable hybrid system
features (energy flow, consumption statistics, deferred charging, e-SAVE function).
Energy application
Energy Flow
The page shows the operation of the rechargeable hybrid system in real time.
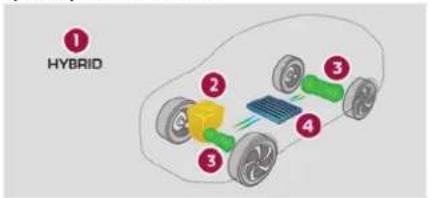
- Active driving mode
- Petrol engine
- Electric motor(s)
- Traction battery charge level
The energy flows have a specific colour for each type of driving:
- Blue: 100% electrical energy.
- White: energy from the petrol engine.
- Green: energy recovery.
Statistics
This page shows electrical energy and fuel consumption statistics.
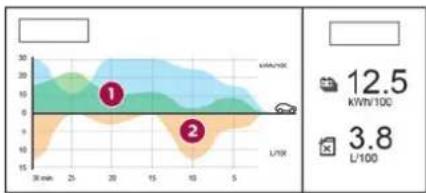
area
| Time (min) | Value | | ---------- | ----- | | 20 | 12.5 | | 10 | 3.8 |- Average electrical consumption for the current trip (kWh/100 km) and historical values:
- Blue graph: energy consumed directly from the traction battery.
- Green graph: energy regenerated during deceleration and braking phases used to recharge the traction battery.
- Average fuel consumption for the current trip (l/100 km) and historical values (orange graph).
Charging
This page allows you to programme deferred charging.
For more information on Charging the traction battery (Rechargeable hybrid), refer to the corresponding section.
e-SAVE
The e-SAVE function makes it possible to reserve all or part of the electrical energy of the traction battery to be used later during a journey
(e.g. passing through an urban area or an area reserved for electric vehicles).
▶ Activate the function by pressing ON, then select the electric range to be reserved (6 miles (10 km), 12 miles (20 km) or the full range MAX).

Activation of the function is confirmed by the lighting of this indicator lamp on the instrument panel and the indication of the energy reserve in miles or kms.
▶ To use the energy reserve, choose the Electric driving mode in the mode selector.
! If the requested range exceeds the available range (not recommended), the internal combustion engine starts to recharge the traction battery up to the requested threshold. This leads to excessive fuel consumption.
Remotely operable additional functions (Rechargeable hybrid)
(Depending on country of sale)



The following functions are available from the MyDS App application, which is accessible from a smartphone:
- Managing the traction battery charging (deferred charging).
- Managing the temperature pre-conditioning.
- Viewing the state of charge and range of the vehicle.
Installation procedure
▶ Download the MyDS App application from the appropriate online store for your smartphone.
▶ Create an account.
▶ Enter the vehicle identification number (available on the vehicle registration certificate). For more information on Identification markings, refer to the corresponding section.
• Network coverage
In order to be able to use the various remotely operable features, ensure that your vehicle is located in an area covered by the mobile network.
A lack of network coverage may prevent communication with the vehicle (for example, if it is in an underground car park). In such cases, the application will display a message indicating that the connection with the vehicle could not be established.
Dashboard instruments


26 Access
Electronic key with remote control function and built-in key
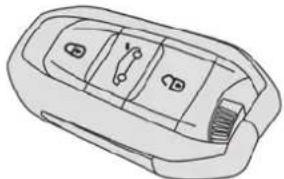
Remote control function
natural_image
Line drawing of a car interior panel with no text or symbolsThe remote control can be used to perform the following remote functions (depending on version):
- Unlocking/Locking/Deadlocking the vehicle.
- Unlocking - Opening the boot.
- Folding/Unfolding the door mirrors.
- Activating/Deactivating the alarm.
- Locating the vehicle.
- Opening/Closing the windows.
- Closing the sunroof.
- Activating the vehicle's electronic immobiliser.
Built-in key
Depending on version, using the remote control built-in key, you can perform the following operations:
- Activation/Deactivation of the manual child lock.
- Activation/Deactivation of the front passenger airbag.
- Back-up Unlocking/Locking of the doors.
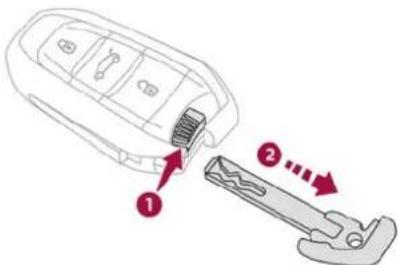
▶ To eject the key or put it back in place, pull and hold the button.
! Once the built-in key is ejected, always keep it with you to be able to carry out the corresponding back-up procedures.
Unlocking the vehicle

Selective unlocking (driver's door, boot) is configured in the Settings > Vehicle touch application.
Complete unlocking
▶ If the selective unlocking is deactivated, press the unlocking button.
Selective unlocking
Driver's door
▶ Press the unlocking button.
The driver's door and the fuel filler flap are unlocked (Petrol or Diesel).
The driver's door is unlocked (Rechargeable hybrid).
▶ Press it again to unlock the other doors and the boot.
The charging nozzle can be unplugged on the second press.
Complete or selective unlocking, and alarm deactivation (depending on version), is confirmed by the flashing of the direction indicators. Depending on version, the door mirrors unfold.
Opening the windows

Depending on version, holding the unlocking button pressed for more than 3 ds opens the windows.
The windows stop when the button is released.
Selective unlocking and opening of the tailgate
By default, selective unlocking of the tailgate is deactivated and its motorised operation is activated.

▶ Press and hold this button to unlock the boot and, depending on version, trigger motorised opening of the tailgate.
When selective unlocking of the tailgate is activated, the doors and the fuel filler flap remain locked.
If selective unlocking of the tailgate is deactivated, pressing the button unlocks the whole vehicle.
If motorised operation of the tailgate is deactivated, pressing the button partially opens the tailgate. To lock the vehicle, it is necessary to close the tailgate again.
Locking the vehicle

Normal locking
▶ Press the locking button. The locking, and the activation of the alarm depending on version, is confirmed by the lighting of the direction indicators. Depending on version, the door mirrors fold.
An access (door or boot) that is not properly closed prevents lacking of the vehicle. However, if the vehicle is fitted with an alarm, it will be activated after 45 seconds. If the vehicle is unlocked but the doors or boots are not subsequently opened, the vehicle will automatically lock itself again after about 30 seconds. If the vehicle is fitted with an alarm, it will be reactivated automatically.
Deadlocking
! Deadlocking renders the interior door controls inoperative. It also disables the central locking button. The horn remains operational. Never leave anyone inside the vehicle when it is deadlocked.
▶ Press the locking button again within 5 seconds to deadlock the vehicle (confirmed by the temporary lighting of the direction indicators). Closing the windows and sunroof An audible signal sounds before the start of movement.
+3s Maintaining pressure on the locking button for more than 3 seconds allows the windows and, depending on version, the sunroof to be closed to the desired position. This operation also closes the sunroof blind.
! Ensure that no person or object could prevent the correct closing of the windows and sunroof.
If, on versions with alarm, you want to leave the windows and/or sunroof partially open, you must first deactivate the interior volumetric alarm protection. For more information on the Alarm, refer to the corresponding section.
• "DS LIGHT VEIL"
1 The additional daytime running lamps and sidelamps illuminate in a scrolling pattern upon locking and unlocking the vehicle.
Locating the vehicle
This function helps you to spot your vehicle from a distance, with the vehicle locked:
- The direction indicators flash for approximately 10 seconds.
- The door mirror spotlamps come on.
- The courtesy lamps come on. Press this button.

Advice
Remote control The remote control is a sensitive, high-frequency device; avoid handling it in your pocket, due to the risk of unintentionally unlocking the vehicle. Avoid pressing the remote control buttons while out of range of the vehicle, due to the risk of rendering the remote control inoperative. It would then be necessary to reset it.
Anti-theft protection Do not modify the electronic vehicle immobiliser, as this might result in malfunctions.
! Locking the vehicle Driving with the doors locked could make it more difficult for the emergency services to enter the passenger compartment in an emergency. As a safety precaution, take the electronic key with you when leaving the vehicle, even for a short time.
i Purchasing a second-hand vehicle Have the key codes memorised by a dealer, to ensure that the keys in your possession are the only ones able to start the vehicle.
Keyless Entry and Start
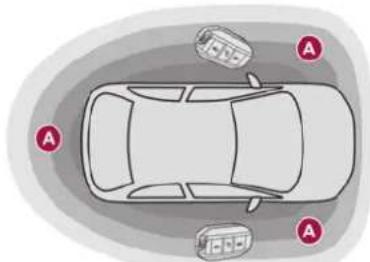
This system allows the unlocking, locking and starting of the vehicle, while carrying the electronic key on your person in the recognition zone A.
Unlocking the vehicle
natural_image
Illustration of a hand holding a device with red arrows pointing to a car interior (no text or symbols)Selective unlocking (driver's door, boot) is configured in the Settings > Vehicle touch screen application.
Complete unlocking
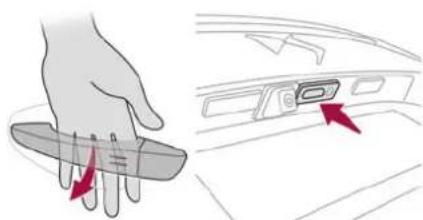
▶ Pass your hand behind the handle of one of the four doors or press the tailgate opening control. If the motorised tailgate opening control is activated, this action triggers its automatic opening.
Opening the windows
Depending on version, keeping your hand behind the door handle or maintaining the press on the tailgate opening control allows the windows to be opened to the desired position.
Selective unlocking
Driver's door
▶ Pass your hand behind the driver's door handle.
The driver's door and the fuel filler flap are unlocked (Petrol or Diesel).
The driver's door is unlocked (Rechargeable hybrid).
▶ To unlock the vehicle completely, pass your hand behind the handle of one of the passenger doors with the electronic key close to the passenger door, or press the tailgate opening control with the electronic key close to the rear of the vehicle.
Complete or selective unlocking, and deactivation of the alarm depending on version, is confirmed by the flashing of the direction indicators. Depending on version, the door mirrors unfold.
Selective unlocking of the tailgate
▶ Press the tailgate opening control to unlock just the boot. The doors remain locked.
i If selective unlocking of the tailgate is deactivated, pressing this control also unlocks the doors.
Locking the vehicle
Normal locking
natural_image
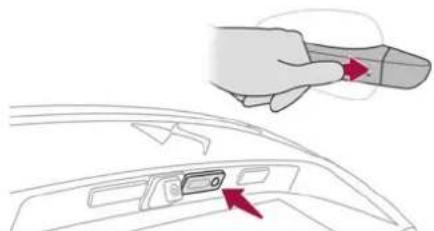
Diagram showing a hand holding a tool interacting with a car's rear panel, with arrows indicating movement (no text or symbols present)▶ Press the handle on one of the four doors (at the markings) or the locking control on the tailgate.
It is not possible to lock the vehicle if one of the electronic keys is left inside the vehicle.
Closing the windows and sunroof
Maintaining pressure on the door handle or the tailgate control allows the windows and, depending on version, the sunroof to be closed to the desired position.
This operation also closes the sunroof blind.
! Make sure that no item or person could prevent the correct closing of the windows and sunroof.
Pay particular attention to children when operating windows.
The locking, and the activation of the alarm depending on version, is confirmed by the temporary lighting of the direction indicators.
Depending on version, the door mirrors fold.
! For safety and theft protection reasons, never leave the electronic key in the vehicle, even when you are close to it.
Deadlocking
! Deadlocking renders the interior door controls inoperative. It also disables the central locking button.
The horn remains operational. Never leave anyone inside the vehicle when it is deadlocked.
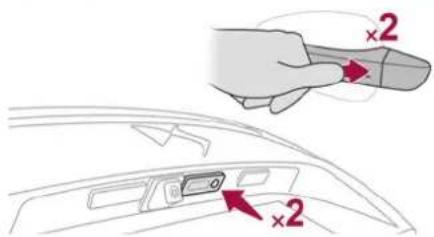
▶ Press the handle on one of the four doors (at the markings) or the locking control on the tailgate to lock the vehicle.
▶ Press it again within 5 seconds to deadlock the vehicle (confirmed by the temporary lighting of the direction indicators).
29 Access
i "DS LIGHT VEIL" The additional daytime running lamps and sidelamps illuminate in a scrolling pattern upon locking and unlocking the vehicle.
If one of the doors or the boot is still open or if the electronic key for the Keyless Entry and Start system has been left inside the vehicle, central locking will not take place.
If the vehicle is unlocked but the doors or tailgate are not subsequently opened, the vehicle will automatically lock itself again after about 30 seconds. If fitted to the vehicle, the alarm is automatically reactivated (if previously activated).
i Automatic folding/unfolding of the door mirrors is configured in the Settings > Vehicle touch screen application.
As a safety measure, never leave the vehicle, even for a short time, without taking the Keyless Entry and Start system's electronic key with you. Be aware of the risk of theft of the vehicle if the key is present in one of the defined areas while the vehicle is unlocked.
! To preserve the battery charge in the electronic key and the vehicle's battery, the "hands-free" functions are set to
hibernation mode after 21 days without use. To restore these functions, press one of the remote control buttons or start the engine with the electronic key in the reader. For more information on starting with the Keyless Entry and Start system, refer to the corresponding section.
• Electrical interference
The electronic key may not work if it is close to an electronic device (e.g. mobile telephone (switched on or on standby), laptop computer, strong magnetic fields). If this occurs, move the electronic key away from the electronic device.
Central locking
natural_image
Two identical car dashboard icons above a security symbol (no text or labels)Manual
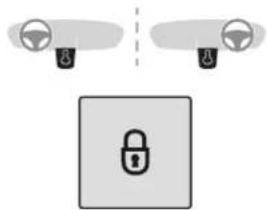
▶ Press this button to lock/unlock the vehicle (doors and boot) from inside the passenger compartment.
The indicator lamp comes on to confirm the central lacking of the vehicle.
! Central locking does not take place if any of the doors are open.
When locking/deadlocking from the outside
When the vehicle is locked or deadlocked from the outside, the indicator lamp flashes and the button is deactivated.
▶ After normal locking, pull one of the interior door controls to unlock the vehicle.
▶ After deadlocking, you must use the remote control, the "Keyless Entry and Start" system or the built-in key to unlock the vehicle.
Automatic (anti-intrusion security)
The doors and boot lock automatically while driving (speed above 6 mph (10 km/h)).
To deactivate/reactivate this function (activated by default):
▶ Press the button until an audible signal is triggered and a confirmation message appears.
• Transporting long or voluminous objects
1 Press the central locking control to drive with the boot open and the doors locked. Otherwise, every time the speed of the vehicle exceeds 6 mph (10 km/h), the sound of the
locks rebounding will be heard and an alert will be displayed.
Back-up procedures
Lost keys, remote control, electronic key
Go to a dealer with the vehicle's registration certificate and your personal identification documents.
The dealer will be able to retrieve the key code and the transponder code, enabling a new key to be ordered.
Complete unlocking/locking of the vehicle with the key
Use this procedure in the following situations:
- Remote control battery discharged.
- Remote control malfunction. - Vehicle battery discharged.
- Vehicle in an area subject to strong electromagnetic interference.
In the first case, change the remote control battery.
In the second case, reinitialise the remote control. Refer to the corresponding sections.
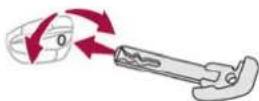
▶ Insert the key into the door lock.
▶ Turn the key towards the front/rear to unlock/lock the vehicle.
▶ Turn the key towards the rear again within 5 seconds to deadlock the vehicle.
i If the vehicle is fitted with an alarm, it will not be activated when locking with the key.
If the alarm is activated, the siren sounds when the door is opened; switch on the ignition to stop it.
Central locking not functioning
Use these procedures in the following cases: - Central locking malfunction.
- Battery disconnected or discharged.
! In the event of a malfunction of the central locking system, the battery must be disconnected to ensure that the vehicle is locked fully.
▶ Insert the key into the door lock.
▶ Turn the key towards the rear of the vehicle to lock it, or towards the front to unlock it.
Other doors
Unlocking
▶ Pull the interior door opening control.
Locking
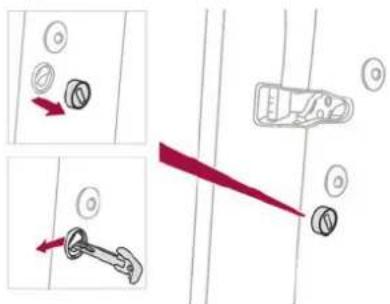
▶ Open the doors.
For the rear doors, check that the child lock is not on.
Refer to the corresponding section.
▶ Remove the black cap, located on the edge of the door, using the key.
▶ Insert the key into the socket without forcing it, then turn the latch towards the inside of the door.
Remove the key and refit the black cap.
▶ Close the doors and check from the outside that the vehicle is locked.
Changing the battery
A message is displayed on the instrument panel when the battery needs changing.
Battery type: CR2032/3 volts.
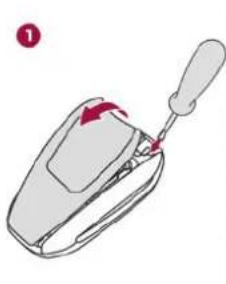
natural_image
Illustration of a car door handle with a red arrow indicating motion (no text or symbols)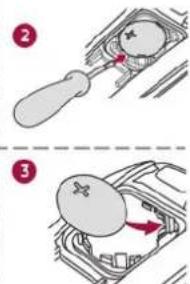
▶ Unclip the cover by inserting a small screwdriver in the slot and lift the cover.
▶ Remove the flat battery from its housing.
▶ Put the new battery in place, respecting the polarity. Start by inserting it into the contacts located in the corner, then clip the cover onto the unit.
▶ Reinitialise the remote control.
For more information on Reinitialising the remote control, refer to the corresponding section.
Do not throw remote control batteries away, as they contain metals that are harmful to the environment. Take them to an approved disposal point.
This equipment contains a button type battery. Do not swallow the battery. Risk of chemical burns!
31 Access

Swallowing the battery can cause serious internal burning in only 2 hours and can be fatal.
If batteries have been swallowed or inserted into a part of the body, seek immediate medical advice.
Keep new and used batteries out of the reach of children.
If the battery compartment does not close properly, stop using the product and keep it out of the reach of children.
! Risk of explosion if the battery is replaced with an incorrect type!
Replace the battery with the same type.
! Risk of explosion or leaking of inflammable liquid or gas!
Do not use in/store in/place in an environment where the temperature is extremely high or where the pressure is extremely low due to very high altitude.
Do not try to burn, crush or cut a used battery.
Reinitialising the remote control
Following replacement of the battery or in the event of a fault, it may be necessary to reinitialise the remote control.
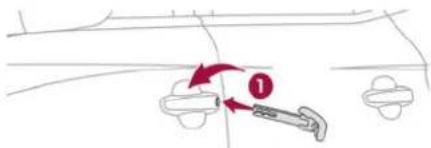
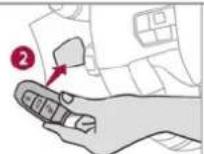
▶ Insert the mechanical key (incorporated into the remote control) into the lock to open the vehicle.
▶ Place the electronic key against the back-up reader on the steering column and hold it there until the ignition is switched on.
▶ While in mode P of the automatic gearbox, depress the brake pedal.
▶ Switch on the ignition by pressing the "START/STOP" button.
If the fault persists after reinitialisation, contact a dealer or a qualified workshop without delay.
Doors
Opening
From outside
▶ After unlocking the vehicle or with the "Keyless Entry and Start" system electronic key in the recognition zone, pull the door handle.
When selective unlocking is activated, the first press of the remote control unlocking button permits unlocking of the driver's door only.
From inside
▶ Pull the interior opening control of a door; this unlocks the vehicle completely.
: With selective unlocking activated:
1 - Opening the driver's door unlocks the driver's door only (if the vehicle has not already been completely unlocked).
- Opening one of the passenger doors unlocks the rest of the vehicle.
Boot
Opening the tailgate
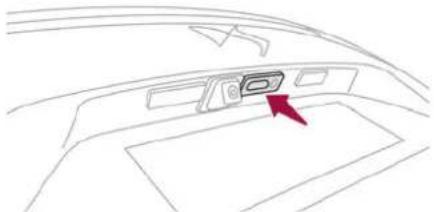
natural_image
Line drawing of a car interior with a red arrow pointing to the dashboard area (no text or symbols)▶ With the vehicle unlocked or with the electronic key in the recognition zone, press the central tailgate control.
▶ Raise the tailgate.
When selective unlocking is activated, the electronic key must be close to the rear of the vehicle.
! The tailgate is not designed to hold a bicycle carrier.
Closing the tailgate
▶ Lower the tailgate using the interior grips. ▶ Release the grips and press down on the outside of the tailgate to close it.
In the event of a malfunction or if you experience difficulty opening or closing the tailgate, have it checked by a dealer or a qualified workshop without delay, to avoid the issue deteriorating and prevent any risk of the tailgate dropping, potentially causing serious injury.
Back-up release
To manually unlock the boot in the event of a battery or central locking failure.
Unlocking
▶ Fold the rear seats to gain access to the lock from inside the boot.
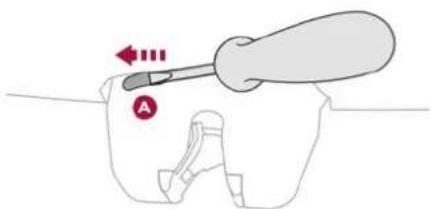
natural_image
Diagram of a mechanical device with a tool and labeled component A, showing motion direction (no text or symbols beyond labels)- Insert a small screwdriver into hole A of the lock to unlock the boot. - Move the latch to the left.
Locking after closing
If the fault persists after closing again, the boot will remain locked.
In the event of a fault with the central locking system, it is essential to disconnect the battery to lock the boot and so ensure complete locking of the vehicle.
Motorised tailgate
(Depending on version) The motorised tailgate must only be operated with the vehicle stationary.
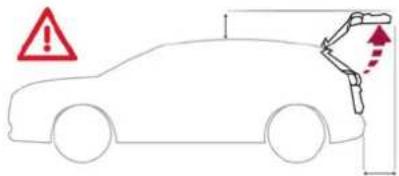
! Check that there is enough space to allow for the movement of the motorised tailgate.

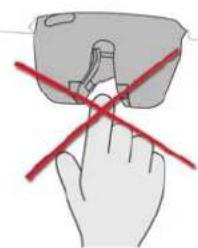
natural_image
Illustration of a hand holding a device with red diagonal lines indicating crossed or no movement (no text or symbols)! Never insert a finger in the locking system of the motorised tailgate - risk of serious injury!
Anti-pinch
The motorised tailgate has an obstacle detection system that automatically interrupts and reverses its movement by a few degrees, to allow the obstacle to be cleared. Please note that this anti-pinch system is not active at the end of the closing travel (around 1 cm from completely closed).
! To avoid the risk of injury through pinching or trapping, before and during operation of the motorised tailgate: - ensure that there is no-one close to the red of the vehicle.
- monitor the activity of the rear passengers, particularly any children.
Bicycle carrier/Towing device
The motorised tailgate is not designed to support a bicycle carrier.
When installing a bicycle carrier on the towing device with connection of the cable to the trailer socket, the motorised operation of the tailgate will be automatically deactivated.
! If using a towing device or bicycle carrier not recommended by the Manufacturer, it is essential to deactivate the motorised operation of the tailgate.
Motorised operation

The motorised operation of the tailgate is configured in the Settings > Vehicle touch
screen application.
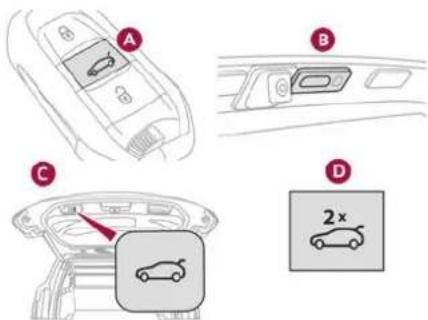
There are several ways of operating the tailgate:
A. Using the Keyless Entry and Start system's electronic key
B. Using the exterior tailgate control
C. Using the interior tailgate control
D. Using the control on the dashboard
Opening
▶ A long press on the central button A of the electronic key.
or
▶ A short press on the exterior tailgate control B, with the electronic key on your person.
or
▶ Two consecutive presses on the control D on the dashboard.
i The tailgate opens, either completely by default, or to the position memorised beforehand.
If motorised operation is not activated, these actions release the tailgate (partially-open position).
When the vehicle is locked, the request to open the boot with one of the controls A or B unlocks the vehicle, or only the boot if selective unlocking is activated, prior to the opening of the boot.
Closing
▶ A short press on the interior tailgate control C.
i It is possible to interrupt the operation of the tailgate at any point.
Pressing one of these controls again interrupts the movement that is underway.
Memorising an opening position
To limit the opening angle of the motorised tailgate:
▶ move the tailgate to the desired position manually or by pressing the button.
▶ press button C or the exterior control B for more than 3 seconds (memorisation is confirmed by a brief audible signal).
A new memorisation operation cancels the previous one.

i Memorising is not available until the height of opening is more than or equal to 1 metre between the low position and the high position of the tailgate.
Manual operation
The tailgate can be manoeuvred by hand, even with motorised operation activated.
The tailgate must be stationary.
When opening and closing the motorised tailgate manually, there is no assistance from gas struts. Resistance to opening and closing is therefore entirely normal.
Repeatedly opening and closing the motorised tailgate can cause overheating of its electric motor, after which opening and closing will not be possible.
Allow at least 10 minutes for the electric motor to cool down before operating the tailgate again.
If you are unable to wait, operate it manually.
Manual closing of the motorised tailgate in case of failure
This operation is only necessary in the case of failure of the tailgate motor.
If the failure originates from the battery, it is recommended to recharge it or change it with the tailgate closed.
In this situation, a significant force may be needed to close the tailgate.
▶ Close it gently without slamming, as slowly as possible, by pushing at the centre of the tailgate.
Do not lower the tailgate by pushing at one of its sides - risk of damage!
Precautions in use
• In wintry conditions
To avoid any operating problems, remove the snow or wait until the ice melts before requesting motorised opening of the tailgate.
: When washing
When washing the vehicle in an automatic car wash, do not forget to lock and move away from the vehicle to prevent any risk of unwanted opening.
Hands-free function (Hands-Free Tailgate Access)
With the electronic key on your person, this function allows the motorised tailgate to be opened, closed or stopped via a "kicking" movement under the rear bumper.

The "Handsfree Trunk Opening" function is configured in the Settings > Vehicle touch application.
! Ensure that you are steady on your feet before performing the "kicking" movement.
Take care not to touch the exhaust system which may be hot - risk of burns!
• Rechargeable hybrid vehicles
1 The function is not available when the vehicle is connected.
36 Access
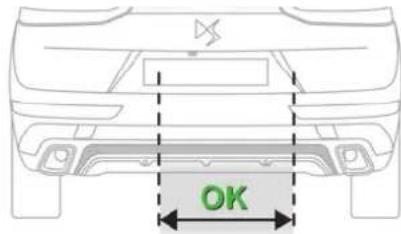
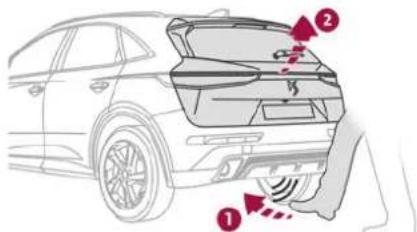
▶ Position yourself behind the vehicle by the number plate and perform a "kicking" movement in the "OK" detection zone. The "kicking" movement must be given forwards, smoothly, not too fast and with a vertical movement from low to high. Raise the foot sufficiently and remove it immediately. Acknowledgement of the "kicking" movement is confirmed by the lighting of the direction indicators.
"Sideward kicking" movements do not work. If the "kicking" movement has not
been detected, wait at least 2 seconds before repeating the movement. Do not perform repetitive "kicking" movements.
If the motorised tailgate has not started to open, check that:
- the function is activated.
- the electronic key is on your person, outside the vehicle in the rear recognition area.
- the "kicking" movement was performed in the detection zone, close enough to the bumper.
- the foot was removed from the bumper quickly enough.
Automatic locking
It is possible to lock automatically the vehicle using the hands-free function (Hands-Free Tailgate Access).
The "Handsfree Trunk Locking" function is configured in the Settings > Vehicle touch screen application.
When the vehicle is locked, the request to open the tailgate with this function unlocks the vehicle, or only the tailgate if selective unlocking is activated, prior to the opening of the tailgate. Closing the tailgate with the "Hands-Free Tailgate Access" function enables you to lock the vehicle.
Recommendations on the hands-free function (Hands-Free Tailgate Access)
If it does not work, check that the electronic key is not exposed to a source of electromagnetic interference (e.g. smartphone).
The function may be deactivated or affected if there is rain or snow.
The function may not work correctly with a prosthetic leg.
In some circumstances, the tailgate may open or close by itself, particularly when:
- hitching up or removing a trailer;
- fitting or removing a bicycle carrier;
- loading or unloading bicycles on/from a bicycle carrier;
- depositing or lifting something behind the vehicle;
- an animal approaches the rear bumper;
- washing the vehicle;
- maintenance is performed on the vehicle;
- accessing the spare wheel.
To avoid such operating problems, keep the electronic key away from the recognition zone or deactivate the hands-free function.
! Towing device The installation of a towing device may disturb the detection system.
To avoid unintentionally opening the tailgate while operating the towing device:
remove the electronic key from the recognition zone, with the tailgate closed. For more information on the Towing device with quickly detachable towball, refer to the corresponding section.
Alarm
(Depending on version)
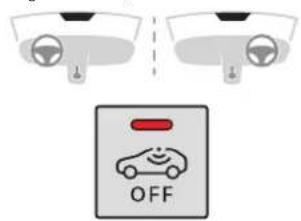
System which protects and provides a deterrent against theft and break-ins.
Exterior perimeter monitoring
The system checks for opening of the vehicle. The alarm is triggered if anyone tries to open a door, the boot or the bonnet, for example.
Interior volumetric monitoring
The system checks for any variation in volume in the passenger compartment.
The alarm is triggered if anyone breaks a window, enters the passenger compartment or moves inside the vehicle.
Anti-tilt monitoring
The system checks for any change in the attitude of the vehicle.
The alarm goes off if the vehicle is lifted or moved.
When the vehicle is parked, the alarm will not be triggered if the vehicle is knocked.
Self-protection function
The system checks whether any of its components are out of service.
The alarm is triggered if the battery, the central control or the siren wiring is put out of service or damaged.
! Work on the alarm system Contact a dealer or a qualified workshop.
Locking the vehicle with full alarm system
Activation
- Switch off the ignition and exit the vehicle. - Lock or deadlock the vehicle using the remote control or with the Keyless Entry and Start system.
When the monitoring system is active, the red indicator lamp in the button flashes once per second and the direction indicators come on for about 2 seconds.
The exterior perimeter monitoring is activated after 5 seconds and the interior volumetric and anti-tilt monitoring after 45 seconds.
! Door, boot or bonnet If an opening is not properly closed, the vehicle is not locked, but the exterior perimeter monitoring will be activated after 45 seconds, at the same time as the interior volumetric and anti-tilt monitoring.
! Sunroof If the sunroof remains open, the vehicle is locked with exterior perimeter monitoring activated but without interior volumetric or anti-tilt monitoring.
Deactivation
▶ Press one of the remote control unlocking buttons:
or
▶ Unlock the vehicle with the Keyless Entry and Start system.
The monitoring system is deactivated: the indicator lamp in the button goes off and the direction indicators flash for about 2 seconds.
i If the vehicle automatically locks itself again (as happens if a door or the boot is
Access

not opened within 30 seconds of unlocking), the monitoring system is automatically reactivated.
Locking the vehicle with exterior perimeter monitoring only
Deactivate the interior volumetric monitoring to avoid the unwanted triggering of the alarm, in certain cases such as:
- Slightly open window.
- Washing the vehicle.
- Changing a wheel.
- Towing the vehicle.
- Transport on a ship or ferry.
Deactivating the interior volumetric and anti-tilt monitoring
▶ Switch off the ignition and within 10 seconds press the alarm button until its red indicator lamp is on fixed.
▶ Get out of the vehicle.
▶ Immediately lock the vehicle using the remote control or the Keyless Entry and Start system. Only the exterior perimeter monitoring is activated; the button's red indicator lamp flashes once every second.
i To take effect, this deactivation must be carried out after each time the ignition is switched off.
Reactivating the interior volumetric and anti-tilt monitoring
▶ Deactivate the exterior perimeter monitoring by unlocking the vehicle using the remote control or the Keyless Entry and Start system.
The indicator lamp in the button goes off.
▶ Reactivate all monitoring by locking the vehicle using the remote control or the Keyless Entry and Start system.
The red indicator lamp in the button once again flashes every second.
Triggering of the alarm
This is indicated by sounding of the siren and flashing of the direction indicators for 30 seconds.
Depending on the country of sale, certain monitoring functions remain active until the alarm has been triggered eleven times consecutively.
When the vehicle is unlocked using the remote control or the Keyless Entry and Start system, rapid flashing of the red indicator lamp in the button informs you that the alarm was triggered during your absence. When the ignition is switched on, this flashing stops.
Failure of the remote control
To deactivate the monitoring functions:
▶ Unlock the vehicle using the key in the front left-hand door lock.
▶ Open the door; the alarm is triggered.
▶ Switch on the ignition; this stops the alarm. The indicator lamp in the button goes off.
Locking the vehicle without activating the alarm
▶ Lock the vehicle using the key (built-in the remote control) in the front left-hand door lock.
Automatic activation
(Depending on version)
The system is activated automatically 2 minutes after the last door or the boot is closed.
▶ To avoid triggering the alarm on entering the vehicle, first press the unlocking button on the remote control or unlock the vehicle using the "Keyless Entry and Start" system.
Malfunction
When the ignition is switched on, the fixed lighting of the red indicator lamp in the button indicates a system malfunction.
Have it checked by a dealer or a qualified workshop.
Electric windows
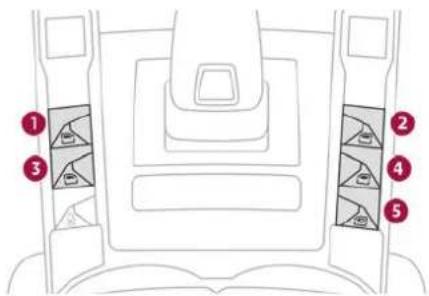
- Left-hand front
- Right-hand front
- Left-hand rear
- Right-hand rear
- Deactivation of electric window controls located by rear seats Deactivation of the rear door opening controls (electric child lock)*
Manual operation
▶ To open/close the window, press/pull the switch without passing the point of resistance; the window stops as soon as the switch is released.
Automatic operation
▶ To open/close the window, press/pull the switch past its resistance point: the window opens/closes completely when the switch is released.
Operating the switch again stops the movement of the window.
i Window controls remain operational for approximately 45 seconds after switching off the ignition or after locking the vehicle. After that time, the controls are disabled. To reactivate them, switch on the ignition or unlock the vehicle.
Anti-pinch
If the window meets an obstacle while rising, it stops and immediately partially lowers again.
Deactivating the rear controls for the rear electric windows
For your children's safety, press control 5 to deactivate the rear electric window controls.
The indicator lamp for the button comes on, accompanied by a message confirming activation. With the ignition on, it remains on as long as the child lock remains activated.
The rear electric windows can still be controlled using the driver's controls.
! For versions fitted with an electric child lock, this control also deactivates the interior rear door controls. For more information on the Child lock, refer to the corresponding section.
Reinitialising the electric windows
After reconnecting the battery, or in the event of abnormal window movement, the anti-pinch function must be reinitialised.
The anti-pinch function is disabled during the following sequence of operations.
For each window:
▶ Lower the window fully, then raise it; it will rise in steps of a few centimetres each time the control is pressed. Repeat the operation until the window is fully closed.
▶ Continue to pull the control for at least one second after the window reaches the closed position.
! If an electric window meets an obstacle during operation, the movement of the window must be reversed. To do this, press the relevant control.
When the driver operates the passengers' electric window controls, it is important to ensure that nothing can prevent the window from closing properly.
Access

It is important to ensure that passengers use the electric windows correctly.
Pay particular attention to children when operating the windows.
Be aware of passengers and/or other persons present when closing windows remotely using the electronic key.
Do not put your head or arms through the open windows when the vehicle is moving - risk of serious injury!
Panoramic sunroof
The panoramic sunroof consists of a movable glass panel that slides over the roof and a blind that can be opened independently. Opening the sunroof automatically opens the blind.
▶ To operate the panoramic sunroof or the blind, use the buttons in the roof console.
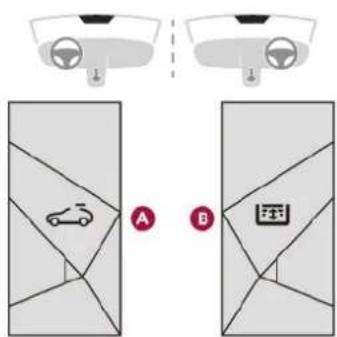
A. Sunroof control
B. Sunroof blind control
The sunroof or blind can be operated when the ignition is turned on (if the battery is charged enough), with the engine running, in STOP mode of Stop & Start, and up to 45 seconds after turning off the ignition or after locking the vehicle.
Precautions
! Do not put your head or arms through the sunroof while the vehicle is moving - risk of serious injury!
! Ensure that any luggage or accessories carried on the roof bars do not interfere with the movement of the sunroof. Do not place heavy loads on the movable glass panel of the sunroof.
! If the sunroof is wet, following a rain shower or washing the vehicle, wait until it is completely dry before operating it.
Do not operate the sunroof if it is covered by snow or ice - risk of damage!
Use only plastic scrapers to remove snow or ice from the sunroof.
! Regularly check the condition of the sunroof seals (e.g. presence of dust, dead leaves).
If using a car wash, check first that the roof is correctly closed and keep the high-pressure jet at least 30 centimetres from the seals.
! Never leave the vehicle with the sunroof open.
Operation
When opening the sunroof fully, the movable glass moves to a partially open position, then slides over the roof. Any intermediate position is possible.
i Depending on the speed of the vehicle, the partially open position may vary to improve the acoustics.
Before operating the sunroof or blind control buttons, ensure that no object or person might prevent the movement. Be particularly aware of children when operating the sunroof or blind. If something is trapped when operating the sunroof or blind, you should reverse the movement of the sunroof or blind by pressing the control in question. The driver must ensure that passengers use the sunroof and blind correctly.
Anti-pinch system
If the sunroof or blind encounters an obstacle when closing, the movement is automatically reversed.
The roof anti-pinch system is designed to be effective at speeds of up to 75 mph (120 km/h).
Opening/Closing
▶ To open the sunroof or the blind, use the part of the button located towards the rear of the vehicle.
▶ To close the sunroof or the blind, use the part of the button located towards the front of the vehicle.
Operation of buttons
▶ Pressing a button beyond its point of resistance directly opens or closes the sunroof or blind fully.
▶ Pressing the button again stops the current movement.
▶ When holding a button (without going beyond the point of resistance), the movement of the sunroof or blind stops when this button is released.
When the sunroof is closed: pressing once without passing the point of resistance moves it to a partially open position.
When the sunroof is partially open: pressing once without passing the point of resistance opens or closes it fully.
The sunroof and windows, then the blind, can be closed by holding down the door locking control. The manoeuvre stops as soon as the locking control is released.
Closing of the blind is limited by the position of the sunroof: the blind cannot go further than the front of the movable glass. During simultaneous movements of the sunroof and blind, the blind automatically stops or resumes movement depending on the position of the sunroof.
Reinitialisation
Following reconnection of the battery or in the event of a fault or jerky movement of the sunroof or blind, reinitialisation is required.
▶ Check that nothing is interfering with the sunroof or blind and that the seals are clean.
▶ With the ignition on, fully close the sunroof and blind.
▶ Press and hold the front part of button A, until the sunroof and blind move slightly, then hold for a further 1 second before releasing.
▶ Wait 2 seconds and then press and hold the front part of button A. The blind and the sunroof will open and close, one after the other. When both are completely closed again, hold for a further 2 seconds and release.
i If there is an operating fault, restart the whole procedure.
Ease of use and comfort
Driving position
Correct seating position
Adopting a good driving position contributes to improving driver comfort and protection. It also optimises interior and exterior visibility as well as access to controls.
Certain seat adjustments described in this section depend on the trim level and the country in which the vehicle is sold.
Driver's side
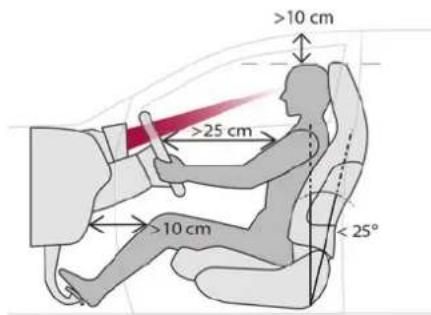
Sit fully back in the seat with your pelvis, back and shoulders in contact with the seat backrest. Adjust the seat cushion height so that your eyes are level with the centre of the windscreen. The head should be at a minimum distance of 10 cm from the roof.
Adjust the longitudinal position of the seat so that you can fully depress the pedals with legs slightly flexed.
The distance between the knees and the dashboard should be at least 10 cm, for easy access to the dashboard controls.
Adjust the backrest angle to as vertical a position as possible; never tilt it more than 25^ .
Adjust the head restraint so that its upper edge is level with the top of the head.
Adjust the length of the seat cushion to support your thighs.
Adjust the lumbar support so that it conforms to the shape of the spine.
Adjust the steering wheel reach so that it is at least 25 cm from the sternum and you can hold it with your arms slightly bent.
Adjust the steering wheel height so that it does not obstruct the information displayed on the instrument panel.
As a safety precaution, adjust the seats only when the vehicle is stationary.
Electrically-adjustable seats Switch the ignition on to enable the adjustments to be made.
Passenger's side
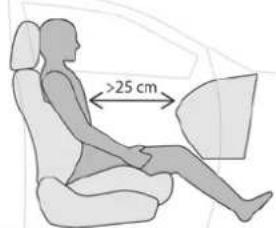
Sit fully back in the seat with the pelvis, back and shoulders in contact with the seat backrest.
Adjust the longitudinal position of the seat so that you are at a distance of at least 25 cm from the dashboard.
Adjust the head restraint so that its upper edge is level with the top of the head.
Before moving off
Adjust the interior and exterior door mirrors to reduce blind spots.
Fasten the seat belt: place the diagonal belt in the middle of the shoulder and adjust the lap belt so that it is tightened across the pelvis.
Ensure that all passengers have fastened their seat belts correctly.
Electric door mirrors Switch the ignition on to enable the adjustments to be made.
When driving
Maintain a good driving position and hold the steering wheel with both hands at the 'quarter to three' position, so that you can easily and quickly reach the controls behind and near the steering wheel.
! Never adjust the seats or steering wheel when driving. Always keep your feet on the floor.
Front seats
Front head restraints
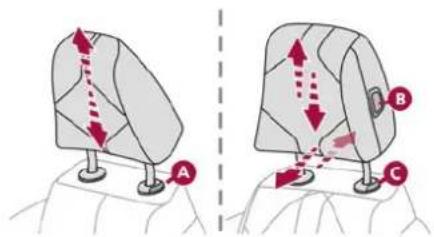
Adjusting the height
Upwards:
▶ Pull the head restraint up to the desired position; you can feel the head restraint clicking into position.
Downwards:
▶ Depending on equipment, press lug A or button B and then, while still pressing, lower the head restraint.
i The head restraint is correctly adjusted when its upper edge is level with the top of the head.
Adjusting the angle
(Depending on equipment)
Forwards:
▶ move the lower part of the head restraint forwards.
Rearwards:
▶ press and hold button B and push the lower part of the head restraint rearwards.
Removing a head restraint
▶ Pull the head restraint fully up. ▶ Depending on equipment, press lug A or C to release the head restraint and raise it fully.
▶ Stow the head restraint securely.
Refitting a head restraint
▶ Insert the head restraint rods into the guides in the corresponding seat backrest.
- Push the head restraint fully down. - If the vehicle is so equipped, press lug Aor C to release the head restraint and push it down.
▶ Adjust the height of the head restraint.
! Never drive with the head restraints removed; they should be in place and adjusted for the occupant of the seat.
! Before moving the seat backwards, ensure that there is no person or object that might prevent the full travel of the seat. There is a risk of trapping or pinching passengers if present in the rear seats or of jamming the seat if large objects are placed on the floor behind the seat.
Manually-adjustable seats
Longitudinal
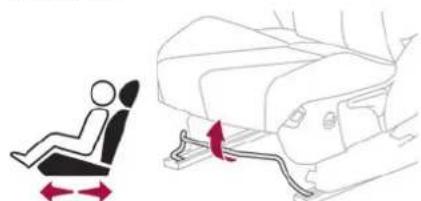
natural_image
Illustration of a person seated on the left and standing next to a vehicle seat with legs and feet, showing motion directions (no text or symbols)▶ Raise the control bar and slide the seat forwards or backwards.
▶ Release the control bar to lock the seat in position on one of the notches.
Height
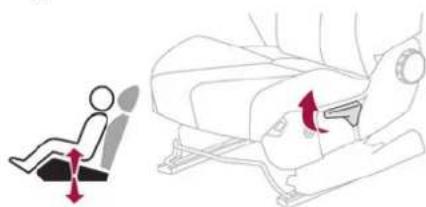
natural_image
Diagram showing a person seated on the back of a car seat with directional arrows indicating movement (no text or symbols present)▶ Pull the control upwards to raise or push it downwards to lower, until you obtain the position required.
Backrest angle
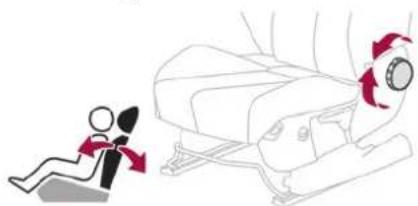
natural_image
Illustration of a person pushing a car seat with red arrows indicating motion (no text or symbols)▶ Turn the knob to obtain the desired angle.
Electrically-adjustable seats
i To avoid draining the battery, carry out these adjustments with the engine running.
Longitudinal
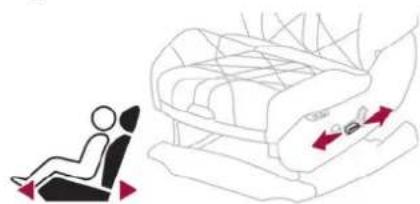
natural_image
Illustration of a person seated in a car seat with a red arrow indicating the seatbelt (no text or symbols present)▶ Push the control forwards or backwards to slide the seat.
Backrest angle
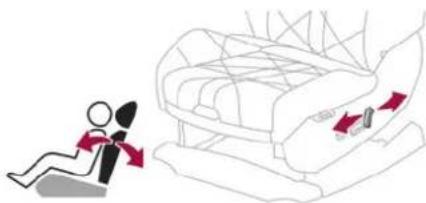
natural_image
Illustration of a person sitting on a chair with red arrows indicating seat movement (no text or symbols)▶ Tilt the control forwards or rearwards.
Cushion height and angle
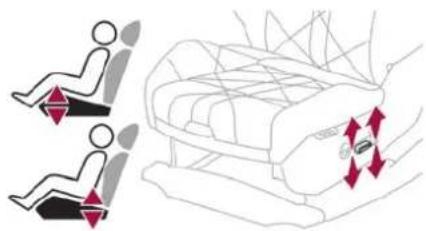
natural_image
Diagram showing two seated individuals with red arrows indicating movement or force direction, next to a vehicle seat (no text or symbols)▶ Tilt the rear of the control upwards or downwards to obtain the required height.
▶ Tilt the front of the control upwards or downwards to obtain the required angle.
Additional adjustments
Electric lumbar adjustment
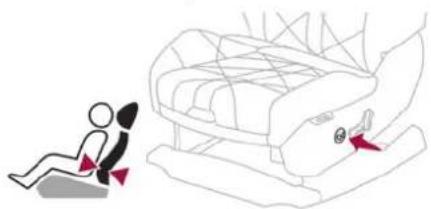
natural_image
Illustration of a person sitting on a chair next to a seatbelt, with no visible text or symbols."2-way" adjustment

▶ Press and hold the front or rear of the control to increase or reduce the lumbar t.
"4-way" adjustment
The control allows independent adjustment of the depth and vertical position of the lumbar support.

▶ Press and hold the front or rear of the control to increase or reduce the lumbar t.
▶ Press and hold the top or bottom of the control to raise or lower the lumbar support area.
Seat cushion length
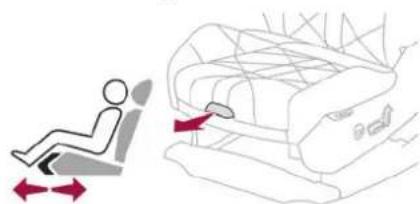
natural_image
Diagram showing a person seated in a chair and pushing a seatbelt, with no text or symbols present.▶ Pull the handle forwards to release the cushion, then move the front part of the cushion forwards or backwards.
Seat cushion angle
This electric adjustment control is present on "AGR" certified manually-adjustable seats.
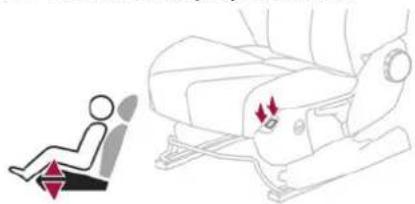
natural_image
Illustration of a person seated on a chair with a red lightning bolt indicating the seat, alongside a separate illustration of a seatbelt (no text or symbols present)▶ Press and hold the front or rear of the button to raise or lower the front part of the seat cushion.
Memorising driving positions
Associated with the electrically-adjusted driver's seat, this function allows two driving positions to be memorised, to make these adjustments easier if there are frequent driver changes.
It records the electric adjustments made to the seat and door mirrors.
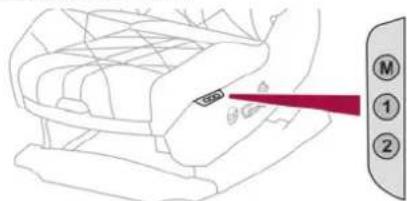
Using buttons M/1/2
▶ Enter the vehicle and switch the ignition on.
▶ Adjust your seat and the door mirrors.
▶ Press button M, then press button 1 or 2 within 4 seconds.
An audible signal confirms the memorisation. Memorising a new position cancels the previous position.
Recalling a stored position
! While the seat is moving, take care that no person or object hinders the automatic movement of the seat.
With the ignition on or engine running
▶ Press button 1 or 2 to recall the corresponding position.
An audible signal sounds when adjustment is complete.
You can interrupt the current movement by pressing button M, 1 or 2 or by using one of the seat adjustment controls.
A stored position cannot be recalled while driving.
The recalling of stored positions is deactivated 45 seconds after switching off the ignition.
Welcome function
The welcome function makes it easier to get in and out of the vehicle.
After switching off the ignition and opening the driver's door, the front seat moves backwards automatically and then stays in this position, ready for the next entry into the vehicle.
When switching on the ignition, the front seat moves forwards to the stored driving position.

It is configured in the Settings > Vehicle touch screen application.
Heated and/or ventilated seats
Activation/Deactivation

In the Seats touch screen application, select the Heating Functions or Ventilated
Seats tab.
▶ Select the driver or passenger seat. The corresponding page is displayed with the last memorised settings.

If the settings are suitable, press to activate/deactivate the function in the
Seats application.
If no action is taken, the display returns to its initial state.
The function status is not memorised when the ignition is switched off.
03
Ease of use and comfort
Changing settings
▶ In the Heating Functions or Ventilated Seats page, select the relevant seat.
▶ Select an intensity from the three preset levels: "1" (Low), "2" (Normal) or "3" (High).
The settings are memorised when the ignition is switched off.

Do not use the function when the seat is not occupied.
Reduce the heating intensity as soon as possible.
When the seat and passenger compartment have reached a satisfactory temperature, switch the function off; reducing electrical consumption in turn decreases energy consumption.

Prolonged use of heated seats is not recommended for people with sensitive
There is a risk of burns for people whose perception of heat is impaired (e.g. illness, taking medication).
To keep the heated pad intact and to prevent a short circuit:
- Do not place heavy or sharp objects on the seat.
- Do not kneel or stand on the seat.
- Do not spill liquids onto the seat.
- Never use the heating function if the seat is damp.
Multipoint massage
System with a choice of type of massage and adjustment of its intensity.
This system operates with the engine running, as well as in STOP mode of the Stop & Start.
Activation/Deactivation

In the Seats touch screen application, select the Massage tab.
Select the driver or passenger seat.
The corresponding page is displayed with the last memorised settings.

If the settings are suitable, press to activate/deactivate the function in the
Seats application.
If no action is taken, the display returns to its initial state.
The function status is not memorised when the ignition is switched off.
Changing settings
In the Massage page, select the seat concerned.
▶ Select a massage intensity from the three preset levels: "1" (Low), "2" (Normal) or "3" (High).
▶ Select another type of massage from those offered.
The modifications are taken into account immediately and memorised when the ignition is switched off.
Once activated, the system starts a one hour massage cycle, made up of sequences of 6
minutes of massage followed by 3 minutes at rest.
The system stops automatically at the end of the cycle.
Steering wheel adjustment
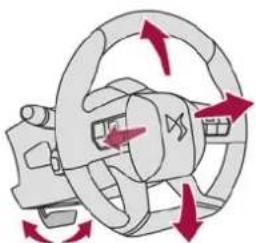
natural_image
Diagram of a car steering wheel with red directional arrows indicating rotational motion (no text or symbols)▶ When stationary, pull the control to release the steering wheel.
▶ Adjust the height and reach to suit your driving position.
▶ Push the control to lock the steering wheel.
! For safety reasons, these adjustments must only be carried out with the vehicle stationary.
Mirrors
Door mirrors
Adjustment
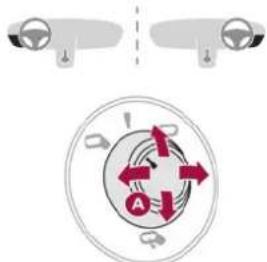
▶ Turn control A to the right or to the left to select the corresponding mirror.
▶ Move the control in any of the four directions to adjust.
▶ Return the control to the central position.
! For optimum safety, adjust the mirrors to reduce the "blind spot".
The objects observed are, in reality, closer than they appear. Take this into account in order to correctly judge the distance of vehicles approaching from behind.
Folding
Automatic: lock the vehicle using the electronic key.

Manual: with the ignition on, move control A downwards.
i If the mirrors are folded using control A, they will not unfold when the vehicle is unlocked.
Unfolding
Automatic: unlock the vehicle using the electronic key.
Manual: with the ignition on, move control A upwards.
The mirrors can be folded manually if necessary.
i Automatic folding/unfolding of the door mirrors is configured in the Settings > Vehicle touch screen application.
Before using an automatic car wash, fold the mirrors.
Automatic tilting in reverse gear
Depending on version, this function allows you to automatically tilt the mirrors downwards to assist with parking manoeuvres in reverse gear.
With the engine running, on engaging reverse gear, the mirror glasses tilt downwards.
They each return to their original positions:
- A few seconds after coming out of reverse gear.
- Once the vehicle speed exceeds 6 mph (10 km/h).
- When the engine is switched off.

It can be activated/deactivated in the Settings > Vehicle touch screen
application.
Demisting/Defrosting

The demisting/defrosting of the door mirrors works with the demisting/ting of the rear screen.
For more information on Rear screen demisting/defrosting, refer to the corresponding section.
Electrochrome interior rear view mirror
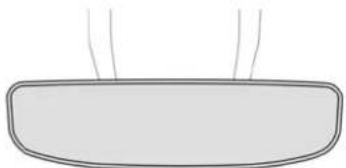
natural_image
Simple line drawing of a bowl with steam rising from top (no text or symbols)The electrochrome system uses a sensor that detects the level of exterior brightness and that coming from the rear of the vehicle, in order to automatically and gradually switch between day and night usage.
To ensure optimum visibility while manoeuvring, the mirror automatically brightens when reverse gear is engaged. The system is deactivated if the load in the boot exceeds the height of the load space cover or if the load space cover has items placed on it.
Ease of use and comfort
• Rechargeable hybrid vehicles
An LED, located below the interior rear view mirror and visible from outside the vehicle, lights up blue to indicate that the vehicle is being driven in Electric mode (depending on country of sale).
Rear seats
Rear head restraints
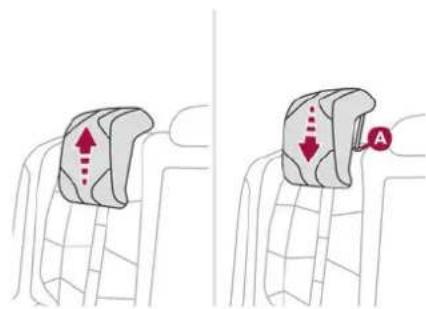
They have two positions:
- A high position, for when the seat is in use:
▶ Pull the head restraint fully up.
- A low position, for stowing, when the seat is not in use:
▶ Press the lug A to release the head restraint and push it down.
The rear head restraints can be removed.
Removing a head restraint
▶ Pull the head restraint fully up.
▶ Press the lug A to release the head restraint and remove it completely.
Refitting a head restraint
▶ Insert the head restraint rods into the guides in the corresponding backrest.
▶ Push the head restraint fully down.
▶ Press the lug A to release the head restraint and push it down.
! Never drive with passengers seated at the rear when the head restraints are removed; the head restraints should be in place and in the high position.
The head restraint for the centre seat and those for the outer seats are not interchangeable.
Backrest angle
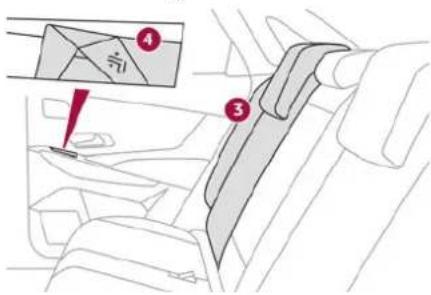
▶ To straighten or recline the backrest 3, press control 4 or pull it into the desired position.
When adjusting the backrest with the boot loaded, check that no object might hinder the movement of the backrest - risk of damaging the backrest!
Folding the backrests
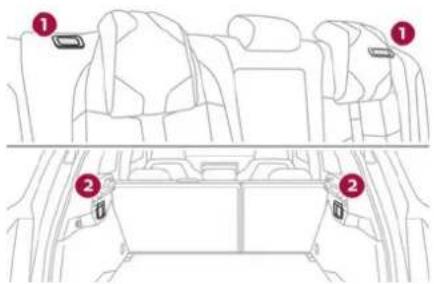
Each section of the backrest has two release controls:
- A grip 1 on the outer edge of the backrest.
- A lever 2 on the boot side trim.
! The backrests should only be manoeuvred when the vehicle is stationary.
First steps:
▶ Lower the head restraints.
▶ Lift up the rear armrest.
▶ If necessary, move the front seats forward.
▶ Check that no person or object might interfere with the folding of the backrests (e.g. clothing, luggage).
▶ Check that the outer seat belts are lying flat on the backrests.
i The folding of the backrest is accompanied by a slight lowering of the corresponding cushion.
To obtain a flat surface, it is necessary to place the adjustable boot floor in the high position. When the backrest is released, the red indicator in the release grip is visible.
Folding from the passenger compartment
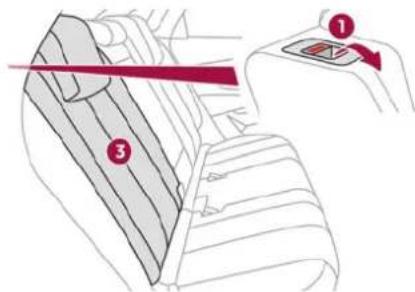
- Press the backrest release grip 1. - Guide the backrest 3 down to the horizontal position.
Folding from the boot
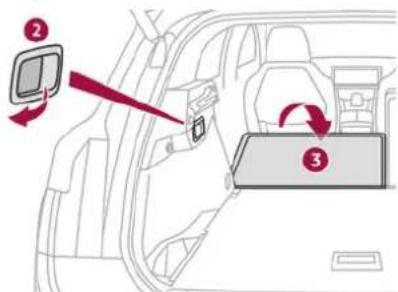
▶ Pull the backrest release lever 2 towards you. The backrest 3 folds fully onto the cushion.
Repositioning the backrests
! First check that the outer seat belts are lying vertically flat alongside the backrest latching rings.
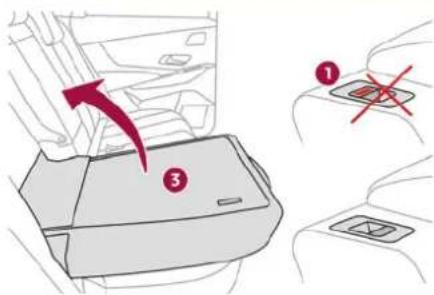
▶ Straighten the backrest 3 and push it firmly to latch it into place.
▶ Check that the red indicator is no longer visible in the release grip 1.
▶ Ensure that the outer seat belts were not trapped during the operation.
! Please note: an incorrectly latched backrest compromises the safety of passengers in the event of sudden braking or an accident.
The contents of the boot may be thrown forwards - risk of serious injury!
Heating and Ventilation
Air intake
The air circulating in the passenger compartment is filtered and originates either from the exterior, via the grille located at the base of the windscreen, or from the inside in air recirculation mode.
Controls
The controls are accessible through the Climate touch screen application and are also grouped together on the centre console panel.
Ease of use and comfort
Air distribution
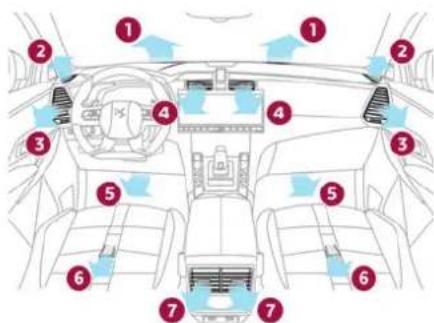
- Windscreen demisting/de-icing vents
- Front side window demisting/de-icing vents
- Adjustable and closable side air vents
- Adjustable and closable central air vents
- Air outlets to the front footwells
- Air outlets to the rear footwells
- Adjustable and closable air vents
Advice
i Using the ventilation and air conditioning system
To ensure that air is distributed evenly, keep the external air intake grilles at the base of the windscreen, the nozzles, the vents, the air outlets and the air extractor in the boot free from obstructions.
Do not cover the sunshine sensor located on the dashboard; this sensor is used to
regulate the automatic air conditioning system.
▶ Operate the air conditioning system for at least 5 to 10 minutes once or twice a month to keep it in good working order.
▶ If the system does not produce cold air, switch it off and contact a dealer or a qualified workshop.
When towing a large load on a steep gradient in high temperatures, switching off the air conditioning increases the available engine power, enhancing the towing capacity.
Avoid driving for too long with the ventilation off or with prolonged operation of interior air recirculation. Risk of misting and deterioration of the air quality!
If the interior temperature is very high after the vehicle has stood for a long time in the sunshine, air the passenger compartment for a few moments. Put the air flow control at a setting high enough to quickly change the air in the passenger compartment.
i Condensation created by the air conditioning results in a discharge of water underneath the vehicle. This is perfectly normal.
i Servicing the ventilation and air conditioning system
▶ Ensure that the passenger compartment filter is in good condition and have the filter elements replaced regularly.
We recommend using a composite passenger compartment filter. Its specific active additive helps protect against polluting gases and bad smells.
To ensure correct operation of the air conditioning system, have it checked according to the recommendations in the Manufacturer's service schedule.
- Stop & Start
1 The heating and air conditioning systems only operate when the engine is running.
Temporarily deactivate the Stop & Start system to maintain a comfortable temperature in the passenger compartment.
For more information on the Stop &
Start system, refer to the corresponding section.
• Rechargeable hybrid vehicles
1 Intensive use of the air conditioning reduces the vehicle range in Electric mode.
Ventilation with the ignition on
When the ignition is switched on, the ventilation system and the air flow 2 and air distribution
3 settings in the passenger compartment are
activated, for a period which depends on the battery charge. This function does not include the air conditioning system.
Dual-zone automatic air conditioning
This system automatically controls the activation of the air conditioning system, regulating the temperature, air flow and air distribution inside the passenger compartment. This system works with the engine running, but access to the ventilation and its controls remains possible with the ignition on.

Press the Climate application button to display the system controls page.
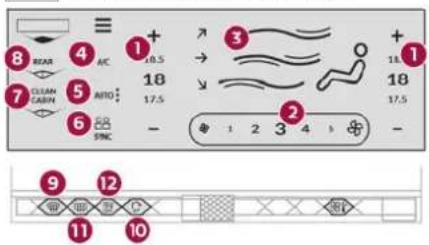
- Temperature adjustment
- Air flow adjustment
- Air distribution adjustment
-
Air conditioning on/off
-
Automatic air conditioning on/off and setting (AUTO SOFT/AUTO NORMAL/AUTO FAST)
- Driver/front passenger temperature synchronisation
- Clean Cabin function
- "Rear" function Locking the remote settings controls
- Front demisting/de-icing
- Interior air recirculation
- Rear screen demisting/de-icing
- Switching the system off
Temperature adjustment
The driver and front passenger can each choose their own temperature setting.
The value indicated corresponds to a level of comfort and not to a precise temperature.
▶ Press one of the buttons 1 (+ or -) or drag vertically to increase or decrease the value. It is possible to go beyond the minimum and maximum values by selecting respectively Low or High.
It is recommended that you avoid a difference of more than 3^ C in the settings for left and right.
Temperature synchronisation
The driver side temperature setting is applied to the passenger side.
▶ Press button 6-SYNC to activate/deactivate the function.
The function is automatically deactivated if the passenger uses their temperature adjustment buttons.
Automatic air conditioning
This automatic mode ensures optimum management of the passenger compartment temperature, air flow and air distribution, based on the selected comfort level.
▶ Press button 5-AUTO to activate/deactivate the automatic mode of the air conditioning system.
The indicator lamp in the button lights up when the air conditioning system is operating automatically.
The intensity of the automatic air conditioning is modulated by choosing one of the following settings:
- AUTO SOFT: provides soft and quiet operation by limiting air flow.
- AUTO NORMAL: offers the best compromise between a comfortable temperature and quiet operation (default setting).
- AUTO FAST: provides dynamic and efficient air distribution.
To change the AUTO mode, press button 5-AUTO successively.
To ensure passenger comfort in the rear seats, favour settings AUTO NORMAL and AUTO FAST.
In cold weather with the engine cold, the air flow is increased gradually until the comfort setting has been reached, in order to
Ease of use and comfort
limit the delivery of cold air into the passenger compartment. On entering the vehicle, if the interior temperature is much colder or warmer than the comfort setting requested, there is no need to alter the value displayed to more quickly reach the required level of comfort. The system automatically corrects the temperature difference as quickly as possible.
Automatic air conditioning manual settings
It is possible to manually adjust one or more of these functions, while the system retains automatic control of the other functions:
- air flow.
- air distribution.
The indicator lamp in the "AUTO" button goes out if a setting is changed.
▶ Press button 5-AUTO again to reactivate automatic air conditioning.
Adjusting the air flow
▶ Press one of the buttons 2 (fan) or drag horizontally to increase or decrease air flow. It is also possible to directly press one of the values.
- Switching off the air conditioning system When the air flow is reduced to a minimum, ventilation stops. "OFF" is displayed alongside the fan.
Adjusting the air distribution
▶ Press the buttons 3 to adjust the air flow distribution inside the passenger compartment.
Windscreen and side windows
Central and side air vents
Footwells
A symbol is activated to display the presence of blown air in the direction indicated. It is possible to activate all three buttons simultaneously, for uniform distribution throughout the passenger compartment.
Clean Cabin function
It includes the AQS (Air Quality System) and Clean Air functions.
▶ To activate/deactivate the function, press button 7.
AQS function
Using an exterior pollution sensor, this function automatically activates the recirculation of interior air when a certain level of pollutants in the exterior air is detected.
When the air quality returns to a satisfactory level, recirculation of interior air is automatically deactivated.
This function is not designed to detect unpleasant odours.
Recirculation is automatically activated when the windscreen wash is used or when reverse gear is engaged.
The function is inactive if the outside temperature is below 5^ C to prevent the risk of misting on the windscreen and side windows.
Clean Air function
Using an interior pollution sensor, this function detects fine particles (e.g. cigarette smoke, mould, bacteria).
The management of the recirculation of interior air makes it possible to return to a purified passenger compartment in just a few minutes, thanks to the passage of air through the high-performance passenger compartment filter. If the air quality appears to be reduced, contact a dealer or a qualified workshop to change the high-performance passenger compartment filter.
Air conditioning on/off
The air conditioning system is designed to operate effectively in all seasons, with the windows closed:
- It lowers the temperature in summer.
- It increase the effectiveness of the demisting, in winter, above 3°C.
▶ Press button 4-A/C to switch the air conditioning on/off.
When the function is switched on, "A/C" changes colour.
Air conditioning does not operate when the air flow is deactivated. To obtain cool air more quickly, enable interior air recirculation for a brief period. Then return to the intake of exterior air. Switching off the air conditioning may result in some discomfort (humidity or misting).
"Rear" function
Activating the function switches on the blower in the rear air vents.
In the Climate touch screen application, select the Rear tab. Press the line "Activate rear climate" to activate/deactivate the function.
Remote settings controls
With the "Rear" function activated and the remote settings controls unlocked, the rear passengers can take control of the main air conditioning system settings using the touch control panel located at the rear of the centre console. The settings displayed on the screen are modified accordingly.
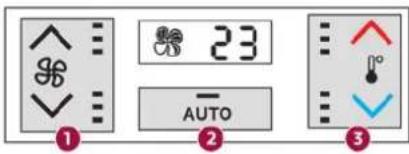
- Adjusting the air flow
- Automatic Comfort programme
- Adjusting the temperature
Locking the remote settings controls
It is possible to prevent the rear passengers from accessing these settings.
In the Climate touch screen application, select the Rear tab. Press the line "Lock rear climate controls" to lock/unlock the remote settings controls. A padlock appears on the rear air conditioning screen.
Switching off the air conditioning system
▶ Press button 12-OFF. Its indicator lamp lights up and all the other indicator lamps of the air conditioning system go off.
This action deactivates all of the functions of the air conditioning system.
The temperature is no longer regulated. A slight flow of air can still be felt, due to the forward movement of the vehicle.
Interior air recirculation
The intake of exterior air prevents the formation of mist on the windscreen and side windows. Recirculating the interior air isolates the passenger compartment from outside odours
and fumes and allows the desired passenger compartment temperature to be achieved more rapidly.
Press this button to activate/deactivate the function (confirmed by the illumination/extinction of the indicator lamp).
i This function is activated automatically when the front screenwash is used or reverse gear is engaged.
Front demisting/defrosting
This mode allows the windscreen and side windows to be demisted or defrosted as quickly as possible.
Press this button to activate/deactivate the mode (confirmed by the illumination/extinction of the indicator lamp). The mode automatically manages the air conditioning, air flow, air intake and distributes ventilation optimally to the windscreen and side windows. The air flow can be changed manually without deactivating this mode.
i With Stop & Start, when demisting has been activated, STOP mode is not available.
In wintry conditions, before moving off, it is essential to remove any snow or ice from the windscreen around the camera. Otherwise, the operation of the equipment using the camera may be affected.
Rear screen demisting/defrosting
This demisting/de-icing only works with the engine running. Depending on version, it also demists/de-ices the door mirrors.

▶ Press this button to activate/deactivate the function (confirmed by the tor lamp coming on/switching off).
Demisting/defrosting switches off automatically to prevent an excessive consumption of electrical current.
e Switch off demisting/defrosting when you no longer need it; reducing electrical consumption in turn decreases energy consumption.
Heated windscreen
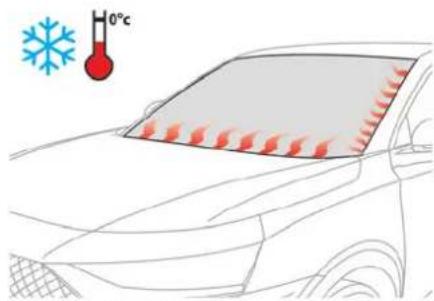
In cold weather, this system heats the bottom of the windscreen, as well as the area alongside the left-hand windscreen pillar.
Without changing the settings for the air conditioning system, it allows faster release of the windscreen wiper blades when they are frozen to the windscreen and helps avoid the accumulation of snow resulting from the operation of the windscreen wipers.
Switching on/off
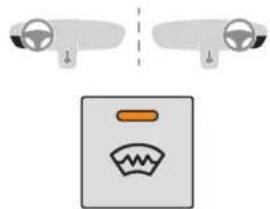
natural_image
Diagram showing two identical air ducts above a square with a stylized smoke or flame symbol (no text or labels)▶ With the engine running, press this button to activate/deactivate the function (confirmed by an indicator lamp).
The function is activated when the outside temperature drops below 0^ C. It is deactivated automatically when the engine is switched off.
Temperature pre-conditioning (Rechargeable hybrid)
This function allows you to programme the temperature in the passenger compartment to reach a pre-defined, non-modifiable temperature (approx. 21°C) before you enter the vehicle, on the days and at the times of your choice.
This function is available when the vehicle is connected or not connected.
Programming

In the Climate touch screen application, select the Preconditioning tab.
▶ Press + to add a programme.
▶ Select the time of entry into the vehicle and the desired days. Press OK.
▶ Press ON to activate this programming. The pre-conditioning sequence begins approximately 45 minutes before the programmed time when the vehicle is connected (20 minutes when it is not connected) and is maintained for 10 minutes after.
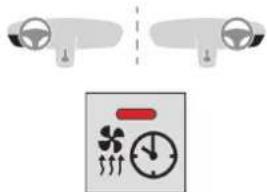
natural_image
Diagram showing two identical aircraft wings above a control panel with directional arrows and clock icons (no text or labels)This indicator lamp comes on fixed when a temperature pre-conditioning cycle is programmed. It flashes when temperature preconditioning is in progress.
i You can set multiple programmes. Each one is saved in the system. To optimise the driving range, we recommend starting a programme while the vehicle is connected.

The programming can also be carried out from a smartphone via the MyDS App
application.
For more information on Remotely operable additional functions, refer to the corresponding section.
i The fan noise that occurs during temperature pre-conditioning is perfectly normal.
Operating conditions
- The function is only activated when the ignition is switched off and the vehicle locked.
- When the vehicle is not connected, the function is only activated if the battery charge level is greater than 20%.
- When the vehicle is not connected and a recurring programme is active (e.g. from Monday to Friday), if two temperature pre-conditioning sequences are run without the vehicle being used, the programme will be deactivated.
Front fittings
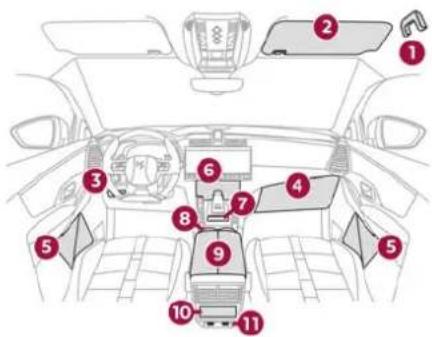
- Grab handle
- Sun visor
- Storage compartment below the steering wheel
- Illuminated glove box
- Door pockets
- Storage compartment or Wireless smartphone charger 12 V (120 W) socket/USB socket(s)
- Storage compartment
- Cup holder
- Front armrest with storage
- Storage compartment or Rear blower
- USB sockets
03
56
Ease of use and comfort
Sun visor
▶ With the ignition on, raise the concealing flap; depending on the version, the mirror is illuminated automatically.
This sun visor is also equipped with a ticket holder.
Glove box
▶ To open the glove box, lift the handle. With the ignition on, the glove box is lit when open.
Depending on version, it contains an adjustable ventilation nozzle, distributing the same conditioned air as the vents in the passenger compartment.
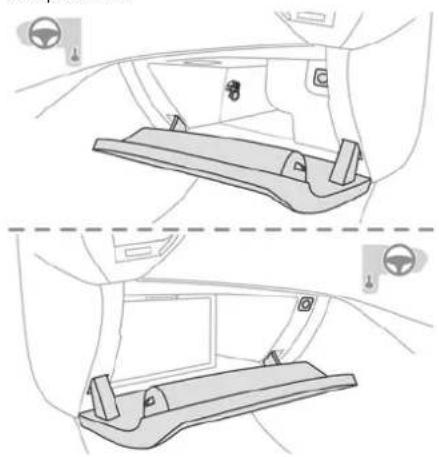
natural_image
Interior view of a car showing front and side views of the dashboard frame (no text or symbols)It houses the front passenger airbag deactivation switch.
! Never drive with the glove box open when a passenger is at the front. It may cause injury during sharp deceleration!
Cigarette lighter/12 V accessory socket(s)
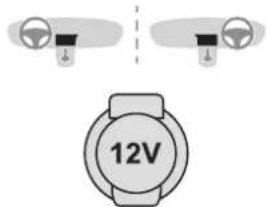
▶ To use the cigarette lighter, press it in and wait a few seconds until it pops out automatically.
▶ To use a 12 V accessory (max. power: 120 W), remove the cigarette lighter and connect a suitable adaptor.
You can use this socket to connect a telephone charger, a bottle warmer, etc.
After use, put the cigarette lighter back into place straight away.
! The connection of an electrical device not approved by the Manufacturer, such as a USB charger, may adversely affect the operation of vehicle electrical systems,
causing faults such as poor radio reception or interference with displays in the screens.
USB sockets
These symbols determine the type of use of a USB socket:

Power supply and recharging.
Likewise, plus use of smartphone applications with the touch screen.
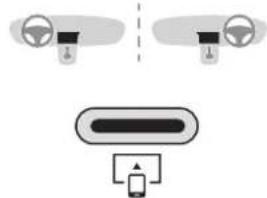
natural_image
Diagram showing car dashboard and steering wheel (no text or symbols)USB sockets allow the connection of a portable device.

The USB socket also allows a smartphone to be connected by
Android Auto ^® or CarPlay ^® , enabling certain smartphone applications to be used on the touch screen.
For best results, use a cable made or approved by the device manufacturer.
These applications can be managed using the steering-mounted controls or the audio system controls.
When the USB socket is used, the portable device charges automatically. While charging, a message is displayed if the power drawn by the portable device exceeds the current supplied by the vehicle. For more information about how to use this equipment, refer to the sections describing the audio and telematics systems.
Storage compartment
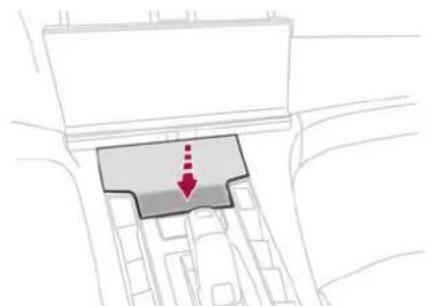
natural_image
Diagram of a car interior showing a highlighted vehicle component with a red arrow indicating direction (no text or symbols present)▶ To open the storage compartment, press the front central part.
Wireless smartphone charger
This system allows wireless charging of a portable device such as a smartphone, using the magnetic induction principle, in accordance with the Qi 1.1 standard.
The portable device to be charged must be compatible with the Qi standard, either by design or by using a compatible holder or shell.
A mat can also be used provided that it is approved by the Manufacturer.
The charging area is identified by the Qi symbol.
The charger works with the engine running and with the Stop & Start system in STOP mode.
Charging is managed by the smartphone.
With the Keyless Entry and Start system, the charger's operation may be briefly disrupted when a door is opened or the ignition is switched off.
Charging
▶ With the charging area clear, place a device in its centre.
When the portable device is detected, the charger's indicator lamp lights up green. It remains lit for the whole time that the battery is being charged.
! The system is not designed to charge multiple devices simultaneously.
Do not leave metal objects (e.g. coins, keys, vehicle remote control) in the charging area while a device is being charged - Risk of overheating or interrupting the charging!

When using applications for a long time in combination with wireless charging, some smartphones may switch to thermal safety and cause some functions to stop.
Checking operation
The state of the indicator lamp allows the operation of the charger to be monitored.
| State of the indicator lamp | Meaning |
| Off Engine switched off. No compatible devices detected. Charging complete. | |
| Fixed green Compatible portable device detected. Charging. | |
| Flashing orange Foreign object detected in the charging zone. Portable device not well centred in the charging zone. | |
| Fixed orange Malfunction of the portable device's battery meter. Device battery temperature too high. Charger malfunction. | |

If the indicator lamp is fixed orange:
- remove the device, then place it back in the centre of the charging zone.
or
- remove the device and try again in a quarter of an hour.
If the problem persists, have the system checked by a dealer or a qualified workshop.
Front armrest
It includes a storage space.
Opening
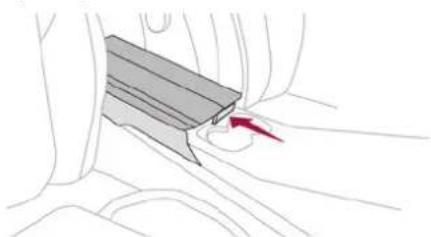
natural_image
Diagram of a hand pressing a button on a car seat, with a red arrow indicating the motion direction (no text or symbols present)▶ Press the lever beneath the cover. The cover opens in two parts.
Closing
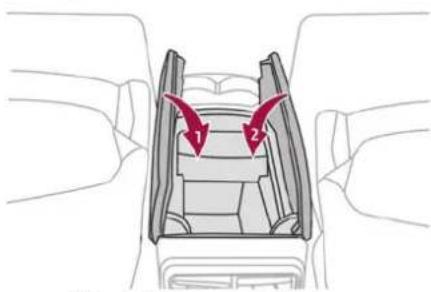
natural_image
Diagram of a car interior showing seatbelt and dashboard with red arrows indicating movement or force (no text or symbols)▶ Fold back the two parts of the cover.
Hi-Fi System FOCAL Electra®
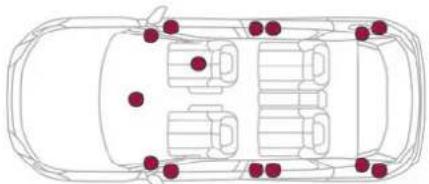
natural_image
Top-down line drawing of a car with red dots marking positions on the roof and side panels (no text or symbols)The vehicle is equipped with a high-fidelity acoustic system from the French brand FOCAL ^® . 14 speakers incorporating exclusive FOCAL ^® technologies offer the pleasure of pure and detailed sound inside the vehicle:
- Polyglass technology central speaker/mid-range satellite speakers: sound immersion and spatialisation.
- Polyglass technology woofers/mid-ranges with high excursion: balance, dynamics and precision of sound.
- Aluminium TNF inverted dome tweeter: optimal sound dispersion, detailed treble.
- 12 channel active amplification - 515 Watts Hybrid Class AB/Class D technology: breadth and finesse in the high frequency signals, as well as real power in the bass.
- Subwoofer with high excursion Power Flower™ triple coil technology: deep and controlled reproduction of low frequencies.
Mats
Fitting
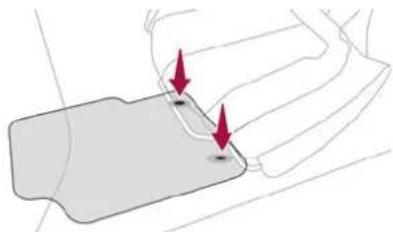
natural_image
Diagram showing a vehicle's seat area with two red arrows indicating direction of movement or force (no text or symbols present)When fitting it on the driver's side, only use the mountings present on the carpet (a "click" indicates proper locking).
The other mats are simply laid over the carpet.
Removing/refitting
▶ To remove it on the driver's side, move the seat backwards and unclip the fasteners.
▶ To refit it, position the mat and secure it by pressing down.
▶ Check that the mat is secured correctly.
To avoid any risk of jamming the pedals: - Only use mats which are suited to the fixings already present in the vehicle; these fixings must be used.
- Never fit one mat on top of another. The use of mats not approved by the Manufacturer may interfere with access to the pedals and hinder the operation of the cruise control/speed limiter.
The approved mats have two fasteners located underneath the seat.
Touch-sensitive courtesy lamps
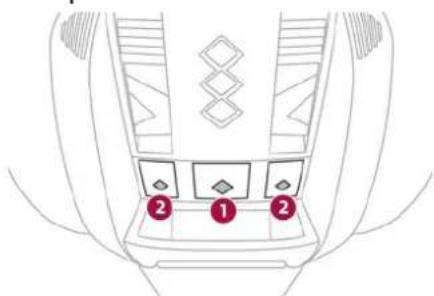
- Front touch-sensitive courtesy lamp
- Front touch-sensitive reading lamps
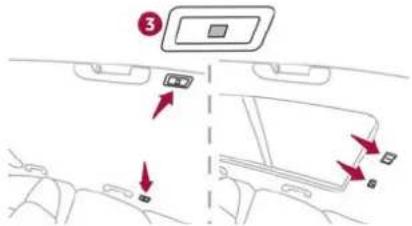
- Rear touch-sensitive reading lamps
Touch-sensitive courtesy lamp
It comes on:
- when the vehicle is unlocked.
- when the ignition is switched off.
- when a door is opened.
- when the remote control locking button is activated, in order to locate the vehicle.
It switches off: - when the vehicle is locked.
- when the ignition is switched on.
- 30 seconds after the last door is closed.
The front and rear touch-sensitive reading lamps come on and go off at the same time as the courtesy lamp.
i A long press on the front touch-sensitive courtesy lamp completely deactivates it (confirmed by the "OFF" symbol).
The front and rear touch-sensitive reading lamps still remain operational.
Touch-sensitive reading lamps
▶ With the ignition on, press the corresponding reading lamp.
Interior ambient lighting
The interior ambient lighting casts soft, coloured lighting in the passenger compartment, when low lighting conditions are detected.
Ease of use and comfort

03
60
Ease of use and comfort
By default, the colour of the interior ambient lighting is linked to that of the screens, depending on the driving mode selected.

Activation/deactivation and adjustment of the brightness are set via the Settings >
Brightness touch screen application.
The colour is selected via the Settings >
Customization touch screen application.
Rear fittings
USB sockets
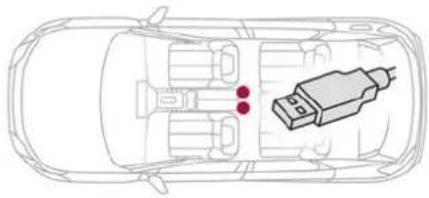
natural_image
Top-down line drawing of a car interior with a highlighted connector (no text or symbols)Each USB socket is used only to power or recharge a portable device.
Rear armrest
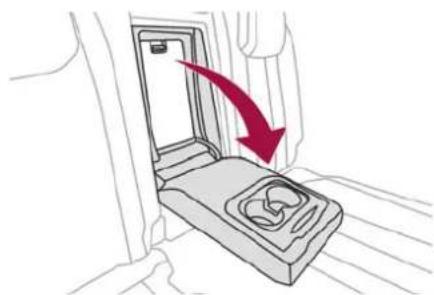
natural_image
Line drawing of a car seatbelt with a red arrow indicating downward motion (no text or symbols)The armrest incorporates two cup holders.
Ski flap
Device for storing and transporting long objects.
Opening
▶ With the rear armrest lowered, open the flap by pulling its handle downwards.
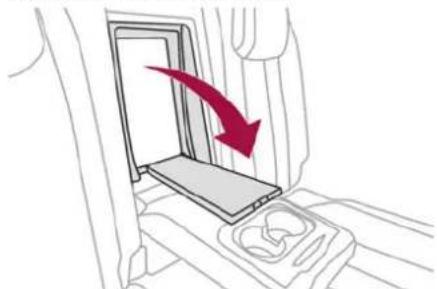
natural_image
Diagram of a car interior showing a seatbelt with a red arrow indicating direction (no text or symbols)▶ Load the objects from inside the boot.
Boot fittings
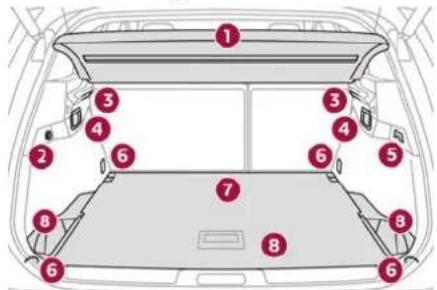
- Load space cover
- 12 V accessory socket (120 W max.)
- Boot lamp
- Rear seat folding controls
- Hooks
- Stowing rings
- Rigid boot floor or 2-position boot floor
- Storage well/Tool box under the floor
i The stowing rings are designed to secure luggage using different types of retaining
nets.
These nets are available as an accessory.
For more information, contact a dealer.
Load space cover shelf
It consists of two sections:
- a fixed section with an open storage space.
- a movable section which rises when the boot is opened, with an open storage space.
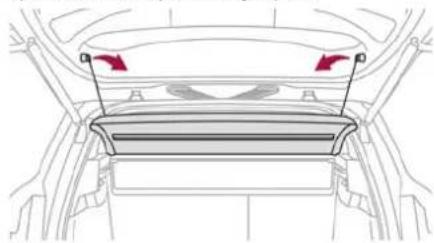
natural_image
Diagram of a car interior showing a lid with red arrows indicating direction (no text or symbols)To remove the load space cover shelf:
▶ Unhook the two cords.
▶ Raise the movable section slightly, then unclip it on each side.
▶ Unclip the fixed section on each side, then take out the load space cover shelf.
In the event of sudden deceleration, objects placed on the load space cover shelf can turn into projectiles.
High load retaining net
This removable net allows the entire loading volume up to the roof to be used:
- behind the front seats (1 ^st row) when the rear seats are folded down.
- behind the rear seats ( 2^nd row) when the load space cover is removed.
i This removable net protects the occupants in the event of sudden braking.
Upper fixings
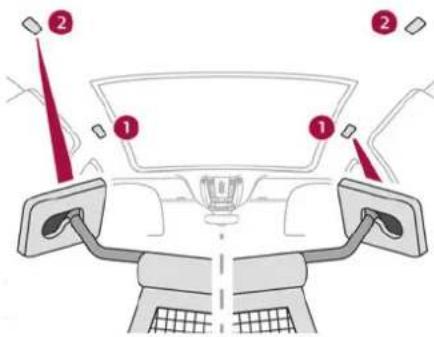
- For installation behind row 1
- For installation behind row 2
Lower fixings
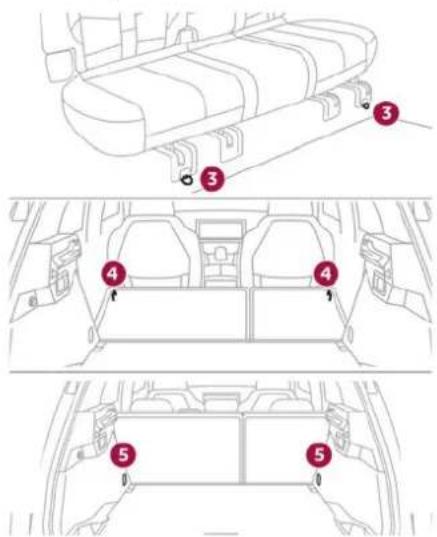
- For installation behind row 1 (Petrol or Diesel)
- For installation behind row 1 (Rechargeable hybrid)
- For installation behind row 2
12 V accessory socket
▶ To connect a 12 V accessory (maximum power: 120 W), lift the cover and plug in a suitable adaptor.
▶ Switch on the ignition.
Ease of use and comfort
! The connection of an electrical device not approved by the Manufacturer, such as a USB charger, may adversely affect the operation of vehicle electrical systems, causing faults such as poor radio reception or interference with displays in the screens.
2-position boot floor
(Depending on version)
This 2-position floor allows the boot volume to be optimised using the lateral stops located on the sides:
- High position (100 kg max.): to obtain a flat floor up to the front seats, when the rear seats are folded down.
- Low position (150 kg max.): maximum boot volume.
On certain versions, the adjustable boot floor cannot be fitted in the low position.
To change the height:
▶ Lift and pull the floor towards you using its central handle, then use the lateral stops to move it.
▶ Push the floor all the way forwards to place it in the desired position.
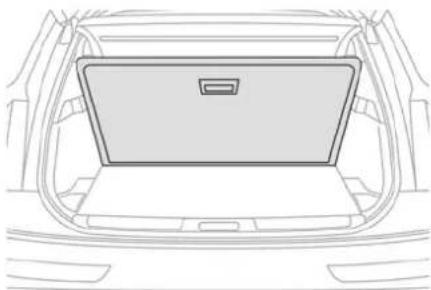
natural_image
Top-down line drawing of a car trunk with a rectangular vent or lid (no text or symbols)To keep it in the inclined position:
▶ From the high position, lift the floor towards the load space cover.
▶ Take it past the retractable stops, then rest the floor on these stops.
Storage well
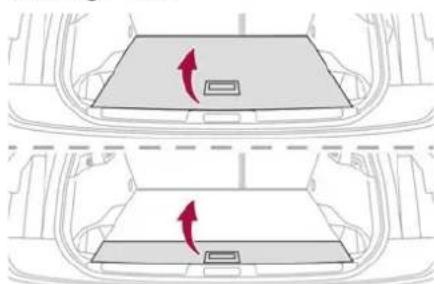
natural_image
Diagram showing two car seats with red directional arrows indicating movement or change (no text or symbols)▶ Lift the boot floor as far as possible or lift the hinged boot carpet (depending on version) to access the storage well. Depending on version, it includes:
- A temporary puncture repair kit with the tool kit.
- A spare wheel with the tool kit.
- The traction battery charging cables (Rechargeable hybrid).
Boot lamp
It comes on automatically when the boot is opened and goes off automatically when the boot is closed.
The lighting time varies according to the circumstances:
- When the ignition is off, approximately 10 minutes.
- In energy saving mode, approximately 30 seconds.
- With the engine running, unlimited.
Exterior lighting control stalk
Main lighting
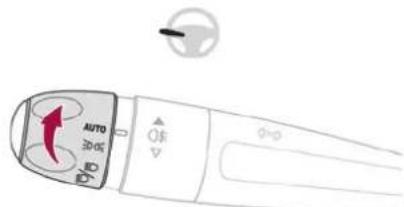

Automatic illumination of lamps/daytime running lamps Sidelamps only
Dipped or main beam headlamps
Remote rear lamps When the vehicle's lamps are on, opening the tailgate automatically switches illumination from the brake lamps, sidelamps and direction indicator lamps to the lamps located in the rear bumper, to maintain the safety of the vehicle.
Headlamp dipping
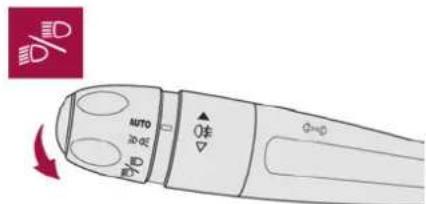
▶ Pull the lighting control stalk to switch between dipped and main beam headlamps. In "AUTO" and sidelamps mode, pull the lighting control stalk to switch the main beam headlamps on directly ("headlamp flash").
Display
Illumination of the corresponding indicator lamp on the instrument panel confirms that the selected lighting is on.
A fault with a lamp is signalled by the permanent illumination of this warning lamp, accompanied by the display of a message and an audible signal.
Rear foglamps
They only work if the dipped or main beam headlamps are on.
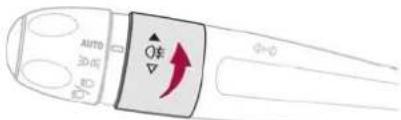
▶ Rotate the ring forwards/backwards to turn them on/off.
When the lighting is switched off automatically ("AUTO" position) the foglamps and the dipped beam headlamps remain on.
When the rear foglamps are activated, the "fog" mode of the Adaptive Frontlight System function can be activated at the front.
For more information on the Adaptive Frontlight System, refer to the corresponding section.
! Switching on the foglamps is prohibited in clear weather or in rain, both day and night. In these situations, the power of their beams may dazzle other drivers. They must only be used in fog or falling snow (rules may vary depending on country).
Do not forget to switch off the foglamps when they are no longer necessary.
i Switching off of the lighting when the ignition is switched off
When the ignition is switched off, all of the lamps turn off immediately, except for the dipped beam headlamps if automatic guide-me-home lighting is activated.
Lighting and visibility

Lighting and visibility
i Switching on the lamps after switching off the ignition
To reactivate the lighting control, rotate the ring to the "AUTO" position, then to the desired position.
If the driver's door is opened, a temporary audible signal warns the driver that the lamps are on.
They will go off automatically after a period of time that depends on the level of charge in the battery (entering energy economy mode).
In some weather conditions (e.g. low temperature or humidity), misting on the internal surface of the glass of the headlamps and rear lamps is normal, and will disappear after the lamps have been on for a few minutes.
! Never look too closely at the light beam of LED technology lamps - risk of serious eye injury!

- Travelling abroad
The design of the dipped beam headlamps allows you to drive, without any modification, in a country that drives on the other side of the road to the country in which your vehicle was sold.
Daytime running lamps/ Sidelamps
These LED lamps at the front and rear of the vehicle light up automatically when the engine starts.
They perform the following functions:
- Daytime running lamps (lighting control stalk at position "AUTO" with adequate ambient light).
- Sidelamps (lighting control stalk at position "AUTO" with low ambient light or "Sidelamps only" or "Dipped/main beam headlamps").
Direction indicators
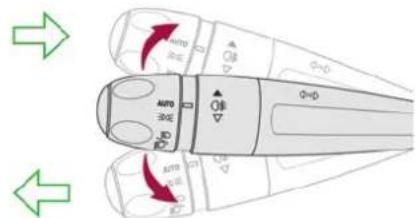
▶ Left or right: lower or raise the lighting control stalk, beyond the point of resistance.
If you keep the direction indicators on for more than 20 seconds, the volume of the audible signal will increase if the speed is above 50 mph (80 km/h).
Three flashes
▶ Press briefly upwards or downwards, without going beyond the point of resistance; the direction indicators will flash 3 times.
Parking lamps
(Depending on version)
Vehicle side marking by lighting the sidelamps on the traffic side only.
▶ Within one minute after switching off the ignition, operate the lighting control stalk upwards or downwards, depending on the side of the traffic (e.g. when parking on the right, push the lighting control stalk down to light up on the left).
This is confirmed by an audible signal and the lighting of the corresponding direction indicator lamp on the instrument panel.
▶ To switch off the parking lamps, return the lighting control stalk to the central position.
Headlamp beam height adjustment
Manual adjustment of LED technology headlamps
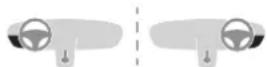
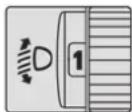
To avoid dazzling other road users, the height of these headlamp beams must be adjusted according to the load in the vehicle.
0 (Initial setting)
Driver only or driver + front passenger
15 people
2 5 people + load in the boot
3 Driver only + load in the boot
456 Not used
Automatic DS PIXEL LED VISION 3.0 headlamp adjustment
This system automatically adjusts the height of the headlamp beams according to the load in the vehicle.
In the event of a malfunction, this warning lamp lights up on the instrument panel, accompanied by the display of a message and an audible signal.
The system places the headlamp beams in the lowest position.
Have it checked by a dealer or a qualified workshop.
Do not touch the DS PIXEL LED VISION 3.0 headlamps - risk of electrocution!
Automatic illumination of lamps
With the lighting control stalk in the "AUTO" position and if a low level of exterior brightness is detected by the rain/sunshine sensor, the sidelamps and dipped beam headlamps are switched on automatically, without any action on the part of the driver. They may also come on if rain is detected, at the same time as automatic operation of the windscreen wipers.
As soon as the brightness returns to a sufficient level or after the windscreen wipers are switched off, the lamps are switched off automatically.
Malfunction
In the event of a malfunction of the rain/ sunshine sensor, the vehicle's lamps come on and this warning lamp is displayed on the
instrument panel, accompanied by an audible signal and/or the display of a message. Have it checked by a dealer or a qualified workshop.
Do not cover the rain/sunshine sensor located at the top centre of the windscreen behind the interior rear view mirror; the associated functions would no longer be controlled.
In fog or snow, the rain/sunshine sensor may detect sufficient light. For this reason, the lighting will not come on automatically.
i The inner surface of the windscreen may become misted up and affect the proper operation of the rain/sunshine sensor. In humid and cold weather, demist the windscreen regularly.
Guide-me-home and welcome lighting
Guide-me-home lighting
Automatic
With the ring of the lighting control stalk in the "AUTO" position and when the light is poor, the
Lighting and visibility
Lighting and visibility
dipped beam headlamps come on automatically when the ignition is switched off.

You can activate/deactivate and adjust
the duration of the guide-me-home lighting
in the Settings > Vehicle touch screen application.
Manual
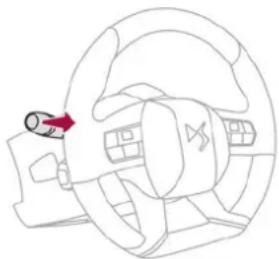
natural_image
Line drawing of a car steering wheel with a red arrow indicating the steering wheel (no text or symbols)▶ With the ignition off, pull the lighting control stalk toward you ("headlamp flash") to activate/deactivate the function.
Manual guide-me-home lighting goes off automatically after a period of time.
Welcome lighting
When the vehicle is unlocked in low light conditions and the "Automatic illumination of headlamps" function is activated, this system automatically switches on:
- On the outside, sidelamps, dipped beam headlamps and door mirror spotlamps.
- Inside, courtesy lamps and footwell lighting.

You can activate/deactivate and adjust
the duration of the welcome lighting in the
Settings > Vehicle touch screen application.
Door mirror spotlamps
These spotlamps facilitate access to the vehicle by lighting the ground near the front doors.
The spotlamps come on automatically:
- when the vehicle is unlocked.
- when a door is opened.
- when a request to locate the vehicle is received from the remote control.
They also come on with the welcome lighting and guide-me-home lighting functions.
They go off automatically after 30 seconds.
Automatic lighting systems - General recommendations
The automatic lighting systems use a detection camera, located at the top of the windscreen.
- Operating limits
1 The system may be disrupted or not work correctly:
- When visibility conditions are poor (e.g. snowfall, heavy rain).
- If the windscreen is dirty, misted-up or masked (e.g. sticker) in front of the camera.
- If the vehicle is facing highly reflective signs or safety barrier reflectors.
The system is not able to detect:
- Road users that do not have their own lighting, such as pedestrians.
- Vehicles with hidden lighting (e.g. travelling behind a safety barrier on the motorway).
- Vehicles at the top or bottom of a steep slope, on winding roads, on crossroads.
Maintenance
! Clean the windscreen regularly, particularly the area in front of the camera.
The internal surface of the windscreen can also become misted around the camera.
In humid and cold weather, demist the windscreen regularly.
Do not allow snow to accumulate on the bonnet or roof of the vehicle as this could obstruct the camera.
Automatic headlamp dipping
! For more information, refer to the General recommendations for automatic lighting systems.
With the ring of the lighting control stalk in the "AUTO" position and the function activated on the touch screen, this system automatically switches between dipped and main beam headlamps,
according to lighting and traffic conditions, using a camera located at the top of the windscreen.
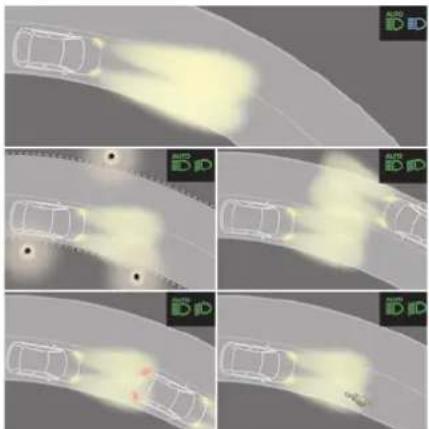
This system is a driving aid. The driver remains responsible for the vehicle's lighting, its correct use in the prevailing light, visibility and traffic conditions, and for compliance with driving and vehicle regulations.
Activation/Deactivation

It is configured in the Settings > Vehicle touch screen application.
The state of the system is stored when the ignition is switched off.
When the system detects thick fog, it temporarily deactivates the function.
Operation
If the ambient light level is very low and traffic conditions permit:
AUTO ED - The main beam headlamps come on automatically. These indicator lamps light up on the instrument panel.
If the ambient light level is sufficient and/or the traffic conditions do not allow the main beam headlamps to be lit:
AUTO D D - The dipped beam headlamps remain lit. These indicator lamps light up on the instrument panel.
The function is deactivated if the foglamps are switched on or if the system detects poor visibility conditions (e.g. fog, heavy rain, snowfall).
When the foglamps are switched off or when the visibility conditions become favourable again, the function is automatically reactivated.
AUTO This indicator lamp goes out when the function is deactivated.
Pause
If the situation requires a change of headlamp beam, the driver can take over at any time.
▶ Switch the headlamps manually between dipped and main beam to pause the function. If the "AUTO" and "Dipped beam" indicator lamps were on, the system changes to main beam.
If the "AUTO" and "Main beam" indicator lamps were on, the system changes to dipped beam.
▶ To reactivate the function, once again switch the headlamps manually between dipped and main beam.
Malfunction
AUTO ED If a malfunction occurs with the system or the camera, this warning lamp lights up on the instrument panel, accompanied by an audible signal and a message.
Have it checked by a dealer or a qualified workshop.
Adaptive Frontlight System
Available only on versions equipped with DS PIXEL LED VISION 3.0 headlamps.
This function has several lighting modes, specific to each driving situation.
The intensity and direction of the main headlamps and the modules vary so as to increase or reduce the range of the lighting.
The modules tilt so as to expand and direct the light beam to increase or decrease the lighting up of the sides of the road.
The function shifts the light beam to the sides of the headlamp to ensure better illumination in curves.
This function is a driving aid which cannot, in any circumstances, replace the
Lighting and visibility
Lighting and visibility
need for vigilance on the part of the driver who must continually adapt the driving of the vehicle to the visibility and traffic conditions.
Activation/Deactivation
Place the ring of the lighting control stalk in the "AUTO" position.

It is configured in the Settings > Vehicle touch screen application.
Operation
"City" mode
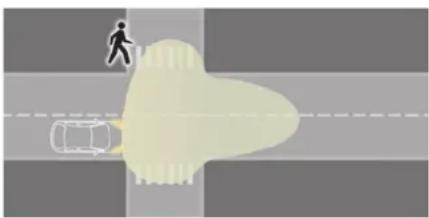
natural_image
Top-down illustration of a pedestrian crossing a road with a car silhouette (no text or symbols)The width of the beam is increased to better distinguish hazards on the side of the road (pedestrians, intersections). By default, the function starts in "Road" mode. After a few seconds, the function switches to "City" mode as long as the speed is below 19 mph (30 km/h). This mode is deactivated after a few seconds above 31 mph (50 km/h).
"Road" mode
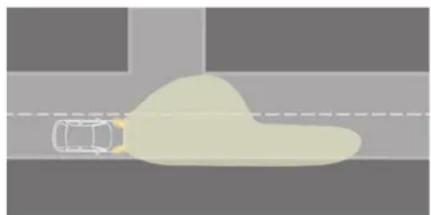
natural_image
Top-down view of a car driving on a road with a cloud-shaped object (no text or symbols visible)This lighting provides a higher light beam, an increased intensity of the headlamps and a decreased intensity of the modules. This mode is active as long as the rear foglamps are switched off and/or the front wipers are activated for less than 2 minutes. Between 19 mph (30 km/h) and 43 mph (70 km/h), with the rear foglamps off and if the front wipers activated for more than 2 minutes continuously, the function switches to "Rain" mode.
"Rain" mode
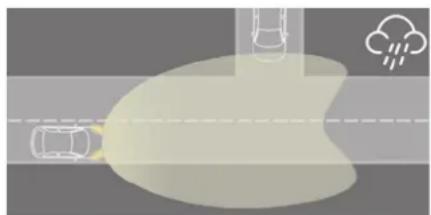
natural_image
Diagram showing a road with cars and cloud icons, no text or symbols presentThe beam is widened. The power of the modules is increased to enable the driver to see the road
markings more easily, whilst the intensity of the main headlamps is reduced so as to improve the driver's vision (taking reflections caused by a wet road into account).
Between 19 mph (30 km/h) and 43 mph (70 km/h), with the rear foglamps off, front wipers activated for many minutes continuously, the function switches to "Road" mode.
"Fog" mode
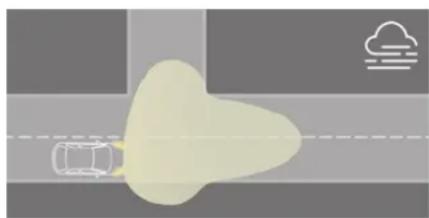
natural_image
Top-down view of a road with a car and cloud icon, no text or symbols presentThis mode is activated if the vehicle is moving at a speed between 0 and 43 mph (70 km/h) and the rear foglamps are on. Beyond 43 mph (70 km/h), the function switches to "High beam" mode even if the rear foglamps are activated.
"High beam" mode
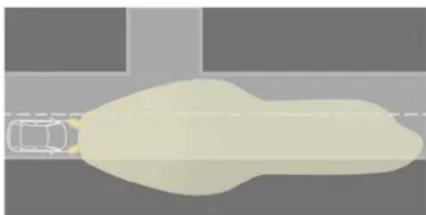
natural_image
Top-down view of a vehicle silhouette with no visible text or symbolsAt any time, this lighting mode can be triggered by the Automatic headlamp dipping function independent of the Adaptive Frontlight System function.
This mode automatically adapts to the speed and angle of the steering wheel.
The power and range of the lighting is maximised to best illuminate the length and width of the roadway.
Dynamic cornering lighting function
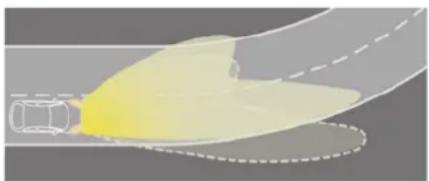
natural_image
Diagram of a car being pulled into a road, showing the yellow vehicle and lane (no text or symbols)Available only with the "City" mode and "Road" mode.
The headlamps follow the trajectory of the vehicle in bends to provide better lighting of the road.
This is done by shifting the intensities of the light area in the bends, to better anticipate obstacles and changes in road direction.
This function operates from a certain angle of rotation of the steering wheel and a certain yaw speed.
DS PIXEL LED VISION 3.0
! For more information, refer to the General recommendations for automatic lighting systems.
The DS PIXEL LED VISION 3.0 system has the Adaptive Frontlight System function and also manages the high beam in conjunction with the Automatic headlamp dipping function.
The DS PIXEL LED VISION 3.0 headlamps incorporate three LED modules:
- a "Pixel" module that varies the number of LEDs lit and their intensity according to driving conditions. This module manages the light flows vertically and horizontally.
- two "Low beam" modules whose intensity only varies with the fog mode.
All these LED modules contribute to the lighting in the low beam and high beam positions.
This system automatically adapts the main beam according to the driving conditions, so that optimum illumination is maintained for the driver, without causing a nuisance to other road users.
! The driver remains responsible for the vehicle's lighting, its correct use in the prevailing light, visibility and traffic conditions, and for compliance with driving and vehicle regulations.
Activation/Deactivation
Place the ring of the lighting control stalk in the "AUTO" position.
This indicator lamp comes on in the instrument panel.
It is configured in the Settings > Vehicle touch screen application.
The state of the system is stored when the ignition is switched off.
When deactivated, the lighting system changes to "Automatic illumination of lamps" mode.
Operation
Using a camera, the system detects the driving conditions (brightness, lights from oncoming or followed vehicles, road turns) and adapts the beams of the main headlamps accordingly. The modules that make up the main beams switch on and off gradually, segment by segment, depending on the driving conditions detected. Nominal main beam lighting is restored as soon as the vehicle is no longer detected by the system.
AUTO If the system is selected but the display on the instrument panel and the alerts are not available, the indicator lamp comes on in grey.
Lighting and visibility
Lighting and visibility
Followed vehicle
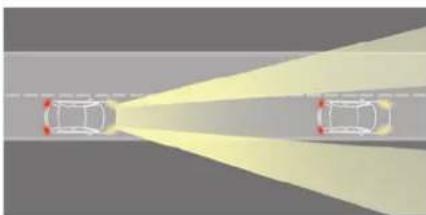
natural_image
Diagram showing two cars with light rays projecting onto a road (no text or symbols)When approaching a vehicle from behind, only those lamp segments directed at the followed vehicle go off, thereby creating a "tunnel" so as not to dazzle its driver.
Oncoming vehicle
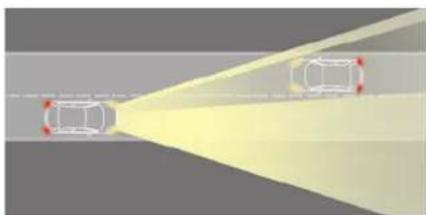
natural_image
Diagram showing two cars with red arrows indicating light rays from a central point, no text or symbols presentWhen an oncoming vehicle approaches, only those lamp segments directed at this vehicle go off, thereby creating a "tunnel" during the duration of the approach.
Entering an illuminated area
At the entrance to an illuminated area (e.g. a town), the lamp segments are gradually switched off from the outside to the inside of the vehicle to switch to the dipped beams.
Exiting an illuminated area
The lamp segments gradually light up from the inside to the outside of the vehicle to restore the main beams.
Pause
If the situation requires a change of headlamp beam, the driver can take over at any time.
▶ Switch the dipped/main beam headlamps manually to pause the function.
The lighting system changes to "Automatic illumination of lamps" mode.
▶ To reactivate the function, manually switch the dipped/main beam headlamps again.
Malfunction

If a malfunction occurs with the adaptive headlamp lighting or the camera, this
warning lamp is displayed on the instrument panel, accompanied by an audible signal and a message.
Have it checked by a dealer or a qualified workshop.
Do not cover the rain/sunshine sensor located at the top centre of the windscreen behind the interior rear view mirror; the associated functions would no longer be controlled.
DS NIGHT VISION
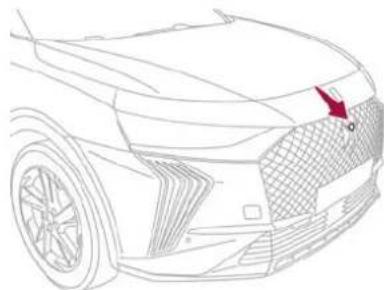
natural_image
Line drawing of a car's front bumper with a red arrow pointing to the grille (no text or symbols)This system identifies and signals the presence of pedestrians and animals in the driver's field of vision, in low exterior light conditions, using an infrared camera located at the front of the vehicle.
Select the "Night vision" display mode if you want the infrared camera image to be displayed constantly on the instrument panel. When the conditions are met, an alert is triggered if there is a risk of collision.
The permanent display disappears upon switching off the ignition or if the conditions are not met.
This system is a driving aid system that cannot, under any circumstances, replace the driver's assessment of night-time visibility and traffic conditions.
In some cases, the differences in temperature are insufficient and the system may not detect
all dangers or, conversely, it may give false warnings (e.g. engines of lorries parked by the side of the road).
Conditions for operation
- With the engine running and in Stop mode of Stop & Start.
- Very low light conditions with dipped beam headlamps on and in good working order.
- Temperature between -30°C and +28°C.
- Speed below 99 mph (160 km/h).
- Detection of animals taller than 0.50 m.
Activation/Deactivation

It is configured in the ADAS touch screen application.
Operation

If the function is selected but the display on the instrument panel and the alerts are available (in "Night Vision" mode), the tor lamp comes on in grey.

If all operating conditions are met, the indicator lamp comes on in green: the y on the instrument panel (with "Night" mode selected) and the triggering of are available.

If certain operating conditions (speed or temperature) are not met, the indicator lamp comes on in orange: only the display on the instrument panel is available (in "Night Vision" mode).
Whilst the exterior light is too bright or the dipped beam headlamps have not been switched on, the alerts are not available.
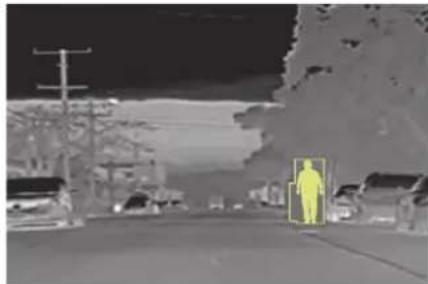
natural_image
Night street scene with a person highlighted in a yellow bounding box, surrounded by trees and utility poles (no visible text or symbols)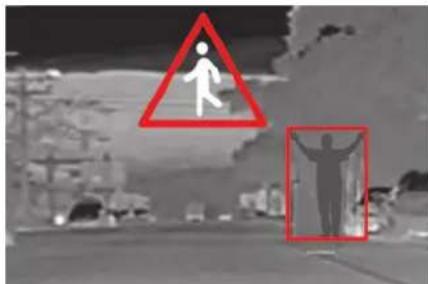
The camera detection range is between 15 m (for pedestrians) and 200 m, depending on visibility conditions.
The image provided by the camera is displayed in shades of grey in the instrument panel; warm objects appear brighter than cold objects.
If pedestrians or animals are detected, they appear in yellow frames.


If the system detects a risk of collision with pedestrians or
animals, it triggers an alert: a symbol appears in the middle of the display window. The silhouette of pedestrians or animals is framed in red. If the "Night Vision" display mode has not been selected, the alert is triggered in the form of a temporary window.
In the event of an alert, the driver may act by making an avoiding manoeuvre or by braking.
Operating limits
The following situations may interfere with the operation of the system or prevent it from working:
- Poor visibility conditions (falling snow, heavy rain, thick fog).
- Camera masked by snow, mud or dust.
- Camera scratched after going through roller car washes repeatedly.
- Very high outside temperature.
- At the top or bottom of a steep slope.
- On a very winding road.
- In a bend.
- After an impact which may have impaired the camera settings or damaged it.
- After repainting of the grille outside of the dealer network or a qualified workshop.
04
72
Lighting and visibility
Maintenance recommendations
The infrared camera has a wash nozzle connected to the vehicle's front screenwash system.
This nozzle operates every 5th use of the screenwash.
Regularly check that the camera is clean. In bad weather, or in wintry conditions, ensure that the camera is not covered with mud, ice or snow.
Malfunction

If the event of a malfunction, this warning lamp comes on in orange on the
instrument panel, accompanied by the display of a message.
Have it checked by a dealer or a qualified workshop.
Wiper control stalk
i
Before operating the wipers in wintry conditions, clear any snow, ice or frost
from the windscreen and around the wiper arms and blades.
!
Do not operate the wipers on a dry windscreen. In extremely hot or cold
weather, check that the wiper blades are not stuck to the windscreen before operating the wipers.
i After using an automatic car wash, you may temporarily notice abnormal noises and poorer wiping performance. You do not need to replace the wiper blades.
Without AUTO wiping

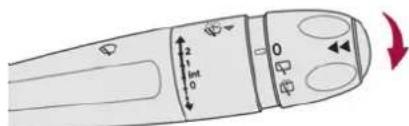
With AUTO wiping
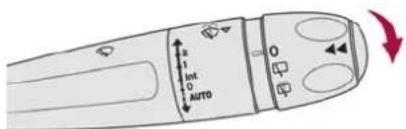
Windscreen wipers
▶ To select the wiping speed: raise or lower the stalk to the desired position.
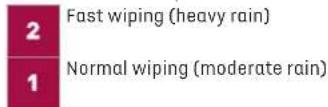
Int

Intermittent wiping (proportional to the vehicle's speed)
Switching off

Single wipe (press down and release).
or
AUTO
Automatic wiping
Refer to the corresponding section.
In position 1 or 2, the wiping frequency is automatically reduced when the speed of the vehicle drops below 3mph (5km / h) When the speed is above 6mph (10km / h) again, the wiping frequency returns to the original frequency (fast or normal).
i After the ignition has been switched off, the wipers may move slightly at the foot of the windscreen.
If the ignition has been switched off with the windscreen wipers active, you must operate the control stalk again to reactivate wiping when the ignition is switched on again (unless the ignition was off for less than a minute).
Single wipe
▶ Pull the stalk briefly towards you.
Windscreen wash
▶ Pull the wiper control stalk towards you and hold.
A final wiping cycle is performed when screenwashing ends.
i The windscreen wash jets are incorporated into the tip of each wiper arm.
Screenwash fluid is sprayed along the length of the wiper blade. This improves visibility and reduces screenwash fluid consumption.
! To avoid damaging the wiper blades, do not operate the screenwash if the screenwash reservoir is empty.
Only operate the screenwash if there is no risk of the fluid freezing on the windscreen and hindering visibility. During the winter period, use "very cold climate" rated products.
Never top up with water.
Rear wiper
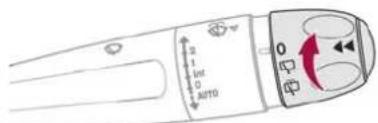
▶ Turn the ring to align the desired symbol with the marking.

0ff
Intermittent wiping
Screenwash-wipe
Reverse
When reverse gear is engaged, the rear wiper will come into operation automatically if the front windscreen wipers are operating.

It is configured in the Settings > Vehicle touch screen application.
In the event of accumulation of snow or hard frost or if a bicycle carrier is fitted to a towing system, deactivate the automatic rear wiper via the Settings > Vehicle touch screen application.
Rear screenwash
▶ Turn the ring as far as it will go and hold it in position.
The screenwash and the wiper operate for as long as the ring remains turned.
A final wiping cycle is performed when screen washing ends.
Special position of the windscreen wipers
This maintenance position is used while cleaning or replacing the wiper blades. It can also be
useful, in wintry weather (ice, snow), to release the wiper blades from the windscreen.
To maintain the effectiveness of the flat wiper blades, it is advisable to:
- handle them with care.
- clean them regularly using soapy water.
- avoid using them to hold cardboard on the windscreen.
- replace them at the first signs of wear.
Before removing a windscreen wiper blade
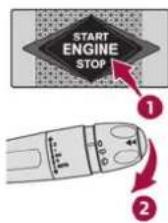
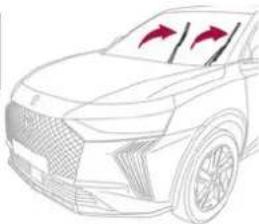
natural_image
Line drawing of a car front view with red arrows pointing to the dashboard area (no text or symbols)Operating the wiper control stalk immediately after switching off the ignition will place the wiper blades in a vertical position.
▶ Proceed with the desired operation or the replacement of the wiper blades.
After refitting a windscreen wiper blade
▶ To return the wiper blades to their initial position after the operation, switch on the ignition and operate the wiper control stalk.
74
Lighting and visibility
Changing a wiper blade
Removing/Refitting at the front
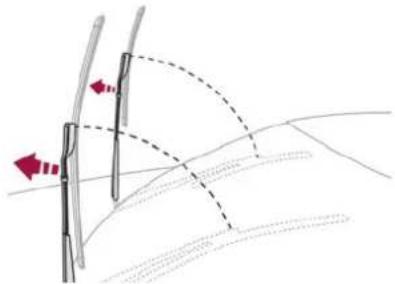
natural_image
Diagram showing two vertical poles with directional arrows indicating motion or force, overlaid on curved lines (no text or symbols)Carry out these wiper blade replacement operations from the driver's side.
Starting with the wiper blade farthest from you, hold each arm by the rigid section and raise it as far as possible.
Take care not to hold the arms at the jet locations.
Do not touch the wiper blades - risk of irreparable deformation.
Do not release them while moving them. Risk of damaging the windscreen!
▶ Clean the windscreen using screenwash fluid.
Do not apply "Rain X" type water-repellent products.
▶ Unclip the worn wiper blade closest to you and remove it.
▶ Install the new wiper blade and clip it to the arm.
▶ Repeat the procedure for the other wiper blade.
Starting with the wiper blade closest to you, once again hold each arm by the rigid section, then guide it carefully onto the windscreen.
Removing/refitting at the rear
▶ Hold the arm by the rigid section and raise it as far as possible.
▶ Clean the rear screen using screenwash fluid.
▶ Unclip the worn wiper blade and remove it.
▶ Install the new wiper blade and clip it to the arm.
▶ Once again hold the arm by the rigid section, then guide it carefully onto the rear screen.
Automatic windscreen wipers
In AUTO mode, the windscreen wipers operate automatically and adapt to the intensity of the rainfall.
Detection is via a rain/brightness sensor, located at the top centre of the windscreen behind the rear view mirror.
! Do not cover the rain/sunshine sensor. When using an automatic car wash, switch off the automatic wipers and the ignition.
In winter, wait until the windscreen is completely clear of ice before activating the automatic wipers.
Switching on
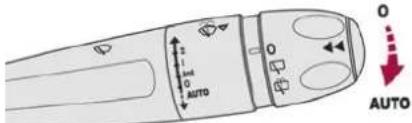
▶ Give a short downwards push to the control stalk.
A wiping cycle confirms that the instruction has been accepted.
This indicator lamp lights up on the instrument panel, accompanied by a message.
Switching off
▶ Give the control stalk another brief push downwards or set the control stalk to another position (Int, 1 or 2).
AUTO This indicator lamp goes off on the instrument panel, accompanied by a message.
If the ignition has been off for more than one minute, the automatic wipers must be reactivated by pushing the control stalk downwards.
75 Lighting and visibility

Malfunction
If a fault occurs with the automatic wipers, the wipers operate in intermittent mode. Have it checked by a dealer or a qualified workshop.
General safety recommendations
Do not remove the labels attached in different places on your vehicle. They include safety warnings as well as identification information for the vehicle.
! For any work on your vehicle, use a qualified workshop that has the technical information, skills and equipment required, all of which a dealer is able to provide.
Depending on country regulations, certain safety equipment may be mandatory: high visibility safety vests, warning triangles, breathalysers, spare bulbs, spare fuses, fire extinguisher, first aid kit, mud flaps at the rear of the vehicle, etc.
Installing electrical accessories:
- The fitting of electrical equipment or accessories not approved by the Manufacturer may cause excessive current consumption and faults and failures with the electrical system of your vehicle. Contact a dealer for information on the range of approved accessories.
- As a safety measure, access to the diagnostic socket, used for the vehicle's electronic systems, is reserved strictly for authorised dealers or qualified workshops,
equipped with the special tools required (risk of malfunctions of the vehicle's electronic systems that could cause breakdowns or serious accidents). The Manufacturer cannot be held responsible if this advice is not followed.
- Any modification or adaptation not intended or authorised by the Manufacturer or carried out without meeting the technical requirements defined by the Manufacturer will result in the suspension of the commercial warranty.
! Installation of accessory radio communication transmitters
Before installing a radio communication transmitter with an external aerial, you must without fail contact a dealer for the specification of transmitters which can be fitted (frequency, maximum power, aerial position, specific installation requirements), in line with the Vehicle Electromagnetic Compatibility Directive (2004/104/EC).
i Declarations of conformity for radio equipment
The relevant certificates are available on the brand website: http://service.dsautomobiles.com
Hazard warning lamps

▶ Pressing this button causes all the direction indicators to flash. They can work with the ignition switched off.
Automatic operation of hazard warning lamps
When braking in an emergency, depending on the rate of deceleration, the hazard warning lamps come on automatically. They switch off automatically when you next accelerate.
They can be switched off by pressing the button.
Horn
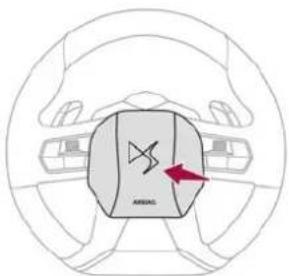
natural_image
Top-down view of a car steering wheel with a highlighted internal component (no text or symbols)▶ Press the central part of the steering wheel.
Pedestrian horn (Rechargeable hybrid)
This system alerts pedestrians that the vehicle is approaching, when driving in Electric mode (100% electric driving).
The pedestrian horn operates once the vehicle is moving and at speeds of up to 19 mph (30 km/h), in forward or reverse gear.
This function cannot be deactivated.
Malfunction

In the event of a malfunction, this warning lamp lights up on the instrument panel.
Have it checked by a dealer or a qualified workshop.
Emergency or assistance call
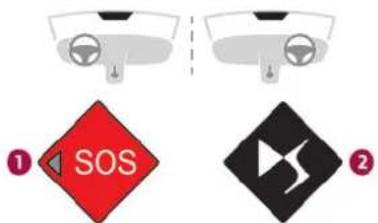
- eCall (SOS)
- DS ASSISTANCE
eCall (SOS)
Your vehicle may be fitted with the eCall (SOS) system either as standard or as an option. The eCall (SOS) system provides direct contact to the emergency services and is fully built into the vehicle. This contact is made either automatically via the sensors built into the vehicle, or by pressing button 1.
According to the country of sale, the eCall (SOS) system corresponds to the systems PE112, ERAGLONASS, 999, etc.
The eCall (SOS) system is activated by default.
▶ To make an emergency call manually, press button 1 for more than 2 seconds.
The lit indicator lamp and a voice message confirm that the call has been made to the emergency services*.
The eCall (SOS) system immediately locates your vehicle and puts you in contact with the appropriate emergency services**.
▶ Pressing again immediately cancels the request.
The indicator lamp flashes while the vehicle data is being sent, and then remains lit when communication is established.
In the event that a serious accident is detected by the sensors built into the vehicle, such as the airbag control unit, an emergency call is made automatically.
i The eCall (SOS) system is a public service of general interest and is free-of-charge.
Operation of the system
- Upon switching on the ignition, the indicator lamp lights up for a few seconds and then goes out: the system is operating correctly.
- The indicator lamp flashes red: emergency battery is flat. This will be recharged after a few minutes' driving.
- The indicator lamp is fixed red: system malfunction. The emergency and assistance call services may not work.
- If the indicator lamp does not light up when the ignition is turned on, this is also a system malfunction.
If the problem persists, contact a qualified workshop as soon as possible.
i The malfunction of the system does not prevent the vehicle from driving.
When an onboard system update is being performed, the eCall (SOS) function is not available.
: Data processing
1 All processing of personal data by the eCall (SOS) function complies with the framework for protection of personal information established by Regulation 2016/679 (General Data Protection Regulation - GDPR) and Directive 2002/58/EC of the European Parliament and the Council, and in
particular, seeks to protect the vital interests of the data subject, in accordance with Article 6 (1) d) GDPR.
The processing of personal data is strictly limited to the purpose of handling the eCall (SOS) function used with the "112" single European emergency call number.
The eCall (SOS) function is only able to collect and process the following data relating to the vehicle: vehicle identification number, vehicle type (passenger vehicle or light commercial vehicle), fuel type or power source, three most recent locations and direction of travel, number of passengers and a timestamped log file of the automatic activation of the system and its timestamp.
The recipients of the processed data are the emergency call handling centres designated by the relevant national authorities in the territory in which they are located, enabling priority routing and handling of calls to the "112" emergency number.
Data storage
Data contained in the system's memory is not accessible from outside the system until a call is made. The system is not traceable and is not continuously monitored in its normal operating mode.
The data in the system's internal memory is automatically and continuously erased. Only
the vehicle's three most recent locations, necessary for the normal functioning of the system, are stored.
When an emergency call is triggered, the data log is stored for no more than 13 hours.
Access to data
You have the right of access to data and as appropriate to request the rectification, erasure or restriction of processing of any personal data not processed in accordance with the provisions of GDPR. Third parties to which data has been disclosed shall be notified of any rectification, erasure or restriction carried out in compliance with GDPR, unless it proves impossible or involves a disproportionate effort.
You also have the right to lodge a complaint with the respective data protection supervisory authority.
If you want to claim your above-mentioned rights please contact us per email at: privacyrights@stellantis.com.
For more information regarding our contact details please take a look at our Privacy & Cookies Policy on the brand's website.
DS ASSISTANCE
If the vehicle breaks down, press button 2 for more than 2 seconds to request assistance (confirmed by a voice message*).
▶ Pressing again immediately cancels the request.
i Privacy mode allows you to manage the level of sharing (data and/or location) between your vehicle and DS AUTOMOBILES. It can be configured in the Settings touch screen application.
If you purchased your vehicle outside the dealer network, you are invited to have a dealer check the configuration of these services and, if desired, modify it as required. In a multilingual country, services can be configured to use the official national language of your choice.
For technical reasons and in particular to improve the quality of telematics services provided to customers, the Manufacturer reserves the right to carry out updates to the vehicle's on-board telematics system at any time.
! During an update to the vehicle's on-board telematics system, the DS ASSISTANCE system will be unavailable.
If you benefit from the DS CONNECT BOX offer with the SOS and Assistance Pack included, there are additional services available to you in your personal space, via the website for your country. For information about the SOS and Assistance Pack, please refer to the general conditions for these services.
Electronic stability control (ESC)
The electronic stability control programme includes the following systems:
- Anti-lock braking system (ABS) and Electronic brake force distribution (EBFD).
- Emergency braking assistance (EBA).
- Anti-slip regulation (ASR).
- Dynamic stability control (DSC).
- Trailer stability assist (TSA).
Anti-lock braking system (ABS)/Electronic brake force distribution (EBFD)
These systems enhance the vehicle's stability and handling during braking, and enable greater control while cornering, particularly on poor or slippery road surfaces.
ABS prevents wheel locking in the event of emergency braking.
Electronic brake force distribution (EBFD) manages overall braking pressure on each individual wheel.
When braking in an emergency, depress the pedal very firmly and maintain this pressure.
i Normal operation of the ABS may make itself felt by slight vibrations of the brake pedal.

The fixed illumination of this warning lamp signals that there is a fault with the ABS.
The vehicle retains conventional braking. Drive carefully at a moderate speed. Have it checked by a dealer or a qualified workshop.

This warning lamp, when lit together with the STOP and ABS warning lamps,
accompanied by a message and an audible signal, indicates an EBFD malfunction.
You must stop the vehicle.
Stop as soon as it is safe to do so and switch off the ignition.
Contact a dealer or a qualified workshop.

When changing wheels (tyres and rims), ensure that these are approved for your cle.

After an impact
! Have it checked by a dealer or a qualified workshop.
Emergency braking assistance (EBA)
This system reduces the emergency stopping distance, by optimising the braking pressure. It is triggered in relation to the speed at which the brake pedal is depressed. The effect of this is a reduction in the resistance of the pedal and an increase in braking efficiency.
Anti-slip regulation (ASR) / Dynamic stability control (DSC)
Anti-slip regulation (or traction control) optimises traction by using engine braking and by applying the brakes on the driving wheels to avoid one or more wheels spinning. It also enhances the vehicle's directional stability.
If there is a difference between the vehicle's trajectory and the path desired by the driver, the dynamic stability control system automatically uses engine braking and the brakes on one or more wheels to return the vehicle to the desired path, within the limits of the laws of physics. These systems are activated automatically every time the vehicle is started.

These systems are activated in the event of a problem with grip or trajectory
(confirmed by this warning lamp flashing on the instrument panel).

E-TENSE 4X4 360
1 The dynamic stability control is optimised to be able to react later on this vehicle.
Deactivation/Reactivation
In exceptional conditions (e.g. moving a vehicle that is bogged down in mud, stuck in snow, on loose soil), it may prove useful to deactivate the DSC/ASR systems, so that the wheels can move freely and regain grip.
Reactivate the system as soon as the level of grip permits.

The ASR system is deactivated/reactivated in the ADAS touch screen
application.

Deactivation/reactivation of the ASR system is indicated by this indicator lamp
on the instrument panel coming on/going out and the display of a message.
The ASR system is automatically reactivated every time the ignition is switched off or at speeds over 31 mph (50 km/h)
Reactivation is manual below 31 mph (50 km/h).
Malfunction
In the event of a malfunction, this warning lamp lights up on the instrument panel, accompanied by the display of a message and an audible signal.
Have it checked by a dealer or a qualified workshop.
ASR/DSC
These systems enhance safety during normal driving, but should not encourage the driver to take extra risks or drive at high speed. It is in conditions of reduced grip (rain, snow, ice) that the risk of loss of grip increases. It is therefore important for your safety to keep these systems activated in all conditions, and particularly in difficult conditions.
Correct operation of these systems depends on compliance with the manufacturer's recommendations relating to the wheels (tyres and rims), braking and electronic components, as well as the assembly and repair procedures provided by dealers.
In order to ensure that these systems remain effective in wintry conditions, the use of snow or all-season tyres is recommended. All four wheels must be fitted with tyres approved for your vehicle.
All tyre specifications are listed on the tyre/paint label. For more information on Identification markings, refer to the corresponding section.
Trailer stability assist (TSA)
When towing, this system reduces the risk of the vehicle or trailer snaking.
Operation
The system is activated automatically when the ignition is switched on. The electronic stability control system (ESC) must not have any faults. The vehicle speed must be between 37 and 99 mph (60 and 160 km/h).
If the system detects that the trailer is snaking, it applies the brakes to stabilise the trailer and reduces engine power, if necessary, to slow the vehicle (indicated by the flashing of this warning lamp on the instrument panel and the brake lamps coming on).
For information on weights and towed loads, refer to the Engine technical data and towed loads section or your vehicle's registration certificate. To ensure safe driving with a Towing device, refer to the corresponding section.
Malfunction

If a fault occurs, this warning lamp lights up on the instrument panel, accompanied message and an audible signal.
To continue towing a trailer, reduce speed and drive carefully! Have it checked by a dealer or a qualified workshop.
! The trailer stability control system provides an extra safety feature under normal driving conditions, when following the recommendations for use of trailers and current legislation in force in your country. It must not encourage the driver to take extra risks, such as using a trailer in unsuitable conditions of operation (e.g. excessive load, exceeded nose weight, worn or under-inflated tyres, faulty braking system) or driving at excessive speed. In certain cases, the system may not detect trailer snaking, particularly with a light trailer. When driving on slippery or poor surfaces, the system may not be able to prevent sudden trailer snaking.
Seat belts
Inertia reel
The seat belts are equipped with an inertia reel which allows the strap length to adjust automatically to the shape of the user. The seat belt returns to its storage automatically when it is not used.
The inertia reels are fitted with a device which automatically locks the strap in the event of a collision, emergency braking or if the vehicle rolls
over. It can be released by pulling the strap firmly and then releasing it so that it reels in slightly.
Pyrotechnic pretensioning
This system improves safety in the event of a frontal or side impact.
Depending on the severity of the impact, the pyrotechnic pretensioning system instantly tightens the seat belts against the body of the occupants.
The pyrotechnic pretensioning seat belts are enabled when the ignition is on.
Force limiting system
This system reduces the pressure of the seat belt on the chest of the occupant, thus improving their protection.
In the event of an impact Depending on the nature and seriousness of the impacts, the pyrotechnic device may trigger before and independently of airbag deployment. Deployment of the pretensioners is accompanied by a slight discharge of harmless smoke and a noise, due to the activation of the pyrotechnic cartridge incorporated in the system. In all cases, the airbag warning lamp comes on. Following an impact, have the seat belt system checked, and if necessary replaced, by a dealer or a qualified workshop.
81 Safety


82
Safety
Front seat belts
The front seat belts are fitted with a pyrotechnic pretensioning system and a force limiting system.
Height adjustment
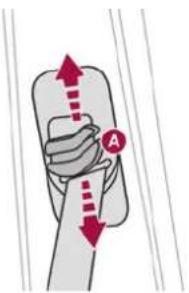
▶ To adjust the height of the anchorage point, squeeze control A and slide it to the notch desired.
Rear seat belts
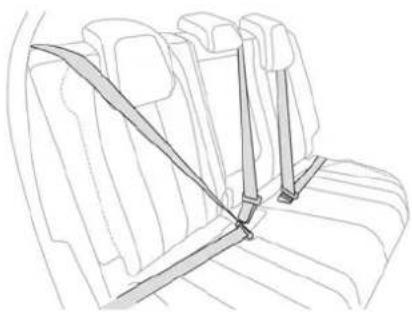
natural_image
Line drawing of a car seatbelt with diagonal bracing (no text or symbols)Each of the rear seats has a three-point seat belt with inertia reel.
The outer seats are fitted with a pyrotechnic pretensioning and force limiting system. For the centre seat, the buckle is held horizontally by an elastic strap if the centre seat belt is not being used.
Fastening
▶ Pull the strap, then insert the tongue into the buckle.
▶ Check that the seat belt is fastened correctly by pulling on the strap.
Unfastening
▶ Press the red button on the buckle.
▶ Guide the seat belt as it is reeled in.
Seat belt not fastened/unfastened alerts
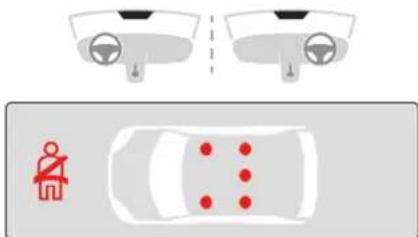
Not fastened/unfastened warning lamp
It comes on in red on both the instrument panel and the front passenger airbag and seat belts
warning lamps display, once the system detects that a seat belt is not fastened or has been unfastened.
Seat belts not fastened/unfastened identification indicator lamp
The red indicator lamps on the display indicate the location of the seat belts which are not fastened or have been unfastened.
Not fastened at the front
When the ignition is switched on, the warning lamp and the corresponding indicator lamps light up if the driver and/or the front passenger have not fastened their seat belts.
At a speed greater than 12 mph (20 km/h), these warning lamps flash, accompanied by an increasing audible signal for approximately two minutes. After two minutes, these warning lamps remain on as long as the front seatbelts are not fastened.
Not fastened at the rear
When the ignition is switched on, with the engine running or the vehicle moving at a speed below 12 mph (20 km/h), the warning lamp and the corresponding indicator lamps light up for 1 minute, if one or more rear seat belts are not fastened.
Unfastened
After the ignition is switched on, the warning lamp and the corresponding indicator lamps light up if the driver and/or one or more passengers unfasten their seat belts.
At a speed greater than 12 mph (20 km/h), these warning lamps flash, accompanied by an audible signal for approximately two minutes. After this time, these warning lamps remain on as long as the seatbelts are not refastened.
Advice
! The driver must ensure that passengers use the seat belts correctly and that they are all fastened before setting off.
Wherever seated in the vehicle, you must always fasten the seat belt, even for short journeys.
Do not invert the seat belt buckles, as they will not fulfil their role properly.
To ensure the proper functioning of the belt buckles, make sure that there are no foreign bodies present (e.g. a coin) before fastening. Before and after use, ensure that the seat belt is reeled in correctly.
After folding or moving a seat or rear bench seat, ensure that the seat belt is positioned and reeled in correctly.
Installation
! The lower part of the strap must be positioned as low as possible over the pelvis. The upper part must be positioned in the hollow of the shoulder.
At the front, adjusting the position of the seat belt may require the seat height to be adjusted.
In order to be effective, a seat belt must:
- be tightened as close to the body as possible.
- be pulled in front of you with a smooth movement, checking that it is not twisted.
- must only be used to secure one person.
- not show signs of tearing or fraying.
- not be changed or modified, in order to avoid affecting its performance.
Recommendations for children
! Use a suitable child seat if the passenger is less than 12 years old or shorter than 1.5 metres.
Never use the same seat belt to secure more than one child.
Never carry a child on your lap.
For more information on Child seats, refer to the corresponding section.
Maintenance
In accordance with current safety regulations, for all work on your vehicle's seat belts, contact a qualified workshop with the skills and equipment needed, which a dealer is able to provide.
Have your seat belts checked regularly by a dealer or a qualified workshop, particularly if the straps show signs of damage.
Clean the seat belt straps with soapy water or a textile cleaning product, sold by dealers.
Airbags
General information
This system is designed to improve the safety of the occupants of the front seats and the rear outer seats in the event of a violent collision. The airbags supplement the action of the seat belts equipped with a force limiting system.
Electronic detectors record and analyse the front and side impacts sustained in the impact detection zones:
- In the event of violent impact, the airbags deploy instantly and help better protect the occupants of the vehicle; immediately after the impact, the airbags deflate rapidly in order not to hinder the visibility or the possible exit of the occupants.
- In the event of a slight impact, a rear impact and under certain rollover conditions, the airbags may not deploy; only the seat belt helps to protect you in these situations.
The seriousness of the impact depends on the nature of the obstacle and the speed of the vehicle at the moment of collision.
! The airbags do not operate when the ignition is switched off.
This equipment will only deploy once. If a second impact occurs (during the same or a subsequent accident), the airbag will not be deployed again.
Safety


84 Safety
Impact detection zones
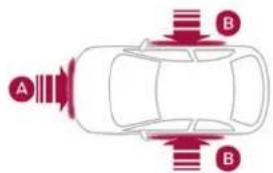
natural_image
Top-down diagram of a car with sound waves and labeled points A and B (no text or symbols beyond labels)A. Front impact zone B. Side impact zone
When one or more airbags are deployed, the detonation of the pyrotechnic charge incorporated in the system makes a noise and releases a small quantity of smoke. This smoke is not harmful, but sensitive individuals may experience irritation. The detonation noise associated with the deployment of one or more airbags may result in a slight loss of hearing for a short time.
Front airbags
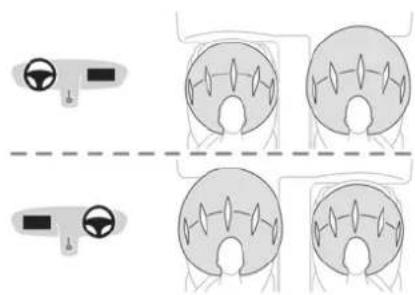
natural_image
Diagram showing four identical circular components with directional arrows, arranged in a grid (no text or symbols)This system protects the driver and front passenger in the event of a serious front impact, limiting the risk of head and chest injury. The driver's airbag is fitted in the centre of the steering wheel; the front passenger airbag is fitted in the dashboard above the glove box.
The front airbags are adaptive. In particular, they inflate less firmly in the presence of a smaller occupant, with the seat set in a forward longitudinal position.
Deployment
They deploy, except the front passenger airbag if it is deactivated*, in the event of a serious front impact to all or part of the front impact zone A. The front airbag inflates between the thorax and head of the front occupant of the vehicle and the steering wheel, driver's side, and the dashboard, passenger's side, to cushion their forward movement.
Lateral airbags
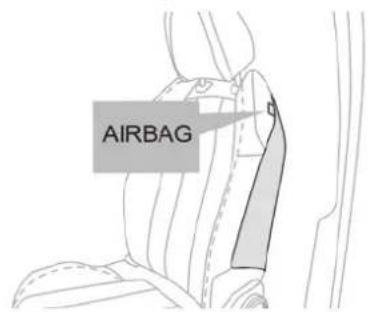
This system protects the driver and front passenger in the event of a serious side impact, limiting the risk of injury to the chest, between the hip and the shoulder. Each lateral airbag is fitted in the seat backrest frame, on the door side.
Deployment
The lateral airbags are deployed on one side in the event of a serious side impact applied to all or part of the side impact zone B. The lateral airbag inflates between the chest of the vehicle's occupant and the corresponding door panel.
Curtain airbags
This system helps provide greater protection for the driver and passengers (with the exception of the rear centre passenger) in the event of a serious side impact, in order to limit the risk of injury to the side of the head.
Each curtain airbag is built into the pillars and the upper passenger compartment area.
Deployment
It deploys simultaneously with the corresponding lateral airbag in the event of a serious side impact applied to all or part of the side impact zone B. The curtain airbag inflates between the front and rear occupants of the vehicle and the corresponding windows.
Malfunction

In the event of a malfunction, these warning lamps light up on the
instrument panel. Contact a dealer or a qualified workshop to have the system checked.
The airbags may not be deployed in the event of a serious impact.
In the event of a minor impact or bump at the side of the vehicle or if the vehicle rolls over, the airbags may not be deployed. In the event of a rear or front collision, none of the lateral airbags are deployed.
Advice
! For the airbags to be fully effective, observe the safety recommendations below.
Adopt a normal and upright sitting position. Fasten your seat belt and position it correctly. Do not place anything between the occupants and the airbags (e.g. child, animal, object), do not fix or attach anything near or in the path of the airbags, as this could cause injuries when they are deployed.
Never modify the original definition of the vehicle, particularly in the area directly around the airbags.
Even if all of the precautions mentioned are observed, a risk of injury or of minor burns to the head, chest or arms cannot be ruled out when an airbag is deployed. The bag inflates almost instantly (within a few milliseconds) then deflates within the same time, discharging the hot gas via openings provided for this purpose.
After an accident or if the vehicle has been stolen, have the airbag systems checked. All work must be carried out only by a dealer or a qualified workshop.
! Front airbags Do not drive holding the steering wheel by its spokes or resting your hands on the centre part of the wheel.
Passengers must not place their feet on the dashboard.
Do not smoke as deployment of the airbags can cause burns or the risk of injury from a cigarette or pipe.
Never remove or pierce the steering wheel or hit it violently.
Do not fix or attach anything to the steering wheel or dashboard, as this could cause injuries when the airbags are deployed.
Lateral airbags
! Use only approved seat covers compatible with the deployment of these airbags. For information on the range of seat covers suitable for your vehicle, contact a dealer. Do not fix or attach anything to the seat backrests (e.g. clothing) as this could cause injuries to the chest or arm when the airbag is deployed.
Do not sit with the upper part of the body any nearer to the door than necessary. The vehicle's front door panels include side impact sensors.
A damaged door or any unauthorised or incorrectly executed work (modification or repair) on the front doors or their interior trim could compromise the operation of these sensors - risk of malfunction of the lateral airbags!
All work must be carried out only by a dealer or a qualified workshop.
Curtain airbags
Do not fix or attach anything to the roof, as this could cause head injuries when the curtain airbag is deployed. Do not remove the grab handles installed on the roof, as these help to secure the curtain airbags.
Child seats
i The regulations on carrying children are specific to each country. Refer to the legislation in force in your country.
For maximum safety, please observe the following recommendations:
- In accordance with European regulations, all children under the age of 12 or less than 1.5 metres tall must travel in approved child seats suited to their weight, on seats fitted with a seat belt or ISOFIX mountings.
- Statistically, the safest seats in your vehicle for carrying children are the rear seats.
- Children weighing less than 9 kg must travel in the "rearward facing" position, whether in the front or rear of the vehicle.
It is recommended that children travel on the rear seats of the vehicle:
- "rearward facing" up to the age of 3.
- "forward facing" over the age of 3.
! Make sure that the seat belt is correctly positioned and tightened. For child seats with a support leg, ensure that the support leg is in firm and steady contact with the floor.
! An incorrectly installed child seat in a vehicle compromises the child's safety in the event of an accident.
Ensure that there is no seat belt or seat belt buckle under the child seat, as this could destabilise it.
Remember to fasten the seat belts or the child seat harness keeping the slack relative to the child's body to a minimum, even for short journeys.
When installing a child seat using the seat belt, ensure that the seat belt is tightened correctly on the child seat and that it secures the child seat firmly on the vehicle seat. If the passenger seat is adjustable, move it forwards if necessary.
Remove the head restraint before installing a child seat with a backrest on a passenger seat.
Ensure that the head restraint is stored or attached securely to prevent it from being thrown around the vehicle in the event of sharp braking. Refit the head restraint once the child seat has been removed.
Installing a booster seat
! The chest part of the seat belt must be positioned on the child's shoulder without touching the neck.
Ensure that the lap part of the seat belt passes correctly over the child's thighs.
Use a booster seat with a backrest, equipped with a belt guide at shoulder level.
Additional protections
! To prevent accidental opening of the doors and rear windows, use the "Child lock". Take care not to open the rear windows by more than one third.
To protect young children from the sun's rays, fit side blinds on the rear windows.
As a safety measure, do not leave:
- A child alone and unsupervised inside a vehicle.
- A child or an animal in a vehicle which is exposed to the sun, with the windows closed.
- The keys within reach of children inside the vehicle.
Child seat at the rear
Forward-facing or rearward-facing


Move the vehicle's front seat forward and straighten the backrest so that the legs of the child in the forward-facing or rearward-facing child seat itself do not touch the vehicle's front seat.
▶ Check that the backrest of the forward-facing child seat is as close as possible to the backrest of the vehicle's rear seat, and ideally in contact with it.
Centre rear seat
A child seat with a support leg must never be installed on the centre rear passenger seat.
Child seat at the front
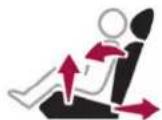
▶ Adjust the front passenger seat to the highest and fully back longitudinal position, with the backrest straightened.
"Forward facing"
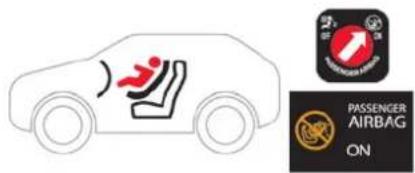
You must leave the front passenger airbag active.
"Rearward facing"
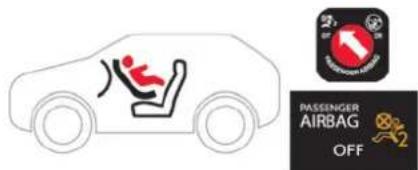
! The front passenger airbag must be deactivated before installing a rearward facing child seat. Otherwise, the child risks being seriously injured or killed if the airbag is deployed.
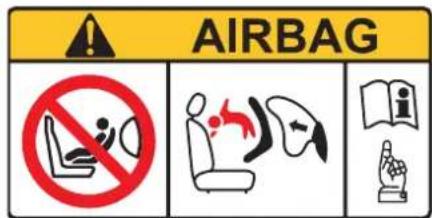
Warning label - Front passenger airbag
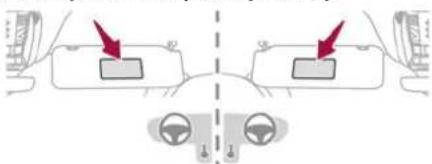
You must comply with the following instruction, as reminded by the warning label on both sides of the passenger sun visor:
NEVER use a rearward facing child restraint on a seat protected by an ACTIVE AIRBAG in front of it, DEATH or SERIOUS INJURY to the CHILD can occur.
Deactivating the front passenger airbag

Passenger airbag OFF
87 Safety

To ensure the safety of the child, the front passenger airbag MUST be deactivated when a "rearward facing" child seat is installed on the front passenger seat. Otherwise, the child risks being seriously injured or killed in the event of deployment of the airbag.

Vehicles not equipped with a deactivation/reactivation control
Installing a "rearward facing" child seat on the front passenger seat is strictly prohibited - risk of death or serious injury in the event of airbag deployment!
Deactivating/Reactivating the front passenger airbag
For vehicles on which it is fitted, the switch is located inside the glove box.
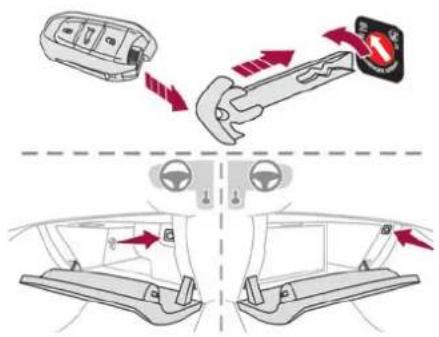
With the ignition off:
▶ To deactivate the airbag, turn the key in the switch to the "OFF" position.
▶ To reactivate it, turn the key to the "ON" position.
When the ignition is switched on:
This warning lamp comes on and remains lit to signal deactivation.
Or

This warning lamp comes on for about 1 minute to signal activation.
Recommended child seats
Range of child seats secured using a three-point seat belt.
Group 0+: from birth to 13 kg
L1
"RÖMER Baby-Safe Plus" Installed in the "rearward facing" position.
Groups 2 and 3: from 15 to 36 kg

L5
"RÖMER KIDFIX XP" Can be fitted to the vehicle's ISOFIX mountings.
The child is restrained by the seat belt. Only suitable for installation on the side rear seats.
The head restraint on the vehicle seat must be removed.
Groups 2 and 3: from 15 to 36 kg
L6
"GRACO Booster"
The child is restrained by the seat belt. Only suitable for installation on the front passenger seat or on the rear side seats.
Locations for child seats secured using the seat belt
In accordance with European regulations, this table indicates the options for installing child seats secured using the seat belt and universally approved (a) in relation to the weight of the child and the seat position in the vehicle.
| Weight of the child/indicative age | |||||||
| Seat Front passenger | airbag | Under 13 kg(groups 0 (b)and 0+)Up to about 1 year old | From 9 to 18 kg(group 1)From about 1 to 3 years old | From 15 to 25 kg(group 2)From about 3 to 6 years old | From 22 to 36 kg(group 3)From about 6 to 10 years old | ||
| Row 1 (c) Passenger seat with height adjustment (d) or without height adjustment (e) | [(WY40)] | Deactivated "OFF" | UUUU | ||||
| Activated "ON" X | UF UF UF | ||||||
| Row 2 (f) Outer rear seats Centre rear seat (c) (g) |  | UF UF UF UF | |||||
U: seat position suitable for installing a child seat secured using the seat belt and universally approved for "rearward facing" and/or "forward facing" use.
UF: seat position suitable for installing a child seat secured using the seat belt and universally approved for "forward facing" use.
X: seat position not suitable for installing a child seat of the weight group indicated.
(a) Universal child seat: child seat that can be installed in all vehicles using the seat belt.
(b) Group 0: from birth to 10 kg. Carrycots and "car" infant carriers cannot be installed on the front passenger seat.
(c) Refer to the current legislation in your country before installing your child on this seat.
(d) The front height-adjustable seat must be adjusted to the highest and fully back longitudinal position.
(e) The backrest must be straightened.
(f) To install a "rearward facing" or "forward facing" child seat at the rear, move the front seat forward, then straighten the backrest to allow enough room for the child seat and the child's legs.

90 Safety
(g) A child seat with a support leg must never be installed on the centre rear seat.
"ISOFIX" mountings
The seats shown below are fitted with ISOFIX compliant mountings:
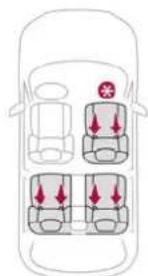
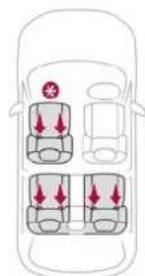
* The electrically-adjusted front passenger seat does not have ISOFIX mountings.
The mountings comprise three rings for each seat, indicated by a marking:
- Two rings A, located between the vehicle seat backrest and cushion.
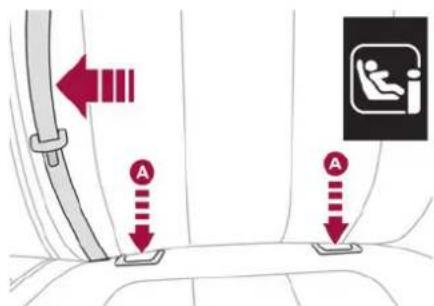
The 2 latches on ISOFIX child seats are secured to them.
- One ring B, located behind the seat, called the TOP TETHER, for attaching seats fitted with an upper strap.
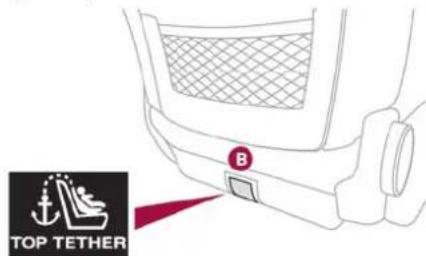
Front seat
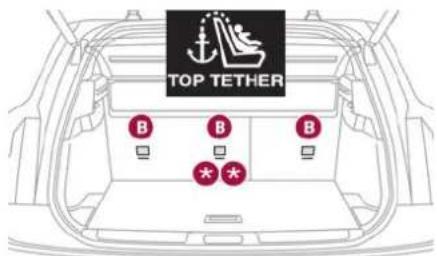
** Depending on country of sale.
Rear seats
This system prevents the child seat from tipping forwards in the event of a front impact.
This ISOFIX mounting system provides fast, reliable and safe fitting of the child seat in the vehicle.
To secure the child seat to the TOP TETHER:
▶ Remove and stow the head restraint before installing the child seat on this seat (refit it once the child seat has been removed).
▶ Pass the strap of the child seat behind the seat backrest, centring it between the openings for the head restraint rods.
▶ Secure the upper strap hook to ring B.
▶ Tighten the upper strap.
When fitting an ISOFIX child seat to the left-hand rear seat of the bench seat, before fitting the seat, first move the centre rear seat belt towards the middle of the vehicle, so as to avoid the seat interfering with the operation of the seat belt.
91 Safety

An incorrectly installed child seat in a vehicle compromises the child's safety in the event of an accident. Strictly observe the fitting instructions provided in the user guide supplied with the child seat.
i For information about the options for fitting ISOFIX child seats in your vehicle, refer to the summary table.
Recommended ISOFIX child seats
i Also consult the user guide from the child seat's manufacturer to find out how to install and remove the seat.
"RÖMER Baby-Safe and its ISOFIX base" (size category: E)
Group 0+: from birth to 13 kg

Installed "rearward facing" using an ISOFIX base which is attached to rings A. Only suitable for installation on the front passenger seat or the outer rear seats. The base has a support leg, height-adjustable, which rests on the vehicle's floor. This child seat can also be secured with a seat belt. In this case, only the shell is used and attached to the vehicle seat using the three-point seat belt.
"RÖMER Duo Plus ISOFIX" (size category: B1)
Group 1: from 9 to 18 kg
Suitable for forward-facing installation only. Attached to rings A and ring B, referred to as TOP TETHER, using an upper strap.
Only suitable for installation on the front passenger seat or the outer rear seats. The head restraint on the vehicle seat must be removed.
Three seat body angles: sitting, reclining, lying down.
This child seat can also be used in seat positions not equipped with ISOFIX mountings. In this case, it must be secured to the vehicle's seat by the three-point seat belt. Adjust the front seat of the vehicle so that the child's feet do not touch the backrest.

92
Safety
Locations for ISOFIX child seats
In accordance with European regulations, this table shows the options for installing ISOFIX child seats on vehicle seats fitted with ISOFIX mountings. In the case of universal and semi-universal ISOFIX child seats, the ISOFIX size category, determined by a letter from A to G, is indicated on the child seat next to the i-Size logo.
| Weight of the child/indicative age | |||||||||||||
| Under 10 kg (group 0) Up to about 6 months old | Under 10 kg Under 13 kg (group 0) (group 0+) Up to about 1 year old | From 9 to 18 kg (group 1) From about 1 to 3 years old | |||||||||||
| Type of ISOFIX child seat | Cot | "Rearward facing" | "Rearward facing" | "Forward facing" | |||||||||
| ISOFIX size category F G C D E C D A B B1 B2 B3 | |||||||||||||
| Seat Front | passenger airbag | ||||||||||||
| Row 1 (a) P | Passenger seat with manual adjustments (b) | Deactivated "OFF" | X IL IL IUF/IL | ||||||||||
| Activated "ON" | X | X | X | IUF/IL | |||||||||
| Passenger seat with electric adjustments | Deactivated "OFF" | Not ISOFIX | |||||||||||
| Activated "ON" | |||||||||||||
93 Safety

| Weight of the child/indicative age | |||||||||||||
| Under 10 kg (group 0) Up to about 6 months old | Under 10 kg Under 13 kg (group 0) (group 0+) Up to about 1 year old | From 9 to 18 kg (group 1) From about 1 to 3 years old | |||||||||||
| Type of ISOFIX child seat | Cot | "Rearward facing" | "Rearward facing" | "Forward facing" | |||||||||
| ISOFIX size category F G C D E C D A B B1 B2 B3 | |||||||||||||
| Seat Front | passenger airbag | ||||||||||||
| Row 2 Rear seat | X IL IL IUF/IL | ||||||||||||
| behind the driver's seat | |||||||||||||
| Rear seat behind the passenger seat | X IL IL IUF/IL | ||||||||||||
| Centre rear seat | Not ISOFIX | ||||||||||||

94
Safety
IUF: seat suitable for installing an Isofix Universal seat, "Forward facing", secured using the upper strap.
IL: seat suitable for installing an Isofix Semi-Universal seat which can be:
- "rearward facing" fitted with an upper strap or a support leg.
- "forward facing" fitted with a support leg.
- a carrycot fitted with an upper strap or a support leg.
X: seat not suitable for installing an ISOFIX seat or carrycot of the weight group indicated.
For information on securing the upper strap using the ISOFIX mountings, refer to the corresponding section.
(a) Refer to the current legislation in your country before installing a child at this seat position.
(b) Tilt the seat backrest to 45^ , then install the child seat. Straighten the backrest until it is in contact with the child seat's backrest.
i-Size child seats
i-Size child seats have two latches that are anchored to the two rings A.
These i-Size child seats also have:
- either an upper strap that is attached to ring B.
- or a support leg that rests on the vehicle floor, compatible with the approved i-Size seat position.
Their role is to prevent the child seat from tipping forward in the event of a collision.
For more information on the ISOFIX mountings, refer to the corresponding section.
In accordance with European regulations, this table indicates the options for installing i-Size child seats on seats in the vehicle fitted with ISOFIX mountings approved for i-Size.
| Seat Front passenger airbag i-Size restraint system | |||
| Row 1 (a) | Manually-adjustable passenger seat (b) | Deactivated "OFF" | i-U |
| Activated "ON" i-UF | |||
| Electrically-adjustable passenger seat Deactivated "OFF" Not i-Size | |||
| Activated "ON" Not i-Size | |||
| Row 2 | Rear outer seats | i-U | |
| Rear central seat | Not i-Size | ||
95 Safety

i-U: suitable for "forward facing" and "rearward facing" Universal i-Size restraint systems.
i-UF: only suitable for "forward facing" Universal i-Size restraint systems.
X: seat position not suitable for Universal i-Size restraint systems.
(a) Refer to the current legislation in your country before placing a child in this seat position.
(b) Tilt the seat backrest to 45^ , then install the child seat. Straighten the backrest until it makes contact with the child seat's backrest.
Manual child lock
The system prevents a rear door from being opened using its interior handle. The red control is located on the edge of each rear door (marked by a label).
Activation/Deactivation
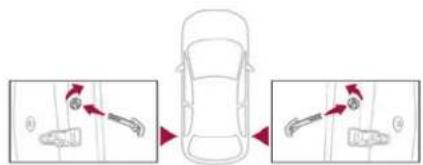
▶ To activate the child lock, turn the built-in key in the red control as far as possible:
- To the right on the left-hand rear door. - To the left on the right-hand rear door. ▶ To deactivate the child lock, turn the key in the opposite direction.
! Do not confuse the child lock control, which is red, with the back-up locking control, which is black.
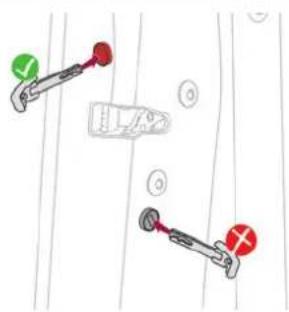
Electric child lock
(Depending on version) This control prevents the opening of the rear doors using their interior handles and the use of the rear electric windows.
Activation/Deactivation
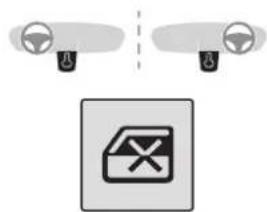
▶ With the ignition on, press this button to activate/deactivate the child lock. When the indicator lamp is on, the child lock is activated.
i With the child lock activated, it is still possible to open the doors from outside and to operate the rear electric windows from the driver's controls.
This system is independent and in no circumstances does it take the place of the central locking control. Check the status of the child lock each time you switch on the ignition. Always keep the electronic key with you when leaving the vehicle, even for a short time. In the event of a serious impact, the electric child lock is switched off automatically to permit the exit of the rear passengers.
Driving recommendations
▶ Observe the driving regulations and remain vigilant whatever the traffic conditions.
▶ Monitor your environment and keep your hands on the wheel to be able to react to anything that may happen any time.
▶ Drive smoothly, anticipate the need for braking and maintain a longer safety distance, especially in bad weather.
▶ Stop the vehicle before performing operations that require sustained attention (e.g. settings).
▶ During long trips, take a break every 2 hours.
Important!

Never leave the engine running in a closed space without sufficient ventilation.
Internal combustion engines emit toxic exhaust gases such as carbon monoxide. Danger of poisoning and death!

In very severe wintry conditions (temperature below -23°C), let the engine for 4 minutes before moving off, to ensure correct operation and durability of the mechanical components of your vehicle (engine and gearbox).

Never drive with the parking brake applied. Risk of overheating and aging the braking system!
! Never park the vehicle and never leave the engine running on a flammable surface (e.g. dry grass, dead leaves). The vehicle exhaust system is very hot, even several minutes after the engine stops. Risk of fire!
Never drive on surfaces covered with vegetation (e.g. tall grass, accumulated dead leaves, crops, debris) such as a field, a country lane overgrown with bushes or a grassy verge.
This vegetation could come into contact with the vehicle's exhaust system or other systems which are very hot. Risk of fire!
! Make sure you do not leave any item in the passenger compartment which could act like a magnifying glass under the effect of the sun's rays and cause a fire. Risk of fire or damage to interior surfaces!
Never leave the vehicle unattended, with the engine running. If you have to leave your vehicle with the engine running, apply the parking brake and put the automatic gearbox into position N or P.

Never leave children inside the vehicle unsupervised.
• E-TENSE 4X4 360
1 Repeated hard braking in this vehicle can generate loud banging noises which are completely normal.
Continue driving but with lighter braking so that the braking system can cool down.
The performance of the braking system remains unaffected.
On flooded roads
We strongly advise against driving on flooded roads, as this could cause serious damage to the internal combustion engine or electric motor, the gearbox and the electrical systems of the vehicle.
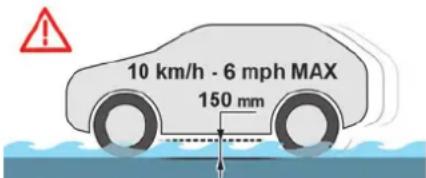
If the vehicle absolutely must drive through a flooded section of road:
▶ Check that the depth of the water does not exceed 15 cm, taking account of waves that might be generated by other users.
▶ Deactivate the Stop & Start function.
For rechargeable hybrid engines, place the mode selector in 4WD position (depending on version).
▶ Drive as slowly as possible without stalling. In all cases, do not exceed 6 mph (10 km/h).
Do not stop and do not switch off the engine. On leaving the flooded road, as soon as safety conditions allow, make several light brake applications to dry the brake discs and pads. If in doubt about the state of your vehicle, contact a dealer or a qualified workshop.
Towing
! Driving with a trailer places greater demands on the towing vehicle and particular care must be taken.
i Do not exceed the maximum towable weights.
At altitude: reduce the maximum load by 10% per 1,000 metres of altitude; the lower air density at high altitudes decreases engine performance.
! New vehicle: do not tow a trailer until the vehicle has driven at least 620 miles (1,000 kilometres).
If the outside temperature is high, let the engine idle for 1 to 2 minutes after the vehicle comes to a stop, to help it to cool.
Before setting off
Nose weight
▶ Distribute the load in the trailer so that the heaviest items are as close as possible to the axle and the nose weight (at the point where it joins your vehicle) approaches the maximum permitted without exceeding it.
Tyres
▶ Check the tyre pressures of the towing vehicle and of the trailer, observing the recommended pressures.
Lighting
▶ Check the electrical signalling on the trailer and the headlamp beam height of your vehicle.
If a genuine towing device is used, the rear parking sensors will be deactivated automatically to avoid the audible signal.
When driving
Cooling
Towing a trailer uphill causes the coolant temperature to increase. The maximum towable load depends on the gradient and the exterior temperature. The fan's cooling capacity does not increase with engine speed.
▶ Reduce speed and lower the engine speed to limit the amount of heating produced.
▶ Pay constant attention to the coolant temperature.
If this warning lamp and the STOP warning lamp come on, stop the
vehicle and switch off the engine as soon as possible.
Brakes
Using the engine brake is recommended to limit the overheating of the brakes. Braking distances are increased when towing a trailer.
Side wind
Bear in mind that the vehicle will be more susceptible to wind when towing.
Anti-theft protection
Electronic immobiliser
The keys contain a code, which must be recognised by the vehicle before starting is possible.
If the system malfunctions, indicated by the display of a message, the engine will not start. Contact a dealer.
Starting/switching off the engine
i The electronic key must be present in the passenger compartment. If the electronic key is not detected, a message is displayed.
Move the electronic key so that the engine can be started or switched off. If there is still a problem, refer to the "Key not detected - Back-up starting or Back-up switch-off" section.
I Illuminated animations of the "START/ STOP" button indicate the presence or absence of the electronic key in the passenger compartment.
Starting
▶ Select mode P or N on the automatic gearbox, then depress the brake pedal.
▶ Press the "START/STOP" button while maintaining pressure on the pedal until the engine starts.
Diesel engines
In negative temperatures and/or when the engine is cold, starting takes place only after the preheating warning lamp goes out.

If this warning lamp comes on after pressing the "START/STOP" button:
▶ Keep the pedal fully depressed and do not press the "START/STOP" button again until the engine is running.
In all circumstances, if one of the starting conditions is not met, a message is displayed. In some circumstances, a message indicates that it is necessary to turn the steering wheel while pressing the "START/STOP" button to assist unlocking of the steering column.
- Petrol engines
1 With Petrol engines, after a cold start, pre-heating the catalytic converter can cause noticeable engine vibrations, for anything up to 2 minutes (accelerated idle speed).
Starting rechargeable hybrid vehicles
▶ Fully depress the brake pedal and press the START/STOP button for approximately 2 seconds.

▶ Keep your foot on the pedal until this indicator lamp comes on, indicating the tion of the rechargeable hybrid system (med by an audible signal).

To exit Park mode, wait for the READY indicator lamp to come on.
By default, the system starts in Electric mode. Depending on certain parameters (battery charge level or outside temperature), the system determines whether it is necessary to start the petrol engine.
It is possible to change the driving mode at any time using the mode selector.
When the vehicle starts in electric mode, it makes no noise. Pay particular attention to pedestrians and cyclists who may not hear the vehicle coming despite the pedestrian horn.
Switching off
▶ Immobilise the vehicle using the parking brake.
▶ Select mode P on the automatic gearbox.
▶ Press the "START/STOP" button.
For rechargeable hybrid vehicles, before leaving the vehicle, check that the READY indicator lamp is switched off.
In some circumstances, it is necessary to turn the steering wheel to lock the steering column.
On certain versions with an automatic gearbox (EAT8), the steering column does not lock, but the gearbox locks in mode P.

If the vehicle is not immobilised, the engine will not stop.

With the engine off, the braking and steering assistance systems are also cut risk of loss of control of the vehicle!

Never leave your vehicle with the electronic key still inside.
Switching on the ignition without starting the engine
With the electronic key in the passenger compartment, pressing the "START/STOP" button, without depressing any of the pedals, allows the ignition to be switched on without starting the engine.
▶ Press this button again to switch off the ignition and allow the vehicle to be locked.
Key not detected
Back-up starting
A back-up reader is fitted to the steering column, to enable the engine to be started if the system fails to detect the key in the recognition zone, or if the battery in the electronic key is flat.
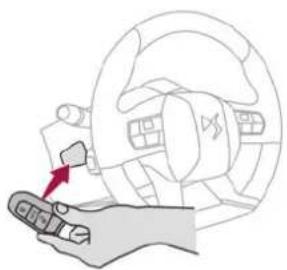
natural_image
Illustration of a hand using a steering wheel to interact with a car (no text or symbols present)▶ Place and hold the remote control against the back-up reader.
▶ Select mode P on the automatic gearbox, then depress the brake pedal.
▶ Press the "START/STOP" button. The engine starts.
Back-up switch-off
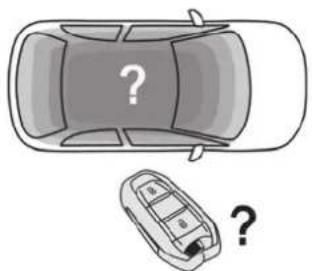
natural_image
Top-down illustration of a car with a question mark on the roof and a small mobile phone with question marks below (no text or symbols)If the electronic key is not detected or is no longer in the recognition zone, a message appears in the instrument panel when closing a door or trying to switch off the engine.
▶ To confirm the instruction to switch off the engine, press the "START/STOP" button for approximately 5 seconds.
In the event of a fault with the electronic key, contact a dealer or a qualified workshop.
Emergency switch-off
In case of emergency only, the engine can be switched off without conditions (even when driving).
▶ Press the "START/STOP" button for about 5 seconds.
In this case, the steering column locks as soon as the vehicle stops.
Electric parking brake
In automatic mode, this system applies the parking brake when the engine is switched off and releases it when the vehicle moves off.
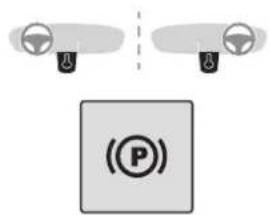
At any time, with the engine running:
▶ To apply the parking brake, briefly pull the control.
▶ To release it, briefly push the control while pressing the brake pedal.
Automatic mode is activated by default.
This automatic operation can be deactivated in certain situations.
Indicator lamp
(P) This indicator lamp comes on both on the instrument panel and on the control to confirm that the parking brake has been applied, accompanied by display of the message "Parking brake applied".
The indicator lamp goes out to confirm the release of the parking brake, accompanied by the display of the message "Parking brake released".
The indicator lamp flashes in response to a manual request to apply or release the brake.

In the event of a battery failure, the electric parking brake will not operate.
As a safety measure, if the parking brake is not applied, immobilise the vehicle by placing the supplied chock against one of the wheels. Contact a dealer or a qualified workshop.
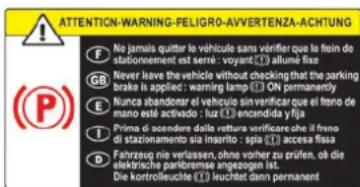

Before leaving the vehicle, check that the parking brake is applied: the parking
brake indicator lamps on the instrument panel and the control must be on fixed.
If the parking brake is not applied, there is an audible signal and a message is displayed on opening the driver's door.

Never leave a child alone inside the vehicle, as they could release the parking ke.
When the vehicle is parked: on a steep slope, heavily loaded or during towing
Turn the wheels toward the pavement and select mode P on the automatic gearbox.
When towing, the vehicle is approved for parking on slopes of up to 12%.
Manual operation
Manual release
With the ignition on or engine running:
▶ Press the brake pedal.
▶ While maintaining pressure on the brake pedal, briefly push the control.
i If the brake pedal is not depressed, the parking brake is not released and a message is displayed.
Manual application
With the vehicle stationary:
▶ Briefly pull the control.
The control indicator lamp flashes to confirm the application request.
Automatic operation
Automatic release
First ensure that the engine is running and that the driver's door is closed.
The electric parking brake gradually releases automatically as the vehicle moves off.
▶ Depress the brake pedal.
▶ Select mode D, M or R.
▶ Release the brake pedal and depress the accelerator pedal.
• If the brake does not release
I automatically, check that the front doors are fully closed.
When stationary with the engine running,
do not depress the accelerator pedal unnecessarily. Risk of parking brake release.
Automatic application
With the vehicle stationary, the parking brake is applied automatically when the engine is switched off.
! It is not applied automatically if the engine stalls or enters STOP mode with Stop & Start.
i In automatic mode, the parking brake can be manually applied or released at any time using the control.
Special cases
Immobilising the vehicle with the engine running
To immobilise the vehicle with the engine running, briefly pull the control.
Parking the vehicle with the brake released
In very cold conditions (ice), applying the parking brake is not recommended. To immobilise the vehicle, place the chock against one of the wheels.
i Mode P is automatically selected when the ignition is switched off. The wheels are blocked. For more information on Free-wheeling, refer to the corresponding section.
If you open the driver's door while mode N is engaged, an audible signal will sound and mode P will be engaged. The audible signal stops when the driver's door is closed.
Deactivating automatic operation
In some situations, for example when it is extremely cold or when towing (e.g. caravan, breakdown), it may be necessary to deactivate automatic operation of the system.
▶ Start the engine.
▶ Use the control to apply the parking brake, if it is released.
▶ Take your foot fully off the brake pedal.
▶ Keep the control pushed in the release direction for 10 to a maximum of 15 seconds.
▶ Release the control.
▶ Depress and hold the brake pedal.
▶ Pull the control in the application direction for 2 seconds.
AUTO (P) OFF This indicator lamp on the instrument panel comes on to confirm deactivation of
the automatic functions.
▶ Release the control and the brake pedal.
From this point onwards, only the manual functions, using the control, allow the parking brake to be applied and released.
▶ Follow this procedure again to reactivate automatic operation (confirmed by the indicator lamp on the instrument panel going out).
Emergency braking
If depressing the brake pedal fails to provide effective braking or in exceptional circumstances (e.g. driver unwell, assisted driving), the vehicle can be braked by sustained pulling on the electric parking brake control. Braking continues for as long as the control is kept pulled, and ceases when the control is released.
The ABS and DSC systems stabilise the vehicle during emergency braking. If emergency braking malfunctions, the message
"Parking brake fault" will be displayed on the instrument panel.
(ABS) If the ABS and DSC systems malfunction, indicated by lighting one or both warning lamps on the instrument panel, the vehicle's stability is no longer ensured
In this case, ensure the vehicle's stability by successive and repeated "pull-release" actions on the electric parking brake control until the vehicle comes to a complete stop.
Automatic gearbox
Automatic 8-speed gearbox with a push selector. It also offers a manual mode with gear changes via control paddles located behind the steering wheel.
Gearbox selector positions
P. Park
For parking the vehicle: the front wheels are blocked.
R. Reverse gear
N. Neutral
For moving the vehicle with the ignition off, or to allow it to free-wheel.
For more information on Changing to free-wheeling, refer to the corresponding section.
D. Driving in automatic mode
The gearbox manages gear changes according to the style of driving, the road profile and the vehicle load.
M. Driving in manual mode
The driver changes gear using the steering-mounted controls.
Push selector
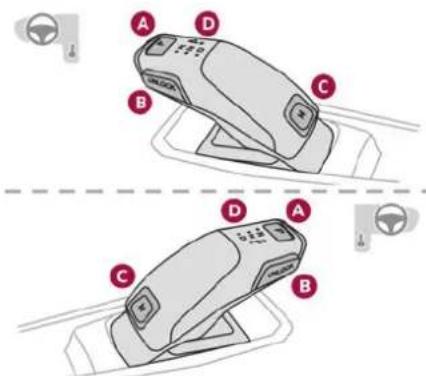
A. Button P
To put the gearbox into Park mode.
B. Unlock button
To unlock the gearbox and come out of P or to change to R, with the foot on the brake pedal. Press and hold this button before pushing the selector.
C. Button M
To change from mode D to permanent manual mode.
D. Gearbox state indicator lamps (R, N, D)
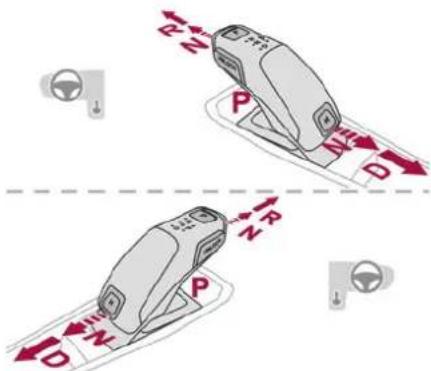
▶ Move the selector by pressing it forwards (N or R) or rearwards (N or D) once or twice, passing the point of resistance if necessary.
The push selector returns to its initial position when released.
For example, to change from P to R, while pressing Unlock, push forward twice without crossing the point of resistance or push once crossing the point of resistance:
- In the first case, the gearbox goes from P to N, then from N to R.
- In the second case, the gearbox goes directly from P to R.
Steering-mounted controls
In mode M or D, the steering-mounted control paddles can be used to change gear manually. They cannot be used to select neutral or to engage or disengage reverse gear.
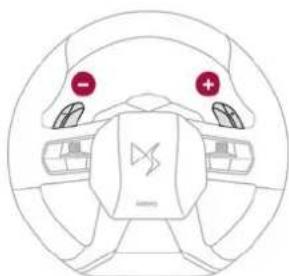
natural_image
Top-down view of a car dashboard with steering wheel and head indicators (no text or symbols)▶ Pull the "+" or "-" paddle towards you and release to shift up or down a gear, respectively.
Information displayed on the instrument panel
When the ignition is switched on, the gearbox status is displayed on the instrument panel:
P: Park.
R: Reverse.
N: Neutral.
D1...D8 : Automatic mode.
M1...M8: Manual mode.
- : Instruction not processed in manual mode. If the driver's door is opened with the ignition on, a message is displayed, prompting you to set the gearbox to mode P.
Operation
With the engine running, if you need to depress the brake pedal and/or the Unlock button in order
to change modes, an alert message is displayed on the instrument panel. Only appropriate mode change instructions are validated.
! With the engine running and the brakes released, if R, D or M is selected, the vehicle moves off, even without pressing the accelerator pedal.
! Never press the accelerator and brake pedals at the same time. Risk of damaging the gearbox! If the battery is flat, you must place the chocks supplied with the vehicle tools against one of the wheels to immobilise the vehicle.
Unlocking the gearbox
- From mode P:
▶ Fully depress the brake pedal.
▶ Press the Unlock button.
▶ While continuing to press the brake pedal and the Unlock button, select another mode.
- From neutral N, at a speed below 3 mph (5 km/h):
▶ Fully depress the brake pedal.
▶ While continuing to depress the brake pedal, select another mode.
Engaging reverse gear
▶ Slow down until you come to a stop.
▶ Depress the brake pedal, then press the Unlock button.
▶ While continuing to press, select mode R.
Permanent manual mode
Entering the mode:
▶ With mode D initially selected.
▶ Press button M; the green indicator lamp in the button comes on.
Exiting the mode:
▶ Push forwards once to return to D.
or
▶ Press button M; the indicator lamp in the button goes off.
Switching off the ignition
To switch off the ignition, the vehicle must be stationary.
Free-wheeling
For more information on Free-wheeling, refer to the corresponding section.
If you open the driver's door while mode N is engaged, an audible signal will sound. It will stop when you close the driver's door again.
Special aspects of automatic mode
The gearbox selects the gear that provides optimal performance based on ambient temperature, road profile, vehicle loading and driving style.
For maximum acceleration, press the accelerator fully down (kick-down). The gearbox changes
down automatically or holds the selected gear until the maximum engine speed is reached. Steering mounted controls allow the driver to temporarily select a gear, if the vehicle speed and engine speed conditions permit.
Special aspects of manual mode
The gearbox only changes from one gear to another if the vehicle speed and engine speed conditions permit.
Starting the vehicle
From mode P:
▶ Fully depress the brake pedal.
▶ Start the engine.
▶ Maintaining pressure on the brake pedal, press the Unlock button.
▶ Push once or twice rearwards to select the automatic mode D, or forwards to engage reverse R.
From neutral N:
▶ Fully depress the brake pedal.
▶ Start the engine.
▶ Maintaining pressure on the brake pedal, push rearwards to select the automatic mode D, or forwards, while pressing the Unlock button to engage reverse R.
Then, from D or R:
▶ Release the brake pedal.
▶ Accelerate gradually to automatically release the electric parking brake.
The vehicle moves off immediately.
! Never try to start the engine by pushing the vehicle.
Switching the vehicle off
Regardless of the current gearbox mode, mode P is immediately engaged automatically when the ignition is switched off.
However, in mode N, mode P will be engaged after a delay of 5 seconds (time to enable free-wheeling mode).
Check that mode P has been engaged and that the electric parking brake was applied automatically; if not, apply it manually.

The corresponding indicator lamps on the gear selector and the electric parking
brake control must be on, as well as the indicator lamps on the instrument panel.
Gearbox malfunction

This warning lamp comes on, accompanied by an audible signal and the display of a
message.
Visit a dealer or a qualified workshop. Do not drive faster than 62 mph (100 km/h), keeping to the speed limit.
Switching of the gearbox to back-up mode
Mode D locks in third gear.
The paddles on the steering wheel do not work and mode M is no longer accessible.
You may feel a significant jolt on engaging reverse gear. This will not damage the gearbox.
Selector malfunction
Minor malfunction

This warning lamp comes on, accompanied by the display of a message and an audible
signal.
Drive carefully.
Visit a dealer or a qualified workshop.
In some cases, the selector indicator lamps may no longer come on, but the gearbox state is still displayed on the instrument panel.
Major malfunction

This warning lamp comes on, accompanied by the display of a message.
! You must stop the vehicle. Stop as soon as it is safe to do so and switch off the ignition.
Contact a dealer or a qualified workshop.
e-EAT8 electric automatic gearbox (Rechargeable hybrid)
Automatic 8-speed gearbox with a push selector and regenerative braking function.
With the exception of manual mode and regenerative braking, the operation is identical to that of other EAT8 gearboxes.
For more information on the Operation or the Malfunctions of the EAT8 gearbox, refer to the corresponding sections.
Gearbox selector positions
P.Car park
For parking the vehicle: the front wheels are blocked.
R. Reverse gear
N. Neutral
For moving the vehicle with the ignition off: in certain car washing machines, when towing the vehicle, etc.
D/B. Automatic forward gear (D) or automatic forward gear with regenerative braking (B) The gearbox manages gear changes according to the style of driving, the road profile and the vehicle load. With the regenerative braking function activated, the gearbox also controls braking when the accelerator pedal is released.
Push selector
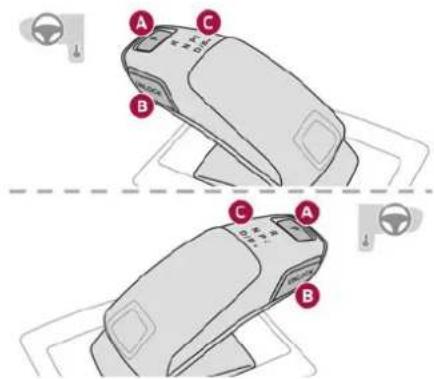
A. Button P
To put the gearbox into Park mode.
B. Unlock button
To unlock the gearbox and come out of P or to change to R, with the foot on the brake pedal. Press and hold this button before pushing the selector.
C. Gearbox selector indicator lamps (R, N, D/B)
! To exit Park mode, wait for the READY indicator lamp to come on.
Displays in the instrument panel
When the ignition is switched on, the status of the gearbox is displayed in the instrument panel:
P: park.
R: reverse.
N: neutral.
D1 to D8: automatic forward gear.
B1 to B8: automatic forward gear with regenerative braking function activated. In all-electric driving, the gear engaged is not indicated.
The state of the gearbox remains displayed in the instrument panel for a few seconds after switching off the ignition.
Regenerative braking (Brake function)
The regenerative braking function emulates engine braking, slowing the vehicle with no need to depress the brake pedal. When the driver releases the accelerator pedal, the vehicle slows down more quickly.
The energy recovered when the accelerator pedal is released is used to partially recharge the traction battery.
i This partial recharging has no effect on the charge level indicator.
! The resulting deceleration of the vehicle does not cause the brake lamps to come on.
From mode D/B, move the push selector backwards to activate/deactivate the function. D on the instrument panel is replaced with B. The state of the function is not saved when the ignition is switched off.
In some situations (e.g. battery full, extreme temperatures), the amount of regenerative braking may be temporarily limited, resulting in less deceleration. The driver must remain alert to traffic conditions and must always be ready to use the brake pedal.
i Regenerative braking using the brake pedal
Energy recovery can also be produced by depressing the brake pedal in order to partially recharge the traction battery, without affecting the charge level indicator.
DS ACTIVE SCAN SUSPENSION
This system adapts the vehicle suspension according to the road condition and profile, the vehicle load, the driving style and the selected driving mode.
Driving

The system uses a computer and sensors, which determine the optimal level of shock absorption to be applied to each shock absorber. The system is also associated with a camera, located at the top of the windscreen, constantly monitoring the road condition. Based on the information transmitted by the camera, the system anticipates possible road defects. The operation of the system depends on the driving mode selected (depending on equipment). For more information on the Driving modes, please refer to the corresponding section.
Malfunction

In the event of a malfunction, this warning lamp lights up on the instrument panel.
Have it checked by a dealer or a qualified workshop.
Driving modes
The driving modes available depend on the engine and equipment of the vehicle. Driving modes are selected using the following control:
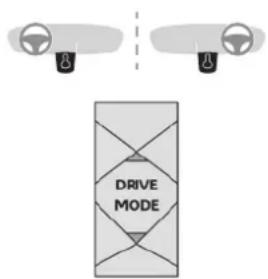
▶ Press the control to display the modes on the instrument panel.
▶ Press the control again to change mode. The selected mode is activated immediately.
With petrol / Diesel engines
Whenever the ignition is switched on, Normal driving mode is selected by default.
Eco
To reduce fuel consumption by optimising the operation of the heating and air conditioning and, depending on version, accelerator, automatic gearbox, gear shift indicator. Free-wheeling in Eco mode: depending on version, with the EAT8 gearbox, switching into "free-wheeling" is encouraged to slow the vehicle down without using engine braking. You can save fuel by taking your foot gradually and fully off the accelerator pedal in anticipation of slowing down.
Comfort
To achieve more comfortable driving on poor road surfaces, over speed humps and sleeping policemen or on long journeys. In this mode, DS ACTIVE SCAN SUSPENSION utilises additional information coming from the multifunction camera (early detection of road type and road surface condition).
Normal
To restore the default settings.
Sport
To obtain more dynamic driving with action on the power steering, DS ACTIVE SCAN SUSPENSION, accelerator and gear changes (with an automatic gearbox), acoustic ambience of the engine and the possibility of displaying the vehicle's dynamic settings on the instrument panel.
Manual
Permanent Manual mode with an automatic gearbox.
This manual mode is accessed via the button M of the push selector.
To change gears manually using the control paddles on the steering wheel.
For more information on Automatic gearbox (EAT8), refer to the corresponding section.

With Rechargeable hybrid engines
Whenever the ignition is switched on, Electric driving mode is selected by default.
Electric
Allows driving using 100% electrical energy. The maximum speed is approximately 84 mph (135 km/h).
When starting the vehicle, if the conditions do not allow the activation or retention of Electric mode, the message "Electric mode currently unavailable" is displayed on the instrument panel. The vehicle automatically changes to Hybrid mode.
If an LED comes on under the interior rear view mirror, visible from outside the vehicle, this confirms that you are driving in Electric mode (depending on country of sale).
The LED can be deactivated by inserting the tip of a paper clip or other similar object into the hole located underneath the interior rear view mirror.
Conditions of activation
- Adequate battery charge level. Charging the vehicle after each drive is therefore recommended. Electric mode is available as long as there is power left in the battery. - Outside temperature between approximately -5°C and 45°C.
Manually exiting the mode
▶ Fully depress the accelerator pedal, or ▶ Select another mode.
In case of non-use of the vehicle for a long period (several months), a restart of the petrol engine may occur even if the battery is charged.
i Depending on equipment, Electric mode is combined with Normal mode of the DS ACTIVE SCAN SUSPENSION function. For more information on DS ACTIVE SCAN SUSPENSION, refer to the corresponding section.
In the event of multiple starts of the internal combustion engine without a sufficient rise in temperature, Electric mode may be temporarily unavailable (natural phenomenon of dilution of fuel in oil). The message "Electric mode unavailable: automatic operation in progress" then appears on the instrument panel. To regain normal electrical operation, drive approximately 50 miles (80 km) in "motorway" conditions or approximately 125 miles (200 km) in urban conditions. This phenomenon does not cause any mechanical or electrical damage. It can occur several times in the life of the vehicle.
Hybrid
To optimise the vehicle's fuel consumption by managing the alternating or simultaneous operation of the two types of engine, depending on driving conditions and driving style. In Hybrid mode, it is possible to drive in 100% electric mode if the battery charge level is sufficient and acceleration requirements are moderate.
Depending on equipment, Hybrid mode is combined with Normal mode of the DS ACTIVE SCAN SUSPENSION function. For more information on DS ACTIVE SCAN SUSPENSION, refer to the corresponding section.
Sport
To obtain more dynamic driving in order to benefit from the maximum performance of the vehicle. Electric power is used to supplement the petrol engine as long as there is energy left in the battery.
Depending on equipment, Sport mode is combined with Sport mode of the DS ACTIVE SCAN SUSPENSION function. For more information on DS ACTIVE SCAN SUSPENSION, refer to the corresponding section.
E-TENSE 4X4 360
The electrical energy is used to supplement the petrol engine or recharge the traction battery, depending on the type of driving.
This mode is optimised with specific settings which make the most of the dynamic performance of this vehicle (power steering, accelerator pedal sensitivity, ESC).
Comfort
(Depending on equipment)
Combines Hybrid mode and Comfort mode of the DS ACTIVE SCAN SUSPENSION function.
To favour flexible shock absorption improving driving comfort on poor surfaces.
i For more information on DS ACTIVE SCAN SUSPENSION, refer to the corresponding section.
4WD (4-wheel drive)
(Depending on version)
Improves the vehicle's grip at low and moderate speeds by driving all 4 wheels continuously. 4WD mode (4-wheel drive) is especially suited to driving on snow-covered roads and difficult terrain (e.g. mud, sand) as well as ford crossings, at moderate speed.
Depending on the driving conditions and the battery charge level, 4WD mode may be 100% electric.
If the system does not detect a situation of wheel slipping or poor grip after 300 metres of driving, it switches to Hybrid mode.
i This mode will be even more effective if the vehicle is fitted with suitable tyres, such as winter tyres.
The grip can be improved up to 84 mph (135 km/h) using the electric motors; above this speed, the vehicle is driven by the front wheels only.
Hill start assist
This system keeps the vehicle briefly stationary (for approximately 2 seconds) when making a hill start, while you transfer your foot from the brake pedal to the accelerator pedal.
The system is only active when:
- The vehicle is completely stationary, with your foot on the brake pedal.
- Certain slope conditions are met.
- The driver's door is closed.
Do not leave the vehicle while it is being held temporarily by hill start assist.
If someone needs to get out of the vehicle with the engine running, apply the parking brake manually. Then check that the parking brake indicator lamp and the P indicator lamp in the electric parking brake control are on fixed.
! The hill start assist function cannot be deactivated. However, using the parking
brake to immobilise the vehicle interrupts its operation.
Operation
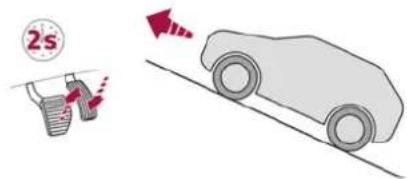
Facing uphill, with the vehicle stationary, the vehicle is held for a short time when the driver releases the brake pedal:
- If mode D or M is selected on an automatic gearbox.
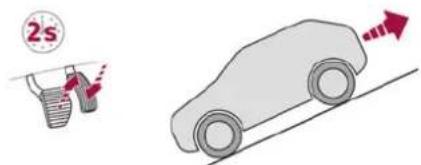
Facing downhill, with the vehicle stationary and reverse gear engaged, the vehicle is held for a short time when the driver releases the brake pedal.
Malfunction


If the event of a malfunction, these warning lamps light up on the
instrument panel, accompanied by the display of a message.
Have it checked by a dealer or a qualified workshop.
Gear shift indicator
(Depending on engine)
This system is designed to reduce fuel consumption by recommending the most suitable gear.
Operation
Depending on the driving situation and the vehicle's equipment, the system may recommend skipping one or more gears.
Gear engagement recommendations are not to be considered mandatory. Indeed, the configuration of the road, the traffic density and safety remain determining factors when choosing the best gear. Therefore, the driver remains responsible for deciding whether or not to follow the system's advice.
The system cannot be deactivated.

The system is only active in mode M of the
automatic gearbox.

The information appears on the instrument panel, in the form of an arrow and the
recommended gear.

The system adapts the gear change instructions according to the driving
conditions (e.g. slope, load) and driving style
(e.g. power demand, acceleration, braking).
The system never suggests:
- engaging first gear.
- engaging reverse gear.
Stop & Start
The Stop & Start function puts the engine temporarily into standby - STOP mode - during phases when the vehicle is stationary (e.g. red lights, traffic jams). The engine automatically restarts - START mode - as soon as the driver indicates the intention of moving off again.
Primarily designed for urban use, the function is intended to reduce fuel consumption and exhaust emissions as well as the noise level when stationary.
The function does not affect the functionalities of the vehicle, in particular the braking.
Deactivation/Reactivation
By default, the function is activated when the ignition is switched on.

It is configured in the ADAS touch screen application.
or
Direct access to the Shortcuts for driving aids.
The display of a message on the instrument panel confirms the change of state.
If the function is deactivated while the engine is in STOP mode, it will restart immediately.
Associated indicator lamps

Function activated: engine on standby
(STOP mode)
Function deactivated or malfunction

Opening the bonnet
Before doing anything under the bonnet, deactivate the Stop & Start system to avoid any risk of injury caused by the engine restarting automatically.

STOP & START SYSTEM


Driving on flooded roads
! Before entering into a flooded area, it is strongly recommended that you deactivate the Stop & Start system.
For more information on Driving
recommendations, particularly on flooded
roads, refer to the corresponding section.
Operation
Main conditions for operation
- The driver's door must be closed.
- The driver's seat belt must be fastened.
- The level of charge in the battery must be sufficient.
- The temperature of the engine must be within its nominal operating range.
- The outside temperature must be between 0^ and 35^ .
Putting the engine into standby (STOP mode)
The engine automatically enters standby mode as soon as the driver indicates their intention to stop:
- With an automatic gearbox, at speeds below 12 mph (20 km/h) on BlueHDi versions, or below 2 mph (3 km/h) on PureTech 130, 180 and 225 versions, when you depress the brake pedal or place the gear selector in mode N.
Time counter
A time counter adds up the time spent in standby during the journey. It is reset to zero every time the ignition is switched on.
Special cases:
The engine will not go into standby if the conditions for operation are not met and in the following cases:
- Steep slope (ascending or descending).
- Needed to maintain a comfortable temperature in the passenger compartment.
- Demisting active.

In these cases, this indicator lamp flashes for a few seconds, then goes off.
i After the engine has restarted, STOP mode is not available until the vehicle has reached a speed of 5 mph (8 km/h).
During parking manoeuvres, STOP mode is not available for a few seconds after coming out of reverse gear or turning the steering wheel.
Restarting the engine (START mode)
The engine automatically restarts as soon as the driver indicates the intention of moving off again:
- With the selector in mode D or M: with the brake pedal released.
- With the selector in mode N and the brake pedal released: with the selector at D or M.
- With the selector in mode P and the brake pedal depressed: with the selector at R, N, D or M.
- With reverse gear engaged.
Special cases
The engine will restart automatically if the conditions for operation are met again and in the following cases:
- Vehicle speed exceeds 2.5 mph (4 km/h) with PureTech 130, 180 and 225 versions, or 16 mph (25 km/h) with BlueHDi versions.

In these cases, this indicator lamp flashes for a few seconds, then goes off.
Malfunctions
In the event of a fault with the system, this warning lamp flashes for a few moments on the instrument panel, then remains on, accompanied by the display of a message.
Have it checked by a dealer or a qualified workshop.
The vehicle stalls in STOP mode
All of the instrument panel warning lamps come on if there is a fault.
▶ Switch off the ignition then start the engine again with the "START/STOP" button.

12 V battery
! The Stop & Start system requires a 12 V battery of specific technology and specification.
All work must be carried out only by a dealer or a qualified workshop.
Tyre under-inflation detection
This system alerts the driver if one or more tyres suffer a drop in pressure.
The alert is raised when the vehicle is moving, not when stationary.
It compares the information given by the wheel speed sensors with reference values, which must be reinitialised every time the tyre pressures are adjusted or a wheel changed.
It takes into account the last values stored during the reinitialisation request. It is therefore essential that the tyre pressure is correct during the operation. This operation is the driver's responsibility.

! The tyre under-inflation detection cannot, in any circumstances, replace the need for vigilance on the part of the driver. This system does not avoid the need to regularly check the tyre pressures (including the spare wheel), especially before a long journey.
Driving with under-inflated tyres, particularly in adverse conditions (heavy load, high speed, long journey):
- worsens road-holding.
- lengthens braking distances.
- causes premature wear of the tyres.
- increases energy consumption.
i The inflation pressures defined for the vehicle can be found on the tyre pressure label.
For more information on the Identification markings, refer to the corresponding section.
! Checking tyre pressures This check should be done monthly when the tyres are "cold" (vehicle stopped for 1 hour or after a journey of less than 6 miles (10 km) at moderate speeds).
Otherwise, add 0.3 bar to the pressures shown on the label.
i Snow chains The system does not have to be reinitialised after fitting or removing snow chains.
Under-inflation alert
This is signalled by the fixed illumination of this warning lamp, accompanied by an audible signal and, depending on equipment, the display of a message.
▶ Reduce speed immediately, avoid excessive steering movements and avoid sudden braking.
▶ Stop the vehicle as soon as it is safe to do so.
! The loss of pressure detected may not always cause visible deformation of the tyre.
Do not rely on just a visual check.
▶ Using a compressor, such as the one in the temporary puncture repair kit, check the pressures of all four tyres when cold.
▶ If it is not possible to carry out this check immediately, drive carefully at reduced speed.
In the event of a puncture, use the temporary puncture repair kit or the spare wheel (depending on equipment).
! Driving too slowly may not ensure optimum monitoring.
The alert is not immediately triggered in the event of a sudden loss of pressure or tyre blow-out. This is because analysis of the values read
by the wheel's speed sensors can take several minutes.
The alert may be delayed at speeds below 25 mph (40 km/h), or when adopting a sporty driving mode.
i The alert is kept active until the system is reinitialised.
Reinitialisation
The system must be reinitialised after any adjustment to the pressure of one or more tyres, and after changing one or more wheels.
! Before reinitialising the system, make sure that the pressures of the four tyres are correct for the conditions of use of the vehicle and conform to the values written on the tyre pressure label.
Check the pressures of the four tyres before performing the reinitialisation.
The system does not advise if a pressure is incorrect at the time of reinitialisation.
With the vehicle stationary, the system can be reinitialised in the Settings>Vehicle
touch screen application.
▶ Then select Safety > Tire Pressure Setup.
▶ Press YES to confirm.
The reinitialisation is confirmed by the display of a message and an audible signal.
Malfunction


In the event of a malfunction, these warning lamps light up on the
instrument panel.
A message appears, accompanied by an audible signal.
In this case, the tyre under-inflation monitoring function is no longer performed.
Have it checked by a dealer or a qualified workshop.

Non-standard or 'space-saver' spare wheel
The use of this type of spare wheel may suspend tyre pressure monitoring. In this case, the malfunction warning lamp comes on and disappears once the wheel has been replaced by one of uniform size (the same as the others), the pressure readjusted and the reinitialisation carried out.
Driving and manoeuvring aids - General recommendations

Driving and manoeuvring aids cannot, in any circumstances, replace the need for once on the part of the driver.
The driver must comply with the Highway Code, must remain in control of the vehicle in all circumstances and must be able to retake
control of it at all times. The driver must adapt the speed to climatic conditions, traffic and the state of the road.
It is the driver's responsibility to constantly monitor traffic conditions, assess the distance and relative speed of other vehicles, and anticipate their manoeuvres before using the direction indicator and changing lanes. These systems do not make it possible to exceed the laws of physics.

Driving aids
You should hold the steering wheel with both hands, always use the door and interior mirrors, always leave your feet close to the pedals and take a break every 2 hours.

Manoeuvring aids
1 The driver must always check the surroundings of the vehicle before and during the whole manoeuvre, in particular using the mirrors.

Radar(s)
The operation of the radar(s), along with any associated functions, may be affected by the accumulation of dirt (e.g. mud, ice), in poor weather conditions (e.g. heavy rain, snow), or if the bumpers are damaged.
If the front bumper is to be repainted, contact a dealer or a qualified workshop; certain types
of paint could interfere with the operation of the radar(s).
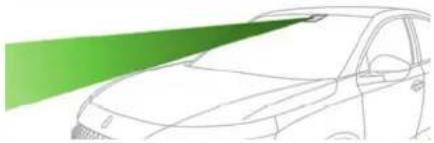
natural_image
Line drawing of a car with a green highlight on the side (no text or symbols)
Driving aids camera
This camera and its associated functions may be impaired or not work if the windscreen area in front of the camera is dirty, misty, frosty, covered with snow, damaged or masked by a sticker.
In humid and cold weather, demist the windscreen regularly.
Poor visibility (inadequate street lighting, heavy rain, thick fog, snowfall), dazzle (headlamps of an oncoming vehicle, low sun, reflections on a damp road, leaving a tunnel, alternating shade and light) can also impair detection performance.
In the event of a windscreen replacement, contact a dealer or a qualified workshop to recalibrate the camera; otherwise, the operation of the associated driving aids may be disrupted.

Other cameras
1 The images from the camera(s) displayed on the touch screen or on the instrument panel may be distorted by the terrain.
In the presence of areas in shade, or in conditions of bright sunlight or inadequate lighting, the image may be darkened and with lower contrast.
Obstacles may appear further away than they actually are.
Sensors
The operation of the sensors, as well as any associated functions, may be disrupted by noise pollution such as that emitted by noisy vehicles and machinery (e.g. lorries, pneumatic drills), by the accumulation of snow or dead leaves on the road or in the event of damaged bumpers and mirrors.
When reverse gear is engaged, an audible signal (long beep) indicates that the sensors may be dirty.
A front or rear impact to the vehicle can upset the sensors' settings, which is not always detected by the system: distance measurements may be distorted.
The sensors do not systematically detect obstacles that are too low (pavements, studs) or too thin (trees, posts, wire fences).
Certain obstacles located in the sensors' blind spots may not be detected or may no longer be detected during the manoeuvre.
Certain materials (fabrics) absorb sound waves: pedestrians may not be detected.
Maintenance
1 Clean the bumpers and door mirrors and the field of vision of the cameras regularly. When washing your vehicle at high pressure, direct the spray from at least 30 cm away from the radar, sensors and cameras.
Mats/Pedal trims
! The use of mats or pedal trims not approved by the Manufacturer may interfere with the operation of the speed limiter or cruise control.
To avoid any risk of jamming the pedals:
- Ensure that the mat is secured correctly.
- Never fit one mat on top of another.
Units of speed
1 Ensure that the units of speed displayed on the instrument panel (mph or km/h) are those for the country you are driving in. If this is not the case, when the vehicle is stationary, set the display to the required units of speed so that it complies with what is authorised locally.
In case of doubt, contact a dealer or a qualified workshop.
Shortcuts for driving aids
The full list of available driving aids can be found in the Functions tab.
Driving
Driving aids can be accessed directly to quickly activate/deactivate them.
By default, driving aids are already stored in the Shortcuts tab (e.g. Stop & Start, Lane keeping assist).
Other driving aids can be added or deleted from this tab.

It is configured in the ADAS>Functions touch screen application.

▶ Press the button corresponding to the driving assistance concerned:
- Full symbol: the function is added to the Shortcuts tab.
- Empty symbol: the function is deleted from the Shortcuts tab.
▶ Check the modification in the Shortcuts tab.
▶ Press this button to access directly to the Shortcuts tab.
Multiple deactivation
It is possible to deactivate several driver assistance functions simultaneously. This is done in two steps:

06
114
Driving
- First of all, the selection of all the functions that you want to deactivate.
- Secondly, the simultaneous deactivation of all these functions.
Selection of functions

▶ Press this button on the dashboard to display the ADAS tabs.

Select the Functions tab.

▶ Press this button to display the list of

available functions

elect the functions to deactivate (e.g. Stop
& Start, Lane Keeping Assist, Automatic Braking System (Active Safety Brake)).

▶ Press this button to return to the previous page.
The functions to deactivate are saved in the system.
Deactivation of these functions

+3s ▶ Press and hold this button on the dashboard.
All previously selected functions are deactivated until the vehicle is next restarted (confirmed by an audible signal).
Road signs recognition
! For more information, refer to the General recommendations on the use of driving and manoeuvring aids.
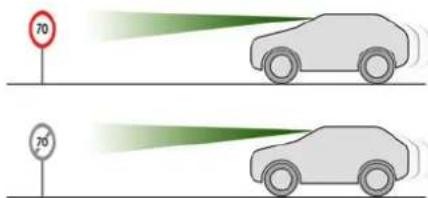
This system displays the maximum speed authorised locally on the instrument panel, using:
- Speed limit signs detected by the camera.
- Speed limit information from the navigation system's mapping.
- Signs indicating a shared traffic zone detected by the camera.
| Sign detected Suggested speed(calculated) | |
| Entry into a sharedtraffic zoneExample: | Without DS IRISSYSTEM10 mph or 20 km/h(depending onthe units on theinstrument panel)With DS IRIS SYSTEMDisplay of the speedin force in the countryyou are driving in. |
- Some supplementary traffic signs detected by the camera.
| Supplementary traffic sign detected | Display of the speed associated with the supplementary traffic sign |
| Speed limit when rainingExamples: | If the wiper control stalk is in the "intermittent wipe" or "automatic wipe" position (in order to activate the rain sensor):68 mph (110 km/h)(for example) |
| Speed limit when towing | If an approved towing device is fixed to the vehicle:56 mph (90 km/h)(for example) |
| Speed limit applicable over a certain distanceExample: 800m | 43 mph (70 km/h)(for example) |
| Speed limit for vehicles with a gross vehicle weight or gross train weight less than 3.5 tonnes | 56 mph (90 km/h) (for example) |
| Speed limit in case of snow Example: | If the outside temperature is below 3°C;19 mph (30 km/h) (for example) with a "snowflake" symbol |
| Speed limit at certain times of the day Example:16-18h | 19 mph (30 km/h) (for example) with a "clock" symbol |
! The units for the speed limit (mph or km/h) depend on the country you are driving in. This should be taken into account to ensure you observe the speed limit. For the system to work properly when changing countries, the speed unit of the instrument panel must match that of the country you are driving in.
Automatic sign reading is a driving aid system and does not always display the correct speed limits. The speed limit signs present on the road always take priority over those displayed by the system. The system is designed to detect signs that conform to the Vienna Convention on road signs.
i Specific speed limits, such as those for heavy goods vehicles, are not displayed. The display of the speed limit on the instrument panel is updated when passing a speed limit sign intended for cars (light vehicles).
Activation/Deactivation
By default, the system is automatically activated at every engine start.
It is configured in the ADAS touch screen application.
Information displayed on the instrument panel

- Detected speed limit indication or
- End of speed limit indication

The system is active but is not detecting speed limit information.

On detecting speed limit information, the system displays the value.

For a suggested maximum speed, the first time that the vehicle exceeds it by more than 3 mph (5 km/h) (e.g. 59 mph (95 km/h)), the speed is displayed and flashes for 10 seconds (depending on version).
115 Driving

Operating limits
The system does not take account of reduced speed limits, especially those imposed in the following cases:
- Poor weather (rain, snow).
- Atmospheric pollution.
- Towing.
- Driving with a space-saver type spare wheel or snow chains fitted.
- Tyre repaired using the temporary puncture repair kit.
- Young drivers.
The system may not display the speed limit if it does not detect a speed limit sign within a preset period and in the following situations:
- Road signs that are obstructed, non-standard, damaged or bent.
- Obsolete or incorrect maps.
Recommendation


In addition to Road signs recognition, the driver can select the speed displayed as a speed setting for the speed limiter or cruise control using the speed limiter or cruise control 'store' button.
For more information on the Speed limiter, Cruise control or Adaptive cruise control, refer to the corresponding sections.
Steering-mounted controls
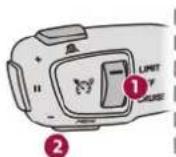
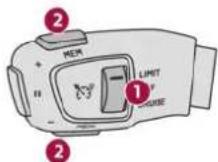
- Speed limiter/cruise control mode selection
- Memorise the speed setting
Information displayed on the instrument panel
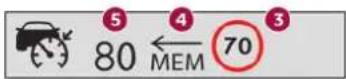
- Speed limit indication
- Speed memorisation prompt
- Current speed setting
Storing the speed setting


▶ Switch on the speed limiter/cruise control. The speed limiter/cruise control information is displayed.
Upon detecting a sign suggesting a new speed setting, the system displays the value and "MEM" flashes for a few seconds, prompting you to save it as a new speed setting.
If there is a difference of less than 6 mph (9 km/h) between the speed setting and the speed displayed by the Road signs recognition, the "MEM" symbol is not displayed.
Depending on the road conditions, several speeds may be displayed.
▶ Press button 2 once to save the suggested speed value.
A message is displayed, confirming the request.
▶ Press button 2 again to confirm and save the new speed setting.
The display then reverts to its previous state.
Extended Traffic Sign Recognition
! For more information, refer to the General recommendations on the use of driving and manoeuvring aids.


This additional system recognises these road signs and displays them on the instrument panel.
As you approach it, the symbol of the corresponding sign is displayed on the instrument panel. The selected display mode must be "Driving".
! The actual road signs always take priority over those displayed by the system. The signs must comply with the Vienna Convention on road signs.
Activation/Deactivation

It is configured in the ADAS touch screen application.
Speed limiter
! For more information, refer to the General recommendations on the use of driving and manoeuvring aids.

This system prevents the vehicle from exceeding the speed programmed by the (speed setting).
The speed limiter is switched on manually. The minimum speed setting is 19 mph (30 km/h). The speed setting remains in the system memory when the ignition is switched off.
Steering-mounted control
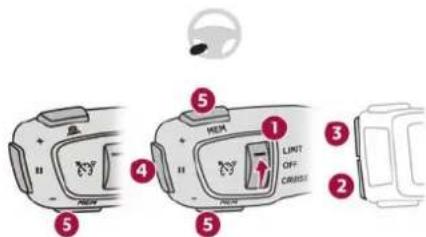
- ON (LIMIT position)/OFF
- Reduce the speed setting
- Increase the speed setting
- Pause/resume speed limiter with the speed setting previously stored
- Use the speed suggested by the Road signs recognition function (MEM display)
For more information on the Road signs recognition, refer to the corresponding section.
Information displayed on the instrument panel
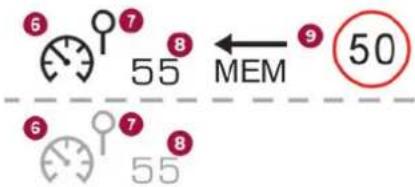
- Speed limiter on/pause status indication
- Speed limiter mode selection indication
- Speed setting value
- Speed suggested by the Road signs recognition function
Switching on/Pausing
▶ Turn thumbwheel 1 to the "LIMIT" position to select speed limiter mode; the function is paused.
▶ If the speed limit setting is suitable (most recent speed setting programmed in the system), press button 4-II to switch the speed limiter on.
▶ Pressing 4-II again temporarily pauses the function (pause).
When the speed setting remains below the vehicle's speed for a prolonged period of time, an audible warning is emitted.
Adjusting the limit speed setting
You do not have to switch the speed limiter on in order to set the speed.
To modify the limit speed setting based on the vehicle's current speed:
For steps of +/- 1 mph (1 km/h), briefly press 2-SET- or 3-SET+ repeatedly.
For steps of +/- 5 mph (5 km/h), press and hold 2-SET- or 3-SET+.
To modify the speed limit setting based on the speed suggested by the Road signs recognition function displayed on the instrument panel:
▶ Press 5-MEM once; a message is displayed, confirming the memorisation request.
▶ Press 5-MEM again to save the suggested speed.
The new speed setting value is displayed on the instrument panel.
Temporarily exceeding the speed setting
▶ Fully depress the accelerator pedal. The speed limiter is temporarily deactivated and the displayed speed setting flashes.
▶ Release the accelerator pedal to return to below the speed setting.
When exceeding the speed is not due to the driver's action (e.g. in case of a steep slope), an audible signal is triggered immediately.
On a steep descent or in the event of sharp acceleration, the speed limiter will not be able to prevent the vehicle from exceeding the speed setting. If necessary, apply the brakes to control your vehicle's speed.
When the vehicle speed returns to the speed setting level, the speed limiter operates again: the speed setting display becomes fixed again.
Switching off
▶ Turn the thumbwheel 1 to the "OFF" position: speed limiter information is no longer displayed.
Malfunction
In the event of a malfunction, dashes are displayed flashing and then fixed instead of the speed setting.
Have it checked by a dealer or a qualified workshop.
Cruise control - Specific recommendations
! The cruise control function does not guarantee compliance with the maximum authorised speed and the safety distance between vehicles, the driver remains responsible for their driving. In the interest of public safety, only use cruise control if the traffic conditions enable vehicles to drive at a steady speed and maintain an adequate safety distance.
Remain vigilant while cruise control is
activated. If you press and hold one of the speed setting modification buttons, your vehicle may change speed very abruptly. When descending a steep hill, the cruise control system cannot prevent the vehicle from exceeding the set speed. Brake if necessary to control the vehicle speed.
On steep climbs or when towing, the set speed may not be reached or maintained.
Exceeding the programmed speed setting You can temporarily exceed the speed setting by pressing the accelerator pedal (the programmed speed flashes).
To return to the speed setting, release the accelerator pedal (when the set speed is reached again, the displayed speed stops flashing).
! Operating limits Never use the system in the following situations:
- In an urban area with the risk of pedestrians crossing the road.
- In heavy traffic (except versions with the Stop & Go function).
- On winding or steep roads.
- On slippery or flooded roads.
- In poor weather conditions.
- In the event of restricted visibility for the driver.
- Driving on a speed circuit.
- Driving on a rolling road.
- When using a 'space-saver' type spare wheel.
- When using snow chains, non-slip covers or studded tyres.
Programmable cruise control
! For more information, refer to the General recommendations on the use of driving and manoeuvring aids and the Specific recommendations on cruise control.

This system automatically maintains the vehicle's speed at the value programmed driver (speed setting), without the use of celerator pedal.
Cruise control is switched on manually. It requires a minimum vehicle speed of 25 mph (40 km/h).
With an automatic gearbox, mode D or second gear or higher in mode M must be engaged.
i Cruise control remains active after changing gear on engines fitted with the Stop & Start function.
i Switching off the ignition cancels any speed setting.
Steering-mounted control
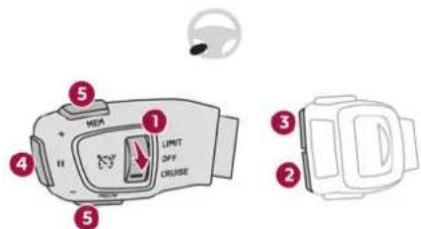
- ON (CRUISE position)/OFF
- Activate cruise control at the current speed/decrease speed setting
- Activate cruise control at the current speed/increase speed setting
- Pause/resume cruise control with the speed setting previously saved
- Use the speed suggested by the Road signs recognition function (MEM display)
For more information on the Road signs
recognition, refer to the corresponding section.
Information displayed on the instrument panel
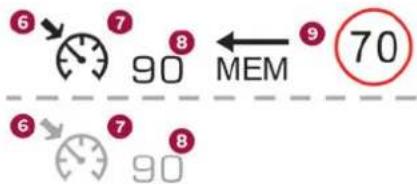
flowchart
graph TD
    A["6"] --> B["7"]
    B --> C["8"]
    C --> D["9"]
    D --> E["70"]
    E --> F["MEM"]
    F --> G["90"]
    G --> H["7"]
    H --> I["8"]
    I --> J["90"]
    style A fill:#f9f,stroke:#333
    style B fill:#f9f,stroke:#333
    style C fill:#f9f,stroke:#333
    style D fill:#f9f,stroke:#333
    style E fill:#f9f,stroke:#333
    style F fill:#f9f,stroke:#333
    style G fill:#f9f,stroke:#333
    style H fill:#f9f,stroke:#333
    style I fill:#f9f,stroke:#333
    style J fill:#f9f,stroke:#333
- Cruise control pause/resume
- Cruise control mode selection
- Speed setting value
- Speed suggested by the Road signs recognition function
Switching on/pausing
▶ Turn thumbwheel 1 to the "CRUISE" position to select cruise control mode; the function is paused.
▶ Press button 2-SET- or 3-SET+ to activate cruise control and save a speed setting when the vehicle has reached the desired speed; the vehicle's current speed is saved as the speed setting.
▶ Release the accelerator pedal.
▶ Pressing button 4-II temporarily pauses the function (pause).
▶ Pressing button 4-II again resumes operation of the cruise control (ON).
i Cruise control can also be paused temporarily:
- by pressing the brake pedal.
– automatically, if the electronic stability control (ESC) system is triggered.
Changing the cruise speed setting
The cruise control must be active.
To change the cruise speed setting, based on the vehicle's current speed:
For steps of +/- 1 mph (1 km/h), briefly press 2-SET- or 3-SET+ repeatedly.
For steps of +/- 5 mph (5 km/h), press and hold 2-SET- or 3-SET+.
! Pressing and holding 2-SET- or 3-SET+ results in a rapid change in the speed of the vehicle.
As a precaution, we recommend setting a cruise speed fairly close to the current speed of your vehicle, to avoid any sudden acceleration or deceleration of the vehicle.
To change the cruise speed setting using the speed suggested by the Road signs recognition function displayed on the instrument panel:
▶ Press 5-MEM once; a message is displayed, confirming the memorisation request.
▶ Press 5-MEM again to save the suggested speed.
The new speed setting value is displayed on the instrument panel.
Switching off
▶ Turn the thumbwheel 1 to the "OFF" position: the cruise control information disappears from the screen.
Malfunction
In the event of a malfunction, dashes are displayed flashing and then fixed instead of the speed setting.
Have it checked by a dealer or a qualified workshop.
DS DRIVE ASSIST
This system automatically adjusts the speed and corrects the trajectory of the vehicle, using Adaptive cruise control with Stop&Go function in conjunction with Lane Positioning Assist.
These two functions must be activated and in operation.
For more information on Adaptive cruise control and Lane Positioning Assist, refer to the corresponding sections.
! The system assists the driver by acting on the steering, acceleration and braking within the physical limits and capacities of the vehicle. Certain road infrastructure elements or vehicles in the surroundings may not be properly seen or may be poorly interpreted by
the camera and radar, resulting in an unexpected change in direction, a lack of steering correction and/or inappropriate management of acceleration or braking.
! Primarily designed for driving on main roads and motorways, this system only works with moving vehicles driving in the same direction as your vehicle.
Adaptive cruise control
! For more information, refer to the General recommendations on the use of driving and manoeuvring aids and the Specific recommendations of cruise control.
This system automatically maintains the vehicle speed at a value set by the driver (speed setting), while respecting a safety distance from the vehicle in front (target vehicle) previously set by the driver. The system automatically manages the acceleration and deceleration of the vehicle. With the Stop function, the system manages braking until the vehicle comes to a complete stop.
With the Stop & Go function, the system manages braking until the vehicle comes to a complete stop and restarts the vehicle.
! The brake lamps come on if the vehicle is slowed down by the system. It can be dangerous to drive if the brake lamps are not in perfect working order.

To do this, the system uses a camera fitted at the top of the windscreen and, depending on version, a radar fitted in the front bumper.
! Primarily designed for driving on main roads and motorways, this system only works with moving vehicles driving in the same direction as your vehicle.
If the driver activates the direction indicator to overtake a slower vehicle, cruise control may temporarily reduce the distance to the target vehicle to facilitate overtaking, without exceeding the speed setting.
Steering-mounted controls
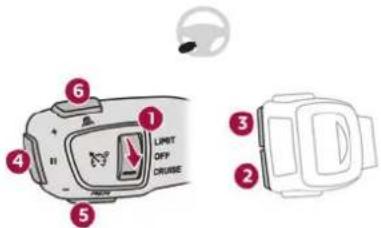
- ON (CRUISE position)/OFF
- Activation of cruise control at the current speed/decrease speed setting
- Activation of cruise control at the current speed/increase speed setting
- Pause/resume cruise control with the speed setting previously saved Confirmation of vehicle restart after an automatic stop (for versions with Stop & Go function)
- Use the speed suggested by the Road signs recognition function (MEM display)
- Display and adjustment of the distance setting to the vehicle in front
Use
Activating the system (pause)
With the engine running, turn thumbwheel 1 downwards to the CRUISE position. Cruise control is ready to operate (grey display).
Switching on cruise control and setting the speed
With an automatic EAT8 gearbox, your speed must be between 0 and 112 mph (0 and 180 km/h).
▶ Press 2-SET- or 3-SET+: the current speed becomes the speed setting (minimum 19 mph (30 km/h)) and cruise control is immediately activated (green display).
▶ Press 3-SET+ to increase or 2-SET- to decrease the speed setting (steps of 5 mph (km/h) if held pressed).
! Pressing and holding either 2-SET- or 3-SET+ results in a rapid change in the speed of the vehicle.
Pausing/resumption of cruise control
▶ Press 4-II or depress the brake pedal (grey display).
Cruise control may also have been paused:
- automatically, if the electronic stability control (ESC) system is triggered.
- by engaging neutral.
- by using the electric parking brake.
▶ Press 4-II to resume cruise control (green display).
With an EAT8 gearbox, following braking that has brought the vehicle to a complete stop, if the traffic conditions do not allow the vehicle to begin moving again within 3 seconds of stopping, press 4-II or depress the accelerator pedal to move off.
Driving

If the driver takes no action after the vehicle has been stopped, the electric parking brake is applied automatically after about 5 minutes.
i Cruise control remains active after changing gear, regardless of the gearbox type.
When the driver attempts to reactivate cruise control after the function has been paused, the message "Activation not possible, unsuitable conditions" is displayed briefly if reactivation is not possible (safety conditions not met).
Changing the programmed speed setting with the Road signs recognition function
▶ Press 5-MEM to accept the speed suggested by the system on the instrument panel, then press again to confirm.
! To prevent sudden acceleration or deceleration of the vehicle, select a speed setting relatively close to the vehicle's current speed.
Changing the inter-vehicle distance
▶ Press 6 to display the distance setting thresholds ("Distant", "Normal", "Close"), then press again to select a threshold. After a few seconds, the option is accepted and will be memorised when the ignition is switched off.
Temporarily exceeding the speed setting
▶ Press the accelerator pedal fully. Distance monitoring and cruise control are deactivated while acceleration is maintained. "Cruise control on hold" is displayed.
Deactivating the system
▶ Turn thumbwheel 1 upwards to the OFF position.
Information displayed on the instrument panel
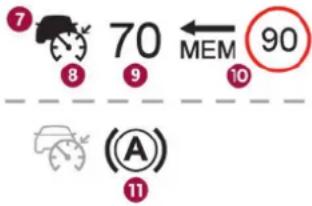
- Vehicle detected by the system (full symbol)
- Cruise control active (colour not grey)
- Speed setting value
- Speed suggested by the Road signs recognition function
- Vehicle held stationary
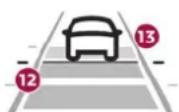
- Inter-vehicle distance setting
- Position of the vehicle detected by the system
Messages and alerts
The digital instrument panel's "Driving" display mode must have been selected first.
i The actual order in which these messages or alerts are displayed may vary.
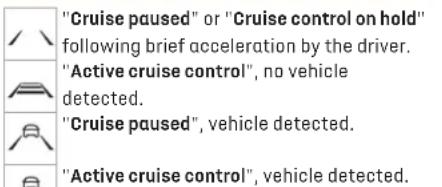
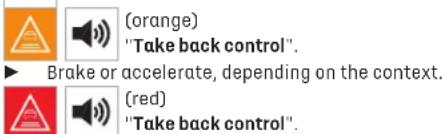
▶ Take back control of the vehicle immediately: the system cannot manage the current driving situation.
i "Activation refused, conditions unsuitable".
The system refuses to activate cruise control, as the necessary conditions are not fulfilled.

Stop function


"Cruise paused" (for a few seconds).
The system has brought the vehicle to a complete stop and is keeping it immobilised: cruise control is paused.
The driver must accelerate to move off again, then reactivate cruise control.
Stop & Go function


"To pick up again: accelerate or press the II button".
The system has brought the vehicle to a complete stop.
Within 3 seconds, the vehicle gradually and automatically begins moving again.
Beyond 3 seconds, the driver must accelerate or press 4-II to move off again.
While the vehicle is immobilised, the following recommendations apply:
- The driver should not leave the vehicle.
- Do not open the boot.
- Do not drop off or pick up passengers.
- Do not engage reverse gear.
When moving off again, watch out for cyclists, pedestrians and animals, as they may not be detected properly.
Operating limits
Cruise control operates by day and night, in dry weather or moderate rainfall.
Certain situations cannot be managed by the system and require driver intervention.
Cases not taken into account by the system:
- Pedestrians, cyclists, animals.
- Stationary vehicles (e.g. traffic jams, breakdown).
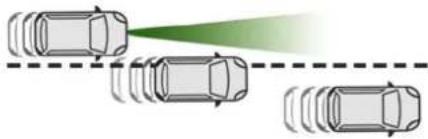
natural_image
Diagram showing a vehicle with multiple cars and a green light beam, no text or symbols present- Vehicles crossing your lane.
- Vehicles driving in the opposite direction.
Situations where the driver must suspend the system:
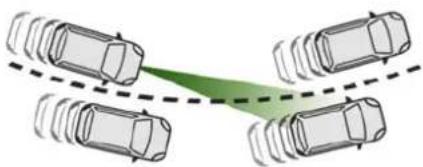
natural_image
Diagram showing four cars with a green arrow pointing from each, connected by a dashed line (no text or symbols)- Vehicles in a tight bend.
- When approaching a roundabout.
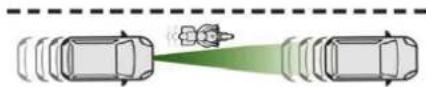
- When following a narrow vehicle.
Reactivate the system when conditions allow. Situations in which the driver is prompted to immediately resume control:
- Excessively sharp deceleration by the vehicle in front of you.
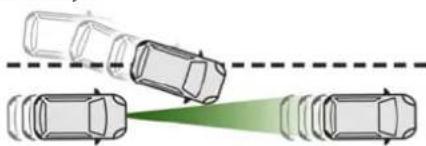
natural_image
Diagram showing multiple cars with a green light beam passing through them, no text or symbols present- When a vehicle cuts in sharply between your vehicle and the one in front.
! Some vehicles on the road may be poorly perceived or interpreted by the camera and/or the radar (e.g. truck), which can lead to an incorrect evaluation of distances and result in inappropriate acceleration or braking of the vehicle.
Pay particular attention:
- When motorcycles are present and when there are vehicles staggered across the traffic lane.
- When entering a tunnel or crossing a bridge.
! If any of the following malfunctions occurs, do not use the system:
- Following an impact on the windscreen close to the camera or on the front bumper (versions with radar).
- Brake lamps not working.
! If the vehicle has undergone any of the following modifications, do not use the system:
- Carrying long objects on roof bars.
- Towing.
- Front end of the vehicle modified (for example by adding long-range headlamps or painting the front bumper).
- Obstructed radar.
Malfunction
In the event of a malfunction, dashes are displayed instead of the speed setting.

This warning lamp comes on, accompanied by a message and an audible signal, to
confirm the malfunction.
Have it checked by a dealer or a qualified workshop.
Lane positioning assist
! For more information, refer to the General recommendations on the use of driving and manoeuvring aids.
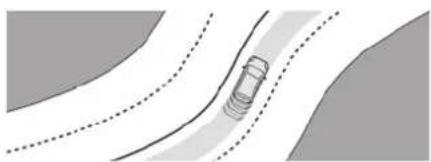
natural_image
Diagram of a car driving on a curved road with dotted lane markings (no text or symbols)The system identifies the edges of the traffic lane and steers the vehicle to keep it inside this lane and maintain the lateral position chosen by the driver.
To do this, the system uses a camera placed on the upper part of the windscreen.
This system is particularly suited to driving on motorways and main roads.
Operating conditions
- Adaptive cruise control active.
- Traffic lane marked out by lines on both sides.
- ESC system operational.
- ASR system activated.
- No trailer detected.
- No 'space-saver' spare wheel in use.
- Vehicle not subject to strong lateral acceleration.
- Direction indicators off upon activation of the system.
Activation/Deactivation
▶ With Adaptive cruise control with Stop&Go function activated, press this button.
The action is confirmed by:
- The indicator lamp in the button lighting up green.
- The following symbol being displayed on the instrument panel.
The colour of the symbol on the instrument panel depends on the operating status of the system:

(grey colour)
One or more operating conditions is not met; the system is paused.

(green colour)
All operating conditions are met; the
system is active.

(orange colour)
System malfunction.
If the driver no longer wishes to use the system for a while, they can deactivate it by pressing the button again.
The indicator lamp in the button goes off and the symbol disappears from the instrument panel.
i The system status is saved when the ignition is switched off.
Cruise control
The driver must hold the steering wheel properly. When cruise control is activated, the symbol is displayed in green: by small steering actions, the system directs the vehicle and keeps it in the position chosen by the driver, in the traffic lane. This position is not necessarily the centre of the lane.
The driver can feel movements in the steering wheel.
The driver can change the position of the vehicle at any time, by turning the steering wheel. When the driver feels that the vehicle's position is appropriate, whilst keeping hands on the steering wheel, they must release the pressure to let the system resume control of the steering, but the vehicle will not be automatically centred within the lane.
Pausing/Suspending the system
! The driver must act promptly if they believe that the traffic conditions or the state of the road surface require their intervention, by moving the steering wheel to temporarily suspend system operation. Any intervention on the brake pedal that causes the Adaptive cruise control to pause will also cause the system to pause.
! If the system detects that the driver is not holding the wheel firmly enough, it triggers a series of gradual alerts and then deactivates itself if there is no response from the driver.
If the function is suspended due to the prolonged release of the force holding the steering wheel, the function must be reactivated by pressing the button again.
Automatic pause
- Triggering of the ESC.
- Prolonged failure to detect one of the lane limit markings. In this case, the Lane keeping assist function can take over, and the system will reactivate itself once the operating conditions are met again.
In response to action by the driver: suspension
- Activation of the direction indicators.
- Travelling outside the lane limits.
- Too tight a grip on the steering wheel or dynamic action on the steering wheel.
- Action on the brake pedal (resulting in a pause until cruise control is reactivated) or accelerator pedal (suspension for as long as the pedal is depressed).
- Pausing of Adaptive cruise control.
- Deactivation of the ASR.
Driving

06
126
Driving
Driving situations and related alerts
The tables below describe the displays associated with the main driving situations.
The actual order of display of these alerts may be different.
| Button indicator lamp Cruise controlthumbwheel | Symbols Display Comments | ||
| Off CRUISE |  (grey) (grey) | [CW66G](grey)Cruise paused.Lane positioning assist not activated. | |
| Off CRUISE |  (green) (green) |  -(grey)Active cruise control.Lane positioning assist not activated. -(grey)Active cruise control.Lane positioning assist not activated. | |
| Green CRUISE |  (green) (green) |  (green)DS DRIVE ASSIST activated.The system is operating normally(correction is made at the steering wheel). (green)DS DRIVE ASSIST activated.The system is operating normally(correction is made at the steering wheel). | |
| Green CRUISE |  (grey) (grey) |  -(grey)DS DRIVE ASSIST paused. -(grey)DS DRIVE ASSIST paused. | |
| Green CRUISE |  (green)/(grey) (green)/(grey) |  -(grey)DS DRIVE ASSIST activated.All the operating conditions for lane positioning assist have not been met. -(grey)DS DRIVE ASSIST activated.All the operating conditions for lane positioning assist have not been met. | |
| Green OFF or LIMIT |  (grey) (grey) | [275G]-(grey)Cruise control deactivated.All the operating conditions for lane positioning assist have not been met. | |
127 Driving

| Button indicator lamp Cruise controlthumbwheel | Symbols Display Comments | ||
| Green CRUISE |  (green)/(grey) (green)/(grey) |  (grey) (grey) | |
| Messages Driving situations | |
| "Activate cruise control to use lane positioning assist" | Activation of lane positioning assist while cruise control is not active. |
| "Conditions unsuitable - Awaiting activation" | Activation of lane positioning assist while not all conditions are met. |
| "Keep your hands on the steering wheel" | Prolonged driving without holding the steering wheel, holding it improperly or without applying any force. |
| "Hold the steering wheel" Actual or imminent loss of lane positioning assist. | |
| "Take back control" | Simultaneous loss of cruise control and lane positioning assist. |
Operating limits
i The system may issue an alert when the vehicle is travelling on a long, straight road with smooth road surface even if the driver thinks they are holding the steering wheel correctly.
The system may not operate or may produce unsuitable corrections to the steering in the following situations:
- Poor visibility (insufficient road lighting, snowfall, rain, fog).
- Dazzle (headlamps of an oncoming vehicle, low sun, reflections on a wet road surface, leaving a tunnel, alternating light and shade).
- Windscreen area in front of the camera dirty, misted up, frost-covered, snow-covered, damaged or covered by a sticker.
- Lane markings eroded, partially hidden (snow, mud) or multiple (roadworks, surface joints).
- Travelling in a tight bend.
- Winding roads.
- Presence of a tarmac joint on the road.
Risk of undesirable operation
! The system should be deactivated in the following situations:
- Driving with a "space-saver" type spare wheel.
- When towing or with a bicycle carrier attached to a towing device, particularly when a trailer is not connected or the trailer is not an approved type.
- Adverse weather conditions.
- Driving on slippery road surfaces (risk of aquaplaning, snow, ice).
- In roadworks or toll booth areas.
- Driving on racing circuits.
- Driving on a rolling road.
Malfunction


In the event of a malfunction, the Service warning lamp comes on and
this (orange) symbol appears on the instrument panel, accompanied by the display of a message and an audible signal.
Have it checked by a dealer or a qualified workshop.
Active Safety Brake with Collision Risk Alert and Intelligent emergency braking assistance
! For more information, refer to the General recommendations on the use of driving and manoeuvring aids.

This system:
- warns the driver that their vehicle is at risk of collision with the preceding vehicle, a pedestrian or a cyclist.
- reduces the vehicle's speed to avoid a collision or to limit its severity.
The speed will be reduced by a maximum of 16 mph (25 km/h) (versions with camera only) or by a maximum of 31 mph (50 km/h) (versions with camera and radar).

The system also takes motorcyclists into account.
It may also react on animals. Animals (especially animals smaller than 0.5 m) and objects on the road are not necessarily detected.
This system includes three functions:
- Collision Risk Alert.
- Intelligent emergency braking assistance (iEBA).
- Active Safety Brake (automatic emergency braking).
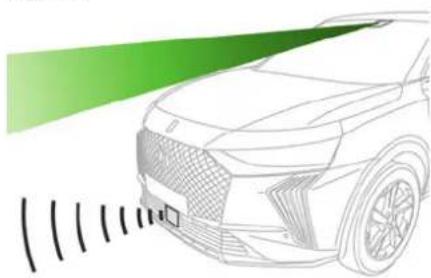
natural_image
Line drawing of a car's front and side view with a green accent line (no text or symbols)The vehicle has a multifunction camera located at the top of the windscreen and, depending on version, a radar located in the front bumper.

This system does not replace the need for driver vigilance.
This system is designed to assist the driver and improve road safety.
It is the driver's responsibility to continuously monitor traffic conditions in accordance with applicable driving regulations.

As soon as the system detects a potential collision, it prepares the braking circuit.
This may cause a slight noise and a slight sensation of deceleration.
Deactivation/Activation
By default, the system is automatically activated at every engine start.

It is configured in the ADAS touch screen application.

Deactivation of the system is signalled by the illumination of this warning lamp,
accompanied by the display of a message.
Operating conditions and limits
Vehicle moving forward without trailer. Brake system operational.
Seat belts fastened for all passengers.
Stabilised speed on roads with no or low curvature.

This warning lamp lights up on the instrument panel without any additional
message, to indicate that the automatic braking system is not available.

This is a normal behavior indicating that a condition is not fulfilled and which does not request the support of a workshop. In any situations with ignition on where automatic braking presents a risk, deactivating the system via the driving aids touch screen application is recommended, for instance:
- Towing a trailer (particularly a trailer without its own braking system).
- Carrying long objects on roof bars.
- Driving with snow chains.
- Using an automatic car wash.
- Performing any maintenance (e.g. changing a wheel, working inside the engine compartment).
- Placing the vehicle on a rolling bench in a workshop.
- Towing the vehicle.
- Following an impact to the windscreen close to the detection camera.
i The system is automatically deactivated once the use of a different diameter "space-saver" type spare wheel is detected, or if a fault with the two lateral brake lamps is detected.
i The system diagnoses permanently its capability and may inhibit itself without specific driver indication, if the system is outside of the regular operating conditions
(e.g. sensor initialization, board voltage out of regular range, activation of stability system). Therefore, the system may not be available just after starting the vehicle.
It can be dangerous to drive if the brake lamps are not in perfect working order.
! The driver must not overload the vehicle (keep within the GVW limit and load height limits for roof bars).
Following an impact (e.g. a collision), the system is automatically deactivated. Have it checked by a dealer or a qualified workshop.
Collision Risk Alert
This function warns the driver if there is a risk of collision with the preceding vehicle, or with a pedestrian or cyclist.
Modifying the alert trigger threshold
The trigger threshold determines the sensitivity with which the function warns of the risk of collision.
It is configured in the ADAS touch screen application.
▶ Select one of the 3 preset thresholds: "Far", "Medium" or "Near".
The selected threshold is memorised when the ignition is switched off.
Operation
Depending on the collision risk detected by the system and the alert trigger threshold chosen by the driver, different levels of alert may be triggered and displayed on the instrument panel. The system takes into account the vehicle dynamics, the difference speed of the own vehicle and the object identified for the collision risk, and the operation of the vehicle (e.g. actions on the pedals, steering wheel) to trigger the alert at the most relevant moment.

(orange)
Level 1: visual alert only, warning that the ing vehicle is very close.
The message "Vehicle close" is displayed.

(red)
Level 2: visual and audible alert, warning collision is imminent.
The message "Brake!" is displayed.
Level 3: a micro-braking may be given, confirming the risk of collision (optional).
While approaching a vehicle too quickly, the level 2 alert may be displayed directly. Important: the level 1 alert depends on the trigger threshold selected. It reacts only on moving vehicles. It is disabled automatically at lower speed.
It is possible that collision warnings are not given, are given too late or seem unjustified.
The driver must always stay in control of the vehicle and be prepared to react at any time to avoid an accident.
! If you select "Far" in the touch screen, then the system warns sooner. This increases the safety but increases also the amount of alerts, if the legal safety distance is not kept.
To reduce the alert occurrence, you can change the setting to either of the other two.
Intelligent emergency braking assistance (iEBA)
This function increases vehicle deceleration if the driver does not brake enough to avoid a collision. This assistance is only provided if the driver presses the brake pedal.
Active Safety Brake
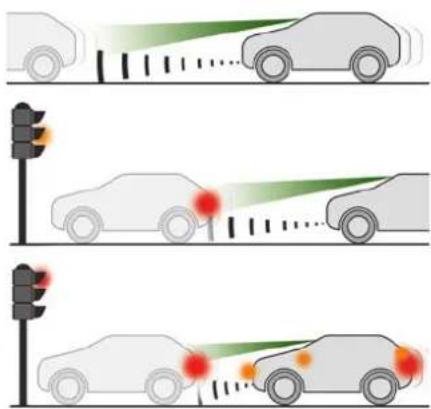
This function, also called "automatic emergency braking", intervenes after the acoustic alert if the driver does not operate the brake pedal quickly enough.
The system aims at reducing the speed of impact or avoiding a collision if the driver fails to react.
The speed will be reduced by a maximum of 16 mph (25 km/h) (versions with camera only) or by a maximum of 31 mph (50 km/h) (versions with camera and radar).
Operation
The system operates subject to the following conditions:
- At reduced speed in an urban environment, when a stationary vehicle, pedestrian or cyclist is detected.
- The vehicle's speed is between 6 mph and 53 mph (10 km/h and 85 km/h) (versions with camera only) or 87 mph (140 km/h) (versions with camera and radar) when a moving vehicle is detected.
This warning lamp flashes (for approximately 10 seconds) as soon as the function applies the vehicle's brakes.
During the flashing time, the function is not available.
In the event of automatic emergency braking, keep the brake pedal depressed, also after a complete stop is reached, to prevent the vehicle from rolling away.
The driver can override the automatic emergency braking at any time by firmly turning the steering wheel and/or firmly depressing the accelerator pedal.
The brake pedal may feel hard and vibrate slightly while the function is operating. If the vehicle comes to a complete stop, automatic braking is maintained for 1 to 2 seconds.

Malfunction

This warning lamp lights up on the
instrument panel with the message
"Sensor blind" in certain cases.
Version with camera only: the system is deactivated.
Version with camera and radar: the system may continue to operate in a degraded mode.
This may be caused by a reduced visibility (e.g. rain, fog, snow, blinding by low sun) or by a real sensor blockage. In this case, stop the vehicle and verify if the front camera or the front radar is covered by dirt, snow, ice or anything preventing the sensing.

In the event of a malfunction, this warning lamp lights up on the instrument panel,
accompanied by the display of a message and an audible signal.
Have it checked by a dealer or a qualified workshop.

If these warning lamps come on after the engine has been switched
off and then restarted, contact a dealer or a qualified workshop to have the system checked.

These warning lamps light up on the instrument panel and/or in the
warning lamp display for seat belts and front passenger airbag to indicate that the driver's and/or front passenger's seat belt is not fastened (depending on version). The automatic braking system is deactivated until the seat belts are fastened.
Distraction detection
! For more information, refer to the General recommendations on the use of driving and manoeuvring aids.
The function comprises the "Driver Attention Warning" and "Driver Attention Warning by Camera" systems, combined, depending on version, with the "DS DRIVER ATTENTION MONITORING" system.
These systems are in no way designed to keep the driver awake or to prevent the driver from falling asleep at the wheel.
It is the driver's responsibility to stop if feeling tired.
Take a break if you are feeling tired or at least every 2 hours.
Activation/Deactivation
By default, the function is automatically activated at every engine start.

The settings are changed via the ADAS touch screen application.
Driver Attention Warning

The system triggers an alert when it detects that the driver has not taken a
break after two hours of driving at a speed above 43 mph (70 km/h).
This alert is issued via the display of a message encouraging the driver to take a break, accompanied by an audible signal.
If the driver does not follow this advice, the alert is repeated hourly until the vehicle is stopped.
The system resets itself if one of the following conditions is met:
- With the engine running, the vehicle has been stationary for more than 15 minutes.
- The ignition has been switched off for a few minutes.
- The driver's seat belt is unfastened and their door is opened.
i As soon as the speed of the vehicle drops below 43 mph (70 km/h), the system goes into standby.
Driving time starts being counted again once the speed reaches above 43 mph (70 km/h).
Driver Attention Warning by Camera
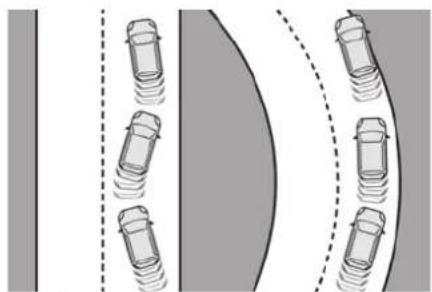
natural_image
Diagram showing vehicle positions on a road with dashed lane markings (no text or symbols)
The system assesses the driver's level of alertness, fatigue and distraction by flying trajectory changes in relation to the markings.
To do this, the system uses a camera, placed on the upper part of the windscreen.
This system is particularly suited to fast roads (speed higher than 43 mph (70 km/h)).
At a first alert level, the driver is warned by the message "Caution!", accompanied by an audible signal.
After three first-level alerts, the system triggers a further alert with the message "Driving at risk: Take a break", accompanied by a more pronounced audible signal.
i In certain driving conditions (poor road surface or strong winds), the system may
give alerts independent of the driver's level of vigilance.
! The following situations may interfere with the operation of the system or prevent it from working:
- lane markings absent, worn, hidden (snow, mud) or multiple (roadworks);
- close to the vehicle ahead (lane markings not detected);
- roads that are narrow, winding, etc.
DS DRIVER ATTENTION MONITORING
(Depending on version)
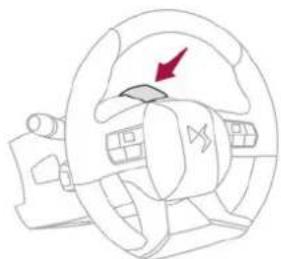
natural_image
Line drawing of a car steering wheel with a red arrow indicating clockwise motion (no text or symbols)
An additional (infrared) camera is fitted to the steering column, behind the steering to monitor driver behaviour.
The camera analyses, firstly, the direction of the driver's gaze and head to assess their distraction
level and, secondly, the closing of their eyelids to assess the level of their vigilance and attention. When the vigilance level (distraction or loss of attention) is low, the system emits an alert. With the "Personal" display mode of the digital instrument panel, the driver can select the permanent display of the "Level of vigilance" diagram, which enables them to monitor this information in real time.
i The system is activated at speeds above 16 mph (25 km/h).
! The following situations may interfere with the operation of the system or prevent it from working:
- system's camera field of vision blocked or obstructed.
- wearing certain types of spectacles or sunglasses that are very dark or reflective.
- face partially obscured (e.g. by a hand, by hair).
- unusual or incorrect driving position. Under no circumstances shall the Manufacturer be held liable in the event of alerts not being given or for the consequences of using this system.
Lane keeping assist
! For more information, refer to the General recommendations on the use of driving and manoeuvring aids.
The system corrects the vehicle's trajectory by alerting the driver as soon as it detects a risk of involuntary lane departure or crossing of a verge or hard shoulder (depending on version).
To do this, the system uses a camera, placed on the upper part of the windscreen, identifying the lane markings on the ground and the side of the road (depending on version).
This system is particularly useful on motorways and main roads.
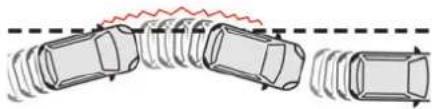
natural_image
Diagram of a vehicle under load with motion arrows indicating speed (no text or symbols)Operating conditions
- Vehicle speed between 43 and 112 mph (70 and 180 km/h).
- Road marked with a central dividing line.
- Steering wheel held with both hands.
- Direction indicators off upon activation of the system.
- ESC system activated and operational.
! The system helps the driver only if there is a risk of the vehicle unintentionally wandering from the lane it is being driven in. It does not manage the safe driving distance, vehicle speed or braking.
The driver must hold the steering wheel with both hands so that they can maintain control when the conditions no longer allow the system to intervene (e.g. in the event that the central dividing line marking on the road surface disappears).
Operation
As soon as the system identifies a risk of involuntarily crossing one of the lane markings detected on the ground or a lane boundary (e.g. grass verge), it performs the trajectory correction necessary to restore the vehicle to its original lane.
The driver will notice a turning movement of the steering wheel.

This warning lamp flashes during trajectory correction.
i The driver can prevent the correction by firmly holding the steering wheel (e.g. during an emergency manoeuvre). The correction is interrupted immediately if the direction indicators are operated.
While the direction indicators are activated and for a few seconds after switching them off, the system considers that a change of trajectory is
intentional and no correction is triggered during this period.
Driving situations and related alerts
The table below describes the alerts and messages displayed in different driving situations.
The actual order of display of these alerts may be different.
| Function status Display Comments | ||
| OFF | [6y27] | Function deactivated. |
| ON None. System active, conditions not met: | - Speed below 40 mph (65 km/h).- No lane marking recognised.- ESC operation triggered.- "Sparty" driving. | |
| ON | [cXD7] | Automatic deactivation/standby of the function (e.g. detection of a trailer, use of the "space-saver" type spare wheel supplied with the vehicle, failure). |
| ON None. Lane marking detected. | Speed above 40 mph (65 km/h). | |
| ON |  | The system corrects the trajectory on the side where the risk of line crossing is detected. The driver's hands are on the steering wheel. |
| ON |   "Hold the steering wheel" or "Stay in lane" (depending on version) "Hold the steering wheel" or "Stay in lane" (depending on version) | If, while correcting the trajectory, the system determines that the correction will not be enough and that a solid line will be crossed: the driver is warned that they must provide additional trajectory adjustment.If the steering wheel is not held properly, an audible warning sounds, accompanied by a message, until the trajectory correction is completed or the driver has grasped the steering wheel correctly.The duration of audible warnings will increase if multiple corrections are performed in quick succession. The warning will become continuous, persisting until the driver responds. |
Operating limits
The system goes into standby automatically in the following cases:
- ESC deactivated or operation triggered.
- Speed below 43 mph (70 km/h) or greater than 112 mph (180 km/h).
- Electrical connection to a trailer.
- Use of a "space-saver" spare wheel detected (as detection is not immediate, deactivation of the system is recommended).
- Dynamic driving style detected, pressure on the brake or accelerator pedal.
- Driving over lane markings.
- Activation of the direction indicators.
- Crossing the inside line on a bend.
- Driving on a tight bend.
- Inactivity by the driver detected during correction.
! The following situations may interfere with the operation of the system or prevent it from working:
- Insufficient contrast between the road surface and the verge or hard shoulder (e.g. shade).
- Lane markings worn, hidden (snow, mud) or multiple (roadworks, etc.),
- Close proximity to the vehicle in front (lane markings may not be detected).
Roads that are narrow, winding.
Risk of undesirable operation
The system should be deactivated in the following situations:
- When changing a wheel or working near a wheel.
- Towing or with a bicycle carrier on a towing device, especially with trailer not plugged in or not approved.
- Road in poor condition, unstable or with very poor grip (risk of aquaplaning, snow, ice).
- Adverse weather conditions.
- Driving on racing circuits.
- Driving on a rolling road.
Deactivation/Activation
By default, the system is automatically activated at every engine start.

It is configured in the ADAS touch screen application.
or
Direct access to the Shortcuts for driving aids.

Deactivation is confirmed by the illumination of this indicator lamp on the ment panel.
Malfunction

In the event of a malfunction, these warning lamps light up on the
instrument panel, accompanied by the display of a message and an audible signal.
Have it checked by a dealer or a qualified workshop.
Blind spot monitoring
! For more information, refer to the General recommendations on the use of driving and manoeuvring aids.
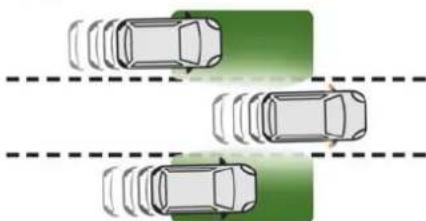
natural_image
Top-down diagram of three cars with motion arrows indicating movement, set against a green background (no text or symbols)This system warns the driver of a potential danger posed by the presence of another vehicle (car, lorry, motorcycle) in the vehicle's blind spots (areas hidden from the driver's field of vision) using sensors located on the sides of the bumpers.
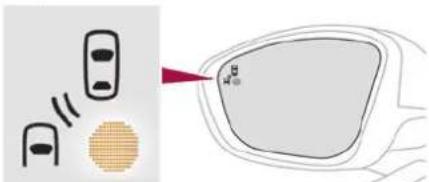
natural_image
Diagram showing a device with sensor icons and a magnified view of a rounded object with a red arrow pointing to it (no text or symbols present)A warning lamp appears in the door mirror on the side in question:
- fixed, immediately, when being overtaken.
06
136
Driving
- flashing, after a delay of about one second, when overtaking a vehicle slowly, and when the direction indicator is used.
Activation/Deactivation

It is configured in the ADAS touch screen application.
When starting the vehicle, the warning lamp comes on in each mirror to indicate that the system is activated. The status of the system is memorised when the ignition is switched off.

The system is automatically deactivated when towing with a towing device roved by the Manufacturer.
Operating conditions
- All vehicles are moving in the same direction and in adjacent lanes.
- The speed of your vehicle must be between 7 and 87 mph (12 and 140 km/h).
- When overtaking a vehicle, the speed difference is less than 6 mph (10 km/h).
- When overtaken by a vehicle, the speed difference is less than 16 mph (25 km/h).
Traffic is flowing normally.
- Overtaking a vehicle over a certain period of time and the vehicle being overtaken remains in the blind spot.
- You are driving on a straight or slightly curved road.
- Your vehicle is not pulling a trailer, a caravan, etc.
Operating limits
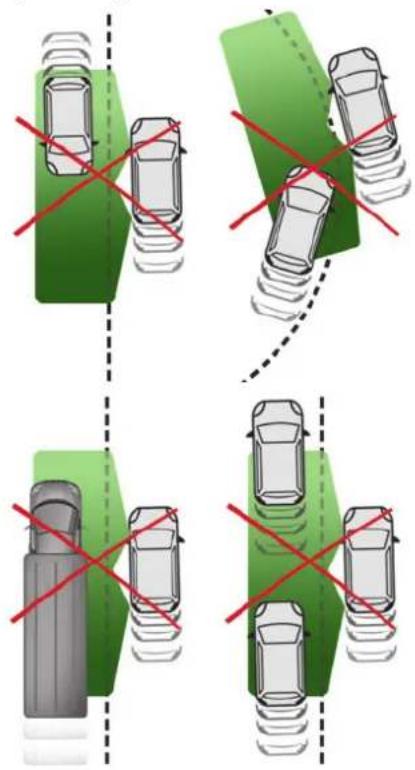
No alert is triggered in the following conditions: - presence of stationary objects (e.g. parked vehicles, safety rails, lampposts, signs).
- vehicles travelling in the opposite direction.
- on winding roads or in case of sharp turns.
- when overtaking or being overtaken by a very long vehicle (e.g. truck, bus), which is both detected in a blind spot from behind and present in the driver's field of vision from the front.
- quick overtaking manoeuvre.
- very heavy traffic: vehicles detected in front and behind are confused with a lorry or a stationary object.
Malfunction

If the event of a malfunction, this warning lamp lights up on the instrument panel,
accompanied by the display of a message. Have it checked by a dealer or a qualified workshop.
i The system may be temporarily disturbed by certain weather conditions (e.g. rain, hail).
In particular, driving on a wet road or going from a dry to a wet area can cause false alerts (e.g. presence of a cloud of water droplets in the blind spot interpreted as a vehicle).
In bad or wintry weather, ensure that the sensors are not covered by mud, ice or snow.
Take care not to cover the warning zone in the door mirrors, or the detection zones on the front and rear bumpers with adhesive labels
or other objects; they may hamper correct operation of the system.
Parking sensors
! For more information, refer to the General recommendations on the use of driving and manoeuvring aids.
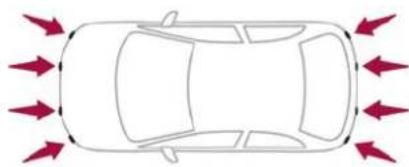
natural_image
Top-down view of a car with red arrows indicating airflow or traffic direction (no text or symbols)This system detects and signals the proximity of obstacles (e.g. pedestrian, vehicle, tree, barrier) using sensors located in the bumper.
Rear parking sensors
▶ Engage reverse gear to start the system (confirmed by an audible signal). The system is switched off when reverse gear is disengaged.
Audible assistance
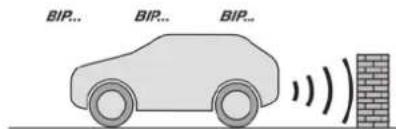
The system signals the presence of obstacles which are both within the sensors' detection zone and in the vehicle path defined by the direction of the steering wheel.
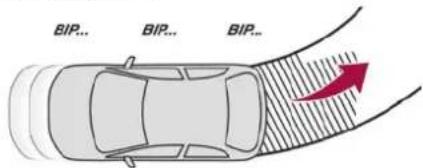
Depending on version, in the example shown, only the obstacles present in the shaded area will be signalled by the audible assistance.
The proximity information is given by an intermittent audible signal, the frequency of which increases as the vehicle approaches the obstacle.
When the distance between the vehicle and the obstacle becomes less than about thirty centimetres, the audible signal becomes continuous.
The sound emitted by the speaker (right or left) indicates the side on which the obstacle is located.
137 Driving
i Adjusting the audible signal Pressing this button opens the window for adjusting the volume of the audible signal.
Visual assistance
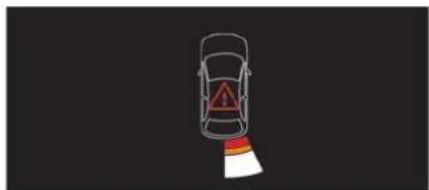
natural_image
Top-down view of a car with a warning sign and red triangle, mounted on a flat surface (no text or symbols)This supplements the audible signal, without taking account of the vehicle's trajectory, by displaying bars on the screen whose location represents the distance between the obstacle and the vehicle (white: more distant, orange: close, red: very close).
When the obstacle is very close, the "Danger" symbol is displayed on the screen.
Front parking sensors
Supplementing the rear parking sensors, the front parking sensors are triggered when an obstacle is detected in front and the speed of the vehicle is below 6 mph (10 km/h).
Front parking sensor operation is suspended if the vehicle stops for more than three seconds in forward gear, if an obstacle is no longer detected or the vehicle speed exceeds 6 mph (10 km/h).

i The sound emitted by the speaker (front or rear) locates the obstacle relative to the vehicle, whether in front of or behind it on its path.
Side parking sensors

natural_image
Top-down diagram of a car inside a vehicle hood, showing front and side views with no text or symbolsUsing four additional sensors located on the sides of the bumpers, the system records the position of obstacles during the manoeuvre and indicates them when they are located alongside the vehicle.
Only fixed obstacles are indicated correctly. Moving obstacles detected at the beginning of the manoeuvre may be indicated mistakenly, while moving obstacles that appear alongside the vehicle but were not previously recorded will not be indicated.
! Objects memorised during the manoeuvre will no longer be stored after switching off the ignition.
Deactivation/Activation
(Depending on country of sale)
It is configured in the ADAS touch screen application. If the function is deactivated, this indicator lamp lights up on the instrument panel.
The system status is saved when the ignition is switched off.
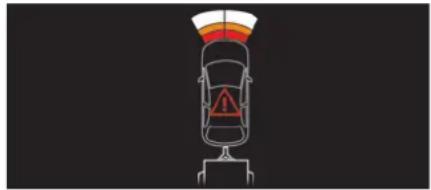
natural_image
Top-down diagram of a car with warning sign and roof, no text or symbols presenti The rear parking sensors are deactivated automatically if a trailer or bicycle carrier is connected to a towing device installed in accordance with the Manufacturer's recommendations. In this case, the outline of a trailer is displayed at the rear of the image of the vehicle.
When starting the vehicle, the graphic and audible aids are only available after the touch screen has started up.
Operating limits
If the boot is heavily loaded, the vehicle may tilt, affecting distance measurements.
Malfunction
P) OFF In the event of a malfunction when changing into reverse gear, these warning lamps light up on the instrument panel, accompanied by the display of a message and an audible signal (short beep). Have it checked by a dealer or a qualified workshop.
Reversing camera
! For more information, refer to the General recommendations on the use of driving and manoeuvring aids.
When reverse gear is engaged, with the engine running, this system displays views of the vehicle's close surroundings on the touch screen using a camera located at the rear of the vehicle.
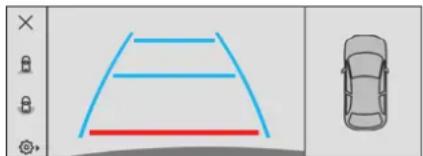
natural_image
Diagram showing a car silhouette with blue and red lines, alongside a control panel with icons (no text or symbols)The screen is divided into 3 parts with a side menu, a contextual view and a view from above the vehicle in its close surroundings.

The parking sensors supplement the information in the view from above the vehicle.
Different contextual views are available:
- Automatic zoom view.
- Standard view.
- Panoramic view.
Depending on the context, the system chooses the best view to display (standard or automatic zoom).
The view type can be changed at any time during the manoeuvre.
The system status is not saved when the ignition is switched off.
Operating principle
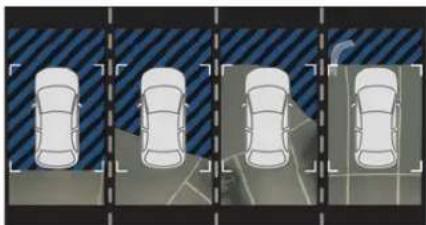
natural_image
Four-panel illustration showing a car viewed from different angles, with no visible text or symbols.Using the camera, the vehicle's close surroundings are recorded during low speed manoeuvres.
An image from above the vehicle in its close surroundings is created in real time (on the side of the screen), as the vehicle progresses.
This view makes it easier to align the vehicle when parking and to perceive nearby obstacles. It is automatically deleted if the vehicle remains stationary for too long.
Settings

In the side menu, this menu allows you to carry out the following operations:
- adjust the volume of the audible signal.
- adjust the brightness.
- adjust the contrast
Activation/Deactivation
To activate the camera, engage reverse gear. The system is deactivated:
- when changing out of reverse gear.
- by pressing the cross in the top left-hand corner of the touch screen.
Automatic zoom view
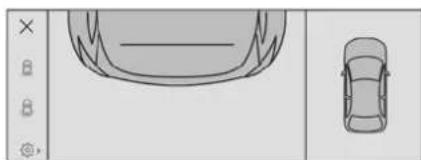
natural_image
Top-down line drawing of a car and its rear view, showing front and side views (no text or symbols)The rear camera records the vehicle's surroundings during the manoeuvre in order to create a view from above the rear of the vehicle in its close surroundings, allowing the vehicle to be manoeuvred around nearby obstacles. Using the sensors located on the rear bumper, the automatic zoom view is displayed when approaching an obstacle at the red line (less than 30 cm) during the manoeuvre.
This view is only available automatically.
i Obstacles may appear further away than they actually are.
It is important to monitor the sides of the vehicle during the manoeuvre, using the mirrors.
Parking sensors also provide additional information about the area around the vehicle.
Standard view
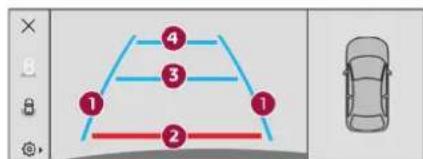
flowchart
graph TD
    A["1"] --> B["2"]
    B --> C["3"]
    C --> D["4"]
    D --> E["End"]
The area behind the vehicle is displayed on the screen.
The blue lines 1 represent the width of your vehicle, with the mirrors unfolded; their direction changes according to the position of the steering wheel.
The red line 2 represents a distance of 30 cm from the rear bumper; the two blue lines 3 and 4 represent 1 m and 2 m, respectively.
This view is available automatically or by selection in the side menu.
Panoramic view
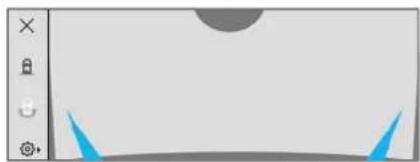
natural_image
Pure graphical interface element with no text, numbers, or symbolsThe panoramic view allows you to leave, in reverse, a parking space by anticipating the arrival of vehicles, pedestrians or cyclists. This view is not recommended for carrying out a complete manoeuvre.
This view is only available by selection in the side menu.
360 Vision
! For more information, refer to the General recommendations on the use of driving and manoeuvring aids.
This system allows you to view your vehicle's close surroundings on the touch screen using cameras, located at the front and rear of the vehicle.
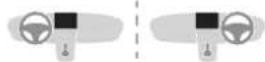
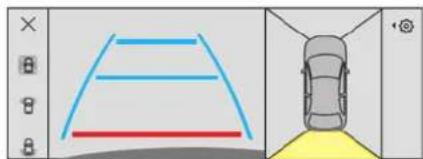
natural_image
Diagram showing a car viewed from above, with no text or symbols present.The screen is divided into 4 parts with two side menus, a contextual view and a view from above the vehicle in its close surroundings.
The parking sensors supplement the information in the view from above the vehicle.
Depending on the view angle chosen in the left-hand side menu, the system provides specific visual assistance in particular driving conditions, such as entering a blind intersection or manoeuvring in areas with reduced visibility. Different contextual views are available for the rear or for the front:
- Automatic zoom view.
- Standard view.
- Panoramic view.
Depending on the context, the system chooses the best view to display (standard or automatic zoom).
The view type can be changed at any time during the manoeuvre.
The system status is not saved when the ignition is switched off.
Operating principle
Reconstructed view
The cameras are activated and a reconstruction of a view from above your vehicle in its close surroundings is displayed on the touch screen.
Live view
natural_image
Top-down view of a car viewed from above, showing its front and rear angles (no text or symbols)The front and rear views automatically appear in the view from above the vehicle.
It is also possible to display any live view by selecting the corresponding zone.
The front view can be selected in forward gear up to 10 mph (16 km/h).
i Installing the very cold climate screen can alter the image transmitted by the front camera.
Settings
In the side menu, this menu allows you to carry out the following operations:
- adjust the volume of the audible signal.
- adjust the brightness.
- adjust the contrast.
Activation/Deactivation
Automatic
With the rear camera, engine running and vehicle stationary, rear vision is displayed automatically if reverse gear is engaged.
With the front camera, engine running and speed below 10 mph (16 km/h), rear vision is displayed automatically if a gear is engaged.
Manual

▶ In the ADAS touch screen application, select Functions>Panoramic Camera
The system is deactivated:
- automatically for the rear, when changing out of reverse gear.
- automatically for the front, above approximately 10 mph (16 km/h).
- by pressing the cross in the top left-hand corner of the touch screen.
Automatic zoom view
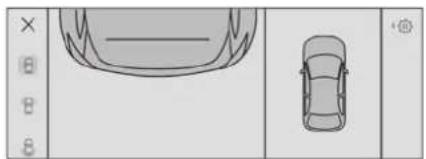
natural_image
Top-down architectural sketch of a car and a roof structure (no text or symbols)The front or rear camera records the surroundings during the manoeuvre to create a front or rear view from above the vehicle in its close surroundings, making it possible to manoeuvre the vehicle around the surrounding obstacles.
Using the sensors located on the front or rear bumper, the automatic zoom view is displayed when approaching an obstacle at the red line (less than 30 cm) during the manoeuvre. This view is only available automatically. Depending on version, it can be activated/deactivated in the ADAS application of the touch screen.
i Obstacles may appear further away than they actually are.
It is important to monitor the sides of the vehicle during the manoeuvre, using the mirrors.
Parking sensors also provide additional information about the area around the vehicle.
Standard view
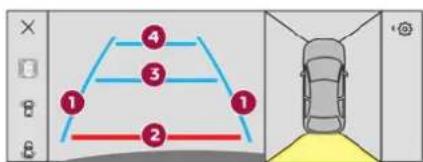
flowchart
graph TD
    A["1"] --> B["2"]
    B --> C["3"]
    C --> D["4"]
    D --> E["Top Right"]
    style A fill:#f9f,stroke:#333
    style B fill:#f9f,stroke:#333
    style C fill:#f9f,stroke:#333
    style D fill:#f9f,stroke:#333
    style E fill:#ccf,stroke:#333
Depending on the context, the area behind or in front of your vehicle is displayed on the screen. The blue lines (at the rear)/orange lines (at the front) 1 represent the width of your vehicle, with the mirrors unfolded; their direction changes according to the position of the steering wheel. The red line 2 represents a distance of 30 cm from the rear or front bumper; the two blue lines (at the
rear)/orange lines (at the front) 3 and 4 represent 1 m and 2 m respectively.
This view is available automatically or by selection in the left-hand side menu.
Panoramic view
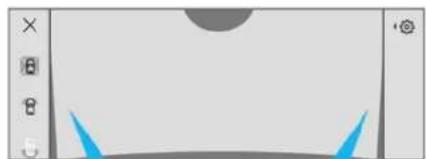
natural_image
Pure graphical interface element with no text, numbers, or symbolsThe rear or front panoramic view allows you to leave a parking space by anticipating the arrival of vehicles, pedestrians or cyclists.
This view is not recommended for carrying out a complete manoeuvre.
This view is only available by selection in the left-hand side menu.


TAILOR-MADE LUBRICANTS FOR HAUTE COUTURE CARS
Partners since the brand's creation in 2015, DS automobiles & TotalEnergies share common values: excellence, performance and know-how. TotalEnergies equips DS vehicles with Quartz lubricants from their first filling in the factory to approved maintenance networks to guarantee them optimal performance on a daily basis. Tailor-made for DS vehicles, Quartz lubricants make them even more efficient, more fuel efficient and more environmentally friendly. TotalEnergies and DS, official partners in automotive excellence!
Keep your engine younger for longer!
Quartz Ineo Xtra First OW-20 is a very high performance lubricant resulting from the joint work of the DS Automobiles and TotalEnergies R&D teams. Its innovative technology extends your engine's life while reaching significant fuel savings and thus limiting CO_2 emissions. The product is now available in new packaging* made of 50% recycled material and 100% recyclable.
- 1L & 5L produced in Europe
Compatibility of fuels

E10
Petrol fuels conforming to the EN228 standard containing up to 5% and 10% ethanol respectively.

B10
B20
B30
Diesel fuels conforming to the EN590, EN16734 and EN16709 standards and containing up to 7%, 10%, 20% and 30% fatty acid methyl ester respectively. The use of B20 or B30 fuels, even occasionally, imposes special maintenance conditions referred to as "Arduous conditions".

Paraffinic Diesel fuel conforming to the EN15940 standard.
! The use of any other type of (bio)fuel (e.g. pure or diluted vegetable or animal oils, domestic fuel) is strictly prohibited - risk of damaging the engine and fuel system!
i The only fuel additives authorised for use are those that meet the B715001 (petrol) or B715000 (Diesel) standards.
Diesel at low temperature
At temperatures below 0 °C (+32 °F), the formation of paraffins in summer-type Diesel fuels could prevent the engine from operating
correctly. In these temperature conditions, use winter-type Diesel fuel and keep the fuel tank more than 50% full.
At temperatures below -15 °C (+5 °F) to avoid problems starting, it is best to park the vehicle under shelter (heated garage).
Travelling abroad
Certain fuels could damage your vehicle's engine. In certain countries, the use of a particular fuel may be required (specific octane rating, specific trade name, etc.) to ensure correct operation of the engine.
For all additional information, consult a dealer.
Refuelling
Fuel tank capacity: approximately 55 litres (Diesel), 62 litres (Petrol) or 43 litres (Rechargeable hybrid).
Reserve level: approximately 6 litres.
Low fuel level
When the low fuel level is reached, this warning lamp lights up on the instrument panel, accompanied by the display of a message and an audible signal. When it first comes on, about 6 litres of fuel remain.
Until sufficient fuel is added, this warning lamp appears every time the ignition is switched on, accompanied by the message and the audible signal. When driving, this message and audible
Practical information
signal are repeated with increasing frequency as the fuel level drops towards 0.
You must refuel as soon as possible to avoid running out of fuel.
For more information on Running out of fuel (Diesel), refer to the corresponding section.
i A small arrow by the warning lamp indicates which side of the vehicle the fuel filler flap is located on.
! Stop & Start Never refuel with the engine in STOP mode; you must switch off the ignition.
Refuelling
Any addition of fuel must be in quantities of at least 10 litres, in order to be registered by the fuel gauge.
Opening the filler flap may create a noise caused by an inrush of air. This vacuum is entirely normal, resulting from the sealing of the fuel system.
To refuel in complete safety:
▶ Always switch off the engine.
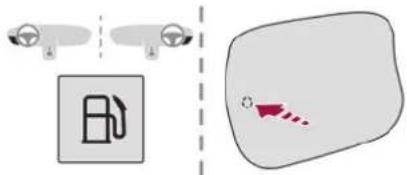
144
Practical information
To open the filler flap, press the flap opening button for more than 2 seconds or, with the vehicle unlocked, press the rear of the filler flap (depending on version).
• Rechargeable hybrid vehicles
1 After pressing the button on the dashboard, the filler flap may not open for several minutes. A sound is emitted when the filler flap opens.
If the flap becomes stuck, press and hold the button on the dashboard for more than 3 seconds.
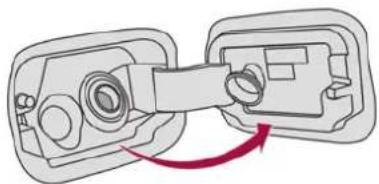
natural_image
Diagram of a mechanical assembly with two components and a red arrow indicating rotation (no text or symbols)The filler cap is built into the flap.
▶ Select a pump that delivers the correct fuel type for the vehicle's engine (see a reminder label on the inside of the filler flap).
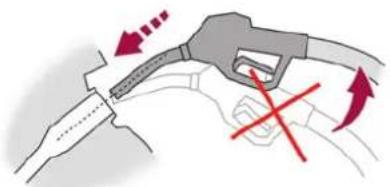
natural_image
Illustration of a fuel nozzle with red arrows indicating direction and a red X mark, no text or symbols present.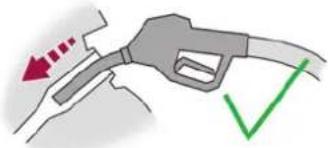
natural_image
Illustration of a fuel pump with red arrow and green checkmark (no text or symbols)Insert the filler nozzle and push it in as far as possible before starting to refuel (to minimise the risk of splashing).
▶ Fill the tank.
Do not continue after the nozzle's third cut-out. Doing so may cause malfunctions.
▶ Push the fuel filler flap to close it. The vehicle is fitted with a catalytic converter, which helps to reduce the level of harmful emissions in the exhaust gases.
For petrol engines, you must use unleaded fuel. The filler neck is narrower, allowing only unleaded petrol nozzles to be inserted.
! If you have put in the wrong fuel for the vehicle, you must have the fuel tank drained and filled with the correct fuel before starting the engine.
Misfuel prevention (Diesel)
(Depending on country of sale.)
This mechanical device prevents filling the tank of a Diesel vehicle with petrol.
Located in the filler neck, the misfuel prevention device is visible when the filler cap is removed.
Operation
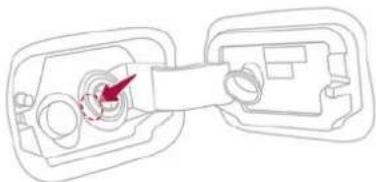
natural_image
Pure diagram of two electrical connectors with a red arrow indicating a component, no text or symbols present.When a petrol filler nozzle is introduced into the fuel filler neck of a Diesel vehicle, it comes into contact with the flap. The system remains closed and prevents filling.
Do not persist but introduce a Diesel type filler nozzle.
i The misfuel prevention device does not prevent filling with a jerrycan, regardless of the fuel type.
: Travelling abroad
As Diesel fuel pump nozzles may be different in other countries, the presence of the misfuel prevention device may make refuelling impossible.
Before travelling abroad, it is advisable to check with a dealer if the vehicle is suitable for the distribution equipment of the countries visited.
Rechargeable hybrid system
Electrical system
The electrical circuit of the rechargeable hybrid system is identified by orange cables and its components are marked with this symbol:

! The rechargeable hybrid powertrain uses a voltage of between 240 V and 400 V. This system may be hot both when the ignition is on and after switching it off. Comply with the warning messages shown on the labels, particularly inside the charging flap.
! High voltage system voltage is dangerous and can cause burns or other injuries or even fatal electric shock.
Since damage to high voltage components is not visible, the Manufacturer recommends that you:
- Never touch the components, damaged or not, and never let your jewelry or other metallic objects come into contact with these components.
- Never work on the orange high voltage cables or on any other high voltage component marked with the Electric risk label. Any intervention on the high voltage system must be carried out by qualified persons in workshops qualified and approved to carry out this type of work.
- Never damage, modify or remove the orange high voltage cables or disconnect them from the high voltage network.
- Never open, modify or remove the cover of the traction battery.
- Never work with cutting and forming tools or heat sources near high voltage components and cables.
In case of low level of fluid in the cooling tank, the refilling shall only be performed in a qualified and trained workshop to verify that the leakage is not in the traction battery. Any intervention on the high voltage system must be carried out by qualified persons in workshops qualified and approved to carry out this type of work.
145 Practical information
Damage to the vehicle or the traction battery could result in the leakage of toxic gases or fluids either immediately or later. The Manufacturer recommends that you:
- Always inform the fire and emergency services in the event of an incident, warning that the vehicle is equipped with a traction battery.
- Never touch the liquids leaking from the traction battery.
- Do not inhale the gases emitted by the traction battery which are toxic.
- Move away from the vehicle in the event of incident or accident, the gases emitted being flammable and could cause a fire.
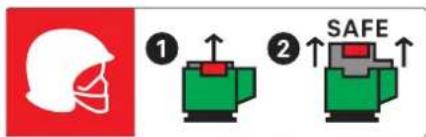
This label is intended solely for use by firefighters and maintenance services in the event of any work on the vehicle. No other person must touch the device shown on this label.
In the event of an accident or impact to the vehicle's underbody In these situations, the electrical circuit or the traction battery can be seriously damaged.
146
Practical information
Stop as soon as it is safe to do so and switch off the ignition. Contact a dealer or a qualified workshop.
When washing
! Before washing the vehicle, always check that the charging flap is closed correctly. Never wash the vehicle while the battery is on charge.
High-pressure washing
To avoid damaging the electrical components, it is expressly prohibited to use high-pressure washing in the engine compartment or under the body. Do not use a pressure greater than 80 bar when washing the bodywork.
Never allow water or dust to enter the connector or charging nozzle - risk of trocution or fire!
Never connect / disconnect the charging nozzle or cable with wet hands - risk of electrocution!
Traction battery
The Li-ion (Lithium-ion) traction battery stores the electrical energy needed to propel the vehicle. It is located under the rear seats. The traction battery's range varies depending on the type of driving, the route, the use of
thermal comfort equipment and the ageing of its components.
i The traction battery ageing depends on several factors, such as climatic conditions and the distance travelled.
! To preserve the mileage of your vehicle and the durability of your traction battery, the Manufacturer recommends that you:
- Do not fully charge the battery of your electric vehicle daily (charge the traction battery below 80% as often as possible).
- Do not completely discharge the battery. - Do not store the vehicle for a long period of non-use (more than 12 hours) when the traction battery has a low or high charge level. Prefer a charge level between 20 and 40% .
- Limit the use of fast charging. - Do not expose the vehicle to temperatures below -30^ and above +60^ for more than 24 hours.
- Avoid charging the vehicle at negative temperatures (except if the vehicle ran more than 20 minutes) or above +30°C.
- Do not use the vehicle's traction battery as a generator of energy.
- Do not use a generator to recharge your vehicle's traction battery.
In the event of damage to the traction battery
It is strictly prohibited to work on the vehicle yourself.
Do not touch liquids coming from the battery, and in the event of skin contact with these products, wash abundantly with water and contact a doctor as soon as possible.
Contact a dealer or a qualified workshop to have the system checked.
Disposal of the traction battery
The traction battery is designed for the life of the vehicle if the recommendations of the Manufacturer are followed.
If it becomes necessary to replace the battery, contact the dealer for instructions on its disposal. Improper disposal carries the risk of severe burns, electric shock, and damage to the environment. In accordance with regulations, the Manufacturer ensures a second life or recycling of this component in collaboration with qualified operators.
Charging flap
The charging flap is located on the rear left-hand side of the vehicle.
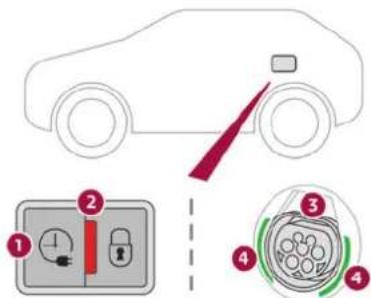
- Deferred charging activation button
- Indicator lamp confirming that the nozzle is locked into the charging connector. Fixed red: nozzle correctly positioned and locked. Flashing red: nozzle incorrectly positioned or locking not possible.
- Charging connector
- Light guides
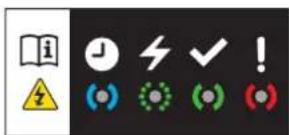
| Status of light guides | Meaning |
| Fixed white Welcome lighting when flap is opened | |
| Status of light guides | Meaning |
| Fixed blue Deferred charging | |
| Flashing green Charging | |
| Fixed green Charging complete | |
| Fixed red Malfunction | |
In case of impact, even light, against the charging flap, do not use it. Do not dismantle or modify the charging connector - risk of electrocution and/or fire! Contact a dealer or a qualified workshop.
Charging cables, sockets and chargers
The traction battery can be charged using several different types of cables.
The charging cables supplied with the vehicle are compatible with the electrical installations of the country of sale. If you are travelling abroad, refer to the following tables to check the compatibility of local electrical installations with the charging cables.
Contact a dealer or a qualified workshop to obtain the appropriate charging cable(s).
Practical information
Identification labels on charging sockets/ connectors
Identification labels are affixed to the vehicle, charging cable and charger to inform the user about which device needs to be used.
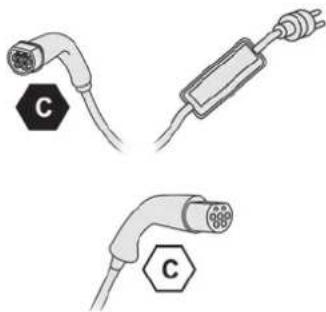
natural_image
Three types of electric vehicle plug connectors with labeled 'C' and hexagonal base markers (no text or symbols on the plugs themselves)148
Practical information
The meaning of each identification label is as
follows:
| Identification label Location Configuration Power type/Voltage range | |||
 | Charging connector (vehicle side) TYPE 2 AC | < 480 Vrms | |
 | Charging socket (charger side) TYPE 2 AC | < 480 Vrms | |
Types of charging
| Cable type Compatibility Specifications | ||
Mode 2 charging cable with integrated control unit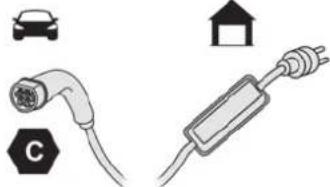 Identification label C on the charging connector (vehicle side). Identification label C on the charging connector (vehicle side). | Conventional electrical socket (depending on country).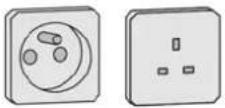 | Charge limited to a maximum of 10 A. |
"Green'Up" type socket. | Charge limited to a maximum of 16 A. | |
Mode 3 charging cable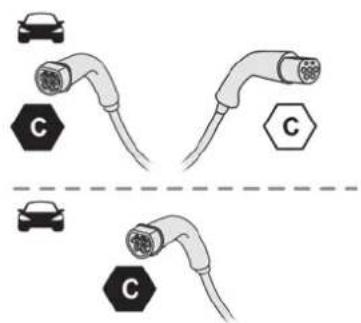 Identification labels C on the charging connector (vehicle side) and on the socket (charger side). Identification labels C on the charging connector (vehicle side) and on the socket (charger side). | Accelerated charging unit socket.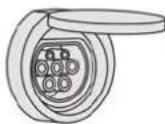 | Charge limited to a maximum of 32 A. |
Wallbox accelerated charging unit. | ||
The estimated charging time is indicated on the instrument panel when the vehicle is connected. It may vary depending on various factors such as the outside temperature or the quality of the electricity supply. If the outside temperature is below -10°C, it is recommended to connect the vehicle as soon as possible as the charging time may increase significantly. The traction battery may not charge fully.
! Domestic charging cable (mode 2) It is essential to avoid damaging the cable and to keep it intact. In the event of damage, do not use it and contact a dealer or a qualified workshop to replace it.
! Accelerated charging unit (mode 3) Do not dismantle or modify the accelerated charging unit - risk of electrocution and/or fire! To find out how it is used, please refer to the accelerated charging unit's user instructions.
Control unit (mode 2)
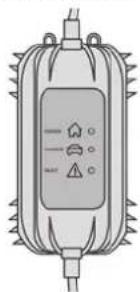
natural_image
Illustration of a cylindrical device with spiky top and internal control panel (no text or symbols)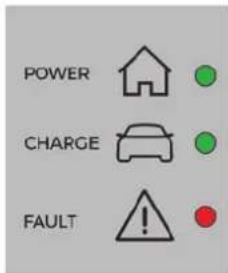
Type 1
150
Practical information
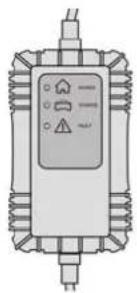
natural_image
Illustration of a mechanical or electrical component with no visible text or symbols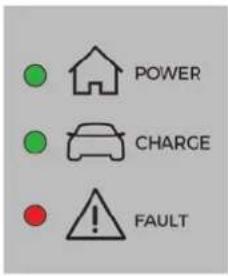
Type 2
POWER
Green: electrical connection established;
charging can begin.

CHARGE
Flashing green: charging in progress or temperature pre-conditioning activated. Fixed green: charging complete.

FAULT
Red: fault; charging not permitted or must
be stopped immediately. Check that everything is connected correctly and that the electrical system is not faulty.
If the indicator lamp does not go off, contact a dealer or a qualified workshop.
Upon plugging the charging cable into a domestic socket, all of the indicator lamps come on briefly. If no indicator lamps come on, check the domestic socket's circuit-breaker.
- If the circuit-breaker has tripped, contact a professional to check that your electricity supply is compatible and carry out any necessary repairs.
- If the circuit-breaker has not tripped, stop using the charging cable and contact a dealer or a qualified workshop.
Type 1 control unit label - Recommendations
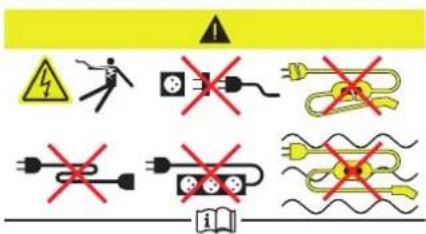
- Refer to the handbook before use.
- Incorrect use of this charging cable may result in fire, property damage and serious injury or death by electrocution!
- Always use a correctly earthed power socket, protected by a 30 mA residual current device.
- Always use an electrical socket protected by a circuit-breaker appropriate for the electrical circuit's current rating.
- The weight of the control unit must not be borne by the electrical socket, plug and cables.
-
Never use this charging cable if it is defective or in any way damaged.
-
Never attempt to repair or open this charging cable. It contains no repairable parts - replace the charging cable if it is damaged.
- Never immerse this charging cable in water.
- Never use this charging cable with an extension cable, a multi-plug socket, a conversion adaptor or on a damaged electrical socket.
- Do not unplug the plug from the wall as a means of stopping charging.
- Do not force the connector if it is locked into the vehicle.
- Immediately stop charging, by locking and then unlocking the vehicle using the remote control key, if the charging cable or wall socket feel burning hot to the touch.
- This charging cable includes components liable to cause electrical arcing or sparks. Do not expose to flammable vapours.
- Only use this charging cable with DS AUTOMOBILES vehicles.
- Never plug the cable into the wall socket (or unplug it) with wet hands.
Type 2 control unit label - State of indicator lamps
| State of the indicator lamp | |
| Off |
151 Practical information

| State of the indicator lamp | |
| On |
| State of the indicator lamp | |
| Flashing |
| POWER CHARGE FAULT Symbol Description | ||||
| ○ | ○ | ○ |  | Not connected to the power supply or power is not available from the infrastructure. |
| (green) | (green) | (red) |  | The control unit is currently performing a self-test. |
| (green) | ○ | ○ |  | Connected only to the infrastructure or to the infrastructure and to the Electric Vehicle (EV) but no charging in progress. |
| (green) | (green) | ○ |  | Connected to the power supply and to the Electric Vehicle (EV).The EV is on charge or in a temperature preconditioning sequence. |
| (green) | (green) | ○ |  | Connected to the power supply and to the Electric Vehicle (EV).The EV is waiting for charging or the charging of the EV is completed. |
152
Practical information
| POWER CHARGE FAULT Symbol Description | ||||
| [77DA] |  |  (red) (red) |  | Control unit malfunction. No charging allowed.If an error indicator reappears after a manual reset,the control unit must be checked by a dealer beforethe next charge. |
 (green) (green) |  (green) (green) |  (red) (red) |  | The control unit is in diagnostic mode. |
Manual reset procedure
The control unit can be reset by simultaneously disconnecting the charging connector and the wall socket.
Then, reconnect the wall socket first. For more information, refer to the handbook.
Type 2 control unit label - Recommendations

Refer to the handbook before use.
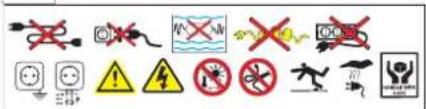
- Incorrect use of this charging cable may result in fire, property damage and serious injury or death by electrocution!
- Always use a correctly earthed power socket, protected by a 30 mA residual current device.
-
Always use an electrical socket protected by a circuit-breaker appropriate for the electrical circuit's current rating.
-
The weight of the control unit must not be borne by the electrical socket, plug and cables.
- Never use this charging cable if it is defective or in any way damaged.
- Never attempt to repair or open this charging cable. It contains no repairable parts - replace the charging cable if it is damaged.
- Never immerse this charging cable in water.
- Never use this charging cable with an extension cable, a multi-plug socket, a conversion adaptor or on a damaged electrical socket.
-
Do not unplug the plug from the wall as a means of stopping charging.
-
Immediately stop charging, by locking and then unlocking the vehicle using the remote control key, if the charging cable or wall socket feel burning hot to the touch.
- This charging cable includes components liable to cause electrical arcing or sparks. Do not expose to flammable vapours.
- Only use this charging cable with DS AUTOMOBILES vehicles.
- Never plug the cable into the wall socket (or unplug it) with wet hands.
- Do not force the connector if it is locked into the vehicle.
Charging the traction battery (Rechargeable hybrid)
For a full charge, follow the charging procedure without interrupting it, until it stops automatically. Charging may be performed either immediately (by default) or deferred.

Deferred charging is set via the touch screen or the MyDS App application.
When the vehicle is connected, the following information is displayed on the instrument panel:
- Traction battery charge status (%).
- Remaining range (miles or km).
- Estimated charging time (calculation may take a few seconds).
- Charging speed (miles or km gained per hour). After the instrument panel has been put into standby mode, this information can be displayed again by unlocking the vehicle or opening a door.
i It is also possible to monitor the charging progress using the MyDS App application.
For more information on Remotely operable additional functions, refer to the corresponding section.
Low charging / Driving
! Driving when the charge level of the traction battery is too low can lead to the vehicle breaking down and can lead to accidents or serious injuries. ALWAYS make
sure the traction battery has a sufficient charge level.
! Low charging / Parking If the outside temperature is negative, it is recommended not to park your vehicle outside for several hours at a low charging (less than 20%).
! Vehicle in storage for more than 1 month In the event of a long period of non-use of the vehicle (beyond 4 weeks) without the possibility of charging when restarting, the self-discharge may make it impossible to restart if the traction battery charge level is a low or very low, especially at negative ambient temperatures. ALWAYS make sure that the traction battery has a charge between 20% and 40% if you do not plan to use your vehicle for several weeks.
Do not connect the charging cable. Always park the vehicle in a place with temperatures between -10^ C and 30^ C (parking in a place with extreme temperatures can damage the traction battery).
Refer to the Accessory battery (Rechargeable hybrid) section for the battery disconnection procedure.
Precautions
Rechargeable hybrid vehicles have been developed in accordance with the
recommendations for maximum electromagnetic field limits established by the ICNIRP (International Commission on Non-Ionizing Radiation Protection - 1998 Guidelines).
Wearers of pacemakers or equivalent devices should consult a doctor to enquire about any applicable precautionary measures, or contact the manufacturer of their implanted electronic medical device to check that it is guaranteed to operate in an environment compliant with the ICNIRP guidelines.
If in doubt, during charging, do not remain inside or near the vehicle, near the charging cable or the charging unit, even for a short time.
! Before charging Depending on th
▶ Have a professional check that the electrical system to be used complies with applicable standards and is compatible with the vehicle.
▶ Have a professional electrician install a dedicated domestic power socket or accelerated charging unit (Wallbox) compatible with the vehicle.
Use the charging cable supplied with the vehicle.
For more information, contact a dealer or a qualified workshop.
! During charging As a safety mea
! As a safety measure, the engine will not start if the charging cable is plugged into
Practical information
154
Practical information
the connector on the vehicle. A warning is displayed on the instrument panel.
While charging is in progress, unlocking the vehicle will cause the charging to stop.
If no action is taken on one of the openings (door or boot) or on the charging nozzle, the vehicle will lock again after 30 seconds and charging will resume automatically.
Never work under the bonnet:
- Some areas remain very hot, even an hour after charging ends - risk of burns!
- The fan may start at any time - risk of cuts or strangulation!

After charging
Check that the charging flap is closed.
Do not leave the cable connected to the domestic power socket - risk of short-circuit or electrocution in the event of contact with or immersion in water!
Charging procedure
Connection
Before charging, check that the gear selector is in mode P and the ignition is off, otherwise charging is impossible.
▶ Press on the rear of the charging flap to open it and check that there are no foreign bodies on the vehicle's charging connector.
The light guides in the flap come on white.
Domestic charging (mode 2)
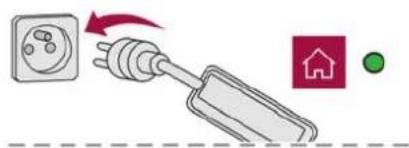
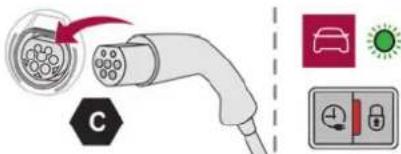
▶ First, connect the charging cable from the control unit to the domestic socket.
When the connection is made, all of the indicator lamps on the control unit light up, then only the POWER indicator lamp remains on in green.
▶ Remove the protective cover from the charging nozzle.
▶ Insert the nozzle into the vehicle's charging connector.
The start of charging is confirmed by the flashing of the green light guides in the flap and the flashing of the CHARGE indicator lamp in green on the control unit.
If this is not the case, charging has not started; restart the procedure, ensuring that all of the connections are properly established.
The red indicator lamp in the flap comes on to indicate that the nozzle is locked.
Accelerated charging (mode 3)
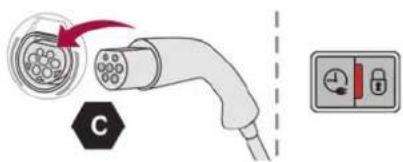
▶ Follow the accelerated charging unit (Wallbox) user instructions.
▶ Remove the protective cover from the charging nozzle.
▶ Insert the nozzle into the vehicle's charging connector.
The start of charging is confirmed by the flashing of the green light guides in the flap.
If this is not the case, charging has not started; restart the procedure ensuring that all connections are properly established.
The red indicator lamp in the flap comes on to indicate that the nozzle is locked.
Disconnection
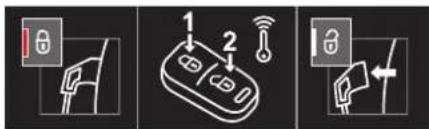
Before disconnecting the nozzle from the charging connector:
▶ If the vehicle is locked, unlock it.
▶ If the vehicle is unlocked, lock it and then unlock it.
If selective unlocking of the doors is activated, press the unlocking button on the remote control twice to disconnect the nozzle.
The red indicator lamp in the flap goes out to confirm that the nozzle is unlocked.
▶ Within 30 seconds, remove the charging nozzle.
Domestic charging (mode 2)
The end of charging is confirmed when the green CHARGE indicator lamp on the control unit comes on fixed and the green light guides in the flap come on fixed.
▶ After disconnection, replace the protective cover over the nozzle and close the charging flap.
▶ Disconnect the control unit's charging cable from the domestic socket.
Accelerated charging (mode 3)
The end of charging is confirmed by the accelerated charging unit (Wallbox) and when the green light guides in the flap come on fixed.
▶ After disconnection, replace the nozzle on to the charging unit and close the charging flap.
Deferred charging
By default, the deferred charging start time is set to be around midnight.
Depending on equipment, this time can be changed.
Settings

▶ In the Energy touch screen application, select the Charging tab.
▶ Set the charging start time.
▶ Press OK.
The setting is saved in the system.
You can also programme the deferred charging function using a smartphone, via the MyDS App application.
For more information on Remotely operable additional functions, refer to the corresponding section.
Activation
▶ After programming the deferred charging, connect the vehicle to the desired charging equipment.
Press this button in the flap within one minute to activate the deferred charging (confirmed by the light guides coming on in blue).
Towing device
Load distribution
▶ Distribute the load in the trailer so that the heaviest items are as close as possible to the axle, and the nose weight approaches the maximum permitted without exceeding it. Air density decreases with altitude, thus reducing engine performance. The maximum towable
load must be reduced by 10% per 1,000 metres of altitude.
i Use genuine towing devices and wiring harnesses approved by the Manufacturer. We recommend having them fitted by a dealer or a qualified workshop.
If not fitted by a dealer, they must still be fitted in accordance with the Manufacturer's instructions.
Important: if the vehicle has a motorised tailgate and Hands-Free Tailgate Access function, and a towing device has been fitted outside the dealer network, it is essential to visit a dealer or a qualified workshop to have the detection system recalibrated - risk of malfunction of the Hands-Free Tailgate Access function.
Certain driving or manoeuvring aid functions are automatically deactivated while an approved towing system is in use.
For more information about driving with a towing device fitted to a trailer and associated with the Trailer stability assist, refer to the corresponding section.
! Comply with the maximum authorised towable weight, as indicated on your vehicle's registration certificate, on the manufacturer's label and in the Technical data section of this guide.
156
Practical information
! If using accessories attached to the towing device (e.g. bicycle carriers, tow boxes):
- Comply with the maximum authorised nose weight.
- Do not transport more than 4 conventional bicycles or 2 electric bicycles.
When loading bicycles onto a bicycle carrier on a towball, be sure to place the heaviest bicycles as close as possible to the vehicle.
! Observe the legislation in force in the country where you are driving.
! Vehicle equipped with motorised tailgate with hands-free function (Hands-Free Tailgate Access)
To avoid unintentionally opening the motorised tailgate when operating the towing device:
- Deactivate this function in advance in the vehicle's configuration application.
- Or remove the electronic key from the recognition zone, with the tailgate closed.
• Rechargeable hybrid vehicles
A rechargeable hybrid vehicle with 20" wheels (R20) cannot be fitted with a towing device.
It is therefore not possible to tow a trailer or caravan.
Towing device with retractable ball joint
When this towing device is not in use, it is folded away underneath the rear bumper.
No tools are required to install or stow it.
! Before any operation, the vehicle must be stationary with the parking brake applied. The area close to the exhaust pipe may reach a high temperature: risk of burns!
! Vehicle equipped with motorised tailgate with hands-free function (Hands-Free Tailgate Access)
To avoid unintentional opening of the tailgate, follow the recommendations on the Towing device by referring to the corresponding section.
Unlocking handle
The towball is locked in either the storage position or the usage position. The unlocking handle is behind the rear bumper, protected by a storage case. To reach the handle:
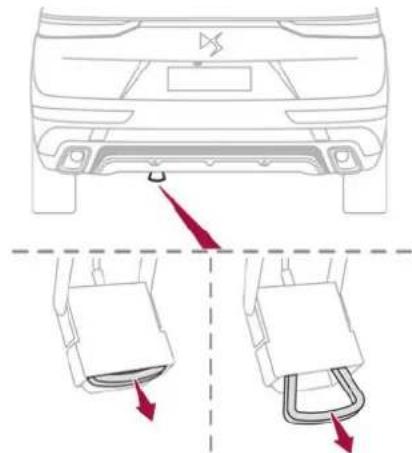
▶ Pass your hand flat under the rear bumper with the palm facing upwards.
▶ Insert your hand into the storage case and grasp the handle.
To unlock the towball:
▶ Pull the handle firmly downwards to release it.
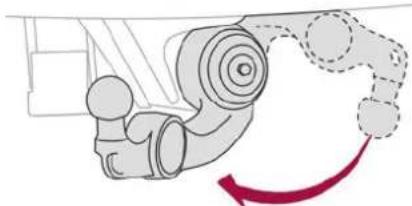
natural_image
Mechanical assembly diagram showing a rotating component with motion arrow (no text or labels)The towball hangs, hooked onto its shaft.
As soon as you release the handle, it is engaged automatically in its storage case.
Usage position
Towball unlocked:
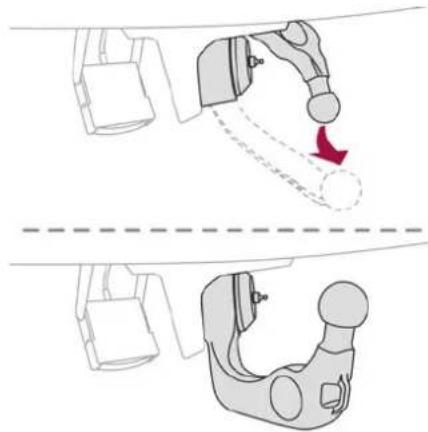
natural_image
Diagram showing a robotic arm with motion arrows indicating movement, no text or symbols present▶ Grasp the towball and rotate it while raising it until it locks into place, in the vertical position.
! The towball must be folded away when using a high-pressure washer. Do not direct the jet from less than 30 cm from the towing system.
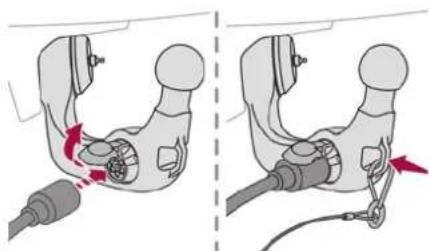
natural_image
Diagram showing two mechanical or electrical setups with red arrows indicating motion or force direction (no text or symbols present)▶ Raise the electrical socket cover and connect the plug for the trailer or carrying device.
▶ Attach the trailer's safety cable to the ring in the towball elbow.
Storage position
When the towing system is not in use, it is recommended to fold the towball away. In the event of a rear-end collision, damage to the vehicle could be worse with the towball in place.
Towball unlocked and socket disconnected:
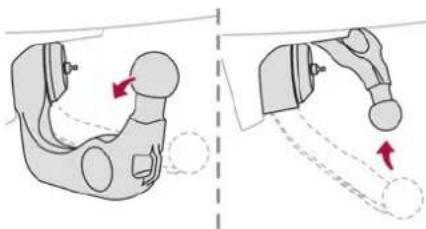
natural_image
Diagram showing two mechanical device configurations with directional arrows indicating movement (no text or symbols)▶ Grasp the towball and rotate it until it locks into place, in the horizontal position. Contact a dealer or a qualified workshop for any work on the towing system.
Roof bars
As a safety measure and to avoid damaging the roof, it is essential to use transverse roof bars approved for your vehicle. Observe the instructions on fitting and use contained in the guide supplied with the roof bars.
! Maximum load distributed over the transverse roof bars, for a loading height not exceeding 40 cm (except bicycle carrier): 80 kg.
As this value may change, please verify the maximum load quoted in the guide supplied with the roof bars.
If the height exceeds 40 cm, adapt the speed of the vehicle to the profile of the road to avoid damaging the roof bars and the fixings on the vehicle.
Be sure to refer to national legislation in order to comply with the regulations for transporting objects that are longer than the vehicle.
Practical information
158
Practical information
Fitting on longitudinal bars
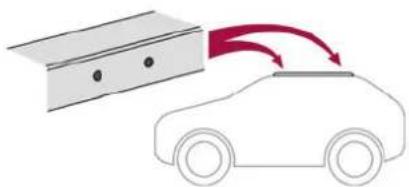
natural_image
Diagram showing a car with a box and directional arrows indicating motion or force (no text or symbols)The transverse bars must be fixed at the markings located on the longitudinal bars.
Direct fitting on roof
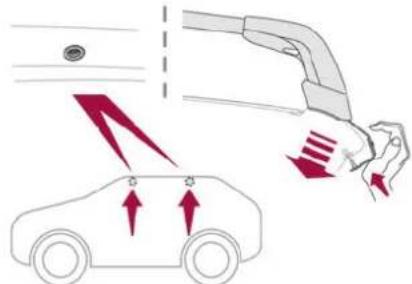
The transverse bars must only be fixed at the four anchorage points located on the roof frame. These points are concealed by the vehicle doors when the doors are closed.
The roof bar fixings have a stud which must be inserted into the opening of each anchorage point.
Recommendations
! Distribute the load uniformly, taking care to avoid overloading one of the sides.
Arrange the heaviest part of the load as close as possible to the roof.
Secure the load firmly.
Drive gently: the vehicle will be more susceptible to the effects of side winds and its stability may be affected.
Regularly check the security and tight fastening of the roof bars, at least before each trip.
Remove the roof bars once they are no longer needed.
Very cold climate screens
(Depending on country of sale)
This removable device prevents the accumulation of snow around the radiator cooling fan.
It consists of a first element for the upper part of the front grille and a second element for the lower part.
i In case of difficulty with installation/removal
Contact a dealer or a qualified workshop.
! Before any operation, ensure that the engine is off and the cooling fan has stopped.
It is essential to remove them when:
- the outside temperature exceeds 10°C.
- recovery is in progress.
- the speed is above 75 mph (120 km/h).
Snow chains
In wintry conditions, snow chains improve traction as well as the behaviour of the vehicle when braking.
! Snow chains must be fitted only to the front wheels. They must never be fitted to "space-saver" type spare wheels.
i Observe the legislation in force in your country relating to the use of snow chains and maximum authorised speeds.
Only use chains that have been designed to be fitted to the type of wheel on the vehicle:
| Original tyre size Maximum link size | |
| 225/55 R18 9 mm | |
| 205/55 R19 9 mm | |
| 235/50 R19 Cannot be fitted with chains | |
| 235/45 R20 Cannot be fitted with chains | |
| 245/35 R21 Cannot be fitted with chains | |
For more information, contact a dealer or a qualified workshop.
Installation tips
▶ To fit the snow chains during a journey, stop the vehicle on a flat surface at the side of the road.
▶ Apply the parking brake and position any wheel chocks under the wheels to prevent movement of the vehicle.
▶ Fit the snow chains following the instructions provided by the manufacturer.
▶ Move off gently and drive for a few moments, without exceeding 31 mph (50 km/h).
▶ Stop the vehicle and check that the snow chains are correctly tightened.
i It is strongly recommended that you practise fitting the snow chains on a level and dry surface before setting off.
Avoid driving with snow chains on roads that have been cleared of snow to avoid damaging the vehicle's tyres and the road surface. If the vehicle is fitted with alloy wheels, check that no part of the chain or its fixings is in contact with the wheel rim.
! Rechargeable hybrid vehicles
The use of snow chains is only authorised on the front wheels.
The driving mode selector must be on the 4WD position (depending on version).
Energy economy mode
This system manages the duration of use of certain functions, in order to conserve a sufficient level of charge in the battery with the ignition off. After switching off the engine and for a maximum cumulative period of around 30 minutes, you can continue to use functions such as the audio and telematics system, dipped beam headlamps or courtesy lamps.
Selecting the mode
A confirmation message is displayed when energy economy mode is entered, and the active functions are placed on standby.
If a telephone call is in progress at the time, it will be maintained for around 10 minutes via the audio system's hands-free system.
Exiting the mode
These functions are automatically reactivated the next time the vehicle is used.
To restore the use of these functions immediately, start the engine and let it run:
- For less than 10 minutes, to use the equipment for approximately 5 minutes.
- For more than 10 minutes, to use the equipment for approximately 30 minutes.
Let the engine run for the specified duration to ensure that the battery charge is sufficient.
To recharge the battery, avoid repeatedly or continuously restarting the engine.
A flat battery prevents the engine from starting. For more information on the 12 V battery, refer to the corresponding section.
Load reduction mode
This system manages the use of certain functions according to the level of charge remaining in the battery.
When the vehicle is being driven, the load reduction function temporarily deactivates certain functions, such as the air conditioning and the heated rear screen.
The deactivated functions are reactivated automatically as soon as conditions permit.
Bonnet
! Stop & Start Before doing anything under the bonnet, you must switch off the ignition to avoid any risk of the engine restarting automatically. Take care with objects or clothing that could be caught in the blades of the cooling fan
160
Practical information
or in certain moving components - risk of strangulation and serious injury!

! Rechargeable hybrid vehicles Before any work is carried out under the bonnet, it is essential to switch off the ignition and disconnect the charging connector nozzle if it is connected, check that the READY indicator lamp is off on the instrument panel and wait 4 minutes - risk of serious injury!
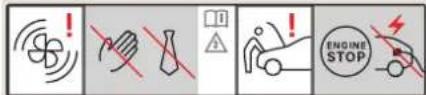
i The location of the interior bonnet release lever prevents the bonnet being opened when the left-hand front door is closed.
When the engine is hot, handle the exterior safety catch with care (risk of burns), using the protected area. When the bonnet is open, take care not to damage the safety catch. Do not open the bonnet under very windy conditions.
! Cooling of the engine when stopped The engine cooling fan may start after the engine has been switched off. Take care with objects or clothing that could be caught in the blades of the fan!
Opening
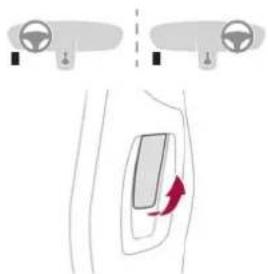
natural_image
Diagram showing a car interior with dashboard and steering wheel (no text or labels)▶ From the inside: pull the control lever, located on the left below the dashboard, towards you.
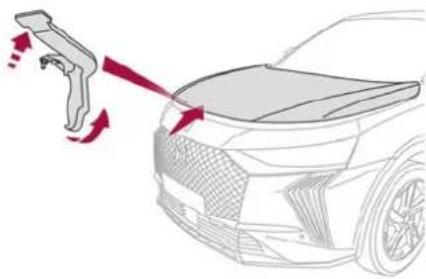
natural_image
Diagram of a car's front bumper with spray gun and red motion arrows indicating movement (no text or symbols)▶ From the outside: lift the safety catch and raise the bonnet. A bonnet strut opens the bonnet and holds it open.
Closing
▶ Lower the bonnet and release it near the end of its travel.
▶ Check the locking.
! Because of the presence of electrical equipment under the bonnet, it is strongly recommended that exposure to water (rain, washing, etc.) be limited.
Engine compartment
The engine shown here is an example for illustrative purposes only.
The locations of the following components may vary:
- Air filter.
- Engine oil dipstick.
- Engine oil filler cap.
- Priming pump.
- Degassing screw.
Petrol engine
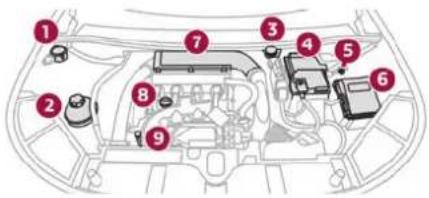
Diesel engine
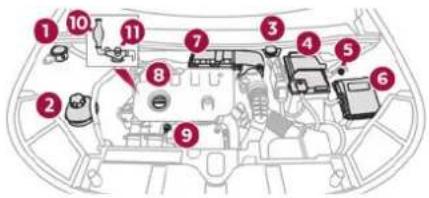
- Screenwash fluid reservoir
- Engine coolant reservoir
- Brake fluid reservoir
- Battery/Fuses
- Remote earth point (-)
- Fusebox
- Air filter
- Engine oil filler cap
- Engine oil dipstick
- Priming pump*
- Degassing screw*
Diesel fuel system
This system is under very high pressure. All work must be carried out only by a dealer or a qualified workshop.
Checking levels
Check all of the following levels regularly in accordance with the Manufacturer's service schedule. Top them up if required, unless otherwise indicated. If a level drops significantly, have the corresponding system checked by a dealer or a qualified workshop.
! The fluids must comply with the Manufacturer's requirements and with the vehicle's engine.
Take care when working under the bonnet, as certain areas of the engine may be extremely hot (risk of burns) and the cooling fan could start at any time (even with the ignition off).
Used products
Avoid prolonged contact of used oil or fluids with the skin. Most of these fluids are harmful to health and very corrosive.
Do not discard used oil or fluids into sewers or onto the ground. Empty used oil into the containers reserved for this purpose at a dealer or a qualified workshop.
Engine oil
The level is checked, with the engine having been switched off for at least 30 minutes and on level ground, either using the oil level indicator in the instrument panel when the ignition is switched on (for vehicles equipped with an electric gauge), or using the dipstick. It is normal to top up the oil level between two services (or oil changes). It is recommended that you check the level, and top up if necessary, every 3,000 miles (5,000 km).
In order to maintain the reliability of the engine and emissions control system, never use additives in the engine oil.
Practical information
162
Practical information
Checking using the dipstick
For the location of the dipstick, please refer to the illustration of the corresponding engine compartment.
▶ Grasp the dipstick by its coloured grip and pull it out completely.
▶ Wipe the end of the dipstick using a clean, lint-free cloth.
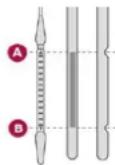
▶ Reinsert the dipstick and push fully down, then pull it out again to visually check the oil level: the correct level is between marks A (max) and B (min).
Do not start the engine if the level is:
- above mark A: contact a dealer or a qualified workshop.
- below mark B: top up the engine oil immediately.
Oil grade Before topping up or changing the engine oil, check that the oil is suitable for your engine and complies with the recommendations in the service schedule supplied with the vehicle (or available from your dealer or qualified workshop).
Use of non-recommended oil may invalidate your warranty in the event of engine failure.
Topping up the engine oil level
For the location of the engine oil filler cap, please refer to the corresponding engine compartment illustration.
▶ Add oil in small quantities, avoiding any spills on engine components (risk of fire).
▶ Wait a few minutes before checking the level again using the dipstick.
▶ Top up the level if necessary.
▶ After checking the level, carefully screw the oil filler cap back on and replace the dipstick in its tube.
i The oil level indication displayed on the instrument panel when the ignition is switched on is not valid for 30 minutes following an addition of oil.
Brake fluid
The level of this fluid should be close to the "MAX" mark. If not, check the brake pads for wear.
To know how often the brake fluid should be replaced, refer to the manufacturer's servicing schedule.
! Clean the cap before removing it to refill. Use only DOT4 brake fluid from a sealed container.
Engine coolant
It is normal to top up this fluid between two services.
The check and top-up must only be done with the engine cold.
A level of coolant that is too low risks causing major damage to the engine; the coolant level must be close to the "MAX" mark without ever going above it.
If the level is close to or below the "MIN" mark, it is essential to top it up.
When the engine is hot, the temperature of the coolant is regulated by the fan.
As the cooling system is pressurised, wait at least one hour after switching off the engine before carrying out any work.
In order to avoid the risk of scalding if you need to top up in an emergency, wrap a cloth around the cap and unscrew the cap by two turns to allow the pressure to drop.
Once the pressure has dropped, remove the cap and top up to the required level.
Screenwash fluid

Top up to the required level when necessary.
Fluid specification
The fluid must be topped up with a pre-mixed product.
In winter (temperatures below zero), a fluid containing an anti-freeze agent which is
appropriate for the temperature conditions must be used in order to protect the system's components (pump, tank, ducts, jets).
! Filling with pure water is prohibited in all circumstances (risk of freezing, limescale, etc.).
Diesel fuel additive (Diesel with particle filter)

On reaching the minimum level in the particle filter additive tank, this warning
lamp comes on fixed, accompanied by an audible signal and a warning message.
Topping up
The topping up of this additive must be carried out quickly.
Visit a dealer or a qualified workshop.
AdBlue ^® (BlueHDi)
An alert is triggered when the reserve level is reached.
For more information on the Indicators and in particular the AdBlue range indicators, refer to the corresponding section.
To avoid the vehicle being immobilised in accordance with regulations, you must top up the AdBlue tank.
For more information on AdBlue ^® (BlueHDi), and in particular the supply of AdBlue, refer to the corresponding section.
Checks
Unless otherwise indicated, check these components in accordance with the Manufacturer's service schedule and according to your engine. Otherwise, have them checked by a dealer or a qualified workshop.
! Only use products recommended by the Manufacturer or products of equivalent quality and specification. In order to optimise the operation of components as important as those in the braking system, the Manufacturer selects an offers very specific products.
12 V battery

The battery does not require any maintenance.
Check regularly that the terminals are correctly tightened (versions without quick-release terminals) and that the connections are clean.
For more information on the precautions to take before any work on the 12 V battery, refer to the corresponding section.
! Versions equipped with Stop & Start are fitted with a 12 V lead-acid battery with special technology and specifications. Its replacement should be carried out only by a dealer or a qualified workshop.
Passenger compartment filter

Depending on the environment and the use of the vehicle (e.g. dusty atmosphere, city ), change it twice as often, if necessary.
i A clogged passenger compartment filter can adversely affect air conditioning system performance and generate undesirable odours.
Air filter

Depending on the environment and the use of the vehicle (e.g. dusty atmosphere, city ), change it twice as often, if necessary.
Oil filter

Change the oil filter each time the engine oil is changed.
Particle filter (Diesel)

The start of clogging of the particle filter is indicated by the temporary lighting of this light lamp, accompanied by an alert message. In as traffic conditions allow, regenerate power by driving at a speed of at least 37 mph (a/h), with an engine speed above 2,500 or about 15 minutes (until the warning lamp out).
If it is not possible to reach 37 mph (60 km/h), leave the engine running at idle for about 15 minutes, then drive with an engine speed above 2,500 rpm for 15 minutes.
164
Practical information
Do not switch off the engine until the filter is fully regenerated; repeated intervals can degrade the engine oil prematurely. Regenerating the filter while the vehicle is stationary is not recommended.
Following prolonged operation of the vehicle at very low speed or at idle, you may, in exceptional circumstances, notice water vapour coming from the exhaust while accelerating. These emissions have no impact on the vehicle's behaviour and the environment.

New vehicle
During the first few particle filter regeneration operations, you may notice a "burning" smell. This is perfectly normal.
Automatic gearbox

The gearbox does not require any maintenance (no oil change).
Electric parking brake

This system does not require any routine servicing. However, in the event of a m, do not hesitate to have the system ed by a dealer or a qualified workshop.

For more information on the Electric parking brake, refer to the corresponding
Brake pads
Brake wear depends on the style of driving, particularly in the case of vehicles used in town, over short distances. It may be necessary to have the condition of the brakes checked, even between vehicle services.
Unless there is a leak in the circuit, a drop in the brake fluid level indicates that the brake pads are worn.
After washing the vehicle, moisture, or in wintry conditions, ice can form on the brake discs and pads: braking efficiency may be reduced. Gently dab the brakes to dry and defrost them.
Brake disc wear

For information on checking brake disc wear, contact a dealer or a qualified hop.
Wheels and tyres
The inflation pressure of all tyres, including the spare wheel, must be checked on "cold" tyres.
The pressures indicated on the tyre pressure label are valid for "cold" tyres. If you have driven for more than 10 minutes or more than 6 miles (10 kilometres) at over 31 mph (50 km/h), add 0.3 bar (30 kPa) to the values indicated on the label.
! Under-inflation increases energy consumption. Non-compliant tyre pressures cause tyres to wear prematurely and have an adverse effect on the vehicle's road holding - risk of accident!
Driving with worn or damaged tyres reduces the braking and road holding performance of the vehicle. Regularly check the condition of the tyres (tread and sidewalls) and rims as well as the presence of the valve caps.
When the wear indicators no longer appear set back from the tread, the depth of the grooves is less than 1.6 mm; replace the tyres as soon as possible.
Using different size wheels and tyres from those specified can affect the lifetime of tyres, wheel rotation, ground clearance, the speedometer reading and have an adverse effect on road holding.
Fitting different tyres on the front and rear axles can cause the ESC to mistime.
Always mark the direction of rotation on the tyres that will be stored when fitting winter or summer tyres. Store them in a cool, dry place and away from direct exposure to the sun's rays.

Winter or 4-seasons tyres can be identified by this symbol on their sidewalls.
Shock absorbers

It is not easy for drivers to detect when shock absorbers are worn. Nevertheless,
the shock absorbers have a major impact on road holding and braking performance. For your safety and driving comfort, it is important to have them regularly checked by a dealer or a qualified workshop.
Timing and accessory kits

The timing and accessory kits are used from the time the engine is started until it
is switched off. It is normal for them to wear over time.
A faulty timing or accessory kit can damage the engine, rendering it unusable. Observe the recommended replacement frequency, stated in distance travelled or time elapsed, whichever is reached first.
AdBlue ^® (BlueHDi)
To respect the environment and ensure compliance with the Euro 6 standard, without adversely affecting the performance or fuel consumption of its Diesel engines, the Manufacturer has taken the decision to equip its vehicles with a system that combines SCR (Selective Catalytic Reduction) with a Diesel Particle Filter (DPF) for the treatment of exhaust gases.
SCR system
Using a liquid called AdBlue ^x that contains urea, a catalytic converter turns up to 85% of the nitrogen oxides (NOx) into nitrogen and water, which are harmless to health and the environment.

The AdBlue ^® is contained in a special tank holding about 17 litres.
Its capacity allows a driving range of approximately 3,900 miles (6,500 km), which may vary considerably depending on your driving style. An alert system is triggered once the reserve level is reached: it is then possible to drive for a further 1,500 miles (2,400 km) before the tank is empty and the vehicle is immobilised.
For more information on the Warning and indicator lamps and the associated alerts, or the Indicators, please refer to the corresponding sections.
Once the AdBlue ^® tank is empty, a device required by law prevents the engine from being restarted.
If the SCR system is faulty, the level of emissions from the vehicle will no longer meet the Euro 6 standard and the vehicle starts polluting the environment. In the event of a confirmed SCR system malfunction, it is essential to visit a dealer or a qualified workshop. After 660 miles (1,100 km) a device is automatically activated to prevent the engine from starting. In both cases, a range indicator indicates the distance that can be travelled before the vehicle is stopped.
• Freezing of the AdBlue\*
1 AdBlue ^® freezes at temperatures below around -11°C.
The SCR system includes a heater for the AdBlue ^® tank, allowing you to continue driving in very cold conditions.
Supply of AdBlue®
It is recommended that the AdBlue ^® be topped up as soon as the first alert is issued indicating that the reserve level has been reached.

For the correct operation of the SCR system:
- Use only AdBlue "fluid that meets the ISO 22241 standard.
- Never transfer AdBlue ^® to another container as it would lose its purity.
- Never dilute AdBlue ^® with water.
You can obtain AdBlue ^® from a dealer or a qualified workshop, as well as service stations equipped with AdBlue ^® pumps specially designed for passenger vehicles.
Recommendations on storage
AdBlue ^x freezes at about -11°C and deteriorates above +25°C. Containers should be stored in a cool area and protected from direct sunlight.
Under these conditions, the fluid can be kept for at least a year.
If the fluid has frozen, it can be used once it has completely thawed out at room temperature.
166
Practical information
! Never store AdBlue ^™ containers in your vehicle.
Precautions for use
AdBlue ^* is a urea-based solution. This fluid is non-flammable, colourless and odourless (when kept in a cool place).
In the event of contact with the skin, wash the affected area with soap and running water. In the event of contact with the eyes, immediately rinse the eyes with large amounts of water or with an eye wash solution for at least 15 minutes. Seek medical attention if you feel a persistent burning sensation or irritation.
If swallowed, immediately wash out the mouth with clean water and then drink plenty of water. In certain conditions (high temperature, for example), the risk of release of ammonia cannot be excluded: do not inhale the fluid. Ammonia vapours have an irritant effect on mucous membranes (eyes, nose and throat).
! Store AdBlue ^® out of the reach of children, in its original container.
Procedure
Before starting the top-up procedure, ensure that the vehicle is parked on a flat and level surface. In wintry conditions, ensure that the temperature of the vehicle is above -11°C. Otherwise the AdBlue* may be frozen and so cannot be poured into the tank. Park the vehicle in a warmer area
for a few hours to allow the top-up to be carried out.
Never pour the AdBlue ^x into the Diesel fuel tank.
If any AdBlue ^® is splashed, or if there are any spillages on the bodywork, rinse immediately with cold water or wipe with a damp cloth. If the fluid has crystallised, clean it off using a sponge and hot water.
! Important: in the event of a top-up after an AdBlue breakdown, you must wait about 5 minutes before switching on the ignition, without opening the driver's door, unlocking the vehicle or bringing the electronic key into the passenger compartment. Switch on the ignition, then wait for 10 seconds before starting the engine.
▶ Press the "START/STOP" button to switch off the engine.
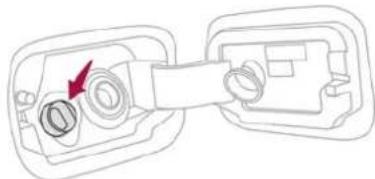
natural_image
Diagram of a mechanical assembly with two components and a red arrow indicating a directional component (no text or symbols)▶ Turn the blue cap of the AdBlutank anticlockwise and remove it.
With a container of AdBlue after checking the expiry date, read the instructions on the label carefully before pouring the contents of the container into the vehicle's AdBlue ^® tank.
▶ With an AdBlue pump: insert the nozzle and fill the tank until the nozzle automatically cuts out.
In order not to overfill the AdBlue ^® tank: - Add between 10 and 13 litres using AdBlue ^® containers.
- Stop after the nozzle's first automatic cut-out, if you are refilling at a service station. The system only registers AdBlue ^x intermediate top-ups of 5 litres or more.
! If the AdBlue ^® tank is completely empty – which is confirmed by the message "Top up AdBlue: Starting impossible" – it is essential to add at least 10 litres.
Top-up detection may not be instantaneous after addition. It may take a few minutes of driving before the top-up detection is effective.
Free-wheeling
In certain situations, it is necessary to put the vehicle into free-wheeling mode (e.g. towing, on a rolling road, automatic car wash (Wash mode), rail or sea transport).
The procedure varies according to the type of gearbox and parking brake.
! Never leave the vehicle unattended with the vehicle into free-wheeling mode.


Release procedure
▶ With the vehicle stationary and the engine running, select mode N and switch off the engine. Within 5 seconds:
▶ Switch on the ignition.
▶ While depressing the brake pedal, move the push selector forwards or backwards to confirm mode N.
▶ While depressing the brake pedal, press the control to release the parking brake.
▶ Release the brake pedal, switch off the ignition.
i If the 5-second time limit is exceeded, the gearbox engages mode P; it is then necessary to restart the procedure.
Reverting to normal operation
▶ While depressing the brake pedal, restart the engine and select mode P.
i Keyless Entry and Start You must not depress the brake pedal while switching the ignition on again, then switching it off. If you do, the engine will start, requiring you to restart the procedure.
Advice on care and maintenance
General recommendations
Observe the following recommendations to avoid damaging the vehicle.
Exterior
Never use a high-pressure jet wash in the engine compartment - risk of damaging the electrical components! Do not wash the vehicle in bright sunshine or extremely cold conditions.
When washing the vehicle in an automatic roller-brush car wash, be sure to lock the doors and, depending on version, move the electronic key away and deactivate the "hands-free" function (Hands-Free Tailgate Access).
When using a pressure washer, keep the jet nozzle at a minimum distance of 30 cm from the vehicle (particularly when cleaning areas containing chipped paint, sensors or seals). Promptly clean up any stains containing chemicals liable to damage the vehicle's paintwork (including tree resin, bird droppings, insect secretions, pollen and tar). Depending on the environment, clean the vehicle frequently to remove salty deposits (in coastal areas), soot (in industrial areas)
and mud/salts (in wet or cold areas). These substances can be highly corrosive. Contact a dealer or a qualified workshop for advice on removing stubborn stains requiring special products (such as tar or insect removers). Preferably, have paint touch-ups performed by a dealer or a qualified workshop.
Interior
When washing the vehicle, never use a water hose or high-pressure jet to clean the interior. Liquids carried in cups or other open containers can spill, presenting a risk of damage to the instruments and controls and the controls located on the centre console. Be vigilant! To clean instrument panels, touch screens or other displays, wipe gently with a soft, dry cloth. Do not use products (e.g. alcohol, disinfectant) or soapy water directly on these surfaces - risk of damage!
Practical information

168
Practical information
Bodywork
High-gloss paint
Do not use abrasive products, solvents, petrol or oil to clean the bodywork.
Never use an abrasive sponge to clean stubborn stains - risk of scratching the paintwork!
Do not apply polish in strong sunshine, or to plastic or rubber parts.
i Use a soft cloth and soapy water or a pH neutral product.
Gently wipe the bodywork with a clean microfibre cloth.
Apply polish with the vehicle clean and dry. Comply with the instructions for use stated on the product.
Decals
(Depending on version)
Do not use a high-pressure washer to clean the vehicle - risk of damaging or detaching the decals!
i Use a high-flow hose (temperature between 25°C and 40°C).
Place the jet of water perpendicular to the surface to be cleaned.
Rinse the vehicle with demineralised water.
Textile
The dashboard, door panels and seats may contain parts made of textile material.
Maintenance
Do not use aggressive cleaning products (e.g. alcohol, solvent or ammonia). Do not use steam-cleaning systems - risk of affecting the adhesion of the fabrics!
i Remove dust from the textile parts regularly with a dry cloth, soft brush or vacuum cleaner.
Rub down the textile parts once per year with a clean, damp cloth. After leaving overnight to dry, brush with a soft-bristled brush.
Stain removal
! Do not rub the stain or it may spread or you may cause the substance to penetrate the surface.
i Act quickly by reducing the stain from its edges inwards.
Remove as much substance or solids as possible using a spoon or spatula, and remove as much liquid as possible using absorbent paper.
i Product/Procedure to use depending on the type of stain:
- Grease, oil and ink: clean with a pH-neutral detergent.
- Vomit: clean with sparkling mineral water.
- Blood: spread flour over the stain and allow to dry; remove with a slightly damp cloth.
- Mud: allow to dry and then remove with a slightly damp cloth.
- Cake, chocolate, ice cream: clean with lukewarm water.
- Sugary and/or alcoholic drinks: clean with lukewarm water, or lemon juice if the stain is persistent.
- Hair gel, coffee, tomato sauce, vinegar: clean with lukewarm water and lemon juice. For solid substances, then use a soft brush or vacuum cleaner.
For liquid substances, then use a damp microfibre cloth and then dry with another cloth.
Alcantara®
Alcantara ^* is an elegant and practical material which is very resistant and easy to maintain.
! Do not use printed cloths or printed absorbent paper.
Do not use steam-cleaning systems.
i Remove dust from the Alcantara ^® parts regularly with a dry cloth, soft brush or vacuum cleaner. Clean the Alcantara ^® , without rubbing too vigorously, with a white cotton cloth which is slightly damp.
To find out which products and procedures to use on different types of stains, refer to the "Textile-Stain removal" section.
For more information, go to the Alcantara* trademark website: www.alcantara.com.
Leather
Leather is a natural product. Appropriate regular care is essential for its durability. It must be protected and nourished using a specific leather product, to keep it supple and preserve its original appearance.
! Do not use maintenance products which are not suitable for cleaning leather (e.g. solvent, detergent, petrol, pure alcohol). Do not use bleaching or colour-removal products (e.g. perchloroethylene). When cleaning items partly made from leather take care not to damage the other materials with the specific leather product.
Before cleaning greasy stains or liquids, quickly mop up any surplus. Before cleaning, wipe off any residues liable to scuff the leather, using a cloth that has
been dampened with demineralised water and thoroughly wrung out. Clean the leather, without rubbing too vigorously, using a soft cloth moistened with soapy water or a pH-neutral product. Dry with a soft, dry cloth.
Practical information


170
In the event of a breakdown
Warning triangle
This reflective and dismantlable device is to be installed on the side of the road when a vehicle is broken down or damaged.
! Before getting out of the vehicle Turn on the hazard warning lamps, then put on the safety vest to assemble and install the triangle.
Storage compartment
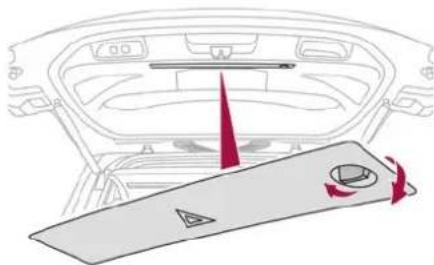
natural_image
Interior view of a car dashboard with a red triangular indicator light and a white panel with a warning symbol (no text or labels)There is a compartment in the interior trim of the tailgate to store a warning triangle.
▶ After opening the tailgate, release the cover by turning the screw a quarter turn to the left.
Assembling and placing the triangle
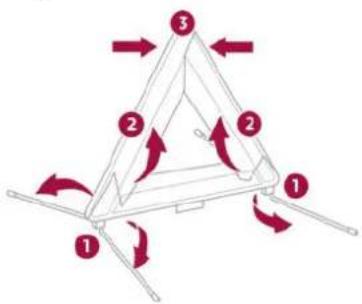
For versions supplied with a triangle as original equipment, refer to the illustration above. For other versions, refer to the assembly instructions provided with the triangle.
▶ Put the triangle in place behind the vehicle, as required by local legislation.
Running out of fuel (Diesel)
With Diesel engines, the fuel system must be primed if you run out of fuel.
Before starting to prime the system, it is essential to put at least 5 litres of Diesel into the fuel tank.
i For more information on Refuelling and on Misfuel prevention (Diesel), refer to the corresponding section.
▶ Switch on the ignition (without starting the engine).
▶ Wait around 1 minute and switch off the ignition.
▶ Operate the starter motor to start the engine. If the engine does not start at the first attempt, do not keep trying, but restart the procedure.
Tool kit
Set of tools supplied with the vehicle.
Its content depends on your vehicle's equipment:
- Temporary puncture repair kit.
- Spare wheel.
- Temporary puncture repair kit. - Spare wheel.
Accessing the tools
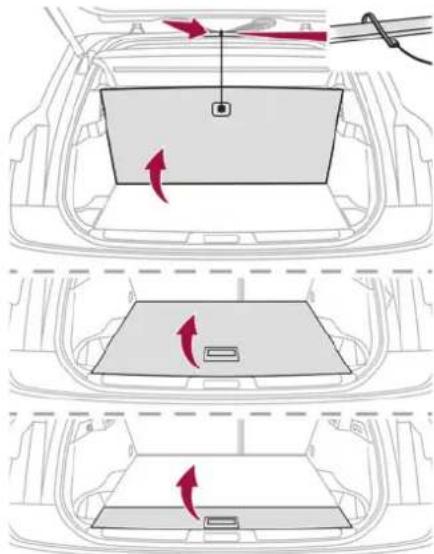
The tool kit is stored in the boot, under the floor.
Versions with rigid boot floor:
▶ Open the boot.
▶ Lift the rigid boot floor.
▶ Attach the floor hook to the upper boot seal.
Versions with 2-position boot floor:
▶ Open the boot.
▶ Place the adjustable boot floor in the high position.
▶ Lift the boot floor past the two retractable stops.
Place the boot floor onto these two stops to hold it up.
Versions with articulated boot mat (Rechargeable hybrid):
▶ Open the boot.
▶ Unfold the articulated boot mat by pulling its handle until it is fully opened.
With temporary puncture repair kit
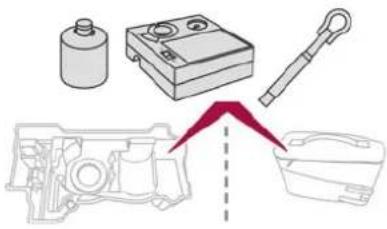
natural_image
Technical line drawing of mechanical components including a cylindrical part, battery pack, wrench, and internal combustion engine casing (no text or labels)With spare wheel
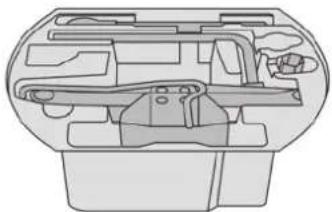
natural_image
Technical line drawing of a mechanical component with internal parts (no text or symbols)These tools are specific to the vehicle and may vary according to the level of equipment. Do not use them for any other purpose.
! The jack must only be used to change a wheel with a damaged or punctured tyre. Do not use any jack other than the one supplied with the vehicle.
If the vehicle does not have its original jack, contact a dealer or a qualified workshop to obtain the one that was intended by the manufacturer.
The jack meets European standards, as defined in the Machinery Directive 2006/42/CE.
The jack does not require any maintenance.

172
In the event of a breakdown
List of tools
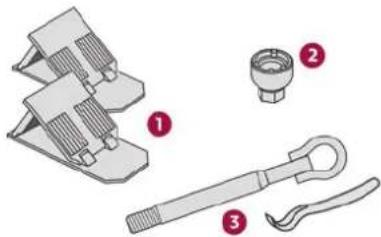
natural_image
Technical illustration of mechanical components including a clamp, washer, and tool (no text or symbols)- Chocks to immobilise the vehicle (depending on equipment)
- Socket for the wheel security bolts (located in the glove box) (depending on equipment) To adapt the wheelbrace to the special 'security' bolts.
- Removable towing eye and tool to open the rear protective cover
For more information on Towing the vehicle and using the removable towing eye, refer to the corresponding section.
With temporary puncture repair kit
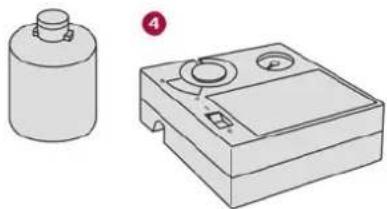
natural_image
Illustration of a cylindrical object next to a rectangular electronic device with circular ports (no text or symbols)- 12 V compressor with cartridge of sealant and speed limit sticker For temporary repair of a tyre and to adjust the tyre pressure.
For more information on the Temporary puncture repair kit, refer to the corresponding section.
With spare wheel
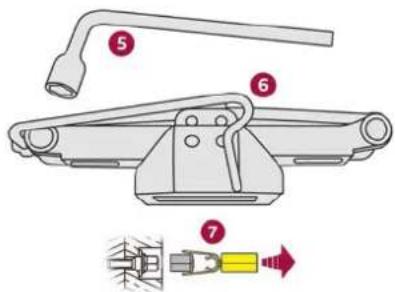
- Wheelbrace
For removing the wheel bolts.
-
Jack with integrated handle To raise the vehicle.
-
Wheel bolt cap removal tool (depending on equipment) For removing the wheel bolt head finishers on alloy wheels.
For more information on the Spare wheel, refer to the corresponding section.
Temporary puncture repair kit
i Visit this link to view explanatory videos: http://q-r.to/bagGI9

Made up of a compressor and a sealant cartridge, it allows you to carry out a temporary repair of the tyre so that you can drive to the nearest garage. It is designed to repair most punctures located on the tyre tread.
i The vehicle's electric system allows the connection of the compressor to the 12 V
power supply for long enough to repair a tyre after a puncture.
i Tyre inflation pressures are indicated on this label. For more information on Identification markings, particularly this label, refer to the corresponding section.
i For more information on the Tool kit, refer to the corresponding section.
Repair procedure
! Do not remove any foreign body (e.g. nail, screw) which has penetrated the tyre.
▶ Park the vehicle without obstructing traffic and apply the parking brake.
▶ Follow the safety instructions (hazard warning lamps, warning triangle, high visibility jacket, etc.) according to the legislation in force in the country in which you are driving.
▶ Switch the ignition off.
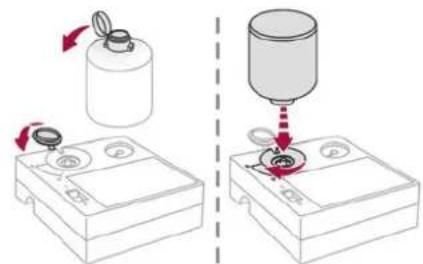
Remove the transparent cap from the bottle of sealant.
▶ Lift the protective cover before installing the bottle of sealant on the compressor.
▶ Turn the bottle of sealant over and screw it a quarter turn into the compressor.
Remove the valve cap from the tyre to be repaired, and place it in a clean place.
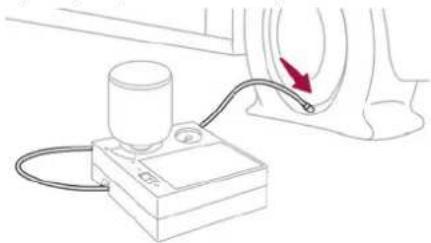
natural_image
Diagram of a medical or laboratory setup with a device connected to a curved tube and a red arrow indicating direction (no text or symbols present)▶ Uncoil the pipe stowed under the compressor.
▶ Connect the pipe from the compressor to the valve of the tyre to be repaired and tighten firmly.
▶ Check that the compressor switch is in position "0".
In the event of a breakdown
▶ Fully uncoil the electric cable stowed under the compressor.
▶ Connect the compressor's electric plug to the vehicle's 12 V socket.
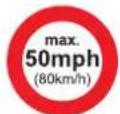
▶ Affix the speed limit sticker.
! The speed limit sticker must be affixed inside the vehicle in the area close to the driver, to remind them that a wheel is in temporary use.
▶ Switch the ignition on.
Switch on the compressor by moving the switch to position "I" until the tyre pressure reaches 2 bar. The sealant product is injected under pressure into the tyre; do not disconnect the pipe from the valve during this operation (risk of blowback).
! If after approximately 7 minutes, the pressure of 2 bar is not reached, this indicates that the tyre is not repairable; contact a dealer or a qualified workshop for assistance.


174
In the event of a breakdown
▶ Move the switch to position "O".
▶ Disconnect the compressor's electric plug from the vehicle's 12 V socket.
Remove the kit.
▶ Refit the cap on the valve.
▶ Remove and store the bottle of sealant.
! The sealant product is harmful if swallowed and causes irritation to the eyes.
Keep this product out of the reach of children. The use-by date of the fluid is marked on the bottle.
After use, do not discard the bottle into the environment; take it to a dealer or an authorised waste disposal site.
Do not forget to obtain a new bottle of sealant, available from a dealer or a qualified workshop.
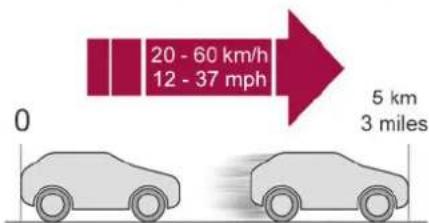
▶ Drive immediately for approximately 3 miles (5 kilometres) at reduced speed (between 12 and 37 mph (20 and 60 km/h)) to plug the puncture.
▶ Stop to check the repair and the tyre pressure using the kit:
- If the tyre pressure is incorrect, contact a dealer to have the tyre changed.
- If the tyre pressure is correct, drive a second time for approximately 3 miles (5 kilometres) at reduced speed (between 12 and 37 mph (20 and 60km / h ), stop then check again the tyre pressure using the kit to confirm the effective repair of the tyre.
! With a tyre repaired using this type of kit, do not exceed a speed of 50 mph (80 km/h) and do not drive more than 125 miles (200 km).
You must contact a dealer or a qualified workshop to have the repair checked and the tyre changed.
Checking/adjusting tyre pressures
The compressor can be used, without injecting sealant, to check and, if necessary, adjust the tyre pressures.
Remove the valve cap from the tyre and keep it in a clean place.
▶ Uncoil the pipe stowed under the compressor.
▶ Screw the pipe onto the valve and tighten firmly.
▶ Check that the compressor switch is in position "0".
▶ Fully uncoil the electric cable stowed under the compressor.
▶ Connect the compressor's electric plug to the vehicle's 12 V socket.
▶ Switch the ignition on.
▶ Start the compressor by placing the switch at position "I" and adjust the pressure to the value shown on the vehicle's tyre pressure label. To deflate: press the black button located on the compressor pipe, near the valve connection.
! If after 7 minutes the pressure of 2 bar is not reached, the tyre is damaged; contact a dealer or a qualified workshop for assistance.
▶ Once the correct pressure is reached, put the switch in position "0".
▶ Remove the kit and stow it.
▶ Refit the cap on the valve.
! Should the pressure of one or more tyres be adjusted, it is necessary to reinitialise the under-inflation detection system.
For more information on Tyre under-inflation detection, refer to the corresponding section.
Spare wheel
i Visit this link to view explanatory videos: http://q-r.to/bagGI9
i For more information on the Tool kit, refer to the corresponding section.
Accessing the spare wheel
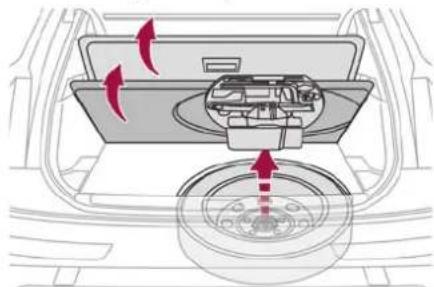
natural_image
Diagram of a car interior showing airflow direction and component placement (no text or symbols)The spare wheel is stored in the boot, under the floor.
To access the spare wheel, first refer to the Tool kit section.
i Depending on version, the spare wheel may be a standard size steel or alloy wheel. In some countries, it is a 'space saver' wheel.
Removing the spare wheel
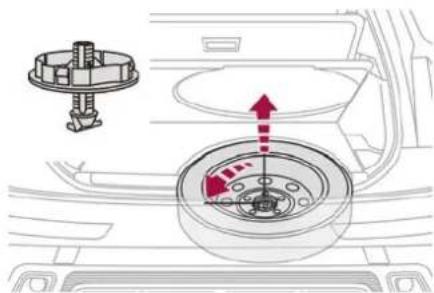
natural_image
Diagram of a car interior showing a wheel assembly and directional arrows indicating motion (no text or symbols)▶ Slacken the central nut.
▶ Remove the fastening device (nut and bolt).
▶ Lift the spare wheel towards the back of the boot.
▶ Take the wheel out of the boot.
Putting the spare wheel back in place
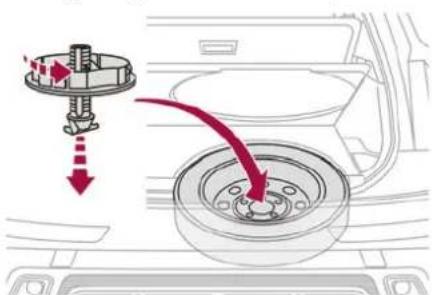
▶ Put the spare wheel back in place in its housing.
- Slacken the nut on the bolt by a few turns.
- Position the fastening device (nut and bolt) in the middle of the wheel.
▶ Tighten the central nut sufficiently to retain the wheel correctly.
▶ Put the tool box back in place in the middle of the wheel and clip it in place.
Removing a wheel
! Parking the vehicle Immobilise the vehicle where it does not obstruct traffic: the ground must be level, stable and non-slippery. Select mode P on the automatic gearbox to lock the wheels, apply the parking brake, unless it is set to automatic mode, and switch off the ignition.
In the event of a breakdown

176
In the event of a breakdown
Check that the parking brake indicator lamps on the instrument panel are on fixed.
The occupants must get out of the vehicle and wait where they are safe.
If necessary, place a chock under the wheel diagonally opposite the wheel to be changed. Never go underneath a vehicle raised using a jack; use an axle stand.
- Wheel with wheel trim
When removing the wheel, first remove the wheel trim by pulling at the valve aperture using the wheelbrace.
When refitting the wheel, refit the wheel trim, starting by placing its aperture in line with the valve and then pushing it into place all round its edge with the palm of your hand.
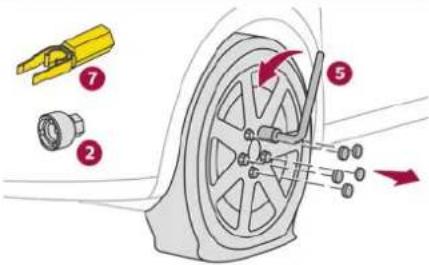
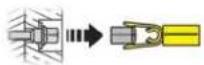
▶ To remove the wheel bolt cover on each of the bolts, use tool 7 (alloy wheels).
▶ Fit security socket 2 on wheelbrace 5 to slacken the security bolt.
▶ Slacken the other bolts using the wheelbrace 5 only.
! Never use an impact wrench on the security bolt socket.
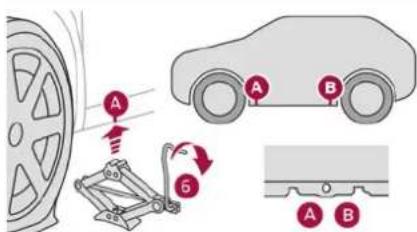
Place the foot of jack 6 on the ground and ensure that it is directly below the front A or rear B jacking point on the underbody, whichever is closest to the wheel to be changed.
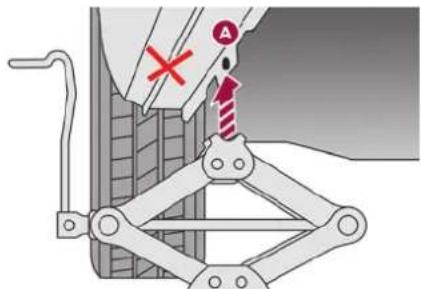
▶ Extend jack 6 until its head comes into contact with jacking point A or B; contact area A or B on the vehicle must be properly inserted into the central part of the head of the jack.
▶ Raise the vehicle until there is sufficient space between the wheel and the ground to easily admit the spare (not punctured) wheel.
! Ensure that the jack is stable. If the ground is slippery or loose, the jack may slip or collapse - risk of injury!
Take care to position the jack strictly at one of the jacking points A or B under the vehicle, ensuring that the head of the jack is centred under the contact area on the vehicle. Otherwise, there is a risk of damage to the vehicle and/or of the jack collapsing - risk of injury!
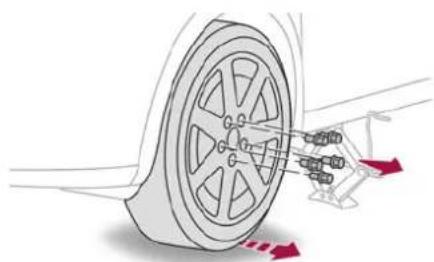
natural_image
Diagram of a car wheel with attached suspension components and red directional arrows indicating motion (no text or symbols)Remove the bolts and store them in a clean place.
Remove the wheel.
Fitting a wheel
i Fitting a steel or "space-saver" type spare wheel
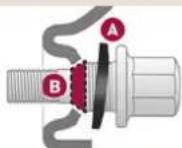
If the vehicle is fitted with alloy wheels, the washers A do not make contact with the steel or "space-saver" type spare wheel. The wheel is held in place by the conical contact surface B of each bolt.
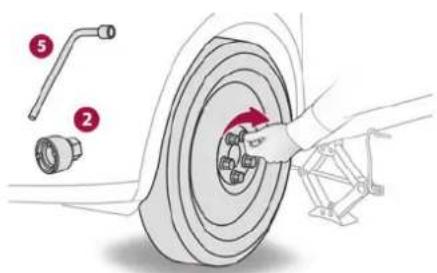
▶ Fit the wheel on the hub.
▶ Screw in the bolts by hand as far as possible.
▶ Pre-tighten the security bolt using the wheelbrace 5 equipped with a security socket 2.
▶ Pre-tighten the other bolts using the wheelbrace 5 only.
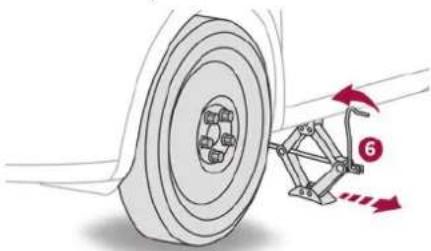
natural_image
Mechanical assembly diagram showing a wheel and linkage mechanism with red arrows indicating motion (no text or symbols)▶ Lower the vehicle again fully.
▶ Fold jack 6 and remove it.
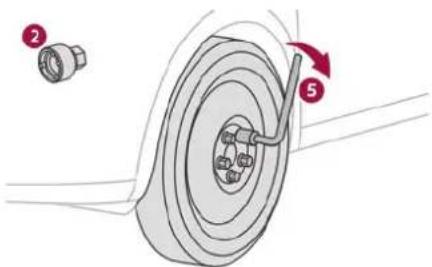
▶ Tighten the security bolt using the wheelbrace 5 equipped with a security socket 2.
▶ Tighten the other bolts using the wheelbrace 5 only.
▶ Refit the bolt covers to each of the bolts (depending on equipment).
▶ Store the tools.
After changing a wheel
Store the punctured wheel in the boot or, depending on version, remove the central cover first to store it beneath the floor in place of the spare wheel.

With a "space-saver" type spare wheel
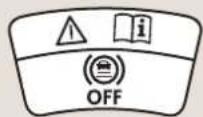
Deactivate certain driving aid functions (Active Safety Brake, Adaptive cruise control, etc.).
In the event of a breakdown

178
In the event of a breakdown
Do not exceed the maximum authorised speed of 50 mph (80 km/h) or the maximum distance of 50 miles (80 km).
Driving with more than one "space-saver" type spare wheel is prohibited.
! Visit a dealer or a qualified workshop. Have the tightening of the spare wheel's bolts and its tyre pressure checked. Have the punctured tyre examined. After inspection, the technician will advise you on whether the tyre can be repaired or if it must be replaced.
Changing a bulb
In some weather conditions (e.g. low temperature or humidity), misting on the internal surface of the glass of the headlamps and rear lamps is normal, and will disappear after the lamps have been on for a few minutes.
! Never look too closely at the light beam of LED technology lamps - risk of serious eye injury!

! The headlamps have polycarbonate lenses with a protective coating: - Do not clean them with a dry or abrasive cloth, nor with detergent or solvent products.
- Use a sponge and soapy water or a pH neutral product.
- When using a high-pressure washer on persistent marks, do not keep the lance directed towards the headlamps, lamps or their edges for too long, so as not to damage their protective coating and seals.
Changing a bulb must only be done with the ignition off and after the headlamp / lamp has been switched off for several minutes - risk of serious burns! Do not touch the bulb directly with your fingers; use a lint-free cloth.
It is essential only to use anti-ultraviolet (UV) type bulbs, so as not to damage the headlamp. Always replace a failed bulb with a new bulb of the same type and specification. To avoid lighting imbalance, replace the bulbs in pairs.
After changing a bulb To refit, carry out the operations in reverse order to removal. Close the protective cover very carefully to guarantee the sealing of the lamps.
Light-emitting diode (LED) headlamps and lamps
Depending on version, the affected types of headlamps/lamps are:
- LED technology headlamps.
- DS PIXEL LED VISION 3.0 headlamps.
- Offset daytime running lamps/sidelamps/direction indicators.
- Direction indicator side repeaters.
- Side spotlamps.
- Brake lamps.
- Tailgate rear lamps.
- Third brake lamp.
- Number plate lamps.
! If you need to replace this type of bulb, you must contact a dealer or a qualified workshop.
Do not touch the LED technology bulbs - risk of electrocution!

Front lamps
Model with DS PIXEL LED VISION 3.0 headlamps
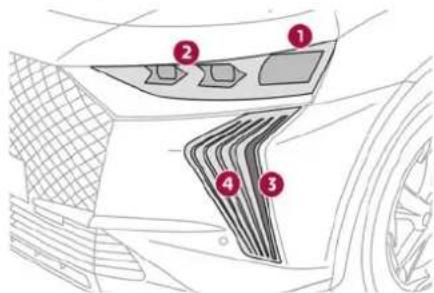
- Dipped beam/main beam headlamps with Pixel module
- Low beam headlamps
- Direction indicators/Daytime running lamps
- Additional daytime running lamps/Sidelamps (DS LIGHT VEIL)
Model with LED technology headlamps
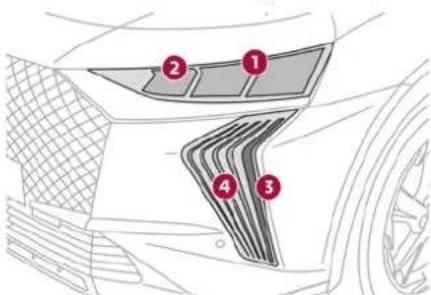
- Dipped beam headlamps
- Main beam headlamps
- Direction indicators/Daytime running lamps
- Additional daytime running lamps/Sidelamps (DS LIGHT VEIL)
Rear lamps
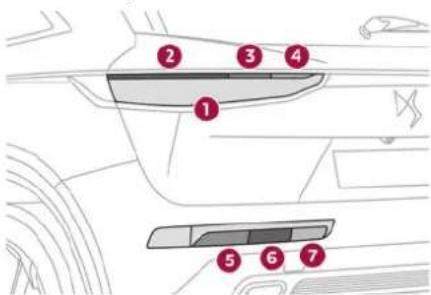
Main lamps
- Sidelamps (LED)
- Direction indicators (LED)
- Brake lamps (LED)
- Reversing lamps (LED)
Secondary lamp cluster
- Brake lamps/sidelamps reminder (P21/5W)
- Direction indicators reminder (PY21W)
- Foglamps (W16W)
Access to the secondary lamp cluster
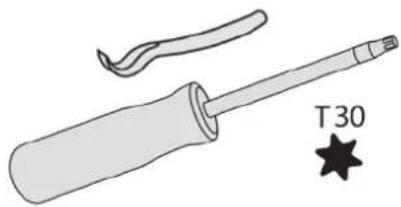
natural_image
Illustration of a screwdriver with a curved handle and a star symbol labeled T30 (no text or symbols on the diagram itself)Tools required: rear protective cover opening tool (tool kit) and Torx T30 screwdriver (not supplied).

180
In the event of a breakdown
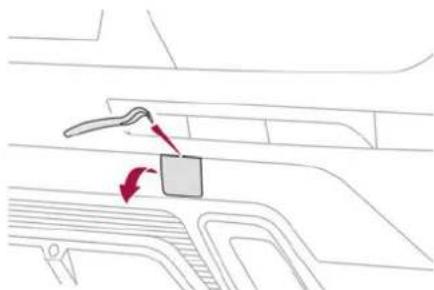
natural_image
Diagram showing a vehicle's rearview and side profile with red arrows indicating motion or movement (no text or symbols)▶ Using the opening tool, unclip the cover of the access flap on the rear screw thread of the towing eye, then pull it towards you.
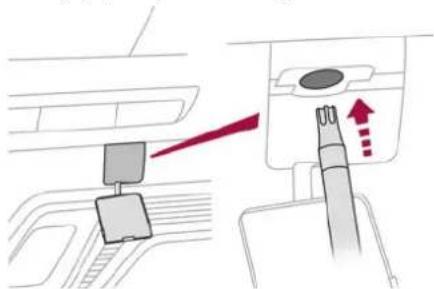
▶ Insert the screwdriver head diagonally in the cylindrical guide until you reach the lamp unit fixing bolt.
▶ Slacken the bolt by about 10 turns then pull the lamp unit to release it from the bumper.
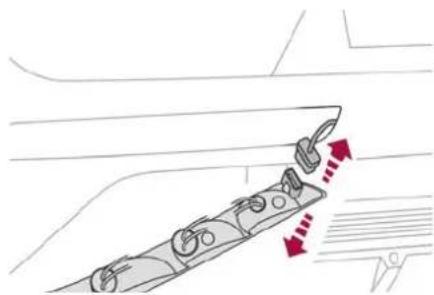
natural_image
Diagram of a car interior showing a steering wheel and dashboard with red arrows indicating motion (no text or symbols)▶ Disconnect the harness.
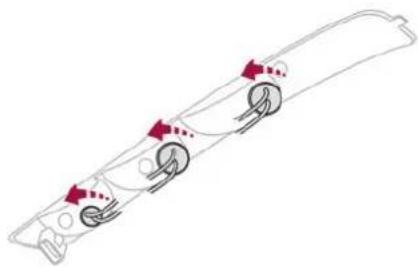
natural_image
Diagram of a vehicle with motion arrows indicating speed or speed (no text or symbols)For each lamp:
▶ Turn the bulb holder a quarter turn anticlockwise and remove it.
▶ Remove the bulb and replace it.
Fuses
Changing a fuse All work must be carried out only by a dealer or a qualified workshop.
The replacement of a fuse by a third party could cause a serious malfunction of the vehicle.
• Installing electrical accessories
1 The vehicle's electrical system is designed to operate with standard or optional equipment.
Before fitting other electrical equipment or accessories to your vehicle, contact a dealer or a qualified workshop.
! The Manufacturer accepts no responsibility for the cost incurred in repairing the vehicle or for rectifying malfunctions resulting from the installation of accessories not supplied or not approved by it and not installed in accordance with its specifications, in particular when the combined power consumption of all of the additional equipment connected exceeds 10 milliamperes.
12 V battery/Accessory batteries
Lead-acid starter batteries
These batteries contain harmful substances (sulphuric acid and lead). They must be disposed of in accordance with regulations and must never under any circumstances be discarded with household waste. Dispose of used batteries at a designated collection point.
! Protect your eyes and face before handling the battery.
All operations on the battery must be carried out in a well ventilated area and away from naked flames and sources of sparks, to avoid any risk of explosion or fire.
Wash your hands afterwards.
Electronic control units/LED technology headlamps
Never connect the negative jump lead to the metal part of the electronic control units or at the back of the headlamps.
Risk of destroying the electronic control units and/or headlamps!
Connect to the remote earth point provided for this purpose.
! Frozen battery Never try to charge a frozen battery - risk of explosion! If the battery has frozen, have it checked by a dealer or by a qualified workshop, who will verify that the internal components have not been damaged and that the case has not cracked, which could lead to a risk of leakage of toxic and corrosive acid.
! Never try to start the engine by pushing the vehicle.
Symbols
No sparks or naked flames, no smoking. Always protect your eyes. Explosive gases can cause blindness and injury. Keep the vehicle's battery out of the reach of children. The vehicle's battery contains sulphuric acid which can make you go blind or cause severe burns. For more information, refer to the handbook. Explosive gases can be present close to the battery.
With petrol/Diesel engines
Procedure for starting the engine using another battery or for charging a discharged battery.
181 In the event of a breakdown
Accessing the battery
The battery is located under the bonnet.
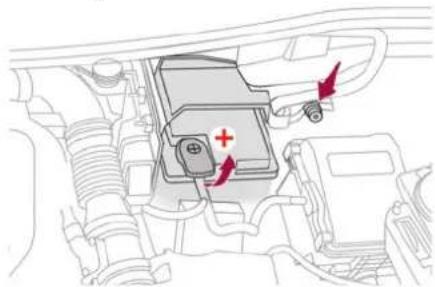
natural_image
Technical diagram of an engine compartment with red arrows indicating directional movement (no text or labels)For access to the (+) terminal:
▶ Release the bonnet by pulling the internal release lever, then the external safety catch.
▶ Raise the bonnet.
(+) Positive terminal with a quick-release terminal.
(-) Negative terminal.
As the battery's negative terminal is not accessible, a remote earth point is located near the battery.
Starting using another battery
If the vehicle's battery is flat, the engine can be started using a backup battery (either external or from another vehicle) and jump leads or using a battery booster.
! Never start the engine by connecting a battery charger. Never use a 24 V or higher battery booster.


182
In the event of a breakdown
Check beforehand that the backup battery has a nominal voltage of 12 V and a capacity at least equal to that of the discharged battery. The two vehicles must not be in contact with each other.
Switch off all electricity-consuming equipment on both vehicles (audio system, wipers, lighting, etc.).
Make sure that the jump leads are well away from the engine's moving parts (fan, belt, etc.). Do not disconnect the (+) terminal while the engine is running.
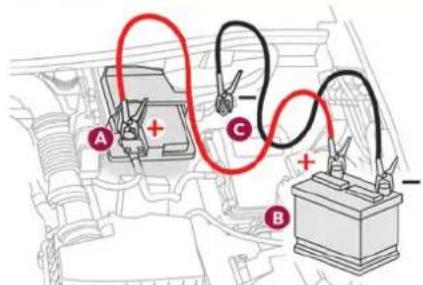
▶ Lift the plastic cover on the (+) terminal, if the vehicle has one.
▶ Connect the red cable to the (+) terminal of flat battery A (at the metal elbow), then to the (+) terminal of the backup battery B or of the booster.
▶ Connect one end of the green or black cable to the (-) terminal of the backup battery B or of the booster (or to an earth point on the assisting vehicle).
▶ Connect the other end of the green or black cable to the earth point C.
▶ Start the engine on the assisting vehicle and leave it running for a few minutes.
▶ Operate the starter on the broken down vehicle and let the engine run.
If the engine does not start immediately, switch off the ignition and wait a few moments before trying again.
▶ Wait for it to return to idle.
▶ Disconnect the jump leads in reverse order.
▶ Refit the plastic cover to the (+) terminal, if the vehicle has one.
▶ Allow the engine to run for at least 30 minutes, with the vehicle stationary, so that the battery reaches an adequate state of charge.
! Driving immediately without having reached a sufficient level of charge may affect some of the vehicle's functions (e.g. Stop & Start).
Charging the battery using a battery charger
For optimum service life of the battery, it is essential to maintain an adequate state of charge.
In some circumstances, it may be necessary to charge the battery:
- When using the vehicle mainly for short journeys.
- If the vehicle is to be taken off the road for several weeks.
Contact a dealer or a qualified workshop.
! To charge the vehicle's battery yourself, use only a charger compatible with lead-acid batteries with a nominal voltage of 12 V.
! Follow the instructions provided by the manufacturer of the charger. Never reverse polarities.
i It is not necessary to disconnect the battery.
▶ Switch the ignition off.
▶ Switch off all electrical consumers (audio system, lighting, wipers, etc.).
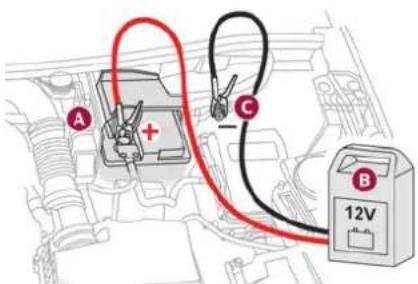
▶ Switch off charger B before connecting the cables to the battery, so as to avoid any dangerous sparks.
▶ Ensure that the charger cables are in good condition.

▶ Lift the plastic cover on the (+) terminal, if the vehicle has one.
▶ Connect the cables of charger B as follows:
- the positive (+) red cable to the (+) terminal of battery A,
- the negative (-) black cable to earth point C on the vehicle.
▶ At the end of the charging operation, switch off charger B before disconnecting the cables from battery A.
! If this label is present, use only a 12 V charger to avoid causing irreversible damage to the electrical components.
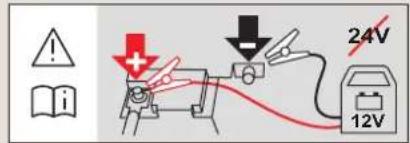
Disconnecting/reconnecting the battery
In order to maintain an adequate state of charge for starting the engine, we recommend disconnecting the battery if the vehicle is to be unused for an extended period.
Before disconnecting the battery:
▶ Close all openings (doors, boot, windows, roof).
▶ Switch off all electricity-consuming devices (audio system, wipers, lamps, etc.).
▶ Switch off the ignition and wait for 4 minutes.
After accessing the battery, it is only necessary to disconnect the (+) terminal.
Quick-release terminal clamp
Disconnecting the (+) terminal
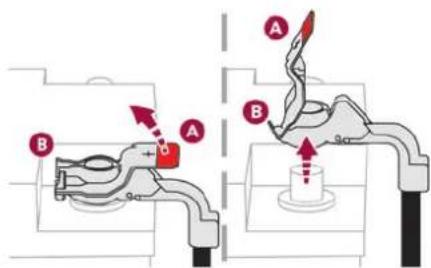
▶ Depending on equipment, lift the plastic cover on the (+) terminal.
▶ Raise lever A fully to release clamp B.
▶ Remove clamp B by lifting it off.
Reconnecting the (+) terminal
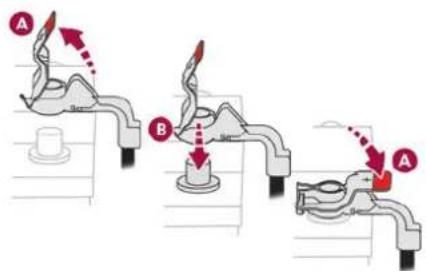
▶ Raise lever A fully.
▶ Refit open clamp B on the (+) terminal.
▶ Push clamp B fully down.
▶ Lower lever A to lock clamp B.
▶ Depending on equipment, lower the plastic cover on the (+) terminal.
! Do not force the lever when pressing on it, as if the clamp is not positioned correctly, locking will then not be possible. Start the procedure again.
i The Stop & Start system may not be operational during the trip following the first engine start.
In this case, the system will only be available again after a continuous period with the vehicle immobilised, the duration of which depends on the exterior temperature and the state of charge of the battery (up to about 8 hours).
With Rechargeable hybrid engines
The rechargeable hybrid system has two accessory batteries: one at the front and one at the rear of the vehicle.
! Replacing the accessory batteries Contact a dealer or a qualified workshop.
184
In the event of a breakdown
! Jump-starting another vehicle Do not start or jump-start another vehicle using the vehicle's accessory batteries.
Accessing the accessory batteries
Front
The front battery is located under the bonnet.
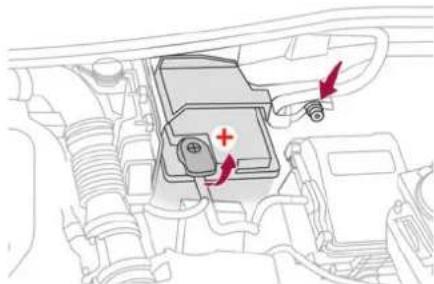
natural_image
Technical diagram of an engine compartment with red arrows indicating directional components (no text or labels)For access to the (+) terminal:
▶ Release the bonnet by pulling the internal release lever, then the external safety catch.
▶ Raise the bonnet.
(+) Positive terminal with a quick-release terminal.
(-) Negative terminal.
As the battery's negative terminal is not accessible, a remote earth point is located near the battery.
Rear
The rear battery is located in the boot. To reach the battery:
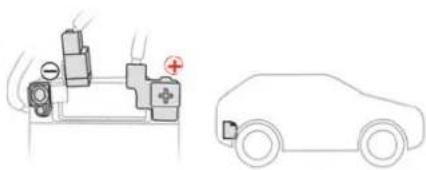
natural_image
Diagram showing a traffic light and emergency response unit connected to a car, with no visible text or symbols.▶ Lift the boot floor.
(+) Positive terminal, protected by a red plastic cover (not accessible).
(-) Negative terminal with a black quick-release connector.
Charging the front battery using a battery charger
For optimum service life of the front battery, it is essential to maintain an adequate state of charge.
In some circumstances, it may be necessary to charge the front battery:
- When using the vehicle mainly for short journeys.
- If the vehicle is to be taken off the road for several weeks.
Contact a dealer or a qualified workshop.
! To charge the vehicle's front battery yourself, use only a charger compatible
with lead-acid batteries with a nominal voltage of 12 V.
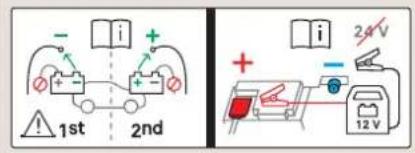
! Follow the instructions provided by the manufacturer of the charger. Never reverse polarities.
i It is not necessary to disconnect the battery.
▶ Switch the ignition off.
▶ Switch off all electrical consumers (audio system, lighting, wipers, etc.).
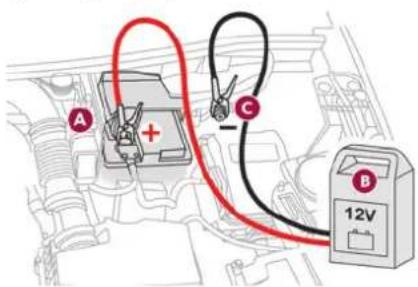

▶ Switch off charger B before connecting the cables to the battery, so as to avoid any dangerous sparks.
▶ Ensure that the charger cables are in good condition.
▶ Lift the plastic cover on the (+) terminal, if the vehicle has one.
▶ Connect the cables of charger B as follows:
- Positive (+) red cable to the (+) terminal on battery A.
- Negative (-) black cable to earth point C on the vehicle.
▶ At the end of the charging operation, switch off charger B before disconnecting the cables from battery A.
Disconnecting/reconnecting the accessory batteries
Procedure for disconnecting/reconnecting the accessory batteries in the event of long-term immobilisation of the vehicle.
Before disconnecting the accessory batteries:
▶ Open the driver's door and boot.
▶ Close all other doors.
▶ Switch off all electrical consumers (audio system, wipers, lamps, etc.).
▶ Switch off the ignition and wait for the READY indicator lamp to go out.
▶ Observe a waiting time of 4 minutes.
! Never reverse the order of the steps for disconnecting and reconnecting the
accessory batteries - risk of irreversible damage!
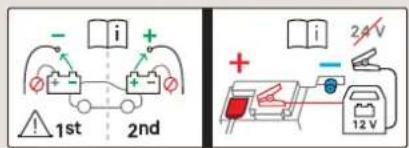
Disconnection
Rear battery:
▶ Disconnect the (-) terminal using the black quick-release connector.
Front battery:
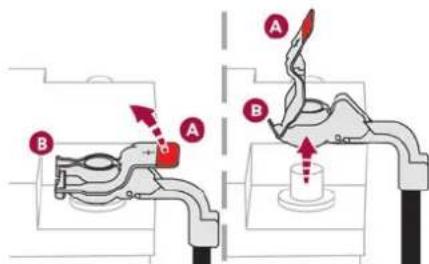
▶ Disconnect the (+) terminal by disconnecting the red quick-release clamp:
- Raise lever A fully to release clamp B.
- Remove clamp B by lifting it off.
Reconnection
Front battery:
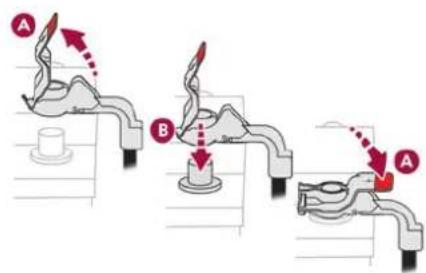
▶ Connect the (+) terminal by connecting the red quick-release clamp:
- Raise lever A fully.
- Refit open clamp B on the (+) terminal.
- Push clamp B fully down.
- Lower lever A to lock clamp B.
Rear battery:
▶ Connect the (-) terminal using the black quick-release connector.
Following reconnection
After reconnecting the battery, turn on the ignition and wait 1 minute before starting the engine, to enable the electronic systems to initialise.
If minor problems nevertheless persist following this operation, contact a dealer or a qualified workshop.
186
In the event of a breakdown
Referring to the relevant section, reinitialise certain equipment:
- Electronic key.
- Sunroof and electric blind.
- Electric windows.
- Date and time.
- Preset radio stations.
After reconnecting the battery, the message "Collision risk detection system fault" is displayed on the instrument panel when the ignition is switched on. This operation is perfectly normal. The message will disappear while driving.
Towing the vehicle
i General recommendations Observe the legislation in force in the country where you are driving.
Ensure that the weight of the towing vehicle is higher than that of the towed vehicle. The driver must remain at the wheel of the towed vehicle and must have a valid driving licence.
When towing a vehicle with all four wheels on the ground, always use an approved towing arm; rope and straps are prohibited. The towing vehicle must move off gently. When the vehicle is towed with its engine off, there is no longer braking and steering assistance.
A professional towing service must be called if: - Broken down on a motorway or main road. - Not possible to put the gearbox into neutral, unlock the steering, or release the parking brake.
- Not possible to tow a vehicle with an automatic gearbox, with the engine running.
- Towing with only two wheels on the ground.
- Four-wheel drive vehicle.
- No approved towbar available.
! Rechargeable hybrid vehicles Before any intervention, with the ignition on, depress the brake pedal and select mode N, then switch off the hybrid system (READY indicator lamp off).
Always call on professionals for recovery of the vehicle on a flatbed lorry or trailer. Use the towing eye only to free the vehicle if it is stuck, or to secure it for recovery on a flatbed lorry or trailer.
2WD: 2-wheel drive.
4WD: 4-wheel drive.
| Towing constraints | ||||
| Type of vehicle (engine/gearbox) | Front wheels on the ground | Rear wheels on the ground Flatbed 4 wheels on the ground | with towbar | |
| Internal combustion/Automatic | ✕ | ✕ | ✕ | ✕ |
| Hybrid 2WD | ✕ | ✕ | ✕ | ✕ |
| Type of vehicle (engine/gearbox) | Front wheels on the ground | Rear wheels on the ground | Flatbed 4 wheels on the ground | with towbar |
| Hybrid 4WD | ✕ | ✕ | ✕ | ✕ |
In case of battery or electric parking brake failure, it is essential to call a professional using flatbed recovery vehicles.
Accessing the tools
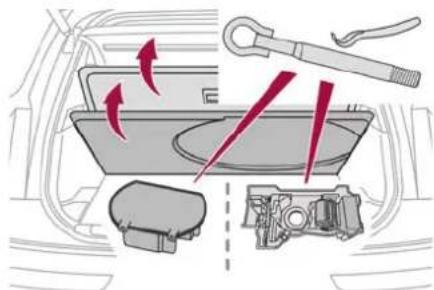
The opening tool for the rear protective cover is secured to the towing eye.
For more information on accessing the Tool kit, refer to the corresponding section.
Towing your vehicle
To access the front screw thread:
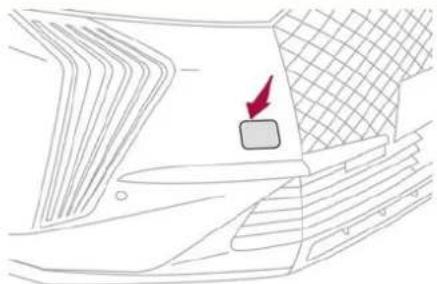
natural_image
Diagram of a car interior showing a knife, patterned fabric, and a red arrow pointing to a button (no text or symbols present)▶ Unclip the cover by pressing at its top left-hand corner.
▶ Release the cover.
To be towed:
▶ Screw the towing eye in fully.
▶ Install the towbar.
▶ Put the gearbox into neutral.
! Failure to observe this instruction could result in damage to certain components (e.g. braking, transmission) and to the absence of braking assistance the next time the engine is started.
! Never tow the vehicle with the driving wheels on the ground and the engine off.
▶ Unlock the steering and release the parking brake.
▶ Switch on the hazard warning lamps on both vehicles in accordance with the legislation in force in the country in which you are driving.
▶ Move off gently, drive slowly and only for a short distance.
Towing another vehicle
To access the rear screw thread:

188
In the event of a breakdown
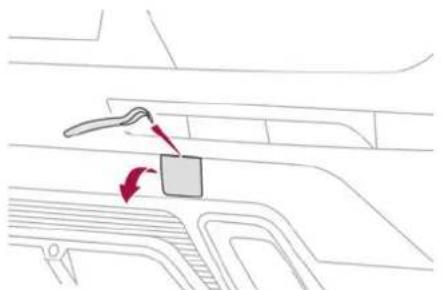
natural_image
Diagram showing a mechanical component with red arrows indicating motion or force, no text or symbols present▶ Unclip the cover, using the tool attached to the towing eye.
To tow:
▶ Screw the towing eye in fully.
▶ Install the towbar.
▶ Switch on the hazard warning lamps on both vehicles.
▶ Move off gently, drive slowly and only for a short distance.
Engine technical data and towed loads
Engines
The engine characteristics are given in the vehicle's registration document, as well as in sales brochures. Only the values available at the time of publication are presented in the tables. Contact a dealer or a qualified workshop to obtain missing values.
i The maximum power corresponds to the value type-approved on a test bed, under conditions defined by European legislation (Directive 1999/99/EC).
For more information, contact a dealer or a qualified workshop.
Weights and towed loads
The weights and towed loads relating to the vehicle are indicated on the registration document, as well as in sales brochures. These values are also indicated on the manufacturer's plate or label. For more information, contact a dealer or a qualified workshop. The GTW (Gross Train Weight) and towed load values indicated are valid up to a maximum altitude of 1,000 metres. The towed load value
must be reduced by 10% for each additional 1,000 metres of altitude. The maximum authorised nose weight corresponds to the weight permitted on the towball.
When exterior temperatures are high, the vehicle performance may be limited in order to protect the engine. When the exterior temperature is higher than 37^ C, reduce the towed weight.
! Towing even with a lightly loaded vehicle can adversely affect its road holding. Braking distances are increased when towing a trailer. When using a vehicle to tow, never exceed a speed of 62 mph (100 km/h) (observe the local legislation in force).
Technical data


190
Technical data
Engines and towed loads - Petrol
| Engines PureTech 130 | Automatic | PureTech 180 Automatic | PureTech 215 Automatic | PureTech 225 Automatic |
| Gearboxes EAT8 | (Automatic 8-speed) | EAT8(Automatic 8-speed) | EAT8(Automatic 8-speed) | EAT8(Automatic 8-speed) |
| Codes EB2ADTS ATN8 STT EP6FADTXD ATN8 STT | Euro 6.3 | EP6FADTXM ATN8 Euro 6.1 | EP6FADTX ATN8 STT Euro 6.3 | |
| Model codes: JR... J4... | HNSU-C1B 5GFU-C1B EGZB-C1A 5GGU-C1B | |||
| Cubic capacity (cc) 1,199 1,598 1,598 1,598 | ||||
| Max. power: EC standard (kW) 96 133 158 165 | ||||
| Fuel Unleaded Unleaded Unleaded Unleaded | ||||
| Braked trailer (within the GTW limit) (kg) on a 10% or 12% gradient | 1,290 1,550 | 600 | 1,550 | |
| Unbraked trailer (kg) | 695 | 750 | 600 | 750 |
| Maximum authorised nose weight (kg) | 60 | 68 | 25 | 68 |
191 Technical data
Engines and towed loads - Diesel
| Engines BlueHDi 130 Automatic | |
| Gearboxes EAT8 | (Automatic 8-speed) |
| Codes DV5RC ATN8 STT Euro 6.3 | |
| Model codes:JC... | YHZU-C2B |
| Cubic capacity (cc) 1,499 | |
| Max. power: EC standard (kW) 96 | |
| Fuel Diesel | |
| Braked trailer (within the GTW limit) (kg)on a 10% or 12% gradient | 1,450 |
| Unbraked trailer (kg) 750 | |
| Maximum authorised nose weight (kg) 60 |


192
Technical data
Engines and towed loads - Rechargeable hybrid
| E-TENSE 225 E-TENSE 4X4 300 E-TENSE 4X4 360 | |||
| Codes EP6FADTXHPD EATN8 FWD | Euro 6.3 | EP6FADTXHPA EATN8 AWD Euro 6.3 | EP6FADTXHPR EATN8 AWD Euro 6.3 |
| Model codes: J4... | DGZU-C1 5GBU-C1 5GBT-C1 | ||
| Braked trailer (within the GTW limit) (kg) on a 10% or 12% gradient | 1,250 1,200 - | ||
| Unbraked trailer (kg) 750 750 - | |||
| Maximum authorised nose weight (kg) 70 70 - | |||
| Petrol engine | PureTech 180 | PureTech 200 | PureTech 200 |
| Gearbox | Electric automatic 8-speed | Electric automatic 8-speed | Electric automatic 8-speed |
| Cubic capacity (cc) | 1,598 1,598 1,598 | ||
| Max. power: EC standard (kW) | 132 | 147 | 147 |
| Fuel | Unleaded | Unleaded | Unleaded |
| Electric motor | |||
| Technology | Synchronous with permanent magnets | Synchronous with permanent magnets | Synchronous with permanent magnets |
| Max. power: EC standard (kW) | 80 | Front: 80 Rear: 80 | Front: 81 Rear: 83 |
| Traction battery | |||
| Technology | Lithium-Ion | Lithium-Ion | Lithium-Ion |
| Voltage (Volts AC) | 240-400 | 240-400 | 240-400 |
| Installed capacity (kWh) | 13.2 | 13.2 | 13.2 |
| Combined power (kW) | 165 220 265 | ||
Dimensions (mm)
These dimensions have been measured on an unladen vehicle.
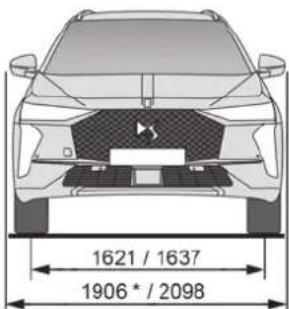
* With folded mirrors.
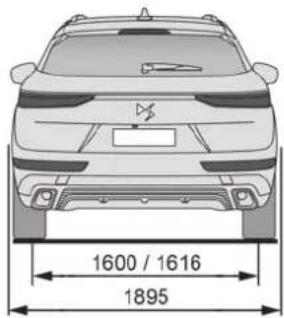
natural_image
Front view of a car with front and rear side views, showing dimensional annotations (no text or symbols on the car itself)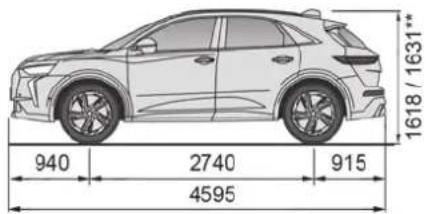
** With longitudinal bars.
Identification markings
Various visible markings for vehicle identification and vehicle search.
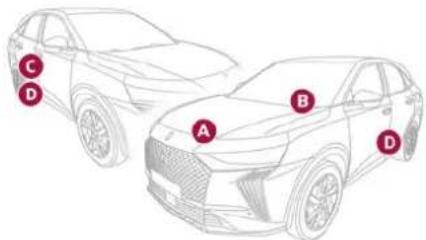
A. Vehicle Identification Number (VIN), under the bonnet.
Stamped on the chassis.
B. Vehicle Identification Number (VIN), on the dashboard.
Printed on an adhesive label visible through the windscreen.
C. Manufacturer's label.
Affixed to the right-hand door.
Technical data

Bears the following information:
- Manufacturer's name.
- European whole vehicle type approval number.
- Vehicle Identification number (VIN).
- Gross vehicle weight (GVW).
- Gross train weight (GTW).
- Maximum weight on the front axle.
- Maximum weight on the rear axle.
D. Tyres/paint code label.
Affixed to the driver's door.
Bears the following information about the tyres:
- Tyre pressures, unladen and laden.
- Tyre specification, made up of the dimensions and type as well as the load and speed indices.
- Spare tyre inflation pressure.
Also indicates the paint colour code.
i The vehicle may be originally equipped with tyres with higher load and speed indices than those indicated on the label, without affecting tyre pressure (on cold tyres). In the event of a change in the type of tyres, contact a dealer for the tyre fits approved for the vehicle.
194
DS IRIS SYSTEM - 12" touch screen Infotainment system
DS IRIS SYSTEM - 12" touch screen Infotainment system
GPS navigation - Applications - Multimedia audio system - Bluetooth® telephone
i The functions and settings described vary according to the version and configuration of the vehicle, and according to the country of sale.
! For safety reasons and because they require continued attention on the part of the driver, the following operations must be carried out with the vehicle stationary and the ignition on:
- Pairing the smartphone with the system via Bluetooth".
- Using the smartphone.
- Connecting to Mirror Screen (Apple ^x CarPlay ^x or Android Auto).
- Changing the system settings and configuration.
The message Energy economy mode is displayed when the system is about to go into standby. For more information on Energy economy mode, refer to the "Practical information" section.
! Warning Navigation is a driving aid. It cannot replace the driver. All guidance instructions should be carefully checked by the user. By using the navigation, you accept the following terms and conditions: https://www.tomtom.com/en_gb/legal/eula-automotive/?388448
First steps
The system starts when the ignition is switched on.
Short press, ignition off: system on/off.
Short press, ignition on: mute/restore sound.
Long press, ignition on: start standby mode (mute sound, screens and clock display off).
▶ Increase or decrease the volume using the knob or the "plus" or "minus" buttons (depending on equipment).
Information
This system gives access to the following elements:
- Audio equipment and telephone controls with display of associated information.
- Connected services and display of associated information.
- Navigation system controls and display of associated information (depending on equipment).
- Voice recognition (depending on equipment).
- Time and outside temperature.
- Heating/air conditioning system controls and reminders of settings.
- Settings for driving aid functions, comfort and safety functions, extended head-up display (depending on equipment and version), audio equipment and digital instrument panel.
- Settings for functions specific to rechargeable hybrid vehicles.
- Display of visual manoeuvring aid functions.
- Interactive handbook.
- Video tutorials (e.g. screen management, driving aids, voice recognition).
Upper banner
Certain information is displayed permanently in the upper banner of the touch screen:
- Outside temperature from the vehicle's sensors (associated with a blue symbol if there is a risk of ice).
- Temperature setting reminder for the air conditioning on the driver's and passenger sides.
- Charge level of the connected smartphone.
- System connection status (Bluetooth ^® , Wi-Fi, mobile telephone network).
- Time.
- Quick access to the Mirror Screen ^3 functions (associated with a connected smartphone). Swipe down from the upper edge of the touch screen to access the notifications centre and display a list of quick settings : Guest, Privacy Settings, Brightness, My Devices, night mode, etc.
Principles

▶ Use this button (HOME) to display the most recent home page used; a second
press displays the first home page, then press the virtual buttons displayed on the touch screen.

Scroll through the home pages by sliding your finger along the screen to the right or left.
Principle of movement in the system
Depending on the pages displayed on the screen, scroll through the text or the menu (on the left side of the screen) by sliding your finger, as with a smartphone.
Touch buttons

Display/hide the context menu.
Return to the previous page.
▶ To change the status of a function, press the description for the corresponding line (change confirmed by the slider moving to the right/left: function activated/deactivated).

Access to additional information about the function.

Access to a function's settings.
Add/delete shortcuts.
Configuring profiles

Press the "Settings" application.


– Language, units, Privacy Settings.
- Screen configuration, appearance, SMART TOUCH (depending on equipment).
– Audio settings, favourite radio stations.
- Lighting, interior ambience (refer to the "Ease of use and comfort" section).
- Navigation history, favourite points of interest (POIs), navigation settings.
- Some driving aids and the list of favourites.

To delete a profile, select it from the list of profiles then press the bin.
Privacy Settings
"Privacy Settings" management is associated with each profile. This function is used with: a "Guest" profile configured by default in "Sharing Data and Location" mode, or
a profile to be created in the system, with or without connection to a mobile device.
If there is no connection to a mobile device, the mode value will be set to "Sharing Data and Location" mode.
The connected mobile device serves as an access key to personal information. First activate the Bluetooth ^® function on the mobile device. The last saved mode value will be restored.

"Sharing Data and Location"
This mode allows the vehicle to externally fit all the personal data needed for each available connected service.
196
DS IRIS SYSTEM - 12" touch screen Infotainment system
i The personal data required to use the connected services is sent to the providers of these services.

"Sharing Data"
This mode allows the vehicle to externally transmit all the data needed for each valid available connected service, with the exception of vehicle location data (e.g. GPS coordinates).
i Some connected services may not function without the vehicle location data.
This mode will not be applied to the emergency call function or to specific services to which the user has consented under the terms of commercial contracts (Connected alarm).

"Private Mode"
This mode does not allow the vehicle to transmit personal data outside the vehicle.
i Connected services will only perform local processing inside the vehicle with limited functions.
i This mode will not be applied to the emergency call function or to specific services to which the user has consented
under the terms of commercial contracts (Connected alarm). If the vehicle is used for professional purposes or under the terms of specific contracts (e.g. corporate fleet, government assignment), some privacy modes will not be available for the user on the screen, depending on the data sharing needs of the services.
To change mode, swipe down from the upper edge of the touch screen to display all of the quick settings.

Press this button and select the chosen mode. The mode is highlighted.
OR

Press the "Settings" application.
In the list, select the "Connectivity". Select "Privacy Settings".

Choose the mode.
Internet portal
During the first use, upon acquisition of the vehicle, the user is invited to select the country of residence for the use of the Internet portal. If the country is not selected, the notification is stored in the notification centre and disappears once the country is selected. Slide a finger on the touch screen from top to bottom to display all the notifications.
The selection of a country is necessary to use the available internet applications.

Press the "Settings" application.
In the list, select the "Connected Services".

Choose the country.

The first time you use it, via a connected mobile device, the system links to your
profile. The connected mobile device serves as an access key to saved personal information. First activate the mobile device's Bluetooth® function. Select the desired application, authentication will be requested if necessary. This authentication will be saved for future uses via the mobile device connected to the current profile.
An authentication will be requested at each use if the mobile device is not connected to the current profile or if the Guest profile is used.

With the use of the "Guest" profile, an identification will be requested for each
use.
Updating the system

Managing devices remotely and remote updating of software and firmware.
Being an integral part of the service used to provide connected services contract(s), the required management of devices as well as the required updating of the software and firmware associated with the aforementioned
connected service will be carried out remotely, in particular using "Over the Air" technology. To do this, a secure connection via radio network is established between the vehicle and the Manufacturer's device management server each time the ignition is switched on, when a mobile telephone network is available. Depending on the vehicle's equipment, the connection configuration must be set to "Connected vehicle" to enable to the connection to the radio network. Irrespective of a valid subscription to a connected service, the remote management of devices relating to or connected with the security of devices, and the updating of software and firmware, will be carried out when necessary in order to comply with a legal requirement applicable to the Manufacturer (e.g. the applicable law in terms of product liability, the regulations governing e-call) or when necessary to protect the respective vital interests of the vehicle's users and passengers.
The establishment of a secure connection via radio network and the corresponding remote updates are not affected by the privacy settings and are intended to be carried out after being initialised by the user in response to a related notification.
The system can notify the receipt of an update when it is connected to an exterior Wi-Fi network or a mobile telephone network.
Large updates are downloaded only via the Wi-Fi network.
The availability of an update is notified on the screen at the end of the journey with an option of immediate installation or postponement of installation.
The installation time is variable and can take several minutes with a maximum of about 30 minutes. A notification will give an estimate of the duration and a description of the update.
Update information is available through the "Settings" application.

Press the "Settings" application.
In the
ist, select the "Updates" tab.

This button allows you to change the authorisation for automatic downloading
of updates via an exterior Wi-Fi network.
! For safety reasons and because it requires sustained attention on the part of the driver, the installation must be carried out with the ignition on but without starting the engine.
The installation cannot be carried out in the following cases:
- engine running
- emergency call in progress.
- insufficient battery level.
- when charging for electric vehicles.
If an update has failed or has expired, contact a dealer or a qualified workshop.
! The Manufacturer does not charge for the use of this service. However, the use of Wi-Fi and/or mobile telephone networks by your smartphone may incur extra charges if you exceed the data allowance included in your contract. Any associated costs will be billed to you by your mobile telephone operator.
Personalisation

Press and hold the screen from one of the system's home pages.
Or

Press the "Settings" application.
In the list, select the "Customization" tab. Press the "Displays" field.
A page divided into 2 parts is displayed. Press the HOME button at any time to leave this page.
Personalising the screen

Press the pencil in the "Customize Touchscreen" part.
A representation of the organisation of the different home page (HOME) Widgets is displayed.
i A Widget is a reduced window of an application or service.
198
DS IRIS SYSTEM - 12" touch screen Infotainment system
Adding a Widget

To add a Widget, press "Widget" on the left of the screen.
Or

Press one of these buttons on the screen.
Select the desired Widget.

Press the back arrow to return to the previous page.
Organising the Widgets on a home page (HOME)
To move a Widget, press and hold it, then drag it to the desired location.
Adding a page

To add a page, press "Page" on the left of the screen.

Press the back arrow to return to the previous page.
Deleting a Widget

To move a Widget to the bin, press and hold it, then drag it to the bin.
Personalising the instrument panel

Press the pencil in the "Customize Driver Information" part.
The modification of the organisation of the different Widget is displayed on the instrument panel in real time.
i A Widget is a reduced window of an application or service.
Adding a Widget

To add a Widget, press "Widget" on the left of the screen.
Or

Press one of these buttons on the screen.
Select the desired Widget.

Press the back arrow to return to the previous page.
Deleting a Widget

To move a Widget to the bin, press and hold it, then drag it to the bin.
Steering-mounted controls

Voice control: Short press, system voice commands
(depending on equipment).
Long press, voice commands of the smartphone connected using Bluetooth ^ or Mirror Screen ^ (Apple ^* CarPlay ^ /Android Auto) via the system.

Increase volume.

Decrease volume. Mute the sound: long press on the
decrease volume button.
Restore the sound by pressing one of the two volume buttons.

Incoming call (short press): accept the call.
Call in progress (short press): hang up.
Incoming call (long press): refuse the incoming call.
Out of call (short press): access the call log of the telephone connected via Bluetooth ^4 .
Mirror Screen ^® connected (short press): access the projected view of the telephone application of your Mirror Screen ^® equipment.

: Radio: automatic search for the previous/next station (in the list of stations sorted by name or by frequencies).
Media: previous/next track, movement in the lists.
Phone: browse the telephone's call log.
Short press: validate a selection. Out of selection, display the lists.

Media (short press): change the multimedia source.
LIST
Radio: display the list of stations.
LIST Media: display the list of tracks.
Radio (press and hold): update the list of detected stations.
Applications

From the home page, press this button to access the applications wall.
i From any page, press the touch screen with three or more fingers to display the applications wall.
Help
Access the handbook and watch tutorials.
Media
Select an audio source or radio station.
Mirror Screen ^®
Smartphone connected with Mirror
Screen ^68 : access to the projected view of Apple ^3 CarPlay ^3 or Android Auto.
Smartphone not connected: access the menu allowing you to connect a smartphone.

Navigation
(depending on equipment)
Enter navigation settings and choose a destination.
Use services available in real time, depending on equipment.

Voice commands
(depending on equipment)
Use the system or smartphone voice recognition via the system.

Phone
Telephone not connected: access the
menu allowing you to connect a telephone.
Telephone connected: access the call log, contacts and telephone settings.
Two connected telephones: access the contents of the priority telephone with the possibility of changing the priority of the telephone.

Settings
Main settings for the audio system, touch screen and digital instrument panel.
Voice commands
First steps
(depending on equipment)
The voice recognition service offers a choice of 17 languages minimum (French, German, English (UK), English (US), Arabic, Brazilian, Chinese, Spanish, Hebrew, Italian, Japanese, Dutch, Polish, Portuguese, Russian, Swedish, Turkish) available with the cellular network and in line with the language chosen and previously configured in the system.
The system supports two languages for cases where the area in which the vehicle is travelling is not covered by the cellular network.
These languages, referred to as on-board languages, are downloaded into the system. If the chosen language has not been downloaded, a message on the screen appears as soon as the cellular network is not connected for the first time and offers to download it.
To use this new language in all areas, download it beforehand (ignition on without starting the engine) via the Wi-Fi network.
Apply the download procedure displayed on the screen.
Downloading this new language removes the least used on-board language.
DS IRIS SYSTEM - 12" touch screen Infotainment system
Information - Using the system

When voice commands are activated, say your command after the audible signal.
For commands in several stages, interaction takes place with the system to complete the initial request.
Some commands self-validate after 7 seconds. If the system has not taken your command into account, it will indicate this by a voice message and an on-screen display.
Opening voice recognition

Voice commands can be used on any screen page, provided there are no other
sources which take priority in use (reverse, emergency or assistance call, telephone call, other smartphone voice recognition already launched).
Choice of opening voice recognition:
Say "OK Iris".
or
▶ Press the button located on the steering wheel.
or
▶ Press the touch screen button.
! To ensure that voice commands are always recognised by the system, please follow these recommendations:
- Use natural language in a normal tone without breaking up words or raising your voice.

200
DS IRIS SYSTEM - 12" touch screen Infotainment system
- After opening voice recognition with the steering wheel-mounted button or the button on the touch screen, always wait for the "beep" (audible signal) before talking. No "beep" sounds when voice recognition is opened using "OK Iris".
- For optimal operation, it is recommended that you close the windows and the sunroof (depending on equipment) to avoid any external interference, and switch the ventilation off.
- Before speaking the voice commands, ask the other passengers not to speak.

Voice command example for air conditioning:
"raise the fan speed"
"Turn on air conditioning"
"i'm too hot"

Voice command example for radio and media:
"I want to listen to michael jackson"
"switch to radio"
"tune to 88.5"

Media voice commands are only available with a USB connection.

Voice command example for navigation: "navigate home"
"Navigate me to gabrielle's house"
"search for public parking nearby"
Depending on the country, give destination (address) instructions in the language configured for the system.
Voice command example for telephone: "Call Matthew's mobile"
"call 0113 345 9869"
"Call jonathan"
If there is no telephone connected by Bluetooth ^* , a voice message announces: "Connect a telephone by Bluetooth ^™ , and the voice session will be closed.

Voice command example for the weather: "do i need a raincoat"
"how is the weather tonight"
"what is today's humidity level"
Navigation
Navigation home screen
(depending on equipment)
Access to additional videos
https://www.tomtom.com/
PSAGroup-Connected-Nav

Press the "Navigation" application to display the navigation home screen. Press "Search" to enter an address or a name.

Press this button to display the main menu for the various options.

Press this button to display the 3D/2D mode.

Select "Sound activated", "Alerts only" and "Silent" with successive presses on

tton.
this button.

Press the "plus"/"minus" buttons to zoom in/out, or use two fingers on the screen.
Main menu

Press the "Navigation" application to display the navigation home screen.

Press this button to display the main menu for the various options.

Select "Search" to enter an address, name or some points of interest.

Select "Go home" using an address previously saved in "Add home".

Select "Go to work" using an address previously saved in "My places".

Select "Recent destinations" to display the latest destinations searched.

Select "Current trip" to open another menu and perform various actions for the
current planned route.

Select "My places" for quick access to saved places as well as favourite
destinations.
Select "My trips" to display your favourite routes.
Select "Parking" to display the various parking options in the area.
Select "Service station" to display the different service stations on the current
route or near the current location

Select "TomTom service" to check the network status.
Select "Settings" to enter the vehicle type and to personalise the display, voice
instructions, map options, trip planning, sounds and alerts, and system information.

Select this button to display details on software versions as well as legal
information. Details of the Open Source software libraries used and their licence URLs.
i Regular connection to a secure Wi-Fi access point automatically updates the installed mapping globally.
The mapping is also updated using a cellular network, depending on version, country of sale, the vehicle's level of equipment, as well as the subscription to connected services and options.
However, using your smartphone's Wi-Fi and/or cellular networks may incur additional charges if you exceed your data plan.
These charges, if any, will be passed on to your telephone operator's bill.
DS IRIS SYSTEM - 12" touch screen Infotainment system
Connectivity
Connecting a wired device by USB
The USB connection of a mobile device allows it to be recharged. It makes its authorised media content available to the system (Media content of iPod ^5 type).
Only one USB socket will allow a Mirror Screen connection (Apple®CarPlay® or Android Auto) for the compatible connected mobile devices and to use some of the device's applications on the touch screen. For more information on the USB socket compatible with the Mirror Screen® function, refer to the "Ease of use and comfort - Fittings" section. The mobile device is in charging mode when connected with the USB cable.
It is recommended that you use your device's original USB cables, preferably with a short cable to ensure optimum performance.
To protect the system, do not use a USB hub.
Bluetooth ^® connection
Connecting a mobile device to the vehicle's system via Bluetooth ^® provides access to its
contents and its "Media" streaming. It also enables the Phone function to be activated. The connection can be initiated either from the mobile device's Bluetooth™ menu or from the vehicle's system, which requires opening the "My Devices" menu for the first connection.
In some cases, you will need to unlock your device and check the authorisation to synchronise contacts and recent calls. Some features may not be supported by your device. For information on the partial or full compatibility of device models or smartphones, please connect to the Brand's national website.
Pairing procedure from a device

From the Bluetooth ^® menu on your mobile device, select the system's name from the detected devices.
In order to make your system's Bluetooth ^® visible, first open the "My Devices" menu on the system.
Continue the first connection procedure proposed by the system and on the device.
For example: validating pairing codes.
Pairing procedure from the system

Press the "Settings" application.
In the list, select the "Connectivity" tab.
202
DS IRIS SYSTEM - 12" touch screen Infotainment system

Select "My Devices".

Select the name of the mobile device that you want to connect, from:
- The list of known devices (if the device has already been connected to the system).
or
- The list of detected devices (if the device has never been connected to the system or previously deleted from the system).
i A mobile device already connected to the system will be able to reconnect automatically when the vehicle is started, once the user profile has been selected.
Automatic reconnection is put on hold as soon as the "My Devices" menu is opened. This is to allow the system to make its Bluetooth ^® visible for the connection of a new device.
The system is disconnected when the driver's door is opened and the ignition is switched off.
Automatic reconnection
The system allows automatic reconnection of devices already connected and detected when a user profile is selected.
The priority reconnected devices are those which have been linked to the selected user profile or, failing this, the last connected devices.
Wi-Fi connection
The system has an external Wi-Fi connection mode for performing system updates.

Press the "Settings" application.

ist, select the "Connectivity" tab. Select "Wi-Fi".

Activate/Deactivate "Wi-Fi". The system starts a search for
nearby Wi-Fi networks. This may take a few seconds.
Select the Wi-Fi network to connect to and enter its password.
! To protect your system, only networks with a sufficient level of security are allowed to connect. WPA2 encryption level, equivalent to a domestic level, is required.
i Any network already connected to the system will reconnect automatically as soon as it is detected by the system and after having previously activated the Wi-Fi function.
i The Wi-Fi connection of the system to a device already connected using a Mirror Screen* wireless connection is not possible. In this case, favour a Mirror Screen* connection using the USB socket.
Device management
For each device already connected to the system using a wireless connection (Bluetooth ^® or wireless Mirror Screen ^® connection), it is
possible to determine a preferred connection mode (depending on the functions the device can support). It is therefore possible to determine whether the device should be connected using a wireless Bluetooth ^® connection or a wireless Mirror Screen ^® connection each time the system is started once the profile is chosen.

Press the "Settings" application.
In the list, select the "Connectivity".

Select "My Devices" to display the list of paired devices.

Press this button to manage the connection of a device.
Choose a connection type then confirm this choice by pressing "APPLY".
Deleting a device

Press the "Settings" application.
In the list, select the "Connectivity".

Select "My Devices" to display the list of paired devices.

Press this button.
Press "DELETE".
Confirm by pressing "YES".
! Some devices that have just been deleted from the system request a connection, refuse this request.
Mirror Screen®
When a smartphone is connected using Mirror Screen ^3 , the vehicle's location and some vehicle data is sent to the smartphone (e.g. brand, left-hand or right-hand drive, day/night mode, physical speed).
Apple ^® CarPlay ^® smartphone connection
Connecting just one Apple ^x CarPlay ^x smartphone can be carried out either by USB cable or using a wireless connection.
i First activate the Siri ^3 function on your Apple ^x smartphone.
If the device fails to connect, refer to the Apple website to check that the device is compatible with this function.
If the problem persists, delete all saved connections on the smartphone and on the system before attempting a new connection.
The cable connection requires that you deactivate the CarPlay function in the Settings, Bluetooth menu of your smartphone.
In the Bluetooth menu, click on the "i" next to the relevant vehicle and deactivate CarPlay.

Connect the smartphone to the system using the USB socket compatible with
Mirror Screen.
Apple ^® CarPlay ^® is automatically launched a few seconds after the USB connection has been established. In some cases, it may be necessary to unlock your device.
The smartphone charges when connected by the USB cable.
The cable connection allows you to avoid disconnections, especially when passing through toll booths.
i Only one USB socket enables the Mirror Screen ^® connection (Apple ^® CarPlay ^® ); refer to the "Ease of use and comfort - Fittings" section.
It is recommended that you use the device's original USB cables, preferably with a short cable to ensure optimum performance.
The wireless connection of an Apple®CarPlay® smartphone can be initiated from the "My Devices" menu.
First activate the smartphone's CarPlay ^3 function. In the Bluetooth menu, click on the "i" next to the relevant vehicle and activate CarPlay.

Press the "Settings" application.
n the list, select the "Connectivity".

Select "My Devices" to display the device to be connected to Apple ^8 CarPlay ^3 .
If the device has already been connected to the system via Bluetooth ^® , select the device settings from the list of known devices and choose Apple ^® CarPlay ^® as the wireless connection mode.
DS IRIS SYSTEM - 12" touch screen Infotainment system
If the device has never been connected to the system before, it will have to be paired (refer to the "Bluetooth" connection" section).
The system detects if the smartphone is compatible with Apple ^x CarPlay ^x and offers to connect to it following the pairing process.
Subsequent automatic connection of the smartphone requires activation of the Bluetooth® on your device.

As soon as the connection is established, press this button to display the
"Apple"CarPlay"interface.

To initiate the smartphone voice commands, press and hold the steering-ed control button.
Android Auto smartphone connection
Connecting just one Android Auto smartphone can be carried out either by USB cable or using a wireless connection.
i First install the "Android Auto" application via "Play Store" on your smartphone.
The "Android Auto" function requires a compatible smartphone.
If the device fails to connect, refer to the Android Auto website to check that the device is compatible with this function.
If the problem persists, delete all saved connections on the smartphone and on the system before attempting a new connection.
204
DS IRIS SYSTEM - 12" touch screen Infotainment system
To ensure an optimum wireless connection, we recommend avoiding placing your smartphone too close to other Wi-Fi networks to which it can connect automatically.
The cable connection requires that you deactivate the Android Auto wireless function, in the Settings menu of the "Android Auto" application of your smartphone.

Connect the smartphone to the system using the USB socket compatible with Screen ^® .
Android Auto is automatically launched a few seconds after the USB connection has been established. A validation procedure on the smartphone has to be followed for the first connection, with the vehicle stationary. The smartphone charges when connected by the USB cable.
The cable connection allows you to avoid disconnections, especially when passing through toll booths.
:
Only one USB socket enables the Mirror Screen" connection (Android Auto); refer the "Ease of use and comfort - Fittings" tion.
It is recommended that you use the device's original USB cables, preferably with a short cable to ensure optimum performance.
The wireless connection of an Android Auto smartphone can be initiated from the "My Devices" menu.
First activate the smartphone's Android Auto wireless function, in the Settings menu of the "Android Auto" application of your smartphone.

Press the "Settings" application.
In the
list, select the "Connectivity" tab.

Select "My Devices" to display the device to be connected to Android Auto.
If the device has never been connected to the system before, it will have to be paired (refer to the "Bluetooth" connection" section).
The system detects if the smartphone is compatible with Android Auto and offers to connect to it following the pairing process. If the device has already been connected to the system via Bluetooth ^® , select the device settings from the list of known devices and choose Android Auto as the wireless connection mode.
The subsequent automatic connection of the smartphone requires activation of Bluetooth ^4 on your device.

As soon as the connection is established, press this button to display the "Android interface.
Auto

To initiate the smartphone voice commands, press and hold the steering-ed control button.
Media
Changing source

Press the "Media" application.

Press this button to change source (radio, audio streaming via a USB socket,
Bluetooth ^2 or Mirror Screen ^3 .
Selecting a radio station

Press the "Media" application.
In the list, select the "Player" tab.

Press one of the buttons to perform an automatic search for radio
stations.
Or

Move the slider to manually search for frequencies up or down.
Or

Press this button.

Enter the frequency values using the virtual keypad. Press this button to confirm.

Press this button to confirm.
A list of stations is available by pressing the "Stations" tab.

Press "Mute" to activate/deactivate the sound.

! Radio reception may be affected by the use of electrical equipment not approved by the Brand, such as a charger with USB socket connected to the 12 V socket. The exterior environment (hills, buildings, tunnels, basement car parks, etc.) may block reception, including in RDS mode. This phenomenon is normal in the propagation of radio waves and does not indicate any malfunction of the system.
Storing a radio station
Select a station.

Press the "Media" application.
In the list, select the "Player" tab.

Press the "Radio Favorites" button.

Storing takes place via a short or long press on one of these buttons, or a long
press on an existing favourite radio station, which will be replaced.

Press this button to return to the previous page.
Automatic search for radio stations
Via the "Media" application.

Press the "Media" application.
In the list, select the "Stations" tab.
The search is carried out automatically.
:—— Using the steering-mounted controls, :—— press this button.
The search is carried out automatically.
Activating radio station tracking
The system changes frequency automatically to obtain better reception.
Press the "Media" application.

st, select the "Settings" tab.

Activate "Radio Station Tracking".
The lighting of the slider confirms that the function is activated.
Changing the waveband

Press the "Media" application.
In the list, select the "Player" tab.

Press this button to change the waveband (FM - AM - DAB) according to the country of
sale.
Activating traffic announcements
This function gives priority to listening to Traffic announcements alert messages. To be active, this function needs good reception of a radio station that transmits this type of message. While traffic information is being broadcast, the current radio station is automatically interrupted so that the
message can be heard. Normal radio listening resumes as soon as the message is finished.

Press the "Media" application.
In the list, select the "Settings" tab.

Activate "Traffic Announcement (TA)".
The lighting of the slider confirms that the function is activated.
Audio streaming
The streaming function allows you to listen to the audio stream coming from the smartphone(s) connected via Bluetooth ^® , USB (iPod ^® type) or Mirror Screen ^® .
First adjust the volume on the portable device (to a high level).
Then adjust the volume of the system.
If playback does not start, it may be necessary to start the audio playback from the smartphone.
Control is from the portable device or by using the system's touch buttons.
Once connected in streaming mode, the smartphone is considered to be a media source.
Playing a track

Press the "Media" application.

If several devices are connected, press this button to select one.
206
DS IRIS SYSTEM - 12" touch screen Infotainment system
Once the device is connected, browsing through the files is possible by pressing the "Playlist" or "Library" button.


Short press: go to the previous/next track.
Long press: fast-forward/rewind in a track.

Repeat the current title or the list of selected titles.

Random track playback.

Sound deactivation/reactivation.
Configuring audio and radio settings
Audio settings can be accessed in 2 different ways.
Via the Media application

Press the "Media" application.
In the list, select the "Settings" tab.
Or
Via the Settings application

Press the "Settings" application.
In the list, select the "Audio and Radio" tab.
It is possible to configure:
- Sound Settings.
- Radio Settings.
- Volume Settings.
Information and advice
The system supports USB Mass Storage devices or Apple ^® devices via the USB sockets. The adapter cable is not supplied.
Devices are managed using the audio system controls.
The system will only play audio files with ".wma, .aac, .flac, .ogg, .mp3" file extensions, at bit rates between 32 Kbps and 320 Kbps.
It also supports VBR (Variable Bit Rate) mode.
No other file types (".mp4", etc.) can be read.
".wma" files must be of the WMA 9 standard.
The supported sampling rates are 32, 44 and 48 KHz.
To avoid reading and display problems, we recommend choosing file names less than 20 characters long that do not contain any special characters (e.g. " ? . ; ù).
Use only USB memory sticks in FAT32 format (File Allocation Table).

We recommend using the original USB cable for the portable device.
Phone
Receiving a call
An incoming call is announced by a ring and a display overlaid on the screen.
Accepting the call:

briefly press the telephone button on the steering-mounted controls to accept an ng call.
Or

Press this touch screen button.
En

press and hold...

...the telephone button on the steering-mounted controls to refuse the call.
Or

Press this touch screen button.

Press this button on the touch screen to send an automatic message indicating
that you are driving.
Making a call

Using the telephone is strongly discouraged while driving.
Park the vehicle.
Making a call using the numeric keypad

Press the "Phone" application.
In the list, select the "Keypad" tab then dial the number.

Press this button to make the call.
Making a call using the list of recent calls

Press the "Phone" application.
In the list, select the "Calls" tab.
Or
Briefly press...

...the telephone button on the steering-mounted controls.
Select and call one of the most recent numbers called in the list.
It is always possible to make a call directly from the telephone; as a safety measure, first park the vehicle.
Calling a contact

Press the "Phone" application.
In the list, select the "Contacts" tab.
Select the desired contact in the displayed list.

Call the contact by selecting one of the contact's phone numbers.
Organising the contact list

Press the "Phone" application.
In the list, select the "Settings" tab to display the telephone-related settings.

Choose to list the contacts starting with their first or last name.
Connecting two phones
i The system allows two phones to be connected simultaneously:
- 2 via Bluetooth ^* connection.
or
- 1 via Bluetooth ^ connection and 1 via Mirror Screen ^ connection.
Display and content priority is given to the last phone used.
To change the priority of the phone:

Press the "Phone" application.

Press this button to change the priority of the phone.
Settings
Configuring the screen display

Press the "Settings" application.
In the list, select the "Customization" tab. It is possible to configure:
- the screen colours associated with the interior ambient lighting. Refer to the "Ease of use and comfort" section.
- the sound ambience.
- the visual welcome and goodbye animations.
- the screen transition animations.
Managing the system connectivity

Press the "Settings" application.
In the list, select the "Connectivity" tab. It is possible to manage:
- The Bluetooth ^® connection.
- The Mirror Screen ^® smartphone connections (Apple ^® CarPlay ^® /Android Auto).
- The Wi-Fi connection.
- The privacy mode.
Configuring the system

Press the "Settings" application.
In the list, select the "System" tab.
It is possible to configure:
- the language.
- the date & time.
- the unit of distance and consumption (kWh/100 miles - miles, mi/kWh - miles, km/kWh - km).
- the temperature unit (Fahrenheit, Celsius). It is also possible to reset the system configuration.
Selecting the language

Select "Language" to change the language.
Press the desired language.
208
DS IRIS SYSTEM - 12" touch screen Infotainment system

Press the back arrow to return to the previous page.
Setting the date and time
Select "Date and Time" to modify the date and time.

"Automatic Date and Time" is activated by default, so that the setting is made
automatically according to your geolocation. To adjust manually, deactivate "Automatic Date and Time".
Press the "Select Time Zone" field then define a time zone.

Press the back arrow to return to the previous page.
Press the "Time Settings" line then set the time.
OK
Press "OK" to confirm.
Press the "Date" line then set the date.
OK
Press "OK" to confirm.

Select the Time Format (12h/24h).

Select the Date Format.
i The system does not automatically change between winter and summer time (depending on the country of sale).
Help

Press the "Help" application.
In the list, select the "User Manual" tab to consult the vehicle's handbook.
or
In the list, select the "Tutorials" tab to watch explanatory videos for a quick start on screen management, certain driving aids and voice recognition.
User Manual

Select the display language.
The handbook home page is displayed. It presents the different possibilities for accessing the information sought:

Visual search
Access to subjects via pictures representing the exterior and interior of the vehicle.

Indicator lamps
= D Access to the descriptions/operation of the instrument panel warning/indicator lamps.

System
Access to sections dedicated to the various audio equipment and telematics systems.

Contents
Access to subjects via the main sections of the handbook.
Visual search

Press Visual search.
Press one of the pictures located at the bottom of the screen.

Press one of the bullet points in the enlarged view.
There are two cases:
- Direct display of the subject, if only one subject is associated with the bullet point.
- Display of a list of subjects, if several subjects are associated with the bullet point.
Indicator lamps

Press Indicator lamps.
The mosaic of warning/indicator lamps is displayed.
The warning/indicator lamps are sorted by colour. Press the warning/indicator lamp concerned; the corresponding content is displayed.

Back to the mosaic of warning/indicator lamps.
System

Press System.
The list of audio and telematics systems is displayed.
Press on the section concerned; the list of subjects is displayed.
Press on the subject concerned; the corresponding content is displayed.

If the subject has more than one page, drag horizontally. Back to the list of subjects.
Contents

Press Contents.
The list of sections is displayed. Press on the section concerned; the list of subjects is displayed.
Press on the subject concerned; the corresponding content is displayed. ◆◇◇ If the subject has more than one page, drag horizontally. Back to the list of subjects.
209
DS IRIS SYSTEM - 12" touch screen Infotainment system

210
Vehicle data recording and privacy
Vehicle data recording and privacy
Electronic control units are installed in your vehicle. These control units process data received from the vehicle's sensors, for example, or data they generate themselves or exchange with each other. Some of these control units are required for the correct operation of your vehicle, some others assist you while driving (driving or manoeuvring aids), while others provide comfort or infotainment functions.
The following contains general information about how data is processed within the vehicle. You will find additional information about the specific data which is downloaded, stored and transmitted to third parties and what it is used for in your vehicle under the keyword
"Data protection". This information is directly associated with the references for the functions in question contained in the corresponding vehicle handbook, or in the general terms and conditions of sale.
This information is also available online.
Vehicle operating data
The control units process the data used for the operation of the vehicle.
This data includes, for example:
- Information about the state of the vehicle (e.g. speed, travel time, lateral acceleration, wheel rotation rate, fastened seat belts display).
- Environmental conditions (e.g. temperature, rain sensor, distance sensor). As a general rule, this data is temporary, is not stored for longer than one operating cycle and is only used within the vehicle itself. The control units often record this data (including the vehicle's key). This function allows either the temporary or permanent storage of information about the state of the vehicle, stresses on components, servicing requirements, as well as events and technical errors.
Depending on the vehicle's equipment level, the data stored is as follows:
- Operating state of system components (e.g. filling level, tyre pressures, battery charge status).
- Faults and malfunctions in important system components (e.g. lamps, brakes).
- System reactions in specific driving situations (e.g. deployment of an airbag, triggering of stability control and braking systems).
- Information about events which have damaged the vehicle.
- For electric and rechargeable hybrid vehicles, the traction battery charge level and the estimated driving range.
In particular circumstances (e.g. if the vehicle has detected a malfunction), it may be necessary to record data which would otherwise simply not be stored.
When taking your vehicle in for servicing (e.g. repairs, maintenance), the stored operating data may be read along with the vehicle's
identification number and used if necessary. The personnel working for the servicing network (e.g. garages, manufacturers) or third parties (e.g. roadside assistance agents) may read the vehicle's data. This also applies to work carried out under warranty and quality assurance measures.
This data is generally read via the OBD (On-Board Diagnostics) port fitted by law to the vehicle. It is used to report on the technical state of the vehicle or its components and facilitates the diagnosis of malfunctions, in compliance with warranty obligations and for quality improvement. This data, in particular the information relating to stress on components, technical events, operator errors and other malfunctions, is sent to the Manufacturer, if necessary, along with the vehicle's identification number. The Manufacturer's liability may also be engaged. The Manufacturer may also use the operating data taken from the vehicle for product recalls. This data may also be used to check the customer's warranty and any claims made under warranty. Any malfunctions stored in the vehicle may be reset by an after-sales service company during servicing or repair work, or at your request.
Comfort and infotainment functions
Comfort settings and personalised settings may be saved in the vehicle and modified or reinitialised at any time.
Depending on the vehicle's equipment level, this may include:
- Seat and steering wheel position settings.
- Chassis and air conditioning settings.
- Personalised settings such as the interior lighting.
You can enter your own data into the functions of your vehicle's audio and telematic system, as part of the selected functionalities.
Depending on the vehicle's equipment level, this may include:
- Multimedia data such as music, videos or photos to be read by an integrated multimedia system.
- Address book data to be used with an integrated hands-free system or with an integrated navigation system.
- Entered destinations.
- Data regarding the use of online services. This data for the comfort and infotainment functions may be stored locally in the vehicle or saved to a device that you have connected to the vehicle (e.g. smartphone, USB memory stick or MP3 player). Data that you have entered yourself may be deleted at any time.
This data may also be transmitted outside the vehicle at your request, particularly when using online services in line with the settings that you have selected.
Smartphone integration (e.g. Android Auto ^® or Apple ^® CarPlay ^® )
If your vehicle is equipped accordingly, you can connect your smartphone or another mobile device to the vehicle in order to operate it using the vehicle's integrated controls. Images and sounds from the smartphone can be transmitted through the audio and telematics system. Specific information is simultaneously sent to your smartphone. Depending on the type of integration, this includes data such as location, day/night mode and other general information about the vehicle. For more information, please refer to the user instructions for the vehicle or the audio and telematics system.
Integrating a smartphone allows you to use its applications, such as a navigation app or music player. No other integration between the smartphone and the vehicle is possible, in particular active access to vehicle data. How the data is processed subsequently is determined by the supplier of the application being used. The ability the change settings depends on the application in question and on the operating system installed on your smartphone.
Online services
If your vehicle is connected to a wireless network, data can be exchanged between your vehicle and other systems. Connection to a wireless network is made possible via a transmitter located in your vehicle or a mobile device that you have provided (e.g. smartphone). The online services can be used via this wireless connection. These include online services and applications (apps) provided to you by the Manufacturer or other suppliers.
Exclusive services
As regards the Manufacturer's online services, the corresponding functions are described by the Manufacturer in an appropriate medium (e.g. handbook, Manufacturer's website) and the information about data protection is provided. Personal data may be used for online services. The exchange of data for this purpose takes place over a secure connection, using for example the Manufacturer's dedicated computer systems. The collection, processing and use of personal data for the development of services are carried out solely on the basis of a legal authorisation, for example in the case of a legal emergency call system or a contractual agreement or else under a consent agreement.
You can activate or deactivate the services and functions (some may be chargeable) and, in some cases, the vehicle's entire connection to the wireless network. This does not include the statutory functions and services such as the emergency or assistance call system.
Third-party services
If you use online services provided by other (third-party) suppliers, these services are subject to the responsibility, the data protection and the terms
11
212
Vehicle data recording and privacy
and conditions of use of the supplier in question. The Manufacturer often has no influence over the content exchanged in this regard. Please therefore ensure that you are aware of the nature, extent and purpose of the collection and use of personal data as part of the third-party services provided by the service provider in question.
360 Vision .140....
A
ABS 79
Accelerated charging unit (Wallbox) ..147-148
Accessories .76.
Active LED Vision ..65
Active Safety Brake ..128..130....
Active Scan Suspension .105
Active suspension .105.
Adaptive headlamp lighting ..67......
AdBlue ^® ..19,165....
AdBlue® tank ..166
Additive, Diesel .163.
Adjusting headlamps .65
Adjusting head restraints .43.
Adjusting seat ..43-44.
Adjusting the air distribution 50, 52
Adjusting the air flow 50, 52
Adjusting the headlamp beam height 65
Adjusting the height and reach
of the steering wheel 46
Adjusting the seat angle 44
Adjusting the seat belt height....82
Adjusting the temperature 51
Adjusting the time 23,208
Advice on care and maintenance ..... 146, 167
Advice on driving 8,96-97
Airbags 83-87
Airbags, curtain 85-86
Airbags, front 84-85, 88
Airbags, lateral 84-85
Air conditioning .50-51......
Air conditioning, automatic 53
Air conditioning, dual-zone automatic .....51
Air intake 52-53
Air vents 49
Alarm 37-38
Amplifier, audio....58
Anti-lock braking system (ABS)....79
Antitheft / Immobiliser 27
Applications 24
Armrest, front....58
Armrest, rear 60
Assistance call 77-78
Assistance, emergency braking ....80, 130
Audio streaming (Bluetooth) 205
B
Battery, 12 V ..... 159, 163, 181-185
Battery, ancillaries 181
Battery, charging 181-182, 184
Battery, remote control 31
Blanking screen (snow shield) 158
Blind 40-41
Blind spot monitoring 135
BlueHDi 19, 163, 170
Bluetooth (hands-free) 202
Bluetooth (telephone) 202
Bodywork....168
Bonnet 160
Boot 32-34,62
Brake discs 164
Brake lamps 179
Brakes 164
Braking 105
Braking assistance system 79-80
Braking, automatic emergency .....128, 130
Braking, dynamic emergency .....100-101
Bulbs (changing) 178-179
C
Capacity, fuel tank 143
Care of the bodywork 168
Central locking 29-30
Changing a bulb 178-179
Changing a fuse .180.
Changing a wheel 171, 175
Changing a wiper blade 73-74
Changing the remote control battery .....31
Changing to free-wheeling 166
Charge level indicator (Rechargeable hybrid) . . .21
Charger, induction 57
Charger, wireless 57
Charging cable 149
Charging cable
(Rechargeable hybrid) 147-148, 154
Charging connector
(Rechargeable hybrid) ..146, .153–.154.
Charging flap
(Rechargeable hybrid)..146,.153-.154.
Charging the traction battery
(Rechargeable hybrid) ..20,145,153-154
CHECK 21
Checking the engine oil level..18....
Checking the levels ..161–162 ......
Checking tyre pressures (using the kit)..172, 174
Checks..161,163-165....
Checks, routine ..163-164
Child lock..95....
Children..83,89-91,94....
Children (safety) ..95....
Child seats..83,86-89....
Child seats, conventional..88-89....
Child seats, i-Size .94
Child seats, ISOFIX..90-92....
Cigar lighter 56
Cleaning (advice)....146, 167–169
Clock....23
Closing the boot....29,33
Closing the doors....29,32
Collision Risk Alert 128-129
Comfort mode 108
Configuration, vehicle....10, 24
Connection, Bluetooth....202
Connectivity 207
Consumptions 24
Container, AdBlue® 165-166
Control, emergency boot release 33
Control, emergency door ..30-31.....
Control, heated seats....46
Controls, steering mounted 101-103
Control stalk, lighting 63-64
Control stalk, wipers 72-74
Control unit....147-149, 154
Courtesy lamp, front....59
Courtesy lamps....59
Cruise control 116, 118–120
Cruise control, adaptive 120
Cruise control, adaptive with Stop function ....116
Cruise control by speed limit recognition ..... 116
Cup holder 56
D
Date (setting) 208
Daytime running lamps 64,179
Deactivating the passenger airbag .....84, 87-88
Deadlocking 27,29
Deferred charging 24,155
Deferred charging
(Rechargeable hybrid) 24-25, 146, 153
Defrosting 47,53
Defrosting, front 53
Defrosting, rear screen 54
Demisting 47,53
Demisting, front 53
Demisting, rear 54
Diagnosis, vehicle 21
Dials and gauges 10
Digital instrument panel 10
Dimensions 193
Dipstick 18, 161
Direction indicators (turn signals)....64, 179
Display screen, instrument panel ....10
Domestic charging 149
Domestic charging (Rechargeable hybrid) .....154
Door pockets 56
Doors 32
Driver's attention warning 131-132
Driving 42-43, 96-97
Driving aids camera (warnings) 112
Driving aid shortcuts 113
Driving aids (recommendations) .....112
Driving economically 8
Driving modes 106
Driving positions (storing) 45
DS Drive Assist 120
Dynamic stability control (DSC) 80
E
EBFD 79
Eco-driving (advice) 8
ECO mode 106
Electric automatic gearbox
(Rechargeable hybrid) 104
Electronic brake force distribution (EBFD) .....79
Emergency braking assistance (EBA) 80
Emergency call ..77-78....
Emergency switching off..99....
Emergency warning lamps ..76,.170....
Emissions control system, SCR..20,.165...
Energy economy (mode) ..159....
Energy economy mode .159....
Energy flows .24.
Energy recovery .20,105
Engine .165
Engine compartment ..160-161......
Engine, Diesel ..143, 161, 170, 191..
Engine, petrol ..107, 161, 190....
Engines ..189-191....
Environment..8,31....
e-Save function (energy reserve)....24
ESC (electronic stability control)....79
Expanded traffic sign recognition .....116
Exterior lighting 66
F
Fatigue detection 131-132
Favourite driving functions 113
Filling the AdBlue® tank 163, 166
Filling the fuel tank 143-144
Filter, air 163
Filter, oil 163
Filter, particle 163
Filter, passenger compartment....50, 163
Fitting a wheel 175, 177
Fitting roof bars 157-158
Fittings, boot 60
Fittings, interior 56-57
Fittings, rear 60
Flap, charging 155
Flap, fuel filler 143-144
Flap, ski 60
Flashing indicators 64
Flat bed (towing) 186
Floor, boot, adjustable....62
Fluid, brake 162
Fluid, engine coolant 162
Foglamps, rear 63
Folding the rear seats 48-49
Folding/unfolding the door mirrors 47
Four-wheel drive (4WD)....108, 159
Frequency (radio) 205
Fuel 8,143
Fuel consumption 8,20
Fuel level, low .143.
Fuel (tank) 143-144
Fuses 180
G
Gauge, fuel 143
Gearbox, automatic .....101-104, 108, 164, 181
Gearbox, manual 108
Gear shift indicator .109.
Glove box 56
Grab handles .56.
H
Hands-free access 35-36
Hands-free tailgate 35-36
Hazard warning lamps 76,170
Headlamps (adjustment) ..65.
Headlamps, automatic dipping .....66-67
Headlamps, automatic operation 65
Headlamps, dipped beam 179
Headlamps, halogen .65.
Headlamps, main beam 66, 179
Head restraints, front 43
Head restraints, rear 48-49
Heated and ventilated seats 45
Heating 49
Heating, programmable 25, 54
Hi-Fi system 58
High voltage 145
Hill start assist 108
Histogramme, fuel consumption .....24-25
Horn 77
|
Ignition 99,207
Ignition on 99
Immobiliser, electronic 97
Indicator, AdBlue® range..19....
Indicator, coolant temperature..19....
Indicator, engine oil level..18....
Indicators, direction ..64....
Indicator, service..17....
Inflating tyres..164,193....
Inflating tyres and accessories
(using the kit)..172,174....
Information, vehicle..10,210....
Infrared camera..70,.112....
Instrument panel..10,22,113....
ISOFIX mountings..90....
J
Jack .171-172,175....
Jump starting .181.
K
Key..26-27,30-31....
Key, electronic..28-29....
Keyless Entry and Starting ..26,28-29, 97-98
Key not recognised 99
Key with remote control 26, 97
Kit, hands-free 202
Kit, puncture repair ..171-172 ....
Kit, temporary puncture repair 171-174
Klaxon....77
L
Labels, identification 193
Lamps, parking 64
Lamps, rear 179
Lane assist 120, 124–126
Lane keeping assist 133
Leather (care)....169
LEDs - Light-emitting diodes .....64, 178-179
Level, AdBlue ^® 163
Level, brake fluid 162
Level, Diesel additive 163
Level, engine coolant 19, 162
Level, engine oil 18, 161
Levels and checks 161-162
Level, screenwash fluid 73, 162
Light-emitting diodes - LEDs 64, 178-179
Lighting, boot 62
Lighting dimmer 21
Lighting, directional .69.
Lighting, exterior 63, 66
Lighting, guide-me home 65-66
Lighting, interior . 59
Lighting, mood 59
Lighting, welcome 65-66
Loading....61, 157–158
Load reduction mode 159
Load space cover 60
Locating your vehicle 27
Locking 27,29
Locking from the inside 30
Locking the doors .30.
Log, alerts 21
Long objects, transporting 60
M
Mains socket (domestic network) .....147-148
Maintenance (advice)....146, 167
Maintenance, routine 113, 163–165
Manoeuvring aids (recommendations) .....112
Map reading lamps 59
Markings, identification 193
Massage function 46
Massage, multi-point 46
Mat 59,113
Menu, shortcuts 24
Mirror, rear view 47
Misfuel prevention 144
Mobile application 24-25, 54, 153, 155
Motor, electric 107, 145, 192
Motorised tailgate 33-34
Mountings, ISOFIX 90
N
Net, high load retaining 61
Night vision 70
Night Vision .70.
0
Obstacle detection .137.
Oil change .161
Oil consumption .161.
Oil, engine .161....
On-board tools .62.170-172....
Opening the bonnet .160
Opening the boot .28.32....
Opening the doors .28,32....
P
Pads, brake .164
Paint .168,193.
Paint colour code .193....
Parcel shelf, rear 60
Parking brake, electric ..99-101, 164...
Parking (sensors) ..137....
Parking sensors, audible and visual ..137.....
Parking sensors, front ..137....
Parking sensors, rear 137
Parking sensors, side 138
Passenger compartment temperature
pre-conditioning (Rechargeable hybrid) .....25, 54
Pedestrian horn (Rechargeable hybrid) .....77
Personalisation....10
Plates, identification....193
Port, USB 56, 60
Power 20
Power indicator (Rechargeable hybrid) .....8, 20
Pressures, tyres 164, 173–174, 193
Pre-tensioning (seat belts) 83
Priming the fuel system 170
Profiles 195
Programmable cruise control 119
Protecting children 84, 86–91, 94
Puncture 172-173, 175
R
Radar (warnings) 112
Radio 204-205
Range, AdBlue ^® 19, 163
Reading lamps, touch-sensitive ..... 59
READY (warning lamp) ..160....
Rear air blower 53
Rear screen (demisting) 54
Rechargeable
hybrid engine 8,24,159-160,186,192
Rechargeable
hybrid system 6,8,24,98,107,145
Recharging the battery 181-182, 184
Recharging the traction battery .....149
Recharging the traction battery
(Rechargeable hybrid) 145, 153-154
Recirculation, air .52-53....
Recorder, trip distance 21
Reduction of electrical load (mode) .....159
Regeneration of the particle filter .....163
Regenerative braking
(deceleration by engine braking)....105
Reinitialising the remote control ....32
Reinitialising the under-inflation
detection system 111
Reminder, lighting on 63-64
Remote control 26-30
Remote functions....155
Remotely operable functions
(Rechargeable hybrid) 24-25,54
Removing a wheel 175-177
Removing the mat ....59
Replacing bulbs 178-179
Replacing fuses .180....
Replacing the air filter 163
Replacing the oil filter .163.
Replacing the passenger
compartment filter 163
Reservoir, screenwash 162
Resetting the trip .....22
Reversing camera 112, 138–140
Reversing lamps 179
Roof bars 157-158
Running out of fuel (Diesel) 170
S
Safety, children..84,86-91,94.....
Saturation of the particle filter (Diesel) ..163 ..
Screens, very cold conditions ..158
Screenwash ..73.
Screenwash, front ..73.
Screenwash, rear ..73.
SCR (Selective Catalytic Reduction) ..20,165
Seat angle ..44,48.
Seat belts ..81-83, 88
Seat belts, rear ..82
Seats, electric ..44-45.
Seats, front ..43-45.
Seats, heated ..45-46.
Seats, rear ..48-49,.86....
Selector, gear..101-105.
Sensors (warnings)..113
Serial number, vehicle ..193
Servicing..17,163-165......
Settings, equipment..10,24.
Shield, snow 158
Sidelamps 64,179
Silent vehicle warning sound
(Rechargeable hybrid) 77
Smartphone 24-25,57
Snow chains 111, 158–159
Snow screen 158
Socket, 12 V accessory....56, 61
Speakers 58
Speed limiter .116-118
Speed limit recognition 114-115
Speedometer .113
Sport mode 106-107
Spotlamps, side 66
Stability control (ESC)....79, 81
Starting a Diesel engine 143
Starting/Stopping the vehicle 97
Starting the engine 97-98
Starting the vehicle 98,101-104
Starting using another battery .....99, 181
State of charge, battery 24
Station, radio 204-205
Steering wheel (adjustment) 46
Stickers, customising 168
Stopping the vehicle 98, 101-104
Stop & Start 22, 50, 53, 109-110,
143, 159, 163, 183
Storage....56-57, 58, 60
Storage box 62
Storage compartments 55
Storage wells .60.62
Storing driving positions 45
Stowing rings .60....
Sunroof, panoramic....40-41
Sunshine sensor 50
Sun visor 56
Suspension....164
Suspension with variable
vibration reduction .105.
Switching off the engine 97
Synchronising the remote control 32
T
Tables of engines 190-192
Tailgate 32
Tank, fuel 143-144
Technical data 190-192
Telephone 202, 206-207
Temperature, coolant 19
Ticket holder 55
Time (setting) .23.208
Tool box 62
Tools 170-172
Topping-up AdBlue ^® 166
Top Tether (fixing) 90
Total distance recorder 21
Touch screen 23-24,54
Towbar 81,155
Towed loads 189-192
Towing 186-187
Towing another vehicle 186-187
Towing the vehicle 186-187
Traction battery charge 149
Traction battery
(Rechargeable hybrid) 21, 145–146, 153
Traction control (ASR) 80
Trailer 81,155
Trailer stability assist (TSA) 81
Trajectory control systems 79
Triangle, warning 170
Trip computer 22.
Tyres 164,193
Tyre under-inflation detection ..... 110, 174
U
Under-inflation (detection) ..110....
Unlocking .26.28
Unlocking from the inside .30.
Unlocking the boot .26.28.
Unlocking the doors .30.
Unlocking the tailgate .26,28....
Updating the time .208....
Welcome lighting 66
Wheel, spare 164, 171–172, 175
Window controls 39
Windscreen, heated 54
Wiper blades (changing) 73-74
Wiper, rear 73
Wipers 72,74
Wipers, automatic rain sensitive .....74
Wipers, windscreen .72, 74....
V
Vehicle data recording and privacy ..210.....
Ventilation ..49-50
Visibility .53.
W
Wallbox (Rechargeable hybrid) ..147-148, 154
Warning and indicator lamps..11....
Warning lamp, driver's seat
belt not fastened ..82....
Warning lamp, READY ..160....
Warning lamps .11....
Warning lamp, seat belts..82....
Warnings and indicators....11-12
Washing 113
Washing (advice)..146,167-168
Weights....189
Welcome function 45
Alphabetical index

220
Appendix
221
Appendix

The Manufacturer declares, in accordance with the provisions of European legislation (Directive 2000/53) relating to End-of-Life Vehicles, that it achieves the objectives set by this legislation and that recycled materials are used in the manufacture of the products that it sells.
No part of this document may be reproduced or translated without written permission from the Manufacturer.
4DCONCEPT
Printed in the EU

DS AUTOMOBILES
Spirit of Avant-Garde
DSautomobiles.comANG.22DS7.0040


- TOUCH SCREEN (depending on availability)
- ONLINE
- Select:
- WELCOME
- Key
- Presentation
- Rechargeable hybrid system
- Labels
- Eco-driving
- Optimise your use of the gearbox
- Drive smoothly
- Control the use of electrical equipment
- Limit the causes of excess consumption
- Comply with the servicing instructions
- Optimising the driving range (rechargeable hybrid vehicles)
- Driver information
- Instrument panel
- Digital instrument panel
- Information displayed on the instrument panel
- Choice of the displayed page
- Settings for displayed pages
- Settings for a "Personal" display page
- Warning and indicator lamps
- Associated warnings
- When the ignition is switched on
- Persistent warning lamp
- If a lamp remains lit
- 01
- List of warning and indicator lamps
- Red warning/indicator lamps
- STOP
- Maximum coolant temperature
- Engine oil pressure
- System malfunction (Rechargeable hybrid)
- Cable connected (Rechargeable hybrid)
- V battery charge (depending on country of sale)
- Braking
- Electric parking brake
- DS ACTIVE SCAN SUSPENSION
- Door(s) open
- Seat belts not fastened/unfastened
- Orange warning/indicator lamps
- Service
- Malfunction (with electric parking brake)
- fault"
- Automatic functions deactivated (electric parking brake)
- Anti-lock braking system (ABS)
- Engine self-diagnostic system
- Dynamic stability control (DSC)/Anti-slip regulation (ASR)
- Emergency brake malfunction (with electric parking brake)
- Hill start assist
- Under-inflation
- Parking sensors
- Engine preheating (Diesel)
- Airbags
- Front passenger airbag (ON)
- Front passenger airbag (OFF)
- Low fuel level
- Pedestrian horn (Rechargeable hybrid)
- Collision Risk Alert/Active Safety Brake
- Lane keeping assist
- Lane positioning assist
- Stop & Start
- AdBlue® (BlueHDi)
- SCR emissions control system (BlueHDi)
- being prevented.
- Rear foglamps
- Automatic headlamp dipping
- DS PIXEL LED VISION 3.0
- DS NIGHT VISION
- Green warning/indicator lamps
- Vehicle ready to drive (Rechargeable hybrid)
- Automatic wiping
- Direction indicators
- Sidelamps
- Dipped beam headlamps
- Blue warning/indicator lamps
- Main beam headlamps
- e-SAVE function (Rechargeable hybrid)
- Black/white warning lamps
- Automatic gearbox or Electric automatic gearbox (e-EAT8) (Rechargeable hybrid)
- Indicators
- Service indicator
- Service spanner
- Service spanner flashing
- Resetting the service indicator
- Reminder of the servicing information
- Engine oil level indicator
- Low oil level
- Oil gauge malfunction
- Coolant temperature indicator
- AdBlue ® range indicators (BlueHDi)
- Manual display of driving range
- Actions required related to a lack of AdBlue®
- Malfunction of the SCR emissions control system
- Malfunction detection
- Malfunction confirmed during the permitted driving phase (between 685 miles and 0 miles (1,100 km and 0 km))
- Starting prevented
- Power indicator (Rechargeable hybrid)
- Charge level indicator (Rechargeable hybrid)
- Manual test
- Total distance recorder
- Lighting dimmer
- Trip computer
- Data displayed on the instrument panel
- Trip reset
- Definitions
- Range
- Current consumption
- Average consumption
- Average speed
- Distance travelled
- Stop & Start time counter
- 12-inch touch screen
- Recommendations
- Main controls
- Applications
- ADAS
- Climate
- Seats
- Settings
- Energy
- Energy application
- Energy Flow
- Statistics
- Charging
- e-SAVE
- Remotely operable additional functions (Rechargeable hybrid)
- Installation procedure
- • Network coverage
- Electronic key with remote control function and built-in key
- Remote control function
- Built-in key
- Unlocking the vehicle
- Complete unlocking
- Selective unlocking
- Driver's door
- Opening the windows
- Selective unlocking and opening of the tailgate
- Locking the vehicle
- Normal locking
- Deadlocking
- • "DS LIGHT VEIL"
- Locating the vehicle
- Advice
- Keyless Entry and Start
- Selective unlocking of the tailgate
- Closing the windows and sunroof
- • Electrical interference
- Central locking
- Manual
- Automatic (anti-intrusion security)
- • Transporting long or voluminous objects
- Back-up procedures
- Lost keys, remote control, electronic key
- Complete unlocking/locking of the vehicle with the key
- Central locking not functioning
- Other doors
- Unlocking
- Locking
- Changing the battery
- Battery type: CR2032/3 volts.
- Reinitialising the remote control
- Doors
- Opening
- From outside
- From inside
- Boot
- Opening the tailgate
- Closing the tailgate
- Back-up release
- Locking after closing
- Motorised tailgate
- Anti-pinch
- Bicycle carrier/Towing device
- Motorised operation
- Closing
- Memorising an opening position
- Manual operation
- Manual closing of the motorised tailgate in case of failure
- Precautions in use
- • In wintry conditions
- : When washing
- Hands-free function (Hands-Free Tailgate Access)
- • Rechargeable hybrid vehicles
- Automatic locking
- Recommendations on the hands-free function (Hands-Free Tailgate Access)
- Alarm
- Exterior perimeter monitoring
- Interior volumetric monitoring
- Anti-tilt monitoring
- Self-protection function
- Locking the vehicle with full alarm system
- Activation
- Deactivation
- Locking the vehicle with exterior perimeter monitoring only
- Deactivating the interior volumetric and anti-tilt monitoring
- Reactivating the interior volumetric and anti-tilt monitoring
- Triggering of the alarm
- Failure of the remote control
- Locking the vehicle without activating the alarm
- Automatic activation
- Malfunction
- Electric windows
- Automatic operation
- Deactivating the rear controls for the rear electric windows
- Reinitialising the electric windows
- The anti-pinch function is disabled during the following sequence of operations.
- Panoramic sunroof
- Precautions
- Operation
- Anti-pinch system
- Opening/Closing
- Operation of buttons
- Reinitialisation
- Driving position
- Correct seating position
- Before moving off
- When driving
- Front seats
- Front head restraints
- Adjusting the height
- Upwards:
- Adjusting the angle
- Forwards:
- Rearwards:
- Removing a head restraint
- Refitting a head restraint
- Manually-adjustable seats
- Longitudinal
- Height
- Backrest angle
- Electrically-adjustable seats
- Cushion height and angle
- Additional adjustments
- Electric lumbar adjustment
- "2-way" adjustment
- "4-way" adjustment
- Seat cushion length
- Seat cushion angle
- Memorising driving positions
- Using buttons M/1/2
- Recalling a stored position
- With the ignition on or engine running
- Welcome function
- Heated and/or ventilated seats
- Activation/Deactivation
- Seats tab.
- Seats application.
- 03
- Changing settings
- Multipoint massage
- Steering wheel adjustment
- Mirrors
- Door mirrors
- Adjustment
- Folding
- Unfolding
- Automatic tilting in reverse gear
- Demisting/Defrosting
- Electrochrome interior rear view mirror
- Rear seats
- First steps:
- Heating and Ventilation
- Air intake
- Controls
- Ventilation with the ignition on
- Dual-zone automatic air conditioning
- Temperature adjustment
- Temperature synchronisation
- Automatic air conditioning
- Automatic air conditioning manual settings
- Adjusting the air flow
- Adjusting the air distribution
- Clean Cabin function
- AQS function
- Clean Air function
- Air conditioning on/off
- "Rear" function
- Remote settings controls
- Locking the remote settings controls
- Switching off the air conditioning system
- Interior air recirculation
- Front demisting/defrosting
- Rear screen demisting/defrosting
- Heated windscreen
- Switching on/off
- Temperature pre-conditioning (Rechargeable hybrid)
- Programming
- Operating conditions
- 56
- Sun visor
- Glove box
- Cigarette lighter/12 V accessory socket(s)
- USB sockets
- Wireless smartphone charger
- Checking operation
- Front armrest
- Hi-Fi System FOCAL Electra®
- Mats
- Fitting
- Removing/refitting
- Touch-sensitive courtesy lamps
- Touch-sensitive courtesy lamp
- Touch-sensitive reading lamps
- Interior ambient lighting
- 60
- Rear fittings
- Rear armrest
- Ski flap
- Boot fittings
- Load space cover shelf
- High load retaining net
- V accessory socket
- 2-position boot floor
- Boot lamp
- Exterior lighting control stalk
- Main lighting
- Headlamp dipping
- Display
- i Switching on the lamps after switching off the ignition
- - Travelling abroad
- Daytime running lamps/ Sidelamps
- Three flashes
- Parking lamps
- Headlamp beam height adjustment
- Manual adjustment of LED technology headlamps
- (Initial setting)
- Automatic DS PIXEL LED VISION 3.0 headlamp adjustment
- Automatic illumination of lamps
- Guide-me-home and welcome lighting
- Guide-me-home lighting
- Automatic
- Welcome lighting
- Door mirror spotlamps
- Automatic lighting systems - General recommendations
- - Operating limits
- Maintenance
- Pause
- Adaptive Frontlight System
- Entering an illuminated area
- Exiting an illuminated area
- Conditions for operation
- Operating limits
- 04
- Maintenance recommendations
- Wiper control stalk
- Without AUTO wiping
- With AUTO wiping
- Windscreen wipers
- Int
- AUTO
- Single wipe
- Windscreen wash
- Rear wiper
- Reverse
- Rear screenwash
- Special position of the windscreen wipers
- Before removing a windscreen wiper blade
- After refitting a windscreen wiper blade
- Changing a wiper blade
- Removing/Refitting at the front
- Removing/refitting at the rear
- Automatic windscreen wipers
- Switching on
- Switching off
- General safety recommendations
- ! Installation of accessory radio communication transmitters
- i Declarations of conformity for radio equipment
- Hazard warning lamps
- Automatic operation of hazard warning lamps
- Horn
- Emergency or assistance call
- eCall (SOS)
- Operation of the system
- : Data processing
- Data storage
- Access to data
- DS ASSISTANCE
- Electronic stability control (ESC)
- Anti-lock braking system (ABS)/Electronic brake force distribution (EBFD)
- You must stop the vehicle.
- After an impact
- Emergency braking assistance (EBA)
- Anti-slip regulation (ASR) / Dynamic stability control (DSC)
- E-TENSE 4X4 360
- Deactivation/Reactivation
- ASR/DSC
- Trailer stability assist (TSA)
- Seat belts
- Inertia reel
- Pyrotechnic pretensioning
- Force limiting system
- Front seat belts
- Fastening
- Unfastening
- Seat belts not fastened/unfastened identification indicator lamp
- Not fastened at the front
- Not fastened at the rear
- Unfastened
- Installation
- Recommendations for children
- General information
- ! The airbags do not operate when the ignition is switched off.
- Deployment
- Curtain airbags
- ! For the airbags to be fully effective, observe the safety recommendations below.
- Lateral airbags
- Child seats
- Installing a booster seat
- Additional protections
- Child seat at the rear
- Centre rear seat
- Child seat at the front
- "Forward facing"
- "Rearward facing"
- Warning label - Front passenger airbag
- Deactivating the front passenger airbag
- Vehicles not equipped with a deactivation/reactivation control
- Deactivating/Reactivating the front passenger airbag
- With the ignition off:
- Recommended child seats
- Locations for child seats secured using the seat belt
- "ISOFIX" mountings
- Recommended ISOFIX child seats
- Locations for ISOFIX child seats
- i-Size child seats
- Manual child lock
- Electric child lock
- Driving recommendations
- Important!
- • E-TENSE 4X4 360
- On flooded roads
- Towing
- Before setting off
- Nose weight
- Tyres
- Lighting
- Cooling
- Brakes
- Side wind
- Anti-theft protection
- Electronic immobiliser
- Starting/switching off the engine
- Starting
- Diesel engines
- - Petrol engines
- Starting rechargeable hybrid vehicles
- Switching on the ignition without starting the engine
- Key not detected
- Back-up starting
- Back-up switch-off
- Emergency switch-off
- Indicator lamp
- Manual release
- Manual application
- Automatic release
- Automatic application
- Special cases
- Immobilising the vehicle with the engine running
- Parking the vehicle with the brake released
- Deactivating automatic operation
- Emergency braking
- Automatic gearbox
- Gearbox selector positions
- Steering-mounted controls
- Unlocking the gearbox
- Engaging reverse gear
- Permanent manual mode
- Entering the mode:
- Exiting the mode:
- Switching off the ignition
- Free-wheeling
- Special aspects of automatic mode
- Special aspects of manual mode
- Starting the vehicle
- Switching the vehicle off
- Gearbox malfunction
- Switching of the gearbox to back-up mode
- Selector malfunction
- Minor malfunction
- Major malfunction
- e-EAT8 electric automatic gearbox (Rechargeable hybrid)
- Displays in the instrument panel
- Regenerative braking (Brake function)
- Driving modes
- With petrol / Diesel engines
- Eco
- Comfort
- Normal
- Sport
- With Rechargeable hybrid engines
- Electric
- Conditions of activation
- Hybrid
- 4WD (4-wheel drive)
- Gear shift indicator
- Associated indicator lamps
- Main conditions for operation
- Putting the engine into standby (STOP mode)
- Time counter
- Special cases:
- Restarting the engine (START mode)
- Malfunctions
- The vehicle stalls in STOP mode
- V battery
- Tyre under-inflation detection
- Under-inflation alert
- Non-standard or 'space-saver' spare wheel
- Driving and manoeuvring aids - General recommendations
- Driving aids
- Manoeuvring aids
- Radar(s)
- Driving aids camera
- Other cameras
- Sensors
- Mats/Pedal trims
- Units of speed
- Shortcuts for driving aids
- Multiple deactivation
- 06
- 114
- Driving
- Selection of functions
- Deactivation of these functions
- Road signs recognition
- Recommendation
- Storing the speed setting
- Extended Traffic Sign Recognition
- Speed limiter
- Steering-mounted control
- Switching on/Pausing
- Adjusting the limit speed setting
- Temporarily exceeding the speed setting
- Cruise control - Specific recommendations
- Remain vigilant while cruise control is
- Programmable cruise control
- Changing the cruise speed setting
- DS DRIVE ASSIST
- Adaptive cruise control
- Use
- Activating the system (pause)
- Switching on cruise control and setting the speed
- Pausing/resumption of cruise control
- Changing the programmed speed setting with the Road signs recognition function
- Changing the inter-vehicle distance
- Deactivating the system
- Messages and alerts
- Stop function
- Stop & Go function
- Cruise control
- Pausing/Suspending the system
- Automatic pause
- In response to action by the driver: suspension
- Driving situations and related alerts
- Risk of undesirable operation
- Active Safety Brake with Collision Risk Alert and Intelligent emergency braking assistance
- This system:
- Deactivation/Activation
- Operating conditions and limits
- Collision Risk Alert
- Modifying the alert trigger threshold
- Intelligent emergency braking assistance (iEBA)
- Active Safety Brake
- Distraction detection
- Driver Attention Warning
- Driver Attention Warning by Camera
- DS DRIVER ATTENTION MONITORING
- Blind spot monitoring
- 136
- Rear parking sensors
- Front parking sensors
- Side parking sensors
- Reversing camera
- Operating principle
- Automatic zoom view
- Standard view
- Panoramic view
- Vision
- Reconstructed view
- Live view
- TAILOR-MADE LUBRICANTS FOR HAUTE COUTURE CARS
- Keep your engine younger for longer!
- Compatibility of fuels
- Diesel at low temperature
- Travelling abroad
- Refuelling
- 144
- Misfuel prevention (Diesel)
- : Travelling abroad
- Electrical system
- 146
- When washing
- High-pressure washing
- Traction battery
- Disposal of the traction battery
- Charging flap
- Charging cables, sockets and chargers
- Identification labels on charging sockets/ connectors
- 148
- 150
- Type 2
- POWER
- CHARGE
- FAULT
- Type 1 control unit label - Recommendations
- 152
- Manual reset procedure
- Type 2 control unit label - Recommendations
- Charging the traction battery (Rechargeable hybrid)
- 154
- After charging
- Charging procedure
- Connection
- Domestic charging (mode 2)
- Accelerated charging (mode 3)
- Deferred charging
- Towing device
- Load distribution
- 156
- Towing device with retractable ball joint
- Unlocking handle
- Usage position
- Storage position
- Roof bars
- 158
- Very cold climate screens
- Snow chains
- Installation tips
- Energy economy mode
- Selecting the mode
- Exiting the mode
- Load reduction mode
- Bonnet
- 160
- Engine compartment
- Diesel fuel system
- Checking levels
- Used products
- Engine oil
- 162
- Checking using the dipstick
- Do not start the engine if the level is:
- Topping up the engine oil level
- Brake fluid
- Engine coolant
- Screenwash fluid
- Fluid specification
- Diesel fuel additive (Diesel with particle filter)
- Topping up
- AdBlue ® (BlueHDi)
- Checks
- Passenger compartment filter
- Air filter
- Oil filter
- Particle filter (Diesel)
- 164
- New vehicle
- Brake pads
- Brake disc wear
- Wheels and tyres
- Shock absorbers
- Timing and accessory kits
- SCR system
- • Freezing of the AdBlue\*
- Supply of AdBlue®
- Recommendations on storage
- 166
- Precautions for use
- Procedure
- Release procedure
- Reverting to normal operation
- Advice on care and maintenance
- General recommendations
- Exterior
- Interior
- 168
- Bodywork
- High-gloss paint
- Decals
- (Depending on version)
- Textile
- Stain removal
- Alcantara®
- Leather
- 170
- Warning triangle
- Assembling and placing the triangle
- Running out of fuel (Diesel)
- Tool kit
- Versions with rigid boot floor:
- Versions with 2-position boot floor:
- Versions with articulated boot mat (Rechargeable hybrid):
- 172
- Temporary puncture repair kit
- Repair procedure
- 174
- Checking/adjusting tyre pressures
- Spare wheel
- Accessing the spare wheel
- Removing the spare wheel
- Putting the spare wheel back in place
- Removing a wheel
- 176
- Fitting a wheel
- After changing a wheel
- 178
- Changing a bulb
- Light-emitting diode (LED) headlamps and lamps
- Front lamps
- Main lamps
- Secondary lamp cluster
- 180
- For each lamp:
- Fuses
- • Installing electrical accessories
- V battery/Accessory batteries
- Lead-acid starter batteries
- Symbols
- With petrol/Diesel engines
- Accessing the battery
- Starting using another battery
- 182
- Charging the battery using a battery charger
- Disconnecting/reconnecting the battery
- Quick-release terminal clamp
- 184
- Accessing the accessory batteries
- Front
- Rear
- Charging the front battery using a battery charger
- Disconnecting/reconnecting the accessory batteries
- Disconnection
- Rear battery:
- Reconnection
- Following reconnection
- 186
- Towing the vehicle
- Towing your vehicle
- Towing another vehicle
- 188
- Engine technical data and towed loads
- Engines
- Weights and towed loads
- Dimensions (mm)
- Identification markings
- DS IRIS SYSTEM - 12" touch screen Infotainment system
- GPS navigation - Applications - Multimedia audio system - Bluetooth® telephone
- First steps
- Information
- Upper banner
- Principles
- Principle of movement in the system
- Touch buttons
- Configuring profiles
- Privacy Settings
- 196
- "Sharing Data"
- "Private Mode"
- OR
- Internet portal
- Updating the system
- Personalisation
- Personalising the screen
- Adding a Widget
- Organising the Widgets on a home page (HOME)
- Adding a page
- Deleting a Widget
- Personalising the instrument panel
- Help
- Media
- Mirror Screen ®
- Navigation
- Voice commands
- Phone
- (depending on equipment)
- Information - Using the system
- Opening voice recognition
- 200
- Navigation home screen
- Main menu
- Connectivity
- Connecting a wired device by USB
- Bluetooth ® connection
- Pairing procedure from a device
- Pairing procedure from the system
- 202
- Automatic reconnection
- Wi-Fi connection
- Device management
- Deleting a device
- Mirror Screen®
- Apple ® CarPlay ® smartphone connection
- Android Auto smartphone connection
- 204
- Changing source
- Selecting a radio station
- Storing a radio station
- Automatic search for radio stations
- Activating radio station tracking
- Changing the waveband
- Activating traffic announcements
- Audio streaming
- Playing a track
- 206
- Configuring audio and radio settings
- Information and advice
- Receiving a call
- En
- Making a call
- Making a call using the numeric keypad
- Making a call using the list of recent calls
- Calling a contact
- Organising the contact list
- Connecting two phones
- Configuring the screen display
- Managing the system connectivity
- Configuring the system
- Selecting the language
- 208
- Setting the date and time
- OK
- User Manual
- Visual search
- Indicator lamps
- System
- Contents
- Vehicle data recording and privacy
- Vehicle operating data
- Comfort and infotainment functions
- Smartphone integration (e.g. Android Auto ® or Apple ® CarPlay ® )
- Online services
- Exclusive services
- Third-party services
- A
- B
- C
- D
- E
- F
- G
- H
- |
- J
- K
- L
- M
- N
- 0
- P
- R
- S
- T
- U
- V
- W
- DS AUTOMOBILES
Brand : CITROEN
Model : DS7 Crossback (2017)
Category : Automotive