
Relay (2014) - Automotive CITROEN - Free user manual and instructions
Find the device manual for free Relay (2014) CITROEN in PDF.


| Product Type | Light Commercial Vehicle (Van) |
| Brand | Citroën |
| Model | Relay (Jumper) 2014 |
| Body Styles | Panel Van, Chassis Cab, Combi |
| Length Options | L1 (4963 mm), L2 (5413 mm), L3 (5998 mm), L4 (6363 mm) |
| Height Options | H1 (2254 mm), H2 (2524 mm), H3 (2764 mm) |
| Width (excl. mirrors) | 2050 mm |
| Wheelbase | 3000 mm (L1), 3450 mm (L2), 4035 mm (L3/L4) |
| Gross Vehicle Weight (GVW) | 3000 kg to 4000 kg (depending on version) |
| Engine Options | 2.2L HDi (110-150 hp), 3.0L HDi (155-180 hp) |
| Transmission | 5-speed or 6-speed manual |
| Fuel Tank Capacity | Approximately 90 litres (optional 60 L or 125 L) |
| Max Power | From 74 kW (100 hp) to 130 kW (180 hp) |
| Braking System | ABS, EBA, ESP/ASR, Electronic Brake Force Distribution |
| Safety Features | Airbags (driver, passenger, lateral), Seatbelts with pretensioners, ISOFIX child seat mounts |
| Comfort & Convenience | Manual/Digital air conditioning, Cruise control, Stop & Start, Reversing camera, Rear parking sensors, Pneumatic suspension, Heated seats |
| Exterior Lighting | Halogen headlamps, Automatic illumination, Guide-me-home, Front/rear fog lamps |
| Maintenance | Oil change intervals per service booklet, Bulb types: H1, H7, PY21W, P21W, W5W, etc. |
| Accessories | Towing hitch (braked trailer up to 3500 kg), Roof bars, Load securing rings |
| Warranty & Handbook | Owner's handbook in PDF, online via MyCitroën; confidential card for immobiliser |
Frequently Asked Questions - Relay (2014) CITROEN
User questions about Relay (2014) CITROEN
0 question about this device. Answer the ones you know or ask your own.
Ask a new question about this device
Download the instructions for your Automotive in PDF format for free! Find your manual Relay (2014) - CITROEN and take your electronic device back in hand. On this page are published all the documents necessary for the use of your device. Relay (2014) by CITROEN.
USER MANUAL Relay (2014) CITROEN
CITROËN JUMPER

MyCITROËN
On-line owner's handbook
You can find your handbook on the CITROËN website, under the heading "MyCitroën".
This personal space provides you with information on your products and services, a direct and special contact with CITROËN and becomes a space tailored for you.
Referring to the owner's handbook on-line also gives you access to the latest information available, easily identified by the bookmarks, associated with this pictogram:


If the heading "MyCitroën" is not available on the public website for your country, you can find your handbook at the following address: http://service.citroen.com
Select:
The Vehicle documentation link in the home page (no registration is needed).
the language,
the model,
the edition date appropriate for the date of registration of your vehicle. You will find your handbook, presented in the same way as the paper version.
We draw your attention to the following...
Your vehicle is fitted with only some of the equipment described in this document, depending on the trim level, version and the specifications for the country in which it is sold.
The fitting of electrical equipment or accessories which are not recommended by CITROËN may result in a failure of your vehicle's electronic system. Please note this specific warning and contact a CITROËN dealer to be shown the recommended equipment and accessories.
For any work on your vehicle, use a qualified workshop that has the technical information, competence and equipment required, which a CITROËN dealer is able to provide.
CITROËN has a presence on every continent, a complete product range, bringing together technology and a permanent spirit of innovation, for a modern and creative approach to mobility. We thank you and congratulate you on your choice.
At the wheel of your new vehicle, getting to know each system, each control, each setting, makes your trips, your journeys more comfortable and more enjoyable.
Happy motoring!
Contents
2
- FAMILIARISATION 4-20
| Presentation | 4 |
| Exterior | 5 |
| Access | 6 |
| Interior | 8 |
| Sitting comfortably | 10 |
| Seeing clearly | 12 |
| Ventilation | 14 |
| Monitoring | 15 |
| Passenger safety | 16 |
| Driving safely | 17 |
| Eco-driving | 19 |

This symbol informs you of equipment which is specific to the combi model.
- READY TO GO 21-45
| Remote control | 21 |
| Key | 23 |
| Confidential card | 25 |
| Alarm | 26 |
| Front - rear doors | 27 |
| Load space | 29 |
| Instrument panels | 30 |
| Warning lamps 3 | 1 |
| Fuel gauge | 38 |
| Temperature indicator 3 | 8 |
| Service indicator | 39 |
| Lighting rheostat 3 | 9 |
| Gearbox and steering wheel | 40 |
| Starting and stopping | 41 |
| Hill start assist | 42 |
| Stop & Start 4 | 3 |
- EASE OF USE and COMFORT 46-78
| Lighting control | |
| stalk | 47 |
| Wipers | 50 |
| Quise control | 51 |
| Demisting and defrosting | 54 |
| Manual heating /air conditioning | 56 |
| Digital air conditioning | 58 |
| Additional heating systems | 60 |
| Rear Heating /Air Conditioning | 60 |
| Programmable additional heating | 62 |
| Front seats | 65 |
| Front bench seat | 67 |
| Rear seats | 68 |
| Crew cab | 70 |
| Front fittings | 71 |
| Rear fittings | 75 |
| Mirrors | 77 |
| Electric windows | 78 |

Sliding side windows. Rear heating / air conditioning. Rear seats / bench seats.
- TECHNOLOGY on BOARD 79-113
| Trip computer | 79 |
| Mode | 80 |
| Parking sensors 8 | 3 |
| Reversing camera 8 | 4 |
| Pneumatic suspension | 86 |
| Tachograph | 88 |
| Audio system | 89 |
5. SAFETY 114-132
Parking brake 1 14
Hazard warning lamps 1 14
Horn 115
ABS 115
Emergency braking assistance 115
Anti-slip regulation (ASR) and electronic stability prog ramme (ESP) 116
Fixed speed limiter 1 18
Seat belts 1 19
Airbags 122
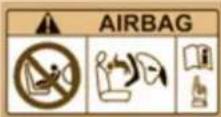
Deactivating the passenger airbag 123
Child seats 1 25
ISOFIX seats 1 29

Child seats in the rear.
6. ACCESSORIES 133-136
Towing a trailer 133
Roof bars 135
Other accessories 135
7. CHECKS 137-144
Opening the bonnet 13 7
Under the bonnet 1 38
Levels 139
Checks 141
Fuel 144
8. QUICK HELP 145-162
Battery 145
Changing a wheel 14 8
Puncture repair kit 1 51
Changing a bulb 1 53
Changing a fuse 1 57
Chang ing a wiper blade 161
Being towed 16 2
9. TECHNICAL DATA 163-173
Dimensions 164
Engines 171
Weights 172
Identifi cation marking s 173
10. VISUAL SEARCH 174-180
Exterior 174
Instruments
and controls 175
Interior 177
Technical data -
Maintenance 178
PRESENTATION
This handbook is designed to familiarise you with the new vehicle from the moment you get behind the wheel and to describe the operating features.
Reading the handbook is made easy by a content divided into 10 colour-coded chapters. Its sections cover, by theme, all of the functions of the vehicle in its most complete specification.
Chapter 9 gives all of the technical data relating to your vehicle. At the end of the document, diagrams of the outside and inside of the vehicle will assist you in locating equipment or functions and page numbers refer you to the relevant section of the handbook.
Within the chapters symbols draw your attention to specific information:

directs you to the chapter and section which contains detailed information concerning a function,

indicates important information relating to use of the equipment,

alerts you to the safety of individuals and equipment on board.
EXTERIOR
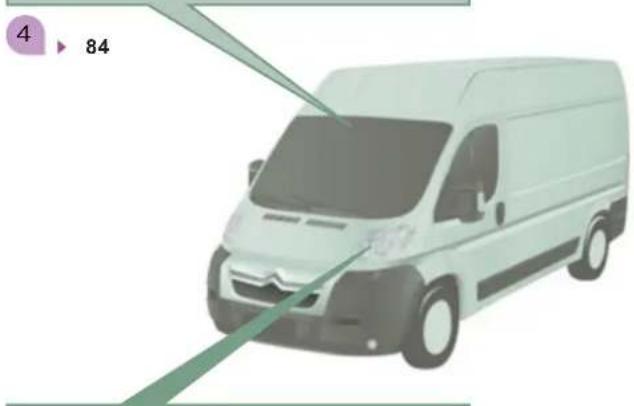
Reversing camera
This system is activated automatically when reverse gear is engaged, with a visual return on a screen that takes the place of the interior rear view mirror.
natural_image
Illustration of a white van with a green arrow pointing to the side, no text or symbols present."Guide-me-home" welcome lighting
After switching off the ignition, when you leave the vehicle, the front lamps remain on for a short period.
3
48
natural_image
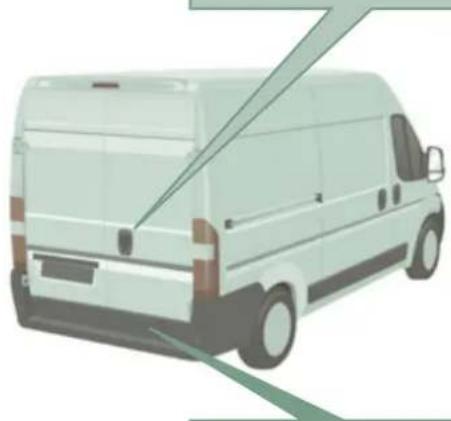
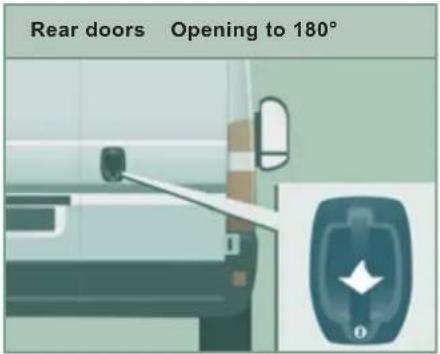
Side view of a white van with a side panel, shown from front and back angles (no text or symbols visible)Opening the rear doors to 180°
Once the vehicle has been unlocked, the rear doors can be opened to 180^ to make unloading/loading operations easier.

28
Rear parking sensors
This system warns you if an obstacle is detected behind the vehicle when reverse gear is engaged.
4
83
Familiarisation
ACCESS
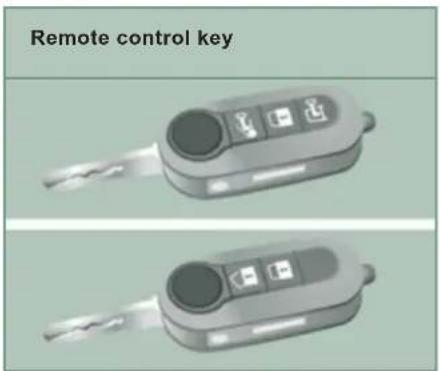
2 buttons

Unfolding / Folding the key.
Unlocking.
Locking.
3 buttons

Unfolding / Folding the key.
Unlocking the cab.
Unlocking the load space.

Locking the vehicle.
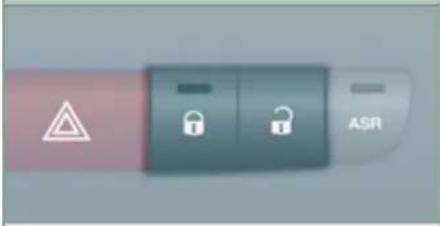
Manual central locking controls
natural_image
Close-up of a remote control panel with buttons and a display (no visible text or symbols)
Locking the vehicle.
Unlocking the vehicle.
Locking / Unlocking the load space.
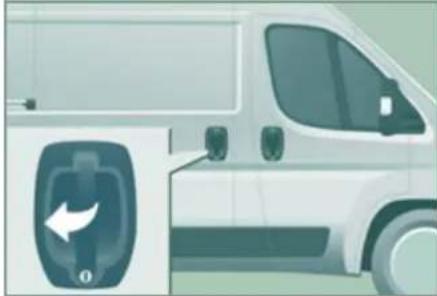
Sliding side door
natural_image
Side view of a white van with a charging plug and directional arrow symbol (no text or labels)Opening
Pull the handle towards you then towards the rear.
Take care not to obstruct the guide space on the floor so as to allow the door to slide correctly.
Take care to open the door fully so as to engage the latch at the bottom of the door.
Do not drive with the sliding side door open.
ACCESS
Opening
Pull the handle towards you.
Closing
To close, start with the left-hand door then close the right-hand door.
natural_image
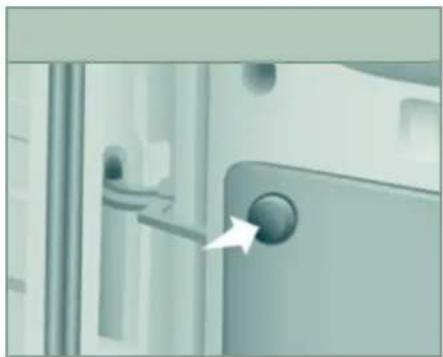
Close-up of a door handle with a circular knob and an arrow pointing to the handle (no text or symbols visible)Press the button, located on the door trim panel, to widen the angle of opening of the door.
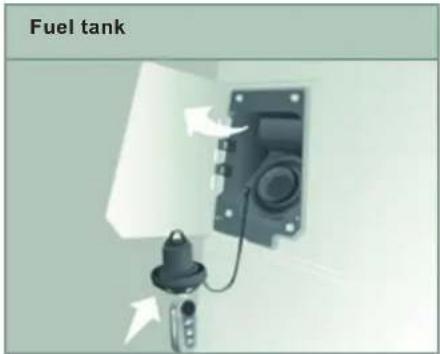
Opening the fuel filler flap.
Hooking the fuel filler cap.
Capacity of the fuel tank: approximately 90 litres.
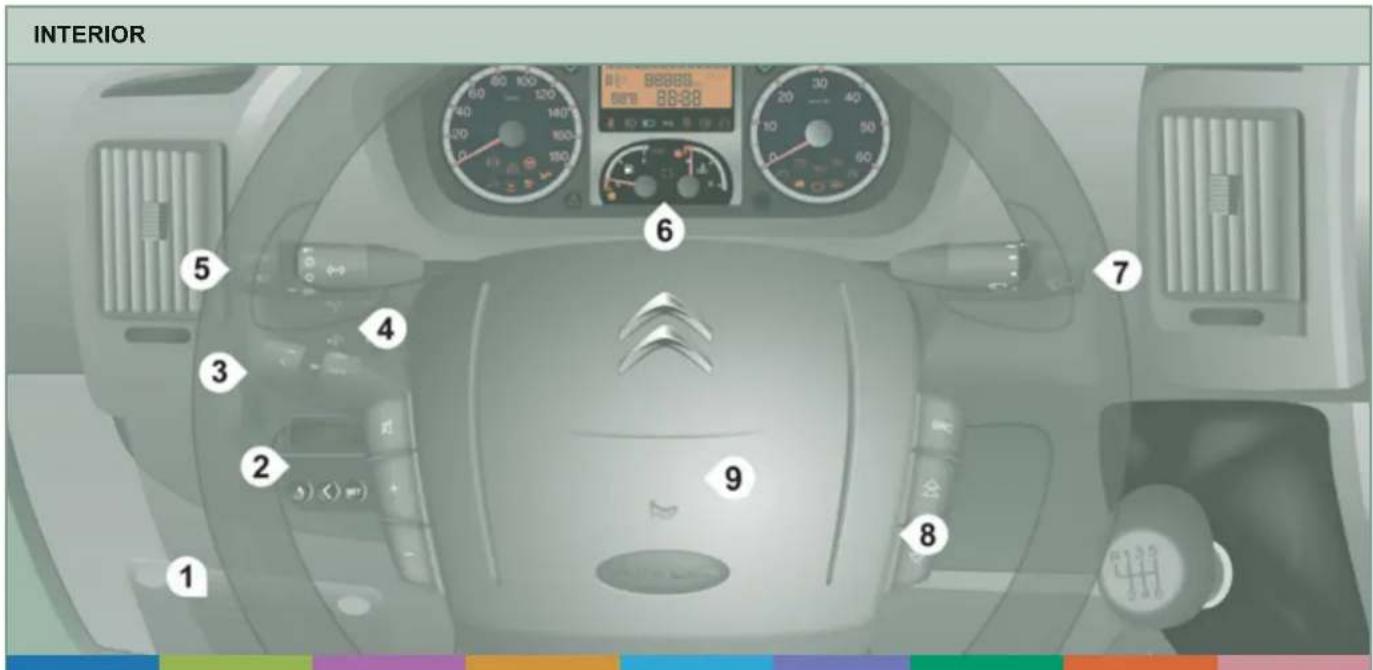
Instruments and controls
- Fusebox.
- Programmable heating.
-
Cruise control switch.
-
MODE, configuration and personalisation / lighting dimmer / headlamp beam height adjustment.
- Lighting and direction indicator control stalk.
-
Instrument panel with screen.
-
Wiper / screenwash / trip computer control stalk.
- Ignition switch.
- Driver's airbag / horn.
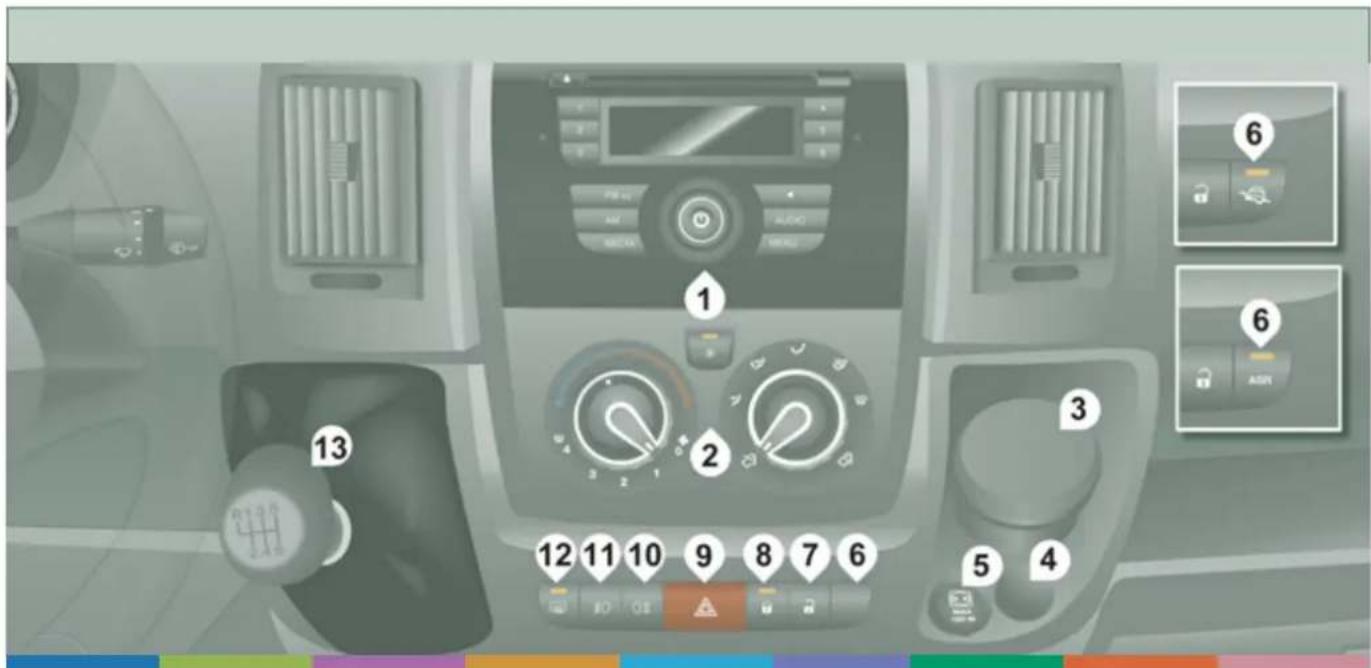
Centre console
- Audio equipment.
- Manual air conditioning.
- Portable ashtray.
-
Cigarette lighter.
-
12 volt accessory socket (180 W max).
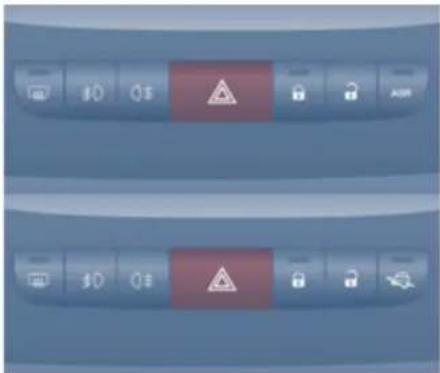
- Dynamic stability control (ASR) / Intelligent Traction Control.
-
Central unlocking of the doors and load space.
-
Central locking / alarm indicator lamp.
- Hazard warning lamps.
- Rear foglamps.
- Front foglamps
- Demisting / defrosting.
- Gear lever.
Familiarisation
SITTING COMFORTABLY
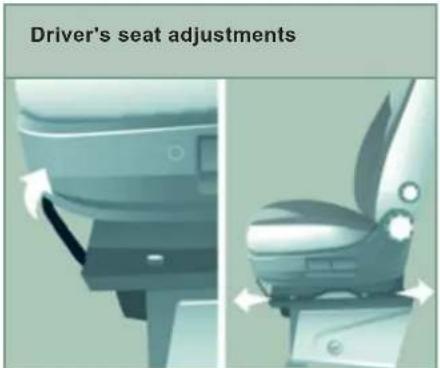
Forwards-backwards
natural_image
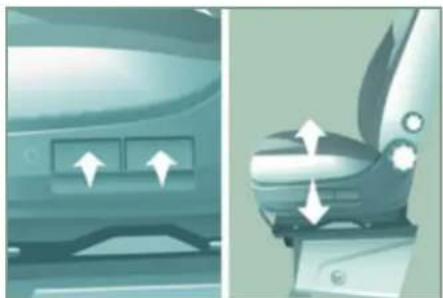
Side-by-side illustration of a car interior and its side view showing airflow or movement (no text or symbols)Seat height Seat back angle
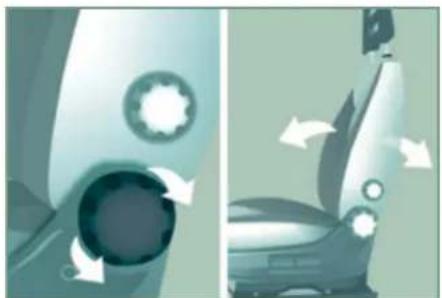
natural_image
Illustration of a car interior with directional arrows indicating movement or flow (no text or symbols)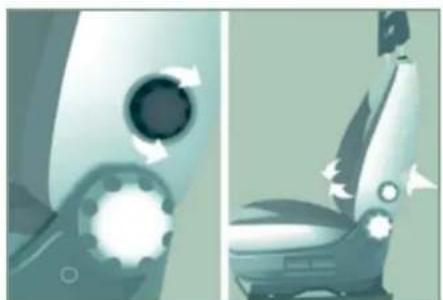
natural_image
Illustration of a car seatbelt with gear and directional arrows indicating motion (no text or symbols)Lumbar support Seat heating Variable damping seat
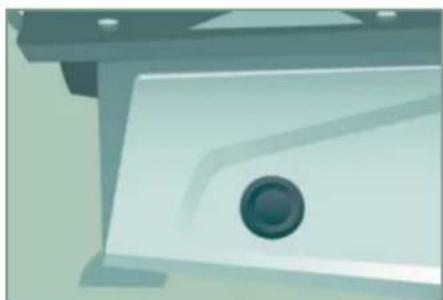
natural_image
Close-up of a mechanical component with a circular aperture (no text or symbols visible)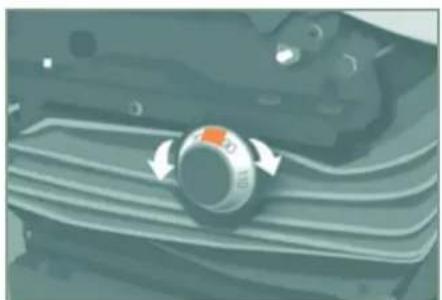
natural_image
Close-up of a mechanical component with a circular knob and directional arrows indicating rotation (no visible text or symbols)
SITTING COMFORTABLY
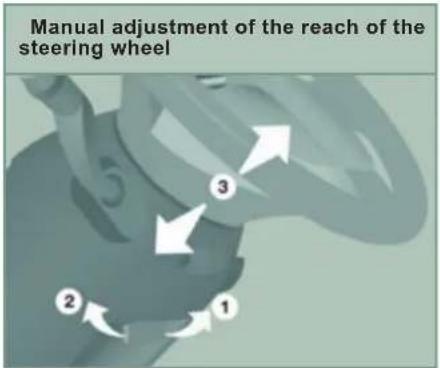
- Unlocking the adjustment mechanism.
- Locking the adjustment mechanism.
- Adjustment of the reach of the steering wheel.
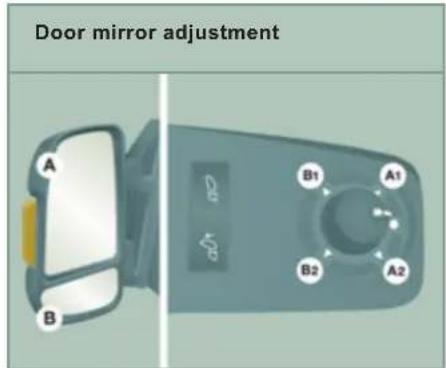
The mirrors are divided into two zones: A and B.
- Driver's mirror:
A1- Adjustment of the upper mirror.
B1- Adjustment of the lower mirror.
2. Passenger's mirror:
A2- Adjustment of the upper mirror.
B2- Adjustment of the lower mirror.
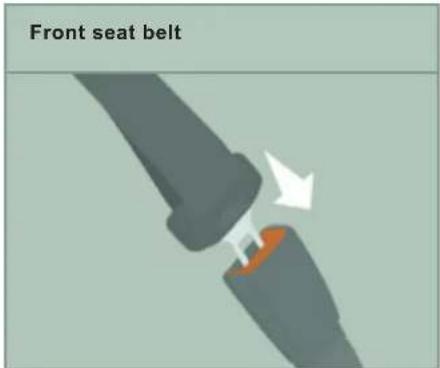
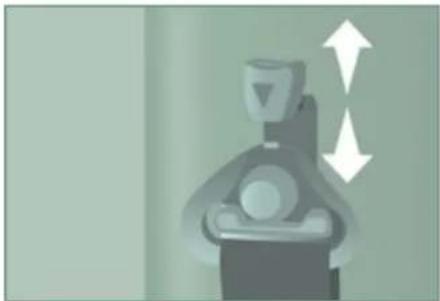
Fastening.
natural_image
Illustration of a toilet with directional arrows indicating movement (no text or symbols)Height adjustment.


Familiarisation
12
SITTING COMFORTABLY
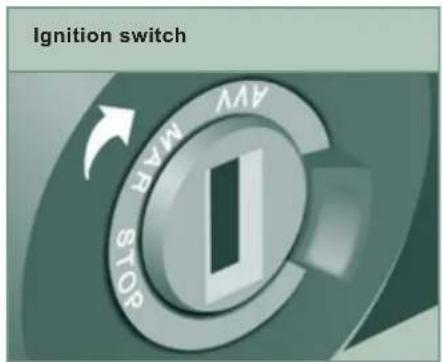
- STOP position.
- RUNNING position.
- START position.
SEEING CLEARLY
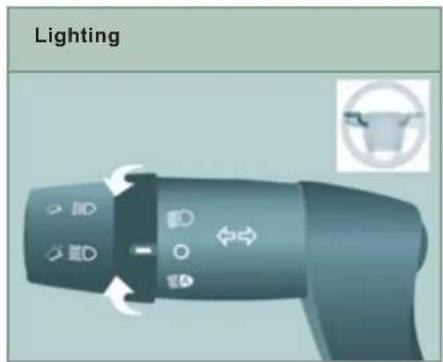

Automatic illumination of headlamps.

Lamps off.

Dipped or main beam headlamps.

Front and rear foglamps.
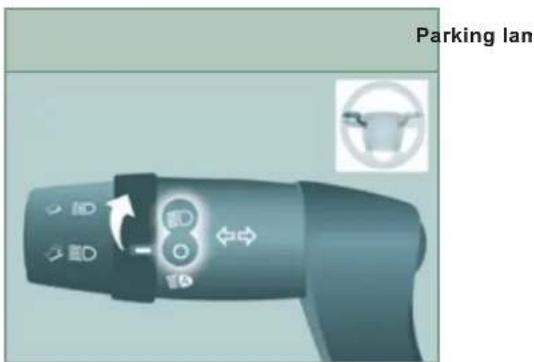
With the ignition off and the key in the STOP position or removed:
Move the ring on the lighting stalk to position O, then to dipped or main beam headlamps.
The lamps will remain on while you are parked.
SEEING CLEARLY
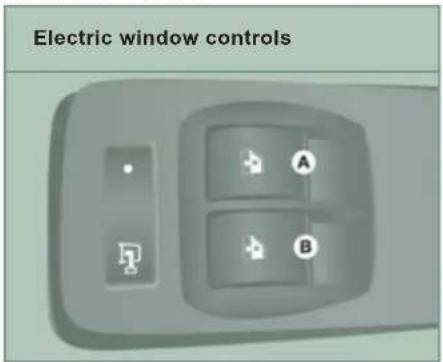
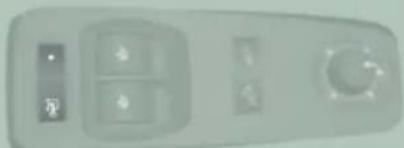
A. Driver's electric window control.
B. Passenger's electric window control.
The electric window functions are deactivated one minute after the ignition is switched off.
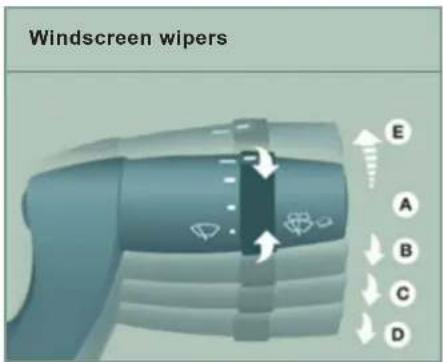
A. Park.
B. Intermittent (4 speeds).
C. Slow continuous.
D. Fast continuous.
E. Single wipe.
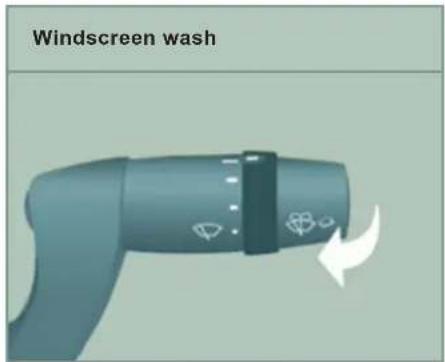
Pull the control stalk towards you, the windscreen wash is accompanied by a timed operation of the wipers.
Familiarisation
VENTILATION
| Recommended interior settings | |||||
| Manual Air Conditioning | |||||
| If I require... | Air distribution | Temperature | Air flow | Air recirculation | AC |
| Heating |  | 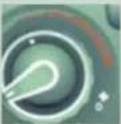 |  |  | - |
| Cooling |  |  |  |  |  |
| Demisting Defrosting |  |  | 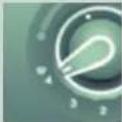 |  |  |
Digital air conditioning: use of the fully automatic operation by pressing the "AUTO" button is recommended.
MONITORING
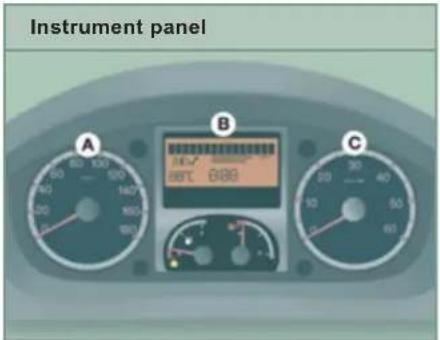
A. Speedometer.
B. Instrument panel screen.
C. Rev counter.
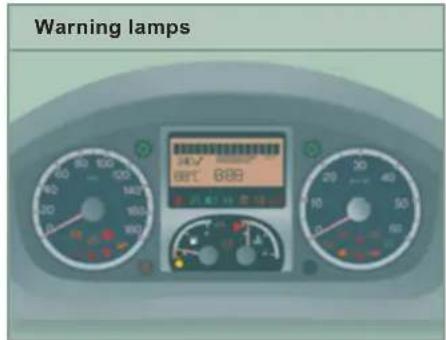
With the ignition on, the orange and red warning lamps come on.
With the engine running, these warning lamps should switch off.
If warning lamps remain on, refer to the chapter concerned.
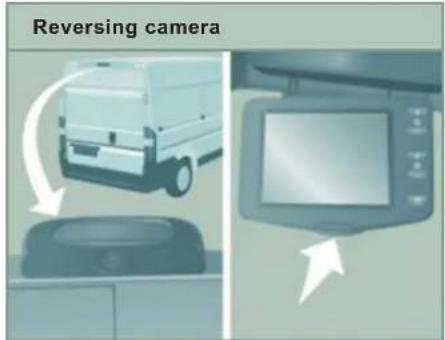
The camera comes on when you engage reverse gear and remains active up to approximately 9 mph (15 km/h). It is deactivated above 11 mph (18 km/h).
Screen
Press the button and place the screen in the required position.
Buttons
Brightness adjustment.
Back-lighting adjustment.
ON/OFF provides views of the rear without engaging reverse gear.
Familiarisation
PASSENGER SAFETY
To deactivate the front passenger airbag, refer to the "MODE" section of chapter 4, then on the "Passenger airbag" menu, select OFF.
The airbag warning lamp on the instrument panel stays on while the airbag is deactivated.
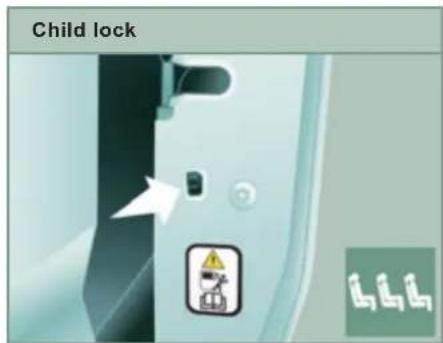
This prevents opening of the sliding side door from the inside.
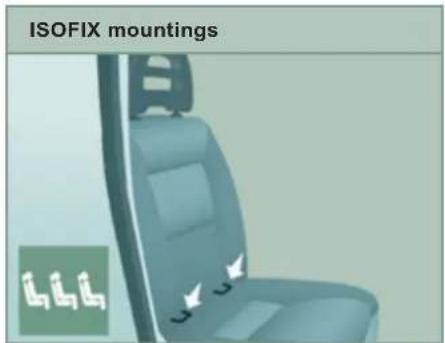
Two front rings, located between the seat back and the seat cushion are used to secure an ISOFIX child seat.
DRIVINGSAFELY
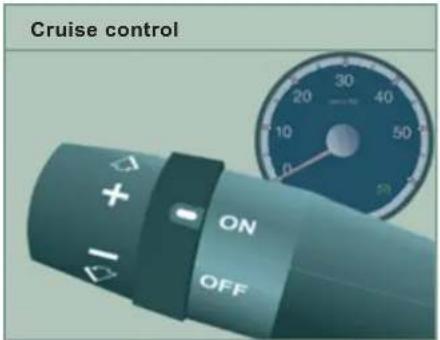
The state of the cruise control system is given on the instrument panel by a warning lamp located in the rev counter.

Function selected.

Function deactivated.
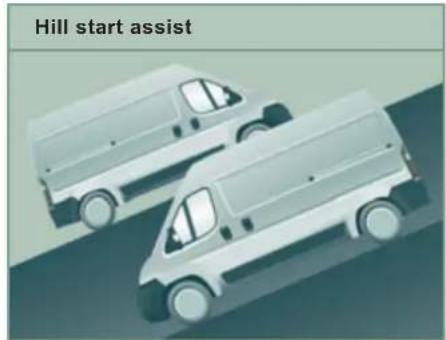
This system, linked with the ESP, makes hill starts easier and is activated in the following conditions:
- the vehicle must be stationary, with the engine running,
- the gradient of the road must be steeper than 5%.
Pneumatic suspension
natural_image
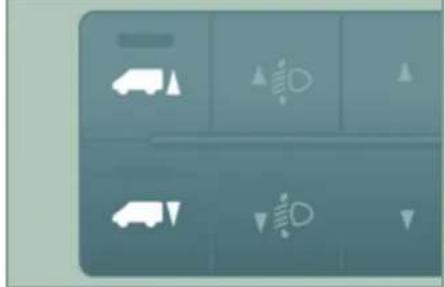
Grid of vehicle icons including cars, vehicles, and directional indicators (no text or symbols)This equipment allows you to alter the rear height of the load floor to make loading or unloading easier.
Press the up control switch; release to stop the movement. Each press increases by one level: +1 to +3.
Press the down control switch; release to stop the movement. Each press decreases by one level: -1 to -3.
Driving with the load floor too high or too low may damage components under the body.
Familiarisation
DRIVINGSAFELY
Stop & Start
Going into engine STOP mode

The "S" warning lamp comes on in the instrument panel and the engine goes into standby:
- with a manual gearbox; vehicle stationary, put the gear lever into neutral, then release the clutch pedal.
In some special cases, STOP mode may not be available; the "S" warning lamp flashes for a few seconds, then goes off.
Going into engine START mode

The "S" warning lamp goes off and the engine restarts:
- with a manual gearbox; depress the clutch pedal.
In some special cases, START mode may be invoked automatically; a message appears in the instrument panel screen, accompanied by the "S" warning lamp that flashes for a few seconds, then goes off.
Automatic stopping of the engine is only possible once the vehicle has exceeded 6 mph (10 km/h), so as to avoid repeated stops of the engine when driving slowly.
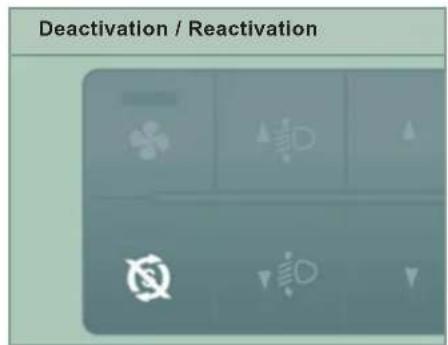
You can deactivate the system at any time by pressing the "S - OFF" control; the lamp in the button comes on, accompanied by a message in the instrument panel screen.
The system is reactivated automatically at every new start with the key.

Before refuelling, before doing
anything under the bonnet or before leaving the vehicle, you must switch off the ignition with the key.
2 43
2 44
2 45
ECO-DRIVING
Eco-driving is a range of everyday practices that allow the motorist to optimise their fuel consumption and CO₂ emissions.
Optimise the use of your gearbox
With a manual gearbox, move off gently, change up without waiting and drive by changing up quite soon. If your vehicle has the system, the gear shift indicator invites you to change up; it is displayed in the instrument panel, follow its instructions.
Drive smoothly
Maintain a safe distance between vehicles, use engine braking rather than the brake pedal, and press the accelerator progressively. These practices contribute towards a reduction in fuel consumption and CO_2 emissions and also helps reduce the background traffic noise.
If your vehicle has cruise control, make use of the system at speeds above 25 mph (40 km/h) when the traffic is flowing well.
Control the use of your electrical equipment
Before moving off, if the passenger compartment is too warm, ventilate it by opening the windows and air vents before using the air conditioning.
Above 30 mph (50 km/h), close the windows and leave the air vents open.
Remember to make use of equipment that can help keep the temperature in the passenger compartment down (sunroof and window blinds...).
Switch off the air conditioning, unless it has automatic digital regulation, as soon as the desired temperature is attained.
Switch off the demisting and defrosting controls, if not automatic.
Switch off the heated seat as soon as possible.
Switch off the headlamps and front foglamps when the level of light does not require their use.
Avoid running the engine before moving off, particularly in winter; your vehicle will warm up much faster while driving.
As a passenger, if you avoid connecting your multimedia devices (film, music, video game...), you will contribute towards limiting the consumption of electrical energy, and so of fuel.
Disconnect your portable devices before leaving the vehicle.
Limit the causes of excess consumption
Spread loads throughout the vehicle; place the heaviest items in the bottom of the boot, as close as possible to the rear seats.
Limit the loads carried in the vehicle and reduce wind resistance (roof bars, roof rack, bicycle carrier, trailer...). Use a roof box in preference.
Remove roof bars and roof racks after use.
Observe the recommendations on maintenance
Check the tyre pressures regularly, when cold, referring to the label in the door aperture, driver's side.
Carry out this check in particular:
- before a long journey,
- at each change of season,
- after a long period out of use.
Don't forget the spare wheel and the tyres on any trailer or caravan.
When refuelling, do not continue after the 3^rd cut-off of the nozzle to avoid any overflow.
At the wheel of your new vehicle, it is only after the first 1 800 miles (3 000 kilometres) that you will see the fuel consumption settle down to a consistent average.
At the end of winter, remove snow tyres and refit your summer tyres.
Have your vehicle serviced regularly (engine oil, oil filter, air filter...) and observe the schedule of operations recommended by the manufacturer.
Access
natural_image
Illustration of a key with icons and arrows indicating motion or change (no text or symbols)ACCESS
REMOTE CONTROL
Unlocking the cab

Press this button to unlock your vehicle's cab. The interior courtesy lamp comes on briefly and the direction indicators
flash twice.
Unlocking the rear doors

Press this button to unlock the side door and the rear doors of the load space.
Central locking

Press this button briefly to lock all of your vehicle's doors, cab and load space.
If one of the doors is open or is not closed correctly, the central locking will not work.
The direction indicators flash once.

The indicator lamp on the control on the centre console comes on then flashes.
Access
Deadlocking

Press this button twice in succession to deadlock the vehicle. It is then impossible to open the doors from the inside or
the outside
The direction indicators flash three times. Never leave anyone inside the vehicle when it is deadlocked.
natural_image
3D rendered image of a handheld smart key with control buttons and a blue logo (no text or symbols on the main object)
natural_image
3D rendered image of a handheld car key with a blue background (no text or symbols)Folding/unfolding the key

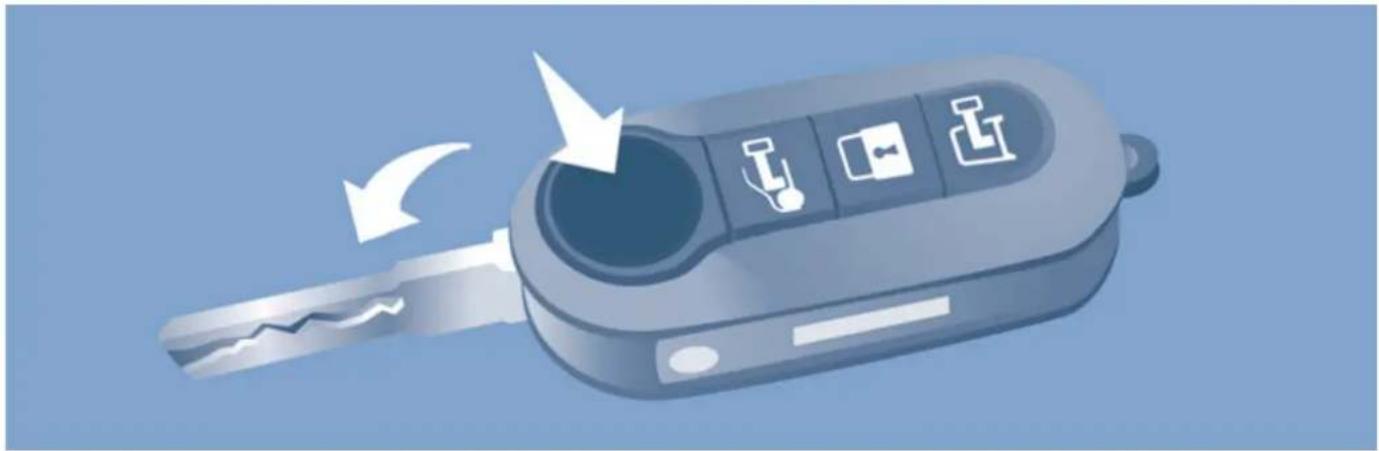
Press this button to release the key from its housing. To fold the key, press the button then fold the key into the housing.
If you do not press the button, the mechanism may be damaged.
Access
natural_image
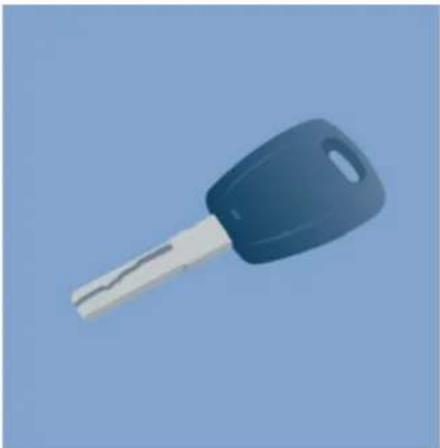
Close-up of a dark blue and silver key against a light blue background (no text or symbols visible)KEY
This locks and unlocks the doors on the vehicle, opens and closes the fuel filler cap, as well as starting and stopping the engine.
natural_image
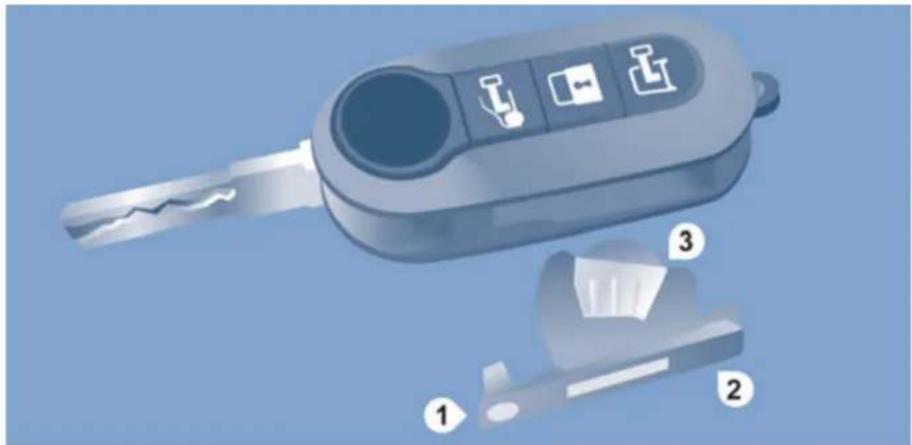
Illustration of a key with labeled parts (1, 2, 3), showing internal components without any text or symbols.REMOTE CONTROL BATTERY
Reference: CR 2032/3 volts.
Charging the remote control battery
- press the button to eject the key,
- turn the screw 1 from the closed padlock to the open padlock using a screwdriver with a thin lip,
-
use the screwdriver as a lever to extract the battery holder housing 2,
-
remove the housing and change the battery 3 observing the polarities,
- put the battery holder housing 2 back inside the key and secure it by turning the screw 1.
There is a risk of damage if the replacement battery is not of the correct type.
Only use batteries which are identical or of an equivalent type to those recommended by a CITROËN dealer. Take used batteries to an authorised collection point.
Access
MAIN FUNCTIONS OF THE KEY
| Type of key | Unlocking the cabin | Locking the doors | Unlocking the rear doors | Deadlocking |
| Key | Turn anti-clockwise (driver's side). | Turn clockwise (driver's side). | - | |
| Remote control | - | - | ||
| Signalling | ||||
| Direction indicators | 2 flashes. | 1 flash. | 2 flashes. | 3 flashes. |
| Lamp on the control | Off. | On for about 3 seconds, then flashing. | Flashing. | Flashing |
ELECTRONIC IMMOBILISER
All of the keys contain an electronic immobiliser device.
This device locks the engine supply system. It is activated automatically when the key is removed from the ignition.
After the ignition is switched on, a dialogue is established between the key and the electronic immobiliser system.

This warning lamp is switched off after the ignition is switched on and the key has been recognised, the engine can be started.
If the key is not recognised, the engine cannot be started. Use another key and have the faulty key checked by a CITROËN dealer.
Good practice
Make a careful note of the number of the keys. If they are lost, your CITROËN dealer will be able to carry out his work more quickly and effectively if you give him this number and the confidential card.
Do not make any modifications to the electronic immobiliser system.
Operating the remote control, even when it is in your pocket, may result in involuntary unlocking of the doors.
However, if none of the doors is opened within approximately thirty seconds following unlocking, the doors relock automatically.
The simultaneous use of other high frequency equipment (mobile telephones, domestic alarms...), may interfere with the operation of the remote control temporarily.
The remote control does not operate while the key is in the ignition, even if the ignition is off, except for reinitialisation.
When purchasing a second-hand vehicle:
- ensure that you are given the confidential card,
- have the keys memorised by a CITROËN dealer to ensure that the keys in your possession are the only ones which can start the vehicle.
Driving with the doors locked may make access to the passenger compartment by the emergency services more difficult in an emergency.
As a safety precaution (with children on board), remove the key from the ignition when leaving the vehicle, even for a short time.
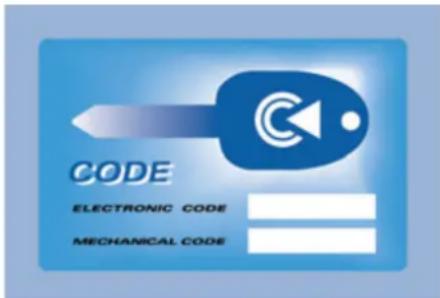
CONFIDENTIAL CARD
This is given to you on delivery of your vehicle with the duplicate keys.
It contains the identification code necessary for any work carried out by a CITROËN dealer on the electronic immobiliser system. This code is hidden by a film, which should be removed only if necessary.
Keep your card in a safe place, never inside the vehicle.
When undertaking a long trip or journey, however, it is advisable to take it with you along with your personal papers.
Access
ALARM
If your vehicle is fitted with an ANTI-THEFT ALARM.
This provides:
- exterior perimeter protection by detectors on the openings (doors, bonnet) and on the electrical power supply,
- anti-tilt protection.
The system also includes a siren and an LED which can be seen from outside, indicating the three possible states of the alarm:
- alarm activated (monitoring), slow flashing of the red LED,
- alarm not activated (not monitoring), LED off,
- alarm triggered (intrusion signal), rapid flashing of the red LED when the vehicle is unlocked.
Activation of the alarm
First ensure that all of the doors are closed correctly.

The alarm is activated by pressing this padlock, the protection is active after a few seconds.
While the alarm is monitoring, any intrusion triggers the siren for approximately 30 seconds, accompanied by lighting of the direction indicators.
The alarm then returns to monitoring mode but the triggering event is stored and is indicated by rapid flashing of the LED, if the alarm is deactivated.
The alarm is also triggered following an electrical supply cut-off, when the supply is restored.
Automatic activation
Depending on the country in which the vehicle is sold: this function activates monitoring automatically approximately 2 minutes after the last door is closed. To avoid triggering the alarm when opening a door, the unlocking button on the remote control must be pressed again.
Deactivation using the key
Unlock the doors using the key and enter the vehicle. Switch on the ignition, identification of the key code will switch off the alarm.
Deactivation using the remote control
When this button is pressed, the alarm is deactivated when the vehicle is unlocked.
Deactivation of the anti-tilt protection\*

Press this control to deactivate the protection (when towing the vehicle with the alarm on, for example).
The protection remains active until the doors are unlocked with the central locking.
Good practice
To deactivate the siren quickly following unwanted triggering:
- switch on the ignition, identification of the key code will switch off the alarm,
- press the unlocking button (cab and key) on the remote control.
To avoid setting the alarm, when washing the vehicle for example, lock the vehicle using the key.
Unlocking the vehicle using the remote control deactivates the siren automatically.
natural_image
Side-by-side comparison of a blue car seatbelt device showing internal airflow direction (no text or symbols)FRONT DOORS
Driver's door
Use the remote control to unlock/lock.
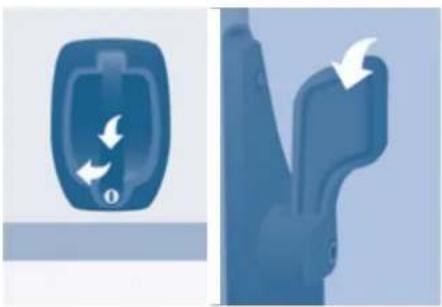
SLIDING SIDE DOOR
Take care not to obstruct the guide space on the floor in order for the door to slide correctly.
From outside
Pull the handle towards you then towards the rear.
From inside
To unlock and open, push the handle towards the rear.
Ensure that the door opens fully in order for the latch at the bottom of the door to engage.
To release and close, pull the handle while sliding the door.

Do not drive with the sliding side door open.
Access
natural_image
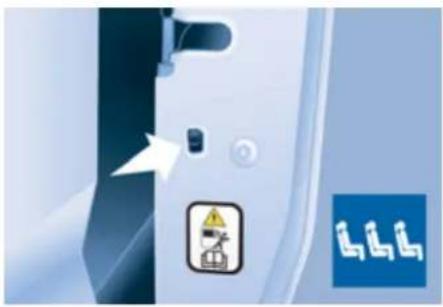
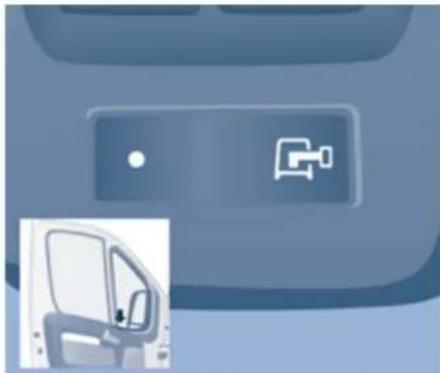
Close-up of a sewing machine's side panel with warning symbol and safety icons (no readable text)Child lock
This prevents opening of the sliding side door from the inside.
Press the control located on the edge of the side door.
Access
natural_image
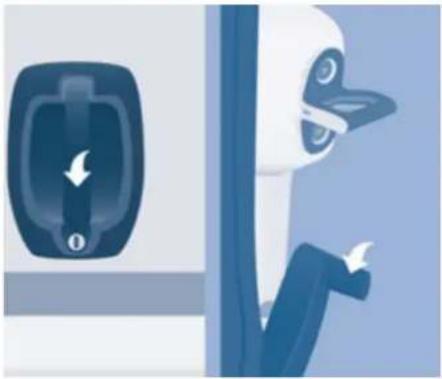
Illustration of a person inside a vehicle charging station with a circular device and directional arrows (no text or symbols)REAR DOORS
From outside
Pull the handle towards you. The two hinged doors open to 96°.
Opening/Closing the doors
To open, pull the handle towards you then pull the lever to open the left-hand door.
To close, start with the left-hand door then close the right-hand door.
natural_image
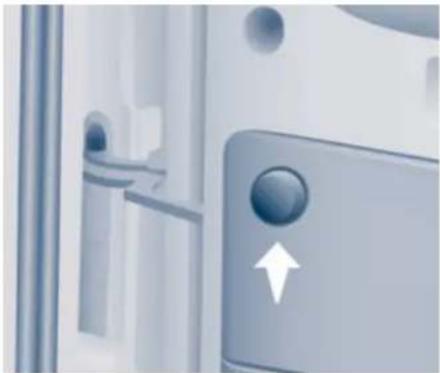
Close-up of a door handle with a circular button and an arrow pointing to it (no text or symbols visible)Opening to 180°
If your vehicle is fitted with this equipment, a retractable check strap system permits extending of the opening from 96° to 180°.
Press the button, located on the door trim pad, to widen the angle of the door.
The check strap will take up its normal position again automatically on closing.
LOCKING/UNLOCKING FROM INSIDE
natural_image
Interior view of a vehicle dashboard with a control panel and seatbelt icon (no text or symbols)Cab and load space

Pressing permits electric central locking, when the doors are closed.

Pressing permits electric central unlocking.
The doors can still be opened from the inside.

If one of the doors is open or is not closed correctly, the central locking does not work.
The indicator lamp on the control:
- comes on when the doors are locked and the ignition is switched on,
- then flashes when the doors are locked when stationary with the engine off.
The control is not active when the vehicle has been locked using the remote control or the key from the outside.
Load space

Press to lock or unlock the side door and rear doors from the cab. The warning lamp remains on on locking.
Protection against attack
When the vehicle is started, the system locks the cab and load space doors automatically when you reach approximately 12 mph (20 km/h).
If none of the doors is opened during the journey, the locking remains active.
Activation/deactivation of the function
The function is activated/deactivated by means of Mode, selecting "Autoclose".

Refer to the "Mode" section in chapter 4.
Door open warning lamp

If this warning lamp comes on, check that the cab doors, the rear or side doors and the bonnet are closed correctly.
Good practice
If you decide to drive with the doors locked, be aware that this could make access to the vehicle by the emergency services more difficult in an emergency.
Instruments and controls
INSTRUMENTS AND CONTROLS
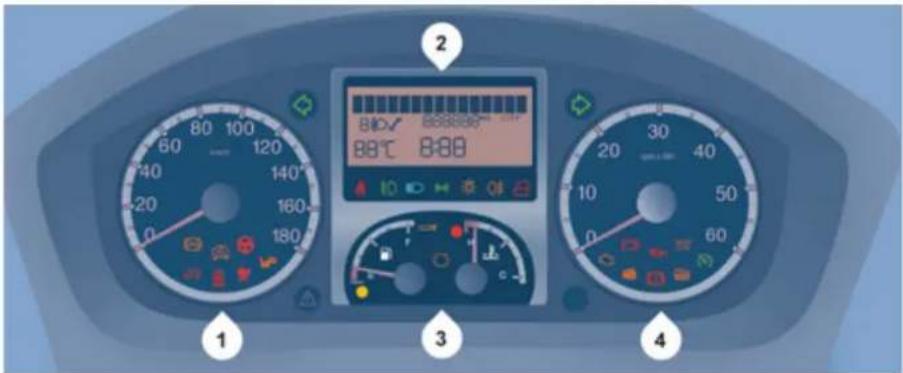
INSTRUMENT PANEL
- Distance recorder in miles / kilometres.
- Screen.
- Dials and gauges.
- Rev counter.
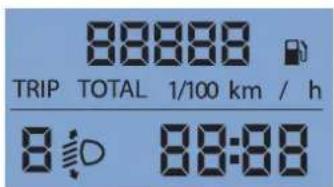
Instrument panel screen 1
- Time,
- Miles / Kilometres travelled,
- Range,
- Fuel consumption,
- Average speed,
- Headlamp beam height,
- Programmable overspeed warning via MODE,
- Stop & Start,
- Service indicator.
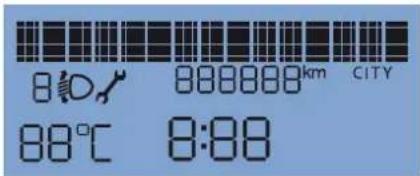
Instrument panel screen 2
- Time,
- Date,
- Ambient temperature,
- Miles / Kilometres travelled,
- Range,
- Fuel consumption,
- Average speed,
- Headlamp beam height,
- Stop & Start,
- Service indicator,
- Programmable overspeed warning via MODE,
- Warning messages displayed in the top section.
- Radio (frequency of the current station).
WARNING LAMPS
Instruments and controls
| Every time the engine is started: a series of warning lamps comes on, applying a self-checking test. They go off almost immediately. When the engine is running: a warning lamp becomes a warning sign if it remains on continuously or flashes. This initial warning may be accompanied by an audible signal and a message in the screen. "Do not ignore these warnings." | ||||
| Warning lamp | is | indicates | Solution - action | |
| Service | on temporarily. | minor faults. Contact a CITROËN dealer. | ||
| continuously on, accompanied by a message on the screen. | major faults. | Make a note of the warning message and contact a CITROËN dealer. | ||
| Parking brake - Brake fluid level | on. | that the parking brake is applied or has not been released correctly. | Releasing the parking brake switches off the warning lamp. | |
| on. | that the fluid level is too low. | Top up with a fluid recommended by CITROËN. | ||
| continuously on, even though the level is correct. | Stop immediately, park, switch off the ignition and contact a CITROËN dealer. | |||
| Electronic brake force distribution | on. | an electronic brake force distribution fault. | Stop immediately. Consult a CITROËN dealer. | |
| Low coolant level | on. | that the fluid level is too low" section of chapter 7. Consult a CITROËN dealer. | Park and switch off the ignition. Allow to cool. Refer to the 'bevels' section of chapter 7. Consult a CITROËN dealer. | |
Instruments and controls
| Warning lamp | is | Indicates | Solution - action | |
 | Coolant temperature | on with the needle in the red zone. | an abnormal increase. | Park and switch off the ignition, allow the system to cool. Visually check the level. |
| on H in the red zone. | a coolant temperature. | Refer to the "Levels" section of chapter 7.Consult a CITROËN dealer. | ||
 | Engine oil pressure | on while driving. | that the pressure is too low. | Park and switch off the ignition, allow the lubrication system to cool in order to check its level. Refer to the "Levels" section of chapter 7. |
| continuously on, even though the level is correct. | a major fault. Consult a CITROËN dealer. | |||
| flashing, for a few seconds, with a message on the screen. | that a service will soon be due. | Refer to the list of checks in the servicing booklet then carry out the CITROËN service. | ||
 | Battery charge | on. | a malfunction of the charging system. | Check the battery terminals... Refer to the "Battery" section of chapter 8. |
| continuously on, fixed or flashing in spite of the checks. | a circuit fault, an ignition or injection malfunction. | Consult a CITROËN dealer. | ||
 | Door or bonnet open detection | on. | that a door or the bonnet is not closed correctly. | Check that the cab doors, the rear and side doors and the bonnet are closed. |
| Warning lamp | Is | Indicates | Solution - action | |
 | Seat belt not fastened | on then flashes. | that the driver has not fastened his seat belt. | Pull the strap then insert the tongue in the buckle. |
| accompanied by an audible signal then remains on. | that the vehicle is moving with the driver's seat belt unfastened. | Check that the seat belt is fastened correctly by pulling the strap. Refer to "Seat belts" section of chapter 5. | ||
 | Power steering | on, accompanied by an audible signal and a message on the screen. | its malfunction. | The vehicle retains conventional steering without assistance. Have the system checked by a CITROËN dealer. |
 | Front/lateral airbag | flashing or continuously on. | a fault with an airbag. | Have the system checked by a CITROËN dealer. Refer to the "Airbags" section of chapter 5. |
 | Suspension | on. | a fault with the pneumatic compensation. | Consult a CITROËN dealer. |
 | ABS | on. | failure of the system. | The vehicle retains conventional braking without assistance. However, you are advised to stop and contact a CITROËN dealer. |
Instruments and controls
| Warning lamp | Is | Indicates | Solution - action | |
 | ASR/ESP | flashing. | that it is in operation. | The system optimises traction and allows improved directional stability of the vehicle. |
| on, accompanied by an audible signal and a message in the screen. | its malfunction or failure of the hill start assist. | Consult a CITROËN dealer.Refer to the "Driving safety" section of chapter 5. | ||
| on. | a fault with the Intelligent Traction Control. | |||
| Anti-pollution | on. | the regeneration of the particle emissions filter. | It is recommended that you leave the engine running until the warning lamp goes off so that regeneration can be completed. Section 7, "Checks". | |
 | Emission control system | on. | a fault with the system. | Have the system checked by a CITROËN dealer without delay. |
 | Deactivation of the front passenger airbag | on. | the intentional deactivation of this airbag when a rear facing child seat is installed. | Configure via the trip computer MODE menu. Refer to the "Mode" section of chapter 4. |
 | Electronic immobiliser | on. | the ignition key inserted is not recognised.The vehicle cannot be started. | Use another key and have the faulty key checked by a CITROËN dealer. Refer to the "Access" section of chapter 2. |
 | Front brake pads | on. | brake pad wear. | Have the pads replaced by a CITROËN dealer. |
 | Water in Diesel filter | on, accompanied by a message on the screen. | that there is water in the Diesel fuel filter. | Have the filter bled by a CITROËN dealer. Refer to the "Checks" section of chapter 7. |
 | Low fuel level | on with the gauge needle in zone E. | that the fuel reserved is being used. | Fill up with fuel without delay. The calculation of the remaining fuel depends on the style of driving, the profile of the road, the time elapsed and the distance travelled since the warning lamp first came on. |
| flashing. | a malfunction. Consult a CITROËN dealer. | |||
 | Diesel pre-heating | on. | that the weather conditions impose pre-heating. | Wait for the warning lamp to switch off before operating the starter. |
 | Dipped beam headlamps | on. | manual selection. Turn the ring | on the lighting stalk to the second position. |
 | Main beam headlamps | pulling of the stalk towards you. | Pull the stalk to return to dipped beam headlamps. | |
Instruments and controls
| Warning lamp | Is | indicates | Solution - action | |
| Direction indicators | flashing with buzzer. | a change of direction using the lighting stalk, to the left of the steering wheel. | To the Right: press the stalk upwards.To the Left: press the stalk downwards. | |
| Front foglamps on. | that the button on the centre console has been pressed. | Manual selection.The foglamps only operate if the dipped beam headlamps are on. | ||
| Rear foglamps on. | that the button on the centre console has been pressed. | Manual selection. The foglamps only operate if the dipped beam headlamps are on. When visibility is normal, please switch the foglamps off. | ||
| Cruise control | on. | that the cruise control has been selected. | Manual selection.Refer to the "Steering mounted controls" section of chapter 3. | |
| Faulty bulb | on accompanied by a message on the screen. | that one or more bulbs have blown. | Have the bulb changed.Refer to the "Changing a bulb" section of chapter 8 or contact a CITROËN dealer. | |
| Rear parking sensors | on. | failure of the system | The audible assistance is no longer active.Have the system checked by a CITROËN dealer without delay. | |
| Screen | displays | indicates | Solution - action | |
 | Temperature / Ice | the ice warning, the temperature flashing accompanied by a message on the screen. | weather conditions which could result in ice on the road. | Be particularly vigilant and do not brake sharply. Refer to the "Driving Safely" section of chapter 5". |
 | ||||
 | Date 11:00:00 | a setting: Date. Time. | a configuration via the MODE menu. | Refer to the "Mode" section of chapter 4. |
 | Headlamp beam height | a headlamp height setting. | A position from 0 to 3 depending on the load carried | Adjust using the control on the dashboard. Refer to the "Steering mounted controls" section of chapter 3. |
 | Service spanner | a service spanner which remains on. | that a service will soon be due. | Refer to the list of checks in the servicing booklet. Have the service carried out by a CITROËN dealer. |
 | Stop & Start | on. | engine going into STOP mode after the the vehicle stops. | As soon as you want to move off, the warning lamp goes off and the engine restarts automatically in START mode. |
| flashes for a few seconds, then goes off. | STOP mode temporarily unavailable or automatic operation of START mode. | Special cases for STOP mode and START mode. See the corresponding sections. | ||
Instruments and controls
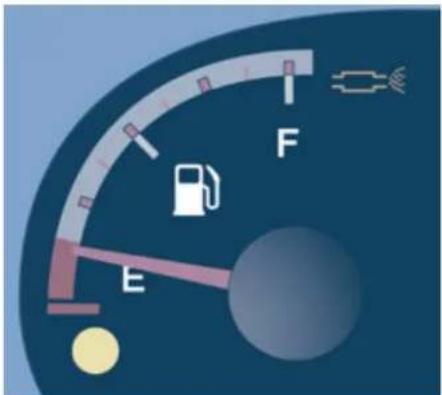
FUEL GAUGE
The fuel level is tested each time the key is turned to the "running" position.
The gauge is positioned on:
- F (Full): the fuel tank is full, approximately 90 litres.
- E (Empty): the reserve is now being used, the warning lamp comes on continuously.
The reserve when the warning first comes on is approximately 11 litres.
Fuel tanks of different capacities (60 and 125 litres) are available as an option.

Refer to the "Fuel" section of chapter 7.
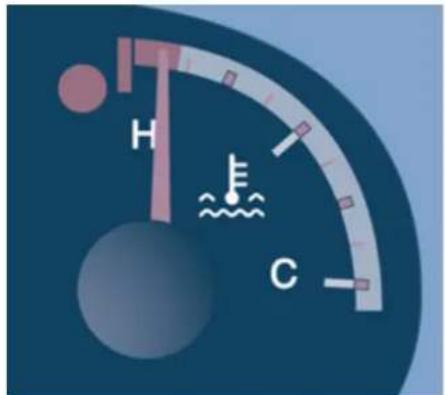
COOLANT TEMPERATURE
The needle is positioned between C (Cold) and H (Hot): normal operation.
In arduous conditions of use or hot climatic conditions, the needle may move close to the red graduations.
What you should do if the needle enters the red zone, or if the warning lamp comes on:
- stop immediately, switch off the ignition. The fan may continue to operate for a certain time up to approximately 10 minutes.
- wait for the engine to cool down in order to check the level and top it up if necessary. Follow this advice: the cooling system is pressurised. In order to avoid any risk of scalding, unscrew the cap by two turns to allow the pressure to drop.
When the pressure has dropped, check the level and remove the cap to top up.
If the needle remains in the red zone, contact a CITROËN dealer.

Refer to the "Levels" section of chapter 7.
EMISSION CONTROL
EOBD (European On Board Diagnosis) is a diagnostics system which complies with, among others, the standards concerning authorised emissions of:
- CO (carbon monoxide),
- HC (unburnt hydrocarbons),
- NOx (nitrogen oxides) or particles, detected by oxygen sensors placed upstream and downstream of the catalytic converters.

Therefore, the driver is warned of any malfunction of this emission control system by the lighting of this specific warning lamp on the instrument panel.
There is a risk of damage to the catalytic converter. Have it checked by a CITROËN dealer.
SERVICE INDICATOR
For a few seconds after the ignition is switched on, the spanner symbolising the service indicator comes on: the screen informs you when the next service is due, in accordance with the manufacturer's servicing schedule indicated in the servicing booklet. This information is determined in relation to the distance travelled since the previous service.
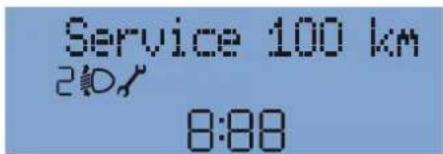
After a few seconds, the display returns to its usual functions.
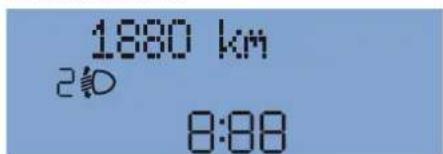
Reminder of servicing information
At any time, to access the service indicator, press briefly on the MODE button.
Use the up/down arrows to see the scheduling and engine oil wear information.
Pressing the MODE button again allows you to return to the various display menus.
A long press returns you to the main menu.
| Menu... | Choose... | Allows you to... |
| 12Service | Service (miles/km before oil change) | Display the distance remaining before the next oil change. |
| Oil | Display the oil level. |

Refer to "Mode" section of chapter 4.
Deterioration of the engine oil

The warning lamp fl ashing and, if your vehicle has the function, a message displayed at every engine start: the system has detected deterioration of the engine oil. Have the oil changed as soon as possible.

This 2 nd warning lamp, coupled with the 1 st , comes on in the instrument panel when the oil has not been changed and the deterioration of the oil has reached another threshold. To avoid the risk of damage, have the oil changed without waiting for this level.
Instruments and controls
For 3.0 litre HDi engines, the engine speed is restricted to 3 000 rpm, then 1 500 rpm until the oil change is done. Have the engine oil changed to avoid any risk of damage.
Resetting to zero
The stopping of the permanent flashing of the indicator is carried out by an repairer equipped with a diagnostic tool.

Refer to the list of checks in the servicing booklet which was given to you on handover of the vehicle.
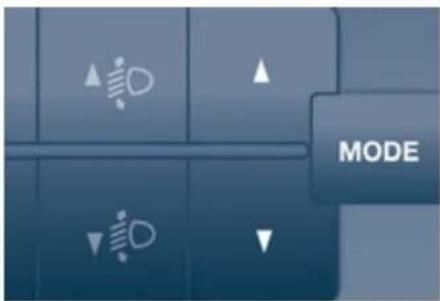
LIGHTING RHEOSTAT
The rheostat is active when the lighting is on.

Use these controls to adjust the brightness of the instrument panel. There are 8 levels.
Gearbox and steering wheel
natural_image
Close-up of a mechanical gear shift knob with number 246 and R135 markings, no text or symbols present.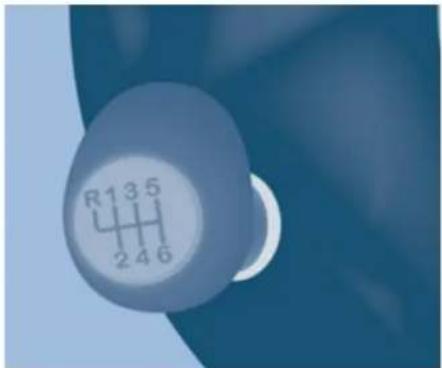
natural_image
Close-up of a blue mechanical gear with visible teeth and hub (no text or symbols)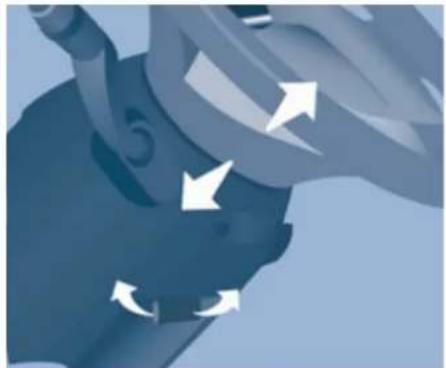
natural_image
Close-up of a mechanical component with directional arrows indicating motion or force (no text or symbols)GEARBOX AND STEERING WHEEL STEERING WHEEL REACH
MANUAL
To change gear easily, always depress the clutch pedal fully.
To prevent the mat from becoming caught under the pedal:
- ensure that the mat is positioned correctly,
never fit one mat on top of another.
Avoid leaving your hand on the gear knob as the force exerted, even if slight, may wear the internal components of the gearbox over time.
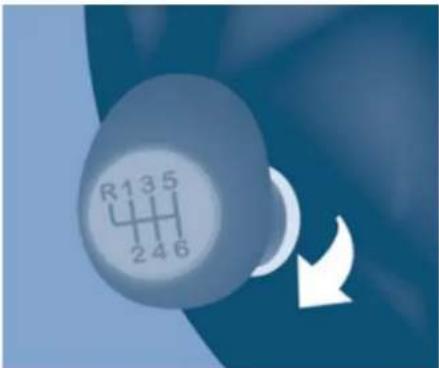
Reverse gear
Raise the collar under the gear knob to engage reverse gear.
Never engage reverse gear before the vehicle is completely stationary.
The lever should be moved slowly to reduce the noise on engaging reverse gear.
Your reversing manoeuvre is indicated by an audible exterior warning.
If your vehicle is fitted with parking sensors, the system comes into operation when reverse gear is engaged and an audible signal is heard.
Refer to the "Rear parking sensors" section of chapter 4.
ADJUSTMENT
With the vehicle stationary, first adjust your seat to the most suitable position.
Unlock the steering wheel adjustment by pulling the lever towards you.
Adjust the reach of the steering wheel, then lock by lowering the lever fully.
As a safety precaution, these operations must not be carried out while driving.
natural_image
Abstract blue and white graphic with a circular button labeled '1' and 'SISA' on its surface, no readable text or symbols.STARTING AND STOPPING
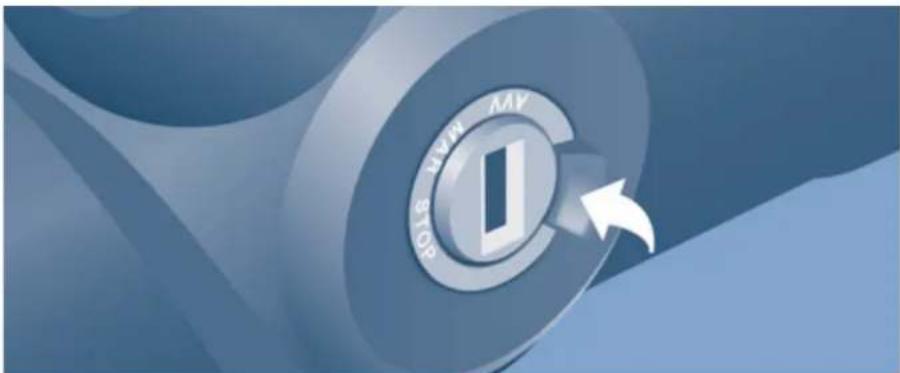
MAR position: running.
Certain accessories can be used.
AVV position: starter.
The starter is operated.
STOP position: steering lock.
The ignition is off.
Good practice when starting

Engine immobiliser warning lamp If this comes on, use another key and have the faulty key checked by a CITROËN dealer.

Diesel pre-heating warning lamp
Turn the key to the MAR position. In cold weather, wait for this warning lamp to switch off then
operate the starter (AVV position) until the engine starts.
If the temperature is high enough, the warning lamp comes on for less than one second, you can start without waiting.

Door or bonnet open warning lamp
If this comes on, a door or the bonnet is not closed correctly, check!
Good practice when stopping
Minimise engine and gearbox wear
When switching off the ignition, let the engine to idle for a few seconds to allow the turbocharger to slow down.
Do not press the accelerator when switching off the ignition.
There is no need to engage a gear after parking the vehicle.

In low temperatures
In mountainous and/or cold areas, it is advisable to use a "winter" type fuel suited to low or minus temperatures.
Startig and stopping
HILL START ASSIST
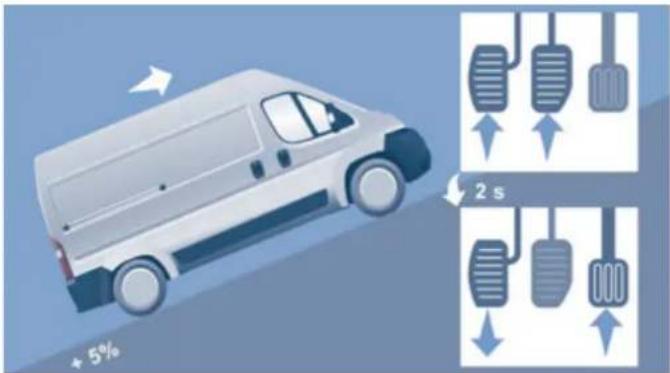
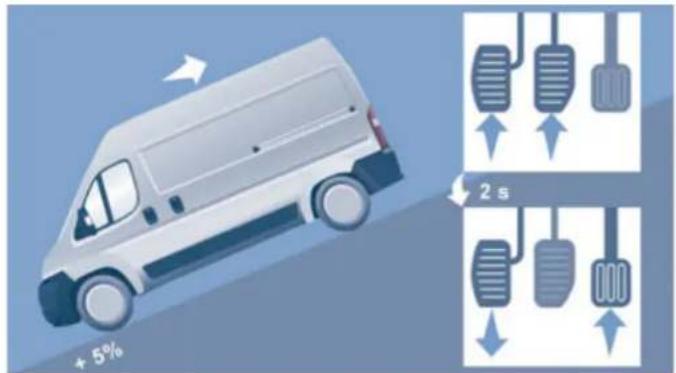
This function, linked with the ESP, makes hill starts easier and is activated in the following conditions:
- the vehicle must be stationary, engine running, foot on the brake,
- the gradient of the road must be steeper than 5%,
- uphill, the gearbox must be in neutral or in a gear other than reverse,
- downhill, reverse gear must be engaged. The HHC (Hill Holder Control) or Hill Start Assist function is a driving comfort system. It is not an automatic vehicle parking function or an automatic parking brake.
Operation
With the brake pedal and clutch pedal pressed, from the time you release the brake pedal you have approximately 2 seconds before the vehicle starts to roll back and without using the parking brake within which to move off.
During the moving off phase, the function is deactivated automatically, gradually releasing the braking pressure. During this phase, the characteristic noise of mechanical release of the brakes may be heard, indicating the imminent movement of the vehicle.
Hill start assist is deactivated in the following situations:
- when the clutch pedal is released,
- when the parking brake is applied,
- when the engine is switched off,
- when the engine stalls.
Operating fault

If a malfunction of the system occurs, this warning lamp comes on accompanied by an audible signal and confirmed by a message in the screen. Contact a
CITROËN dealer or a qualified workshop to have the system checked.
STOP & START
The Stop & Start system puts the engine temporarily into standby - STOP mode - during stops in the traffic (red lights, traffic jams, or other...). The engine restarts automatically - START mode - as soon as you want to move off. The restart takes place instantly, quickly and silently.
Perfect for urban use, the Stop & Start system reduces fuel consumption and exhaust emissions and offers the comfort of complete silence when stationary.
Operation
Going into engine STOP mode

- The "S" warning lamp comes on in the instrument panel and the engine goes into standby. With the vehicle stationary, put the gear lever into neutral, then release the clutch pedal.
Automatic stopping of the engine is only possible after the vehicle has exceed a speed of about 6 mph (10 km/h), to avoid repeated stopping of the engine when driving slowly.
Never leave your vehicle with out first turning off the ignition with the key.
Never refuel with the engine in STOP mode; you must switch off the ignition with the key.
Special cases: STOP mode unavailable
The STOP mode is not invoked when:
- the system is initialising,
- the driver's door is open,
- the driver's seat belt is not fastened,
- the air conditioning is running,
- the heated rear screen is on,
- the windscreen wiper is on fast wipe,
- reverse gear is engaged, for a parking manoeuvre,
- some special conditions (battery charge, engine temperature, particle filter regeneration, braking assistance, ambient temperature...) where the engine is needed to assure control of a system.

The "S" warning lamp flashes for a few seconds, then goes off.
Startig and stopping
Going into engine START mode
With the vehicle in gear, automatic engine restarting is only allowed by fully depressing the clutch pedal.

- The "S" warning lamp goes off and the engine restarts.
If following an automatic restart in START mode, the driver takes no action on the vehicle during the next 3 minutes, the system stops the engine definitively. The engine can then only be restarted using the key.
Special cases: START invoked automatically
The START mode is invoked automatically when:
- the vehicle's is free wheeling on a slope,
- the windscreen wiper is on fast wipe,
- the air conditioning is running,
- the engine has been stopped for around 3 minutes with Stop & Start,
- some special conditions (battery charge, engine temperature, braking assistance, ambient temperature...) where the engine is needed to assure control of a system.
Gooφ ractice
With a manual gearbox in STOP mode, if a gear is engaged without fully depressing the clutch pedal, restarting may not take place.
A warning lamp or message is displayed in the instrument panel asking you to fully depress the clutch pedal to allow restarting.
With the engine stopped in STOP mode, if the driver unfasten's their seat belt and opens a front door, the engine can only be restarted using the ignition key. There is an audible signal, accompanied by flashing of the "S" warning lamp and, depending on equipment, a message is displayed.

In this case, a message appears in the instrument panel screen, accompanied by the "S" warning lamp, which flashes for a few seconds, then goes off.
This operation is perfectly normal.
natural_image
Blue industrial control panel with icons for ventilation, fuel, and control buttons (no readable text or symbols)Deactivation
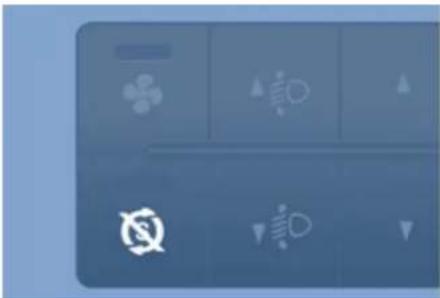
At any time, press the "S - OFF" switch to deactivate the system.
Illumination of the switch warning lamp, accompanied by a message in the instrument panel screen, confi rms the the instruction has been registered.
If the system has been deactivated in STOP mode, the engine restarts immediately.
It is necessary to deactivate the Stop & Start system if you want to allow continuous operation of the air conditioning. The switch warning lamp stays on.
Reactivation
Press the "S - OFF" switch again.
The system is active again; the switch warning lamp going off and a message in the instrument panel screen confirm reactivation.
Operating fault

In the event of a fault with the system, the Stop & Start system is deactivated and the service warning lamp comes
on, accompanied by a message in the instrument panel screen
Have it checked by a CITROËN dealer or a qualified workshop.
In the event of an operating fault with STOP mode, it is possible to restart the engine by depressing the clutch pedal fully and putting the gear lever into neutral.
Startig and stopping
Maintenance
Before working under the bonnet, you must switch off the ignition with the key to avoid any risk of injury resulting from automatic operation of START mode.
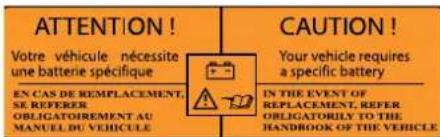
This system requires a specific battery with a special specification and technology (reference numbers available from a CITROËN dealer or a qualified workshop).
Fitting a battery not listed by CITROËN introduces the risk of malfunction of the system.
Refer to part 8 in the "Battery" section.
The Stop & Start system makes use of advanced technology. Specialist knowledge is needed for any work on the system, which can only be assured by CITROËN dealers.
Improved comfort
natural_image
Interior view of a vehicle with beige seats and rear seats, featuring a green circular logo on the left (no visible text or symbols)IMPROVED COMFORT
SOUNDPROOFING
Your vehicle benefits from a suspension which contributes to improving general comfort.
These developments also contribute to reducing noise disturbance.
TREATMENT OF THE BODYWORK LEADING TO ACOUSTIC COMFORT
The underseal under the body, on the body sills and on the wheel arches considerably reduces noise and protects the body from external attack.
natural_image
Green handheld device with control buttons and directional arrows, no visible text or symbolsSTEERING MOUNTED CONTROLS
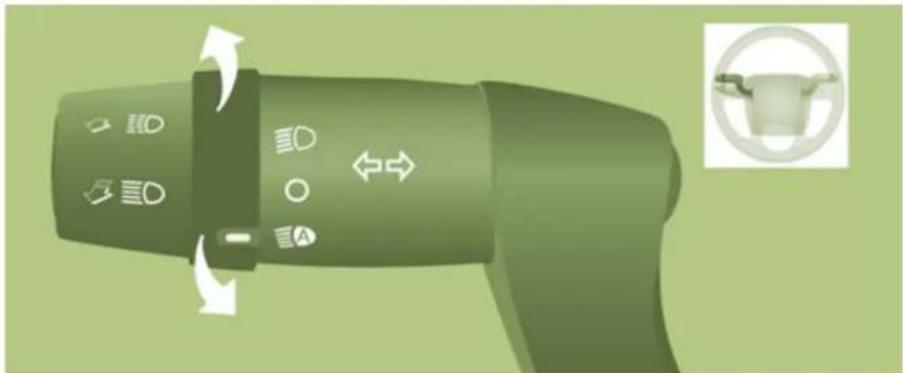
LIGHTING CONTROL STALK
Selection is by rotation of the white mark on the ring.

Sidelamps on

Dipped/main beam headlamps on
Switching between dipped and main beam
Pull the control stalk fully towards you.
Headlamp flash
Pull the control stalk towards you, regardless of the position of the ring.
"Motorw" function
Pull the lever towards the steering wheel with a press, without passing the point of resistance of the lighting stalk; the corresponding direction indicators will flash five times.

Direction indicators (green flashing)
Left: downwards. Right: upwards.
Steering mounted controls
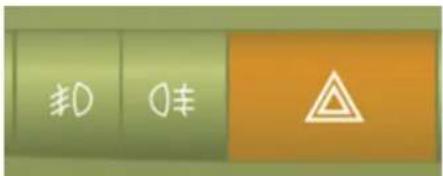

Front fglamps

Rear fglamps
If your vehicle is fitted with foglamps, these operate with the dipped or main beam headlamps.
Press one of these controls to switch on the lamps.
The foglamps should only be used in fog or when snow is falling.
In clear weather or in rain, both day and night, rear foglamps dazzle and their use is prohibited.
Do not forget to switch them off when they are no longer necessary.
Steerig mounted controls
AUTOMATIC ILLUMINATION OF HEADLAMPS
If your vehicle is fitted with this function, the dipped beam headlamps are switched on automatically if the light is poor.
In fog or snow, the sunshine sensor may detect sufficient light. Therefore, the lamps will not be switched on automatically. If necessary, you must switch on the dipped beam headlamps manually.
They are switched off when the light returns to a sufficient level.

Do not cover the sunshine sensor at the top centre of the windscreen.

To set the sensitivity of the sensor, refer to "Mode" in chapter 4.
GUIDE-ME-HOME LIGHTING
If your vehicle is fitted with this function: when you leave your vehicle, the dipped beam headlamps remain on for the selected duration (when leaving a car park for example).
Ignition off or key in the STOP position.
Within 2 minutes after switching off the engine, position the ignition key in the STOP position or remove it.
Pull the lighting stalk towards the steering wheel.

The indicator lamp comes on in the instrument panel.
Each action on the lighting stalk, pulled towards the steering
wheel, prolongs the guide me home lighting by 30 seconds up to approximately 3 minutes. When this time has elapsed, the lamps are switched off automatically.
Deactivate this control by keeping the stalk pulled towards the steering wheel for more than 2 seconds.
Activation

Turn the ring to this position. The lamps are switched off automatically when the ignition is switched off.
natural_image
Close-up of a handheld electric shaver with control buttons and a small inset image showing a cow (no text or symbols on the device itself)PARKING LAMPS
This system enables you to leave the lamps on when parked; with the ignition off, key in the STOP position or key removed.
Move the ring on the lighting stalk to position O then to dipped or main beam headlamps.

The warning lamp on the instrument panel comes on.
The lamps will remain on while you are parked.
Leaving the lighting on for long periods may significantly reduce the state of charge of your vehicle's battery.
HEADLAMP BEAM
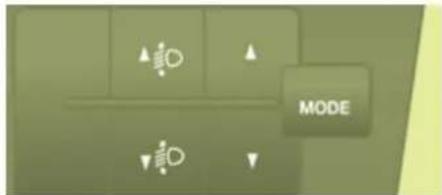
You are advised to adjust the height of the headlamp beams in accordance with the load in your vehicle.
This function works in the dipped and main beam headlamps position.

Press these controls, located on the dashboard, several times in succession to adjust the headlamps.

An indicator lamp on the screen indicates the adjustment position selected (0, 1, 2, 3).

Travelling abroad
If using your vehicle in a country that drives on the other side of the road, the headlamps must be adjusted to avoid dazzling on-coming drivers.
Contact a CITROËN dealer or a qualified workshop.
Steerig mounted controls
natural_image
Illustration of a green hairdryer with directional arrows indicating motion (no text or symbols)WIPER STALK
Windscreen wipers
Wiping is only active when the ignition key is in the RUNNING position.
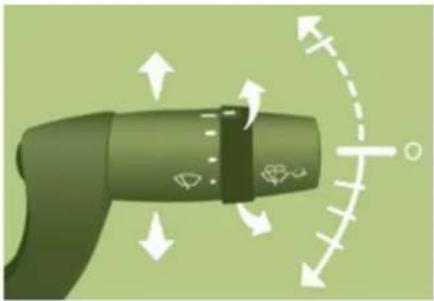
The stalk has five different positions:
Wipers off.
Intermittent wiping:
1 notch downwards.
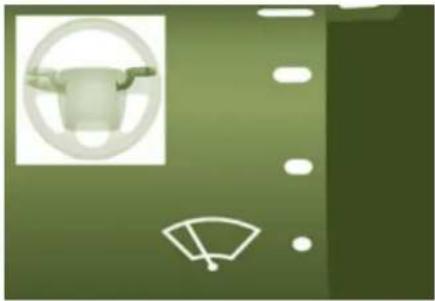
In this position, four speeds can be selected by turning the ring:

- very slow intermittent,
- slow intermittent,
- intermittent,
- fast intermittent.
natural_image
Green panel with white icons including a circular frame and a fan-like symbol (no text or labels)Slow continuous wiping: 2 notches downwards.
Fast continuous wiping: 3 notches downwards.
Single wipe, pull the control towards the steering wheel.
Automatic rain sensitive windscreen wipers
If your vehicle is fitted with this system, the wiping speed is adapted automatically to the intensity of the rainfall.
Automatic wiping: 1 notch downwards. This is confirmed by one wipe. Must be reactivated each time the ignition is switched on.
In this position, the sensitivity of the rain sensor can be increased by turning the ring.
Do not cover the rain sensor, located at the top centre of the windscreen.
When washing the vehicle, switch off the ignition or deactivate the automatic rain sensitive wipers.
Goodpractice
Check that the windscreen wiper blades can operate freely when using the wipers in icy weather.
Use the step in the front bumper, to remove any accumulation of snow at the base of the windscreen and on the blades.
To change the blades, refer to the "Changing a wiper blade" section of chapter 8.
With Stop & Start, when the wiper control stalk is in the fast wipe position, the STOP mode is not available.
Screenwash and headlamp wash
Pull the stalk towards you, the wash-wipe is accompanied by a timed operation the wipers.
The headlamp wash is linked with the screenwash, it is triggered if the dipped beam headlamps are on.
To top up the levels, refer to the "Levels" section of chapter 7.
Steerig mounted controls
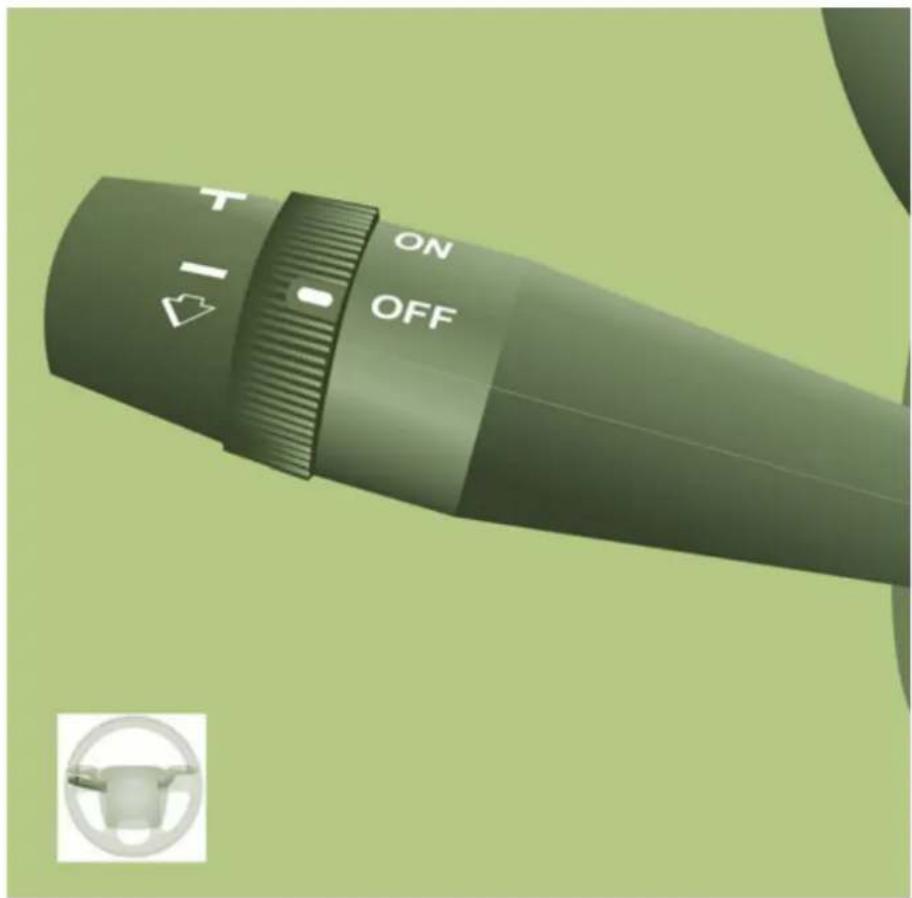
CRUISE CONTROL
"This is the speed at which the driver wishes to travel".
This aid to driving in free-flowing traffic conditions enables the vehicle to maintain a constant speed programmed by the driver, except when a considerable load is carried on a steep gradient.
In order to be programmed or activated, the vehicle speed must be greater than approximately 25 mph (40 km/h), with at least 4th gear engaged.
If your vehicle is fitted with cruise control, this is displayed on the instrument panel by an indicator located in the rev counter.

Function selected.

Function deactivated.
Steerigmounted controls
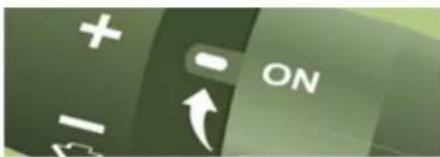
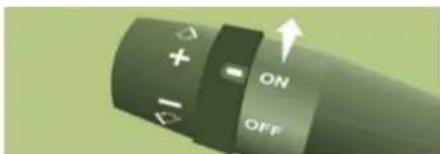
Selecting the function - ON
When the selection is set to ON, this switches the function on.
If your vehicle is fitted with
this screen, a message confirms the action.
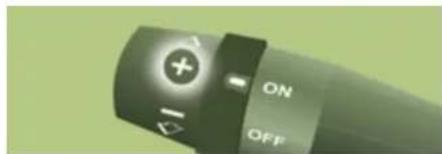
Programming a speed
Accelerate to the required speed, with 4th or 5th gear engaged.
Move the control upwards (+), for approximately one second, to store this speed.
Release the pressure on the accelerator pedal, the vehicle will maintain this speed.
Temporarily exceeding the programmed speed
When the cruise control is active, it is still possible to exceed the programmed speed by pressing the accelerator pedal (to overtake another vehicle for example).
Changing the programmed speed while the cruise control is in operation
You can:
natural_image
Close-up of a black handheld device with indicator lights and control buttons (no readable text or symbols)- increase the speed in steps, by means of brief presses, or continuously by pressing and holding the control upwards (+ sign),
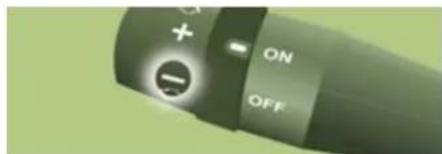
- decrease the speed continuously by pressing and holding the control downwards (- sign).
natural_image
Two technical diagrams showing a connector with three leads and a rotary knob labeled T, ON, OFF (no text or symbols beyond labels)Switching off / deactivating the function
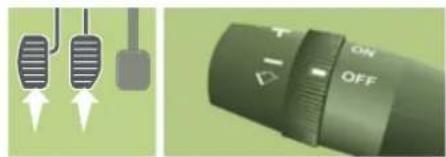
Press the brake or clutch pedal or place the dial in the OFF position, the indicator is switched off.
If the ESP or ASR comes into operation, the cruise control function is deactivated temporarily.
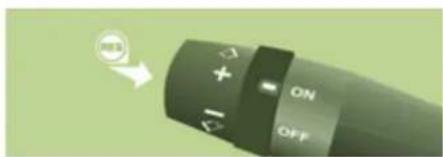

Restore - RS
To restore the vehicle's programmed speed (for example after pressing the brake or clutch
pedal), gradually return to the chosen speed and press RES.
The indicator comes on, the cruise control function is restored.
Cancelling the programmed speed
When the vehicle stops, after the ignition is switched off, the system no longer stores any speed.
Operating fault
In the event of a malfunction, the function is switched off and the indicator switches off.
Contact a CITROËN dealer to have the system checked.
Steering mounted controls
Good practice
When changing the programmed reference speed by pressing and holding the control, take care as the speed may increase or decrease rapidly.
Do not use the cruise control on slippery roads or in heavy traffic.
On a steep gradient, the cruise control will not be able to prevent the vehicle from exceeding the programmed speed.
The cruise control cannot, in any circumstances, replace the need to comply with speed limits nor can it replace the need for vigilance and responsibility on the part of driver.
It is advisable to leave your feet near the pedals.
To prevent the mat from becoming caught under the pedals:
- ensure that the mat is positioned correctly,
- never fit one mat on top of another.
Ventilation
natural_image
Green dashboard-style rotary dial with two dials showing speed, battery, and fan controls (no text or symbols)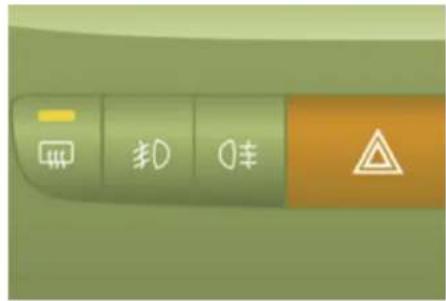
VENTILATION
DEMISTING AND DEFROSTING
Windscreen and side windows
The ventilation outlets located at the base of the windscreen and the side vents for the side windows increase the effectiveness of the demisting and defrosting. Do not obstruct these air outlets.
The pollen filter continuously and effectively filters dust.
Air recirculation (which can be activated by the driver or the passenger) isolates the passenger compartment from the exterior atmosphere. However, this position should only be used temporarily, normal use is to drive with the control positioned with the exterior air intake open.
Manual mode

Direct the control to this air distribution setting.
For faster and more effective demisting and defrosting of
the windscreen:
- increase the air flow setting,

- move the exterior air intake control temporarily to air recirculation.

Returning to the exterior air intake position permits renewal of the air in the passenger compartment.
Defrosting the rear screen and mirrors

Only operates when the engine is running. Pressing this button activates the rapid demisting-defrosting of the rear screen and
door mirrors.
This function switches off automatically to prevent excessive energy consumption. It stops when the engine is switched off but resumes when the engine is started again.
Pressing this button switches the function off.

With Stop & Start, when the heated rear screen is switched on, the STOP mode is not available.
natural_image
Interior view of a car dashboard and steering wheel (no text or symbols visible)CORRECT USE OF THE AIR CONDITIONING
In order to be effective, the air conditioning should only be used with the windows closed. However, if the interior temperature remains high after a prolonged period parked in the sun, first ventilate the passenger compartment for a few minutes.
For even air distribution, ensure that the exterior air intake grille located at the base of the windscreen is not obstructed and that the side and central vents, the air outlets on the floor and the air extractor at the rear are open.
The air conditioning is useful in all seasons as it eliminates condensation and air humidity.
Operate the air conditioning system for 5 to 10 minutes, once or twice a month, to keep it in good working order.
Have the filter elements (air filter and passenger compartment filter) replaced regularly. If you drive in a dusty environment, have them replaced twice as often.
It is normal that the condensation created by the air conditioning system results in a flow of water which may form a puddle under the vehicle when parked.
If the system does not produce cold air, do not use it and contact a CITROËN dealer.
VENTS
"Leave them open"
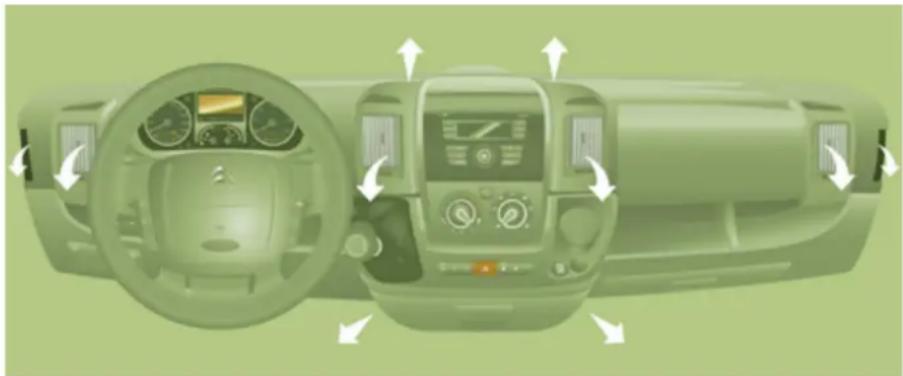
For optimum distribution and diffusion of hot or cool air in the passenger compartment, there are: 4 adjustable central vents, of which 2 can be directed sideways (right or left) towards the top of the body and 4 side vents which can be directed towards the passengers. The air vents directed towards the floor of the vehicle complete the equipment.
Ventilation
natural_image
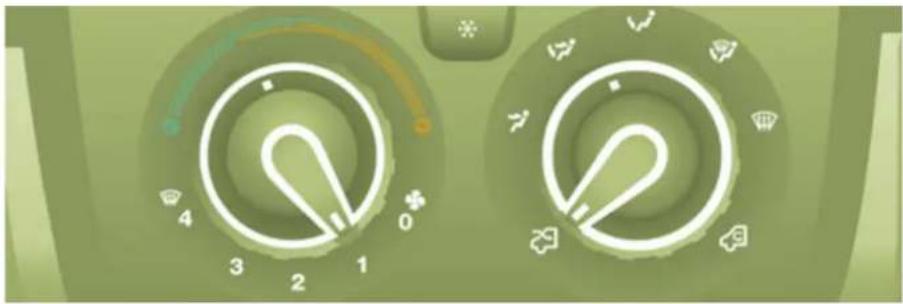
Green automotive dashboard with two rotary switches (no text or symbols visible)WITH MANUAL ADJUSTMENT
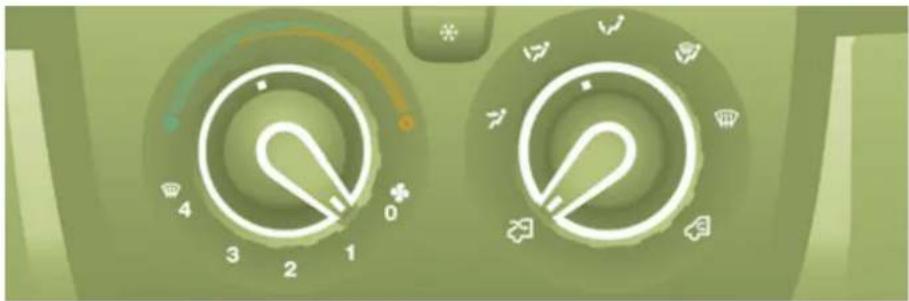
If your vehicle is fitted with these controls, they are located on the dashboard on the centre console control panel.
Air conditionig
The air conditioning mode can only operate with the engine running.

The air blower must be set to at least 1.
Pressing the button triggers the operation of the air conditioning,
the LED is on. Pressing the button again switches the function off and the LED is switched off.
Temperature adjustment

Control positioned:
- in the blue zone provides cool air,

- in the red zone provides heating of the interior ambient air.
Air flow

The force of the blown air, from the vents, varies from 1 to the strongest 4. Remember to adjust this control in order to reach the
ambient air comfort level. To switch off the blower, place the control in position 0.
Air distribution
The air supply distribution is directed by the control turned towards:

the side vents and the central vents,

the side vents, the central vents and the footwells,

the footwells,

the windscreen, the footwells and the side windows,

the windscreen and the side windows.
Intake of exterior air

This is the preferred operating position.
Recirculation of interior air

This position should only be temporary.
Used with the air conditioning switched on and setting of the
force of blown air (from 1 to 4), recirculation enables you to obtain the required ambient air comfort level with both hot or cold settings.
Recirculation temporarily prevents exterior odours and smoke from entering the passenger compartment.
When your ambient air comfort level has been reached, return to the intake of exterior air position to permit renewal of the air in the passenger compartment and demisting. This operating mode is preferable.
Recommended settings for the air conditioning
| For optimum operation of the system, the settings below are recommended: | |||||
| If I require... | Air distribution | Temperature | Air flow | Air recirculation | AC |
| Heating | 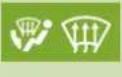 |  |  | 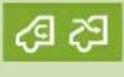 | |
| Cooling |  |  |  |  |  |
| Demisting Defrosting |  |  |  |  |  |
Ventilation
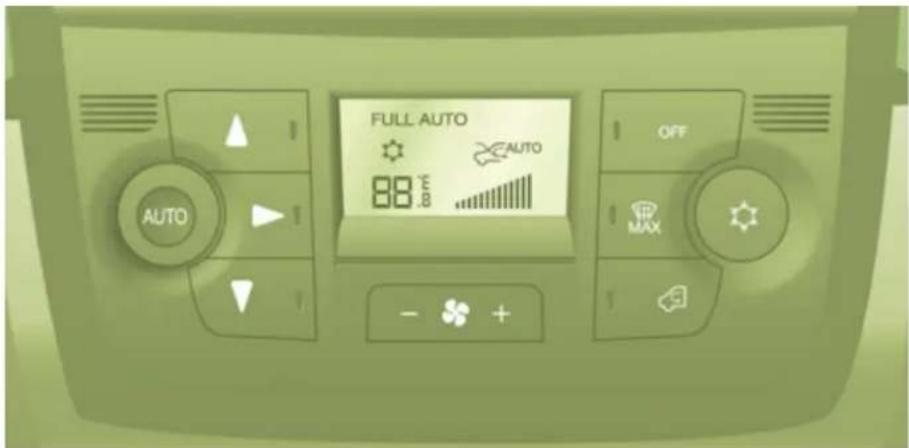
MONO-ZONE DIGITAL AIR CONDITIONING
If your vehicle is fitted with this system, the controls are located in the middle of the dashboard. The system can be identified by its control screen.
Control screen for your digital air conditioning system.

When the engine is running and the air conditioning is on, this symbol and the message FULL AUTO are displayed.
The other components are displayed according to the settings selected by the user.
AUTO mode

Switching on FULL AUTO mode: pressing the AUTO control switches on the system's functions, confirmed by the display
of FULL AUTO. This is the normal operating mode for the digital air conditioning system.
Using the moving ring surrounding the AUTO control, set the comfort temperature to be reached according to a setting between:
- HI (High to ≈ 32) and,
- LO (Low to ≈ 16).
The system controls the distribution, flow and intake of air to ensure comfort equivalent to the setting displayed and
sufficient recirculation of air in the passenger compartment.
No further adjustments are required.
AUTO mode withpersonalisation

Switch on in AUTO mode, certain settings can be modified: the distribution, the air flow, the air conditioning and the air intake/recirculation.
The display changes from FULL AUTO to AUTO.
To return to fully automatic operation, press this button again. The display on the control panel changes from AUTO to FULL AUTO.
If the system is not able to maintain the setting selected following manual adjustments, the setting flashes then AUTO is cleared. Press the AUTO control to return to the automatic settings.
Switching off the air conditioning

Pressing this control switches off the air conditioning functions. The snowflake is cleared from the screen.
Complete switch-off

Pressing this control switches the system off. The LED and the screen switch off.
Comfort value adjustment ring
The settings range between:
- increasing the interior ambient air temperature HI (High) which goes up to a maximum setting of 32,
- cooling the interior ambient air temperature LO (Low) which goes down to a setting of 16.
Air distribution
A press illuminates the LED on the buttons which distribute the air flow towards:

the windscreen and front side window vents (demisting/defrosting the windows),

the central and side vents (chest and face),

the vents in the front and rear areas (feet).
The combination of buttons permits improvement of air distribution.

Air flow
Successive presses of this button increase (+) or reduce (-) the force of the air flow to the interior.

Intake of exterior air/ recirculation of interior air
When the LED is on, the air recirculates inside the passenger
compartment to prevent the entry of exterior odours and smoke. This position should be temporary.
When the ambient air comfort level has been reached, pressing the button switches the LED off and reopens the exterior air intake. Pressing the AUTO button also restores the intake of exterior air. Returning to this position permits renewal of the air in the passenger compartment and demisting. Pressing the AUTO button again restores the FULL AUTO function.

Rapid demisting/defrosting
Pressing this control permits rapid clearing of the windows. The LED is on.
The system manages the air conditioning, the flow and intake of air, the defrosting of the rear screen and provides optimum distribution of the air to the windscreen and front side windows.
If your vehicle is fitted with additional heating, switch it off to ensure rapid and effective demisting/defrosting.
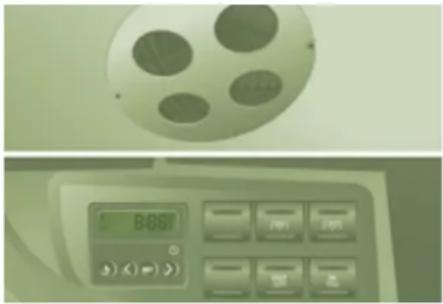
ADDITIONAL REAR VENTILATION

The controls for this system, additional to the standard cabin ventilation system, are on the lower dashboard, to the left of the steering wheel.

Air outlet
A press on this control activates the extraction of air to the outside; the LED comes on. Press again to switch off.

Air inlet
A press on this control activates the entry of air into the cabin; the LED comes on. Press again to switch off.
Ventilation
ADDITIONAL HEATING SYSTEMS
Additional heating
This is passenger compartment heating, additional to the standard equipment. It can operate independently of the engine.
Additional heater or prgrammable additional heating
This is an additional, programmable and separate system which heats the Diesel engine hot coolant loop to make starting easier.
It improves the demisting and defrosting performance and that of the heated seats, if fitted to the vehicle.
The passenger compartment heating is brought up to temperature more rapidly.
This system must be programmed to start up before you enter the vehicle.
natural_image
Grid of four icons including a clover, folder, refresh, and dollar sign, arranged in two rows (no text or labels)Supplementary heating
On the 2-3 seats version, this is located under the seat on the driver's side with air diffusion directed forwards.

On the 5-9 seats version, it is located at the rear. Depending on the model version, the air diffusion is either direct from the
rear or comes from the rail located under each of the two rows of seats.

Press this control to activate/deactivate the heating. The LED is on if the heating is activated. When rapid demisting and
defrosting is required, switch off the control.
natural_image
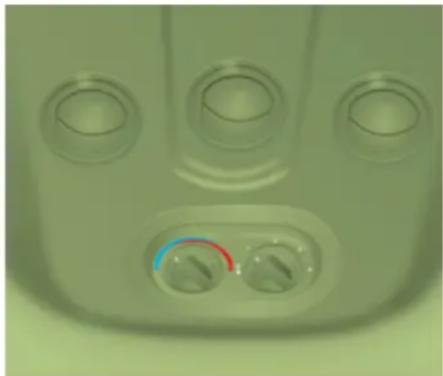
Close-up of a small electronic device's front panel with three circular buttons and a color-coded dial (no text or symbols visible)REAR HEATING AND / OR AIR CONDITIONING

If your vehicle is fitted with an additional air conditioning unit, located in the rear of the vehicle: the distribution rail located in
the roof and the individual diffusion vents provide a perfect diffusion of cold air.
The warm air diffused at the floor, from the front air conditioning unit, is distributed at the feet of the rear passengers of rows 2 and 3.
A warm air diffusion vent, located on the rear left wheelarch, may complete the assembly for the feet of the rear passengers of row 3.
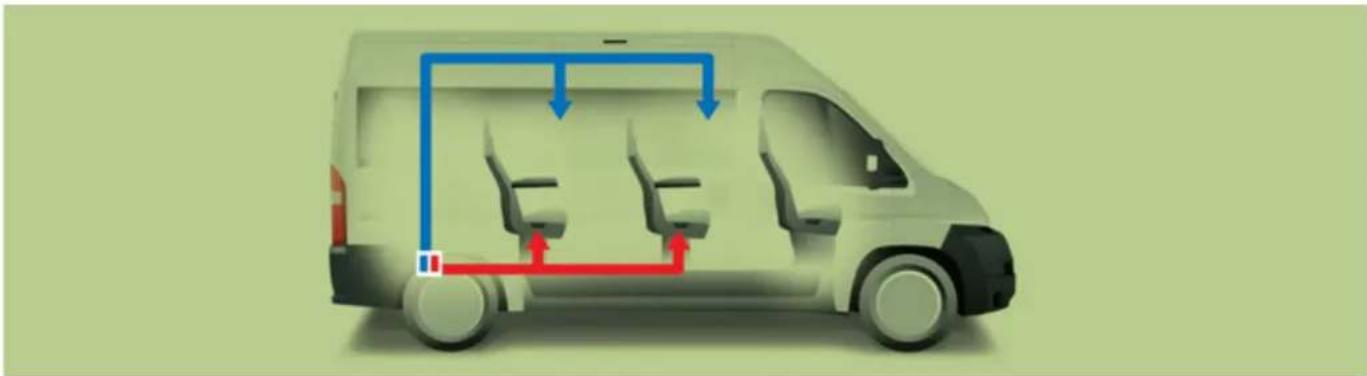
natural_image
Diagram of a van with three seats and blue arrows indicating airflow or movement, no text or symbols present.Activation/Deactivation

This control, located on the control panel at the left-hand end of the dashboard, enables you to activate/deactivate the operation
of the rear controls from the driver's seat.
The first press activates (LED on).
A second press deactivates (LED off).
Air flow

The force of the fan blown air, via the vents, varies from 1 to the strongest 4.
To obtain a comfortable level of
ambient air, remember to adjust this control.
To deactivate the fan, place the control in position 0.
Comfort value adjustment
Control positioned:

- on the blue, delivers cool air,
- on the red, delivers heating of the ambient air.

The OFF control on the "Mono-zone" central control panel switches the function off.
However, a safety device will ventilate the rear circuit automatically, even if the control is in position 0, to prevent the formation of condensation.
However, a safety device will ventilate the rear circuit automatically, even if the control is in position 0, to prevent the formation of condensation.
Ventilation
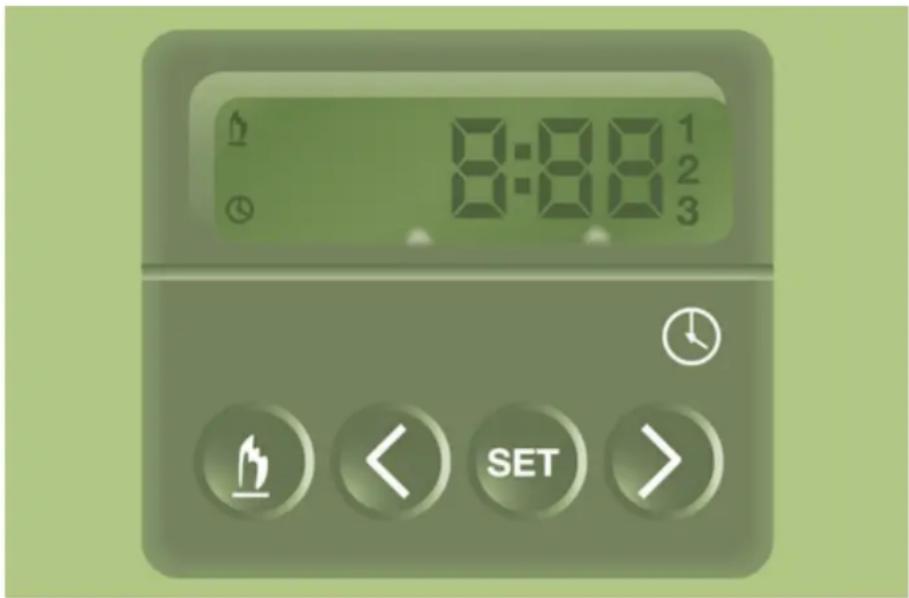
PROGRAMMABLE ADDITIONAL HEATING
If your vehicle is fitted with separate programmable heating: it gradually brings the engine up to a good temperature to facilitate starting.
An integrated clock permits programming of its start time. The passenger compartment will be heated more quickly.
Digital programming control
The programmable heating system control panel is located at the bottom left of the dashboard.

Heating cycle indicator

Display on

Display of the programme number selected

Time display button

Time setting buttons

Selection of the stored programme

Button for immediate switching on of the heating

Time setting and reading indicator
Setting the time of the internal clock
Set the clock on the control panel before programming the deferred switching on of the heating.

Press this button.
The screen and the associated indicator come on.
Within ten seconds, press these two setting buttons until the correct time is displayed.

Press ">" to increase the hours or "<" to decrease.
Press and hold the button for more rapid scrolling of the digits.
Reading the time

Press this button.
This indicator comes on, the time is displayed for approximately ten seconds.
Immediate switchig on of the heating
Before switching on the heating, check that:
- the temperature setting control is in the "Hot air" position (red).
- the air flow setting control is in position 2.

Press this button.
The screen and the heating cycle indicator come on and remain on throughout the duration of operation.
Switching on the deferred heating
Switching on can be programmed between one minute and twenty-four hours in advance.
You can store up to three different start times, but programme one deferred start only.
Note: if you wish to start the heating at a fixed time each day, simply reprogramme the stored time each day.

Press this button, the screen becomes brighter.
This symbol or the previous stored time and the number (e.g. 1) corresponding to the recalled pre-selection are displayed for ten seconds.
Note: if you wish to recall the other pre-selected times, press the SET button several times before the ten seconds have elapsed.

Within the ten seconds, press these two setting buttons to select the required start time.

Setting of the stored time is confirmed by clearing of the start time, displaying of the pre-selection number (e.g. 1)
and increased brightness of the screen illumination.
Ventilation
Cancelling the programming

Press this button briefly to clear the programmed start time.
The screen illumination and the pre-selection number (e.g. 1) are
switched off.
Recalling one of the pre-selected start times

Press this button as many times as necessary until the number corresponding to the required pre-selected start time (e.g. 2) appears.
After ten seconds, the time is cleared but remains stored for as long as the number (e.g. 2) and the screen remain lit.
Switching off the heating

Press this button.
The heating cycle indicator and the screen are switched off.
Good practice
To avoid any risk of poisoning or asphyxiation, the additional heating must not be used, even for short periods, in an enclosed space such as a garage or workshop which is not fitted with an exhaust gas extraction system.
The additional heating is supplied by the vehicle's fuel tank. Ensure that the fuel gauge indicator lamp is not at reserve.
Always switch off the additional heating when filling with fuel to avoid any risk of fire or explosion.
Do not park the vehicle on an inflammable surface (dry grass, dead leaves, paper...), there is a risk of fire.
The temperature near the heater must not exceed 120 °C. A temperature higher than this (for example in the case of painting in an oven) could damage the components of the electronic circuits.
The additional heating system is fitted with a temperature limiter which cuts off the combustion in the event of overheating due to a lack of coolant. Top up the coolant, then press the programme selection control before switching the heating on again.
i Have the additional heating system checked at least once a year at the beginning of winter. Maintenance and repairs should only be carried out by a CITROËN dealer.
Use only genuine replacement parts.
Two different types of equipment
The additional heating is separate and programmable. Before you enter the vehicle, it gradually increases the temperature of the engine to make starting easier. This also facilitates passenger compartment heating, demisting and defrosting.
The additional passenger compartment heating system supplements the standard equipment. Its operation may be independent of the engine. Switching on of the heating may be programmable.
Seats
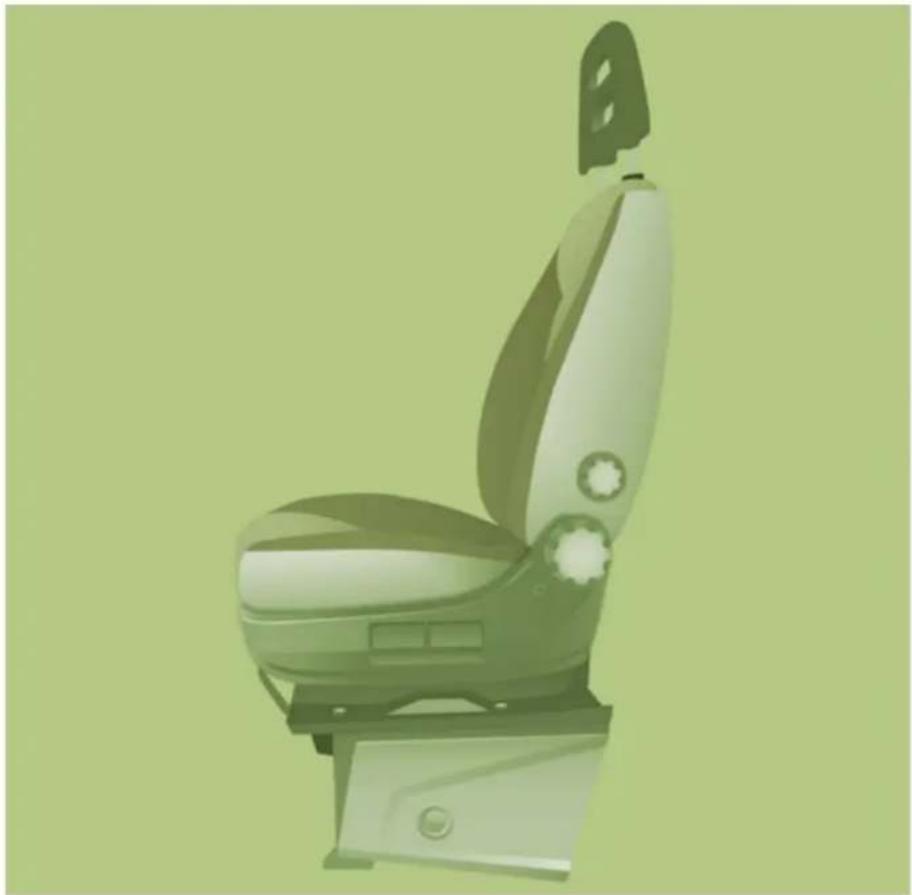
natural_image
Illustration of a modern passenger seat with a seatbelt and top mount, shown against a plain green background (no text or symbols)SEATS
DRIVER'S SEAT
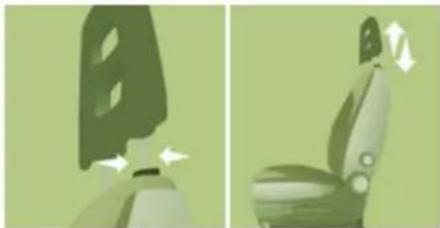
natural_image
Two-step illustration of a car seat assembly process, showing front and side views with arrows indicating motion (no text or symbols)Head restraint
Press the tab to adjust the height of the head restraint.
To remove the head restraint, press the tabs and raise the head restraint.
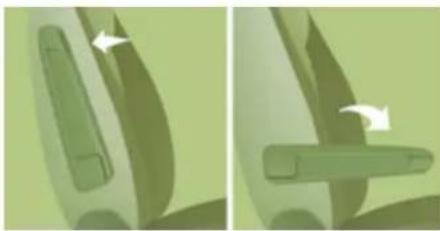
natural_image
Two-step illustration of a car seatbelt mechanism, showing left and right views with arrows indicating movement (no text or symbols)Adjustable armrest
Turn the control located under the end of the armrest.
Seats
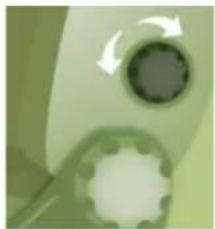
natural_image
Close-up of a green mechanical component with circular and gear-like features (no text or symbols visible)Lumbar spport
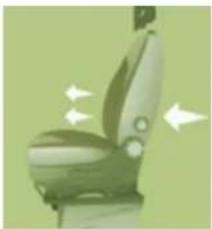
natural_image
Side view of a car seat with directional arrows indicating movement or force (no text or symbols)Turn the control.
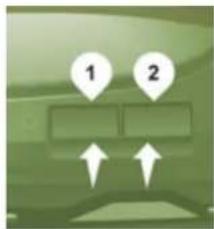
Seat cushion height adjustment
natural_image
Illustration of a car seat with chrome finish and seatbelt (no text or symbols)Lift the handle 1 to raise or lower the front of the seat. Lift the handle 2 to raise or lower the rear of the seat.
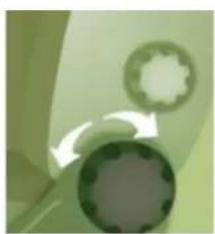
natural_image
Abstract green and gray circular shapes with curved arrows, no text or symbols presentSeat back agle
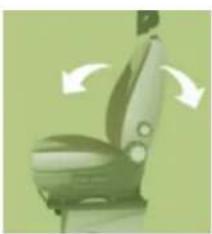
natural_image
Illustration of a car seat with directional arrows indicating rotation (no text or symbols)Turn the control to adjust the angle of the seat back.
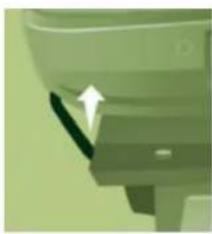
natural_image
Close-up of a mechanical component with a black clip and arrow indicating direction (no visible text or symbols)Forwards-backwards adjustment
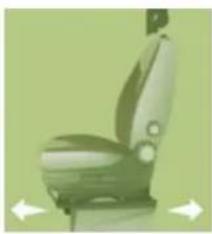
natural_image
Side view of a car seat with visible seat, wheels, and side-mounted buttons (no text or symbols)Lift the control bar, located under the seat, and adjust to the required position.
natural_image
Close-up of a circular dark object on a light green surface, possibly a button or knob (no text or symbols visible)Heated seat
Use this control to switch the heating of the seat on or off.
natural_image
Close-up of a mechanical knob with rotating arrows indicating rotation (no text or symbols visible)Seat with variable dampig
If your seat is fitted with this system, turn the control to adjust the level of damping to suit the driver's weight.
Rotating seat
If fitted on your seat, press the control to rotate the seat by 180^ .
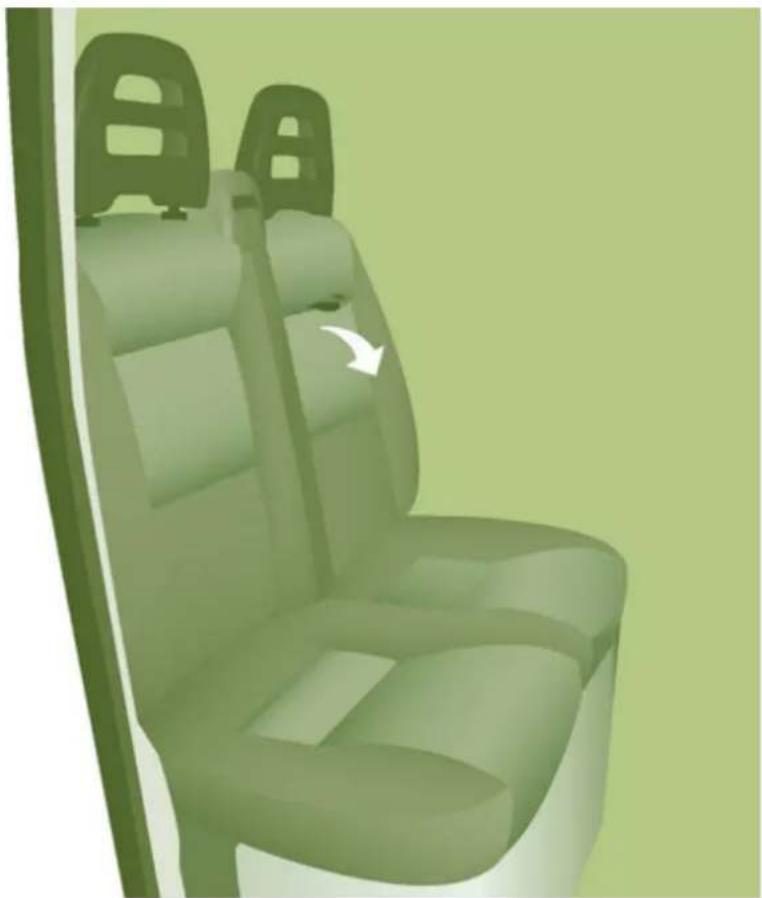
natural_image
3D rendered illustration of a car simulator seat with two seats and a white arrow indicating rotation (no text or symbols)2-SEAT FRONT BENCH
This is fitted with two seat belts.
natural_image
Close-up of a light green plastic curved bracket with rounded ends and a flat base (no text or symbols visible)Grab handle
This is located above the centre passenger.
natural_image
Close-up of a white mechanical component with a yellow knob, possibly a valve or bracket (no visible text or symbols)Writing table
The back of the centre seat folds to form a writing table.
Pull the handle located at the top of the seat back cushion.
Seats
Seats
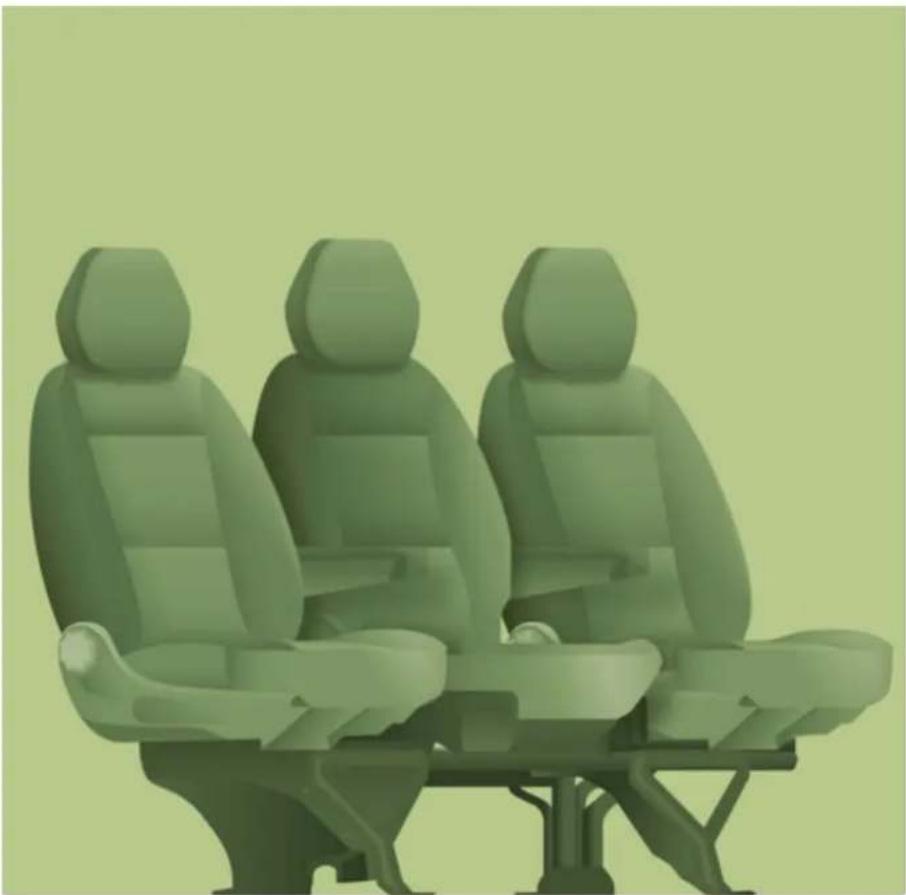
natural_image
Illustration of three seated car seats in a row, rendered in green tones against a plain light green background (no text or symbols)
REAR SEATS Seat back agle
Turn the control to adjust the angle of the seat back.
Access to the rear seats

natural_image
Abstract 3D rendering of green geometric shapes against a dark background (no text or symbols)To gain access to row 3, manoeuvre the control on the outer seat of row 2 and tilt the seat back forwards.
To return the seat back to its initial position, bring it to the vertical position without touching the control.
Seat back folded position of the central seat (rows 2 and 3)
The back of the central seat can be folded fully onto the cushion and used as a cup holder table.
Lower the head restraint then raise the control and fold the seat back forwards.
To return the seat back to its initial position, raise the control again.
Seats
natural_image
Illustration of a vintage computer monitor with legs and front-mounted cable (no text or symbols visible)REAR BENCH SEATS
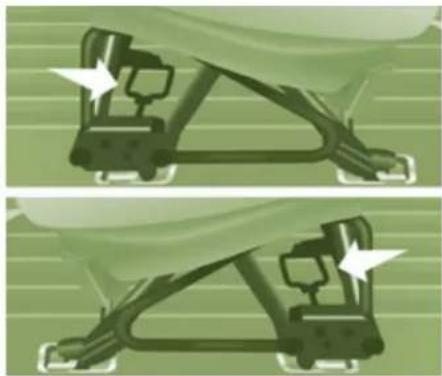
natural_image
Two identical illustrations of a mechanical device with arrows indicating motion or force direction (no text or symbols)Removing the bench seat
At least two people are required to remove the bench seat.
Fold the seat back onto the cushion as described above.
Turn the two levers forwards.
Tilt the base of the bench seat forwards to place the assembly in the vertical position.
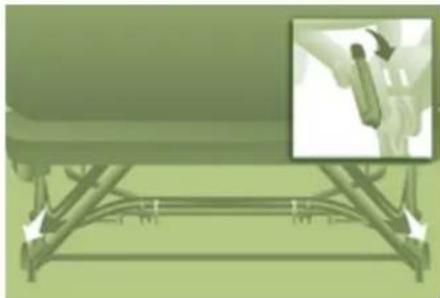
natural_image
Illustration of a table with a ruler and a magnified inset showing a hand holding a tool (no text or symbols present)Turn the two levers upwards.
Raise the bench seat and remove it.
Good practice
Following the various operations:
- do not remove a head restraint without storing it securely,
- do not travel in row 3 with the row 2 bench seat in the vertical position,
- do not store any kind of object on the folded seat back of row 2,
- check that the seat belts are always accessible and easy for the passenger to use,
- a passenger must not take their seat without correctly adjusting their seat's head restraint and adjusting and fastening their seat belt.
Seats
natural_image
Silhouettes of a vehicle or car with three vertical panels, possibly a vehicle or industrial setting (no visible text or symbols)CREW CAB
Consisting of an ergonomic 4-seat bench and a high-strength partition, it offers comfort and safety.
Each seat of the bench is fitted with an inertia reel seat belt.
Refer to section 5 to read the "Good practice" recommendations.
natural_image
Pure electrical circuit lines without any symbolsAccess to the box under the bench seat
From the cab
Tilt the seat cushion forwards to gain access to the large box.
From the load space
Raise the two flaps which make the full length at the floor available. The flaps are retained in the raised position by magnets on the back of the partition.
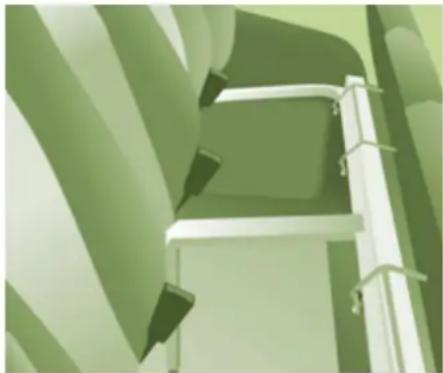
natural_image
Illustration of a ladder structure with green panels and black connectors (no text or symbols)Goodpratice
Do not tilt the bench seat cushion during transportation.
No not attach anything to the cab fixing structure.
Do not exceed the number of passengers indicated on the registration certificate.
Do not install child seats, booster cushions or carrycots on the rear seats of the crew cab.
In the rear, the load space is intended for the transportation of goods only.
You are advised to place the goods or heavy objects as far forwards as possible in the load space (towards the cab) and secure them by means of straps using the stowing rings on the floor.
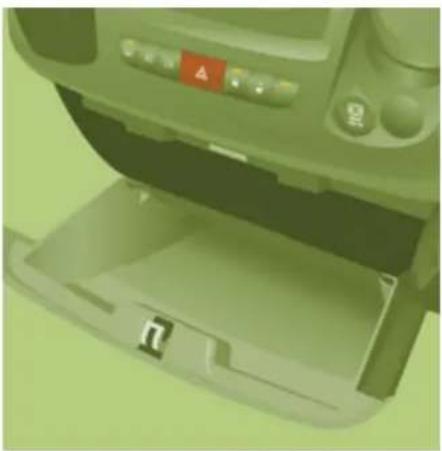
natural_image
Green plastic car interior showing a door, control panel, and storage tray (no visible text or symbols)PRACTICAL INFORMATION
CABIN FITTINGS
Central storage tray
This may be lockable (according to specification).
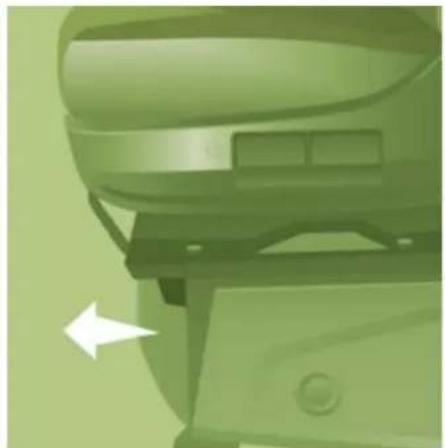
natural_image
Green mechanical component with a white arrow pointing to a specific part (no visible text or symbols)Front seat storage
A storage drawer is provided under the front seat (driver's).
The space under the passenger's seat is used to store the tools required in order to change a wheel.
If your vehicle is fitted with a seat with variable damping, it does not have any storage compartments.
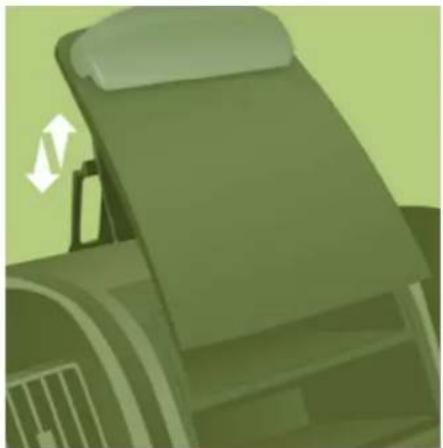
natural_image
Illustration of a green ergonomic chair with a white arrow indicating rotation (no text or symbols)Folding writing table
This is located in the centre of the dashboard.
The clip can be used to secure documents, slips, ...
Pull or push the top of the table to unfold or fold it.
If your vehicle is fitted with a front passenger airbag, the table cannot be raised.
Practical information
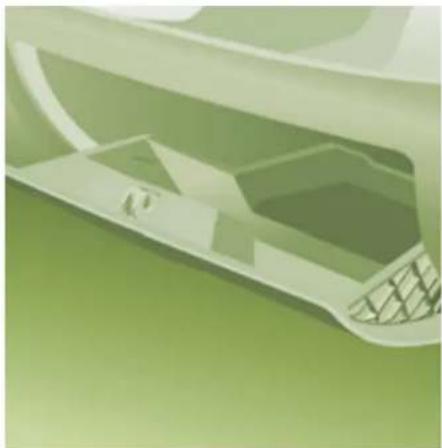
natural_image
Abstract green and white geometric design with no visible text or symbolsGlove box
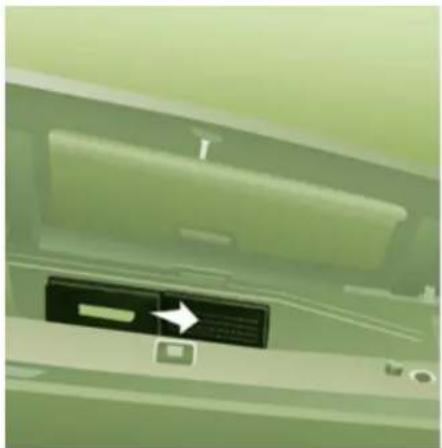
natural_image
Close-up of a green electronic device with a black drive and indicator lights, no visible text or symbolsCooleglove box
This is located on the top right part of the fascia panel.
The air blown into the glove box is the same as that blown out via the vents.
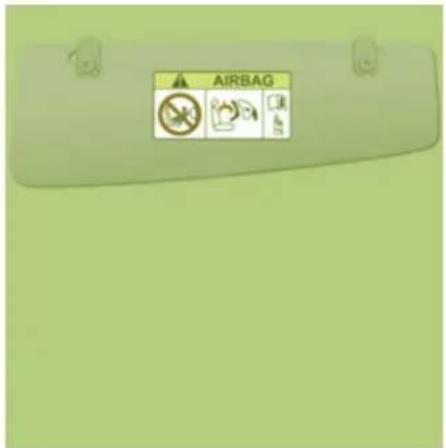
Sun visor
To avoid glare from ahead, fold the sun visor down.
Pockets are arranged in the sun visors for storing toll cards, tickets, ...
Practical information
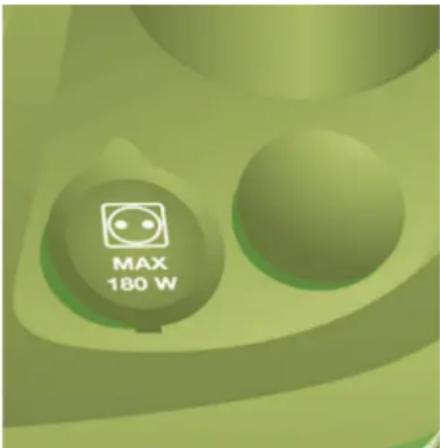
12 volt socket
Press and wait a few moments until the lighter pops out automatically.
When used as a socket: 180 W max.
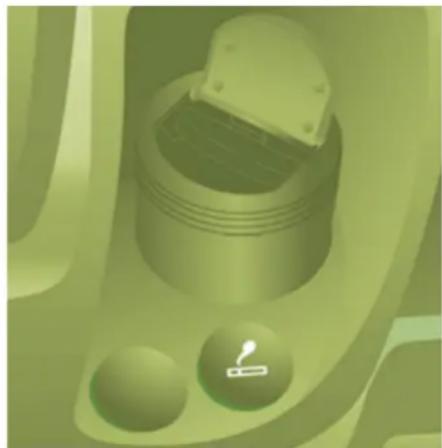
natural_image
Close-up of a mechanical component with a piston and handle, no visible text or symbolsCigarette lighter / Portable ashtray
After opening the ashtray, pull it upwards then empty it into a bin.
natural_image
Close-up of a light green plastic mechanical component with no visible text or symbolsOverhead storage compartment
This is located above the sun visors. Maximum load: approximately 20 kg.
Practical information
natural_image
Abstract green geometric shape with layered edges and a white border (no text or symbols)Fittings/storage compartment in the door trays
natural_image
Green rectangular object with two small square buttons on top, no visible text or symbolsCourtesy lamp
This is a double courtesy lamp located in the centre of the roof. It can be activated by means of:
- the switches located on the courtesy lamp, with the ignition on - RUNNING position,
- opening or closing one of the front doors,
- locking/unlocking the vehicle.
It switches off automatically:
- if the switch is not pressed to the right or to the left,
- in all cases after 15 minutes, if the doors remain open or when the ignition is switched on.
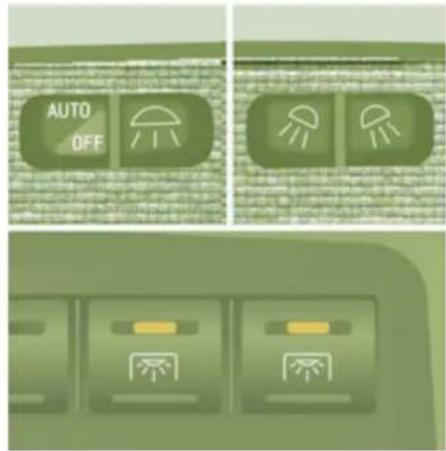
Reading lamps
These are controlled by the switches.
The driver's switch controls both reading lamps simultaneously.
The passenger switch controls either the driver's reading lamp or the passenger's reading lamp.

Controls located at bottom left of the dashboard allow the driver to activate/deactivate the passenger spotlamp.
Practical information

natural_image
Green abstract icon resembling a stylized letter or symbol (no text or symbols present)LOAD SPACE FITTINGS
Support for stowin
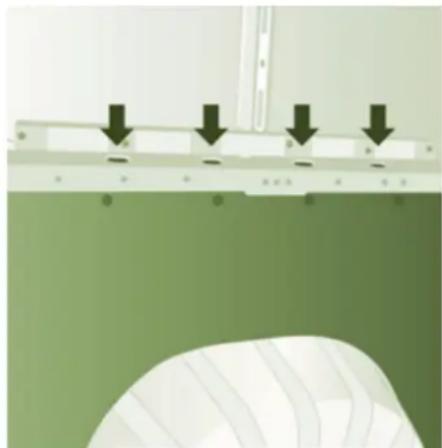
natural_image
Diagram showing four black arrows pointing downward on a white panel with a green background, no text or symbols present.g rail

natural_image
Abstract green geometric shapes with a circular logo in the top-right corner (no text or symbols)12 volt socket
When used as a power socket: 180 W max.
Stowing rings
Eight stowing rings are provided for securing your loads. Six rings are located on the floor and two on the partition behind the cab.
As a safety precaution in case of sharp braking, you are advised to place heavy objects as far forwards towards the cab as possible.
Supports for securing a stowing rail are available above the trims, on each side of the vehicle.
Trims
The lower parts of the sides are fitted with load protection trims.
Practical information
natural_image
Close-up of a green mechanical component with a white arrow pointing to a button (no text or symbols visible)Courtesy lamps
If fitted on your vehicle, one or two courtesy lamps are located above the rear and side doors.
They can be activated by:
- tilting the courtesy lamp (to the left or to the right),
- opening or closing the rear or side doors.
This lighting switches off automatically, after a few minutes, if the doors are left open.
Reading lamps
They are located above each row of seats.
Roof box
This is a storage compartment located in the load space, above the cab roof. Its capacity varies depending on the height of the van roof.
Torch
If provided in your vehicle.
Step
To make access and exit easier, your vehicle may be fitted with a step which unfolds when the sliding side door is opened.
Ladder type vertical partition
Behind the driver's seat, a ladder type vertical partition protects the driver against the risk of load movement.
Load retainer
On the floor, behind the front seats, a horizontal partition protects the driver and front passengers against the risk of load movement.
Glazed separation partition
Use the control to open/close the sliding window of the separation partition.
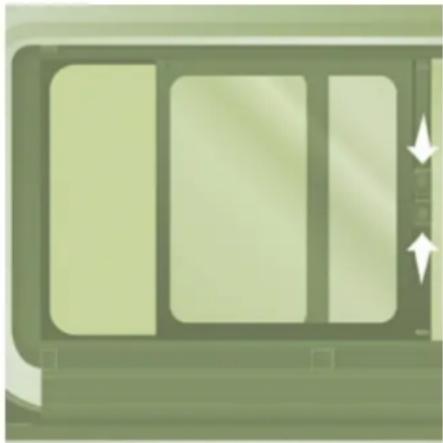
natural_image
Illustration of a window with three vertical panes and directional arrows (no text or symbols)Sliding side windows

Depending on the vehicle's equipment, the side windows of row 2 can be opened.
Squeeze the two controls then slide the window.
While driving, the window must be closed or secured in an intermediate position.
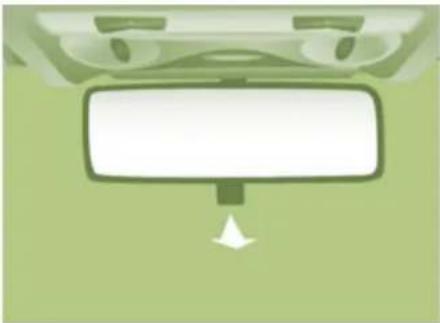
natural_image
Green vehicle front view showing a blank rectangular panel with a white arrow pointing downward (no text or symbols)MIRRORS AND WINDOWS
MIRRORS
Rear view mirror
The lever located on the lower edge moves the mirror into two positions.
For the day position, the lever is pushed.
For the night position to prevent dazzle, pull the lever towards you.
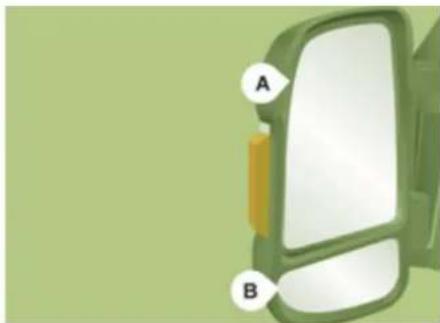
natural_image
Close-up of a green automotive door handle with labeled points A and B (no text or symbols beyond labels)Door mirrors
These are divided into two zones:
A - Upper mirror
B - Lower mirror
The mirror glass is spherical in order to widen the lateral field of vision. Objects seen in the mirror are in reality closer than they appear. Therefore, this must be taken into account in order to assess the distance correctly.
The shell incorporates the direction indicator side repeater and the aerials, according to the equipment available on board (GPS, GSM, Radio, ...).
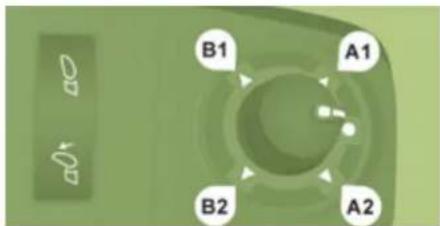
Electrical controls
The ignition switch must be in the MAR position.
Turn the control to select the mirror zone.
1 Driver's mirror:
A1 - Upper mirror
B1 - Lower mirror
Then move the control in the direction of the adjustment required.
2 Passenger mirror:
A2 - Upper mirror
B2 - Lower mirror
Then move the control in the direction of the adjustment required.

Electric folding
Press this control.

Defrosting the mirrors
Press the rear screen defrosting button.
Mirrors and windows
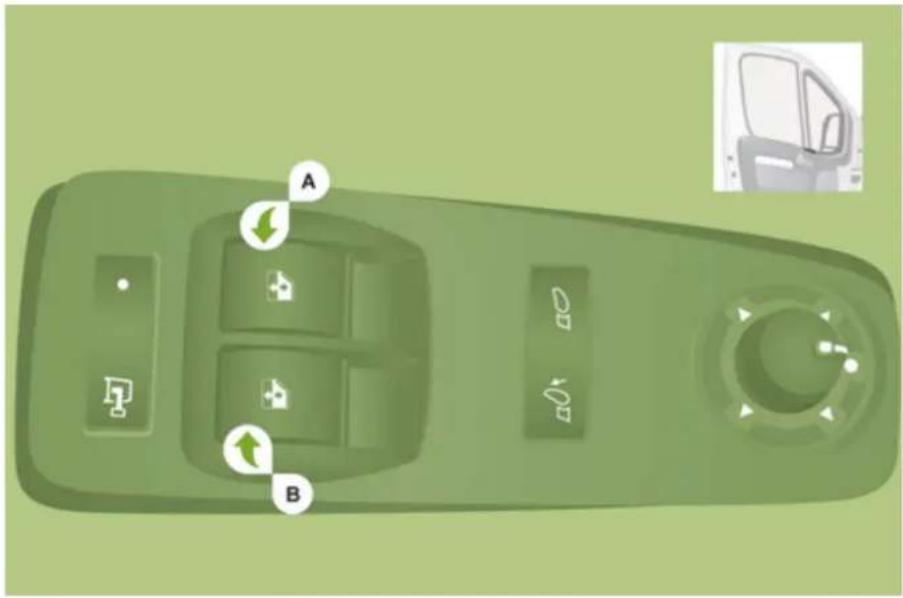
natural_image
Green automotive control panel with labeled buttons and navigation icons (no text or symbols on the panel itself)ELECTRIC WINDOWS
A. Driver's electric window control
B. Passenger's electric window control
You have two options:
Manual operation
Press or pull control A, without passing the point of resistance.
The window stops when you release the control.
Automatic operation
Press or pull control A/B, beyond the point of resistance: the window opens or closes fully when the control is released.
Pressing the control again stops the movement of the window.
Goodpractice
Always remove the key from the ignition when leaving the vehicle, even for a short time.
If the electric windows meet an obstacle during operation, you must reverse the movement of the window. To do this, press the control concerned.
When the driver operates the passenger electric window controls, they must ensure that no one is preventing correct closing of the windows.
The driver must ensure that the passengers use the electric windows correctly.
Be aware of children when operating the windows.
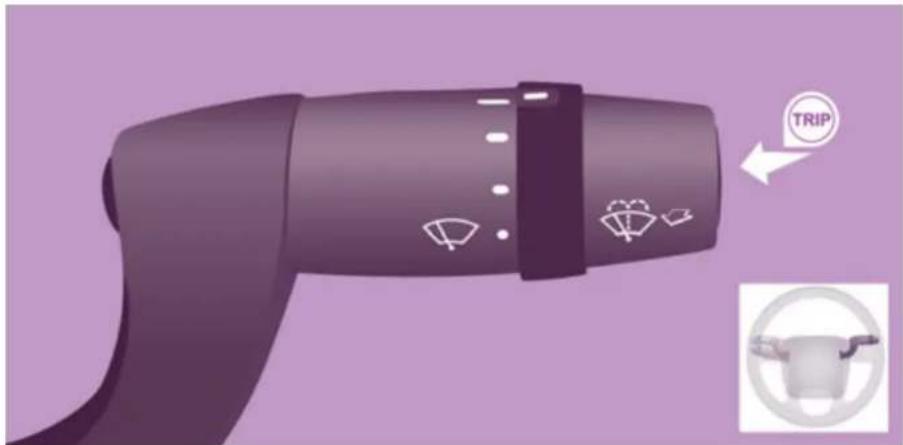
TRIP COMPUTER
The TRIP button, located at the end of the wiper stalk, provides access to the following information:
- Ambient temperature
This indicates the temperature outside the vehicle.
- Range
This indicates the distance that can still be travelled with the fuel remaining in the tank on the basis of the average consumption over the last few miles (kilometres) travelled.
- Distance A
This indicates the distance travelled since the last trip computer zero reset.
- Average fuel consumption A
This is the average quantity of fuel consumed since the last trip computer zero reset.
- Current fuel consumption A
This is the average quantity of fuel consumed during the last few seconds.
- Average speed A
This is the average speed calculated since the last trip computer zero reset (with the ignition on).
- Trip duration A
This indicates the total time since the last trip recorder zero reset.
If TRIP B is activated on the MODE menu:
- Distance B
- Average fuel consumption B
- Average speed B
- Trip duration B
Mode
MODE
Configuration - Personalisation
If your vehicle is fitted with the control panel located to the left of the steering wheel, this provides access to menus which permit the personalisation of some of your equipment.
Seven languages are offered: Italian, English, German, French, Spanish, Portuguese, Dutch.
As a safety precaution, some menus can only be accessed when the ignition is off.
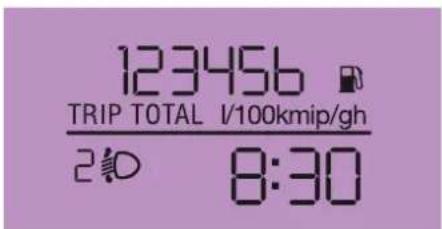
Instrument panel screen 1
If your vehicle is fitted with this screen, you have access to the menus 1 (Speed), 4 (Hour), 8 (Unit), 10 (Buzz), 13 (Bag P) and 14.
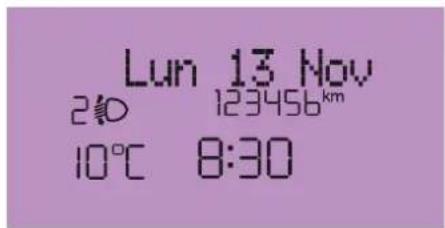
Instrument panel screen 2
If your vehicle is fitted with this screen, you have access to all of the menus.


This MODE button enables you to:
- access the menus and sub-menus,
- confirm your selections, within a menu,
- exit from the menus.
A long press enables you to return to the welcome screen.

This button enables you to:

- scroll up through a menu,
- increase a value.

This button enables you to:

- scroll down through a menu,
- decrease a value.
| Menu... | Press... | Sub-menu... | Press... | Select... | Confirm and exit | Enables you to... | |||
 | 1 Bleep Speed (Speed) | M | ON | [0x0x1] | Decrease | [0x0x1] | Activate/deactivate the audible signal indicating exceeding of the programmed speed and select the speed. | ||
| OFF | |||||||||
| M▲▼ | 2 Headlamp sensor | M | Increase | [0x0x1][0x0x2] | Set the sensitivity of the sunshine sensor (1 to 3). | ||||
| [0x0x1] | Increase | ||||||||
| M▲▼ | 3 Activation Trip B | M | [0x1v1] | Activate | [0x0v1] | Display a second distance "Trip B". | |||
| Deactivate | |||||||||
| M▲▼ | 4 Setting the time (Hour) | M | [HW0T] | Hours/Minutes | M | Increase | [0x0x3] | Set the clock. | |
| Decrease | |||||||||
| [BC36] | Time format | M | 24 | [0y8a] | Select the clock display mode. | ||||
| 12 | |||||||||
| M▲▼ | 5 Setting the date | M | [X604] | Year/Month/Day | M | Activate | [2655] | Set the date. | |
| Deactivate | |||||||||
| M▲▼ | 6 See radio | M | [TK76] | ON | [0x0x7] | Display the name of the station. | |||
| OFF | |||||||||
| M▲▼ | 7 Autoclose | M | [X6A3] | While moving | M | ON | [6W7H] | Activate/Deactivate automatic door locking above approx 12 mph (20 km/h) | |
| OFF | |||||||||
Mode
| Menu... | Press... | Sub-menu... | Press... | Select... | Confirm and exit | Enables you to... | |||
| M ▲ ▼ | 8 Measurement unit (Unit) | M | ▲ | Distance | M | ▲ | Km | M | Select the distance display unit. |
| ▼ | Miles | ||||||||
| ▼ | Fuel consumption | M | ▲ | km/l | Select the fuel consumption display unit. | ||||
| ▼ | I/100 km | ||||||||
| M ▲ ▼ | 9 Languages | M | ▲ | List of languages available | M | Select the display language. | |||
| ▼ | |||||||||
| M ▲ ▼ | 10 Volume of announcements (Buzz) | M | ▲ | Increase | M | Increase/decrease the volume of the announcements or of the audible warning. | |||
| ▼ | Decrease | ||||||||
| M ▲ ▼ | 11 Volume of the buttons | M | ▲ | Increase | M | Increase/decrease the volume of the buttons. | |||
| ▼ | Decrease | ||||||||
| M ▲ ▼ | 12 Service | M | ▲ | Service (Miles/km before oil change) | M | Display the miles/kilometres remaining before the next oil change. | |||
| ▼ | Oil | Displa | |||||||
| M ▲ ▼ | 13 Passenger airbag (BAG P) | M | ▲ | ON | M | ▲ | Yes | M | Activate the passenger airbag. |
| ▼ | No | ||||||||
| ▼ | OFF | ▲ | Yes | Deactivate the passenger airbag. | |||||
| ▼ | No | ||||||||
| M ▲ ▼ | 14 Exit from menu | M | Exit from the menu. Press the arrow at the bottom to go to the first menu. | ||||||
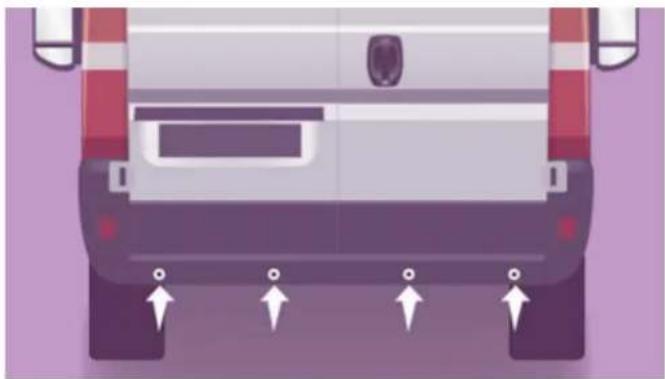
natural_image
Illustration of a car's rear suspension system with four directional arrows indicating vehicle movement (no text or symbols)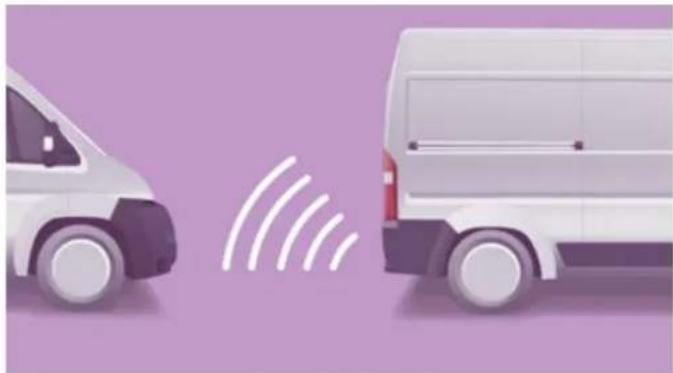
natural_image
Illustration of two white vans with sound waves between them, set against a solid purple background (no text or symbols)AUDIBLE REAR PARKING SENSORS
If fitted on your vehicle, the system consists of four proximity sensors, installed in the rear bumper.
They detect any obstacle: person, vehicle, tree, fence, behind the vehicle during the manoeuvre.
However, objects the size or thickness of which are detected at the beginning of the manoeuvre will no longer be detected at the end of the manoeuvre: blind spots between and below the sensors. Examples: stake, roadworks cone or pavement post.
Engage reverse gear
The proximity information is indicated by an audible signal of increasing frequency as the vehicle approaches the obstacle.
When the distance between the rear of the vehicle and the obstacle is less than approximately thirty centimetres, the audible signal becomes continuous.
The system cannot, in any circumstances, take the place of the vigilance and responsibility of the driver.
Stop the assistance
Change to neutral.
Malfunction

If this warning lamp comes on in the instrument panel, contact a CITROËN dealer.
If your vehicle is fitted with this screen, a message appears.
Good practice
In bad weather or in winter, ensure that the sensors are not covered with mud, ice or snow.
Reversig camera
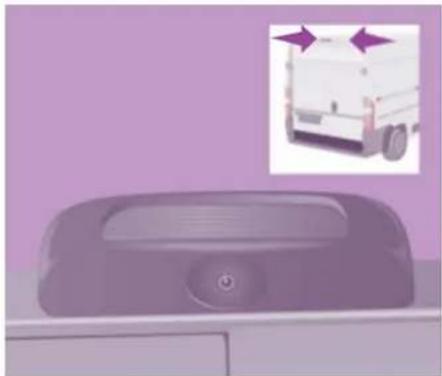
natural_image
Close-up of a car air conditioner unit with a magnified view of the front panel showing a truck (no text or symbols visible)REVERSING CAMERA
If your vehicle is fitted with this camera, it is located at the rear of the van, next to the third brake lamp.
It sends views to the screen installed in the cab. This rear vision is an aid to manoeuvring.
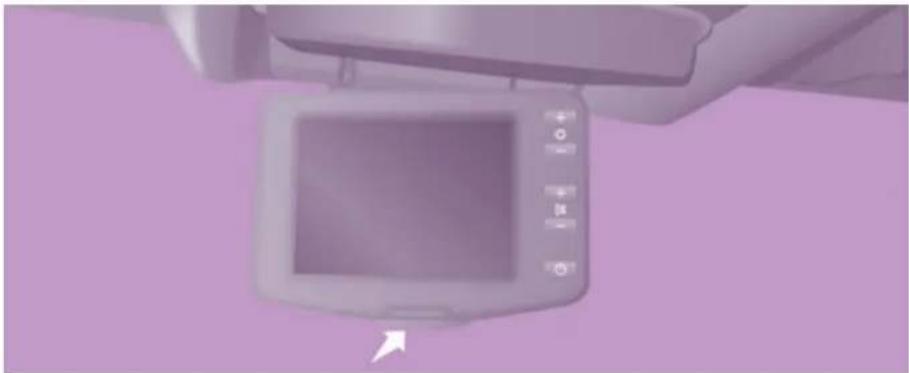
natural_image
Interior view of a modern air conditioner unit with control panel and indicator lights (no visible text or symbols)Screen
The camera sends the images to a 4 inch or 6.5 inch adjustable colour LCD which takes the place of the interior rear view mirror.
Press the button and place the screen in the required position.
Activation
With the key in the running position, unfold the screen.
The camera comes into operation when reverse gear is engaged and remains active up to approximately 9 mph (15 km/h). It is deactivated above 11 mph (18 km/h).
When a forward gear is engaged, the last image remains displayed for approximately 5 seconds then switches off.
Fold the screen.
Buttons

Brightness adjustment.

Back-lighting adjustment.

ON/OFF enables you to see rear views without engaging reverse gear.
Initial settings

With reverse gear not engaged, press and hold the ON/OFF button for approximately 3 seconds. The button flashes
twice to confirm the reinitialisation.
Alarm display on the screen
In the ON position, information in text format accompanies the manoeuvre and is displayed on the screen:
- each time reverse gear is engaged, a message appears before the first view is transmitted,
- at 11 mph (18 km/h) in reverse gear, the rear view disappears and the screen switches to "Stand by". The view appears again when the vehicle returns to a speed below 9 mph (15 km/h).
Change of language
With reverse gear not engaged, press the ON/OFF button and any other button simultaneously.
Scroll through the languages by pressing ON/OFF.
When the language has been selected, wait approximately 3 seconds for it to be stored.
Good practice
When vehicle conditions are optimum (position on the road, loading level) the maximum area of visibility covered by the camera has a field depth approximately 3 m long and 5.5 m wide.
The area of visibility may vary depending on the external weather conditions (brightness, rain, snow, fog, ...), the load in the vehicle and the position of the vehicle on the road.
Please store the screen in its housing when no longer in use.
When cleaning the camera and the screen, avoid using a detergent or a tool which may scratch the glass.
Use a non-abrasive cloth or a small brush.
Following a collision, if the screen glass has cracked and allows liquid crystal to flow out: do not touch it.
If you have come into contact with it, quickly wash the contaminated part of the body with soapy water.
Contact a CITROËN dealer to have the screen repaired.
Pneumatic suspension
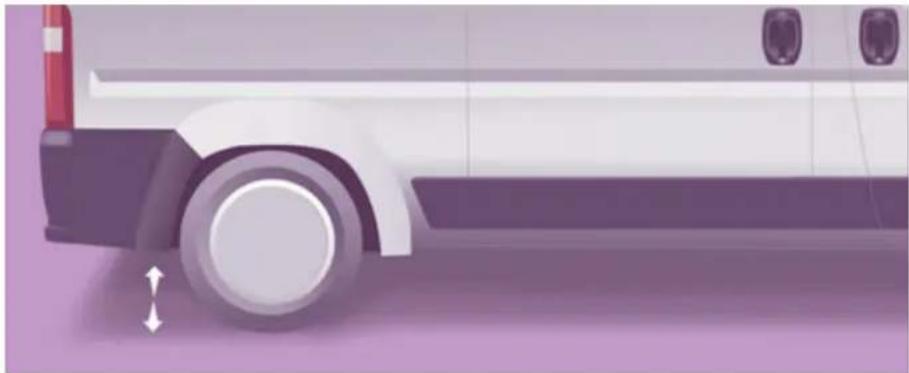
natural_image
Side profile illustration of a white car with red and black side panels, showing wheel rim and side profile (no text or symbols)PNEUMATIC SUSPENSION
If your vehicle is fitted with pneumatic suspension, you can adjust the height of the rear of the vehicle to make loading and unloading easier.
The control panel is located on the dashboard.
There is a nominal level as well as 6 height adjustment levels, raising (from +1 to +3) or lowering (from -1 to -3). Each level reached is indicated on the instrument panel screen.
Manual adjustment of the loading height
Raise: upwards adjustment of the load floor

Make a quick press on the control to select the next level up. Each press (LED on) raises the floor by one level: +1 to +3.
A long press selects the highest level (+3).
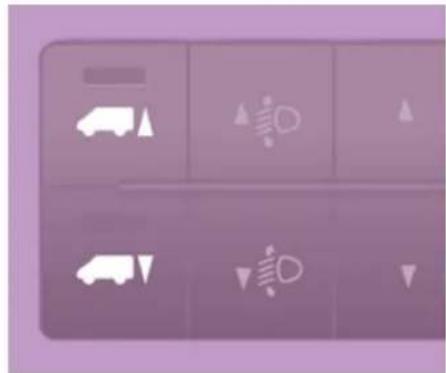
natural_image
Abstract purple background with white vehicle icons and geometric symbols (no text or labels)Lower: downwards adjustment of the load floor

Make a quick press on the control to select the next level down. Each press (LED on) lowers the floor by one level: -1 to -3.
A long press selects the lowest level (-3).
Return to the nominal floor height
Press the same number of times in reverse as the level of the position displayed.
Deactivation
Make a long press on both controls simultaneously to deactivate the system. The LEDs remain on.
Reactivation
A second long press on both controls simultaneously reactivates the system. The LEDs go off.

Above 3 mph (5 km/h), the system reactivates automatically.
Automatic correction of loading floor height
Above 12 mph (20 km/h), the system automatically returns the rear height to its nominal value.
Warning lamp

Refer to the "Instruments and controls" section of chapter 2.
Goodpractice
Driving with the suspension set too high or too low risks damaging components under the body.
The height may be adjusted automatically to take account of changes of temperature or loading.
You must avoid using this control in the following circumstances:
- when working underneath the vehicle,
- when changing a wheel,
- when the vehicle is being transported by lorry, train, ferry, boat, ...
Tachograph
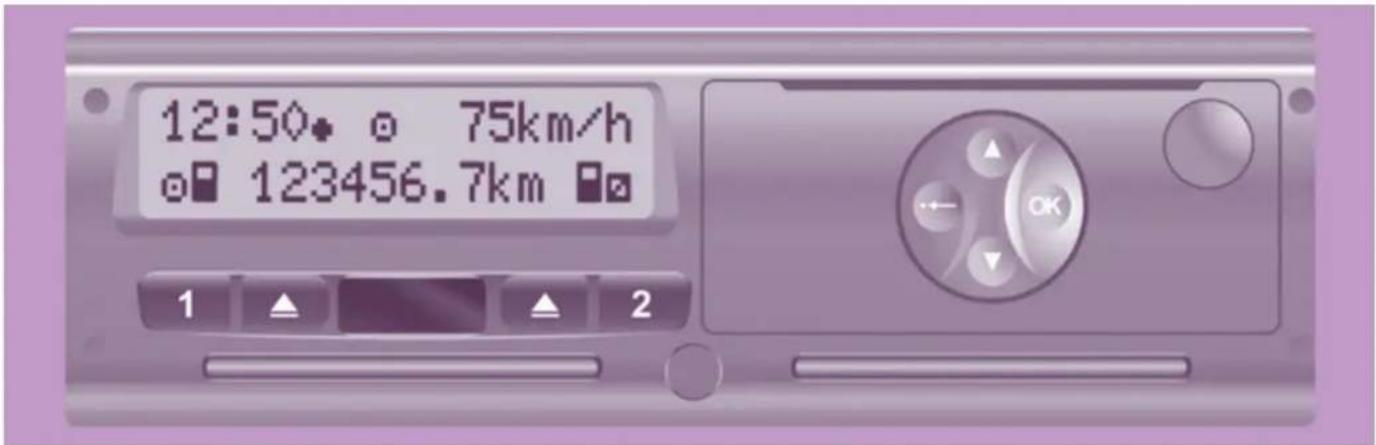
TACHOGRAPH
If your vehicle is fitted with a tachograph, this permits storing of all of the data relating to the vehicle in the unit and on a card inserted in it.
Example: at the beginning of each journey or change of team.
When the card is inserted, all of the data can be:
- displayed on the tachograph screen,
- printed,
- transferred to external storage media via an interface.
For further information, refer to the documents supplied by the manufacturer of the tachograph.
If your vehicle is fitted with a tachograph, disconnection of the negative (-) terminal of the battery (located under the floor on the left-hand side, in the cab) is recommended if the vehicle is not to be used for a period of more than 5 days.
FIRST STEPS
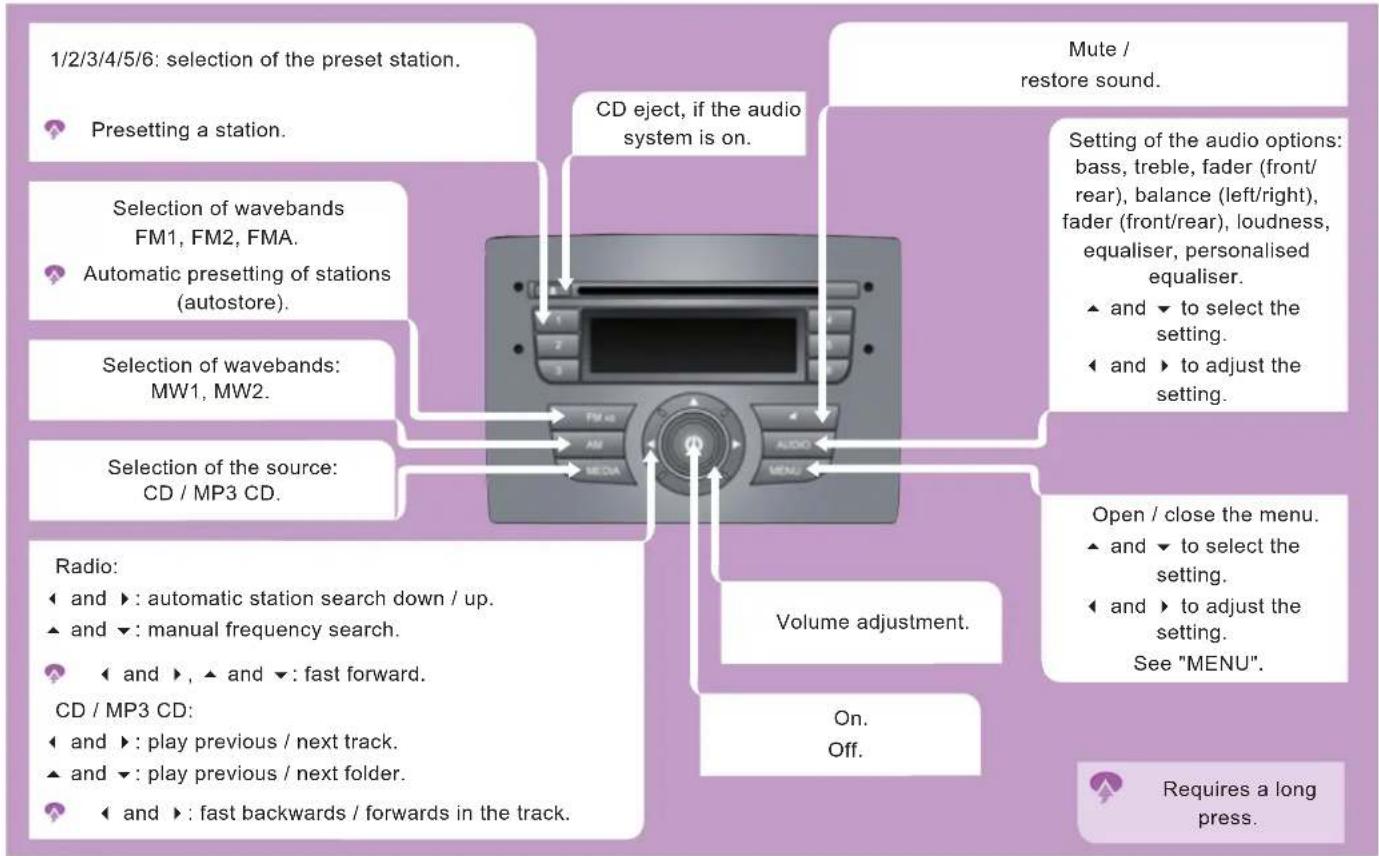
flowchart
graph TD
A["1/2/3/4/5/6: selection of the preset station."] --> B["Presetting a station."]
B --> C["Selection of wavebands FM1, FM2, FMA."]
C --> D["Automatic presetting of stations (autostore)."]
D --> E["Selection of wavebands: MW1, MW2."]
E --> F["Selection of the source: CD / MP3 CD."]
F --> G["Radio: <br> ◆ and ▶ : automatic station search down / up.<br> ▲ and ▼ : manual frequency search."]
G --> H["CD / MP3 CD: <br> ◆ and ▶ : play previous / next track.<br> ▲ and ▼ : play previous / next folder."]
H --> I["◆ and ▶ : fast backwards / forwards in the track."]
I --> J["CD eject, if the audio system is on."]
J --> K["Volume adjustment."]
K --> L["On. Off."]
L --> M["Mute / restore sound."]
M --> N["Setting of the audio options: bass, treble, fader (front/rear), balance (left/right), fader (front/rear), loudness, equaliser, personalised equaliser.<br> ▲ and ▼ to select the setting.<br> ◆ and ▶ to adjust the setting."]
N --> O["Open / close the menu.<br> ▲ and ▼ to select the setting.<br> ◆ and ▶ to adjust the setting.<br> See "MENU"."]
O --> P["Requires a long press."]
Audio equipment
STEERING MOUNTED CONTROLS
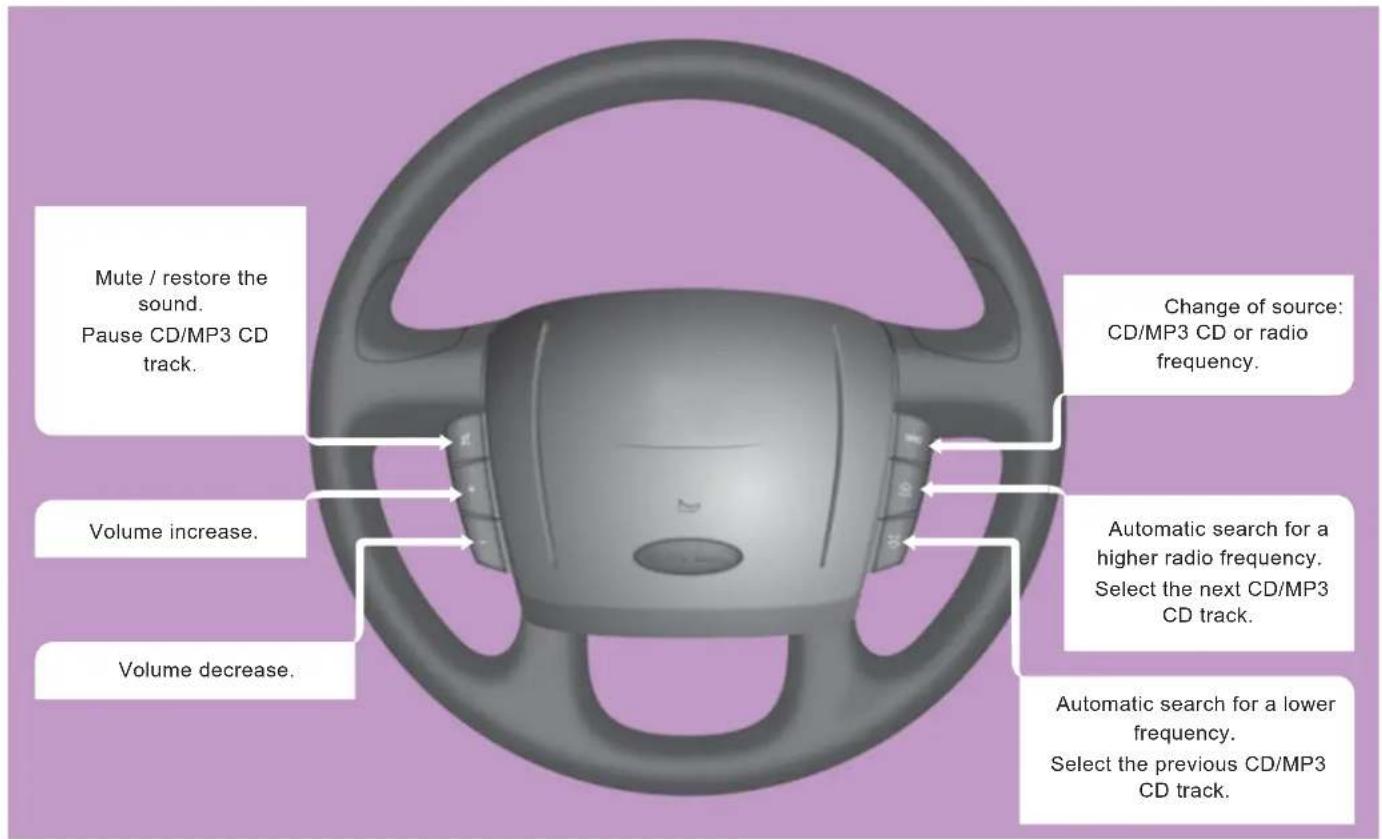
MENU
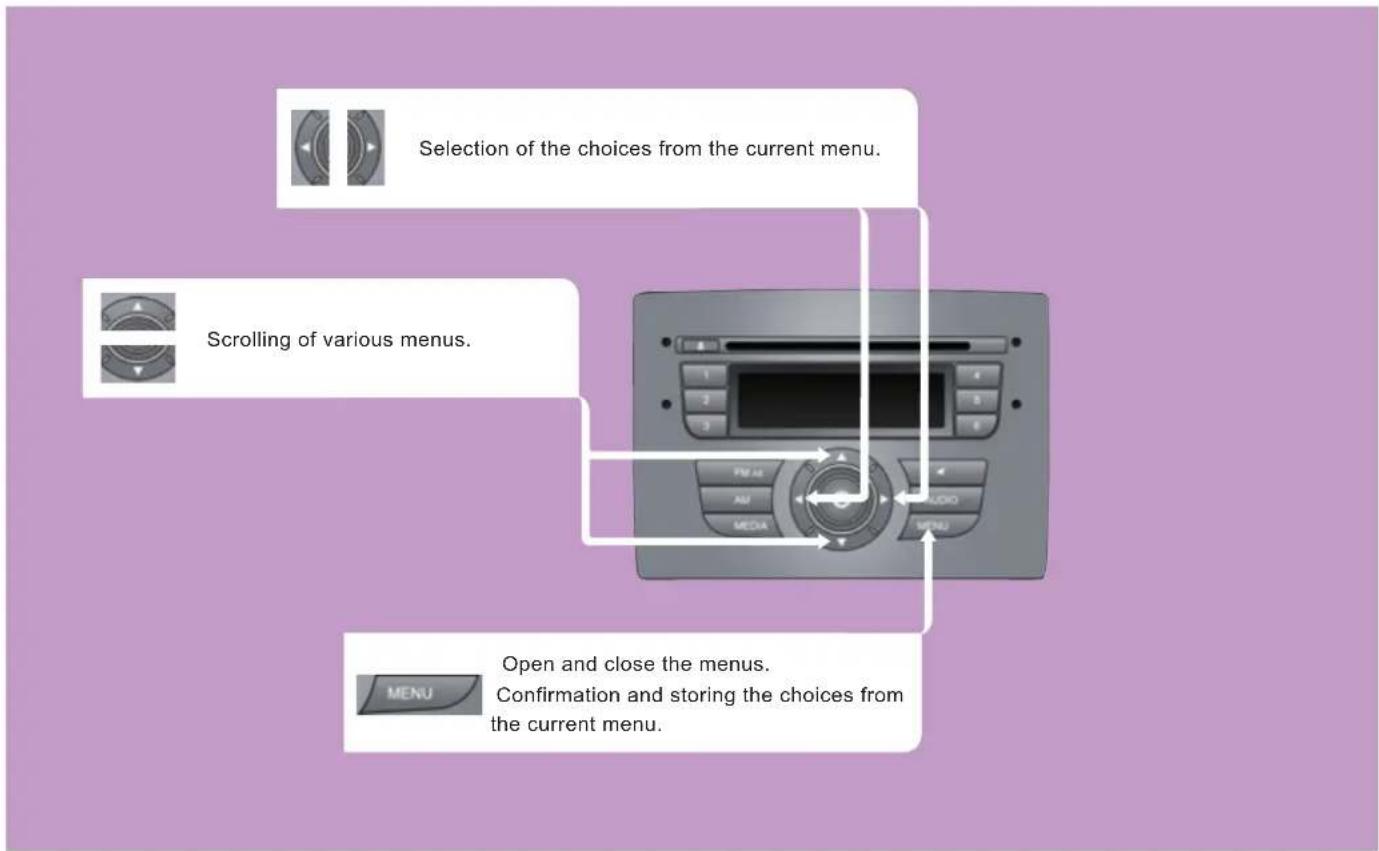
Audio equipment
| Scroll the display | Select | Display | Select | Display | Select | Display | Select | Display | Select | Display | Enables you to... |
| AF Switching On | ◀ | AF Switching Off | Set the sensitivity of automatic reception of the FM radio frequencies (tuner):- On for a search of the transmitters which have the strongest signal,- Off for a search of all of the surrounding transmitters. | ||||||||
| ▼▲ | |||||||||||
| Traffic Information Off | ◀ | Traffic Information On | Receive traffic information from FM1, FM2, FMA radio stations.TA is displayed if On is selected. | ||||||||
| ▼▲ | |||||||||||
| Regional mode Off | ◀ | Regional mode On | Select the reception of local or regional programmes (different from one region to another):- Off for no programmes,- On for local programmes. | ||||||||
| ▼▲ | |||||||||||
| MP3 display (if there is an MP3 CD in the player) | ◀ | Title | ◀ | Author | ◀ | Album | ◀ | Folder name | ◀ | File name | Select the type of MP3 display for the current track (if ID3 TAG available for the CD):- Title for the title of the track,- Author for the name of the artist,- ALBUM for the title of the album,- Folder name for the name of the directory (folder) for the current track,- File name for the name of the file. |
| ▼▲ | |||||||||||
Audio equipment
| Scroll the display | Select | Display | Select | Display | Select | Display | Select | Display | Enables you to... |
| Speed volume Off | ◀◀ | Speed volume Low | ◀◀ | Speed volume High | Select the automatic control of the volume in relation to the vehicle speed:- Off.- Low for on (low sensitivity),- High for on (high sensitivity), | ||||
| ▼▲ | |||||||||
| Radio on vol - Limit on | ◀◀ | Radio on vol - Limit off | Select the initial volume setting:Limit on:- if the volume equal to or greater than the maximum value, the volume will be at maximum,- if the volume is between the maximum and minimum values, the volume will be that memorised when switching off,- if the volume is equal to or lower than the minimum value, the volume will be at minimum.Limit off:- the volume is memorised when switching off.Choose a volume setting between 1 and 40. | ||||||
| ▼▲ | |||||||||
| EXT Audio off | ◀◀ | EXT Audio Volume 23 | Choose the volume setting for an external telephone:- Off for mute,- 23 by default. Select a volume level between 1 and 40. | ||||||
| ▼▲ | |||||||||
Audio equipment
| Scroll the display | Select | Display | Select | Display | Select | Display | Select | Display | Enables you to... |
| Radio off | 00 MIN | 20 MIN | Set the audio system play time after switching off the engine:- 00 MIN to switch off immediately,- 20 MIN to play for 20 minutes.Place the key in the "MAR" running position to switch the audio system back on. | ||||||
| ▼▲ | |||||||||
| System reset NO | YES | Restore factory settings.- NO to not restore factory settings,- YES to restore factory settings, "Resetting" is displayed. | |||||||
| ▼▲ | |||||||||
RADIO
SELECTING A STATION
Press the AM or FM button and then select a waveband from: MW1 and MW2 or FM1, FM2 and FMA.
To select the radio function, make a short press on the AM or FM button.

Briefly press one of these buttons to carry out an automatic search of the radio stations.

Press one of these buttons to carry out a manual search of the radio stations.
STORING A STATION - MANUALLY

After selecting a frequency, press one of these buttons (for more than 2 seconds) to store the frequency. Storing is confirmed by an audible beep.
STORING A STATION - AUTOMATICALLY

Press the FM AS * button (for more than 2 seconds) until the audible signal is heard.

The radio searches for and stores the 6 stations with the strong signal (in decreasing signal strength order) in the waveband.
A long press on the button updates the selection.
Audio equipment
CD - MP3 CD
PLAY ACD
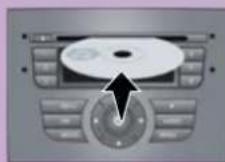
Insert circular compact discs only. Some anti-pirating systems, on original discs or CDs copied using a personal recorder, may cause faults which are no reflection on the quality of the original player.
Insert a CD or an MP3 CD in the player, play begins automatically.
1

If the player already contains a disc, switch on the audio equipment and press the MEDIA source button briefly. The last track played begins.
2
Press one of the buttons to select a track on the CD. Press and hold one of the buttons for fast forwards or backwards.
3

Press this button to pause play. Press again to resume play.

MP3

The MP3 format, an abbreviation of MPEG 1.2 & 2.5 Audio Layer 3, is an audio compression standard which permits the recording of several tens of music files on a single disc.
In order to be able to play a recorded CDR or CDRW, when recording it is preferable to select standards ISO 9660 level 1.2 or Joliet. If the disc is recorded in another format, it may not be played correctly.
It is recommended that the same recording standard is always used for an individual disc, with as low a speed as possible (4x maximum) for optimum sound quality. In the particular case of a multi-session CD, the Joliet standard is recommended.
The audio equipment will only play files with the extension ".mp3" with a sampling rate of 22.05 KHz or 44.1 KHz. No other type of file (.wma, .mp4, m3u...) can be played.
It is advisable to restrict file names to 20 characters without using special characters (e.g.: () " " ? ; , space) to avoid any playing or displaying problems.
SECRET CODE
When you switch on the audio system, you may have to enter a code for access to its functions.
In this cases, the message "Radio Code" is displayed in the screen, followed by 4 dashes.
The 4-number code should be entered using the buttons 1 to 6. You have 20 seconds to enter the code.
If the wrong code is entered, the audio system gives an audible signal and the message message "Radio blocked/wait" is displayed. You should then start the procedure again.
Each time an incorrect code is entered, the waiting time before the code can be entered again increases progressively (1 minute, 2 minutes, 4 minutes, 8 minutes, 16 minutes, 30 minutes, 1 hour, 2 hours, 4 hours, 8 hours, 16 hours, 24 hours).

Keep your code in a safe place, never inside the vehicle.
TELEPHONE PRE-EQUIPMENT
If the hands-free kit is fitted to your vehicle, you can use the audio system and the steering mounted controls to manage your telephone calls.
During an incoming call, the audio system is deactivated, and the message "PHONE" is displayed.
The volume can be adjusted and stored via the " EXTERNAL AUDIO " menu.
BLUETOOTH HANDS-FREE SYSTEM
INTRODUCTION
This system allows you to:
- send and receive calls via the Bluetooth connection with your mobile telephone,
- display the names of your contacts and numbers from the directory of your mobile phone in the instrument panel screen,
- use voice commands to make a call and manage your contacts while keeping both hands on the steering wheel,
- hear your text messages via the voice synthesiser built into the system,
- listen to MP3, WMA, AAC, M4A, MP4 and WAV audio files from a USB storage device,
- display information on the track being played in the radio screen (title, artist, etc...),
- control vocally a portable music player (iPod type).
- recharge your portable music player (iPod type) via the USB port.

The language of the Bluetooth system adapts automatically by detecting the language set on your telephone.
Bluetooth hands-free system
PRESENTATION
Description of the steering mounted controls
Display of the menus and directories of the files being played (USB storage device).
USB connection port. Remove the plastic cover to connect your portable player.

Pause/resume the file being played (portable player).

Adjustment of the volume of the functions: hands-free, audio and text message player, voice announcements.

- Scroll the menu options.
- Select the files to be played (portable player).
- Scroll the list of text messages.

- Activate the main menu.
- Confirm the current menu option.
- Accept the incoming call.
- Switch one telephone conversation to another.
- Select a visual message.
- Reject an incoming telephone call.
- End the current telephone call.

- Confirm the current menu option.
- Transfer he telephone conversation from the hands-free system to the mobile telephone and vice versa.
- Select the audio source.
- Select the text displayed.

- Deactivate voice recognition.
- Interrupt the voice message.
- Exit from the main menu.
- Exit from a sub-menu and return to the previous menu option.
- Exit without storing
- Deactivate/reactivate the microphone during a telephone conversation.
- Set the volume of the incoming call ring to zero.

- Activate voice recognition.
- Interrupt the voice message in order to issue a new voice command.
- Repeat the last voice message.
PRESENTATION
Description of voice commands

By pressing this button and saying "Help", you have access to the list of voice commands available at any time or by saying "Help" after a system message.

You can access the main menu of the system via the voice command by pressing this button.
The main voice commands for navigating in the menu are the following:
| LAST CALLS | HENRY BRIDGES | |||
| OK | CHRISTOPHER ANDREW | |||
| 123456789 | ||||
| PHONEBOOK | HENRY BRIDGES | |||
| OK | CHRISTOPHER ANDREW | |||
| 123456789 | ||||
| MESS. READER READ LAST | ||||
| IN BOX OK VIS+ACOUST | ||||
| DELETE ALL VIS. SIGNAL | ||||
| OK | SIGNAL TYPE READER OFF | |||
| MEDIA PLAYER | USB OPTION* | OK | PLAY ANYTHING | |
| OK | SET USB | FOLDERS** | ||
| ARTISTS | ||||
| GENRES | ||||
| ALBMUS | ||||
| PLAYLISTS | ||||
| OK | TRACK PLAY | |||
| SHUFFLE | ||||
| TRACK LOOP | ||||
| SETTINGS | OK | USER DATA | OK | COPY PHONEBOOK |
| PAIRING | DELETE USERS | |||
| ADVANCED OPTIONS | DELETE PHONEBOOK | |||
| EXIT | DELETE ALL | |||
| ADD CONTACTS | ||||
* If the system is activated.
** Not available on iPod®.
MOBILE TELEPHONE WITH HANDS-FREE FUNCTION
Pairing a mobile telephone
Pairing consists of setting your vehicle's Bluetooth® system to recognise your mobile telephone.
For this you must activate the Bluetooth® function of your telephone and set its visibility.

With the ignition on, activate the main menu.
Select SETTINGS.
Confirm.
Select PAIRING.
Confirm.
"Settings"\wait for a response\ "Pairing".
PIN
This number, which permits recognition of your mobile telephone, is generated randomly by the system.
It is communicated by the instrument panel screen and is repeated verbally by the system.
This PIN is independent of your SIM card and your mobile's access code.
Once your handset has been paired, there is no need to keep a record of this number.
If you change your mobile telephone, you must repeat the pairing procedure as you will be given a new PIN.

Look for the option which displays the Bluetooth ^® system detected by your telephone.

When the system has been identified, a message appears in your telephone (My car, ...).
When prompted by the telephone, enter the PIN displayed in the instrument panel. If the pairing has been successful, the system announces "Connecting".
The name of the telephone identified appears in the instrument panel screen, pairing is confirmed.
i Pressing MAIN or ESC during the pairing phase may cancel the procedure.
If the pairing fails, an error message will appear; in this case, repeat the procedure.
Downloading your phonebook
There are 2 options:
1 - Following the pairing procedure, the system suggests downloading your telephone's phonebook.
Pressing confirms your agreement.

"Yes" starts the download.

Pressing declines this download.

"No" declines.
2 - You can download the phonebook later via the menu:

Activate the main menu.

Select SETTINGS then USER DATA then PHONEBOOK.


"Settings" "User data" "Download phonebook".
Calling a contact recorded in the phonebook
Your telephone's phonebook must first be downloaded into the system.

Activate the main menu.

Select PHONEBOOK.

Confirm.

Select the group with which the person to be contacted is associated.

Confirm.

Select the name.
Confirm to make the call, if the person has only one number.
Bluetooth hands-free system

"Call [Name of the person]"\ wait until the information relating to the person (name, tel. n°, ...) appears\ "Yes" to make the call or "No" to cancel.
If the person has more than one number:

Select the number.

Confirm to make the call.

Specify "Home" or "Work", or "Next" or "Previous". Press OK to make the call.
Bluetooth hands-free system
Making a call by dialling a number By means of the voice commands only


"Dial / Dial a number"\ Say the number character by character (+, #, *), digit by digit (0 to 9).
The system displays and verbally repeats the number recognised.

"Call" if the number is correct. or "Cancel" to cancel dialling of the number. "Start over" to delete and start dialling another number. "Repeat" to hear the number again.
Ending a call

Press and hold.

Incoming call
If the person is recorded in the phonebook, his name is displayed.

Press to accept the call.
Press and hold to decline the call.


Press to ignore the call, however, the call is stored in the log of incoming calls.

During a call, if a second incoming call is received.

Press to switch the conversation and place the other person on hold.
Transferring an active call
There are 2 options:
1 - From the mobile telephone to the hands-free system
With the ignition on, the recognition connection between the mobile telephone and the vehicle's audio equipment is done automatically.
Confirm this recognition using the keypad on the mobile telephone.
The call can then be transferred.
2 - From the hands-free system to the mobile telephone

Press, the system's controls are still active.
Placing a call on hold

Press to deactivate the microphone and place your contact on hold.

Press again to resume the conversation.
Bluetooth hands-free system
Call list
This enables you to call the number of one of the last 10 calls received, of one of the last 10 people called or of one of the last 5 missed calls.
Activate the main menu.

Select CALL LIST.
Confirm.

Select the number to be called.
Confirm.

"Callback" for the last person who called you, or
"Redial" for the last person you called.
"Yes" or "No" to confirm/cancel.
The "Redial" button can also be used.
The system will again ask "Redial or callback?".

"Callback" to call back the last person who called you.
"Redial" to redial the last person you called.
Bluetooth hands-free system
VOICE COMMANDS
Settings/pairing


The key words which can be recognised by the system are organised into three levels (levels 1, 2 and 3).
When you say a level 1 command, the system makes the level 2 commands available; when you say a level 2 command, the system makes the level 3 commands available.
| Level 1 | Level 2 | Level 3 | Actions |
| SettingsAdjustConfigure | Activation of the hands-free system SETTINGS menu. | ||
| User data | Activation of the USER DATA menu. | ||
| Delete users Deletion of the data recorded for all of the users. | |||
| Delete contacts / Delete directory / Delete numbers | Deletion of the phone book data. | ||
| Copy phone book / Copy phonebook / Copy numbers | Transfer of the phone books from your mobile telephone to the hands-free system (available according to the type of mobile telephone). | ||
| Add Contacts | Transfer of the names from your mobile telephone to the hands-free system (available according to the type of mobile). | ||
| Delete all | Deletion of the pairing data and of the phone books / contacts of all of the telephones paired, with restoration of the default settings of the hands-free system. | ||
| Pairing / Pair / Pair the user | Activation of the pairing procedure for a new mobile telephone. | ||
| Advanced options Activation of the ADVANCED OPTIONS menu. | |||
VOICE COMMANDS
Mobile telephone with hands-free function


The key words which can be recognised by the system are organised into three levels (levels 1, 2 and 3).
When you say a level 1 command, the system makes the level 2 commands available; when you say a level 2 command, the system makes the level 3 commands available.
| Level 1 | Level 2 | Level 3 | Actions |
| Dial / Dial a number | One, Two, ..., Plus, Star, Hash | Call / Dial | Entering the digits or symbols to dial the telephone number. |
| Delete / Correct Deletion of the last group of digits entered. | |||
| Start over | Deletion of all of the groups of digits entered with the option of entering a new number. | ||
| Repeat | Repeating the telephone number entered and recognised by the hands-free system. | ||
| Cancel | Cancellation of dialling of the | ||
| Sending the call to the number entered verbally. | |||
| Call | Yes / No Call to the name of the person, stored in the system's phone book. | ||
| Mobile | Call to the name of the person with personalisation if there are several numbers stored in the system. | ||
| Home | |||
| Work / Office | |||
| Redial | Call | ||
| Callback | Call to | ||
Bluetooth hands-free system
TEXT READER
Only on mobile telephones with this function
If your mobile telephone includes this function, every time a text message is received, the system produces an audible signal and offers to read the text message vocally.
Read an incoming text message

To read the text received.

"Yes" starts the playback of the text received.

To save a message and read it later.

"No" to save the message and read it later.
Read the last text received

Activate the main menu.
Select MESS. READER.
Confirm.
Select READ LAST.
Confirm.


"Read last" starts playback of the last text message received.
List of text messages
The system can hold around 20 text messages. If the list is full, reception of a new text message causes the deletion of the oldest text message.
To go to a specific text message:

Activate the main menu.
Select MESS. READER.
Confirm.
Select IN BOX.
Confirm.
Select the desired text message.
Confirm to read the text message.
"Message reader" then after the audible signal "message received". "Previous" or "Next" moves through the list of text messages. "Read" starts reading of the text message selected.
Managing text messages
During reading of the message:
Activate the main menu.
Choose the desired option.

"Read" starts reading of the message. "Erase" deletes the message. "Call" allows you to contact the sender of the message.
Deleting all text messages
Activate the main menu.
Select DELETE ALL.
Confirm.
The system asks you to confirm your choice:
Confirm to delete.
To cancel.

"Message reader" then after the audible signal "Delete all".
The system requests confirmation, reply with: "Yes" to confirm or "No" to cancel.

Information settings

Activate the main menu.
Select MESS. READER.
Confirm.
Select SIGNAL TYPE.
Confirm to select from the 3 choices available:
- Audio + visual: the system signals the receipt of a message audibly and visibly and offers to read it.
- Visual only: reception of a message is signalled visibly in the instrument panel.
- Off: the text message reader is deactivated.
"Message reader" then after the audible signal "Signal type". The system lists the options, select between: "Reader deactivated", "Audio and visual info" or "Visual info only".
Bluetooth hands-free system
Bluetooth hands-free system
VOICE COMMANDS
Message reader


The key words which can be recognised by the system are organised into three levels (levels 1, 2 and 3).
When you say a level 1 command, the system makes the level 2 commands available; when you say a level 2 command, the system makes the level 3 commands available.
| Level 1 | Level 2 | Level 3 | Actions |
| Message reader Messages | Activation of the MESS. READER menu. | ||
| Messages received / Received | Activation of the list of text messages received. | ||
| Read/ read again Reads the text message selected in the list. | |||
| Call | Deletion of the phone book data. | ||
| Delete | Transfer of the phone books from your mobile telephone to the hands-free system (available according to the type of mobile). | ||
| Back / Next / Next Go to the next text message in the list | |||
| Back / Previous Go to the previous test message in the list. | |||
| Read last / read last message / read message | Read the last text message received. | ||
| Delete all / Delete messages / Delete | Delete all text messages in the list after confirmation. | ||
Bluetooth hands-free system
| Level 1 | Level 2 | Level 3 | Actions |
| Read messages / Messages | Type of info / Info | Activation of the MESS. READER menu. | |
| Deactivation of the info settings function. | |||
| Deactivate reader / Reader not active / Reader off | |||
| Visual and audible info / Visual and audible / Visual plus audible / Audible | |||
| Visual info only / Only visual / Visual | |||
Bluetooth hands-free system
PORTABLE AUDIO DEVICE PLAYER
Audio tracks in .mp3, .wma, .wav format and playlists with the extension .wpl are recognised by the system.
USB port
Connect the device to the USB port directly or using an appropriate cable (not provided).
Ignition on:
- activates the recognition connection and automatically starts the playlist,
- or activates automatic play if the system is programmed to autoplay.

Otherwise, select the track to be played via the menu.
Autoplay
Activate the main menu.

Select SETTINGS then MEDIA PLAYER then TRACK PLAY.
Confirm.

Select READER or READER OFF.
Confirm.
Selecting tracks
Activate the main menu.
Select MEDIA PLAYER.

Confirm.

Choose one of the selection modes: FOLDERS, ARTISTS, GENRES, ALBUMS, PLAYLISTS, SHUFFLE (random play of tracks in the playlist).

"Media player", then "USB options" and finally choose "Folders", "Artists", ...


The PLAY ALL function enables you to listen to the entire content of a tion mode (folders, artists, ...).
Confirm.
Select the file.
Start play.
Displaying the fi le information
This function is only available by voice command.
3) "Track info".
Bluetooth hands-free system
Previous track

Pressing:
- within 3 seconds following the start of play enables you to play the previous track.
- after 3 seconds enables you to listen to the current track again.
"Previous".
Next fi le

Press to play the next file.
3) "Next".
Pausing/resuming play

Pressing suspends or resumes play.
"Stop" to interrupt playback. "Play" to continue playback.
The voice function "Play" is only available if playback has been previously interrupted by the "Stop" command.
Changing the sound source
Press to select the audio source (Radio, CD, Media player).
Bluetooth hands-free system
VOICE COMMANDS
Portable audio device


The key words which can be recognised by the system are organised into three levels (levels 1, 2 and 3).
When you say a level 1 command, the system makes the level 2 commands available; when you say a level 2 command, the system makes the level 3 commands available.
| Level 1 | Actions |
| Player / Multimedia player / Media player Activation of the MEDIA PLAYER menu. | |
| Play / Play the track / Play the multimedia file Activation of play. | |
| Stop / Stop the track / Stop the multimedia file | Interruption of playing of the current file. |
| Next / Next track Go to the next menu or file. | |
| Previous / Previous track / Back Go to the previous menu or file. | |
| Shuffle on / Random play on Activation of playing of the files in random order. | |
| Shuffle off / Random play off Deactivation of playing of the files in random order. | |
| Track repeat on / Repeat on / Repeat Activation of playing of the files in a loop. | |
| Track repeat off / Repeat off Deactivation of playing of the files in a loop. | |
| Now playing / Track information / What is playing / What is this? | Display of the information for the file currently being played. |
| USB media settings / USB settings Activation of the MEDIA PLAYER menu. | |
| Activate automatic play | Activation of automatic play on connection of a portable device. |
| Deactivate automatic play | Deactivation of automatic play on connection of a portable device. |
| Shuffle / Any / Random | Activation of play of all tracks in random order |
Bluetooth hands-free system
Level 1
Level 2
Level 3
Actions
Activation of the MEDIA PLAYER menu.
Advanced USB options / Other options Activation of playback options.
Folder / Explore
folders / Consult list of folders
Activation of FOLDERS menu.
Player / Multimedia player / Media player / Player
Artists / List of artists
Activation of ARTISTS menu.
Genres / List of genres
Activation of GENRES menu.
Album / List of albums
Activation of ALBUMS menu.
Playlist / List of tracks
Activation of PLAYLISTS menu.
Drivig safely
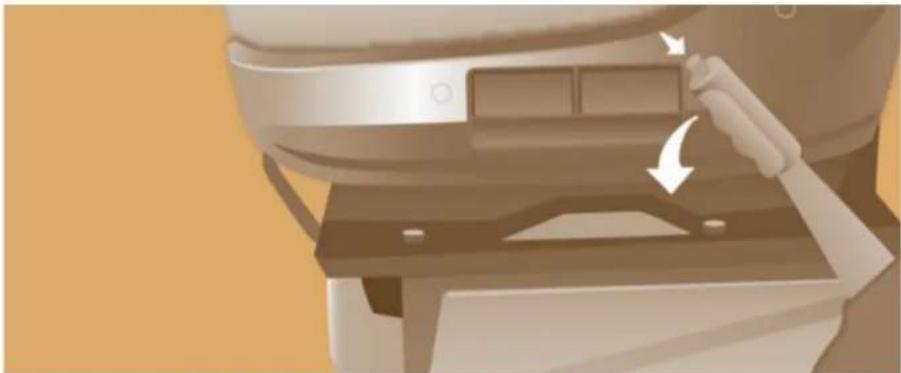
natural_image
Illustration of a robotic device with a handle and control panel, showing motion arrows (no text or symbols)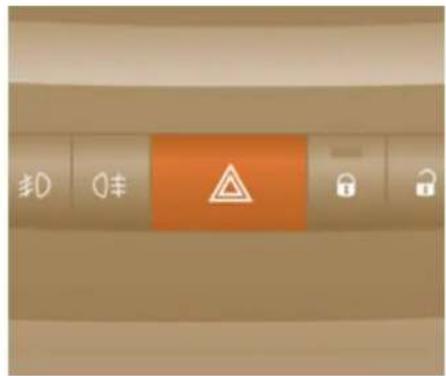
DRIVING SAFELY
PARKING BRAKE HAZARD WARNING LAMP Pull on the parking brake lever, only with the vehicle stationary.
S
Applying
Pull the parking brake lever up to immobilise your vehicle.
Check that the parking brake is applied firmly before leaving the vehicle.

If the parking brake is still on or has not been released properly, this is indicated by this warning lamp which comes on on the instrument panel.
When parking on a slope, direct your wheels towards the pavement and pull the parking brake lever up.
There is no advantage in engaging a gear after parking the vehicle, particularly if the vehicle is loaded.
In the exceptional case of use of the parking brake when the vehicle is moving, apply the brake by pulling gently to avoid locking the rear wheels (risk of skidding).
Releasing
Pull the lever and press the button to lower the parking brake lever.
Press this button, the direction indicators flash.
They can operate with the ignition off. The hazard warning lamps should only be used in dangerous situations, when stopping in an emergency or when driving in unusual conditions.
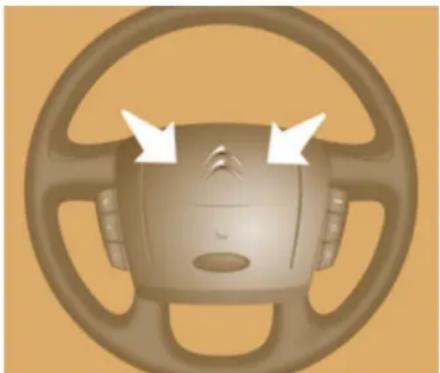
natural_image
Interior view of a car steering wheel with white arrows pointing to the dashboard (no text or symbols)HORN
Press the centre of the steering wheel.
Drivig safely
ANTI-LOCK BRAKING SYSTEM (ABS - EBFD)
The ABS and EBFD (electronic brake force distribution) systems improve the stability and manoeuvrability of your vehicle on braking, in particular on poor or slippery surfaces.
The ABS prevents locking of the wheels, the EBFD provides full control of the braking pressure wheel by wheel.

If this warning lamp comes on, it indicates a malfunction of the ABS which could result in a loss of control of the vehicle on braking.

If this warning lamp comes on, together with the brake warning lamp, it indicates a malfunction of the electronic brake force distribution which could result in a loss of control of the vehicle on braking.
Stop immediately.
In both cases, contact a CITROËN dealer.
Good practice
The anti-lock braking system comes into operation automatically when there is a risk of wheel lock. It does not reduce the braking distance.
On very slippery surfaces (ice, oil, etc...) the ABS may increase the braking distance. When braking in an emergency, do not hesitate to press the brake pedal firmly, without releasing the pressure, even on a slippery surface, you will then be able to continue to steer the vehicle to avoid an obstacle.
Normal operation of the ABS may be felt by slight vibration of the brake pedal.
When changing wheels (tyres and rims), ensure that these are approved.
In an emergency, this system enables the optimum braking pressure to be reached more quickly, press the pedal firmly without releasing it.
It is triggered by the speed at which the brake pedal is activated.
This alters the resistance of the brake pedal under your foot.
To prolong the operation of the emergency braking assistance system: keep your foot on the brake pedal.
Drivig safely
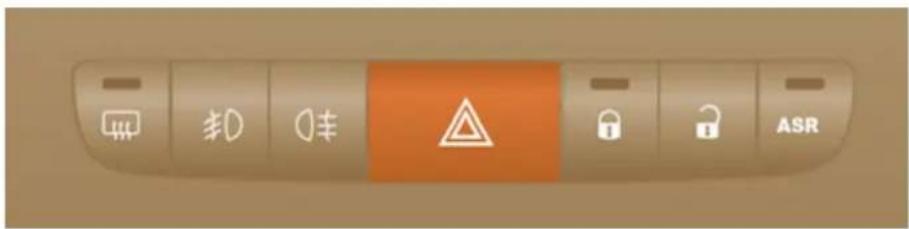
ANTI-SLIP REGULATION(ASR) AND ELECTRONIC STABILITY PROGRAMME (ESP)
These systems are linked and complement the ABS.
The ASR system is very useful for maintaining optimum drive and avoiding losses of control of the vehicle on acceleration.
The system optimises drive to prevent the wheels skidding, by acting on the brakes of the drive wheels and on the engine. It also allows the directional stability of the vehicle to be improved on acceleration.
Use the ESP to hold your course without attempting to countersteer.
If there is a variation between the trajectory followed by the vehicle and that required by the driver, the ESP system automatically acts on the engine and the brake of one or more wheels, in order to put the vehicle back on course.
Operation of the ASR and ESP systems
The LED flashes when the ASR or ESP is triggered.
Deactivating the ASR system
In certain exceptional conditions (when starting a vehicle stuck in mud or snow, or on loose ground...), it could prove useful to deactivate the ASR system to make the wheels spin and regain grip.
Press this button.

The LED on the button comes
on: the ASR system no longer acts on the engine operation, but continues to act on the brakes.
Operating fault

When a malfunction of the ASR system occurs, this warning lamp comes on, accompanied by an audible signal and confirmed by a message on the screen.

When a malfunction of the ESP system occurs, this warning lamp comes on, accompanied by an audible signal and confirmed by a message on the screen.
Contact a CITROËN dealer to have the system checked.
Good practice
The ASR/ESP systems offer increased safety during normal driving, but should not incite the driver to take risks or to drive at high speed.
The operation of these systems is ensured if the recommendations of the manufacturer regarding the wheels (tyres and rims), the braking components, the electronic components and the fitting and repair procedures within the CITROËN network are observed.
After an impact, have these systems checked by a CITROËN dealer.
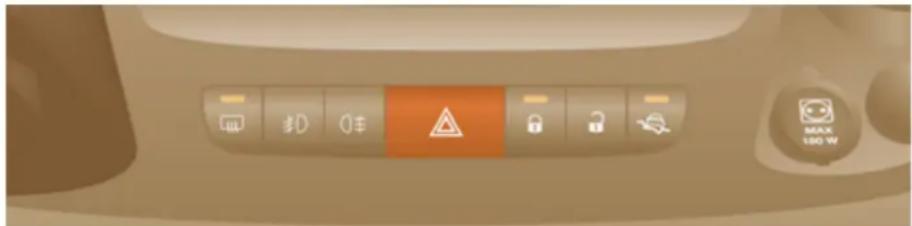
Intelligent Traction Control
System to improve traction on slippery surfaces (snow, black ice, mud...)
This system checks for situations of difficult surface adhesion that could make it difficult to move off or make progress.
In these situations, Intelligent Traction
Control takes over from the ASR system, by transferring drive to the wheel with the best grip on the ground to provide the best traction and trajectory control.
Activation
On starting the vehicle, the system is deactivated.
Press the button, located on the dashboard, to activate the system; the warning lamp in the button comes on.
The system is active up to about 18 mph (30 km/h).
Once the speed exceed 18 mph (30 km/h, the system is deactivated automatically, but the warning lamp in the button comes on.
The system is reactivated automatically as soon as the speed drops below 18 mph (30 km/h).
Drivig safely
Deactivation
Press the button, located on the dashboard, to deactivate the system; the warning lamp in the button goes off and the ASR system is active again.
Operating fault

This warning lamp comes on in the instrument panel if there is a fault with the system.
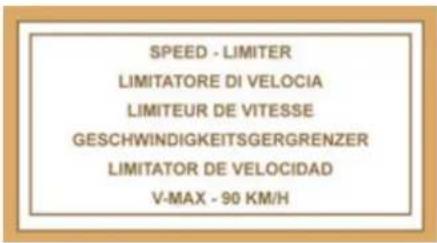
FIXED SPEED LIMITER
If your vehicle is fitted with this function, the speed of your vehicle can be limited to a fixed speed of approximately 55 mph (90 km/h) or 60 mph (100 km/h). This maximum speed cannot be changed.
A label in the passenger compartment indicates this maximum speed.
The fixed speed limiter is not a function of the cruise control type. It cannot be activated or deactivated by the driver while driving.
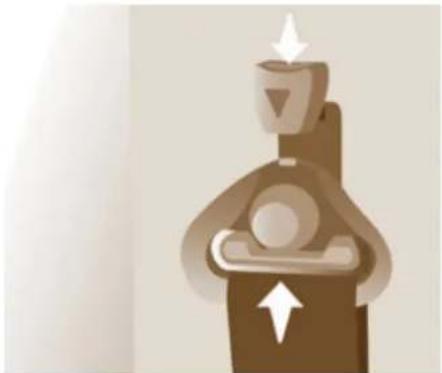
natural_image
Illustration of a stylized object resembling a device or device with a cup and arrow, no text or symbols present.SEAT BELTS
CAB SEAT BELTS
The front seats are fitted with pre-tensioners and force limiters.
The bench rear seat is fitted with two seat belts.
If you install a bench seat after handover, it must be fitted with seat belts.
Height adjustment
Squeeze the control with the return and slide the assembly on the driver's seat side and on the side passenger seat side.
The height of the seat belt associated with the centre seat cannot be adjusted.
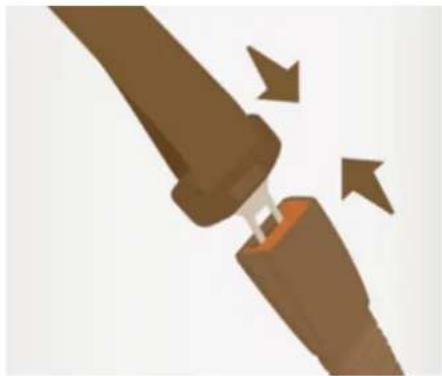
natural_image
Illustration of a brown car seatbelt with directional arrows indicating movement (no text or symbols)Fastening
Pull the strap in front of you, with an even movement, ensuring that it does not twist. Secure the buckle in its housing.
Check that the seat belt is fastened securely and that the automatic locking system is operating correctly by pulling the strap rapidly.
Unfastening
Press the "red" button on the buckle housing, the seat belt rolls up automatically but you are advised to guide it.

As a safety precaution, these operations should not be carried out while the vehicle is moving.

Driver's seat belt not fastened warning lamp
When the vehicle is started, this warning lamp comes on if the driver has not fastened their seat belt.
CREW CAB
Each rear seat is fitted with a three-point inertia reel seat belt.
Use the seat belt to restrain one person only per seat.

If the driver's seat belt is unfastened, START mode of Stop & Start will not be fixed. Engine restarting is only possible the ignition key.
REAR SEAT BELTS
The seats/bench seats are fitted with three-point seat belts and inertia reels.
The centre seat has a seat belt guide and inertia reel, solid with the seat back.
Seat belts
Good practice
The driver must ensure that passengers use the seat belts correctly and that they are all strapped in securely before moving off.
Wherever you are seated in the vehicle, always fasten your seat belt, even for short journeys.
The seat belts are fitted with an inertia reel which automatically adjusts the length of the strap to your size.
Do not use accessories (clothes pegs, clips, safety pins, etc.) which permit a clearance with the seat belt straps.
Ensure that the seat belt has reeled in correctly after use.
After folding or moving a seat or a rear bench seat, ensure that the seat belt has reeled in correctly and that the buckle is ready to accommodate the tongue.
Depending on the nature and seriousness of any impact, the pretensioning device may be triggered before and independently of inflation of the airbags. It instantly tightens the seat belts against the body of the occupants.
Triggering of the pretensioners is accompanied by a slight discharge of harmless smoke and a noise, due to the activation of the pyrotechnic cartridge incorporated in the system.
The force limiter reduces the pressure of the seat belt against the body of the occupants.
The pretensioning seat belts are active when the ignition is switched on.
The inertia reels are fitted with a device which automatically locks the strap in the event of a collision or emergency braking or if the vehicle rolls over.
You can unfasten the seat belt by pressing the red button on the buckle. Guide the seat belt after unfastening.

The airbag warning lamp comes on if the pretensioners are triggered. Consult a CITROËN dealer.
In order to be effective, a seat belt must:
- restrain one person only,
- must not be twisted, check by pulling in front of you with an even movement,
- be tightened as close to the body as possible.
The upper part of the seat belt should be positioned in the hollow of the shoulder.
The lap part should be placed as low as possible on the pelvis.
Do not invert the seat belt buckles as they will not fulfil their role completely.
If the seats are fitted with armrests, the lap part of the seat belt should always pass under the armrest.
Check that the seat belt is fastened correctly by pulling the strap firmly.
Recommendations for children:
- use a suitable child seat if the passenger is less than 12 years old or shorter than one metre fifty,
- never allow a child to travel on your lap, even with the seat belt fastened.

For more information on child seats, refer to the "Child safety" section of chapter 5.
Your CITROËN dealer can ensure that all work or any checks, from testing to maintenance on your seat belt equipment meets current regulations.
Have the seat belts checked regularly (even after a minor impact) by a CITROËN dealer: they must not show any signs of wear, cutting or fraying and they must not be converted or modified.

Clean the seat belt straps with soapy water or a textile cleaning product, sold by CITROËN dealers.
Improved safety and security
natural_image
Illustration of a van with a thought bubble icon and a no-drawn bus symbol (no text or labels)IMPROVED SAFETY AND SECURITY
IMPACT RESISTANCE
Your vehicle has been designed to limit the forces on the passenger compartment as much as possible in the event of a collision, the engine compartment adopts a progressive deformation structure and the front doors have been reinforced to contribute to the rigidity of the whole.
ANTI-THEFT PROTECTION
Your vehicle, in the van version, comprises two zones with separate locking: the cab and the load space.
Depending on the way in which it is used, this function provides increased protection both for your personal belongings and for your merchandise.
An exterior protection alarm with anti-tilt detection is available (as standard or as an option) in certain countries.

Details of these functions are given in part 2.
Airbgs
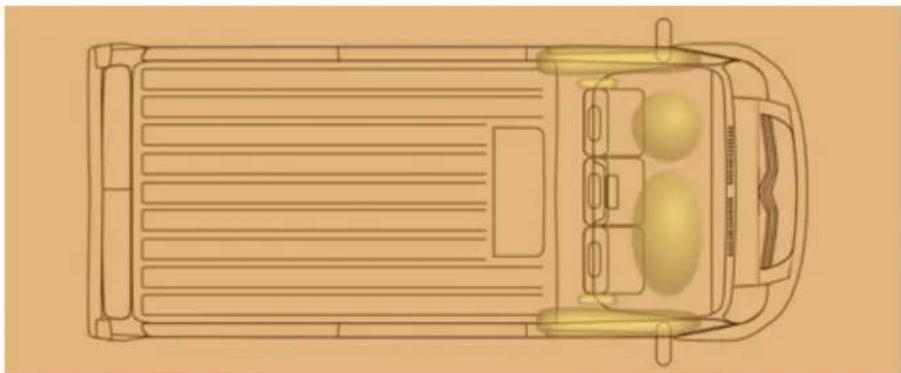
natural_image
Top-down architectural sketch of a vehicle showing front, rear, and side views (no text or symbols)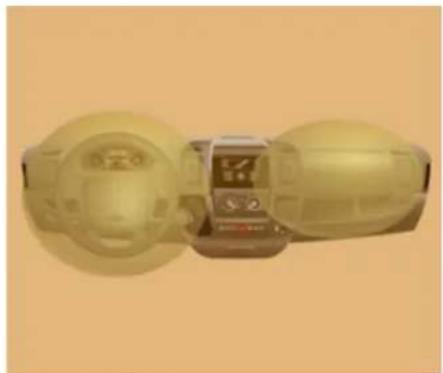
natural_image
Two transparent circular devices with a digital display showing 'S 2' and 'Z', placed on a plain background (no text or symbols visible)AIRBAGS
The airbags have been designed to optimise the safety of the occupants in the event of a serious collision; they work in conjunction with the force limiting seat belts.
In the event of a serious collision, electronic detectors record and analyse any abrupt deceleration of the vehicle:
- in the event of a serious collision, the airbags are deployed instantly and contribute towards better protection of occupants of the vehicle; immediately after the impact, the airbags rapidly deflate so as to not hinder visibility or the possible exit by the occupants,
- in the event of a less serious impact, an impact to the rear and in certain conditions of rollover, the airbags are not
deployed; the seat belts alone contribute towards providing protection in these situations.
Airbags only operate when the ignition is switched on.
Deployment of the airbags is accompanied by a slight discharge of smoke and a noise, resulting from the activation of the pyrotechnic charge included in the system.
This smoke is not harmful but may be an irritant to sensitive persons.
The noise of the detonation may result in a slight loss of hearing for a short time.
Front airbgs
These are fitted in the centre of the steering wheel for the driver and in the dashboard for the front passenger. They are deployed simultaneously, except in cases where the passenger airbag has been deactivated.
Front airbg fault

If this warning lamp comes on, contact a CITROËN dealer to have the system checked.
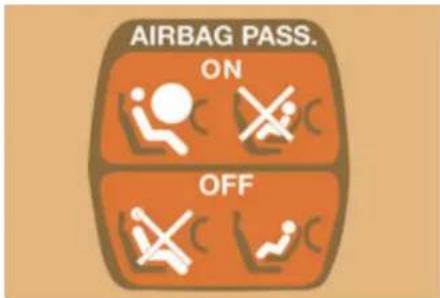
Deactivating the passenger airbag

Refer to the "MODE" section of chapter 4, then on the "Passenger g" menu, select OFF.

The airbag warning lamp on the instrument panel remains on while the passenger airbag is deactivated.
To ensure the safety of your child, it is essential to deactivate the passenger airbag when you install a rear-facing child seat on the front passenger seat. Otherwise, the child would risk being killed or seriously injured if the airbag were to inflate. If your vehicle is not fitted with this equipment: do not install a rear-facing child seat.
When OFF is selected, the passenger airbag will not be triggered in the event of an impact. As soon as the child seat is removed, select ON to re-activate the airbag and thus ensure the safety of your passenger in the event of an impact.
Deactivation check

This is confirmed by lighting of this warning lamp each time the engine is started.
If your vehicle is fitted with this screen, the check is accompanied by a message.
Airbags
Lateral airbags and curtain airbags
If your vehicle is fitted with lateral airbags, these are fitted to the front seat backs on the door side.
The curtain airbags are fitted to the door pillars and the upper part of the passenger compartment, in the roof over the front cab seats.
They inflate between the occupant and the glass.
They are deployed independently of each other depending on which side the collision occurs.
Operating check

Confirmed by this indicator lamp.
Airbgs
Good practice
If your vehicle is fitted with front, lateral and curtain airbags, in order for these to be fully effective, observe the following safety rules:
Wear a correctly adjusted seat belt.
Sit in a normal upright position.
Do not leave anything between the occupants and the airbags (child, animal, object...).
This could hamper the operation of the airbags or injure the occupants.
All work on the airbag systems is strictly prohibited unless it is carried out by qualified personnel of the CITROËN network.
After an accident or if the vehicle has been stolen or broken into, have the airbag systems checked.
Front airbags
Do not drive holding the steering wheel by its spokes or resting your hands on the centre part of the wheel.
Passengers must not place their feet on the dashboard.
Smoke as little as possible; deployment of the airbags can cause burns or the risk of injury from a cigarette or pipe.
Never remove or pierce the steering wheel or hit it violently.
Lateral airbags
Only put approved covers on the front seats. Consult a CITROËN dealer.
Do not fix or attach anything to the front seat backs. This could cause injury to the chest or arms when the lateral airbag is deployed.
Do not sit with the upper part of the body any nearer to the door than necessary.
Curtain airbgs
Do not fix or attach anything to the pillars or the roof. This could cause injury to the head when the curtain airbag is deployed.
Do not remove the bolts from the grab handles installed on the roof, they play a part in securing the curtain airbags.
Child safety
GENERAL POINTS RELATING TO CHILD SEATS
Although one of CITROËN's main criteria when designing your vehicle, the safety of your children also depends on you.
For maximum safety, please follow these precautions:
- all children under the age of 12 or less than one metre fifty tall must travel in approved child seats suited to their weight, on seats fitted with a seat belt or ISOFIX mountings.
- statistically, the safest seats in your vehicle for carrying children are the rear seats,
- a child weighing less than 9 kg must travel in the "rearwards-facing" position both in the front and in the rear,
- the passenger must not travel with a child on their lap.
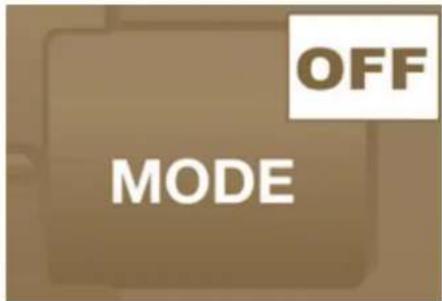
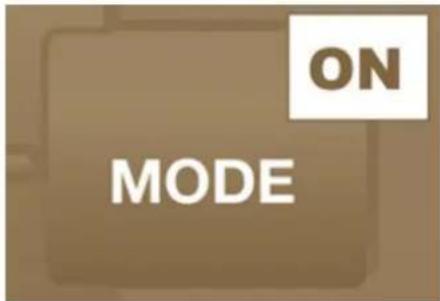
INSTALLING A CHILD SEAT USING A THREE POINT SEAT BELT

"Rearwards-facing"
Recommended on the rear seats up to the age of 2.
When a "rearwards-facing" child seat is installed on the front passenger seat, it is essential that the passenger airbag is deactivated. Otherwise, the child would risk being seriously injured or killed if the airbag were to inflate.

"Forwards-facing"
Recommended on the rear seats over the age of 2.
When a "forwards-facing" child
seat is installed on the front passenger seat, leave the passenger airbag activated.
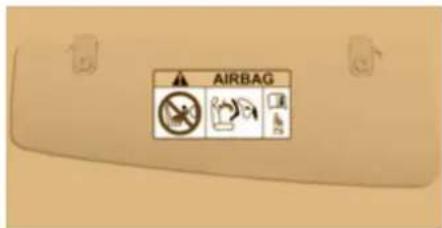
Child safety
The child seats function and the passenger airbag deactivation function are common to the entire CITROËN range. If the passenger air bag is not deactivated, the installation of a "rearwards-facing" child seat in the front is strictly prohibited.

Refer to chapter 5, "Airbags" section.
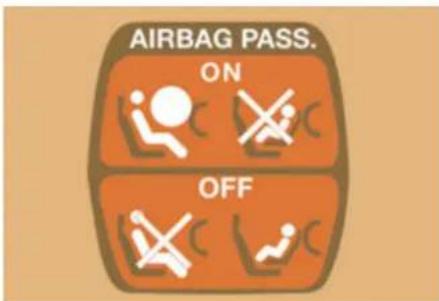
Passenger airbag OFF
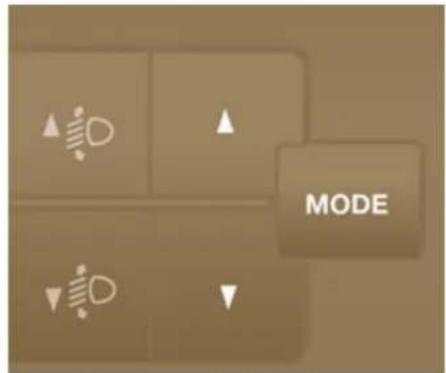
If your vehicle is fitted with this function, the passenger airbag must be deactivated using the trip computer MODE button.
The rules for carrying children are specific to each country. Consult the current legislation in your country.
Please consult the list of seats approved in your country. The Isofix mountings, the rear seats, the passenger airbag and the deactivation of this airbag depend on the version sold.
Child safety
Label present on both sides of the passenger's sun visor
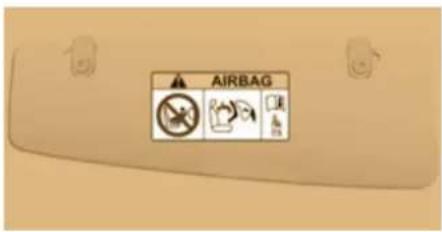
| AR | لا يجب ayında تركيب ظظام لاجلاس الع PLC لويع باتجاء الوراء على مقد سبارة مJEZ BOUASDA AMAN HOYANIA AUSANA MCTO, فкт يويدي هاإلى التسب بويت ع WWAL OAO BIJASATI. |
| BG | НИКОГА НЕ инсталирайте детско столче на седалка с АКТИВИРАНА предна ВЗДУШHA ВЗГЛАВНЦА. Това можеда причини СМБРТ ИЛИ СЕРИОЗНО НАРАНЯВАНЕ на детето. |
| CS | NIKDY neumisl'ujte dětské zádržné zařizení orientované směrem dozadu na sedadlo chráněné AKTIVOVANÝM čelním AIRBAGEM. Hrozí nebezpeči SMRTI DÍTÉTE nebo VÁZNÉHO ZRANÉNÍ. |
| DA | Brug aldrig en bagudvendt barnestol på et sæde der er beskyttet af en aktiv airbag. Død eller alvorlig skade på barnet kan forekomme. |
| DE | Verwenden Sie NIEMALS einen Kindersitz oder Babyschale gegen die Fahrtrichtung bei AKTIVIERTEM Airbag, TOD oder ERNSTHAFTE VERLETZUNGEN können die Folge sein. |
| EL | Mn χρησιμοποιείτε ΠOTE παιδικό κάθισμα με την πλάτη του προς το εμπρός μέρος του autokivnýτου, σε μια θέση που προστατεύεται από METΩΠΙΚΟ αερόσακο που είναι ENERΓΟΣ. Autó μπορεί να έχει σαν συνέπεια το ΘΑΝΑΤΟ ή το ΣΟΒΑΡΟ ΤΡΑΥΜΑΤΙΣΜΟ του ΠΑΙΔΙΟΥ |
| EN | NEVER use a rearward facing child restraint on a seat protected by an ACTIVE AIRBAG in front of it, DEATH or SERIOUS INJURY to the CHILD can occur |
| ES | NO INSTALAR NUNCA EL SISTEMA DE RETENCIÓN PARA NIÑOS DE ESPALDAS AL SENTIDO DE LA CIRCULACIÓN SOBRE UN ASIENTO PROTEGIDO CON UN COJÍN INFLABLE FRONTAL ( AIRBAG ) ACTIVADO. ESTO PUEDE CAUSAR LA MUERTE DEL BEBE O HERIRLO GRAVEMENTE. |
| ET | Ärge kasutage kunagi lapse turvatooli seljaga söidusuunas söiduki istmel mis on kaitstud AKTIVEERITUD TURVAPADJAGA. See võib põhjustada lapsele RASKEID VIGASTUSI või SURMA. |
| FI | ÄLÄ KOSKAAN aseta lapsen turvaistuinta selkä ajosuntaan istuimelle, jonka edessä suojana on käyttöön aktivoitu TURVATYYNY. Sen laukeaminen voi aiheuttaa LAPSEN KUOLEMAN tai VAKAVAN LOUKKAANTUMISEN. |
| FR | NE JAMAIS installer de système de retenue pour enfants faisant face vers l'arrière sur un siège protégé par un COUSSIN GONFLABLE frontal ACTIVÉ.Cela peut provoquer la MORT de l'ENFANT ou le BLESSER GRAVEMENT |
Child safety
| HR | NIKADA ne postavljati dječju sjedalicu leđima u smjeru vožnje na sjedalo zaštićeno UKLJUČENIM prednjim ZRAČNIM JASTUKOM. To bi moglo uzrokovati SMRT ili TEŠKU OZLJEDU djeteta. |
| HU | SOHA ne használjon menetiránynak háttal beszerelt gyermekülést olyan ülésen, amely AKTIVÁLT ÁLLAPOTÚ (BEKAPCSOLT) FRONTLÉGZSÁKKAL van védve. Ez a gyermek halálat vagy súlyos sérülését okozhalja. |
| IT | NON installare MAI seggiolini per bambini posizionati in senso contrario a quello di marcia su un sedile protetto da un AIRBAG frontale ATTIVATO. Ció potrebbe provocare la MORTE o FERITE GRAVI al bambino. |
| LT | NIEKADA nejrenkite vaiko prilaikymo priemonės su atgal atgrežtu vaiku ant sédynės, kuri saugoma VEIKIANČIOS priekinės ORO PAGALVĖS. Išsiskleidus oro pagalvei vaikas gali būti MIRTÍNĂI arba SUNKIAI TRAUMUOTAS. |
| LV | NAV PIEŁAUJAMS uzstādīt uz aizmuguri vērstu bērnu sēdeklīti priekšējā pasažiera vietā, kurā ir AKTIVIZĖTS priekšējais DROŠĪBAS GAISA SPILVENS.Tas var izraisīt BĒRNA NĂVI vai radīt NOPIETNUS IEVAINOJUMUS. |
| MT | Qatt m'ghandek thalli tifel/tifla marbut f'siggu dahru lejn l-Airbag attiva, ghaliex tista’ tikkawza korriment serju jew anke mewt lit-tifel/tifla |
| NL | Plaats NOOIT een kinderzitje met de rug in de rijrichting op een zitplaats waarvan de AIRBAG is INGESCHAKELD. Bij het afgaan van de airbag kan het KIND ERNSTIG OF DOĐELIJK GEWOND raken. |
| NO | Installer ALDRI et barnesete med ryggen mot kjøreretningen i et sete som er beskyttet med en frontal AKTIVERT KOLLISJONSPUTE, BARNET risikerer á bli DREPT eller HARDT SKADET. |
| PL | NIGDY nie instalować fotelika dziecięcego w pozycji «tyłem do kierunku jazdy»na siedzeniu wyposażonym w CZOŁOWA PODUŚZKĘ POWIETRZNĄ w stanie AKTYWNYM.W przeciwnym razie dziecko narażone będzie na ŚMIERC lub BARDZO POWAŻNE OBRAŻENIA CIAŁA w momenicie wyzwolenia poduszki powietrznej |
| PT | NUNCA instale um sistema de retenção para criaņcas de costas para a estrada, num banco protegido por um AIRBAG frontal ACTIVADO. Esta instalação poderá provocar FERIMENTOS GRAVES ou a MORTE da CRIANÇA. |
| RO | Nu instalati NICIODATA un sistem de retinere pentru copii, dispus cu spatele in directia de mers, pe un loc din vehicul protejat cu AIRBAG frontal ACTIVAT. Aceasta ar putea provoca MOARTEA COPILULUI sau RANIREA lui GRAVA. |
| RU | BO BCEX СЛУЧАЯХ ЗАПРЕЩАЕТСЯ использовать обращенное назад детское удерживающее устройство на сиденье, защищенном ФУНКЦИОНИРУЮЩЕЙ ПОДУШКОЙ БЕЗОПАСНОСТИ, установленной перед этим сиденьем.Это может привести к ГИБЕЛИ РЕБЕНКА или НАНЕСЕНИЮ ЕМУ СЕРЬЕЗНЫХ ТЕЛЕСНЫХ ПОВРЕЖДЕНИЙ |
| SK | NIKDY nepoužívajte na prednom sedadle chránenom AKTÍVNYM AIRBAGOM detské zadržiavacie zariadenie umiestnenė v proti smere jazdy. Môže to spôsobit’ SMRT, alebo VĂŽNE ZRANENIE DIETATA. |
| SL | NIKOLI ne nameščajte otroškega sedeža s hrbtom v smeri vožnje, će je VARNOSTNA BLAZINA pred sprednjim sopotnikovim sedežem AKTIVIRANA. Takšna namestitev lahko povzroči SMRT OTROKA ali HUDE POŠKODBE. |
| SR | NIKADA ne koristite dečje sedište koje se okreće unazad na sedištu zaštićenim AKTIVNIM VAZDUŠNIM JASTUKOM ispred njega, jer mogu nastupiti SMRT ili OZBILJNA POVREDA DETETA. |
| SV | Använd ALDRIG en bakātvänd barnstol i ett säte skyddat av en AKTIV AIRBAG framför det. Det kan orsaka ALLVARLIGA eller DŐDLIGA skador på barnet. |
| TR | KESÍNLKLE HAVA YASTIĞI AKTÍF olan ön koltuğa yüzü arkaya dönük bir çocuk koltuğu yerleştirmeyiniz. Bu ÇOCUĞUN ÖLMESİNE veya ÇOK AĞIR YARALANMASINA sebep olabilir. |
Child safety
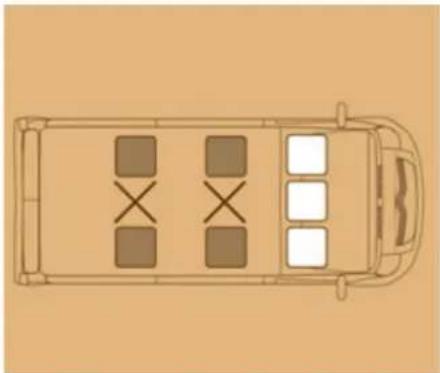
natural_image
Top-down architectural sketch of a vehicle with four windows and a cross symbol on the side (no text or labels)
"ISOFIX" MOUNTINGS
Your vehicle has been approved in accordance with the new ISOFIX regulation.
If fitted on your vehicle, the regulation ISOFIX mountings are located by labels.

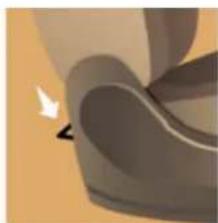
natural_image
Close-up of a mechanical component with a highlighted section and arrow (no visible text or symbols)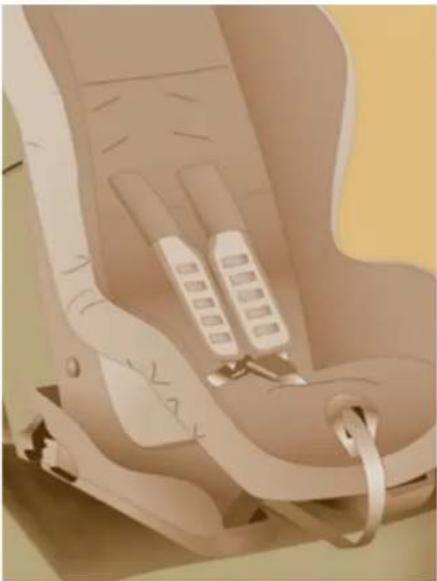
natural_image
Close-up of a baby car seat with attached straps and rings (no visible text or symbols)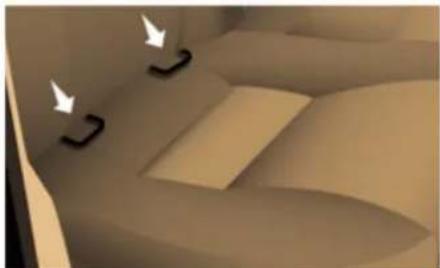
natural_image
Abstract 3D surface with curved and angular features, no visible text or symbolsThe mountings comprise three rings for each seat:
- two front rings, located between the vehicle seat back and cushion, indicated by a label,
- a rear ring, for securing the upper strap referred to as the TOP TETHER, indicated by another label.
This ISOFIX mounting system provides fast, reliable and safe fitting of the child seat in your vehicle.
The ISOFIX child seats are fitted with two latches which are secured easily on the two front rings.
Some also have an upper strap which is attached to the rear ring.
To attach this strap, raise the vehicle seat's head restraint then pass the hook between its rods. Then fix the hook on the rear ring and tighten the upper strap.
The incorrect installation of a child seat in a vehicle compromises the child's protection in the event of an accident.
For information regarding the ISOFIX child seats which can be installed in your vehicle, consult the summary table for the location of the ISOFIX child seats.
Child safety
LOCATIONS FOR THE INSTALLATION OF ISOFIX CHILD SEATS
In accordance with European regulations, this table indicates the options for the installation of ISOFIX child seats on the vehicle seats fitted with ISOFIX mountings.
In the case of the universal and semi-universal ISOFIX child seats, the child seat's ISOFIX size category, determined by a letter from A to G, is indicated on the child seat next to the ISOFIX logo.
| Less than 10 kg (group 0) Up to 6 months approx | Less than 10 kg (group 0) Less than 13 kg (group 0+) Up to 1 year approx | From 9 to 18 kg (group 1) From 1 to 3 years approx | |||||||
| Type of ISOFIX child seat | Infant car seat | "rearward facing" | "forward facing" | ||||||
| ISOFIX size category | F | G | C | D | E | C | D | A | B1 |
| Row 2 outer rear seats with individual seats in Row 1 | IUF | IUF | IUF | ||||||
| Row 2 outer rear seats with 2-seat bench in Row 1 | IUF | X | IUF | X | IUF | ||||
IUF: Seat suitable for the installation of an ISOFIX child seat of the universal category. "Forward facing" ISOFIX child seats fitted with an upper strap secured to the upper ring of the vehicle seats equipped with ISOFIX mountings.
X: Seat not suitable for the installation of an ISOFIX seat of the size category indicated.
INSTALLING CHILD SEATS ATTACHED USING THE SEAT BELT
In accordance with the European regulation, this table indicates the options for installing child seats secured using a seat belt and universally approved in accordance with the weight of the child and the seat in the vehicle.
| Seat | Weight of the child and indicative age | ||||
| Under 13 kg(groups 0 (a) and 0+)Up to approx 1 year | From 9 to 18 kg(group 1)1 to 3 years approx | From 15 to 25 kg(group 2)3 to 6 years approx | From 22 to 36 kg(group 3)6 to 10 years approx | ||
| Front passenger seat (b) |  | U | U | U | U |
| Front passenger bench seat with centre and outer seat (b) |  | U | U | U | U |
| Outer seats in rows 2 and 3 |  | U | U | U | U |
| Centre seat in rows 2 and 3 |  | U | U | U | U |
a : Group 0: from birth to 10 kg.
b: consult the legislation in force in your country before installing your child on this seat.
U: seat suitable for the installation of a child seat secured using a seat belt and universally approved, "rear facing" and/or "forward facing".
Child safety
ADVICE ON CHILD SEATS
The incorrect installation of a child seat in a vehicle compromises the child's protection in the event of an accident.
Remember to fasten the seat belts or the child seat harnesses keeping the slack in relation to the child's body to a minimum, even for short journeys.
For optimum installation of the "forward facing" child seat, ensure that the back of the child seat is in contact with the back of the vehicle's seat and that the head restraint does not cause any discomfort.
If the head restraint has to be removed, ensure that it is stored or attached securely to prevent it from being thrown around the vehicle in the event of sharp braking.
Children under the age of 10 must not travel in the "forward facing" position on the front passenger seat, unless the rear seats are already occupied by other children, cannot be used or are absent.
Deactivate the passenger's airbag when a "rear facing" child seat is installed on the front seat.
Otherwise, the child would risk being seriously injured or killed if the airbag were to inflate.
As a safety precaution, do not leave:
- one or more children alone and unsupervised in a vehicle,
- a child or an animal in a vehicle which is exposed to the sun, with the windows closed,
- the keys within reach of children inside the vehicle.
To prevent accidental opening of the doors, use the "Child Lock".
Take care not to open the rear windows by more than one third.
To protect young children from the rays of the sun, fit side blinds to the rear windows.
Installing a booster seat
The chest part of the seat belt must be positioned on the child's shoulder without touching the neck.
Ensure that the lap part of the seat belt passes correctly over the child's thighs.
CITROËN recommends the use of a booster seat which has a back, fitted with a seat belt guide at shoulder level.
Crew cab
Do not install child seats, booster cushions or carrycots on the rear seats of the cab.
Towing a trailer
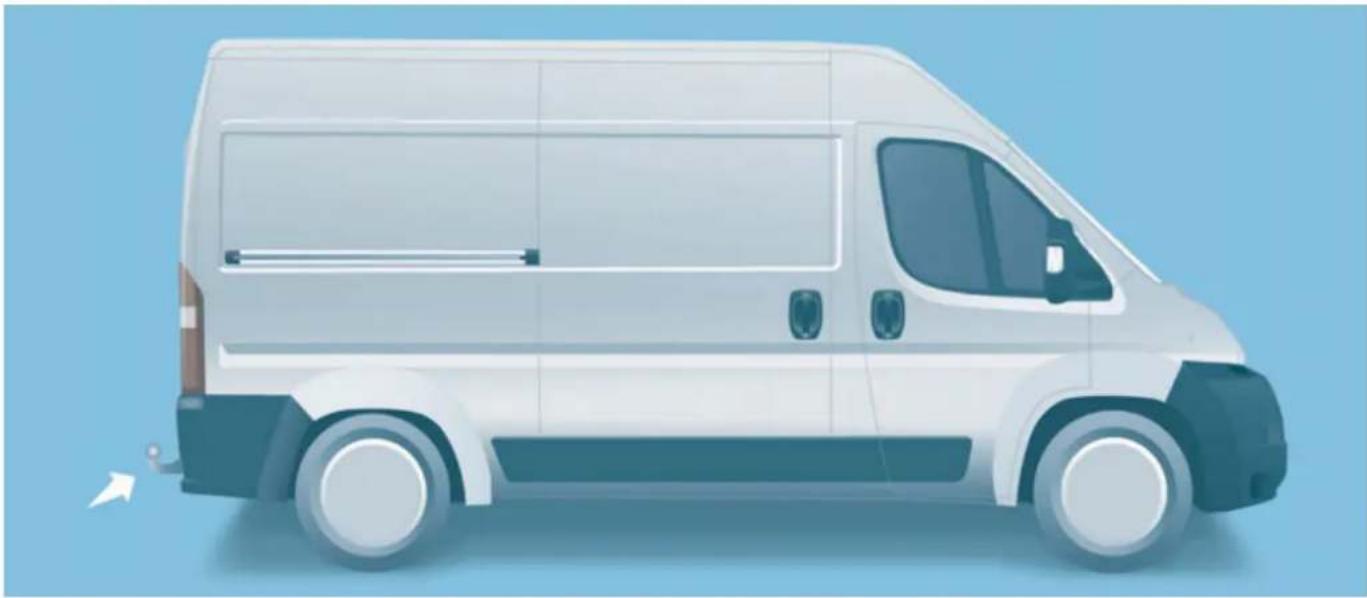
natural_image
Side profile illustration of a white delivery van with blue accents against a light blue background (no text or symbols)TOWING A TRAILER, CARAVAN, BOAT, ETC...
For more information about weights, refer to the administrative documents (V5 registration document, ...)
Driving advice
A towed vehicle must free wheel: gearbox in neutral.
Distribution of loads: distribute the load in the trailer so that the heaviest objects are as close as possible to the axle and the nose weight is close to the maximum authorised without, however, exceeding it.
Towig a trailer
Cooling: towing a trailer on a slope increases the coolant temperature.
As the fan is electrically controlled, its cooling capacity is not dependent on the engine speed.
On the contrary, use a high gear to lower the engine speed and reduce your speed.
In all cases, pay attention to the coolant temperature.
Goodpractice
In certain cases of particularly arduous use (towing the maximum load up a steep slope in high temperatures), the engine automatically limits its power. In this case, the automatic cutting off of the air conditioning allows the engine power to be recovered.

If the coolant temperature warning lamp comes on, stop the vehicle and switch off the engine as soon as possible.

See the "Levels" section of chapter 7.
+ Tyres: check the tyre pressures of the towing vehicle (see the "Identification markings" section of chapter 9) and of the trailer, observing the recommended pressures.
Brakes: towing increases the braking distance. Drive at a moderate speed, change down early and brake gradually.
Side wind: sensitivity to side wind is increased. Drive smoothly and at a moderate speed.
ABS: the system only controls the vehicle, not the trailer.
Rear parking sensors: the system does not operate while the vehicle is towing.
Towbar
We recommend the use of original CITROËN towbars and their harnesses, which have been tested and approved from the design stage of your vehicle and that the fitting of this equipment is entrusted to a CITROËN dealer.
If this equipment is not fitted by a CITROËN dealer, it is imperative that it is fitted using the electrical pre-equipment installed at the rear of the vehicle and in accordance with the manufacturer's instructions.
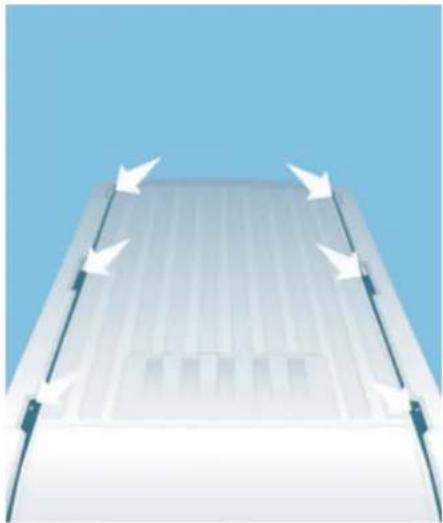
natural_image
Illustration of a roof structure with white arrows indicating direction, set against a blue sky (no text or symbols)ROOF BARS
To install the transverse roof bars, use the fixings provided for this purpose.
Maximum useful load on the roof bars: 100 kg distributed, regardless of the type of vehicle. The roof bars can only be installed on the H1 and H2 vehicles.
Never exceed the maximum weight of the vehicle when loaded (GVW).

Refer to the "Dimensions" section of chapter 9 for further information ordering the length (L1 to L4) and the height (H1 to H3) of the vehicle.
OTHER ACCESSORIES
These accessories and parts, having been tested and approved for reliability and safety, are all adapted to your vehicle. A wide recommended range and original parts are offered.
Range of professional equipment
Parts and Service technical information publishes an accessories catalogue offering various equipment and fittings, such as:
Roof bars for short, medium and long wheelbase (load retainers for all models).
Foot board, loading roller, step.
Towbar, 7/13 pin, 7/7 pin, 13 pin towbar harness: trailer towbar which must be fitted by the CITROËN network.
Roof bars for the various heights, additional roof bar.
Separation partitions, protective floor, non-slip floor.
Equipment
Another range is also available, structured around comfort, leisure and maintenance:
Audio equipment, hands-free system, speakers, navigation, ...
Trims, front mud flaps, rear mud flaps, wooden floor, deflectors...
Anti-theft alarm, window etching, first aid kit, high visibility safety jacket, rear parking sensors, warning triangle, ...
Installation of radiocommunication transmitters
You are advised to contact a representative of the CITROËN marque before installing accessory radiocommunication transmitters with external aerial on your vehicle.
Screenwash, interior and exterior cleaning and maintenance products, replacement bulbs, ...
Front seat covers compatible with airbags, rubber mats, carpet mats, snow chains.
The CITROËN Network will inform you of the specifications (frequency waveband, maximum output power, aerial position, specific installation conditions) of the transmitters which can be fitted, in accordance with the Motor Vehicle Electromagnetic Compatibility Directive (2004/104/EC).
The fitting of electrical equipment or accessories which are not recommended by Automobiles CITROËN may result in the failure of your vehicle's electronic system.
To prevent the mat from becoming caught under the pedals:
- ensure that the mat and its fixings are positioned correctly,
- never fit one mat on top of another.
Please note this specific warning. You are advised to contact a representative of the Marque to be shown the range of recommended equipment and accessories.
Depending on the country in which the vehicle is sold or operated, it is compulsory to have a high visibility safety jacket, warning triangle and replacement bulbs available in the vehicle.
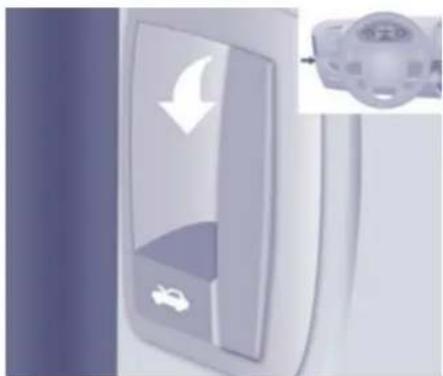
natural_image
Close-up of a white industrial ventilation cover with directional arrows and a small inset showing a device (no text or symbols visible)OPENING THE BONNET
On the inside
This operation must only be carried out with the vehicle stationary and the driver's door open.
Pull the release lever on the side of the dashboard towards you.
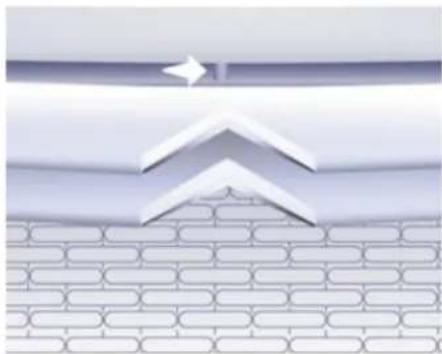
natural_image
Abstract geometric design with layered white chevron shapes and a grid pattern below (no text or symbols)On the outside
Push the safety catch lever located above the grille to the right and raise the bonnet.
Bonnet stay
Unclip the stay and tilt it to insert it in the first notch, then the second.
Before closing the bonnet, put the stay back in its housing.
Openign the bonnet
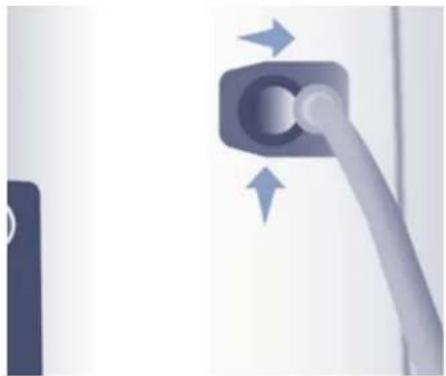
natural_image
Close-up of a mechanical component with directional arrows indicating movement or force (no text or symbols visible)To close
Lower the bonnet and release it at the end of its travel. Check that the bonnet has latched.

If the bonnet is not closed correctly, this warning lamp comes on in the instrument panel.
Before doing anything under the bonnet, switch off the ignition with the key to avoid any risk of injury resulting from an automatic change to START mode.
Under the bonnet
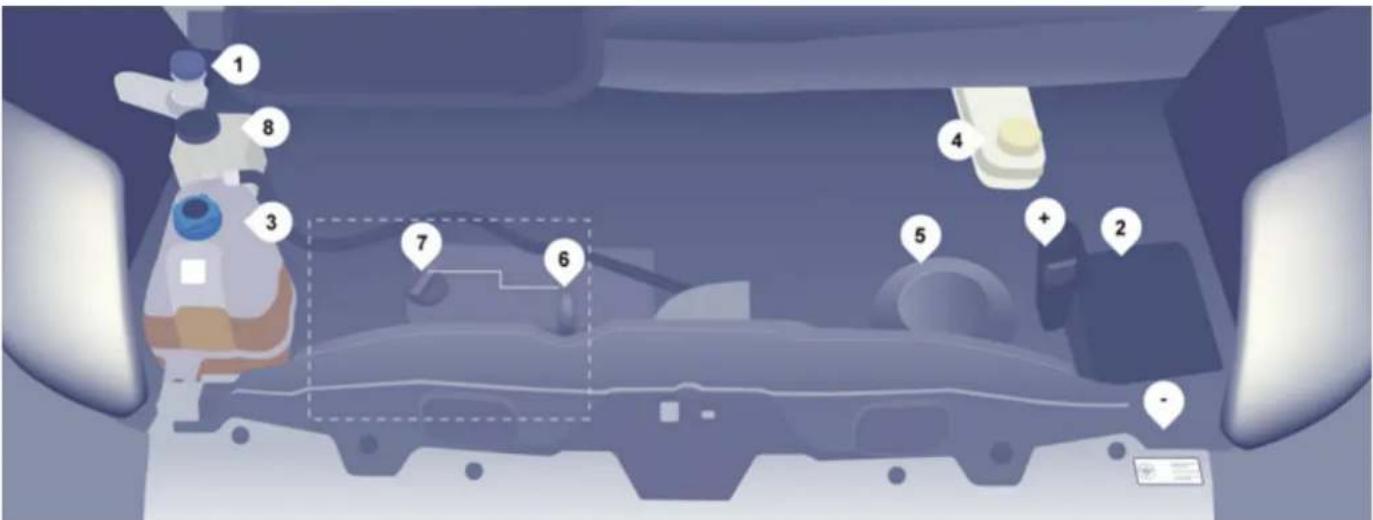
UNDER THE BONNET
DISEL ENGINES
- Windscreen/headlamp wash reservoir.
- Fusebox.
- Coolant reservoir.
-
Brake and clutch fluid reservoir.
-
Air filter.
-
Dipstick.
2.2 litre 100 engine - Engine oil filler cap.
2.2 litre 100 engine - Power steering reservoir.
Battery connections:
- Positive metal point.
- Negative metal point (earth).
LEVELS
These regular maintenance operations will keep your vehicle in good running order. Ask for advice at a CITROËN dealer or consult the servicing booklet enclosed in the handbook pack.
If you have to remove/refit the engine style cover, handle it with care to avoid damaging the fixing clips.
Oil level
Check the level regularly and top up between changes. The maximum consumption is 0.5 litre per 600 miles (1 000 km). Check the level with the vehicle level, engine cold, using the dipstick.
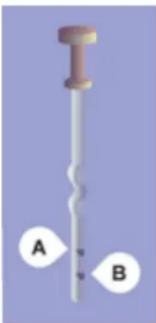
natural_image
Illustration of a screw with labeled points A and B (no text or symbols on the object itself)Dipstick
There are two marks on the dipstick:
A = maximum
If you fill past this mark, contact a CITROËN dealer.
B = minimum
Never allow the level to fall below this mark.
To maintain the reliability of engines and emission control systems, the use of additives in engine oil is prohibited.
Oil chage
It is imperative that this is carried out at the intervals specified and the viscosity grade of the oil selected must fulfil the requirements in accordance with the manufacturer's servicing schedule. Ask for advice at at CITROËN dealer.
Remove the dipstick before filling.
Check the level after filling (never exceed the maximum mark).
Screw the cap back onto the sump before closing the bonnet.
Viscosity selection
In all cases, the oil selected must meet the manufacturer's requirements.
Changing the brake fluid
The brake fluid must be changed at the intervals stated, according to the manufacturer's servicing schedule.
Use fluids recommended by the manufacturer, which fulfil DOT4 standards.
The level must be between the MIN and MAX marks on the reservoir.
If fluid has to be added frequently, this indicates a failure which must be checked by a CITROËN dealer as soon as possible.
Warning lamps

Checking by means of the warning lamps on the instrument panel is described in chapter 2, refer to the "Instruments and controls" section.
Levels
Coolig system
Only use the fluid recommended by the manufacturer. Otherwise, you risk seriously damaging your engine. When the engine is warm, the temperature of the coolant is controlled by the engine fan. As this fan can operate with the ignition key removed and because the cooling system is pressurised, wait for at least one hour after the engine has stopped before carrying out any work.
Slacken the cap by 1/4 of a turn to release the pressure to prevent any risk of scalding. When the pressure has dropped, remove the cap and top up the level with coolant.
If fluid has to be added frequently, this indicates a failure which must be checked by a CITROËN dealer as soon as possible.
Power steering fluid level
The vehicle must be parked on level ground with the engine cold. Unscrew the cap integrated with the gauge and check the level which must be between the MIN and MAX marks.
Windscreen wash and headlamp wash level
For best quality cleaning and to prevent freezing, this fluid must not be topped up or replaced with plain water.
Capacity of the reservoir: approximately 5.5 litres.
Used oil
Avoid prolonged contact of used oil with the skin.
Brake fluid is harmful to health and very corrosive.
Do not dispose of used oil, brake fluid or coolant into drains or into the ground but into the containers dedicated to this use at CITROËN dealerships (France) or to an authorised waste disposal site.
Toppig up
The level must be between the MIN and MAX marks on the expansion bottle. If more than 1 litre of fluid is required to top up the level, have the system checked by a CITROËN dealer.
CHECKS Air filter and passen
Bleeding the water contained in the Diesel filter

If this warning lamp comes on, bleed the filter, otherwise bleed regularly each time the engine oil is changed.
To drain the water out, unscrew the bleed screw or the water in Diesel sensor, located at the base of the filter. Leave open until all of the water has been drained out. Then tighten the bleed screw or the water sensor. HDi engines use advanced technology. All work requires a special qualification which is guaranteed by a CITROËN dealer.
Battery
At the start of winter, have your battery checked by a CITROËN dealer.
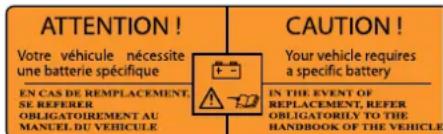
The presence of this label, in particular with the Stop & Start system, indicates the use of a specific 12 V lead-acid battery with special technology and specification. The involvement of a CITROËN dealer or a qualified workshop is essential when replacing or disconnecting the battery.
ger compartment
filter
A clogged passenger compartment fi Iter may reduce the performance of the air conditioning system and generate undesirable odours. The replacement intervals for these components are indicated in the servicing booklet.
Depending on the environment (dusty atmosphere...) and the use of the vehicle (urban driving...), change them twice as often if necessary, refer to the "Under the bonnet" section of chapter 7.
Brake pads
Brake pad wear depends on the style of driving, in particular for vehicles which are used in town, over short distances. It may be necessary to check the thickness of the pads, even between services.
Unless there is a leak on the system, a drop in the brake fluid level indicates that the brake pads are worn.
Brake disdrum wear status
For any information relating to checking the brake disc/drum wear status, contact a CITROËN dealer.
Parking brake
Where the parking brake travel is too great or there is a reduction in the performance of the system, the parking brake should be adjusted, even between services.
Have the system checked by a CITROËN dealer.
Oil filter
Change the filter regularly, in accordance with the servicing schedule.
Manual gearbox
Have the level checked in accordance with the manufacturer's servicing schedule.
To check the main levels and certain components, in accordance with the manufacturer's servicing schedule, refer to the pages of the servicing booklet which correspond to your vehicle's engine.
Only use products recommended by CITROËN or products of equivalent quality and specification.
In order to optimise the operation of units as important as the braking system, CITROËN selects and offers specific products.
In order to avoid damaging the electrical units, high pressure washing to clean the engine compartment is strictly prohibited.
Checks
Particle filter system (Diesel)
An addition to the catalytic converter, this filter makes an active contribution to the preservation of air quality by the retaining of the unburnt pollutant particles. Black exhaust fumes are thus no longer emitted.
This filter, fitted to the exhaust system, accumulates particles of soot. The engine control unit manages the automatic periodic elimination of the soot particles (regeneration).
The regeneration procedure is invoked according to the quantity of particles accumulated and the driving conditions of the vehicle. During this phase, you may notice some unusual phenomena - increased idling speed, cooling fan running, increase in smoke and higher exhaust gas temperature - which does not affect the operation of the vehicle or the environment.
After prolonged idling or driving at very low speeds, you may occasionally notice water vapour being emitted from the exhaust when accelerating. This is of no consequence to the running of the vehicle or to the environment.
Because of the higher exhaust gas temperature resulting from the normal operation of the particle filter, it is recommended that you do not park the vehicle over inflammable materials (grass, dry leaves, pine needles, ...) so as to avoid any risk of fire.
Saturation / Regeneration

If there is risk of blockage of the filter, this warning lamp comes on in the instrument panel.
This alert tells you that the particle filter is starting to fill up (in conditions of urban driving of exceptionally long duration: low speeds, traffic jams etc.)
To regenerate the filter, it is advised to drive as soon as possible, when traffic conditions and the law permit, at a speed of at least 40 mph (around 60 km/h), with an engine speed above 2 000 rpm for about fifteen minutes (until the warning lamp and/or the message disappears).
If possible, avoid switching off the engine before the end of regeneration of the filter; repeated interruptions could cause premature deterioration of the engine oil. It is not recommended to end regeneration of the filter with the vehicle stationary.
Operating fault
If this alert persists, do not ignore the warning; it indicates that a fault has occurred in the exhaust / particle filter system.
Have it checked by a CITROËN dealer.
TOTAL & CITROËN
Partners in performance and protecting the environment
Innovation in the search for performance
For over 40 year, the TOTAL Research and Development departments have developed for CITROËN, lubricants to match the latest technical innovations on CITROËN vehicles, both for competition and for everyday motoring.
For you, this is an assurance that you will obtain of the best performance for your engine.
Optimum protection for your engine
By having your CITROËN vehicle serviced with TOTAL lubricants, you are contributing towards improving the life and performances of your engine, while also protecting the environment.


natural_image
Scientist in lab coat examining a flask with liquid, alongside a car with 'TOTAL' branding (no readable text on main subject)
CITROËN
CITROËN prefers TOTAL

TOTAL
Fuel
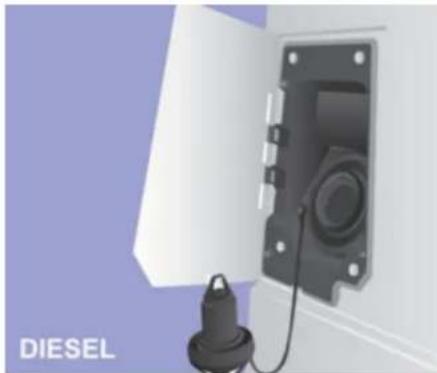
natural_image
Electric vehicle battery pack with attached plug and cable, labeled 'DIESEL' (no other text or symbols)FILLING WITH FUEL

With Stop & Start, never refuel with the system in STOP mode; you must ch off the ignition with the key.
Low fuel level

When the fuel tank level E (Empty) is reached, this warning lamp comes on. At this moment, you have enough fuel left to
drive approximately 30 miles (50 km), depending on the driving conditions, the engine and the profile of the road. Fill up without delay to avoid running out of fuel.
The fuel tank must be filled with the engine off.
- Open the fuel filler flap.
- Support the cap with one hand.
- With the other hand, insert the key, then turn it anticlockwise.
- Remove the cap and hook it onto the clip located on the inside of the flap.
A label affixed to the inside of the flap reminds you of the type of fuel to be used. When filling the fuel tank, do not continue after the 3rd cut-off of the nozzle. This could cause malfunctions.
The capacity of the fuel tank is approximately 90 litres.
- After filling the fuel tank, lock the cap and close the flap.

Fuel tanks of different capacities, 60 and 125 litres, may be fitted.
In low temperatures
In mountainous and/or cold areas, it is advisable to use a "winter" type fuel suited to low or minus temperatures.
FUEL SYSTEM CUT-OFF
In the event of a serious collision, a device automatically cuts off the fuel supply to the engine and the vehicle's electrical supply.
Check that there is no smell or leak of fuel outside the vehicle.
Restore the supply by pressing:
- the first button, located under the glove box.
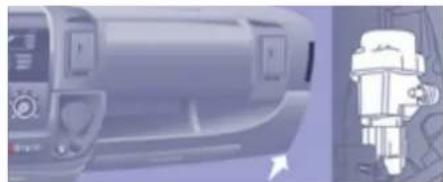
natural_image
Side profile of a car dashboard and a robot arm (no visible text or symbols)- the second button, located in the battery compartment under the driver's floor.
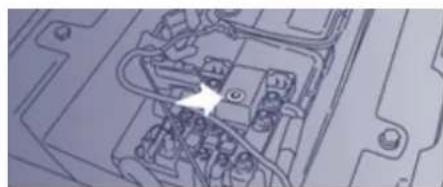
natural_image
Pure electrical circuit lines without any symbols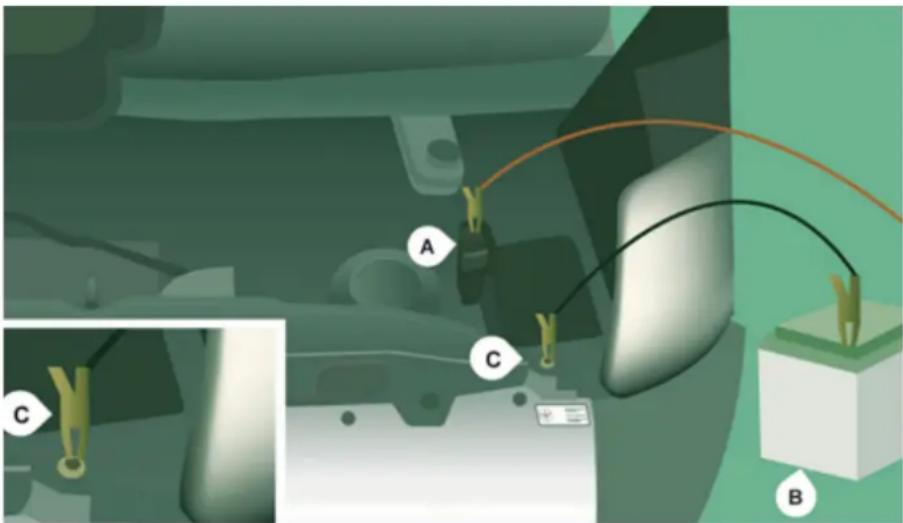
BATTERY
A. Positive metal point on your vehicle
B. Slave battery
C. Earth on your vehicle
Chaging the battery using a charger
- disconnect the battery located in the front left floor,
- follow the instructions for use given by the battery charger manufacturer,
- reconnect starting with the negative (-) terminal,
- check that the terminals and connectors are clean. If they are covered with sulphate (white or greenish deposit), disconnect them and clean them.
The charging operation must be carried out in a ventilated area away from naked flames or any possible sources of sparks to eliminate the risk of explosion and fire.
Do not attempt to charge a frozen battery: it must first be thawed to eliminate the risks of explosion. If the battery has frozen, before charging it have it checked by a specialist who will check that the internal components have not been damaged and that the container is not cracked, which could mean that there is a risk of a leak of toxic and corrosive acid.
Proceed with a slow charge charge at low current for a maximum pf about 24 hours to avoid damaging the battery.
Starting from another battery
- connect the red cable to the metal point A then to the positive (+) terminal of the slave battery B,
- connect one end of the green or black cable to the negative (-) terminal of the slave battery B,
- connect the other end of the green or black cable to the earth point C on your vehicle,
- operate the starter, let the engine run,
- wait for the engine to return to idle, then disconnect the cables.
Batter
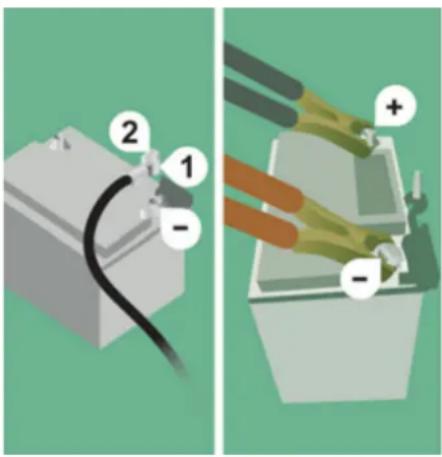
Access to the negative terminal
For access to the negative (-) terminal: press button 2 then pull on connector 1.
The batteries contain harmful substances such as sulphuric acid and lead. They must be discarded in accordance with the provisions of the law and must not, in any circumstances, be discarded with household waste.
Take used batteries to a special collection point.
Before disconnecting the battery, you must wait for 2 minutes after switching off the ignition.
Never disconnect a terminal when the engine is running.
Never charge a battery without first disconnecting the terminals.
Close the windows and doors before disconnecting the battery.
After every reconnection of the battery, switch on the ignition and wait 1 minute before starting to allow the electronic systems to be initialised. If slight difficulties are experienced after this, please contact a CITROËN dealer.
It is advisable to disconnect the negative (-) terminal of the battery if the vehicle is not to be used for a period of more than one month.
The description of the battery charging procedure is given as an indication only.
If the battery has been disconnected for some time, it may be necessary to reinitialise the following functions:
- the display parameters (date, time, language, distance unit and temperature unit),
- the radio stations,
- the central locking.
Some settings are cleared and must be reprogrammed, consult a CITROËN.
If your vehicle is fitted with a tachograph or an alarm, disconnection of the negative (-) terminal of the battery (located under the floor on the left-hand side, in the cab) is recommended if the vehicle is not to be used for a period of more than 5 days.
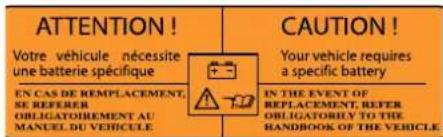

The presence of this label, in particular with the Stop & Start system, indicates
the use of a 12 V lead-acid battery with special technology and specification; the involvement of a CITROËN dealer or a qualified workshop is essential when replacing or disconnecting the battery.
Failure to observe this recommendation may cause premature wear of the battery.

After refitting the battery by a CITROËN dealer or a qualifi ed workshop, the
Stop & Start system will only be active after a continuous period of immobilisation of the vehicle, a period which depends on the climatic conditions and the state of charge of the battery (up to about 8 hours).

Do not disconnect the battery to charge it.
Batter
Chaging a wheel
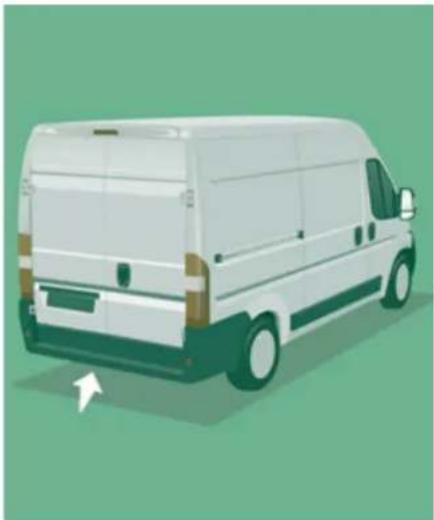
natural_image
Side view of a white van parked on a green background, no visible text or symbolsCHANGING A WHEEL
1. PARKING THE VEHICLE
As far as possible, park the vehicle on level, stable and non-slippery ground.
Apply the parking brake, switch off the ignition and engage first gear.
Put on a high visibility vest and position the warning triangle.
If possible, place a chock under the wheel diagonally opposite the wheel to be changed.
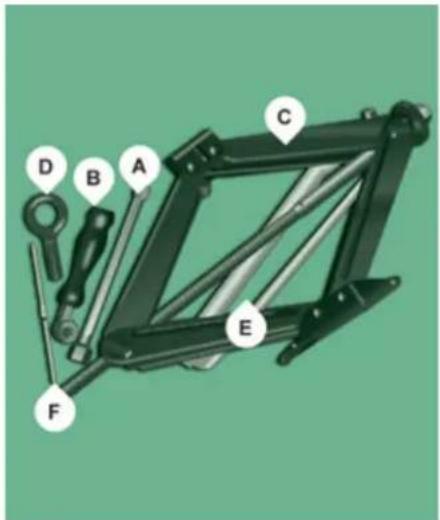
You must ensure that the occupants get out of the vehicle and wait in a safe location.
2. TOOLS
These are located under the front passenger seat cushion.
- Turn the button a quarter of a turn then pull the box.
- After use, press the button then turn it a quarter of a turn to secure the box.
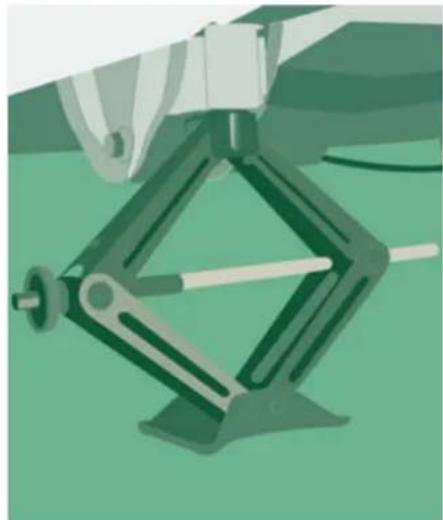
natural_image
Illustration of a robotic arm with articulated joints and a handle, set against a green background (no text or symbols)A. Long socket.
B. Ratchet wrench.
C. Jack.
D. Towing hook.
E. Wheelbrace.
F. Screwdriver.
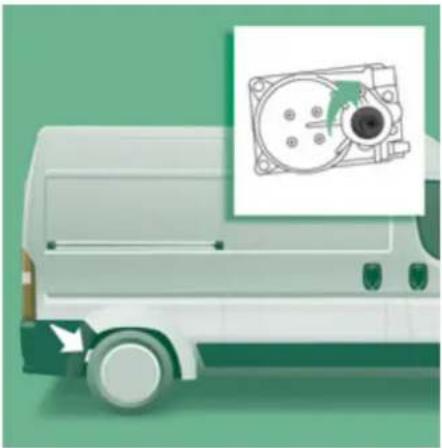
natural_image
Illustration of a white delivery truck with a circular component inset showing a rotary dial (no text or symbols)3. SPARE WHEEL
The spare wheel retaining bolt is located below the bumper on the right.
- Turn the bolt using the socket A and the ratchet wrench B to release the wheel.
- Turn to the locking point, indicated by an increase in the force required for the manoeuvre.
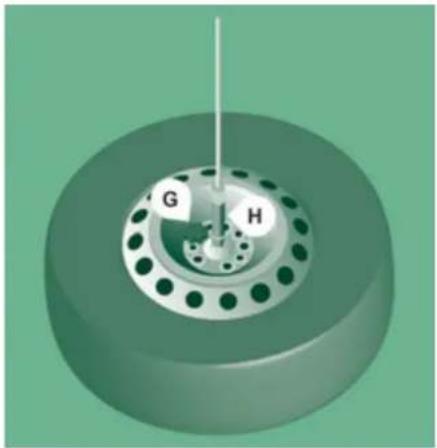
natural_image
3D rendering of a mechanical component with labeled parts G and H, no readable text or symbols beyond labels- Take out the spare wheel using the wrench.
- Unscrew the handle G and remove the support H.
- Release the spare wheel and place it near the wheel to be changed.
- Remove the trim using the screwdriver F as a lever.
- Release the bolts using the wheelbrace E.
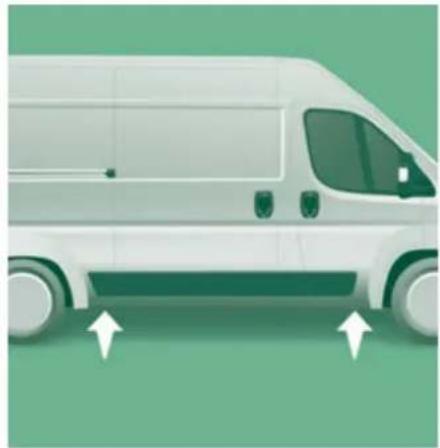
natural_image
Side view of a white van with two white arrows pointing to the side, against a green background (no text or symbols)- Position the jack C at one of the four locations provided on the underbody near the wheels.
If you have a retractable foot board, the jack must be positioned at 45^ .
- Extend the jack using the ratchet wrench B until the wheel is a few centimetres off the ground.
- Unscrew the bolts fully and change the wheel.
Chaging a wheel
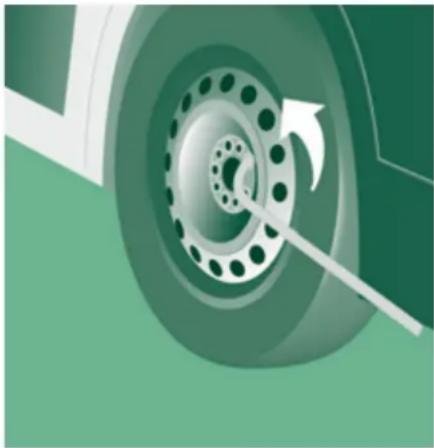
natural_image
Close-up of a car tire with a white arrow indicating clockwise motion (no text or symbols)5. FITTING THE SPARE WHEEL
- Put the wheel in place on the hub and start screwing in the bolts by hand.
- Carry out an initial tightening of the bolts using the wheelbrace E.
- Lower the vehicle completely by folding the jack, then remove the jack.
- Tighten the bolts again using the wheelbrace E, tighten them fully without forcing them.
-
Stow the wheel to be repaired at the rear of the vehicle.
-
Hook the support H and screw in the handle G.
- Insert the socket A in the hole then screw in the bolt, using the ratchet wrench B, to raise the wheel.
- Stow the tools and the trim.
Never go underneath a vehicle supported only by a jack (use an axle stand).
The jack and the tool kit are specific to your vehicle. Do not use them for other purposes.
6. REFITTING THE REPAIRED WHEEL
Refitting of the wheel is identical to step 5, do not forget to refit the wheel trim.
Refer to the "Identification markings" section of chapter 9 to locate the tyre label.
The spare wheel is not designed to be used over long distances. Have the tightening of the bolts and pressure of the spare wheel checked by a CITROËN dealer without delay.
Also, have the original wheel repaired and refitted by a CITROËN dealer as soon as possible.
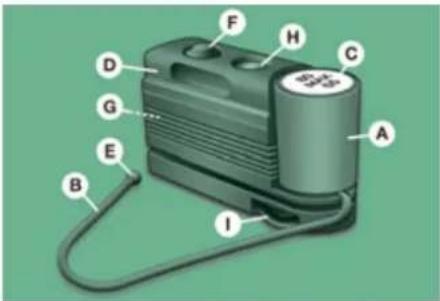
PUNCTURE REPAIR KIT Procedure
This temporary puncture repair kit is located at the front of the passenger compartment. It consists of:
- a cartridge A, containing the sealant fluid, equipped with:
- a filling hose B,
-
a sticker C indicating "max. 80 km/h", which the driver must affix in full view (on the dashboard) after repairing the tyre,
-
a quick guide to use of the repair kit,
- a compressor D equipped with a pressure gauge and unions,
- adaptors, for the inflation of various items.
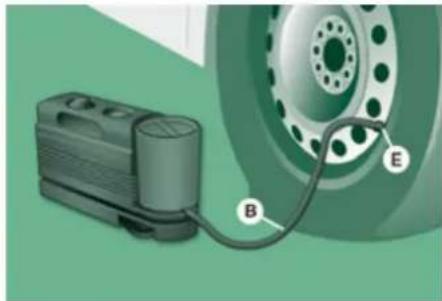
natural_image
Illustration of a mechanical device connected to a car tire, labeled B and E (no text or symbols on the device itself)- Apply the parking brake. Unscrew the tyre valve cap, remove the filling hose B and screw the ring E onto the tyre valve,
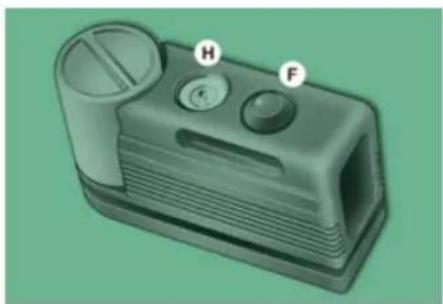
natural_image
3D rendering of a mechanical component with labeled parts H and F (no text or symbols beyond labels)- check that the switch F on the compressor is in position 0 (off),
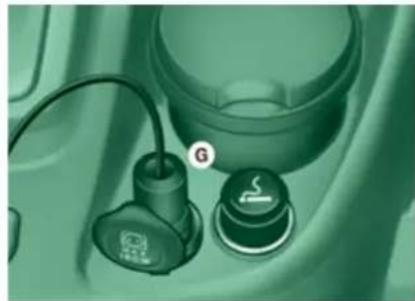
natural_image
Close-up of a car headset with two buttons and a connector (no visible text or symbols)- start the engine,
- insert the connector G into the nearest power socket on the vehicle,
- switch on the compressor by placing the switch F in position I (on),
- inflate the tyre to a pressure of 4 bars.
To obtain a more accurate reading, you are advised to check the pressure value on the pressure gauge H, with the compressor off.
Chaging a wheel
- If a pressure of at least 3 bars is not reached within 5 minutes, disconnect the compressor from the valve and the power socket, then move the vehicle forward by approximately 10 metres to distribute the sealant fluid inside the tyre.
- Then repeat the inflating operation:
- if a pressure of at least 3 bars is not reached within 10 minutes, switch off your vehicle: the tyre has suffered too much damage and repair has not been possible. Consult a CITROËN dealer.
- if the tyre has been inflated to a pressure of 4 bars, set off again immediately.
After driving for approximately 10 minutes, stop and check the pressure of the tyre again.
Adjust the pressure if necessary and contact a CITROËN dealer as soon as possible.
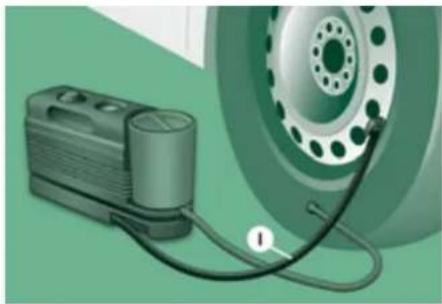
natural_image
Illustration of a portable air vent connected to a car tire, with no visible text or symbols.Checking and adjusting the pressure
The compressor can only be used to check and adjust the pressure.
- Disconnect the hose I and connect it to the tyre valve directly; the cartridge will then be connected to the compressor and the filling fluid will not be injected.
If it is necessary to deflate the tyre, connect the hose I to the tyre valve and press the yellow button, placed in the centre of the switch on the compressor.
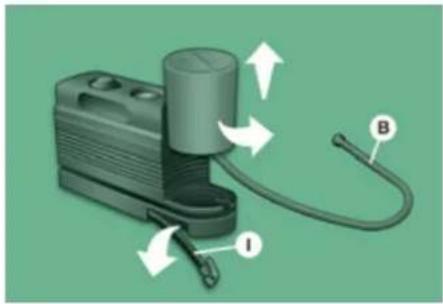
natural_image
Illustration of a portable air compressor with labeled parts I and B, showing internal components and airflow direction (no text or symbols beyond labels)Replacig the sealant fluid cartridge
To replace the cartridge, carry out the following operations:
- disconnect the hose I
- turn the cartridge to be replaced anticlockwise and lift it,
- insert the new cartridge and turn it clockwise,
- reconnect the hose I and connect the hose B in its location.
The cartridge contains ethylene-glycol, a product which is harmful if swallowed and which causes irritation to the eyes. Keep out of reach of children.
After use, do not discard the cartridge in the environment, take it to a CITROËN dealer or to an organisation responsible for its collection.
This replacement kit is available from CITROËN dealers.
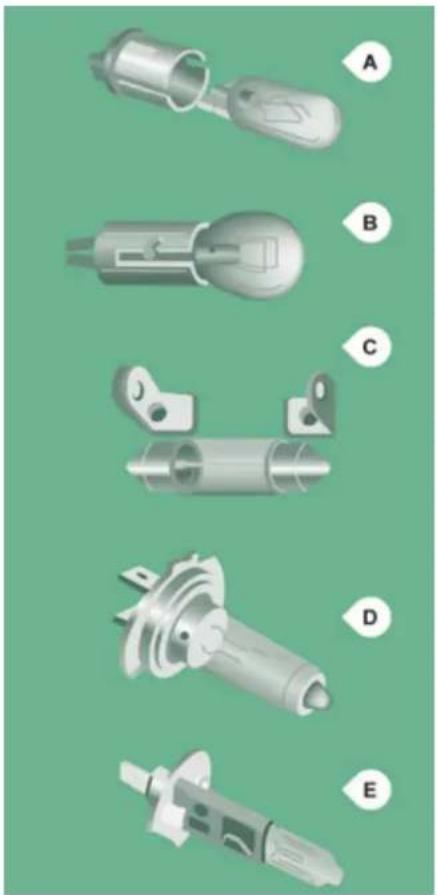
natural_image
Five different types of electrical switch components labeled A through E, shown against a green background (no text or symbols on parts)Changing a bulb
CHANGING A BULB
TYPE OF BULB
Various types of bulb are installed on your vehicle. To remove them:
Type A Entirely glass bulb: pull gently as it is fitted by pressure.
Type B Bayonet bulb: press on the bulb then turn it anticlockwise.
Type C Cylindrical bulb: move aside the contacts.
Type D - E Halogen bulb: release the retaining spring from its housing.
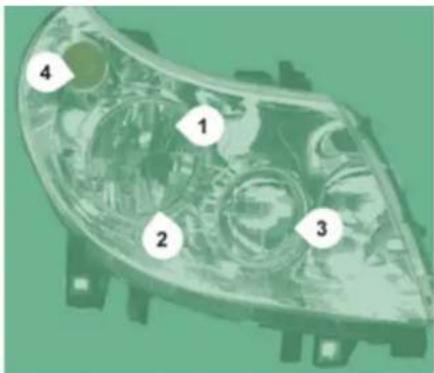
FRONT LAMPS
Open the bonnet. To access the bulbs, reach behind the headlamp unit.
Carry out the operations in reverse order to refit each bulb.
Chaging a bulb
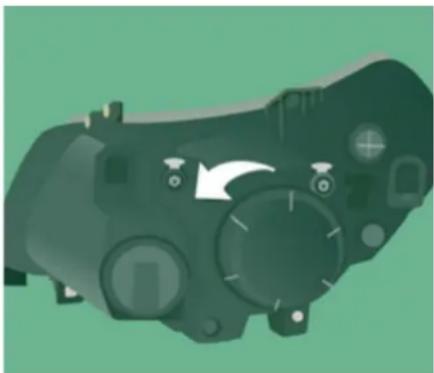
natural_image
Illustration of a vehicle's internal components with a white arrow indicating rotation (no text or symbols)1 - Dipped beam headlamp
Type D, H7 - 55 W
- Remove the cover by turning it anticlockwise.
- Disconnect the electrical connector.
- Release the retaining spring by pressing on the two clips.
- Change the bulb taking care to align the metal part with the grooves on the lamp.
2 - Sidelamp
Type A, W 5 W - 5 W
- Remove the cover by turning it anticlockwise.
- Remove the bulb holder fitted by pressure.
- Change the bulb.
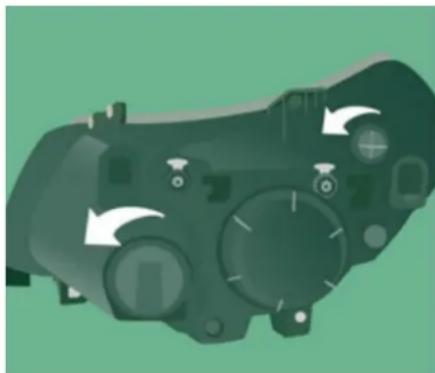
natural_image
Illustration of a mechanical device with directional arrows indicating motion or flow (no text or symbols)3 - Main beam headlamp
Type E, H1 - 55 W
- Remove the cover by turning it anticlockwise.
- Disconnect the electrical connector.
- Release the retaining spring by pressing on the two clips.
- Change the bulb taking care to align the metal part with the groove on the lamp.
4 - Direction indicators
Type B, PY 21 W - 21 W
- Turn the bulb holder a quarter turn anticlockwise.
- Remove the bulb by pressing it lightly while turning it anticlockwise.
- Change the bulb.
5 - Foglamps
Type D, H1 - 55 W
- Turn the steering fully to the left.
- Unscrew the screw located in the wheel arch then open the flap.
- Remove the cover.
- Disconnect the electrical connector.
- Release the retaining spring by pressing on the two clips.
- Change the bulb taking care to align the metal part with the grooves on the lamp.
Halogen bulbs must be changed after the headlamp has been off for several minutes (risk of serious burns). Do not touch the bulb directly with your fingers, use lint-free cloths.
When each operation has been completed, check the operation of the lamps.
When using a high pressure washer on stubborn dirt, do not persist on the headlamps, the lamps and their edges to avoid damaging their lacquer finish and seals.
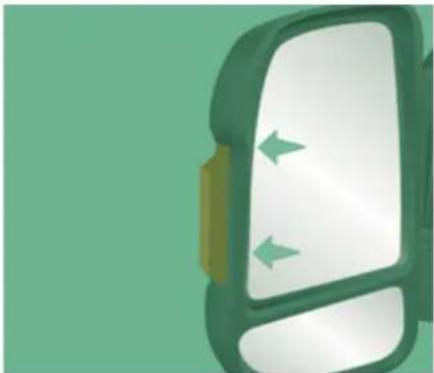
natural_image
Green and white 3D object with two green arrows pointing left, against a solid green background (no text or symbols)DIRECTION INDICATOR SIDE REPEATER
Type A, W 16 W F - 16 W
- Move the mirror glass to access the screws.
- Unscrew the two screws using the screwdriver supplied.
- Pull the bulb holder to release it from the dog points.
- Pull the bulb then change it.
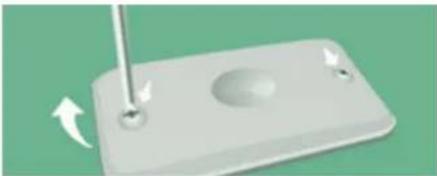
natural_image
3D illustration of a mechanical component with a pin and circular hole, showing rotational motion (no text or symbols)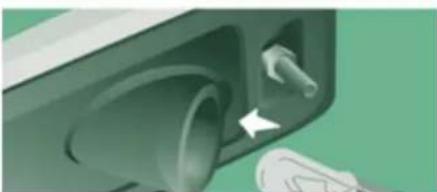
natural_image
Close-up of a mechanical component with a white arrow pointing to a circular opening (no text or symbols visible)SIDE MARKER LAMPS
Type A, W5W - 5W
- If your vehicle is fitted with these lamps (van type L4), unscrew the two screws using the screwdriver supplied.
- Pull the bulb holder to release it from the lugs.
- Pull the bulb then change it.
natural_image
Simple diagram of a rectangular object with two small square markers on top, no text or symbols present.
flowchart
graph LR
    A["Input Node"] --> B["Processing Block"]
    B --> C["Output Node"]
Front/Rear
COURTES Y LAMPS
Type C, 12 V 10 W - 10 W
- Press the points, indicated by the arrows, then remove the courtesy lamp.
- Open the protective flap.
- Change the bulb moving aside the two contacts.
- Ensure that the new bulbs are secured correctly between the two contacts.
- Close the protective flap.
- Fix the courtesy lamp in its housing and ensure that it is secured correctly.
Chaging a bulb
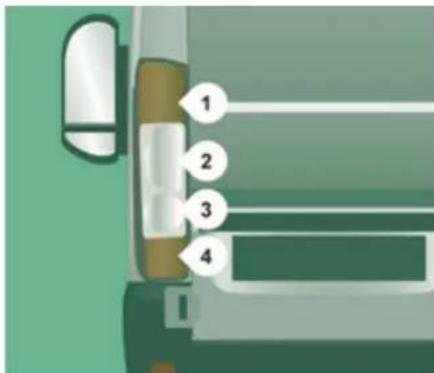
REAR LAMPS
For more information on the bulbs, refer to the table "Types of bulb".
1. Brake/sidelamps
Type B, P 21/5 W - 5 W
2. Direction indicators
Type B, PY 21 W - 21 W
3. Reversing lamps
Type B, P 21 W - 21 W
4. Foglamps
Type B, P 21 W - 21 W
- Identify the faulty bulb then open the rear doors.
- Disconnect the electrical connector.
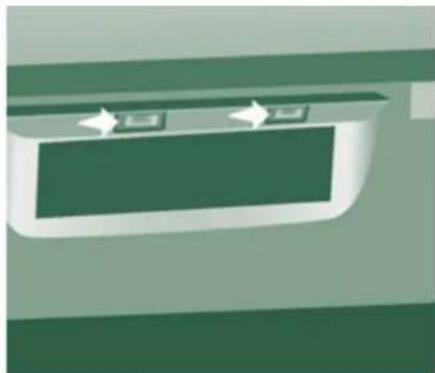
natural_image
Pure diagram of a mechanical component with two directional arrows, no text or symbols present- Remove the two fixing nuts.
- Pull the lens block from the outside.
- Unscrew the three screws using the screwdriver supplied (under the front passenger seat) and extract the bulb holder.
- Remove the faulty bulb by pressing it lightly while turning it anticlockwise.
- Change the bulb.
NUMBER PLATE LAMPS
Type A, C 5 W - 5 W
- Press the point, indicated by the arrow, then remove the plastic lens.
- Change the bulb by moving aside the two contacts.
natural_image
Simple diagram of a door with two arrows pointing to the top panel (no text or symbols)- Ensure that the new bulbs are secured correctly between the two contacts.
- Replace the plastic lens and press on it.
THIRD BRAKE LAMP
Type B, P21W - 21W
- Unscrew the two screws.
- Remove the lamp.
- Remove the bulb holder moving aside the two tabs.
- Remove the faulty bulb by pressing it lightly while turning it anticlockwise.
- Change the bulb.
Changing a fuse
natural_image
Two identical mechanical clips with pointed tips, shown against a solid green background (no text or symbols)Good
Failed
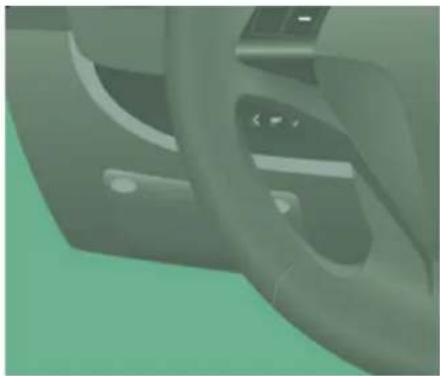
natural_image
Close-up of a car interior showing steering wheel and dashboard (no visible text or symbols)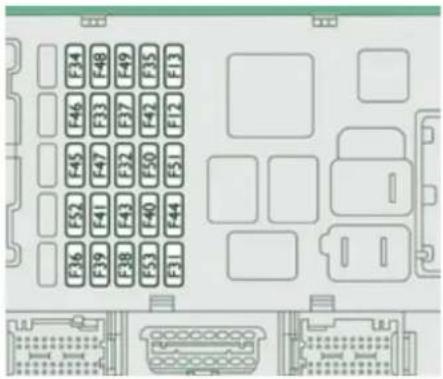
The three fuseboxes are located in the dashboard on the driver's side, in the passenger pillar and in the engine compartment.
The descriptions provided cover only the fuses that can be replaced by the user. For any other replacement, go to a CITROËN dealer or a qualified workshop.
Information for technicians: for complete information on the fuses and relays, refer to the wiring diagrams in the workshop procedures available from dealers.
Removing and fitting a fuse
Before changing a fuse, the cause of the fault must be found and rectified. The fuse numbers are indicated on the fusebox.
Always replace a faulty fuse with a fuse of the same rating.
CITROËN does not accept any responsibility for expenses incurred by repairs to your vehicle or for any malfunctions resulting from the installation of additional accessories which are not supplied or recommended by CITROËN and which are not installed in accordance with its instructions, in particular when the combined consumption of all of the additional equipment connected exceeds 10 milliamperes.
Chaging a fuse
DRIVER'S SIDE DASHBOARD FUSES
- Remove the bolts and tilt the box to access the fuses.
| Fuses | A (amps) | Allocation |
| 12 | 7.5 | Right-hand dipped headlamp |
| 13 | 7.5 | Left-hand dipped headlamp |
| 31 | 7.5 | Relay supply |
| 32 | 10 | Cabin lighting |
| 33 | 15 | Rear 12 V socket |
| 34 | - | Not used |
| 35 | 7.5 | Reversing lamp - Water in Diesel fuel sensor |
| 36 | 15 | Central locking control - Battery |
| 37 | 7.5 | Brake lamp - Third brake lamp - Instrument panel |
| 38 | 10 | Relay supply |
| 39 | 10 | Radio - Diagnostic socket - Alarm siren - Programmable additional heating - Air conditioning controls - Tachograph - Battery |
| 40 | 15 | Demisting: rear screen (left), driver's side door mirror |
| 41 | 15 | Demisting: rear screen (right), passenger's side door mirror |
| 42 | 7.5 | ABS control unit and sensor - ASR sensor - ESP sensor - Brake lamps switch |
| 43 | 30 | Windscreen wiper motor |
| 44 | 20 | Cigarette lighter - 12 V socket |
| 45 | 7.5 | Door controls |
| 46 | - | Not used |
| 47 | 20 | Driver's electric window motor |
| 48 | 20 | Passenger's electric window motor |
| 49 | 7.5 | Audio equipment - Instrument panel controls - Driver's side electric window |
| 50 | 7.5 | Airbags and pre-tensioners unit |
| 51 | 7.5 | Tachograph - Cruise control - Air conditioning controls |
| 52 | 7.5 | Optional relay supply |
| 53 | 7.5 | Instrument panel - Rear foglamp |
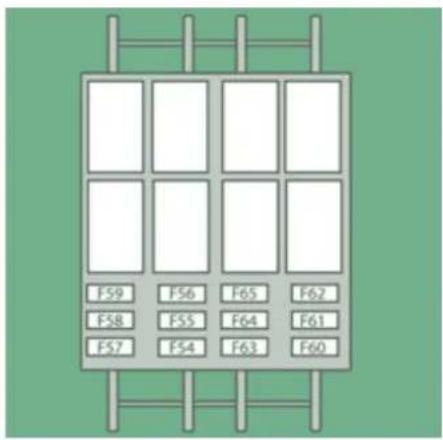
When you have finished, close the cover carefully.
Changing a fuse
| Fuses | A (amps) | Allocation |
| 54 | - | Not used |
| 55 | 15 | Heated seats |
| 56 | 15 | Rear passenger 12 V socket |
| 57 | 10 | Programmable additional heating |
| 58 | 10 | Lateral sidelamps |
| 59 | 7.5 | Pneumatic suspension |
| 60 | - | Not used |
| 61 | - | Not used |
| 62 | - | Not used |
| 63 | 10 | Programmable additional heating switch |
| 64 | - | Not used |
| 65 | 30 | Fan for programmable additional heating |
Chaging a fuse
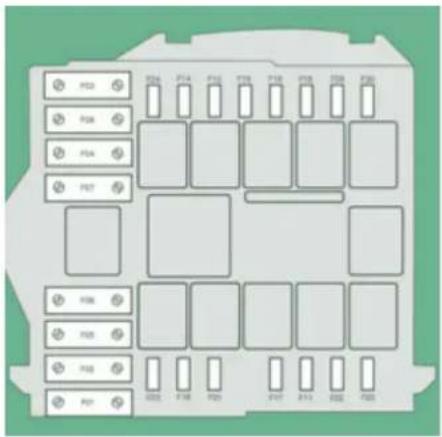
FUSES IN THE ENGINE COMPARTMENT
- Remove the nuts and tilt the box to access the fuses.
| Fuses | A (amps) | Allocation |
| 1 | 40 | ABS pump supply |
| 2 | 50 | Diesel pre-heat unit |
| 3 | 30 | Ignition switch |
| 4 | 20 | Additional programmable heating |
| 5 | 20 | Cabin ventilation with additional programmable heating |
| 6 | 40/60 | Cabin fan maximum speed |
| 7 | 40/50 | Cabin fan minimum speed |
| 8 | 40 | Cabin fan assembly |
| 9 | 20 | Screenwash pump |
| 10 | 15 | Horn |
| 14 | 7.5 | RH main beam |
| 15 | 7.5 | LH main beam |
| 18 | 7.5 | Engine management |
| 19 | 7.5 | Air conditioning compressor |
| 20 | 30 | Headlamp wash pump |
| 21 | 15 | Fuel pump supply |
| 23 | 30 | ABS electrovalves |
| 30 | 15 | Foglamps |
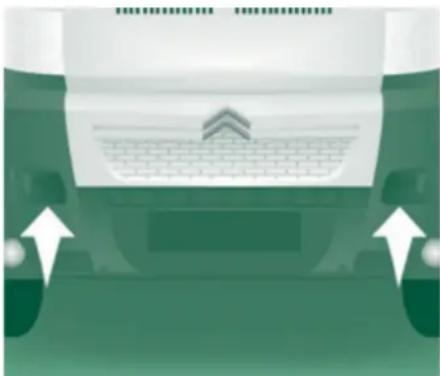
natural_image
Interior view of a vehicle showing a roof, dashboard, and side-mounted sensors (no visible text or symbols)CHANGING A WIPER BLADE
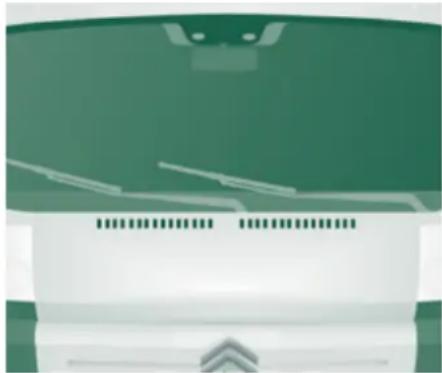
natural_image
Green and white abstract graphic with no visible text or symbolsChaging a front wiper blade
Lift the wiper arm.
Unclip the blade by pressing the button and remove it by pulling it outwards.
Fit the new blade and ensure that it is secured correctly.
Push back the wiper arm.
To return the windscreen wipers to their normal position, switch on the ignition and operate the wiper stalk.
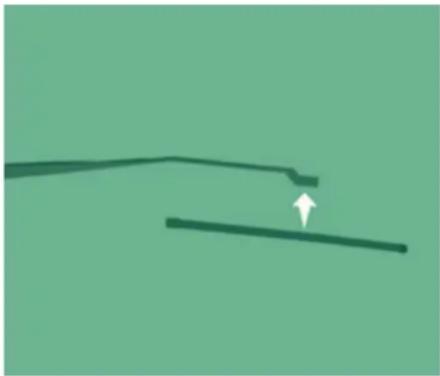
natural_image
Simple line diagram with two horizontal lines and a small arrow, no text or symbols presentChanging the rear wiper blade
Lift the wiper arm, then unclip the blade and remove it.
Fit the new blade and push back the wiper arm.
Check that the screenwash or headlamp wash nozzles are not blocked.
Havig your vehicle towed
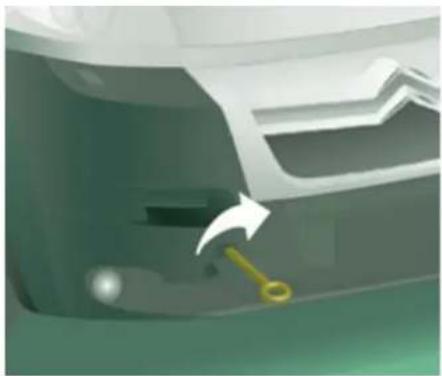
natural_image
Close-up of a mechanical component with a yellow tool inserted, showing no visible text or symbols.BEING TOWED
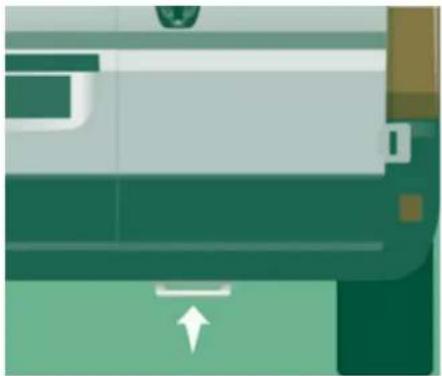
natural_image
Abstract graphic with green and white geometric shapes and a white arrow (no text or symbols)Without liftig four wheels on the ground)
You must always use a towing bar.
From the front
The removable towing eye is located in the box under the front passenger seat.
Unclip the cover using a flat tool.
Screw the removable towing eye in fully.
Place the gear lever in neutral. Failure to observe this special condition may result in damage to certain braking components and the absence of braking assistance when the engine is re-started.
From the rear
Hook the bar onto the rigid eye located under the bumper.
With lifting (2 wheels only on the ground)
It is preferable to lift the vehicle using professional lifting equipment.
When being towed with the engine off, there is no braking or steering assistance.
Dimensions
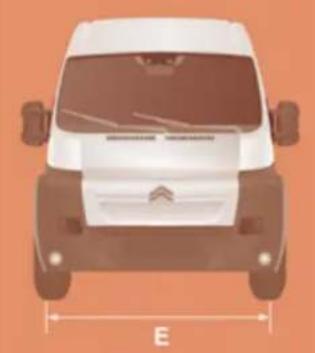
natural_image
Front view of a white car with a black arrow symbol and dimension label 'E' (no text or symbols on the car itself)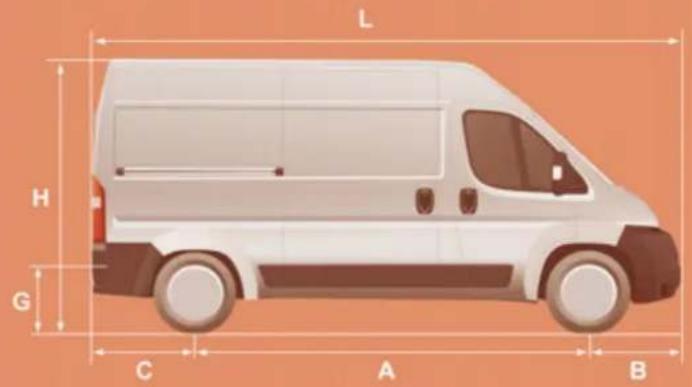
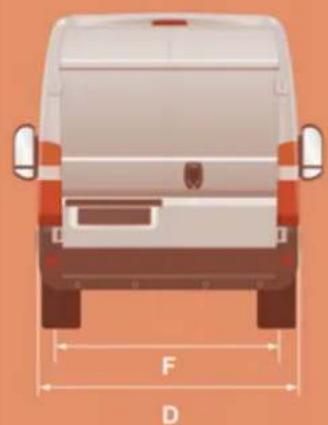
natural_image
Top-down view of a white van with red and orange side stripes, labeled with dimensions F and D (no text or symbols on the vehicle itself)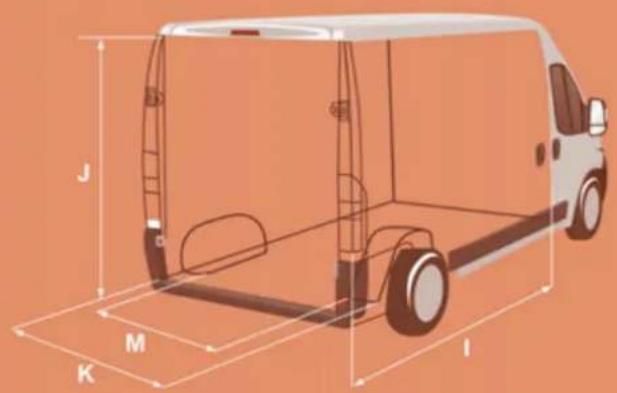
DIMENSIONS
Your vehicle is available in 4 lengths (L1..) and 3 heights (H1..), refer to the tables:
| Van | |||||||||
| L1 | L2 | L3 | L4 | ||||||
| H1 | H2 | H1 | H2 | H2 | H3 | H2 | H3 | ||
| L | Overall length | 4 963 | 5 413 | 5 998 | 6 363 | ||||
| H | Overall height | 2 254 | 2 524 | 2 254 | 2 524 | 2 524 | 2 764 | 2 524 | 2 764 |
| A | Wheelbase | 3 000 | 3 450 | 4 035 | |||||
| B | Front overhang | 948 | |||||||
| C | Rear overhang | 1 015 | 1 380 | ||||||
| D | Overall width (excluding mirrors) | 2 050 | |||||||
| E | Width of front track | 1 810 | |||||||
| F | Width of rear track | 1 790 | |||||||
| G | Height of load floor | 535 to 565 | |||||||
| I | Length of interior floor | 2 670 | 3 120 | 3 705 | 4 070 | ||||
| J | Maximum interior load height | 1 662 | 1 932 | 1 662 | 1 932 | 1 932 | 2 172 | 1 932 | 2 172 |
| K | Maximum interior width | 1 870 | |||||||
| M | Interior width between wheel arches | 1 422 | |||||||
| Volume (ft) | 8 | 9.5 | 10 | 11.5 | 13 | 15 | 15 | 17 | |
Dimensions
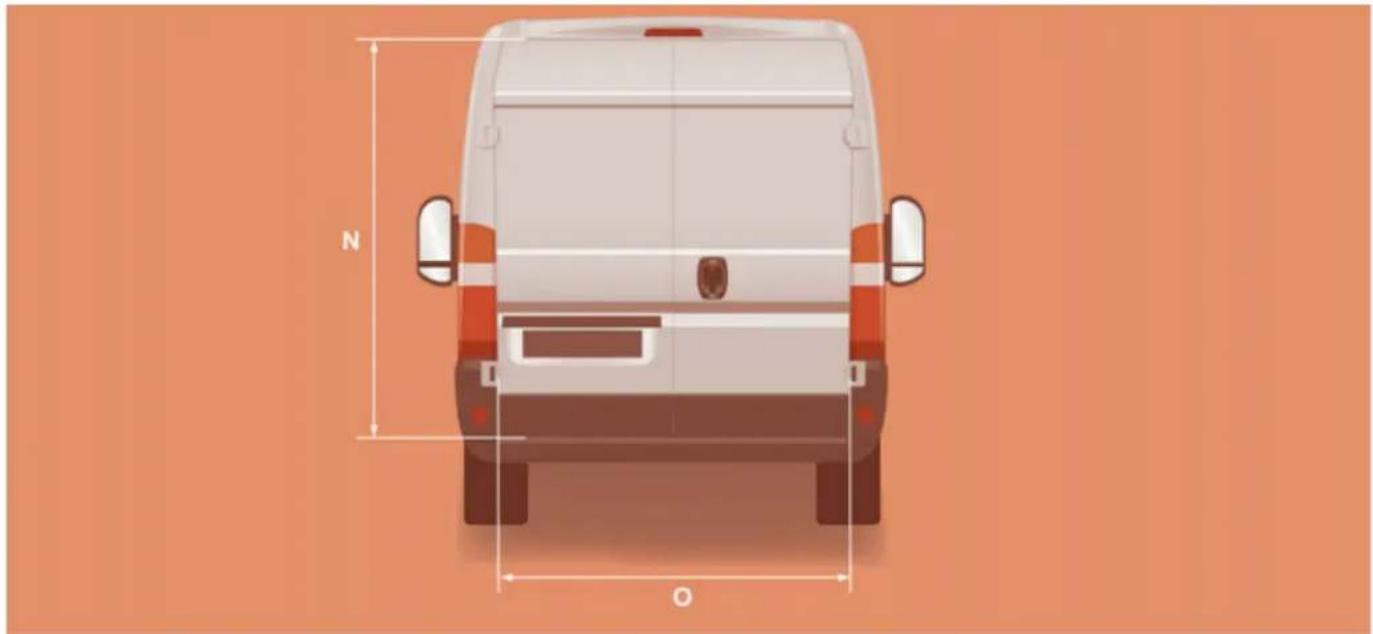
| REAR DOORS | |||||||||
| L1 | L2 | L3 | L4 | ||||||
| H1 | H2 | H1 | H2 | H2 | H3 | H2 | H3 | ||
| N | Rear door aperture height | 1 520 | 1 790 | 1 520 | 1 790 | 1 790 | 2 030 | 1 790 | 2 030 |
| O | Rear door aperture width | 1 562 | |||||||
Dimensions
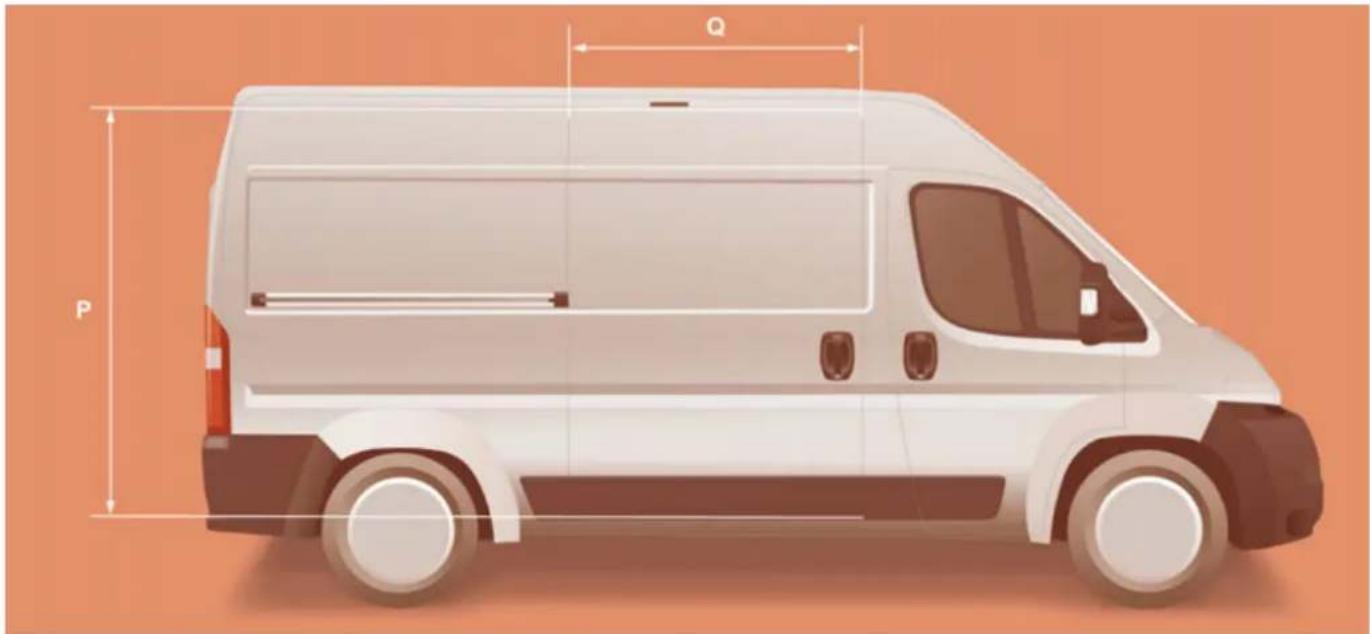
| SIDE DOOR | |||||||||
| L1 | L2 | L3 | L4 | ||||||
| H1 | H2 | H1 | H2 | H2 | H3 | H2 | H3 | ||
| P | Height of the sliding side door | 1 485 | 1 755 | 1 485 | 1 755 | ||||
| Q | Width of the sliding side door | 1 075 | 1 250 | ||||||
Dimensions
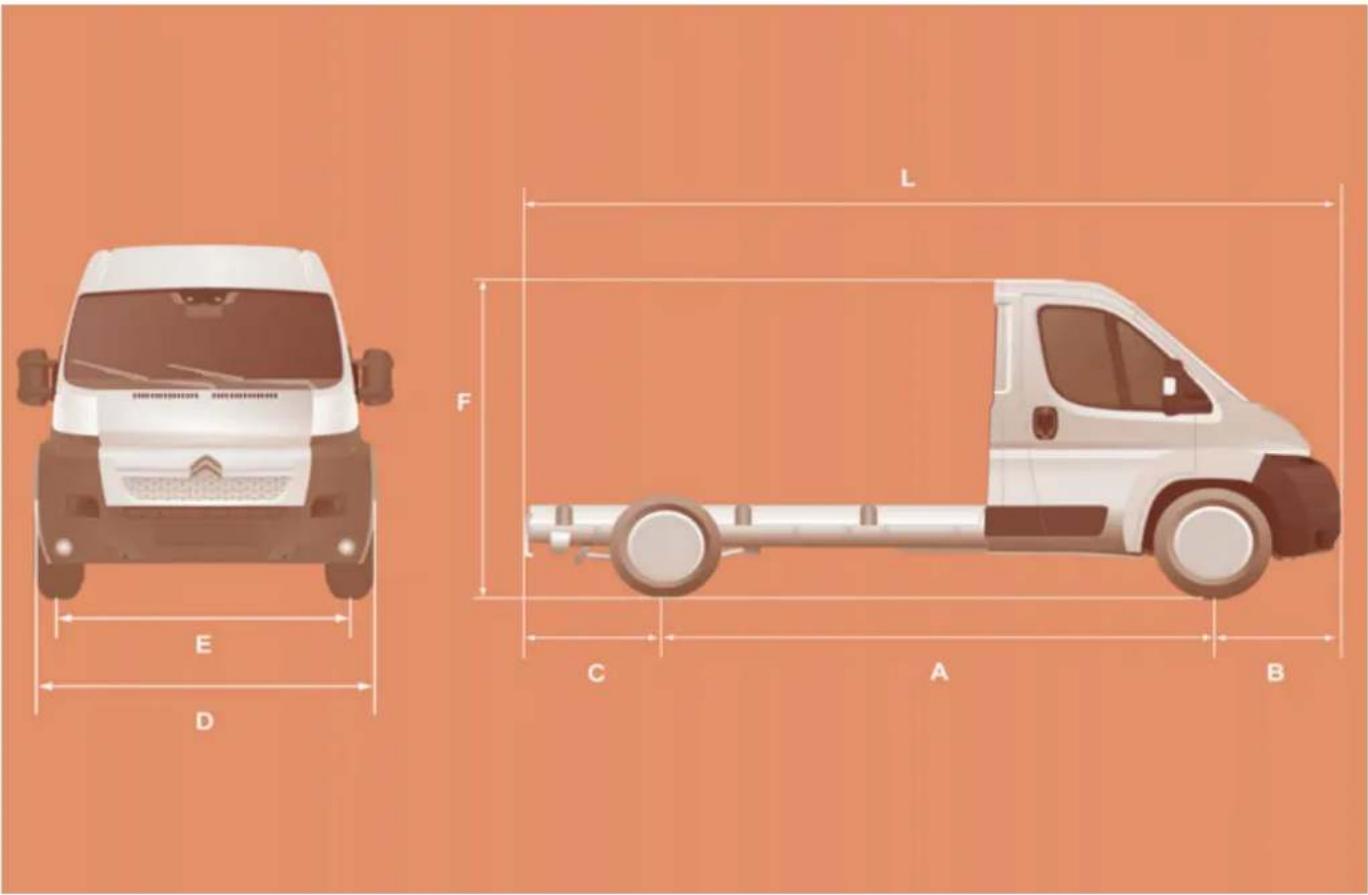
Dimensions
| CHASSIS CAB | ||||||
| L1 | L2 | L2S | L3 | L4 | ||
| L | Overall length | 4 908 | 5 358 | 5 708 | 5 943 | 6 208 |
| A | Wheelbase | 3 000 | 3 450 | 3 800 | 4 035 | 4 035 |
| B | Front overhang | 948 | ||||
| C | Rear overhang | 960 | 1 225 | |||
| D | Overall width (excluding mirrors) | 2 050 | ||||
| - | Passable width | 2 207 | ||||
| - | Max permitted body width | 2 350 | ||||
| E | Width of front track | 1 810 | ||||
| - | Width of rear track | 1 790 | ||||
| - | Width of increased rear track | 1 980 | ||||
| F | Overall height | 2 153 | ||||
| - | Max permitted body height | 3 500 | ||||
Dimensions
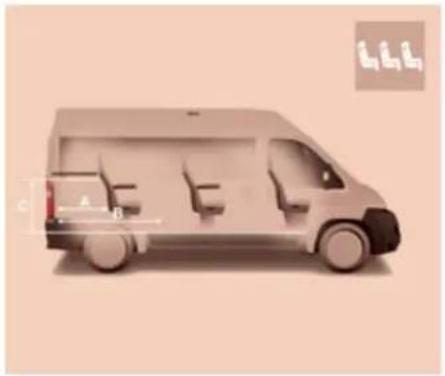
natural_image
3D illustration of a van with internal compartments and labeled parts (no text or symbols)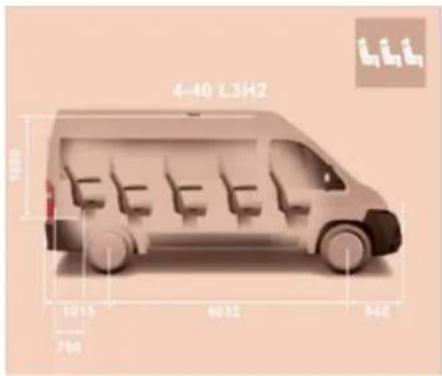
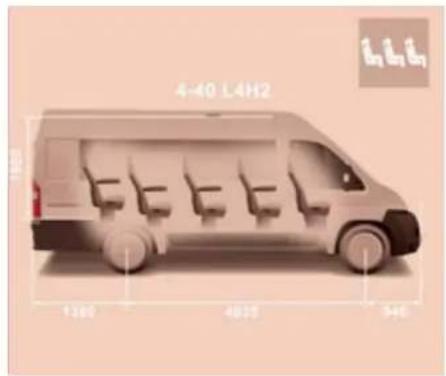
| L1H1 | L2H2 | |||
| A | 751 | 872 | 1 201 | 1 322 |
| B | 1 201 | 1 743 | 1 651 | 2 193 |
| C | - | 860 | - | 860 |
| ENGINES and gearboxes - Diesel | |||||||
| 2.2 litre HDi 110 | 2.2 litre HDi 130 | 2.2 litre HDi 150 | 3 litre HDi 155 | 3 litre HDi 180 | |||
| Gearbox | Manual | ||||||
| Gears | 5 | 6 | 6 | 6 | 6 | 6 | |
| Maximum power (hp) | 100 | 110 | 120 | 130 | 150 | 156 | 180 |
| EU standard maximum power (kW) | 74 | 81 | 88 | 96 | 110 | 115 | 130 |
| Cubic capacity (cc) | 2 198 | 2 198 | 2198 | 2 999 | 2 999 | ||
| Bore x stroke (mm) | 86 x 94.6 | 86 x 94.6 | 86 x 94.6 | 95.8 x 10⁴ | 95.8 x 10⁴ | ||
| Max power engine speed (rpm) | 2 900 | 3 500 | 3 500 | 3 500 | 3 500 | 3 600 | |
| EU standard max torque (daNm) | 250 | 320 | 320 | 400 | 400 | ||
| Max torque engine speed (rpm) | 1 500 | 2 000 | 2 000 | 1 400 | 1 400 | ||
| Fuel | Diesel | Diesel | Diesel | Diesel | Diesel | ||
| Catalytic converter | Yes | Yes | Yes | Yes | Yes | ||
| Particle emissions filter | - | Yes | - | Yes | Yes | Yes | Yes |
| Engine oil capacity (in litres) afterdraining and oil filter replacement | 6.4 | 6.2 | 6.4 | 6.2 | 6.2 | 9 | 9 |
Quality of the fuel used for Diesel engines
The Diesel engines are perfectly compatible with biofuels which conform to current and future European standards (Diesel fuel which complies with standard EN 590 mixed with a biofuel which complies with standard EN 14214) available at the pumps (containing up to 7 % Fatty Acid Methyl Ester).
The B30 biofuel can be used in certain Diesel engines; however, this use is subject to strict application of the special servicing conditions. Consult a CITROËN dealer.
The use of any other type of (bio) fuel (vegetable or animal oils, pure or diluted, domestic fuel...) is strictly prohibited (risk of damage to the engine and fuel system).
Weights
WEIGHTS
Refer to your registration certifi cate.
In each country, it is imperative that the towed loads permitted by local legislation are complied with. For information regarding your vehicle's towing possibilities and its gross train weight, contact a CITROËN dealer.
The speed of a towing vehicle must not exceed 60 mph (100 km/h) (comply with the legislation in force in your country).
High ambient temperatures may result in a reduction in the performance of the vehicle, to protect the engine. When the ambient temperature is higher than 37 °C , limit the weight towed.
This table indicates the gross vehicle weight (GVW) according to the dimensions and the vehicle model.
| Dimensions | Model | GVW in kg |
| L1 H1 | 30 | 3 000 |
| 33 | 3 300 | |
| L2 H1 | 33 | 3 300 |
| 35 | 3 500 | |
| 30 | 3 000 | |
| L2 H2 | 33 | 3 300 |
| 35 | 3 500 | |
| 30 | 3 000 | |
| L3 H2 | 35 | 3 500 |
| 435 | 3 500 | |
| 440 | 4 000 | |
| 30 | 3 000 | |
| L3 H3 | 35 | 3 500 |
| 435 | 3 500 | |
| 440 | 4 000 | |
| L4 H2 | 35 | 3 500 |
| L4 H3 | 435 | 3 500 |
Load transfer
It is possible, if the towing vehicle has not reached the GVW, it is possible to transfer this weight to the trailer.
In all cases, do not exceed the trailer weight and GTW indicated.
Observe the towing limits of your vehicle.
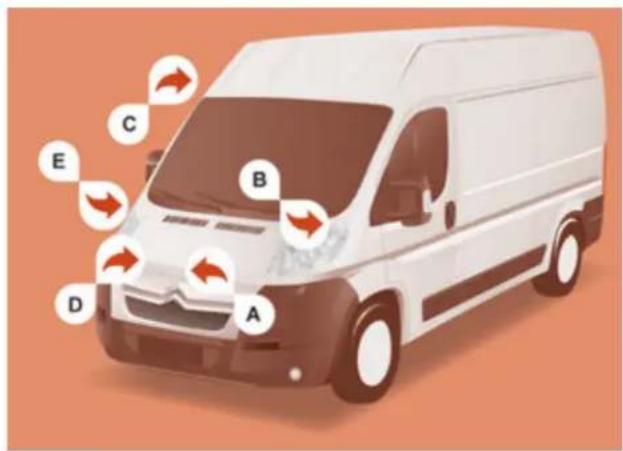
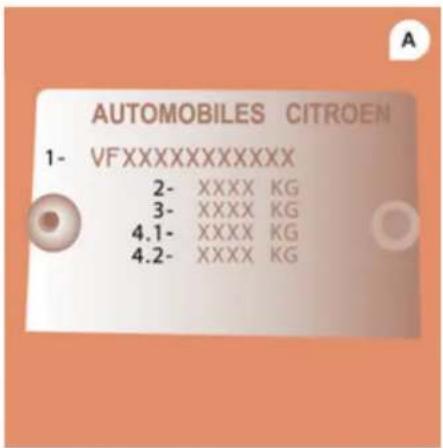
Identification markings
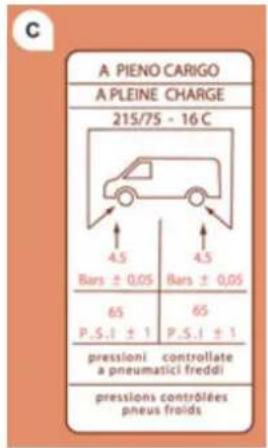
IDENTIFICATION MARKINGS
A. Manufacturer's plate
1 - VF Type serial number.
2 - Gross vehicle weight (GVW).
3 - Gross train weight (GTW).
4.1 - Maximum weight on front axle.
4.2 - Maximum weight on rear axle.
B. Serial number on the bodwork
C. yres
The label C (image given as an indication only) affixed to the van pillar, on the right-hand door side, indicates:
- the wheel and tyre sizes,
- the tyre pressures (the pressures must be checked when cold, at least once a month).
D. Paint code
E. Serial number on the bodywork
The number is located under the plastic cover, at the sill on the right-hand door side.
Exterior
EXTERIOR
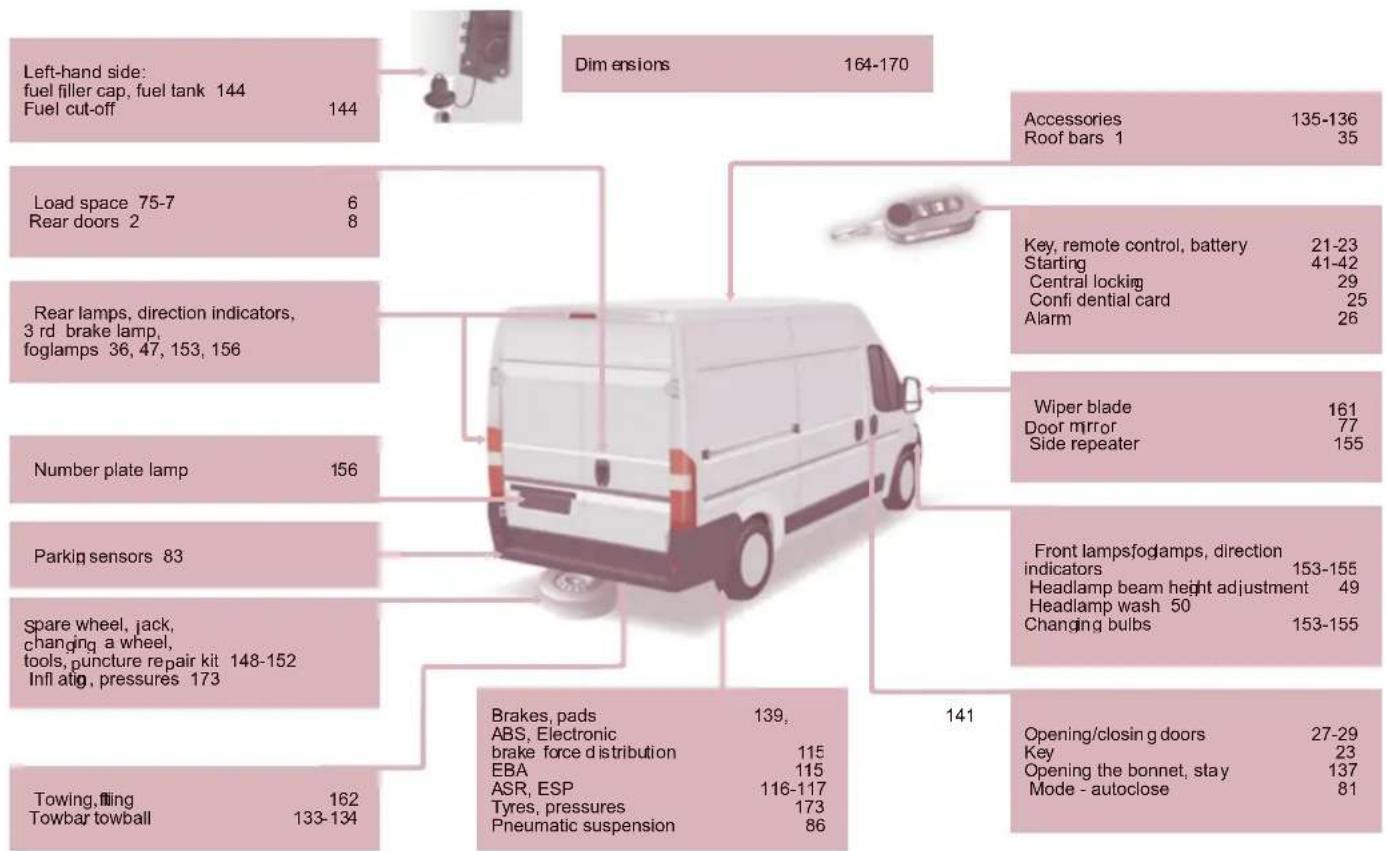
tree
| Item | Dimension | |---|---| | Left-hand side: fuel filler cap, fuel tank 144 Fuel cut-off | 144 | | Load space 75-7 Rear doors 2 | 68 | | Rear lamps, direction indicators, 3 rd brake lamp, foglamps 36, 47, 153, 156 | | | Number plate lamp | 156 | | Parking sensors 83 | | | Spare wheel, jack, changing a wheel, tools, puncture repair kit Infl atig, pressures 173 | | | Towing, fling Towbar towball | 162 133-134 | | Brakes, pads ABS, Electronic brake force distribution EBA ASR, ESP Tyres, pressures Pneumatic suspension | 139, 115, 115, 116-117, 173, 86 | | Accessories Roof bars 1 | 135-136 35 | | Key, remote control, battery Starting Central locking Confi dential card Alarm | 21-23 41-42 29 25 26 | | Wiper blade Door mirror Side repeater | 161 77 155 | | Front lampsfogamps, direction indicators Headlamp beam height adjustment Headlamp wash 50 Changing bulbs | 153-155 49 50 153-155 | | Opening/closing doors Key Opening the bonnet, stay Mode - autoclose | 27-29 23 137 81 |INSTRUMENTS AND CONTROLS
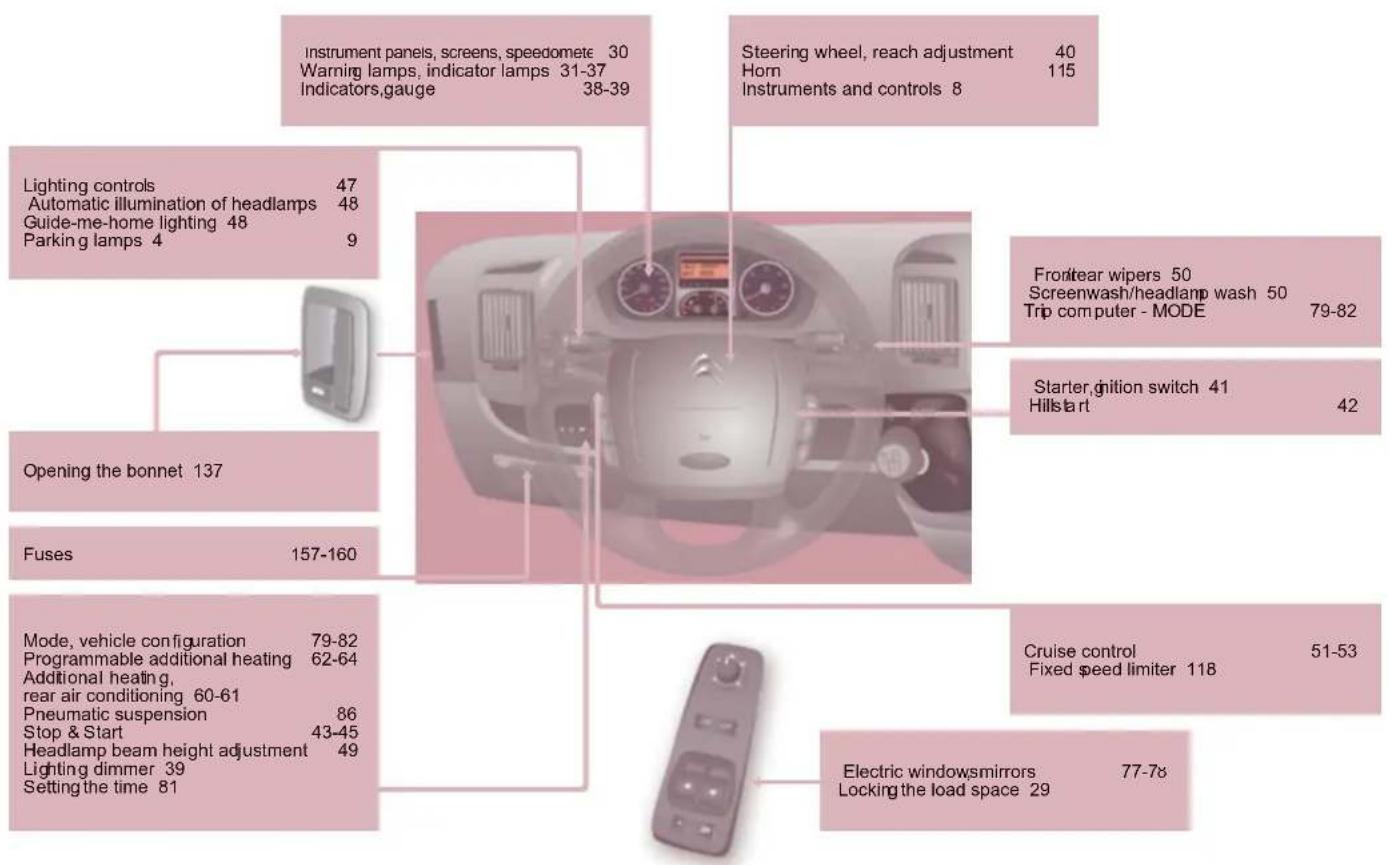
Instruments and controls
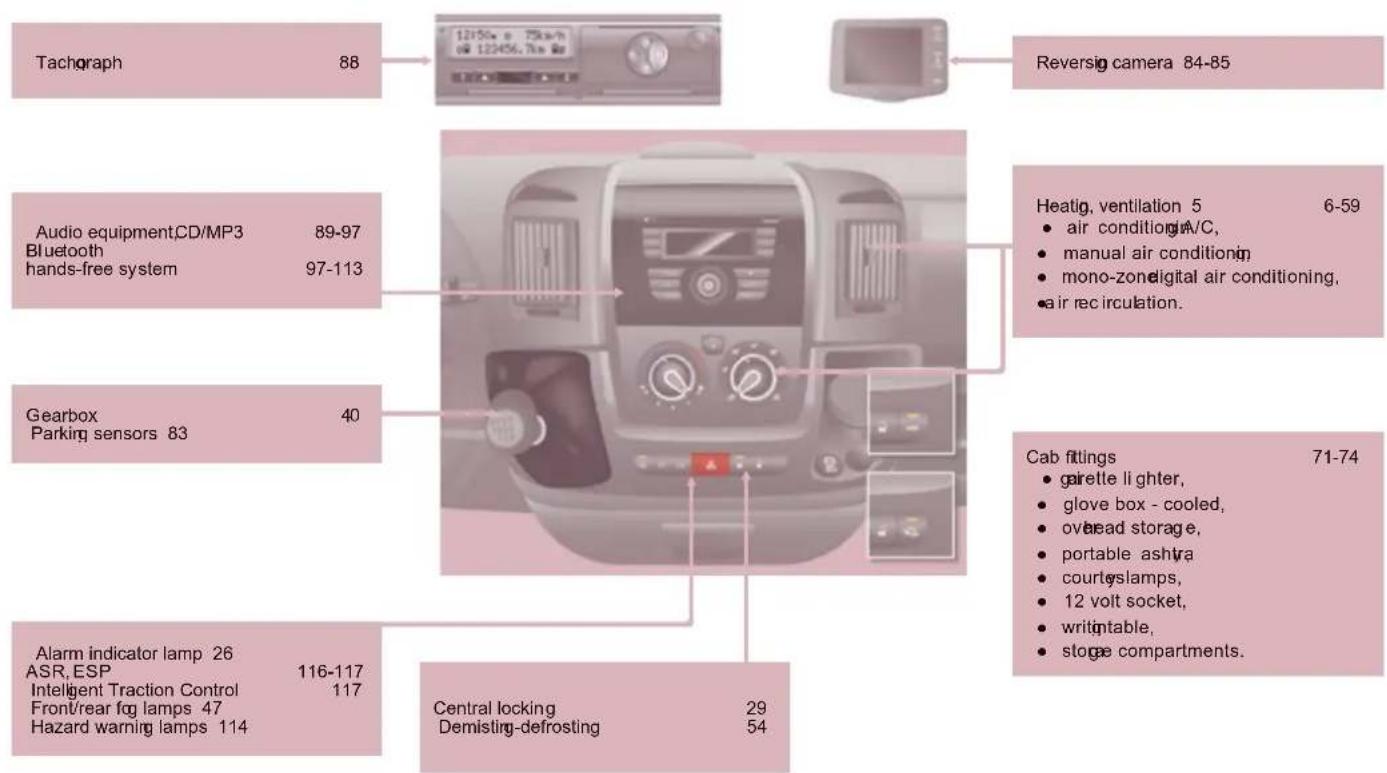
flowchart
graph TD
    A["Tachograph 88"] --> B["1215x a 75x/h 04 122456.75x Hz"]
    B --> C["Reversig camera 84-85"]
    D["Audio equipment,CD/MP3 89-97 Bluetooth hands-free system 97-113"] --> E["Central locking 29 Demisting-defrosting 54"]
    F["Gearbox 40 Parking sensors 83"] --> E
    G["Alarm indicator lamp 26 ASR, ESP 116-117 Intelligent Traction Control 117 Front/rear fog lamps 47 Hazard warning lamps 114"] --> E
    H["Heatig, ventilation 5 6-59 • air condition/A/C, manual air condition, mono-zone digital air conditioning, air recirculation."] --> E
    I["Cab fittings 71-74 • garette lighter, glove box-cooled, overhead storage, portable ashtracourtslamps, 12 volt socket, writtable, storage compartments."] --> E
INTERIOR
Interior
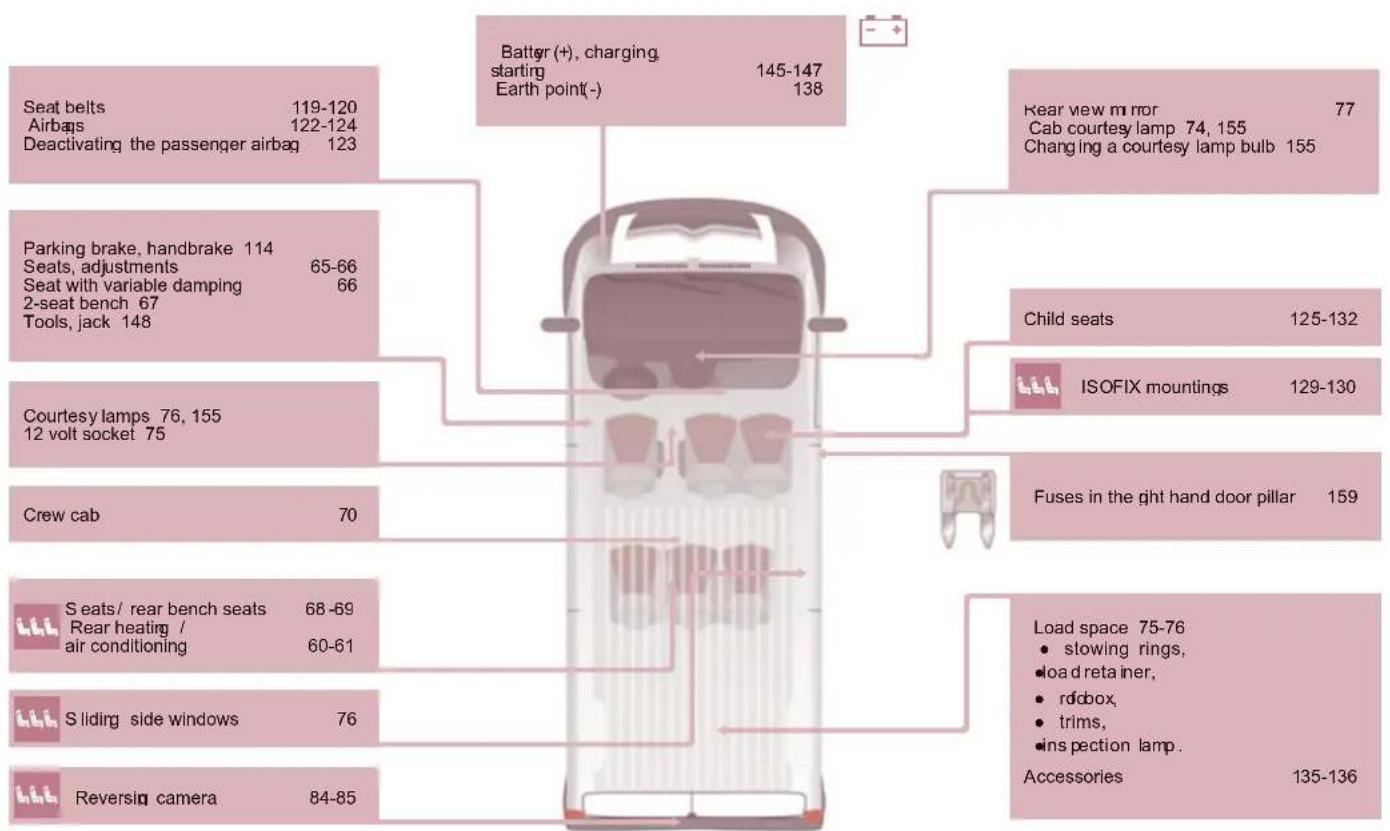
Technical data - Maintenance
TECHNICAL DATA - MAINTENANCE
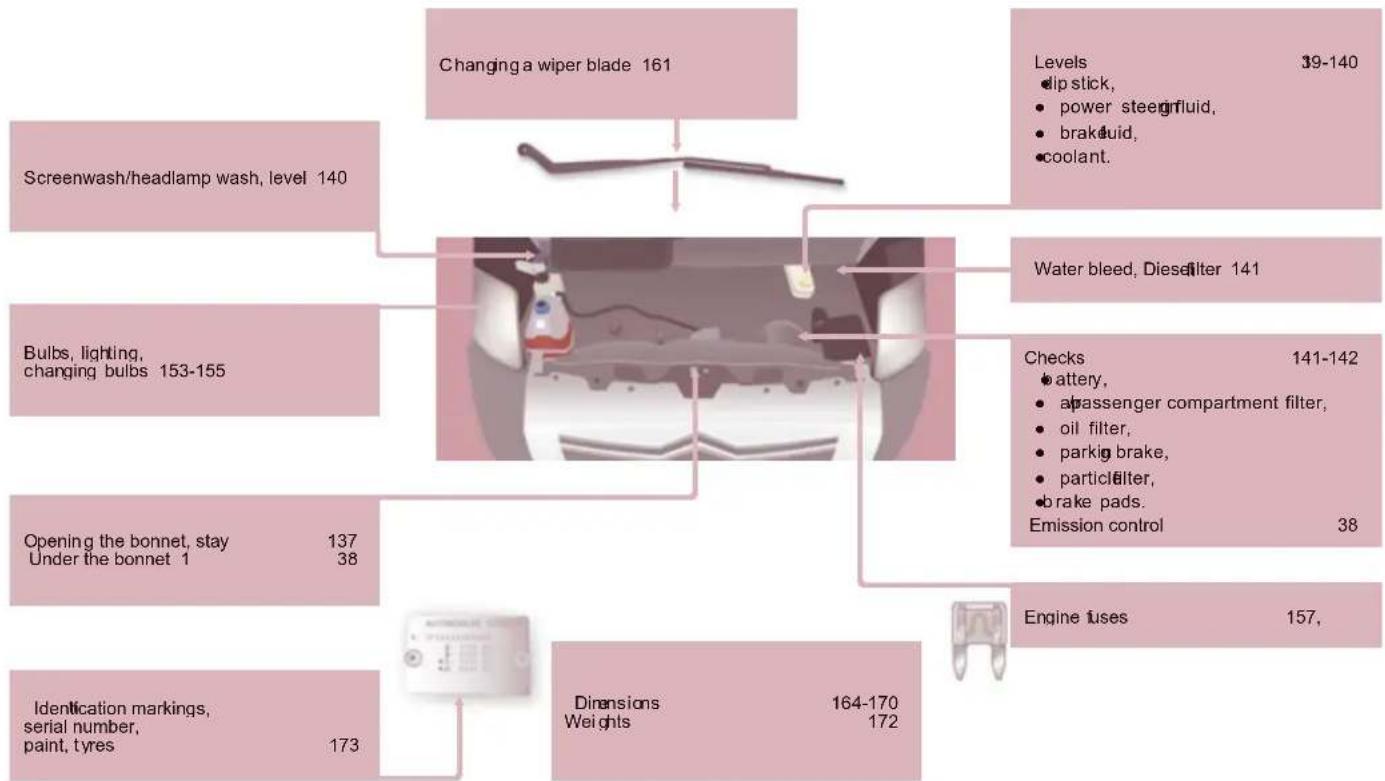
flowchart
graph TD
    A["Changing a wiper blade 161"] --> B["Screenwash/headlamp wash, level 140"]
    A --> C["Bulbs, lighting, changing bulbs 153-155"]
    A --> D["Opening the bonnet, stay Under the bonnet 1 137 38"]
    A --> E["Identification markings, serial number, paint, tyres 173"]
    A --> F["Levels: dip stick, power steeg fluid, brak fluid, coolant."]
    A --> G["Water bleed, Diesel filter 141"]
    A --> H["Checks: battery, passenger compartment filter, oil filter, parkig brake, particle filter, brake pads."]
    A --> I["Engine tuses: 157"]
    A --> J["Dimensions Weights 164-170 172"]
This handbook describes all of the equipment available in the whole range.
Your vehicle will be fitted with some of this equipment described in this document, depending on its trim level, version and the specification for the country in which it is sold.
The descriptions and illustrations are given without any obligation. Automobiles CITROËN reserves the right to modify the technical specifications, equipment and accessories without having to update this edition of the handbook.
This document is an integral part of your vehicle. It should be passed on to the new user in the event of sale or transfer.
Automobiles CITROËN declares, by application of the provisions of the European regulation (Directive 2000/53) relating to End of Life Vehicles, that it achieves the objectives set by this regulation and that recycled materials are used in the manufacture of the products that it sells.
Reproduction or translation of all or part of this handbook is prohibited without written authorisation from Automobiles CITROËN.
Printed in the EU
Anglais
03.13
Automobiles CITROËN
- MyCITROËN
- On-line owner's handbook
- Select:
- Contents
- SAFETY 114-132
- ACCESSORIES 133-136
- CHECKS 137-144
- QUICK HELP 145-162
- TECHNICAL DATA 163-173
- VISUAL SEARCH 174-180
- PRESENTATION
- EXTERIOR
- Reversing camera
- "Guide-me-home" welcome lighting
- Opening the rear doors to 180°
- Rear parking sensors
- Familiarisation
- ACCESS
- buttons
- buttons
- Opening
- Closing
- Instruments and controls
- Centre console
- SITTING COMFORTABLY
- SEEING CLEARLY
- MONITORING
- Screen
- Buttons
- PASSENGER SAFETY
- DRIVINGSAFELY
- Going into engine START mode
- ECO-DRIVING
- Optimise the use of your gearbox
- Drive smoothly
- Control the use of your electrical equipment
- Limit the causes of excess consumption
- Observe the recommendations on maintenance
- REMOTE CONTROL
- Unlocking the cab
- Unlocking the rear doors
- Central locking
- Deadlocking
- Folding/unfolding the key
- KEY
- REMOTE CONTROL BATTERY
- Charging the remote control battery
- There is a risk of damage if the replacement battery is not of the correct type.
- ELECTRONIC IMMOBILISER
- Good practice
- When purchasing a second-hand vehicle:
- CONFIDENTIAL CARD
- ALARM
- Activation of the alarm
- Automatic activation
- Deactivation using the key
- Deactivation using the remote control
- Deactivation of the anti-tilt protection\*
- Driver's door
- SLIDING SIDE DOOR
- From outside
- From inside
- Child lock
- REAR DOORS
- Opening/Closing the doors
- Opening to 180°
- Cab and load space
- Load space
- Protection against attack
- Activation/deactivation of the function
- Door open warning lamp
- INSTRUMENT PANEL
- Instrument panel screen 1
- Instrument panel screen 2
- WARNING LAMPS
- FUEL GAUGE
- COOLANT TEMPERATURE
- What you should do if the needle enters the red zone, or if the warning lamp comes on:
- EMISSION CONTROL
- SERVICE INDICATOR
- Reminder of servicing information
- Deterioration of the engine oil
- Resetting to zero
- LIGHTING RHEOSTAT
- Gearbox and steering wheel
- GEARBOX AND STEERING WHEEL STEERING WHEEL REACH
- MANUAL
- Reverse gear
- ADJUSTMENT
- STARTING AND STOPPING
- Good practice when starting
- Diesel pre-heating warning lamp
- Door or bonnet open warning lamp
- Good practice when stopping
- Minimise engine and gearbox wear
- In low temperatures
- Startig and stopping
- HILL START ASSIST
- Operation
- Operating fault
- STOP & START
- Going into engine STOP mode
- Special cases: STOP mode unavailable
- Special cases: START invoked automatically
- Gooφ ractice
- Deactivation
- Reactivation
- Maintenance
- IMPROVED COMFORT
- SOUNDPROOFING
- TREATMENT OF THE BODYWORK LEADING TO ACOUSTIC COMFORT
- STEERING MOUNTED CONTROLS
- LIGHTING CONTROL STALK
- Sidelamps on
- Dipped/main beam headlamps on
- Switching between dipped and main beam
- Headlamp flash
- "Motorw" function
- Direction indicators (green flashing)
- Front fglamps
- Rear fglamps
- The foglamps should only be used in fog or when snow is falling.
- Steerig mounted controls
- AUTOMATIC ILLUMINATION OF HEADLAMPS
- GUIDE-ME-HOME LIGHTING
- Ignition off or key in the STOP position.
- The indicator lamp comes on in the instrument panel.
- Activation
- PARKING LAMPS
- The warning lamp on the instrument panel comes on.
- HEADLAMP BEAM
- Travelling abroad
- Windscreen wipers
- Automatic rain sensitive windscreen wipers
- Goodpractice
- Screenwash and headlamp wash
- CRUISE CONTROL
- Steerigmounted controls
- Temporarily exceeding the programmed speed
- Changing the programmed speed while the cruise control is in operation
- Cancelling the programmed speed
- Ventilation
- DEMISTING AND DEFROSTING
- Windscreen and side windows
- Manual mode
- Defrosting the rear screen and mirrors
- CORRECT USE OF THE AIR CONDITIONING
- VENTS
- "Leave them open"
- WITH MANUAL ADJUSTMENT
- Air conditionig
- Temperature adjustment
- Air flow
- Air distribution
- Intake of exterior air
- Recirculation of interior air
- MONO-ZONE DIGITAL AIR CONDITIONING
- AUTO mode
- AUTO mode withpersonalisation
- Switching off the air conditioning
- Complete switch-off
- Comfort value adjustment ring
- Intake of exterior air/ recirculation of interior air
- Rapid demisting/defrosting
- ADDITIONAL REAR VENTILATION
- Air outlet
- Air inlet
- ADDITIONAL HEATING SYSTEMS
- Additional heating
- Additional heater or prgrammable additional heating
- Supplementary heating
- REAR HEATING AND / OR AIR CONDITIONING
- Activation/Deactivation
- Comfort value adjustment
- PROGRAMMABLE ADDITIONAL HEATING
- Digital programming control
- Setting the time of the internal clock
- Reading the time
- Immediate switchig on of the heating
- Switching on the deferred heating
- Cancelling the programming
- Recalling one of the pre-selected start times
- Switching off the heating
- Two different types of equipment
- SEATS
- DRIVER'S SEAT
- Head restraint
- Adjustable armrest
- 2-SEAT FRONT BENCH
- Grab handle
- Writing table
- REAR SEATS Seat back agle
- Seat back folded position of the central seat (rows 2 and 3)
- Removing the bench seat
- CREW CAB
- Access to the box under the bench seat
- From the cab
- From the load space
- Goodpratice
- CABIN FITTINGS
- Central storage tray
- Front seat storage
- Folding writing table
- Practical information
- Courtesy lamp
- Reading lamps
- Stowing rings
- Trims
- Courtesy lamps
- Roof box
- Torch
- Step
- Ladder type vertical partition
- Load retainer
- Glazed separation partition
- Sliding side windows
- MIRRORS
- Rear view mirror
- Door mirrors
- Electrical controls
- Electric folding
- Defrosting the mirrors
- ELECTRIC WINDOWS
- Manual operation
- Automatic operation
- TRIP COMPUTER
- - Ambient temperature
- - Range
- - Distance A
- - Average fuel consumption A
- - Current fuel consumption A
- - Average speed A
- - Trip duration A
- If TRIP B is activated on the MODE menu:
- MODE
- Configuration - Personalisation
- This button enables you to:
- AUDIBLE REAR PARKING SENSORS
- Engage reverse gear
- Stop the assistance
- Malfunction
- Reversig camera
- Initial settings
- Alarm display on the screen
- Change of language
- Pneumatic suspension
- Raise: upwards adjustment of the load floor
- Lower: downwards adjustment of the load floor
- Return to the nominal floor height
- Automatic correction of loading floor height
- Warning lamp
- TACHOGRAPH
- FIRST STEPS
- MENU
- RADIO
- SELECTING A STATION
- STORING A STATION - MANUALLY
- STORING A STATION - AUTOMATICALLY
- CD - MP3 CD
- PLAY ACD
- MP3
- SECRET CODE
- TELEPHONE PRE-EQUIPMENT
- BLUETOOTH HANDS-FREE SYSTEM
- INTRODUCTION
- Description of the steering mounted controls
- Description of voice commands
- MOBILE TELEPHONE WITH HANDS-FREE FUNCTION
- Pairing a mobile telephone
- Downloading your phonebook
- There are 2 options:
- Calling a contact recorded in the phonebook
- Ending a call
- Incoming call
- Transferring an active call
- Placing a call on hold
- Call list
- VOICE COMMANDS
- Settings/pairing
- TEXT READER
- Only on mobile telephones with this function
- Read an incoming text message
- Read the last text received
- List of text messages
- Managing text messages
- Deleting all text messages
- Information settings
- Message reader
- PORTABLE AUDIO DEVICE PLAYER
- Displaying the fi le information
- Previous track
- Next fi le
- Pausing/resuming play
- Changing the sound source
- Portable audio device
- Drivig safely
- DRIVING SAFELY
- S
- Applying
- Releasing
- ANTI-LOCK BRAKING SYSTEM (ABS - EBFD)
- Stop immediately.
- ANTI-SLIP REGULATION(ASR) AND ELECTRONIC STABILITY PROGRAMME (ESP)
- Operation of the ASR and ESP systems
- Deactivating the ASR system
- Intelligent Traction Control
- FIXED SPEED LIMITER
- CAB SEAT BELTS
- Height adjustment
- Unfastening
- Driver's seat belt not fastened warning lamp
- REAR SEAT BELTS
- Seat belts
- Recommendations for children:
- IMPROVED SAFETY AND SECURITY
- IMPACT RESISTANCE
- ANTI-THEFT PROTECTION
- Airbgs
- AIRBAGS
- Front airbgs
- Front airbg fault
- Deactivating the passenger airbag
- Deactivation check
- Lateral airbags and curtain airbags
- Operating check
- Front airbags
- Lateral airbags
- Curtain airbgs
- GENERAL POINTS RELATING TO CHILD SEATS
- INSTALLING A CHILD SEAT USING A THREE POINT SEAT BELT
- "Rearwards-facing"
- "Forwards-facing"
- Child safety
- "ISOFIX" MOUNTINGS
- LOCATIONS FOR THE INSTALLATION OF ISOFIX CHILD SEATS
- INSTALLING CHILD SEATS ATTACHED USING THE SEAT BELT
- ADVICE ON CHILD SEATS
- Installing a booster seat
- TOWING A TRAILER, CARAVAN, BOAT, ETC...
- Driving advice
- Towig a trailer
- Towbar
- ROOF BARS
- OTHER ACCESSORIES
- Range of professional equipment
- Equipment
- Installation of radiocommunication transmitters
- On the inside
- On the outside
- Bonnet stay
- To close
- Under the bonnet
- DISEL ENGINES
- LEVELS
- Oil level
- Dipstick
- Oil chage
- Viscosity selection
- Changing the brake fluid
- Coolig system
- Power steering fluid level
- Windscreen wash and headlamp wash level
- Used oil
- Toppig up
- CHECKS Air filter and passen
- Bleeding the water contained in the Diesel filter
- Battery
- ger compartment
- filter
- Brake pads
- Brake disdrum wear status
- Parking brake
- Oil filter
- Manual gearbox
- Checks
- Particle filter system (Diesel)
- Saturation / Regeneration
- TOTAL & CITROËN
- Partners in performance and protecting the environment
- Optimum protection for your engine
- Fuel
- FILLING WITH FUEL
- Low fuel level
- FUEL SYSTEM CUT-OFF
- Chaging the battery using a charger
- Starting from another battery
- Batter
- Chaging a wheel
- PARKING THE VEHICLE
- TOOLS
- SPARE WHEEL
- FITTING THE SPARE WHEEL
- Never go underneath a vehicle supported only by a jack (use an axle stand).
- REFITTING THE REPAIRED WHEEL
- Refer to the "Identification markings" section of chapter 9 to locate the tyre label.
- Checking and adjusting the pressure
- Replacig the sealant fluid cartridge
- CHANGING A BULB
- TYPE OF BULB
- FRONT LAMPS
- Chaging a bulb
- - Dipped beam headlamp
- - Sidelamp
- - Main beam headlamp
- - Direction indicators
- - Foglamps
- COURTES Y LAMPS
- REAR LAMPS
- Brake/sidelamps
- Direction indicators
- Reversing lamps
- Foglamps
- NUMBER PLATE LAMPS
- THIRD BRAKE LAMP
- Removing and fitting a fuse
- Chaging a fuse
- FUSES IN THE ENGINE COMPARTMENT
- Chaging a front wiper blade
- Changing the rear wiper blade
- Without liftig four wheels on the ground)
- From the front
- From the rear
- With lifting (2 wheels only on the ground)
- DIMENSIONS
- Quality of the fuel used for Diesel engines
- WEIGHTS
- IDENTIFICATION MARKINGS
- Manufacturer's plate
- Serial number on the bodwork
- yres
- Paint code
- Serial number on the bodywork
- INTERIOR
- TECHNICAL DATA - MAINTENANCE
Brand : CITROEN
Model : Relay (2014)
Category : Automotive