YN-622N-TX - Télécommande à distance Yongnuo - Free user manual and instructions
Find the device manual for free YN-622N-TX Yongnuo in PDF.


User questions about YN-622N-TX Yongnuo
0 question about this device. Answer the ones you know or ask your own.
Ask a new question about this device
Download the instructions for your Télécommande à distance in PDF format for free! Find your manual YN-622N-TX - Yongnuo and take your electronic device back in hand. On this page are published all the documents necessary for the use of your device. YN-622N-TX by Yongnuo.
USER MANUAL YN-622N-TX Yongnuo
Conventions used in the manual. 2
Supported Functions List .... 3
Name of Parts/LCD 4
Name of Parts/Quick Start Guide .... 5
Preparation Before Use 6-7
Setting 8-10
Flash awakening and triggering ..... 11
The other Trigger Modes ..... 12
Shutter Release Function ..... 13
Reference 14-15
Troubleshooting 16
Specifications 17
Cautions
- Please turn off power supplies of all equipment when connecting or installing the product.
- Please keep it dry. Be sure not to use wet hand to touch the product. It is also not allowed to immerse the product into waster or make it be exposed in the rain; otherwise it may not work normally or even be damaged.
- Do not use it in explosive situations; violation of this warning may cause an explosion or fire.
• This product involves battery, please be in strict accordance with the relevant provisions on the use of the battery, otherwise it would cause property damage or personal injury.
General Description
Thank you for purchase the products of Yongnuo firstly.
- YN-622N-TX i-TTL wireless flash controller is for supporting the use of YN-622N i-TTL wireless flash trigger transceiver.
- This product adopts flexible LCD menu control, supporting mixed use of the A/B/C three groups of flashes using i-TTL, manua, or super sync flash mode, can be adjusted the exposure compensation or flash output of each group. In addition, it supports setting different focal length(zoom)of the three groups of flash, the remote-controlled distance can reach 100M, supporting seven wireless channels and A/B/C three groups, and equipped with the AF-assist beam emitter. Support USB firmware upgrade.
Compatible camera list:
Nikon
D70/D70S/D80/D90/D200/D300/D300S/D600/D700/D800/
D3000series/D5000series/D7000series
Include items:
1×YN-622N-TX Controller
1×Usermanual
1×LS-2.5/N1 shutter connecting cable
1×LS-2.5/N3 shutter connecting cable
Conventions used in the manual
- This manual to assume that using the compatible camera/flash, and using the YN-622N transceiver with same channel. Functions supported by the product depend on the camera and flash used. Concerning the operation of YN-622N transceiver, camera and flash, please read the user manual respectively.
• The latest version of the compatibility list and user manual, firmware, please visit www.hkyongnuo.com. - Upgrade to the latest firmware version b efore using(P15).
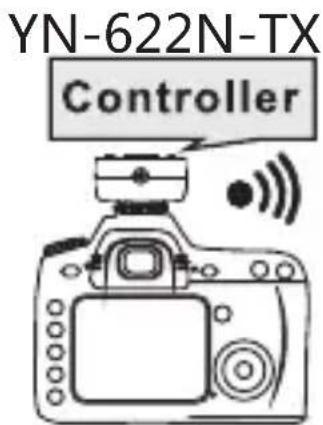
text_image
YN-622N-TX Controller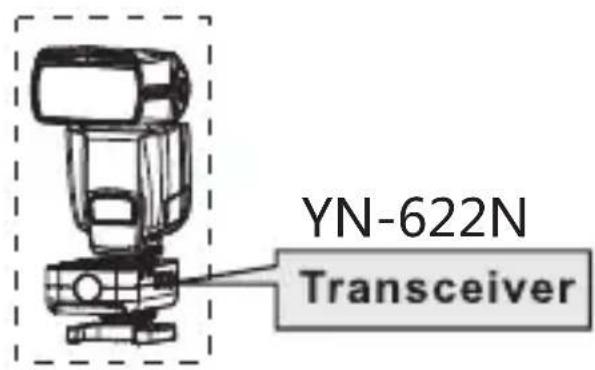
text_image
YN-622N TransceiverThe below icon used in this manual:

Refers to short press the button.

Refers to long press(hold down) the button.
Supported Functions List
• LCD screen display, multi-buttons quick operation
• The firmware can be upgraded through the USB interface
• Support wireless shutter release function
• The focal length(zoom) of the A/B/C three groups of flash can be adjusted separately
• Equipped with the AF focus assist light (can be disabled)
• Grouping flash mode: i-TTL/Manual flash/Super sync
• Supporting mixed use of the A/B/C three groups of flashes with i-TTL, Mashuraloflash, or Super sync
• The exposure compensation or flash output of A/B/C three groups of flashes can be adjusted separately
- Shutter Sync: first curtain sync, second curtain sync and FP high-speed sync, the highest sync speed is 1/8000s
• Support exposure compensation, flash value lock function(FVL)
• Support simulate (modeling) flash, red-eye reduction flash
• Support the flash zooming (auto)
• Super Sync (SS) time delay adjustment, for higher x-sync speed than the camera allows
- Settings saved automatically
• The flash sync signal can be input through the PC port
- Support the basic flash trigger (max sync speed is 1/250s) of standard hot shoe (non Nikon body)
*The above functions need to be used with the YN-622N transceiver. Parts of functions may refer to the manufacturer of the camera and flash.(FVL,Modeling Flash, Red-eye Reduction Flash etc.).
Name of Parts/LCD
※The protective film can be torn out.
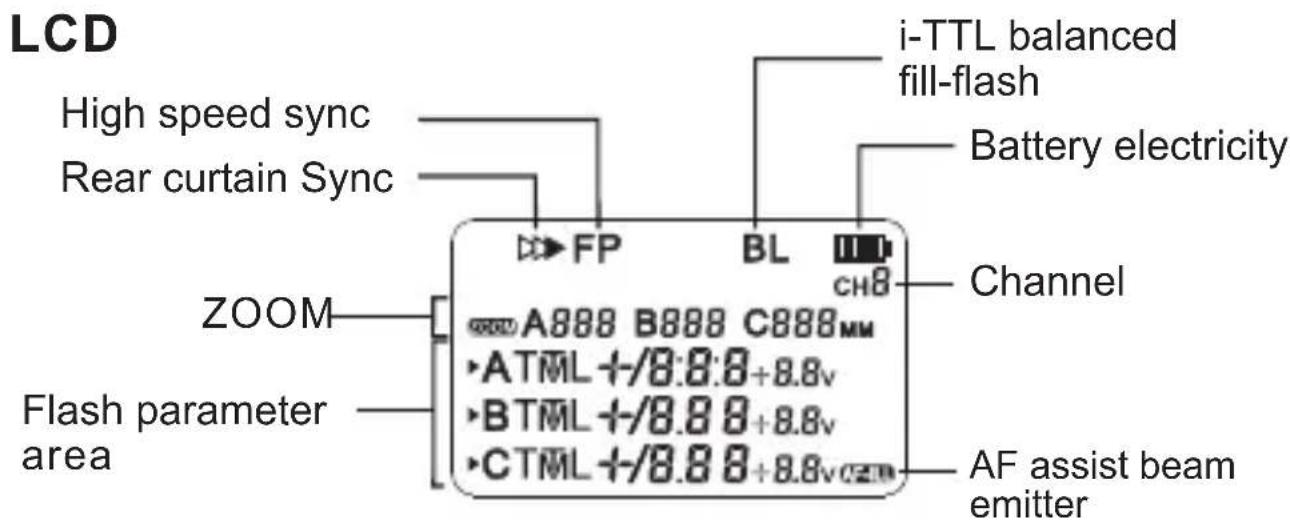
text_image
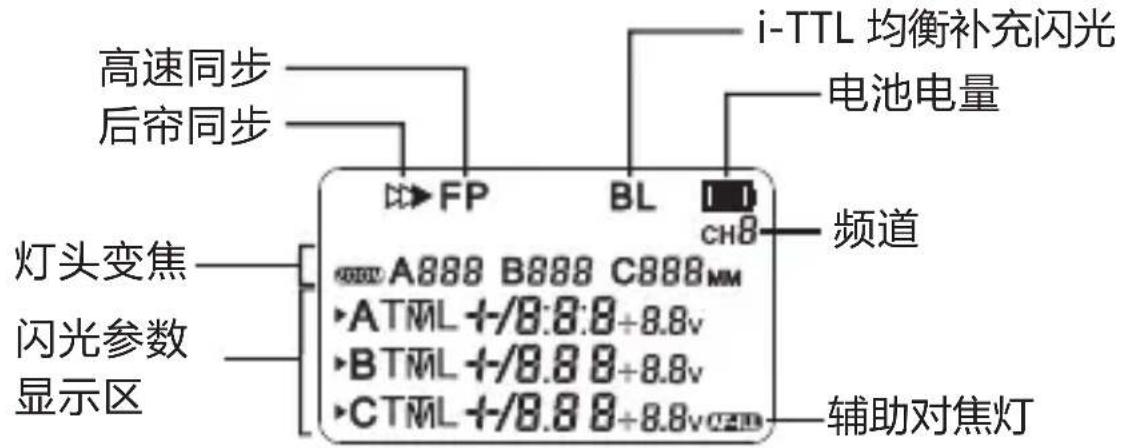
LCD High speed sync Rear curtain Sync ZOOM Flash parameter area FP BL i-TTL balanced fill-flash Battery electricity Channel A888 B888 C888MM ATML +/-/8.8.8+8.8v BTML +/-/8.8.8+8.8v CTML +/-/8.8.8+8.8v AF assist beam emitterName of Parts/Quick Start Guide
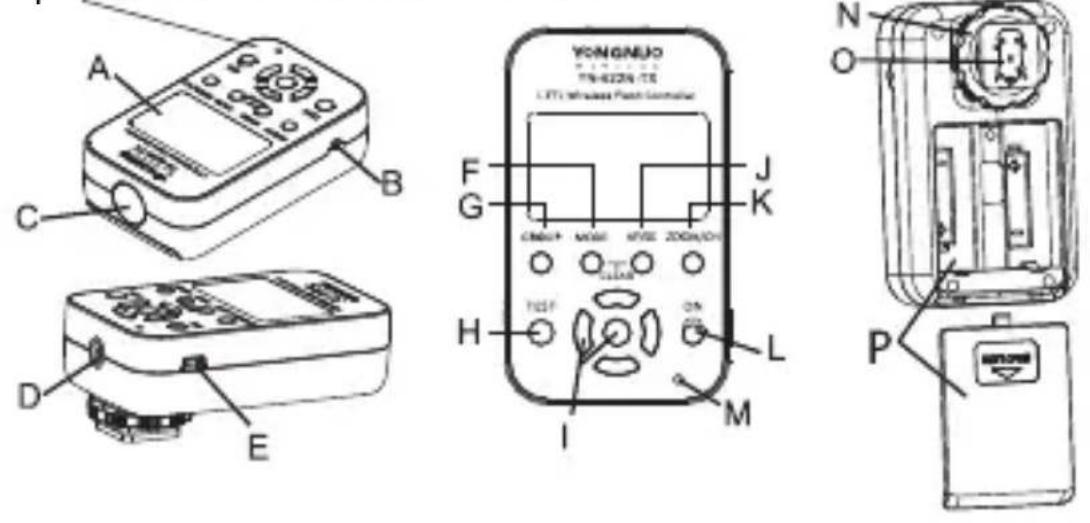
A-LCD: Display all the settings of controller, convenient for your view and setup.
B-2.5MM Shutter release interface: Wireless shutter release function(P.13).
C-AF assist beam emitter: (P.10)
D-PC interface: Input the flash sync signal(P.12).
E-USB interface: Firmware upgrade through connecting the computer(P.15).
F-Mode button: Each time you press the switch in the flash mode(P.8).
G-Group button: The arrow shown the switch setting group(P.8).
H-TEST button: Long press for flash awaken, loosen for flash testing(P.11).
I-Select/Set button group: Multifunction button group, including the [UP] [DOWN] [LEFT] [RIGHT] and [OK] buttons, which can set the channel, ZOOM, flash output and other parameters.
J-AF/SS button: Short press for AF assist beam emitter switch(P.10), long press for [Super Sync] parameter setting (P.9).
K-ZOOM/CH button: Each short press for A/B/C three groups switch(P.10), long press for channel setting(P.7).
L-Power switch: Slide to ON for power on.
M-Status indicator : The green light will bright when in communication, while the red light will bright when in triggering (or shutter releasing).
N-Locking ring and locking pin: (P.6)
O-Hot shoe Mounting foot and contacts: (P.6)
P-Battery compartment and battery cover: (P.6)
Preparation Before Use
1. Installing the Batteries
Open the cover and install two AA batteries (excluded) according to the marks, rechargeable batteries of 1.2V can be used.
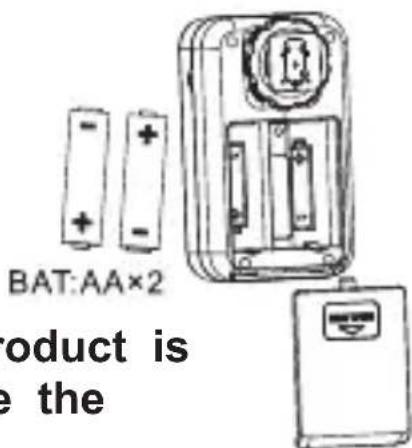
text_image
BAT:AA×2 product is e the- Remove the batteries when the product is not used for long time. Please replace the both two batteries at the same time.
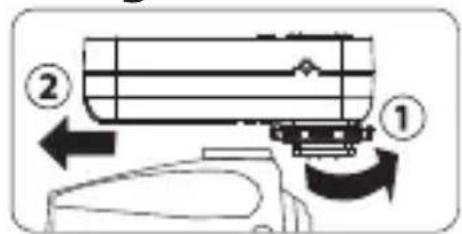
2. Installing the Controller on the Camera
text_image
Diagram showing a mechanical device with labeled parts 1 and 2, indicating directional movement or assembly.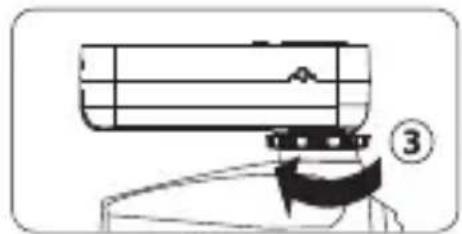
natural_image
Diagram of a person using a handheld device to reach a wall-mounted panel, labeled with number 3 (no text or symbols on the diagram itself)1). Unscrew the locking ring of the controller.
2). Slip the mounting foot into the hot shoe of the camera.
3). Turn the locking ring according to the direction of arrow, the locking pin will protrude from the mounting foot.
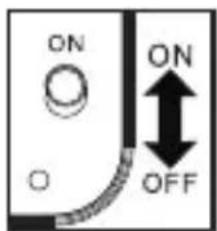
3. Power ON.
Power on when the power switch slides to [ON].
text_image
ON ON OFFPreparation Before Use
4.Channel Setting:
Long press the [ZOOM/CH] button, then press the [UP] or [RIGHT] for increasing, press the [DOWN] or [LEFT] for decreasing, press [OK] for confirm. Set the same channel as the YN-622N transceiver.
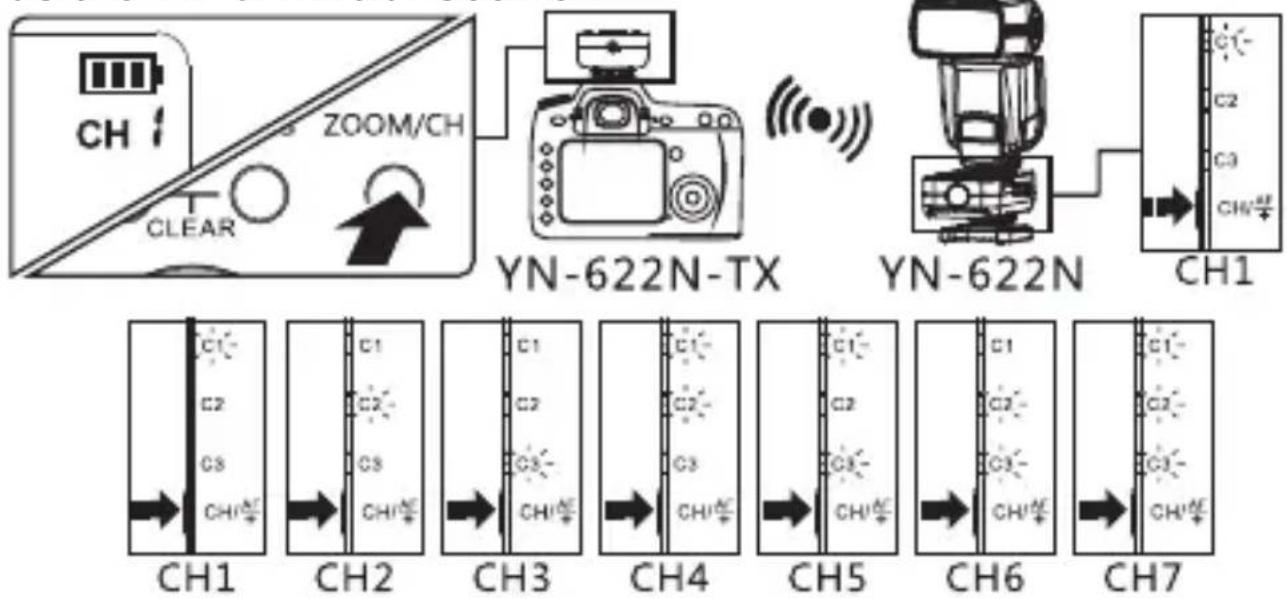
5. Transceiver and Flash Settings
1). Set the transceiver's receiving group, and set the same channel as the YN-622N-TX controller.
2). Set the flash to i-TTL flash mode*, the flash will fire according to the flash mode and parameters set by the controller, support i -TTL/manual flash. (*For non-i-TLL flash mode or other triggering mode, refer to P.12).
Setting
1. Groups and Modes Setting(Remote Control)
• Shooting with a Different Flash Mode for Each Group
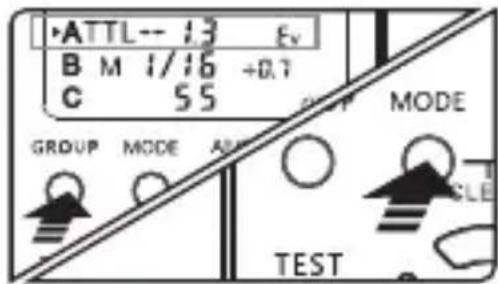
1). Press the [GROUP] button to choose the setup group, press with the arrow to select A/B/C group.
2).Press the [MODE] button to set the flash mode of selected group, each press for the settings as below:
text_image
ATTL -- 13 Ev B M 1/16 +0.7 C 55 GROUP MODE AVE MODE TESTTTL: i-TTL Flash, the FEC adjustment range is within -3-+3EV, press [LEFT] or [RIGHT] button to increase and reduce 1EV, press [UP] or [RIGHT] button to increase and reduce 0.3EV. It is supported to set the FEC on the flash directly, the compensation value shall be superposed according to flash setting plus the controller setting.
M: Manual Flash, The adjustment range is within 1/128-1/1, press [LEFT] or [RIGHT] button to adjust, press the [UP] or [RIGHT] button for fine adjustment.
SS: (Super Sync, refer to Page 9) (None): The group is not participate in flash.
- When setting the flash mode and parameters on the controller, the screen of the flash on the transceiver will not change.
Setting
2. About the Super Sync(SS)
• Use the non-high speed sync flash to realize higher sync speed, this function is more applicable to strobe flashes whose flash duration is longer, and it is for the camera which support Auto FP only. Supportsetup the time delay parameter of Super Sync.
text_image
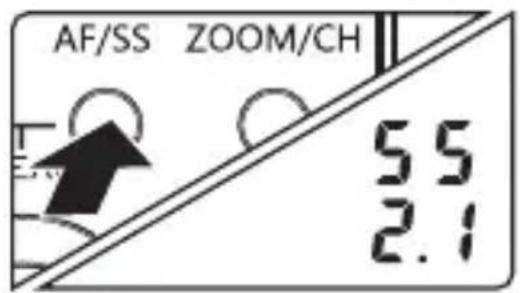
AF/SS ZOOM/CH 5.5 2.11. Set the time delay parameter of controller SS:
Long press the [AF/SS] button to proceed setting, press the [UP][DOWN][LEFT][RIGHT] button to adjust, press [OK] to confirm and exit setup, supports Automatic Setup (AU) or Manual Setup 0.1-3.0.
2. Using Super Sync:
1). Set the flash in manual mode, Support transceiver using hot shoe flash or connecting to the PC port. and it may needs setting at manual full-power flash output (1/1).
2). Set the flash sync speed of the camera as AUTO FP, the maximum shutter sync speeds can reach to 1/8000s. According to the flash model, output power and shutter speed to adjust controller "SS" to a suitable time delay parameters.
3). Take photos and check whether the photos are synchronous, it may see gradations or variations in the photos, results depend on the camera and flash.
Setting
3.ZOOM
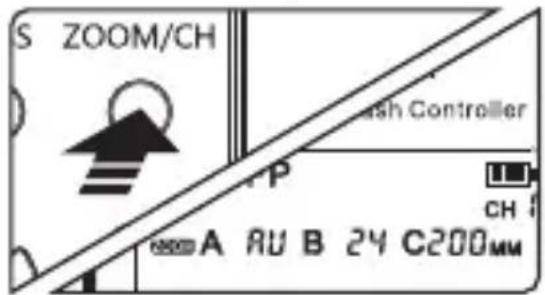
• It support the controller setting the focal length of the flash lamp holder on the transceiver.
text_image
S ZOOM/CH Cash Controller P CH A AU B 24 C200mmEach short press the [ZOOM/CH] button, choose one of the A/B/C group, press the [UP] [DOWN] [LEFT] [RIGHT] buttons to setup, supports the range of setup: 24-200,AU (automatic), press the [OK] button to confirm.
4. AF Assist Beam Emitter
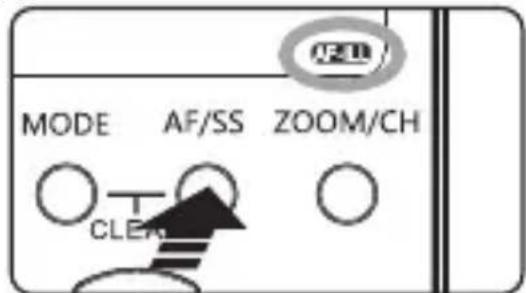
- When using AF under low-light, the built-in AF-assist beam emitter of the contorller will be emitted automatically to make it easier to autofocus.
Short press the [AF/SS] button to enable/disable the AF Assist Beam Emitter function, the LCD will displayed the icon.
text_image
MODE AF/SS ZOOM/CH CLEA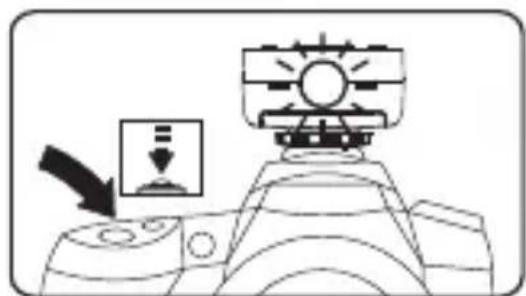
text_image
Diagram showing a device with directional arrows and a control panel, likely illustrating a measurement or navigation system.※ It need to using single AF of the camera.
Flash awakening and triggering
1. Flash awakening&Testing flash
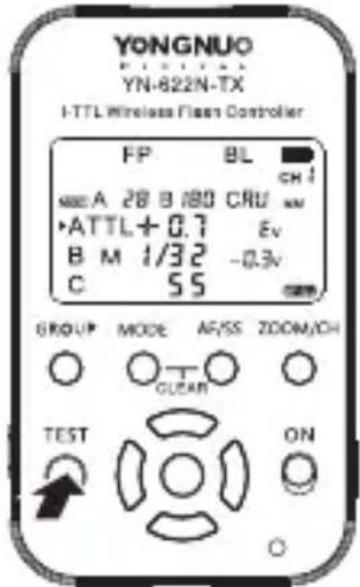
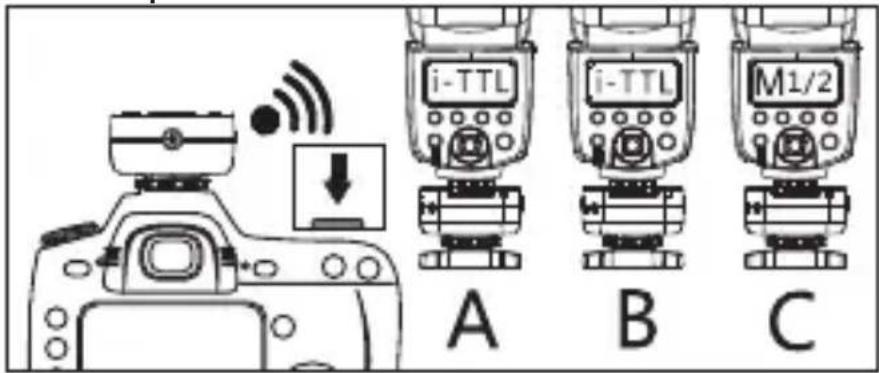
When half press the shutter button of the camera or press the [TEST] button of the controller, the awakening indicator light of green light will bright, the hot-shoe flash on the transceiver will be awakened. When loosing the [TEST] button, the groups have been selected of flash will be tested for once.
2. Flash triggering
Completely press the shutter button of the camera will trigger the flash synchronously, the triggering indicator light of red light will bright.
text_image
YONGNUO YN-822N-TX I-TTL Wireless Flex Controller FP BL CH 1 A 28 B 180 CRU ATTL+0.7 Ev B M 1/32 -0.3v C 55 GROUP MODE AF/SS ZOOM/CH GUAR TEST ONExamples:
text_image
i-TTL A i-TTL B M1/2 CThe other Trigger Modes
1.Non-Remote Control Mode:
Set the compatible flash on the transceiver to Manual or RPT flash mode, the flash will work according to the mode and parameters displayed, the controller will not support the remote controlling the flash mode or flash exposure compensation (flash output).
2.PC interface & Basic flash Trigger(Support non Nikon body)
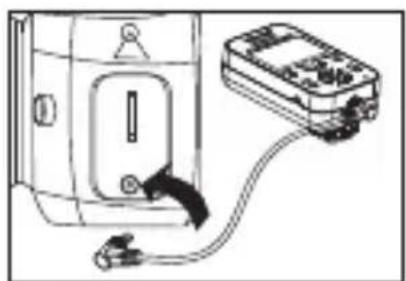
• PC interface (input) trigger: Use LS-PC/PC cable (option) to connect the controller and the PC interface of camera.
- Basic flash (Single Contact) trigger: Install the controller on the camera hot shoe.
natural_image
Diagram of a device connected to an electrical terminal (no text or symbols visible)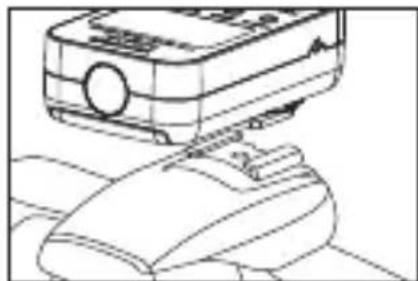
natural_image
Line drawing of a printer with a paper airplane being inserted into a device (no text or symbols)1).Transmitting group setup: Group setup according to the controller.
2).Flash mode setup: Set the manual flash(M) mode through the flash control panel, change the flash output manually, use the controller PC interface or main flash contact trigger, not support high speed sync or other TTL function (the highest synchronous speed is 1/250s or lower).
Shutter Release Function
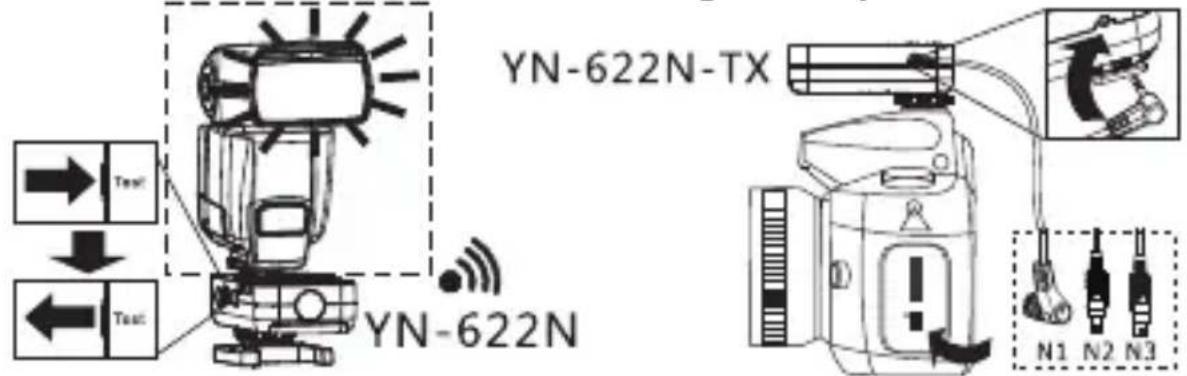
• Use the YN-622N transceiver for wireless transmitting, the YN-622N-TX controller as the shutter signal output.
text_image
YN-622N-TX YN-622N YN-622N N1 N2 N31). Install the YN-622N-TX controller on the camera's hot shoe, and use LS-2.5 series shutter connecting cable (may additional purchases) to connect the controller and camera. 2). Long press the [TEST] button of YN-622N transceiver to focus, loosen the [TEST] button to shot. If the flash installed on the YN-622N transceiver, the flash will fire synchronously.
• Support single shot only.
- If the controller does not installed on the compatible camera's hot shoe, the shutter will release when pressing the [TEST] button of transceiver.
The compatible shutter release cable list:
LS-2.5/N1: D200/D300/D300S/D700/D800
LS-2.5/N3: D90/D600/D3100/D3200/D5000Series/D7000Series
LS-2.5/N2(Optional): D70/D70S/D80
Reference
1. Flash Shutter Sync:
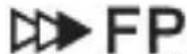
- Refer to the camera's setting. Supports front-curtain sync, rear-curtain sync and high speed synchronous(Auto FP*).The relevant icons will be displayed on the LCD(P.4).
- Using high-speed synchronization need to set the flash sync speed of the camera to “AUTO FP”. The maximum sync speed is 1/8000s or 1/4000s (depends on the camera).
• Some models of camera does not support the HSS (without Auto FP option), the shutter speed will be limited to 1/250s or less when using this kind of camera.
2.About the LCD backlight:
Press any button, the LCD backlight will light for 5 seconds.
3.About the battery electricity display :
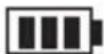
The battery icon in the upper right corner of the LCD will display the current electricity. When in low battery, the battery icon will blink, please replace the battery.
4. About the Automatic Save Function:
Then controller will automatically save the settings of channel, grouping, flash mode, AF assist beam emitter etc.
Reference
5.Factory Reset
text_image
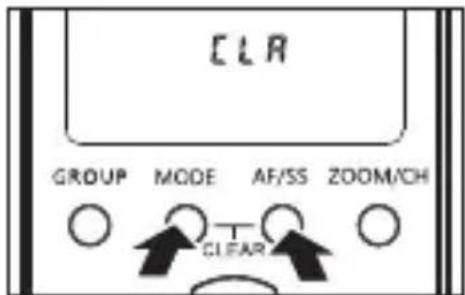
CLR GROUP MODE AF/SS ZOOM/CH CLEARHold down the [MODE] and [AF/SS] buttons at the same time until the screen as shown, then loosen to restore factory settings.
6.USB Firmware Upgrade
text_image
y0 622 1.03 FU GROUP MODE AF/SS ZOOM/CH ① TEST ② ON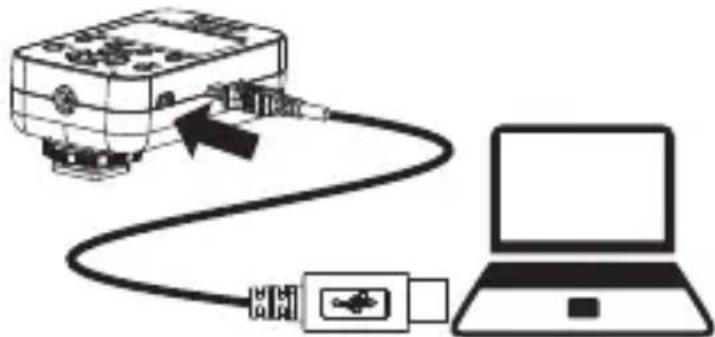
natural_image
Diagram showing a USB cable connecting an electronic device to a laptop (no text or symbols present)1). Visit YONGNUO official website: http://www.hkyongnuo.com/e-detail.php?ID=339 to download the firmware upgrade software and the latest firmware.
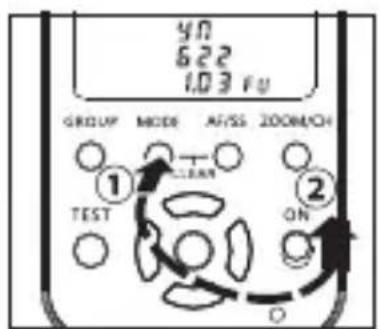
2). Turn off. Keep pressing [mode] button and turn on again. The screen will show firmware upgrade interface (will display the current version).
3). Connect the controller to PC via USB-MINIB cable (not include).
4). Complete the firmware upgrade operation according to the prompt of software.
Troubleshooting
1. Fail to power on or automatic shutdown:
• The battery is loaded inversely or exhausted.
➢ Install the battery according to the correct direction the battery compartment indicates and ensure the battery is full and restart the power.
2. The flash doesn't fire
➢ Ensure the power of all equipments are full, the flash is in ready state(the flash-ready indicator on)
The connection among the controller (transceiver), camera and the flash is reliable;
Whether the controller and transceivers are set in the same channels and controllable groups.
3. i-TTL underexposure or overexposure:
- Check whether the camera body or the flash set compensation setting. It may be underexpose if exceeds the flashing effect distance. It may overexposure when TTL and manual flash are used at the same time, now the manual flash suits to be used as a backlight.
It is suggested using the following procedures to deal with when other trouble occur during the using:
1). Restart all the equipments.
2). Replace the batteries of the controller and transceivers.
3). Reset the factory set of the controller and transceivers.
4). Reset the factory set of the camera/flash.
Specifications
System type: Digital FSK 2.4GHz wireless controller
Distance: 100M
Channel: 7
Flash mode: i-TTL, Manual flash, Super Sync
Sync mode: front-curtain sync, rear-curtain sync, Hi-speed sync(Auto FP)
Groups: 3Groups (A/B/C)
MAX Sync speed: 1/8000s
Trigger Interface: Hot-shoe,PC
Shutter release interface: 2.5MM shutter release interface
USB Firmware Upgrade: support
AF Assist Beam Emitter: support
Battery: AAX2(support 1.2 V rechargeable battery)3V
Stand-by time: 120h
Dimensions: 89.5×53×39mm
Weight:82g
The functions of this user manual are based on test conditions of our company. Further notice will not be given if the design and specifications change.
The YONGNUO logo in this manual includes the registered trademark or trademark of Shenzhen Yongnuo Photography Equipment Co., Ltd in China or/and other countries(regions). All other trademarks are the property of their respective owners.
目录
产品功能简介 …… 1
说明书约定 2
支持的功能列表 3
各部位名称/显示屏....4
各部位名称、快速使用指南……5
使用前准备 6-7
设置 8-10
闪光灯唤醒、引闪....11
其他引闪模式....12
快门线功能 13
参考 14-15
故障排除....16
规格 17
注意事项
D70/D70S/D80/D90/D200/D300/D300S/D600/D700/
text_image
Technical diagram of a handheld device with labeled parts A, B, C, D, and E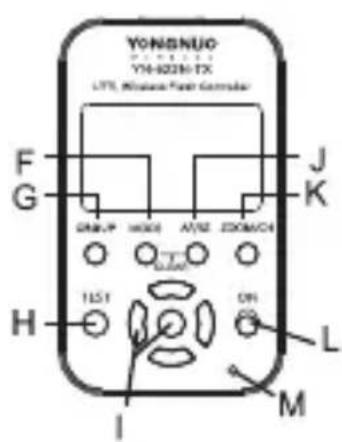
text_image
YONBNUC YH-023N-TX LTF, Transmission Power Generator F G J K DRAP HDDI AT/IE ZOOM/CH 1551 ON L H M I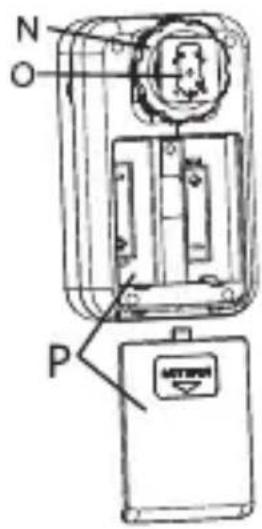
text_image
N O P MTSPN显示屏
text_image
Diagram showing airflow or fluid flow from a container to a tank, labeled with numbers 1 and 2.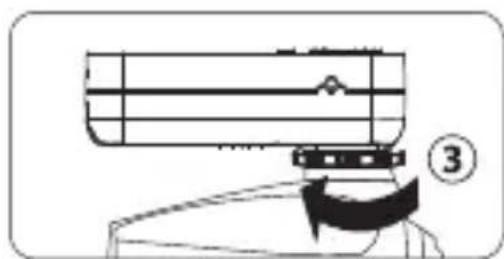
natural_image
Technical line drawing of a mechanical component with no visible text or symbolschemical
Chemical reaction pathway diagram showing CH1 to CH7 with labeled carbon atoms and transition states5.收发器及闪光灯设置:
text_image
Diagram showing a device with a control panel and directional arrow, likely illustrating a process or system setup.※ 需相机 单次AF模式。使用
闪光灯唤醒、引闪
1. 闪光灯唤醒、测试引闪
text_image
Diagram showing a camera with wireless signal and three digital devices labeled A, B, and C, likely illustrating a wireless communication setup.其他引闪模式
1. 非远程控制模式
natural_image
Line drawing of a device connected to a digital multimeter (no text or symbols visible)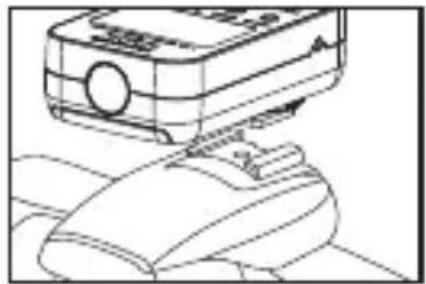
natural_image
Line drawing of a projector on a surface with a foot (no text or symbols)natural_image
Diagram showing a USB cable connecting an electronic device to a laptop (no text or symbols present)1). 访问永诺官方网站:
http://www.hkyongnuo.com/s-detail.php?ID=339
下载固件升级程序及最新固件。
Website:www.hkyongnuo.com
Email: service@hkyongnuo.com
V1.0