
Plus III - Remote trigger POCKETWIZARD - Free user manual and instructions
Find the device manual for free Plus III POCKETWIZARD in PDF.


User questions about Plus III POCKETWIZARD
0 question about this device. Answer the ones you know or ask your own.
Ask a new question about this device
Download the instructions for your Remote trigger in PDF format for free! Find your manual Plus III - POCKETWIZARD and take your electronic device back in hand. On this page are published all the documents necessary for the use of your device. Plus III by POCKETWIZARD.
USER MANUAL Plus III POCKETWIZARD
IMPORTANT: FCC/Canada frequency radios are NOT compatible with CE frequency radios and vice versa. PocketWizard.com/wheretobuy/frequency
The Plus III is a radio transceiver, capable of acting as a transmitter or receiver for triggering remote flashes and cameras. It requires at least one other PocketWizard radio for wireless triggering. It can be connected to almost any remote flash or camera with the proper sync cable. PocketWizard.com/support/cable_finder
- Please read this Quick Guide thoroughly before operating.
- Visit wiki.PocketWizard.com for extended operating information.
PLUS® III Transceiver
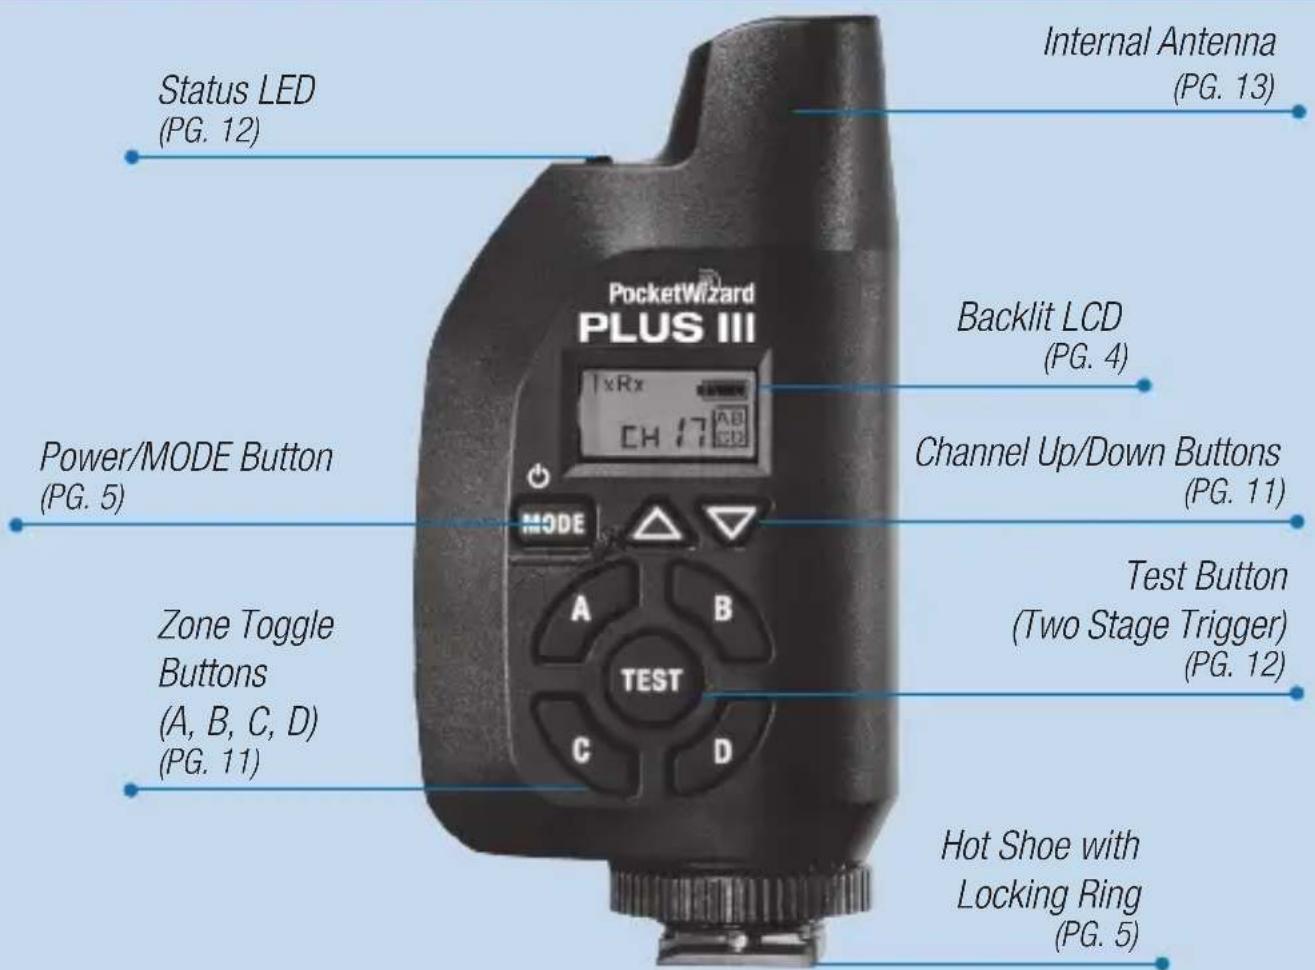
text_image
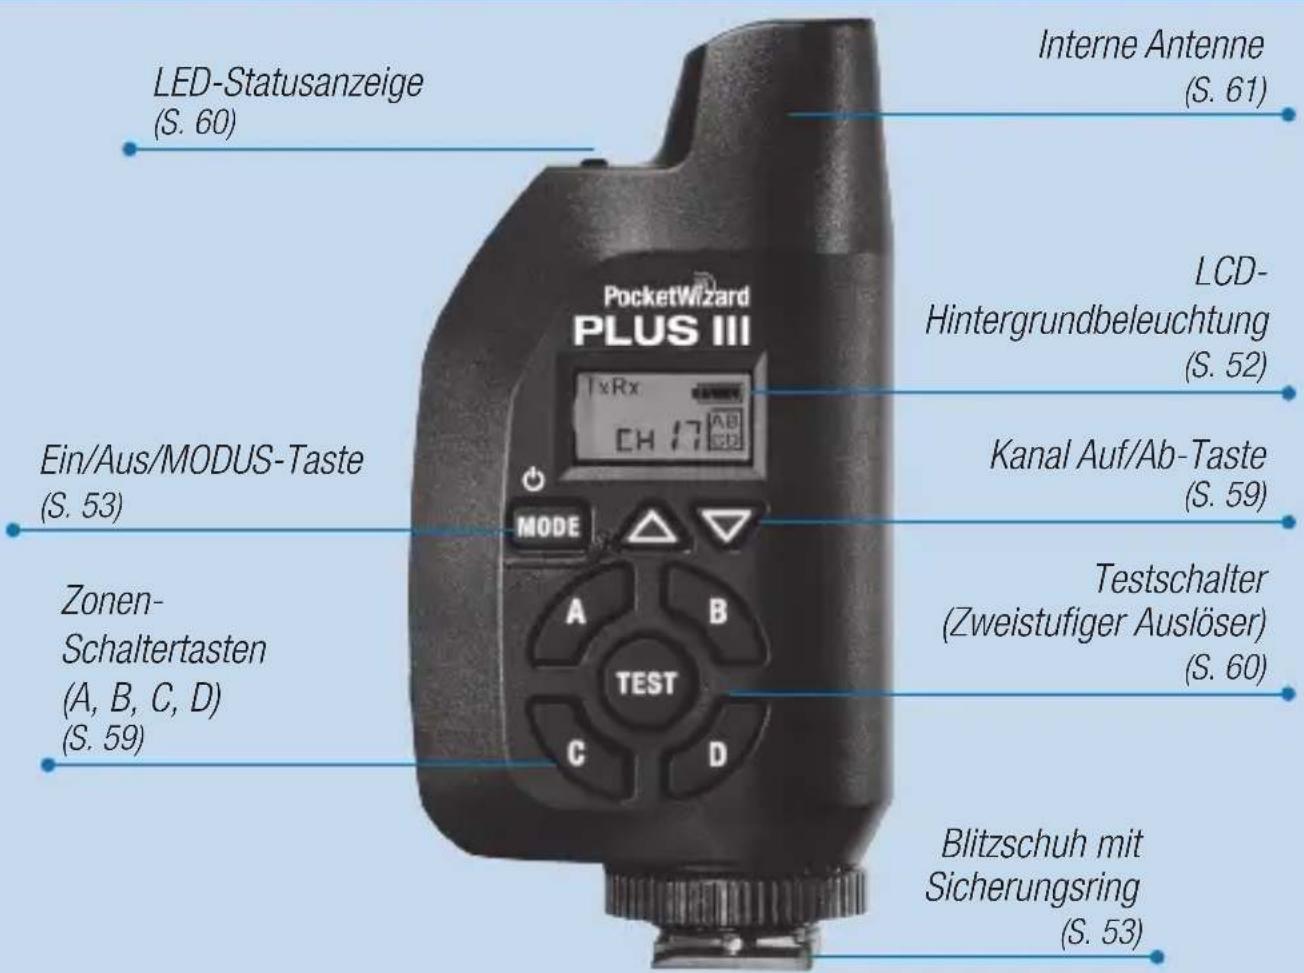
Status LED (PG. 12) Internal Antenna (PG. 13) Backlit LCD (PG. 4) Power/MODE Button (PG. 5) Channel Up/Down Buttons (PG. 11) Zone Toggle Buttons (A, B, C, D) (PG. 11) Test Button (Two Stage Trigger) (PG. 12) Hot Shoe with Locking Ring (PG. 5)READ ME FIRST:
- All equipment should be turned OFF when making connections, otherwise unwanted triggering or erratic behavior may occur.
- If operation is erratic, check batteries in all equipment first.
- A PocketWizard® transceiver/receiver is required for each remote flash or camera.
- Set all radios to the same channel.
PLUS® III Transceiver
3
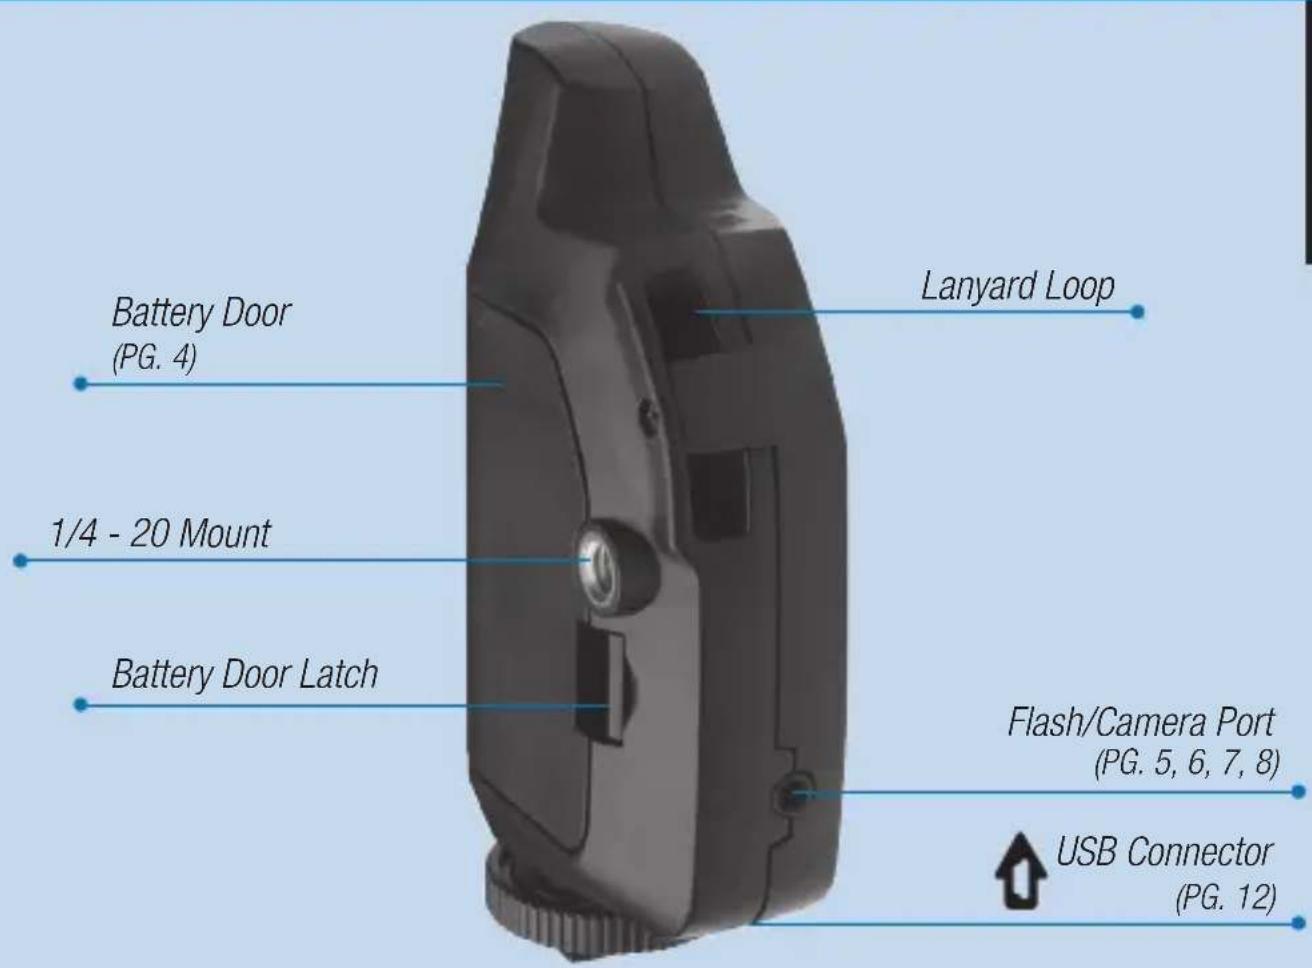
text_image
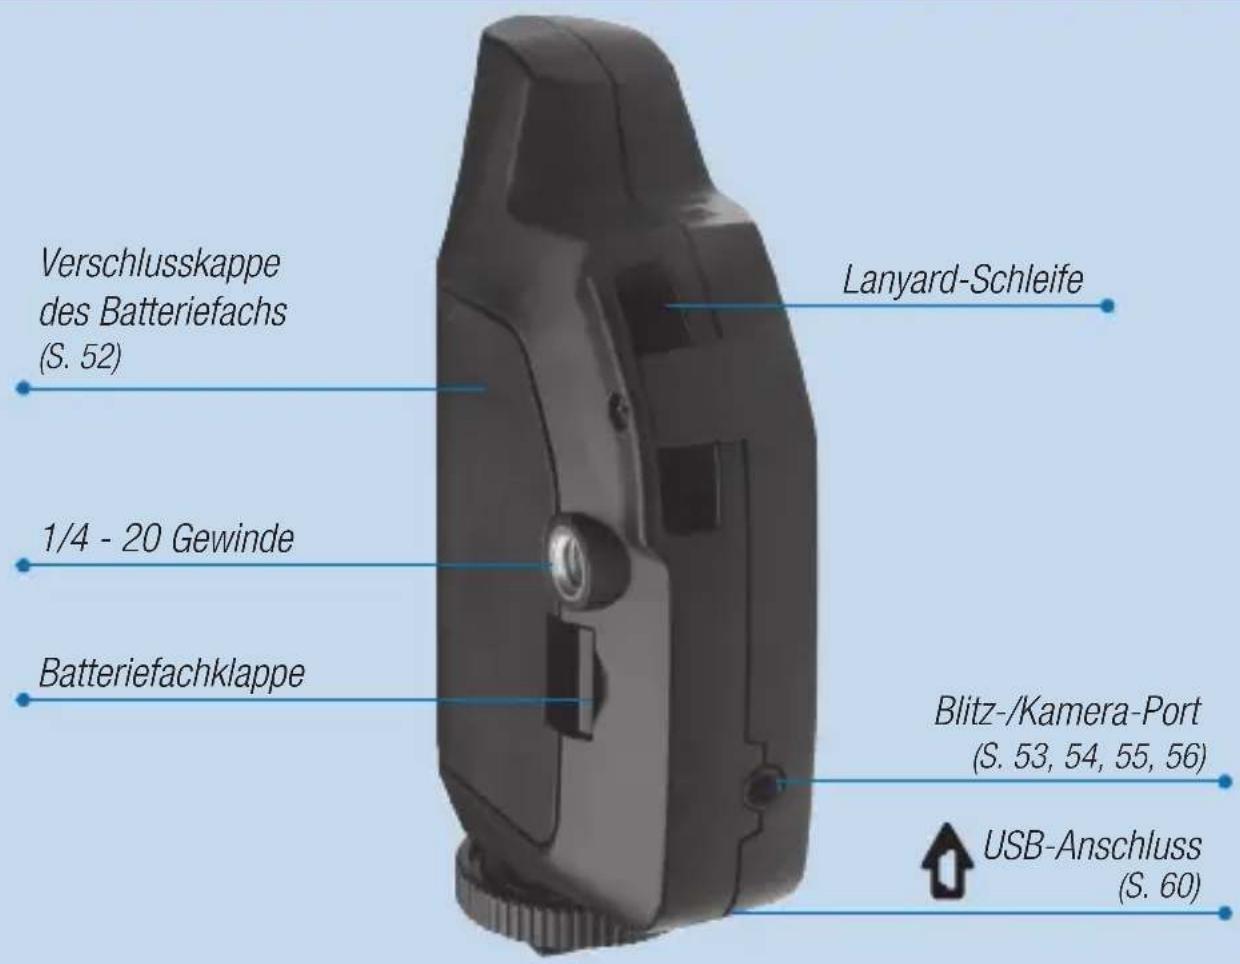
Battery Door (PG. 4) 1/4 - 20 Mount Battery Door Latch Lanyard Loop Flash/Camera Port (PG. 5, 6, 7, 8) USB Connector (PG. 12)English
INCLUDED IN BOX:
• Plus III Transceiver • Locking PC Sync Cable
• Lanyard • 3.5mm (1/8" Miniphone) Cable
- Quick Guide • 6.35mm (1/4" Phone) Adapter
Visit PocketWizard.com/support/cable_finder to find the correct cables for your gear.
PLUS® III Transceiver
Triggering
Mode
(PG. 9, 10)
Half/Full Press
Indicator
(PG. 7, 12)
Channel
(PG. 11)
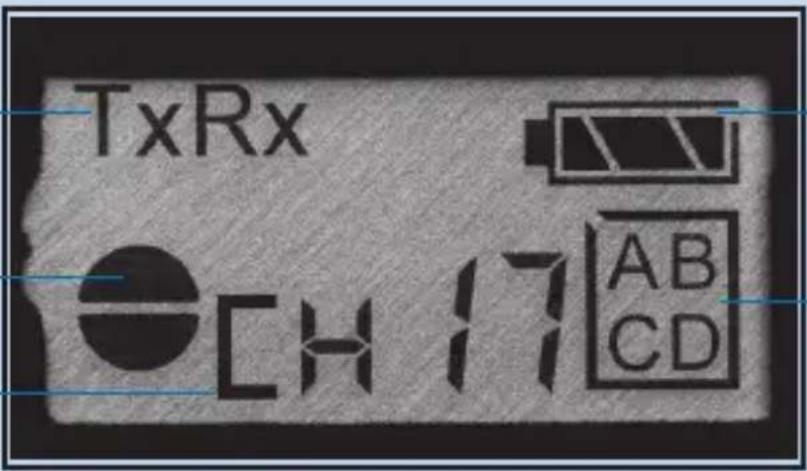
text_image
TxRx CH 17 AB CDBattery Level
(See Below)
Selected
Zones
(PG. 11)
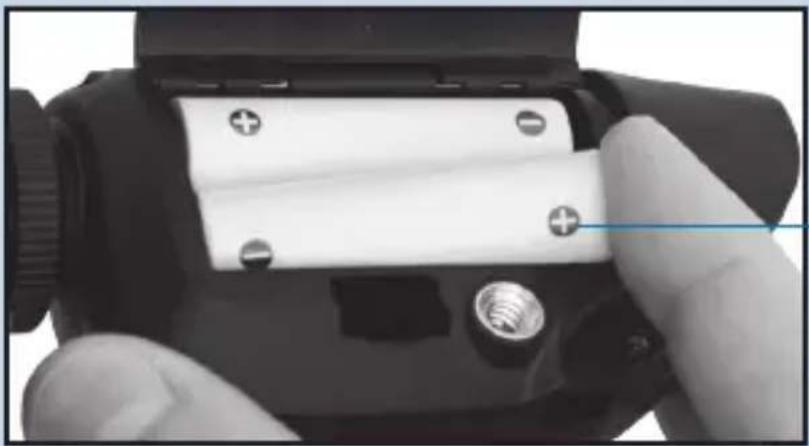
natural_image
Close-up of a hand holding a black camera lens with a white battery pack and screw base (no visible text or symbols)Note proper
polarity when
installing
batteries.
- Always turn OFF all equipment (PocketWizard® radios, electronic flashes, cameras, etc.) before making connections or replacing batteries.
- The Plus III will operate reliably using almost any pair of \~1.5 volt AA (IEC:LR6) batteries. Rechargeable batteries will work, though operation time may be reduced and battery level display may not be as accurate. Remove batteries during storage.
PLUS® III Transceiver
5
NOTE: This Plus III can work with any PocketWizard ^® radio transmitting or receiving on Standard Channels. Visit wiki.PocketWizard.com for more information.
natural_image
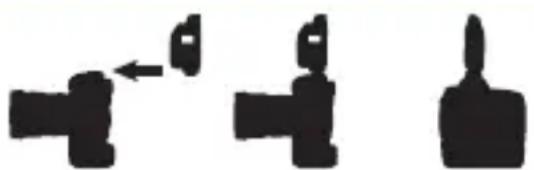
Three abstract black shapes on white background: a left-pointing arrow, a right-pointing arrow, and a thumbs-up (no text or symbols)Connect transmitting Plus III to camera hot shoe. Tighten locking ring.
text_image
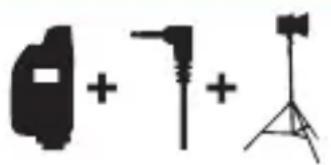
Image showing a camera icon, a stylized number 7, and a tripod-mounted device with a flag symbol.Connect receiving Plus III to remote flash with appropriate sync cable. A PocketWizard transceiver/receiver is required for each remote flash.
Plus III Transceiver Basics
Connecting:
Connect a Plus III to your camera via the hot shoe. This will be your transmitting radio. Connect a Plus III to each of your remote flashes using the appropriate sync cable. These will be your receiving radios.
NOTE: If you are using a camera with no hot shoe, or the hot shoe cannot be used, connect the transmitting Plus III's Flash/Camera Port to the camera's sync terminal. Visit PocketWizard.com/support/cable_finder for correct camera cable.
Powering On/Off:
Make sure batteries are properly installed (PG. 4). To turn on your Plus III, hold down the Power/MODE Button ⏻ for about two seconds. The Status LED blinks green every few seconds to indicate normal operation. It will blink red when a trigger is transmitted or received. Hold down the Power/MODE Button for about two seconds to turn off your Plus III.
Channels & Zones:
Your Plus III needs to be on the same channel as other PocketWizard radios to work together. Channels can be set via the Plus III's Channel Up/Down Buttons △▽. When using Channels 17-32, you can specify Zones A, B, C, and D. You may have as many remote Plus III Transceivers on the same channel as you would like. See “Channels and Zones” section (PG. 11) for more info.
Remote Flash Triggering
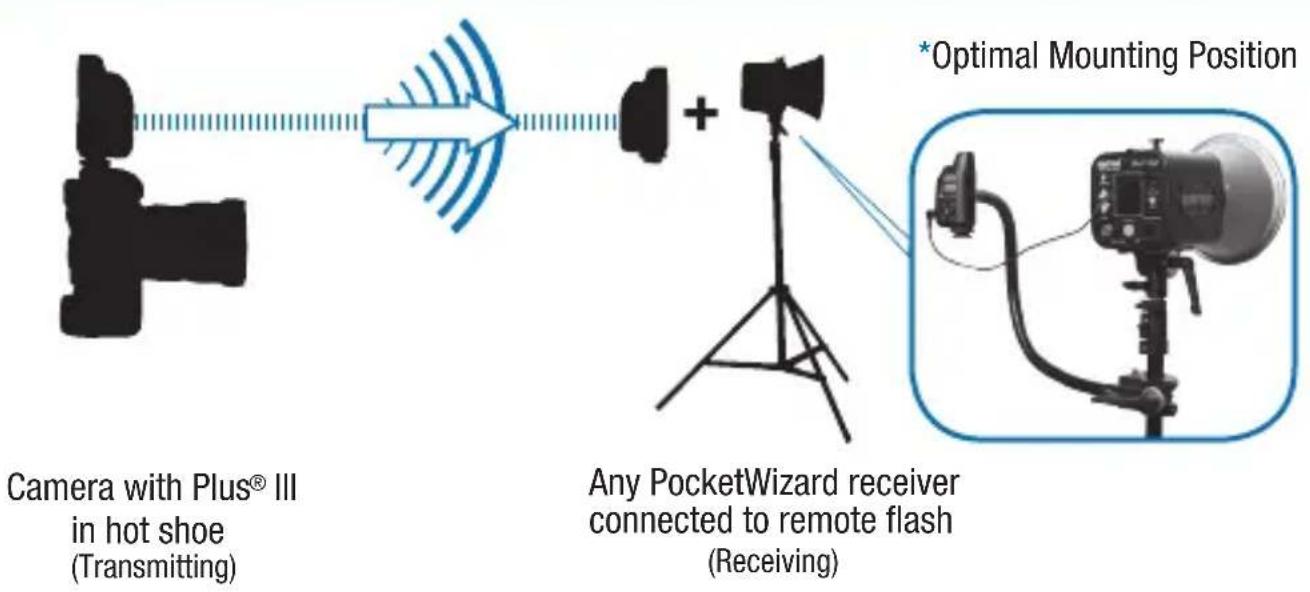
NOTE: With transmitting and receiving PocketWizard® radios set to the same channel and zone, remote flashes will be synchronized with the camera.
flowchart
graph LR
    A["Camera with Plus® III in hot shoe (Transmitting)"] --> B["Optimal Mounting Position"]
    B --> C["Any PocketWizard receiver connected to remote flash (Receiving)"]
Triggering a Remote Flash with your Plus® III Transceiver
- Attach a Plus III to your camera's hot shoe. You may also connect the Plus III to your camera's PC sync port using the included cable.
- Connect a Plus III to your remote flash via the appropriate sync cable.
- Select a Channel and Zone A, B, C, or D via Channel Up/Down Buttons △▽ and Zone Toggle Buttons. Set any other PocketWizard radios to a matching Channel and Zone. (See the “Using Zones” section for more information)
- Take pictures normally at or below your camera's X-sync speed.
Momentarily pressing the TEST button will test trigger the flash.
*See wiki.PocketWizard.com for more mounting suggestions.
Remote Camera Triggering

7
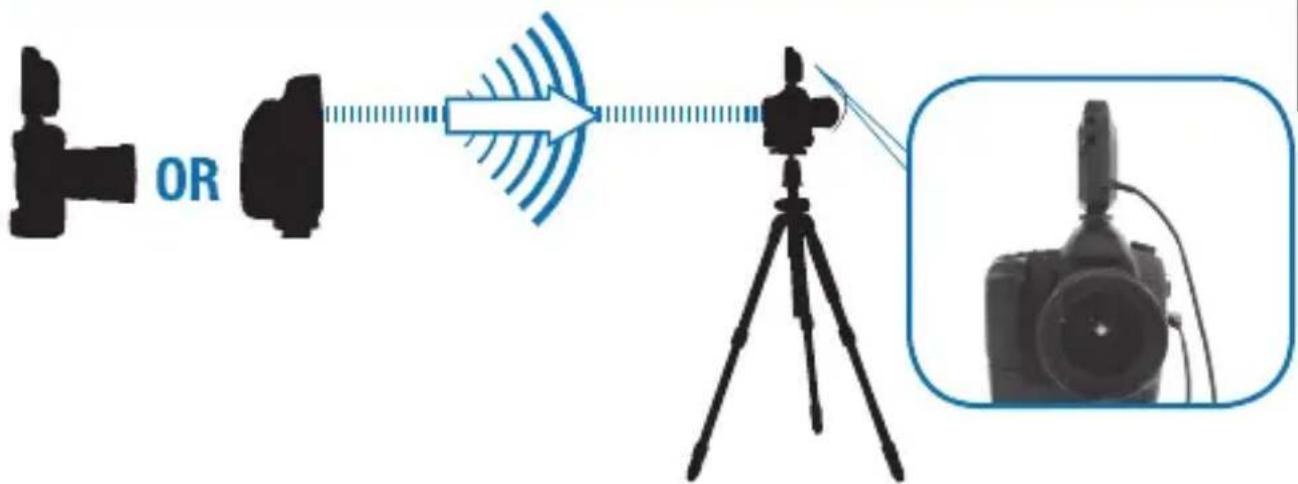
NOTE: The transmitting PocketWizard® radio triggers the receiving PocketWizard radio, which fires the remote camera via a remote camera cable.
text_image
ORPlus ^® III on camera OR in hand (Transmitting)
Plus III connected to Remote Camera (Receiving)
Triggering a Remote Camera with your Plus® III Transceiver
- Connect a Plus III to your remote camera via the appropriate remote camera cable.
- Select a Channel and Zone A, B, C, or D via the Channel Up/Down Buttons △▽ and Zone Toggle Buttons.
- Press the TEST button on the transmitting PocketWizard radio or fire the camera in your hands. The remote camera will trigger.
If the transmitting PocketWizard radio in your hands is a Plus III and you are using the correct ACC cable, you can pre-release the remote camera by pressing the TEST button half way. This wakes up the remote camera so it can respond more quickly and consistently. It can also engage autofocus.
Auto-Relay

NOTE: Auto-Relay allows you to trigger remote flashes in sync with a remote camera and requires only three PocketWizard® radios. Using Auto-Relay is the only situation where not all PocketWizard radios are set to the same channel: The relaying radio trasmits on one channel higher than it received on. Visit wiki.PocketWizard.com for additional information.
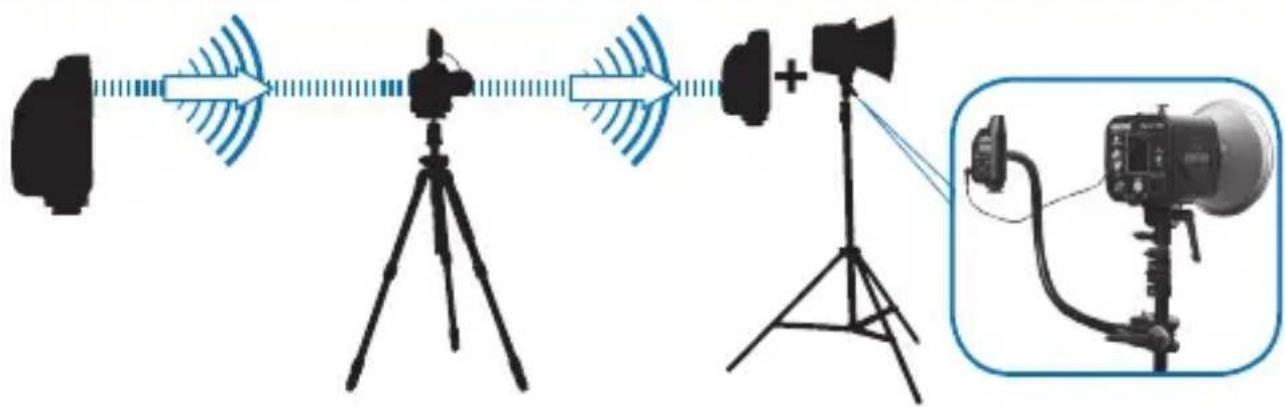
text_image
Diagram illustrating the use of a camera setup with signal transmission from a camera to a mounted device, including an inset image of the camera.Plus® III (Transmitting) Channel 1
Remote Camera (Relaying Plus III) Receiving Ch.1 & Transmitting Ch.2
Remote Flash (Receiving) Channel 2
Using Auto-Relay
- Set the transmitting PocketWizard radio in your hands to TxRx Mode and the desired channel and zone.
- Connect the relaying Plus III's Flash/Camera Port to the remote camera triggering port of the camera via a remote camera cable and place the radio in the camera's hot shoe.
- Set the relaying Plus III attached to your remote camera to TxRx Mode and also the same channel and zone as the transmitting PocketWizard radio in your hands
- Connect a remote flash to a receiving PocketWizard radio via the appropriate sync cable and set it to TxRx Mode and one channel higher than the transmitting PocketWizard radio in your hands.
- Press and release TEST on the transmitting PocketWizard to fire the remote camera. Remote flashes will be automatically synchronized with the camera.
Triggering Modes
Modes of Operation
Your Plus® III Transceiver supports six modes of triggering for different applications. You can switch between modes by pressing and quickly releasing the MODE button.

text_image
TxRx CH 17 AB CDTxRx Mode allows the radio to be used as a transmitter attached to a camera or as a receiver connected to a remote flash or remote camera. As an Auto-Sensing Transceiver, the Plus III automatically switches between transmit and receive. This is the default mode.

text_image
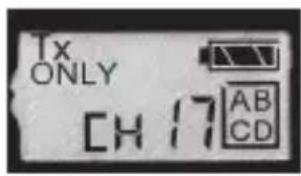
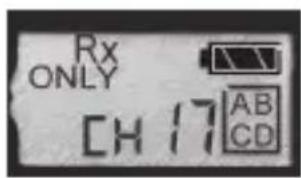
Tx ONLY CH 17 AB CDTx ONLY Mode disables all receiving (Rx) functionality and allows you to use your Plus III as a transmitter only. Use this mode when sharing remote flashes with other photographers. This mode will prevent other photographers from triggering the Plus III on your camera. Rx ONLY Mode disables all transmit (Tx) functionality allowing you to use your Plus III radios as receivers for remote flashes or remote cameras. Use this mode when you do not want a remote Plus III to perform relay functions when mounted in the shoe of a remote camera, or to prevent a remote Plus III from triggering other radios when its TEST button is pressed.
text_image
Rx ONLY CH 17 AB CD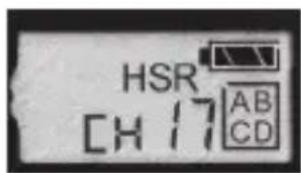
text_image
HSR CH 17 AB CDHSR (High Speed Receive) Mode shortens the contact time of the Flash/Camera Port, allowing for triggering of remote flashes at higher FPS (frames per second).
Triggering Modes
text_image
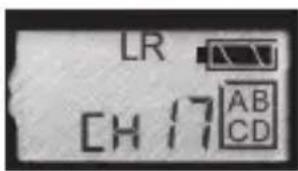
LR CH 17 AB CDLR (Long Range) Mode doubles the maximum range of a radio in a given shooting environment. Long Range
Mode must be enabled on both transmitting and receiving radios. Use this mode when triggering remote cameras at greater distances. It can also be used with remote flash, but there may be a reduction in maximum X-sync speed.

text_image
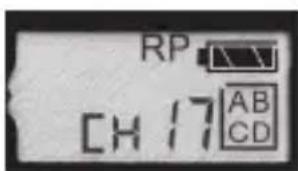
RP CH 17 AB CDRP (Repeater) Mode automatically retransmits any triggers received on the selected channel, increasing the maximum triggering distance when a Plus® III is placed half-way between a pair of transmitting and receiving radios. This mode is recommended when triggering remote cameras. It can be used with flash with a reduction in maximum X-sync speed. This is not the same operation as Auto-Relay Mode.
Notes: You may use multiple radios in repeater mode for extremely long distances. Make sure each repeating radio can only receive the signal from one other radio, otherwise an endless trigger loop could occur! Put the transmitting radio into Tx ONLY Mode for best performance when using Repeater Mode.
Repeater mode is only for Standard Channels. It will not repeat ControlTL Channel information such as TTL or power control.
For more detailed information about triggering modes, visit wiki.PocketWizard.com
Channels and Zones
NOTE: Some PocketWizard ^® radios, like the MiniTT1 ^® or FlexTT5 ^® , operate on Standard Channels as well as ControlTL ^® Channels. ControlTL Channels work with TTL or remote flash power control. This Plus III can work with any PocketWizard radio transmitting or receiving on Standard Channels, but not ControlTL Channels.
Channels 32
The Plus® III Transceiver supports 32 different Standard Channels. Each Standard Channel represents a digital code transmitted on specific PocketWizard radio frequencies. This enables many photographers to work in the same area or for one photographer to exclusively control different sets of receivers. A Plus III will trigger any number of receiving PocketWizard radios set to the same channel. Radios set to different channels will not trigger each other.
Press the Channel Up/Channel Down Buttons △▽ to change channels.
Features that use Zones are only available on channels 17-32.
Using Zones

Zones can be used to toggle remote cameras or flashes on or off from a transmitting PocketWizard radio. Zones can also be used when sharing flashes with another photographer so only some of the remote flashes are shared, even when using the same channel.
Zones A, B, C, and D are selectable via the Plus III's Zone Toggle Buttons when using channels 17-32. The enabled Zones are displayed in a box on the right side of the LCD. You can enable any combination of all four Zones. A receiving Plus III will only trigger if the transmitting PocketWizard radio has at least one matching zone enabled.
Quad-Zone Triggering on a transmitting or receiving Plus III can work with any other PocketWizard radios that support Quad-Zone Triggering Channels 17-32.
Other Functions
TEST Button (Two Stage Trigger)
Half-pressing 🚙 the TEST button on a transmitting Plus® III pre-releases a remote camera connected to a receiving PocketWizard® radio with a remote -ACC camera cable (available separately). This wakes up the camera and makes it respond more quickly and consistently, but also reduces battery life. Half-pressing the TEST button will not affect remote flashes. See wiki.PocketWizard.com for more information.
Fully pressing ● the TEST button fires any remote cameras or flashes connected to receiving PocketWizard radios set to the same channel and zones.
Status LED
The Plus III's status LED will blink in three different colors: Green, Red and Amber.
Green Blinking indicates good battery life.
Amber Blinking indicates the batteries are getting low or when TEST button is half-pressed.
Red Blinking indicates batteries are critically low and should be changed immediately. The status LED turns solid red when Plus III is transmitting or receiving a trigger.
Reset
To reset your Plus III Transceiver to the default setting, hold the TEST button as you power the radio on. The default mode after a reset is TxRx on Channel 17 with all Zones enabled.
USB
The Plus III can be powered via USB with a compatible AC adapter or from most computers. Future firmware updates can be installed via the PocketWizard Utility.
Sustaining High Performance
13
NOTE: Your PocketWizard ^® radios use the environment as a medium for transmitting and receiving radio signals. The performance of your radios depends on their placement in the environment, nearby radio interference, and the radios' orientation and position relative to each other.

Best

Acceptable

Poor

Worst
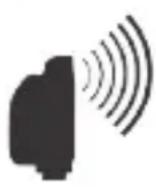
Orientation of transmitting and receiving Plus® III's for optimal radio reception.

natural_image
Abstract graphic with crossed-out lines and icons (no text or symbols)
Keep radios away from metal, concrete, or high water-content objects.
Wireless Basics
The Plus III is designed to work in many challenging environments. For the best performance with any radio, maintain a line of sight between radios and keep antennas parallel. Make sure radios are not near any large metal, concrete, or high water-content objects. People and trees are mostly water! Make sure radios are not blocked by these objects or by hills.
The Plus III Transceiver's antenna is omnidirectional and its orientation should not significantly impact performance in most shooting scenarios, but optimizing for radio reception will always improve the maximum range.
Maintain at least a 12" distance between antennas. Avoid direct antenna contact with anything metallic. "Dead spots" have a number of causes, but the solution is usually the same: move the radio a few inches or feet away from the problem area. Always obey the laws of physics.
Specifications
Technical Information
Frequency: Plus® III FCC/IC: 340.00 – 354.00 MHz
Plus ^® III CE: 433.42 – 434.42 MHz
Transmit Output Power: Less than 1 milliwatt (1/1000 of a watt)
Batteries: 2 x AA (IEC:LR6)
External USB Power at \~5 volts and < 100mA
Triggering Delay: 1/1200 of a second
Operating Temperature: Above -15°C (5°F) and below 50°C (120°F)
Always use fresh batteries in cold temperatures.
Storage Temperature
(without battery): Above -30^ C ( -22^ F) and below 85^ C ( 185^ F) without batteries.
Flash/Camera Port Sync Voltage Tolerance: 300 Volts
Backlit LCD: The Plus III's backlit LCD activates automatically when any button other than TEST is pressed. It turns off after 5 seconds.
LEDs: Red LEDs are used for dim light application and do not indicate a hazardous status.
Warranty
This PocketWizard® product is covered under a two-year limited manufacturer's warranty. For warranty details, and to register your product, please go to PocketWizard.com/support or contact your local PocketWizard Distributor. Distributor contact information can also be found at PocketWizard.com To receive a copy of the two-year limited manufacturer's warranty on this PocketWizard product, e-mail us at warranty@lpadesign.com or write to us at LPA Design, 21 Gregory Drive, Suite 140, South Burlington, VT 05403, United States of America, Attn: Warranty.
Information in this Quick Guide is subject to change. For current operating documentation, features, specifications and compatibility, visit wiki.PocketWizard.com
Simplified EU Declaration of Conformity
Hereby, LPA Design Inc. South Burlington VT USA declares that the radio equipment type PocketWizard Plus III CE wireless photographic remote control is in compliance with Directive 2014/53/EU. The full text of the EU declaration of conformity is available at the following internet address:
www.pocketwizard.com/support/reference/CE/
© 2016 LPA Design. All rights reserved. Product features and specifications are subject to change without notice. PocketWizard, ControlTL, MiniTT1, FlexTT5, HyperSync, Plus and MultiMAX are either trademarks or registered trademarks of LPA Design. All other trademarks contained herein are the property of their respective owners.
For patent information, please visit www.pwpatents.com
The FCC wants you to know:
WARNING
Changes or modifications to this unit not expressly approved by the party responsible for compliance could void the user's authority to operate this equipment.
NOTE: This equipment has been tested and found to comply with the limits for a Class B digital device, pursuant to Part 15 of the FCC rules. These limits are designed to provide reasonable protection against harmful interference in a residential installation. This equipment generates, uses, and can radiate radio frequency energy, and, if not installed and used in accordance with the instructions, may cause harmful interference to radio communications. Mounting and cable connections detailed in this document represent the intended usage, however, there is no guarantee that interference will not occur in a particular installation. If this equipment does cause harmful interference to radio or television reception, which can be determined by turning the equipment off and on, the user is encouraged to try to correct the interference by one or more of the following measures:
- Reorient or relocate the receiving antenna.
- Increase the separation between the equipment and the receiver.
- Consult the dealer or an experienced radio or television technician for help.
This device complies with Part 15 of the FCC rules and also with RSS-210 of Industry Canada. Operation is subject to the following two conditions: (1) This device may not cause harmful interference, and (2) This device must accept any interference received, including interference that may cause undesired operation.
Plus ^® III FCC ID: KDS-PW3-100
Plus® III IC ID: 2170A-PW3100
PocketWizard®
Guide rapide PLUS® III
FCC/IC: 340,00 - 354,00 MHz
CE: 433,42 - 434,42 MHz
PocketWizard.com/support/cable_finder
INCLUS DANS LA BOÎTE:
PocketWizard.com/support/cable_finder
natural_image
Close-up of a hand holding a black camera lens with a white battery pack and screw base (no visible text or symbols)natural_image
Three abstract black shapes with arrow indicators, no text or symbols presenttext_image
Image showing a camera icon, a plus sign, and a tripod-mounted device with a screen.natural_image
Abstract grayscale illustration of a cross over geometric shapes including trees, mountains, and buildings (no text or symbols)
PocketWizard.com/support/cable\_finder
natural_image
Close-up of a hand holding a camera lens with a battery pack and screw base (no visible text or symbols)natural_image
Three black silhouette figures with arrow indicators, no text or symbols presentnatural_image
Three black-and-white icons: a camera, a stylus, and a tripod (no text or symbols)text_image
Diagram illustrating camera setup with a camera, tripod-mounted sensor, and an inset image of a camera.natural_image
Abstract diagram with crossed lines and icons including a person, trees, mountains, and a block (no text or symbols)
PLUS® III Transceiver
PLUS® III Transceiver
PLUS® III Transceiver
natural_image
Close-up of hands holding a camera lens with battery pack and screw base (no visible text or symbols)PLUS® III Transceiver
natural_image
Three black silhouette figures of mechanical parts with arrows indicating movement or force (no text or symbols)text_image
Image showing a camera icon with plus and minus signs, accompanied by a tripod-mounted camera setup.natural_image
Abstract grayscale illustration with crossed lines and icons, no text or symbols present
PocketWizard.com/support/cable_finder
natural_image
Close-up of a hand holding a camera lens with a battery pack and screw base (no visible text or symbols)natural_image
Three abstract black shapes on white background: a left-pointing arrow, a small figure, and a right-tipped shape (no text or symbols)natural_image
Simple line drawing of a camera with two additional components: a lens and a tripod (no text or symbols)natural_image
Abstract graphic with crossed-out black X on gray background, no text or symbols present
natural_image
Close-up of hands holding a camera lens with battery pack and screw base (no visible text or symbols)安装电池时
请注意正确的极性。
natural_image
Three abstract black shapes on white background: a left-pointing arrow, a small figure, and a right-tipped shape (no text or symbols)text_image
Diagram showing a camera with lens and tripod-mounted device, indicating total lens and tripod-mounted device.natural_image
Abstract graphic with geometric shapes and a crossed X symbol (no text or symbols present)
使无线电远离金属、混凝土或高含水物体。
无线的基本知识
Plus® III CE: 433.42 – 434.42 MHz