
Grenada 1154 - Rotisserie tepro - Free user manual and instructions
Find the device manual for free Grenada 1154 tepro in PDF.


User questions about Grenada 1154 tepro
0 question about this device. Answer the ones you know or ask your own.
Ask a new question about this device
Download the instructions for your Rotisserie in PDF format for free! Find your manual Grenada 1154 - tepro and take your electronic device back in hand. On this page are published all the documents necessary for the use of your device. Grenada 1154 by tepro.
USER MANUAL Grenada 1154 tepro
natural_image
Technical line drawing of a multi-tiered industrial device with wheels and a dome-shaped top component (no text or symbols)Inhalt
text_image
Technical diagram showing a mechanical assembly with labeled parts 1 and 2, including a hook and connection points.text_image
Technical diagram showing a mechanical assembly with labeled components and directional arrows indicating motion or force.8
D
natural_image
Technical line drawing of a mechanical support frame with wheels and a central curved component (no text or symbols)D
text_image
Exploded view diagram of a kitchen appliance with numbered parts for identificationtext_image
Technical diagram showing mechanical assembly with labeled components and motion indicatorstext_image
Technical diagram of a circular mechanical component with numbered parts and labeled partsnatural_image
Circular object with beige top and two black side handles, resembling a lid or cover (no text or symbols visible)natural_image
3D rendering of a black frying pan with two side handles (no text or symbols)natural_image
Black wok with two side handles, no text or symbols visiblenatural_image
3D rendered image of a portable kettle with lid and base, no visible text or symbolsnatural_image
Black cylindrical metal mug with handle and perforated slots (no text or symbols visible)Scope of delivery.... 20 - 21
Intended use 21
For your safety.... 21 - 23
Signal symbols....21
General safety instructions 21
Safety instructions 22 - 23
Assembly.... 24 - 27
Preparation 24
Required tools....24
Assembling the BBQ....24 - 27
Setting up the BBQ.... 27
Before grilling 27
Operation.... 28 - 29
Maintenance and Cleaning 30
Disposal.... 30
Technical details.... 31
Declaration of conformity 31
Service 31
Distributor 31
Matching accessories (not included in the delivery scope).... 32 - 34
Before using the device
After unpacking and before every use, check whether the item shows any signs of damage. Should this be the case, do not use the item, but notify your retailer.
The operating manual is based on the norms and regulations that are applicable in the European Union. In non-EU countries, observe country-specific directives and laws!

Before start-up, first read through the safety information and the operating manual carefully. Only by doing so will you be able to use all of the functions safely and reliably.
Keep the operating manual in a safe place and hand it over to any possible future owner.
Scope of delivery
| No. | Description Part | Quantity | |
| 1 | Support leg | 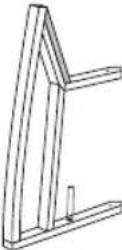 | 4 |
| 2 | Castor with break |  | 2 |
| 3 | Castor |  | 2 |
| 4 | Cross connection for support legs | 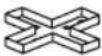 | 2 |
| 5 | BBQ grate with BBQ grate insert |  | 1 |
| 6 | Ceramic insert upper | 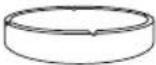 | 1 |
| 7 | Charcoal plate |  | 1 |
| 8 Ceramic insert lower | 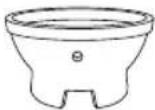 | 1 |
| 9 BBQ body with lid | 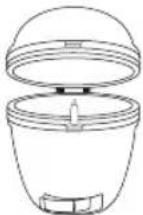 | 1 |
| 10 Lid handle | 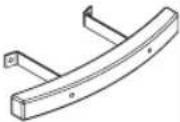 | 1 |
| 11 Cast iron ventilation controller |  | 1 |
| 12 Side rack | 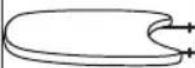 | 2 |
| 13 Bracket for side rack, rear left/ front right | 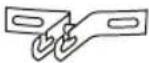 | 2 |
| 14 Bracket for side rack, rear right/ front left | 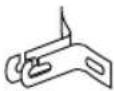 | 2 |
| No. | Description Quantity | |
| A | Screw 16 | |
| B | Domed nut 4 | |
| C | Screw 2 | |
| D | nut 2 | |
| E | Snap ring 4 |
Please check that the delivery is complete and undamaged. Should a part be missing or defective, please contact your dealer.
Claims relating to damages or missing parts made after assembly has taken place or commenced will not be recognised.
Intended use
Use this BBQ to heat, cook and grill food.
This BBQ is intended exclusively for private, outdoor use and not for indoor or commercial use.
Only use the item as described in this operating manual. All other uses are considered improper and can lead to material damage or even to personal injuries.
The manufacturer accepts no liability for damages caused by improper use.
GB
For your safety
Signal symbols
Danger High risk!

Failure to observe the warning can lead to potentially fatal injuries.
Attention Moderate risk!

Disregarding this warning can lead to property damage.
Caution Low risk!

Facts that should be respected when handling the device.
GENERAL SAFETY INSTRUCTIONS
– to be observed in each use
- Do not use indoors!
- WARNING! Do not use spirit or petrol for lighting or relighting!
- Use only firelighters complying to EN 1860-3!
- WARNING! This barbecue will become very hot, do not move it during operation!
- WARNING! Keep children and pets away!
- It is recommended you avoid using liquid BBQ lighters. These can affect the taste of your food, penetrate into the ceramic composite and thereby lead to forfeiture of the warranty. Please use only solid firelighters complying with EN 1860-3, such as wood wool or a separate chimney starter.
Safety instructions
Danger Fire hazard!

Live coals and BBQ components get very hot during operation and can start fires.
- It is essential that you have a fire extinguisher and first-aid kit ready and be prepared for an accident or fire.
- Place the BBQ on an even, horizontal, secure, heat-resistant and clean surface.
- Set up the BBQ with at least 2 m clearance from highly flammable materials such as awnings, wooden patios or furniture.
- Do not move the BBQ during use.
– Ignite the charcoal only in a sheltered location. - Fill the BBQ with a max. 3 kg of charcoal.
– Some foods produce flammable fats and juices. Clean the BBQ regularly, preferably after each use. - Only tip out the ash once the charcoal has completely burned out and cooled down.
– Never leave the BBQ unattended during use.
Danger Risk of burning and accidents!

This device is not intended for use by persons (incl. children) with limited physical, sensory, or mental capacities or lacking experience and/or lacking knowledge.
- Such persons must be informed about the dangers of the device and supervised by a person responsible for their safety.
– Any modifications to the product represent a large safety risk and are forbidden. Do not undertake any unauthorised interventions yourself. In case of damages, repairs or other problems with the BBQ, contact our service point or a professional in your area. - Keep children and pets away from the device.
The BBQ, the charcoal and BBQ meat become very hot during use. Any contact can result in serious burns.
- Keep sufficient distance from the hot parts, since any contact can lead to severe burns.
– Always wear oven or BBQ gloves when grilling. - Use only long-handled utensils with heat-resistant grips.
- Do not wear any clothing with wide sleeves.
– Use only dry lighters complying with EN 1860-3 as firelighters. - Let the BBQ cool down completely before cleaning and/or storage.
Danger Risk of deflagration!

Flammable liquids that are poured on the embers cause flash flames or deflagrations.
– Never use flammable liquids such as petrol or spirits.
– Nor put pieces of charcoal soaked in flammable liquid onto the embers.
Danger Risk of poisoning!

When burning charcoal, barbecue briquettes, etc., carbon monoxide is formed. This gas is odourless and can be fatal in closed spaces!
– Use the grill outdoors only.
Danger Health risk!

Do not use any decolourants or thinners to remove stains. These are harmful to health and must not come into contact with food.
Danger Risks to children!

While playing, children can become caught in the packaging film and choke.
- Do not let children play with the packaging films.
- Make sure that children do not put any small assembly parts into their mouths. They could swallow the parts and choke on them.
Danger Risk of injury!

Both the BBQ and individual parts have some sharp edges.
- Be careful with individual parts to prevent accidents and/or injury during assembly and use. Wear protective gloves if necessary.
- Do not set up the BBQ near entryways or high-traffic zones.
– Always exercise extreme caution while grilling. If distracted, you can lose control of the device.
– Always be attentive to and aware of what you are doing. Do not use this product if you are unfocussed or tired, or if you are under the influence of drugs, alcohol, or medications. Just one moment of carelessness during use of the product can lead to serious injuries.
Attention Risk of damage!

During use, the screws can loosen slowly and impair the BBQ's stability.
- Check the stability of the screws prior to each use. If necessary, tighten all of the screws again to ensure the BBQ is standing securely.
- Regularly check the screws of the hinge strips and, when necessary, tighten them carefully with a spanner.
Attention Risk of damage!

Do not use any strong or grinding solvents or abrasive pads, since these can attack the surfaces and leave behind scrape marks.
Danger Risk of injury!

At high temperatures, open the lid slowly and carefully in order to let heat and hot steam escape and to avoid a flare up of the embers due to a sudden intake of air.
Assembly
Preparation
Danger Risk of injury!

Failure to follow these instructions can lead to problems and risks while using the BBQ.
– Follow all of the assembly instructions listed here.
- First read through the assembly instructions completely.
- Take sufficient time for the assembly and establish an even work surface of one to two square metres.
- Small parts such as handles will probably be preassembled.
- Look out for sharp corners and wear protective gloves for assembly.
- Attention! The BBQ body is very heavy! Two people are needed for the assembly.
Required tools
1 x Phillips screwdriver
1 x Adjustable spanner
Assembling the BBQ
1. Unpack BBQ
Unpack the BBQ and dispose of all packaging materials. Keep the packaging materials out of the reach of children and dispose of them according to regulations after BBQ assembly. Pay attention to the illustration of the BBQ during assembly.
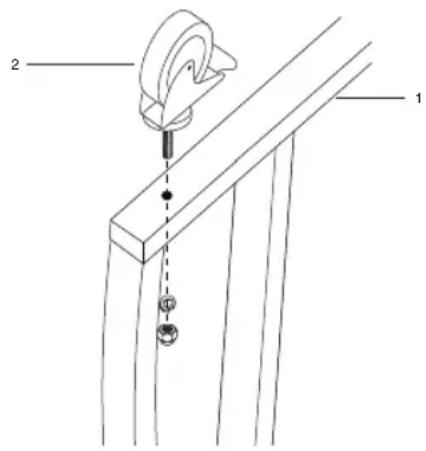
2. Attach the castors
Stick the castors (2+3) through the holes in the support legs (1) and fasten them in place using a snap ring (E) and a domed nut (B).
text_image
Technical diagram showing a mechanical assembly with labeled parts 1 and 2, including a hook and hanging pins.3. Insert cross connections
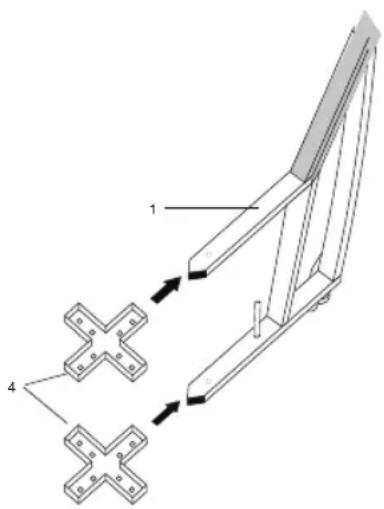
Slide the cross connections for the support legs (4) above and below into the brackets of a support leg (1).
text_image
Technical diagram showing a mechanical assembly with labeled components and directional arrows indicating motion or force.4. Assemble base frame
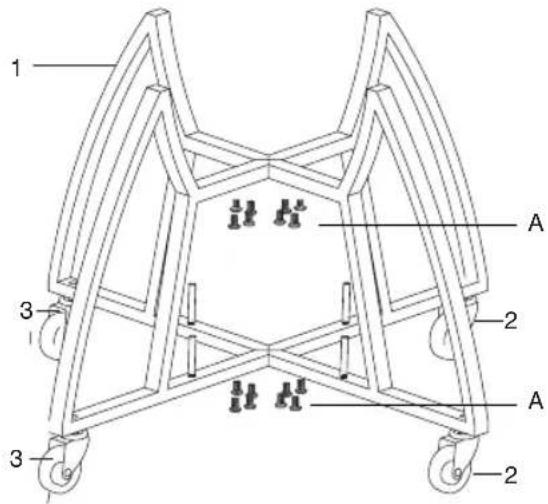
Slide the brackets of the remaining support legs (1) onto the cross connections (4) and join the parts above and below with screws (A). Make sure that all screws are firmly tightened.
text_image
1 A 3 2 A 3 2In order to prevent the base frame from moving, block the castors with the brakes (2).
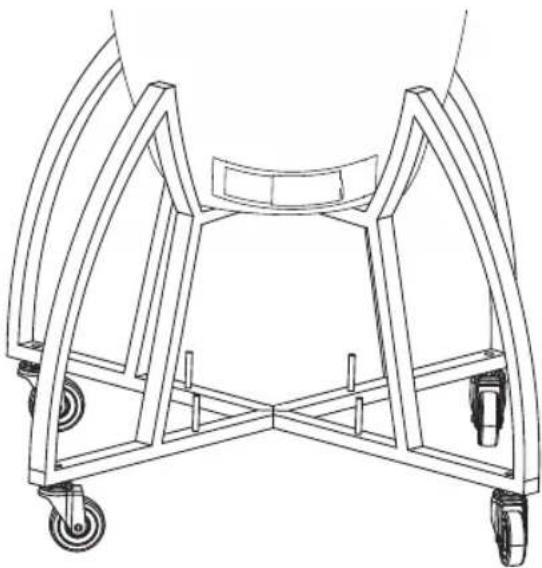
5. Place the BBQ body on the base frame
Remove all of the parts inside the BBQ body.
Caution, risk of damage!
Never lift the BBQ body by the hinge or by the side racks. The BBQ body must be carried by at least two people, who hold onto it on the underside and at the back.
During insertion, hold the BBQ body with one hand inside, on the air inlet, and with the other and under the BBQ. Insert the BBQ body such that the air inlet is pointing forward and can be opened and closed without hassle.
natural_image
Technical line drawing of a mechanical support frame with wheels and a curved frame (no text or symbols)GB
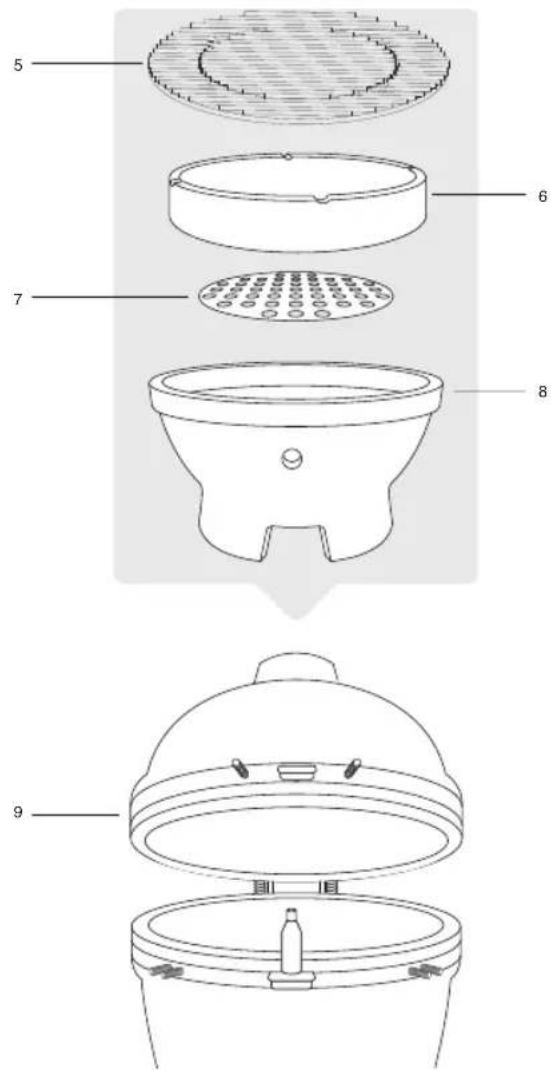
- Insert the BBQ grate with BBQ grate insert, ceramic insert (upper and lower) and charcoal plate
Place the parts in the following sequence into the BBQ body:
text_image
Exploded view diagram of a kitchen appliance with numbered parts for identificationWarning! The air inlet opening of the lower ceramic insert (8) and the air inlet of the BBQ body (9) must be aligned in order to guarantee adequate air circulation.
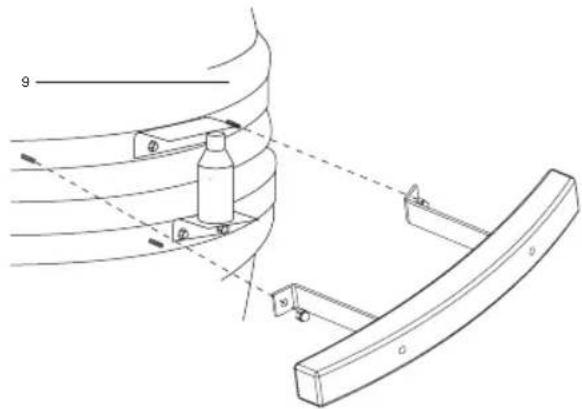
- Attach the lid handle
Remove the domed nuts and stick the lid handle (10) onto the screws already installed on the lid.
Fasten the lid handle in place with the nuts.
text_image
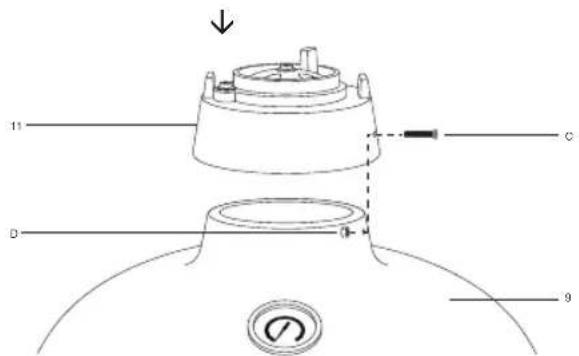
Technical diagram showing mechanical assembly with labeled components and dimension annotations- Attach the cast-iron ventilation controller
Place the cast-iron ventilation controller (11) onto the lid such that the screw holes lie flush.
Fasten the ventilation controller (11) using two screws (C) and two nuts (D).
Attention! The screw of the ventilation controller must be on the left side.
text_image
11 D C 99. Attach the brackets for the side racks
Remove the nuts and stick the brackets for the side racks (13, 14) on the screws already installed on the BBQ body.
Fasten the brackets using the nuts. Pay attention to the positions of the brackets (13, 14):
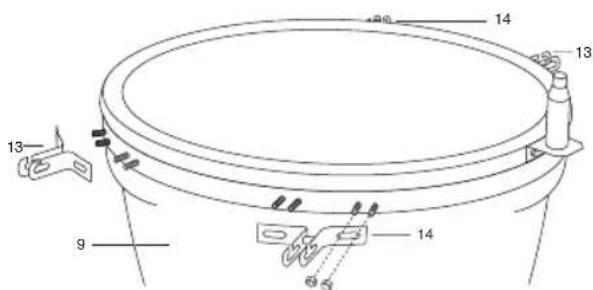
text_image
Technical diagram of a mechanical component with numbered parts labeled 9, 13, and 1410. Attach the side racks
Hang the two side racks (12) onto the brackets (13, 14).
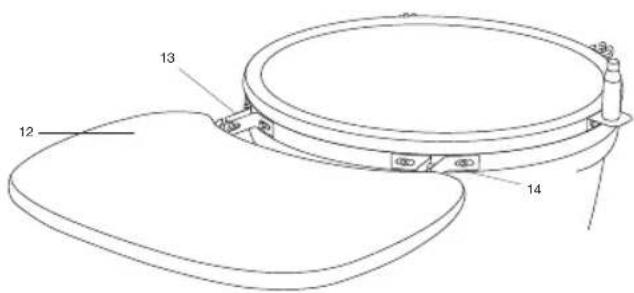
text_image
12 13 14Disassemble the BBQ in the reverse order.
Important: All screws must be tightly fastened.
Setting up the BBQ
Attention Risk of damage!

During use, the screws can loosen slowly and impair the BBQ's stability.
- Check the stability of the screws prior to each use. If necessary, tighten all of the screws again to ensure the BBQ is standing securely.
- Before use, place the BBQ on an even, sturdy surface outdoors.
Before grilling
• Using warm, soapy water, wash down the BBQ grate and the BBQ grate insert (5) before first use.
- Pre-firing
Prior to the first grilling, the BBQ must be pre-fired for a minimum of 30 minutes at a temperature of 100 °C - 200 °C.
This is necessary in order to make the inside ready for barbecuing.
Operation
Danger Risk of burning!

The BBQ, the charcoal and BBQ meat become very hot during use. Any contact can result in serious burns.
- Keep sufficient distance from the hot parts, since any contact can lead to severe burns. Always wear oven or BBQ gloves when grilling.
- Use only long-handled utensils with heat-resistant grips.
-
Do not wear any clothing with wide sleeves.
– Use only dry lighters complying with EN 1860-3 as firelighters. -
Open the lid and lift out the BBQ grate (5).
- Place 1-2 solid firelighters in the middle of the charcoal plate (7). Pay attention to the manufacturer's instructions on the packaging.
- Layer a few handfuls (maximum 3 kg) of charcoal around the firelighters. For the best results, we recommend not moving the charcoal after lighting.
- Open the air inlet of the BBQ body (9) and light the firelighters using a long-stemmed match.
Warning! Avoid letting the flames get too high, in order to avoid damaging the lid seal. - Insert the BBQ grate using the BBQ grate insert (5) into the BBQ body.
Concluding barbecuing
- Close the cast-iron air controller (11) and the air inlet on the BBQ body completely after barbecuing, so that the embers go out. It will take a few hours until the BBQ has cooled off completely. DO NOT EXTINGUISH THE EMBERS WITH WATER.
Temperature control
- Close the lid.
- Monitor the temperature on the thermometer. As soon as the BBQ temperature approaches the desired temperature, close the cast-iron ventilation controller (11) and the air inlet on the BBQ body in order to maintain this temperature. Leave both completely closed, until the cooking temperature has been reached.
- Then regulate the temperature using the cast-iron ventilation controller (11).
- In order to reduce the temperature drastically, briefly and carefully open the lid.
Ventilation Settings and Cooking Times
The following settings of the air inlet on the BBQ body (9) and the cast-iron ventilation regulator (11) are approximate and the cooking times are estimated values. Please use a meat thermometer in order to guarantee the quality of your food and to achieve the respective safe temperature range.

Cast-iron ventilation controller (11)
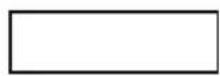
Air inlet on BBQ body

open

closed
Slow-cooking and smoking 110 °C to 135 °C

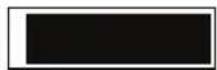
Beef brisket 4 hrs. per kilo
Pulled pork 4 hrs. per kilo
Chicken (whole) 3-4 hrs.
Pork ribs 3-5 hrs.
Roasting 9+ hrs.
Barbecuing and Roasting 160 °C to 180 °C


Fish 15-20 mins.
Pork loin 15-30 mins.
Chicken cuts 30-45 mins.
Chicken (whole) 1-1.5 hrs.
Leg of lamb 3-4 hrs.
Turkey 2-4 hrs.
Ham 2-5 hrs.
Searing
260 °C to 370 °C

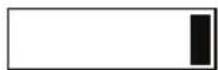
Steak 5-8 mins.
Pork cutlets 6-10 mins.
Hamburgers
6-10 mins.
Sausages
6-10 mins.
Maintenance and Cleaning
Your grill is made of high-quality materials. To clean and maintain the surfaces, please heed the following instructions:
Danger Risk of burning!

Let the grill cool down completely before cleaning.
- Only tip out the ash when the fuel has completely burned out.
Danger Health risk!

Do not use any decolourants or thinners to remove stains. These are harmful to health and must not come into contact with food.
Attention Risk of damage!

Do not use any strong or grinding solvents or abrasive pads, since these can attack the surfaces and leave behind scrape marks.
- Remove the cold ashes. It is very important that you remove the ash before moisture combines with the cold ash. Ash is saline and, when wet, attacks the charcoal plate. Thus, over several years, the charcoal plate can become damaged by rust.
-
Remove the BBQ grate and BBQ grate insert (5), clean the parts thoroughly with soapy water and rinse them down with clean water. Carefully dry off the BBQ grate and BBQ grate insert and place them back on the BBQ.
-
The inside of the BBQ is self-cleaning. WARNING! Do not use water or cleaning products on the inside of the BBQ. The walls are porous and absorb liquids, which can cause cracks in the ceramic when the BBQ is next used.
- Clean the glazed exterior of the BBQ with warm water and normal dishwashing liquid.
- Tighten all screws before every use to guarantee the stability of your BBQ at all times.
- IMPORTANT: The BBQ should always be stored somewhere where it is protected from moisture.
- Protect your BBQ against direct weather effects.
- Frequent opening and closing of the lid can, over time, lead to stresses in the hinge. Lubricate the moving elements of the hinge at least once per year so that it continues to move without difficulty.
Disposal

The packaging is made from environmentally friendly materials, which you can dispose of at your local recycling points.
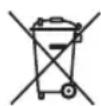
Do not under any circumstance dispose of the BBQ in normal household waste! Dispose of it at an approved disposal business or at your community disposal facility. Respect the currently valid regulations. If in doubt, get in touch with your disposal facility.
Technical details
Product: Item No. 1154
Ceramic BBQ
"Grenada"
Weight: approx. 80 kg
Overall
dimension, approx. 130 x 73 x
BBQ assembled: 123.5 cm (WxDxH)
Grill surface: approx. ∅ 46.5 cm
Max. amount
of fuel: 3 kg max.
Declaration of conformity
This product is in compliance with the applicable European and national Directives (DIN EN 1860-1).
Service
Please contact our service point for assistance with technical questions. This product was carefully manufactured and packaged. Should you nevertheless have a complaint, our employees are more than happy to assist.
Subject to technical modifications and typographical errors.
Distributor
tepro Garten GmbH
Matching accessories (not included in the delivery scope)
Available over-the-counter and online.
Step 1: Remove the centre of the grid

text_image
... and the door to a new grilling dimension opens for youStep 2: Attach the desired rack inlay

text_image
Sear your food in the twinkle of an eye and produce the typical steak pattern
text_image
Ideal for everything that should be fried, whether it's eggs, vegetables or potatoes
text_image
Bread, pizza and tarte flambée - turn your grill into an oven
text_image
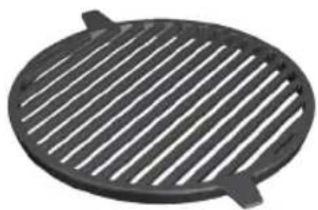
Ideally suited for vegetable dishes and Asian mealsCast Iron BBQ Grate Insert
tepro Item Number 8571
natural_image
Circular black metal grate with slatted edges, no text or symbols visible- for insertion into the main grate
- Cast iron BBQ grate, approx. ∅ 30.5 cm
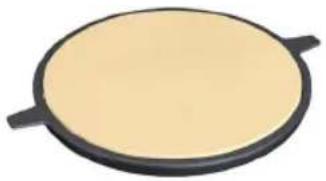
Pizza Stone Insert
tepro Item Number 8572
natural_image
Circular object with beige top and two black side handles, resembling a food item or plate (no text or symbols visible)Cast Iron Pan Insert
tepro Item Number 8573
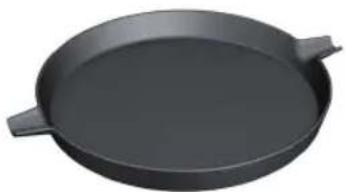
natural_image
3D rendering of a black circular baking pan with two side handles (no text or symbols)Cast-iron wok inlay
tepro Item Number 8580
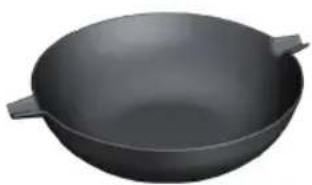
natural_image
3D rendering of a dark gray wok with two side handles (no text or symbols)- for insertion into the main grate
-
Pizza stone made of cordierite, approx. 28.5 cm ∅
-
for insertion into the main grate
- Cast iron pan, approx. ∅ 31.7 x 3.5 cm
– for insertion into the main grate
- Cast iron wok approx. ∅ 35.3 × 10 cm
Matching accessories (not included in the delivery scope)
Universal covering hood – kettle BBQ
tepro Item Number 8601
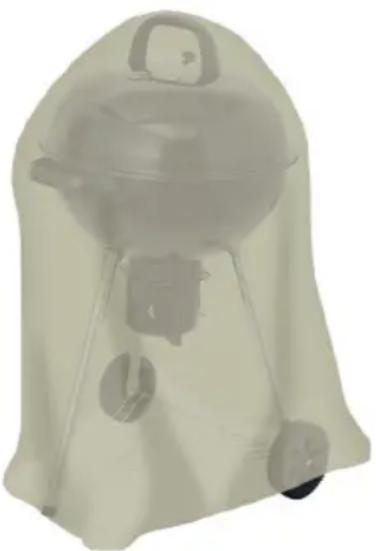
natural_image
Illustration of a portable grill with a dome cover and wheels (no text or symbols)- Made from high-quality, durable, polyester fabric 300 x 250D
– with water-repellent PVB coating - resistant to UV rays
- ventilation holes
– with Velcro fastener
– Material: Exterior: PVB (Polyvinyl butyral) Interior: 100% polyester - Hood dimensions approx. 73 x 90 cm ( x H)
Chimney starter
tepro Item Number 8500
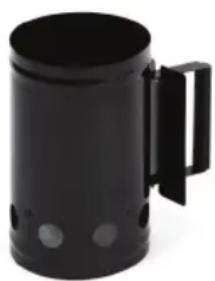
natural_image
Black cylindrical metal mug with handle and perforated slots (no text or symbols visible)– made of steel, painted black
– with plastic handle
- diameter 17 cm
– ensures quick heating of fuel
Available over-the-counter and online.
GB