
TAB T76 - Tablet GOCLEVER - Free user manual and instructions
Find the device manual for free TAB T76 GOCLEVER in PDF.

| Product Type | Tablet |
| Brand | GoClever |
| Model | TAB T76 (T76GPS/T76GPS TV) |
| CPU | Telechips 8925, 1 GHz |
| RAM | 512 MB DDR |
| Storage | 8 GB NAND Flash |
| Operating System | Android 4.0 |
| Screen Size | 7.0 inches |
| Screen Resolution | 800 x 480 pixels |
| Display Type | TFT LCD with capacitive touch panel |
| Rear Camera | 2 MP |
| Front Camera | 0.3 MP (300,000 px) |
| Battery Capacity | 2900 mAh |
| Battery Type | Lithium polymer, 3.7 V |
| Wi-Fi | 802.11 b/g/n |
| USB | MicroUSB |
| HDMI | 1080P digital output |
| Card Slot | microSD up to 32 GB |
| Supported Video Formats | AVI, MKV, FLV, MPG, VOB, TS/TP, H.264, MPEG-4, RMVB, DIVX, MPEG-2 |
| Supported Audio Formats | AAC, OGG, WAV, APE, FLAC, AMR, WMA, MP3 |
| Dimensions (approx.) | 190 x 120 x 11 mm |
| Weight (approx.) | 350 g |
| Power Adapter | Input AC 100-240 V, Output DC 5 V, 2 A |
| TV Tuner (optional) | DVB-T (on T76GPS TV model) |
Frequently Asked Questions - TAB T76 GOCLEVER
User questions about TAB T76 GOCLEVER
0 question about this device. Answer the ones you know or ask your own.
Ask a new question about this device
Download the instructions for your Tablet in PDF format for free! Find your manual TAB T76 - GOCLEVER and take your electronic device back in hand. On this page are published all the documents necessary for the use of your device. TAB T76 by GOCLEVER.
USER MANUAL TAB T76 GOCLEVER
natural_image
Abstract logo design with a blue square inside a gray infinity symbol (no text or symbols)GOCLEVER
INFINITE INVENTION
GOCLEVER TAB
T76GPS/T76GPS TV
OWNER'S MANUAL
GOCLEVER TAB
T76GPS/T76GPS TV
INSTRUKCJA OBSŁUGI
VISIT OUR WEBSITE
WWW.GOCLEVER.COM
TO SEE MORE PRODUCTS TAB, NAVIO, DVR, DVB-T
| INTRODUCTION | 4 |
| PRODUCT DESCRIPTION | 6 |
| QUICK START GUIDE | 8 |
| BASIC SETTINGS | 17 |
| MULTIMEDIA | 21 |
| CONNECTIONS AND NETWORKS | 26 |
| APPLICATIONS | 30 |
| INSTALLING NEW APPLICATIONS | 34 |
| ADVANCED OPERATIONS | 34 |
| System upgrade | 34 |
| Safe Mode | 37 |
| MOBILE TV (OPTIONAL) | 38 |
| GPS | 40 |
| TROUBLESHOOTING | 41 |
| SPECIFICATIONS | 42 |
Introduction
Acknowledgement
Thanks for your purchase of our product. The product is tablet, it is a high end product, with a touch screen which resolution of 800x480 pixel. It is designed with TTC8925 high speed processor and 512RAM, and 8GB flash. The operating system is Android 4.0.
The product has a built in WIFI module, front and rear camera, it is easy Internet function, it can be viewed high definition video and photos, it can also support camera shooting and video shooting function. Besides, it is available for many office and entertainment applications. Brand new operation interface will provide you with different enjoyment.
The manual systemically introduces the functions, use techniques and announcements, please read this manual carefully before operation.
Announcements
Preventive maintenance
- Please always keep the tablet dry. To avoid the device short trouble, corrosion fault and electric short, please prevent the device, battery and charger from water and moisture, and don't operate the device or charger by wet hand.
- To avoid failure of device, battery and charger, please prevent the device, battery, charger from violent shock or shake.
- To avoid failure of device, battery and charger, please prevent the device, battery, charger of all over heating or too cold circumstance
- Never shock, throw, prod the tablet, or drop, extrude, bend the tablet.
- Never disassemble the device and accessories arbitrarily, otherwise the device and accessories are not in our company warranty scope.
Safety Instruction
Before the operation of the tablet, please read this chapter and teach your kids about these information. For further details, please refer to the safety instructions and announcement.
- Never use the tablet when driving car, in order to ensure safe driving.
- In the medical area, please abide by related rules and regulations. Please shut down the tablet when it is near to the medical area.
- To avoid the wireless signal to interrupt the plane-controlled signal, please shut down the tablet or using airplane mode when you are boarding a flight,
- To avoid electronic equipment failure, please shut down the table: it in the vicinage of high-accuracy electronic equipments.
- Please don't disassemble the tablet and accessories. Only authorized agent has access to service the tablet.
- Please keep the tablet far away from magnetic equipments, the radiation of tablet may erase the data stored in the magnetic equipments.
- Never use the tablet in the vicinage of high temperature, inflammable gas (gas station).
- Protect the tablet and accessories from kids reach scope, a nd avoid the kids to use the tablet without parents' supervision.
- Please comply with related rules and regulations, and respect others' privacy and legal rights while using the tablet.
- Please strictly adhere to related instructions in the manual when using USB cable to ensure the safety of the tablet or PC.
- Never use the tablet in bathroom or other humid environment, and please protect the tablet from liquid wash or wet.
Abbreviation/Terminology
| Abbreviation/Terminology | Full Name | Description |
| Tablet | Tablet | mobile internet terminal |
| WIFI | Wireless Fidelity | Base on IEEE 802.11b standard wireless LAN |
| microSD | microSD | Alternative name is Micro SD, super miniature memory card |
| HDMI | High Definition Multimedia Interface | HDMI: HighDefinition Multimedia Interface |
Product Description
Accessories
Below items are included in your tablet package, please confirm:
- tablet complete device
- power adaptor
- USB cable
- Car charger
- Bracket
- Back clip
- User's manual
- Warranty Card
- OTG connector
Usage and Preparation
Battery Charging
If this device is first used, please use AV adaptor to fully charge it.
Apply the power adaptor to charge for tablet.
Status and Reminder Icons
Reminder icons:
When some remind message appears in your reminder window, please click column and slip the screen to open the reminder list. Choose the menu you need, and confirm the information. Then you can close the reminder window through clicking the column to slide up. Please refer to below status icons.
 | New email |  | Airplane mode |
 | USB is connected |  | USB adjustment is connected |
 | Home key |  | Downloading |
 | Display the latest programs |  | Home key |
 | Battery volume mark |  | WIFI service has been connected, available to internet |
 | No SD card |  | Alarm on |
 | General notice |  | Mute |
Quick Start Guide
Keys Function
| Power key (power) | Short press to dormant/awake function, long press to turn in/off |
| Volume + (up) | Increase volume |
| Volume- (down) | Decrease volume |
| HOME key (home) | Click it in any interface to return main menu interface |
| MENU Key | This icon will be displayed in the applications of menu key |
| Display the APPs | Display the history record that the user browsed |
| Back key (back) | Click it in any interface to return previous menu |
| Search (search) | Click it to enter into Google search |
Startup and Shutdown
Startup
Long press Power key for three seconds, you can enter into startup picture. The system enters into screen locked status, please unlock it to enter into main interface to operate.
Shutdown
• Long press Power, it will popup shutdown window.
• The setting includes mute mode and shutdown, as picture 1
- Clicking Shutdown is the last step.
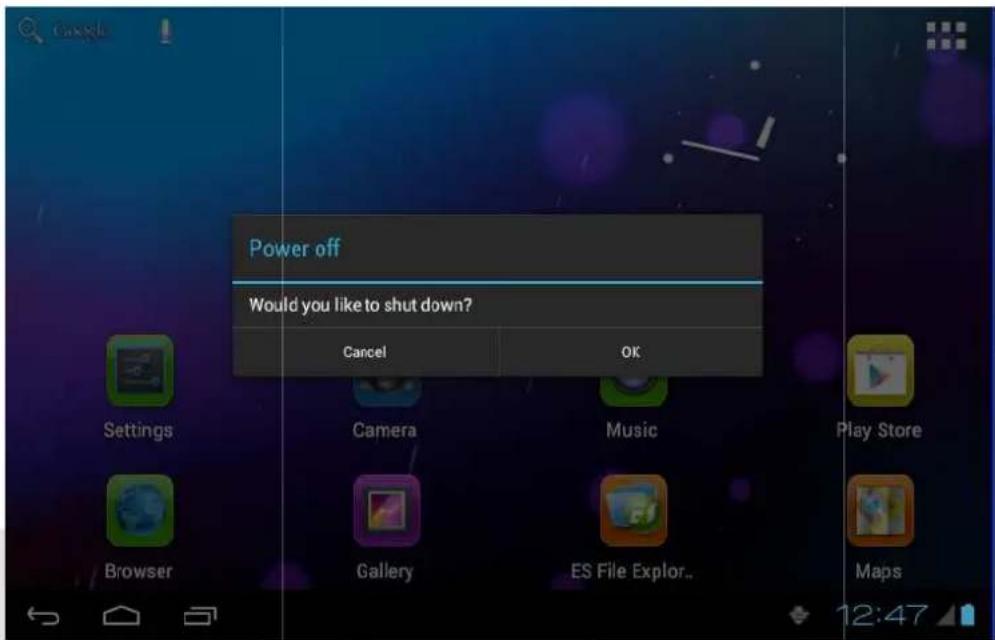
Picture 1
Open and Close the Screen
Screen will be closed on its own when no operation happens.
- Screen will be closed on its own if no operation happens for some time to save battery power.
- When screen is open, press Power key, the screen will be closed immediately.
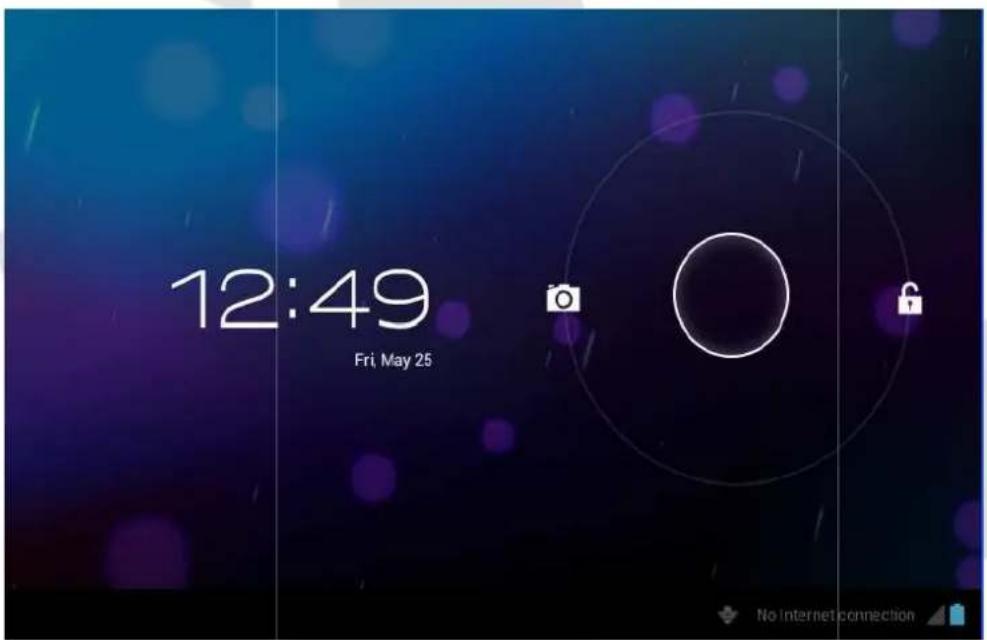
Open the screen when it is closed.
If the screen is closed, short press Power to open the screen. The screen will be locked as picture 2 after opening it, hold "lock" icon via finger or touch pens and slid up it to lock icon, as picture 3.
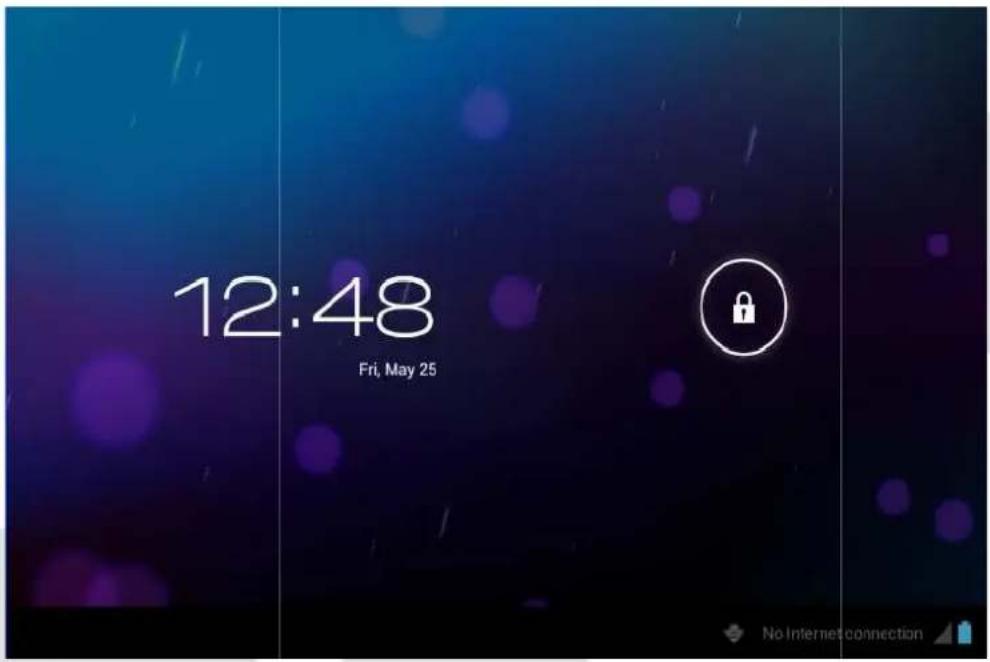
Picture 2

Picture 3
Usage of Touch Screen
Tablet operating methods
There are many methods to view the main screen, menu and applications of your tablet.
Click
When you want to use the screen keyboard input or choose application in the main interface, you only need to touch it by finger.
Quickly slide or slide
Quickly slide or slide indicates make quick vertical or horizontal movement via finger or touch pen.
Pull
Before you pull, you need to hold it with strength until you pull it into the position you want.
Rotate
For most pictures, you only need to rotate the tablet sidewise to change the screen direction from horizontal to vertical. For instance, when you are inputting words, and listening MP3.
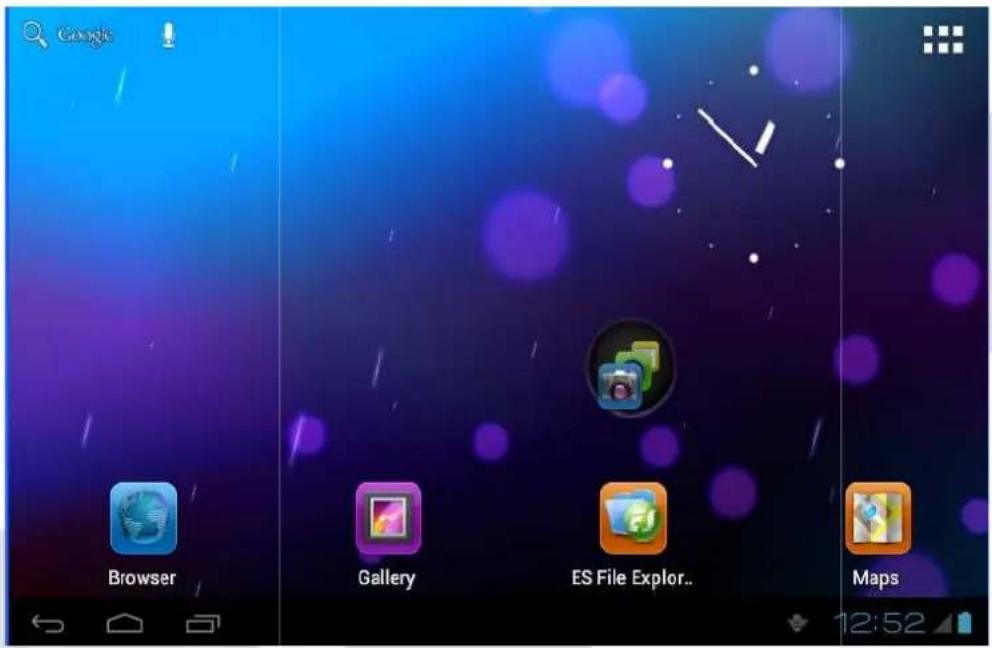
Main Interface
Main menu screen will show all the applications as below Picture 4. You can use applications, shortcut and define your main interface wallpapers.

Picture 4
- Search
- Voice search
- Dynamic wallpaper
- Applications
- Return key
-
Home
-
Last app
- Notice column
- Remind information
- Time
- Battery status
Extensible homepage interface
Homepage will extend to exceed the screen to offer more space, you can place newly increased shortcuts, widgets. Click the blank space in the homepage, then slide right and left to move to the right and left of the screen. There are two extended pictures as picture 5 in the homepage.
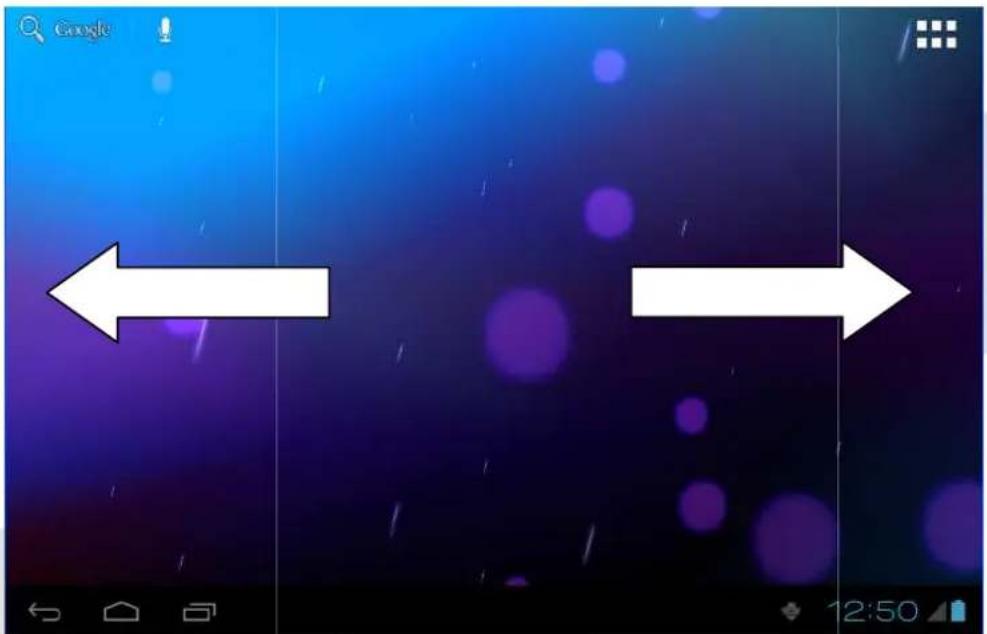
Picture 5
Shortcut icons management of desktop applications
System below Android 2.3 has the function of creating folder in the desktop, and put the icons in the folder. Android 4.0 system make the folder creation more simple. The steps are as below:
- Draw all the icons together, as picture 6 shown.
- Then click the composited icons to open all the applications as picture 7.
- Click unnamed folder below black frame, it will popup hidden keyboard, and you can rename this folder(it is similar with IOS system.)
Picture 6
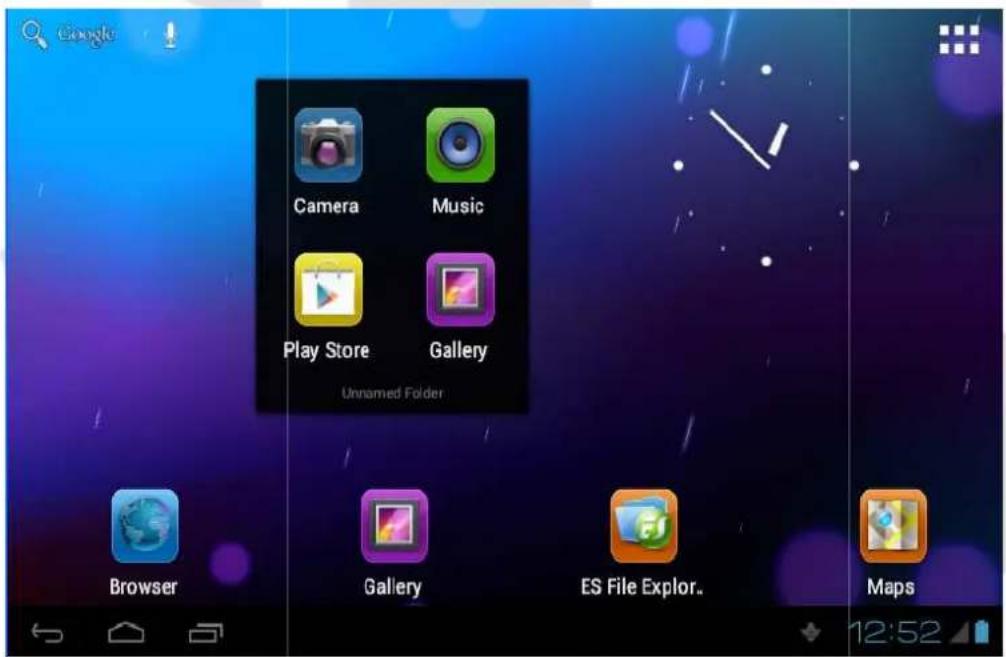
Picture 7
Delete the icons in the desktop
Click and hold the icon needs to delete, the top left will show the icon.
Draw the icon to the upper of the DELETE icon till the icon turns to red, then move your ginger to delete.
Change the desktop wallpaper
Click and hold the blank space in main screen, it will popup the window to change the wallpaper.
Click the photo gallery or wallpapers gallery to choose photo.
Voice search
- Touch the Microphone icon
- You can set the language according to your need in the voice search frame, click OK to confirm.
- Keep your mouth direct to the microphone, and speak out the content you need to search, the browser will open the search result list.
Note: Please make sure the internet is well connected before voice search.
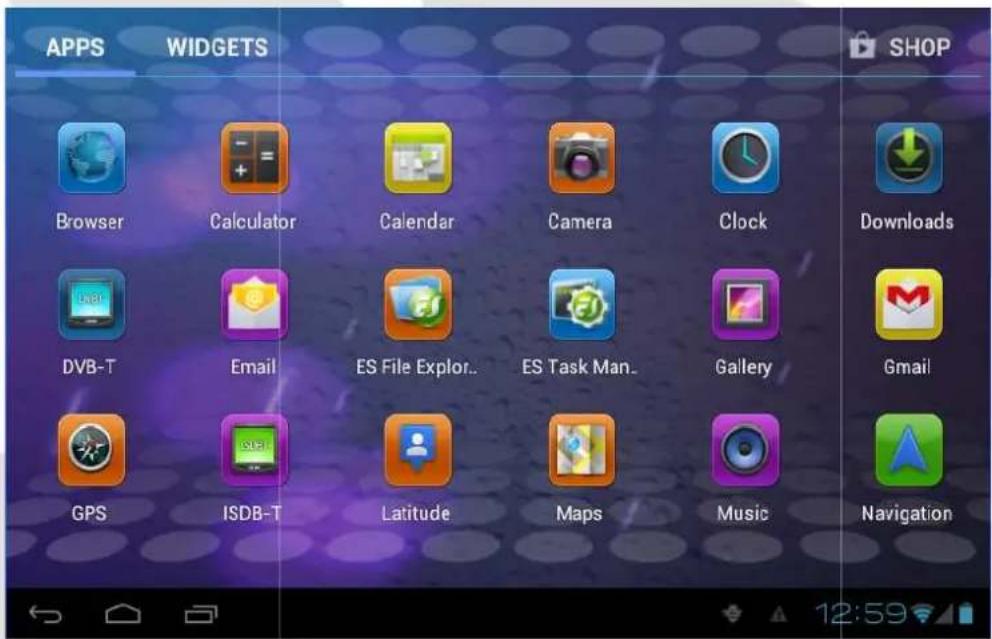
Applications
How to open the application.
- Click icon (picture 4), enter into application (as picture 8).
- Choose the application you want to open.
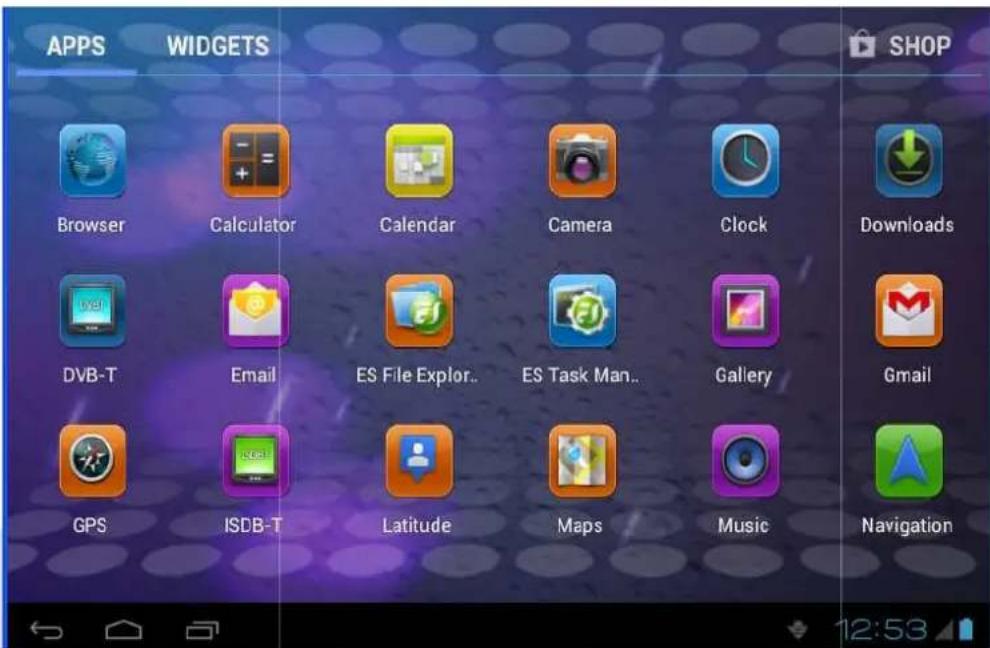
Picture 8
USB Connection
MID storage configuration
Before transmitting documents, you have to conduct storage configuration for your tablet. Connect tablet and PC via USB connection, the reminder column will show the remind information.
- Open the reminder board
- In the remind board, click USB is connected, then touch to open USB memory device.
- Now USB is well connected.
Copy the file into memory card
- Connect tablet and PC via USB connector.
- Operate as the tablet memory setting to connect the tablet and PC.
- Open "My computer" to view Mobile disk(x).
- Copy the file you need to copy into "Mobile disk(x)".
- After copying, click "close USB memory" in your computer to uninstall.
Note: If you want to open memory card resources on your device, you need to disconnect the USB cable first.
Basic settings
Voice and display
Multi-media volume setting
- Click setting application in the main interface.
- Click Voice.
- Click volume to adjust the volume for music and video.
- When popup volume setting board, left or right progress bar to control.
- Click confirm.
Display setting
Adjust the brightness of screen
- Click Setting application procedure in main interface.
- Click display.
- Click brightness when the menu popup.
- It will popup setting board, left and right slide the brightness bar to adjust the brightness.
- Click OK.
Adjust screen standby time
-
Click Setting application procedure in the main interface.
-
Click display.
- Slide down the screen, and click dormant.
• It will popup screen standby time setting, choose the standby time you want.
Basic setting
Setting screen lock
You can unlock the picture or password to lock the touch screen to protect you tablet privacy.
Note: After setting the screen locked, you need to enter the password when you start the tablet.
Setting unlock picture
- Click setting application in the main interface.
- Click safety.
- Click screen lock.
- Choose picture in the text setting area.
- Move to next step according to remind.
- There are nine touch points in the picture, when it popup unlock picture board, connect the four points from vertical and horizontal direction. As Picture 9, move your finger when finish. System will record the picture you set.
- Click continue.
- When you see the remind information, click the screen locked picture, click OK.
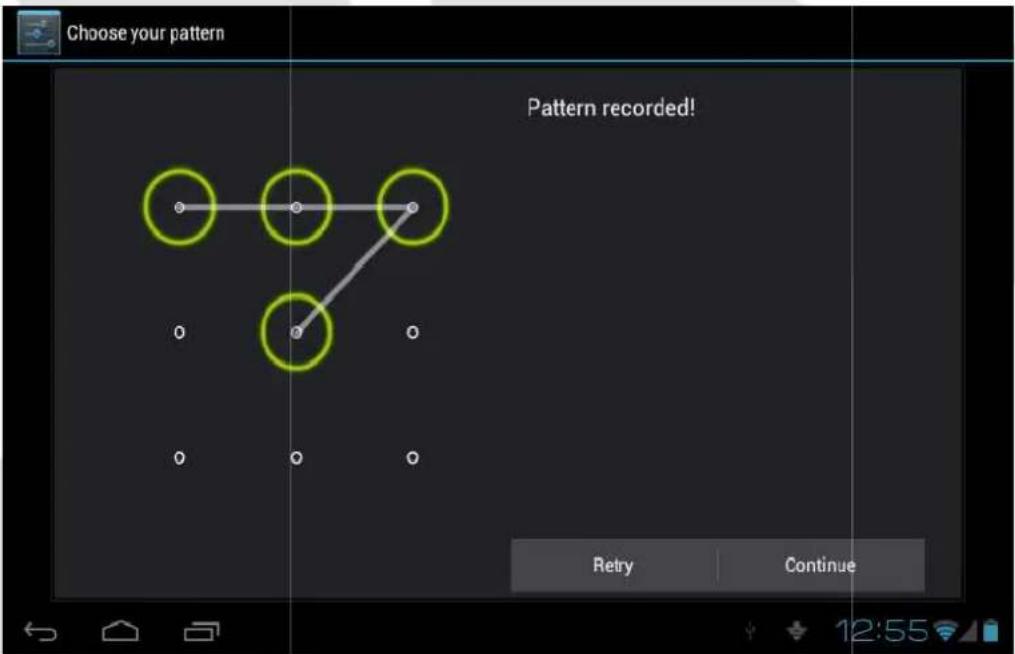
Picture 9
Set unlock PIN code
- Click setting application in the main interface.
- Click confirm.
- Click screen locked.
- Choose PIN when it popup text setting area.
• Enter new PIN code and click continue. - Enter new PIN code again and choose OK.
Setting unlock password
- Click setting application in main interface.
- Click safe.
- Click screen locked.
- Click password in the text setting area.
- Set new password(letters and number) and click continue.
- Enter password again and click confirm.
SD card and tablet memory
View SD card and tablet memory available space
- Click setting application in the main interface.
- Click memory.
• View the available space in SD card.
• View tablet internal memory space.
Remove SD card safely
Remove the SD card safely can prevent the SD card and extend the SD lifetime.
- Click setting application in main interface.
-
Click memory.
-
Click remove SD card.
- Pull out SD card.
Date and Time
Manual adjust date, time and zone
- Click Setting application procedure.
- Slide down screen, a nd click date and time.
- Click select time zone, and choose the zone in the list. Slide down to view more zone information.
- Click setting date and then click up and down button or slide up and down to set area to adjust date, month and year, click setting when finish.
- Click setting time and click up and down or slide up and down to setting area to adjust hour and minute, click AM or PM to change the morning and afternoon (there is no such selection when you choose 24 hour format), click setting.
- Click to choose 24 hour format, you can switch between 12 hour format and 24 hour format, the selected time format will be used on the alarm.
Setting Language
- Click setting application in main interface.
- Click language and input method.
- Click language, and select the language you want, slide down to search more language.
About Tablet
View the tablet Status
- Click Settings.
- Click About Tablet, you can view the electric volume, status messages and so on.
System update
- Click Setting application procedure in main interface.
- Click About tablet.
- Click System update, update as steps.
- Click Install system update if there is new version. (Please confirm there is new version microSD card in device before installation.
View system version
- Click Setting application procedure.
- Click About Tablet.
- You can view model NO., Android version, firmware version and internal version.
Multimedia
Supported file formats
Supported music file formats:
AAC, OGG, WAV, APE, FLAC, AMR, WMA
Supported video formats
AVI, MPG, VOB, MKV, FLV, TS/TP, H264, MPRC-4, RMVB, DIVX, MPEG-2
Supported photo formats
JPEG, GIF, PNG, BMP
Music
You music can be divided into four types: artists, album, and music and play list. Choose a type to view the list.
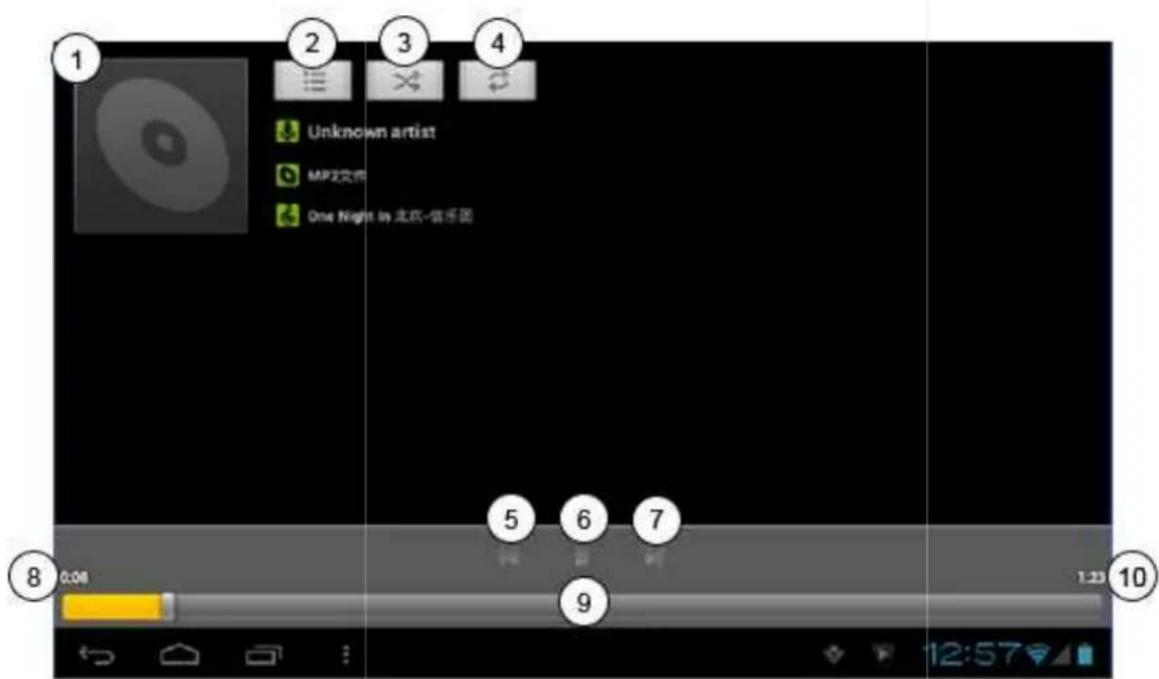
- Cover of album
- View current play
- Random play
- Repeat
- Previous
-
Pause
-
Next
- Elapsed time
- Progress bar
- Total time
Play music
- Click music in the main interface.
• Enter to select music and click artist, album and play list. - Select any music to play.
Add the music into new playlist
- Click music in the main interface.
- Enter to select music.
- Click and hold the music you want play.
- Click music setting menu, click add into playlist.
- Click new list.
- Input playlist name.
- Click save.
Delete the music in play list
- Click music.
- Click and hold the music you want delete in the play list.
- Click delete in popup menu.
Video
Enter into video player: in the desktop choose application and choose the video you want to play.
- Click gallery application.
- Wait for device to refresh all video files.
- Click a file you want play.
Photo gallery
Photo gallery application shows all video and image files on your SD card.
- Click photo gallery application in main interface.
- Enter into photo gallery, click the file you want to view.
- Click the photo yo u want to view, system will display the photo in full screen mode.
When you view photos, you can zoom in and out, touch the screen with two fingers, and pull the fingers or separate the fingers to decrease and increase image size. When you view photos, you can slide left and right to switch between photos.
Camera
Camera application includes two cameras: front (300.000 px) and rear (2 million px). Rear camera provides full screen mode and picture capturing.
Open the camera
You can open the camera in two ways:
-
Slide the screen (if you already set the setting to "slide", slide down the icon to camera icon.)
-
Touch camera icon in the main screen or application menu.
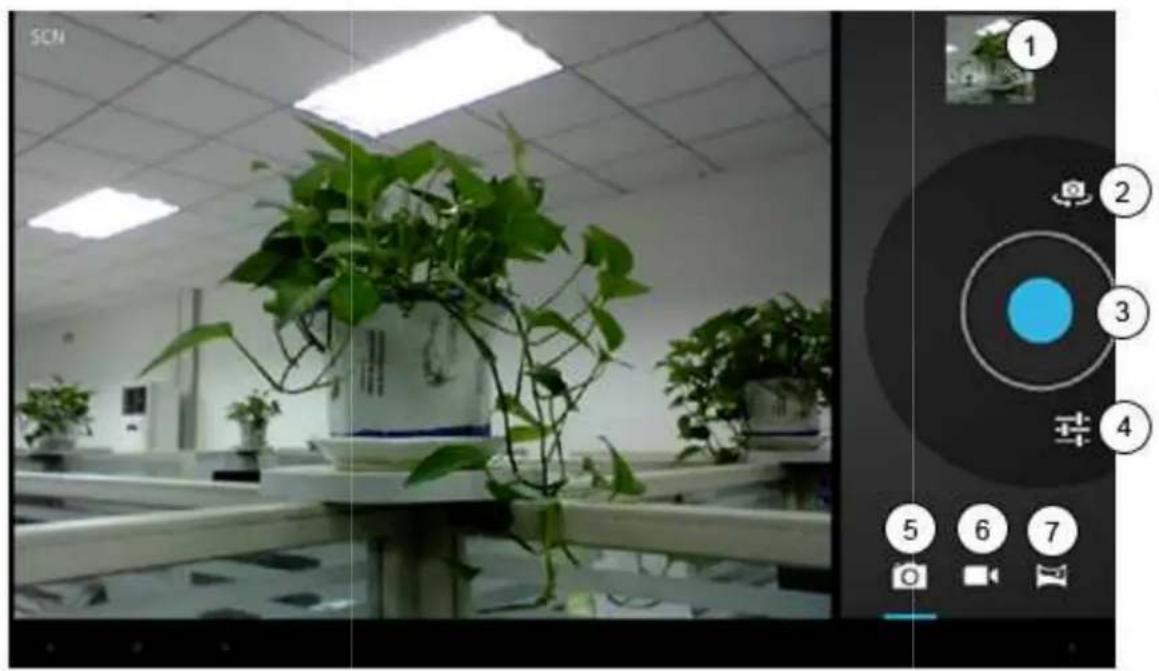
natural_image
Interior view of a plant nursery with potted plants and a digital camera interface (no readable text or symbols)-
View photo or video
-
Photo shooting mode
-
Switch front and rear camera
-
Video recording mode
-
Take photo
-
Panorama mode
-
Options
Taking photos
- Open camera, make sure your device is in camera mode (see picture above).
- Touch blue button to take photos.
- Note: To avoid the unclear photo, please catch the tablet tightly and stably, you'd better touch the blue button as soft as possible.
Recording videos
• Make sure your device is in video mode (see picture above).
- Touch red button to start recording the video. During the record, the red button will display a white diamond.
- Touch the red button when finish record.
Remember
• The photos and videos will save automatically.
• You can view the photos and videos you have recorded.
• If you want view more photos and videos you can slide left and right.
- When you view the photos, move together or separately to zoom in or out the photos or double touch the screen.
- When you view videos, if you want to play the video, click play button

Panorama mode
Panorama mode can let you capture scenic shots.
- Open the camera, make sure your device is in panorama mode (see picture above).
- Aim at the scene you want to shoot from one end to another end. For example, if you want to shoot one bridge, please take the head of the bridge first.
- Touch green button, then move the camera from the whole scene.
• Take bridge for example, you need to move the camera from one angle to another.
• During the shooting, green button will display a white diamond. - C lick the green button when finish. The system will display full screen photo, and the camera will display the progress bar when saving photo.
Connections and networks
3G (3rd generation mobile telecommunications)
- Enter the main interface.
• The device will connect to 3G automatically. - Wait for 3G icon to appear on status bar.
WIFI connection
- Your tablet can connect Wi-Fi internet.
- Click settings in main interface.
- Select WI-Fi.
- Enter into WI-Fi interface, click WI-Fi button.
- Tablet will auto scan available WI-Fi networks. See picture 10.
- Select the WI-Fi you want to connect, if there is any password window, enter the password and click Connect to finish.
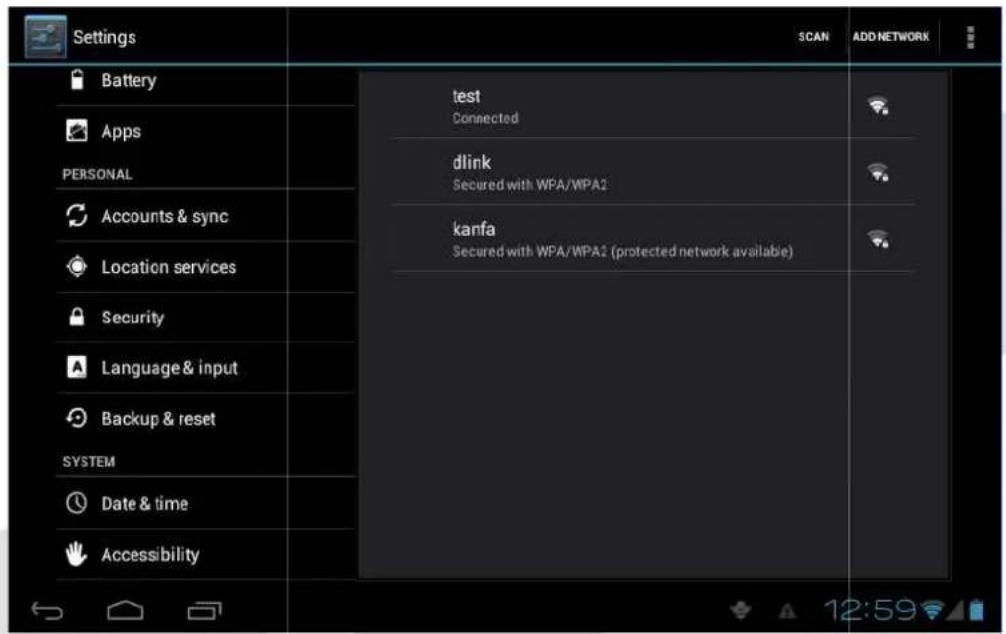
Picture 10
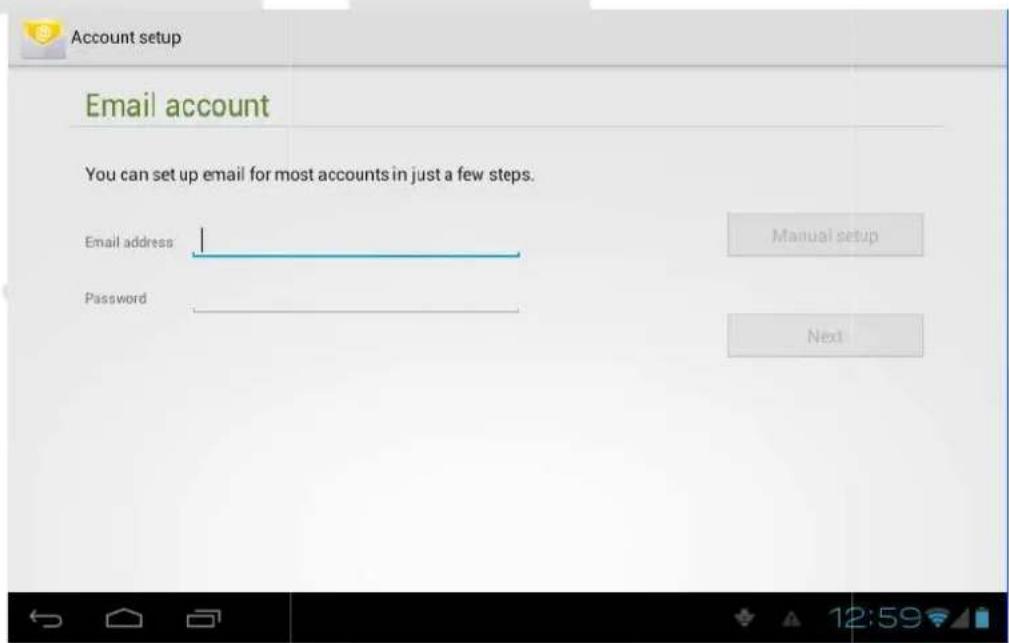
E-mail settings
The e-mail application provides configuration wizard. You can add ordinary web email service to the external POP3 or IMAP email account of provider (such as Yahoo or Gmail).
Picture 11
Note: make sure your internet connection is working before starting e-mail configuration wizard.
E-mail configuration wizard
• Enter into main interface
- Click email icon to start a configuration wizard
- Enter your e-mail account address and password.
- Click next button, choose your e-mail type (POP3 or IMAP).
- Click next button to verify your e-mail settings.
- Enter account name and the email sender's name, click finish.
• If the mailbox is available, it will enter into your inbox.
Picture 12
Internet
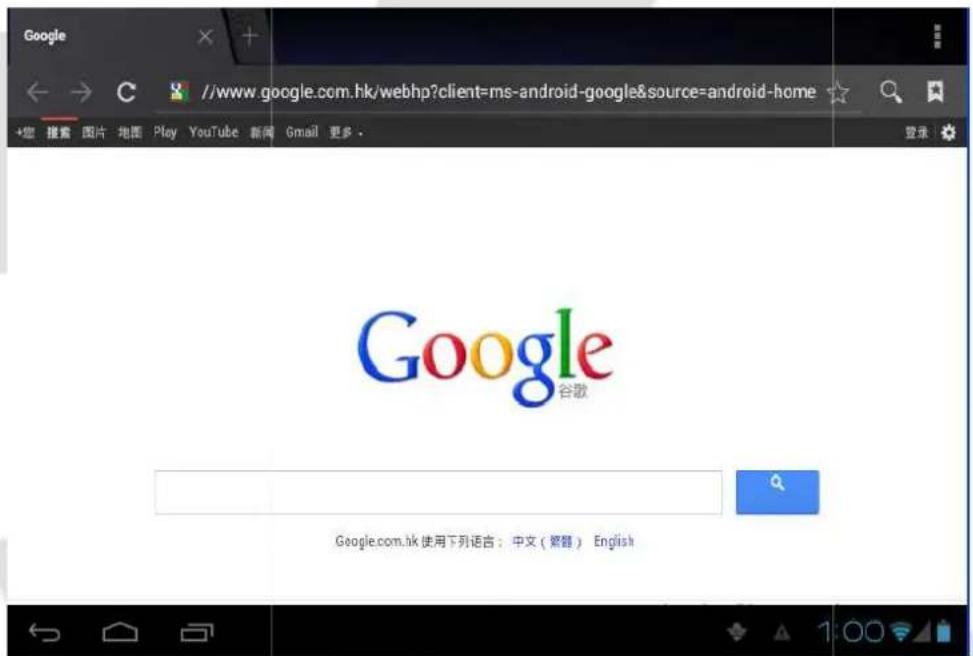
Web browser
Touch browser icon in main screen or all application screen.
Browser will open the previous webpage you visit. If you haven't use browser, it will open your main webpage.
On the top of the screen, it will display the current URL (website address).
Viewing pages in offline mode
You can save a webpage into MID to view it in offline mode (without interret connection)
- Open the menu to save a webpage for viewing it without internet.
- Below the save webpage bookmark, it will display the thumbnail, to return to the real webpage, please touch "return" button.
- To view saved webpage, please touch the icon , then select menu, saved webpage, and the thumbnail of this webpage.
Applications
Clock
- Enter into applications menu.
- Click the clock application icon.
- Select settings and add clock (see picture 14)
- Touch menu key to bring up the clock settings menu.
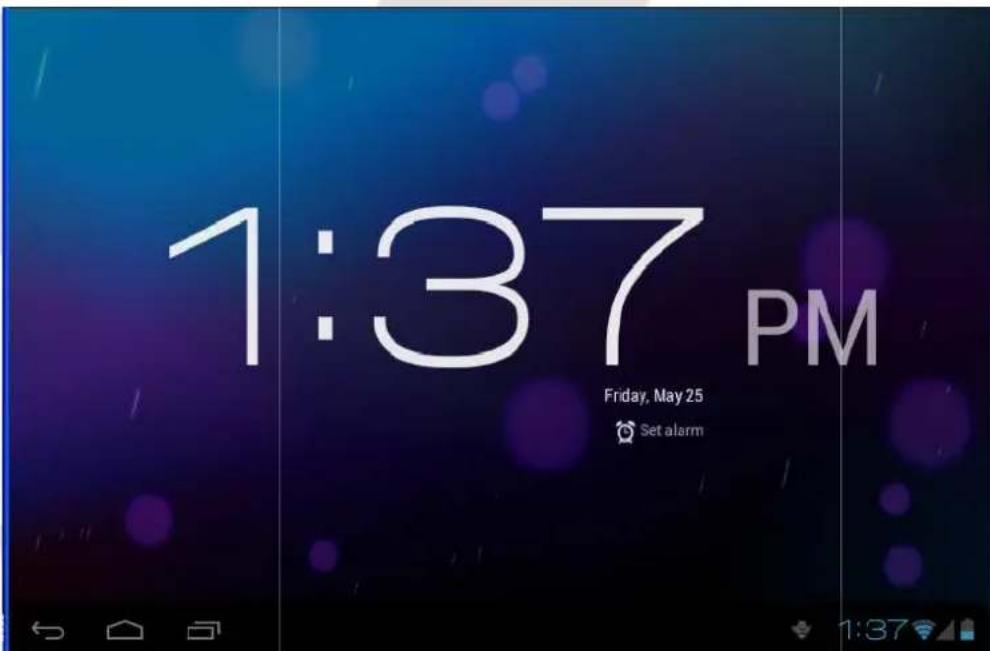
Picture 14
Calculator
- Click the calculator icon in the application interface.
- Enter into the basic board of calculator.
- Click menu key, then click advanced board.
- Touch the number or operator in the calculator.
- Flip your device to switch between advanced and basic calculator board
File management
File Browser
You can use the file browser to edit and delete files and folders. You can also use FTP service to share your resources.
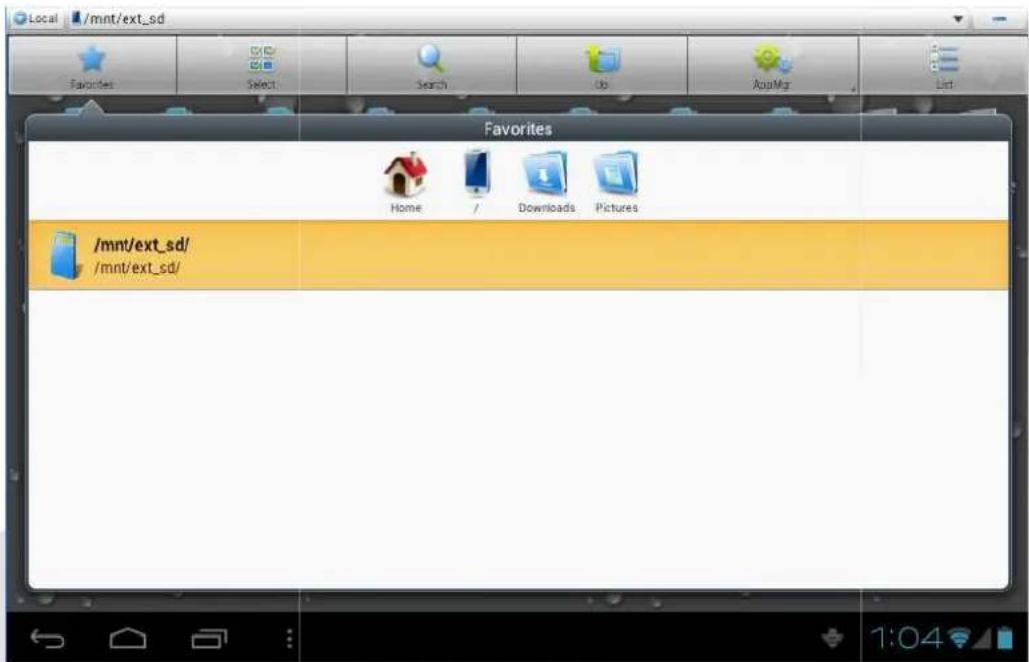
SD card read path
- In the main interface click file browser icon to enter into file browser interface (see picture 15).
- Click the icon in the top of file browser
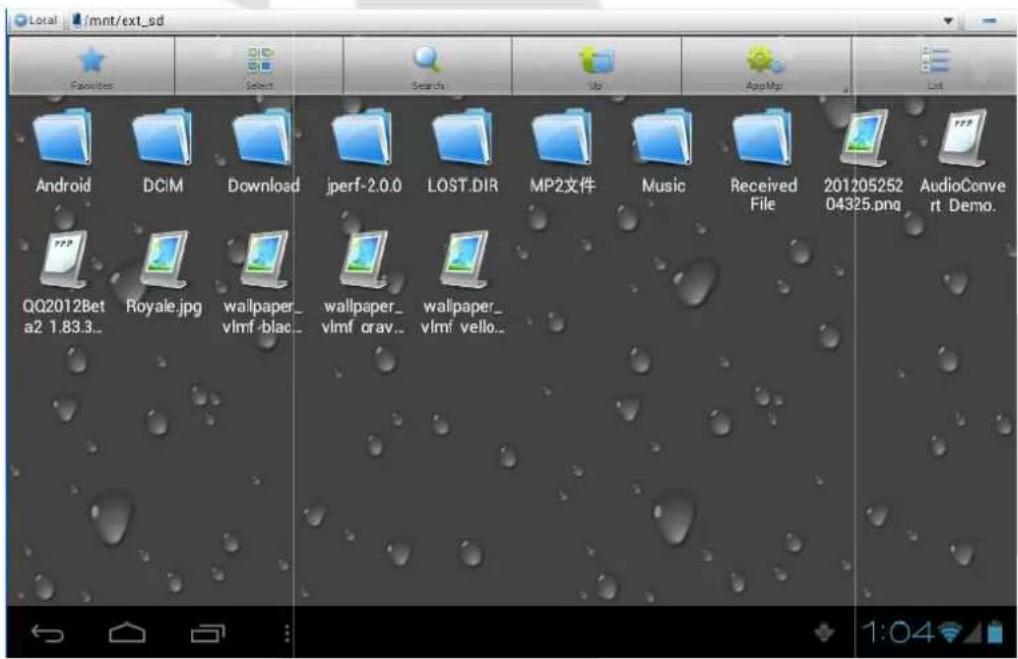
- Open folder, as in the picture 15, click /mnt/ext_sd.
- Open the file, you can view the file in SD card, (see picture 16)
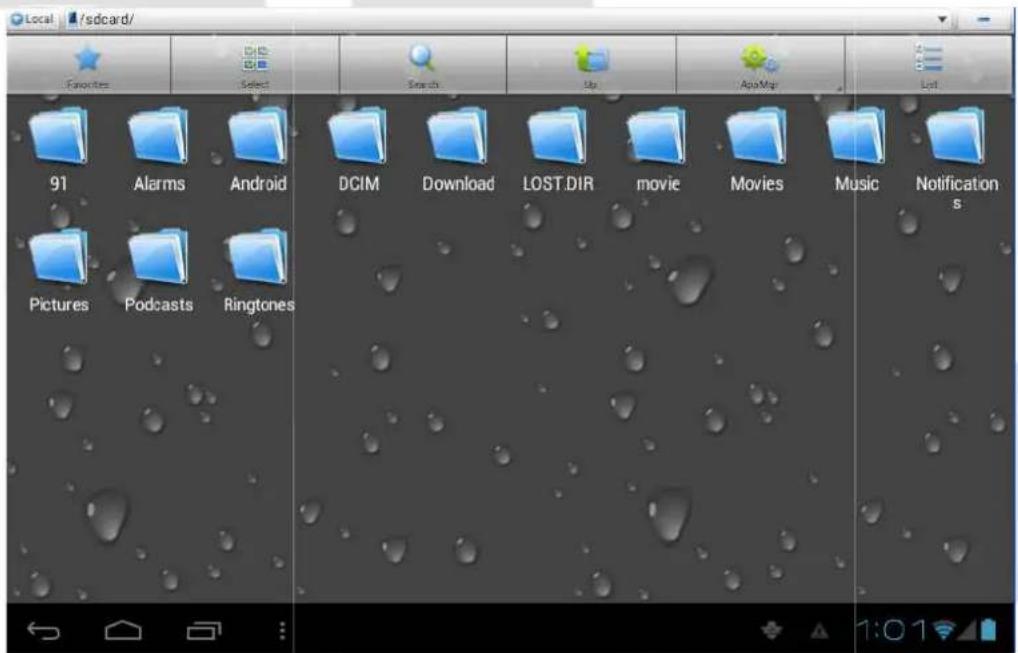
Picture 15

Picture 16
Picture 17
Cut and copy files
- Select the file you want to copy or cut.
- It will bring up the operation menu which includes cut, copy, delete, rename, select all, set main menu and properties.
- Click cut or copy file or folder.
- Click to enter into the folder you want to paste, touch menu key to bring up the menu.
- Click operate, then click paste to finish.
Delete file
• In the file browser, click and hold the file you want to delete.
- Click delete.
- Click OK to delete the file.
Create folder
- In the file browser, touch menu key to bring up the menu.
- Click create.
- Click folder.
- I nput the new folder name in edit column.
- Click OK to create folder.
Fast search
- Click menu to bring up the menu in the file browser.
- Click search.
- Input the key words in name edition column.
- Click OK.
• The system will display the search results.
Installing new applications
Installing a new application
Installing the third part applications
- You can get new applications for your Android device from the internet. Search for files with *.apk extension.
• Copy application file into SD card. - Click ES file browser; choose the application you need to install.
- Hold the application you want to install.
- Click install APK.
• Follow installation wizard procedure
Uninstalling an application
- Click setting in main interface.
- Click applications, it will list all the application on your device.
- Select the a plication you want to uninstall, click uninstall.
- Click OK to finish uninstall progress.
Advanced operations
System upgrade
- Download the soft ware upgrade pack from related website.
- Backup your data from the memory card and from your device!
- Format your SD card (FAT or FAT 32 file format only)
- Restore factory settings
a. When your MID occurs some serious problem or passwords have been forgotten, you can restore factory settings. Remember to backup your data.
b. When the device is in shutdown state, hold the Volume up key by one hand and press Power key into upgrade picture by another hand.
c. The device will enter into upgrade mode (see picture 18)
d. Click Volume down key when you see the red triangle.
e. The system will enter into recovery menu interface (see picture 19)
f. Press Volume down key, the option bar will slide down, press Volume up key to execute.
g. Choose wipe data/factory reset to execute.
h. Warning: all data on your device will be lost! Don't forget to make a backup.
i. Enter into confirmation interface, click Yes to restore factory settings.
-
Turn off your device.
-
Make sure the battery is fully charged! Don't follow the next steps if battery status is low!
-
Insert the microSD card with update zip upgrade package into your device (the file named update zip)
-
In shutdown mode, click Volume up key, then press Power key to enter into recovery mode.
-
Enter into the second option to enter into the next interface, then select the second option, the system will enter into upgrade mode, it will display the progress bar.
-
After system upgrade finishes, it will display the information: "Install from SD card complete"
-
After system upgrade finishes, the menu cursor will back into the first option, now click volume + to exit upgrade interface and run the Android system.

natural_image
3D rendered green Android robot with a red warning sign on its body, set against a black background (no text or symbols)Picture 18
| Android system recovery <3e> | |
| Use back key to highlight: press menu key to select. | |
| reboot system now | |
| apply sdcard:update.zip | |
| wipe data/factory reset | |
| wipe cache partition | |
| updated user logo | |
| burn write data | |
| burn license | |
Picture 19
Safe mode
After entering the safe mode, you can uninstall the software that can't run correctly under normal mode.
- Press the power switch, wait until it display the first logo.
- While the device is in the logo interface, press and hold the VOL - and MENU button at the same time. Your system will run in safe mode now (see the left bottom corner of picture 20)
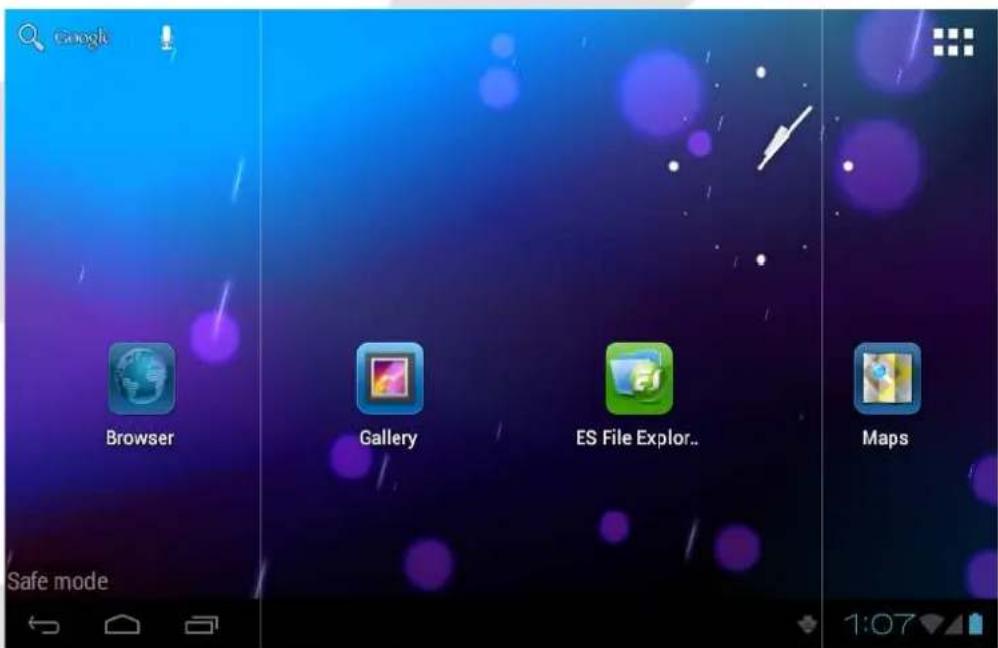
Picture 20
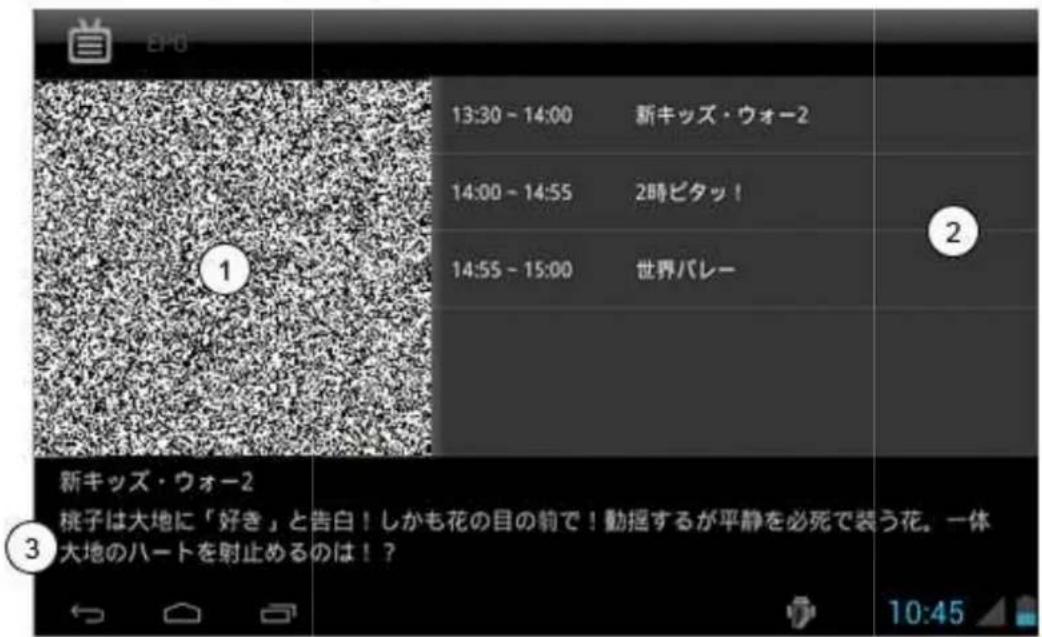
Mobile TV (optional)
Mobile TV main interface
- Click DVB- T icon in application programs interface.
- Click search button to search TV programs.
- Choose the TV program you want to watch in programs list.
- Click play screen enter into full screen play.
• After intercepting the picture, save it into /SDCARD/Images.
• The intercepted video will be saved into /SDCARD/Videos.
• Note: During TV recording never pull out the SD card!
![Ch6 [661] TBS ② ① ③ ④ ⑤ ⑥ 10:14](/content/2026/05/758686/images/e885e48e63672e594ddfcde8e003e7c125a32dbe5993f8dc8b4544431d2f7cf8.jpg)
- Playback interface
- Channel list
- Search for channels
-
Capture
-
Record video
- Adjust brightness
- Adjust volume
While playing in full screen mode, press the menu key to bring up the menu bar (see picture below)

- Return to DVB-T main interface
- Zoom in/out the screen
- Preview program
-
Next/previous channel
-
Settings menu
Click EPG icon, to enter the Electronic Program Guide interface (see picture below)
- Click "GPS" on the APP interface.
- The blue signal bar means it is positioning.
- Once the signal bar turns to green, the positioning is succeed.
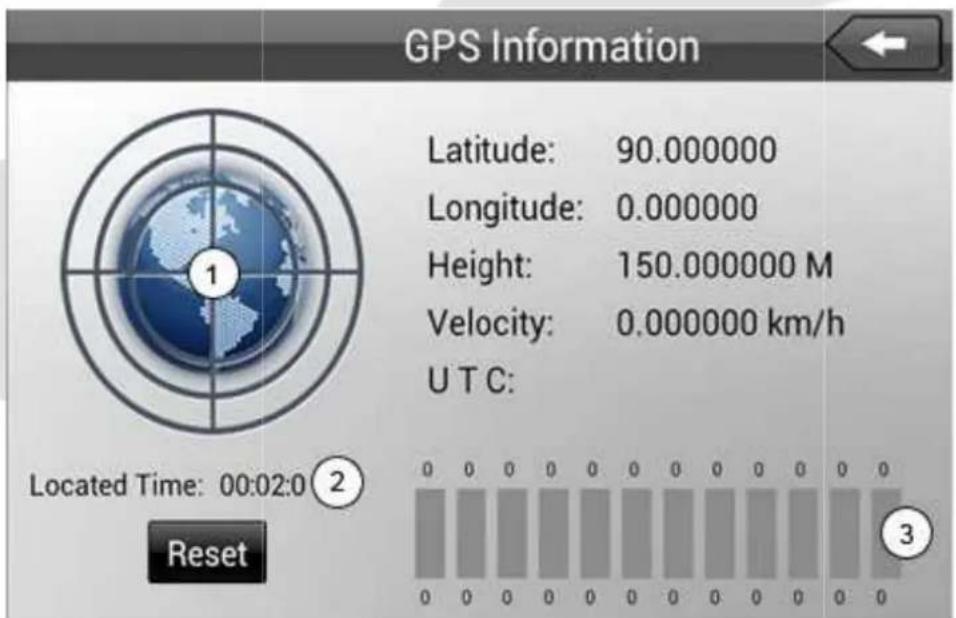
- Signal
- Positioning time
- SNR (signal strength)
Troubleshooting
1. The first time to turn on the tablet takes too long time.
- After updating the system of the tablet, it will take 2-3 minutes to install the application software. Then, the speed of turning on the tablet will be faster than before.
2. Sometimes, the temperature of the tablet is a little high.
- It is the common situation that the temperature of the teblet is a little high when use several applications at the same time or the backlight is maximum or it is charging.
- Tablet cannot connect the Wi-Fi.
• Make sure the wireless router works well. - The distance between the tablet and the wireless router should be within 50-100m and there is no wall or other barriers between them.
- Please make sure the user and the password are correct.
4. Cannot surf the Internet
- Please make sure the distance between the tablet and wireless is within 50-100m.
- Please re- connect the WIFI.
5. The system cannot run in some situation.
- When installing some third party applications, the system may not run. It is suggested to long click the Power button for 6 seconds to turn off the MID.
6. Cannot set the E-mail or register the application system
- Please make sure the connection of the internet works well.
- Please make sure the way to set the E-mail is correct.
7. Cannot read the data of the microSD card
- Please make sure the microSD card inserted into the device correctly.
8. Sometimes, the tablet runs slowly.
- This is the common situation. But you can close some applications in the last management interface, or uninstall some third party application to release more system resources.
Specifications
| Type | Details | Description |
| Basic parameters | Model | T76GPS/T76GPS TV |
| CPU model | Telechips 8925, supports 3D boosting | |
| CPU frequency | 1GHZ | |
| DDR-RAM | 512MB | |
| NAND FLASH | 8GB | |
| OS | Google Android 4.0 | |
| Internet Connection | Wi-Fi b/g/n wireless internet | |
| Camera | Built-in two cameras, the back camera is 2 million pixel, the front camera is 0.3 million pixel. | |
| USB connector | microUSB | |
| HDMI connector | 1080P digital signal output | |
| battery | Polymer lithium battery, 2900mAh/3.7V | |
| Power adaptor | Input AC 100V-240V, output DC 5V, 2A | |
| SD card | Supports memory cards up to 32G | |
| Screen | 7.0 inch TFT LCD with capacitive touch panel, resolution 800x480 | |
| Applications | Video play | Supports AVI, MKV, FLV etc.Supports 720P 1080P play |
| Audio play | Built-in video player which support MP3, MIDI, WAV etc. | |
| Games | Support third party software | |
| Photo Viewer | Support JPG, BMP, PNG, GIF etc. | |
| OFFICE software | Supports office (word, excel read and edit ), supports PDF files |

natural_image
Abstract logo design with a blue square inside a large gray infinity symbol (no text or symbols)GOCLEVER
INFINITE INVENTION
GOCLEVER TAB
T76GPS/T76GPS TV
INSTRUKCJA OBSŁUGI
ODWIEDŻ NASZĄ STRONE
WWW.GOCLEVER.COM
ABY ZOBACZYĆ WIĘCEJ PRODUKTÓW TAB, NAVIO, DVR, DVB-T
Obraz 1
Obraz 2
Obraz 3
Obraz 9
Ustawianie kodu PIN
natural_image
Interior view of a plant nursery with potted plants and water-filled basins, no visible text or symbols3G (3rd generation mobile telecommunications)
Obraz 10
Ustawienia e-mail
Obraz 12
Internet
Obraz 14
Kalkulator
Obraz 15
Obraz 16

Obraz 17
natural_image
3D rendered green Android robot with a red warning sign on its body, set against a black background (no text or symbols)Obraz 18
| Android system recovery <3e> | |
| Use back key to highlight: press menu key to select. | |
| reboot system now | |
| apply sdcard:update.zip | |
| wipe data/factory reset | |
| wipe cache partition | |
| updated user logo | |
| burn write data | |
| burn license | |
Obraz 19
Tryb awaryjny
www.AUTORMA.GOCLEVER.com
67531 Jemnice, Czech Republic
servis@goclever.cz
Ukraina
Service Center "KROK-TTC"
Member of Logo d.o.o.
Group Bulevar kralja Aleksandra 261
11000 Beograd. Srbija
+381 11 2042 109,+381 11 2042 101
www.etservis.rs
servis@etseivis.rs
Chorwacja
PlayCom
Ulica grada Vukovara 249,10000 Zagreb
+385 01 5618 433,+385 01 6184 115,
+385 01 6184 115
Skype : PlayCom - HR
info@play.com.hr
www.playcom.hr

- GOCLEVER
- INFINITE INVENTION
- GOCLEVER TAB
- T76GPS/T76GPS TV
- OWNER'S MANUAL
- INSTRUKCJA OBSŁUGI
- Introduction
- Acknowledgement
- Announcements
- Preventive maintenance
- Safety Instruction
- Abbreviation/Terminology
- Product Description
- Accessories
- Usage and Preparation
- Status and Reminder Icons
- Quick Start Guide
- Keys Function
- Startup and Shutdown
- Startup
- Shutdown
- Open and Close the Screen
- Usage of Touch Screen
- Main Interface
- Extensible homepage interface
- Shortcut icons management of desktop applications
- Delete the icons in the desktop
- Change the desktop wallpaper
- Voice search
- Applications
- USB Connection
- MID storage configuration
- Copy the file into memory card
- Basic settings
- Voice and display
- Multi-media volume setting
- Display setting
- Adjust screen standby time
- Basic setting
- Setting screen lock
- Setting unlock picture
- Set unlock PIN code
- Setting unlock password
- SD card and tablet memory
- View SD card and tablet memory available space
- Remove SD card safely
- Date and Time
- Setting Language
- About Tablet
- System update
- View system version
- Multimedia
- Supported file formats
- Music
- Play music
- Add the music into new playlist
- Delete the music in play list
- Video
- Photo gallery
- Camera
- Open the camera
- Taking photos
- Recording videos
- Remember
- Panorama mode
- Connections and networks
- 3G (3rd generation mobile telecommunications)
- WIFI connection
- E-mail settings
- E-mail configuration wizard
- Internet
- Web browser
- Viewing pages in offline mode
- Clock
- Calculator
- File management
- File Browser
- SD card read path
- Cut and copy files
- Delete file
- Create folder
- Fast search
- Installing new applications
- Installing a new application
- Installing the third part applications
- Uninstalling an application
- Advanced operations
- System upgrade
- Safe mode
- Mobile TV (optional)
- Mobile TV main interface
- Troubleshooting
- The first time to turn on the tablet takes too long time.
- Sometimes, the temperature of the tablet is a little high.
- Cannot surf the Internet
- The system cannot run in some situation.
- Cannot set the E-mail or register the application system
- Cannot read the data of the microSD card
- Sometimes, the tablet runs slowly.
- Specifications
- Ustawianie kodu PIN
- Ustawienia e-mail
- Kalkulator
- Tryb awaryjny
- Ukraina
- Chorwacja
Brand : GOCLEVER
Model : TAB T76
Category : Tablet