
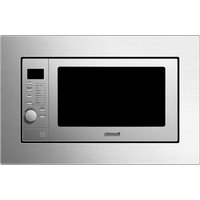
BTM23.3M - Microwave BAUMATIC - Free user manual and instructions
Find the device manual for free BTM23.3M BAUMATIC in PDF.


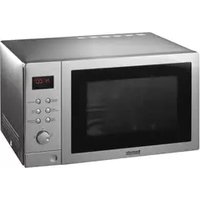
| Product Type | Microwave oven with grill |
| Capacity | 23 litres |
| Microwave Power | 800 W |
| Grill Power | 1000 W |
| Power Levels | 5 (100%, 80%, 60%, 40%, 20%) |
| Auto Programs | 8 (Popcorn, Pizza, Beverage, Potato, Fish, etc.) |
| Defrost Programs | 3 (Meat, Poultry, Seafood) |
| Display | LED full programmer with temperature and function display |
| Clock | Yes |
| Safety Lock | Yes (child lock) |
| Interior Light | Yes |
| Turntable | Yes, rotating plate and base |
| Dimensions (H x W x D) | 278.2 x 482.8 x 360 mm |
| Power Supply | 230 V ~ 50 Hz, 13 A |
| Material | Stainless steel exterior and interior |
| Viewing Window | Yes |
| Grill Type | Quartz grill |
| Control | Electronic with touch buttons |
| Installation | Freestanding only, distance limiter required |
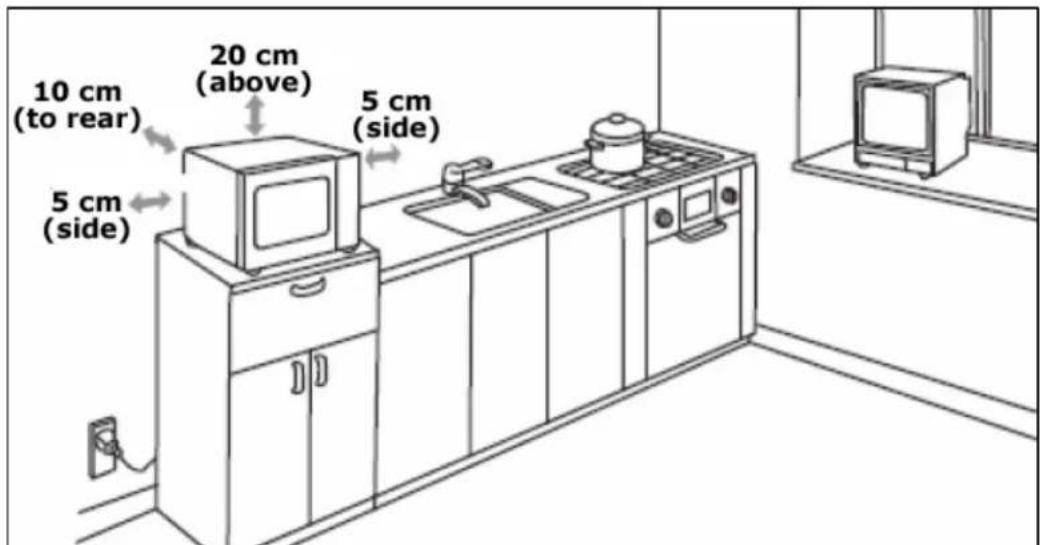
| Ventilation Clearance | 10 cm rear, 5 cm sides, 20 cm above |
| Accessories Included | Turntable, rotating base, grill rack, distance limiter |
| Cleaning | Wipe with soft cloth and mild detergent; no abrasives |
| Spare Parts Availability | Genuine Baumatic parts from Spares Department |
Frequently Asked Questions - BTM23.3M BAUMATIC
User questions about BTM23.3M BAUMATIC
0 question about this device. Answer the ones you know or ask your own.
Ask a new question about this device
Download the instructions for your Microwave in PDF format for free! Find your manual BTM23.3M - BAUMATIC and take your electronic device back in hand. On this page are published all the documents necessary for the use of your device. BTM23.3M by BAUMATIC.
USER MANUAL BTM23.3M BAUMATIC
BTM23.3M 23 Litre microwave oven with grill
INSTRUCTION MANUAL

natural_image
Simple line drawing of a fish with fins and tail, no text or symbols presentUser Manual for your Baumatic
BTM23.3M
23 Litre microwave oven
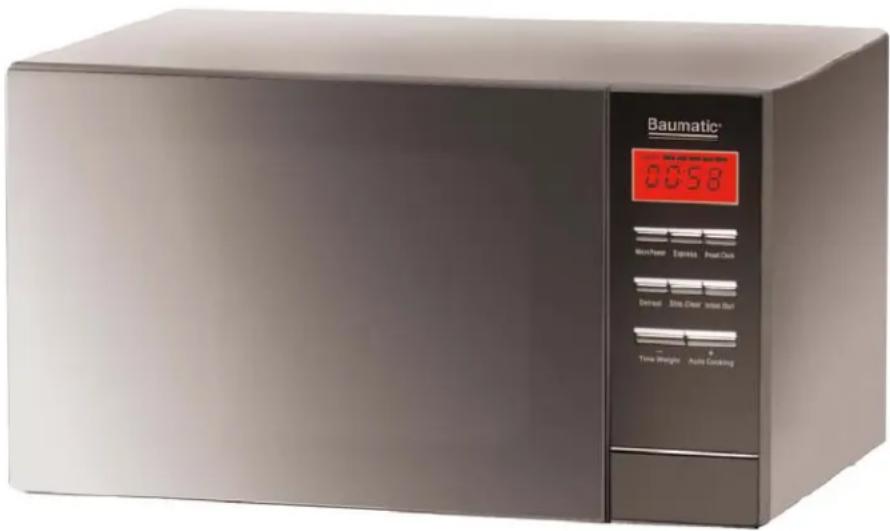
Baumatic®
NOTE: This User Instruction Manual contains important information, including safety & installation points, which will enable you to get the most out of your appliance. Please keep it in a safe place so that it is easily available for future reference; for you or any person not familiar with the operation of the appliance.
GS 20/02/12
Contents
| E | n | v | i | r | o | n | m | e | n | t | a | l | |
| Important safety information | 5-8 | ||||||||||||
| Specifications | 9-12 | ||||||||||||
| Product dimensions | 9 | ||||||||||||
| Product specifications | 9 | ||||||||||||
| Description of the appliance | 10 | ||||||||||||
| C o n t r o l p a n e l | |||||||||||||
| T h e t u r n t a b l e | |||||||||||||
| U s i n g y o u r m i c | |||||||||||||
| S e t t i n g t h e c l | |||||||||||||
| B e f o r e f i r s t u | |||||||||||||
| Microwave cooking | 13- | 14 | |||||||||||
| Grill / grill combi mode | |||||||||||||
| Automatic defrost | 16- | ||||||||||||
| A u t o m a t i c c o o k | |||||||||||||
| Setting multiple cooking phases | 19 | ||||||||||||
| S e t t i n g a d e l a | |||||||||||||
| S a f e t y l o c k | |||||||||||||
| Microwave cooking guidelines | 21- | 2 | |||||||||||
| Materials you can use in a microwave oven | 22-23 | ||||||||||||
| Materials not to be placed in a microwave oven | 23 | ||||||||||||
| U t e n s i l s t a b l e | |||||||||||||
| Defrosting guidelines 24 | |||||||||||||
| Cleaning and maintenance | 25-26 | ||||||||||||
| The appliance exterior | 25 | ||||||||||||
| The appliance interior | 25 | ||||||||||||
| Rotating plate and rotating base | 25 | ||||||||||||
| General cleaning advice 25-26 | |||||||||||||
| Installation | 26- | ||||||||||||
| Fitting the distance limiter | 27 | ||||||||||||
| P o s i t i o n i n g 28-29 | |||||||||||||
| Electrical connection 31 | |||||||||||||
| T r o u b l e s h o o t i n | |||||||||||||
| Baumatic consumables 31 | |||||||||||||
| C o n t a c t d e t a i l | |||||||||||||
This appliance is marked according to the European directive 2002/96/EC on Waste electrical and Electronic Equipment (WEEE). By ensuring this product is disposed of correctly, you will help prevent potential negative consequences for the environment and human health, which could otherwise be caused by inappropriate waste handling of this product.
The symbol

on the product, or on the documents accompanying the product, indicates that this appliance may not be treated as household waste. Instead it shall be handed over to the applicable collection point for the recycling of electrical and electronic equipment.
Disposal must be carried out in accordance with local environmental regulations for waste disposal.
For more detailed information about treatment, recovery and recycling of this product, please contact your local city office, your household waste disposal service or the shop where you purchased the product.

natural_image
Pure diagram of a trash bin with no text, numbers, or symbols- The packaging materials that Baumatic uses are environmentally friendly and can be recycled.
- Please discard all packaging material with due regard for the environment.

Your safety is of the utmost importance to Bauma. Please make sure that you read this instruction booklet before attempting to install or use the appliance. If you are unsure of any of the information contained in this booklet, please contact the Baumatic Advice Line.
General Information
- This appliance is designed for domestic household use. It can NOT be used as a built-in microwave and must be used as a freestanding appliance.
- You should only operate the appliance when the turntable and turntable support are in position.
- You should only use ovenware that is suitable for being used in a microwave.
To prevent corrosion occurring due to moisture/condensation, the cavity and the door of the microwave should be wiped dry after each use of the appliance. - The appliance must not be left unattended if you are heating or cooking food in containers that are made of paper, plastic or other flammable materials. If left unattended, they could pose a fire hazard.
- If you notice smoke coming from the appliance, you should keep the door of the microwave closed and then disconnect it from your mains supply. DO NOT use your microwave oven, if you think it is not operating correctly.
Installation
○ IMPORTANT: Only the freestanding installation sanctioned by Baumatic and outlined in this manual should be followed.
- Ventilation gaps MUST be left around the microwave; at least 10 cm to the rear, 5 cm to both sides and 20 cm above the appliance.
- The use of this appliance for any other purpose or in any other environment without the express agreement of Baumatic Ltd. will invalidate any warranty or liability claim.
- Your new appliance is guaranteed against electrical or mechanical defects, subject to certain exclusions that are noted in Baumatic's Conditions Of Guarantee. The foregoing does not affect your statutory rights.
Service
- Your microwave complies with all relevant safety standards. In order for it to continue to operate safely, only an engineer that is approved by the Baumatic Customer Care Department should work on the appliance.
- IMPORTANT: It is dangerous for a non qualified person to work on the appliance, in particular if they remove the cover that provides protection against exposure to microwave energy.
- If you notice that the door seal, door surfaces, power cord and plug are damaged. You should stop using the appliance, disconnect it from the mains supply and contact the Baumatic Customer Care Department.
○ Only genuine Baumatic spare parts should be fitted to your appliance. These can be obtained from the Baumatic Spares Department.
Warning and safety instructions
- This appliance complies with all current European safety legislation. Baumatic do wish to emphasise that this compliance does not remove the fact that the appliance surfaces will become hot during use and retain heat after operation.
- DO NOT place anything between the door and the door frame.
- DO NOT store anything that is flammable inside of the microwave. When it is switched on, the items could catch fire.
- DO NOT switch the appliance on if there is no food or liquid inside of the microwave. If you run the microwave whilst it is empty, there is a chance that it will overload.
- The door seals and the door surfaces should ALWAYS be kept clean and free from debris.
Child Safety
○ Baumatic strongly recommend that babies and young children are prevented from being near to the appliance and not allowed to touch the appliance at any time.
- If it is necessary for younger family members to be in the kitchen, please ensure that they are kept under close supervision at all times.
- IMPORTANT: This appliance should only be operated by adults. You SHOULD NOT allow young children to use the microwave without supervision. Older children should only operate the appliance if they have been thoroughly instructed on how to use the microwave and the consequences of improper usage.
General Safety
- Do not allow electrical fittings or cables to come into contact with areas on the appliance that get hot.
- Do not use the appliance to heat the room it is located in.
- Do not use the appliance to dry paper, textiles or animals.
- Do not install the appliance next to curtains or soft furnishings.
- Do not use the appliance to heat unopened bottles or cans etc.
- Do not heat cooking oil or liquid containing alcohol, as there is the chance of spontaneous combustion.
Do not boil eggs or similar foods in their shells, otherwise they may burst. It is possible to poach eggs in your microwave, providing you prick the yolks first.
Do not attempt to lift or move cooking appliances by using the oven door, as this may cause damage to the appliance or result in injury to the person lifting the appliance.
Cleaning
- Cleaning of the oven should be carried out on a regular basis.
- Great care should be taken whilst using this appliance and when following the cleaning procedure.
- IMPORTANT: The appliance must be disconnected from the mains before following the cleaning procedure.
Installation

This appliance must be correctly installed by a suitably qualified person, strictly in accordance with the manufacturer's instructions.
○ Baumatic Ltd. declines any responsibility for injury or damage, to person or property, as a result of improper use or installation of this appliance.
- Heat, steam and moisture will be created during use of the appliance, take care to avoid injury and ensure that the room is adequately ventilated. If the appliance is going to be used for prolonged periods of time, then additional ventilation may be required.
- Please consult with your qualified installer if you are in any doubt about the amount of ventilation that you will require.
Declaration of conformity
- CE: Appliance conforming to the European directives 89/336/EEC, 93/68/EEC, 73/23/EEC and subsequent revisions and “RoHS” directive 2002/95/CE.*
- The manufacturer declares that the oven is built using certified materials and requires the appliance to be installed in accordance with the standards currently in force. This appliance must be used by a trained person for domestic purposes only.
* The RoHS directive stands for “the restriction of the use of certain hazardous substances in electrical and electronic equipment”. This directive bans the placing on the EU market of new electrical and electronic equipment containing more than the agreed levels of lead, cadmium, mercury, hexavalent chromium, polybrominated biphenyl (PBB) and polybrominated diphenyl ether (PBDE) flame retardants.
Specifications
Product dimensions\*
| Height: | 278.2 | mm |
| Width: | 482.8 | mm |
| Depth: | 360 | mm |
* Please refer to the installation instructions contained in this user manual, to see the ventilation gaps you will need to leave around the appliance.
Product specifications
- 5 power levels
- 13 programs
- 8 auto-programs
- Electronic control operation
o LED full programmer with temperature and function display
○ Clock
o Safety lock - Interior light
- Weight control auto-programs
- Quartz grill mode
- Stainless steel exterior and interior
○ Viewing window
○ Capacity: 23 litres - MAX microwave power: 800 W
o MAX grill power: 1000W
For future reference please record the following information which can be found on the rating plate and the date of purchase which can be found on your sales invoice. The rating plate for your oven can be located by opening the microwave oven door and looking on the right hand side of the chassis and/or on the rear of the appliance.
Model Number
Serial Number
Date of Purchase ....
Description of the appliance
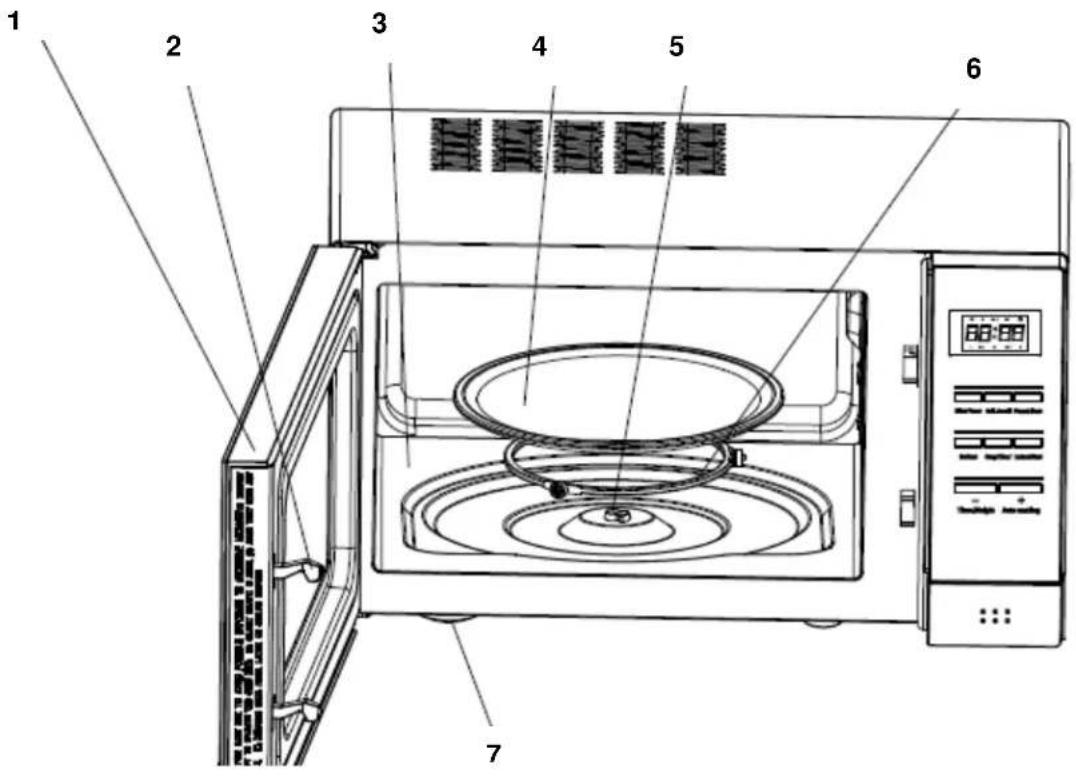
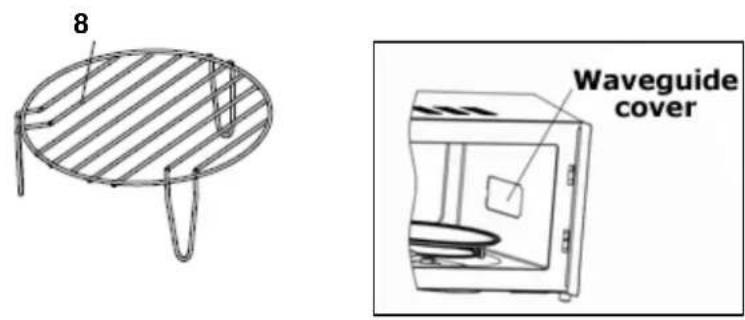
1) LCD display. This display shows the clock time, cooking mode and remaining operation time.
2) Auto cooking / plus button. Press this button to select auto-cooking mode or to increase the weight cooking time when setting a program.
3) Stop / clear button. Press this button once to cancel any input programs and resume the first stage or to stop the oven operation. Press this button twice to cancel a cooking program.
4) Instant / start button. Press this button to begin a chosen program.
5) Time and weight / minus button. Use this button to decrease the weight or cooking time when setting a program.
6) Micro power button. Use this button to set the power level for the microwave cooking mode.
7) Grill, combi button. Press this button to enter the grill and grill and microwave combination cooking mode.
8) Defrost button. Press this button to enter the defrost mode.
9) Preset, clock button. Use this button to set a pre-set cooking time or to set the time of day.
The turntable
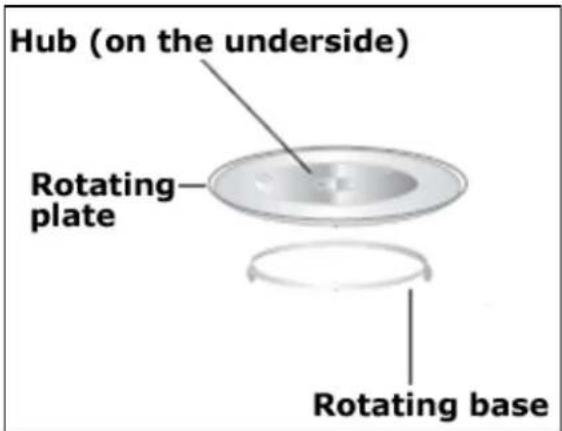
- Never place the rotating plate upside down.
- The rotating plate and rotating base MUST always be used during cooking.
○ All food and food containers must ALWAYS be placed on the rotating plate during cooking.
- If the rotating plate or rotating base cracks or breaks, it must be replaced immediately. Genuine Baumatic parts can be obtained from the Baumatic Spares Department.
Using your microwave
Setting the clock
- When your microwave is connected to the power supply, you can set the clock to the correct time of day.
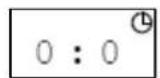
- Press the clock button (9) to enter the time setting mode.
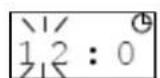
- The hour digits will flash. Use the plus (2) and minus (5) buttons to set the current hour.
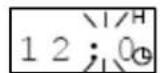
o Press the clock button (9) again to confirm.
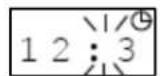
- The minute digits will flash. Use the plus (2) and minus (5) buttons to set the current minutes.
- Press the clock button (9) again to confirm the time or wait 5 seconds and the time will be automatically set.
Before first use
To remove any residue from the oven that may have been left from the manufacturing process, you should place a cup that is half filled with water in the microwave.
- Set the microwave on its highest power level for 2 minutes.
- The oven cavity and outside of the appliance should be cleaned with warm soapy water, using either a sponge or soft cloth. No abrasive cleaners should be used. The appliance should be thoroughly dried afterwards.
- We would recommend that an appropriate stainless steel cleaner and polish is regularly used on the stainless steel surfaces of this appliance.
Microwave cooking
Once the clock has been set, your microwave is then ready to use.
- Check that the rotating plate and rotating base are correctly assembled in the cavity. NEVER use the grill rack during microwave cooking.
- Place whatever you are cooking in the centre of the microwave cavity and then close the microwave door. IMPORTANT: You should make sure that the door of the microwave is shut securely.

- After initially supplying power to the appliance, the colon on the LCD display will flash, Press the stop / button (3) to enter manual mode.

- Press the micro power button (6) repeatedly to select the required cooking power from the following options: 80P 60P 40P 20P . Please see the table below power level guide.

- Use the plus (2) and minus (5) buttons to set the desired cooking time. The maximum time available is 60 minutes.
- Press the instant / start button (4) to begin the cooking function. The LCD display will count down the remaining time.
- It is possible to change the cooking time during operation, using the plus and minus buttons.
- It is recommended that food is turned half way through the cooking process to ensure proper cooking results. Press the instant / start button (4) to continue the cooking process after turning the food.
- If you intend to remove the food before the cooking time is reached, you MUST press the stop / clear button (3) to avoid unintended operation during next usage.
| LED Display | Microwave power level | Power level suitable for... |
| 100P Full | power (100%) Meat and vegetables | |
| 80P | Medium/high power (80%) | Eggs, fish, congee, rice, soup |
| 60P Medium | ium power (60%) Steaming | food |
| 40P Medium | ium/low power (40%) | Defrosting food |
| 20P Low | power (20%) Keeping food | warm |
- IMPORTANT: The inside of the microwave and the food that you have been cooking may be extremely hot. So care should be taken when removing items from the microwave. We would recommend that you use an oven glove.
○ After the food has been removed from the microwave, you should make sure that the door is closed.
Grill/ grill combi mode
IMPORTANT: When using the grill and/or grill combi mode, the inside of the oven, grill rack and cooking containers may become extremely hot. YOU MUST use an oven glove when removing items from the cavity.
- Check that the rotating plate and rotating base are correctly assembled in the cavity.
- Place whatever you are grilling in the centre of the microwave cavity on the grill rack and then close the microwave door. IMPORTANT: You should make sure that the door of the microwave is shut securely.
- There is no need to preheat the cavity when using any of the grill modes.
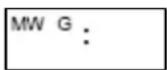
- After initially supplying power to the appliance, the colon on the LCD display will flash. Press the stop / clear button (3) once to enter manual mode.

o Press the grill, combi button (7) repeatedly to select the required grill function from the following options: G C1 C2 . Please see the table below for a grill function guide.
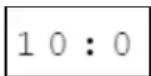
- Use the plus (2) and minus (5) buttons to select the required cooking time.
o Press the instant / start (4) to begin the chosen cooking function. The LCD display will countdown the remaining cooking time.
| LED display | Description | Suitable for... |
| G | Grill only cook | Grilling and browning thin meats, pork, sausage and chicken wings. |
| C1 | Grill microwave cooking | aThe microwaves will penetrate thicker food, alternating with the grill element, which will brown and crisp off the food. |
| C2 | Grill microwave cooking | aAd C1, but the grill element remains on for longer periods of time. |
Automatic defrost
- Check that the rotating plate and rotating base are correctly assembled in the cavity.
- Place whatever you are defrosting in the centre of the microwave cavity and then close the microwave door. IMPORTANT: You should make sure that the door of the microwave is shut securely.
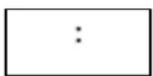
○ After initially supplying power to the appliance, the colon on the LCD display will flash. Press the stop / button (3) once to enter manual mode.

o Press the defrost button (8) repeatedly to select the defrost level from the following options: d1 d2 ase see the table below for a defrost level guide.
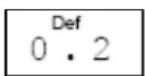
- Set the appropriate weight of the food you wish to defrost using the plus (2) and minus (5) buttons.
○ Start the defrost function by pressing the instant / start button (4). The LCD display will show the remaining defrost time which the appliance has calculated, based on the information you have programmed.
○ Half way through the defrosting time, 3 beeps will sound to prompt you to turn over the food to ensure thorough defrosting. Press the instant / start button again to continue the defrosting process once the food has been turned.
- If you do not turn the food over, the defrosting cycle will continue automatically.
| LED display | Defrost level suitable for... | Weight range (kg) |
| d.1 Defrosting meat 0.1 – 2.0 | ||
| d.2 Defrosting poultry 0.2 – 3.0 | ||
| d.3 Defrosting seafood 0.1 – 0.9 | ||
- Usually the defrosting process will take a longer time to complete than cooking the food. If the food can be cut by a knife, this usually indicates the defrosting is complete.
- For optimum defrosting results, see the instructions in the table below for defrosting specific foods.
| Food | Instructions |
| Steak / chops | ○Shield the thin end of the chops or steak with foil.○Position the food with thinner parts in the centre in a single layer on a shallow dish. If pieces are stuck together, try to separate as soon as possible.○When the oven beeps, you should turn the food over. Rearrange and shield the defrosted portions.○After the defrost time, stand the food covered with aluminium foil for 5-15 minutes. |
| Minced beef | ○Place the frozen minced beef on a shallow dish and shield the edges.○When the oven beeps you should turn the food over. Remove the defrosted portions and shield the edges with foil strips.○After the defrost time, stand the food covered with aluminium foil for 5-15 minutes. |
| Roast meat (beef / pork / lamb) | ○Shield the edges with foil strips.○Place the joint with the lean side facing upwards if possible on a shallow dish.○When the oven beeps you should turn the food over and shield the defrosted portions.○After the defrost time stand the food covered with aluminium foil for 10-30 minutes. |
| Poultry | ○Remove from the original wrapper. Shield the wing and leg tips with foil.○Place the breast side down on a shallow dish.○When the oven beeps you should turn the food over and shield the defrosted portions.○After the defrost time, stand the food covered with aluminium foil for 15-30 minutes.○After standing, run under cold water to remove giblets if necessary. |
| Chicken pieces(chicken wings and drumsticks) | ○Shield the exposed bone with foil. Place the chicken pieces on a shallow dish.○When the oven beeps you should turn the food over, rearrange and shield the defrosted portions.○After the defrost time, stand the food covered with aluminium foil for 5-30 minutes. |
Automatic cooking
The oven has a default cooking menu for simple operation. Choose the appropriate menu according to the food type and weight and strictly observe the directions of the table below, otherwise the cooking effect may be largely influenced.
- The automatic cooking times are suitable for food that is stored at room temperature.
- The temperature, weight and shape of the food will all influence the final cooking results. It is possible to adjust the cooking times to suit personal preference using the plus and minus buttons while cooking is in progress.
- Check that the rotating plate and rotating base are correctly assembled in the cavity.
- Place whatever you are cooking in the centre of the microwave cavity and then close the microwave door. IMPORTANT: You should make sure that the door of the microwave is shut securely.
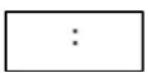
○ After initially supplying power to the appliance, the colon on the LCD display will flash. Press the stop / clear button (3) once to enter manual mode.
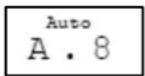
○ Choose the desired menu by pressing the auto cooking button (2) and then the minus (5) and plus (2) is from A1 to A8.
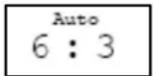
- Start the cooking function by pressing the instant / start button (4) and the LCD display will count down aining cooking time.
| Display | Category | Directions |
| Popcorn | Suitable for popping a bag of corn which is available on the market weighing 85g. During the cooking process, if the popping speed has decreased to 1 time per 1-2 seconds you should press the stop / clear button to end the process. | |
| Popcorn | Same as A.1 except with a weight of 100g. | |
| Pizza To | warm a piece of chilled pizza of 0.15kg. | |
| Beverage | Heating a cup of 250ml liquid. The liquid temperature should be 5-10°C. Use a big mouthed cup and do not seal. | |
| Beverage | Heating a cup of 500ml liquid. The liquid temperature should be 5-10°C. Use a big mouthed cup and do no seal. |
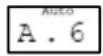 | Potato To cook potato strips, cut into 5mm width and height lengths with a total weight of 0.45kg. Place the strips on a large dish and cover with thin film to prevent water loss. |
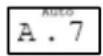 | Potato Same as A.6 except the weight of the potato strips is about 0.65kg. |
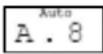 | Fish Suitable for steaming a fish of 0.45kg. After the fish is washed and the scales are removed, make slits in the skin. Put the fish on a shallow dish of 22-27cm diameter and cover with a thin film to prevent water loss. After cooking leave to stand for 2 minutes. |
Setting multiple cooking phases
It is possible to set the microwave to cook at different power levels within a single cooking time. A maximum of 4 cooking phases can be programmed for one cycle.
- Press the micro power button (6) or the grill, combi button (7) to select the first cooking phase function required.
- Use the plus (2) and minus (5) buttons to set the desired cooking time.
o Press the micro power button (6) or the grill, combi button (7) to select the second cooking phase function required. - Use the plus (2) and minus (5) buttons to set the desired cooking time.
- Repeat these steps a maximum of 4 times to create your desired cooking program.
- Start the cooking process by pressing the instant / start button (4).
- After the food has been removed from the microwave, you should make sure that the door is closed.
Setting a delay start
This function will allow you to set a time in the future that the microwave will switch on at.
- IMPORTANT: You must make sure that the clock is set to the correct time before using this feature.
- IMPORTANT: It is not possible to set a delay start when using automatic cooking, automatic defrost or quick start.
- Press the micro power button (6) or the grill, combi button (7) to select the required cooking mode.
- Use the plus (2) and minus (5) buttons to set the length of cooking time needed.
- Press and hold the clock button (9) for 3 seconds until a beep sounds.
- Use the plus (2) and minus (5) buttons to select the hour you wish the cooking program to start. Press the clock button (9) again and set the minutes past the hour at which you wish the cooking program to begin.
- Press the clock button (9) to confirm the set time and the delayed cooking function will be activated. You can view the starting time by pressing the clock button.
IMPORTANT: If the microwave door is not shut when the time of day that you have programmed is reached, then cooking will not commence.

IMPORTANT: Although your microwave has a delay start feature, we do not recommend that the microwave is EVER programmed to switch on when it is unattended.
Safety lock
- When the microwave is not heating, it is possible to switch on the safety lock.
-
Press and hold the stop / clear button (3) for 3 seconds until the LCD display shows the word "OFF".
-
Until the safety lock is switched off, all control buttons on the microwave will be disabled.
- To switch off the safety lock, press and hold down the stop / clear button until the colon reappears on the LCD display.
Microwave cooking guidelines
- If you are heating liquid in the microwave, then you must also place a teaspoon in the container. This will ensure that the liquid does not boil suddenly after being removed from the microwave cavity.
- This phenomenon is called “delayed boiling”, this means that a liquid can be close to boiling point, even if there is no steam coming off the liquid or the liquid is not bubbling. If the liquid container is even gently shaken, then the liquid can without warning boil over or even spurt. This could scald the end user.
○ If the food you are cooking has a skin or peel (e.g. sausages, tomatoes, potatoes etc), then you should pierce the skin or peel with a fork. This will ensure that if steam is created during the heating process, it can escape and the food will not burst.
When heating baby food, the bottle or jar containing the food should NEVER have a top or lid on. After cooking, to ensure that the food has been heated uniformly, you should stir or shake the food. IMPORTANT: You must check the temperature of the food before feeding it to a child. - When heating food in a microwave, it will transmit the heat to the container that the food is in or on. You should ALWAYS use oven gloves when removing items from the microwave.
- You should make sure that you do not cook food for too long or at too high a power level. This could cause certain areas of the food to dry out or even ignite.
- You should not use ceramic or porcelain crockery, or porous earthenware inside of your microwave. These dishes could absorb moisture from the food whilst it is cooking, which could cause pressure to build up and shatter the dish.
- If you are heating certain foods and any liquid, moisture will evaporate and condensation may occur. This does not indicate that the appliance is faulty and it can be particularly noticeable if the ambient temperature of the room is high.
- IMPORTANT: Any condensation should be wiped up with a soft cloth as soon as you have finished using the microwave.
- After the cooking time has completed, you should let the food stand for a few minutes. This is called “standing time” and will allow the heat generated by the microwave to spread evenly throughout the food.
Materials you can use in a microwave oven
| Material | Remarks |
| Aluminium foil | To be used for shielding only. Small smooth pieces can be used to cover thin parts of meat or poultry to prevent overcooking. Arcing can occur if foil is too close to the cavity walls. The foil should be at least 2.5 cm away from the cavity walls. |
| Browning dish | Follow the manufacturer's instructions. The bottom of the browning dish must be at least 5 mm thick above the turntable. Incorrect usage may cause the turntable to break. |
| Dinnerware | Microwave-safe only. Follow the manufacturer's instructions. Do not use cracked or chipped dishes. |
| Glass jars Always remove the lid. Use only to heat food until just warm. Most glass jars are not heat resistant and may break. | |
| Glassware Heat-resistant oven glassware only. Make sure there is no metallic trim. Do not use cracked or chipped dishes. | |
| Oven cooking bags | Follow the manufacturer's instructions. Do not close with a metal tie. Make slits in the bag to allow steam to escape. |
| Paper plates and cups | Use for short-term cooking/warming only. Do not leave the oven unattended whilst cooking. |
| Paper towels Use to cover food for reheating and absorbing fat. Use under supervision and for short-term cooking only. | |
| Parchment paper | Use as a cover to prevent splattering or as a wrap for steaming |
| Plastic | Microwave-safe only. Follow the manufacturer's instructions. It should be labelled as “microwave safe”. Some plastic containers soften as the food inside gets hot. “Boiling bags” and tightly closed plastic bags should be slit, pierced or vented, as described by the package. |
| Plastic wrap Microwave-safe only. Use to cover food during cooking to retain moisture. Do not allow the plastic wrap to touch the food. | |
| Thermometers Microwave-safe only. Meat and candy thermometers. | |
| Wax paper Use as a cover to prevent splattering and to retain moisture. | |
Materials not to be placed in a microwave oven
| Material | Remarks |
| Aluminium tray May cause arcing. Transfer food into a microwave-safe dish. | |
| Food carton with metal handle | May cause arcing. Transfer food into a microwave-safe dish. |
| Metal or metal-trimmed utensils | Metal shields the food from microwave energy. The metal trim may cause arcing. |
| Metal twist ties May cause arcing and could cause a fire in the oven. | |
| Paper bags May cause a fire in the oven. | |
| Plastic foam Plastic foam may melt or contaminate the liquid inside when exposed to a high temperature. | |
| Wood Wood will dry out when used in the microwave oven and may split or crack. | |
Utensils table
| Cookware | Microwave | Grill | Combination* |
| Heat-resistant glass | Yes | Yes | Yes |
| Non heat-resistant glass | No | No | No |
| Heat-resistant ceramics | Yes | Yes | Yes |
| Microwave-safe plastic dish | Yes | No | |
| Kitchen paper Yes No No | |||
| Metal | tray | No | Yes |
| Metal | rack | No | Yes |
| Aluminium foil and foil containers | No | Yes | No |
* Combination mode applies to microwave + grill mode.
Defrosting guidelines
○ Only use microwave-safe dishes for defrosting (porcelain, glass, suitable plastic).
- The defrosting time depends on the quantity and weight of the food that you are defrosting. When freezing, you should split the food into quantities that are suitable for defrosting in the microwave.
○ Distribute the food as evenly as possible within the microwave cavity. The thickest parts of fish or chicken legs should be placed on top.
- The thicker parts of the food should be turned around several times during the defrosting process.
- Foods that are rich in fats, such as butter, cottage cheese and cream should not be entirely defrosted. If they are at room temperature, they will be ready to serve within a few minutes. If cream are deep frozen and little bits of ice remain on the top of it, the cream should be whipped before eating.
- Bread should be wrapped in a napkin so that it does not get too dry when being defrosted.
- Remove frozen food from its packaging and do not forget to remove any metal clips. If the containers are suitable for placing in a freezer and a microwave, then you can simply remove the lid.
- The liquid that is created during the defrost process, particularly in the case of poultry should be discarded. Under no circumstances should it come into contact with other foods.
○ A resting period is required when defrosting food, to ensure that the food is totally defrosted. This normally takes between 15 – 20 minutes.

Cleaning operations must only be carried out when the oven is cool.
The appliance should be disconnected from your mains supply before commencing any cleaning process.
The appliance exterior
- You should wipe over the front of the appliance with a soft cloth and warm water mixed with a little washing up liquid.
- DO NOT use abrasive cleaners or sharp objects to clean the front surface of the microwave.
The appliance interior
- You should wipe over the inside of the appliance with a soft cloth and warm water mixed with a little washing up liquid.
- You should pay particular attention to the door seal and the surrounding area.
- DO NOT use abrasive cleaners or sharp objects to clean the inside of the microwave.
Rotating plate and rotating base
- The rotating plate and rotating base should be removed from the microwave for cleaning purposes after each use.
- Clean the rotating plate and rotating base in warm water mixed with a little washing up liquid.
General cleaning advice
- IMPORTANT: Any condensation should be wiped up with a soft cloth as soon as you have finished using the microwave.
To remove odours from inside of the microwave, you should boil one cup of water mixed with several tablespoons of lemon juice inside of the cavity.
- The microwave should be thoroughly cleaned before it is operated for the first time and after each use. This will avoid residual food stuffs becoming baked on the oven cavity. After residues have been baked on several times, they are far more difficult to remove.
- Never clean the oven surfaces by steam cleaning.
- We would recommend that an appropriate stainless steel cleaner and polish is regularly used on the stainless steel surfaces of this appliance.
- If you use any form of oven cleaner on your appliance, then you must check with the manufacturer of the cleaner that it is suitable for use on your appliance.
- Any damage that is caused to the appliance by a cleaning product will not be fixed by Baumatic free of charge, even if the appliance is within the guarantee period.
Installation
IMPORTANT: THIS INSTALLATION MUST BE COMPLETED BY A SUITABLY QUALIFIED PERSON. BAUMATIC ONLY SANCTION THE INSTALLATION GIVEN IN THIS INSTRUCTION MANUAL.
Before beginning to install your appliance, check that there is no sign of damage (on the inside or the outside of the microwave), and that there are no packing materials or accessories inside the cavity. Remove any protective film on the microwave.
Fitting the distance limiter

IMPORTANT: The distance limiter MUST be fitted to the appliance, to prevent it from being pushed up against the wall surface behind it.

- Push the distance limiter in the direction shown in the diagram above.
Positioning
Electrical connection
Before connecting the appliance, make sure that the supply voltage marked on the rating plate corresponds with your mains supply voltage.
- We recommend that the appliance is connected by a qualified electrician, who is a member of the N.I.C.E.I.C. and who will comply with the I.E.E. and local regulations.
○ WARNING: THIS APPLIANCE MUST BE EARTHED. - This appliance is supplied with a moulded plug, which must be connected to an earthed socket.
- If in future you need to change the fuse in this plug, then a 13 amp ASTA approved (BS 1362) fuse must be used.
- The socket must still be accessible even when your microwave is located on the worktop.
- The wiring in the mains lead is coloured as follows:
Brown
Live
Blue
Neutral
Green and yellow
Earth
- As the colours of the wires in the appliance's mains lead may not correspond with the coloured markings identifying the terminals in your spur box, please proceed as follows:
The brown wire must be connected to the terminal marked "L" (live), or coloured red.
The blue wire must be connected to the terminal marked "N" (neutral), or coloured black.
The green and yellow wire must be connected to the terminal marked "E" (earth), or by the earth symbol, or coloured green and yellow.
- When the connection is completed, no stray strands or cut wire should be present. The cord clamp must be secured over the outer sheath.
- Broken or damaged power leads must only be replaced by a suitably qualified person. A power lead of a similar type must be used in replacement.
Troubleshooting
- The microwave will not switch on.
* Check that the appliance has been connected to the mains supply correctly.
* Check that the fuse in the moulded plug has not blown.
* Check that the fuses in your fuse box have not blown.
* If fuses blow on a regular basis, then we would recommend that you consult with a qualified electrician.
* Check that there has not been a power cut.
- The microwave will not start cooking.
* Check that the door is properly shut.
* Check that the door seal and surrounding area are clean.
- The turntable is not turning.
* Check that the rotating base is connected to the drive motor correctly.
* Check that the ovenware is not larger than the rotating plate.
* Check that the food you are cooking does not extend beyond the rotating plate.
- Check that there is nothing underneath the rotating base that is preventing it from turning.
- The microwave does not switch off.
* Isolate the microwave from your mains supply and then contact the Baumatic Customer Care Department.
- The interior light bulb is not working.
* Call the Baumatic Customer Care Department. The interior light bulb can only be replaced by a trained service technician.
○ My food is not cooking properly.
* Check that the power level and cooking time that you have set, is appropriate for the food that you are cooking.
* If you are cooking a double amount of food, then you will normally need to almost double the cooking time.
* If the food that you have placed in the cavity is colder than normal, then the power level and cooking time may need to be increased.
- I am getting condensation in my oven.
* Steam and condensation are a natural by product of cooking in a microwave.
* Do not leave food in the oven to cool after it has been cooked and the oven has been switched off.
* Use a covered container, where practical, when cooking to reduce the amount of condensation that forms.
* You should wipe over any condensation that has formed, as soon as the food has stopped cooking.
IMPORTANT: If your appliance appears not to be operating correctly, then you should disconnect it from your mains supply and then contact Baumatic Customer Care on telephone number (0118) 933 6911.
DO NOT ATTEMPT TO REPAIR THE APPLIANCE YOURSELF.
Please note that if an engineer is asked to attend whilst the product is under guarantee and finds that the problem is not the result of an appliance fault, then you may be liable for the cost of the call out charge.
The appliance must be accessible for the engineer to perform any necessary repair. If your appliance is installed in such a way that an engineer is concerned that damage will be caused to the appliance or your kitchen, then he will not complete a repair.
This includes situations where appliances have been tiled in, sealed in with sealant, have wooden obstructions placed in front of the appliance, like plinths. Or any installation other than the one specified by Baumatic Ltd. has been completed.
Please refer to the conditions of guarantee that appear on the warranty card that you receive with the appliance.
IMPORTANT: Baumatic Ltd. operates a policy of continuous improvement and reserves the right to adjust and modify its products without prior notification.
Baumatic consumables
- BC001 Degreaser for Dishwashers (200g)
o BC002 Descaler for Washing Machines and Dishwashers (200g) - BC003 Ceramic Hob Cleaner (250ml)
- BC004 Oven Cleaner (250ml)
- BC005 Stainless Steel Cleaner and Protector (250ml)
- BC007 E-Cloth – General Purpose Cloth
- BC008 Microwave Cover
To order a Baumatic consumable product please call 0123 5437 244 and quote the product code. You can also order online from eshop.baumatic.co.uk
Baumatic®
United Kingdom
Baumatic Ltd.,
Baumatic Buildings,
6 Bennet Road,
Reading, Berkshire
RG2 0QX
United Kingdom
Sales Telephone
(0118) 933 6900
Sales Fax
(0118) 931 0035
Customer Care Telephone
(0118) 933 6911
Customer Care Fax
(0118) 986 9124
Spares Telephone
(01235) 437244
Advice Line Telephone
(0118) 933 6933
E-mail:
sales@baumatic.co.uk
customercare@baumatic.co.uk
spares@baumatic.co.uk
technical@baumatic.co.uk
Website:
www.baumatic.co.uk
Facebook:
www.facebook.com/baumatic.uk
Republic of Ireland
Service Telephone
1-890 812 724
Spares Telephone
091 756 771
Czech Republic
Baumatic CR spol s.r.o.
Lípovà 665
460 01 Liberec 4
Czech Republic
+420 483 577 200
www.baumatic.cz
Slovakia
Baumatic Slovakia, s.r.o.
Galvániho 7/D
Slovakia
+421 255 640 618
Germany
Baumatic GmbH
Bachstr.10-12
D-32 257 Bünde
Deutschland
+49 (0) 5223 99408 0
www.baumatic.de
Italy
Baumatic Italia S.R.L.
Via Galvani N.3
35011 Campodarsego (PD)
+3904 9920 2297
www.baumatic.it
Holland
Baumatic Benelux B.V.
Dukdalfweg 15d
1332 BH ALMERE
Nederland
+31(0)36 549 1553
www.baumatic.nl
- BTM23.3M 23 Litre microwave oven with grill
- INSTRUCTION MANUAL
- User Manual for your Baumatic
- BTM23.3M
- Litre microwave oven
- Baumatic®
- The symbol
- General Information
- Installation
- Service
- Warning and safety instructions
- Child Safety
- General Safety
- Cleaning
- Declaration of conformity
- Specifications
- Product dimensions\*
- Product specifications
- Description of the appliance
- The turntable
- Using your microwave
- Setting the clock
- Before first use
- Microwave cooking
- Grill/ grill combi mode
- Automatic defrost
- Automatic cooking
- Setting multiple cooking phases
- Setting a delay start
- Safety lock
- Microwave cooking guidelines
- Defrosting guidelines
- The appliance exterior
- The appliance interior
- Rotating plate and rotating base
- General cleaning advice
- Fitting the distance limiter
- Positioning
- Electrical connection
- Troubleshooting
- Baumatic consumables
- United Kingdom
- Sales Telephone
- Sales Fax
- Customer Care Telephone
- Customer Care Fax
- Spares Telephone
- Advice Line Telephone
- E-mail:
- Website:
- Facebook:
- Republic of Ireland
- Service Telephone
- Czech Republic
- Slovakia
- Germany
- Italy
- Holland
Brand : BAUMATIC
Model : BTM23.3M
Category : Microwave