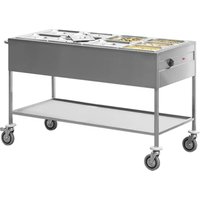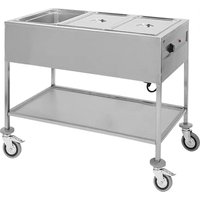
710053 - Service cart Rocam - Free user manual and instructions
Find the device manual for free 710053 Rocam in PDF.


User questions about 710053 Rocam
0 question about this device. Answer the ones you know or ask your own.
Ask a new question about this device
Download the instructions for your Service cart in PDF format for free! Find your manual 710053 - Rocam and take your electronic device back in hand. On this page are published all the documents necessary for the use of your device. 710053 by Rocam.
USER MANUAL 710053 Rocam
natural_image
Metal kitchen grater with open lid and two side compartments, displayed on four wheels (no text or symbols visible)Item:
*710.052
*710.053
*710.054
1. Inhoud
NL
text_image
Technical diagram of a mechanical device with numbered components and labeled parts, likely for assembly or maintenance instructions.natural_image
Exterior view of a stainless steel multi-level kitchen grater with a red pitcher and lid, displayed on wheels (no text or symbols visible)Item:
*710.051
*710.052
*710.053
Summary:

- Instruction warnings....2
- Safety and Right Use Warning....2
- Warranty 2
- Settings.....2
4.1 Appliance Start Up ....3
4.2 Technical Features....4
4.2 Spare parts....4
- Cleaning and Maintenance 6
5.2 Wiring diagram 7 - Disposal....8
1. Instruction warnings
The user has to hold the whole instruction and store up this document in case of use. The manufacturer does not assume any responsibility for damages incurred due to the failure of improper use of this manual.
All measures in this manual are expressed in mm.
2. Safety and Right Use Warning

The manufacturer products meet the latest technological evolutions and current safety guidelines.
The trolley line CAPRICORNO, object of this booklet, is projected to be in compliance with directives and field laws, in order to guarantee a safe and reliable product. Any other use will be considered inapposite to the original destination. The producer do not assume any responsibility for damages caused by an improper use. Responsibility lies only on user.
A proper use also includes compliance with the instructions for use and installation and any additional documentation as well as the conditions of inspection and maintenance
3. Warranty
We thank you for purchasing a product, designed and produced for a professional environment. Due to commercial and construction requirements, the manufacturer reserves the right to make changes in order to enhance the quality and use of product, in compliance with European Community legislation, grants its products for 24 months. This warranty does not include electrical parts, labour and all replacements related to an improper use of the good.
Any manipulation carried out automatically excludes the liability of the manufacturer. The products or parts to be replaced or repaired for unequivocal defects in workmanship and materials used must be in a “free port” at the offices of the producer, who after a careful inspection, will repair or replace them. The repairs are carried out exclusively at the headquarters of the manufacturer, and none cost incurred by the customer for repairs will be refunded by the manufacturer unless expressly agreed.
4. Settings
This item is packed and shipped assembled. The manufacturer declines every responsibility of damage of someone or something caused by the failure to comply with the instructions of this manual.

Do not make any structural change to the trolley.
The elements composing the trolley (plastic, polyurethane foam, bubble wrap, Styrofoam, cardboard and so on) must be kept away from children as potential sources of danger and must be collected and disposed off separately in accordance with local regulations.
The manufacturer declines every responsibility of damage of someone or something caused by the failure to comply with the instructions of this manual.
After the unpacking of the item from its packing, proceed by removing the adhesive plastic tape before starting up the product. Any residual glue has to be removed carefully (do not use abrasive cleaners).
The device is designed to run on AC to the voltage specified on the technical data plate (located on the bottom of the tank).
The grounding line is marked by the colours yellow/green and must not be interrupted.
The device is provided with a cable in accordance with the CE regulations and with a schuko plug (that can be replaced, when necessary, with a different plug, suitable for the specified wattage and in accordance to the current regulations and guidelines; when necessary, replace the provided cable with a new one with the same features).
Before switching the appliance
- Check if the electrical system can withstand the appliance's load (WATT as indicated on the technical plate)
- Make sure that the electrical system is provided with ground connection according to the current norms and guidelines.
- Connect the appliance with the ground network through a cable connected to the specific screw placed on the external casing of the appliance.
4.1 Appliance Start Up
Once ready to switch on the appliance, plug the device in the electrical system and turn the thermostat knob to the desired temperature. If the switch light is turned on, the device is working correctly and is reaching the selected temperature.
Once started up, the appliance reaches the selected temperature in about one hour (it depends much on the starting temperature, the room temperature and the exposure of the buffet trolley).the switch will turn off once the device has reached the selected temperature.
The appliance will keep the temperature during the service time.

This buffet trolley has been designed and created to work exclusively through the “bain-marie” system, therefore It shall never be turned on when without water in the tank.
First use of the appliance:

The first use of the appliance may give off unpleasant smells and smoke, this is due to the fat residues.
FOR THE FIRST USE IT IS RECOMMENDED TO TURN ON THE UNIT WITHOUT FOOD INSIDE and with water only so that the residues can be eliminated. Warning: the water must cover completely the heating element
placed inside the tank.
WARNING:

Once the appliance is switched on, the selected temperature will be reached in a short time. In order to avoid any inconvenience, switch on the unit only when the service is about to begin and turn it off right after the end. Do not make any structural change to the unit.
4.2 Technical Features
| CAPRICORNO1/1 | CAPRICORNO2/1 | CAPRICORNO3/1 | CAPRICORNO4/1 | |
| Heating element | 2000 W 2000 | W 2000 W 2 x 2000W | ||
| Power | 230 V | |||
| Temperature range * | 30-90°C | |||
| Capacit | 1 x GN 1/1 h200 | 2 x GN 1/1 h200 3 | x GN 1/1 h200 | 4 x GN 1/1 h200 |
| Weight (Kg) | 20 | 25 | 30 35 | |

WARNING: The appliance works through a bain marie process and the water inside the tanked is warmed up by a heating element. In order to avoid any damage to the heating element itself do never use the appliance without water inside the tank (the maximum water level is indicated by a notch).
ANY MANIPULATION AUTOMATICALLY EXCLUDES THE MANUFACTURER RESPONSABILITY MAKING THE WARRANTY VOID.
4.2 Spare parts
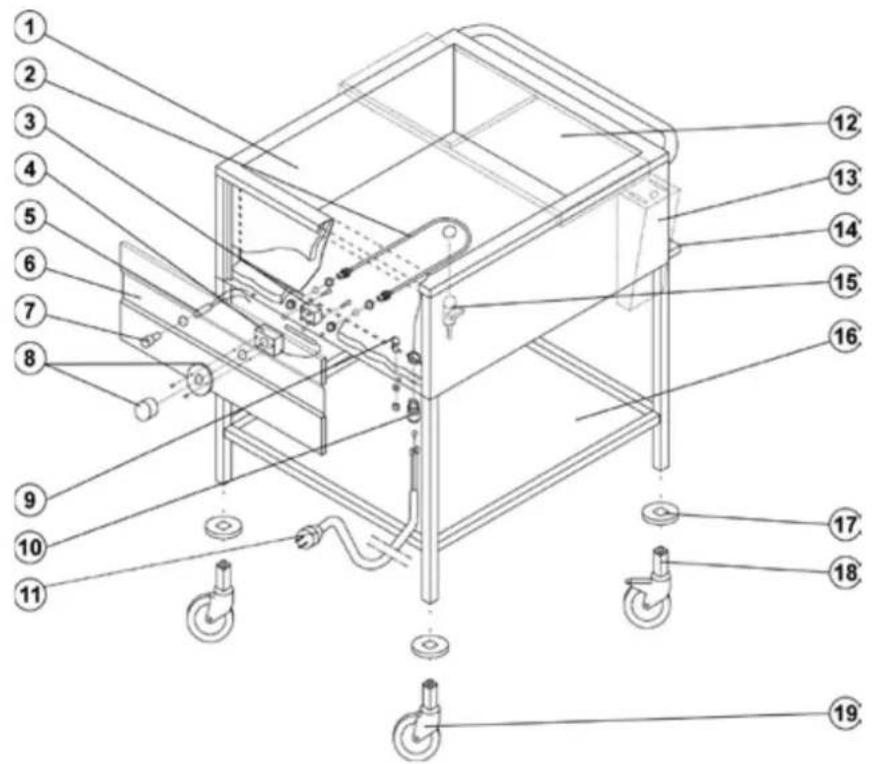
text_image
Technical diagram of a mechanical device with numbered components for identification| Rif. | CAPRICORNO | 1/1 2/1 3/1 | 4/1 | Description | ||
| Code | Quantity | |||||
| 1 1 | 1 1 1 | Tank | ||||
| 2 | D04INR2000 | 1 | 1 | 1 | 2 Heating element | |
| 3 D0 | 300TESIC 1 1 1 | Safety thermostat 150°C | ||||
| 4 | D0300TE3090 | 1 | 1 | 1 | 1 | Termostat 30-90°C |
| 5 | D0500SPIATC | 1 | 1 | 1 | 1 | Warning light |
| 6 1 | 1 1 1 | S/Steel front part | ||||
| 7 1 | 1 1 1 Warning light plastic cover | |||||
| 8 1 | 1 1 1 | Thermostat w/knob | ||||
| 9 1 | 1 1 1 | Ground terminal | ||||
| 10 | D0500PRESCA | 1 | 1 | 1 | 1 | Cable gland |
| 11 | D0500CAVO | 1 | 1 | 1 | Schuko Cable | |
| 12 | 1 | 1 | 1 | 1 | Chopping board TS/1 (OPTIONAL) | |
| 13 | 1 | 1 | 1 | 1 | Knivesholder (OPTIONAL) | |
| 14 | 1 1 | 1 1 | Drops collection grid | |||
| 15 | D0100RUB1/2 | 1 | 1 | 1 | 1 | Drain cock |
| 16 | 1 | 1 | 1 | 1 | S/Steel shelf | |
| 17 | 4 | 4 | 4 | 4 | Bumper | |
| 18 | 2 2 | 2 2 | Wheel ∅125 with brake | |||
| 19 | 2 | 2 | 2 | 2 | Wheel ∅ standard | |
5. Cleaning and Maintenance
WARNING:

Before any cleaning operation unplug the device from the electrical system. Never wash the appliance with water jets in order to prevent water seepage inside the electrical components

Before any cleaning operation wait for the appliance to be cooled down (wait at least one hour from the end of the service).
The thermic trolley should be cleaned with specific cleansers for stainless steel and the chromed parts with alcool or specific cleansers for chrome
finish. In any case do not use abrasive products.
The trolley is supplied with a safety thermostat set to 150^ C, which works in case of malfunction of the electronic thermostat. To reset the system following an interruption due to the safety thermostat, unscrew the control panel and push the red button on it.
5.1 Breakdowns
| Problem | Possible cause | Solution |
| The appliance does not heat up | Power cut | Check the power presence in the electricity network. |
| The heating element is burned | Contact the retailer | |
| The thermostat is broken | Contact the retailer | |
| The power switch is broken | Contact the retailer | |
| The power cable is worried-out | Replace the cable with a new one with the same technical features |
5.2 Wiring diagram
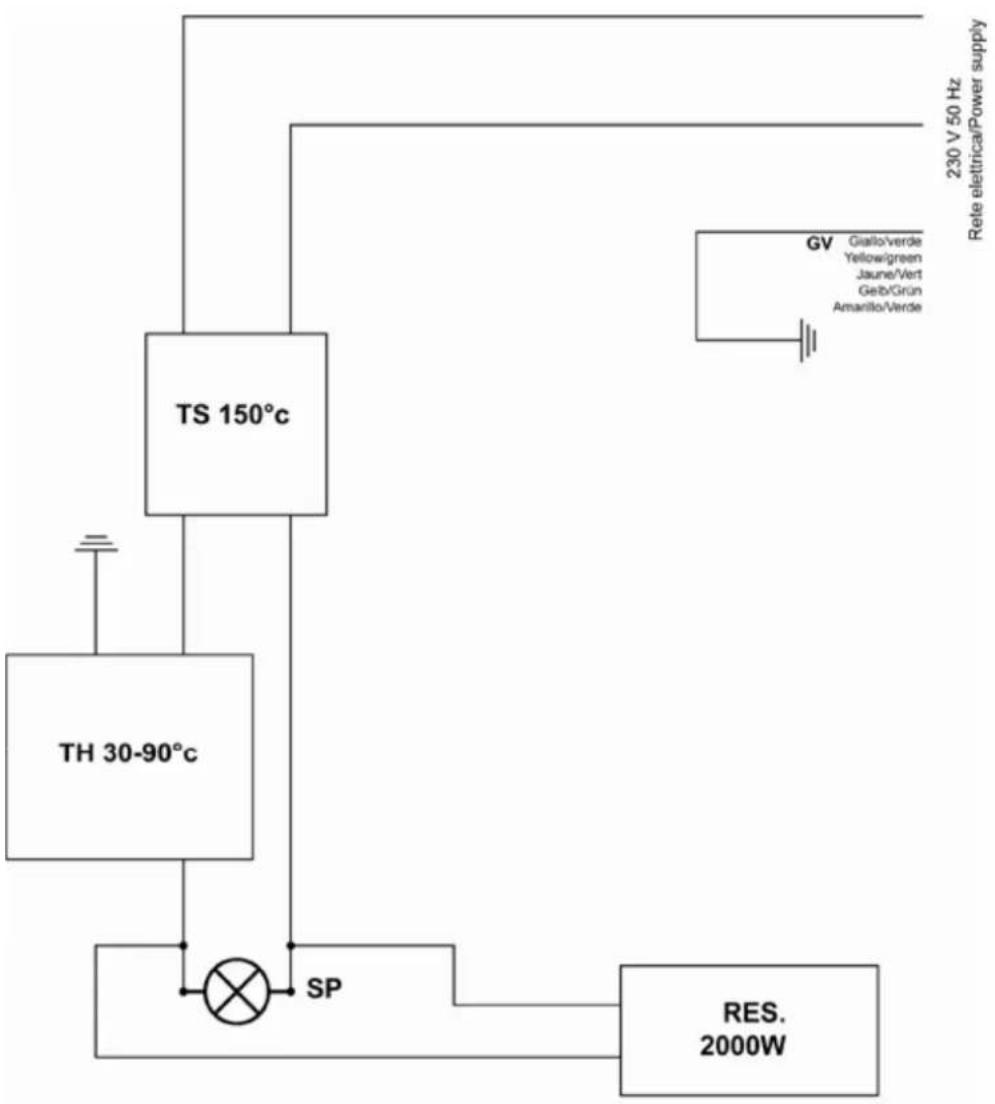
flowchart
graph TD
    A["TS 150°C"] --> B["TH 30-90°C"]
    B --> C["SP"]
    C --> D["RES. 2000W"]
    E["GV Giallo/verde Yellow/green Jaune/Vert Gelb/Grun Amarillo/Verde"] --> F["230 V 50 Hz Rete elettrica/Power supply"]
| Code Description | |
| TS Safety thermostat | |
| TH Thermostat 30-90°C | |
| SP Warning light | |
| RES Heating element |
6. Disposal
At the end of its life cycle, the device must be disposed according to the current regulations and must, where possible, be disassembled and disposed according to the nature of its various components. The packing materials (plastic, foam, bubble wrap, styrofoam, cardboard etc) must be kept away from children as potential sources of danger and must be collected and disposed separately in accordance with the local regulations.
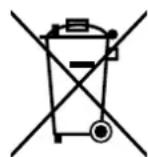
This marking shown on the product or its literature, indicates that it should not be disposed with other household wastes at the end of its working life.
To prevent possible harm to the environment or human health from uncontrolled waste disposal, please separate this from other types of wastes. It is responsibly to promote the sustainable reuse of material resources.
Household users should contact either the retailer where they purchased this product, or their local government office, for details of where and how they can take this item for environmentally safe recycling.
natural_image
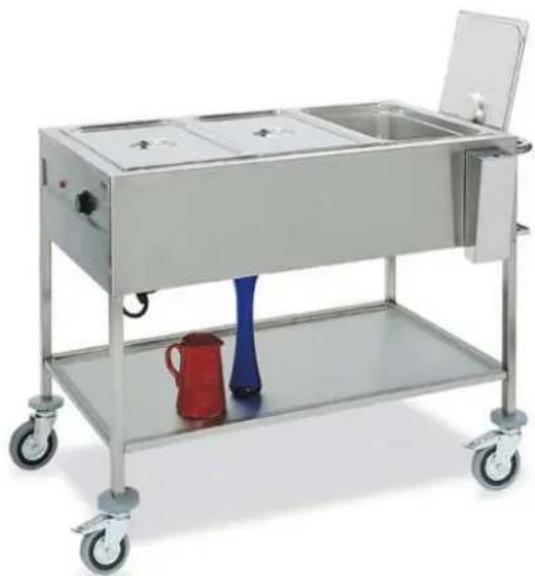
Exterior view of a stainless steel multi-level kitchen grater with a red pitcher and blue lid on the lower shelf (no text or symbols visible)Article:
*710.051
*710.052
*710.053
Index