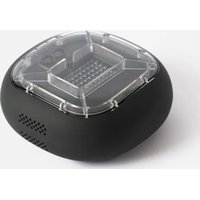
USER MANUAL ROXProX 1 A-Champs
HOW TO CHANGE THE SENSITIVITY OF THE TAP SENSOR 6
HOW TO ACTIVATE THE LASER SENSOR 7
HOW TO SET UP THE STRAPS 7
HOW TO SET UP THE CLAW
WARNINGS 8
FRANÇAIS
| QU'Y A-T-IL DANS LA BOITE? | 12 |
| COMMENT CHARGER LE ROX | 13 |
| CONFIGURATION | |
COMMENT ACTIVER LE CAPTEUR DU TAP 14
COMMENT CHANGER LA SENSIBILITÉ DU CAPTEUR DU TAP 14
COMMENT ACTIVER LE CAPTEUR LASER 15
COMMENT METTRE EN PLACE LES SANGLES 15
COMMENT METTRE EN PLACE LA CLAW 15
AVERTISSEMENTS 16
DEUTSCHE
If you charge with a ROXBase:
1 · Find the power adapter and plug it into a power socket.
2 · Charge all the ROX by placing them on the charging base, with the front side of the ROX facing towards the front side of the base. If they are properly placed, they will flash red (empty), yellow (half full) or green (full). A full charging cycle takes between 3-5 hours.
3 · Once ROX continuous light in green, take them off the charging base and they are ready to go.
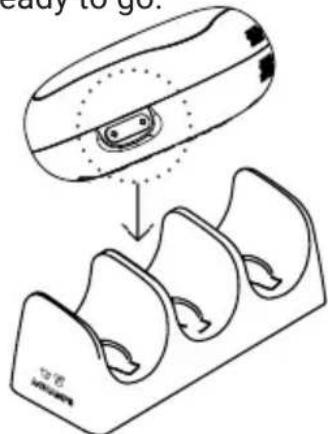
If you charge with a charging cable:
1 · Plug the power adapter into a power socket.
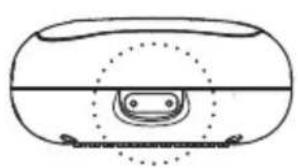
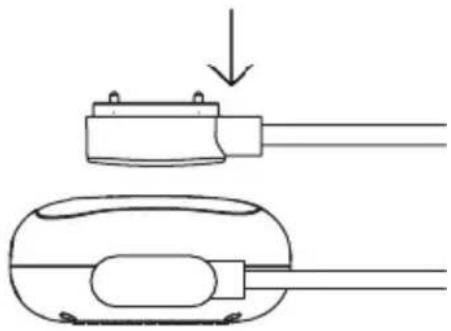
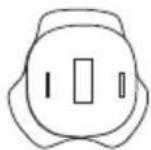
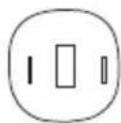
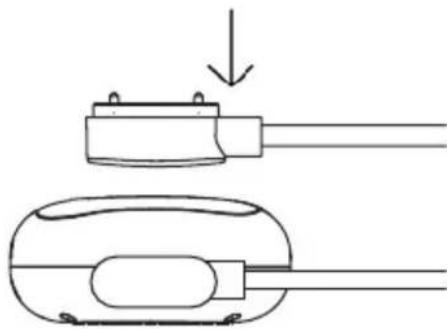
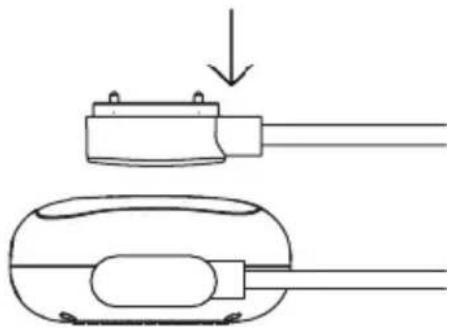
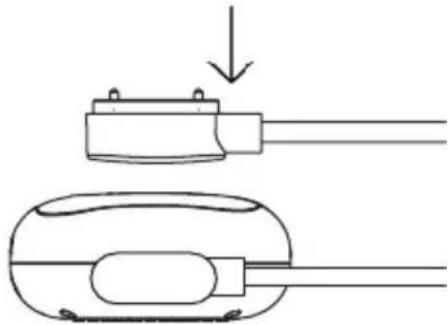
2 · Plug the magnetic head of the cable into the charging slot on ROX (see drawing). If the cable is properly connected, ROX will flash red (empty), yellow (half full) or green (full). A full charging cycle takes between 3-5 hours.
3 · Once ROX flash green, take them off the charging cable and they are ready to go.
natural_image
Diagram of a device with a central connector and dotted circular outline (no text or symbols)
natural_image
Diagram showing two connected electrical components with a downward arrow indicating a process or connection (no text or symbols present)
Notes:
- Make sure the ROX are not wet when placed on the charging base or when connected with a charging cable.
- Do not remove the foam inserts that hold the ROX in position.
- Keep the cover open during the charging process.
- In case ROX do not blink red, yellow or green while charging, check if they are properly placed on the charging base or if the charging cables are properly connected (in case you are using a charging cable), and that the adapter is properly plugged into the socket.
GET READY
1 · Download the A-CHAMPS ROX Pro App.
2 · Create an account and sign in to the App. Make sure to share your training goals and objectives so that we can propose customized content to you.
TURN ON ROX AND BLUETOOTH
1 · ROX will turn on automatically by taking them off the charging base. ROX will be green for 10 seconds to indicate that it is on.
Or, To turn ROX on manually, find the power button on the ROX (at one side), place the whole palm of your hand on the button, wait for the ROX to flash green and only let loose once it vibrates. ROX will be green for 10 seconds to indicate that it is on. Repeat this with all ROX.
At any time, you can check if a ROX is on by tapping on it, it will flash green and make a sound.
2 · Turn on the Bluetooth signal of your phone.
CONNECT ROX TO APP
3 · Go to SETUP, select ROX STATUS and then SYNC ROX.
4 · The screen will show all ROX that are found close by, tap each ROX that you want to synchronize with the App. You can always go back to these steps and sync more ROX.
5 · Navigate to EXPLORE to discover workouts and the drill library, or go to CREATE to create your own drills or sessions.
HOW TO ACTIVATE THE TAP SENSOR
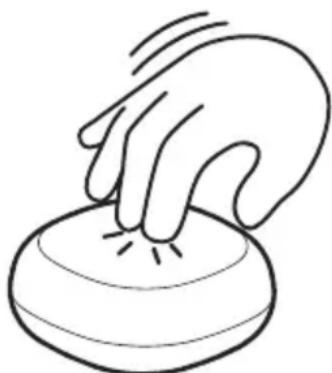
The best way to tap ROX/ROXPro is with the fingertips in the middle of the white hit area. It makes the sensors inside ROX detect each interaction. The default sensitivity settings of the ROX is set on medium level, to allow best practice for most use cases.
natural_image
Line drawing of a hand pressing a button with motion lines (no text or symbols)
HOW TO CHANGE THE SENSITIVITY OF THE TAP SENSOR
If you want to change the sensitivity of the tap sensor, you can choose from 12 different sensitivity levels through the App. Go to any of the PROGRAMS, then MORE SETTINGS and HIT SENSITIVITY.
HOW TO ACTIVATE THE LASER SENSOR
(applicable for ROXProX)
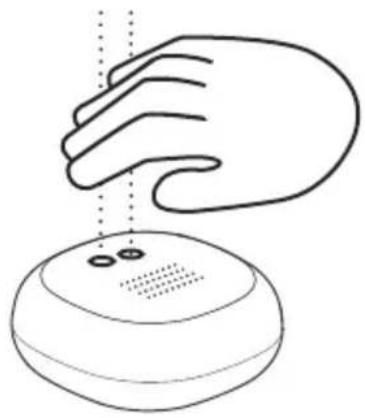
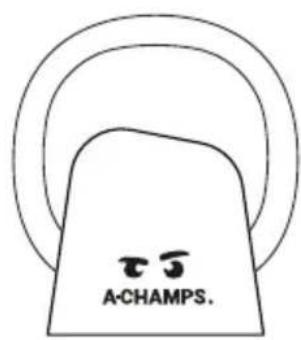
Move your hand, foot or any other object or body part right over the 2 "Fish eyes" on the top of ROXProX. You can select different distance settings through the App: Go to any of the PROGRAMS, then MORE SETTINGS and LASER DISTANCE.
natural_image
Line drawing of a hand pressing down on a computer mouse (no text or symbols)
HOW TO SET UP THE STRAPS
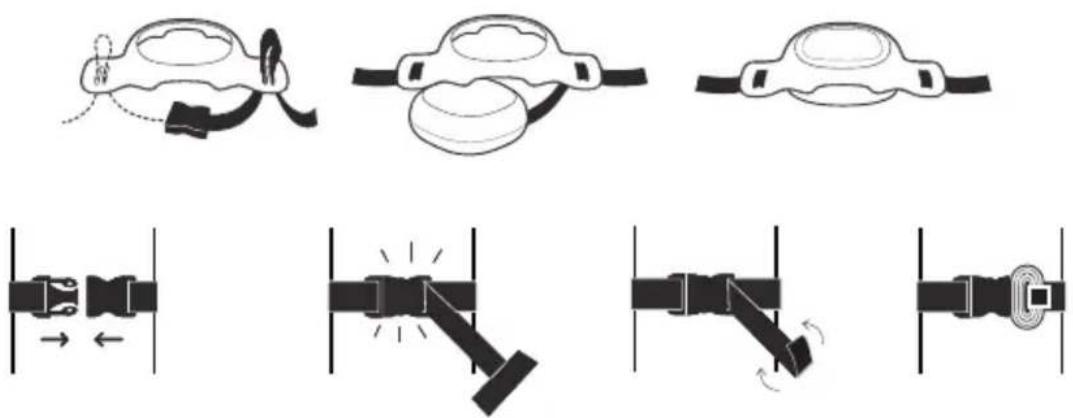
1 · Fix the silicone holsters to the straps as shown.
2 · Place ROX in the holsters and fasten the straps around different objects. (e.g. boxing bag, fence, tree etc).
3 · Roll up the hanging end of the strap and fix it with the velcro.
HOW TO SET UP THE CLAW
1 · Chose the adapter that you want to use.
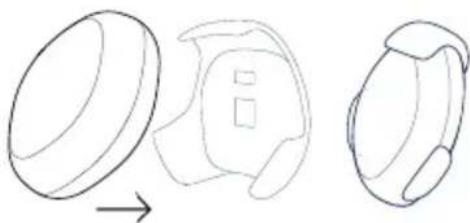
2 · Fix the adapter to the claw (see drawing).
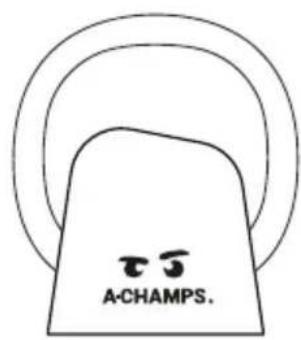
3 · Place ROX into the claw, tap side outwards.
1 · Chose adapter
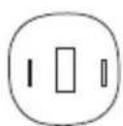
Velcro

Pole Suction Cups
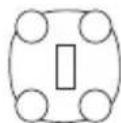
2 · Fix adapter
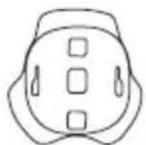
↑
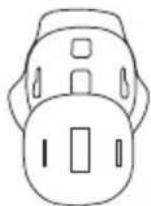
3 · Place ROX
natural_image
Three line drawings of a mechanical component or housing, showing a transformation from a circular component to a curved housing (no text or symbols present)
This information guide, contains safety, handling, disposal, recycling and regulatory information as well as the limited warranty for ROX.
Read all safety information and operating instructions before using ROX, to avoid injury or harm.
TO AVOID BATTERY LEAKAGE
· Always follow the instructions carefully.
- Do not charge the ROX longer than 5 hours. After 5 hours of charging take ROX off the charging base/ charging cable or unplug the adapter from the socket to stop the charging.
- If you have a charging case, please keep the case opened while charging and do the charging in an open space.
- Don't leave ROX unattended when charging.
· Do not charge ROX when the room temperature is above 86°F/30°C or below 32°F/0°C.
- Please properly position ROX on the charging base.
- Don't modify the charging adapter, charging cable, charging base and charging case.
Read the following warnings before you or your athletes, clients or children use ROX. Failing to do so may cause injury.
To reduce the risk of damage or injury, do not attempt to remove ROX' shell. Seizure, Blackouts and Eyestrain. A small percentage of people may be susceptible to blackouts or seizures (even if they have never had one before) when exposed to flashing lights or light patterns such as when playing games or watching video. If you have experienced seizures or blackouts or have a family history of such occurrences, you should consult a physician before using ROX. Discontinue use of ROX and consult a physician if you experience headaches, blackouts, seizures, convulsion, eye or muscle twitching, loss of awareness, involuntary movement, or disorientation. Keep ROX within acceptable temperatures. Operate and store ROX in a place where the temperature is between 32° to 104° F (0° and 40° C). Low or high-temperature conditions might temporarily shorten battery life or cause ROX to temporarily stop working properly. Avoid dramatic changes in temperature or humidity when using ROX, as condensation may form on or within ROX. Don't leave ROX in your car, because temperatures in parked cars can exceed this range.
USE AND MAINTENANCE
WARNING
ROX is not suitable for use by children under 3 years of age.
NEVER
- Abuse, throw, drop, puncture, or violently kick ROX. This can damage the product and compromise its safe operation.
- Step on ROX. You could fall and injure yourself.
- Operate ROX in dangerous, hazardous or public areas where use is not permitted (high voltage power lines, train stations, airports, trains). Check whether use of ROX is permitted before using it in public areas or public transport.
ALWAYS
- Keep ROX in sight at all times when operating it to avoid injuries or damages to people, animals or property.
- Use ROX on suitable surfaces such as grass, carpet, wood floors and concrete.
USE AND STORAGE
- Do not use ROX if its body has been broken.
· Do not expose the battery to excessive physical shock.
· Do not expose ROX and its batteries to heat or dispose of a fire.
- Do not put the batteries in a microwave oven or in a pressurised container.
· Do not attempt to dismantle, pierce, distort or cut the ROX body.
· Do not subject ROX to large temperature variations. Do not place your ROX near a source of heat.
BATTERY DISPOSAL
Discarding ROX and its batteries in your general household waste can be harmful to the environment. Damaged or finished ROX must be disposed of in a container especially reserved for this purpose. When disposing, follow appropriate local guidelines and regulations.
WARRANTY
Limited Warranty to Original Purchaser
ROX are supplied and distributed by A-Champs Ltd., and delivered new, in the original carton to the original customer purchaser, is warranted by A-Champs Ltd. against manufacturing defects
in materials and workmanship for a period of 1 year. A-Champs Ltd. will repair or replace this product, at our option and at no charge with new or reconditioned parts, if found to be defective during the limited warranty period specified above.
IF A DEFECT ARISES:
Please contact us at help@a-champs.com to be provided with a Return Material Authorisation Request (RMA) number.
Provide this number with your package when shipping. We do not accept returns without the RMA number. Purchaser is responsible for all shipping costs.
EXCLUSIONS AND LIMITATIONS
This warranty covers the normal and intended use of ROX. It applies only to the hardware product ROX manufactured
by or for A-Champs Ltd. A-Champs Ltd. does not warrant that the operation of ROX will be uninterrupted or error-free. A-Champs Ltd. is not responsible for damage arising from failure to follow instructions relating to ROX use.
THIS WARRANTY DOES NOT APPLY TO
a) Consumable parts, such as batteries, or protective coatings designed to diminish over time unless failure has occurred due to a defect in materials or workmanship;
b) Damage caused by use with non-ROX products;
c) Damage caused by accidents, misuse, abuse, neglect, misapplication, fire, water, lightning or other acts of nature;
incorrect electrical line voltage, fluctuations or surges; damage caused by improper installation; product alteration or modification;
improper or unauthorised repair; exterior finish or cosmetic damage;
d) Damage caused by operating ROX outside the intended uses described by A-Champs Ltd.;
e) Defects caused by normal wear and tear or otherwise due to the normal ageing of ROX.
THERE ARE NO EXPRESS WARRANTIES OTHER THAN THOSE LISTED AND DESCRIBED ABOVE, AND NO WARRANTIES WHETHER EXPRESS OR IMPLIED, INCLUDING, BUT NOT LIMITED TO, ANY IMPLIED WARRANTIES OF MERCHANTABILITY OR FITNESS FOR A PARTICULAR PURPOSE AND WARRANTIES AGAINST HIDDEN OR LATENT DEFECTS, SHALL APPLY AFTER THE EXPRESS WARRANTY PERIOD STATED ABOVE, AND NO OTHER EXPRESS WARRANTY OR GUARANTEE GIVEN BY ANY PERSON, FIRM OR CORPORATION WITH RESPECT TO THIS PRODUCT SHALL BE BINDING ON A-Champs Ltd. EXCEPT AS PROVIDED IN THIS WARRANTY AND TO THE MAXIMUM EXTENT PERMITTED BY LAW, A-Champs Ltd. IS NOT RESPONSIBLE FOR LOSS OF REVENUE OR PROFITS, FAILURE TO REALIZE SAVINGS OR OTHER BENEFITS, LOSS OF OPPORTUNITY, LOSS OF GOODWILL, LOSS OF REPUTATION, LOSS OF, DAMAGE TO, COMPROMISE OR CORRUPTION OF DATA, OR ANY OTHER SPECIAL, INCIDENTAL OR CONSEQUENTIAL DAMAGES CAUSED BY THE USE, MISUSE OR INABILITY TO USE THIS PRODUCT, OR ANY BREACH OF ANY WARRANTY OR CONDITION REGARDLESS OF THE LEGAL THEORY ON WHICH THE CLAIM IS BASED, AND EVEN IF A-Champs Ltd. HAS BEEN ADVISED OF THE POSSIBILITY OF SUCH DAMAGES. NOR SHALL RECOVERY OF ANY KIND AGAINST A-Champs Ltd. BE GREATER IN AMOUNT THAN THE PURCHASE PRICE OF ROX. WITHOUT LIMITING THE FOREGOING, PURCHASER ASSUMES ALL RISK AND LIABILITY FOR LOSS, DAMAGE OR INJURY TO PURCHASER AND PURCHASER'S PROPERTY AND TO OTHERS AND THEIR PROPERTY ARISING OUT OF THE USE, MISUSE OR INABILITY TO USE THIS PRODUCT SOLD BY A-Champs Ltd. NOT CAUSED DIRECTLY BY THE GROSS NEGLIGENCE OF A-Champs Ltd. THIS LIMITED WARRANTY SHALL NOT EXTEND TO ANYONE OTHER THAN THE ORIGINAL PURCHASER OF THIS PRODUCT, IS NON TRANSFERABLE AND STATES YOUR EXCLUSIVE REMEDY.
Some states do not allow limitations on how long an implied warranty lasts, or the exclusion or limitation of incidental or consequential damages, so the above limitations or exclusions may not apply to you. This warranty gives you specific legal rights and you may also have other rights, which vary from state to state.
This Limited Warranty shall be governed by the laws of the State of Hong Kong without giving effect to any conflict of laws principles that may provide the application of the law of another jurisdiction. Any claim or dispute in connection with this Limited Warranty shall be resolved in a cost effective manner through binding non-appearance-based arbitration. The arbitration shall be initiated through an established alternative dispute resolution provider mutually agreed upon by the parties. The alternative dispute resolution provider and the parties must comply with the following rules:
a) The arbitration shall be conducted by telephone, online and/or be solely based on written
submissions, the specific manner shall be chosen by the party initiating the arbitration; b) The arbitration shall not involve any personal appearance by the parties or witnesses unless otherwise mutually agreed by the parties.
c) Any judgment on the award rendered by the arbitrator may be entered in any court of competent jurisdiction. If the foregoing arbitration clause does not apply for any reason, you agree to submit to the personal jurisdiction of the state courts located within Hong Kong and the federal courts in Hong Kong for the purpose of litigating all such claims or disputes, which courts shall have exclusive jurisdiction of such claims or disputes. Notwithstanding the foregoing, A-Champs Ltd. may seek injunctive or other equitable relief to protect its intellectual property rights in any court of competent jurisdiction.
The explanations and specifications in this guide are given for information only and may be modified at any time without prior notice.
The latest version of this guide will be available from our website at www.a-champs.com. The explanations and specifications contained in this guide are correct at the time of printing.
A-Champs Ltd. reserves the right to amend or improve the product design or user guide without any restrictions and without any obligation to notify users. As part of our ongoing effort to upgrade and improve our products, the product that you have purchased may therefore differ slightly from the model described in this guide.
END OF LIFE PRODUCT DISPOSAL
At the end of this product's life, please do not dispose of this product in your general household waste. Instead, in order to prevent possible harm to the environment or human health from uncontrolled waste disposal, please dispose of this product separately in accordance with your local laws and regulation. For more information on the separate collection systems for waste electrical and electronic equipment that are available for consumers, near your home, free of charge, please contact your local municipality authority.
You can also contact the retailer from which you purchased your ROX – they might have put in place recycling services or he may be part of a specific recycling program.
This product will be then treated in an environmentally sound manner at a licensed recycling plant and its components will be recovered, recycled or reused in the most efficient manner, in compliance with the requirements of the Directive on Waste Electrical and Electronic Equipment (2002/96/EC) of 27 January 2003 (as subsequently amended or replaced).
IMPORTANT!
Any changes or modifications not expressly approved by the party responsible for compliance could void the user's authority to operate this equipment.
WEEE
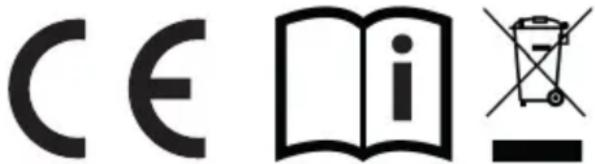
This symbol on the product or on its packaging indicates that this product must not be disposed of with your other household waste.
Instead, it is your responsibility to dispose of your waste equipment by handing it over to a designed collection point for the recycling of waste electrical and electronic equipment.
The separate collection and recycling of your waste equipment at the time of disposal will help to conserve natural resources and ensure that it is recycled in a manner that protects human health and the environment. For more information about where you can drop off your waste equipment for recycling, please contact your local city office, your household waste disposal service, or the shop where you purchased the product.
Please note that changes or modifications not expressly approved by the party responsible for compliance could void the user's authority to operate the equipment.
NOTE: This equipment has been tested and found to comply with the limits for a Class B digital device, pursuant to part 15 of the FCC Rules. These limits are designed to provide reasonable protection against harmful interference in a residential installation. This equipment generates, uses and can radiate radio frequency energy and, if not installed and used in accordance with the instructions, may cause harmful interference to radio communications. However, there is no guarantee that interference will not occur in a particular installation. If this equipment does cause harmful interference to radio or television reception, which can be determined by turning the equipment off and on, the user is encouraged to try to correct the interference by one or more of the following measures:
- Reorient or relocate the receiving antenna.
- Increase the separation between the equipment and receiver.
- Connect the equipment into an outlet on a circuit different from that to which the receiver is connected.
- Consult the dealer or an experienced radio/TV technician for help.
QU'Y A-T-IL DANS LA BOITE?
ROX®
3x ROX

1x Charging System
ROXPro.
3PCS SET
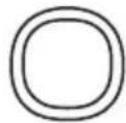
3x ROXPro
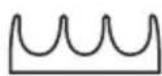
1x ROXBase
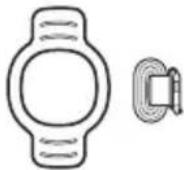
3x ROXStraps
6PCS SET
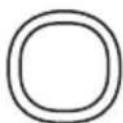
6x ROXPro
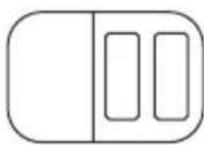
1x Charging Bag
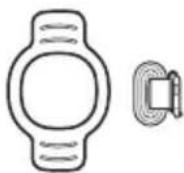
6x ROXStraps
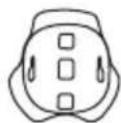
6x ROXClaw
ROXPro X.
3PCS SET
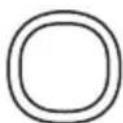
3x ROXProX
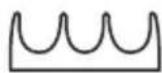
1x ROXBase
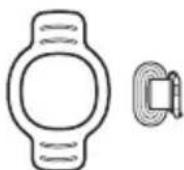
3x ROXStraps
6PCS SET
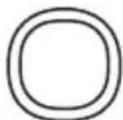
6x ROXProX
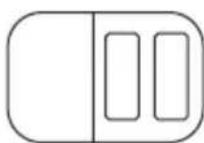
1x Charging Bag
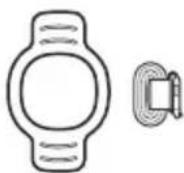
6x ROXStraps
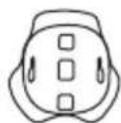
6x ROXClaw
natural_image
Diagram of a device with a central rectangular component and dotted circular regions, no text or symbols present.
natural_image
Diagram showing two mechanical components with a downward arrow indicating motion (no text or symbols)
Remarques:
natural_image
Line drawing of a hand pressing a button on a circular object (no text or symbols)
natural_image
Line drawing of a hand pressing down on a computer mouse (no text or symbols)
natural_image
Three line drawings of a device with an open lid, showing transformation from top-left to front-right (no text or symbols)
MISE AU REBUT DES PILES
natural_image
Diagram of a device with a central rectangular component and dotted circular regions, no text or symbols present.
natural_image
Diagram showing two mechanical components with a downward arrow indicating motion (no text or symbols)
Anmerkungen:
natural_image
Line drawing of a hand pressing a button on a circular object (no text or symbols)
SO ÄNDERN SIE DIE EMPFINDLICHKEIT DES TAP SENSOR
natural_image
Line drawing of a hand pressing down on a computer monitor (no text or symbols)
WIE MAN DIE GURTE BENUTZT
WIE MAN DIE CLAWS BENUTZT
natural_image
Diagram showing three variations of a device or component with internal compartments and directional arrows (no text or symbols)
natural_image
Three line drawings of a mechanical component or housing, showing progressive assembly from top to front (no text or symbols)
natural_image
Diagram of a device with a central rectangular component and dotted circular regions, no text or symbols present.
natural_image
Diagram showing two mechanical components with a downward arrow indicating motion (no text or symbols)
Notas:
natural_image
Simple line drawing of a hand pressing a button on a circular object (no text or symbols)
CÓMO CAMBIAR LA SENSIBILIDAD DEL SENSOR TÁCTIL
natural_image
Line drawing of a hand pressing down on a computer mouse (no text or symbols)
CÓMO COLOCAR LAS CORREAS
CÓMO CONFIGURAR LA CLAW
ROX – Interactive Training System
Model: ACM001
Made in China
FCC ID: 2AUXNACM001
ROXPro:
ROX – Interactive Training System
Model: ACM002
Made in China
FCC ID: 2AUXNACM002
ROXProX:
ROX – Interactive Training System
Model: ACM003
Made in China
FCC ID: 2AUXNACM003
Manufactured by:
www.a-champs.com
A-Champs Ltd. - 22/F. Bupa Centre - 141 Connaught Road West - Hong Kong
help@a-champs.com
www.a-champs.com