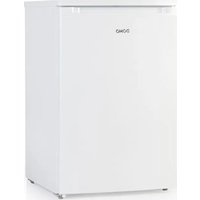
DO920DV - Freezer DOMO - Free user manual and instructions
Find the device manual for free DO920DV DOMO in PDF.


| Brand | DOMO |
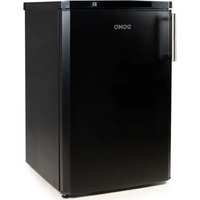
| Model | DO920DV |
| Product type | Freezer |
| Freezer type | Upright with drawers |
| Electrical supply | 220-240 V ~ 50 Hz |
| Operating ambient temperature | 16 °C to 38 °C |
| Temperature setting | Positions 1 (minimum) to 4 (maximum) |
| Functions | Freezing fresh food, storing frozen food, making ice cubes |
| Defrosting | Manual |
| Adjustable feet | Yes |
| Door opening direction | Reversible |
| Interior equipment | Freezer drawers |
| Refrigerant | R600a (isobutane) |
| Safety | Earthing mandatory, do not use extension cord, child protection (under 16 years) |
| Warranty | 2 years, 6 months for accessories and wear parts |
| After-sales service | Linea 2000 - +32 14 21 71 91 - info@linea2000.be |
| Cleaning | Soft cloth and soapy water, do not use abrasive products |
| Intended use | Household and similar use (staff kitchens, farms, hotels) |
Frequently Asked Questions - DO920DV DOMO
User questions about DO920DV DOMO
0 question about this device. Answer the ones you know or ask your own.
Ask a new question about this device
Download the instructions for your Freezer in PDF format for free! Find your manual DO920DV - DOMO and take your electronic device back in hand. On this page are published all the documents necessary for the use of your device. DO920DV by DOMO.
USER MANUAL DO920DV DOMO
natural_image
Interior view of a white refrigerator with open door and shelves filled with packaged food items (no visible text or labels)DO920DV
natural_image
Two black-and-white icons: a triangular warning symbol with an exclamation mark and an open book (no text or symbols present)natural_image
Simple line drawing of an open box with arrows indicating upward movement (no text or symbols)natural_image
Technical line drawing of a mechanical clamp or bracket assembly (no text or symbols)natural_image
Line drawing of a hand holding a small object near a vertical line (no text or symbols)natural_image
Technical line drawing of a mechanical clamp or bracket assembly with a screwdriver inserted (no text or symbols)natural_image
Line drawing of a hand holding a tool against a vertical pole (no text or symbols)natural_image
Simple line drawing of a tool or bracket with a handle, no text or symbols presentJOUW APPARAAT VERPLAATSEN
natural_image
Recycling symbol icon with three chasing arrows forming a triangle (no text or labels)natural_image
Technical line drawing of a mechanical bracket assembly with a screwdriver inserted (no text or symbols)natural_image
Line drawing of a tool interacting with a vertical rod (no text or symbols)natural_image
Simple line drawing of a Y-shaped tool with a handle, no text or symbols presentnatural_image
Recycling symbol icon with three chasing arrows forming a triangle (no text or labels)natural_image
Simple line drawing of a cabinet with an open lid and arrows indicating upward movement (no text or symbols)natural_image
Technical line drawing of a mechanical clamp or bracket assembly (no text or symbols)natural_image
Line drawing of a hand holding a small object near a vertical line (no text or symbols)natural_image
Technical line drawing of a mechanical assembly with a screwdriver inserted (no text or symbols)natural_image
Line drawing of a hand holding a tool against a vertical pole (no text or symbols)natural_image
Recycling symbol icon with three chasing arrows forming a triangle (no text or labels)All of our products are always submitted to a strict quality control before they are sold to you. Should you nevertheless experience problems with your device, we sincerely regret this.
In that case, we kindly request you to contact our customer service.
Our staff will gladly assist you.

+32 14 21 71 91

info@linea2000.be
Monday – Thursday: 8.30 – 12.00 and 13.00 – 17.00
Friday: 8.30 - 12.00 and 13.00 - 16.30
This appliance has a two year warranty period. During this period the manufacturer is responsible for any failures that are the direct result of construction failure. When these failures occur the appliance will be repaired or replaced if necessary. The warranty will not be valid when the damage to the appliance is caused by wrong use, not following the instructions or repairs executed by a third party. The guarantee is issued with the original till receipt. All parts, which are subject to wear, are excluded from the warranty.
If your device breaks down within the 2-year warranty period, you can return the device together with your receipt to the shop where you purchased it.
The guarantee on accessories and components that are liable to wear-and-tear is only 6 months.
The guarantee and responsibility of the supplier and manufacturer lapse automatically in the following cases:
· If the instructions in this manual have not been followed.
· In case of incorrect connection, e.g., electrical voltage that is too high.
· In case of incorrect, rough or abnormal use.
· In case of insufficient or incorrect maintenance.
- In case of repairs or alterations to the device by the consumer or non-authorised third parties.
- If the customer used parts or accessories that are not recommended or provided by the supplier / manufacturer.
SAFETY INSTRUCTIONS
READ THE INSTRUCTION BOOKLET CAREFULLY BEFORE USING THE APPLIANCE.
- Remove the exterior and interior packing, wipe the outside thoroughly with a soft dry cloth and the inside with a wet, lukewarm cloth.
- This appliance is suitable to be in an household environment and in similar surroundings such as :
· Kitchen for personnel of shops, offices or other similar professional surrounding
· Farms
· Hotel or motel rooms and other surroundings with a residential character
· Guest rooms or similar
- This appliance can be used by children, starting from the age of 16 and up. And by persons with a physical or sensory limitation as well as, mentally limited persons or persons with a lack of experience and knowledge. On the condition that these persons have received the necessary instruction on how to use this appliance in a safe way and they must also know the dangers that can occur in using this appliance.
- Children cannot be allowed to play with the appliance.
- Maintenance and cleaning of the appliance, cannot be done by children younger than 16 year old.
- The equipment must be disconnected from the mains when not in use, during maintenance and when replacing parts.
- If the supply cord is damaged, it must be replaced by the manufacturer or its service agent or a similarly qualified person in order to avoid a hazard.
· Attention : This appliance can not be used with external timer or separate remote control.
- Do not use this equipment with a damaged power lead or plug, or if the equipment is damaged. Take to equipment to the DOMO department or its representative for inspection, repair, or for electrical or mechanical modifications.
- Keep the appliance and the power supply away from children under 16 years.
- Do not use an extension cord. Use an exclusive wall outlet. Do not connect your refrigerator to extension cords or together with any other appliance in the same wall outlet. Do not splice the cord.
· This appliance must be grounded. In the event of an electrical short circuit, grounding reduces the risk of electrical shock by providing an escape wire for the electrical current.
· Do not use this equipment for purposes other than those for which it is intended.
- Do not move the equipment when in use.
- Poor maintenance of this equipment may negatively affect its life cycle and could result in a hazardous situation.
- An empty freezer is a very dangerous attraction to children. Remove either the gasket, latches, lids or doors from unused appliances, or take some other action that will guarantee it harmless.
PARTS
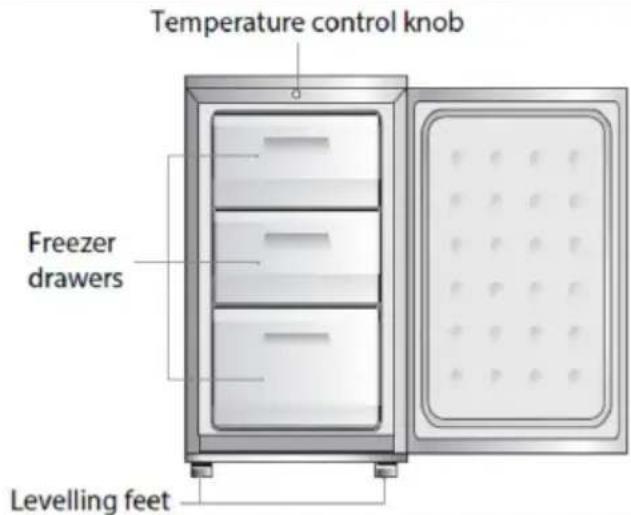
BEFORE THE FIRST USE
INSTALLATION
- Remove the exterior and interior packing, wipe the outside thoroughly with a soft dry cloth and the inside with a wet, lukewarm cloth. Avoid placing the cabinet in a narrow recess or near any leave source, direct sunlight, or moisture. Let air circulate freely around the cabinet.
- Select a place with a strong, level floor.
- Allow 10 cm of space between the back of the freezer and any adjacent wall.
- Avoid direct sunlight and heat. Direct sunlight may affect the acrylic coating. Heat sources nearby will cause higher electricity consumption.
- Avoid very moist places. Too much moisture in the air will cause frost to from very quickly on the evaporator, and your freezer.
- Before connecting your freezer to the power supply, check that the voltage stated on the rating label of your appliance corresponds to the voltage in your home. A different voltage could damage the appliance.
- The appliance must be grounded. The manufacturer is not responsible for damages that may occur as a result of usage without grounding.
- For uneven surfaces, front feet can be aligned.
- After installation, leave the freezer for 6 hours before turning it on. This way the refrigerant can settle.
- Allow the appliance to run empty for 24 hours so the compartment can cool to the appropriate temperature.
- This appliance is designed to operate in ambient temperature between 16°C and 38°C. If these temperatures are exceeded, i.e. colder or warmer, the appliance will not operate correctly.
· The appliance may only be used indoors.
· The freezer makes noise when the compressor pumps the coolant. This is normal.
LEVELLING
The freezer needs to be placed completely upright and level, so that it will not rock.
- Check if the 2 adjustable legs are firmly on the ground when the freezer is completely upright and level.
· If not, adjust the legs by screwing or them in or out the freezer. - Caution: This appliance is heave. Be careful.
USE
TEMPERATURE CONTROL
The freezer is controlled with a temperature control knob located inside the appliance. Adjust the control knob as desired to suit your individual preference. 1 is the warmest setting, 4 is the coldest setting.
- The running time and temperature are affected by where the freezer is located, how often the door is opened and the temperature of the room the freezer is located in.
- When you use the appliance for the first time or after defrosting, adjust the control knob to the coldest setting for at least 2 hours before introducing food to be stored, and then readjust to the middle setting.
FREEZING AND STORING FOOD IN THE FREEZER
Use the freezer
· To store deep-frozen food.
· To make ice cubes.
· To freeze food.
Note: Ensure that the freezer door has been closed properly. Avoid opening the freezer drawers unnecessarily.
Purchasing frozen food
· Packaging must not be damaged.
- Use by the 'use by /best before/best by/' date.
• If possible, transport deep-frozen food in an insulated bag and place quickly in the freezer.
Freezing fresh food
Freeze fresh and undamaged food only. To retain the best possible nutritional value, flavour and colour, vegetables should be blanched before freezing.
Aubergines, peppers, zucchini and asparagus do not require blanching.
Note: Keep food to be frozen away from food which is already frozen.
- The following foods are suitable for freezing: Cakes and pastries, fish and seafood, meat, game, poultry, vegetables, fruit, herbs, eggs without shells, dairy products such as cheese and butter, ready meals and leftovers such as soups, stews, cooked meat and fish, potato dishes, soufflés and desserts.
- The following foods are not suitable for freezing: Types of vegetables, which are usually consumed raw, such as lettuce or radishes, eggs in shells, grapes, whole apples, pears and peaches, hard-boiled eggs, yoghurt, soured milk, sour cream, and mayonnaise.
Packing frozen food
To prevent food from losing its flavour or drying out, place food in airtight packaging.
- Place food in packaging.
- Remove air.
- Seal the wrapping.
- Label packaging with contents and dates of freezing.
Suitable packaging: Plastic film, tubular film made of polyethylene, aluminium foil, freezer containers.
Recommended storage times of frozen food in the freezer
These times vary depending on the type of food. The food that you freeze can be preserved from 1 to 12 months (minimum at -18°C).
| Food Storage time | |
| Bacon, casseroles, milk 1 month | |
| Bread, ice cream, sausages, pies, prepared shellfish, oily fish 2 months | |
| Non-oily fish, shellfish, pizza, scones and muffins 3 months | |
| Ham, cakes, biscuits, beef and lamb chops, poultry pieces 4 months | |
| Butter, vegetables (blanched), eggs whole and yolks, cooked crayfish, minced meat (raw), pork (raw) | 6 months |
| Fruit (dry or in syrup), egg whites, beef (raw), whole chicken, lamb (raw), fruit cakes | 12 months |
Never forget:
- When you freeze fresh foods whit a 'use by /best before/best by/' date, you must freeze them before the expiry of this date.
- Check that the food was not already frozen. Indeed, frozen food that has thawed completely must not be refrozen.
· Once defrosted, food should be consumed quickly.
CLEANING AND MAINTENANCE
CLEANING
Do not use abrasive cleaning agents or solvents.
- Turn the appliance off. Disconnect the mains plug from the mains socket.
- Take out the food and store in a cool location.
-
Clean the appliance with a soft cloth, warm water and detergent.
-
Wipe the door seal with clear water only and then wipe dry thoroughly.
- After cleaning reconnect and adjust the temperature control knob as desired.
- Put the food back into the appliance.
DEFROSTING
A layer of frost in the freezer will impair refrigeration of the frozen food and increases power consumption. Remove the layer of frost regularly. Do not scrape off frost or ice with a knife or pointed object. Doing this may damage the refrigerant tubes.
- Remove the frozen food and place temporarily in a cool location.
- Disconnect the appliance from the mains socket.
- To accelerate the defrosting process, place a pan of hot water on a stand in the freezer.
- Wipe up condensation with a cloth or sponge.
- Wipe dry the freezer compartment.
- Plug in the appliance and adjust the temperature control knob as desired.
- Put the frozen food back in the freezer.
VACATION TIME
For short vacation periods, leave the control knobs at their usual settings. During longer absences;
- Remove all foods.
- Disconnect from electrical outlet.
- Clean the refrigerator thoroughly, including defrost pan.
· Leave door open to avoid possible formations of condensate, mold or odors.
POWER FAILURE
- Most power failures are corrected within an hour or two and will not affect your refrigerator temperatures. However, you should minimize the number of door openings while the power is off. During power failures of longer duration, take steps to protect your food by blacking dry ice on top of packages.
- Frozen food should not be affected if the power failure lasts for less than 15 hours.
- Do not refreeze frozen foods that have thawed completely. The food may be dangerous to eat.
DOOR CONVERSION
If you need to hinge your door on the opposite side it is recommended that you call your local authorised service agent to make this conversion or ask a technician. Before you reverse the door, you should ensure the appliance is unplugged and empty. It is recommended to use a crosshead screwdriver and a spanner (both not supplied).
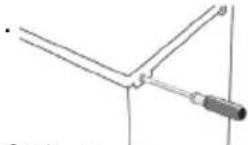
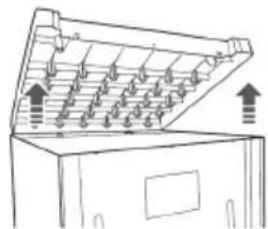
- Remove the 2 screws on the back of the top cover.
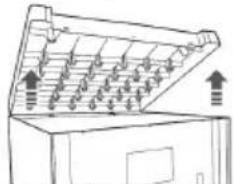
- Lift the top cover away from the fridge.
natural_image
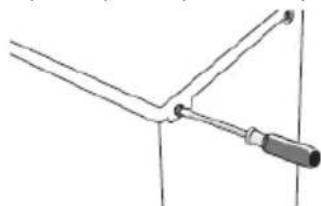
Diagram of a mechanical device with arrows indicating upward force or movement (no text or symbols)- Remove the three screws and then remove the top hinge that holds the door in place. Lift the door and place it on a padded surface to prevent it from being scratched.
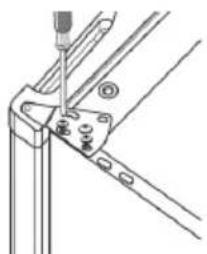
natural_image
Technical line drawing of a mechanical assembly with a screwdriver inserted (no text or symbols)- Remove the bottom screw, hinge bracket and adjustable foot from the bottom of the appliance.
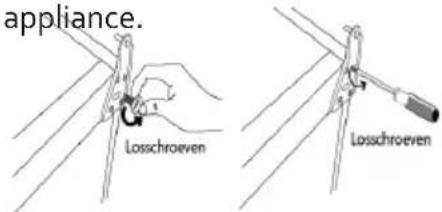
5.
Remove the adjustable foot from another side of the bottom and transfer it to the corresponding position on the opposite side of the bottom.
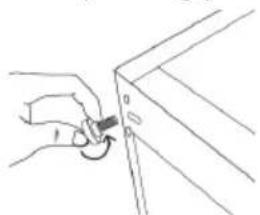
natural_image
Line drawing of a hand holding a small object with an arrow, next to a vertical line (no text or symbols)- Attach the screws, hinge bracket and adjustable foot to the opposite side of the bottom. Loosely secure.
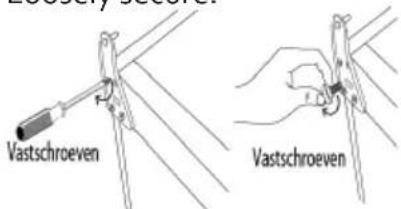
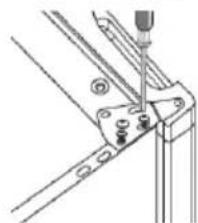
- Carefully set the door back into place. Ensure the door is aligned horizontally and vertically so that the seals are closed on all sides before finally tightening the top hinge. Insert the hinge back and screw it to the top of the appliance.
natural_image
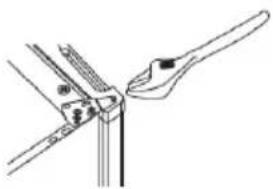
Technical line drawing of a mechanical assembly with a screwdriver inserted (no text or symbols)- Use a spanner to tighten it if necessary.
natural_image
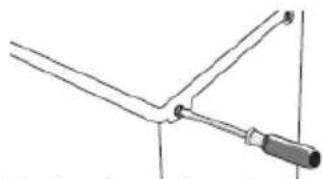
Line drawing of a hand holding a tool near a vertical rod (no text or symbols)- Put the top cover back and fix it in place with the screws.
natural_image
Simple line drawing of a tool with a handle and lever (no text or symbols)- With the door closed, check that the door is aligned horizontally and vertically and that the seals are closed on all sides before finally tightening the bottom hinge. Readjust the levelling feet as required.
MOVING YOUR APPLIANCE
If the appliance is turned off for any reason, wait for 10 minutes before turning it back on. This will allow the refrigeration system pressures to equalise before restarting.
- Turn off the appliance and unplug it from the mains socket. Remove all food. Also remove all mobile parts (shelves, accessories, etc.) or fix them into the fridge to avoid any shock.
- Relocate and install. If the appliance has been left on its side for any length of time, leave it standing upright for at least 10 minutes before turning on.
Your appliance uses isobutane (R600a) as a refrigerant. Although R600a is an environmentally friendly and natural gas, it is explosive. Therefore you should be careful during shipment and installation to prevent your appliance's cooler elements from being damaged. In the event of a leak caused by damage to the cooler elements, move your fridge from open flame or heat sources and ventilate the room where the appliance is located for a few minutes.
TROUBLE SHOOTING
Frequently, a problem is minor and a service call may not be necessary, use this trouble shooting guide for a possible solution.
Does not work.
- Check connection of power cord to power source.
- Plug in unit
- Use proper voltage.
The appliance is too cold.
· The temperature has been set too cold. Raise the temperature slightly.
The food is not frozen.
· The temperature has not been set correctly. Reset the temperature.
· The door has been left open too long. Only open the door when it is necessary.
· The appliance is positioned too close to a source of heat.
Formation of ice on the seal of the door.
- The seal of the door does not seal properly. Thaw the ice on the seal and reshape the rubber with your hand so that the door closes properly.
Unusual noise.
The appliance is touching the wall or another object. Gently move the appliance.
ENVIRONMENTAL GUIDELINES
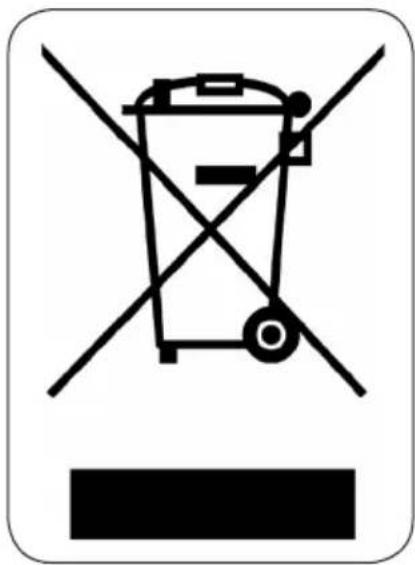
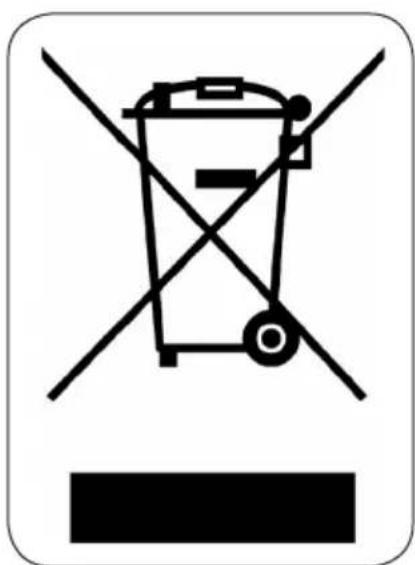
This symbol on the product or on its packaging indicates that this product may not be treated as household waste. Instead it must be brought to the applicable collection point for recycling of electrical and electronic equipment. By ensuring this product is disposed of correctly, you will help prevent potential negative consequences for the environment and human health, which could otherwise be caused by inappropriate waste handling of this product. For more detailed information about recycling of this product, please contact your local city office, your household waste disposal service or the shop where you purchased the product.
natural_image
Recycling symbol icon with three arrows forming a triangle (no text or labels)The packaging is recyclable. Please treat the packaging ecologically.
GARANTIA
natural_image
Diagram of a cabinet with arrows indicating upward movement or force, no text or symbols presentnatural_image
Line drawing of a hand holding a small object with an arrow, next to a vertical line (no text or symbols)natural_image
Technical line drawing of a mechanical assembly with no visible text or symbolsnatural_image
Line drawing of a tool interacting with a rod, showing a pliers and tools (no text or symbols)natural_image
Simple line drawing of a mechanical tool or bracket with no text or symbolsnatural_image
Recycling symbol icon with three chasing arrows forming a triangle (no text or labels)natural_image
Hand holding a small object with an arrow indicating rotation, next to a vertical line (no text or symbols)natural_image
Technical line drawing of a mechanical clamp or bracket assembly (no text or symbols)natural_image
Line drawing of a hand holding a tool against a vertical pole (no text or symbols)natural_image
Simple line drawing of a mechanical tool or bracket with no text or symbolsOHLED NA ŽÍVOTNÍ PROSTŘEDÍ
natural_image
Recycling symbol icon with three chasing arrows inside a rounded square (no text or labels)natural_image
Pure mechanical diagram showing a lever and rod without any text, numbers, or symbols- Horný kryt zložte.
natural_image
Diagram of a device with an open lid and internal components, showing upward arrows indicating movement (no text or symbols present)natural_image
Technical line drawing of a mechanical clamp or bracket assembly (no text or symbols)natural_image
Hand holding a small object with an arrow indicating rotation (no text or symbols)natural_image
Technical line drawing of a mechanical clamp or bracket assembly with a screwdriver inserted (no text or symbols)natural_image
Line drawing of a hand holding a tool against a vertical line (no text or symbols)- Pant prekryte krytom a opät' ho priskrutkujte.
natural_image
Simple line drawing of a tool with a handle and bracket (no text or symbols)natural_image
Recycling symbol icon with three chasing arrows inside a rounded square (no text or labels)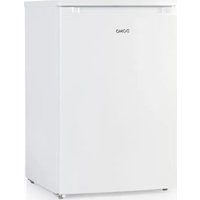
- JOUW APPARAAT VERPLAATSEN
- SAFETY INSTRUCTIONS
- PARTS
- BEFORE THE FIRST USE
- INSTALLATION
- LEVELLING
- USE
- TEMPERATURE CONTROL
- FREEZING AND STORING FOOD IN THE FREEZER
- Purchasing frozen food
- Freezing fresh food
- Packing frozen food
- Recommended storage times of frozen food in the freezer
- Never forget:
- CLEANING AND MAINTENANCE
- CLEANING
- DEFROSTING
- VACATION TIME
- POWER FAILURE
- DOOR CONVERSION
- MOVING YOUR APPLIANCE
- TROUBLE SHOOTING
- Does not work.
- The appliance is too cold.
- The food is not frozen.
- Formation of ice on the seal of the door.
- Unusual noise.
- ENVIRONMENTAL GUIDELINES
- GARANTIA
- OHLED NA ŽÍVOTNÍ PROSTŘEDÍ
Brand : DOMO
Model : DO920DV
Category : Freezer