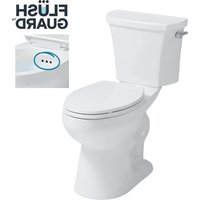
Easley Flush Guard TL-5800AFH - Toilet CRAFT + MAIN - Free user manual and instructions
Find the device manual for free Easley Flush Guard TL-5800AFH CRAFT + MAIN in PDF.


User questions about Easley Flush Guard TL-5800AFH CRAFT + MAIN
0 question about this device. Answer the ones you know or ask your own.
Ask a new question about this device
Download the instructions for your Toilet in PDF format for free! Find your manual Easley Flush Guard TL-5800AFH - CRAFT + MAIN and take your electronic device back in hand. On this page are published all the documents necessary for the use of your device. Easley Flush Guard TL-5800AFH by CRAFT + MAIN.
USER MANUAL Easley Flush Guard TL-5800AFH CRAFT + MAIN
INSTALLATION AND USER GUIDE
EASLEY™ Complete 2-Piece Toilet TL-5800AFH-EW / TL-5800AFH-RW
Read all instructions carefully before proceeding.
FLÜSH GUARD™
ANTI-OVERFLOW TOILETS
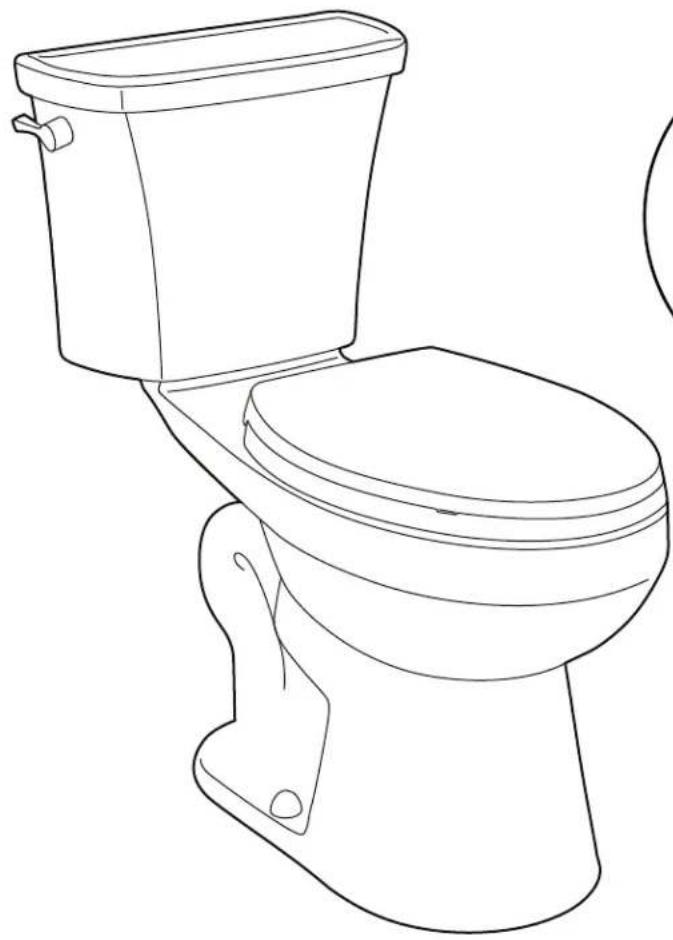
natural_image
Line drawing of a standard toilet with handle and seat (no text or symbols)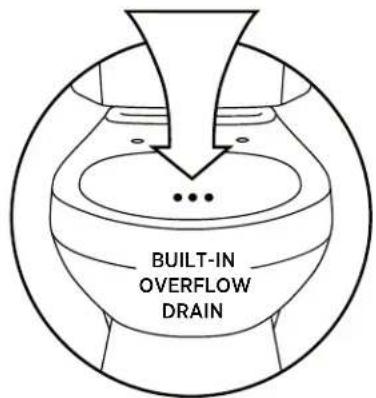
text_image
BUILT-IN OVERFLOW DRAIN• To ensure that timely and effective service is available for you, please keep this manual for future reference.
CRAFT + MAIN®
INSTALLATION AND USER GUIDE
EASLEY™ Complete 2-Piece Toilet
TL-5800AFH-EW / TL-5800AFH-RW
HARDWARE & PARTS LIST

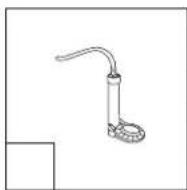
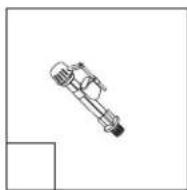
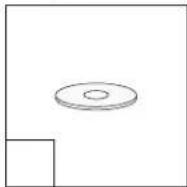
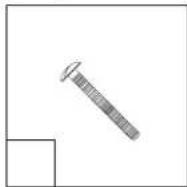
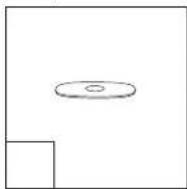
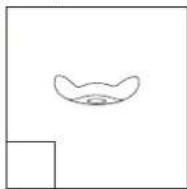
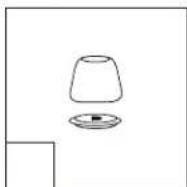
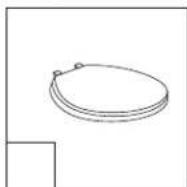
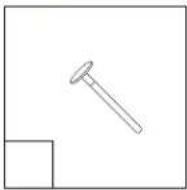
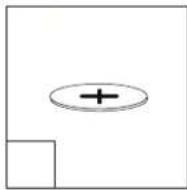
A Complete Lever x1
B Complete Flush Valve with Flapper (Installed) x1
C Complete Fill Valve with Float (Installed) x1
D Rubber Bolt Washers x2
E Metal Washers x4
F Metal Tank Bolts x2
G Metal Nuts x2
H Oval Washers x2
I Wing Nuts x2
J Large Rubber Sealing Gasket x1
K Plastic Bolt Caps & Washers x2
L Plastic toilet Seat x1
M Sealing Ring (11/16" Wax) x1
N Floor Bolts x2
- Plastic Retaining Washers x2
P Metal Washers x2
Q Tightening Nuts x2
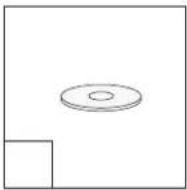
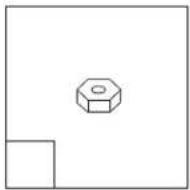
TOOLS & MATERIALS REQUIRED

FLOOR FLANGE (MAY ALREADY BE
INSTALLED IF REPLACING EXISTING TOILET)

NUT DRIVER OR SOCKET SET
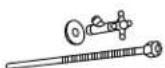
WATER SUPPLY KIT (NOT NEEDED IF REPLACING TOILET)
LEVEL
PUTTY KNIFE
ADJUSTABLE WRENCH

FLATHEAD SCREWDRIVER

TAPE MEASURE
HAND SAW
CRAFT + MAIN®
INSTALLATION AND USER GUIDE
EASLEY™ Complete 2-Piece Toilet TL-5800AFH-EW / TL-5800AFH-RW
STEP 1 REMOVING OLD TOILET
Turn off the water supply. Flush the toilet to empty the tank. Remove any water left in the tank or bowl. Disconnect the supply line from the tank. Remove decorative caps. Unscrew nuts that attach the toilet to the floor. Remove toilet.
STEP 2 INSTALLATION PROCEDURE
Make sure the water supply valve is shut off before installation. Remove old floor bolts from floor flange. Clean any old wax, putty, etc. from base area.
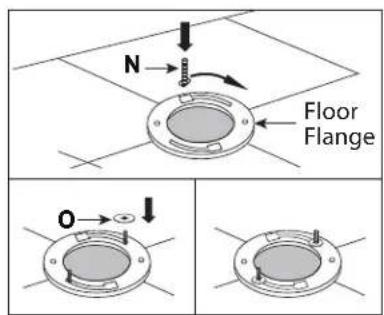
Install new floor bolts (N) into floor flange. Use plastic retaining washers (O) to hold bolts in full length, upright position. You can pre-cut the floor bolts to the desired length to put on the bolt cap by doing the following: Temporarily install floor bolts and set the toilet and place the washers and nuts onto the bolts. Then mark the length needed. Take toilet out of the place and remove the floor bolts. Cut the floor bolts to the desired length.
text_image
N Floor Flange OSTEP 3 INSTALLATION PROCEDURE
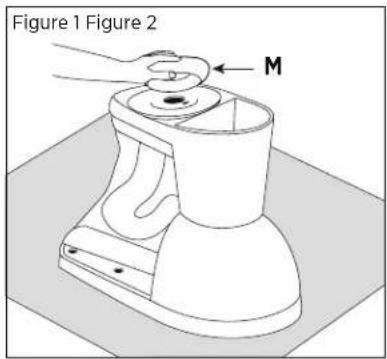
Turn toilet bowl upside down onto a soft surface. Place a new wax ring (M) around the raised outlet ring of the bowl with the rounded (tapered) end of the ring facing the toilet, and press firmly enough so the wax ring adheres to the bowl. (Figure 1)
Lower the toilet onto the floor bolts (N), so the bolts protrude through mounting holes in base of toilet. (Figure 2) Using a rocking motion, press the bowl down to position the toilet onto the flange.
text_image
Figure 1 Figure 2 M
natural_image
Technical line drawing of a toilet with a compass needle indicating north (no text or symbols present)© 2024 FGI Industries, Ltd. | CRAFT + MAIN*, EASLEY™, FLUSH GUARD™, and logo designs are trademarks or registered trademarks of FGI Industries, Ltd. USA: www.flushguardtoilets.com / www.craftandmain.com | CANADA: www.craftandmain.ca
CRAFT + MAIN®
INSTALLATION AND USER GUIDE
EASLEY™ Complete 2-Piece Toilet TL-5800AFH-EW / TL-5800AFH-RW
STEP 4 INSTALLATION PROCEDURE
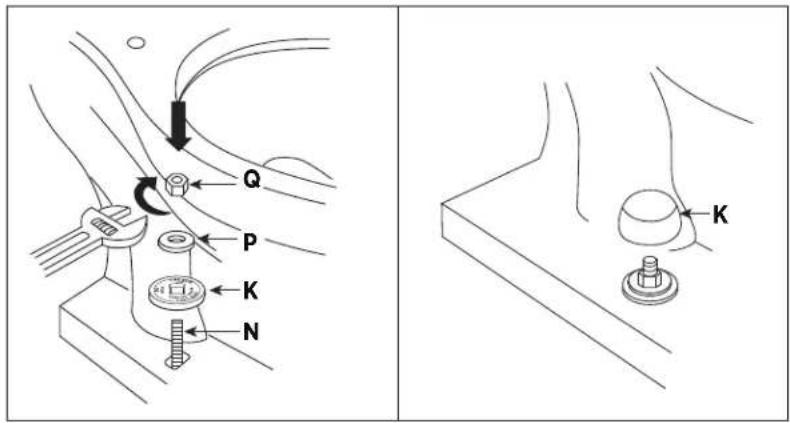
Install plastic cap washers (K), followed by metal washers (P) and nuts (Q) onto the floor-bolts (N). Tighten the bolts alternately until toilet is firmly seated on the floor. Install the plastic bolt caps (K).
CAUTION: DO NOT OVERTIGHTEN NUTS, SEVERE DAMAGE MAY OCCUR.
text_image
Q P K NSTEP 5 INSTALLING THE TANK
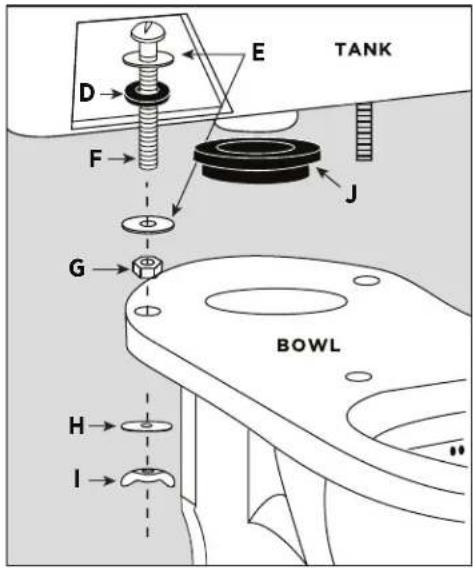
Place a metal washer (E) followed by a rubber washer (D) onto each bolt (F). Insert the bolts (F) with washers (E & D) through the holes inside the tank.
Place a metal washer (E) followed by a metal nut (G) onto each bolt (F) protruding from the bottom of the tank. Tighten the metal nuts (G) to create a proper and secure seal.
Attach the rubber sealing gasket (J) to the center drain hole under the tank. Gently place the tank on the toilet bowl with the bolts (F) protruding out through the holes in the bowl.
Place an oval metal washer (H) followed by a wing nut (I) onto each of the protruding bolts (F). Tighten the wing nuts (I) enough so that the tank sits flat on the toilet bowl.
Make sure the tank is parallel to the wall and straight on the toilet bowl.
CAUTION: DO NOT OVERTIGHTEN NUTS. SEVERE DAMAGE MAY OCCUR.
text_image
TANK E D F J G BOWL H ICRAFT + MAIN®
INSTALLATION AND USER GUIDE
EASLEY™ Complete 2-Piece Toilet TL-5800AFH-EW / TL-5800AFH-RW
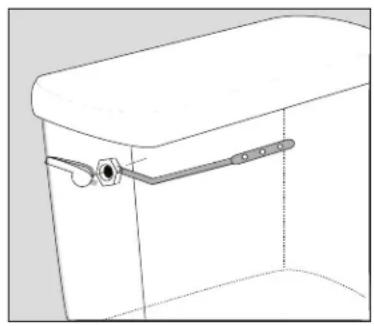
STEP 6 INSTALLING TANK LEVER
Turn clockwise to remove plastic nut from the lever arm.
Insert lever arm through the hole on the side of tank. The lever should be pointing to the back side of the toilet. Screw the plastic nut counter clockwise to tighten it.
Hook the chain onto the lever into the furthest hole from the lever. With the lever at rest, the chain should only be long enough for flapper to close.
NOTE: All CRAFT + MAIN™ toilets come preset and do not need to be adjusted.
natural_image
Technical line drawing of a toilet with handle and outlet (no text or symbols)STEP 7 INSTALLING TOILET SEAT
Place the seat on the toilet, aligning the holes of the seat with the holes in the back of the toilet bowl.
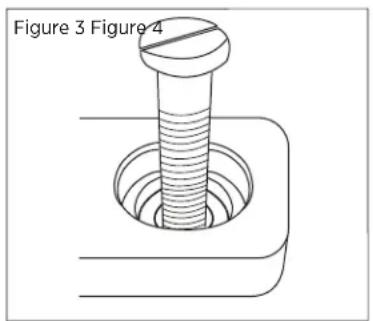
Insert the screw through the toilet seat holes on the bowl and secure it with the nuts/washers from the bottom of the toilet. (Figure 3)
Tighten up the nuts from the bottom of toilet, use a regular screwdriver to tighten to fit. (Figure 4)
CAUTION: DO NOT OVERTIGHTEN THE SCREW AS IT MAY CAUSE DAMAGE ON SEAT.
Push the decorative cap down.
Please note: Do not push down on the seat with force, doing so may damage the smooth close mechanism.
text_image
Figure 3 Figure 4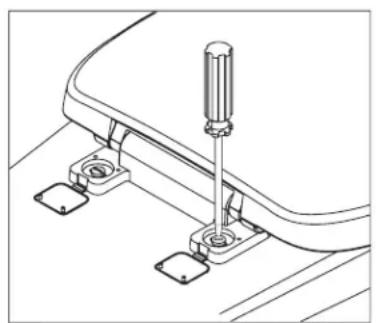
natural_image
Technical line drawing of a mechanical assembly with screwdriver and mounting base (no text or symbols)CRAFT + MAIN®
INSTALLATION AND USER GUIDE
EASLEY™ Complete 2-Piece Toilet TL-5800AFH-EW / TL-5800AFH-RW
STEP 8 CONNECTING WATER SUPPLY
Connect water supply line (new or existing) between shutoff valve and tank inlet water fitting. Tighten coupling nuts securely.
NOTE: DO NOT OVERTIGHTEN.
Turn on supply valve and allow tank to fill until float rises to shutoff position.
Check for leakage at fittings, tighten or correct as needed.
STEP 9 PRIMING THE FLUSH GUARD OVERFLOW PROTECTION FEATURE
This toilet is equipped with the FLUSH GUARD™ Overflow Protection feature. This is a separate water channel built-into the toilet that allows water to drain even when the main trapway is clogged.
This separate overflow water channel incorporates a small P-trap to prevent sewer gases from entering the house. This P-trap is rinsed and refilled every time you flush.
When the toilet is first installed, it should be flushed twice to make sure the P-trap in the overflow water channel is completely filled with water.
! TROUBLESHOOTING
Problem: Poor Flush, the water level is below water line mark.
Solution: Fine tune the fill valve adjustment rod to increase or decrease the water level in the tank.
Problem: Continuous water running.
Solution: It may occur if the flush seal is not completely closed. Verify if there is any obstruction with the flush seal and that the seal is in contact with the valve lip.
REPAIR PARTS:
Fill Valve w/Float
Flush Valve w/Flapper
Large Rubber Gasket
Tank Lever
Toilet Seat
Wipe the outside of the toilet gently with a damp cloth and blot dry with a soft towel. Make sure that the complete surface is cleaned and completely dry. NOTE: IMPROPER CARE MAY CAUSE THE WARRANTY TO BECOME INVALID.
CRAFT + MAIN®
WARRANTY REGISTRATION:
To receive warranty coverage for your purchase, you must complete the warranty registration form found on our website within 30 days of purchase, or provide valid proof of purchase detailing the date and location of your purchase.
U.S. CUSTOMERS: www.craftandmain.com/warranty
CANADIAN CUSTOMERS: www.craftandmain.ca/179-2
CUSTOMER SERVICE:
U.S. CUSTOMERS: 1-888-620-3667
Monday - Friday, 7:00 a.m. - 5:00 p.m., CT
www.craftandmain.com | customerservice.us@fgi-industries.com
CANADIAN CUSTOMERS: 1-888-256-7551
Monday - Friday, 8:00 a.m. - 5:00 p.m., ET
www.craftandmain.ca | customerservice.cdn@fgi-industries.com
LIMITED WARRANTY
CRAFT + MAIN™ plumbing products are covered by the FGI Industries, Ltd. 5 year (Vitreous China) and 1 year (Parts and Fittings) limited warranty, which is as follows:
FGI Industries, Ltd. warrants its products to be free from defects in material or workmanship for 5 years (Vitreous China) and 1 year (Parts and Fittings) from the date of purchase of the product by the original purchaser.
If inspection of this product, within 5 years (Vitreous China) and 1 year (Parts and Fittings) after its initial purchase, confirms that it is defective in materials or workmanship, FGI Industries, Ltd. will repair or at its option, exchange the product for a similar model. FGI Industries, Ltd. provides no warranties or guarantees beyond those in this limited warranty.
This limited warranty applies only to the original purchaser and installation of these products. All de-installation and re-installation and transportation costs or charges incidental to warranty services are to be borne by the owner. In no event will FGI Industries, Ltd. be liable for the cost of repair or replacement of any installation materials, including but not limited to, tiles, marble etc. FGI Industries, Ltd. will not be responsible for and this warranty does not cover and specifically excludes any liability to the purchaser or any third party for consequential or incidental damages, all of which are hereby expressly disclaimed, or the extension beyond the duration of this warranty of any implied warranties, including those of merchantability or fitness for an intended purpose.
This warranty does not apply to local building code compliance. Since local building codes vary considerably, the purchaser of this product should check with a local building or plumbing contractor to ensure local code compliance before installation.
FGI shall not be responsible or liable for any failure or damage to its toilet tank trim, plumbing fittings, or china products caused by the use of either chloramines or high concentration of chlorine, lime/iron sediments and/or other minerals not removed from public water during the treatment of public water supplies or caused by toilet tank type cleaners containing chlorine, calcium hypochlorite, and/or other chemicals.
This warranty is void if the product has been moved from its initial place of installation; if it has been subjected to faulty maintenance, abuse, misuse, accident, or other damages; if it was not installed in accordance with FGI Industries, Ltd. instructions; or if it has been modified in a manner inconsistent with the product as shipped by FGI Industries, Ltd.
This Warranty excludes the following:
- Replacement of discolored or damaged parts as a result of strong cleaning or disinfecting chemicals.
- Damage to, or malfunction of the unit resulting from improper installation, negligence, misuse, abuse or tampering by an unauthorized repair personnel.
- Under no circumstances will FGI Industries, Ltd. be held liable for any loss or damage directly, consequently or incidentally arising out of the misuse of, or inability to use this product.
- Damage or loss resulting from electrical surges, electrical outages, lightning strikes or other acts are not covered by this warranty.
- The owner hereby releases FGI Industries, Ltd. from any or all claims against damages to the property or the product resulting from misuse, improper installation, inadequate maintenance, or exposure to extreme temperature, high water pressure or strong chemicals.
Note: Some states or provinces do not allow the limitations on an implied warranty, and some states/provinces do not allow exclusions or limitations regarding incidental or consequential damages, so the above limitations may not apply to you. This warranty gives you specific legal rights, and you may have other rights, which vary from state to state or province to province. No person is authorized to change, add to, or create any warranty or obligation other than that set forth herein.
CRAFT + MAIN®
GUIDE D'INSTALLATION ET D'UTILISATION
natural_image
Line drawing of a standard toilet with lid and handle (no text or symbols)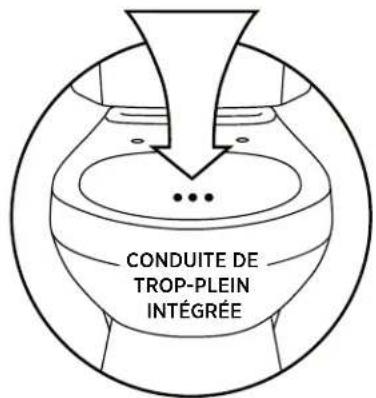
text_image
CONDUITE DE TROP-PLEIN INTÉGRÉEtext_image
Figure 1 Figure 2 M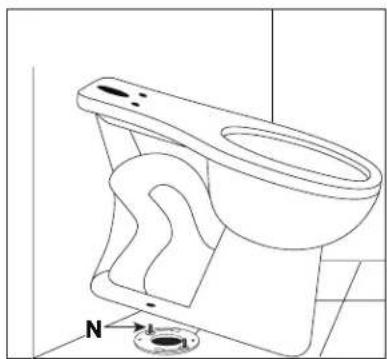
natural_image
Technical line drawing of a toilet with a compass needle indicating north (no text or symbols present)© 2024 FGI Industries, Ltd. | CRAFT + MAIN*, EASLEY™, FLUSH GUARD™, and logo designs are trademarks or registered trademarks of FGI Industries, Ltd. USA: www.flushguardtoilets.com / www.craftandmain.com | CANADA: www.craftandmain.ca
CRAFT + MAIN®
GUIDE D'INSTALLATION ET D'UTILISATION
text_image
Q P K N KÉTAPE 5 INSTALLATION DU RÉSERVOIR
text_image
RÉSERVOIR E D F G J CUVETTE H ICRAFT + MAIN®
GUIDE D'INSTALLATION ET D'UTILISATION
natural_image
Technical line drawing of a mechanical component with a handle and mounting bracket (no text or symbols)ÉTAPE 7 INSTALLATION DU SIÈGE DE TOILETTE
natural_image
Technical line drawing of a bolt and nut assembly (no text or symbols)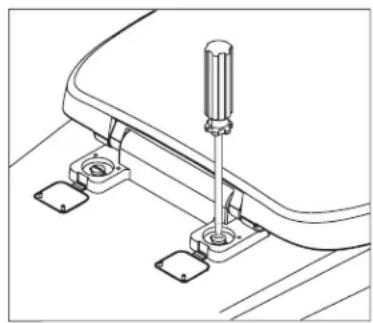
natural_image
Technical line drawing of a mechanical assembly with screws and mounting holes (no text or symbols)CRAFT + MAIN®
GUIDE D'INSTALLATION ET D'UTILISATION
www.craftandmain.ca | customerservice.cdn@fgi-industries.com
GARANTIE LIMITÉE
natural_image
Line drawing of a standard toilet with handle and seat (no text or symbols)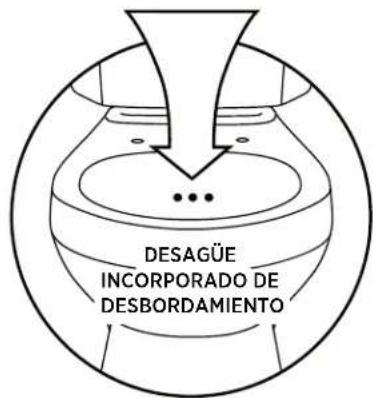
text_image
DESAGÜE INCORPORADO DE DESBORDAMIENTOnatural_image
Line drawing of a toilet with a compass needle pointing to the base (no text or symbols present)© 2024 FGI Industries, Ltd. | CRAFT + MAIN®, EASLEY™, FLUSH GUARD™, and logo designs are trademarks or registered trademarks of FGI Industries, Ltd. USA: www.flushguardtoilets.com / www.craftandmain.com | CANADA: www.craftandmain.ca
CRAFT + MAIN®
text_image
Q P K N KSTEP 5 CÓMO INSTALAR EL TANQUE
text_image
TANQUE E D F G J TAZA H ICRAFT + MAIN®
natural_image
Technical line drawing of a mechanical component with a handle and mounting bracket (no text or symbols)PASO 7 CÓMO INSTALAR EL ASIENTO DEL INODORO
natural_image
Technical line drawing of a mechanical assembly with screwdriver and mounting base (no text or symbols)CRAFT + MAIN®
De lunes a viernes, de 7:00am a 5:00pm, Hora Central
www.craftandmain.com | customerservice.us@fgi-industries.com