
Parilla ARBIS02 - Grill plate ARDES - Free user manual and instructions
Find the device manual for free Parilla ARBIS02 ARDES in PDF.

User questions about Parilla ARBIS02 ARDES
0 question about this device. Answer the ones you know or ask your own.
Ask a new question about this device
Download the instructions for your Grill plate in PDF format for free! Find your manual Parilla ARBIS02 - ARDES and take your electronic device back in hand. On this page are published all the documents necessary for the use of your device. Parilla ARBIS02 by ARDES.
USER MANUAL Parilla ARBIS02 ARDES
natural_image
Line drawing of a Ardes air fryer with control panel and side buttons (no text or symbols)ARBIS02
Bistecchiera
Electric grill
Grill électrique
Kontaktgrill
Placa grille
Grelha eléctrica
A·2

natural_image
Line drawing of a kitchen grater with a square top and side-mounted handle (no text or symbols)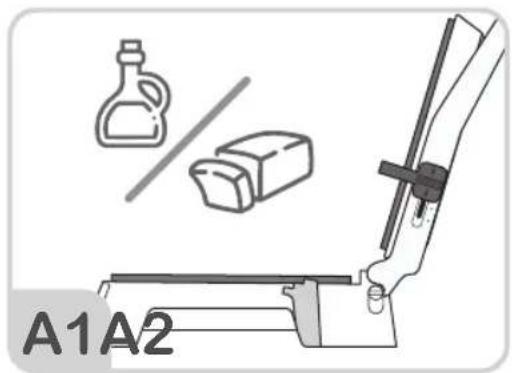
natural_image
Diagram of a machine tool with directional arrows indicating rotation or movement (no text or symbols present)
flowchart
graph TD
    A["Input Data"] --> B["Processing"]
    B --> C["Output"]
    style A fill:#f9f,stroke:#333
    style B fill:#ccf,stroke:#333
    style C fill:#cfc,stroke:#333
natural_image
Line drawing of a portable grater with ventilation slots and control knobs (no text or symbols)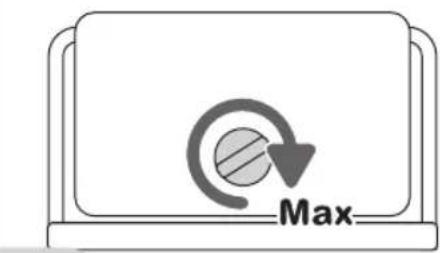
B1B2
natural_image
Mechanical device diagram showing a lever mechanism with a rotating arrow (no text or symbols)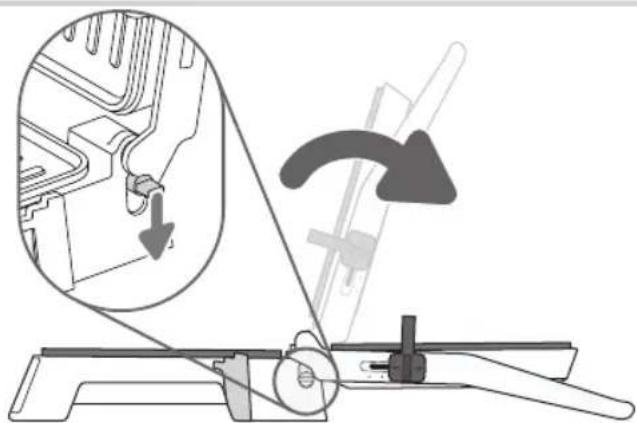
natural_image
Technical diagram of a mechanical device with an inset showing a cable or wire connection (no text or symbols present)B3
natural_image
Diagram showing a spray bottle, a cleaning box, and a device with control panel (no text or symbols)B4
natural_image
Simple line drawing of a device control panel with a circular button and arrow (no text or symbols)B5B6


A·4
ISTRUZIONI D'USO
Bistecchiera
AVVERTENZE
Attention : read this booklet carefully it contains important instructions for a safe installation, use and maintenance.
Important instructions to be kept for future reference.
- This unit can be used by children aged 8 and above and individuals with reduced physical, sensory or mental capacity, or lack of experience or knowledge, if they are provided with adequate supervision or have received instructions regarding the use of safety equipment and that they understand the risks related.
• Children must not play with the unit. - Cleaning and user maintenance shall not be made by children unless they are older than 8 and supervised.
- Keep the equipment and its cable out of reach of children younger than 8 years of age.
- The appliance must never be operated by means of an external timer or with a separate remote control system.
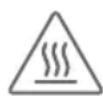
WARNING! The surfaces are subject to heating up during use.
- To clean the appliance, refer to the MAINTENANCE chapter.
- If the power cable gets damaged, it has to be replaced only in a service centre approved by the manufacturer, in order to avoid a hazard.
- This appliance can operate at 50Hz or 60Hz without adjustments.
- This device is designed to be used at a maximum altitude of 2000m above sea level.
WARNING! Do not leave parts of the packaging within the reach of children to avoid the danger of suffocation.
After removing the packaging, check the appliance for any signs of damage. In case of visible damage, do not use it and contact a qualified technician.
Do not leave parts of the packaging within the reach of children.
This appliance is not a children's toy: it is an electrical device and must be treated with the necessary caution.
Before connecting the appliance, make sure that the power supply voltage matches the indication on the data plate.
Electrical safety of this appliance is assured only if it has been connected to an effective earthing system. If the plug and socket are not compatible, the socket has to be replaced with a suitable type by skilled persons
Do not use adapters or extensions that do not comply with the current safety regulations or that are not suitable for the power (W) of the appliance.
Unplug the appliance from the mains when not in use.
Do not tug on the power cable or on the appliance itself to remove the plug from the socket.
The use of any electrical appliance requires that a number of basic rules are observed, namely:
- Never touch the appliance with wet or humid hands.
- Do not use the appliance when barefoot.
- Do not leave the appliance exposed to weathering (rain, sunlight).
- Do not subject it to rough handling.
In case of failure, disconnect it at once. Do not attempt to repair it, but take it to a service centre approved by the manufacturer.
If you decide you do not want to use this appliance any longer, disable it by cutting the power cable of course, after disconnecting it from the socket.
In case of a breakdown or malfunctioning of the appliance, disconnect it at once. Do not attempt to repair it, but take it to a service centre approved by the manufacturer.
The appliance was created and designed for use in domestic environments as indicated in the instructions. Any other use is therefore considered improper and thus dangerous.
Do not use the appliance out of doors.
For safety reasons, the appliance should never be opened.
During use, rest the appliance on a flat surface.
To prevent children from accidentally touching hot components, use the appliance on surfaces that are at least 85 cm high.
Leave space around all other surfaces of the appliance and do not cover with other objects.
Do not place the cord near sources of heat.
Do not place the appliance above or below other ovens, microwave ovens or close to gas stoves.
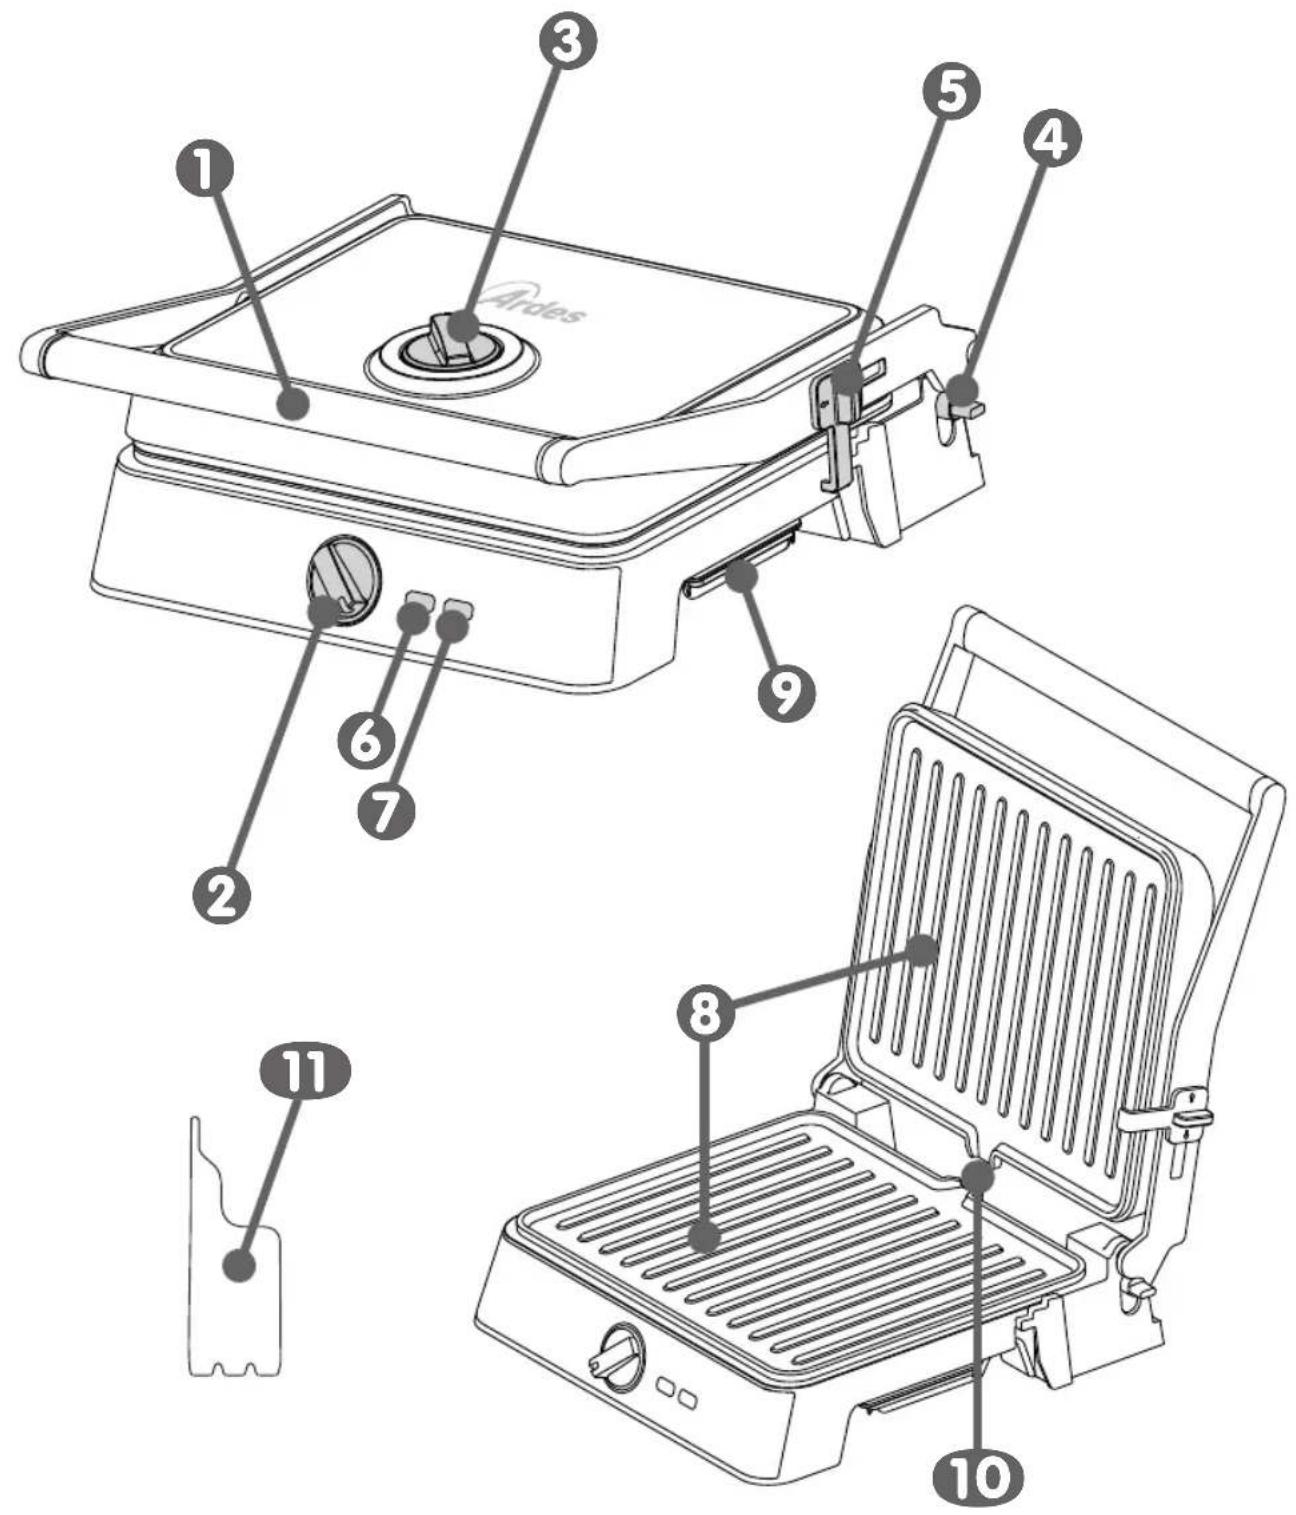
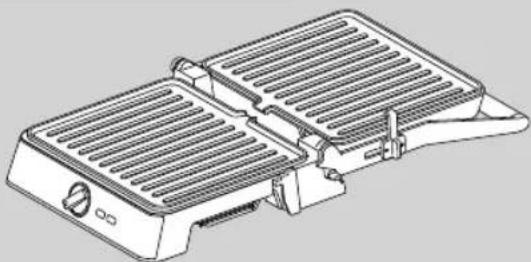
Technical information
See the image on page 2
1 Handle
② Lower plate thermostat
③ Upper plate thermostat
4 180° opening button
⑤ Locking and height adjustment lever
6 Power indicator light
⑦ Thermostat indicator light
⑧ Cooking plates
9 Drip drawer
The drawer are provided only to collect the cooking residues; do not use it to contain water, other beverages or food intended to be consumed. Do not consume the residues collected in the drawer.
10 Chutes
11 Spatula
Technical data indicated on the appliance.
Availability of off mode and standby mode
| Mode | Power consumption | Time needed for the equipment to reach the applicable low power mode or condition |
| Off mode 0,0 WN.A. |
Instructions for use
Food contact
Only these parts are intended to come into contact with food, under the conditions indicated:
| Parts intended to come in contact with food | Type of foods | Maximum temperature | Maximum time |
| Cooking plates 8 | All types of food 230°C 20 min | ||
First use
Before using the appliance, remove all packaging materials and any labels/advertising tags present on the product.
Before using the appliance for the first time:
- clean the plates ⑧ come as specified in the MAINTENANCE section.
- operate the appliance empty (for approximately 2 minutes, until the green light goes out) in a well ventilated room to remove odours and fumes due to possible processing residue on the inner parts of the appliance.
- disconnect the plug from the mains socket and allow the appliance to cool.
Note: when using this appliance for the first time, you may notice some smoke. This is normal and is due to initial heating of the inner components.
USE OF THE CONTACT GRILL
See the image on page 3
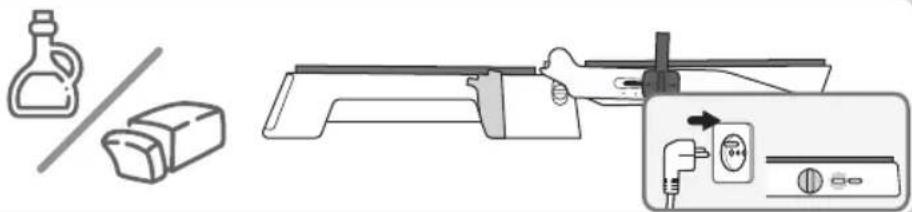
Position the drawer ⑨ in correspondence with the chute ⑩ to collect any grease residues.
Lightly coat the cooking plates ⑧ with a little butter or cooking oil.
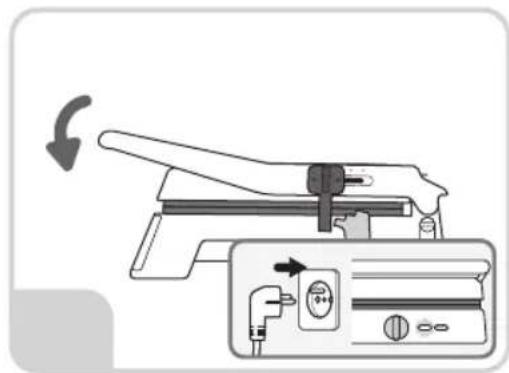
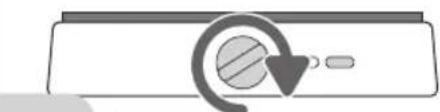
Close the grill and insert the mains plug into the wall socket. The red power on light ⑥ will turn on.
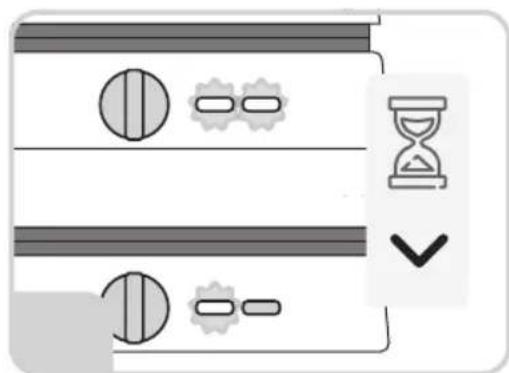
Adjust the lower plate thermostat ② and the upper plate thermostat ③
Note: thermostat ② is the main thermostat that turns the appliance on and off and controls both plates.
Thermostat ③ only controls the upper plate and allows you to:
- turn it off (if set to "0");
- adjust its temperature to match that of the lower plate (if set to "Max");
- adjust its temperature to a lower value than that of the lower plate (in other positions).
The green indicator light ⑦ turns on. Wait until the green light goes out. The appliance has reached the correct temperature for use.
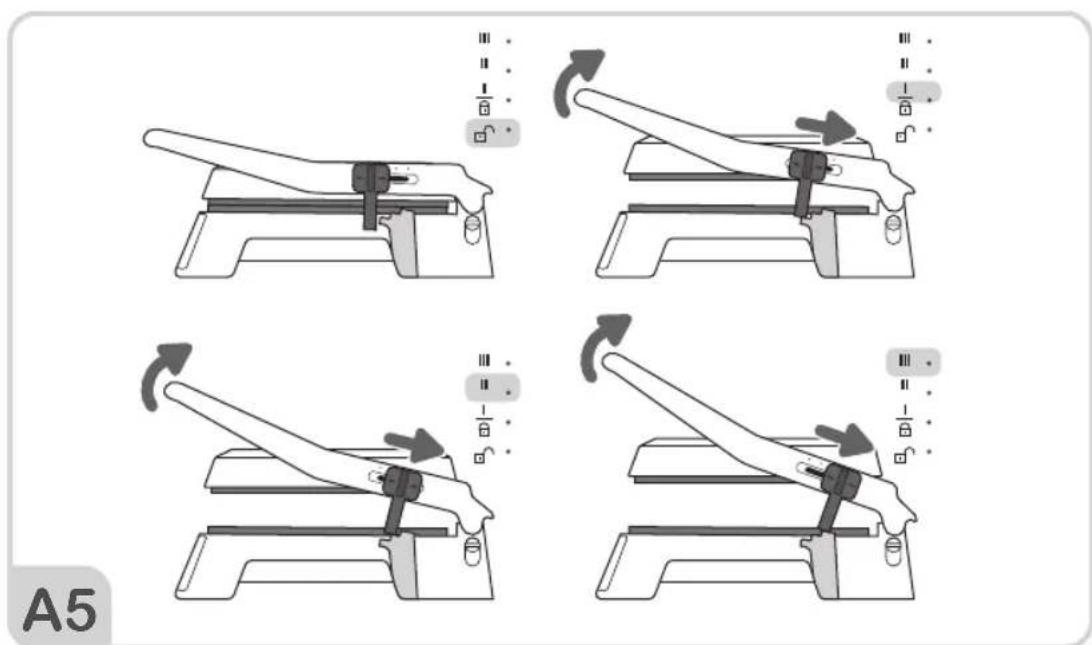
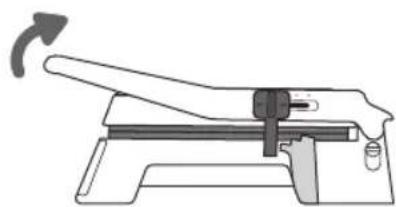
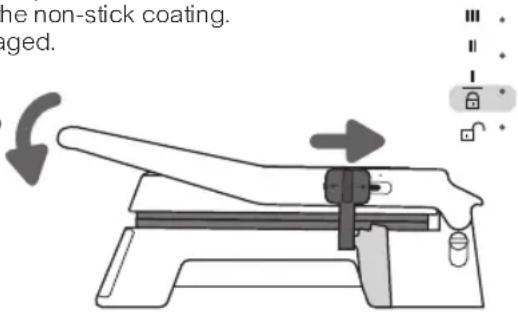
Open the grill using the handle ① and adjust the height of the upper plate using the lever ⑤.
Put the food on the lower grill (you can cook sandwiches, burgers, pieces of meat without bones and vegetables).
The sandwiches must be positioned in the rear part of the grill. If you decide to cook different foods, it is important that these have approximately the same thickness so that the upper grill adheres evenly on the foods.
Close the upper grill.
The cooking time varies according to the food, to the set temperature and to personal tastes. For sandwiches, the indicative cooking time ranges from 3 to 6 minutes. It is possible to check the status of cooking by lifting the upper grill.
Note: During the cooking process, the green indicator light turns on and then off to maintain the appliance at the correct temperature.
When cooking is finished, lift the upper grill and use a non-metallic utensil (for example, wooden spatula) to remove the food. Do not use sharp or abrasive kitchen utensils.
After use, unplug the appliance from the socket and wait for it to cool down. Clean the appliance as indicated in the MAINTENANCE paragraph. Close the locking lever ⑤ in order to move the appliance by the handle ① and store the appliance.
USE AS A 180° OPEN GRILL
See the image on page 4
Set the upper plate thermostat ③ to the maximum level.
Position the drawer ⑨ in correspondence with the chute ⑩ to collect any grease residues.
To open the grill to 180^ , just push the side button ④ downward and, using the handle ①, rotate the upper plate until complete opening.
Lightly coat the cooking plates ⑧ with a little butter or cooking oil.
Insert the mains plug into the wall socket.
The red power on light ⑥ will turn on.
Use thermostat ② to adjust the temperature of both plates.
The green indicator light ⑦ turns on. Wait until the green light goes out. The appliance has reached the correct temperature for use and it is possible to place the food to be cooked on it.
After use, unplug the appliance from the socket and wait for it to cool down. Clean the appliance as indicated in the MAINTENANCE paragraph. Close the locking lever ⑤ in order to move the appliance by the handle ① and store the appliance.
Maintenance
Disconnect the plug from the socket and let the appliance cool down well before cleaning it.
To clean, open the appliance and remove food residues from the plates using the spatula 11.
For cleaning of the plates, use a sponge or a soft cloth dampened with hot water; do not use steel wool or other abrasive items which could damage the non-stick coating.
Do not use the appliance if the non-stick coating is damaged.
In order to clean the appliance, use a soft or slight damp cloth.
Do not use very wet substances, liquids or cloths to prevent water from entering into the appliance and irreparably damaging it.
NEVER IMMERSE THE APPLIANCE INTO THE WATER.
Close the locking lever ⑤ in order to move the appliance by the handle ① and store the appliance.
Disposal
PACKAGING
To respect the environment, the packaging material must be disposed of correctly, respecting separate collection.
Check the provisions of your municipality.
USER INFORMATION
"Implementation of Directive 2012/19/EU on Waste Electrical and Electronic Equipment (WEEE)", pertaining to reduced use of hazardous substances in electrical and electronic equipment, as well as to waste disposal.
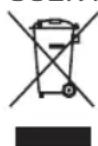
The symbol of the crossed-out wheelie bin on the equipment or on its packaging indicates that the product must be disposed of separately from other waste at the end of its service life. The user must therefore take the dismissed equipment to suitable separate collection centres
for electrical and electronic waste.
For more details, please contact the appropriate local authority.
Suitable segregated collection of the equipment for subsequent recycling, treatment or environmentally-friendly disposal helps prevent damage to the environment and to human health, and encourages the re-use and/or recycling of the materials that make up the equipment.
Abusive disposal of the product by the user shall result in the application of administrative fines in accordance with the laws in force.
Limited Warranty
1. SCOPE OF APPLICATION
1.1. Poly Pool S.p.A., with registered office in Via Sottocorna, 21/B, 24020 PARRE (BG) provides this Limited Warranty under the terms and conditions set forth herein for Ardes-branded products (hereinafter "Products").
This Limited Warranty includes only the Products in their original configuration, including any accessory equipment.
This Limited Warranty is not effective and therefore does not apply to consumable parts of the product, such as, where present, batteries inserted into Products, bulbs, filters, etc.
2. CONSUMER RIGHTS
2.1 This Limited Warranty is not affected by the rights of the consumer that are provided for by the national legislative provisions transposing Directive (EU) 2019/771 and subsequent amendments on guarantees for consumer goods ("Legal Warranty").
The Limited Warranty does not replace, limit, impair or exclude the Legal Warranty, but is in addition to the latter. The consumer may, therefore, always assert the rights referred to in the Statutory Warranty against the seller, under the conditions and within the terms provided for by the aforementioned legislation.
3. PURPOSE OF THE WARRANTY
3.1 On the basis of this Limited Warranty, in the event that the lack of conformity of the Product due to
manufacturing defects is ascertained and recognised, Poly Pool S.p.A. undertakes to repair or, at its discretion, replace the Products or components.
4. CASES OF EXCLUSION OF WARRANTY
4.1 This Limited Warranty does not apply in the event of breakages, malfunctions or otherwise defects caused by the following:
i) installation errors caused by negligence, imprudence, inexperience or carelessness;
ii) failure or incorrect compliance with the instructions and warnings contained in the manuals or on any additional instruction sheets;
iii) failure or incorrect maintenance of the products in the manner indicated by Poly Pool S.p.A.;
iv) poor storage of the Product;
v) tampering, modifications or interventions carried out by the End Customer or commissioned by the End Customer to third parties, and in any case not carried out by persons authorised by Poly Pool S.p.A;
vi) improper use and not in accordance with the normal use or intended use of the Product;
vii) aggravated damage caused by further use by the end customer once the possible malfunction or defect has already become apparent;
viii) any external factors both during installation and use of the Product not assignable or otherwise attributable to PolyPool S.p.A.;
ix) if the model, serial code or label on the product has been deliberately counterfeited or erased;
x) loss of performance and/or visual appearance or such that the essence of the features is not compromised.
4.2 This Limited Warranty does not include clear defects immediately recognisable on delivery of the Product, nor defects or malfunctions caused by deterioration due to normal wear and tear.
4.3 This Limited Warranty is void if breakages, malfunctions, defects or faults are caused by products, parts or components manufactured by third parties other than Poly Pool S.p.A. to which the product is connected or with which it is otherwise used.
5. WARRANTY CLAIM REQUEST
5.1 For any request for support, the Consumer can contact customer support at ardes@polypool.it For Italy, San Marino and Vatican City only, you can directly contact your nearest Authorised Technical Support Centre.
Contact details can be found on the SUPPORT page on the www.ardes.it website.
5.2 In order to be able to activate this Limited Warranty, the End Customer must be in possession of a sales receipt and/or a purchase invoice for the product and/or delivery note and/or other document certifying delivery. Poly Pool S.p.A. reserves the right to refuse to provide this Limited Warranty if the End Customer does not provide at least one of these documents.
6. DURATION
6.1 The duration of this warranty is 2 years (hereinafter, the "Warranty Period") from the date of purchase of the product (and, therefore, from the date shown on the tax receipt and/or on the invoice) or, at the latest, from the date of delivery (resulting from the delivery note or other delivery documentation).
6.2 In the event of replacement, the original Warranty Period will continue to apply and will therefore not be renewed or extended.
7. REGIONAL SCOPE
7.1 This warranty is valid only for warranty services to be rendered in the European Union, Vatican City or San Marino.
MODE D'EMPLOI
Grill électrique