Nitrogon NT06-PRO-V2 - Computer cooling system SILVERSTONE - Free user manual and instructions
Find the device manual for free Nitrogon NT06-PRO-V2 SILVERSTONE in PDF.

| Product Type | CPU Cooling System |
| Brand | Silverstone |
| Model | Nitrogon NT06-PRO-V2 |
| Compatible Sockets | Intel LGA 775, LGA 115x, LGA 1366, LGA 2011 ; AMD AM2/AM3/FM1/FM2 |
| Heatsink Dimensions | 120 x 120 x 65 mm (L x W x H) |
| Net Weight | 350 g |
| Heatsink Material | Aluminum with copper base |
| Fan Included | Yes, 120 mm |
| Fan Speed | 800 - 2000 RPM (PWM) |
| Noise Level | 20 - 35 dB(A) |
| Maximum Airflow | 80 m³/h |
| Connector | 4-pin PWM |
| Thermal Paste | Pre-applied or included |
| Fan Dimensions | 120 x 120 x 25 mm |
| Power Supply | 12 V DC, 0.2 A |
| Installation | With backplate and spacers |
| Key Features | Efficient CPU cooling, compact size, multi-socket compatibility |
| Maintenance & Cleaning | Regularly dust the heatsink and fan with a soft cloth or compressed air |
| Safety | Disconnect power before installation; avoid contact with live components |
| Spare Parts & Repairability | Replaceable fan; mounting kit available separately |
Frequently Asked Questions - Nitrogon NT06-PRO-V2 SILVERSTONE
User questions about Nitrogon NT06-PRO-V2 SILVERSTONE
0 question about this device. Answer the ones you know or ask your own.
Ask a new question about this device
Download the instructions for your Computer cooling system in PDF format for free! Find your manual Nitrogon NT06-PRO-V2 - SILVERSTONE and take your electronic device back in hand. On this page are published all the documents necessary for the use of your device. Nitrogon NT06-PRO-V2 by SILVERSTONE.
USER MANUAL Nitrogon NT06-PRO-V2 SILVERSTONE
Designing Inspiration
NITROGON HELIGON
SERIES
MANUAL
NITROGON/HELIGON SERIES
The following manual and guides were carefully prepared by the SilverStone engineering team to help you maximize the potential of your SilverStone product. A copy of this manual can also be downloaded from our website at:
http://www.silverstonetek.com
COMPONENTS LIST — P.2
INTEL P.3
AMD P.9
FAN MOUNTING P.15
NITROGON/HELIGON SERIES
COMPONENTS LIST
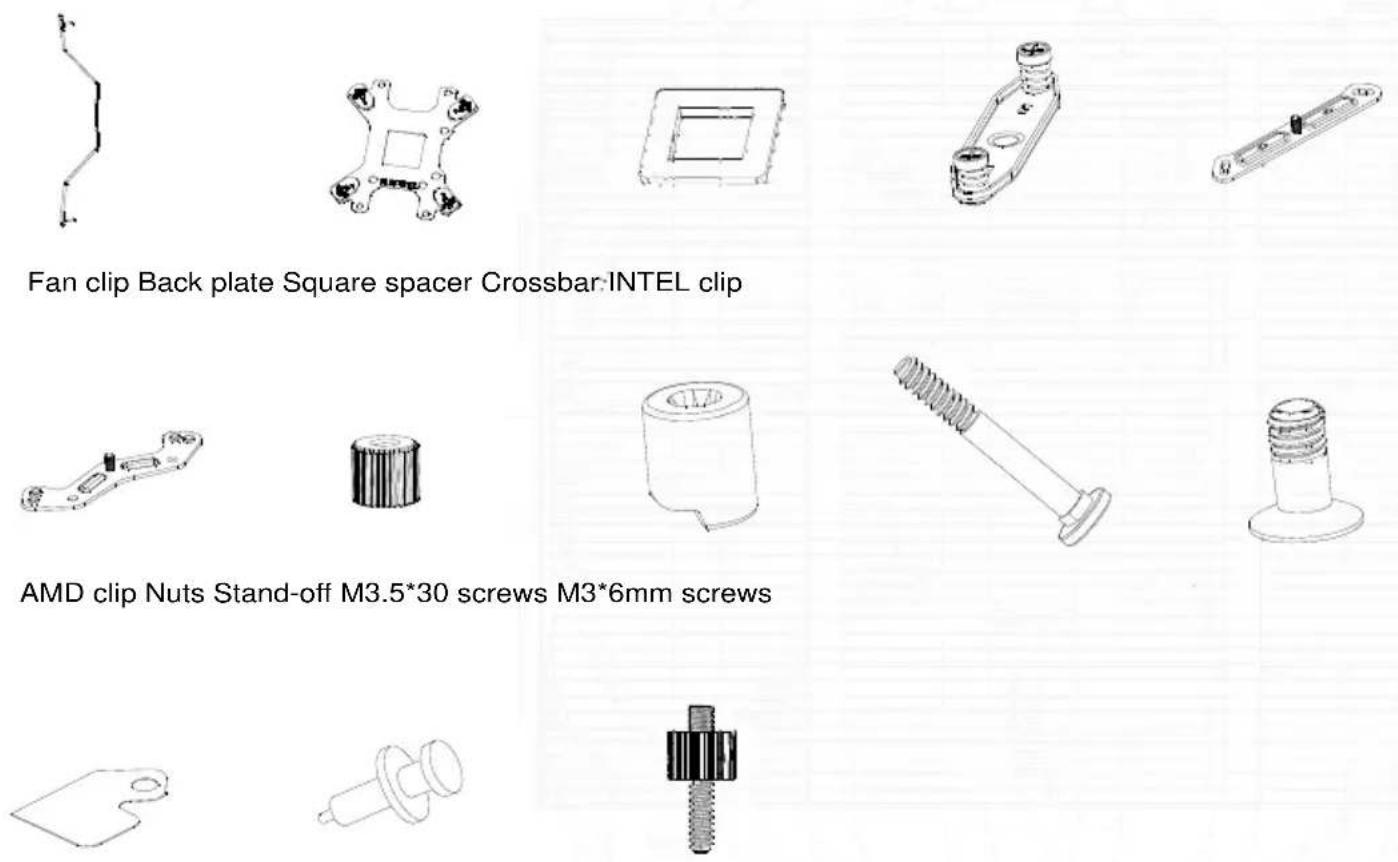
Insulation sheet Thermal grease LGA2011 screws

ENGLISH
Please check the holes of motherboard before installation and insert the screws M3.5*30 into the correct holes of back-board.
*Please insert the square spacer into the centric hole of back-board with LGA775 installation only.
DEUTSCH
natural_image
Technical line drawings of a microchip assembly with mounting holes and screw fasteners (no text or symbols)ENGLISH
Install the back-board set onto the motherboard and slip on the standoff.
РУССКИЙ
※LGA2011
natural_image
Technical line drawing of a mechanical assembly with multiple cylindrical components and mounting base (no text or symbols)※LGA775/115X/1366
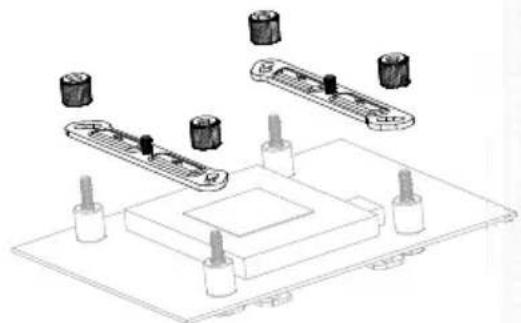
ENGLISH
Mount LCA2011 and INTEL clips and tighten the nuts.
DEUTSCH
natural_image
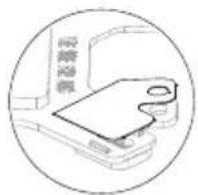
Technical line drawing of a microchip with a pipette inserted into a substrate (no text or symbols)ENGLISH
Please clean the surface of CPU before applying the thermal grease and then apply the Thermal grease evenly on CPU.
РУССКИЙ
natural_image
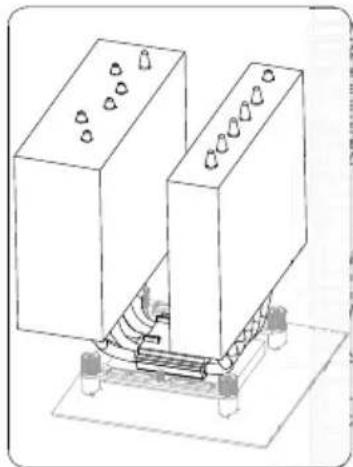
Technical line drawing of two rectangular industrial blocks with cooling fans and piping (no text or symbols)ENGLISH
Take off the film of CPU surface and place heat-sink on CPU.
РУССКИЙ
natural_image
Technical line drawing of a mechanical assembly with connectors and base (no text or symbols)ESPAÑOL
natural_image
Isometric line drawing of two rectangular blocks with a central mechanical component and directional arrows (no text or symbols)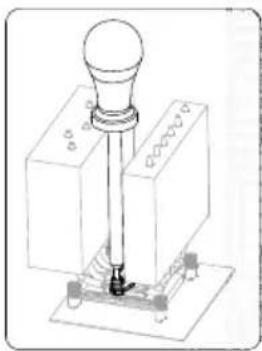
natural_image
Technical line drawing of a mechanical assembly with a cylindrical component and base mount (no text or symbols)ENGLISH
Install the crossbar through heat-sink and tighten the screws on the both of clips.
РУССКИЙ
natural_image
Technical line drawing of a robotic arm interacting with a mechanical component (no text or symbols visible)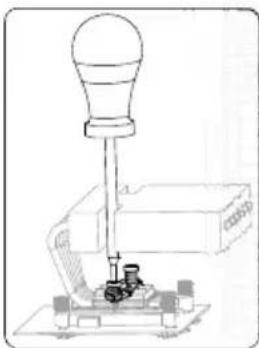
natural_image
Technical line drawing of a mechanical device with a bulb and base mount (no text or symbols)ESPAÑOL
natural_image
Technical line drawing of a mechanical component with four bolts and a central square feature (no text or symbols)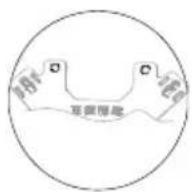
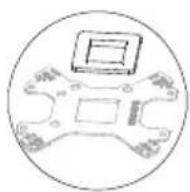
ENGLISH
Please check the holes of motherboard before installation then insert the square spacer into the centric hole of back-board and attach the insulation sheets on the back-board. Insert M3.5*60 screws into the correct holes of back-board.
DEUTSCH
natural_image
Technical line drawing of a microchip assembly with mounting holes and internal components (no text or symbols)ENGLISH
Install the back-board set to the motherboard and slip the pillars.
(Remove the original AMD back-board)
РУССКИЙ
natural_image
Technical illustration of a mechanical assembly with exploded view and close-up views (no text or symbols)ENGLISH
Combine the AMD and INTEL clips with M3*6 screws then insert the clip set onto the back-board and tighten the nuts.
РУССКИЙ
natural_image
Technical line drawing of a mechanical assembly with a pipette inserted into a component (no text or symbols)ENGLISH
Please clean the surface of CPU before applying the thermal grease, then apply the Thermal grease evenly on CPU.
РУССКИЙ
ENGLISH
Take off the film of CPU surface and placeheat-sink on CPU.
РУССКИЙ
natural_image
Technical line drawing of an industrial robotic arm with connecting rods and a base platform (no text or symbols)ESPAÑOL
natural_image
Technical line drawing of a mechanical assembly with two blocks and a base plate (no text or symbols)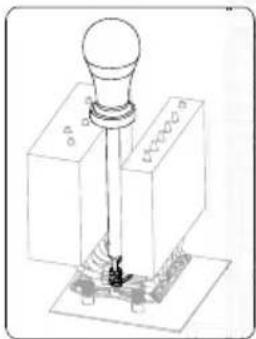
natural_image
Technical line drawing of a mechanical component with a cylindrical head and base, no visible text or symbolsENGLISH
Install the crossbar through heat-sink and tighten the screws on the both of clips.
РУССКИЙ
natural_image
Technical line drawing of a mechanical assembly with no visible text or symbols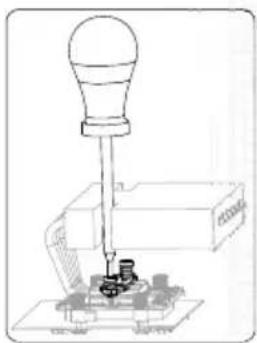
natural_image
Technical line drawing of a mechanical device with a bulb and base mount (no text or symbols)ESPAÑOL
natural_image
Pure technical diagram of a mechanical component with no text or symbols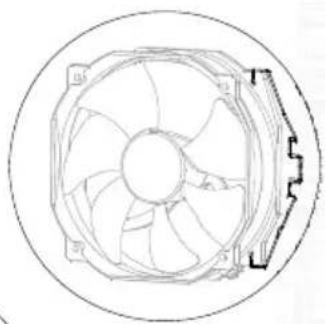
natural_image
Technical line drawing of a circular fan with internal blades and mounting bracket (no text or symbols)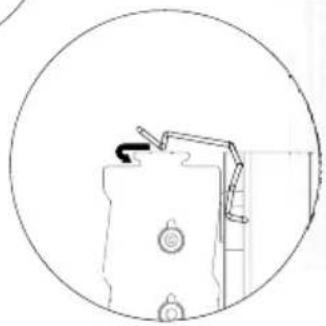
natural_image
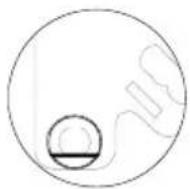
Simple line drawing of a mechanical component inside a circular frame (no text or symbols)ENGLISH
Insert the fan clips into the holes of fan and hook the fan set into the groove on the heat-sink.
РУССКИЙ
natural_image
Simple line drawing of a mechanical assembly with cylindrical components and a bracket (no text or symbols)ENGLISH
Connect the fan connector with the motherboard. Installation completed.
РУССКИЙ
Warranty Information
This product has a limited 1 year warranty in North America, Europe, and Australia.
For information on warranty periods in other regions, please contact your reseller or SilverStone authorized distributor.
Warranty terms & conditions
-
Product component defects or damages resulted from defective production is covered under warranty.
Defects or damages with the following conditions will be fixed or replaced under SilverStone Technology's jurisdiction.
a) Usage in accordance with instructions provided in this manual, with no misuse, overuse, or other inappropriate actions.
b) Damage not caused by natural disaster (thunder, fire, earthquake, flood, salt, wind, insect, animals, etc...)
c) Product is not disassembled, modified, or fixed. Components not disassembled or replaced.
d) Warranty mark/stickers are not removed or broken.
Loss or damages resulted from conditions other than ones listed above are not covered under warranty. -
Under warranty, SilverStone Technology's maximum liability is limited to the current market value for the product (depreciated value, excluding shipping, handling, and other fees). SilverStone Technology is not responsible for other damages or loss associated with the use of product.
-
Under warranty, SilverStone Technology is obligated to repair or replace its defective products. Under no circumstances will SilverStone Technology be liable for damages in connection with the sale, purchase, or use including but not limited to loss of data, loss of business, loss of profits, loss of use of the product or incidental or consequential damage whether or not foreseeable and whether or not based on breach of warranty, contract or negligence, even if SilverStone Technology has been advised of the possibility of such damages.
-
Warranty covers only the original purchaser through authorized SilverStone distributors and resellers and is not transferable to a second hand purchaser.
-
You must provide sales receipt or invoice with clear indication of purchase date to determine warranty eligibility.
-
If a problem develops during the warranty period, please contact your retailer/reseller/SilverStone authorized distributors or SilverStone http://www.silverstonetek.com.
Please note that: (i) You must provide proof of original purchase of the product by a dated itemized receipt; (ii) You shall bear the cost of shipping (or otherwise transporting) the product to SilverStone authorized distributors, SilverStone authorized distributors will bear the cost of shipping (or otherwise transporting) the product back to you after completing the warranty service; (iii) Before you send the product, you must be issued a Return Merchandise Authorization ("RMA") number from SilverStone. Updated warranty information will be posted on SilverStone's official website. Please visit http://www.silverstonetek.com for the latest updates.
Additional info & contacts
For North America (usasupport@silverstonetek.com)
SilverStone Technology in North America may repair or replace defective product with refurbished product that is not new but has been functionally tested. Replacement product will be warranted for remainder of the warranty period or thirty days, whichever is longer. All power supplies should be sent back to the place of purchase if it is within 30 days of purchase, after 30 days, customers need to initiate RMA procedure with SilverStone Technology in USA by first downloading the "USA RMA form for end-users" form from the below link and follow its instructions.
http://silverstonetek.com/contactus.php
For Australia only (support@silverstonetek.com)
Our goods come with guarantees that cannot be excluded under the Australian Consumer Law.
You are entitled to a replacement or refund for a major failure and for compensation for any other reasonably foreseeable loss or damage.
You are also entitled to have the goods repaired or replaced if the goods fail to be of acceptable quality and the failure does not amount to a major failure. Please refer to above "Warranty terms & conditions" for further warranty details.
SilverStone Technology Co., Ltd. 12F No. 168 Jiankang Rd., Zhonghe Dist., New Taipei City 235 Taiwan R.O.C. + 886-2-8228-1238
(standard international call charges apply)
For Europe (support.eu@silverstonetek.de)
For all other regions (support@silverstonetek.com)
SilverStone Technology Co., Ltd.
www.silverstonetek.com
support@silverstonetek.com
Issue date: June, 2012
NO. G11216070