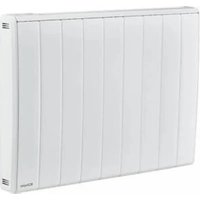
RCE 050 - Heating DIMPLEX - Free user manual and instructions
Find the device manual for free RCE 050 DIMPLEX in PDF.


| Brand | Dimplex |
| Model | RCE 050 |
| Product type | Infrared radiant convector |
| Total power | 500 W |
| Radiant power | 200 W |
| Convection power | 300 W |
| Power supply | 230-240 V, 50 Hz |
| Protection class | IP24 |
| Temperature range | 7 °C to 32 °C (adjustable, default max 26 °C) |
| Dimensions (H x L) | 513 x 225 mm |
| Weight | Approximately 5 kg (estimated) |
| Main functions | Dual circuit, open window, learning, timer, manual/eco/frost protection/off/holiday modes, boost, child lock |
| Safety | Overload limiter, key lock, frost protection |
| Cleaning | Unplug and let cool, clean with a soft damp cloth |
| Warranty | 2 years |
| Disposal | Do not dispose with household waste, take to a recycling center |
Frequently Asked Questions - RCE 050 DIMPLEX
User questions about RCE 050 DIMPLEX
0 question about this device. Answer the ones you know or ask your own.
Ask a new question about this device
Download the instructions for your Heating in PDF format for free! Find your manual RCE 050 - DIMPLEX and take your electronic device back in hand. On this page are published all the documents necessary for the use of your device. RCE 050 by DIMPLEX.
USER MANUAL RCE 050 DIMPLEX
1 Information for the user
2 Energy saving functions
2.1 Dual circuit heating element
2.2 "Open Window" function
2.3 Learning function
3 Technical device description
4 Assembly, installation, minimum clearance
5 Electrical connection
6 Overload protector
7 Operation
7.1 Control panel
7.2 Operating functions
7.3 Main screen
7.4 Initial start-up
7.5 Date/ Time setting
8 Modes
8.1 Manual Mode
8.2 Eco Mode
8.3 Frost Protect mode
8.4 Off
8.5 Timer Mode
8.6 Holiday
9 Advance
10 Time specification for Comfort Mode
11 Options
12 Activate/Deactivate Auto Lock
13 Advanced functions
14 Cleaning
15 Warranty
16 Disposal
DE-6
DE-7
DE-7
DE-7
DE-7
DE-7
DE-8
DE-8
DE-8
DE-8
DE-8
DE-8
DE-10
DE-10
DE-10
DE-10
DE-11
DE-11
DE-11
DE-11
DE-11
EN-13
EN-14
EN-14
EN-14
EN-14
EN-14
EN-14
EN-15
EN-15
EN-16
EN-16
EN-16
EN-16
EN-17
EN-17
EN-17
EN-17
EN-17
EN-17
EN-17
EN-17
EN-19
EN-19
EN-19
EN-19
EN-20
EN-20
EN-20
EN-20
EN-20
1 Information for the user
i NOTE
Dear customer,
To ensure safe operation, the heater may only be installed and connected in accordance with these installation and operating instructions. Read all information contained in this manual carefully. Keep these instructions in a safe place and pass them on to any new owner.
ATTENTION!
This appliance can be used by children aged from 8 years and above and persons with reduced physical, sensory or mental capabilities or lack of experience or knowledge if they have been given supervision or instruction concerning the use of the appliance in a safe way and understand the hazards involved. Children shall not play with the appliance. Cleaning and user maintenance shall not be made by children without supervision!
ATTENTION!
Children of less than 3 years should be kept away unless continuously supervised!
ATTENTION!
Children aged from 3 years and less than 8 years shall only switch on/off the appliance provided that it has been placed or installed in its intended normal operating position and they have been given supervision or instruction concerning the use of the appliance in a safe way and understand the hazards involved!
ATTENTION!
Children aged from 3 years and less than 8 years shall not plug in, regulate and clean the appliance or perform user maintenance!
ATTENTION!
Some parts of this product can become very hot and cause burns! Particular attention has to be given where children and vulnerable people are present!
ATTENTION!
If the supply cord is damaged, it must be replaced by the manufacturer, its service agent or similarly qualified persons in order to avoid a hazard!
ATTENTION!
The heater must not be located above or below a socket outlet!
ATTENTION!
In order to avoid overheating, do not cover the heater!
ATTENTION!
The heater carries the warning symbol indicating that it must not be covered!!

ATTENTION!
This device is not fitted with equipment for regulating room temperature. The heater must not be used in small rooms occupied by people who cannot leave the room without assistance unless continuous monitoring is guaranteed!
The installation of this heater must be carried out by a competent electrician in accordance with the current safety regulations.
The heater may only be used for heating room air in enclosed spaces.
Repairs to the appliance, or any other interventions, may only be performed by qualified persons or the after-sales customer service.
In the event of any defect or during extended periods of non-use, the heater must be disconnected from the power supply. Deactivate or remove fuse.
The outside of the appliance gets hot when in use.
- Do not use the appliance in areas where flammable gases or liquids are stored or used..
ATTENTION!
Do not place the power supply cord over the heater!
ATTENTION!
If the appliance is switched on automatically while unattended, potential hazards may exist, e.g. appliances that have been covered or obstructed in your absence may pose a risk of fire!
ATTENTION!
Install the device such that it is not possible for someone in the bath or shower to touch the control element!
ATTENTION!
Device not attached near curtains, draperies and other flammable materials!
ATTENTION!
In order to avoid a hazard due to inadvertent resetting of the thermal cutout, this appliance must not be supplied through an external switching device, such as a timer or connected to a circuit that is regularly switched on and off by the utility.
ATTENTION!
Connection only to fixed installed cables! The hardwired electrical installation must be provided with a disconnect device with a contact grasp of at least 3mm at each pole (e.g. automatic circuit breaker)!
ACHTUNG!
The device must be earthed!
2 Energy saving functions
2.1 Dual circuit heating element
The Dimplex RCE radiant heat convector has a convection heating element and a radiant heating system. This combination enables just the radiant heating to be used if the temperature difference is low. This minimises the risk of overheating the room, which saves energy.
2.2 "Open Window" function
If a window or a door is left open by mistake, the control will detect the sudden temperature fluctuations and switch to Standby mode. If the window or door is closed, the device returns to normal mode. This function interrupts the heating operation to prevent heat from escaping from the room in an uncontrolled manner. This saves money and minimises energy consumption.
2.3 Learning function
This function enables the heating device to be switched on early to ensure that the desired temperature is reached at the time specified in the program.
Example: A temperature of 21^ is set for mornings at 7 am in the time program. The heating device now determines how long it takes to reach the desired temperature at the specified time based on its "experience".
i NOTE
If the Anticipatory (ES) function is activated, the device heats for the pre-set time to ensure that the room has reached the required temperature at the right time. Technical Device Description.
3 Technical device description
| Type | Output radiant heating | Output convector heating | Total output |
| RCE 050 | 200 W 300 W 500 W | ||
| RCE 100 | 300 W 700 W 1000 W | ||
| RCE 150 | 300 W 1200 W | 1500 W | |
| RCE 200 | 350 W 1650 W | 2000 W |
| Connection voltage | 1/N/PE~230-240V, 50Hz |
| Temperature controller 7 - 32°C | |
| Protection class | Protective conductor con- nection |
| Degree of protection | IP24 |
4 Assembly, installation, minimum clearance
The radiant heat heating device is designed for wall mounting using the wall bracket provided. The device may only be installed in upright position as shown in Fig. 1-3.
Caution with inflammable objects. The minimum clearances must be complied with. A distance of at least 500mm must be complied with on the front of the device.
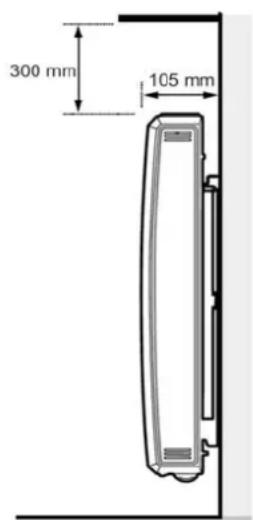
Fig.1
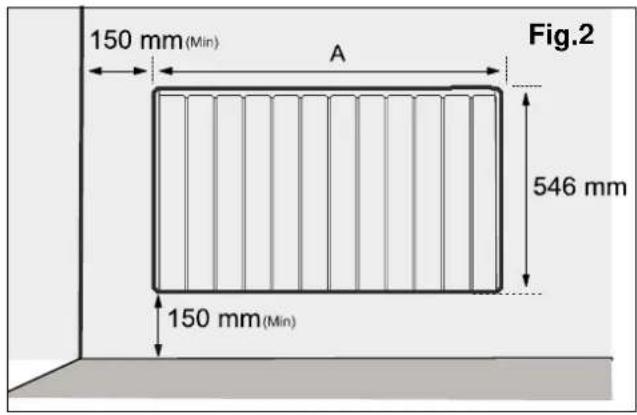
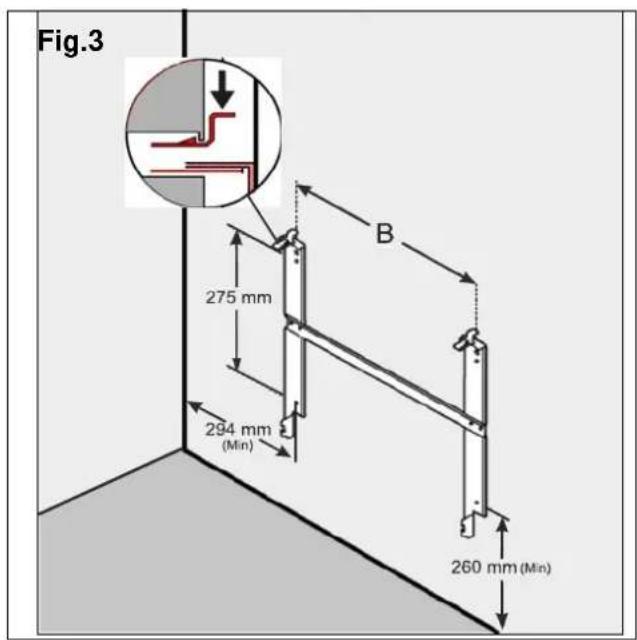
| Type Dimension A (mm) | Dimension B (mm) |
| RCE 050 513 | 225 |
| RCE 100 675 | 387 |
| RCE 150 756 | 468 |
| RCE 200 918 | 630 |
Installation on wooden walls is permissible.
All models are splash-water protected in accordance with the IP24 standard and can be used in bathrooms in protection zone II.
The supply connection socket must be accessible after installation.
ATTENTION!
The original wall bracket supplied on the rear of the device must be used!
Remove the wall bracket from the rear of the device by pressing the springs on each side. (see Fig. 2.)
- Drill the fastening holes. Look out for electric cables or pipework in the wall.
Screw the wall bracket securely to the wall with the accompanying screws.
- Hook the device into the bottom slots on the wall bracket.
Bring the device into an upright position and press the device into the springs until they engage to lock in place.
ACHTUNG!
Please note that burning cigarettes, candles and oil lamps, in conjunction with the convection of electric heating systems, can cause soot deposits on the wall and on the surface of the device. This is not a device malfunction.
5 Electrical connection
The current regulations according to VDE 0100 part 701 and the relevant installation requirements must be observed. The heating devices are equipped with a device connection cable, type H05VV-F, 4 × 1.0 ~mm^2 , without a plug.
Wire assignment of the device connection cable:
Green/yellow: 'PE' protective conductor
Blue: 'N' - neutral conductor supply voltage
■ Brown: 'L' - phase supply voltage
Black: Pilot wire
ATTENTION!
The pilot wire has no function and must be isolated correctly! Do not earth the pilot wire!
The device connection cable must be connected to a connection socket which is suitable for the heating device. A disconnecting device with a contact opening of at least 3mm at each pole (e.g. circuit breaker) must be provided in the permanently installed wiring.
6 Overload protector
For your safety, the heating device is equipped with an overload protector. If the air circulation is interrupted, the overload protector switches off the heating device. After sufficient cooling, the heating device switches on again automatically.
If the overload protector is triggered multiple times, the cause must be determined (e.g. ventilation grill covered).
The triggering of the overload protector is shown in the display by a red flashing indicator light.
To reset the display, remove the cause of the overheating and press the ENTER key for 10 seconds.
7 Operation
7.1 Control panel
The control elements are located on the top right side of the device. The device is equipped with a configurable electronic control unit, consisting of a display and six touchscreen keys.
The heating device also has an adjustable room thermostat for controlling the room temperature. The adjustable minimum temperature is 7^ .
The maximum temperature is set to 26^ at the factory, but can be increased to a maximum of 32^ .
A temperature of 21^ corresponds to a normal room temperature.
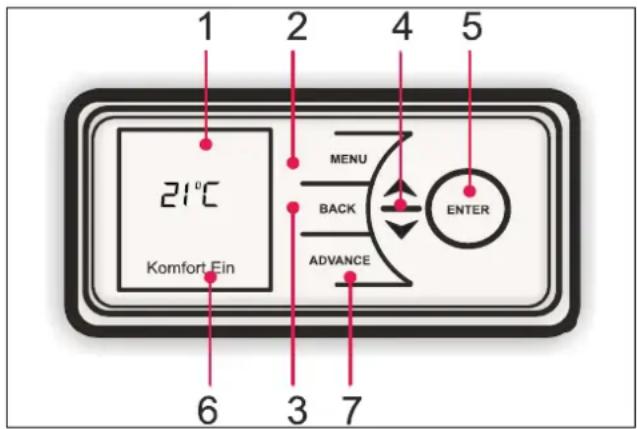
(1) Display
(2) Menu key
(3) Back key
(4) Up/down key
(5) Enter key
(6) Status display
(7) Advance key
7.2 Operating functions
The parameters of the device can be set easily using the six keys on the display user interface.
The available settings are shown on the display.
- Menu - Shows the most important functions:
Date / Time - Date and time setting.
Mode - Time Program, Manual Temperature Selection, Setback, Frost Protect, Off.
Options - Summer Time, Auto Lock, Service Info, Temp Units, Audio Feedback (keys)
- Back key: Return to the previous program item
- Up and down keys:
Used to navigate through the menu and to change the setting values.
The up and down keys are also used for setting the desired room temperature.
The display colour changes from blue to red based on the selected temperature.
- ENTER key: Used to confirm the settings. Pressing the ENTER key shows the current activated function.
- Comfort On: The times during which the heating device heats up to the set comfort temperature. This is shown in the bottom area of the display.
- Comfort Off: The times during which the heating device is not switched on. The set mode is shown in the bottom area of the display.
- ADVANCE key: Overwrites the heating settings and changes the operating status of the heating device.
If a Timer Mode is activated, pressing the ADVANCE key changes the mode.
It can switch between "Comfort Off" and "Comfort On", for example.
The ADVANCE key is also used to activate the Boost Mode. The Boost Mode delivers heat for between one and four hours.
7.3 Main screen
If no input is made for 30 seconds, the display returns to the main screen. The selected temperature is shown here, along with the mode. The use of the Advance function is also shown.
The activated functions are shown by pressing the ENTER key.
If no change is made for a prolonged period, the screen switches to "Sleep Mode" and the display is turned off. Press any key to activate the display.
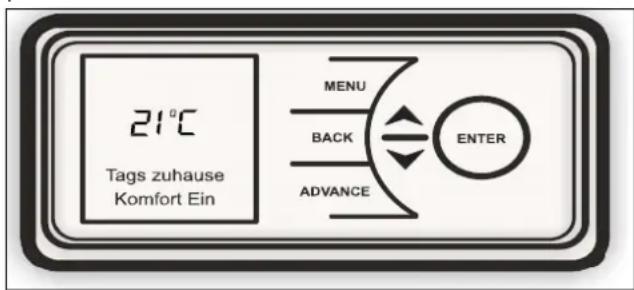
i NOTE
If no key is pressed, the display returns to the Main Menu after 30 seconds. The activated functions are shown by pressing the ENTER key.
7.4 Initial start-up
When commissioning the heater in the display the start screen is displayed. Here you can set the language, date, time, time zone, key lock, key sounds and temperature unit. These values can be changed later again. See the corresponding chapter in the manual.
7.5 Date/Time setting
The control includes a real-time clock with calender function. The clock has a backup battery (type CR2032, 3V), which supplies the clock with power in the event of a power failure.
Setting the date and time:
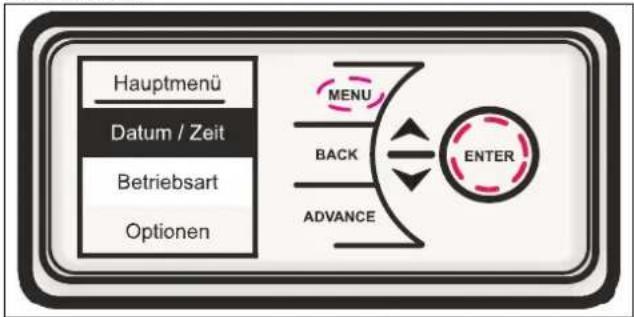
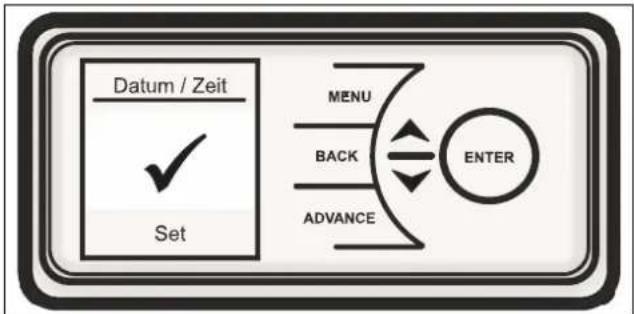
Press the MENU key. Select Date/Time and press the ENTER key.
Press and to set the correct day of the month and press the ENTER key.
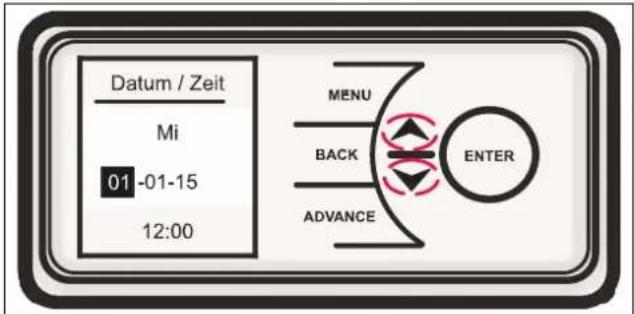
Repeat this process until the date and time have been set and press the ENTER key to save the settings. Press the BACK key as soon as appears and return to the main screen.
8 Modes
The radiant heat convector can maintain a constant room temperature with the following modes:
8.1 Manual Mode heats the room to a pleasant temperature of 21^ .
8.2 Eco Mode (energy-saving mode) maintains a room temperature of 18^ . Significant energy savings can be achieved by reducing the room temperature slightly. The green display indicates the energy-saving mode.
8.3 Frost Protect Mode maintains a room temperature of 7^ C. The blue display indicates the Frost Protect Mode.
8.4 Off Select the mode "Off" to switch off the device. This mode should be used if heating is not required for a prolonged period.
Press one of the keys to activate the display and then select the desired mode.
i NOTE
The room temperature can be changed with the
keys in all modes. In Timer Mode, this change is only temporary and the device returns to the pre-set program afterwards.
8.5 Timer Mode
ATTENTION!
It is advisable to use the timer function to reduce the operating costs. Using the device in permanent heating operation can result in increased operating costs.
The device is pre-programmed with a range of usable heating profiles. There are four options available - three pre-set programs and a time program which can be freely selected by the user:
- Out all Day - (pre-programmed) - the following preset heating times are available:
Monday to Sunday 7 am to 8.30 am and 5.30 pm to 10 pm, can be changed if necessary. - Home all Day - (pre-programmed) - the following pre-set times are available:
Monday to Sunday 8 am to 9 pm, can be changed if necessary. - Holiday - (pre-programmed for 7 days with frost protect 10^ ) - number of programmable holiday days: 1 to 300
- User Timer - offers maximum flexibility for the user. Four time blocks are available per day, which can be adapted individually for each weekday.
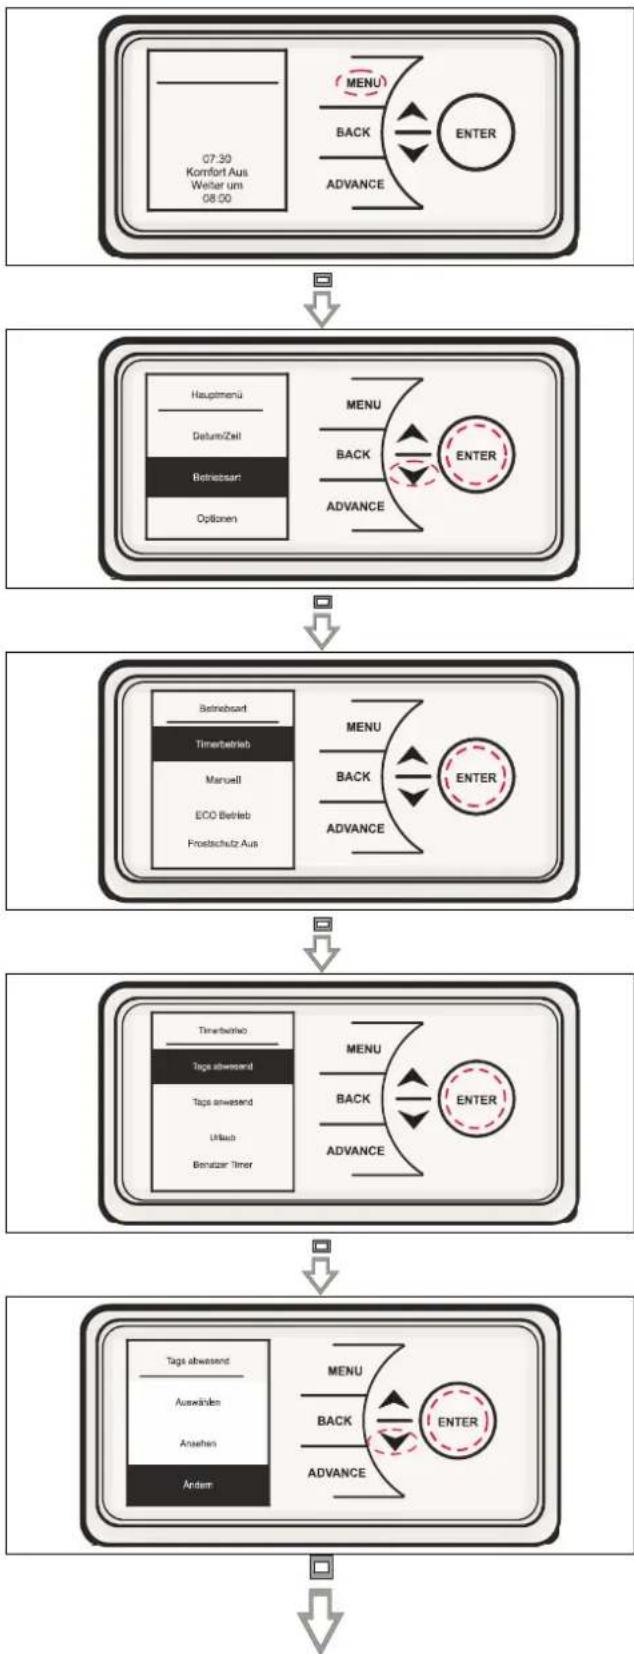
To select the Timer Mode, press the MENU key, then select the mode with the key and press ENTER.
Now select the Timer Mode by pressing the ENTER key.
Select the desired mode with confirm with the ENTER key.

and
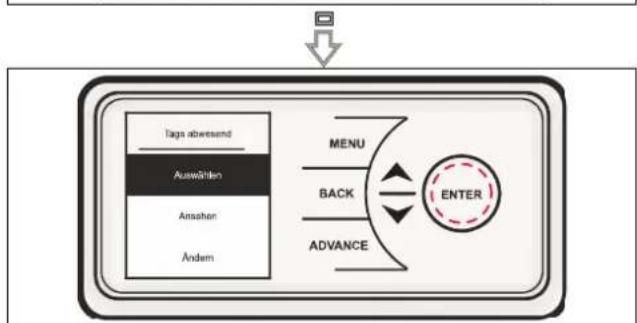
Three possible selections are available for the options "Out all Day", "Home all Day" and "User Timer" - "Select", "Preview" and "Modify".
Select - select the Timer Mode
Preview - view the current set times
Modify - change the current set time
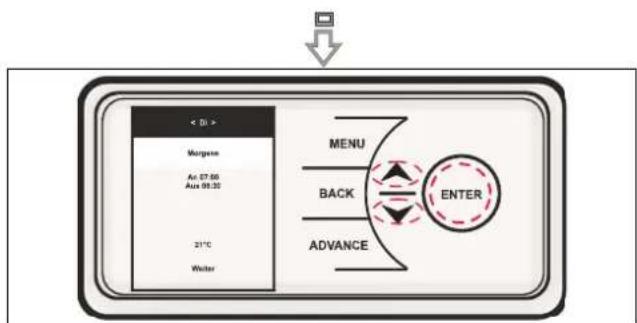
If "Modify" is selected, the individual options can be selected with or changed if necessary and confirmed with the ENTER key.
At the end of each period, select "Next" to enter the following periods.
When the settings are complete for one day, press the ENTER key to save the settings.
Once the settings are complete for the first day, it is possible to apply the settings to the following day or all weekdays.
Each day can be changed and saved individually. This is also possible with "Delete" or "Delete All".
The following options are available:
| Save Save the switching times for a day | |
| Copy | Copy the switching times to the following day |
| Copy All | Copy the switching times to all seven days |
| Clear Set all times to | 00:00 for this day |
| Clear All | Set all times to 00:00 for all seven days |
To select a Timer Mode, choose "Select" and press the ENTER key.
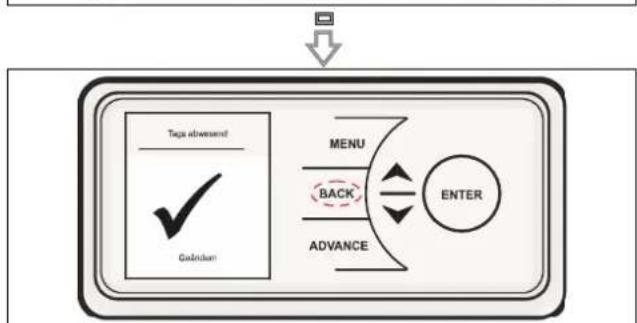
8.6 Holiday
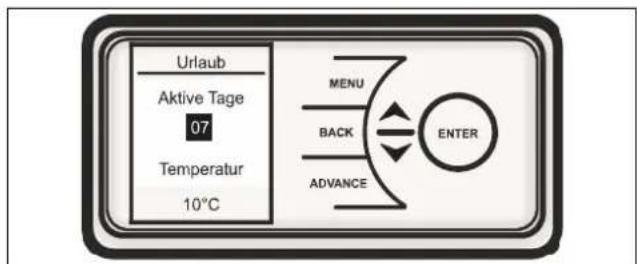
In Holiday Mode, the number of days for which the room is not in use can be set, along with the desired room temperature.
Press and to set the number of days absent between 1 and 300 days. Then press the ENTER key.
Press and to select a desired temperature to be maintained during this period and press the ENTER key. Once the set number of holiday days has passed, the control returns to the previously selected program.
9 Advance
The Advance function enables the time profile to be changed temporarily. If a time program has been selected, the Advance function will bring forward the next set time profile to the current time.
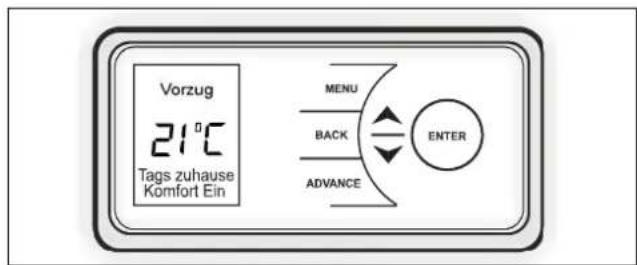
10 Time specification for Comfort Mode
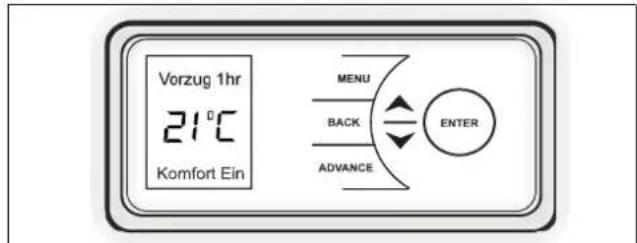
The ADVANCE key is also used to specify the comfort temperature for a fixed period of time (1-4 hours).
Press the ADVANCE key twice to program an increase to last one hour.
For longer time settings, press the ADVANCE key multiple times.
11 Options
The user can use the Options menu to adjust the menu settings.
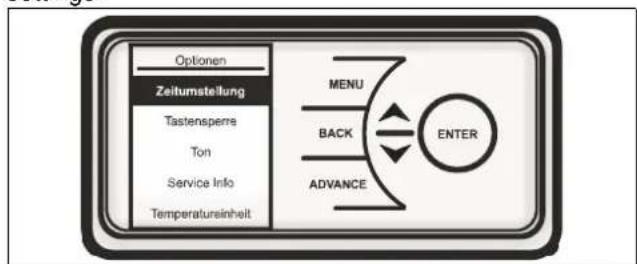
DST Rule - switch between summer/ winter time.
- Auto Lock - child lock. This function locks the keys. To unlock the device, press and hold the ENTER key for two seconds.
Sound - audio feedback (keys) can be activated or deactivated.
Service Info - service information is shown.
Temp Units - select the temperature unit degrees centigrade or Fahrenheit.
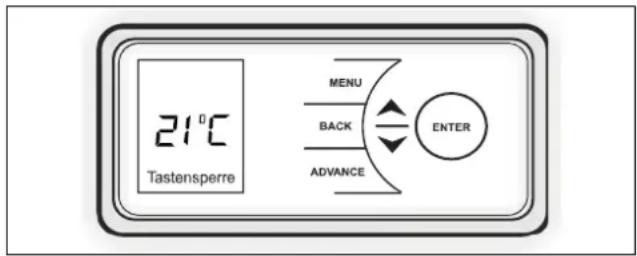
12 Activate/deactivate Auto Lock
To lock the control, press the BACK key and ENTER key for three seconds. The key lock is indicated in the bottom edge of the display. To unlock the control, repeat the action and press the BACK key and ENTER key for three seconds.
i NOTE
The control cannot be adjusted if the key lock is active.
13 Advanced functions
i NOTE
Open Window - detection is activated at the factory.
ANTICIPATORY - is deactivated at the factory.
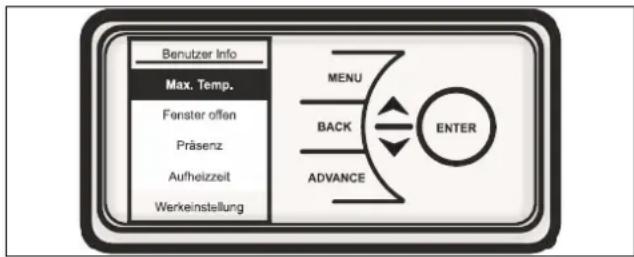
To display the User Info menu, press and hold the ENTER key for five seconds.
SP Range (setpoint) can be used to define the maximum possible temperature.
"Open Window" detection (OW). When this function is activated, the room temperature is reduced to limit the energy loss when a window is open.
- Anticipatory (ES) - If the Anticipatory (ES) function is activated, the device heats for the pre-set time to ensure that the room has reached the required temperature at the right time.
Example: A setpoint room temperature of 21^ is specified for 7 am via the Timer menu. With the Anticipatory (ES) function, the control switches on the heating device before 7 am to achieve the desired temperature of 21^ at the selected time of 7 am.
Factory Reset- this function resets all settings made by the user to the factory settings.
14 Cleaning
ATTENTION!
Before cleaning, the device must be disconnected from the power supply.
Before starting the cleaning process, disconnect the device from the power supply and let it cool down. Clean the outside by wiping down with a soft, damp cloth. Then rub dry.
Do not use abrasive cleaning powder or furniture polish, as this may damage the surface.
The device can be tilted forwards to enable better cleaning. See the instructions in section 4, Fig.3.
15 Warranty
This device is supplied with a two-year warranty according to our terms of guarantee.
16 Disposal
Dispose of packaging and packaging parts in accordance with the regulations in the country where the device was installed.
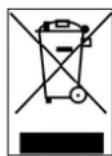
Do not dispose of the device with household waste. The device must be taken to a local waste disposal plant.
Subject to technical modifications
Telephone: +49 9221 709 564
Telefax: +49 9221 709 589
E-Mail: 09221709589@dimplex.de
www.dimplex.de
4 Montage, installation, distances minimales
- Information for the user
- i NOTE
- ATTENTION!
- ACHTUNG!
- Energy saving functions
- Dual circuit heating element
- "Open Window" function
- Learning function
- Assembly, installation, minimum clearance
- Electrical connection
- Overload protector
- Operation
- Control panel
- Operating functions
- Main screen
- Initial start-up
- Date/Time setting
- Modes
- Timer Mode
- Holiday
- Advance
- Time specification for Comfort Mode
- Options
- Activate/deactivate Auto Lock
- Advanced functions
- Cleaning
- Warranty
- Disposal
- Montage, installation, distances minimales
Brand : DIMPLEX
Model : RCE 050
Category : Heating